Когда на сайт пытается попасть человек, а вместо искомого контента натыкается на ошибку, то важно выяснить, что это за ошибка и почему она посмела явиться в столь неподходящий (а это любой) момент.
Благо у нас есть замечательные коды 4хх и 5хх, хоть и не так подробно, как хотелось бы, но рассказывающие о том, почему возникла ошибка. Ну а мы, зная эту информацию, можем попытаться ошибку исправить.
В этом материале речь пойдет об ошибке 405 Method Not Allowed. В деталях опишу проблему и расскажу, как ее побороть.
Что означает код ошибки сервера 405?
Код 405 Method Not Allowed говорит нам о том, что сервер получил определенный запрос с заданным HTTP-методом, смог его распознать, но не дает добро на его реализацию. То есть пользователь не получит доступ к контенту, который запросил.
В отличие от 404, 405 уточняет, что запрашиваемая страница существует и функционирует. Только вот стоит изменить используемый в HTTP-запросе метод. Иначе ничего не выйдет.
Комьюнити теперь в Телеграм
Подпишитесь и будьте в курсе последних IT-новостей
Подписаться
Из-за чего я вижу эту ошибку?
Есть 9 HTTP-методов, которые используются браузерами для общения с серверами. Из них два задействуются чаще остальных. Это метод GET для запроса информации с ресурса и метод POST для передачи какой-нибудь информации на ресурс. Два метода покрывают почти все существующие сценарии взаимодействия клиента и сервера от запроса статьи до отправки логина и пароля на сайт. Так как они выполняют разные задачи, для сервера нет никакой нужды принимать GET для авторизации на сайте или POST для загрузки данных. Если же клиент так делает и отправляет некорректный запрос (не с тем методом, который должен быть), то сервер ответит ему ошибкой. То же произойдет, если ресурс будет настроен так, что не сможет принимать специфичный набор запросов, не попадающих в «стандарт». Такие дела.
Как исправить 405 Method Not Allowed?
Ок, небольшой ликбез провел, теперь расскажу о том, что можно предпринять, чтобы исправить обнаруженную ошибку и вернуть посетителям доступ к сайту.
Что может сделать пользователь?
Ошибка Method Not Allowed под номером 4хх вроде бы говорит о вине клиента. Но несмотря на это, пользователь мало что может сделать, чтобы устранить проблему. В его компетенции только убедиться в том, что он не допустил ошибку в базовых вещах, и попробовать повторить те же действия в надежде на успех.
Заново открыть ту же страницу
Иногда 405 Method Not Allowed может исчезнуть после перезагрузки страницы. Так что перед тем как принимать сложные решения и жаловаться на владельцев сайта, нажмите F5 или Cmd + R раза два.
Проверить, правильно ли он ввел URL-адрес
Несложная задача, но полезная. Как и в случае с кучей других ошибок, 405 может явиться из-за банальной опечатки или лишнего символа. К тому же многие серверы защищены таким образом, чтобы напрочь блокировать доступ к несуществующим страницам или каким-либо подуровням (в которые человек может пытаться залезть неслучайно).
Так что пользователю стоит заглянуть в адресную строку браузера и убедиться в корректности введенной ссылки. Если что-то нет так, то лучше открыть главную страницу сайта и искать нужную информацию там, а не пытаться попасть на нее, вводя адрес вручную.
Что может сделать владелец сайта?
Как это часто бывает, у сервера гораздо больше способов исправить клиентскую ошибку. Тут реально целый ворох решений: от удаления подозрительных компонентов из CMS до редактирования конфигурационных файлов.
Проверить настройки сервера
Тут будут инструкции для владельцев сайтов на базе Apache и Nginx в Timeweb. Понятно, что есть другие варианты конфигураций, но эти два — чуть ли стандарт, использующийся повсеместно. А информация, касающаяся конкретно Timeweb, заденет только расположение файлов и работу с панелью управления хостинга. Остальные моменты универсальны.
Инструкция для пользователей Apache
Наша задача состоит в том, чтобы в файле .htaccess найти записи, которые могут провоцировать появление ошибки 405. А потом их закомментировать или удалить. Чтобы это сделать:
- Открываем панель управления Timeweb.
- Ищем внутри вкладку «Файловая система» и переходим на нее.
- Открываем файл .htaccess.
- Внутри .htaccess ищем директивы Rewrite… (обычно это RewriteEngine, RewriteCond и RewriteRule).
Эти директивы помогают в настройке переадресации и некоторых других аспектах поведения сервера. Например, чтобы заставить сервер отправлять клиенту ошибку на каждый запрос GET, можно ввести такой код:
RewriteEngine on
RewriteCond %{REQUEST_URI} ^/ru/services/?.$
RewriteCond %{REQUEST_METHOD} =GET
RewriteRule ^(.)$ http://timeweb/ru/new$1 [R=405,L]
За появление ошибки отвечает запись [R=405,L]. То есть в настройках указано, как себя будет вести сервер при определенном запросе. Надо найти все такие директивы и закомментировать их, поставив # перед записью.
Инструкция для пользователей Nginx
Здесь нужно сделать примерно то же. Разница в том, как выглядит файл с настройками и в его расположении.
- Ищем файл nginx.conf по пути /usr/local/nginx/conf или /usr/local/etc/nginx.
- Открываем его любым текстовым редактором.
- Находим код, включающий в себя упоминание ошибки 405.
В Nginx код выглядит немного сложнее. Например, запрос метода для ссылки https://moysait.com/ru/services/create будет выглядеть так:
server { listen 80; listen 443 ssl;

server_name moysait.com;

location /users/create { if ($request_method = POST) { return 405 https://moysait.com/services/create$request_uri; } } }
Делаем ту же процедуру. Останавливаемся везде, где находим директиву с ошибкой 405. Анализируем ее (вдруг, она тут случайно). И при необходимости комментируем или удаляем.
Исправить проблемы, связанные с PHP-скриптами
Ошибки могут возникнуть при попытке импортировать или экспортировать слишком объемную базу данных. На хостинге может быть установлено ограничение в полминуты, запрещающее использовать один PHP-скрипт дольше этого времени. Поэтому, если процесс затянется, сервер может отозваться ошибкой 405.
Обойти ограничение можно тремя путями:
- Попробовать экспортировать БД через phpMyAdmin.
- Разбить файл БД на несколько мелких частей, передача каждого из которых займет меньше 30 секунд.
- Использовать для передачи БД Cron-задачу. На них сервер выделяет больше времени.
Еще специалисты рекомендуют удалить статические файлы с разрешением, которые Nginx обрабатывать не должен. Это делается через панель управления хостингом в соответствующем разделе файлового менеджера.
Исправить эксклюзивные для Nginx ошибки
Как мы уже выяснили выше, ошибка может возникнуть при попытке использовать неподходящий метод. Вот как можно исправить это в случае с Nginx-сервером.
Первый вариант — убедить сервер в том, что вместо кода 405 надо отправлять код 200, и это вполне нормально:
server {
   listen 80;
   server_name localhost;
location / {
   root html;
   index index.html index.htm; }
error_page 404 /404.html;
  error_page 403 /403.html;
error_page 405 =200 $uri;

…

}
Для тех, у кого Nginx-сервер — это proxy, понадобится вот такой код:
error_page 405 =200 @405;

location @405 { root /htdocs; proxy_pass http://localhost:8080; }
Аналогичная ошибка возникает при работе с модулем FastCGI. Из-за него сервер неправильно считывает запросы с методом POST, поэтому необходимо делить параметры и адрес скрипта вот так:
location ~.php(.*) {
 fastcgi_pass 127.0.0.1:9000;
 fastcgi_split_path_info ^(.+.php)(.*)$;
 fastcgi_param SCRIPT_FILENAME $document_root$fastcgi_script_name;
 fastcgi_param PATH_INFO $fastcgi_path_info;
 fastcgi_param PATH_TRANSLATED $document_root$fastcgi_path_info;
 include /etc/nginx/fastcgi_params;
}
Далее речь пойдет об общих методах диагностики и исправления ошибок. На крайний случай, если конкретные решения не помогли.
Проанализировать все недавние изменения в коде
Если недавно что-то поменяли, а после этого все сломалось, то надо это «поменяли» рассмотреть подробнее. Провести ручной дебаггинг, если можно это так назвать. Наверняка где-то затесалась несерьезная, но обидная ошибка.
Удалить сторонние дополнения для CMS
Если вы используете условный WordPress, то разного рода ошибки могут подкрасться оттуда, где их не ждешь. Например, после установки нового расширения.
Так что при подозрении на наличие сбойного дополнения, лучше попробовать от него избавиться и посмотреть, что будет. Возможно, ошибка исчезнет.
После этого уже можно будет поискать альтернативное расширение или пообщаться с разработчиками по поводу того, почему вообще возникает сбой.
Главное, не забудьте сделать резервную копию CMS перед тем, как что-то удалять и менять. И продолжайте делать бэкапы после, чтобы всегда можно было восстановить рабочую версию сайта.
Откатиться на более старую версию CMS
Бывает так, что сама CMS несет в себе баги и ошибки. Ну или криво установилась. В таком случае можно восстановиться из старой резервной копии и откатиться на одну или несколько версий в прошлое. Когда все работало без ошибок.
Проверить новые записи в базе данных
Расширения могут вносить изменения в базу данных сайта. Иногда не очень полезные. Надо проверить, не появилось ли после установки свежего дополнения каких-либо непрошенных изменений в базе данных. Может, появились подозрительные записи, которых не должно быть. Лучше подвергнуть анализу всю БД от начала до конца (если другие методы исправления ошибки 405 не помогли, конечно).
На этом будем заканчивать. Мы и так уже перешли на самые маловероятные способы исправления этой ошибки. Надеюсь, они не понадобятся, но знать о таких вариантах стоит. Вдруг эти знания когда-нибудь спасут вас и посетителей вашего сайта.
Jun 8, 2022 10:44:17 AM |
405 Method Not Allowed: What It Is and How to Fix It
An overview of what a 405 Method Not Allowed response is, including troubleshooting tips to help you resolve this error in your own application.
The 405 Method Not Allowed is an HTTP response status code indicating that the server received and recognized the specified request HTTP method, but the server rejected that particular method for the requested resource. This code response confirms that the requested resource is valid and exists, but the client has used an unacceptable HTTP method during the request.
Like most HTTP response codes — especially for those that indicate an error — it can be challenging to find the cause of a 405 Method Not Allowed response.
In this article, we’ll examine the 405 Method Not Allowed in more detail. We’ll look at what might cause this message, along with a handful of tips for diagnosing and debugging the appearance of this error within your application. We’ll also examine popular content management systems (CMSs) for potential problem areas that could cause an unexpected 405 Method Not Allowed.
Server- or Client-Side?
All HTTP response status codes in the 4xx category are client error responses. This category contrasts with 5xx classification errors, such as the 503 Service Unavailable Error. These are server error responses. That said, the appearance of a 4xx error doesn’t necessarily mean the issue is on the client-side, where the “client” is the web browser or device being used to access the application.
If you’re trying to diagnose an issue within your application, you can ignore most client-side code and components, such as HTML, cascading style sheets (CSS), client-side JavaScript, etc. This doesn’t apply solely to websites, either. Standard web applications power many smartphone apps that implement a modern-looking user interface.
On the other hand, this doesn’t entirely rule out the server as the actual cause of a 405 error. In some cases, the server may be mishandling requests. This could result in 405 code responses and other problematic traffic routing issues. We’ll explore some of these scenarios (and potential solutions) below. Be aware that, even though the 405 Method Not Allowed is considered a client error response, it doesn’t inherently mean we can rule out the client or the server as the culprit.
Start With a Thorough Application Backup
It is critical that you perform a complete backup of your application before attempting any fixes to the system.
Even better, create a complete copy of the application onto a secondary staging server that isn’t active. This will give you a clean testing ground to test all potential fixes without threatening your live application.
Diagnosing a 405 Method Not Allowed
As discussed in the introduction, a 405 Method Not Allowed indicates that the user agent (the web browser, in most cases) has requested a valid resource using an invalid HTTP method.
This could happen in a few different circumstances:
- The user agent accidentally sent an incorrect HTTP method
- The server is expecting only a handful of valid HTTP methods for the requested resource
Currently, there are nine possible HTTP methods, though some of them are far more prevalent than others. For example, the GET method handles most requests made on the Internet to retrieve data (i.e. “get” a page or resource). The POST method is the second-most common, and it’s typically used to send data to the server (such as login credentials).
Since each possible HTTP method has its own intended uses, it often doesn’t make sense for a server to accept requests using specific methods for particular resources. For example, a resource might exist at the URL https://airbrake.io/users/create, where the server creates a new user when valid credentials are sent via a POST HTTP method request. Therefore, it makes no sense for the server to accept a GET request at that resource/URL, so it may respond with a 405 Method Not Allowed code.
Troubleshooting on the Client-Side
Since the 405 response is a client error response code, it’s best to start troubleshooting any potential client-side issues. Here are a handful of tips to try on the browser or device giving you problems.
Check the Requested URL
The most common cause of a 405 Method Not Allowed is simply inputting an incorrect URL. As discussed before, many web servers will disallow access to improper URLs.
This could be anything from trying to access a file directory via a URL to gaining access to a private page meant for other users. Double-check the exact URL returning the 405 Method Not Allowed error.
Debugging Common Platforms
If you’re running common software packages on the server responding with the 405 Method Not Allowed, you may want to look into the stability and functionality of those platforms.
The most common content management systems (CMSs) — like WordPress, Joomla!, and Drupal — are typically well-tested. Once you start making modifications to the underlying extensions or PHP code, it’s easy to cause unforeseen issues resulting in a 405 error.
Troubleshoot some of these popular software platforms using the tips below.
Rollback Recent Upgrades
Suppose you recently updated the content management system before the 405 Method Not Allowed appeared. You may want to consider rolling back to the previous version you had installed when things were working fine.
Similarly, any extensions or modules you may have recently upgraded can also cause server-side issues, so reverting to previous versions may also help.
Simply Google “downgrade [PLATFORM_NAME] for assistance with this task.” In some cases, however, certain CMSs don’t provide a version downgrade capability, which indicates that they consider the base application and each new version released to be stable and bug-free.
Uninstall New Extensions, Modules, or Plugins
New extensions, modules, and plugins within your CMS all serve the same purpose across every system: improving the capabilities and features of the platform beyond what it’s typically capable of out of the box.
A word of caution: such extensions can take complete control of the system and make virtually any changes. As such, it may be wise to uninstall any new extensions if you suddenly see a 405 error.
Check for Unexpected Database Changes
It’s worth noting that, even if you uninstall an extension through the CMS dashboard, this doesn’t guarantee that changes made by the extension will fully revert. This is particularly true for many WordPress extensions. Some of these extensions are given carte blanche within the application, including full access rights to the database.
For example, some extensions modify database records that don’t “belong” to the extension itself but are instead created and managed by other extensions (or even the base CMS itself). The extension may not know how to revert alterations to database records, so it will ignore such things during uninstallation.
Your best course of action is to open the database and manually look through records that the extension modified.
Troubleshooting on the Server-Side
If you aren’t running a CMS application — or even if you are, but you’re confident the 405 Method Not Allowed error isn’t related to that — here are some additional tips to help you troubleshoot what might be causing the issue on the server-side of things.
Confirm Your Server Configuration
Your application is likely running on a server using one of these three popular webserver software: Apache, nginx, or Cloudflare. At the time of publication, these web servers make up over 86% of the world’s web server software! Check your configuration files for your web server software for unintentional redirect or request handling instructions.
Apache
To determine which web server your application uses, look for a key file. If your web server is Apache, look for an .htaccess file within the root directory of your website file system.
For example, if your application is on a shared host, you’ll likely have a username associated with the hosting account. You can find the application root directory at the path of /home/<username>/public_html/, so the .htaccess file would be at /home/<username>/public_html/.htaccess.
Once you’ve located the .htaccess file, open it in a text editor. Look for lines that use RewriteXXX directives, which are part of the mod rewrite module in Apache. Covering exactly how these rules work is well beyond the scope of this article. However, the basic concept is that a RewriteCond directive defines a text-based pattern that is matched against entered URLs. Suppose a visitor requests a matching URL to the site. In that case, the RewriteRule directive that follows one or more RewriteCond directives is used to perform the actual redirection of the request to the appropriate URL.
For example, here is a simple RewriteRule that matches all incoming GET requests to https://airbrake.io/users/create and responds with a 405 Method Not Allowed error code:
RewriteEngine on
RewriteCond %{REQUEST_URI} ^/users/create/?.*$
RewriteCond %{REQUEST_METHOD} =GET
RewriteRule ^(.*)$ https://airbrake.io/users/new$1 [R=405,L]
Notice the R=405 flag at the end of the RewriteRule, which explicitly states that the response code should be 405. This indicates to user agents that the resource exists, but the provided HTTP method is not allowed. If you find any strange RewriteCond or RewriteRuledirectives in the .htaccess file that doesn’t belong, try temporarily commenting them out (using the # character prefix) and restarting your web server to see if this resolves the issue.
nginx
On the other hand, if your server is running on nginx, you’ll need to look for a completely different configuration file. By default this file is named nginx.conf. It’s located in one of a few common directories: /usr/local/nginx/conf, /etc/nginx, or /usr/local/etc/nginx.
Once located, open nginx.conf in a text editor and look for directives that are using the 405 response code flag. For example, here is a simple block directive (i.e. a named set of directives) that configures a virtual server for airbrake.io and ensures that a POST request to https://airbrake.io/users/create fails and is responded with a 405 response code:
server {
listen 80;
listen 443 ssl;
server_name airbrake.io;
location /users/create {
if ($request_method = POST) {
return 405 https://airbrake.io/users/create$request_uri;
}
}
}
Look through your nginx.conf file for any abnormal directives or lines that include the 405 flag. Comment out any abnormalities. Once that’s done, restart the server and see if the issue is resolved.
Configuration options for each different type of web server can vary dramatically. We’ll just list a few popular ones to give you some resources to look through:
- Apache
- Nginx
- Cloudflare
- IIS
- Node.js
- Apache Tomcat
Look Through the Logs
Nearly every web application will keep some form of server-side logs. Application logs are typically the history of what the application did, such as pages requested, connected servers, database results, etc.
Server logs are related to the actual hardware running the application. Logs will often provide details about the health and status of all connected services or the server itself.
Google “logs [PLATFORM_NAME]” if you’re using a CMS, or “logs [PROGRAMMING_LANGUAGE]” and “logs [OPERATING_SYSTEM]” if you’re running a custom application to get more information on finding the logs in question.
Debug Your Application Code or Scripts
If all else fails, it may be a problem in some custom code within your application. Manually debug your application and parse through application and server logs to diagnose where the issue may be coming from. Or, you can see the error in a manner of seconds using an error monitoring tool.
Airbrake’s error and performance monitoring software provides real-time error monitoring and automatic exception reporting for all development projects. In addition to this, Airbrake integrates with all popular languages and frameworks. Plus, Airbrake makes it easy to customize exception parameters, so you only gather the errors that matter.
See why so many of the world’s best engineering teams use Airbrake to revolutionize their exception handling practices and create your free dev account today.
Note: We published this post in January 2018 and recently updated it in June 2022.
If someone comes across an error page on your site, there’s a good chance they’ll get annoyed and leave. This can result in plenty of lost engagement and sales. One particularly common error to be aware of is the “405 Method Not Allowed” message.
This error can be tricky to navigate, as it indicates that something has gone wrong without telling you why it occurred. Fortunately, with a little effort and patience, you can be back up and running before long.
In this post, we’ll explain what a 405 error is and show you the different ways it can appear. We’ll then talk you through some of the ways you can fix this error on your WordPress site. Let’s get to it!
What Is the 405 Method Not Allowed Error?
When you manage a website, it’s almost guaranteed that you’ll run into some kind of common issue eventually. Websites go down, links break, and pages load a little too slowly. Although these occurrences are common, leaving them unattended is likely to result in a poor user experience.
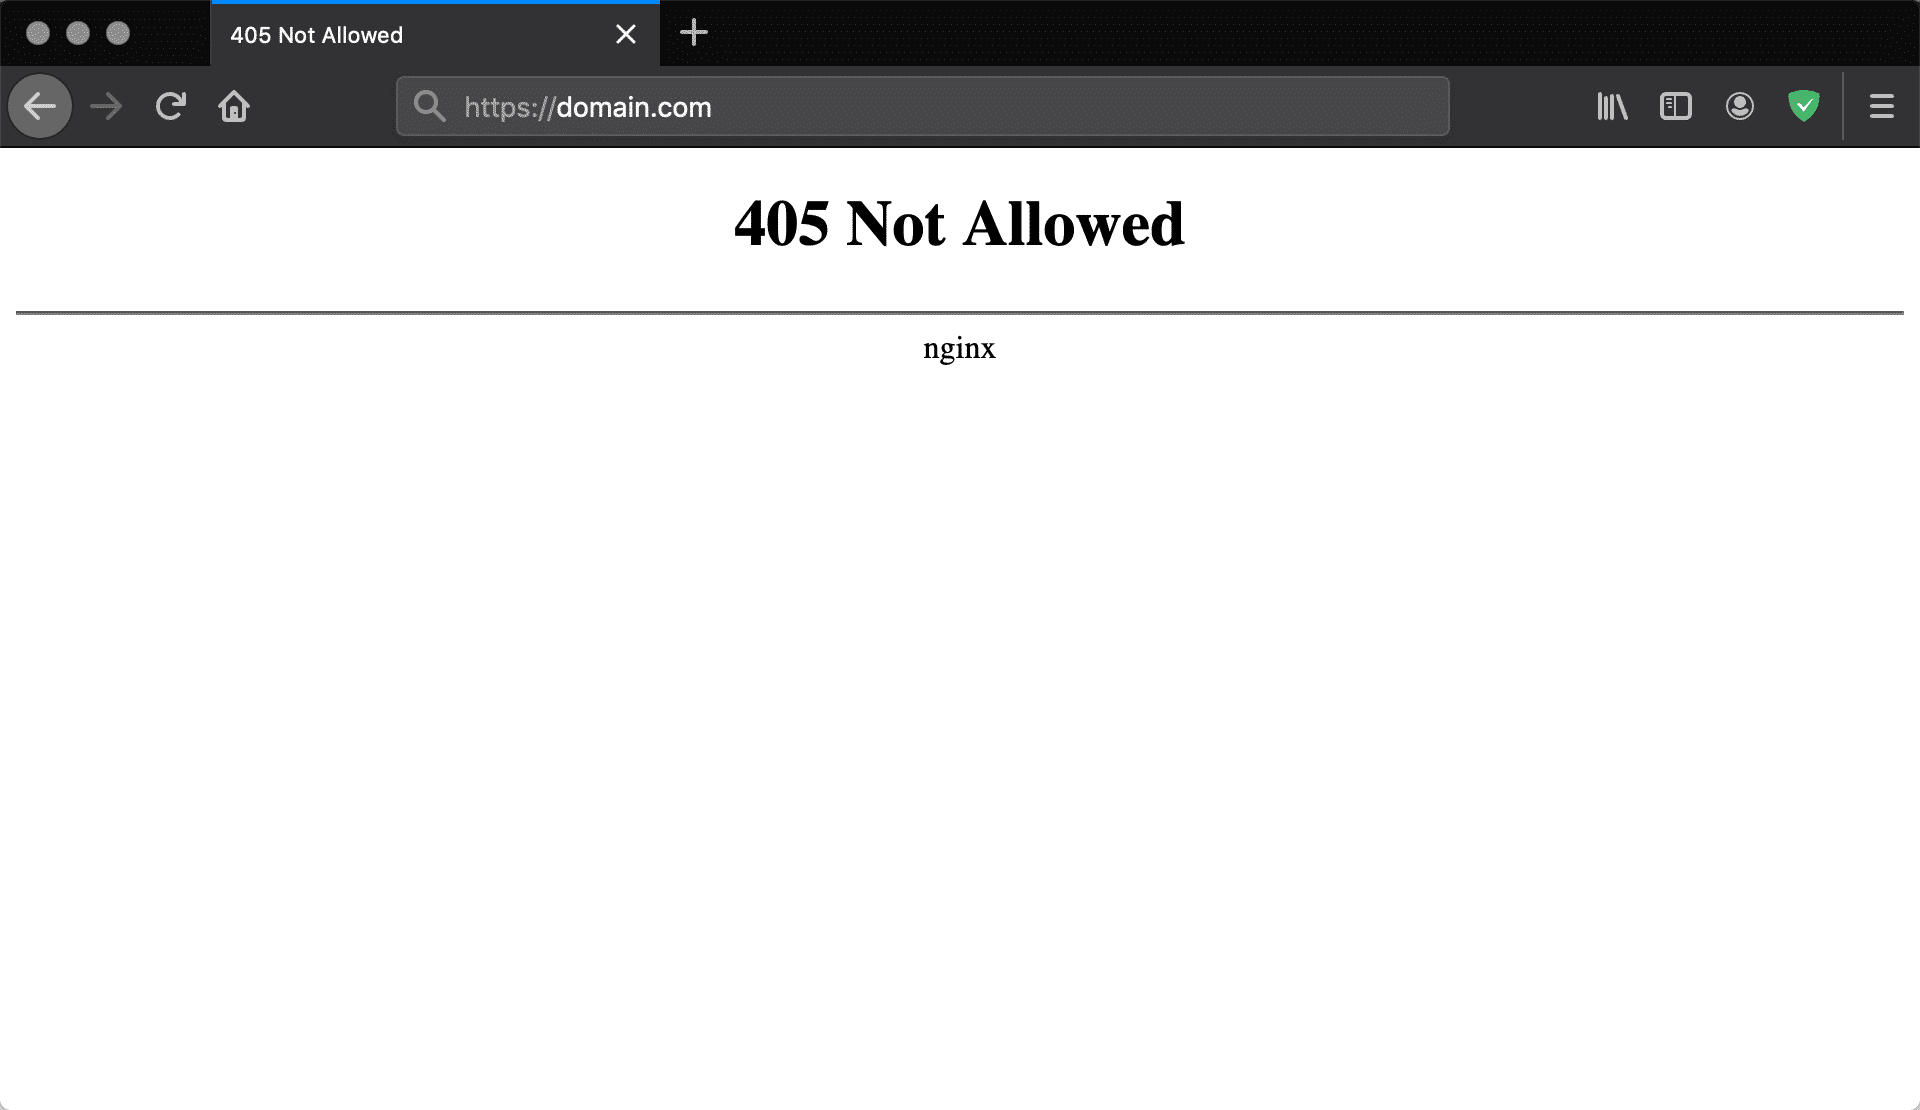
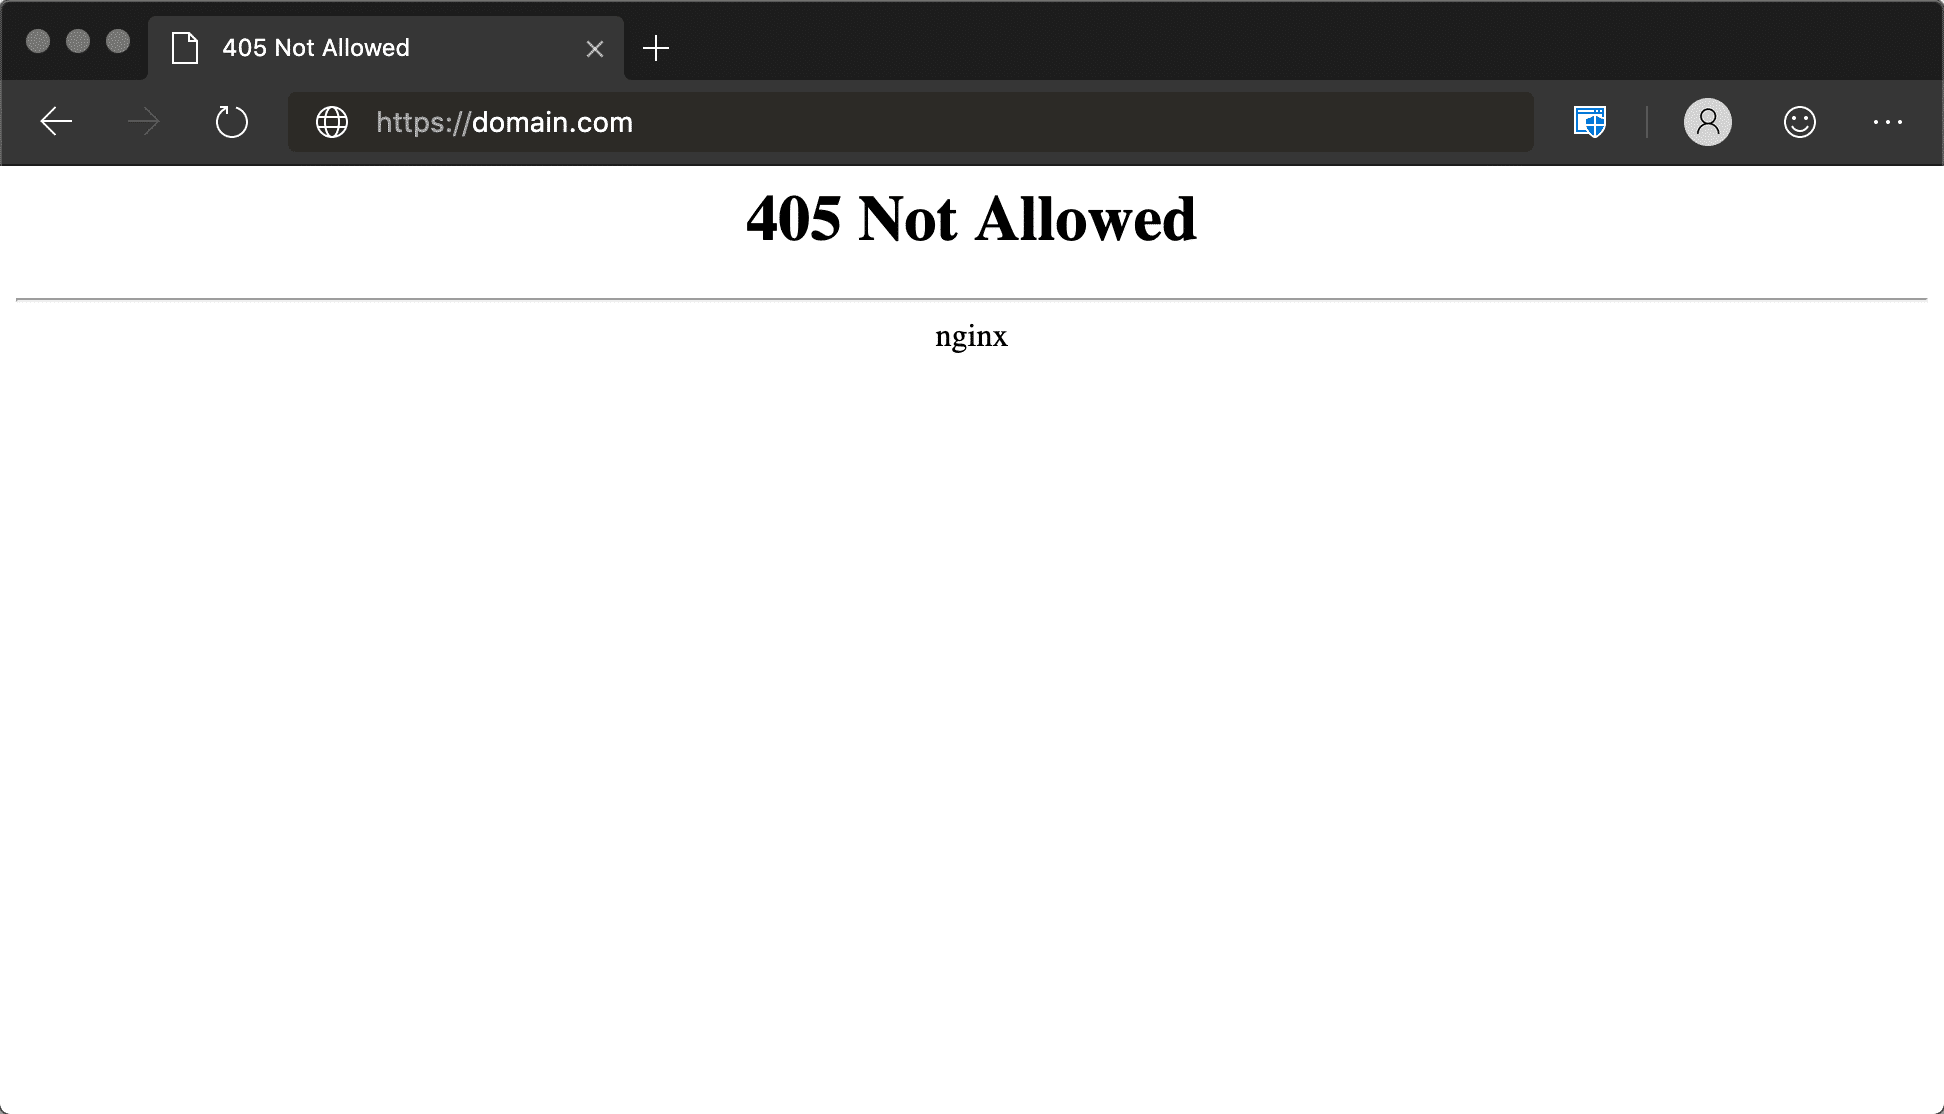
Unfortunately, some problems are more difficult to fix than others. Consider the 405 Method Not Allowed error message, for example. This is an HTTP response status indicating that a web browser has requested access to one of your site’s pages.
In this scenario, your web server has received and recognized the request, but has rejected the specific HTTP method it’s using. In practical terms, this means that the browser can’t access the page it requested. Your site’s visitors will see an error page, rather than the content they were looking for:
Google Chrome
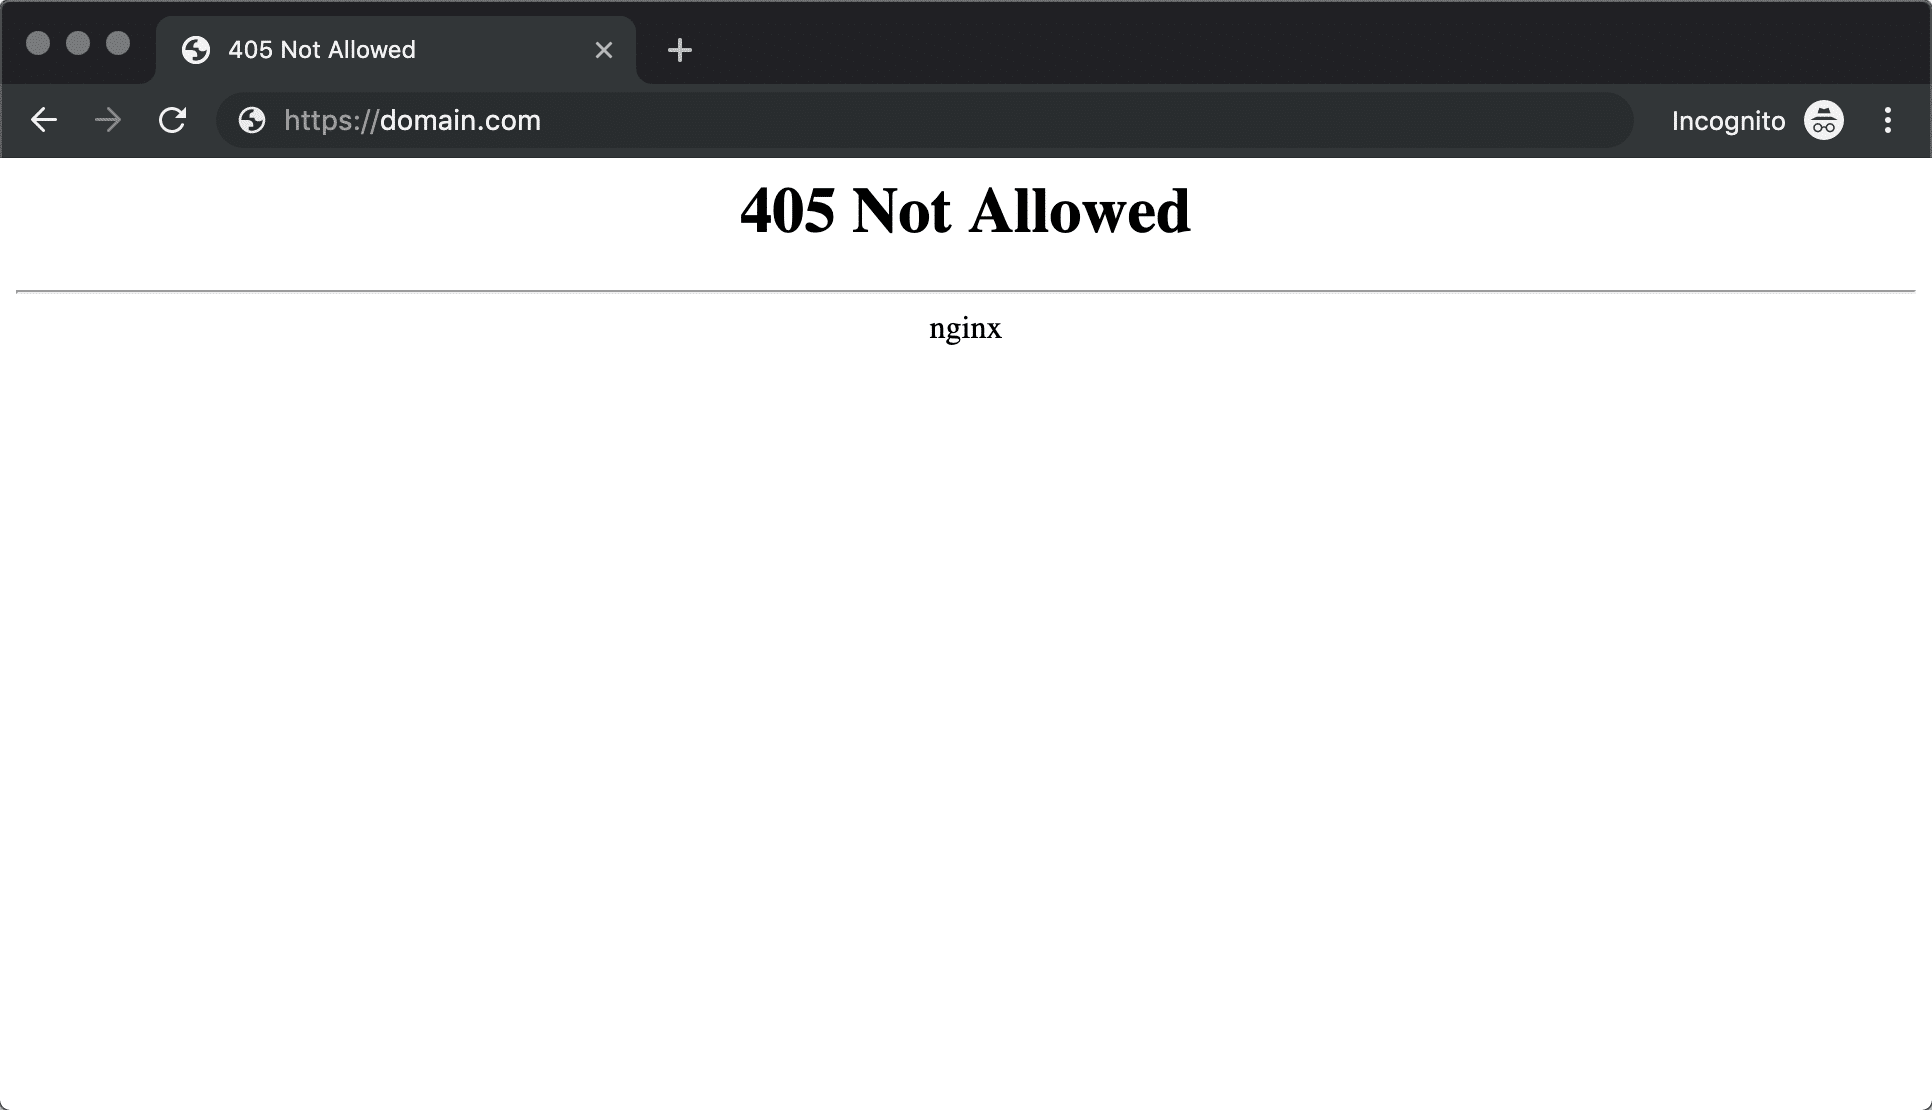
Safari
Firefox
Microsoft Edge
The 405 Method Not Allowed error shouldn’t be confused with the 404 Not Found error. A 404 tells you that the requested URL couldn’t be found or that it was entered incorrectly. A 405 error message, on the other hand, confirms that the requested page does exist (and the URL was input correctly), but an unacceptable HTTP method was used to make the initial request.
405 Method Not Allowed (Short Definition):
The 405 Method Not Allowed error occurs when the web server is configured in a way that does not allow you to perform a specific action for a particular URL. It’s an HTTP response status code that indicates that the request method is known by the server but is not supported by the target resource.
Check Out Our Video Guide to the 405 Method Not Allowed Error
Variations on the 405 Method Not Allowed Error
Although the 405 error message most commonly appears in the form we showed above, various web servers, operating systems, and browsers can present it in numerous ways. The actual cause of the issue is also likely to differ slightly from server to server, which can affect the way the error appears.
Here are just a few of the many different variations you might run across:
- 405 Not Allowed
- Method Not Allowed
- HTTP 405 Error
- HTTP Error 405 – Method Not Allowed
- HTTP 405 Method Not Allowed
Regardless of how they appear, the trouble with 405 errors is that they can be difficult to solve. This is because they let you know that something has gone wrong, but they don’t tell you what the cause of the problem is. In most cases, it’s up to you to find the root cause and repair it if possible.
Are you getting the 405 Method Not Allowed Error with your #WordPress site? Here are 7 ideas to easily fix it! 💡Click to Tweet
How to fix the 405 Method Not Allowed Error on Your WordPress Site (7 Possible Solutions)?
Before we start discussing the possible solutions, you’ll want to create a backup of your site. This will give you something to fall back on if you make a mistake. Many web hosting providers include regular site backups as a part of their plans. If you have a hosting plan here at Kinsta, creating a backup is simple.
Once that’s out of the way, it’s time to begin the troubleshooting process. The methods we’ve outlined below are organized from most likely to fix the problem to least likely, so start from the top and work your way down to achieve the best results.
Without further ado, let’s get started with one of the easier steps on our list.
1. Check to See If You’ve Input the Correct URL
It may sound a little too simple but the most common cause of a 405 Method Not Allowed error is entering the wrong URL. Most web servers are tightly secured and designed to disallow access to improper URLs to prevent users from visiting the wrong pages (or trying to access pages that don’t exist).
Before going any further, therefore, double-check to ensure that you’ve entered the URL of the site you wish to visit correctly. It’s easier than you might think to make mistakes – such as forgetting a letter or misspelling a word. You may also find that simply refreshing the page could prompt it to load correctly.
2. Roll Back Any Recent WordPress Updates
Updates are wonderful things. They typically bring a wealth of exciting new features and can help to fix any ongoing bugs and patch security holes. However, despite their good intentions, updates can occasionally cause some issues.
If you updated WordPress just before the 405 Method Not Allowed error message started to appear, the new code could be the root of the problem. This also applies to any extensions or themes you may have recently upgraded – although we’ll focus more on that aspect in the next section.
If you feel that an update might be at fault, it’s worth reverting back to the previous version of WordPress. As we’ve already touched on, make sure you have a full site backup ready before doing this – you don’t want to make any irreversible changes.
While you can do this manually, the easiest way to roll back WordPress updates is to use a plugin. There are many available options, although WP Downgrade is particularly effective. This plugin will largely automate the process, meaning that you’re less likely to make mistakes.
Having a tool like this in your arsenal also means that you can prevent similar issues from happening in the future. Of course, if rolling back the latest update doesn’t fix the problem, remember to re-update your site or restore your backup.
3. Uninstall New Plugins and Themes
Plugins are an essential part of any WordPress website. They enable you to add a wealth of new features, and can even automate more complex processes. Themes are equally as important. Without them, you’d need a lot of complex coding (or an expensive developer) to create an aesthetically-pleasing site.
Unfortunately, just as with software updates, these extensions can sometimes create problems. This is because adding functionality to your site on any level completely changes the way it operates. There may be an issue with the plugin or theme you’re using, or a specific extension might conflict with another part of your site (or even your WordPress version).
As a result, you may find that uninstalling certain plugins or themes could help to fix the 405 Method Not Allowed error. To begin this process, you’ll need to navigate to the Plugins section of your WordPress dashboard. On this page, you should be able to see a complete list of all the plugins you have installed:
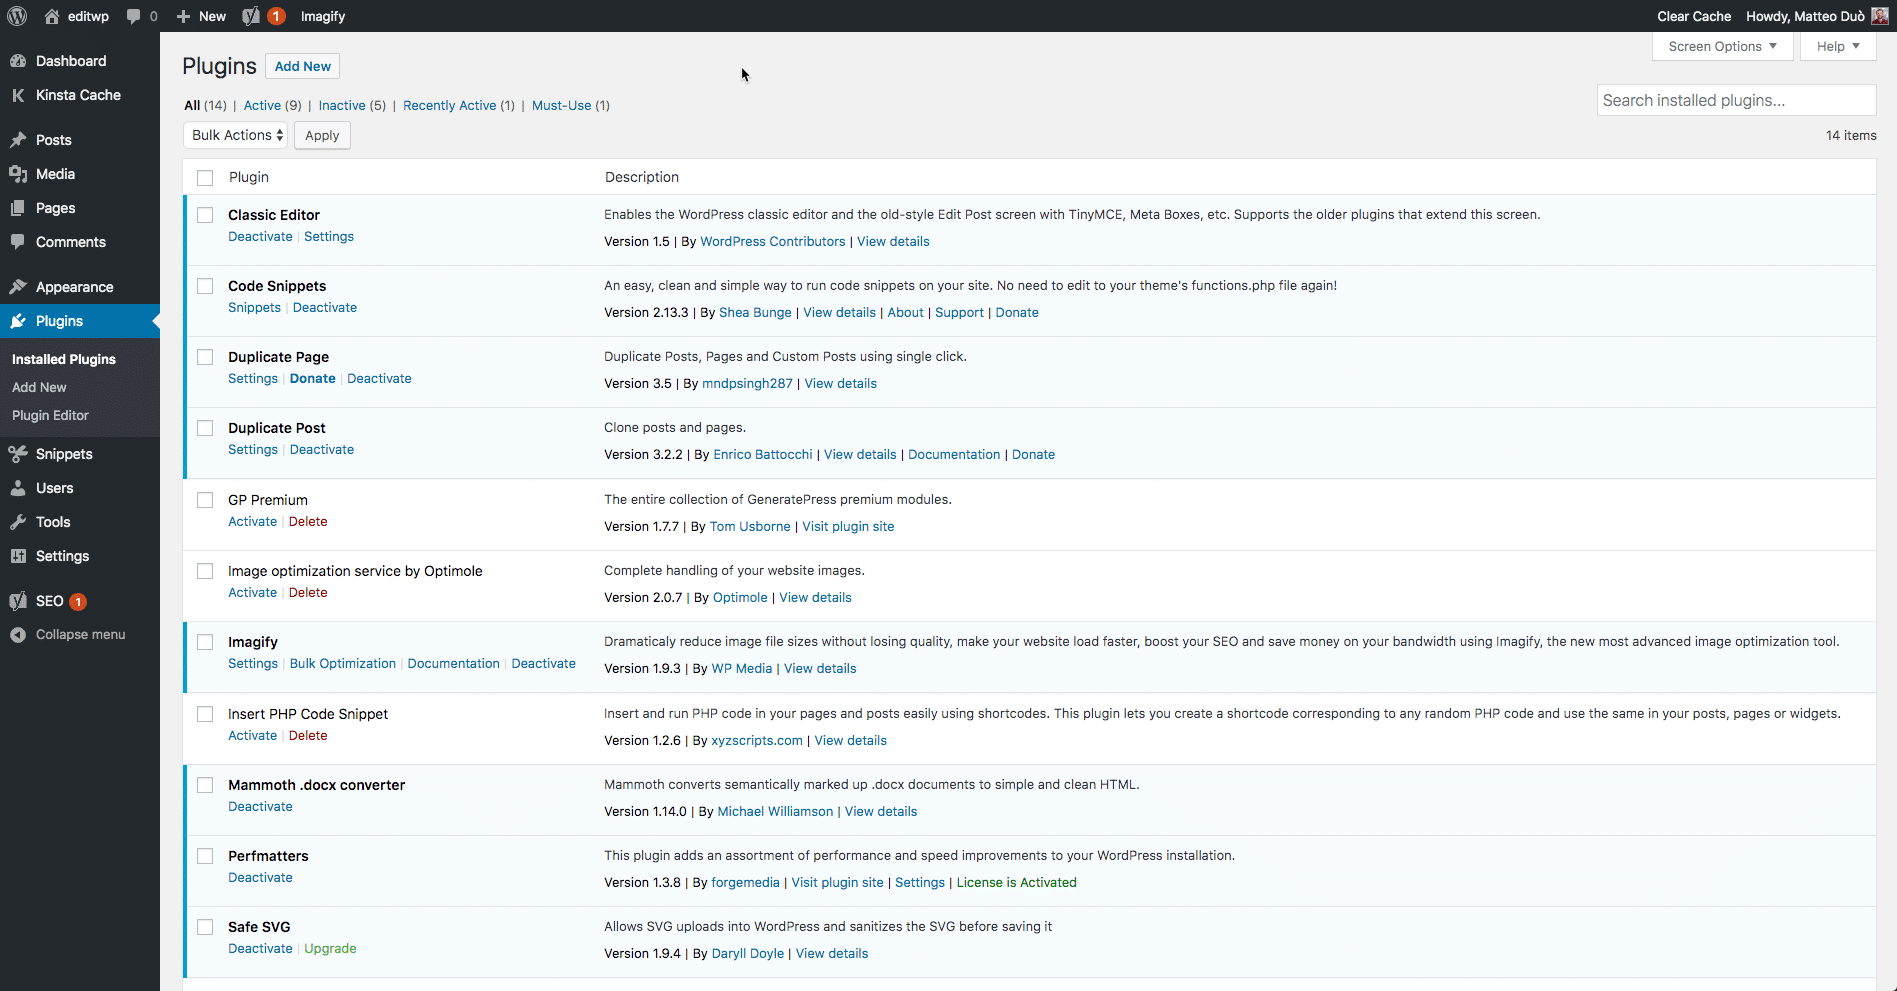
From here, you can begin to uninstall your plugins one at a time. After uninstalling each one, check your website to see if the error has been resolved. This process may take some time to complete, but it will enable you to pinpoint exactly which plugin is causing the problem (if any of them are at fault):

Once you’ve checked over your plugins, you can repeat this process with your active theme. If your theme or one of your plugins turns out to be the issue, you’ll want to either contact the developers, remove the plugin or theme, or look for a replacement. Here’s our guide on how to install a new WordPress theme.
4. Check for Any Unexpected Database Changes
Although the above step should resolve any plugin- or theme-related issues, it doesn’t guarantee that all changes made by your extensions have been fully reverted. This is especially true for many WordPress plugins. They are often given complete access to your database as soon as you hit Install, meaning that their changes go deeper than you might initially think.
Unless the developer explicitly codes against it, a plugin may be able to modify database records that don’t “belong” to it but are instead managed by WordPress itself. In this scenario, the plugin may not know how to revert those alterations to database records, so it will ignore them during the uninstallation process.
Diagnosing this particular problem can be difficult, but if you still suspect that a plugin or theme is the cause of the 405 Method Not Allowed error, checking your database directly is your best course of action. To do that, you’ll need to open your site’s database, and manually look through the tables and records modified by the extension. If you’re not sure what to look for, getting in touch with your developer is a smart idea at this point (as well as for the remaining steps on this list).
5. Confirm Your Server’s Configuration
Your website likely runs on a server that uses one of the two most popular server software options – Apache or Nginx. In fact, together they power 84% of the world’s web servers. Checking your web server software’s configuration files for any unintentional handling instructions may help to determine the root cause of the 405 Method Not Allowed error.
To determine which application your web server is using, you’ll want to look out for a key file. For example, if your web server is running Apache, you should be able to find an .htaccess file within the root directory of your website’s file system.
When your application is on a shared host, you’ll likely have a username associated with your particular account. If that’s the case, the application root directory can typically be found by following this path:
/home/public_html/
Therefore, the .htaccess file would be found at:
/home/public_html/.htaccess
Once you’ve located the .htaccess file, open it up in a text editor and look for lines that use Rewrite directives. These are part of the mod_rewrite module in Apache and define a text-based pattern that will be matched against all entered URLs. If a matching URL is requested by a visitor to your site, the RewriteRule will redirect the visitor appropriately.
To better demonstrate this, here is a simple RewriteRule that matches all incoming requests to https://kinsta.com and responds with a 405 Method Not Allowed error code:

As you can probably see, there’s a flag at the end of the rule marked R=405. This explicitly states that the response code should be 405, indicating to the user that the resource exists, but the provided HTTP method was not allowed. If you find any strange Rewrite directives in the .htaccess file that contain a similar instruction, try temporarily commenting them out using the # character prefix. You can then restart your web server, to see if your change has resolved the issue.
Remember, if you’re a client at Kinsta, we use Nginx servers, not Apache. You can reach out to our support team if you think something might be wrong with your Nginx config.
6. Look Through the Server-Side Logs
Nearly every web application keeps some kind of server-side logs. Application logs usually comprise the complete history of everything the software has done – from the pages it’s requested, to the database results it provides.
Server logs are slightly different, as they’re related to the actual hardware that runs the application. They will often provide details about the health and status of all connected services, or even just the server itself.
To find your WordPress server logs, you’ll want to connect to your site via Secure File Transfer Protocol (SFTP). In the root directory, you will see a folder called logs. Within this folder are your access logs, and your WordPress error logs. They should look a little something like this:
- Access.log
- Error.log
From there, you can begin to follow a similar process to that outlined in the previous step. Look through the logs and take note of anything that looks out of place (or ask your developer to do so). You can also refer to the codex for additional debugging information in WordPress.
7. Debug Your Application Code or Scripts
If none of the previous steps have done the trick, it may be a sign that there’s an issue with some custom code in your WordPress installation. The only way of determining whether this is the cause of the 405 Method Not Allowed error is to debug it.
Ideally, you’ll want to make a copy of the entire installation to an online or local development area – such as a staging site. From there, you can begin to conduct a step-by-step debugging process, which will vary depending on your site and its attached software.
Unfortunately, there’s no quick fix here. You’ll have to be prepared to put in the time to comb each section of your site for anything that looks out of place. Remember, however, that a fully-operational site is worth the hassle.
What to Do if None of These Solutions Work
If you’re still reading, it probably means that the solutions we’ve outlined above still haven’t fixed the 405 Method Not Allowed error. This is usually an indication that a more complex issue has occurred, and is unlikely to be something you can fix personally unless you’re a seasoned developer.
In this scenario, the best thing you can do is often to contact your hosting provider directly. You should have access to 24/7 customer support through a live chat or ticketing service. You may also be able to reach out to your host via email or phone, although opting for live chat is likely to offer a faster solution.
Summary
No matter how carefully-optimized your website might be, it’s nearly inevitable that you’ll encounter at least one error message at some point. It’s important to resolve the issue quickly when this happens, to keep visitors interested in your site. Fortunately, although the 405 Method Not Allowed error can be confusing, it’s often possible to fix it with a little troubleshooting.
Let’s recap the seven methods you can try in order to fix a 405 error on your WordPress site:
- Check to ensure that you’ve entered the correct URL into the address bar.
- Roll back any recent WordPress updates, to distinguish whether that’s causing the issue.
- Uninstall any new plugins or themes one at a time.
- Ensure that there haven’t been any unexpected database changes.
- Confirm your server’s configuration.
- Look through the server-side logs stored by WordPress.
- Attempt to debug your application code or scripts.
Do you have any further questions about the 405 Method Not Allowed error? Or is there another commonly-encountered error message you’d like us to cover? Let us know in the comments section below!
Get all your applications, databases and WordPress sites online and under one roof. Our feature-packed, high-performance cloud platform includes:
- Easy setup and management in the MyKinsta dashboard
- 24/7 expert support
- The best Google Cloud Platform hardware and network, powered by Kubernetes for maximum scalability
- An enterprise-level Cloudflare integration for speed and security
- Global audience reach with up to 35 data centers and 275 PoPs worldwide
Test it yourself with $20 off your first month of Application Hosting or Database Hosting. Explore our plans or talk to sales to find your best fit.
If someone comes across an error page on your site, there’s a good chance they’ll get annoyed and leave. This can result in plenty of lost engagement and sales. One particularly common error to be aware of is the “405 Method Not Allowed” message.
This error can be tricky to navigate, as it indicates that something has gone wrong without telling you why it occurred. Fortunately, with a little effort and patience, you can be back up and running before long.
In this post, we’ll explain what a 405 error is and show you the different ways it can appear. We’ll then talk you through some of the ways you can fix this error on your WordPress site. Let’s get to it!
What Is the 405 Method Not Allowed Error?
When you manage a website, it’s almost guaranteed that you’ll run into some kind of common issue eventually. Websites go down, links break, and pages load a little too slowly. Although these occurrences are common, leaving them unattended is likely to result in a poor user experience.
Unfortunately, some problems are more difficult to fix than others. Consider the 405 Method Not Allowed error message, for example. This is an HTTP response status indicating that a web browser has requested access to one of your site’s pages.
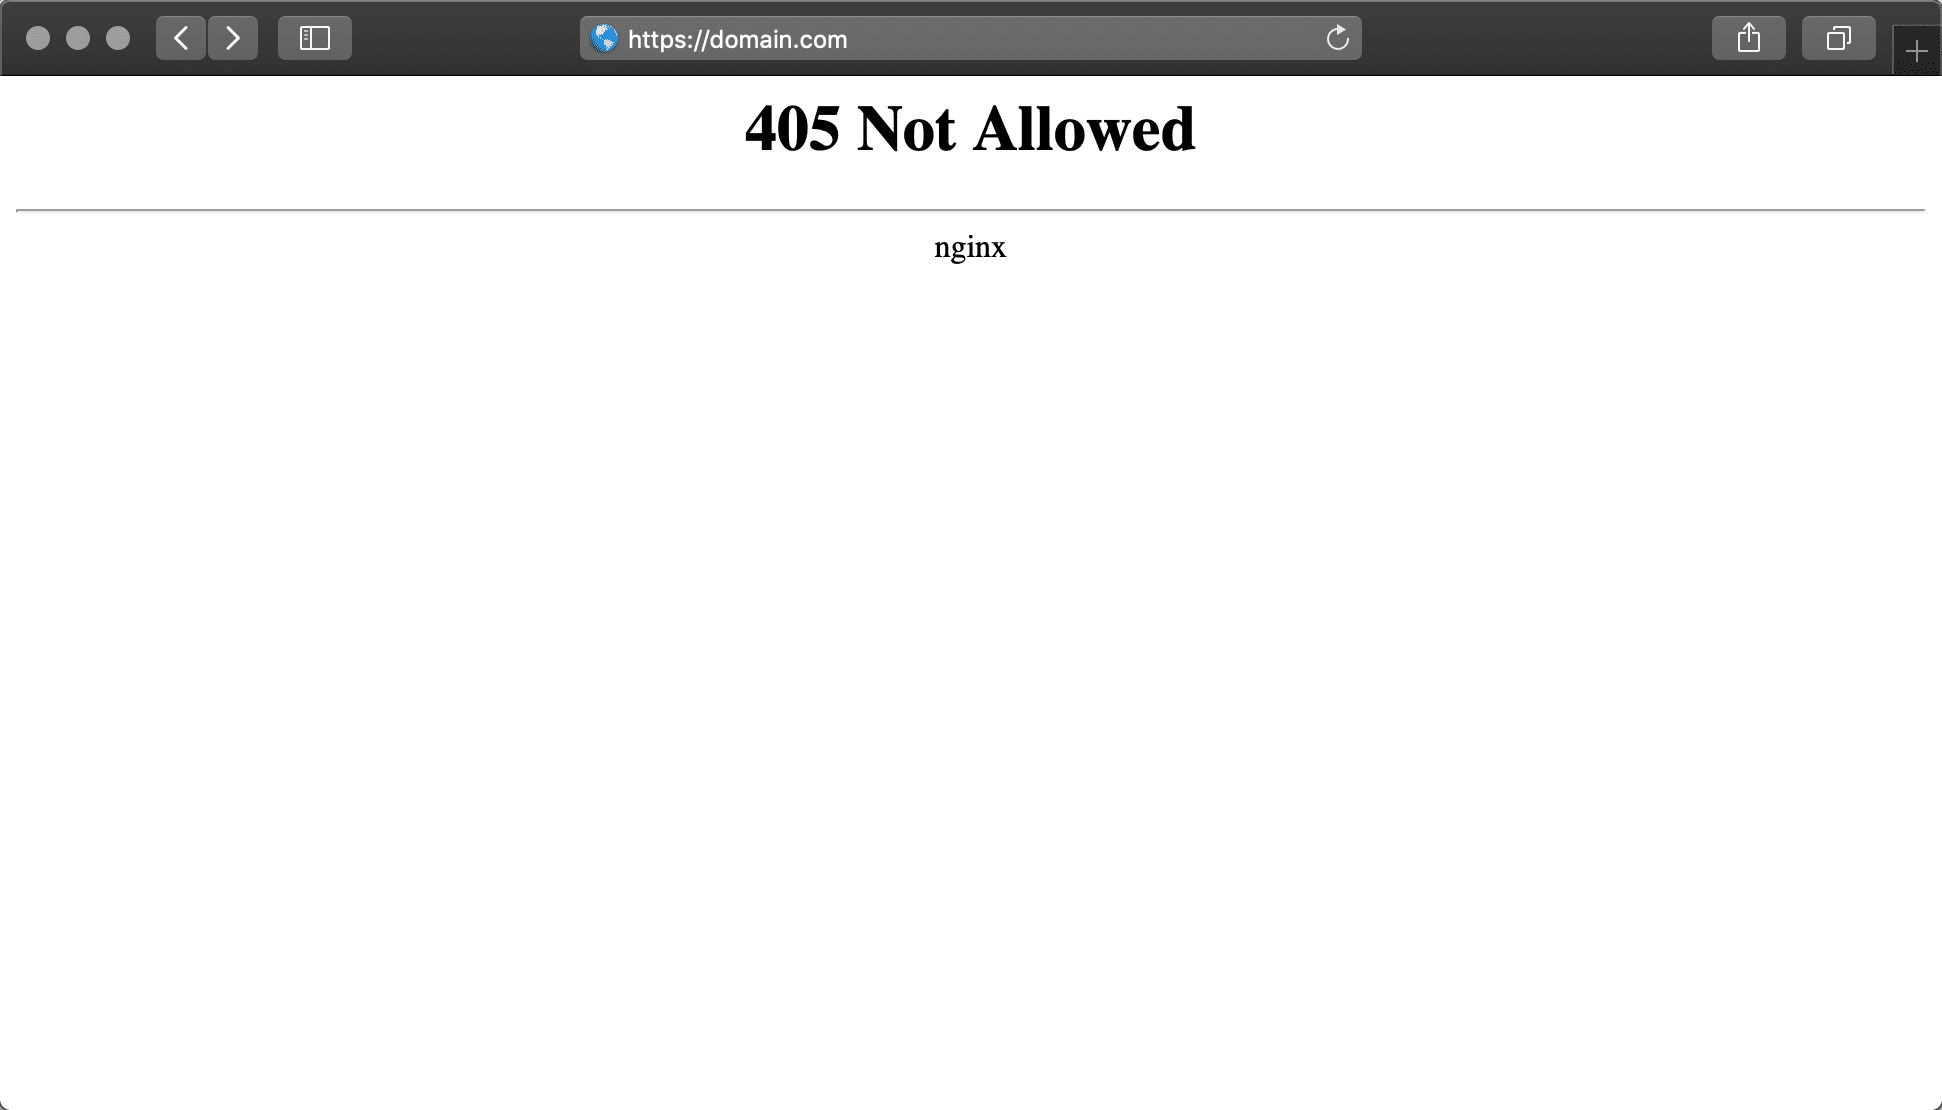
In this scenario, your web server has received and recognized the request, but has rejected the specific HTTP method it’s using. In practical terms, this means that the browser can’t access the page it requested. Your site’s visitors will see an error page, rather than the content they were looking for:
Google Chrome
Safari
Firefox
Microsoft Edge
The 405 Method Not Allowed error shouldn’t be confused with the 404 Not Found error. A 404 tells you that the requested URL couldn’t be found or that it was entered incorrectly. A 405 error message, on the other hand, confirms that the requested page does exist (and the URL was input correctly), but an unacceptable HTTP method was used to make the initial request.
405 Method Not Allowed (Short Definition):
The 405 Method Not Allowed error occurs when the web server is configured in a way that does not allow you to perform a specific action for a particular URL. It’s an HTTP response status code that indicates that the request method is known by the server but is not supported by the target resource.
Check Out Our Video Guide to the 405 Method Not Allowed Error
Variations on the 405 Method Not Allowed Error
Although the 405 error message most commonly appears in the form we showed above, various web servers, operating systems, and browsers can present it in numerous ways. The actual cause of the issue is also likely to differ slightly from server to server, which can affect the way the error appears.
Here are just a few of the many different variations you might run across:
- 405 Not Allowed
- Method Not Allowed
- HTTP 405 Error
- HTTP Error 405 – Method Not Allowed
- HTTP 405 Method Not Allowed
Regardless of how they appear, the trouble with 405 errors is that they can be difficult to solve. This is because they let you know that something has gone wrong, but they don’t tell you what the cause of the problem is. In most cases, it’s up to you to find the root cause and repair it if possible.
Are you getting the 405 Method Not Allowed Error with your #WordPress site? Here are 7 ideas to easily fix it! 💡Click to Tweet
How to fix the 405 Method Not Allowed Error on Your WordPress Site (7 Possible Solutions)?
Before we start discussing the possible solutions, you’ll want to create a backup of your site. This will give you something to fall back on if you make a mistake. Many web hosting providers include regular site backups as a part of their plans. If you have a hosting plan here at Kinsta, creating a backup is simple.
Once that’s out of the way, it’s time to begin the troubleshooting process. The methods we’ve outlined below are organized from most likely to fix the problem to least likely, so start from the top and work your way down to achieve the best results.
Without further ado, let’s get started with one of the easier steps on our list.
1. Check to See If You’ve Input the Correct URL
It may sound a little too simple but the most common cause of a 405 Method Not Allowed error is entering the wrong URL. Most web servers are tightly secured and designed to disallow access to improper URLs to prevent users from visiting the wrong pages (or trying to access pages that don’t exist).
Before going any further, therefore, double-check to ensure that you’ve entered the URL of the site you wish to visit correctly. It’s easier than you might think to make mistakes – such as forgetting a letter or misspelling a word. You may also find that simply refreshing the page could prompt it to load correctly.
2. Roll Back Any Recent WordPress Updates
Updates are wonderful things. They typically bring a wealth of exciting new features and can help to fix any ongoing bugs and patch security holes. However, despite their good intentions, updates can occasionally cause some issues.
If you updated WordPress just before the 405 Method Not Allowed error message started to appear, the new code could be the root of the problem. This also applies to any extensions or themes you may have recently upgraded – although we’ll focus more on that aspect in the next section.
If you feel that an update might be at fault, it’s worth reverting back to the previous version of WordPress. As we’ve already touched on, make sure you have a full site backup ready before doing this – you don’t want to make any irreversible changes.
While you can do this manually, the easiest way to roll back WordPress updates is to use a plugin. There are many available options, although WP Downgrade is particularly effective. This plugin will largely automate the process, meaning that you’re less likely to make mistakes.
Having a tool like this in your arsenal also means that you can prevent similar issues from happening in the future. Of course, if rolling back the latest update doesn’t fix the problem, remember to re-update your site or restore your backup.
3. Uninstall New Plugins and Themes
Plugins are an essential part of any WordPress website. They enable you to add a wealth of new features, and can even automate more complex processes. Themes are equally as important. Without them, you’d need a lot of complex coding (or an expensive developer) to create an aesthetically-pleasing site.
Unfortunately, just as with software updates, these extensions can sometimes create problems. This is because adding functionality to your site on any level completely changes the way it operates. There may be an issue with the plugin or theme you’re using, or a specific extension might conflict with another part of your site (or even your WordPress version).
As a result, you may find that uninstalling certain plugins or themes could help to fix the 405 Method Not Allowed error. To begin this process, you’ll need to navigate to the Plugins section of your WordPress dashboard. On this page, you should be able to see a complete list of all the plugins you have installed:
From here, you can begin to uninstall your plugins one at a time. After uninstalling each one, check your website to see if the error has been resolved. This process may take some time to complete, but it will enable you to pinpoint exactly which plugin is causing the problem (if any of them are at fault):
Once you’ve checked over your plugins, you can repeat this process with your active theme. If your theme or one of your plugins turns out to be the issue, you’ll want to either contact the developers, remove the plugin or theme, or look for a replacement. Here’s our guide on how to install a new WordPress theme.
4. Check for Any Unexpected Database Changes
Although the above step should resolve any plugin- or theme-related issues, it doesn’t guarantee that all changes made by your extensions have been fully reverted. This is especially true for many WordPress plugins. They are often given complete access to your database as soon as you hit Install, meaning that their changes go deeper than you might initially think.
Unless the developer explicitly codes against it, a plugin may be able to modify database records that don’t “belong” to it but are instead managed by WordPress itself. In this scenario, the plugin may not know how to revert those alterations to database records, so it will ignore them during the uninstallation process.
Diagnosing this particular problem can be difficult, but if you still suspect that a plugin or theme is the cause of the 405 Method Not Allowed error, checking your database directly is your best course of action. To do that, you’ll need to open your site’s database, and manually look through the tables and records modified by the extension. If you’re not sure what to look for, getting in touch with your developer is a smart idea at this point (as well as for the remaining steps on this list).
5. Confirm Your Server’s Configuration
Your website likely runs on a server that uses one of the two most popular server software options – Apache or Nginx. In fact, together they power 84% of the world’s web servers. Checking your web server software’s configuration files for any unintentional handling instructions may help to determine the root cause of the 405 Method Not Allowed error.
To determine which application your web server is using, you’ll want to look out for a key file. For example, if your web server is running Apache, you should be able to find an .htaccess file within the root directory of your website’s file system.
When your application is on a shared host, you’ll likely have a username associated with your particular account. If that’s the case, the application root directory can typically be found by following this path:
/home/public_html/
Therefore, the .htaccess file would be found at:
/home/public_html/.htaccess
Once you’ve located the .htaccess file, open it up in a text editor and look for lines that use Rewrite directives. These are part of the mod_rewrite module in Apache and define a text-based pattern that will be matched against all entered URLs. If a matching URL is requested by a visitor to your site, the RewriteRule will redirect the visitor appropriately.
To better demonstrate this, here is a simple RewriteRule that matches all incoming requests to https://kinsta.com and responds with a 405 Method Not Allowed error code:
As you can probably see, there’s a flag at the end of the rule marked R=405. This explicitly states that the response code should be 405, indicating to the user that the resource exists, but the provided HTTP method was not allowed. If you find any strange Rewrite directives in the .htaccess file that contain a similar instruction, try temporarily commenting them out using the # character prefix. You can then restart your web server, to see if your change has resolved the issue.
Remember, if you’re a client at Kinsta, we use Nginx servers, not Apache. You can reach out to our support team if you think something might be wrong with your Nginx config.
6. Look Through the Server-Side Logs
Nearly every web application keeps some kind of server-side logs. Application logs usually comprise the complete history of everything the software has done – from the pages it’s requested, to the database results it provides.
Server logs are slightly different, as they’re related to the actual hardware that runs the application. They will often provide details about the health and status of all connected services, or even just the server itself.
To find your WordPress server logs, you’ll want to connect to your site via Secure File Transfer Protocol (SFTP). In the root directory, you will see a folder called logs. Within this folder are your access logs, and your WordPress error logs. They should look a little something like this:
- Access.log
- Error.log
From there, you can begin to follow a similar process to that outlined in the previous step. Look through the logs and take note of anything that looks out of place (or ask your developer to do so). You can also refer to the codex for additional debugging information in WordPress.
7. Debug Your Application Code or Scripts
If none of the previous steps have done the trick, it may be a sign that there’s an issue with some custom code in your WordPress installation. The only way of determining whether this is the cause of the 405 Method Not Allowed error is to debug it.
Ideally, you’ll want to make a copy of the entire installation to an online or local development area – such as a staging site. From there, you can begin to conduct a step-by-step debugging process, which will vary depending on your site and its attached software.
Unfortunately, there’s no quick fix here. You’ll have to be prepared to put in the time to comb each section of your site for anything that looks out of place. Remember, however, that a fully-operational site is worth the hassle.
What to Do if None of These Solutions Work
If you’re still reading, it probably means that the solutions we’ve outlined above still haven’t fixed the 405 Method Not Allowed error. This is usually an indication that a more complex issue has occurred, and is unlikely to be something you can fix personally unless you’re a seasoned developer.
In this scenario, the best thing you can do is often to contact your hosting provider directly. You should have access to 24/7 customer support through a live chat or ticketing service. You may also be able to reach out to your host via email or phone, although opting for live chat is likely to offer a faster solution.
Summary
No matter how carefully-optimized your website might be, it’s nearly inevitable that you’ll encounter at least one error message at some point. It’s important to resolve the issue quickly when this happens, to keep visitors interested in your site. Fortunately, although the 405 Method Not Allowed error can be confusing, it’s often possible to fix it with a little troubleshooting.
Let’s recap the seven methods you can try in order to fix a 405 error on your WordPress site:
- Check to ensure that you’ve entered the correct URL into the address bar.
- Roll back any recent WordPress updates, to distinguish whether that’s causing the issue.
- Uninstall any new plugins or themes one at a time.
- Ensure that there haven’t been any unexpected database changes.
- Confirm your server’s configuration.
- Look through the server-side logs stored by WordPress.
- Attempt to debug your application code or scripts.
Do you have any further questions about the 405 Method Not Allowed error? Or is there another commonly-encountered error message you’d like us to cover? Let us know in the comments section below!
Get all your applications, databases and WordPress sites online and under one roof. Our feature-packed, high-performance cloud platform includes:
- Easy setup and management in the MyKinsta dashboard
- 24/7 expert support
- The best Google Cloud Platform hardware and network, powered by Kubernetes for maximum scalability
- An enterprise-level Cloudflare integration for speed and security
- Global audience reach with up to 35 data centers and 275 PoPs worldwide
Test it yourself with $20 off your first month of Application Hosting or Database Hosting. Explore our plans or talk to sales to find your best fit.
Привет, читатель блога ZametkiNaPolyah.ru! Продолжим знакомиться с протоколом HTTP в рубрике Серверы и протоколы и ее разделе HTTP протокол. Эта запись целиком и полностью посвящена ошибка клиента при взаимодействие по HTTP протоколу. Мы с тобой рассмотрим коды ошибок клиента HTTP. Вообще, коды ошибок клиента в HTTP протоколе могут быть расширены любым сервером, мы рассмотрим только коды ошибок клиента, которые указаны в стандарте HTTP 1.1. Сперва, как и обычно при рассмотрение кодов HTTP протокола, мы дадим общее описания кодам ошибок клиента, а затем рассмотрим по отдельности каждый из 18 HTTP кодов ошибок клиента.

HTTP коды ошибок клиента
Общая информация о HTTP кодах ошибок клиента
Содержание статьи:
- Общая информация о HTTP кодах ошибок клиента
- HTTP код ошибки 400, код ошибки 401, код ошибки клиента 402, код ошибки 403, HTTP код ошибки клиента 404, ошибка клиента 405
- HTTP код ошибки 406, код ошибки 407, HTTP код ошибки клиента 408, код ответа сервера 409, код ошибки 410, код ошибки клиента 411, HTTP код 412
- HTTP код ошибки клиента 413, код ошибки клиента 414, ошибка клиента 415, ошибка 416, HTTP код 417
HTTP коды ошибок клиента говорят пользователю о том, что ему не удалось получить запрашиваемый ресурс, указанный в URI (запись про URI в HTTP), по вине самого пользователя или клиента, например, пользователь ошибся при вводе URL в браузере, в этом случае сервер даст ответ с кодом состояния 404. Все коды ошибок HTTP клиента начинаются с четверки. HTTP сервер всегда в случае ошибки клиента отправляет вместе с кодом состояния пояснения того, почему произошла ошибка, за исключение тех случаев, когда используется HTTP метод HEAD.
Давайте для удобства рассмотрения сведем в одну таблицу все коды ошибок HTTP клиента в одну таблицу. И не будем забывать, что в основе протокола HTTP лежит модель взаимодействия клиент-сервер, которая делит обязанности приложений на клиентские и серверные, рассматриваемый протокол довольно строго придерживается данной модели, и у нас есть специальные коды ошибок, которые происходят по вине серверных приложений и есть коды ошибок, которые происходят по вине человека или клиентского приложения, которым человек пользуется.
| Код ошибки HTTP клиента | Описание кода ошибки HTTP клиента |
| 400 Bad Request | Код состояния ошибки HTTP клиента 400: плохой запрос Такой код состояния ошибки клиента вы можете увидеть тогда, когда сервер не понял ваш запрос из-за синтаксической ошибке в HTTP запросе. |
| 401 Unauthorized | Код состояния ошибки HTTP клиента 401: не авторизован Такой код состояния ошибки клиента вы можете увидеть в том случае, если для доступа к ресурсу требуется аутентификация по соображениям безопасности HTTP сервера. |
| 402 Payment Required | Код состояния ошибки HTTP клиента 402: требуется оплата Этот код состояния ошибки клиента на данный момент пока не используется, он предназначен для платных сервисов, а не для хостингов и интернет-провайдеров. |
| 403 Forbidden | Код состояния ошибки HTTP клиента 403: запрещено Такой код состояния ошибки клиента вы увидите в том случае, когда сервер вас прекрасно понял, но отказывается вам предоставлять доступ к ресурсу из-за того, что у вас недостаточно прав доступа. |
| 404 Not Found | Код состояния ошибки HTTP клиента 404: не найдено Самый популярный код состояния ошибки клиента. Вы его можете увидеть в том случае, когда ошиблись, вводя URL в браузере. |
| 405 Method Not Allowed | Код состояния ошибки HTTP клиента 405: метод не дозволен Данный код состояния ошибки клиента можно увидеть в том случае, когда вы используете метод запроса, запрещенный в настройках HTTP сервера. |
| 406 Not Acceptable | Код состояния ошибки HTTP клиента 406: не приемлем Этот код состояния вы увидите в том случае, когда HTTP сообщение вашего клиента содержит неправильные параметры для указанного в нем URI. |
| 407 Proxy Authentication Required | Код состояния ошибки HTTP клиента 407: требуется установления подлинности через прокси-сервер Если вы видите этот код состояния ошибки клиента, то вам нужно пройти аутентификацию на прокси-сервере. |
| 408 Request Timeout | Код состояния ошибки HTTP клиента 408: истекло время ожидания запроса Этот код состояния ошибки HTTP клиента вы увидите тогда, когда сервер устал ждать от вас сообщение. |
| 409 Conflict | Код состояния ошибки HTTP клиента 409: конфликт Такой код состояния ошибки клиента будет появляться очень редко, когда будет происходить конфликт действий между двумя пользователями. |
| 410 Gone | Код состояния ошибки HTTP клиента 410: удален А этот код состояния ошибки клиента будет показан сервером в том случае, когда ресурс был доступен по указанному URI, но теперь его там нет. |
| 411 Length Required | Код состояния ошибки HTTP клиента 411: требуется длина Этот код состояния ошибки клиента появляется в том случае, когда серверу нужно обязательно указывать поле заголовка Content-Lenght |
| 412 Precondition Failed | Код состояния ошибки HTTP клиента 412: предусловие неверно Сервер вернет HTTP ответ с таким кодом состояния в том случае, когда он не смог выполнить ни одно из условий из запроса клиента. |
| 413 Request Entity Too Large | Код состояния ошибки HTTP клиента 413: объект запроса слишком велик
А такой код ошибки клиента можно увидеть в том случае, когда тело (HTTP объекты и тело сообщения) запроса слишком большое и сервер его получить не смог.
|
| 414 Request-url Too Long | Код состояния ошибки HTTP клиента 414: URI запроса слишком длинный Такой код ошибки клиента сервер выдаст в том случае, если URI запроса слишком длинный. |
| 415 Unsupported Media Type | Код состояния ошибки HTTP клиента 415: неподдерживаемый медиа тип Сервер может выдать такой код состояния ошибки клиента в том случае, если не захочет работать с указанным типом данных (типы данных в HTTP) тем методом, который указан в запросе клиента |
| 416 Requested Range Not Satisfiable | Код состояния ошибки HTTP клиента 416: запрашиваемый диапазон не достижим Данный код и ошибки клиента говорит нам о том, что диапазон фрагмента (единицы измерения в HTTP) в поле заголовка Range указан неверно. |
| 417 Expectation Failed | Код состояния ошибки HTTP клиента 417: ожидаемое неприемлимо Код состояния ошибки клиента 417 появится в том случае, если сервер не сможет удовлетворить значению, указанному в поле заголовка Expect. |
Далее мы рассмотрим более подробно коды ошибок HTTP клиента.
HTTP код ошибки 400, код ошибки 401, код ошибки клиента 402, код ошибки 403, HTTP код ошибки клиента 404, ошибка клиента 405
HTTP код ошибки клиента 400: Bad Request или неверный запрос. Сервер вернет ответ с кодом ошибки 400 в том случае, когда обнаружит, что HTTP запрос клиента содержит синтаксическую ошибку.
HTTP код ошибки клиента 401: Unauthorized или не авторизован. Код ошибки клиента 401 сервер отправляет в том случае, когда для доступа к ресурсу требуется авторизация, при этом ответ HTTP сервера должен (читай про требования HTTP протокола) включать поле заголовка WWW-Authenticate и перечень условий для аутентификации клиента, после чего клиент может повторить запрос к серверу с полем Authorization, в котором будут указаны все необходимые данные для авторизации.
HTTP код ошибки клиента 402: Payment Required или требуется оплата. Данный код ошибки клиента зарезервирован для будущего использования и предназначен для оповещения клиента о том, что для доступа к ресурсу ему необходимо произвести оплату. Обратите внимание: данный код ошибки клиент не используется ни хостингами, ни интернет-магазина, ни даже интернет-провайдерами.
HTTP код ошибки клиента 403: Forbidden или запрещено. HTTP код ошибки клиента 403 отправляется сервером в том случае, когда он отказывается выполнить ваш запрос, причин на то могут быть разными. При этом сервер не должен сообщать является ли эта мера временной или постоянной. Одной из причин появления HTTP кода 403 может быть то, что у пользователя недостаточно прав доступа к ресурсу.
HTTP код ошибки клиента 404: Not Found или не найдено. HTTP код ошибки клиента 404 – самый популярный код ошибки клиента, код ошибки 404 видел, наверное, каждый. Ведь для того, чтобы увидеть код ошибки 404 достаточно ввести неверный URL.
HTTP код ошибки клиента 405: Method Not Allowed или метод не дозволен. Код ошибки 405 сервер отправляет клиенту в том случае, когда для ресурса, указанного в URI, нельзя применить метод, указанный в запросе клиента. Код ошибки 405 появляется в основном из-за конфигураций безопасности сервера, когда администратор преднамеренно запрещает выполнение тех или иных методов HTTP запросов на сервере. При этом ответ сервера с кодом ошибки 405 должен содержать поле заголовка Allow, в котором будут указаны доступные метода для ресурса.
HTTP код ошибки 406, код ошибки 407, HTTP код ошибки клиента 408, код ответа сервера 409, код ошибки 410, код ошибки клиента 411, HTTP код 412
HTTP код ошибки клиента 406: Not Acceptable или не приемлем. Код ошибки 406 говорит клиенту о том, что введенный URI не приемлем с теми характеристиками, которые были указаны в HTTP заголовке (читай про параметры HTTP протокола). Если метод запроса был отличным от метода HEAD, то серверу нужно включить в тело сообщения список доступных характеристик для данного URI. Формат HTTP объекта определяется медиа типом в поле заголовка Content-Length и в зависимости от клиента и его возможностей подходящий вариант запроса может быть выбран автоматически, этот код применяется при обсуждении содержимого в HTTP.
HTTP код ошибки клиента 407: Proxy Authentication Required или требуется установление подлинности через прокси-сервер. HTTP код ошибки клиента 407 появится в том случае, когда клиенту для доступа к указанному ресурсу необходимо авторизоваться на прокси-сервере. Когда возникает код ошибки 407 прокси-сервер должен возвратить поле заголовка Proxy-Authenticate содержащее вызов (challenge), применяемый прокси-сервером для запрошенного ресурса. Код ошибки 407 аналогичен по своему действию с кодом 401.
HTTP код ошибки клиента 408: Request Timeout или истекло время ожидания запроса. Код ошибки 408 возникает в том случае, когда клиент не произвел запрос в течение того времени, которое сервер готов ждать, но клиент может повторить запрос.
HTTP код ошибки клиента 409: Conflict или конфликт. Код ошибки клиента 409 возникает в том случае, когда происходит конфликт между несколькими клиентами при доступе к одному ресурсу. Код ошибки 409 показывается клиенту только в том случае, когда тот может устранить конфликт и повторить свой запрос. HTTP ответ сервера должен предоставить максимум информации для пользователя, чтобы он устранил конфликт, и код 409 больше не появлялся. Чаще всего ошибка 409 появляется при использование метода PUT.
HTTP код ошибки клиента 410: Gone или удален. HTTP код ошибки клиента 410 будет отправлен сервером в том случае, когда ресурс удален и сервер не знает, где искать копию ресурса или его новую версию. В том случае, когда у сервера есть информация о том, что ресурс может быть восстановлен, ему не следует показывать ошибку 410, а лучше показать код ошибки 404.
HTTP код ошибки клиента 411: Length Required или требуется длина. Код ошибки 411 будет показан клиенту в том случае, когда серверу для корректной обработки запроса требуется длина содержимого. Клиент может повторить запрос, если добавит допустимое поле заголовка Content-Length, содержащее длину тела сообщения (message-body) в сообщении запроса.
HTTP код ошибки клиента 412: Precondition Failed или предусловие неверно. Код ошибки 412 будет выслан клиенту сервером в том случае, когда сервер не может выполнить условия, указанные в заголовке HTTP запроса.
HTTP код ошибки клиента 413, код ошибки клиента 414, ошибка клиента 415, ошибка 416, HTTP код 417
HTTP код ошибки клиента 413: Request Entity Too Large или объект запроса слишком большой. Код ошибки 413 появляется в том случае, когда объект, передаваемый в запросе клиента слишком большой и сервер его не может обработать. Сервер может закрыть соединение (здесь написано про HTTP соединения), чтобы не дать клиенту возможность продолжить запрос. Если такая ситуация временная, то сервер в своем сообщении вместе кодом ошибки 413 передает поле заголовка Retry-After, в котором указывает время, через которое запрос может быть повторен.
HTTP код ошибки клиента 414: Request-URI Too Long или запроса слишком длинный. Сервер отправляет сообщение с кодом ошибки 414 в том случае, когда URI, указанный в запросе слишком длинный. Ошибка 414 обычно возникает тогда, когда клиент пытается передать кучу параметров методом GET, а следовало бы использовать метод POST.
HTTP код ошибки клиента 415: Unsupported Media Type или неподдерживаемый медиа тип. Код ошибки 415 сервер отправляет в том случае, когда он отказывается обслуживать запрос из-за некорректного типа данных для ресурса, который указан в URI: когда метод выбранный в запросе не соответствует типу данных ресурса.
HTTP код ошибки клиента 416: Requested Range Not Satisfiable или запрашиваемый диапазон не достижим. Сервер отправит сообщение с кодом ошибки 416 в том случае, когда в поле заголовка запроса Range был указан неверный диапазон фрагмента.
HTTP код ошибки клиента 417: Expectation Failed или ожидаемое неприемлемо. Код ошибки 417 появляется в том случае, когда сервер не может удовлетворить значению Expect, которое указано в заголовке HTTP запроса.
Мы рассмотрели коды ошибок HTTP клиента, давайте перейдем к последнему классу кодов состояния — HTTP коды ошибок серевра. Позволю себе напомнить, что в HTTP еще есть информационные коды состояния, успешные коды состояния и коды перенаправления. А если тебе нужна информацию обо всех кодах состояния, обратись к справочнику HTTP кодов состояния, в котором есть полное описание всех кодов.
Не забывайте делиться своим мнением в комментариях и оставлять отзывы, это поможет сделать нашу работу лучше, с уважением ZametkiNaPolyah.ru!
В этой статье мы объясним, что такое ошибка 405 и как она может проявляться. А также расскажем, как исправить эту ошибку, возникающую на WordPress-сайте.
- Что означает ошибка 405 Method Not Allowed
- Google Chrome
- Safari
- Firefox
- Microsoft Edge
- Вариации ошибки 405
- Как исправить ошибку 405 Method Not Allowed на WordPress-сайте
- Проверьте, правильно ли вы ввели URL-адрес
- Откат недавно установленных обновлений WordPress
- Удалите новые плагины и темы оформления
- Проверить любые непреднамеренные изменения в базе данных
- Проверка конфигурации сервера
- Просмотрите журналы сервера
- Отладка кода приложения или скриптов
- Что делать, если ни одно из этих решений не помогло
- Заключение
Ошибка 405 Method Not Allowed возникает, когда браузер запросил доступ к одной из страниц сайта, но веб-сервер отклонил определенный в запросе HTTP-метод. Получается, что браузер не может получить доступ к запрашиваемой странице. Вместо интересующего пользователей конвента они увидят страницу с ошибкой.

Ошибка 405 Not Allowed в Chrome

Ошибка 405 Not Allowed в Safari

Ошибка 405 Not Allowed в Firefox

Ошибка 405 Not Allowed в Microsoft Edge
Ошибку 405 не следует путать с кодом ответа 404 Not Found. Он означает, что запрошенный URL-адрес не найден или введен неправильно. Сообщение об ошибке 405 подтверждает, что запрашиваемая страница, но для выполнения запроса использовался неподдерживаемый HTTP-метод.
Это код ответа HTTP указывает, что метод запроса известен серверу, но не поддерживается целевым ресурсом.
Вот некоторые варианты отображения ошибки:
- 405 Not Allowed;
- Method Not Allowed;
- HTTP 405 Error;
- HTTP Error 405 – Method Not Allowed;
- HTTP 405 Method Not Allowed.
Самой распространенной причиной возникновения ошибки 405 является неправильный URL-адрес. Большинство веб-серверов блокируют доступ пользователей к несуществующим страницам сайта.
Если вы обновили WordPress незадолго до того, как стало появляться сообщение об ошибке 405 Method Not Allowed, то именно обновление может являться причиной возникновения проблем. Это также относится к любым плагинам и темам оформления, которые вы недавно обновили.
Самый простой способ откатить обновления WordPress – использовать специальный плагин. Самый эффективный из них – WP Downgrade. Он в значительной степени автоматизирует процесс обновления.
Плагины и темы оформления могут создавать проблемы. Это связано с тем, что добавление любой функциональности на сайт влияет на его работу. Ошибка 405 быть связана с плагином или темой оформления, которую вы используете. А также если конкретное расширение конфликтует с другой частью CMS.
Удаления определенных плагинов или тем оформления может устранить ошибку 405 Method Not Allowed. Для этого перейдите в раздел «Плагины» панели администрирования WordPress.

Страница плагинов в WordPress
После удаления каждого плагина не забудьте проверять, устранена ли возникшая ошибка. Этот процесс позволит вам точно определить, какой плагин вызывает проблему.

Как деактивировать плагин в WordPress
После проверки плагинов можно приступить к деактивации (удалению) используемой темы.
Рассмотренный выше способ не гарантирует, что изменения, внесенные расширениями, будут полностью отменены. Это особенно актуально для WordPress-плагинов. Многие из них могут изменять записи в базе данных, которые влияют на работоспособность WordPress.
Если вы уверены, что плагин или тема оформления являются причиной возникновения ошибки 405 Method Not Allowed, проверка используемой базы данных полностью решит проблему. Для этого необходимо открыть базу данных сайта и вручную просмотреть таблицы и записи, измененные расширением.
Ваш сайт, скорее всего, работает на сервере, который использует Apache или Nginx. На их основе базируется более 80% всех серверов. Проверка файлов конфигурации сервера на наличие неподдерживаемых инструкций поможет решить причину возникновения ошибки 405.
Например, если веб-сервер работает под управлением Apache, то конфигурационный файл .htaccess располагается в корневом каталоге сайта. В него можно попасть, перейдя по следующему пути:
Таким образом, файл .htaccess будет располагаться по адресу:
/home/public_html/.htaccess
Откройте файл .htaccess в текстовом редакторе и найдите строки, которые используют директивы Rewrite. Они являются частью модуля mod_rewrite в Apache и определяют текстовый шаблон, который будет сопоставляться со всеми введенными URL-адресами. Если посетитель сайта запрашивает URL-адрес, подходящий под правило RewriteRule, оно перенаправит посетителя соответствующим образом.
Вот простой пример правила RewriteRule, которое сопоставляет все входящие запросы и отвечает кодом ошибки 405 Method Not Allowed

Пример правила RewriteRule
В конце записи правила есть флаг R = 405. Поэтому полученный код ответа будет 405. Если вы обнаружите другие «странные» директивы Rewrite в файле .htaccess, попробуйте временно закомментировать их, используя префикс #. После этого перезапустите веб-сервер, чтобы увидеть, решило ли данное изменение возникшую проблему.
Почти каждое веб-приложение хранит журналы на стороне сервера. Они содержат полную историю операций, совершенных приложением.
Журналы сервера немного отличаются. Они часто предоставляют подробную информацию о состоянии всех подключенных служб или даже только самого сервера.
Чтобы просмотреть логи сервера, вам нужно подключиться к вашему сайту через протокол защищенной передачи файлов (SFTP). В корневом каталоге найдите папку logs. В ней находятся журналы доступа и журналы ошибок WordPress:
- Access.log;
- Error.log.
Теперь просмотрите журналы и проверьте все записи, которые выглядят странно.
Если ни один из предыдущих методов не помог, тогда проблема связана с пользовательским кодом. Для ее решения нужно провести отладку кода.
Для этого нужно скопировать весь сайт на промежуточный сайт. После этого можно будет провести пошаговую процедуру отладки.
Если ни один из перечисленных методов не помог, то возникла более сложная проблема. В этом случае стоит обратиться к вашему хостинг-провайдеру.
К счастью, в большинстве случаев ошибку 405 Method Not Allowed можно легко исправить с помощью быстрой отладки.