Windows 7 Starter Windows 7 Home Basic Windows 7 Home Premium Windows 7 Professional Windows 7 Ultimate Windows 7 Enterprise Windows Server 2008 R2 Web Edition Windows Server 2008 R2 Foundation Windows Server 2008 R2 Standard Windows Server 2008 R2 Enterprise Windows Server 2008 R2 Datacenter Windows Server 2008 R2 for Itanium-Based Systems Windows HPC Server 2008 R2 Еще…Меньше
Не уверены, что решение правильное? Мы добавили эту неполадку к нашей диагностике дампа памяти, которую можно провести.
Проблема
Ваш компьютер работает под управлением Windows 7 или Windows Server 2008 R2. Однако он аварийно завершает работу во время запуска перед запросом учетных данных пользователя. Кроме того, появляется такое сообщение о STOP-ошибке:
STOP: 0x0000006B (Parameter1, Parameter2, Parameter3, Parameter4)
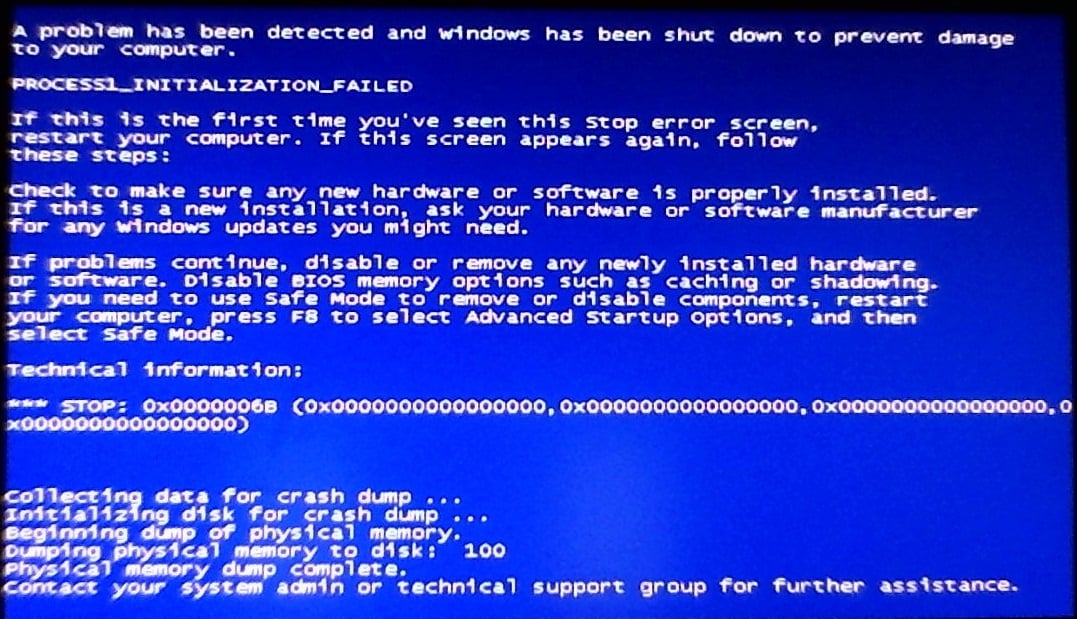
PROCESS1_INITIALIZATION_FAILED
Примечание. Названия четырех параметров в сообщении о STOP-ошибке могут зависеть от конфигурации компьютера.
Причина
Неполадка возникает из-за повреждения файла Bootcat.cache или вследствие изменения его размера после последнего успешного запуска.
Примечание. Файл Bootcat.cache расположен по адресу %SystemRoot%system32codeintegrity.
Решение
Чтобы решить эту проблему, установите пакет обновления 1 для Windows 7 и Windows Server 2008 R2. Майкрософт не предоставляет поддерживаемое исправление для этой проблемы. Чтобы получить дополнительные сведения об этом пакете обновления, щелкните номер следующей статьи в базе знаний Майкрософт:
976932 Сведения о пакете обновления 1 для Windows 7 и Windows Server 2008 R2
Временное решение
Чтобы обойти эту неполадку, запустите компьютер с жесткого диска или USB-накопителя с помощью установочного носителя Windows. Удалите файл Bootcat.cache, и перезапустите компьютер.
Статус
Майкрософт подтвердила наличие этой проблемы в ее продуктах, перечисленных в разделе «Применимость».
Дополнительная информация
Чтобы получить дополнительные сведения о терминологии обновления программного обеспечения, щелкните номер следующей статьи в базе знаний Майкрософт:
824684 Описание стандартной терминологии, используемой для описания обновлений программного обеспечения Майкрософт
Нужна дополнительная помощь?
Windows 7 Starter Windows 7 Home Basic Windows 7 Home Premium Windows 7 Professional Windows 7 Ultimate Windows 7 Enterprise Windows Server 2008 R2 Web Edition Windows Server 2008 R2 Foundation Windows Server 2008 R2 Standard Windows Server 2008 R2 Enterprise Windows Server 2008 R2 Datacenter Windows Server 2008 R2 for Itanium-Based Systems Windows HPC Server 2008 R2 More…Less
Not sure if this is the right fix? We’ve added this issue to our memory dump diagnostic which can confirm.
Symptoms
You have a computer that is running Windows 7 or Windows Server 2008 R2. However, the computer crashes during the startup process before you are prompted for user credentials. Additionally, you receive a Stop error message that resembles the following:
STOP: 0x0000006B (Parameter1, Parameter2, Parameter3, Parameter4)
PROCESS1_INITIALIZATION_FAILED
Note The four parameters in the Stop error message may vary, depending on the configuration of the computer.
Cause
This issue occurs because the Bootcat.cache file is corrupted or because the size of the Bootcat.cache file is changed since the last successful start.
Note The Bootcat.cache file is located at %SystemRoot%system32codeintegrity.
Resolution
To resolve this problem, apply Service Pack 1 for Windows 7 and for Windows Server 2008 R2. Microsoft provides no supported hotfix for this problem. For more information about this service pack, click the following article number to view the article in the Microsoft Knowledge Base:
976932 Information about Service Pack 1 for Windows 7 and for Windows Server 2008 R2
Workaround
To work around this issue, start the computer from the disc drive or from the USB drive by using the Windows installation media. Delete the Bootcat.cache file, and then restart the computer.
Status
Microsoft has confirmed that this is a problem in the Microsoft products that are listed in the «Applies to» section.
More Information
For more information about software update terminology, click the following article number to view the article in the Microsoft Knowledge Base:
824684 Description of the standard terminology that is used to describe Microsoft software updates
Need more help?
В данной статье мы с вами будем рассматривать синий экран смерти, который именуется PROCESS1_INITIALIZATION_FAILED и имеет номер 0x0000006B. Что сами Майкрософт говорят по поводу этой проблемы? Они говорят вот что: «Данная проблема появляется вследствие повреждения файла Bootcat.cache или же из-за изменения размера этого файла». Из этого мы точно можем утверждать, что проблема заключается в файле Bootcat.cache. Также нельзя исключать таких вещей, как повреждения системных файлов, аппаратных компонентов, кабелей или прочее. Синий экран смерти PROCESS1_INITIALIZATION_FAILED может проявлять себя на большинстве версий операционной системы Windows.
В сообщении этого критического сбоя присутствует следующая информация:
STOP: 0x0000006B (Параметр1, Параметр2, Параметр3, Параметр4)
PROCESS1_INITIALIZATION_FAILED
Заметка: эти четыре параметра могут меняться в зависимости от конфигурации компьютера пользователя.
Помимо прочего, этот синий экран смерти можно увидеть даже на клиентах, серверных машинах и смартфонах. В данной статье мы опишем целых 8 методов, которые помогут разрешить вам эту непростую ситуацию.
Содержание
- Решаем сбой PROCESS1_INITIALIZATION_FAILED
- Метод №1 Удаление файла Bootcat.cache
- Метод №2 Копирование Bootcat.cache с другого компьютера
- Метод №3 Удаление файла COMPONENTS
- Метод No4 Установка Windows 7 SP1
- Метод No5 Удаление Roxio GoBack
- Метод №6 Восстановление Windows с помощью утилиты DISM
- Метод №7 Исключить папку от сканирований
- Метод №8 Использование утилиты CHKDSK
Решаем сбой PROCESS1_INITIALIZATION_FAILED
Метод №1 Удаление файла Bootcat.cache
Следуя из сообщения Майкрософт, первым вашим шагом станет удаление файла Bootcat.cache из папки CodeIntegrity. Данный файл располагается в директории C:WindowsSystem32Codeintegrity. Вам понадобится загрузить компьютер через диск восстановления системы Windows. Если вы не знаете, как создать этот диск, то пройдите по этой ссылке на сайт Майкрософт, где написаны точные инструкции по его созданию. Создав этот диск, сделайте следующее:
- Вставьте диск или же флеш-носитель в свой компьютер.
- Перезапустите компьютер.
- Загрузите систему через диск восстановления Windows.
- Выберите предпочитаемый язык и другие параметры, а затем нажмите «Далее» для продолжения.
- Кликните на кнопку «Восстановление системы».
- Далее пройдите путем «Диагностика→Дополнительные параметры→Командная строка»
- Выберите пункт «Командная строка».
- Впишите в нее команду diskpart.
- Впишите list volume и нажмите Enter.
- Запомните в каком разделе находится ваша ОС, затем впишите Exit и нажмите Enter.
- Впишите C:(укажите тот раздел, в котором находится ваша ОС) и нажмите Enter.
- Впишите cd windowssystem32codeintegrity и нажмите Enter.
- Впишите del bootcat.cache и нажмите Enter.
- Закройте Командную строку.
- Перезагрузите свой компьютер, а затем попытайтесь зайти в систему обычным путем.
Метод №2 Копирование Bootcat.cache с другого компьютера
Если первый метод вам не помог в решении проблемы с синим экраном смерти PROCESS1_INITIALIZATION_FAILED, то вы должны попробовать этот метод, который включает в себя копирование файла Bootcat.cache с другого компьютера, подразумевая, что тот работает там корректно. Также как и в предыдущем методе, вам снова придется загрузить свою систему через диск восстановления.
- Найдите другой компьютер и зайдите в его операционную систему.
- Вставьте в флеш-устройство в компьютер.
- Нажмите Windows+E чтобы открыть Проводник Windows.
- Пройдите в директорию C:WindowsSystem32Codeintegrity.
- Копируйте файл Bootcat.cache к себе на флеш-устройство.
- Вставьте флеш-хранилище в компьютер, у которого проблемы с синим экраном смерти PROCESS1_INITIALIZATION_FAILED.
- Запустите проблемный компьютер через диск восстановления Windows и доберитесь до Командной строки, как это было показано в предыдущем методе.
- Открыв Командную строку, впишите в нее команду diskpart.
- Впишите list volume и нажмите Enter.
- Запомните в каком разделе находится ваша ОС, затем впишите Exit и нажмите Enter.
- Впишите C:(укажите тот раздел, в котором находится ваша ОС) и нажмите Enter.
- Впишите cd windowssystem32codeintegrity и нажмите Enter.
- Впишите copy E:bootcat.cache(впишите ту букву, под которой выступает ваше флеш-хранилище) и нажмите Enter.
- Закройте Командную строку.
- Перезагрузите свой компьютер.
Метод №3 Удаление файла COMPONENTS
Итак, если ничего из вышеперечисленного не помогло, а такое вполне возможно, то давайте двигаться дальше. На этот раз мы с вами попробуем сделать кое-что другое – удаление файла COMPONENTS из директории windowssystem32config. Данное действие также зарекомендовало себя отличным способом по борьбе с синим экраном смерти PROCESS1_INITIALIZATION_FAILED.
- Снова запустите свою ОС через диск восстановления.
- Пройдите весь путь до Командной строки, как это было уже показано в предыдущих методах.
- Впишите команду diskpart и нажмите Enter.
- Впишите list volume и нажмите Enter.
- Впишите Exit и нажмите Enter.
- Впишите cd windowssystem32config и нажмите Enter.
- Впишите del components и нажмите Enter.
- Закройте Командную строку.
- Перезагрузите свой компьютер.
Ну что, ваша система все еще загружается с синим экраном смерти PROCESS1_INITIALIZATION_FAILED? Ок, тогда давайте двигаться далее.
Метод No4 Установка Windows 7 SP1
Если вы используете Windows 7 без SP1, то вам нужно попробовать установить этот сервисный пакет для вашей операционной системы. Все что вам нужно сделать, так это пройти в Центр загрузок Майкрософт и скачать от туда необходимый сервисный пакет. Однако, будьте внимательно, что именно вы скачивайте. Обязательно отталкивайтесь от того, какой разрядностью обладает ваша система, т.е. 32-битная или 64-битная. Загрузите Windows 7 SP1, установите его и перезагрузите систему. Затем проверьте, появляется ли синий экран смерти PROCESS1_INITIALIZATION_FAILED.
Метод No5 Удаление Roxio GoBack
Если вы используете программное обеспечение Roxio GoBack, то вам нужно попробовать удалить его, чтобы проверить, не вызывает ли ли оно уже оговоренный синий экран смерти. Удаляется Roxio GoBack довольно просто через Программы и компоненты.
- Нажмите на клавиатуре Windows+R.
- Впишите appwiz.cpl и нажмите Enter.
- Выберите Roxio GoBack и удалите ее.
- Перезагрузите компьютер.
- Протестируйте систему на стабильность.
Возможно, что именно эта утилита и стояла за таким серьезным сбоем в системе, как PROCESS1_INITIALIZATION_FAILED. Однако, если ничего не изменилось, то давайте двигаться дальше по нашему списку методов.
Метод №6 Восстановление Windows с помощью утилиты DISM
Для выполнения этого метода, нам потребуется использовать утилиту под названием DISM. DISM – это команда, которая позволяет вам монтировать образ Windows(install.wim) и выполнять такие действия, как установку, удаление, настройку и обновление операционной системы. DISM является компонентом комплекта средств для развертывания и оценки Windows(Windows ADK), который можно загрузить по этой ссылке. Итак, чтобы восстановить Windows с помощью утилиты DISM, вам потребуется сделать следующее:
- Для начала загрузите Windows ADK, а затем установите DISM.
- Нажмите на Пуск и впишите в поисковик запрос «Система обслуживания образов развертывания и управления ими».
- Нажмите на найденный результат ПКМ и выберите Запустить от Администратора.
- Впишите в нее DISM /image:D: /cleanup-image /revertpendingactions и нажмите Enter.
- После выполнения команды, перезагрузите свой компьютер, а затем протестируйте систему на наличие синего экрана смерти PROCESS1_INITIALIZATION_FAILED.
Метод №7 Исключить папку от сканирований
Антивирусное программное обеспечение также может стоять у истоков проблемы с появлением оговоренного синего экрана смерти. Чтобы исправить это, вам нужно исключить папки CodeIntegrity и catroot от сканирования антивирусом. Сейчас мы покажем вам как это делать на примере Защитника Windows. Если вы используете иной антивирус, то это не беда, так как там, скорее всего, будут применимы эти шаги.
- Кликните на Пуск и впишите в поисковик запрос «Защитник Windows».
- Нажмите на найденный результат ПКМ и выберите «Запустить от имени Администратора».
- Перейдите во вкладку «Параметры».
- Кликните на «Добавить исключение».
- Кликните на «Исключить папку».
- Пройдите в директорию C:WindowsSystem32CodeIntegrity.
- Кликните «Исключить эту папку».
- Кликните на «Исключить папку» еще один раз.
- Пройдите в директорию C:WindowsSystem32catroot.
- Кликните «Исключить эту папку».
- Еще раз хорошенько проверьте, исключили ли вы нужные вам папки.
Возможно, синий экран смерти PROCESS1_INITIALIZATION_FAILED появлялся в случае сканирования этих папок. По крайней мере, так утверждают некоторые пользователи в Интернете. Ну что, проблема все еще преследует вас?
Метод №8 Использование утилиты CHKDSK
Когда ваш жесткий диск не работает как надо, то на нем могут появиться поврежденные данные или же плохие сектора. В этом случае вам поможет довольно неплохая системная утилита CHKDSK, которая поможет найти вам бэдблоки и исправить их, но только если это будет возможно.
- Нажмите ПКМ на Пуск и выберите «Командная строка(администратор)».
- Впишите chkdsk /r и нажмите Enter.
- Далее напишите Y и нажмите Enter, чтобы принять перезагрузку компьютера.
- Подождите, пока утилита завершит починку файловой системы на компьютере. Должны завершиться все пять стадий операции.
Мы надеемся, что данная статья помогла вам преодолеть проблему в виде синего экрана смерти PROCESS1_INITIALIZATION_FAILED. Если же он так и продолжает постоянно проявляться, то вы также можете еще попробовать выполнить восстановление системы с помощью ранее созданной точки или через бэкап. Если и это не помогло, то это может означать, что у вас присутствуют проблемы аппаратного характера, например, виновниками могли стать ваш HDD/SSD или же оперативная память.
Skip to content
Как убрать PROCESS1_INITIALIZATION_FAILED (0x0000006B)?
Как убрать « PROCESS1_INITIALIZATION_FAILED» ( 0x0000006B)?
На компьютере или ноутбуке под управлением Windows появился «синий экран смерти»? После появления сообщения «
PROCESS1_INITIALIZATION_FAILED» (
0x0000006B) система перезагружается? Ищите как исправить
0x0000006B: «
PROCESS1_INITIALIZATION_FAILED»?
Как просмотреть информацию об ошибках, исправить ошибки в Windows 10, 8 или 7
Причины появления ошибки
- На жестком диске компьютера или ноутбука не достаточно места. Для правильной работы ОС Windows 10 на системном диске должно быть свободно 2 — 10 ГБ.
- На компьютер был установлен не совместимый BIOS или прошивка была повреждена.
- Установлены не совместимые с ОС драйвера устройств.
- Реестр Windows был поврежден или удален. Возможно в результате очистки были удалены системные ключи реестра.
- Ативирусное программное обеспечение или компьютерные вирусы могут заблокировать системные файлы или удалить важные ключи реестра.
- В результате ошибок в работе программы для резервного копирования.
- В результате обновления ОС Windows.
Актуально для ОС: Windows 10, Windows 8.1, Windows Server 2012, Windows 8, Windows Home Server 2011, Windows 7 (Seven), Windows Small Business Server, Windows Server 2008, Windows Home Server, Windows Vista, Windows XP, Windows 2000, Windows NT.
Вот несколько способов исправления ошибки «
PROCESS1_INITIALIZATION_FAILED»:
Восстановите удаленные файлы
Часто появление BSoD ошибок приводит к утери важных файлов. Блокировка файлов компьютерными вирусами, ошибки в работе программ для резервного копирования, повреждение или перезапись системных файлов, ошибки файловой системы или наличие битых секторов диска – это не далеко полный список причин удаления данных.
Исправление соответствующих ошибок восстановит работоспособность устройства, но не всегда восстановит повреждённые или утерянные файлы. Не всегда имеется возможность устранить ту или иную ошибку без форматирования диска или чистой установки операционной системы, что также может повлечь за собой утерю файлов.
Загрузите бесплатно и просканируйте ваше устройство с помощью Hetman Partition Recovery. Ознакомьтесь с возможностями программы и пошаговой инструкцией.
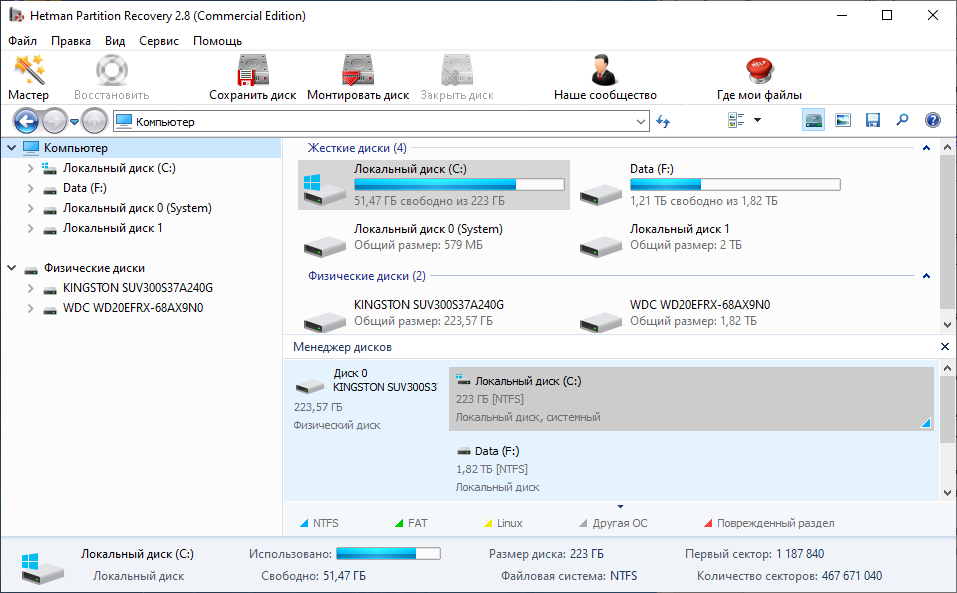
Программа для восстановления данных
Запустите компьютер в «безопасном режиме»
Если ошибка «PROCESS1_INITIALIZATION_FAILED» (0x0000006B) возникает в момент загрузки Windows и блокирует любую возможность работы с системой, попробуйте включить компьютер в «безопасном режиме». Этот режим предназначен для диагностики операционной системы (далее ОС), но функционал Windows при этом сильно ограничен. «Безопасный режим» следует использовать только если работа с системой заблокирована.
Чтобы запустить безопасный режим сделайте следующее:
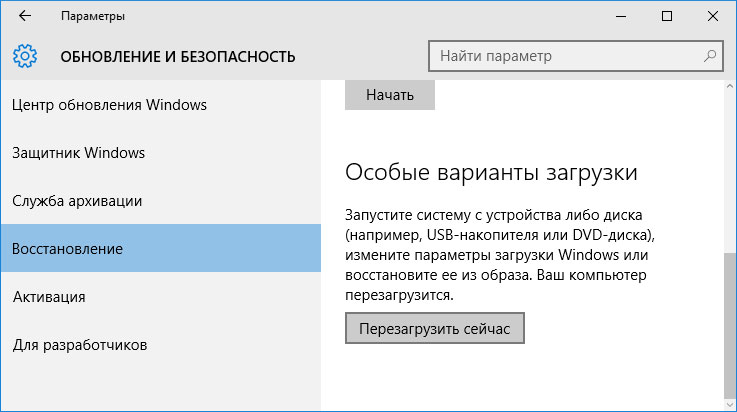
- Перейдите в меню Пуск и выберите Параметры.
- В открывшемся окне параметров перейдите в меню Обновление и Безопасность и выберите раздел Восстановление.
- В разделе Восстановление найдите Особые варианты загрузки и нажмите кнопку Перезагрузить сейчас.
- После этого Windows перезагрузится и предложит выбрать следующее действие. Выберите Поиск и устранение неисправностей.
- В меню Поиск и устранение неисправностей кликните на Дополнительные параметры, далее — Параметры загрузки.
- Далее Windows уведомит вас о том, что компьютер можно перезагрузить с использованием дополнительных параметров загрузки. Укажите — Включить безопасный режим. Нажмите Перезагрузить.
- После перезагрузки выберите Включить безопасный режим нажав клавишу F4.
Как загрузить Windows в безопасном режиме
Обновите драйвер через Диспетчер устройств
Вы установили новое аппаратное обеспечение на компьютере? Возможно вы начали использовать новое USB-устройство с вашим компьютером. Это могло привести к ошибке «PROCESS1_INITIALIZATION_FAILED». Если вы установили драйвер устройства используя диск, который поставляется вместе с ним, или использовали драйвер не c официального сайта Microsoft, то причина в нем. Вам придется обновить драйвер устройства, чтобы устранить эту проблему.
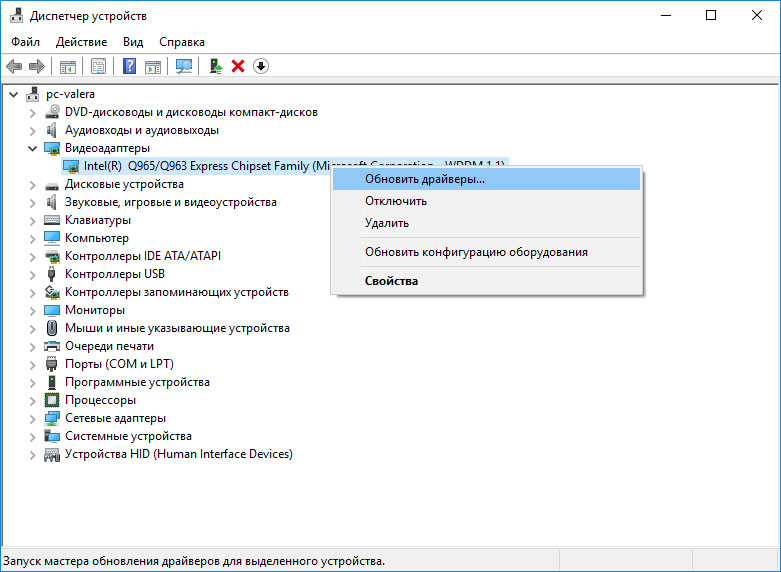
Вы можете сделать это вручную в диспетчере устройств Windows, для того выполните следующие инструкции:
- Нажмите кнопку Windows, затем введите диспетчер устройств с клавиатуры.
- Выберите Диспетчер устройств из списка.
- Просмотрите список категорий устройств, нажмите на стрелочку рядом с категорией вашего нового устройства. Драйвер может быть отмечен желтым треугольником.
- Кликните правой кнопкой мыши на имя устройства и нажмите Обновить драйвер.
- Далее откроется окно Мастера обновления драйверов с двумя опциями:
- Автоматический поиск обновленных драйверов. Windows проверит наличие наиболее подходящего драйвера для этого устройства в автоматическом режиме.
- Выполнить поиск драйверов на этом компьютере. Используйте эту опцию, что бы самостоятельно указать ОС файлы драйвера.
Перезагрузите компьютер после установки драйвера.
Используйте sfc /scannow для проверки всех файлов системы
Повреждение или перезапись системных файлов может привести к ошибке «PROCESS1_INITIALIZATION_FAILED». Команда sfc находит поврежденные системные файлы Windows и заменяет их.
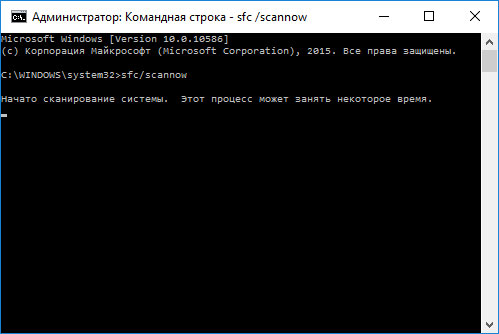
- Нажмите кнопку Windows, затем введите cmd с клавиатуры.
- Правой кнопкой мышки кликните на CMD и запустите от имени администратора.
- В окне командной строки введите sfc /scannow и нажмите Enter.
Этот процесс может занять несколько минут.
Как восстановить системные файлы Windows 10

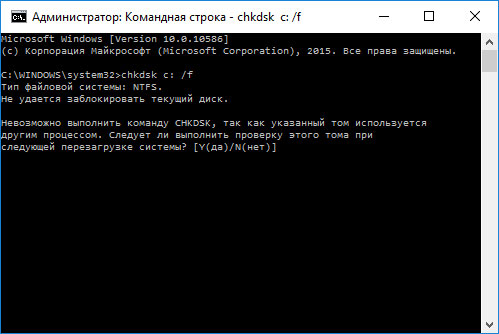
Проверьте диск с Windows на наличие ошибок командой chkdsk c: /f
Возможно к синему экрану с «PROCESS1_INITIALIZATION_FAILED» привела ошибка файловой системы или наличие битых секторов диска. Команда CHKDSK проверяет диск на наличие ошибок файловой системы и битых секторов. Использование параметра /f заставит программу автоматически исправлять найденные на диске ошибки, а параметр /r позволяет найти и «исправить» проблемные сектора диска. Для запуска следуйте инструкциям:
- Нажмите кнопку Windows, затем введите CMD с клавиатуры.
- Правой кнопкой мышки кликните на CMD и запустите от имени администратора.
- В окне командной строки введите chkdsk c: /f и нажмите Enter (используйте ту букву диска, на котором установлена ОС).
Дождитесь окончания процесса и перезагрузите компьютер.
Используйте режим совместимости со старой версией Windows
Отключите лишние программы из автозагрузки Windows
Программное обеспечение, вызывающее «PROCESS1_INITIALIZATION_FAILED» (0x0000006B), может быть прописано в автозагрузку Windows и ошибка будет появляться сразу после запуска системы без вашего участия. Удалить программы из автозагрузки можно с помощью Диспетчера задач.

- Загрузитесь в Безопасном режиме.
- Кликните правой кнопкой мышки на Панели задач, затем на пункте Диспетчер задач.
- Перейдите на вкладку Автозагрузка.
- Чтобы убрать ту или иную программу из автозагрузки выберите её из списка и отключите, нажав кнопку Отключить в правом нижнем углу окна.
Обратитесь в поддержку Microsoft
Microsoft предлагает несколько решений удаления ошибки «голубого экрана». «PROCESS1_INITIALIZATION_FAILED» (0x0000006B) можно убрать с помощью Центра обновления или обратившись в поддержку Windows.
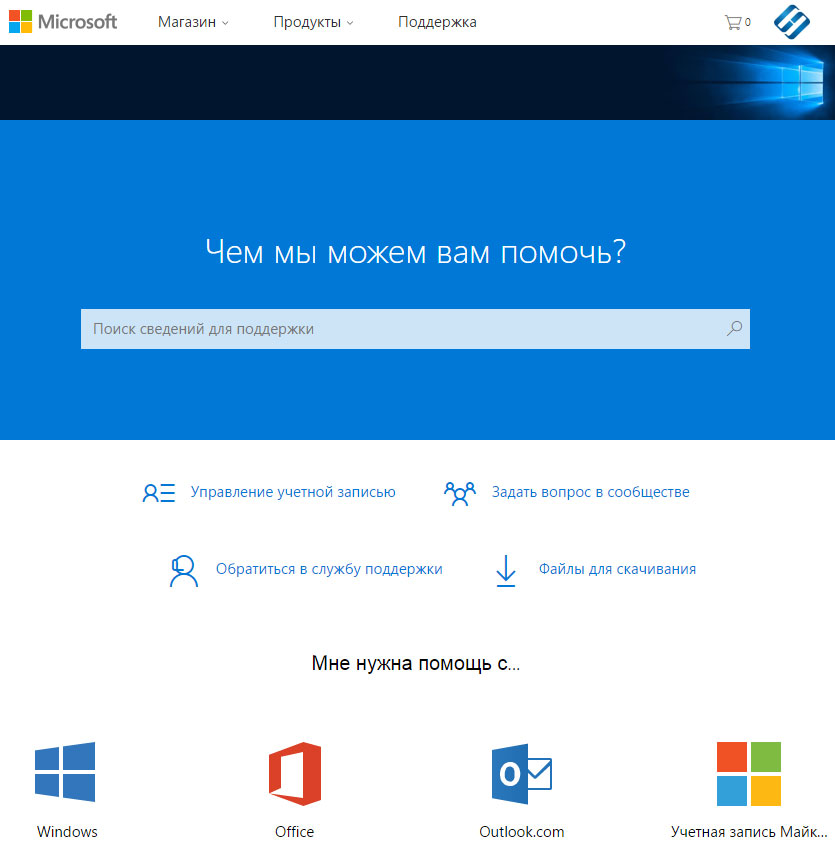
- Перейдите на сайт технической поддержки Microsoft.
- Введите код и сообщение об ошибке в поисковую строку и следуйте найденным рекомендациям.
- Если вы не найдете готового решения, то задайте вопрос в сообществе — возможно вам ответит сертифицированный системный администратор.
Установите последние обновления системы
С обновлениями Windows дополняет базу драйверов, исправляет ошибки и уязвимости в системе безопасности. Загрузите последние обновления, что бы избавиться от ошибки «PROCESS1_INITIALIZATION_FAILED» (0x0000006B).
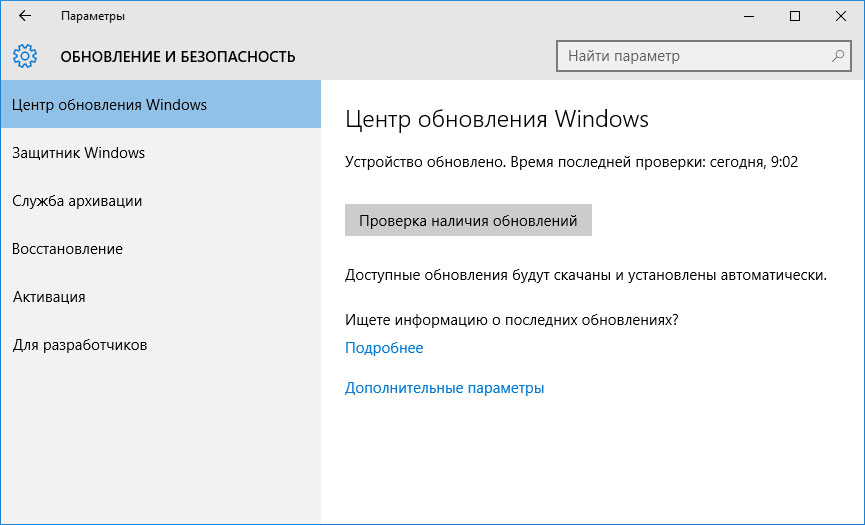
Запустить Центр обновления Windows можно следующим образом:
- Перейдите в меню Пуск и выберите Параметры.
- В окне Параметров перейдите в меню Обновление и Безопасность.
- Для установки последних обновлений Windows нажмите кнопку Проверка наличия обновлений и дождитесь окончания процесса их поиска и установки.
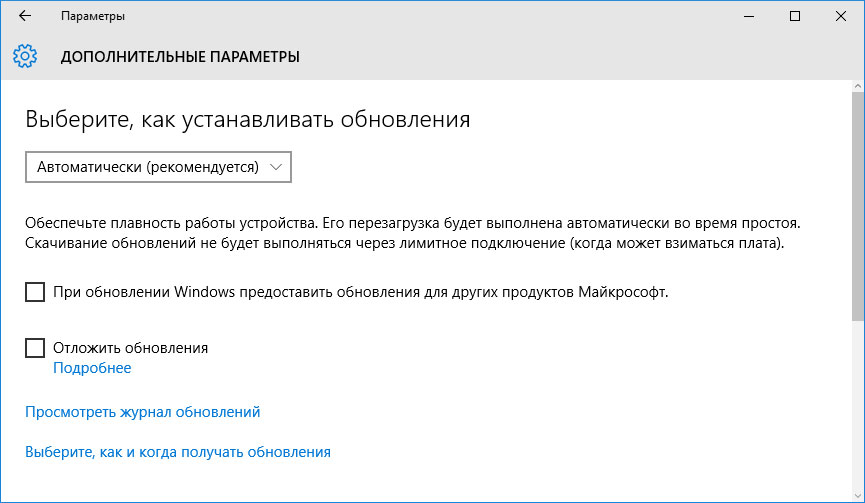
Рекомендуется настроить автоматическую загрузку и установку обновлений операционной системы с помощью меню Дополнительные параметры.
Чтобы включить автоматическое обновление системы необходимо запустить Центр обновления Windows:
- Перейдите в меню Пуск и выберите Параметры.
- В окне Параметров перейдите в меню Обновление и Безопасность и выберите подменю Центр обновления Windows. Для установки последних обновлений Windows нажмите кнопку Проверка наличия обновлений и дождитесь окончания процесса их поиска и установки.
- Перейдите в Дополнительные параметры и выберите, как устанавливать обновления — Автоматически.
Запустите проверку системы на вирусы
«Синий экран смерти» с ошибкой «PROCESS1_INITIALIZATION_FAILED» 0x0000006B может вызывать компьютерный вирус, заразивший систему Windows.
Для проверки системы на наличие вирусов запустите установленную на компьютере антивирусную программу.
Современные антивирусы позволяют проверить как жесткие диски, так и оперативную память. Выполните полную проверку системы.
Выполните проверку оперативной памяти
Неполадки с памятью могут привести к ошибкам, потере информации или прекращению работы компьютера.
Прежде чем проверять оперативную память, отключите её из разъёма на материнской плате компьютера и повторно вставьте в него. Иногда ошибка PROCESS1_INITIALIZATION_FAILED» вызвана неправильно или не плотно вставленной в разъём планкой оперативной памяти, или засорением контактов разъёма.
Если предложенные действия не привели к положительному результату, исправность оперативной памяти можно проверить средствами операционной системы, с помощью средства проверки памяти Windows.
Запустить средство проверки памяти Windows можно двумя способами:
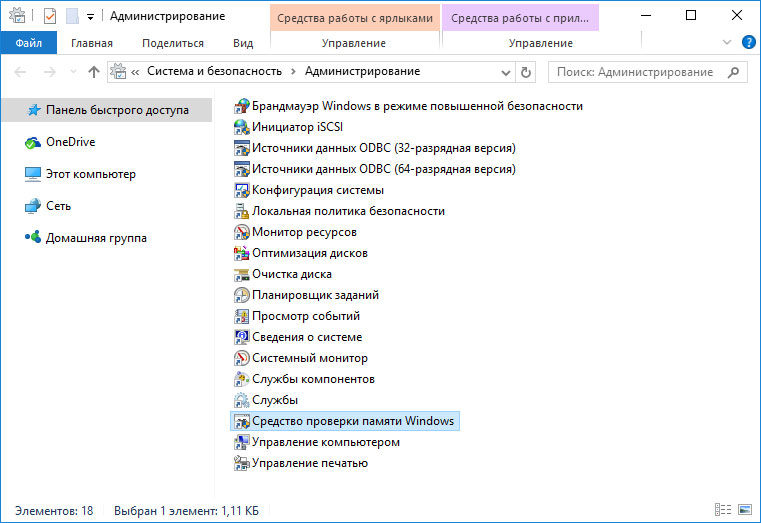
- С помощью Панели управления:

Перейдите в Панель управления / Система и безопасность / Администрирование. Запустите приложение Средство проверки памяти Windows.
- С помощью средства Выполнить:

Запустите средство Выполнить с помощью комбинации клавиш Windows + R. Наберите mdsched и нажмите Enter. После чего откроется средство проверки Windows.
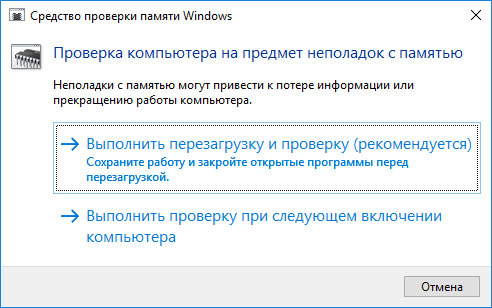
Для начала проверки выберите один из предлагаемых вариантов, проверка оперативной памяти в соответствии с которым будет запущена после перезагрузки компьютера.
Если в результате проверки будут определены ошибки, исправить которые не представляется возможным, то такую память необходимо заменить (замене подлежит модуль памяти с неполадками).
Выполните «чистую» установку Windows
Если не один из перечисленных методов не помог избавиться от PROCESS1_INITIALIZATION_FAILED», попробуйте переустановить Windows. Для того чтобы выполнить чистую установку Windows необходимо создать установочный диск или другой носитель с которого планируется осуществление установки операционной системы.
Загрузите компьютер из установочного диска. Для этого может понадобиться изменить устройство загрузки в BIOS или UEFI для более современных компьютеров.
Следуя пунктам меню установщика укажите диск, на который вы хотите установить Windows. Для этого понадобится отформатировать его. Если вас не устраивает количество или размер локальных дисков, их можно полностью удалить и заново перераспределить.
Помните, что форматирование, удаление или перераспределения дисков удалит все файлы с жесткого диска.
После указания диска для установки Windows запуститься процесс копирования системных файлов и установки операционной системы. Во время установки от вас не потребуется дополнительных действий. В течении установки экран компьютера будет несколько раз гаснуть на непродолжительное время, и для завершения некоторых этапов установки компьютер будет самостоятельно перезагружаться.
В зависимости от версии Windows на одном из этапов от вас может понадобиться выбрать или внести базовые параметры персонализации, режим работы компьютера в сети, а также параметры учётной записи или создать новую.
После загрузки рабочего стола чистую установку Windows можно считать законченной.
Примечание. Прежде чем приступить к выполнению чистой установки Windows заранее побеспокойтесь о наличии драйверов ко всем установленным устройствам и сохранности ваших файлов. Загрузите и сохраните драйвера на отдельный носитель информации, а для важных данных создайте резервную копию.
Как сбросить Windows 10 к исходному состоянию
Как сбросить Windows 10, 8, 7 если компьютер не загружается
Does your laptop or desktop computer with the Windows OS displaying a blue screen? Do you restart computer after flashing the message «PROCESS1_INITIALIZATION_FAILED»? If you are also facing this problem, this article may help you solve the problem. This article from MiniTool Partition Wizard shows you how to fix error: PROCESS1_INITIALIZATION_FAILED Windows 10.
When the computer is affected by the stop code PROCESS1_INITIALIZATION_FAILED 0x0000006B, the problems that the computer may encounter are frequent restarts, bug checks, irregular screen flickering and temporary freezing of the desktop area.
Problems related to the Bootcat.cache file are the main reason for this Windows 10 PROCESS1_INITIALIZATION_FAILED error. The lack of .dll files, bad areas of the hard disk, using the old version of the operating system also cause the same problem.
When you encounter such a problem, you may look for a way to fix it. Luckily, the following is how to fix the error: Windows 10 PROCESS1_INITIALIZATION_FAILED.
Disable Automatically Restart to Ensure Smooth Operation
Once PROCESS1_INITIALIZATION_FAILED Windows 10 error appears on your computer, the main problem you will face is the frequent automatic restart of Windows 10. So, before fix this error, you need to disable automatic restart to ensure smooth operation.
Step 1: Restart your computer while continuously press the F8 key until you get Windows logo on screen.
Step 2: In this window, select Safe Mode.
Step 3: After Windows boot into Safe Mode, type sysdm.cpl in the search box and click OK.
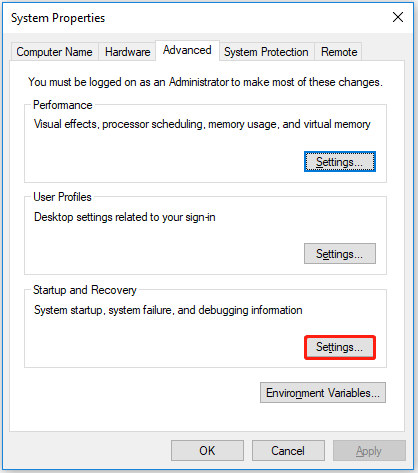
Step 4: Under the System Properties, select the Settings button located under the Startup and Recovery section.
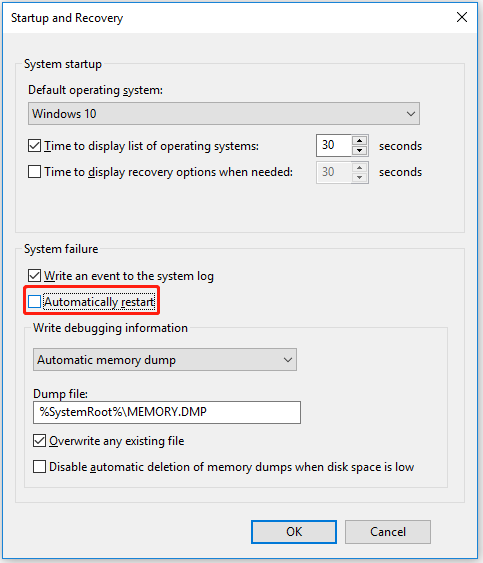
Step 3: Under the System failure section, uncheck the Automatically restart box. Then click the OK button.
Solution 1: Perform a Windows Startup Repair
PROCESS1_INITIALIZATION_FAILED Windows 10 error caused a very serious system crash in Windows, which may affect Windows 10 startup. Therefore, the Startup Repair tool will fix the problem that restricts Windows 10 startup.
Step 1: Insert the installation media drive (such as CD/DVD/USB) into the Windows 10 computer.
Note: If you don’t have one, go to official Windows and download the media creation tool to create one.
Step 2: Restart Windows and press any key during startup.
Step 3: Choose your language preference. Then Click the Next button.
Step 4: Click Repair your computer.
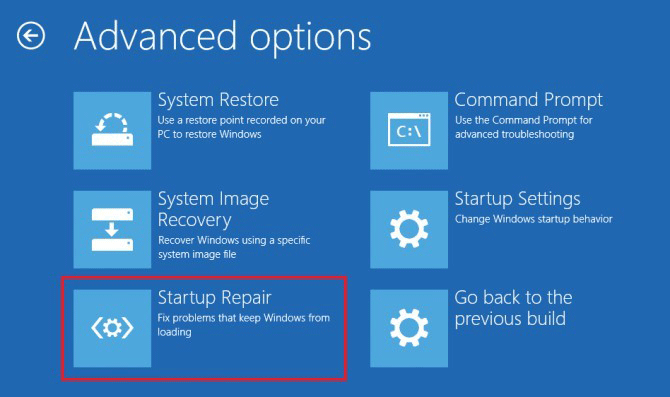
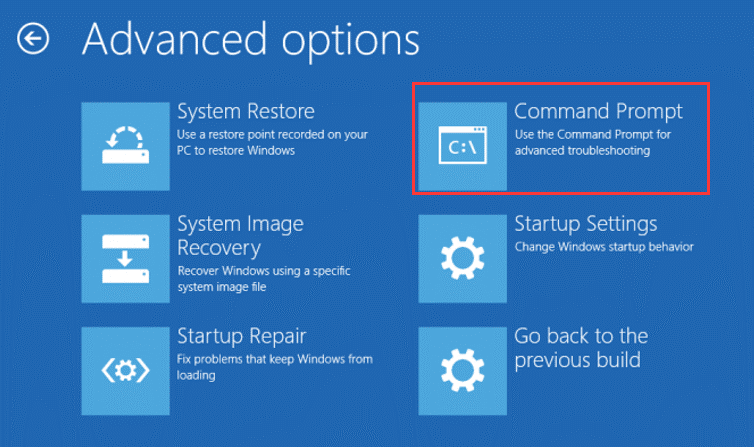
Step 5: Click Troubleshoot > Advanced options > Startup Repair.
When the Startup Repair is complete, try to boot normally in Windows. If you still receive the «Process1 initialization failed» error, or if Startup Repair fails to repair your PC, please proceed to the next method.
Solution 2: Fix Disk Errors
The bad sectors or the corrupted file system in the hard disk are likely to cause the PROCESS1_INITIALIZATION_FAILED BSOD error in Windows 10.
Way 1. Run CHKDSK Utility
You can use the CHKDSK utility to investigate and repair bad sectors in the disk drive to fix this error.
Step 1: Restart your computer while press the Shift key to enter the Advanced Startup window.
Step 2: Select Troubleshoot and then Advanced Options. In the Advanced Options window, select the Command Prompt option.
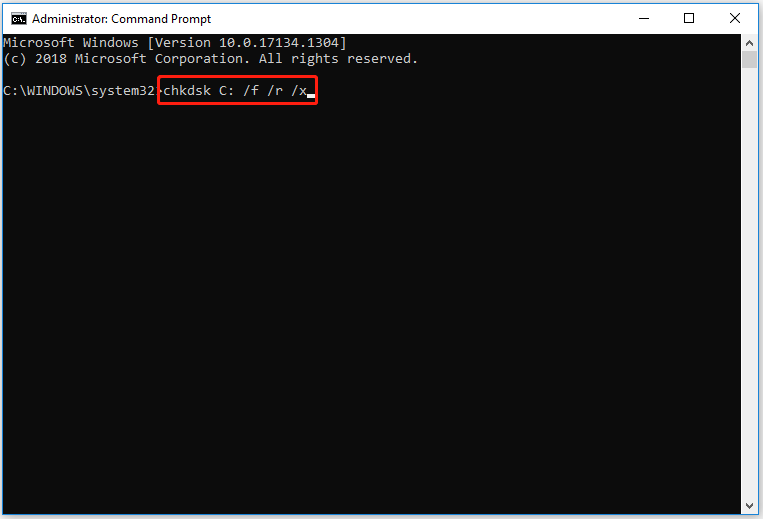
Step 3: In Command Prompt, type chkdsk C: /f /r /x command and press Enter key to execute (replace the letter of drive with that your system drive).
Step 4: Run chkdsk command for every partition. After execution, restart the computer and check if the error is resolved.
Way 2. Use MiniTool Partition Wizard
If the above method fails to solve the issue, you can use a professional disk management tool to check hard disk problems. It is recommended that you try MiniTool Partition Wizard. How to use MiniTool Partition Wizard to check hard disk problems? The steps are as follows.
You can use the Check File System and Surface Test feature to help you solve PROCESS1_INITIALIZATION_FAILED BSOD error.
Free Download
Step 1: Launch MiniTool Partition Wizard to get the main interface.
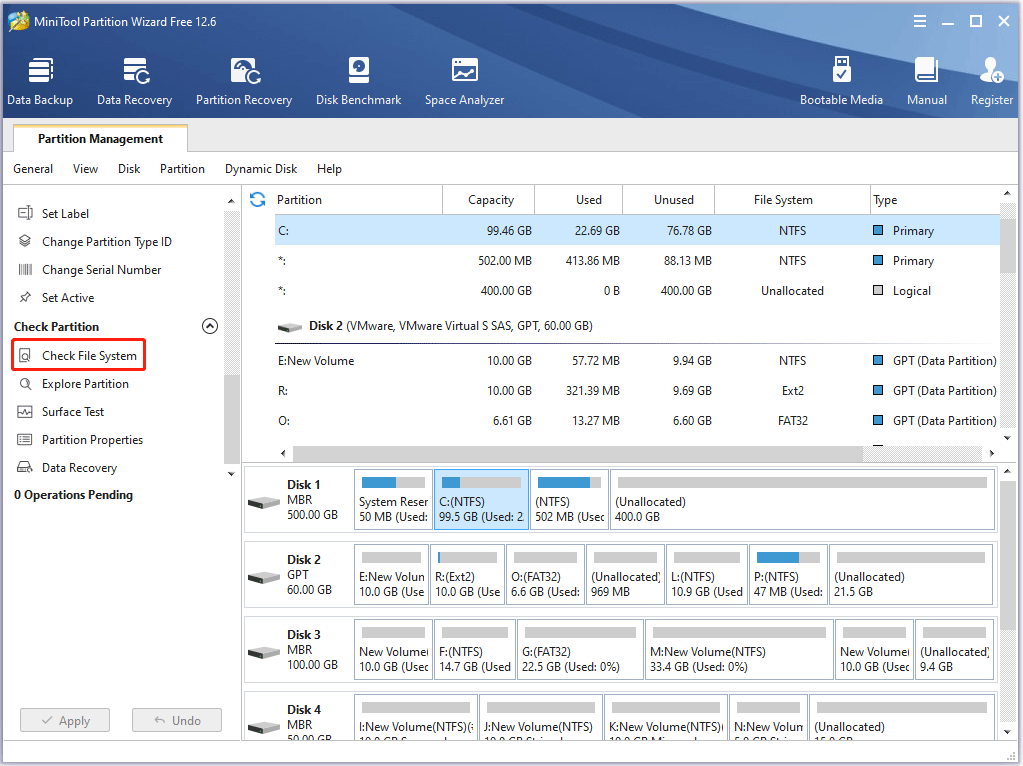
Step 2: Then select the partition on the hard disk and select Check File System on the left operation panel.
Step 3: In the pop-up window, select Check & fix detected errors and click the Start button.

Step 4: MiniTool Partition Wizard will start scanning the file system. After the scan process completed, you can see the scanning and repairing result.
Step 5: Then select the partition on the hard disk and select Surface Test on the left operation panel.
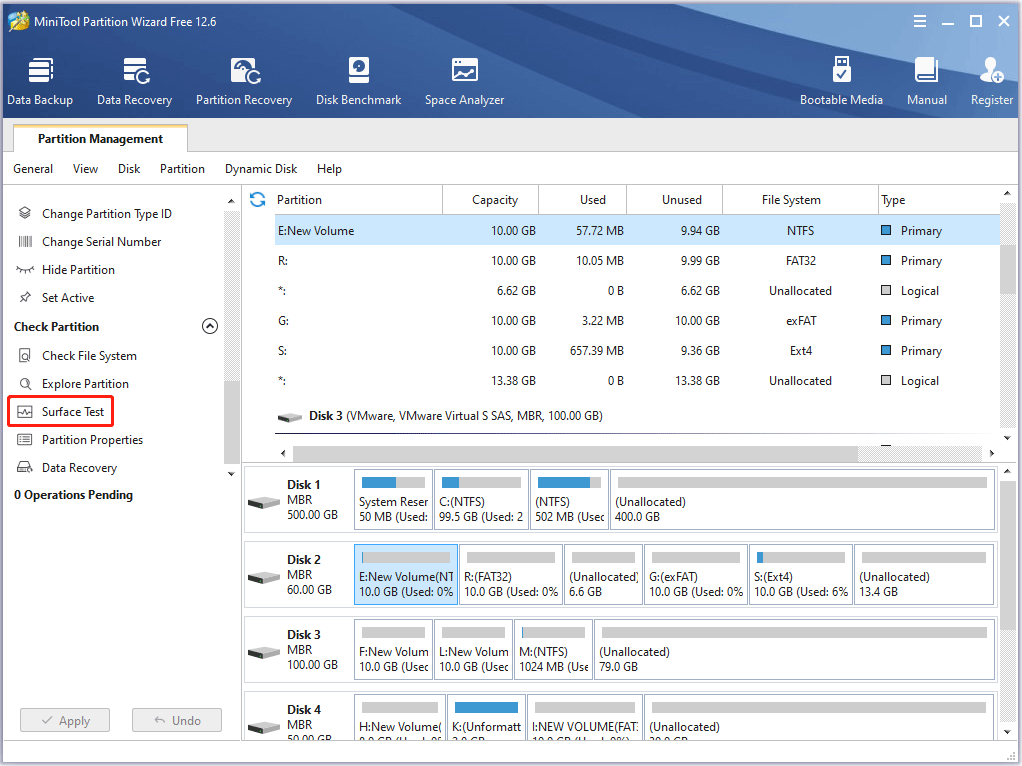
Step 6: In the pop-up window, click the Start Now button to immediately check the bad sectors for Windows 10.
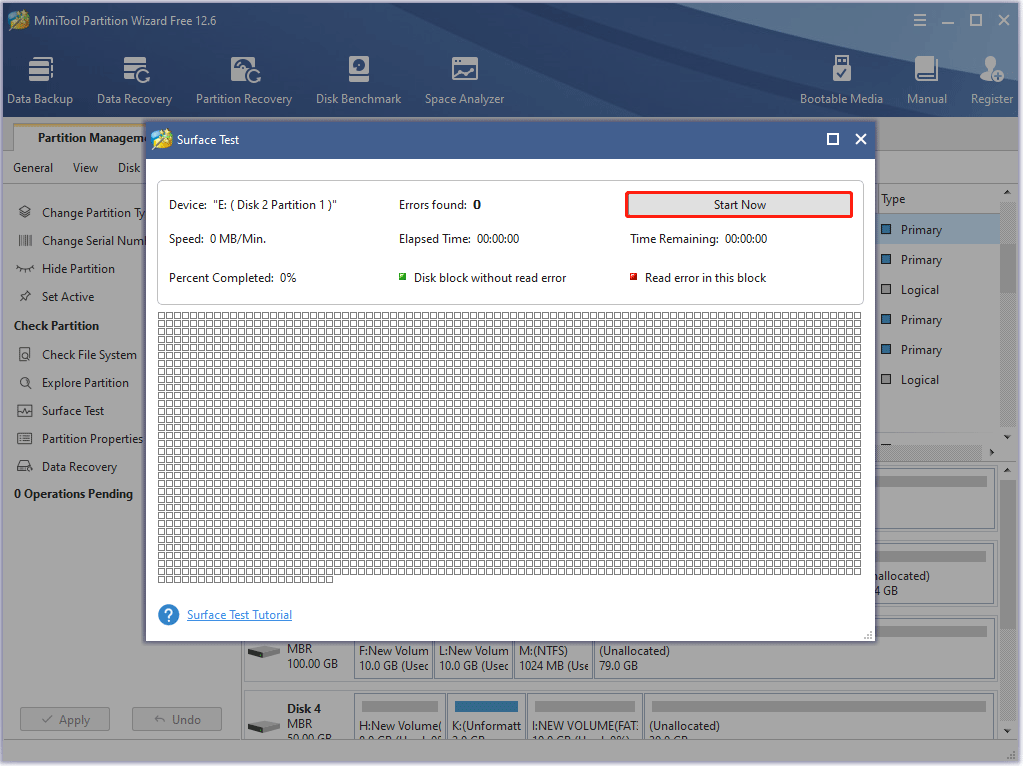
Step 7: When the hard drive error test process is completed, the disk blocks that have no read errors will be marked in green. However, if MiniTool Partition Wizard finds some hard disk errors, the blocks will be marked as red.
Note: This disk management tool detects bad physical sectors. If you find too many bad sectors on the hard drive, you need to replace the disk.
Solution 3: Delete the Bootcat.cache File
Once the Bootcat.cache file is damaged or resized at startup, Windows 10 will encounter PROCESS1_INITIALIZATION_FAILED BSOD. It is a component of CodeIntegrity, and its location in Windows is «C:WindowsSystem32Codeintegrity». In order to solve this PROCESS1_INITIALIZATION_FAILED error, you need to delete Bootcat.cache file. Here are the steps to help you do that.
Step 1: Press the Windows + I key to open Settings, and navigate to the Update & Security > Recovery > Advanced startup option. Then click Restart now.
Step 2: When the blue screen appears, select Troubleshoot > Advanced options > Command Prompt.
Step 3: In the Command Prompt window, type the following commands in order and press Enter:
c:
cd windowssystem32codeintegrity
del bootcat.cache
After the deletion is complete, exit the command prompt and restart Windows 10.
The system will automatically recreate the Bootcat.cache file and fix the PROCESS1_INITIALIZATION_FAILED error.
Solution 4: Copy Bootcat.cache File from Another Computer
If removing the Bootcat.cache file from your computer does not resolve the PROCESS1_INITIALIZATION_FAILED blue screen error, you can copy the Bootcat.cache file from a fully functional and error-free computer running the same version of Windows 10.
Step 1: Insert USB flash drive to another computer.
Step 2: Press Windows + E key to open File Explore and navigate to following location: C:windowssystem32codeintegrity. Then right click on Bootcat.cache file and choose Copy.
Step 3: Remove the drive and insert it into the affected computer.
Step 4: Copy and paste the Bootcat.cache file to C:Windowssystem32codeintegrity.
Solution 5: Replace the NTDLL.DLL from Another Computer
The lack of some DLL files such as ntdll.dll is also the cause of the PROCESS1_INITIALIZATION_FAILED blue screen. To fix the error, you can copy the NTDLL.DLL file from the protected computer and paste it into the System32 folder of the affected computer.
Note: The process is almost similar to copying the Bootcat.cache file, but you need to register after pasting it. The prerequisite is that it is safe to use the USB drive, and the computer you want to copy from must have the same version of Windows 10.
Step 1: Insert USB flash drive to another computer.
Step 2: Go to C:WindowsSystem32 and copy all files with a .dll extension. Paste the project to the USB drive.
Step 3: Remove the drive and insert it into the affected computer.
Step 4: Copy and paste all .dll files to C:WindowsSystem32.
Step 5: Launch the Command Prompt and enter the following command:
regsvr32 (name of DLL file)
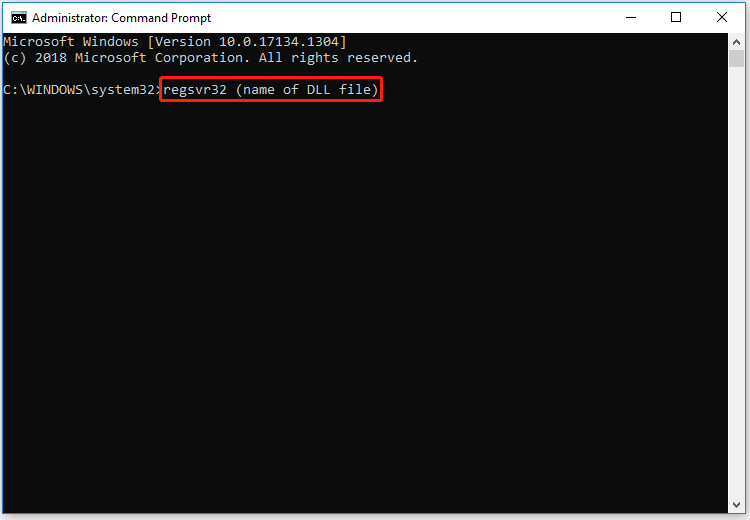
Note: Replace the DLL file names with ntdll.dll, wintrust.dll, vbscript.dll, oleaut32.dll, cryptdlg.dll, softpub.dll, jscript.dll, initpki.dll, msxml.dll in sequence. Press Enter after each.
Step 6: Reboot your computer.
Solution 6: Run System File Checker
Damaged or rewritten system files may cause the error «PROCESS1_INITIALIZATION_FAILED». You can use System File Checker to solve these broken system files.
Step 1: Press Windows + S key and type cmd.exe in the search of the box. Then right-click it and select Run as administrator.
Step 2: In the Command Prompt window, type sfc /scannow and press Enter.
Step 3: Restart your computer.
After the image file is damaged by a third-party tool or malware attack, it will cause a blue screen or blue screen error in Windows 10. Therefore, running the DISM (Deployment Image Servicing and Management) tool is the best way to repair defective image files.
Step 1: Press the Windows key to open the Start menu.
Step 2: Click the Power icon and select the Restart option while holding down the Shift key.
Step 3: After the restart is complete, the window will boot to Automatic Repair.
Step 4: In the blue screen that appears, select Troubleshoot > Advanced Options > Command Prompt.
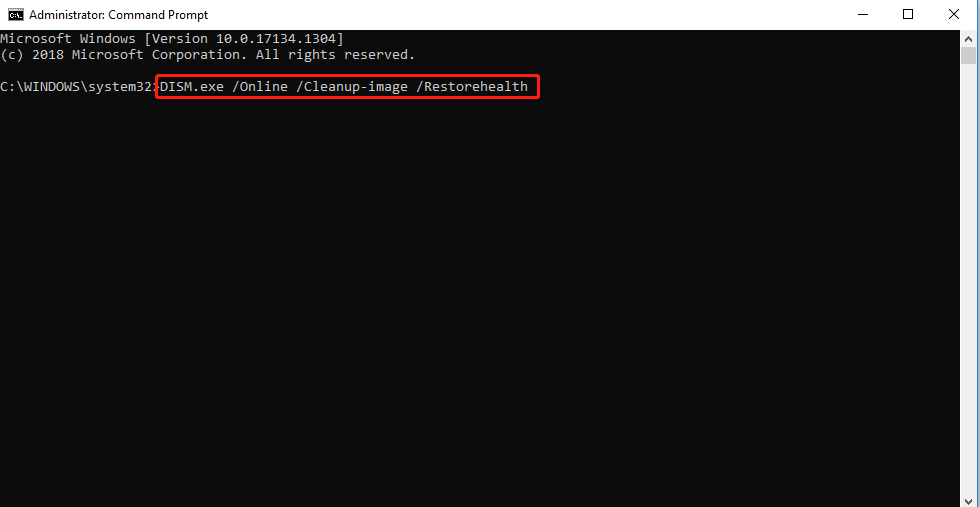
Step 5: In the Command Prompt, type DISM.exe /Online /Cleanup-image /Restorehealth. Then press Enter.
Step 6: After the DISM scan is over, restart your computer.
Solution 8: Update Drivers with Device Manager
Outdated device drivers cause PROCESS1_INITIALIZATION_FAILED errors in Windows 10. Then you can use Device Manager to update and fix them.
Step 1: Press Windows + S key and type Device Manager in the search box. Then press Enter.
Step 2: Refer to the error code you received, and check the update of the driver that caused the problem by right-clicking and selecting Update Driver.
Step 3: In a pop-up window, select Search automatically for updated driver software.
Then your Windows 10 will check, download and install the latest and appropriate driver.
Solution 9: Scan Your Entire System
You can check for malware by scanning the entire system. The steps are as follows:
Step 1: Open the Settings, and navigate to the Update & Security > Windows Security >Virus & threat protection option.
Step 2: In the Windows Defender Security Center, click the Scan now option.
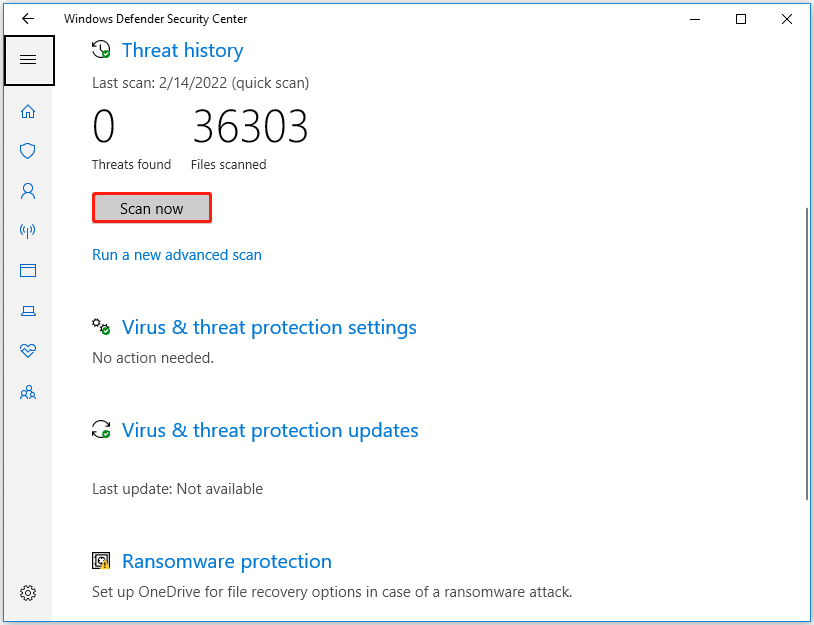
The Windows Defender Security Center will now start to detect if there are any threats on the system. After the scan is over, you will notice the results. If the scan finds any threats, click the Clean threats button to remove them from the system.
Solution 10: Run System Restore
The latest changes in Windows may contradict the Windows registry, resulting in the PROCESS1_INITIALIZATION_FAILED error. So, load back to the previous state through system restore.
Step 1: Press Windows + R key to open Run and type rstrui. Then press Enter key.
Step 2: When the System Restore window opens, click on the Next option to generate a restore of the device.
Step 3: Select the latest and click Next to continue. Finally, click Finish to let start this process.
Note: This method is based on the premise that you have proper system restore points.
Solution 11: Reinstall Windows 10
If none of these methods help you resolve the PROCESS1_INITIALIZATION_FAILED» error, please try to reinstall Windows.
Note: Before installing, please make sure that you have saved a backup and stored all your important data and files in a safe place.
Step 1: Create an installation media (DVD, CD, or USB flash drive) to install the operating system. Then insert it into the computer.
Step 2: When prompted, press any key (F2, DEL, F12) to enter BIOS. Then set the installation media as the first boot order to boot the computer.
Step 3: On the Windows Installer, click the Next button.
Step 4: Click Install now button.
Step 5: Follow the on-screen instructions to complete the setup configuration. When the installation process is completed, you just need to log in with your account.
Here are some solutions about how to fix PROCESS1_INITIALIZATION_FAILED error on Windows 10. I’d like to share them with you. These solutions are easy to operate. You can try it.Click to Tweet
Bottom Line
Now we have reached the end of this article. The above content is all about the solutions for PROCESS1_INITIALIZATION_FAILED Windows 10.
After trying so many solutions, we believe that you may have successfully solved your problem. If you have any suggestions or need any help when you use MiniTool Wizard Partition, you are welcome to send us an email at [email protected] or leave a comment below. Thank you in advance.
Does your laptop or desktop computer with the Windows OS displaying a blue screen? Do you restart computer after flashing the message «PROCESS1_INITIALIZATION_FAILED»? If you are also facing this problem, this article may help you solve the problem. This article from MiniTool Partition Wizard shows you how to fix error: PROCESS1_INITIALIZATION_FAILED Windows 10.
When the computer is affected by the stop code PROCESS1_INITIALIZATION_FAILED 0x0000006B, the problems that the computer may encounter are frequent restarts, bug checks, irregular screen flickering and temporary freezing of the desktop area.
Problems related to the Bootcat.cache file are the main reason for this Windows 10 PROCESS1_INITIALIZATION_FAILED error. The lack of .dll files, bad areas of the hard disk, using the old version of the operating system also cause the same problem.
When you encounter such a problem, you may look for a way to fix it. Luckily, the following is how to fix the error: Windows 10 PROCESS1_INITIALIZATION_FAILED.
Disable Automatically Restart to Ensure Smooth Operation
Once PROCESS1_INITIALIZATION_FAILED Windows 10 error appears on your computer, the main problem you will face is the frequent automatic restart of Windows 10. So, before fix this error, you need to disable automatic restart to ensure smooth operation.
Step 1: Restart your computer while continuously press the F8 key until you get Windows logo on screen.
Step 2: In this window, select Safe Mode.
Step 3: After Windows boot into Safe Mode, type sysdm.cpl in the search box and click OK.
Step 4: Under the System Properties, select the Settings button located under the Startup and Recovery section.
Step 3: Under the System failure section, uncheck the Automatically restart box. Then click the OK button.
Solution 1: Perform a Windows Startup Repair
PROCESS1_INITIALIZATION_FAILED Windows 10 error caused a very serious system crash in Windows, which may affect Windows 10 startup. Therefore, the Startup Repair tool will fix the problem that restricts Windows 10 startup.
Step 1: Insert the installation media drive (such as CD/DVD/USB) into the Windows 10 computer.
Note: If you don’t have one, go to official Windows and download the media creation tool to create one.
Step 2: Restart Windows and press any key during startup.
Step 3: Choose your language preference. Then Click the Next button.
Step 4: Click Repair your computer.
Step 5: Click Troubleshoot > Advanced options > Startup Repair.
When the Startup Repair is complete, try to boot normally in Windows. If you still receive the «Process1 initialization failed» error, or if Startup Repair fails to repair your PC, please proceed to the next method.
Solution 2: Fix Disk Errors
The bad sectors or the corrupted file system in the hard disk are likely to cause the PROCESS1_INITIALIZATION_FAILED BSOD error in Windows 10.
Way 1. Run CHKDSK Utility
You can use the CHKDSK utility to investigate and repair bad sectors in the disk drive to fix this error.
Step 1: Restart your computer while press the Shift key to enter the Advanced Startup window.
Step 2: Select Troubleshoot and then Advanced Options. In the Advanced Options window, select the Command Prompt option.
Step 3: In Command Prompt, type chkdsk C: /f /r /x command and press Enter key to execute (replace the letter of drive with that your system drive).
Step 4: Run chkdsk command for every partition. After execution, restart the computer and check if the error is resolved.
Way 2. Use MiniTool Partition Wizard
If the above method fails to solve the issue, you can use a professional disk management tool to check hard disk problems. It is recommended that you try MiniTool Partition Wizard. How to use MiniTool Partition Wizard to check hard disk problems? The steps are as follows.
You can use the Check File System and Surface Test feature to help you solve PROCESS1_INITIALIZATION_FAILED BSOD error.
Free Download
Step 1: Launch MiniTool Partition Wizard to get the main interface.
Step 2: Then select the partition on the hard disk and select Check File System on the left operation panel.
Step 3: In the pop-up window, select Check & fix detected errors and click the Start button.
Step 4: MiniTool Partition Wizard will start scanning the file system. After the scan process completed, you can see the scanning and repairing result.
Step 5: Then select the partition on the hard disk and select Surface Test on the left operation panel.
Step 6: In the pop-up window, click the Start Now button to immediately check the bad sectors for Windows 10.
Step 7: When the hard drive error test process is completed, the disk blocks that have no read errors will be marked in green. However, if MiniTool Partition Wizard finds some hard disk errors, the blocks will be marked as red.
Note: This disk management tool detects bad physical sectors. If you find too many bad sectors on the hard drive, you need to replace the disk.
Solution 3: Delete the Bootcat.cache File
Once the Bootcat.cache file is damaged or resized at startup, Windows 10 will encounter PROCESS1_INITIALIZATION_FAILED BSOD. It is a component of CodeIntegrity, and its location in Windows is «C:WindowsSystem32Codeintegrity». In order to solve this PROCESS1_INITIALIZATION_FAILED error, you need to delete Bootcat.cache file. Here are the steps to help you do that.
Step 1: Press the Windows + I key to open Settings, and navigate to the Update & Security > Recovery > Advanced startup option. Then click Restart now.
Step 2: When the blue screen appears, select Troubleshoot > Advanced options > Command Prompt.
Step 3: In the Command Prompt window, type the following commands in order and press Enter:
c:
cd windowssystem32codeintegrity
del bootcat.cache
After the deletion is complete, exit the command prompt and restart Windows 10.
The system will automatically recreate the Bootcat.cache file and fix the PROCESS1_INITIALIZATION_FAILED error.
Solution 4: Copy Bootcat.cache File from Another Computer
If removing the Bootcat.cache file from your computer does not resolve the PROCESS1_INITIALIZATION_FAILED blue screen error, you can copy the Bootcat.cache file from a fully functional and error-free computer running the same version of Windows 10.
Step 1: Insert USB flash drive to another computer.
Step 2: Press Windows + E key to open File Explore and navigate to following location: C:windowssystem32codeintegrity. Then right click on Bootcat.cache file and choose Copy.
Step 3: Remove the drive and insert it into the affected computer.
Step 4: Copy and paste the Bootcat.cache file to C:Windowssystem32codeintegrity.
Solution 5: Replace the NTDLL.DLL from Another Computer
The lack of some DLL files such as ntdll.dll is also the cause of the PROCESS1_INITIALIZATION_FAILED blue screen. To fix the error, you can copy the NTDLL.DLL file from the protected computer and paste it into the System32 folder of the affected computer.
Note: The process is almost similar to copying the Bootcat.cache file, but you need to register after pasting it. The prerequisite is that it is safe to use the USB drive, and the computer you want to copy from must have the same version of Windows 10.
Step 1: Insert USB flash drive to another computer.
Step 2: Go to C:WindowsSystem32 and copy all files with a .dll extension. Paste the project to the USB drive.
Step 3: Remove the drive and insert it into the affected computer.
Step 4: Copy and paste all .dll files to C:WindowsSystem32.
Step 5: Launch the Command Prompt and enter the following command:
regsvr32 (name of DLL file)
Note: Replace the DLL file names with ntdll.dll, wintrust.dll, vbscript.dll, oleaut32.dll, cryptdlg.dll, softpub.dll, jscript.dll, initpki.dll, msxml.dll in sequence. Press Enter after each.
Step 6: Reboot your computer.
Solution 6: Run System File Checker
Damaged or rewritten system files may cause the error «PROCESS1_INITIALIZATION_FAILED». You can use System File Checker to solve these broken system files.
Step 1: Press Windows + S key and type cmd.exe in the search of the box. Then right-click it and select Run as administrator.
Step 2: In the Command Prompt window, type sfc /scannow and press Enter.
Step 3: Restart your computer.
After the image file is damaged by a third-party tool or malware attack, it will cause a blue screen or blue screen error in Windows 10. Therefore, running the DISM (Deployment Image Servicing and Management) tool is the best way to repair defective image files.
Step 1: Press the Windows key to open the Start menu.
Step 2: Click the Power icon and select the Restart option while holding down the Shift key.
Step 3: After the restart is complete, the window will boot to Automatic Repair.
Step 4: In the blue screen that appears, select Troubleshoot > Advanced Options > Command Prompt.
Step 5: In the Command Prompt, type DISM.exe /Online /Cleanup-image /Restorehealth. Then press Enter.
Step 6: After the DISM scan is over, restart your computer.
Solution 8: Update Drivers with Device Manager
Outdated device drivers cause PROCESS1_INITIALIZATION_FAILED errors in Windows 10. Then you can use Device Manager to update and fix them.
Step 1: Press Windows + S key and type Device Manager in the search box. Then press Enter.
Step 2: Refer to the error code you received, and check the update of the driver that caused the problem by right-clicking and selecting Update Driver.
Step 3: In a pop-up window, select Search automatically for updated driver software.
Then your Windows 10 will check, download and install the latest and appropriate driver.
Solution 9: Scan Your Entire System
You can check for malware by scanning the entire system. The steps are as follows:
Step 1: Open the Settings, and navigate to the Update & Security > Windows Security >Virus & threat protection option.
Step 2: In the Windows Defender Security Center, click the Scan now option.
The Windows Defender Security Center will now start to detect if there are any threats on the system. After the scan is over, you will notice the results. If the scan finds any threats, click the Clean threats button to remove them from the system.
Solution 10: Run System Restore
The latest changes in Windows may contradict the Windows registry, resulting in the PROCESS1_INITIALIZATION_FAILED error. So, load back to the previous state through system restore.
Step 1: Press Windows + R key to open Run and type rstrui. Then press Enter key.
Step 2: When the System Restore window opens, click on the Next option to generate a restore of the device.
Step 3: Select the latest and click Next to continue. Finally, click Finish to let start this process.
Note: This method is based on the premise that you have proper system restore points.
Solution 11: Reinstall Windows 10
If none of these methods help you resolve the PROCESS1_INITIALIZATION_FAILED» error, please try to reinstall Windows.
Note: Before installing, please make sure that you have saved a backup and stored all your important data and files in a safe place.
Step 1: Create an installation media (DVD, CD, or USB flash drive) to install the operating system. Then insert it into the computer.
Step 2: When prompted, press any key (F2, DEL, F12) to enter BIOS. Then set the installation media as the first boot order to boot the computer.
Step 3: On the Windows Installer, click the Next button.
Step 4: Click Install now button.
Step 5: Follow the on-screen instructions to complete the setup configuration. When the installation process is completed, you just need to log in with your account.
Here are some solutions about how to fix PROCESS1_INITIALIZATION_FAILED error on Windows 10. I’d like to share them with you. These solutions are easy to operate. You can try it.Click to Tweet
Bottom Line
Now we have reached the end of this article. The above content is all about the solutions for PROCESS1_INITIALIZATION_FAILED Windows 10.
After trying so many solutions, we believe that you may have successfully solved your problem. If you have any suggestions or need any help when you use MiniTool Wizard Partition, you are welcome to send us an email at [email protected] or leave a comment below. Thank you in advance.
Get the fix for the error STOP: 0x0000006B PROCESS1_INITIALIZATION_FAILED on Windows XP, Windows Vista, Windows 7, Windows 8, Windows 8.1 and Windows 10.
Contents
- 1 About the “0x0000006B” error
- 1.1 Description and Symptoms
- 1.1.1 Symptom 1: 0xc000006b error screen on startup
- 1.1.2 Symptom 1: 0xc000006b error screen on Windows 7 or Windows Server 2008 R2
- 1.2 Causes of this Error
- 1.2.1 Cause 1: NTDLL.dll file is missing or corrupt
- 1.2.2 Cause 2: Bootcat.cache file is corrupt
- 1.1 Description and Symptoms
- 2 Fixing “0x0000006B” on Windows
- 2.1 Fix #1: Replace the DLL
- 2.2 Fix #2: Use Startup Repair to attempt NTDLL replacement
- 2.3 Fix #3: Repair corrupted system files with the SFC command
- 2.4 Fix #4: Delete Bootcat.cache and Install SP1
- 2.5 Fix #5: Check the hard drive with CHKDSK utility
- 3 More Information
- 3.1 Linked Entries
- 3.2 Support Links
- 3.3 Applicable Systems
About the “0x0000006B” error
The following information on this error has been compiled by NeoSmart Technologies, based on the information gathered and reported by our global network of engineers, developers, and technicians or partner organizations.
Description and Symptoms
The error messages, alerts, warnings, and symptoms below are tied to this error.
Symptom 1: 0xc000006b error screen on startup
The ntdll.dll file is a library created by Microsoft that basic contains NT kernel functions. It is required by the system to load properly, and it must be located in the %windir%/system32 folder. If it is missing or corrupt, then the 0x0000006b error screen appears.
Here is an example of an error screen that appears on Windows XP, Vista, and Windows 7

A problem has been detected and Windows has been shut down to prevent damage
to your computer.

PROCESS1_INITIALIZATION_FAILED

If this is the first time you’ve seen this Stop error screen,
restart your computer. If this screen appears again, follow
these steps:

Check to make sure any new hardware or software is properly installed.
If this is a new installation, ask your hardware or software manufacturer
for any Windows updates you might need.

If problems continue, disable or remove any newly installed hardware
or software. Disable BIOS memory options such as caching or shadowing.
If you need to use Safe Mode to remove or disable components, restart
your computer, press F8 to select Advanced Startup Options, and then
select Safe Mode.

Technical Information:

*** STOP: 0x0000006B (0x00000034, 0x00000002, 0x00000000, 0x00000000)
And here is an example of an error screen that appears on Windows 8, Windows 8.1 and Windows 10:
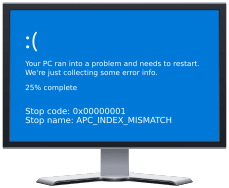
Your PC ran into a problem and needs to restart. We're just collecting some error info, and then we'll restart for you(80% complete)
If you'd like to know more, you can search online later for this error: PROCESS1_INITIALIZATION_FAILED
Symptom 1: 0xc000006b error screen on Windows 7 or Windows Server 2008 R2
On Windows 7 with no Service Packs installed, or on Windows Server 2008 R2, this error is often caused because the Bootcat.cache file is corrupted or because the size of the Bootcat.cache file is changed since the last successful start. This error is fixed in Service Pack 1 for both Windows 7 and Windows Server 2008 R2.
Causes of this Error
This error has been known to occur as a result of one or more of the following:
Cause 1: NTDLL.dll file is missing or corrupt
The NTDLL.dll file, located at %windir%/system32 is a vital component of Windows boot process, and the system cannot work properly if it is corrupt or missing. This may happen because of disk read/write errors, virus attacks, or power outages.
Cause 2: Bootcat.cache file is corrupt
On Windows 7 and Windows 2008 R2 with no Service Packs installed, this error is caused because the Bootcat.cache file is corrupted or its size was changed. If that’s the case, the user should either delete this file manually, or install the latest Service Pack provided by Microsoft
Fixing “0x0000006B” on Windows
Windows Setup CD/DVD Required!
Some of the solutions below require the use of the Microsoft Windows setup CD or DVD. If your PC did not come with a Windows installation disc or if you no longer have your Windows setup media, you can use Easy Recovery Essentials for Windows instead. EasyRE will automatically find and fix many problems, and can also be used to solve this problem with the directions below.
Fix #1: Replace the DLL
If ntdll.dll is in fact missing or corrupt, you can restore the original ntdll.dll file back from your Windows XP installation disc.
Unable to boot into the Windows setup CD?
See our guide on setting up a PC to boot from the CD or DVD for troubleshooting and more detailed instructions.
- Insert your XP CD into the computer.
- Restart your computer.
- Press any key to boot into the CD when you see the “Press any key to boot from CD” message.
- Press R to start Recovery Console when the Options screen appears.
- Type in your Administrator password followed by the Enter key to submit it.
- You’ll reach the Command Prompt now, type the following command, where
D:is your CD’s drive letter andC:is the letter of the drive you installed Windows to:copy D:i386ntdll.dll C:Windowssystem32ntdll.dll
- Press Y when you are asked if you want to overwrite this file and then hit Enter to submit the command.
- Restart your computer.
Here is an example of what the PC’s console output should look like once the ntdll.dll file is properly restored:

Replacing the ntdll.dll file
Fix #2: Use Startup Repair to attempt NTDLL replacement
On Windows Vista, Windows 7, Windows 8 and Windows 8.1, Startup Repair can be used to scan the system for damaged or missing system files to replace the ntdll.dll file if it is corrupt or missing.
Windows Setup CD/DVD Required!
Some of the solutions below require the use of the Microsoft Windows setup CD or DVD. If your PC did not come with a Windows installation disc or if you no longer have your Windows setup media, you can use Easy Recovery Essentials for Windows instead. EasyRE will automatically find and fix many problems, and can also be used to solve this problem with the directions below.
Startup Repair is an automated diagnosis and repair tool that is available from the Windows setup disc and can be used to find and repair some common problems. More information about how Startup Repair operates and what it does can be found in our knowledgebase. The following steps will initiate Startup Repair from the Windows setup disc:
Unable to boot into the Windows setup CD?
See our guide on setting up a PC to boot from the CD or DVD for troubleshooting and more detailed instructions.
- Insert your Windows installation DVD into your PC’s CD-ROM drive,
- Fully power down your PC, and make sure it has fully shut off,
- Power up your PC,
- Press any key when you see “Press any key to boot from CD or DVD..”
- Click the link titled “Repair your computer” in the bottom-lefthand corner, after first selecting your language and keyboard options.

- Wait for Startup Repair to scan your PC for Windows installations, then select your install from the list it shows:

- Choose “Startup Repair” from the list of available recovery options to begin:

- Startup Repair will begin scanning your installation for known issues and will attempt a repair, if possible.


Here is an example of what the PC’s startup repair should look like once the ntdll.dll file is properly restored:

Ntdll.dll restored by Windows 7 Startup Repair
Fix #3: Repair corrupted system files with the SFC command
On Windows Vista, Windows 7, Windows 8 and Windows 8.1, it is possible to use the built-in Windows SFC(system file checker) tool to automatically scan a computer’s system files and repair them if necessary.
Here are the steps to run SFC:
- Boot from your Windows install disc
- Click on Repair your computer after selecting proper language, time and keyboard input.
- Select the Windows installation drive, which is usually
C:, and click Next - Choose Command Prompt when the System Recovery Options box appears
- Write the following command and press Enter afterwards:
sfc /scannow /offbootdir=D: /offwindir=D:Windows
Replace D: with the letter of the driver where Windows is installed, and D:Windows with the Windows folder location.
Here is an example of what the PC’s console output should look like once the sfc.exe scan is complete and missing files are successfully restored:

Ntdll.dll restored by the SFC utility
Fix #4: Delete Bootcat.cache and Install SP1
If the error is caused by a corrupt Bootcat.cache file, it is possible to delete it manually and install the Service Pack to fix this error once the system loads successfully. To do so, follow these steps:
- Insert the Windows 7 installation DVD
- Restart the computer
- Boot from the DVD
- At the Install Windows screen, select Repair your computer or press R

- At the System Recovery Options screen, select Command Prompt
- When Command Prompt appears, type the letter of the drive where your Windows 7 is installed:
D:
Replace
D:with the letter of the drive where Windows 7 is installed, ifD:is not your default installation drive. - Press Enter
- Then type:
cd windowssystem32codeintegrity
- Press Enter
- Type:
del bootcat.cache
- Press Enter
- Restart your computer


Here is an example of what the PC’s console output should look like once the bootcat.cache file is deleted:

Bootcat.cache file deleted
After your computer loads successfully, follow these steps to install the Service Pack:
- Click Start
- Click All Programs
- Click Windows Update
- Click Check for updates
- Select Service Pack for Microsoft (KB976932)
- Click OK
- Click Install Updates
- Type the Administrator password, when prompted
- Follow the instructions on the screen to complete the installation
Fix #5: Check the hard drive with CHKDSK utility
If the hard drive has its file integrity compromised, it is possible to use built-in Windows CHKDSK utility to scan the disk and fix the file system errors.
Here are the steps to run CHKDSK:
- Boot from your Windows install disc
- Click on Repair your computer after selecting proper language, time and keyboard input.
- Select the Windows installation drive, which is usually
C:, and click Next - Choose Command Prompt when the System Recovery Options box appears
- Write the following command and press Enter afterwards:
chkdsk C: /f
Replace C: with the letter of the driver where Windows is installed.
Here is an example of what the PC’s console output should look like once the chkdsk.exe is complete:

Chkdsk utility results screen
More Information
Linked Entries
- sfc
- chkdsk
Support Links
- Easy Recovery Essentials for Windows – our repair and recovery disk.
It’s an easy-to-use and automated diagnostics disk. It’s available for Windows 8, Windows 7 and Windows Vista. It’s also available for Windows XP and Windows Server.
Read more at Windows Recovery Disks.
- The NeoSmart Support Forums, member-to-member technical support and troubleshooting.
- Get a discounted price on replacement setup and installation discs: Windows XP, Windows Vista, Windows 7, Windows 8, Windows 10.
Applicable Systems
This Windows-related knowledgebase article applies to the following operating systems:
- Windows XP (all editions)
- Windows Vista (all editions)
- Windows 7 (all editions)
- Windows 8 (all editions)
- Windows 8.1 (all editions)
- Windows 10 (all editions)
Propose an edit
| Номер ошибки: | Ошибка 0x6B | |
| Название ошибки: | PROCESS1_INITIALIZATION_FAILED | |
| Описание ошибки: | The PROCESS1_INITIALIZATION_FAILED bug check has a value of 0x0000006B. This bug check indicates that the initialization of the Microsoft Windows operating system failed. | |
| Шестнадцатеричный код: | 0x0000006B | |
| Разработчик: | Microsoft Corporation | |
| Программное обеспечение: | Windows Operating System | |
| Относится к: | Windows XP, Vista, 7, 8, 10, 11 |
Проблемы 0x6B с 0x0000006B, которые приводят к ошибке типа «синий экран» (BSOD) чаще всего возникают из-за повреждённых или отсутствующих драйверов устройства для Windows 10 или из-за неисправного оборудования. Как правило, любую проблему, связанную с файлом 0x6B, можно решить посредством замены файла на новую копию.
Ошибки PROCESS1_INITIALIZATION_FAILED
Ошибки PROCESS1_INITIALIZATION_FAILED обычно связаны с синим экраном смерти (BSOD) или ошибкой «Stop»:
- «Обнаружена проблема с PROCESS1_INITIALIZATION_FAILED. Windows выключается, чтобы предотвратить повреждение. «
- «:( Ваш компьютер столкнулся с проблемой и нуждается в перезагрузке. Мы соберем необходимую информацию и осуществим перезагрузку. Если вам нужна дополнительная информация, вы можете позже поискать в Интернете по названию ошибки: PROCESS1_INITIALIZATION_FAILED.»
- «0x0A: IRQL_NOT_LESS_EQUAL — PROCESS1_INITIALIZATION_FAILED»
- 0x1E — PROCESS1_INITIALIZATION_FAILED: КМОДЕ_ИСКЛЮЧЕНИЕ_НЕТ_ОБРАБАТЫВАЕТСЯ — PROCESS1_INITIALIZATION_FAILED
- 0×00000050 ОСТАНОВКА: СТРАНИЦА_FAULT_IN_NONPAGED_AREA — PROCESS1_INITIALIZATION_FAILED
Большинство ошибок PROCESS1_INITIALIZATION_FAILED BSOD происходят после новой установки нового оборудования или программного обеспечения (Windows). Обычно ошибки синего экрана, связанные с PROCESS1_INITIALIZATION_FAILED, возникают при загрузке драйвера устройства, связанного с Microsoft Corporation, во время установки Windows или связанной программы или во время запуска или завершения работы Windows. Важно отметить, когда происходят ошибки синего экрана с PROCESS1_INITIALIZATION_FAILED, так как это помогает устранять проблемы, связанные с Windowss, и сообщать о них в Microsoft Corporation.
Причины проблем PROCESS1_INITIALIZATION_FAILED
Проблемы с прошивкой, драйвером, оборудованием или программным обеспечением могут привести к ошибкам синего экрана, связанного с PROCESS1_INITIALIZATION_FAILED. Аппаратные сбои Microsoft Corporation или Windows могут привести к этим ошибкам PROCESS1_INITIALIZATION_FAILED в некоторых случаях.
В частности, ошибки, связанные с PROCESS1_INITIALIZATION_FAILED, создаются:
- Устаревшие, поврежденные или неправильно настроенные драйверы устройств Microsoft Corporation/Windows.
- Недопустимые/поврежденные разделы реестра PROCESS1_INITIALIZATION_FAILED или Windows.
- Заражение вредоносными программами повреждено файл PROCESS1_INITIALIZATION_FAILED или связанные с ним файлы Windows.
- Установка оборудования, связанная с NewMicrosoft Corporation, создает конфликты PROCESS1_INITIALIZATION_FAILED.
- Установка Windows или драйверов устройств (PROCESS1_INITIALIZATION_FAILED), вызывающих удаление или повреждение.
- Повреждение диска, вызывающее ошибку PROCESS1_INITIALIZATION_FAILED STOP.
- Память (ОЗУ) повреждена из PROCESS1_INITIALIZATION_FAILED BSOD.
Продукт Solvusoft
Загрузка
WinThruster 2022 — Проверьте свой компьютер на наличие ошибок.
Совместима с Windows 2000, XP, Vista, 7, 8, 10 и 11
Установить необязательные продукты — WinThruster (Solvusoft) | Лицензия | Политика защиты личных сведений | Условия | Удаление
The blue screen error «Process1 Initialization Failed STOP 0x0000006B» may appear on Windows 10 or 8-based computers because of a damage in Windows system files.
The Windows 10 error «Process1 Initialization Failed» can usually occur after a power failure or after updating Windows and in rare cases, the error may be due to a virus attack or to a memory (RAM) problem.

This tutorial contains instructions to resolve the BSOD Error 0x0000006B: «Process1 Initialization Failed» in Windows 10 OS.
How to fix Error 0x0000006B: Process1 Initialization Failed in Windows 10.
Suggestions: Before you continue to the methods below, try the following…
1. Continually press the Power button for 5-6 seconds, to fully power off your PC. Power on it again and try to boot to Windows.
2. Disconnect all the peripheral devices that you don’t need (e.g. USB Drives, SD Cards, USB Wireless Mouse or Keyboard Receiver, USB Wireless Network Card, Printer etc.), and try to boot to Windows.
3. Check the Memory (RAM) for problems.
Requirements: A Windows Installation USB or DVD media.
In order to fix the «Process1 Initialization Failed» problem on Windows 10 you need a Windows 10 USB or DVD Installation Media. If you don’t own a Windows 10 Installation Media, then (from another computer) you can create one, by following the instructions mentioned on these articles:
- How to create a Windows 10 USB boot media.
- How to create a Windows 10 DVD boot media.
Method 1: Perform a Windows Startup Repair.
Method 2. Check Disk and File System for Errors.
Method 3. Delete the «bootcat.cache» file.
Method 4. Rename the NTDLL.DLL File.
Method 5. Replace the NTDLL.DLL from Another Working Computer.
Method 6. Reinstall Windows 10.
Method 1: Perform a Windows Startup Repair
The first method to resolve the «Process1 Initialization Failed (0x0000006B)» error, is to perform a «startup repair» from a Windows Installation Media. TO do that:
1. Boot your computer from the Windows installation media (USB or DVD).
2. At the first setup screen click Next.

3. At the next screen select Repair your computer.

4. Then click Troubleshoot –> Advanced options –> Startup Repair.

5. Wait while Windows diagnosing and fix problems.
6. When the Startup Repair is completed try to boot in Windows normally. If your still receive the «Process1 Initialization Failed » error or if the Startup Repair couldn’t repair your PC, continue to the next method.
Method 2. Check Disk and File System for Errors.
The next method to fix the «Stop 0x0000006B: Process1 Initialization Failed» error, is to repair the hard disk and the file system. To do that:
1. Boot from the Windows installation media.
2. At the Windows Setup screen press SHIFT + F10 to access the Command Prompt. *
* Or choose: NEXT –> REPAIR YOUR COMPUTER -> TROUBLESHOOT -> ADVANCED OPTIONS -> COMMAND PROMPT)

3. In command prompt, give the following command and press Enter, to find out the Windows drive:
- bcdedit
4. Notice the drive letter at «osdevice . . . . . partition=X:» line.
* Info: The «OSDEVICE» is the drive which contains the Windows Operating System (aka: «Windows drive»).
e.g. As you can see at the screenshot below the Windows drive is the drive D:

5. Now proceed and check the Windows drive for problems, by typing this command:
- chkdsk X: /r /x
* Note: Replace the letter «X» according to your case. e.g.:
chkdsk D: /r /x

6. When the CHKDSK process is completed, check the Windows System files, by typing this command: *
- sfc /SCANNOW /OFFBOOTDIR=X: /OFFWINDIR=X:windows
* Notes:
1. Replace the letter ‘X‘ according to your case.
sfc /SCANNOW /OFFBOOTDIR=D: /OFFWINDIR=D:windows

2. If after typing the above command, you receive the error «Windows Resource Protection could not start the repair service», the following may be responsible:
a. You ‘re using a Windows Installation Media, that is incompatible with the installed Windows version & architecture (64 or 32 bit).
b. The Windows Installation Media is damaged. At this case, proceed to recreate the Windows Installation Media.
7. When the SFC repair is completed, type exit to close the command prompt window.
8. Remove the Windows Installation media and close all open windows.
8. Reboot your computer and see if Windows can start normally,
Method 3. Delete the «BOOTCAT.CACHE» file.
The «Process1 Initialization Failed» problem, can be caused because the «BOOTCAT.CACHE» file is corrupted. At that case, proceed and delete the «BOOTCAT.CACHE» file, by following the instructions below:
1. Boot from the Windows 10 installation media and launch command prompt.
2. By using the BCDEDIT command (see the Steps 2 & 3 in the above method), find the Windows Drive Letter.
3. Navigate to the Windows drive, by typing: «Drive_Letter:» (without quotes & press Enter). *
* Note: Replace the Drive_Letter according to your case. In this example the Windows are located at drive «D», so we type:
- D:
4. Now type the following command and press Enter:
- cd windowssystem32CodeIntegrity
5. Then give the following command and press Enter: *
- del bootcat.cache
* Note: If you receive «The file cannot be found» error, after executing the last command, then the «NTDLL.DLL» file is corrupted. (To fix the problem see the next methods…)

6. Remove the installation media and try to boot to Windows normally.
Method 4. RENAME the NTDLL.DLL File.
The BSOD «Process1 Initialization Failed» commonly appears because the NTDLL.DLL (C:WindowsSystem3ntdll.dll) file is damaged. The NTDLL.DLL file is used to create the BOOTCAT.CACHE file which is needed from Windows to boot normally.
To fix the damaged NTDLL.DLL file, proceed as follows:
1. Boot from the Windows 10 installation media and launch command prompt.
2. By using the BCDEDIT command (see the Steps 2 & 3 in the above method), find the Windows Drive Letter.
3. Navigate to the Windows drive, by typing: «Drive_Letter:» (without quotes & press Enter). *
* Note: Replace the Drive_Letter according to your case. In this example the Windows are located at drive «D», so we type:
- D:
4. Now type the following commands in order, to rename the «NTDLL.DLL» file:
- cd windowssystem32
- ren ntdll.dll ntdll.BAK

5. Remove the installation media and close all open windows to restart your PC.
6. After restart, Windows will display again the «Process1 Initialization Failed» error screen, but after 2 or 3 automatically restarts, it should start the «Automatic Repair» process.

7. Let Windows fix the issues, and when it’s done, Windows will start normally. *
* Note: If Windows still not start, see the next solution.
Method 5. Replace the NTDLL.DLL from Another Working Computer
Another method, to resolve the blue screen error «0x0000006B: Process1 Initialization Failed» in all Windows versions, is to copy the «NTDLL.DLL» file from another working PC. To do that: *
* Important: In order to apply the steps in this method, you must have access to another working computer, with the same Windows Version and Architecture as the installed Windows version and architecture (e.g. Windows 10 Home 64bit).
1. From another working computer, (with the same Windows version/architecture), copy the «NTDLL.DLL» file from the «C:WindowsSystem32» directory to the root folder of the USB Windows installation media.
2. Boot the PC with the «Process1 Initialization Failed» error, from the Windows Installation media and launch command prompt.
3. At command prompt, list all drive letters (drives), with this command:
- wmic logicaldisk get name

4. Now, by using the «DIR <Drive_Letter>:« command (e.g. «DIR C:», «DIR D:», «DIR E:», etc.), examine the contents of all the listed drives (except the drive X:), and find out which drive contains the ntdll.dll file and which drive contains the Windows folder.
e.g. As you can see in the screenshot below the ‘NTDLL.DLL’ file is located at drive E: and the ‘Windows’ folder at drive D:

5. Once you locate which drive contains the ‘NTDLL.DLL’ file, type its drive letter and : and press Enter. *
* e.g. At this example the ‘NTDLL.DLL’ file is on drive «E:», so we have to type:
- E:
6. Now give the following command to copy the «NTDLL.DLL» file from the USB to the «windowssystem32» folder of the Windows drive («D:» in this example). *
- copy ntdll.dll D:windowssystem32
* Note: Replace the Windows drive letter according your case.

7. When the file is copied, remove the installation media and close all the open windows to restart your PC.
Method 6. Reinstall Windows 10.
If none of the above methods solved your problem, I suggest to backup your files and to RESET your PC to its default state, or to perform a clean Windows 10 installation.
That’s it! Which method worked for you?
Let me know if this guide has helped you by leaving your comment about your experience. Please like and share this guide to help others.
If this article was useful for you, please consider supporting us by making a donation. Even $1 can a make a huge difference for us in our effort to continue to help others while keeping this site free:

If you want to stay constantly protected from malware threats, existing and future ones, we recommend that you install Malwarebytes Anti-Malware PRO by clicking below (we
do earn a commision from sales generated from this link, but at no additional cost to you. We have experience with this software and we recommend it because it is helpful and useful):