Sign in with Microsoft
Sign in or create an account.
Hello,
Select a different account.
You have multiple accounts
Choose the account you want to sign in with.
Can’t sync files between your computer and OneDrive? Try the following:
-
Make sure the OneDrive process is running. Look for the OneDrive icon on the right side of the menu bar.
-
Restart OneDrive. Select the OneDrive icon on the menu bar, then select Quit OneDrive. Use Spotlight to search for OneDrive and reopen it.
-
Update the OneDrive sync app for Mac.
See more solutions
Need more help?
Thank you for your feedback!
×
Содержание
- Проверить другие синхронизированные данные iCloud
- Могут ли серверы Apple быть перегружены?
- Если вы только что восстановили свой Mac
- Вы успешно вошли в систему?
- Тест с других устройств
- Проверьте ваше интернет соединение
- Если вы делитесь Интернетом с iPhone
- Обновите программное обеспечение Mac
- Зайдите в веб-версию, если она вам нужна срочно
- Аппаратное обеспечение почти исключено как проблема
Когда мы говорим об iCloud Drive, мы имеем в виду только Яблокооблачным хранилищем, а не другими службами, которые включает эта система, такими как синхронизация фотографий, календарей, заметок или контактов, среди прочего. Поэтому первое, что вы должны проверить, — это синхронизация службы iCloud на вашем Mac. Откройте, например, приложение Notes и убедитесь, что отображаются все синхронизированные аннотации. Если у вас есть другое оборудование Apple, например iPhone or IPad, вы можете более точно проверить его работу, создав новую заметку из одного из них и проверив, отображается ли она на Mac (это также работает и наоборот).

Могут ли серверы Apple быть перегружены?
Хотя сбои на этих серверах не являются обычным явлением и когда они возникают, они быстро решаются, все же вероятно, что это ваша проблема. Есть веб-сайт Apple, который точно ориентирован на отображение возможных сбоев в одной из своих систем. Вы можете получить к нему доступ, нажав здесь .
Если вы только что восстановили свой Mac
Эти сбои синхронизации iCloud Drive обычно возникают, когда вы только что восстановили свой Mac или запустили его в первый раз, независимо от того, было ли выполнено резервное копирование или нет. Следовательно, загрузка может занять немного больше времени, учитывая, что на вашем компьютере в фоновом режиме работает множество служб и процессов. Если являетесь Также есть много данных в iCloud, это Более того, чем обычно, эта загрузка несколько медленнее, чем ожидалось, и в зависимости от занимаемого пространства она может занять несколько часов.
Вы успешно вошли в систему?
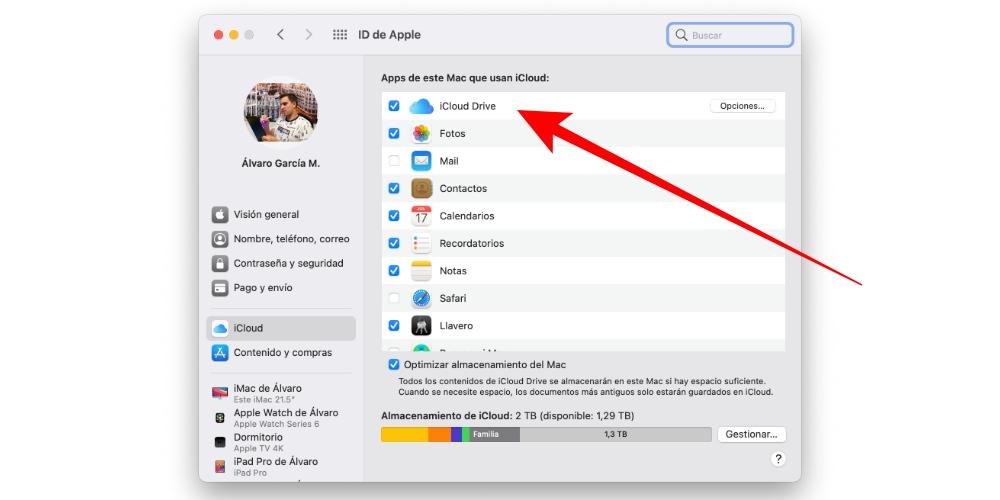
Это может показаться абсурдным, но, возможно, вы не вошли в iCloud или не активировали соответствующую вкладку, которая включает iCloud Drive. Поэтому вам нужно будет пойти в Системные настройки> Apple ID> iCloud и убедитесь, что эта вкладка правильно активирована. Если вы хотите исключить, что процесс был заблокирован, вы можете перезапустить его, снова деактивировав вкладку и снова активировав ее.
Тест с других устройств
Папка iCloud Drive может отображаться в Finder пустой, что не обязательно означает, что она пуста. Поэтому мы рекомендуем вам перейти на другое устройство Apple и получить доступ к папкам, которые у вас есть в облаке, и добавить туда документ, папку или файл, чтобы увидеть, появляется ли он на Mac. Рекомендуется, чтобы эти новые данные, которые вы храните, занимали мало места для быстрой синхронизации. Если вы видите, что он не загружается на вашем Mac, попробуйте сделать наоборот, добавив файл со своего компьютера и посмотрите, появляется ли он на другом устройстве.
Проверьте ваше интернет соединение
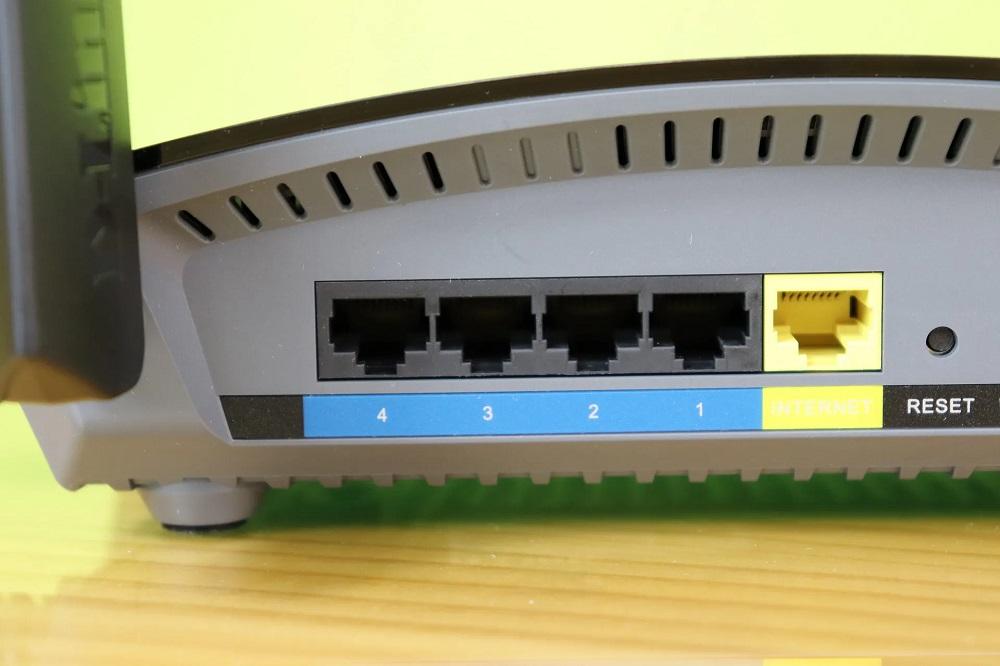
Для загрузки файлов и документов из iCloud Drive требуется подключение к Интернету на вашем Mac через кабель или Wi-Fi. Мы советуем вам провести тест скорости, чтобы определить, хорошее у вас соединение или нет. Если вы обнаружите, что он медленнее, чем обычно, и вы используете кабель, вы должны убедиться, что он правильно подключен к роутеру и Mac. На самом деле, желательно попробовать его поменять, если у вас есть другой.
 Если вы подключены по Wi-Fi, убедитесь, что вы находитесь в правильной сети. Вы также можете попробовать выключить маршрутизатор на несколько секунд и снова включить его, чтобы позже проверить, есть ли у вас лучшее соединение. О любых других инцидентах, связанных с плохим подключением к Интернету или его отсутствием, необходимо сообщать в компанию, предоставляющую услугу, чтобы ее специалисты могли решить проблему.
Если вы делитесь Интернетом с iPhone
Если точнее, если подключение к Интернету на вашем Mac связано с обменом данными с iPhone, вы можете столкнуться с проблемой. Мы понимаем, что если вы используете это подключение к Интернету, это связано с отсутствием сети Wi-Fi в том месте, где вы находитесь, и хотя это правда, что вы можете просматривать и получать доступ к множеству онлайн-сервисов с помощью этого подключения, будет определенное действия, которые вы, возможно, не сможете выполнить, потому что iPhone не позволяет сохранить данные о ваших тарифах. Поэтому синхронизация данных из iCloud Drive и iCloud в целом может быть медленнее или даже невозможна с этим подключением.
Обновите программное обеспечение Mac
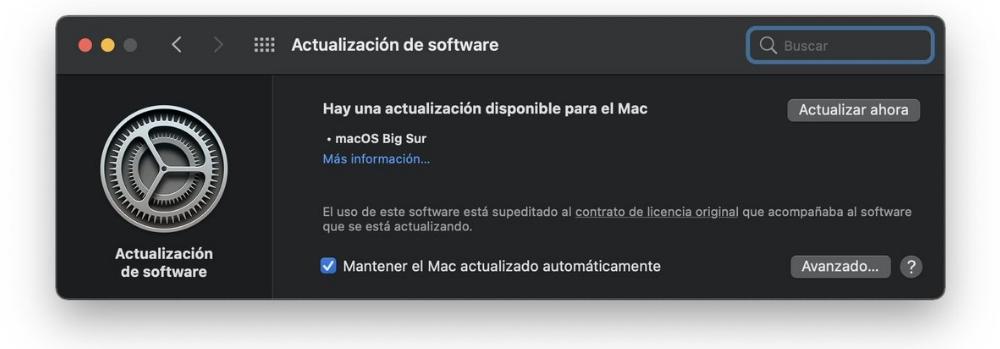
Хотя iCloud Drive должен синхронизироваться, даже если вы не используете последнюю версию macOS, правда в том, что в программном обеспечении, которое его предотвращает, может быть какая-то проблема. Поэтому очень важный совет, который следует иметь в виду при этой и многих других проблемах, — обновить устройство. Перейдите в Системные настройки> Обновление программного обеспечения и проверьте, есть ли более новая версия операционной системы, которую вы можете загрузить и установить. Если вы используете очень старую версию, возможно, вам придется перейти в Mac App Store и на вкладку «Обновления», чтобы найти ее.
Зайдите в веб-версию, если она вам нужна срочно
На этом этапе, если вам не удалось решить проблему и вы убедились, что все работает правильно, вам нужно только дождаться полной синхронизации данных и получить к ним доступ. Понятно, что это бремя может стать отчаянным, но другого нет, и как бы вы ни отчаялись, оно это наиболее распространенное решение в большинстве случаев . Если вам нужен немедленный доступ к файлу, вы можете посетить веб-сайт iCloud из своего браузера (предпочтительно Safari) и управлять им оттуда. К сожалению, у этой веб-версии есть некоторые недостатки, такие как невозможность загрузки полных папок, если вы не выберете все файлы, так же как вы не сможете их загрузить. Однако это может помочь вам избежать неприятностей.
Аппаратное обеспечение почти исключено как проблема
Если вам не удалось решить проблемы синхронизации даже в ожидании завершения синхронизации, у вас не будет другого выбора, кроме как обратиться в службу поддержки Apple, чтобы обсудить эту проблему и запросить решение. Странно, что это отказ компонентов компьютера, потому что обычно они не проявляют себя таким образом. Тем не менее, это будут собственные специалисты компании, которые могут более точно заверить вас в этом и даже могут попросить отнести Mac в службу технической поддержки. Помните, что вы можете связаться с компанией с ее сайт технической службы .
Summary: Outlook sync issues such as Outlook for Mac not Syncing with Exchange Server are common. This post provides the reasons behind these issues and different solutions to fix them. It also provides an advanced software you can use to convert Outlook’s OLM data into an importable PST file if you cannot fix Outlook for Mac Sync Errors.

Contents
- Reasons Behind “Outlook for Mac Not Syncing with Exchange Server” Issue
- Solutions to Fix Outlook For Mac Sync Errors
- Conclusion
Outlook for Mac users often report issues such as “Outlook for Mac Not Syncing with Exchange Server” or “Outlook 2016 for Mac not connecting to Exchange”. These issues usually occur when Outlook’s connection with the Exchange server is disrupted or the Outlook database is corrupted.
Reasons Behind “Outlook for Mac Not Syncing with Exchange Server” Issue
- Outlook for Mac is running in offline mode
- No connectivity with Exchange Server
- Misconfigured Outlook for Mac settings
- Missing important Outlook for Mac updates
- Corrupted Outlook database
Tip: Want to instantly save Outlook’s OLM file as importable PST file? Use Stellar Converter for OLM to convert all OLM items such as emails, attachments, contacts, etc. into a portable PST file. It’s easy to use and supports Microsoft Outlook 2019, 2016, 2011 for Mac.
Solutions to Fix Outlook For Mac Sync Errors
There are different ways to fix the “Outlook for Mac Not Syncing with Exchange Server” issue. These are:
Method #1: Ensure Outlook isn’t Set to “Work Offline”
If you face the Outlook for Mac not connecting to Exchange server error, first check if Outlook is running in offline mode. For this, open the Outlook menu and see if Work Offline is enabled. If it’s enabled, click it to disable the feature.

Method #2: Verify Outlook is Connected to Exchange Server
Often, the underlying cause of Outlook sync issues is Outlook for Mac not connecting to Exchange server. Outlook for Mac must have a stable connection with the Exchange Server to perform synchronization. To verify this connection, follow these steps:
1. Open Outlook and Under Tools ribbon, click Accounts.

2. Find the Exchange account in the left pane. If the indicator icon along the account is orange, there is some problem with the Exchange connection. You can contact your Exchange server admin to re-establish the connection.

Method #3: Update Outlook for Mac
If you’re facing problems such as Outlook 2019 or Outlook 2016 for mac not connecting to Exchange, the application might be missing critical updates. To update the application, follow these steps:
1. Launch Outlook and go to Help > Check for Updates.

2. In the Microsoft AutoUpdate wizard that pops up, select Automatically. Also, select an appropriate option in Check for Updates section.

3. Click Check for Updates button to download and install the latest updates.
Method #4: Rebuild Outlook for Mac file (Outlook for Mac 2011)
If there is a problem with Outlook for Mac database, you may observe the issue of Outlook for Mac not syncing with Exchange Server.
- Close Outlook for Mac and other Microsoft Office applications.
- Locate Microsoft Database Utility. Its default location is Applications/Microsoft Office 2011/Office.
- Launch the utility and select the identity of the database you want to rebuild. Then click Rebuild.
Note: When Microsoft Database Utility rebuilds a database, it also replicates the database to create a backup. So, make sure your system has enough free space (the free space should be equal to or more than the space taken by the current database).
Note: This method applies to Outlook for Mac 2011 only. In newer Outlook for Mac versions, you can’t manually repair the Outlook database as the updates are performed automatically.
Method #5: Clear Cache
If synchronization between the Exchange server and Outlook for Mac is interrupted, the local system’s cache may have incomplete files. In that case, you need to fix Outlook for Mac sync errors by clearing the cache. For this, follow these steps:
1. In the left-side panel in Outlook’s main interface, open the folder list.
2. Right-click the folder which is causing the problem of Outlook for Mac not receiving emails. Then click Properties.

3. Under the General tab, click Empty Cache, and then click OK.

Following these steps, Outlook will clear the cache and re-download emails from the server.
What if These Methods Fail?
If you cannot fix Outlook For Mac Sync Errors with the above methods, you can use an OLM to PST converter such as Stellar Converter for OLM to export Outlook for Mac data. You can use this tool to convert Outlook for Mac’s OLM file into a PST file and import this PST in Outlook for Windows. Alternatively, you can save important emails from OLM in MSG or EML formats.
Stellar Converter for OLM is an advanced OLM to PST converter tool that offers the following features:
- Converts all OLM items such as emails, attachments, contacts, etc. into a PST file
- Supports MS Outlook 2019, 2016, and 2011 for Mac
- Converts emails into PST, MSG, and EML
- Offers free preview of converted OLM mailbox items
Conclusion
When Outlook users face issues such as Outlook for Mac not syncing with Exchange Server, Outlook 2016 for Mac not connecting to Exchange, etc. it’s usually because of bad server connection, corrupted database, or wrong Outlook settings. In this post, we have covered the most straightforward solutions to all these problems. Still, if you cannot fix Outlook for Mac sync errors, you can save OLM file data using OLM to PST converter software. It’s the safest and easiest way to save your important emails, contacts, calendar entries, etc. as a portable/backup PST file.
About The Author
Abhinav Sethi
Abhinav Sethi is a Senior Writer at Stellar. He writes articles, blog posts, knowledge-bases, case studies, etc. for different technologies. He also has a keen interest in digital forensics and helps forward-thinking companies fight different threats with apt solutions.
Best Selling Products

OLM to PST Converter
This advanced OLM to PST converter tool
Read More

MBOX to PST Converter Tool
An efficient tool to convert MBOX to PST
Read More

EDB to PST Converter Tool
Stellar Converter for EDB converts offli
Read More

GroupWise to PST Converter
Stellar Converter for GroupWise is a pow
Read More

Before going in-depth, we first should know the reasons that cause this fatal error in iOS and windows. We all know the importance of Google drive in taking care of our files by generating a backup for these files to keep them al safe from any loss. Anything causing an error in this facility leads us to the trouble, and we see a fatal error reporting us the error 400. Google sign-in issue is an occasional error. The particular other reasons that can cause this error are:
- Windows firewall blockage
- Invalid drive path
- Interference of antivirus software
- Part 1. Fixing the “Backup and Sync Has Encountered A Fatal Error” on macOS Catalina
- Part 2. Fixing Google Backup and Sync Not Working In Windows
- Part 3: Windows/Mac Tip: How to Recover Data If the File on Your Computer Is Missing
Part 1. Fixing the “Backup and Sync Has Encountered A Fatal Error” on macOS Catalina
We are here to share some of the methods that will help you fix these issues that keep you from generating the backup or sync your files with Google drive. These methods are the simple ones and will help you get rid of all the backup and syncing issues. Without any further delay, let’s get started!
Fix#1. Type Commands into Terminal
In this procedure, you have to follow the following simple steps to lead you to the issue resolution. Let’s start!
- Uninstall “back up and sync from Google” from the application settings and then download it again using the mentioned link: https://www.google.com/intl/en-GB_ALL/drive/download/backup-and-sync/
-
The next step is to open the terminal application, type the commands, or use iTerm.

- After typing every command that I’m going to tell you, you have to click return command so that you can run the command.
- Reach the terminal window and type “cd ~/Library/Application Support/Google”.
- The next command is to make the directory for Google drive, and you have to make sure that it has all the permission sets. The command is “sudo mkdir -p Drive; sudo chmod 700 Drive”.
- If the application tells you to enter the password, you will have to enter the administrator or user password of the device in that place.
- The next step to make sure that you own the Google director you just made. You can do it by typing your username there.
- Sudo chown “your username here” Drive.
- When you follow the whole process carefully, your back and sync will start working as intended. And if it is still not working, you should consult Google support to resolve the issue.
Fix#2. Update to the Latest Google Drive Version
Another thing that can cause trouble in backup and sync from Google is that you may have been using the outdated version of backup and sync. In that case, the only update will be enough to resolve the issue.
-
Hit the link to download the update: https://www.google.com/drive/download/
- The main thing is that you must read the term and conditions before hitting “agree and continue”.
- When the downloading ends, you have to open installbackupandsync.exe.
- Shift “backup and sync” to the application folder.
- Open “backup and sync”.
- If you see a notification, hit “open”.
- The next step is to log in to your Google account with the same credentials you have made an account.
- Do your desired sync settings and proceed by clicking “next”.
Fix#3. Contact Google Drive Support If Backup and Sync Still Fail to Open
Google support is especially dedicated to helping you with the issues you face and getting rid of. If you want to talk to us on call, you have to follow the following steps.
- In the “backup and sync” screen top left side, click on the menu to access the option “contact us”.
- Then you have to select the issue that you want help about.
- Choose the contact option.
Part 2. Fixing Google Backup and Sync Not Working In Windows
Fix#1. Reinstall Google Backup and Sync
Reinstallation of this backup and sync utility may also save a lot of underlying issues that you are unable to configure and eradicate. The old or corrupted version may also cause this error, and in such cases, reinstalling the right and the latest version is the best solution to this issue. For this, uninstall the currently downloaded version by going to Apps in the laptop settings.
You have to select the app that you want to uninstall.
After following all the steps carefully, you have to check whether the issue is resolved or not.
Fix#2. Run Backup and Sync as Administrator
Assigning the administrator rights to backup and sync Google can also resolve the issue. To do this, follow the steps given below.
- Open the backup and sync app properties.
- In the next window, you have to click the compatibility tab.
-
Click on the option “run as administrator”.
After these steps, you have to check if the problem is resolved or not.
Fix#3. Restart Backup and Sync Application
Restarting backup and sync Google can also eradicate the issue as follows:
- Tap the “backup and sync” icon.
- Click on the three dots menu.
-
You have to choose the option “Quit Backup and Sync”.
After doing this, the app will stop working, and you can restart the app by clicking on the desktop icon of backup and sync.
Fix#4. Disable Firewall/ Antivirus Programs:
Disabling firewalls and third-party antivirus software can also solve the working error of backup and sync. If you tried all the above methods and your backup and sync are still not working, you can use it to resolve the issue.
Windows/Mac Tip: How to Recover Data If the File on Your Computer Is Missing
If you accidentally removed the file from your device, you can get the data back using the software utility named Tenorshare 4DDiG for Windows Data Recovery. This tool will help you successfully recover the lost data even if the file is missing on the computer. Want to know how? Let’s learn how!


-
Select Files Location:
In the main screen, you have to give the location of the deleted file, if you don’t know, don’t worry, type “whole computer” to scan the entire computer.
-
Scan and Preview:
The next step is to start scanning, and after scanning, you have to preview the files that you want to recover before recovery.
-
Restore Deleted Files:
The next step is to start recovering the files that you want back.Check the files that you want to recover from the deleted file section. We recommend you not to save these recovered files at the same destination where these files were deleted.
Save somewhere else in the computer to keep them safe from further loss in disk overwritten and permanent data loss.
Final Words:
We know that backup and sync issues are common issues that almost all the Google backup and sync users have faced once. In the past, solving this issue required much effort, but now, you can do it yourself. It is quite simple to remove the issue from your device. All the methods for resolving the backup and sync, not working issues, are tested and qualified.
So, you can use them with the full confidence that you will get the desired results. If you have been getting worried about this issue on your laptop, put a full stop to your worries. And give a try to any of the methods we mentioned above. We recommend you to use Tenorshare 4DDiG for Windows Data Recovery that you will get rid of this backup and sync not working issue.
Recently I made the switch from Google Gmail to Microsoft Outlook for my personal emails. This migration also meant I had to move over all of my existing emails from Google to Microsoft. In order to migrate the whole mailbox from one account provider to the other, I used Microsoft Outlook for Mac device running the latest macOS operating system and Outlook 16.6 (latest version at the time of writing this blogpost).
Unfortunately, some of the mails that were migrated showed up in the Sync Error dialog and reported some kind of error message. There error messages contained the information about the mail (the subject line), the time at then the error in the synchronisation happened, the error message itself, the details of this error message and some kind of cryptic error code. Here are some examples of error messages that I have observed:
- Error: Could not synchronise record. Operation would change object type, which is not permitted. Error code: -19703
- Error: Could not synchronise record. ChangeKey is required for this operation. Error code: -19928
- Error: Could not synchronize record. Property is not valid for this object type. Error code: -19803

Solution 1: empty the cache
In my case, the migration of my mails meant that over 100.000 emails were transferred from one mailbox to another in a matter of hours. The Outlook program has to orchestrate the migration and there is always a chance something is going wrong with the cache of the Outlook mail program. You should try at least to empty the cache and see if the issue remains
- Ensure you don’t work in Off-line mode first.
- In the navigation pane, right-click the Exchange folder for which you want to empty the cache, and then click Properties.
- On the General tab, click Empty Cache. The folder will be emptied, so be prepared because Outlook will automatically download all the email items again from the Exchange server.

Try also to restart Microsoft Outlook at this point (fully quit the application and open it again).
Solution 2: Delete these items manually
Typically, the affected items are containing special characters, or they are out of office (automatic replies), or RSVP calendar replies or any other special types of email which blocks the synchronisation process.
In this case, given the number of emails that fail to synchronise, it may be advisable to manually look up these emails and remove the manually. Also ensure to remove them from the bin / deleted items folder because the error message may still persist otherwise.
Ensure that there is proper internet connection and try to sync your journal again. Check Google Drive status on this website to see if Google Drive is facing any technical issues. If the problem continues to persist, please check for a sync error code.
To check for a sync error code, go to Settings > Cloud Services > tap on your Cloud account > in «Last Sync Status», you should see “Unsuccessful” with an error code. Alternatively, go to your Journey’s Main Screen > tap on the Cloud icon. Additionally, please check if your entries are already synced with Google Drive via our website at Journey.Cloud.
Should you require any further assistance, please contact us with the error code and Sync Error Log via Live Chat.
A100
Error in retrieving UUID of the Google account. Re-login and try again.
A101
Error in fetching token. This is a Google Drive error. Please try again later.
A102
Fail to fetch toBeDownload file info from ToBeDownload Table of core data. Re-sync and try again. If it still fails, reinstall the app.
A103
Fail to fetch file list from Google Drive using GTLRDrive_FileList query for ToBeDownloadTable. This is a Google Drive error. Please try again later.
A104
Fail to download JSON file from Google Drive. Google Drive error or connection timeout error. Please ensure that there is good internet connection.
A105
Fail to download Thumbnail file or FullMedia file. Google Drive error or connection timeout error. Please ensure that there is good internet connection.
A106
Fail to download media file. It could be Google Dive error or error in the date of upload of the media file. Google Drive error or connection timeout error. Please ensure that there is good internet connection.
A107
Error in thumbnail link URL format. Re-sync and try again. If it still fails, contact us via Intercom.
A108
Error in saving profile picture. Google Drive error or connection timeout error. Please ensure that there is good internet connection.
A109
Fail to fetch profile info from Google Drive. Google Drive error or connection timeout error. Please re-login and try again.
Prior to the re-logging in of your Journey account, please check to see if your data has been backed up or synced.
A110
Fail to get file resource from Google Drive. Google Drive error or connection timeout error. Please ensure that there is good internet connection.
A111
Fail to fetch file list from Google Drive. Google Drive error or connection timeout error. Please ensure that there is good internet connection.
A112A
Fail to fetch changes list from Google Drive. Google Drive error or connection timeout error. Please ensure that there is good internet connection.
A112
Error in downloading changes list from Google Drive.
Read Resolve Empty / Corrupt Entry.
A114
Error in retrieving the email account. Re-login and try again.
A115
Google Drive error code 400 (bad request). Re-login and try again.
A118
Fail to delete file from Google Drive. Google Drive error or connection timeout error. Please ensure that there is good internet connection. Re-sync and try again.
A119
Unable to connect to the internet. Please ensure that there is good internet connection. Re-sync and try again.
A120
Fetch file from Google Drive during the file upload process. Google Drive error. Please ensure that there is good internet connection. Re-sync and try again.
A121
Error in the response of files creation. This is a Google Drive error. Please ensure that there is good internet connection. Re-sync and try again.
A122
Duplicated entries.
Read Resolve Duplicated Entry.
A123
Fail to upload JSON file. This is a Google Drive error. Please ensure that there is good internet connection. Re-sync and try again. If it still fails, check if the Google Drive has exceeded the storage space limit.
A124
Fail to upload media file. This is a Google Drive error. Please ensure that there is good internet connection. Re-sync and try again. If it still fails, check if the Google Drive has exceeded the storage space limit.
Updated on: 11/06/2021
Как исправить ошибку синхронизации календаря iCloud 400 на вашем Mac или устройстве iOS (02.09.23)
Что ваш компьютер не может делать или управлять? Вы можете, например, создавать и управлять календарями практически для любой области вашей жизни, используя Календарь в iCloud, где вносимые вами изменения автоматически отображаются везде, где вы настраиваете iCloud для Календаря.
Иногда, однако, все могло пойти не так, и могут возникнуть ошибки синхронизации. Вот несколько исправлений распространенных проблем Mac, например, что делать, когда Календарь возвращает ошибку 400.
Что такое iCloud Calendar?
Функция календаря iCloud — отличный инструмент для занятых людей. Вам даже не нужно подключать устройство к компьютеру, чтобы поддерживать календари в актуальном состоянии — изменения отображаются в приложении «Календарь», если вы используете iPhone, iPad, iPod touch или Mac. Изменения отображаются в Microsoft Outlook, если вы являетесь пользователем Windows.
Чтобы использовать Календарь iCloud, просто перейдите на icloud.com/calendar и затем войдите в систему со своим Apple ID (если вы еще не вошли в систему ).
Если вы не видите Календарь на iCloud.com, значит, у вашей учетной записи есть доступ только к веб-функциям iCloud. В этом случае вам необходимо настроить iCloud на вашем Mac или устройстве iOS. Для этого выполните следующие действия:
- На Mac : выберите Меню Apple & gt; Системные настройки . Нажмите iCloud и введите свой Apple ID и пароль. Включите функции, которые хотите использовать.
- На устройствах iOS : перейдите в Настройки & gt; [ваше имя] & gt; iCloud (или Настройки> iCloud). Введите свой Apple ID и пароль и включите функции, которые хотите использовать.
Знаете ли вы, что вы также можете делиться своими календарями и приглашать других людей на мероприятия? Выполните следующие действия, чтобы поделиться календарями в iCloud или пригласить людей на мероприятие.
Для работы с календарем iCloud требуется рекомендуемый браузер. Для пользователей Apple, вот некоторые минимальные системные требования:
- < 1xMac
- macOS Mojave
- iTunes 12.7
- Safari 9.1 или новее, Firefox 45 или новее или Google Chrome 54 / более поздняя версия
- iWork для Mac (Pages 5.5 или более поздняя версия, Numbers 3.5 / более поздняя версия, Keynote 6.5 / более поздняя версия
- iOS 12
- iWork для iOS (Pages 2.5 или новее, Numbers 2.5 / новее, Keynote 2.5 / новее)
Ошибка синхронизации календаря iCloud 400
Однако это не всегда гладко. Пользователи Mac, использующие iCloud на своих машинах, также могут столкнуться с ошибкой номер 400. Если вы впервые сталкиваетесь с этим, знайте, что ошибка указывает на невозможность синхронизации с вашими календарями iCloud, что мешает вам использовать приложение «Календарь» на вашем Mac.
Обычно это происходит, если вы открываете приложение «Календарь» на Mac и видите сообщение об ошибке «Не удалось выполнить запрос учетной записи iCloud». Сервер отвечает «400» на операцию CalDAVUpdateShareesQueuableOperation , что означает, что ваш Mac не может получить доступ к синхронизированным календарям iCloud в вашей учетной записи.
Узнайте, как исправить эту распространенную ошибку. в macOS Sierra / Mac OS X 10.10 (Yosemite) / 10.9/10.8/10.7 и ниже, в основном путем перемещения двух файлов календаря из одной папки в другую на вашем Mac. Вот шаги:
Примечания и рекомендации

iCloud быстро становится очень важным инструментом для онлайн-хранения данных, обеспечивая доступ к вашим данным в любой точке мира. Однако безопасность всегда является важным аспектом, поэтому вы должны предпринять серьезные шаги, чтобы ваши данные в iCloud были в безопасности. Для этого включите двухэтапную аутентификацию iCloud — выполните следующие действия:
- Оставить доверенное устройство как Mac :
- Перейдите в Меню Apple & gt; Системные настройки .
- Перейдите в iCloud & gt; Сведения об учетной записи & gt; Раздел безопасности .
- Нажмите Двухфакторная аутентификация .
- Оставить доверенное устройство, например iPhone, iPad или iPod Touch:
- перейдите в Настройки
- Нажмите на iCloud & gt; Apple ID .
- Введите пароль Apple ID & gt; Пароль & amp; Безопасность .
- Прокрутите вниз и нажмите Двухфакторная аутентификация .
С помощью этих шагов вы можете добавить или обновить доверенный номер телефона для своего Apple. Я БЫ. Эта функция безопасности позволяет получать проверочный код на доверенном устройстве и доверенный номер всякий раз, когда вы входите в систему на новом устройстве или в браузере.
Не пренебрегайте работоспособностью вашего Mac или устройств iOS. Поддерживайте бесперебойную работу календаря iCloud, регулярно оптимизируя свою машину для достижения максимальной производительности с помощью надежного инструмента, такого как приложение для ремонта Mac .
Вы когда-нибудь сталкивались с этой ошибкой? Расскажите о своем предыдущем опыте! Если вы впервые видите это, удачи, и мы надеемся, что вышеприведенное решение сработает для вас!
YouTube видео: Как исправить ошибку синхронизации календаря iCloud 400 на вашем Mac или устройстве iOS
02, 2023