Hey acayon, and everyone else having this issue. I also have a mid 2007 MacMini 2,1 1.73 GHz with (upgraded) 4 GB 667 MHz DDR2 SDRAM and Intel GMA 950 64 MB graphics. It is on the latest lion version with all combo updates and security patches or whatever (there is nothing in the updates left to update) and cannot get it to install, it came with . However I did follow 13,14,15 based on the steps here https://blog.christophersmart.com/2009/12/22/does-your-mac-have-64bit-efi/ it shows UFI32. I am under the impression that the core2 duo is a 64bit cpu as well, but just stating that even following those steps did not produce anything — you may be right to skip those steps — i honestly don’t know.
Before i go on, i’ll mention i’m using a separate partition on the same disk and no USB.
My outcome is a bit different though than others stating a loading bar and some store of crossed out symbol, for me it just hangs on the grey background apple icon, if there is a loading bar its gone faster than i can see it, and i have no crossed out line thing.
Further, I tried both boot.efi variants (black/grey). First I went with black because the site stated the legacy grey was for macpro but again, both result in a gray background with dark grey apple logo (thats it, nothing more) and it just stays there forever. What may be of interest however is that when i used the black boot.efi it did start as a white on black apple logo for less than a second, then reverts to the dark grey on light grey logo.
I tried the bless command too, and got the same message. When i enter the installer partition in safe mode, all i get is a couple of lines displaying my device UID. and it just sits there.
There are a couple of things that were a bit confusing, If anyone would like to answer these I’d appreciate it!
— Is the black / grey boot.efi required to match that of the original boot color? or is it just preference.
— The instructions in most place state that operations are to be done to the installation device, and I was curious (even though the example command states install device in brackets) that i am not supposed to apply these things to the current hard drive — also I did not follow the step for RestoreHD, If its neccisary to get it to install then that may be my issue.
— The instructions state to apply the same text edit to both plists, and states before hand that these are the only things that should be edited, so I’d like some clarification that we are not supposed to edit the second array in the PlatformSupport.plist that looks to have model (not board-id) values in it? Also if it could be clarified that we are supposed to CHANGE the last entry in the list and not add it to the list as suggested in a prior step right?
example: PlatformSupport.plist
<plist ..>
<dict>
<key>SupportedBoardIds</key>
<array><string>Mac-….</string>..</array>
<key>SupportedModelProperties</key>
<array><string>MacPro#,#</string>..</array>
</dict>
</plist>
I am using a july 2016 el capitan app file which appears to be the latest version, but just for the purpose of seeing if we are all running into the same issue because of the source — i didn’t acquire this app file from the mac app store directly. I am guessing/taking a shot in the dark that the issue everyone else is running into at the same time derives from either the latest version or possibly that we are all getting it from a popular source.
Also, just to follow up on MacPostFactor, I do get error code 1 as well. And as mentioned its stuck at that same 97.something percent.
I’m going to try and locate an older version of el capitan app, (perhaps one that has a «boot» file on it that is apparently missing with the bless call?) I am curious though if i should be using the EFI32 boot or not now though.. Is there any kind of a model number / board id to EFI32/64 lookup?
Thanks guys
Also, for further verification here is the MD5/SHA1 hashes..
Code:
openssl md5 "/Applications/Install OS X El Capitan.app/Contents/SharedSupport/InstallESD.dmg"

06f6e4a7b1996c542cbda28eb5f7a8f2

openssl sha1 "/Applications/Install OS X El Capitan.app/Contents/SharedSupport/InstallESD.dmg"

7739e3f62080000da5d28efa689c53976112a262
update
I’ll be trying 10.11.5 next, just to see if its 10.11.6 that is causing the issue. I’ll try MacPostFactor and let you all know how it goes, then the longer version afterwards. Thanks
update
10.11.5 with macpostfactor fails as well.
I’ll try the other method next.
Decided to instead try macpostfactor with 10.11.4 first, i’ll update then.
update
10.11.4 does not work either. I’m going to change tactics and get something to make the first method automated.
update
Just a quick note, about something that I could be completely wrong about.. but it seems like the 97.75 % error could be related to you having the log zip on your desktop. When i delete the zip, it gets much further before failing. I noticed this after trying v2.0.0 and noticing that the logs were printing v2.0.1, so i figure that when the log file exists ( or i dunno, maybe for some reason a app had the file handle open or something and it was unwritable..? ) no attempt is made without first removing it (like it checks for it at that percent..), So basically all my results from testing / extracting/ wasting time with 10.11.5 and 10.11.4 seem to have been for no reason, since the log literally wasn’t updating.
So, now that I’ve ran into that. I’ll be retrying 10.11.5. 10.11.6 still fails (for some reason, it does not generate any log zip file however) but at least it ran for a couple of minutes before failing. It could be that i need more disk space or something, either way it doesnt look good for 10.11.6 (if it is even a version related issue). yea going to try 10.11.5 on macpostfix and if it fails again, I will actually do the manual method again and verify.
I hope these long forum posts are not against the rules or anything, but yea I’ve read elsewhere there could be an issue with the fact that I installed the security update(s) on lion. So if 10.11.5 does not work through both methods, I’ll do a clean restore, get back to lion, attempt it at 10.7.2 then if that does not work, update to full blown 10.7.5 avoiding the the security patches, then if that does not work, well I’ll probably give up on el capitan and target yosemite. Trying to remain positive though!
update
Ok, so with the 10.11.5 install app and MacPostFactor 2.0.1 I was able to make an external installer (the second option on the right bottom). Going to try installing from that now.
-
#1,551
MAC POST FACTOR v.2.0.1 ERROR code 1, unable to create bootable OS X Yosemite usb. «There are not log files on your desktop, something unknown happened!!»
I’m on a 2013 Macbook Air 4Gb RAM Mac OS X 10.15 Catalina, in order to create a bootable Yosemite USB for my Macbook3,1.
-
#1,552
Thanks for the advice! I’ve been doing this for the fourth day, as soon as I found the right image of the system and was able to install. It took a lot of attempts.
[automerge]1573954674[/automerge]
But working with graphics is very difficult. New Photoshop is very slow even with a video driver, and in general the whole system is very slow because of the small memory on an already weak video card (
Good day sir! Where did you get your Yosemite 10.10.5 image?
-
#1,553
Hi all!
I’ve made all steps in #2 and got bootable image of Yosemite on the flash drive.
But unfortunately when the installer boots, it says that Yosemite is already installed on my mac. And the only way is to reboot the system.
Have you any ideas how to fix the problem?
Macbook 4,1
board-id Mac-F22788A9
The macOS extractor didn’t help, I get non-bootable image, my laptop just ignores the flash drive.
-
#1,554
Got handed an Imac 5,1 the other day and installed Yosemite on it to see what would happen, using this guide. Install was flawless, graphic performance was non-existent, but I see there are some fixes here in the forum for that, but my question is, I have two matching apple-installed 2 GB RAM cards in the machine, but under Yosemite, it reports only 3 GB.
I’ve trawled this forum looking for an answer, but wondering if that’s a known bug, or if it’s really not seeing the 4GB installed?
Thanks
—edit: found the answer. only 3GB is supported
Last edited: Jan 17, 2020
-
#1,555
I just moved my original question with the kernel panic log to a new post in the SFOTT thread as it was SFOTT related. As far as I see, people on 10.7 seem to have success with MCPF or MacExtractor. What is the best method in 2020 to get 10.10 running on my MacBook2,1?
Last edited: Jan 14, 2020
-
#1,556
Installed the kexts for x1600, set the flag in single user mode. rebooted, now have no background screen or dock. Formatted, reinstalled, re-installed the kexts, same issue. Anyone ever get past this?
Thanks
-
#1,557
Hello,
I’m putting this out there because I can find no useful information online. From my understanding, to run Mountain Lion on an unsupported Mac with 64-bit EFI, you need a patched boot.efi that supports booting the 64bit kernel (I know this is not required on Mavericks and newer). For an unsupported Mac with 32-bit EFI, you need a patched boot.efi as well, but a different one. I have tried using many different copies from multiple patchers with varying degrees of success. But there’s one thing I haven’t been able to find: Where the files come from. If anyone can track down two actual working files *and* where they come from (MacRumours post, GitHub repo, anything) I’d appreciate it. If you’re a developer of some kind of patched boot.efi file, please contact me directly. Thank you.
Edit: Found out they were compiled from Piker Alpha’s macosxbootloader repo on GitHub. Still having issues with them but I have located the source of them at least!
Last edited: Mar 7, 2020
-
#1,558
Hi guys, can u help me with my Mac book 4,1 early 2008…got my audio working with x3100 kext from the topic , but i tried everything to get my acceleration to work, but nothing, can u help me to find the correct kexts to use to get my card recognized? I have Montior 6mb in system info…thank you….I’m on Yosemite 10.10.5
Everything works except my video card
-
#1,559
Hello, I have the same problem of kayaman80 but with ATI X1600 (graphic acceleration doesn’t work on Mavericks) . I can’t find the 64bit kexts. Do they exist ?
-
#1,560
i think the thread is dead
-
#1,561
i think the thread is dead
Ok, I’m going to create a new one…
-
#1,563
Any news about? or, can u suggest me the best os for this mac, thank you
-
#1,564
No news. I gave up for now. May be I’ll try later. For your computer, Mactracker says : maximum os possible is 10.7.5.
-
#1,565
Hello, I have the same problem of kayaman80 but with ATI X1600 (graphic acceleration doesn’t work on Mavericks) . I can’t find the 64bit kexts. Do they exist ?
I would say, read the first post (updatedd recently) and do some research. X1600 is fully working until 10.8.5 after that workarounds are possible, sound and graphics seem fixable at least partly (but I’m currently looking into that myself) Google x1600 Kexts Yosemite or El capitan.
-
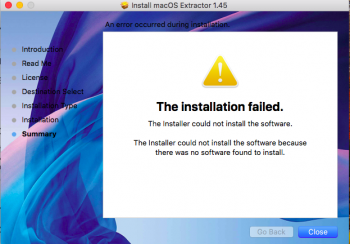
#1,566
I have a problem with MPF, when show the ‘Skip ad’ (I use 1.01 versión because with the 2.01 don’t work). And I have error with MaOs Extractor too.
I tried move Skip Ad button to safari but don’t work
Another day I created usb (With MPF 1.01) but I lost the USB and it worked, why now no?
Help please, and sorry my bad English, I am from Spain.
-
#1,567
I have a problem with MPF, when show the ‘Skip ad’ (I use 1.01 versión because with the 2.01 don’t work). And I have error with MaOs Extractor too.
I tried move Skip Ad button to safari but don’t work
Another day I created usb (With MPF 1.01) but I lost the USB and it worked, why now no?
Help please, and sorry my bad English, I am from Spain.
If you are in the same boat as me, on a really old OS (10.7 Lion), you will need specially-compiled browsers that understands modern web. I use Firefox Legacy with great success (https://parrotgeek.com/fxlegacy.html).
I also started trying to upgrade my Mac OS X Lion on my MacBookPro2,2 to a newer OS. I had problems with MacOS Extractor where I only saw a small stop-sign above the Apple logo when trying to boot from USB. I switched to use MacPostFactor (2.01) and I managed to go into main installation menu and is installing it now. Will report back if it truly works.
-
#1,568
If you are in the same boat as me, on a really old OS (10.7 Lion), you will need specially-compiled browsers that understands modern web. I use Firefox Legacy with great success (https://parrotgeek.com/fxlegacy.html).
I also started trying to upgrade my Mac OS X Lion on my MacBookPro2,2 to a newer OS. I had problems with MacOS Extractor where I only saw a small stop-sign above the Apple logo when trying to boot from USB. I switched to use MacPostFactor (2.01) and I managed to go into main installation menu and is installing it now. Will report back if it truly works.
I have tried what you said, with Firefox Privacy but it still doesn’t work. The white screen comes out but the Skip ad bar is not passed. I have dragged the button to the browser and I get it Please wait, but it does not advance. I use MacPostFactor 1.01 which is the one that really patches for Yosemite. I have tried on a more updated MacBook too and the same thing happens to me, it does not go beyond the Skip ad screen.
EDIT: I tried to install with MPF 2.0 and it works finally. Sorry and thanks for all!??
-

6D4622DF-E2C7-46FB-B202-02C8C6B23A69.jpeg
439 KB · Views: 259
-
63CA9F4D-F58E-42A0-B358-5C5AD183BEBC.jpeg
363.1 KB · Views: 228
-
49D6B15C-5DB9-473F-8996-56115B04B647.jpeg
407.1 KB · Views: 254


Last edited: Apr 18, 2020
-
#1,569
I have another problem. Joe Incan upgrade to Yosemite 10.10.5? ? ? ? ?
thanks!!!!!
PS: Sorry for doublepost
-
#1,570
I finally am able to upgrade my MacBookPro2,2 (Core 2 Duo late 2006 model) from Lion to Yosemite 10.10.5. The trick seems to be

OS X Yosemite on Unsupported Macs [Guide]
Hi, If you installed OSXH then there should be a ‘OS X Hackers Patch Files’ folder in your Applications. There find the kextATIX1600.zip and extract it. Open the KextUtility.app by dropping all of the files inside this extracted folder to it. Also drop in the AppleHDA.kext reboot Boot…

forums.macrumors.com
— Use MPF 2 to install Yosemite
— Install macOS Extractor to get the kext’s
— Specifically for me, do NOT run the ATI kext package installer. It will screw up your Dock. Instead, download Pacifist (https://www.charlessoft.com/), use it to open the ATI kext installer, and extract the kext’s yourselves.
— Use Kext Utility (http://cvad-mac.narod.ru/index/0-4) to patch the ATI kext’s (and AppleHDA to fix audio issuues)
— *VERY IMPORTANT*, when you reboot, boot to single user mode (hold command+S), then type
sudo nvram boot-args=»kext-dev-mode=1″
-Reboot again, that’s it!
Hope this helps.
-
#1,571
Hi again!
i have a new problem. I update my 10.10.0 to 10.10.5 with succesful!!! But my keyboard and my trackpad don’t work.
Can you help me?
Thanks! ?
-
#1,572
I finally am able to upgrade my MacBookPro2,2 (Core 2 Duo late 2006 model) from Lion to Yosemite 10.10.5. The trick seems to be
OS X Yosemite on Unsupported Macs [Guide]
Hi, If you installed OSXH then there should be a ‘OS X Hackers Patch Files’ folder in your Applications. There find the kextATIX1600.zip and extract it. Open the KextUtility.app by dropping all of the files inside this extracted folder to it. Also drop in the AppleHDA.kext reboot Boot…
forums.macrumors.com— Use MPF 2 to install Yosemite
— Install macOS Extractor to get the kext’s
— Specifically for me, do NOT run the ATI kext package installer. It will screw up your Dock. Instead, download Pacifist (https://www.charlessoft.com/), use it to open the ATI kext installer, and extract the kext’s yourselves.
— Use Kext Utility (http://cvad-mac.narod.ru/index/0-4) to patch the ATI kext’s (and AppleHDA to fix audio issuues)
— *VERY IMPORTANT*, when you reboot, boot to single user mode (hold command+S), then typesudo nvram boot-args=»kext-dev-mode=1″
-Reboot again, that’s it!
Hope this helps.
OK, I’ve started with ‘MPF’ (once I worked out this meant Macpostfactor!)
Installing a key now with the installer.
BUT I can’t get Macosextractor to work. Get an error message on the lion 2006 macbook about it not being able to reach the addrss and my High sierra macbook it gives the below screen.
-

Screen Shot 2020-04-22 at 12.06.31.png
234.4 KB · Views: 230
-
#1,573
OK, I’ve started with ‘MPF’ (once I worked out this meant Macpostfactor!)
Installing a key now with the installer.BUT I can’t get Macosextractor to work. Get an error message on the lion 2006 macbook about it not being able to reach the addrss and my High sierra macbook it gives the below screen.
So, the MACPOSTFACTOR 2 created USB key has installed Yosemite.
But obviously I now can’t get the kext’s from Macosextractor as I get errors running it on either mac.
Next steps? Workaround? Other source for the correct Kexts? (also — which kext do I need?)
EDIT OK, managed to find some kexts and an installer. Which has left me with a black screen and no dock….maybe the wrong ones?
-

Screen Shot 2020-04-22 at 16.52.44.png
57.4 KB · Views: 210

Last edited: Apr 22, 2020
-
#1,574
I just moved my original question with the kernel panic log to a new post in the SFOTT thread as it was SFOTT related. As far as I see, people on 10.7 seem to have success with MCPF or MacExtractor. What is the best method in 2020 to get 10.10 running on my MacBook2,1?
I’ve got the same Macbook. So far I’ve used Macpostfactor 2 and gotten as far as installing Yosemite.
Now I need the drivers (Kexts).
Happy to help you through to the same point as me? We will need help with the graphics drivers working properly.
Last edited: Apr 22, 2020
-
#1,575
Well…progress. Wiped the hard drive this time rather than letting the Macpostfactor key upgrade Lion and…well, this time it seems to have installed the drivers itself?
As far as can tell I’ve got a working system, with graphics!
So does this mean MPF2.1 installs drivers? The docks not right though.
Anything else I need to do?
-
Screen Shot 2020-04-23 at 08.53.54.png
1.1 MB · Views: 264
-

Screen Shot 2020-04-23 at 08.54.08.png
1.1 MB · Views: 252

Last edited: Apr 23, 2020
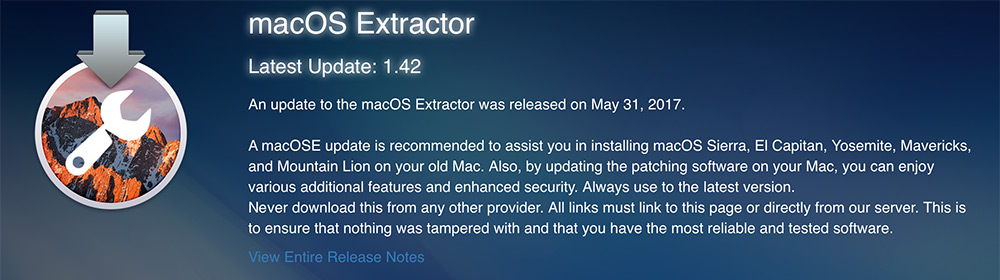
This Patcher has been discontinued. While the app can still be used for macOS 10.8 — 10.11, no further updates or support will be available.
Developed by Kelian Dumarais (MLforAll)
Verison 2.0.1
July 8, 2016
macOS Extractor is a legacy Application that assists you in install OS X 10.8-10.11 on your Unsupported Mac. By using this patching software on your Unsupported Mac, you can enjoy the various features and added security that modern Macs have.
Overview
Beautifully Deviant of the Rules
Lorem ipsum dolor sit amet, consectetuer adipiscing elit. Aenean commodo ligula eget dolor. Aenean massa. Cum sociis natoque penatibus et magnis dis parturient montes, nascetur ridiculus mus. Donec quam felis, ultricies nec, pellentesque eu, pretium quis, sem. Nulla consequat massa quis enim.
Release Notes
Latest Update: 2.0.1
An update to the MacPostFactor was released on July 8, 2016.
An MCPF update is recommended to assist you in installing OS X El Capitan, Yosemite, Mavericks, and Mountain Lion on your old Mac. Also, by updating the system software of your Mac, you can enjoy various additional features and enhanced security. Always use to the latest version.
Never download this from any other provider. All links must link to this page or directly from Kelian’s server. This is to ensure that nothing was tampered with and that you have the most reliable and tested software.
Verison History
This update includes:
-
Fixes adfly URL issues- Improves some error messages (makes them more explicit)
-
Fixes some minor UI issues/glitches
-
Fixes log files not appearing!
-
Add some verbosity to the install process (for logs)
MacPostFactor v2.0
This version is huge! It features many improvements everywhere! Anyway, in this version, you’ll find:
Other Features in Previous Versions:
-
OS X El Capitan support- Ability to use a smaller Recovery (≈ 600MB instead of 5GB)with no compromises on available features
-
Bluetooth Audio FIX on 32bit ML Hack- Better MacPostFactor UI and UX
-
New Preferences Window- New Customise button- Search again for Install OS X _ _ _.app by a click of a button
-
Nicer interface- Nicer switching animations- Better MacPostFactor App
-
Better code organization
-
Snow Leopard Compatibility (BETA)
-
Contributors now working! Donate to figure on the list!
-
Ability to change the USB name when erasing it
-
New feature: «One click install»
-
Really fixes Paypal donation link
-
Fixes USB space check (total space instead of left space)
-
Fixes ton of other minor bugs
-
Reduces the energy footprint when creating USB Installers
-
Better OSXHackers Preview boot logo
-
Better logs in case of error
-
OS X Mav+ kernels are now stored online (reduces MacPostFactor’s size and allows MLforAll to add a new kernel without updating the MacPostFactor app itself)
-
Improved the Hacking Process
-
No more Error Code 3- Use of kernelcache whenever possible
-
Fixes USB installers not booting
-
Improved MacPostFactor «side-apps» (recovery apps)
-
Better MacPostFactor Services Init- Better OS X Manager with SIP management support
-
MUCH BETTER «MacPostFactor OS X Installer” (active progress bar.. support for ML and Mav…)
-
«About MCPF.app» and «Dock Glass Effect Manager.app» replaced by «MacPostFactor Utilities.app» that also adds new tweaks!
System Requirements
See if your Mac can handle the Patcher.
Tested Macs listed below. Here are the minimum requirements:
General Requirements
-
Running 10.6.8 Snow Leopard
-
At least 2GB of RAM.
-
A copy of the OS X installer in the Applications Folder (.app file required / NO DMGs)
-
15 GB of free space from USB or HDD Partition.
Supported Mac Models
-
MacBook2,x
-
MacBook3,x
-
MacBook4,x
-
MacBookPro2,x
-
MacBookAir1,1
-
MacMini1,x (C2D upgraded)
-
MacMini2,x
-
iMac4,x
-
iMac5,x
We DON’T assist with Hackintosh. All private messages/emails involving installing OS X on non-Apple hardware will be redirected to another support team.
Download Size: 400 MB
Download Previous Versions

Terms and Conditions About Us Donate Contact
Designed by Isiah Johnson
OS X Hackers are is not affiliated with Apple Inc. Mac OS Ten (X), Mac, iOS, iPhone, iPad, and all other Apple product names are trademarks or registered trademarks of Apple Inc. All other company and product names are trademarks or registered trademarks of their respective companies.
Продолжаем изобретать костыли и велосипеды и сегодня речь пойдёт про установку Mac OS X Yosemite (10.10) вместо максимально возможной OS X Lion (10.7) на неподдерживаемые компьютеры Mac. Спросите как такое возможно? Давайте разбираться.
Для начала немного истории. Итак, OS X 10.6 (Snow Leopard) стала первой версией OS X с опциональной поддержкой 64-битного ядра, позволяющей загружать как 32-битное, так и 64-битное ядро. Однако загрузить 64-разрядное ядро на маках, поставляемых с микропрограммой EFI32, даже если у них стоял 64-разрядный процессор, не представлялось возможным. Поддержка 64-битных ядер точно имеется на iMac и MacBook Pro начиная с начала 2008 г.
С выходом OS X 10.8 (Mountain Lion), Apple полностью отказалась от 32-битных ядер и компьютерам с EFI32 обновления до новых версий OS X стали недоступны. Однако, энтузиасты нашли обходной путь и сегодня рассмотрим два варианта установки OS X Yosemite на неподдерживаемых Mac.
Ниже перечислены рекомендуемые минимальные требования:
- Установлена OS X 10.7 Lion
- Минимум 2 ГБ оперативной памяти
- Установщик OS X Yosemite в папке приложения (можно взять на трекере inmac.org)
- 15 ГБ свободного пространства на USB или внешнем HDD, который будет использоваться в качестве установочного диска.
Собственно, сам мак должен соответсвовать одной из моделей ниже (взято с форума forums.macrumors.com):
- MacBook2,x
- MacBook3,x
- MacBook4,x
- MacBookPro2,x
- MacBookAir1,1
- MacMini1,x
- MacMini2,x
- iMac4,x
- iMac5,x
Предупреждение! Все действия, изложенные в данном руководстве вы делаете на свой страх и риск. Любой вред или ущерб, будет результатом именно ваших действий, потому если у вас имеются сомнения, относительно собственных знаний и навыков, то вам определённо не стоит заниматься этим самостоятельно.
У меня нет возможности протестировать все возможные варианты установки OS X и уж тем более всех перечисленных выше компьютеров Apple. Относитесь к материалам статьи, как ознакомительным.
Вариант 1. macOS Extractor
1. Подготовка установочного диска
(Предполагается что OS X Yosemite Installer у вас уже скачан и находится в каталоге с программами.)
- Устанавливаем macOS Extractor (актуальная версия на данный момент 1.42 от 31 мая 2017). На рабочем столе должен появиться значок «OS X Install ESD».
- Перейдя в раздел «Программы -> OS X Hackers Patch Files» запускаем AutoPatch и выбираем флешку или диск, на который планируем разместить установщик.
- (для не 64-битных Mac) Нужно заменить boot.efi файлы, расположенные в каталогах /System/Library/CoreServices и /usr/standalone/i386 копией из каталога /Applications/OS X Hackers Patch Files/Boot EFI/. Для замены файлов, с них предварительно следует снять блокировку, выполнив в терминале:
sudo chflags nouchg /Volumes/OS X Base System/System/Library/CoreServices/boot.efi
(Если что-то не так с путём и вы получили сообщение об ошибке, найдите файл boot.efi самостоятельно, затем в терминале введите «sudo chflags nouchg» и перетащите его в окно терминала)
После того, как вы заменили boot.efi новой версией, следует вернуть ему атрибуты (блокировка) в первоначальное состояние:
sudo chflags uchg /Volumes/OS X Base System/System/Library/CoreServices/boot.efi
2. Установка OS X Yosemite
Перезагружаем Mac удерживая клавишу Alt (Option) и выбираем наш установочный диск «OS X Base System».
Если установка выкидывает обратно в главный раздел, пробуем внести некоторые изменения в терминале:
sudo bless --folder /Volumes/OS X Base System --file /Volumes/OS X Base System/System/Library/CoreServices/boot.efi --setBoot
После чего установка должна пойти в штатном режиме.
3. Возможные проблемы после перезагрузки
Если после установки, компьютер не показал долгожданного рабочего стола Yosemite, снова загружаемся с установочной флешки и открыв терминал из верхней строки меню (не запуская заново установку) или загружаемся в однопользовательском режиме (удерживая Command-S сразу после включения) и выполняем команду:
sudo rm /Volumes/[имя_диска]/System/Library/CoreServices/PlatformSupport.plist
Установка 64-разрядных драйверов устройств (kexts) из папки Kexts OS X Extractor.
Хотелось бы обратить внимание, что на старых видеокартах (GMA 950, X3100, X1600, X1300, X1900, 7300gt, etc.) ускорение графики в Mac OS X Mavericks и Yosemite не поддерживается.
Существуют бета-версии версии драйверов, хотя они могут лагать, но это всё же лучше, чем совсем ничего. Найти их можно в каталоге ‘OS X Hackers Patch Files’. Открыв папку ‘Kexts’ запускаем Graphics Card Kext Installer и выбираем раздел со свежеустановленной Mac OS X. После чего остается только перезагрузить компьютер.
Из-за отсутствия нормальных драйверов для видюхи, возникает проблема с переходом в спящий режим, что лечится дополнительным «костылём» в виде расширения NoSleep и измененного управления яркостью.
Вариант 2. MacPostFactor
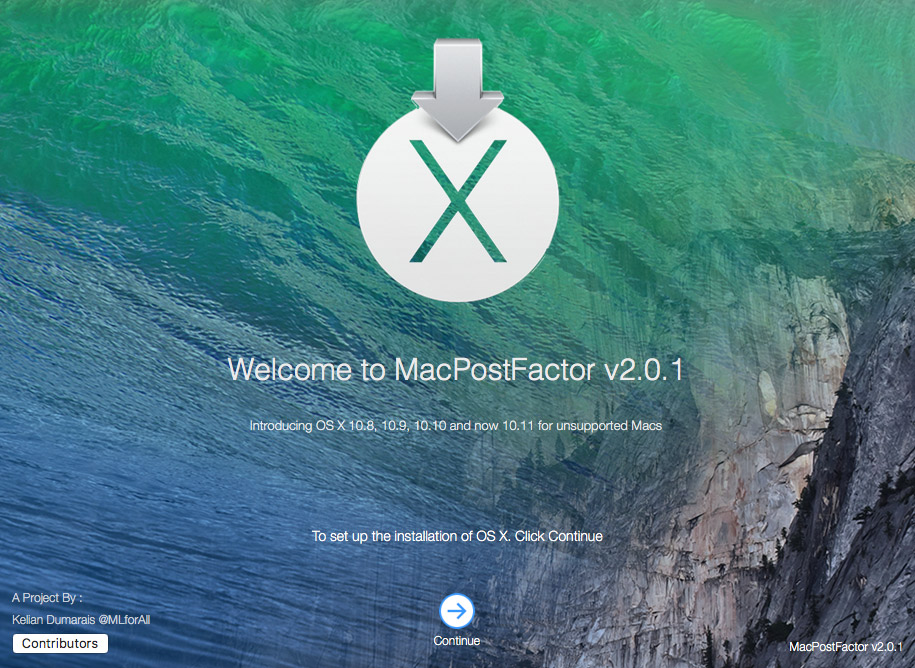
MacPostFactor (версия 2.0.1 от 8 июля 2016 г.) Тут всё упростили по полной программе, никаких действий в терминале проводить не потребуется.
Установка ОС OS X Yosemite с диска.
Убеждаемся что пакет Установка OS X Yosemite.app (Install OS X Yosemite.app) присутствует в папке с программами. Далее, запустив MacPostFactor (MCPF), выбираем тип установки «On this computer», а затем раздел диска, на который будет производится установка Yosemite.
Нажимаем кнопку установить и вводим пароль. Компьютер должен перезагрузиться с логотипом OSXHackers. После завершения процесса установки получаем наш старый Мак с ОС OS X Yosemite на борту.
Установка через USB
Установочная флешка делается не сложнее, единственное отличие состоит в том, что главном окне MCPF следует выбрать тип установки «On an external drive» (на внешнем диске) и указать вашу флешку или диск.
Далее, по уже знакомой с первого варианта схеме, перезагружаем Мак, удерживая клавишу ‘Alt’ (Option), и выбираем USB-накопитель для загрузки.
Возможные проблемы:
- не отображаются Карты в соответствующем приложении
- может подтормаживать Launchpad
- может не воспроизводиться видео в iTunes, Safari, VLC и DVD-плеере
- не корректное отображение в Центре уведомлений
- доступно только одно разрешение экрана
- могут не работать iMessage и FaceTime
Подписывайтесь на канал
Яндекс.Дзен
и узнавайте первыми о новых материалах, опубликованных на сайте.
OS X Yosemite on Unsupported Macs
OS X Extracter and MacPostFactor are apps that guide you through patching and installing OS X El Capitan (10.11), Yosemite (10.10), Mavericks(10.9), or Mountain Lion (10.8) on your older Mac. This thread focuses on OS X Yosemite.
MacPostFactor works for Mountain Lion, Mavericks, and Yosemite (certain Models).
Please note that older GPU (GMA 950, X3100, X1600, X1300, X1900, 7300gt, etc.) Graphics Acceleration on Mavericks and Yosemite is not supported yet but this thread consists of many graphical workarounds.
Installing on these models may cause them to have graphical issues as stated in these pages. Kexts are provided to help a little bit.OS X Extractor is somewhat for more advanced users and should only be used as an alternative to MacPostFactor. This thread consists of members prominent in these patches that can help you solve your issues. Please do not hesitate to post if you have questions.
Apple History
OS X 10.6 Snow Leopard was the first OS X version with optional support for a 64-bit kernel, allowing booting either with a 32-bit or 64-bit kernel. However, Apple did not support booting the 64-bit kernel in Macs that shipped with EFI32 firmware, even if they had 64-bit processors capable of running the 64-bit kernel. When Apple dropped the 32-bit kernel entirely from OS X, starting with OS X 10.8 Mountain Lion, EFI32 Macs no longer had an Apple-supported mechanism to boot newer OS X versions.
Fortunately, we have found a work around for these version of OS X. Here we provide guides in Post 1 and 2 and support for Installing OS X Yosemite on your Unsupported Mac.
This page is usually updated with recent summarized information, updates, and more solutions.
For those who have 2006/2007 Mac Pros, you may be best suited to using Mr. Zarniwoop’s Thread here. The MCPF and OSXE projects are not affiliated with them. We will not contact them either. Confrontation has occurred both publicly and privately in MacRumors, the site, and other forms of communications and we don’t want anything to do with them and their Mac Models. It simple don’t ask Mac Pro questions to people who don’t have Mac Pros :p. Your post will be requested to be moved to their thread.Mac Pro (1,1/2,1) Yosemite Guide: Hennesie2000’s Guide here.
Prerequisites
Tested Macs listed below. Here are the minimum requirements:
- Running 10.7 Lion
- At least 2GB of RAM.
- A copy of Yosemite in Applications Folder (Recommended from the Mac App Store)
- 15 GB of free space from USB or HDD Partition to serve as your Installation Drive.
-MacBook2,x
-MacBook3,x
-MacBook4,x
-MacBookPro2,x
-MacBookAir1,1
-MacMini1,x (C2D upgraded)
-MacMini2,x
-iMac4,x (C2D can be upgraded)
-iMac5,x (post #846 might help)
We DON’T assist with Hackintosh. All private messages/emails involving installing OS X on non-Apple hardware will be redirected to another support team.
Guide to Installing OS X Yosemite on Unsupported Macs
Method 1 — OS X Extractor
ANY HARM OR DAMAGE CAUSED BY THIS GUIDE HAPPENED UNDER YOUR OWN RESPONSIBILITY!IF YOU HAVE ANY REGRETS ABOUT DOING THIS TO YOUR MAC, YOU PROBABLY SHOULDN’T DO IT. IF YOU ARE QUESTIONING WHETHER IT IS WORTH IT, YOU SHOULD DEFINITELY NOT TRY THIS.
PLEASE READ THIS GUIDE BEFORE ASKING QUESTIONS? WE HAVE TOO MANY EMAILS AND SKYPE MESSAGES TO ANSWER AND CAN’T BABY YOU THROUGH THIS ONE STEP AT A TIME. IF YOU CAN’T FIGURE YOUR WAY AROUND OS X, YOU SHOULDN’T BE DOING THIS.
Be sure to have root privileges (administrator password) as OS X will prompt you for this on some stage.
A: Preparing The Installation Drive
- Make a BACKUP of your system if you can.
- OS X Extractor has generally everything you need to patch OS X (There are also numerous other sources that can help).
- Get an OS X Yosemite Installer app (Recommended from the Mac App Store)
- Make sure your Mac meets the Requirements above
B: Start Patching
- Install OS X Extractor or use the Yosemite Patch Files.
- show hidden files in Finder (use included DisAppear.app and press anzeigen. Why is it in German? IDK dude!). You will need to work with some hidden files.
- Right click on the OS X Yosemite Installer app and click show package contents.
- Browse to the folder /Contents/SharedSupport
- Double-click to mount «InstallESD.dmg»
- Open up Disk Utility in Applications/Utilities and drag BaseSystem.dmg to the lower Disk Utility side pane
- Click on BaseSystem.dmg in Disk Utility and select the Restore tab.
- Set the BaseSystem.dmg as the source and choose the installation drive (formatted as HFS+ and GUID) as the destination.
- Use Finder to browse the newly restored installation drive installer.
- Go to the folder /System/Installation on the installation drive and delete the «Packages» alias file. It will be replaced with the actual folder.
- Go back to the mounted InstallESD.dmg and drag the «Packages» folder into the /System/Installation folder where the alias file used to be.
- Copy the files, ”BaseSystem.dmg» and “BaseSystem.chunklist,» to the root of the thumb drive.
- Unmount InstallESD.dmg You don’t need it anymore.
- (for non 64 bit Macs) Unlock and Replace the boot.efi files located in /System/Library/CoreServices and /usr/standalone/i386 with the copy provided in /Applications/OS X Hackers Patch Files/Boot EFI/ or from here .
To Unlock it, use the Terminal app in Applications/Utilities/ and enter the command: - [CODE]sudo chflags nouchg /Volumes/OS X Base System/System/Library/CoreServices/boot.efi
[/CODE]
(If you receive an error, go the that directory and find the boot.efi. Then in the Terminal, enter ‘sudo chflags nouchg ‘ and drag the old boot.efi in the window. Press Enter) - Now lock the new boot.efi file
- (for non 64 bit Macs) lock the new boot.efi with this command:
- [CODE]sudo chflags uchg /Volumes/OS X Base System/System/Library/CoreServices/boot.efi [/CODE]
19 Copy the folder named «Kernels», (rename it so if it says «Kernel») from ‘/Applications/OS X Hackers Patch Files/‘ to the ‘/System/Library/Kernels/‘ folder on the installer drive. - replace the original OSInstall.mpkg in the Installation drive (/System/Installation/Packages/) with the modified one from /Applications/OS X Hackers Patch Files/
- Next you will have to add your Mac Model to the installer. You will have to replace the files without corrupting them. Some of the files are signed so be careful not to change anything else. Make sure your changes mimics the same syntax as other entries. You may have to copy and paste the quote marks from an existing entry. If your closing quote after the boardID looks italic, you’re WRONG!
- run the IORegistryExplorer.app from the OS X Hackers Patch Files folder make sure in the top left corner IOServices is selected
- under root select your Mac(model) -> on the right at the top copy the board-id value.
- open in your Installation Drive, /System/Installation/Packages/InstallableMachines.plist with TextEdit and search for the last entry and replace it with your board-id value
- open /System/Library/CoreServices/PlatformSupport.plist and do the same.
- Great! The hard part is over. Now it’s time for installation. Re-hide the hidden files with the DisAppear.app, Close the Terminal, and Close all other Applications. Take a breather and move on to the next part of the guide.
C: Installation
- reboot your Mac holding option (alt) key.
- If the installation drive boot you back to the main partition, try blessing the drive from your terminal app:
- [CODE]sudo bless —folder /Volumes/OS X Base System —file /Volumes/OS X Base System/System/Library/CoreServices/boot.efi —setBoot[/CODE]
- select the Installation drive «OS X Base System» (and press enter)
- when booted click install/continue until you reach the disk selection menu, select you main drive (probably Macintosh HD) if you are sure about it, else select another empty drive (at least 15GB for testing/bigger if it should be a secondary system)
D: If Reboot Fails
(If the Mac does not reboot to the Yosemite desktop boot to the install-drive again and perform the following.
Boot back into the Yosemite Install Partition
open the terminal at the top menu bar or boot into single user mode (Hold Command -S immediately afterturning on)
enter:[CODE]sudo rm /Volumes/[Main Drive Name]/System/Library/CoreServices/PlatformSupport.plist[/CODE]
E: Install these 64 bit Kexts from the Kexts folder from OS X Extractor
(These will better the graphics by a little but you will not have Graphics Acceleration. Still in beta so they may not work well)
1 open the KextUtility.app by dropping all of the files inside this attachment zip folder named “kexts[yourgraphicsmodel…]“ to it. Don’t forget to drop in the AppleHDA.kext for sound.
2 reboot.
3 Boot into Single User Mode (Hold Command-S after hearing the bong sound)
4 enter:
5 [CODE]sudo nvram boot-args=»kext-dev-mode=1″[/CODE]
6 reboot again normally.
IF your Macbook can’t wake up from sleep:
Because of lack of working Graphics Acceleration.
Your Macbook may not be able to wake from a display sleep
Install the NoSleep Extension
Set the Preferences to Never Sleep on AC Adapter and Battery
Check the ‘Start NoSleep Utility on system startup’ setting
Your Macbook screen will never turn off unless your actually shut down your Macbook.
CONGRATULATIONS!!!
Method 2 — MacPostFactor
IMPORTANT NOTES
Install MacPostFactor at your own risk. We are not liable if your computer explode, fail to wake you up for work, lose important files, pictures, porn or simply ceased to work. Always backup your existing installation before installing MacPostFactor or install in a second partition.
We are not aware of remaining bugs…Although its been thoroughly tested by us and our group of private beta testers, you might still find bugs in it, and if you do find one, feel free to contact us on Twitter [USER=796263]@MLforAll[/USER] & @IsiahJohnson15 or simply email me at voolfy@me.com (@MLforAll’s mail) or go to the Support Page.
Yosemite Install is EXPERIMENTAL. Try this on a secondary partition.
Supplementary Informations for Yosemite
Yosemite can be installed on all computer but ONLY Mac Pros WITH AN UPGRADED GRAPHICS CARD can use graphics acceleration as of now !
Requirements for MacPostFactor to work
◆ A Mac with Core 2 Duo or Xeon Processor.
◆ OS X 10.7 or later
◆ 2GB RAM at least
◆ At least 15GB of HDD space (8GB for USB)
◆ Install OS X Yosemite.app 10.10.0 or later in your Application Folder
◆ Read our instructions on MacRumors at least twice
Friendly reminder.
We’re not responsible if you screw up your system. Technically, that won’t happen as you can always go back to Lion, Mountain Lion or Mavericks
Instructions — Installing directly on this computer
- Make sure you have Install OS X Yosemite.app in your Application Folder
- Select «On this computer» on the main MCPF window. Then, choose the partition you want to install Yosemite on.
- Click install and prompt your password.
- Click reboot. Your computer should reboot with the OSXHackers logo.
- Once booted, Click Continue, Agree and choose the only partition showed.
- Click reboot when you see «Installation succeeded !». 7 Enjoy!
Instructions — Installing via USB
- Make sure you have Install OS X Yosemite.app in your Application Folder
- Select «On an external drive» on the main MCPF window. Then, choose the disk you want to install the Yosemite installer on.
- Click install and prompt your password.
- Click exit. Boot the computer you want to install Yosemite on with ‘alt’ held and select your USB drive.
- Once booted, Click Continue, Agree and choose the partition you want to install on.
- Click reboot when you see «Installation succeeded !». 7 Enjoy!
Bugs (from multiple Mac Models)
1 Maps does not view the maps
2 Launchpad is somewhat delayed and choppy
3 Video don’t play in iTunes, Safari, nor DVD Player (best use Quicktime and Google Chrome)4 Notification Center is sometimes a mess.
5 Only one Screen Resolution available
6 Some Apps will have artifacts if primary using Graphics Card.
7 iMessage/FaceTime note: Most users cannot initially login to iMessage or FaceTime using their Apple ID from their Macs after installing Yosemite as a security precaution. When trying to login, they receive an iMessage Registration validation code. The solution is to contact Apple support, provide the Mac’s serial number, explain that Yosemite was installed using our guide and that iMessage isn’t working and provide the validation code. Apple then unblocks the Mac, allowing iMessage and FaceTime login immediately and in the future OS updates. They really don’t care.
Содержание
- Установка OS X Yosemite на неподдерживаемых компьютерах Mac
- Вариант 1. macOS Extractor
- 1. Подготовка установочного диска
- 2. Установка OS X Yosemite
- 3. Возможные проблемы после перезагрузки
- Вариант 2. MacPostFactor
- Установка ОС OS X Yosemite с диска.
- Установка через USB
- Комментариев: 7
- Install Yosemite on any Mac (unsupported) SFOTT
- 128keaton
- Старые macOS 10.12 Sierra, 10.11 El Capitan и 10.10 Yosemite: откуда скачать установщик
- Где скачать старые macOS 10.10, 10.11 и 10.12
- [HOW TO] Yosemite on Macbook (Mid2007) with Audio and Graphics
- garretts228
- garretts228
- Chipmunk03
- Jack Neill
- garretts228
- Resolved OS X Yosemite on Unsupported Macs [Guide]
- TMRJIJ
Установка OS X Yosemite на неподдерживаемых компьютерах Mac
Продолжаем изобретать костыли и велосипеды и сегодня речь пойдёт про установку Mac OS X Yosemite (10.10) вместо максимально возможной OS X Lion (10.7) на неподдерживаемые компьютеры Mac. Спросите как такое возможно? Давайте разбираться.
Для начала немного истории. Итак, OS X 10.6 (Snow Leopard) стала первой версией OS X с опциональной поддержкой 64-битного ядра, позволяющей загружать как 32-битное, так и 64-битное ядро. Однако загрузить 64-разрядное ядро на маках, поставляемых с микропрограммой EFI32, даже если у них стоял 64-разрядный процессор, не представлялось возможным. Поддержка 64-битных ядер точно имеется на iMac и MacBook Pro начиная с начала 2008 г.
С выходом OS X 10.8 (Mountain Lion), Apple полностью отказалась от 32-битных ядер и компьютерам с EFI32 обновления до новых версий OS X стали недоступны. Однако, энтузиасты нашли обходной путь и сегодня рассмотрим два варианта установки OS X Yosemite на неподдерживаемых Mac.
Ниже перечислены рекомендуемые минимальные требования:
Предупреждение! Все действия, изложенные в данном руководстве вы делаете на свой страх и риск. Любой вред или ущерб, будет результатом именно ваших действий, потому если у вас имеются сомнения, относительно собственных знаний и навыков, то вам определённо не стоит заниматься этим самостоятельно.
У меня нет возможности протестировать все возможные варианты установки OS X и уж тем более всех перечисленных выше компьютеров Apple. Относитесь к материалам статьи, как ознакомительным.
1. Подготовка установочного диска
(Предполагается что OS X Yosemite Installer у вас уже скачан и находится в каталоге с программами.)
(Если что-то не так с путём и вы получили сообщение об ошибке, найдите файл boot.efi самостоятельно, затем в терминале введите «sudo chflags nouchg» и перетащите его в окно терминала)
После того, как вы заменили boot.efi новой версией, следует вернуть ему атрибуты (блокировка) в первоначальное состояние:
sudo chflags uchg /Volumes/OS X Base System/System/Library/CoreServices/boot.efi
2. Установка OS X Yosemite
Перезагружаем Mac удерживая клавишу Alt (Option) и выбираем наш установочный диск «OS X Base System».
Если установка выкидывает обратно в главный раздел, пробуем внести некоторые изменения в терминале:
После чего установка должна пойти в штатном режиме.
3. Возможные проблемы после перезагрузки
Если после установки, компьютер не показал долгожданного рабочего стола Yosemite, снова загружаемся с установочной флешки и открыв терминал из верхней строки меню (не запуская заново установку) или загружаемся в однопользовательском режиме (удерживая Command-S сразу после включения) и выполняем команду:
sudo rm /Volumes/[имя_диска]/System/Library/CoreServices/PlatformSupport.plist
Установка 64-разрядных драйверов устройств (kexts) из папки Kexts OS X Extractor.
Хотелось бы обратить внимание, что на старых видеокартах (GMA 950, X3100, X1600, X1300, X1900, 7300gt, etc.) ускорение графики в Mac OS X Mavericks и Yosemite не поддерживается.
Существуют бета-версии версии драйверов, хотя они могут лагать, но это всё же лучше, чем совсем ничего. Найти их можно в каталоге ‘OS X Hackers Patch Files’. Открыв папку ‘Kexts’ запускаем Graphics Card Kext Installer и выбираем раздел со свежеустановленной Mac OS X. После чего остается только перезагрузить компьютер.
Из-за отсутствия нормальных драйверов для видюхи, возникает проблема с переходом в спящий режим, что лечится дополнительным «костылём» в виде расширения NoSleep и измененного управления яркостью.
Вариант 2. MacPostFactor
MacPostFactor (версия 2.0.1 от 8 июля 2016 г.) Тут всё упростили по полной программе, никаких действий в терминале проводить не потребуется.
Установка ОС OS X Yosemite с диска.
Убеждаемся что пакет Установка OS X Yosemite.app (Install OS X Yosemite.app) присутствует в папке с программами. Далее, запустив MacPostFactor (MCPF), выбираем тип установки «On this computer», а затем раздел диска, на который будет производится установка Yosemite.
Установка через USB
Установочная флешка делается не сложнее, единственное отличие состоит в том, что главном окне MCPF следует выбрать тип установки «On an external drive» (на внешнем диске) и указать вашу флешку или диск.
Возможные проблемы:
Если считаете статью полезной,
не ленитесь ставить лайки и делиться с друзьями.
Комментариев: 7
Попробовал установить по варианту #2 MCPF после того как программа начала свою работу, перезапустился MacBook, но я увидел логотип не OSXHackers, а моргающую папку со знаком вопроса «?». Что делать? MacBook White
Папка со знаком вопроса означает что не найден ни один загрузчик. Есть как минимум два пути: загрузиться с флешки или начать установку OS X через Интернет. Можете почитать о всех возможных вариантах переустановки macOS https://mdex-nn.ru/page/chetyre-varianta-pereustanovki-macos.html
Способи 2 всрал ссд и анешний хард! Систему восстановить невозможно!
Не запускается МакПостФактор из-за прилипшей рекламки adf.ly и сколько не нажимай СКИП рекламка не пропадает
Не могу запустить MacPostFactor 1.0.1 из-за прилипшей рекламки adf.ly и сколько не нажимай Скип Адд рекламка не пропадает
Источник
Install Yosemite on any Mac (unsupported) SFOTT

128keaton
macrumors 68020
NOTICE: I am not responsible for erasing or breaking your Mac! Continue at your own risk!
This works on the public release with some ‘shoe-horn’ing.
Prerequisites:
* An unsupported Mac, your choice if you deem it capable or not.
* SFOTT Beta [download] [mirror]
* A USB Drive (8GB).
* OS X Yosemite.app
1. Download and install SFOTT from the link/mirror above.
2. Download Yosemite either from a suspicious location or from the Mac App Store (try using Mavericks Download Enabler if on unsupported Mac).
3. Rename ‘Install OS X Yosemite.app’ to ‘Install OS X Yosemite Beta.app’.
Hopefully that will not need to happen in newer versions of the script.
4. Plug the USB drive into your Mac and format it as ‘Mac OS Extended’ and name it SFOTT.
(photos will be added later)
Note: 12a only needs to be done if your Mac Pro’s graphic card doesn’t have EFI boot. If it does, you can still use 12a, but you can also use 12b.
1. Open SFOTTBeta and follow the instructions until you get to a numbered Terminal menu.
2. Go to the Extras menu (7) and then the Yosemite menu (9).
3. Select Yosemite Public Beta (2), since the official option is a placeholder, lol.
4.Go back to the main menu (1) and go to settings (3).
5. Select ‘Choose USB/media for the sfott key’ (2) and select the SFOTT usb key you made earlier.
6. Return to the main menu (5) and then go to settings (3) then select option ‘Select the computer to use’ (3).
7. Use option ‘Choose current computer’ (1) and then select ‘Select OS X System Version’ (4).
8. Select ‘OS X Yosemite Beta’ (1)
9. Select ‘Select OS X Installer’ (5) and select ‘In the default /Applications Folder location (Faster)’ (1) It should work if you renamed your installer specified above.
10. Go back to the main menu and select ‘Create / Patch SFOTT Key’ (4).
11. Select ‘Create a New key in Autorun’ (2). Follow the directions there.
12a. If you have a graphics card that doesn’t support EFI boot, open System Preferences on the target Mac, plug in the SFOTT USB key, and open the ‘Startup Disk’ preference pane. Select the SFOTT key and reboot from the panel.
12b. If you are using a Mac with built-in graphics or your graphics card supports EFI boot, just reboot and hold down option after the chime.
13. Your install should continue as expected.
1. The installer says ‘OS X Cannot be Installed on this Machine’:
Make sure you set your machine/board-id in step 6-7.
Источник
Старые macOS 10.12 Sierra, 10.11 El Capitan и 10.10 Yosemite: откуда скачать установщик
После выхода новой Catalina Apple, скажем так, немножко перепрятала старые macOS, а припасенные ранее установщики с 24 октября уже не годятся. Но образы mac OS 10.10, 10.11 и 10.12 с официального сайта еще можно скачать, если знать, где они теперь лежат.
Apple, на самом деле, годами хранила в App Store установщики предыдущих macOS El Capitan, Sierra и High Sierra. Другое дело, что просто так на видном месте они не лежат и через поиск их не найти. А чтобы «нарыть» нужную ссылку, надо было долго копаться в справочной документации Apple.
Но с недавних пор в такой способ заполучить можно загрузчики максимум macОS Mojave (ЛИНК) и High Sierra (ЛИНК). Ссылки на старые macOS 10.10 Yosemite, macОS 10.11 El Capitan и macОS 10.12 Sierra из App Store уже убрали.
Но пока не совсем, и если очень над, то и установщики этих операционок еще можно найти.
Более того, как оказалось, найти еще можно даже установщик совсем уж «древней» macОS 10.4.11 Tiger 2005 года (на секундочку! ЛИНК). И даже скачать можно (к слову, старая Tiger загружается просто пулей, поскольку «весит» всего 340 MB, а новая Catalina, для сравнения, весит целых 4.5 GB).
Правда, как его потом проверить, мы не знаем. Нынешние Mac-и установщик Tiger не распознают и обзывают его «неопознанным разработчиком». Так что, без необходимости и понимания процесса лучше не экспериментировать…
Тем более, что примерно там же по-прежнему лежат гораздо менее раритетные и, что самое главное, подходящие для старых Mac-ов версии maсOS.
Где скачать старые macOS 10.10, 10.11 и 10.12
В общем, вот список ссылок на (все сугубо официальные):
Напомним также, что, согласно рекомендациям Apple, прежде чем устанавливать любую из старых систем, следует, во-первых, сначала проверить комп на предмет того, с какой из последних версий он способен работать.
Во-вторых, перед началом процедуры установки maсOS также необходимо выполнить резервное копирование всех данных «тщательно и многократно».
В-третьих, старую macOS поверх любой из более свежих просто так поставить нельзя (придется сначала удалить работающую систему и только потом вручную устанавливать другую).
И в-четвертых, все перечисленные выше старые macOS действительны до 2029 года (вроде как).
Источник
[HOW TO] Yosemite on Macbook (Mid2007) with Audio and Graphics

garretts228
macrumors newbie
Before we begin this, I would like to thank everyone that is active in this community and others.
I have a Mid 2007 Macbook.
Model Identifier: Macbook 2,1
Processor: Intel Core 2 Duo 2.16Ghz
Memory: 4Gb
Hard Drive: 320Gb
Graphics: Intel GMA 950
If your specs look accordingly, this should work with a breeze.
I also believe this should work on the Mac Mini 2, 1.
So first things first.
Prerequisites:
1. An unsupported Mac.
2. SFOTT Beta [download] [mirror]
3. A USB Drive (8GB or more).
4. OS X Yosemite.app (make sure this is 10.10 and not 10.10.5 for example)
Prepare your USB device for Yosemite:
Visit: 128keaton’s awesome written guide on how to prepare your USB flash drive.
Visit: clyde gallagher’s awesome video guide on how to prepare your USB flash drive.
This part should be pretty explanatory, but if you insist..
Once you have prepared your USB drive with Yosemite, all you need to do is restart your system, and hold down the option key until you get and option showing to select either your Hard Drive or the prepared Yosemite installer.
Select the installer, and use diskpart to format the hard drive before installing.
Getting everything working:
Everything should work for the most part out of the box other than Graphics and Audio.
We are going to fix that.
Download the graphics and drivers here or here.
Once you have them unpack them.
1. Install the VoodooHDA.pkg
2. Open Kext Utility and wait until its done loading.
3. Drag and drop the files that are in the Graphics folder into Kext Utility and wait until it is done.
4. Drag and drop the files in the Audio folder into Kext Utility.
5. Wait until it is done processing everything, and Quit the application and restart your Mac.
After this.. Everything should be good to go.
Enjoy and I hope you are able to give your Mac an extended life.
garretts228
macrumors newbie
Chipmunk03
macrumors newbie
I think your post is pretty clear. I like your post. I like the zipped package containing every thing one needs to get Video, Sound and Wifi running again. Many thanks for that.
Lately, I decided to buy a Mac. And since mid Feb 2016 I own a Mac Mini mid 2007 (macmini2,1). A second hand one. While working with Lion, I discovered it’s not supported any more and looking for a way to get it running on a newer version of OS X, I stumbled upon SFOTT. I decided to give it a try.
The mini had an 80 GB hard drive, which I saved and laid aside so, when in trouble, I could go back to the original OS X Lion. I build in a 120 GB drive, but I didn’t manage to get it working with Yosemite. I attached a 160GB drive to the mac and I managed to get it installed with Yosemite. I also upgraded it to 10.10.5. After that Audio, Video and WiFI didn’t work anymore.
Yesterday I joined macrumors. I read so much information on this site and it helped me a lot. But, yesterday, after reading post #369 I screwed up my yosemite install. I think I missed a step somewhere and left me with a mac that wouldn’t boot anymore. I tried booting with shift key pressed, with command-s. I booted from the internal disk and tried to repair and undo the steps inputs #369. Finally, I got it back by pressing command-s while booting from the recovery partition.
I had sound (Voodoo), but very low. Wifi does not recognize my SSID. Actually, while scanning, it find nothing and I know there are several SSIDs in the neighborhood. I tried to use your post and give it a try.
I followed your instruction. Sound and Video are working again but WiFi does not find any SSIDs. Could it be it does not work on a macmini2,1? I hardly found any posts on mac mini’s. Video is working fine, like in Lion.

Jack Neill
macrumors 68000
garretts228
macrumors newbie
I think your post is pretty clear. I like your post. I like the zipped package containing every thing one needs to get Video, Sound and Wifi running again. Many thanks for that.
Lately, I decided to buy a Mac. And since mid Feb 2016 I own a Mac Mini mid 2007 (macmini2,1). A second hand one. While working with Lion, I discovered it’s not supported any more and looking for a way to get it running on a newer version of OS X, I stumbled upon SFOTT. I decided to give it a try.
The mini had an 80 GB hard drive, which I saved and laid aside so, when in trouble, I could go back to the original OS X Lion. I build in a 120 GB drive, but I didn’t manage to get it working with Yosemite. I attached a 160GB drive to the mac and I managed to get it installed with Yosemite. I also upgraded it to 10.10.5. After that Audio, Video and WiFI didn’t work anymore.
Yesterday I joined macrumors. I read so much information on this site and it helped me a lot. But, yesterday, after reading post #369 I screwed up my yosemite install. I think I missed a step somewhere and left me with a mac that wouldn’t boot anymore. I tried booting with shift key pressed, with command-s. I booted from the internal disk and tried to repair and undo the steps inputs #369. Finally, I got it back by pressing command-s while booting from the recovery partition.
I had sound (Voodoo), but very low. Wifi does not recognize my SSID. Actually, while scanning, it find nothing and I know there are several SSIDs in the neighborhood. I tried to use your post and give it a try.
I followed your instruction. Sound and Video are working again but WiFi does not find any SSIDs. Could it be it does not work on a macmini2,1? I hardly found any posts on mac mini’s. Video is working fine, like in Lion.
Источник
Resolved OS X Yosemite on Unsupported Macs [Guide]

TMRJIJ
macrumors 68040
Warning: MacPostFactor has been depreciated. No Further Developments will be made for now.
OS X Yosemite on Unsupported Macs
OS X Hackers
macOS Extractor and MacPostFactor are apps that guide you through patching and installing macOS Sierra (10.12), OS X El Capitan (10.11), Yosemite (10.10), Mavericks(10.9), or Mountain Lion (10.8) on your older Mac. This thread focuses on OS X Yosemite.
MacPostFactor works for Mountain Lion, Mavericks, and Yosemite, and El Capitan (certain Models).
Please note that older GPU (GMA 950, X3100, X1600, X1300, X1900, 7300gt, etc.) Graphics Acceleration on Mavericks and Yosemite is not supported yet but this thread consists of many graphical workarounds.
Installing these models may cause them to have graphical issues as stated in these pages. Kexts are provided to help a little bit.
macOS Extractor is somewhat for more advanced users and should only be used as an alternative to MacPostFactor. This thread consists of members prominent in these patches that can help you solve your issues. Please do not hesitate to post if you have any questions.

OS X 10.6 Snow Leopard was the first OS X version with optional support for a 64-bit kernel, allowing booting either with a 32-bit or 64-bit kernel. However, Apple did not support booting the 64-bit kernel in Macs that shipped with EFI32 firmware, even if they had 64-bit processors capable of running the 64-bit kernel. When Apple dropped the 32-bit kernel entirely from OS X, starting with OS X 10.8 Mountain Lion, EFI32 Macs no longer had an Apple-supported mechanism to boot newer OS X versions.
Fortunately, we have found a workaround for this version of OS X. Here we provide guides in Post 1 and 2 and support for Installing OS X Yosemite on your Unsupported Mac.
This first post is usually updated with recently summarized information, updates, and more solutions.
For those who have 2006/2007 Mac Pros, you may be best suited to using Mr. Zarniwoop’s Thread here. The MCPF and macOSE projects are not affiliated with them. We will not contact them either. Some confrontation has occurred both publicly and privately in MacRumors, the site, and other forms of communications and we don’t want anything to do with them and their Mac Models. It’s simple, don’t ask Mac Pro questions to people who don’t have Mac Pros. Your post will be requested to be moved to their thread.
Mac Pro (1,1/2,1) Yosemite Guide: Hennesie2000’s Guide here.
Prerequisites
Tested Macs listed below. Here are the minimum requirements:
— Running 10.7 Lion
— At least 2GB of RAM.
— A copy of Yosemite in Applications Folder (Recommended from the Mac App Store)
— 15 GB of free space from USB or HDD Partition to serve as your Installation Drive.
-MacBook2,x
-MacBook3,x
-MacBook4,x
-MacBookPro2,x
-MacBookAir1,1
-MacMini1,x (C2D upgraded)
-MacMini2,x
-iMac4,x (C2D can be upgraded)
-iMac5,x (post #846 might help)
We DON’T assist with Hackintosh. All private messages/emails involving installing OS X on non-Apple hardware will be redirected to another support team.
Guide to Installing OS X Yosemite on Unsupported Macs

ANY HARM OR DAMAGE CAUSED BY THIS GUIDE HAPPENED UNDER YOUR OWN RESPONSIBILITY!
IF YOU HAVE ANY REGRETS ABOUT DOING THIS TO YOUR MAC, YOU PROBABLY SHOULDN’T DO IT. IF YOU ARE QUESTIONING WHETHER IT IS WORTH IT, YOU SHOULD DEFINITELY NOT TRY THIS.
PLEASE READ THIS GUIDE BEFORE ASKING QUESTIONS? WE HAVE TOO MANY EMAILS AND SKYPE MESSAGES TO ANSWER AND CAN’T BABY YOU THROUGH THIS ONE STEP AT A TIME. IF YOU CAN’T FIGURE YOUR WAY AROUND OS X, YOU SHOULDN’T BE DOING THIS.
Be sure to have root privileges (administrator password) as OS X will prompt you for this on some stage.
A: Preparing The Installation Drive
Because of the lack of working Graphics Acceleration. Your MacBook may not be able to wake from a display sleep. The Kext Installer includes a NoSleep Extension and Brightness App.
We are not aware of remaining bugs.
Although it has been thoroughly tested by us and our group of private beta testers, you might still find bugs in it, and if you do find one, feel free to contact us on Twitter @MLforAll & @IsiahJohnson15 or simply email me at voolfy@me.com (@MLforAll’s mail) or support@osxhackers.net.
Yosemite Install is EXPERIMENTAL. Try this on a secondary partition.
Supplementary Information for Yosemite
Yosemite can be installed on all computer but ONLY Mac Pros WITH AN UPGRADED GRAPHICS CARD can use graphics acceleration as of now!
Requirements for MacPostFactor to work
◆ A Mac with Core 2 Duo or Xeon Processor.
◆ OS X 10.7 or later
◆ 2GB RAM at least
◆ At least 15GB of HDD space (8GB for USB)
◆ Install OS X Yosemite.app 10.10.0 or later in your Application Folder
◆ Read our instructions on MacRumors at least twice
Friendly reminder.
We’re not responsible if you screw up your system. Technically, that won’t happen as you can always go back to Lion, Mountain Lion or Mavericks
Feel free to post your questions, concerns, or success stories in this thread. If you can’t post us back because your only usable device is bricked, Skype at TMRJIJ, MLforAll, or email us at Support@OSXHackers.net. We’ll try to respond within 3-5 days.
There should be some great support Applications that we will use to help you.
Be sure to thank our awesome developers who have contributed greatly.
Support Documentation (Construction)
MacPostFactor 2.0.1 [July 8, 2016]:
Download Link
Boot.efi support for El Capitan (OS X 10.11) for unsupported Mac hardware with a 32-bit only EFI [by Pike R. Alpha]:
Download Link
OS X Hackers are is not affiliated with Apple Inc. Mac OS Ten (X), Mac, iOS, iPhone, iPad, and all other Apple product names are trademarks or registered trademarks of Apple Inc. All other company and product names are trademarks or registered trademarks of their respective companies.
MacPostFactor was made by Wayne Wong (@Wayne_819) and Kelian Dumarais (@MLforAll)
Guide and OSXH site/app designed by Isiah Johnson (@TMRJIJ) and Robby Sharpero and is provided by Johnson Network.
Support us by sharing our guide to others. Let everyone know that their older Macs are not obsolete yet. Thank the developers who helped make this possible. Some Developers also appreciate donations to help make this site/app better.
Источник