![]()
Download Article
![]()
Download Article
Zooming isn’t a native feature in Minecraft. However, the OptiFine mod for Minecraft: Java Edition adds improved graphics and the ability to zoom. Minecraft: Java Edition is available on PC, Mac, and Linux computers. You cannot install mods on Minecraft: Windows 10 Edition or Minecraft for smartphones or game consoles. However, you can lower the field-of-view (FOV) in the Settings menu, which makes objects appear a little closer. This wikiHow teaches you how to zoom using the OptiFine mod and how to lower the FOV in the Settings menu.
-

1
Go to https://optifine.net/downloads in a web browser. This is the website to download the OptiFine mod. OptiFine is an improved graphics mod that adds the ability to zoom in Minecraft, among other things. It also includes improved graphics, high definition textures, dynamic lighting, realistic water, and more.
- In order to install OptiFine or any other mods, you need Minecraft: Java Edition for PC, Mac, or Linux. You cannot install mods on Minecraft: Windows 10 Edition or Minecraft for mobile devices or game consoles.
- Minecraft: Windows 10 Edition is different from Minecraft: Java Edition. You cannot install Optifine on Minecraft: Windows 10 Edition. You can find out which version you are playing by launching the game and checking to see if it says «Java Edition» or «Windows 10 Edition» below «Minecraft» on the title screen.
-
2
Click (Mirror). It’s to the right of the latest version of the OptiFine mod. This takes you to a direct download for the OptiFine mod.
- If you click the button that says Download, you will be taken to an adware website that may contain malicious software.[1]
Advertisement
- If you click the button that says Download, you will be taken to an adware website that may contain malicious software.[1]
-
3
Click Download. It’s below the latest version of OptiFine. This downloads a «.jar» file for the latest version of OptiFine to your Downloads folder.
- This file may be flagged as potentially harmful by your web browser or Antivirus program. If asked if you want to keep the file, click Keep or a similar option to confirm you want to download this file.
- OptiFine may cause your game to run slower if your PC has a slower graphics card or processor.
-
4
Double-click the OptiFine «.jar» file. The OptiFine «.jar» file you just downloaded can be found in your Downloads folder. Double-click the file to begin the installation process.
- If the file doesn’t open, or it doesn’t have an icon that resembles a coffee cup, you need to install the latest version of Java.
-
5
Click Install. This installs the OptiFine mod for Minecraft.
- You must run the latest version of Minecraft in the Minecraft launcher at least once before you can install the OptiFine mod.
-
6
Click Ok. Once the mod is installed, you will see a pop-up alert informing you the mod was successfully installed. Click Ok to close the window.
-
7
Open the Minecraft Launcher. The Minecraft Launcher has an icon that resembles a grass block. Click the icon in your Windows Start menu or Applications folder to open the Minecraft launcher.
-
8
Select the OptiFine mod. Use the drop-down menu to the left of the green «Play» button to select «OptiFine».
- If you don’t see OptiFine in the drop-down menu next to the «Play» button, click Installations at the top of the launcher. Then click New in the upper-left corner. Type a name for the installation (i.e. «OptiFine»). Then use the «Version» menu to select the version with «OptiFine» in the title.
-
9
Click Play. It’s the green button in the bottom-center of the launcher. This launches a new game of Minecraft with the OptiFine mod enabled.
-
10
Click Singleplayer, Multiplayer, or Realms. Local single-player games can be found under the «Singleplayer» option. Game servers can be found under «Multiplayer.» Games that are part of your Minecraft Realms subscription can be found under «Realms».
-
11
Select a game and click Play Selected World or Join Server. This either loads your Minecraft game or connects you to a multiplayer server.
- Alternatively, you can click Create New World to start a new game.
- Servers with lots of players and lots of detail may be especially slow with OptiFine.
-
12
Press and hold C. When the OptiFine mod is enabled, you can zoom by pressing and holding the «C» key.


Advertisement
-
1
Open the Minecraft Launcher. The Minecraft Launcher has an icon that resembles a grass block. Click the icon in your Windows Start menu or Applications folder to open the Minecraft launcher. The Minecraft launcher can be used to launch Minecraft:
- Using a lower field of view reduces the number of objects on-screen and zooms in on the objects in your center view. This won’t zoom in by a lot, but it will make objects appear significantly closer.
- Minecraft: Windows 10 Edition is different from Minecraft: Java Edition. You can find out which version you are playing by launching the game and checking to see if it says «Java Edition» or «Windows 10 Edition» below «Minecraft» on the title screen.
-
2
Click Play. It’s the green button in the bottom-center of the launcher. This launches Minecraft.
-
3
Click Singleplayer, Multiplayer, or Realms. Local single-player games can be found under the «Singleplayer» option. Game servers can be found under «Multiplayer.» Games that are part of your Minecraft Realms subscription can be found under «Realms».
-
4
Select a game and click Play Selected World or Join Server. This either loads your Minecraft game or connects you to a multiplayer server.
- Alternatively, you can click Create New World to start a new game.
-
5
Press Esc. This opens the Game Menu.
-
6
Click Options…. It’s the fourth button on the left in the Game Menu.
-
7
Drag slider bar in the «FOV» box to the left. The «FOV» bar is at the top of the Options menu and to the left. Drag the FOV bar to the left to lower your field of view. This will make objects appear significantly closer.[2]


Advertisement
-
1
Open Minecraft. This method works on Minecraft for smartphones and tablets, game consoles, and Minecraft: Windows 10 Edition.
- Using a lower field of view reduces the number of objects on-screen and zooms in on the objects in your center view. This won’t zoom in by a lot, but it will make objects appear significantly closer.
- Minecraft: Windows 10 Edition is different from Minecraft: Java Edition. You can find out which version you are playing by launching the game and checking to see if it says «Java Edition» or «Windows 10 Edition» below «Minecraft» on the title screen.
-
2
Click or tap Play. It’s the first button at the top of the title page. This displays saved games for you to play.
-
3
Select or create a new game. Click a game to load it. Single-player games are under the «Worlds» tab. Click Create New to start a new game. You can join a friend’s game under the «Friends» tab, or join a multiplayer game under the «Servers» tab.
-
4
Open the game menu. To open the Game Menu, tap the icon that resembles a pause button with two vertical lines at the top on smartphones and tablets. On game consoles, press the «Options», «Menu (☰)», or «+» button to open the game menu. On Windows 10 Edition, press the «Esc» button.
-
5
Select Settings. It’s the second option in the game menu. This displays the Settings menu where you can adjust your game preferences.
-
6
Select Video. It’s towards the bottom of the Settings menu in the left panel. It’s the second option under «General.»
-
7
Lower the slider bar below «FOV.» It’s in the panel to the right about halfway down the menu. This lowers the field of view. Using a lower field of view will make objects appear significantly closer.


Advertisement
Add New Question
-
Question
Does this work on the regular Minecraft servers?

Yes, most. Some servers ban it.
-
Question
Do I need Forge to use OptiFine?
No you can download OptiFine with or without Forge.
-
Question
In servers like Jartex network it doesn’t allow me to zoom, I downloaded everything. What should I do?
Raai0100
Community Answer
Maybe they don’t allow you to zoom as it is banned. You should check with the owner of the server.
See more answers
Ask a Question
200 characters left
Include your email address to get a message when this question is answered.
Submit
Advertisement
-
You can see far away objects and mobs using the Spyglass in all versions of Minecraft.
Thanks for submitting a tip for review!
Advertisement
Video
References
About This Article
Article SummaryX
1. Download the OptiFine mod from https://optifine.net/downloads.
2. Open the OptiFine «.jar» file in your Downloads folder and click Install.
3. Open the Minecraft launcher.
4. Use the menu to the left of the «Play» button to select «OptiFine».
5. Click Play.
6. Load a game in Minecraft.
7. Press and hold «C» to zoom.
Did this summary help you?
Thanks to all authors for creating a page that has been read 210,142 times.
Did this article help you?
![]()
Download Article
![]()
Download Article
Zooming isn’t a native feature in Minecraft. However, the OptiFine mod for Minecraft: Java Edition adds improved graphics and the ability to zoom. Minecraft: Java Edition is available on PC, Mac, and Linux computers. You cannot install mods on Minecraft: Windows 10 Edition or Minecraft for smartphones or game consoles. However, you can lower the field-of-view (FOV) in the Settings menu, which makes objects appear a little closer. This wikiHow teaches you how to zoom using the OptiFine mod and how to lower the FOV in the Settings menu.
-
1
Go to https://optifine.net/downloads in a web browser. This is the website to download the OptiFine mod. OptiFine is an improved graphics mod that adds the ability to zoom in Minecraft, among other things. It also includes improved graphics, high definition textures, dynamic lighting, realistic water, and more.
- In order to install OptiFine or any other mods, you need Minecraft: Java Edition for PC, Mac, or Linux. You cannot install mods on Minecraft: Windows 10 Edition or Minecraft for mobile devices or game consoles.
- Minecraft: Windows 10 Edition is different from Minecraft: Java Edition. You cannot install Optifine on Minecraft: Windows 10 Edition. You can find out which version you are playing by launching the game and checking to see if it says «Java Edition» or «Windows 10 Edition» below «Minecraft» on the title screen.
-
2
Click (Mirror). It’s to the right of the latest version of the OptiFine mod. This takes you to a direct download for the OptiFine mod.
- If you click the button that says Download, you will be taken to an adware website that may contain malicious software.[1]
Advertisement
- If you click the button that says Download, you will be taken to an adware website that may contain malicious software.[1]
-
3
Click Download. It’s below the latest version of OptiFine. This downloads a «.jar» file for the latest version of OptiFine to your Downloads folder.
- This file may be flagged as potentially harmful by your web browser or Antivirus program. If asked if you want to keep the file, click Keep or a similar option to confirm you want to download this file.
- OptiFine may cause your game to run slower if your PC has a slower graphics card or processor.
-
4
Double-click the OptiFine «.jar» file. The OptiFine «.jar» file you just downloaded can be found in your Downloads folder. Double-click the file to begin the installation process.
- If the file doesn’t open, or it doesn’t have an icon that resembles a coffee cup, you need to install the latest version of Java.
-
5
Click Install. This installs the OptiFine mod for Minecraft.
- You must run the latest version of Minecraft in the Minecraft launcher at least once before you can install the OptiFine mod.
-
6
Click Ok. Once the mod is installed, you will see a pop-up alert informing you the mod was successfully installed. Click Ok to close the window.
-
7
Open the Minecraft Launcher. The Minecraft Launcher has an icon that resembles a grass block. Click the icon in your Windows Start menu or Applications folder to open the Minecraft launcher.
-
8
Select the OptiFine mod. Use the drop-down menu to the left of the green «Play» button to select «OptiFine».
- If you don’t see OptiFine in the drop-down menu next to the «Play» button, click Installations at the top of the launcher. Then click New in the upper-left corner. Type a name for the installation (i.e. «OptiFine»). Then use the «Version» menu to select the version with «OptiFine» in the title.
-
9
Click Play. It’s the green button in the bottom-center of the launcher. This launches a new game of Minecraft with the OptiFine mod enabled.
-
10
Click Singleplayer, Multiplayer, or Realms. Local single-player games can be found under the «Singleplayer» option. Game servers can be found under «Multiplayer.» Games that are part of your Minecraft Realms subscription can be found under «Realms».
-
11
Select a game and click Play Selected World or Join Server. This either loads your Minecraft game or connects you to a multiplayer server.
- Alternatively, you can click Create New World to start a new game.
- Servers with lots of players and lots of detail may be especially slow with OptiFine.
-
12
Press and hold C. When the OptiFine mod is enabled, you can zoom by pressing and holding the «C» key.
Advertisement
-
1
Open the Minecraft Launcher. The Minecraft Launcher has an icon that resembles a grass block. Click the icon in your Windows Start menu or Applications folder to open the Minecraft launcher. The Minecraft launcher can be used to launch Minecraft:
- Using a lower field of view reduces the number of objects on-screen and zooms in on the objects in your center view. This won’t zoom in by a lot, but it will make objects appear significantly closer.
- Minecraft: Windows 10 Edition is different from Minecraft: Java Edition. You can find out which version you are playing by launching the game and checking to see if it says «Java Edition» or «Windows 10 Edition» below «Minecraft» on the title screen.
-
2
Click Play. It’s the green button in the bottom-center of the launcher. This launches Minecraft.
-
3
Click Singleplayer, Multiplayer, or Realms. Local single-player games can be found under the «Singleplayer» option. Game servers can be found under «Multiplayer.» Games that are part of your Minecraft Realms subscription can be found under «Realms».
-
4
Select a game and click Play Selected World or Join Server. This either loads your Minecraft game or connects you to a multiplayer server.
- Alternatively, you can click Create New World to start a new game.
-
5
Press Esc. This opens the Game Menu.
-
6
Click Options…. It’s the fourth button on the left in the Game Menu.
-
7
Drag slider bar in the «FOV» box to the left. The «FOV» bar is at the top of the Options menu and to the left. Drag the FOV bar to the left to lower your field of view. This will make objects appear significantly closer.[2]
Advertisement
-
1
Open Minecraft. This method works on Minecraft for smartphones and tablets, game consoles, and Minecraft: Windows 10 Edition.
- Using a lower field of view reduces the number of objects on-screen and zooms in on the objects in your center view. This won’t zoom in by a lot, but it will make objects appear significantly closer.
- Minecraft: Windows 10 Edition is different from Minecraft: Java Edition. You can find out which version you are playing by launching the game and checking to see if it says «Java Edition» or «Windows 10 Edition» below «Minecraft» on the title screen.
-
2
Click or tap Play. It’s the first button at the top of the title page. This displays saved games for you to play.
-
3
Select or create a new game. Click a game to load it. Single-player games are under the «Worlds» tab. Click Create New to start a new game. You can join a friend’s game under the «Friends» tab, or join a multiplayer game under the «Servers» tab.
-
4
Open the game menu. To open the Game Menu, tap the icon that resembles a pause button with two vertical lines at the top on smartphones and tablets. On game consoles, press the «Options», «Menu (☰)», or «+» button to open the game menu. On Windows 10 Edition, press the «Esc» button.
-
5
Select Settings. It’s the second option in the game menu. This displays the Settings menu where you can adjust your game preferences.
-
6
Select Video. It’s towards the bottom of the Settings menu in the left panel. It’s the second option under «General.»
-
7
Lower the slider bar below «FOV.» It’s in the panel to the right about halfway down the menu. This lowers the field of view. Using a lower field of view will make objects appear significantly closer.
Advertisement
Add New Question
-
Question
Does this work on the regular Minecraft servers?
Yes, most. Some servers ban it.
-
Question
Do I need Forge to use OptiFine?
No you can download OptiFine with or without Forge.
-
Question
In servers like Jartex network it doesn’t allow me to zoom, I downloaded everything. What should I do?
Raai0100
Community Answer
Maybe they don’t allow you to zoom as it is banned. You should check with the owner of the server.
See more answers
Ask a Question
200 characters left
Include your email address to get a message when this question is answered.
Submit
Advertisement
-
You can see far away objects and mobs using the Spyglass in all versions of Minecraft.
Thanks for submitting a tip for review!
Advertisement
Video
References
About This Article
Article SummaryX
1. Download the OptiFine mod from https://optifine.net/downloads.
2. Open the OptiFine «.jar» file in your Downloads folder and click Install.
3. Open the Minecraft launcher.
4. Use the menu to the left of the «Play» button to select «OptiFine».
5. Click Play.
6. Load a game in Minecraft.
7. Press and hold «C» to zoom.
Did this summary help you?
Thanks to all authors for creating a page that has been read 210,142 times.
Did this article help you?
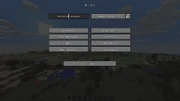
Демонстрация настроек в Java Edition 1.12.2.
Настройки в Minecraft используются для изменения условий игрового процесса и визуального восприятия. Чтобы выбрать определённый параметр, необходимо нажать кнопку Настройки в главном меню.
Дополнительные значения изменяются путём редактирования файла options.txt (Java Edition).
Java Edition
Настройки
Список настроек с описанием параметров.
| Настройка | Описание | Параметры |
|---|---|---|
| Поле зрения | Регулирование углового пространства, видимого игроком. | 30 (70)—110
|
| Сложность | Изменение уровня сложности игрового процесса. Если в дальнейшем зафиксирован, то настраивается с помощью команды консоли /difficulty.Невозможно изменить в режиме игрового процесса Хардкор и на сервере без прав администратора. Будучи владельцем сервера, можно отредактировать файл server.properties.
|
Мирная/Лёгкая/Нормальная/Сложная
|
Внешний вид
| Настройка | Описание | Параметры |
|---|---|---|
| Плащ | Изменение отображения плащей у игроков. Деактивация настройки также повлияет на элитры. | Включить/Выключить
|
| Куртка | Изменение отображения куртки. | Включить/Выключить
|
| Левый рукав | Изменение отображения левого рукава. | Включить/Выключить
|
| Правый рукав | Изменение отображения правого рукава. | Включить/Выключить
|
| Левая штанина | Изменение отображения левой штанины. | Включить/Выключить
|
| Правая штанина | Изменение отображения правой штанины. | Включить/Выключить
|
| Головной убор | Изменение отображения головного убора. | Включить/Выключить
|
| Основная рука | Изменение ведущей руки. | Правая/Левая
|
Музыка и звуки
| Настройка | Описание | Параметры |
|---|---|---|
| Общая громкость | Регулирование общей громкости. | Выключить—100%
|
| Музыка | Регулирование громкости музыки, воспроизводимой во время игрового процесса. | Выключить—100%
|
| Музыкальные блоки | Регулирование громкости музыки проигрывателей и музыкальных блоков. | Выключить—100%
|
| Погода | Регулирование громкости звуков дождя и молний. | Выключить—100%
|
| Блоки | Регулирование громкости звуков размещения/разрушения и активации блоков. | Выключить—100%
|
| Враждебные существа | Регулирование громкости звуков враждебных и нейтральных существ. | Выключить—100%
|
| Дружелюбные существа | Регулирование громкости звуков дружелюбных существ. | Выключить—100%
|
| Игроки | Регулирование громкости звуков игроков. | Выключить—100%
|
| Окружение | Регулирование громкости фоновых звуков. | Выключить—100%
|
| Голос/Речь | Регулирование громкости голоса/речи, используется исключительно для создателей карт. | Выключить—100%
|
| Субтитры | Изменение отображения субтитров. | Включить/Выключить
|
Настройки графики
| Настройка | Описание | Параметры |
|---|---|---|
| Графика | Изменение графики:
|
Потрясающе!/Детальная/Быстрая
|
| Прорисовка | Изменение расстояния рендеринга. Высокие значения оказывают негативное влияние на FPS. |
2 (12)—32
|
| Мягкое освещение | Сглаживание освещения блоков. Не оказывает влияние на игровой процесс, но негативно сказывается на FPS. |
Максимум/Минимум/Выключить
|
| Частота кадров | Регулирование ограничения FPS. Если выбрать значение, кратное обновлению монитора, то это сэкономит вычислительную мощность компьютера. |
10 (120)Максимум
|
| 3D анаглиф | Получение стереоэффекта за счёт использования разных цветов для каждого глаза, наравне с анаглифическими очками. С предварительной сборки 17w43a неактуально. |
Включить/Выключить
|
| Покачивание камеры | Использование реалистичного движения. Оказывает негативное влияние на FPS. |
Включено/Выключено
|
| Индикатор атаки | Изменение отображения индикатора атаки:Прицел — отображение индикатора атаки под прицелом в виде серого меча;Инвентарь — отображение индикатора атаки около пояса инвентаря на той стороне, в который выбрана ведущая рука, в виде серого меча;Выключить — отображение индикатора атаки отключено.
|
Прицел/Инвентарь/Выключить
|
| Яркость | Регулирование освещения блоков, даже при полной темноте. Не оказывает влияние на игровой процесс, придавая исключительно визуальный эффект. Работает в любом измерении и при эффекте ночного видения. |
0%—100%
|
| Облака | Изменение отображения облаков:Объёмные — трёхмерные облака;Упрощённые — двухмерные облака;Выключить — облака отключены.
|
Объёмные/Упрощённые/Выключить
|
| Интерфейс | Изменение размера интерфейса, включая HUD. | Авто/Мелкий/Обычный/Крупный
|
| Частицы | Изменение отображения частиц. | Все/Меньше/Минимум
|
| Полноэкранный режим | Использование полноэкранного режима | Включить/Выключить
|
| Использовать V-Sync | Использование вертикальной синхронизации. | Включить/Выключить
|
| Уровни детализации | Сглаживание удалённых текстур посредством сглаживания деталей текстуры. | Выключить—4
|
| Использование VBO | Использование альтернативной системы рендеринга, которая производительнее стандартной на 10-15 %. | Включить/Выключить
|
| Тени сущностей | Изменение отображения тени сущностей. | Включить—Выключить
|
Управление
Данная вкладка предназначена для настройки управления.
Язык
Основная статья: Язык
Данная вкладка предназначена для изменения языка
Настройки чата
| Настройка | Описание | Параметры |
|---|---|---|
| Чат | Изменение отображения чата:Виден — чат отображается на серверах;Только команды — чат отображается на серверах только для ввода команд;Скрыт — чат на серверах отключён.
|
Виден/Только команды/Скрыт
|
| Цвета | Изменение отображение цветов:Включено — отображение текста в чате в различных цветах;Выключено — отображение текста в чате только в светло-сером цвете.
|
Включено/Выключено
|
| Ссылки | Изменение отображения ссылок:Включено — отображение ссылок в чате используется;Выключено — отображение ссылок в чате отключено.
|
Включено/Выключено
|
| Непрозрачность | Изменение непрозрачности чата. | 10% — 100%
|
| Запрашивать переход | Изменение отображения запроса перехода:Включено — при переходе по ссылке на веб-страницу появится уведомление;Выключено — будет совершён мгновенный переход по ссылке на веб-страницу без предупреждения.
|
Включено/Выключено
|
| Размер | Изменение размера чата. | Выключено — 100%
|
| Активный чат | Изменение отображения активного чата. | 20px — 180px
|
| Неактивный чат | Изменение отображения неактивного чата. | 20px (90px)—180px
|
| Ширина | Регулирование ширины чата. | 40px—320px
|
| Малый экран отладки | Изменение отображения краткой информации в режиме отладки. | Включено/Выключено
|
| Диктор | Использование диктора. | Включить/Выключить
|
Пакеты ресурсов
Данная вкладка предназначена для выбора пакета ресурсов.
Сбор данных
| Настройка | Описание | Параметры |
|---|---|---|
| Отправка данных | Использование отправки определённой информации Mojang AB для улучшения Minecraft. | Включить/Выключить
|
Bedrock Edition
Игра
| Настройка | Описание |
|---|---|
| Имя пользователя | Изменение публичного имени пользователя (недоступно при входе в Minecraft Realms, можно изменить через Xbox Live). |
| Громкость звука | Регулирование уровня громкости звука. |
| Сложность | Изменение уровня сложности игрового процесса (4 опции, аналогично Minecraft: Java Edition (с версии Alpha 0.12.1)). |
| Вид от третьего лица | Изменение использования вида от третьего лица. |
| Многопользовательская игра | Изменение разрешения пользователям присоединяться к серверу. |
| Широковещательный канал в LAN | Изменение разрешения локальным пользователям присоединяться к серверу. |
| Широковещательный канал в Xbox Live | Пригласить друзей из Xbox Live, чтобы присоединиться к серверу. |
Управление
Данная вкладка предназначена для настройки управления.
Обратная связь
| Настройка | Описание |
|---|---|
| Уничтожить блок (вибрация) | Включение вибрации при уничтожении блоков (только для Android). |
Графика
| Настройка | Описание |
|---|---|
| Яркость | Регулирование сглаживания освещения блоков. |
| Прорисовка | Изменение расстояния рендеринга. |
| Поле зрения | Регулирование углового пространства, видимого игроком. |
| Детальная графика | Изменение использования детальной графики. Примечание: Облака на быстрой графике остаются объемными, но становятся непрозрачными.
|
| Детальная листва | Изменение использования детальной листвы, будучи прозрачной. |
| Дальность прорисовки частиц | Изменение расстояния рендеринга частиц. |
| Детальное небо | Изменение отображения солнца, луны, облаков, звёзд и цвета неба |
| Анимация | Изменение отображения воды, лавы и огня. |
| Антиалиасинг | Сглаживание неровных линий и цветовых переходов текстур. |
| Тексел антиалиасинга | Сглаживание текстур блоков, придавая им ровный вид. |
Экспериментальные
| Настройка | Описание |
|---|---|
| Скрыть HUD | Изменение отображения HUD. |
| Ограничение игрового мира | Регулирование ограничения игрового мира. |
| Пользовательский интерфейс | Изменение отображения интерфейса. |
История
| Classic-версия Java Edition | ||
|---|---|---|
| 0.0.12a | Добавлена возможность регулирования дальности прорисовки. | |
| 0.23 | Добавлена страница настроек. | |
| Добавлена кнопка Графика. | ||
| Добавлена возможность назначить индивидуальные клавиши. | ||
| 0.24_01 | Добавлена возможность использования 3D анаглифа в качестве тестирования. | |
| 0.27 | 24.09.2009 | Добавлена возможность регулирования FPS. |
| Indev-версия Java Edition | ||
| 0.31 | 05.02.2010 | Добавлена возможность регулирования уровня сложности игрового процесса. |
На уровне сложности Мирная регенерируется здоровье игрока и не спаунятся враждебные существа. |
||
| Infdev-версия Java Edition | ||
| 15.06.2010 | В кнопке Графика появилась возможность выбора между параметрами детально и быстро. |
|
| Альфа-версия Java Edition | ||
| 1.0.12 | Большие слизни больше не спаунятся на уровне сложности Мирный. |
|
| 1.1.1 | Добавлена возможность регулирования чувствительности компьютерной мыши. | |
| Добавлена возможность регулирования громкости музыки и звуков. | ||
| Бета-версия Java Edition | ||
| 1.3 | Добавлена возможность регулирования мягкого освещения. | |
| 1.6.3 | Добавлена возможность ограничения FPS до 40 и во время сна 10. | |
| 1.6.5 | Добавлена кнопка Улучшенный OpenGL. | |
| 1.8 | Добавлена возможность регулирования яркости. | |
| Добавлена возможность регулирования угла обзора. | ||
Добавлены три клавиши управления, которые могут быть переназначены: Атака, Использование предмета и Выбор блока. |
||
| Официальный выпуск Java Edition | ||
| 1.0.0 | Beta 1.9 Prerelease 5 | Добавлен параметр отключения облаков во вкладке Настройки графики. |
| 1.3.1 | 12w21a | Добавлена вкладка Настройки чата. |
| 1.4.2 | 12w34a | Вкладка Настройки чата переименована в Настройки сетевой игры |
| Добавлена возможность отключить отображение плаща. | ||
| Добавлена кнопка Полноэкранный режим. | ||
| Добавлена кнопка Использовать V-Sync. | ||
| 1.4.6 | 1.4.6-pre | Добавлен параметр для сенсорных экранов. |
| 1.5 | 13w09b | Перемещена кнопка Пакеты текстур из главного меню в настройки. |
| 1.7.2 | Изменён экран главного меню. | |
| Добавлена кнопка Super Secret Settings. | ||
| При нажатии кнопки Super Secret Settings проигрывается случайный звук. | ||
| Обновлена кнопка Прорисовка. Рендеринг, на высоких значениях параметра, осуществляется путём загрузки 16 чанков, вместо 12. | ||
| 1.7.4 | 13w47a | Добавлена настройка трансляции и чата Twitch. |
| 1.7.6 | 1.7.6-pre1 | Кнопка Пакет ресурсов присутствует на каждом сервере со следующими значениями: всплывающее окно, включить |
| Изменён минимальный угол обзора параметра со значения 60 до 30. | ||
| 1.8 | 14w02a | Добавлена возможность зафиксирования уровня сложности игрового процесса, который в дальнейшем изменяется с помощью консольной команды /diffurity. |
| 14w03a | Добавлена вкладка Внешний вид. | |
| 14w25a | Удалена кнопка Анизотропная фильтрация во вкладке Настройки графики. | |
| 14w28a | Добавлена кнопка Альтернативные блоки во вкладке Настройки графики. | |
| 14w29a | Во вкладке Настройки мультиплеера добавлена возможность настроить сокращение информации в экране отладки F3. | |
| Добавлена кнопка Использование VBO во вкладке Настройка графики. | ||
| 14w30a | Если используется 64-битная версия Java, то у кнопки Прорисовка во вкладке Настройки графики увеличится максимальное значение 32, однако для плавного FPS необходимо 2 ГБ ОЗУ.
|
|
| Удалена кнопка Улучшенный OpenGL во вкладке Настройки графики. | ||
| 1.8.1 | Вкладка Настройки мультиплеера переименована в Настройки чата. | |
| Добавлена кнопка Облака во вкладке Настройки графики. | ||
| Кнопка Настройки графики во вкладке Настройки графики затрагивает только отображение листвы и частиц дождя. | ||
| Добавлена кнопка Тени сущностей во вкладке Настройки графики. | ||
| 1.9 | 15w31a | Добавлена кнопка Субтитры во вкладке Музыка и звуки. |
| Добавлена кнопка Ведущая рука во вкладке Внешний вид. | ||
| Удалена кнопка Super Secret Settings. | ||
| Удалена кнопка Настройки трансляции. | ||
| Удалена кнопка Альтернативные блоки во вкладке Настройки графики. | ||
| 15w34a | Добавлена кнопка Индикатор атаки во вкладке Настройки графики. | |
| 1.9 | Добавлена кнопка Голос/речь во вкладке Музыка и звуки. | |
| 1.13 | 17w43a | Удалена кнопка 3D анаглиф во вкладке Настройки графики. Также теперь можно настроить разрешение экрана в полноэкранном режиме. |
| 1.13-pre6 | Удалена кнопка, позволявшая принудительно использовать Unicode-шрифт. | |
| 1.13-pre8 | Возвращена настройка «Шрифт Unicode» в меню выбора языка. | |
| 1.13-pre10 | Название опции Fullscreen resolution изменено на Fullscreen Resolution. |
|
| 1.14 | 18w46a | Из меню настроек убран параметр выключения VBO, так как он теперь включён всегда. |
| 1.16 | 20w21a | Добавлена возможность импортировать/экспортировать настройки мира. |
| 1.16 Pre-release 1 | Добавлена новая графическая опция «Fabulous!» (Перевод с английского: «Потрясающе!») Для некоторых прозрачных элементов используются слои смешивания по пикселям. | |
| 1.16 Pre-release 3 | Ключ локализации для привязки клавиши неведущей руки был изменён с key.swapHands на key.swapOffhand. |
|
| Изменено описание типа графики «Детально» на «’Fancy’ graphics balances performance and quality for the majority of machines. [След. строка] Weather, clouds and particles may not appear behind translucent blocks or water.» Ранее было «’Fancy’ graphics balances performance and quality for the majority of machines.» | ||
| Изменено описание «потрясающего» типа графики на «’Fabulous’ graphics uses screen shaders for drawing weather, clouds and particles behind translucent blocks and water. [След. строка] This may severely impact performance for portable devices and 4K displays.» Ранее было «’Fabulous’ graphics enables screen shaders to draw translucent objects per-pixel. [След. строка] This may severely impact performance for portable devices and 4k displays.» | ||
| Изменено описание клавиши смены неведущей руки в меню управления с «Swap Item In Hands» на «Swap Item With Offhand». | ||
| 1.16 Pre-release 5 | Добавлено предупреждающее сообщение при включении «Превосходной!» графики. Предупреждение появляется, когда известно, что графический процессор и/или драйвер игрока вызывает проблемы с прорисовкой с данным режимом графики, или если драйвер определяется как проблемный. Список влияющих драйверов может быть изменён с помощью пакетов ресурсов. | |
| Убраны кавычки у «Быстрая» и «Детальная» в описаниях этих режимов графики. | ||
| «Превосходный!» в описании превосходной графики теперь отображается курсивом («Превосходный!»). | ||
| 1.16.2 | 1.16.2 Pre-release 1 | Добавлен новый ползунок эффектов искажений, который влияет на такие эффекты, как Тошнота или нахождение в портале Нижнего мира. |
| 1.17 | 20w46a | Кнопки в меню, которые изменяют какое-то значение (например, сложность), теперь могут меняться с помощью колёсика мыши. |
| Тип мира «Debug» теперь можно получить, удерживая клавишу Alt (было ⇧ Shift). | ||
| Альфа-версия Pocket Edition | ||
| 0.4.0 | Добавлен новый параметр в настройке Сложность — Мирный, в котором спаун враждебных и нейтральных существ отсутствует. |
|
| 0.7.0 | Разделение настроек на 4 вкладки: Игра, Управление, Графика и Звук. | |
| Добавлены параметры во вкладке Игра: Игровое имя, Сложность, Вид от 3-его лица, Размер геймпада и Локальный сервер по Wi-Fi. | ||
| Добавлены параметры во вкладке Управление: Чувствительность, Инвертирование Y-оси, Левша, Сенсорный режим, Управление Split и Вибрация во время разрушения блока. | ||
| Добавлены параметры во вкладке Графика: Дальность прорисовки, Красивая графика, Красивые облака, Анимированная вода и Экспериментальная графика (мягкое освещение блоков). | ||
| Добавлены параметры во вкладке Звук: Громкость. | ||
| 0.8.0 | Добавлены новые параметры в настройке Дальность прорисовки: 256 (далеко) и 400 (очень далеко).
|
|
| Удалена настройка Экспериментальная графика (теперь используется всегда). | ||
Настройка Графика по умолчанию использует параметр Детальная.
|
||
Настройка Дальность прорисовки по умолчанию использует параметр 256. |
||
| 0.9.3 | На мобильных устройствах с ОС Android появилась возможность выбора 3 параметров настройки Дальность прорисовки. | |
| 0.10.0 | Во вкладке Настройки графики появилась настройка Яркость. | |
| 0.11.0 | Добавлена возможность переименования игровых миров. | |
| Добавлена возможность изменения режима игрового процесса. | ||
| 0.12.1 | Добавлена возможность изменение прыжка и приседания. | |
| 0.13.0 | Добавлена возможность отключения сетевой игры в главном меню. | |
| 0.13.1 | Перенесён настройка Громкость звука из Настройки в главное меню. | |
| На титульном экране больше не отображаются настройки в виде ключа. | ||
| Значки параметров стали немного больше. | ||
| 0.16.0 | Переработан экран настроек. |
См. также
- Экран отладки