![]()
I have installed MariaDB on Ubuntu 16.04. But when trying for the first time is says:
~$ mysql
ERROR 1045 (28000): Acces denied for user 'username'@ 'localhost' (using password: NO)
And when I try mysql_secure_installation to set a root password is says:
~$ mysql_secure_installation
NOTE: RUNNING ALL PARTS OF THIS SCRIPT IS RECOMMENDED FOR ALL MariaDB
      SERVERS IN PRODUCTION USE!  PLEASE READ EACH STEP CAREFULLY!

In order to log into MariaDB to secure it, we'll need the current
password for the root user.  If you've just installed MariaDB, and
you haven't set the root password yet, the password will be blank,
so you should just press enter here.

Enter current password for root (enter for none):
ERROR 1045 (28000): Access denied for user 'root'@'localhost' (using password: NO)
Enter current password for root (enter for none):
Giving Enter doesn’t work.
I read something about «UNIX_SOCKET plugin is installed by default in new installs of Ubuntu 15.10» but I do not understand how I can log in with this. I hope getting a answer soon!
Answer
It seems that you have forgotten root password which was set during installation of MariaDB
Solution:- reset root password
Follow below steps to reset root password:-
1) Stop mariadb services
service mysql stop
2) Run mysqld safe version by below command
sudo mysqld_safe —skip-grant-tables &
3) Run mysql client with below commnad on new terminal
mysql -u root
4) Set password in user table of mysql database
use mysql;
update user SET PASSWORD=PASSWORD(«<new_password>») WHERE USER=’root’;
flush privileges;
exit
5) Login with new password, set in above command
mysql -u root -p
Enter password: <new_password>
- ↑ Starting and Stopping MariaDB ↑
Comments
Content reproduced on this site is the property of its respective owners,
and this content is not reviewed in advance by MariaDB. The views, information and opinions
expressed by this content do not necessarily represent those of MariaDB or any other party.
MySQL users often face an issue called Error 1045 (28000) access denied for user ‘root’@’localhost’ (using password: yes). This usually occurs when you enter an incorrect password or password for your database. Fixing these credentials can resolve this error in no time.
In this article, we will look at the ways to resolve this error.
How to fix “Error 1045 (28000) access denied for user ‘root’@’localhost’ (using password: yes)”?
The error looks something like this —
mysql -uroot -proot

ERROR 1045 (28000): Access denied for user 'root'@'localhost' (using password: YES)
It arises when you perform a fresh installation of MySQL and try to login with a password. The default password of MySQL is blank () (i.e. empty string).
So, you can login to the MySQL server using the same password.
Example
>mysql -uroot -pEnter password:
Welcome to the MariaDB monitor. Commands end with ; or g.
Your MariaDB connection id is 9
Server version: 10.4.11-MariaDB mariadb.org binary distribution
Copyright (c) 2000, 2018, Oracle, MariaDB Corporation Ab and others.
Type ‘help;’ or ‘h’ for help. Type ‘c’ to clear the current input statement.
MariaDB [(none)]>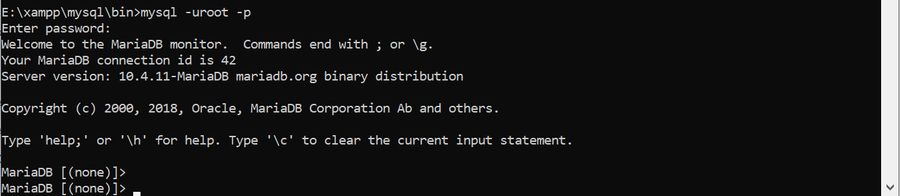
The best practice is to change the password after the new installation.
Set root user password
You must set the root user password after performing the new installation. Here is the code to set it –
Login as user root with blank password

>mysql -u root

mysql> ALTER USER 'root'@'localhost' IDENTIFIED BY 'abc';
Now the new password for root user is abc.
How to fix the Error 1045 (28000)?
Let us look at the ways to fix this problem –
-
Enter the correct credentials
The primary method to fix this error is to enter the correct username and password using the following command –
mysql –u username –p -
Ensure the user is correct
Sometimes, the user you might be trying to access does not exist on the MySQL server. You can check if the user exists using the following code-
MariaDB [(none)]> select user from mysql.user where user like '%root%';

+------+

| User |

+------+

| root |

| root |

| root |

+------+

3 rows in set (0.001 sec) 
If the user does not exist, create it with the desired username.
-
Enter the correct host name
You might be trying to access the server from a host that is different from the defined host name. You will encounter Error 1045 in this case. You can use this code to view details of the user –
To fix this, you can update the host name for the user using the code below –
mysql> mysql -u root -pabc -h <IP> -P 3306You might encounter the error in due to the following scenarios –
Entered wrong password

>mysql -uroot -pssssss

ERROR 1045 (28000): Access denied for user 'root'@'localhost' (using password: YES)

Host doesn’t not have permission to connect database
This is a very common error that occurs while connecting to a remote database. While connecting to such a database we need to give access to the HOST IP ADDRESS to connect to it.
This is the IP Address of the source system which connects to the database server.
If access is not given, then run the given command –
CREATE USER ‘dbuser1’@'< Host IP >’ IDENTIFIED VIA mysql_native_password USING ‘***’;GRANT ALL PRIVILEGES ON *.* TO ‘dbuser1’@'< Host IP >’ REQUIRE NONE WITH GRANT OPTION MAX_QUERIES_PER_HOUR 0 MAX_CONNECTIONS_PER_HOUR 0 MAX_UPDATES_PER_HOUR 0 MAX_USER_CONNECTIONS 0;
Conclusion
Apart from all this, make sure the host contains the correct IP address and host name, to avoid the Error 1045 (28000) access denied for user ‘root’@’localhost’ (using password: yes).
This “access denied” error is one of the most common errors you’ll get when working with MySQL.
Learn how to fix it, and see a range of solutions if the suggested fix does not work, in this article.
When you try to connect to a MySQL database on your own computer (called “localhost”), you may get this error:
Access denied for user 'root'@'localhost' (using password: YES)
You might get an error code in front of it:
ERROR 1045 (28000): Access denied for user 'root'@'localhost' (using password: YES)
You might also get the error with “using password no”:
Access denied for user 'root'@'localhost' (using password: NO)
You’ll see this if you log into MySQL using the command line:
mysql -u root -p
You might also see this if you log in to MySQL using an IDE such as MySQL Workbench. Or even if you use phpMyAdmin.
What does this mean? How can you fix it?
There are a few solutions to this, which I’ve detailed below. Try one, and if it doesn’t work, try another one.
Also a tip for logging in: don’t enter your password in the command line itself, because this will be stored in your command history. Use the -p option, as mentioned above, and then you’ll be prompted to enter the password.
Solution 1: Sudo then Change Password
If you get the “access denied” error, one way to solve it is by using sudo to log in to mysql and change the root password.
Step 1: Open the command line on your system.
Step 2: Open mysql using the sudo command:
sudo mysql
Step 3: Enter the password for this account.
Step 4: Change the auth_plugin to mysql_native_password, and the password for the root account, in a single command:
ALTER USER 'root'@'localhost'
IDENTIFIED WITH mysql_native_password BY 'your_new_password';
Substitute the word your_new_password with a new secure password that you want to use for the root account.
The mysql_native_password method is a traditional method of authentication and will allow you to login.
Step 5: Flush the privileges, which tells the server to refresh the grant tables and apply your changes, with this command:
FLUSH PRIVILEGES;Step 6: You can confirm that the new authentication method, or plugin, is used by selecting from the mysql.user table.
SELECT user, plugin
FROM mysql.user
Results:
| user | plugin |
| root | mysql_native_password |
Step 7: Exit the console by pressing CTRL + D or typing exit.
exit;
Step 8: Log in to mysql using the root account and the new password you set, which should work:
mysql -u root -p
You should now be logged in to the root account in mysql.
Solution 2: Edit My.cnf File
If the above solution did not work, you may need to edit the mysql.cnf file to allow for changes to the root account.
Step 1: Open the my.cnf file. This may be stored in:
/etc/my.cnf
/etc/mysql/my.cnf
If you’re not sure where it is, search your MySQL installation folder (e.g. on Windows or Mac) for the file.
If you don’t have a my.cnf file (MacOS does not include one by default). You can create one in the /etc folder if you like.
Step 2: Add the word skip-grant-tables under the word [mysqld]. Your file may look like this:
[mysqld]
skip-grant-tables
Step 3: Restart the MySQL server.
Step 4: Login to the root account:
mysql -u root -p
Step 5: Flush the privileges, which tells the server to refresh the grant tables and apply your changes, with this command:
FLUSH PRIVILEGES;Step 6: Set a new password for the account:
ALTER USER 'root'@'localhost' IDENTIFIED BY 'your_new_password';Substitute the word your_new_password with a new secure password that you want to use for the root account.
Step 7: Open the my.cnf file you opened in step 1, and remove the line about skip-grant-tables, and save the file.
Step 8: Restart the MySQL server again.
Step 9: Log in to the root account again:
mysql -u root -p
You should now be able to log in successfully with your new password and not get an error.
Conclusion
Either of these two solutions should hopefully solve the problem for you, and you should no longer get the error “Access denied for user ‘root’@’localhost’”.
If you have any questions, feel free to use the comments section below.