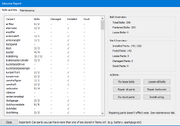
My Summer Car editor является бесплатным софтом, с помощью которого можно изменять файлы игры.
Основным файлом в котором содержатся данные об сохранении является deafultES2File.txt
Функции
В вкладке Satsuma Report можно делать следующие вещи: Установить проводку, починить все запчасти(не меняет их изношенность, о том как ее поменять речь идет ниже), собрать все детали, разобрать все детали, починить застрявшие детали, и починить кузов(формально это просто удаляет meshsave.txt).
Maintenanse
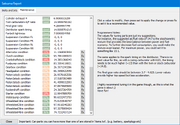
Является вкладкой с состоянием запчастей сатсумы и ее настроек. Такие как: воздушно-топливная смесь, настройка клапанов, развал колес, натяжение ремня(насчет этого не уверен) и метка ГРМ. Нажатием кнопки fix, можно улучшить состояние до 100%. Эти так сказать, основные настройки вы можете изменить открыв файл deafultES2File.txt. Остальные запчасти, расходники (свечи, масляной фильтр, аккумулятор и т.д) находятся в файле items.txt
Удаление мочевых пятен
С помощью MSC editor, можно удалить мочевые пятна следующим способом: находите файл homepisstain и ставите значение на 0.
Игрок. Опьянение, инициалы, вес и тд.
С помощью этого раздела, можно менять местоположение игрока, количество сигарет, нужды, скилл в собирании ягод, зависимость, вес, имя, фамилия, сделать смерть перманентной, изменить степень опьянения и куча всего прочего.
Возвращение дома себе.
Если я не ошибаюсь, вернуть дом можно если изменить параметр keyhome на 1.
Поймали вирус на ЭВМ? Вот решение!
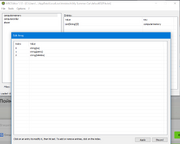
Находите computermemory и записываете эти параметры из скрина
Manage Keys
Меню где вы также можете присвоить себе транспорт или дом.
World Map
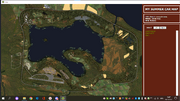
В этом меню можно выбрать определенные предметы, или все сразу.
Итоги
Надеюсь эта статья будет полезна, буду рад если кто то дополнит ее ссылками или сносками на некоторые термины. Многие возможности были еще не раскрыты, возможно в будущем дополню статью.
Overview
Руководство по MSCeditor часть вторая YOUTUBE
помощь
Как получить номера
1. Открываем файл “defaultES2File.txt”; 2. В фильтре вписываем “carinspected”; 3. Меняем значение параметра на “true”; 4. В фильтре вписываем “leimapaperiin”; 5. Меняем значение параметра на “true”; 6. Сохраняем изменения и проверяем в игре, номера будут в здании тех. осмотра.
Как поменять/установить шины
1. Открываем файл “defaultES2File.txt”; 2. В фильтре вписываем название нужного колеса (можно взять из таблицы выше, но в конце, вместо “transform” нам нужно “tiretype”, т.е., например, вместо “wheelocto1transform” нужно “wheelocto1tiretype”); 3. Меняем значение на одно из следующих: 0 – без шины; 1 – стандартная шина (новая); 2 – шина “Gommer Gobra”; 3 – раллийная резина; 4 – дрэговый слик; 5 – старая шина (которая дается при старте игры). 4. В фильтре вписываем название нужного колеса (но на этот раз в конце, вместо “transform” нам нужно “tirewear”, т.е., например, вместо “wheelocto1transform” нужно “wheelocto1tirewear”); 5. Меняем значение на “100”; 6. Повторяем 2, 3 и 4 действие для остальных колес, на которые нужно поменять/установить шины; 7. Сохраняем изменения и проверяем в игре.
Как купить весь тюнинг
1. Открываем файл “defaultES2File.txt”; 2. В фильтре вписываем “purchased”; 3. Меняем значения всех параметров, в названии которых есть “purchased” на “true”; 4. Сохраняем изменения и проверяем в игре. Тюнинг будет лежать сбоку магазина.
Как получить чемодан с деньгами без выполнения квеста
1. Открываем файл “defaultES2File.txt”; 2. В фильтре вписываем “drunkstage”; 3. Меняем значение параметра на “5”; 4. Сохраняем изменения и можно искать чемодан в игре. Возможность телепортировать чемодан появится после сохранения в игре.
Как восстановить дом после пожара
1. Открываем файл “defaultES2File.txt”; 2. В фильтре вписываем “bathroomdone”; 3. Меняем значения параметра на “false”; 4. В фильтре вписываем “bedroom1done”; 5. Меняем значения параметра на “false”; 6. В фильтре вписываем “bedroom2done”; 7. Меняем значения параметра на “false”; 8. В фильтре вписываем “kitchendone”; 9. Меняем значения параметра на “false”; 10. В фильтре вписываем “livingroomdone”; 11. Меняем значения параметра на “false”; 12. В фильтре вписываем “saunadone”; 13. Меняем значения параметра на “false”; 14. Сохраняем изменения и проверяем в игре.
Как исправить баг с дверями гаража
1. Открываем файл “defaultES2File.txt”; 2. В фильтре вписываем “garagedoorleftrotation”; 3. Удаляем значение; 4. В фильтре вписываем “garagedoorrightrotation”; 5. Удаляем значение; 6. Сохраняем изменения и проверяем в игре.
Как убрать ос из машины, которую можно выиграть в карты
1. Открываем файл “defaultES2File.txt”; 2. В фильтре вписываем “wasphive01dead”; 3. Меняем значение параметра на “true”; 4. Сохраняем изменения и проверяем в игре.
Как сделать, чтобы детали не отваливались
1. Открываем файл “defaultES2File.txt”; 2. В фильтре вписываем название нужной детали; 3. Меняем значение “Tightness” на “5000”; 4. Сохраняем изменения и проверяем в игре.
Нюансы: Данный способ работает не со всеми деталями; Детали в “Satsuma Report” определяются как “Stuck”;
Функция “Fix stuck parts” в “Satsuma Report” отменяет изменения; Открутить и снять детали в игре не представляется возможным.
Как выставить шкив распредвала по меткам
1. Открываем файл “defaultES2File.txt”; 2. В фильтре вписываем “camshaft”; 3. Меняем значение параметра “camshaftgearangle” на “0”; 4. Сохраняем изменения и проверяем в игре.
Как начать/пройти квест, в котором нужно помочь с переездом
1. Открываем файл “defaultES2File.txt”; 2. В фильтре вписываем “movingjobwait”; 3. Меняем значение параметра “movingjobwait” на “0”; 4. В фильтре вписываем “movingjobstage”; 5. Меняем значение параметра “movingjobstage” на “2” – если хотим начать квест или на “4” – если хотим пройти его; 6. Сохраняем изменения и проверяем в игре.
Как подключить всю электрику в Satsum’е
1. Открываем файл “defaultES2File.txt”; 2. В фильтре вписываем “batteryterminalminusbolted”; 3. Меняем значение параметра на “true”; 4. В фильтре вписываем “batteryterminalminusinstalled” на “true”; 5. Меняем значение параметра на “true”; 6. В фильтре вписываем “batteryterminalplusbolted” на “true”; 7. Меняем значение параметра на “true”; 8. В фильтре вписываем “batteryterminalplusinstalled” на “true”; 9. Меняем значение параметра на “true”; 10. В фильтре вписываем “wiring”; 11. Меняем значение параметра “wiringalternatorinstalled” на “true”; 12. Меняем значение параметра “wiringampaudioinstalled” на “true”; 13. Меняем значение параметра “wiringamppowerinstalled” на “true”; 14. Меняем значение параметра “wiringbatteryharnessinstalled” на “true”; 15. Меняем значение параметра “wiringcoilinstalled” на “true”; 16. Меняем значение параметра “wiringdash1installed” на “true”; 17. Меняем значение параметра “wiringdash2installed” на “true”;
18. Меняем значение параметра “wiringfueltankinstalled” на “true”; 19. Меняем значение параметра “wiringgaugeafrinstalled” на “true”; 20. Меняем значение параметра “wiringgaugeextrainstalled” на “true”; 21. Меняем значение параметра “wiringgroundinstalled” на “true”; 22. Меняем значение параметра “wiringharnessheadlightsinstalled” на “true”; 23. Меняем значение параметра “wiringheadlightsleftinstalled” на “true”; 24. Меняем значение параметра “wiringheadlightsrightinstalled” на “true”; 25. Меняем значение параметра “wiringignitioninstalled” на “true”; 26. Меняем значение параметра “wiringradiatorfaninstalled” на “true”; 27. Меняем значение параметра “wiringradioinstalled” на “true”; 28. Меняем значение параметра “wiringrearlightsleftinstalled” на “true”; 29. Меняем значение параметра “wiringrearlightsrightinstalled” на “true”; 30. Меняем значение параметра “wiringregulatorinstalled” на “true”; 31. Меняем значение параметра “wiringstarterbolted” на “true”; 32. Меняем значение параметра “wiringstarterinstalled” на “true”; 33. Меняем значение параметра “wiringsubwooferleftinstalled” на “true”; 34. Меняем значение параметра “wiringsubwooferrightinstalled” на “true”; 35. Меняем значение параметра “wiringswitchlightinstalled” на “true”; 36. Сохраняем изменения, закрываем редактор сохранений, запускаем игру, загружаем сохранение, выходим из игры, запускаем редактор сохранений; 37. В фильтре вписываем “wiring”; 38. Меняем значение параметра “wiringbatteryminusbolts” на “int(8)”; 39. Меняем значение параметра “wiringbatteryminustightness” на “8”; 40. Меняем значение параметра “wiringbatteryplusbolts” на “int(8)”; 41. Меняем значение параметра “wiringbatteryplustightness” на “8”; 42. Меняем значение параметра “wiringstarterbolts” на “int(8)”; 43. Меняем значение параметра “wiringstartertightness” на “8”; 44. Сохраняем изменения и проверяем в игре.
Как отремонтировать подвеску
1. Открываем файл “defaultES2File.txt”; 2. В фильтре вписываем “wheelfldamagevector”; 3. Удаляем значение параметра “wheelfldamagevector”; 4. В фильтре вписываем “wheelfrdamagevector”; 5. Удаляем значение параметра “wheelfrdamagevector”; 6. В фильтре вписываем “wheelrldamagevector”; 7. Удаляем значение параметра “wheelrldamagevector”; 8. В фильтре вписываем “wheelrrdamagevector”; 9. Удаляем значение параметра “wheelrrdamagevector”; 10. Сохраняем изменения и проверяем в игре.
Как настроить угол опережения зажигания на максимальную мощность
1. Открываем файл “defaultES2File.txt”; 2. В фильтре вписываем “distributor”; 3. В левом области нажимаем на “distributor”; 4. В правой области ищем строку “distributorsparkangle” и меняем значение на “15”; 5. Сохраняем изменения и проверяем в игре.
Как получить компьютер
1. Открываем файл “defaultES2File.txt”; 2. В фильтре вписываем “computerorderwait” и ставим значение с “False” на “True” и ниже пишем цифру “0”; 3. В фильтре вписываем “computerordertime” и пишем цифру “10000”; 4. Сохраняем изменения, после этого в магазине будет лежать чек на оплату.
продолжение
Список всех игр и программ для компьютера
1. string(fishgame) 2. string(rapula) 3. string(massacre) 4. string(grilli) 5. string(sormilki) 6. string(spdtest) 7. string(filosofi) 8. string(invapasi) 9. string(jfkrace) 10. string(wildvest) 11. string(sextest) 12. string(allikko)
Как получить наручные часы
1. Открываем файл “defaultES2File.txt”; 2. В фильтре вписываем “wristwatchowned”; 3. Меняем значение параметра “wristwatchowned” на “true”; 4. Сохраняем изменения и проверяем в игре.
Как убрать мух и насекомых
1. Открываем файл “defaultES2File.txt”; 2. В фильтре вписываем “player”; 3. В правой области ищем строку “playerdirtiness и меняем значение на -∞; 4. В правой области ищем “playermosquitoshield” и меняем значение на ∞; 5. Сохраняем изменения и проверяем в игре.
My Summer Car: MSCEditor – Редактор сохранений 1.12 для
My Summer Car
» 4Mods.ru
- durkhaz
- 78 157
- 16 окт 2020
- 1
Описание
Скачать
Изменения
Скачать MSCEditor – Редактор сохранений для My Summer Car
Программа позволит вам редактировать ваши сохранения, посмотреть прикручены ли детали, прикрутить или открутить любые детали с Сатсумы, переместить любую вещь или деталь, в том числе и любой автомобиль в любою точку в игровом мире. Во истину безграничные возможности!
Возможности:
Полностью редактировать ваши сохранения
Создавать резервные копии
Телепортировать объекты
Анализировать ваше авто на наличие проблем
Спавнить предметы и удалять их
ИНСТРУКЦИЯ ПО УСТАНОВКЕ
Скачайте и распакуйте архив
Запустите программу и откройте ваше сохранение
Версия 1.12
• Добавлена функция сравнения файлов.
• Добавлены чистые пустые предметы
• Добавлены новые предметы
• Установка фиксированной проводки
• Фиксированный менеджер ключей
• Обновлены новые имена объектов
• Обновленная карта и местоположения
Информация о модификации
Версия
1.12 (Предыдущие версии так же доступны под кнопкой СКАЧАТЬ)
Размер файла
21.5 Mb
Информация
Посетители, находящиеся в группе Гости, не могут оставлять комментарии к данной публикации.

В My Summer Car – игре с элементами выживания и симулятора – вам предстоит возиться со сборкой и обслуживанием собственного автомобиля, попутно пытаясь заработать денег на новые детали и собственные нужды. Если вам хочется как можно быстрее начать беззаботно кататься по округе, обратите внимание на читы.
С помощью читов вы сможете добавить себе денег, купить любые запчасти, забыть о ремонте, стать неуязвимым и даже телепортироваться от одной локации к другой. И это, разумеется, далеко не всё.
Читы в игре представляют собой консольные команды, для активации которых необходимо сперва получить доступ к консоли. Разработчик использовал её для дорелизной отладки игры, после чего она случайно попала в релиз, но через несколько дней была отключена, и теперь по умолчанию недоступна.
Консоль можно включить, если при создании новой игры ввести Rauhijoketti в качестве фамилии вашего персонажа. Также это получится сделать и в уже начатой игре, отредактировав файл сохранения с помощью редактора сохранений MSCEditor. После этого консоль можно будет открыть, зайдя в меню опций нажатием F1 или Esc. Команды вводятся по отдельности, ввод каждой из них подтверждается нажатием Enter.
Список читов для My Summer Car
Ниже приведены все известные консольные команды для игры. Имейте в виду, что часть из них не работает в новых версиях, но может работать в более старых.
Знак звёздочки * в записи команды означает число, которое вводится сразу после команды без пробела. Так, команда DATE4 изменит день недели на четверг.
- ARVO – получить комбайн Арво-Алготсон
- DATA – выполнить отладку машины (может работать некорректно)
- DATE* – изменить день недели (значения от 1 до 7)
- TIME* – изменить время (от 0 до 24 часов)
- WEAR – убрать износ деталей
- KEKE – режим бога (бессмертие)
- WEAT – изменить погоду
- ENDI – показать концовку игры
- DRAG – телепортироваться на аэродром
- FARM – телепортироваться на ферму
- HEMO – телепортироваться домой
- JAIL – телепортироваться в тюрьму
- KESA – телепортироваться в театр
- KEYS – получить ключи от всех машин
- LEFA – телепортироваться в мастерскую Флитари
- MANS – телепортироваться в особняк
- MOKK – телепортироваться на остров
- MUMM – телепортироваться в дом Сиркки
- PASK – телепортироваться на очистные сооружения
- PIGG – телепортироваться в дом для игры в вентти
- SALE – телепортироваться в магазин Теймо
- TANS – телепортироваться на танцплощадку
- RALL – телепортироваться на грунтовую дорогу рядом с домом Теймо (можно понаблюдать за раллийными машинами)
- COLL – вклвыкл дополнительные модели столкновений у деревьев
- CLIP – вклвыкл режим прохождения через препятствия
- OCCL – вклвыкл рендеринг объектов, скрытых от камеры
- POOR* – получить деньги в указанном количестве
- SHIT – полностью заполнить бак Гифу
- SOBE – снизить степень опьянения до нуля
- RBED – выспаться (не работает в более новых версиях)
- PORO – добавить мощности Ферндейлу (не работает в более новых версиях)
- KILL – удалить Сатсуму из игрового мира (не работает в более новых версиях)
- RCAR – вернуть Сатсуму обратно домой (не работает в более новых версиях)
- RTRA – вернуть трактор обратно домой (не работает в более новых версиях)
- RVAN – вернуть фургон обратно домой (не работает в более новых версиях)
- SEIV – сохранить игру (не работает в более новых версиях)
Источник: gamertweak.com
This page shows you how to mod textures, models and sounds in My Summer Car.
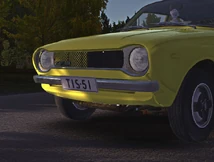
New license plate texture.
Even though the game doesn’t have official modding support, there are some textures that you can change without additional programs, as well as adding your own music. For more advanced modding you can use the Unity Asset Explorer to export and import assets out of the game to modify them.
For the Steam version, the game files can be found from *steam_install_directory*steamappscommonMy Summer Car
Importing Custom Music
The radio is only compatible with .ogg files. Placing the files in the «Radio» folder will allow the music to play after pressing the «Import Music» from the main menu and tuning into the right Radio Station. Be sure to change the name of the files to «track1.ogg, track2.ogg and track3.ogg» etc, Theres a limit of 99 songs.
Once done, enable the Import of player songs on the game’s start menu.
You can also use custom songs in CDs.
Changing Default Images
In the «Images» folder you can change your drivers license photo, the «Custom paint made by artist» and the rear window stickers for the Satsuma, your garage flag, the posters in your room and Jonnez ES skin.
NOTE: Make sure all the files are saved as .png’s or they will not show in-game, keep the original file name.
Garage Flag
Example flag #1
Example flag #2
Example flag #3
Garage flags must be named flag_garage.png
Posters
Posters must be named poster1.png, poster2.png and poster3.png respectively
Car Skin
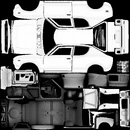
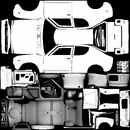
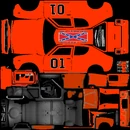
A lot of Satsuma skins can be found at the /r/MySummerCar Satsuma skin thread. You can also make your own skins by using the templates below.
Stock Template
Semi Transparent Overlay
Example custom skin #1
Example custom skin #2
Car skins must be named car.png
Car Window Sticker
After Steam update 13.03.17 you no longer have to use UAV to mod window stickers!
Old sticker
Default sticker
Window stickers must be named window_sticker.png
Jonnez ES Skin
Jonnez ES skins must be named jonnez.png
Texture Editing
Use this guide to edit texture that aren’t changeable by default, you will need UAE and software able to edit DDS textures. Paint.net is a good free option, GIMP and Photoshop both require a free plug-in to edit DDS files.
Using Unity Asset Explorer, select «Open Assets-file» and open an .assets file (sharedassets1, 2 or 3 for the latest version, 1 or 2 for pre-13.03.17 builds, 0 or 1 for pre-08.11.16 builds). After the load is done, right click on the file you want to extract and select «Extract This File». All texture files will be type «Texture: 2D». Your extracted file will be found in a folder next to UAE’s executable corresponding to the asset file name. To import it back, right click the file in Unity Asset Explorer and select «Import this file from DDS». After you are done, select «Save assets-file» and overwrite the .assets file.
You can enable DDS preview to help you find the correct textures from the right.
The DDS files are upside down, so either deal with it or when loading the file to photoshop select «Load Flipped Vertically» and then when saving «Save Flipped Vertically». When saving an edited DDS file; make sure ‘Generate MIP Map’ is enabled, as it is disabled by default on some software.
Notes for texture-editing
- DXT5 files have an additional monochrome alpha channel for transparency hidden with the RGB channels.
- Textures ending in «_spec» are specular maps which are used to set how reflective/shiny something is.
- Textures ending in «_emission» are used for glowing surfaces, like lights and screens.
- Some texture replacements work with quit & continue, some need you to close the game completely.
- UAE doesn’t work with ARGB4444 or RGB565 textures. Try UAV, however this can cause texture bugs.
Sample textures
Visual guide to motorparts_atlas texture.
You can find an Imgur album with some rather quick and crude example changes here.
Niche mod examples can be found here , with an imported flair. (Sli.mg broke, here’s an image dump from the album)
Model Editing
Extracting and importing models is quite complicated, this guide will reference using Blender but it’s fully compatible with 3DS, Maya, or any other software that can import and edit .obj files. There’s plenty of online resources if you’re new to model editing and want to learn.
General knowledge of 3D modeling is recommended. Including: How to set a UV Map, naming an object, editing nodes and Normalizing/Smoothing/Dissolving/Triangulating objects. If you only want to lightly edit an object and not create a new model, naming and general editing is all you really need.
Software use is UABE, Unity 5.4 (Unity Personal) and UAE — Knowledge of UAE is recommended.
To avoid flooding this page with images, check this guide here as it’s got many. Full credit to Roman Evgenev for the linked images.
You’ll need Unity Assets Bundle Extractor. Select File -> Open -> sharedassetsX.assets (X = 1, 2 or 3). From here a new window will open with a long list of all the assets, sorted by their type. The search function can be found under View -> Search by Name, your item must be spelled perfectly though so it’s recommended to use UAE to find the model, then copy the name into UABE’s search.
All models are Type: Mesh, select the item’s name and click ‘Plugins’ on the right, then ‘Export to .obj’. Save it anywhere outside of the games folder. Some in game items use multiple models to create an object (for example, wheels and tires are a separate mesh).
Editing the Model
Blender with example Dice replacement
Import your newly extracted .obj into your favorite editing software, for blender this is File -> Import -> Wavefront (.obj). Remember to delete that daft cube first though (you’ll see what I mean). Once your item is in, feel free to edit the object, here’s Blenders guide page if you’re stuck or new to Blender. You must create a UV map if you’re making a completely new model, make sure it’s the same resolution as the original models texture and saved as the originals name.
Using the smooth function will make sure your texture looks nice, remember to normalize all the nodes to avoid transparent textures (unless this is your aim). Unity uses triangular faces, so if you’re creating new faces as squares, use Blender’s triangulate function as it’ll do a better job than Unity turning squares into two triangles.
Once you’re happy with the new model, use File -> Export -> Wavefront (.obj) to save over the old model.
Importing the Model
This is the hardest part, it’s silly how long-winded the technique is. Brace yourself!
Create a new blank scene in Unity Personal, then go find the Assets folder for this new scene in Windows Explorer. Copy your new model .obj into this Assets folder, you will now see the model in Unity’s assets section, drag the model onto the scene. Click File -> Save Scene… And save it. The name and location do not matter. Now click File -> Build Settings… A new window will open, leave everything as it is and click ‘Build’. Save the .exe anywhere, the name doesn’t matter, the folder that opens up when complete will have your *SceneName*_Data folder inside. Inside that _Data folder will be your scene’s sharedassets0.assets file, just like My Summer Car has one.
Now go back to UABE and open up your new assets0 file, there will be a model inside, it’s your new model! Highlight it and click «Export Raw», save the .dat file as the models name. Now re-open up My Summer Car’s Assets file from before and highlight the model you want to replace, click ‘Import Raw’ using your .dat file. Now click File -> Save and save the assets file as anything EXCEPT it’s original name (stick an X on the end or something).
In game mod example
Now, using Windows Explorer, cut the original assets file from MSC’s Data folder and replace it with your new re-named assets file, get rid of that X on the end so it’s the same name as the original.
If all has gone to plan your new model will be in game!
If you’ve made a new model or edited the UV Map (texture) then you’ll need to use UAE to replace the original game’s texture with the updated one (See texture editing above).
Issues
- If your model has texture artifacts, try normalizing the nodes or checking the resolution of your new texture.
- If your model has weird lines all over, try using Limited Dissolve and make sure your item is Triangulated in Blender/3Ds/Maya. Can’t help to normalize the model either, normalizing solves many issues.
- If your texture is missing a random section of the model, it maybe cause you’ve extruded a section or added a new section to the model and the UV map is ignoring it. Try re-assigning/creating a UV Map for the new model, it should find the bald spots.
- When you make a change to body panels or other deformable items, you may need to delete the meshsave.txt from your AppData folder. It’s under %AppData%/Amistech/My Summer Car
- Updates for MSC often re-arrange the contents of the .assets files, a mesh previously in assets2 may now be in assets3.
Audio Editing
A fantastic guide is available over on RaceDepartment. Full credit to ajanhallinta for his wonderful work.
To avoid making this page any bigger, use the above guide. Feel free to ask questions on here or at racedepartment regarding Audio Editing.
Issues
- Make sure your new edited .resource file is in the _Data folder next to the assets files and that M-Source is spelled exactly correct (including .resource on the end).
- It’s common that the executable builder will give errors, that part isn’t necessary unless you want to release your mod to the public easily. Click ‘Save’ instead, save as sharedassetsX.assets, remove the original assets file and rename your saved assets file as the original was.
Downloads
| Type | File | Creator | Description | Screenshots |
|---|---|---|---|---|
| Parts | Clean Satsuma (requires login) | Glien | No rust/clean parts | SS1, SS2, SS3 |
| Motor | Yellow Engine Paint (outdated) | RAD32X | Yellow Cover/Block/Filter | — |
| Lights | TrackTape Headlamps | Some sort of username | Crossed tape headlamps. | SS1, SS2 |
| RegPlate | ‘TIS-51’ Reg plate | JohnEdwa | TIS-51 plate from Napapiirin Sankarit | SS1 |
| Misc | Cleaner Windows V1 | JohnEdwa | Greatly reduces the amount of dirt and scratches in the windows. | SS1 |
| Dice | Fluffy Fox Dice | Some sort of username | Replace those drab dice with fluffy foxes | SS1 |
| Wheel
Skin |
Momo Rally Wheel | MicrowaveOven♔ | Momo steering wheel skin for rally wheel | SS1 |
| Wheel skin | Nardi Wooden Wheel | RAD32X | Wooden rally steering wheel | SS1 |
| Plugin | Developer Toolkit | zamp | A toolkit to read and tweak game logic/variables | x |
| Tire skin | Dirty Gobra tires | Some sort of username | Dusty Finnish gravel on worn tires | SS1, SS2 |
More texture and model modifications can also be found on RaceDepartment’s MSC Mod section
Tools
| Type | File | Creator | Description | Screenshots | ||
|---|---|---|---|---|---|---|
| Backup | MSC Save/Load | Auksasful | Backs up and saves multiple saves | SS1 | ||
| Editor | MSCeditor
[1] |
durkhaz | My Summer Car savegame editor | SS1 | ||
| Explorer | UAE | Haoose | Unity Assets Explorer 1.6 (Recommended)
DXT1, DXT3, DXT5 Compatible |
SS1 | ||
| Explorer | UAV | Alex Sadonis | Unity Assets Viewer
ARGB4444, ARGB32 Compatible |
SS1 | ||
| Explorer | UABE | DerPopo | Unity Assets Bundle Extractor
Model and Audio extraction |
SS1 | ||
| Editor | Unity — Ver. Archive | UT SF | Unity Personal — Ver. 5.4.x confirmed working | x | ||
| Editor | Blender | SBF | Blender Free model editor | SS1 SS2 | ||
| Plugin Loader | MSC Mod Loader | piotrulos | Mod Loader for My Summer Car | x | ||
| Plugin
Loader |
MSC Mod Loader Pro | MSCLoader Pro Team | Mod Loader for My Summer Car | x |
General FAQ and other Issues
- Error Wrong Size DDS: Make sure you have MIP Maps enabled and the texture is the correct TYPE (usually DXT1 or DXT5), also that you haven’t accidentally resized the canvas. Rarely a texture will have no MIP Maps so try with them disabled too (usually with textures like repair shop orders, inspection paper and car parts magazine…) .
- Transparent Texture: This can happen if a DXT5 DDS opens in your editor as the Alpha Channel, usually in a program like Paint.net. You can solve this by using programs like DXTBmp with Paint.net or try another image editing software.
- Texture upside down: You forgot to flip the canvas back round! DDS’ are flipped by default, save them upside down.
- White marks on body: Even with rust removed, the metallic sheen texture has the rusk marks overlaying the body, causing white marks in sunlight. Edit the body_metallic.text (sharedassets1) to be a solid black texture. For a metallic effect without singling the Alpha, make it an opaque black; lighter = more metallic.
- Missing texture on edited model: If you changed a model in game, but the texture is wrong, it’s because your model isn’t tagged to the correct UV map. Create a new UV map with your chosen texture, make sure it’s the same resolution as the game’s original model. You’ll then need to re-name and insert your new UV map as whatever the original model’s texture was using UAV.
- Texture turns white at distance: This could be caused by using UAV. Only use UAV for ARGB# files and use UAE for other textures.
- Your Unity assets won’t open in UABE: This is usually caused by using Unity 5.5.x, try using Unity 5.4.x from here . Your version of UABE may also have an effect, always use the latest.
- Your assets2 files have broke: A recent steam update moved some files out of assets2 and into a new assets3. Create a new sharedassets3 folder in UAE’s exe location and move the affected files there.
- Error building executable: UABE’s executable builder is rather rickety, there’s a high chance it will fail. Try reloading the application, or skipping this part if you don’t with to publicise your mod.
Updates
As of Steam Update 08.11.16 the location of textures in sharedassets has changed, the update will have replaced your modified textures with the original game ones. Be wary of this for future updates.
As of Steam Update 13.03.17 the location of some sharedassets2 textures have been moved to sharedassets3. This means you may have to relocate some texture save locations using UAE.
References
- ↑ MSCeditor — a Savegame Editor for My Summer Car

