Oops!! Frustrated with ‘Access denied for user ‘root’@’localhost’ (using password yes) in MySQL?
This error may occur due to many reasons which include insufficient privileges for the user to access the database, and when MySQL root password is wrong and so on.
At Bobcares, we often get requests to fix MySQL errors, as a part of our Server Management Services.
Today, let’s see how our Support Engineers fix this MySQL for our customers.
Why does access denied error occurs in MySQL?
This error may occur due to different reasons in different scenarios. Some of them are:
- When a user who doesn’t exist on the MySQL server tries to access the database.
- When there is no privilege for the user.
- If the username or password is wrong.
Today, we’ll discuss in detail how we fix this Access denied for user ‘root’@’localhost’ (using password yes) in MySQL.
How we fix ‘access denied for user ‘root’@’localhost’ (using password yes) in MySQL’?
Let’s see, how we fix this access denied error for our customers in detail.
a. Not able to login
Recently, one of our customers approached us saying that he is getting an error like the one shown below while he is trying to log in to MySQL.
![]()
So, our Support Engineers checked in detail and found that the root password is wrong. So, to reset the password we did the following:
1. Initially, we opened /etc/mysql/my.cnf
2. Then we added skip-grant-tables under [mysqld] section.
Here we skipped grant tables as there is no other way to log in.
By skipping the grant table option it allows anyone to log in from anywhere and can do anything on the database.
Note: skip-grant-tables is dangerous, so we will remove this at the end.
3 Then, we restarted the MySQL service using the command below:
service mysql restartNow MySQL is configured to skip the grant-tables. So, we can log in now.
4. We logged into MySQL using:
mysql -u root 5. Then, we flushed the privileges using:
![]()
6. After that, we set a new password using the command below: UPDATE user SET
Password=PASSWORD('my_password') where USER='root';
FLUSH PRIVILEGES;
7. Then, we removed skip-grant-tables from /etc/mysql/my.cnf
8. Finally, we restarted the MySQL service and logged in to MySQL using the new password.
This fixes the error.
b. No global privilege
If there is no global privilege then this error can happen. In such cases, our Engineers add the privilege by:
GRANT ALL PRIVILEGES ON database.* TO 'user'@'localhost';This fixes the error.
[Need more assistance to fix MySQL Error?- We’re available 24/7.]
Conclusion
In short, this error occurs mainly due to insufficient privileges to the user and can be fixed by granting the privilege. Also, today we discussed in detail how our Support Engineers fix this error for our customers.
PREVENT YOUR SERVER FROM CRASHING!
Never again lose customers to poor server speed! Let us help you.
Our server experts will monitor & maintain your server 24/7 so that it remains lightning fast and secure.
GET STARTED
var google_conversion_label = «owonCMyG5nEQ0aD71QM»;

Last updated on September 7th, 2022 | 4 replies
If you’re certain the password is correct, it is most likely that MySQL is denying you access based on the specified host value for the user. In this article we will learn how to change a user’s host value in command line or phpMyAdmin.
Introduction
This article is for users who are trying to log into MySQL with a correct password but are getting an error: “Error 1045: Access denied for user (using password: YES)”
If you’ve forgotten your MySQL root password, please see this article:
- How to Reset the MySQL root password.
If you are trying to log in as root via phpMyAdmin, please see:
- Can’t log into phpMyAdmin: mysqli_real_connect(): (HY000/1698): Access denied for user ‘root’@’localhost’
Understanding MySQL Users and Hosts
MySQL restricts user access based on the host value of a user. By default, the host value for the root account and new users is set to localhost, meaning you can only log in via the local machine or via phpMyAdmin if installed on the same localhost. If you try to log into a localhost account remotely, it may reject your correct password with “Access denied for user (using password: YES)”.
If we look at this simple MySQL user list below as an example:
+------------------+-------------+
| User             | Host        |
+------------------+-------------+
| test-user1       | localhost   |
| test-user3       | 10.0.53.185 |
| test-user2       | %           |
Above we have three MySQL users with different host values.
Let’s have a look at a few scenarios where your correct password may be rejected depending on the host value:
- User
test-user1@locahost- ✅ Can log in from the
localhost, that is, the machine on which the MySQL service is running. - ✅ Can log in from phpMyAdmin if installed on the same localhost.
- ❌Cannot log in remotely and will get “Access denied for user (using password: YES)”.
- ✅ Can log in from the
- User
test-user2@10.0.53.185- ✅ Can log in only from the IP address
10.0.53.185. - ❌ Cannot log in from any other IP address “Access denied for user (using password: YES)”.
- ❌ Cannot log in from localhost “Access denied for user (using password: YES)”.
- ❌ Cannot log in from phpMyAdmin “Access denied for user (using password: YES)”.
- ✅ Can log in only from the IP address
- User
test-user3@%- ✅ Can log in from anywhere (
%is a wildcard).
- ✅ Can log in from anywhere (
Changing a MySQL User’s Host Value
You can change the host value for a user using the MySQL root account or any account with superuser privileges. This can be done via command line or phpMyAdmin.
Via Command Line
You will need to access your MySQL database using root or a superuser that has access to the MySQL Users table.
The root account is by default only accessible from localhost, so you may get “Access denied for user (using password: YES)” if you try and log in remotely. In such eventuality, you will need to somehow gain local access to the server.
To log into a local MySQL database:
To log into a remote MySQL database, simply replace hostname_or_ip with your own.
mysql -u root -h hostname_or_ip -pOnce logged into MySQL, list all MySQL users and their corresponding hosts in your database.
SELECT User,Host FROM mysql.user;Result:
+------------------+-------------+
| User             | Host        |
+------------------+-------------+
| test-user1       | localhost   |
| test-user3       | 10.0.53.185 |
| test-user2       | %           |
+------------------+-------------+
3 rows in set (0.00 sec)
Above we can see a list of MySQL users and their hosts.
If we want to log in using test-user1 remotely from anywhere, we must change the host value to the % wildcard, which will allow remote login from anywhere. For heightened security, you could change this to an IP address.
In the example below, we are changing the host for test-user1 from localhost to %
% means wildcard and will allow this user to log in remotely from anywhere.
RENAME USER 'test-user1'@'localhost' TO 'test-user1'@'%';You must flush MySQL privileges for changes to take affect.
Now try logging in again remotely.
Via phpMyAdmin
Log into phpMyAdmin using your root account or an account with superuser privileges.
- Once logged into phpMyadmin, click the
mysqldatabase in the left-hand column. - Click the SQL tab.
- Type or paste into the SQL query box:
SELECT User,Host FROM mysql.user;to list all MySQL users in the database. - Click Go to run the query.

You should now see a list of all MySQL users and their corresponding hosts.
To change the host value of a MySQl user:
- Double-click the host field beside the user your wish to change (in red below).
- Type
%to allow anyone to log into this user from anywhere. You could also change this to a remote IP for better security. - Press
ENTERon your keyboard to save changes.

You’re not done yet. You must now flush MySQL privileges.
- Click the SQL tab again
- Type or paste into the SQL query box:
FLUSH PRIVILEGES; - Click Go to run the query.

You should now be able to log in remotely.
Let me know if this helped. Follow me on Twitter, Facebook and YouTube, or 🍊 buy me a smoothie.
p.s. I increased my AdSense revenue by 200% using AI 🤖. Read my Ezoic review to find out how.
grep 'temporary password' /var/log/mysqld.log
Sort date (newest date)
You may see something like this;
[root@SERVER ~]# grep 'temporary password' /var/log/mysqld.log
2016-01-16T18:07:29.688164Z 1 [Note] A temporary password is generated for root@localhost: O,k5.marHfFu
2016-01-22T13:14:17.974391Z 1 [Note] A temporary password is generated for root@localhost: b5nvIu!jh6ql
2016-01-22T15:35:48.496812Z 1 [Note] A temporary password is generated for root@localhost: (B*=T!uWJ7ws
2016-01-22T15:52:21.088610Z 1 [Note] A temporary password is generated for root@localhost: %tJXK7sytMJV
2016-01-22T16:24:41.384205Z 1 [Note] A temporary password is generated for root@localhost: lslQDvgwr3/S
2016-01-22T22:11:24.772275Z 1 [Note] A temporary password is generated for root@localhost: S4u+J,Rce_0t
[root@SERVER ~]# mysql_secure_installation
Securing the MySQL server deployment.
Enter password for user root:

The existing password for the user account root has expired. Please set a new password.

New password:

Re-enter new password:
If you see it says
... Failed! Error: Your password does not satisfy the current policy requirements
That means your password needs to have a character such as ! . # - etc...
mix characters well, upper case, lower case, ! . , # etc...

New password:

Re-enter new password:
The 'validate_password' plugin is installed on the server.
The subsequent steps will run with the existing configuration
of the plugin.
Using existing password for root.

Estimated strength of the password: 100
Change the password for root ? ((Press y|Y for Yes, any other key for No) : Y

New password:

Re-enter new password:

Estimated strength of the password: 100
Do you wish to continue with the password provided?(Press y|Y for Yes, any other key for No) : Y
By default, a MySQL installation has an anonymous user,
allowing anyone to log into MySQL without having to have
a user account created for them. This is intended only for
testing, and to make the installation go a bit smoother.
You should remove them before moving into a production
environment.

Remove anonymous users? (Press y|Y for Yes, any other key for No) : Y
Success.


Normally, root should only be allowed to connect from
'localhost'. This ensures that someone cannot guess at
the root password from the network.

Disallow root login remotely? (Press y|Y for Yes, any other key for No) : Y
Success.

By default, MySQL comes with a database named 'test' that
anyone can access. This is also intended only for testing,
and should be removed before moving into a production
environment.


Remove test database and access to it? (Press y|Y for Yes, any other key for No) : Y
 - Dropping test database...
Success.

 - Removing privileges on test database...
Success.

Reloading the privilege tables will ensure that all changes
made so far will take effect immediately.

Reload privilege tables now? (Press y|Y for Yes, any other key for No) : Y
Success.

All done!
[root@SERVER ~]# mysql -u root -p
Enter password:
Welcome to the MySQL monitor.  Commands end with ; or g.
Your MySQL connection id is 11
Server version: 5.7.10 MySQL Community Server (GPL)
Watch the last 10 minutes of this video, it teaches you how you do it.
Стандарт / от Автора / 18.06.2022 / 2 комментария /
3 способа РЕШЕНИЯ по исправлению ошибки mysqli real connect (): (HY000/1045): Access denied for user ‘username’@’localhost’ на сервере Centos 7 и VestaCP
Ошибка mysqli real connect (): (HY000/1045): Access denied for user ‘username’@’localhost’ очень часто возникает при обновлении версии PHP на веб сервере или самой базы данных, особенно при использовании панели управления VestaCP.
Содержание:
Введение — ошибка mysql 1045
1 способ устранения ошибки mysql 1045
2 способ устранения ошибки mysql 1045
3 способ устранения ошибки mysql 1045
Заключение по устранению ошибки mysql 1045
Введение — ошибка mysql 1045
Прежде чем приступить к устранению данной ошибки, необходимо понять ряд элементарных вещей в работе базы данных MySQL.
Итак:
При создании пользователя базы данных MySQL учитывается 3 параметра, а не два. Первый параметр это username, имя пользователя базы данных, второй параметр, это имя хоста, под именем хоста подразумевается разрешение входа в базу, или с определенного IP адреса, или с определенного домена, или с любой машины кроме локальной, или только с локальной машины. Под локальной машиной подразумевается Ваш сервер, где расположена сама база данных и панель phpmyadmin.
Поясняю:
- Пользователь например, root@localhost имеет имя root, свой пароль и право входить только с локальной машины, то есть с Вашего сервера через командную строку или панель управления.
- Пользователь например, root@’мой домашний ip’ имеет имя root, свой пароль и право входить только с домашнего компьютера.
- Пользователь например, root@’%’ имеет имя root, свой пароль и право входить с любого компьютера, кроме локального, то есть Вашей панели управления веб сервером.
Знак ‘%’ в одинарных кавычках указывает именно на право входить в базу с любого компьютера, кроме локальной машины.
Пользователей с именем root может быть два, три и более. Все эти пользователи будут иметь разные пароли и разные разрешения на вход с определенных хостов.

1 способ устранения ошибки mysql 1045
Ошибка 1045
ERROR 1045 (28000): Access denied for user ‘ root’@’localhost’ (using password: YES)
Самая распространенная и банальная ошибка это неправильная пара логина и пароля для входа в БД. Грубо говоря, Вы можете пытаться входить под пользователем root@’%’, вводя правильный никнейм и пароль через установленную на сервере панель phpmyadmin. Но данный пользователь имеет право заходить с любого компьютера, кроме локальной машины. А панель phpmyadmin как раз является локальной машиной. Таким образом Вы будите получать данную ошибку.
Решение:
Самое простое, это попробовать ввести другой пароль от указанного пользователя. Но пароль может быть задан автоматически (в частности root), может быть пустым или просто утерянным.
Вам необходимо войти в MySQL через терминал в командной строке. Лично я использую программу putty, как и 99% администраторов веб сервера. Для того, чтобы попасть в БД, необходимо предварительно отредактировать конфигурационный файл под названием my.cnf. В операционной системе Centos 7 он находится /etc/my.cnf. Скачайте данный файл с сервера и вставьте в него после такую строку: skip-grant-tables, должно получится примерно так:
[mysqld]
skip-grant-tables
другие параметры
Залейте файл с новыми параметрами на сервер, предварительно удалив старый, а лучше просто переименуйте старый файл. Перезапустите сервер БД через Вашу панель управления.
После редактирования выше указанного файла попасть в MySQL можно без пароля со всеми привилегиями.
Теперь откройте терминал и войдите под пользователем root без пароля, введя команду:
sudo mysql -u root
Далее введите команду:
SELECT user,host,password FROM mysql.user;

Из таблицы видно, что пользователя root вообще НЕ существует, однако после правки выше указанного конфига, я без труда вошел под root и без пароля. Так же видно из таблицы, что присутствуют 2 пользователя — admin с паролями и доступом с локальной машины (непосредственно с сервера через панель phpmyadmin) и с любого домашнего компьютера через терминал.
Этих пользователей я создавал сам и пароли от них я знаю. Исходя из полученной информации, я могу без труда войти в панель phpmyadmin. И создать любого необходимого пользователя с любыми привилегиями (правами).
Пользователь root отсутствует по причине удаления. Я его просто удалил для написания данной статьи. У вас он скорей всего присутствует и таблица будет гораздо шире. Это просто мой тестовый сервер для экспериментов.
Давайте посмотрим еще один пример с другого сервера.

По root у Вас будет примерно такая же картина. То есть один root имеет право войти в панель phpmyadmin с паролем. Один root имеет право на вход через терминал без пароля и т. д. Пароли в БД хранятся в зашифрованном виде.
Получив данную информацию, Вы сможете разобраться с доступами, найти необходимый пароль и войти в панель phpmyadmin.
НО увы, так бывает НЕ всегда!
2 способ устранения ошибки mysql 1045
Как уже писалось в начале статьи данная ошибка возникает после обновления ПО на сервере. И зачастую в панель phpmyadmin просто НЕ попасть. Если из первого раздела Вам не удалось разобраться с пользователями и паролями, то проще всего создать нового пользователя с правами администратора и войти в панель.
Выполнить это можно через терминал. Войдите на сервер через терминал с правами администратора и проверьте есть ли доступ без пароля. Как правило на сервере создается один пользователь root со входом без пароля из терминала. Введите команду:
sudo mysql -u root
Если на сервер баз данных попасть не удалось, то отредактируйте файл (my.cnf), как рассказано в первом способе и повторите команду:
sudo mysql -u root
Теперь, когда в БД удалось попасть через терминал, необходимо создать нового пользователя с паролем и правами админа. Команда:
CREATE USER 'root'@'localhost' IDENTIFIED BY 'ЗДЕСЬ ПАРОЛЬ';
Следующей командой предоставляются права администратора:
GRANT ALL PRIVILEGES ON *.* TO 'root'@'localhost' WITH GRANT OPTION;
После создания нового пользователя, как правило, можно под ним зайти в панель phpmyadmin. Это может быть совсем не обязательно пользователь root, а любой другой. Запомните имя пользователя и пароль, где то запишите себе. Лучше НЕ использовать root при создании нового пользователя.
Внимание!!! Не забудьте обратно отредактировать файл my.cnf, то есть удалить строку — skip-grant-tables.
3 способ устранения ошибки mysql 1045
Пожалуй, самый сложный способ, попытаюсь объяснить простым языком. Дело в том, что root пользователь создается по умолчанию. И если Вы начинаете играться с этим пользователем (root), то Вы нарушите пару логин — пароль. Так как пароль для этого пользователя создается и хранится в нескольких файлах на сервере.
Давайте поставим точку, рассмотрим все эти файлы и при необходимости зададим один пароль к данному юзеру.
Итак,
Файлов к счастью у нас не много, точнее три места которые необходимо проверить и поправить при необходимости.
-
Первое, открываем файл config.inc.php в Centos 7 находится /etc/phpmyadmin/config.inc.php В самый конец этого файла добавьте следующие строки кода:
/* User for advanced features */
$cfg['Servers'][$i]['controluser'] = ' root';
$cfg['Servers'][$i]['controlpass'] = 'ЗДЕСЬ ПАРОЛЬ';
- Второе, в файле /usr/local/vesta/conf/mysql.conf. Я использую панель управления VestaCP, если у Вас другая панель, то расположение файла будет отличатся. Откройте данный файл и посмотрите какой там указан пароль, если нужно, то смените на Ваш.
- Третье, это непосредственно сама панель управления phpmyadmin.
Во всех трех местах, должны быть одинаковые пароли от этого юзера. Если не так, то исправляйте. В VestaCP при неправильных паролях в этих файлах может отвалится бэкап.
Заключение по устранению ошибки mysql 1045
Ошибка mysqli real connect 1045, как правило появляется при неправильной паре имя — пароль или после обновления ПО на сервере. Устраняется путем проверки пользователей через терминал и создания новых пользователей. В случаи не корректного пароля от root редактируются необходимые файлы.
P. S.
Я отлавливал все 3 причины сбоя панели управления phpmyadmin и данную статью публикую больше для себя как памятку по устранению неполадок. Но надеюсь Вам она тоже поможет. Оставляйте комментарии по решению данной проблемы.
Думаю, что теперь Вам не страшна ошибка mysqli_connect(): (HY000/1045): Access denied for user ‘username’@’localhost’.
Учебные материалы
Понравился материал? Подписывайтесь на наш блог. И получите бесплатный конструктор лендингов!
Только полезная информация и реальные кейсы
Are you looking for a solution to fix the MySQL ERROR 1045 (28000): Access denied for user ‘user’@’localhost’ (using password: YES) error message?
If you’re an experienced MySQL database manager, you may have come across some vague and confusing problems, like MySQL Error 1045 (28000) messages. Fortunately, while resolving this error can be confusing at first due to its many potential causes, its solutions tend to be relatively simple. Once you determine the reason behind the database error you’re seeing, you should be able to fix it fairly quickly.
In this post, we’ll cover the various possible causes of the MySQL Error 1045 (28000). Then we’ll share solutions for each common situation, to help you get your database and your site back up and running.
Why the MySQL Error 1045 (28000) Error Occurs
The MySQL Error 1045 (28000) is an authentication error. «MySQL ERROR 1045 (28000): Access denied for user ‘user’@’localhost’ (using password: YES)» typically indicates that MySQL cannot log you in using the username and password you’ve specified.
This usually occurs when you provide an incorrect username/password combination when making the database connection. However, there are many other different situations that can lead to this type of behaviour.
- Connecting to the wrong host or port
- Provided user does not exist
- User does exist but client host have insufficient permission to connect, or be IP banned
- Wrong password provided
- Bash converts special characters in the password to a different encoding
Wrong host or port
If you don’t specify the host to connect (with the -h flag), MySQL client will try to automatically connect to the localhost instance. You may be trying to connect to another host/port instance. In this case, simply add -h flag followed by the hostname you’re trying to connect to.
Code language: HTML, XML (xml)
Also, double check if you are trying to connect to the right port. MySQL, by default, listen on port 3306, but different setups use different ports for security purposes. Providing -P flag and a port number in the command is a great way to remind you of this detail.
Code language: HTML, XML (xml)
[[email protected]]# mysql -u root -psekret -h <IP_or_hostname> -P 3306
Provided user does not exist
MySQL stores user data in a table called user in a database named mysql (by default). The following query will return 1 if a user with the specified username exists, 0 otherwise.
Code language: JavaScript (javascript)
mysql> SELECT EXISTS(SELECT 1 FROM mysql.user WHERE user = 'username') Query OK, 0 rows affected (0.00 sec)
If the user does not exist, you can create a new user:
Code language: JavaScript (javascript)
mysql> CREATE USER 'username'@'localhost' IDENTIFIED BY 'password'; Query OK, 0 rows affected (0.00 sec)
Client host have insufficient permission
By default, the MySQL server listens for connections only from localhost, which means it can be accessed only by applications running on the same host.
Remote root access is disabled by default. If you want to enable that, run this SQL command locally:
GRANT ALL PRIVILEGES ON *.* TO 'root'@'%' IDENTIFIED BY 'password' WITH GRANT OPTION; FLUSH PRIVILEGES;Code language: JavaScript (javascript)
And then find the following line and comment it out in your my.cnf file, which usually lives on /etc/mysql/my.cnf on Unix/OSX systems. In some cases the location for the file is /etc/mysql/mysql.conf.d/mysqld.cnf).
Alternatively, you can check to see which host user/host MySQL allows connections with the following query:
Code language: JavaScript (javascript)
mysql> SELECT Host, User FROM mysql.user WHERE User='user01'; +-------------+-------------+ | Host | User | +-------------+-------------+ | 192.168.0.1 | user01 | +-------------+-------------+ 1 row in set (0.00 sec)
Wrong password provided
This is by far the most common reason for MySQL ERROR 1045 (28000): Access denied for user ‘user’@’localhost’ (using password: YES).
MySQL lists user accounts in the user table of the mysql database. Each MySQL account can be assigned a password, although the user table does not store the cleartext version of the password, but a hash value computed from it.
You cannot read user passwords in plain text from MySQL as the password hash is used for authentication, but if you can get into MySQL command line interface (with root privileges), you can compare what you remember with the hashed value with “PASSWORD” function with the command below.
Code language: JavaScript (javascript)
mysql> SELECT Host, User, authentication_string, PASSWORD('forgotten') FROM mysql.user WHERE User='nonexistant'; +-------------+-------------+-------------------------------------------+-------------------------------------------+ | Host | User | authentication_string | PASSWORD('forgotten') | +-------------+-------------+-------------------------------------------+-------------------------------------------+ | 192.168.0.1 | nonexistant | *AF9E01EA8519CE58E3739F4034EFD3D6B4CA6324 | *70F9DD10B4688C7F12E8ED6C26C6ABBD9D9C7A41 | | % | nonexistant | *AF9E01EA8519CE58E3739F4034EFD3D6B4CA6324 | *70F9DD10B4688C7F12E8ED6C26C6ABBD9D9C7A41 | +-------------+-------------+-------------------------------------------+-------------------------------------------+ 2 rows in set, 1 warning (0.00 sec)
From the output, we can clearly see that the hashed value for ‘forgotten’ does not match the authentication_string column, which means ‘forgotten’ is the wrong password.
Executing the following query will overwrite the current password with a new one :
mysql> set password for 'nonexistant'@'%' = 'helloworld'; Empty set (0.00 sec)Code language: PHP (php)
Special characters in the password
If you’re using Bash as your main shell, you should know that not all characters are treated equal in Bash. Some characters are evaluated by Bash to have a non-literal meaning. Instead, these characters carry out a special instruction, or have an alternate meaning; they are called «special characters», or «meta-characters».
In this case, your password contains some of the those special characters which might be mistakenly converted to another form by Bash. To prevent this from happening, wrap your password in single quotes in the command:
Code language: PHP (php)
[[email protected]]# mysql -u user01 -p'hello$!*&^%$#@!' mysql: [Warning] Using a password on the command line interface can be insecure ... mysql>
Regain access to the database
If you’re locked out and need to bypass the authentication mechanisms to regain access to the database, here are simple steps to do so. Please note that we’re using MariaDB to demonstrate the steps.
- Stop the instance by running
sudo systemctl stop mariadb - Use
mysqld_safeto start mysqld server by running the command:mysqld_ safe –user=mysql –skip-grant-tables –skip-networking - Now you can open up a new terminal and access the MySQL server instance with
rootprivileges by runningmysql -u root -h localhost. - Please do note that since we’re running
grant-skip-tables, any GRANT/CREATE/SET PASSWORD statements won’t work straight away. In order to fix this, run FLUSH PRIVILEGES;. - Run
SET PASSWORD FOR 'root'@'localhost' = '[email protected]!'to change the password forrootuser. - Alternatively, you can modify
mysql.userstable with a query which modifies the password for User and Host like UPDATE mysql.user SET authentication_string=PASSWORD(‘newpwd’) WHERE User=’root’ and Host=’localhost’; - Stop the
mysqld_safeinstance and restart MySQL again fromsystemctl. - You should be able to login with
rootfrom the localhost with the new password and do any other necessary corrective operations with root user.
MySQL users often face an issue called Error 1045 (28000) access denied for user ‘root’@’localhost’ (using password: yes). This usually occurs when you enter an incorrect password or password for your database. Fixing these credentials can resolve this error in no time.
In this article, we will look at the ways to resolve this error.
How to fix “Error 1045 (28000) access denied for user ‘root’@’localhost’ (using password: yes)”?
The error looks something like this —
mysql -uroot -proot

ERROR 1045 (28000): Access denied for user 'root'@'localhost' (using password: YES)
It arises when you perform a fresh installation of MySQL and try to login with a password. The default password of MySQL is blank () (i.e. empty string).
So, you can login to the MySQL server using the same password.
Example
>mysql -uroot -pEnter password:
Welcome to the MariaDB monitor. Commands end with ; or g.
Your MariaDB connection id is 9
Server version: 10.4.11-MariaDB mariadb.org binary distribution
Copyright (c) 2000, 2018, Oracle, MariaDB Corporation Ab and others.
Type ‘help;’ or ‘h’ for help. Type ‘c’ to clear the current input statement.
MariaDB [(none)]>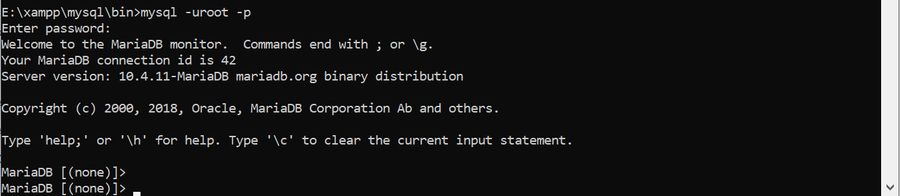
The best practice is to change the password after the new installation.
Set root user password
You must set the root user password after performing the new installation. Here is the code to set it –
Login as user root with blank password

>mysql -u root

mysql> ALTER USER 'root'@'localhost' IDENTIFIED BY 'abc';
Now the new password for root user is abc.
How to fix the Error 1045 (28000)?
Let us look at the ways to fix this problem –
-
Enter the correct credentials
The primary method to fix this error is to enter the correct username and password using the following command –
mysql –u username –p -
Ensure the user is correct
Sometimes, the user you might be trying to access does not exist on the MySQL server. You can check if the user exists using the following code-
MariaDB [(none)]> select user from mysql.user where user like '%root%';

+------+

| User |

+------+

| root |

| root |

| root |

+------+

3 rows in set (0.001 sec) 
If the user does not exist, create it with the desired username.
-
Enter the correct host name
You might be trying to access the server from a host that is different from the defined host name. You will encounter Error 1045 in this case. You can use this code to view details of the user –
To fix this, you can update the host name for the user using the code below –
mysql> mysql -u root -pabc -h <IP> -P 3306You might encounter the error in due to the following scenarios –
Entered wrong password

>mysql -uroot -pssssss

ERROR 1045 (28000): Access denied for user 'root'@'localhost' (using password: YES)

Host doesn’t not have permission to connect database
This is a very common error that occurs while connecting to a remote database. While connecting to such a database we need to give access to the HOST IP ADDRESS to connect to it.
This is the IP Address of the source system which connects to the database server.
If access is not given, then run the given command –
CREATE USER ‘dbuser1’@'< Host IP >’ IDENTIFIED VIA mysql_native_password USING ‘***’;GRANT ALL PRIVILEGES ON *.* TO ‘dbuser1’@'< Host IP >’ REQUIRE NONE WITH GRANT OPTION MAX_QUERIES_PER_HOUR 0 MAX_CONNECTIONS_PER_HOUR 0 MAX_UPDATES_PER_HOUR 0 MAX_USER_CONNECTIONS 0;
Conclusion
Apart from all this, make sure the host contains the correct IP address and host name, to avoid the Error 1045 (28000) access denied for user ‘root’@’localhost’ (using password: yes).