Windows 11, самая продвинутая версия от Microsoft, вопреки распространенному мнению, подвержена ошибкам. И худшие те, которые влияют на основное функционирование. В этой статье мы обсудим ошибку 0x80071AB1.
Обратите внимание, что это происходит, когда пользователи пытаются получить платформу. NET, но вместо этого появляется 0x80071AB1. Это представляет собой серьезное препятствие, поскольку многим приложениям требуется, чтобы они работали эффективно.
Чтобы исправить ошибку 0x80071AB1 в Windows 11, мы посвятили эту статью, в которой объясняется, как работает. NET Framework, а также наиболее эффективные методы устранения ошибки.
Как работает. NET Framework?
Проще говоря,. NET Framework — это набор из тысяч фрагментов кода, которые помогают разработчикам создавать приложения. Поскольку код доступен всем, разработчики могут использовать его везде, где это необходимо, вместо того, чтобы писать его с нуля.
Кроме того,. NET Framework также предоставляет разработчикам среду выполнения для тестирования своих приложений. Она называется Common Language Runtime или CLR, которая компилирует и выполняет код.
Мы можем часами просто обсуждать. NET Framework, но для устранения имеющейся ошибки достаточно базового понимания.
Если у вас есть приложение, для которого требуются эти коды или. NET Framework, самое время его установить. В следующем разделе мы познакомим вас с методами устранения ошибки 0x80071AB1 и получения. NET Framework.
Как исправить ошибку 0x80071AB1 в Windows 11?
1. Обновите Windows 11
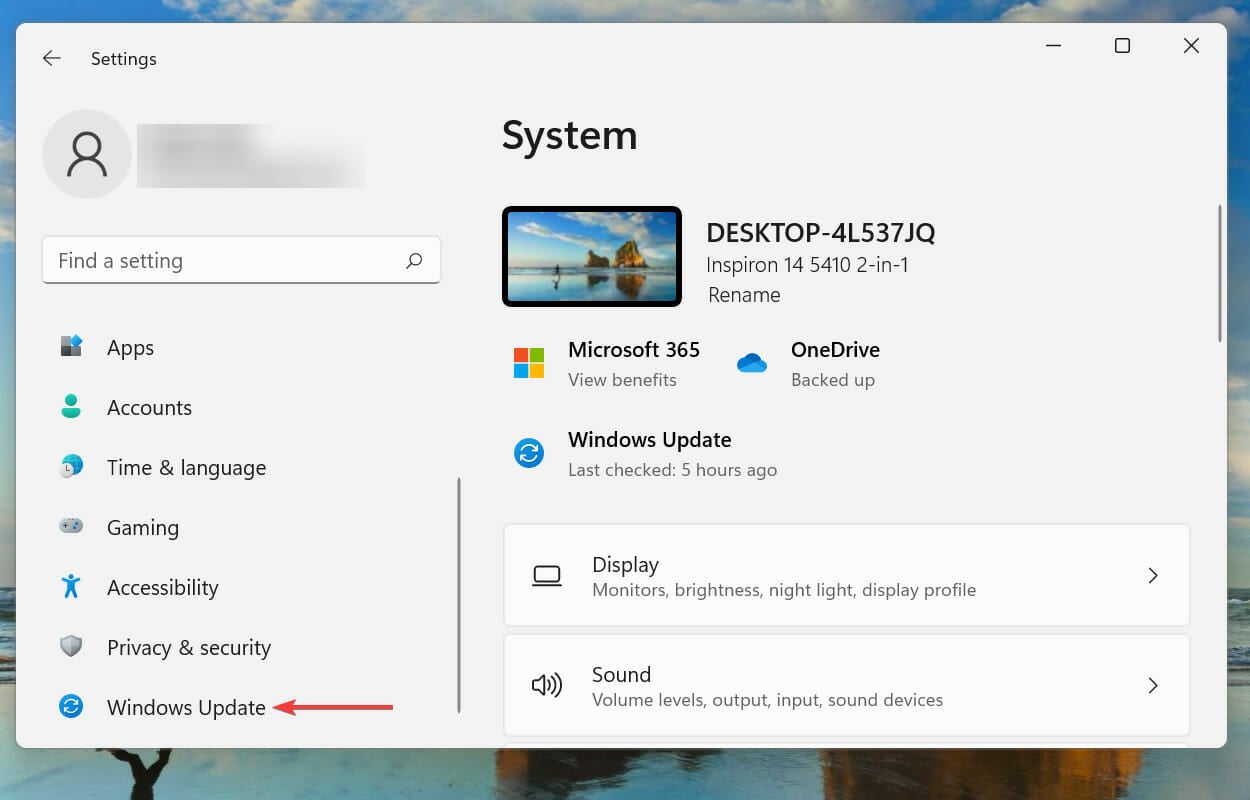
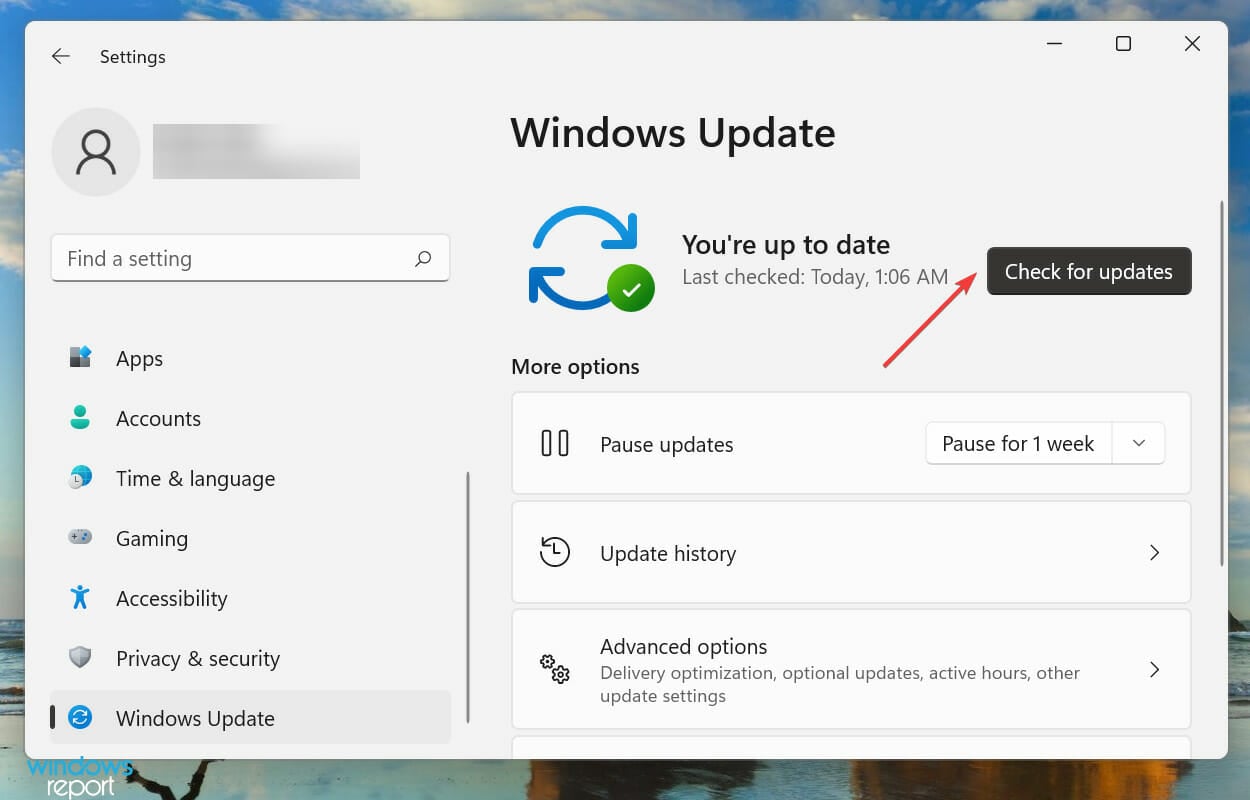
- Нажмите Windows+ I, чтобы запустить приложение « Настройки », и выберите « Центр обновления Windows » в списке вкладок на панели навигации слева.

- Затем нажмите «Проверить наличие обновлений » , чтобы отсканировать все обновления, относящиеся к .NET Framework , и, если они будут найдены, загрузить и установить их.

После появления. NET Frameworks 3.5 все обновления для них выпускались через Центр обновления Windows. Таким образом, пользователям теперь не нужно делать почти ничего, кроме регулярной проверки обновлений.
2. Запустите средство устранения неполадок Центра обновления Windows.
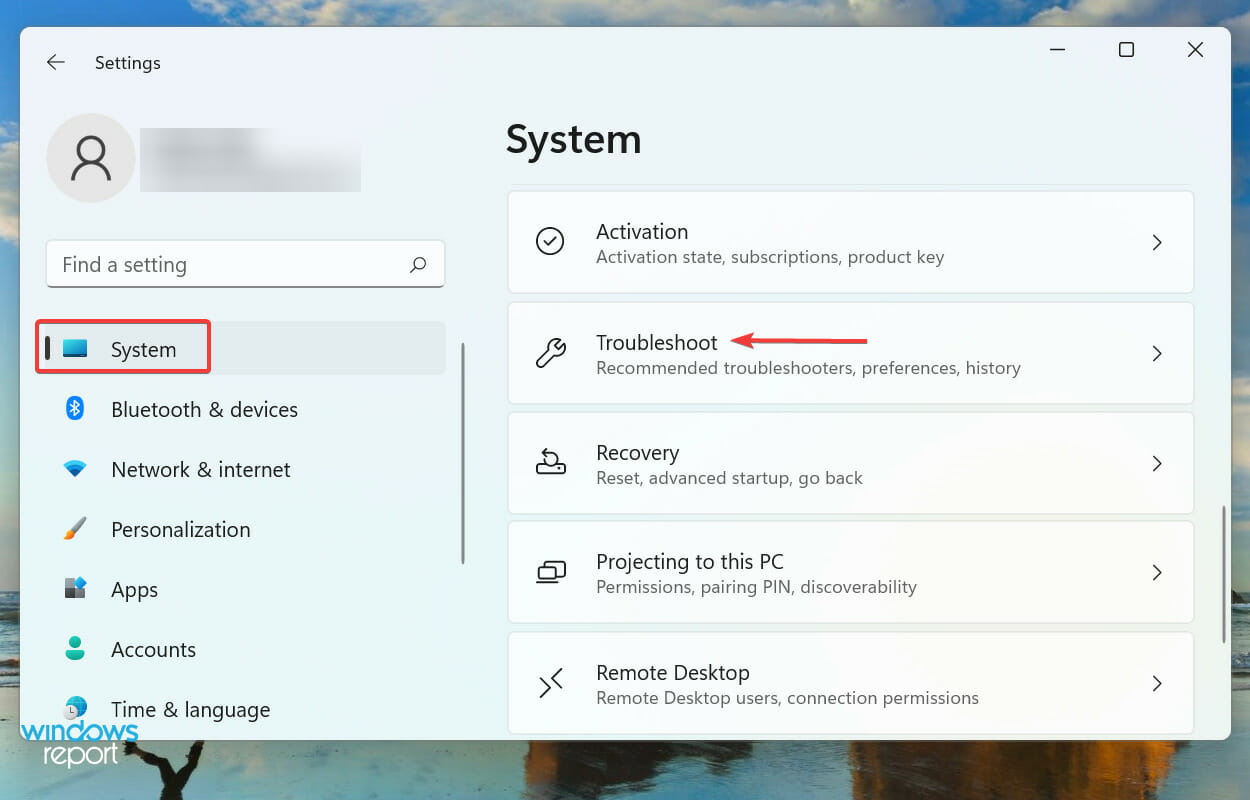
- Нажмите Windows+ I, чтобы запустить приложение « Настройки », и нажмите « Устранение неполадок » справа на вкладке « Система ».

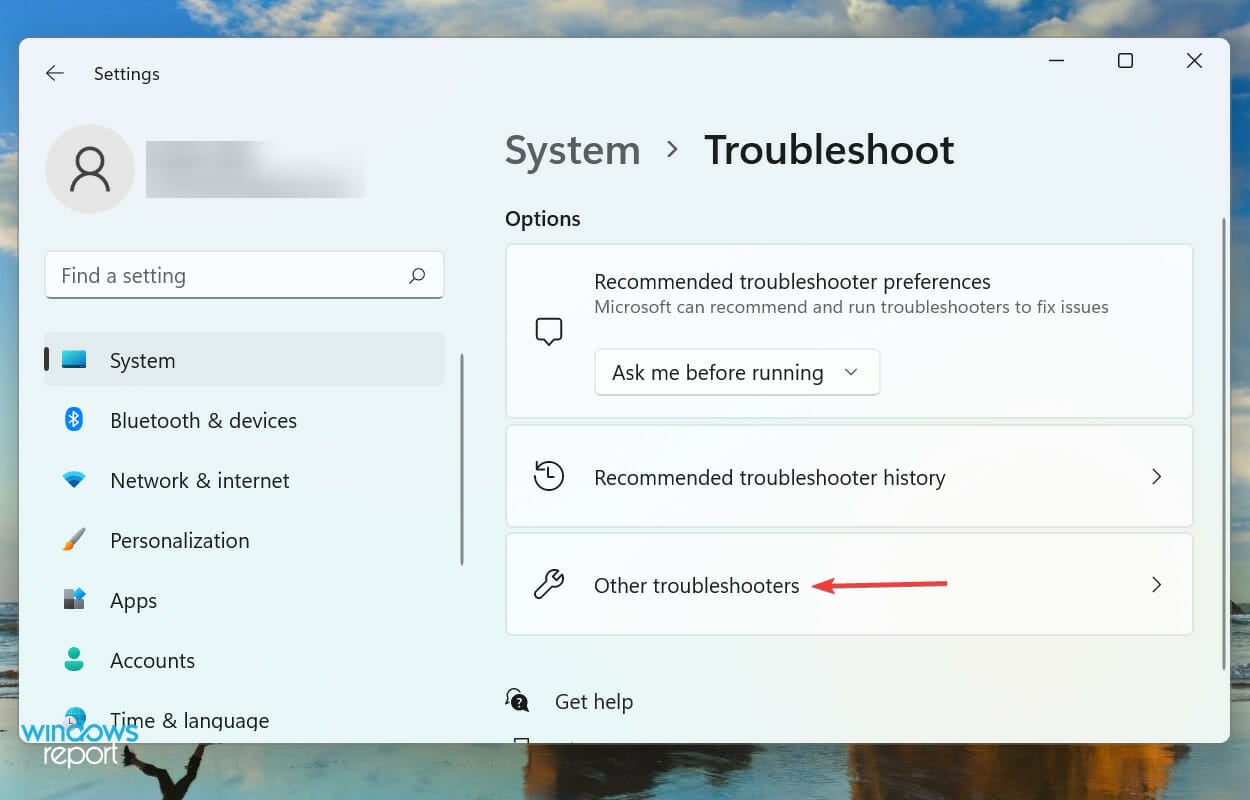
- Щелкните Другие средства устранения неполадок .

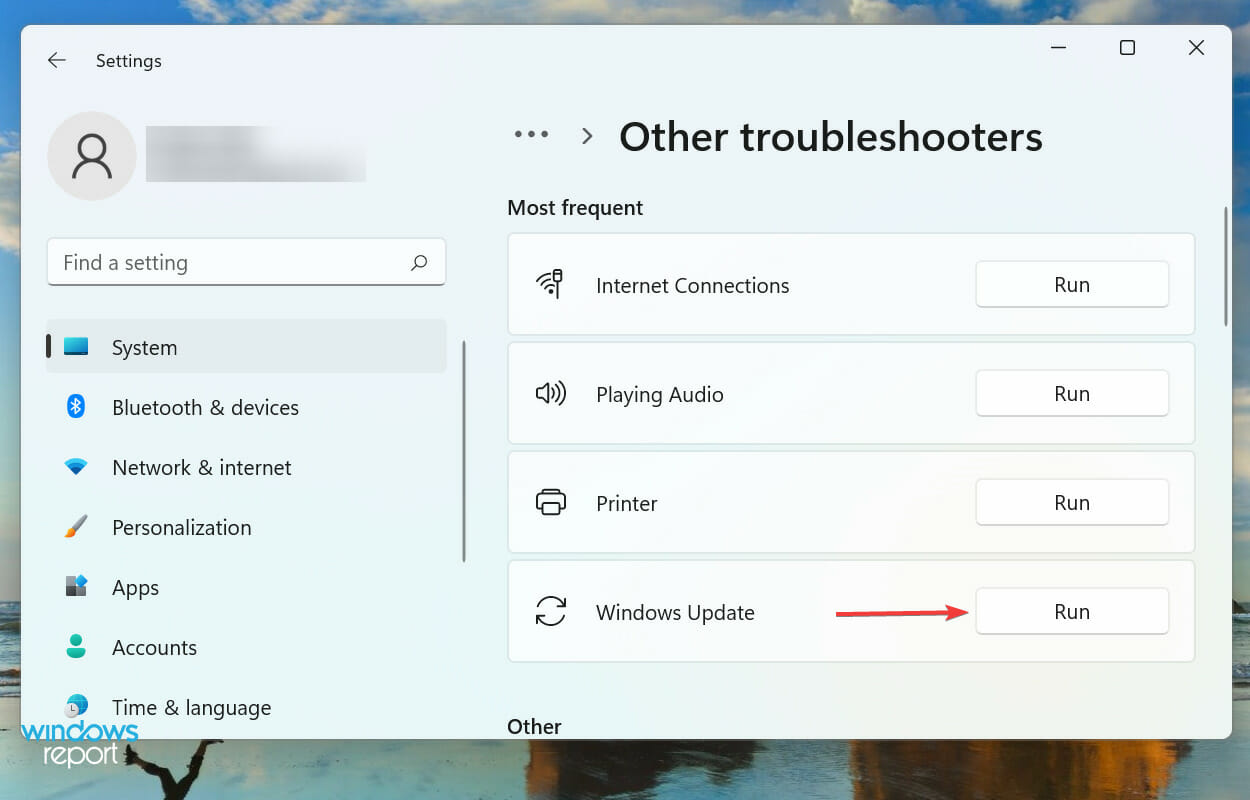
- Теперь найдите запись Центра обновления Windows и нажмите кнопку « Выполнить» рядом с ней.

Встроенные средства устранения неполадок, предлагаемые Microsoft, довольно хорошо устраняют множество ошибок. Если. NET Framework не появился в Центре обновления Windows в последнем методе, это может указывать на проблему с самим процессом обновления.
Следовательно, рекомендуется запустить средство устранения неполадок Центра обновления Windows, чтобы диагностировать и устранить проблемы, препятствующие отображению. NET Framework в разделе обновлений.
3. Выполните быстрое сканирование SFC
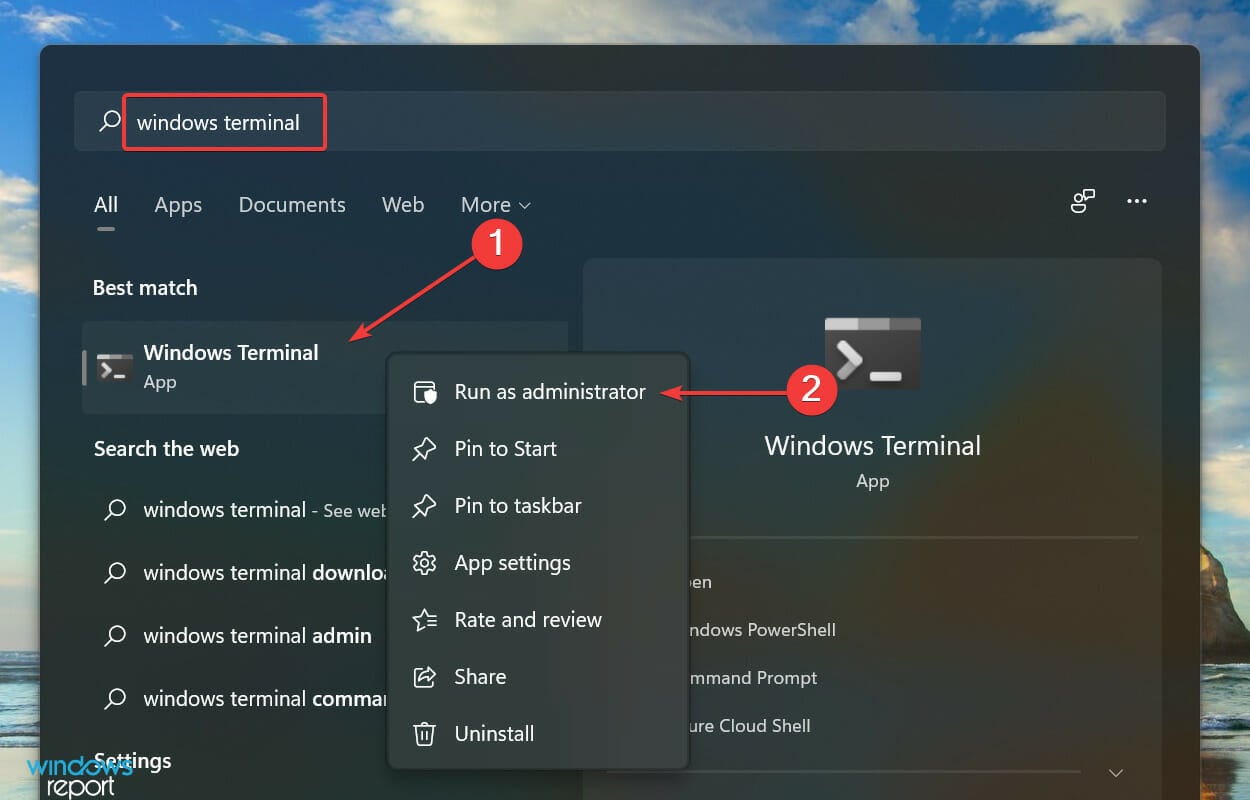
- Нажмите Windows+ S, чтобы открыть меню поиска . Введите Терминал Windows в текстовое поле вверху, щелкните правой кнопкой мыши соответствующий результат поиска и выберите « Запуск от имени администратора» в контекстном меню.

- Нажмите « Да » в появившемся окне UAC (Контроль учетных записей) .

- Затем щелкните стрелку вниз вверху и выберите « Командная строка » из списка параметров в меню. Кроме того, вы можете нажать Ctrl+ Shift+ 2, чтобы запустить командную строку на новой вкладке.

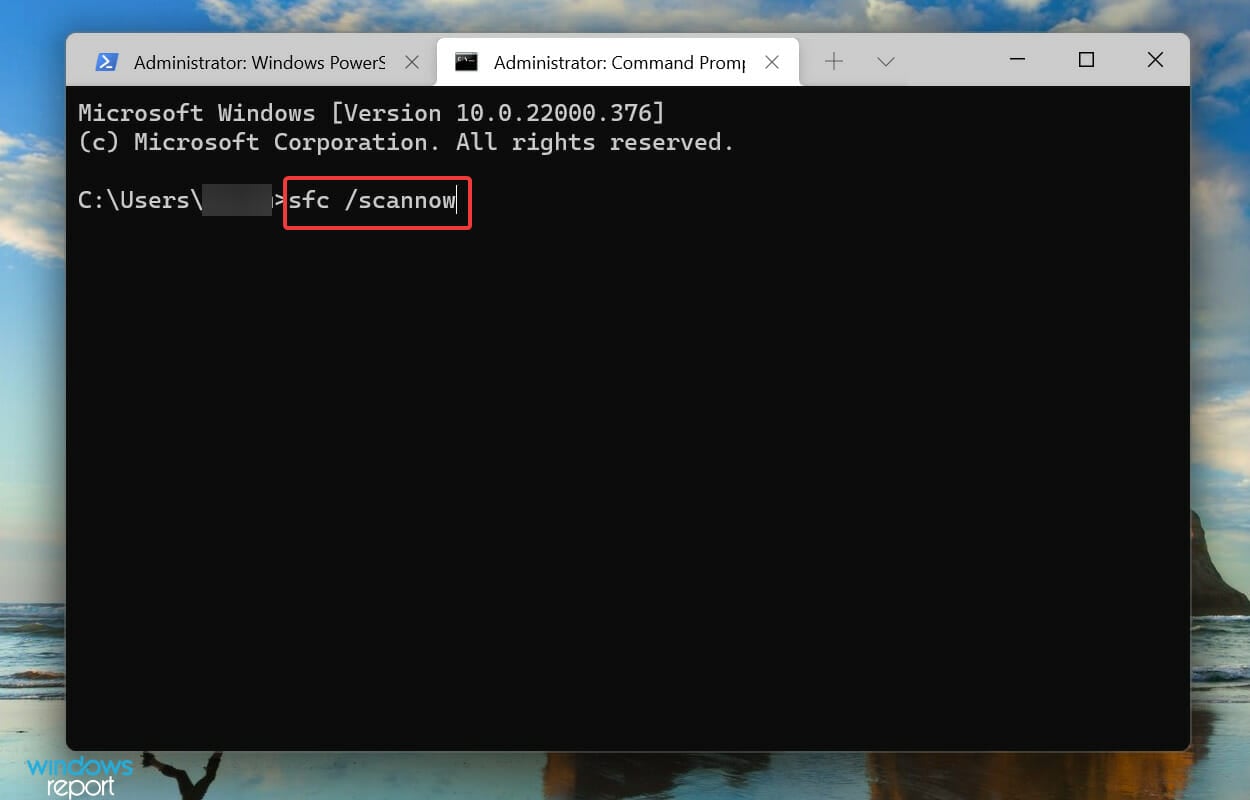
- Введите следующую команду и нажмите Enter, чтобы запустить сканирование SFC :
sfc /scannow

- Дождитесь завершения сканирования, перезагрузите компьютер и проверьте, устранена ли ошибка,
Сканирование SFC (System File Checker) выявляет поврежденные системные файлы и, если таковые обнаружены, заменяет их кэшированной копией, хранящейся в системе. Известно, что поврежденные системные файлы вызывают множество ошибок, включая 0x80071AB1 в Windows 11.
4. Запустите службу Центра обновления Windows.
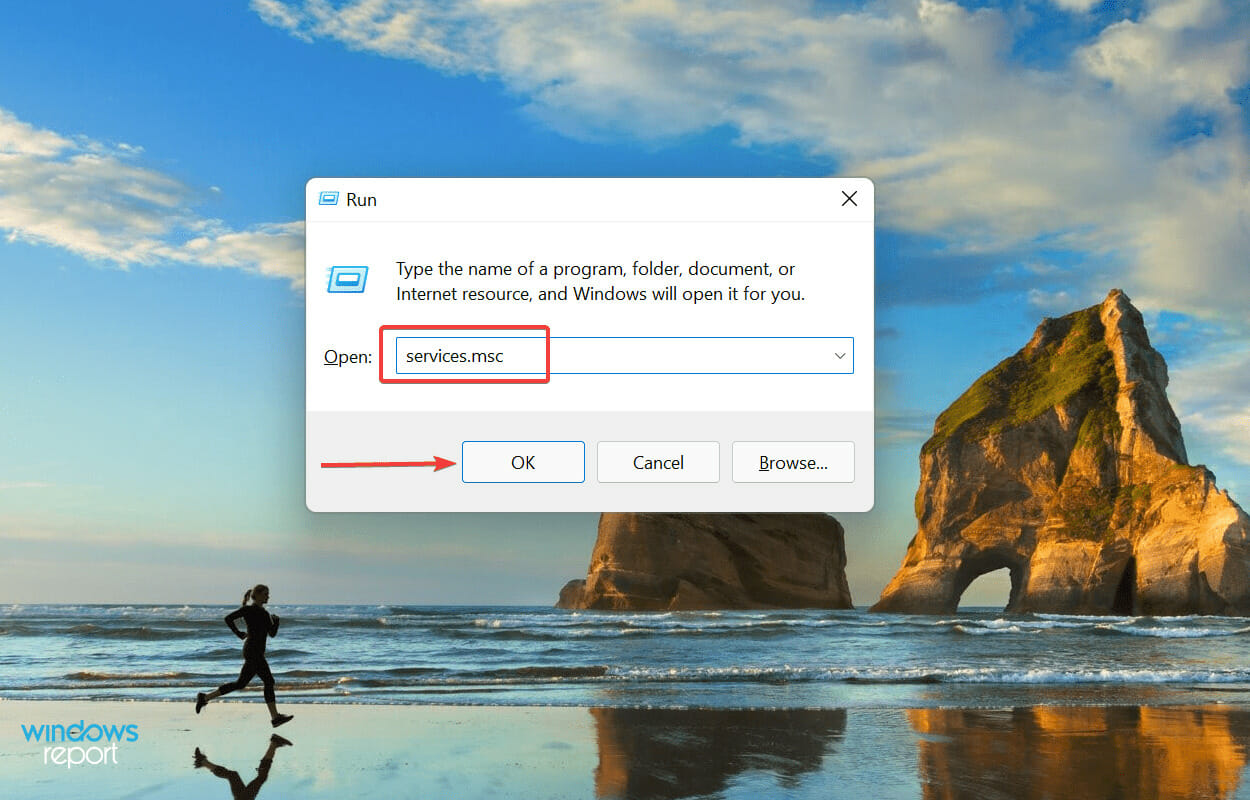
- Нажмите Windows+ R, чтобы запустить команду « Выполнить» , введите services.msc в текстовое поле, а затем либо нажмите « ОК », либо нажмите Enter, чтобы запустить приложение « Службы » .

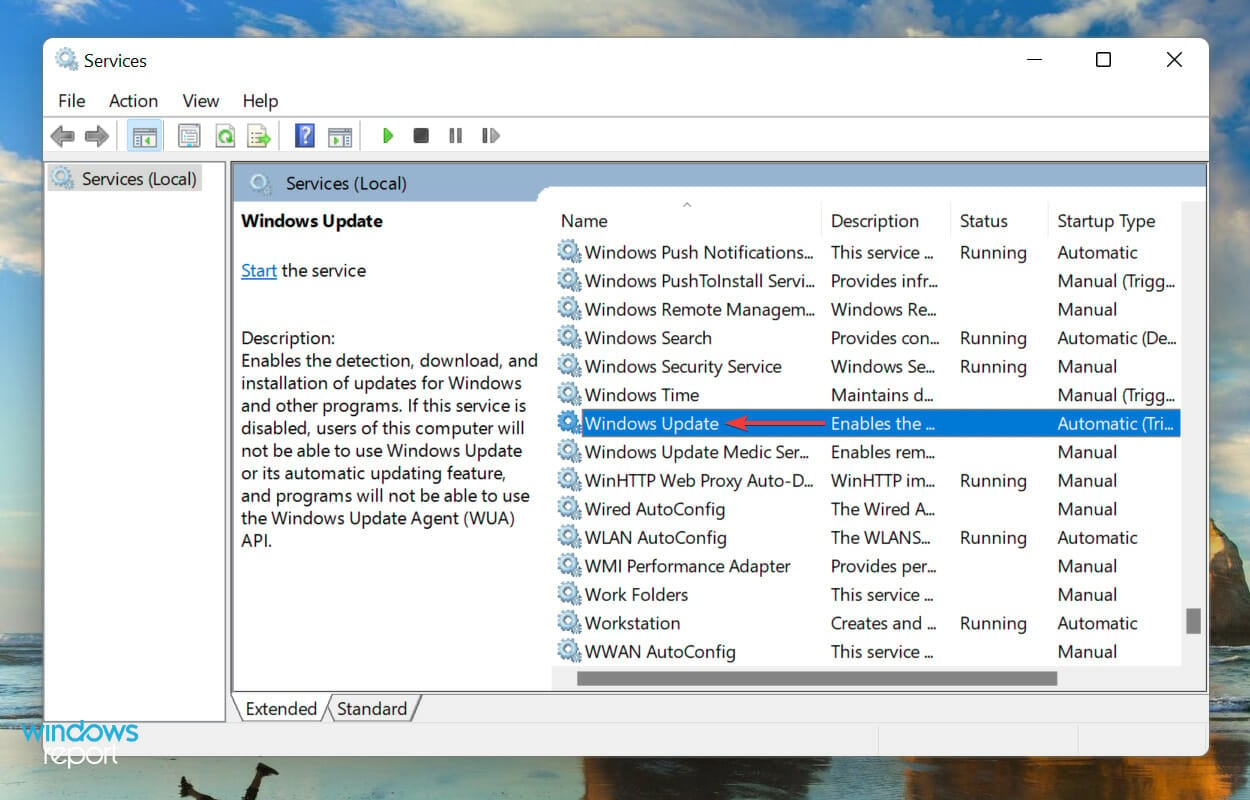
- Теперь прокрутите вниз, найдите службу Центра обновления Windows и дважды щелкните ее, чтобы запустить Свойства . Сервисы здесь перечислены в алфавитном/обратном алфавитном порядке, поэтому найти сервис не составит труда.

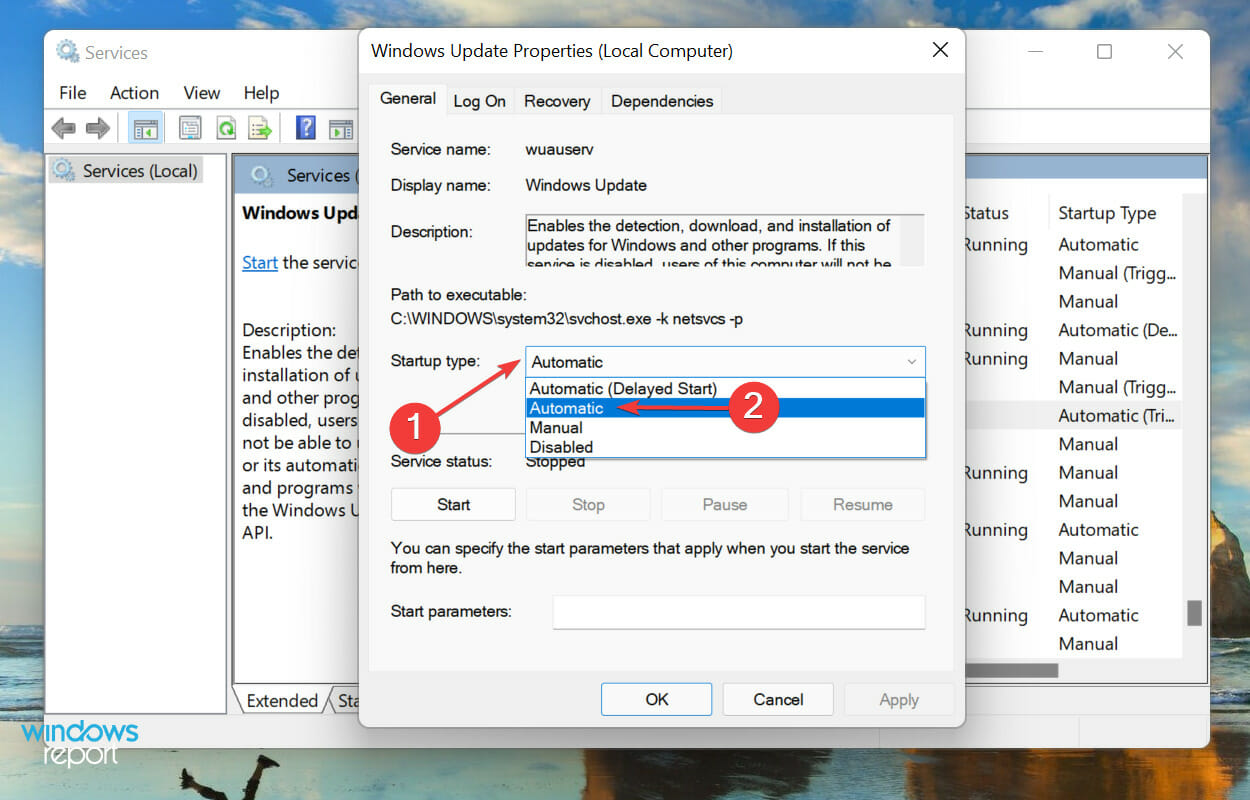
- Щелкните раскрывающееся меню « Тип запуска» и выберите « Автоматически » в списке параметров.

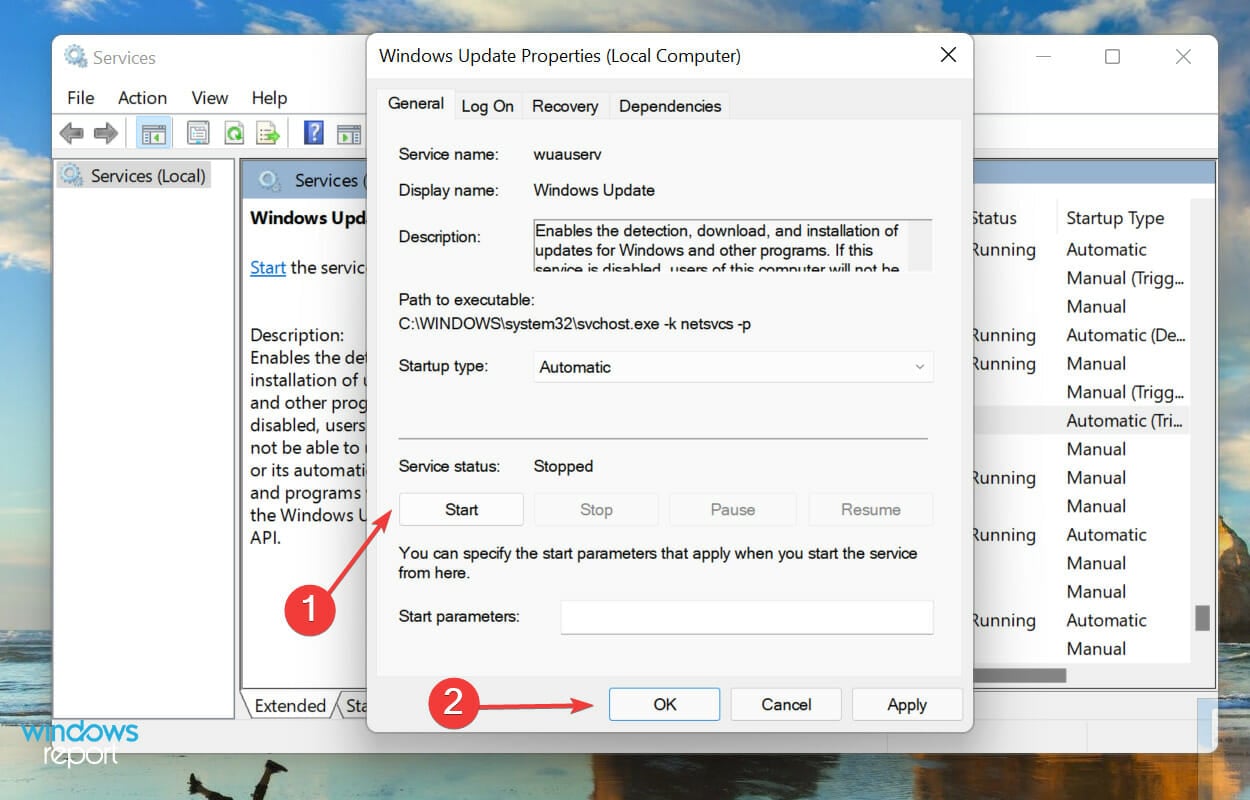
- Если служба не запущена, нажмите кнопку « Пуск » в разделе « Статус службы» , подождите, пока она запустится, и нажмите « ОК » , чтобы сохранить изменения.

После этого перезагрузите компьютер и проверьте, устранена ли ошибка 0x80071AB1.
5. Сбросьте компоненты Центра обновления Windows.
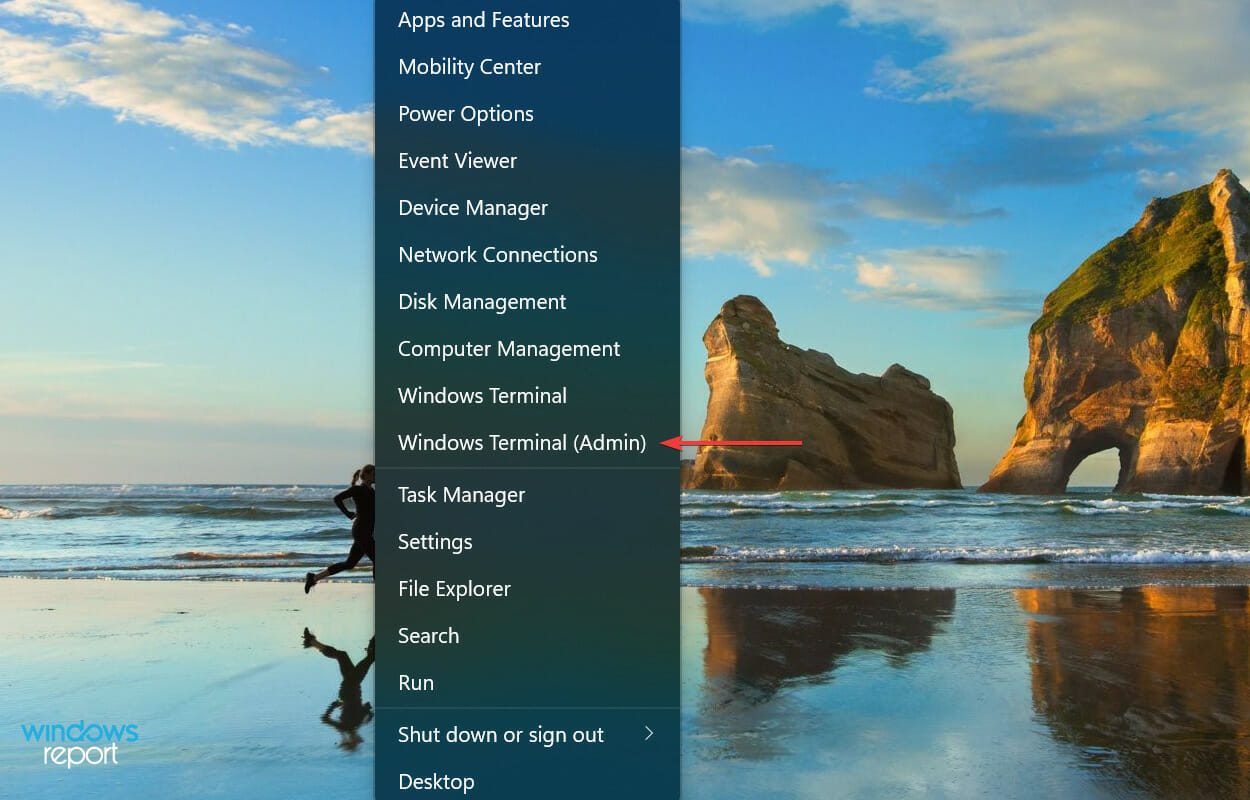
- Щелкните правой кнопкой мыши значок « Пуск » на панели задач или нажмите Windows+ X, чтобы открыть меню « Опытный пользователь/быстрый доступ », и выберите « Терминал Windows (администратор) » из списка параметров.

- Нажмите « Да » в появившемся окне UAC (Контроль учетных записей) .

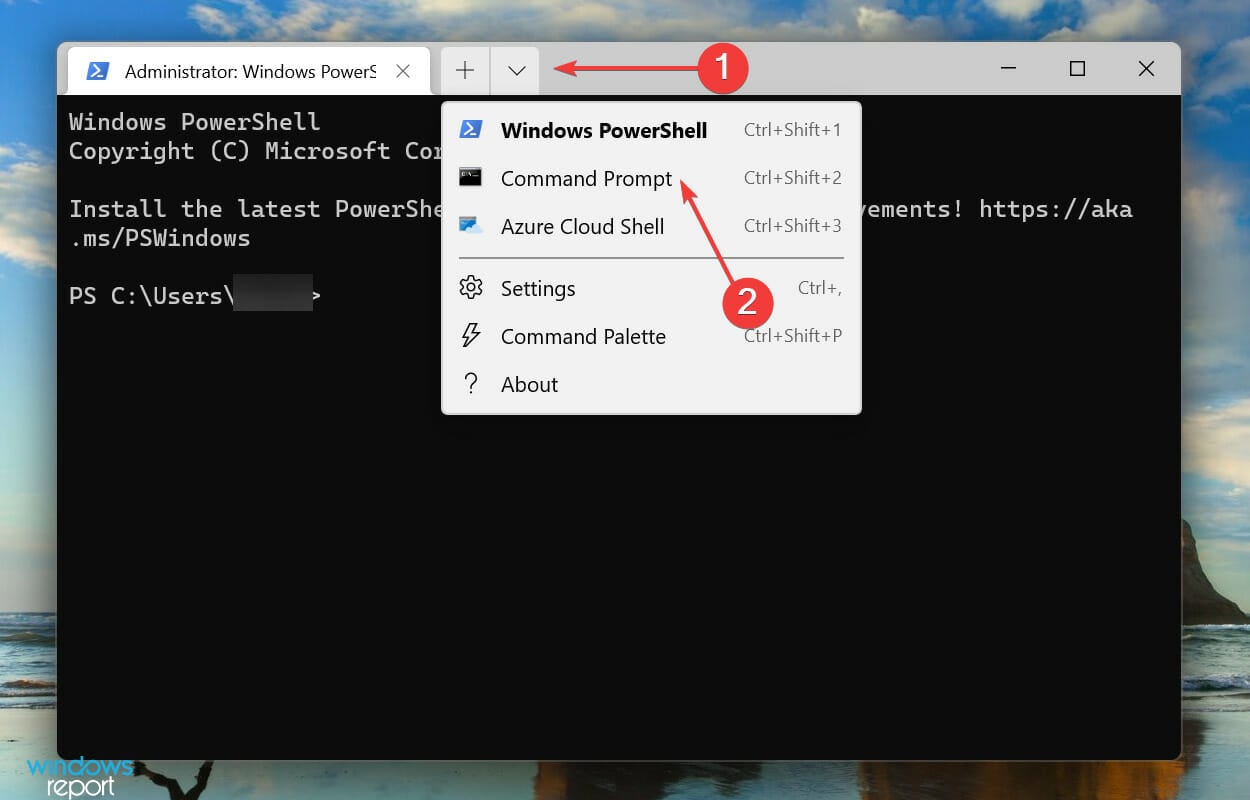
- Нажмите на стрелку вниз вверху и выберите в меню « Командная строка », чтобы запустить ее на новой вкладке.

- Теперь начните вставлять следующие команды по одной и нажимайте Enterпосле каждой, чтобы сбросить компоненты Центра обновления Windows . Эти две команды остановят службу BITS и Центра обновления Windows:
net stop bitsnet stop wuauserv - Затем выполните следующую команду, чтобы удалить файлы qmgr*.dat :
Del “%ALLUSERSPROFILE%Application DataMicrosoftNetworkDownloaderqmgr*.dat” - Если это ваша первая попытка сброса, пропустите следующие три команды и перейдите к следующему шагу. Если это не сработает, вы можете выполнить их при следующей попытке:
Ren %Systemroot%SoftwareDistributionDataStore DataStore.bakRen %Systemroot%SoftwareDistributionDownload Download.bakRen %Systemroot%System32catroot2 catroot2.bak - Затем выполните следующие команды для сброса службы BITS и Центра обновления Windows :
sc.exe sdset bits D:(A;;CCLCSWRPWPDTLOCRRC;;;SY)(A;;CCDCLCSWRPWPDTLOCRSDRCWDWO;;;BA)(A;;CCLCSWLOCRRC;;;AU)(A;;CCLCSWRPWPDTLOCRRC;;;PU)sc.exe sdset wuauserv D:(A;;CCLCSWRPWPDTLOCRRC;;;SY)(A;;CCDCLCSWRPWPDTLOCRSDRCWDWO;;;BA)(A;;CCLCSWLOCRRC;;;AU)(A;;CCLCSWRPWPDTLOCRRC;;;PU) - Вставьте следующую команду и нажмите Enter:
cd /d %windir%system32 - Теперь выполните каждую из следующих команд по отдельности, чтобы перерегистрировать важные файлы:
regsvr32.exe atl.dll
regsvr32.exe urlmon.dll
regsvr32.exe mshtml.dll
regsvr32.exe shdocvw.dll
regsvr32.exe browseui.dll
regsvr32.exe jscript.dll
regsvr32.exe vbscript.dll
regsvr32.exe scrrun.dll
regsvr32.exe msxml.dll
regsvr32.exe msxml3.dll
regsvr32.exe msxml6.dll
regsvr32.exe actxprxy.dll
regsvr32.exe softpub.dll
regsvr32.exe wintrust.dll
regsvr32.exe dssenh.dll
regsvr32.exe rsaenh.dll
regsvr32.exe gpkcsp.dll
regsvr32.exe sccbase.dll
regsvr32.exe slbcsp.dll
regsvr32.exe cryptdlg.dll
regsvr32.exe oleaut32.dll
regsvr32.exe ole32.dll
regsvr32.exe shell32.dll
regsvr32.exe initpki.dll
regsvr32.exe wuapi.dll
regsvr32.exe wuaueng.dll
regsvr32.exe wuaueng1.dll
regsvr32.exe wucltui.dll
regsvr32.exe wups.dll
regsvr32.exe wups2.dll
regsvr32.exe wuweb.dll
regsvr32.exe qmgr.dll
regsvr32.exe qmgrprxy.dll
regsvr32.exe wucltux.dll
regsvr32.exe muweb.dll
regsvr32.exe wuwebv.dll
10. Теперь выполните следующую команду для сброса Winsock :netsh winsock reset
11. Последний шаг — перезапустить службу BITS и Windows Update. Для этого выполните следующие две команды:net start bits net start wuauserv
После сброса компонентов Центра обновления Windows проверьте, устранена ли ошибка 0x80071AB1, и вы можете получить. NET Framework в Windows 11.
6. Запустите обновление на месте
- Создайте загрузочную флешку для Windows 11 .
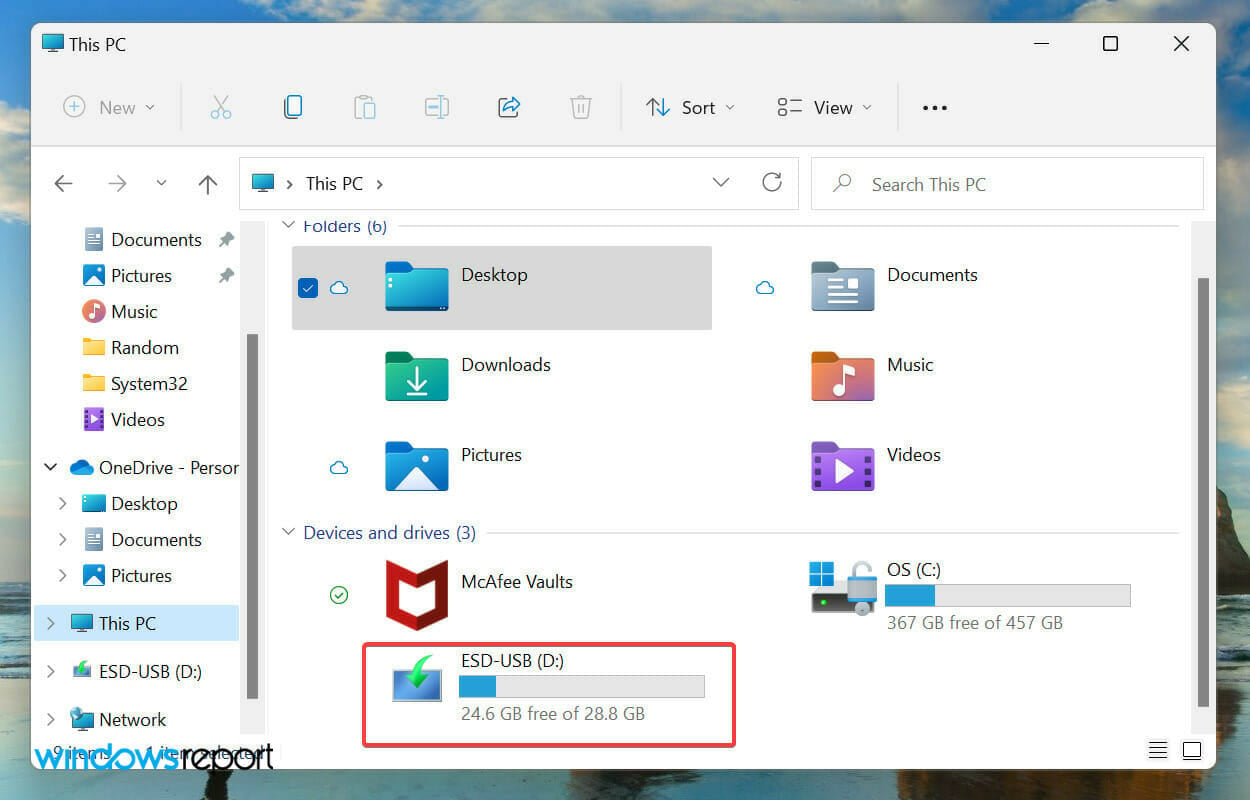
- После создания подключите диск к системе. Теперь нажмите Windows+ , Eчтобы запустить проводник , и дважды щелкните загрузочный USB-накопитель .

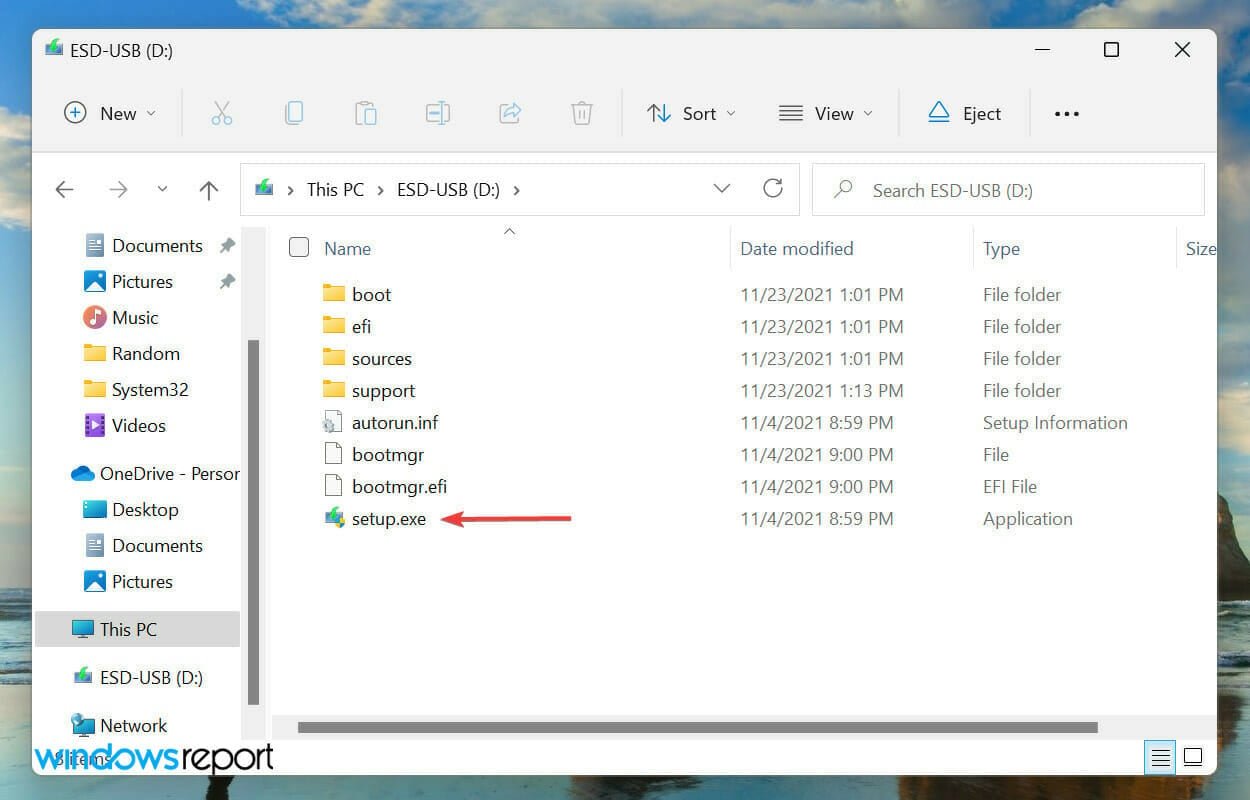
- Дважды щелкните файл setup.exe , чтобы запустить его.

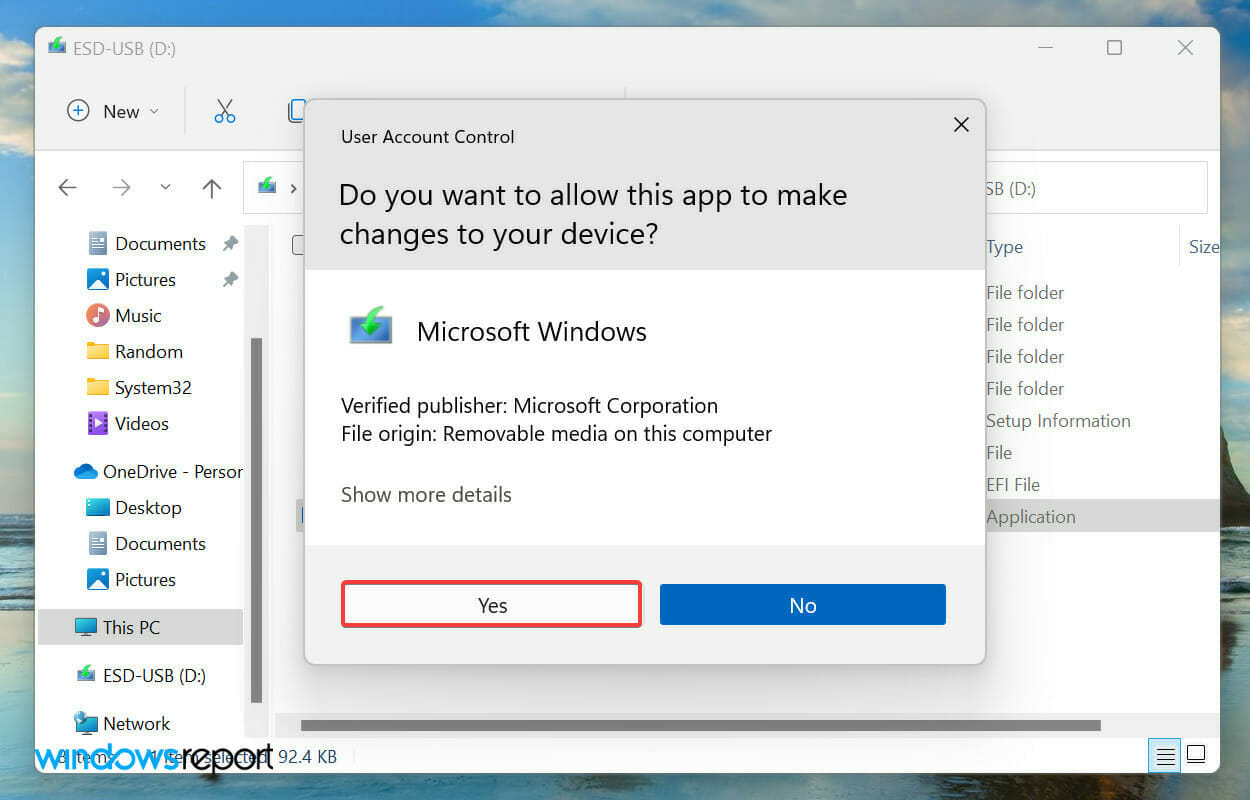
- Нажмите « Да » в ответ на запрос UAC (Контроль учетных записей) .

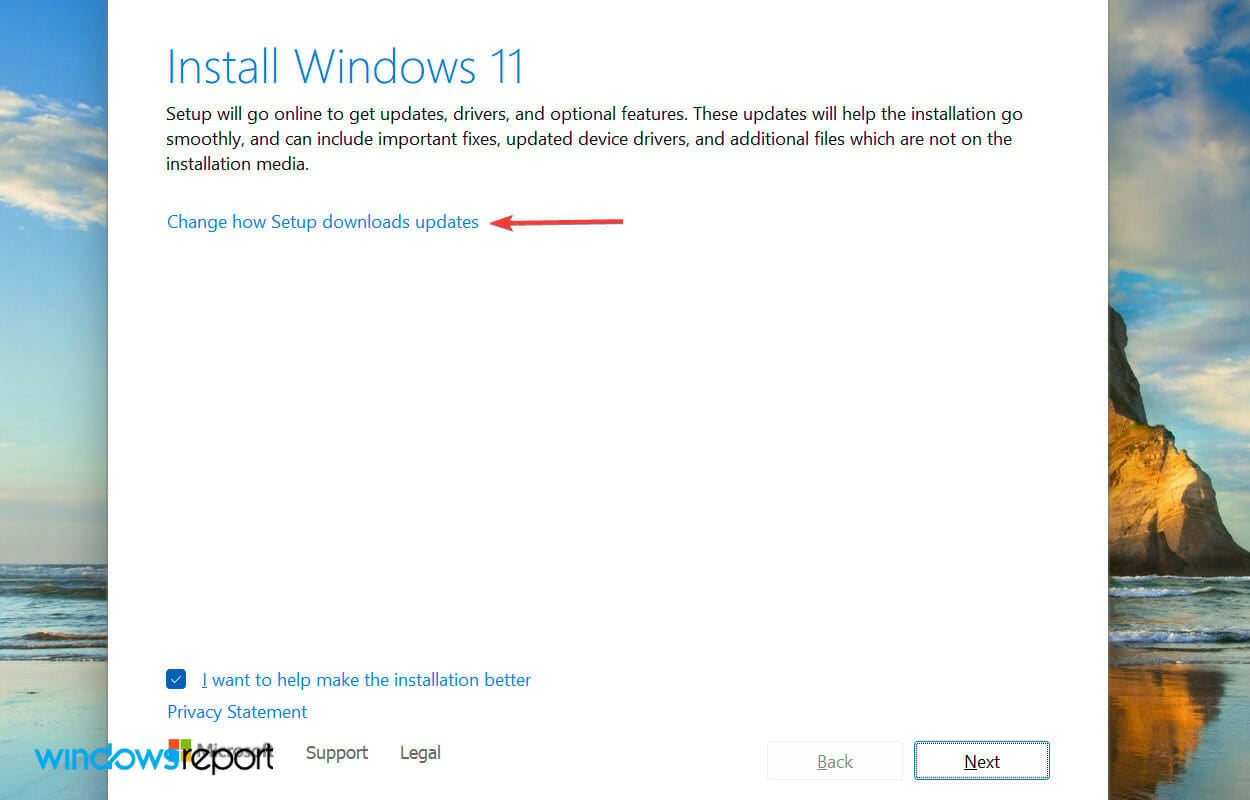
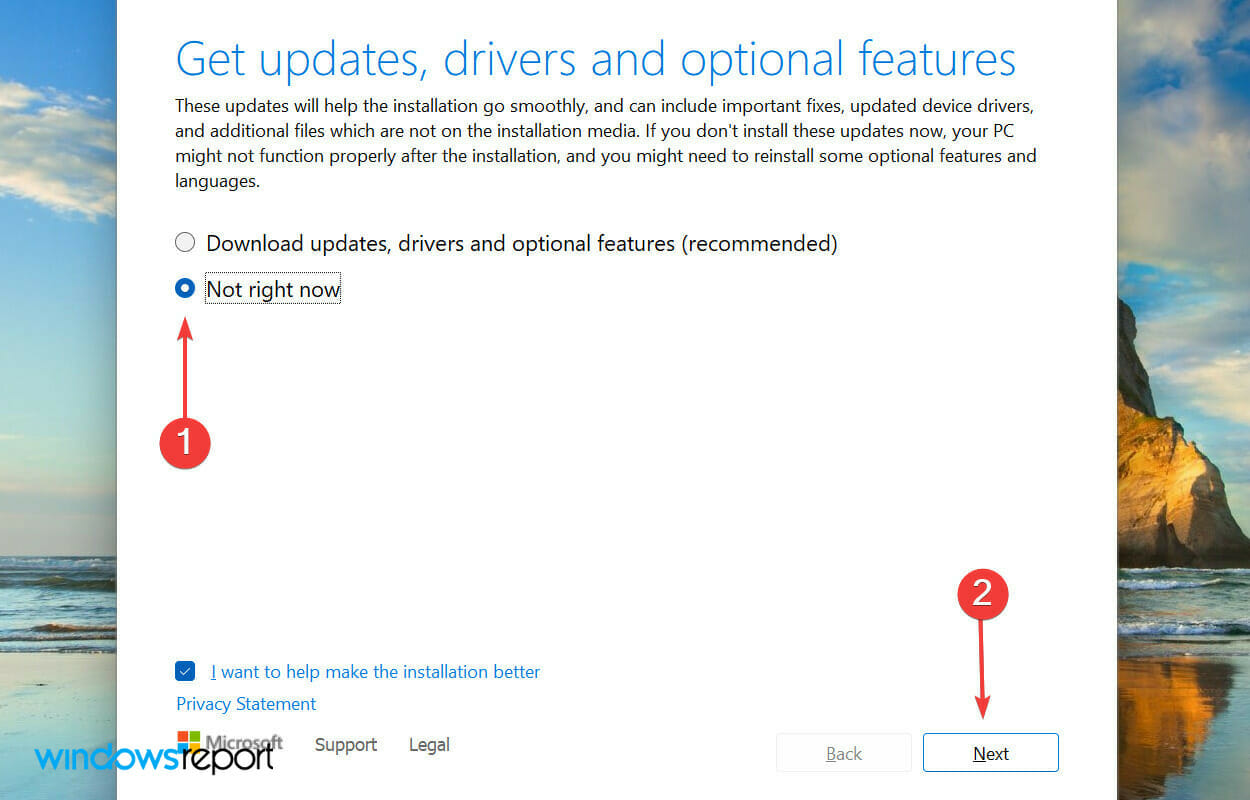
- Щелкните Изменить способ загрузки обновлений программой установки .

- Затем выберите « Не сейчас » и нажмите « Далее » , чтобы процесс восстановления был простым и быстрым.

- Нажмите « Принять» внизу.

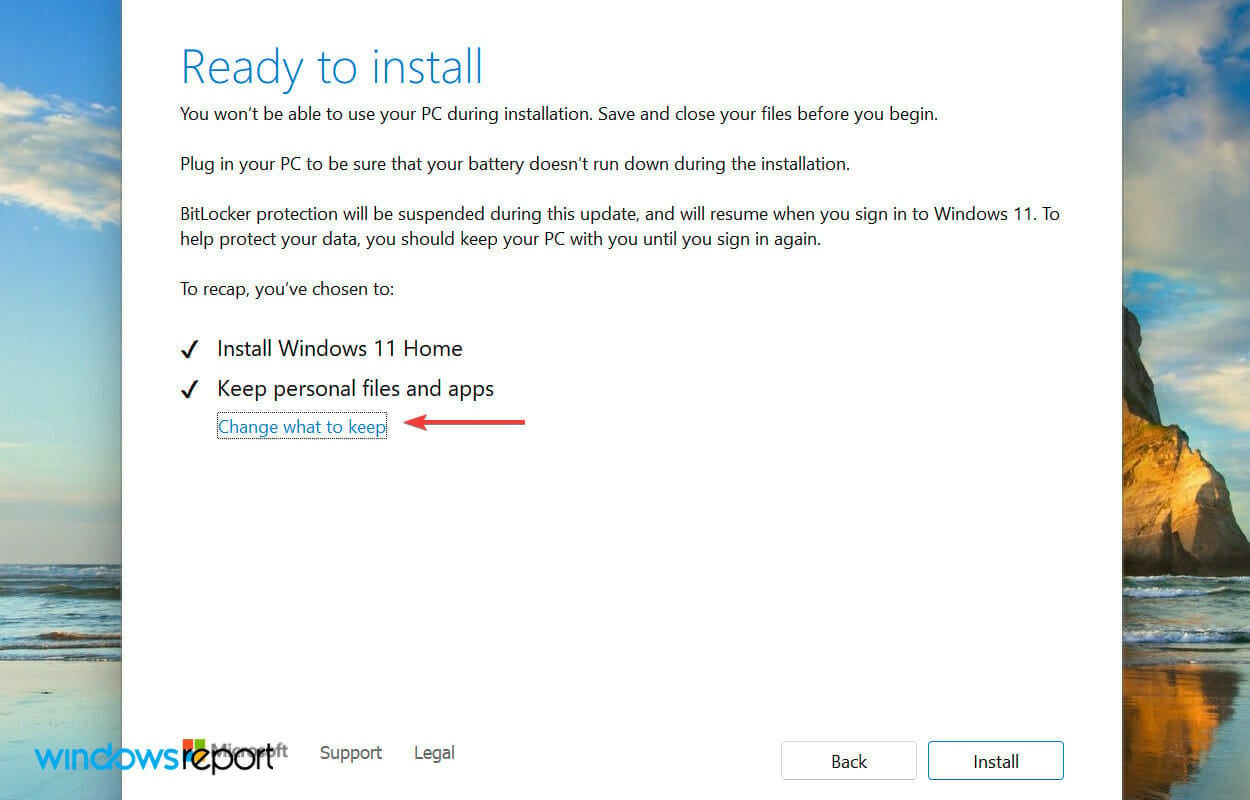
- Теперь нажмите «Изменить, что оставить» .

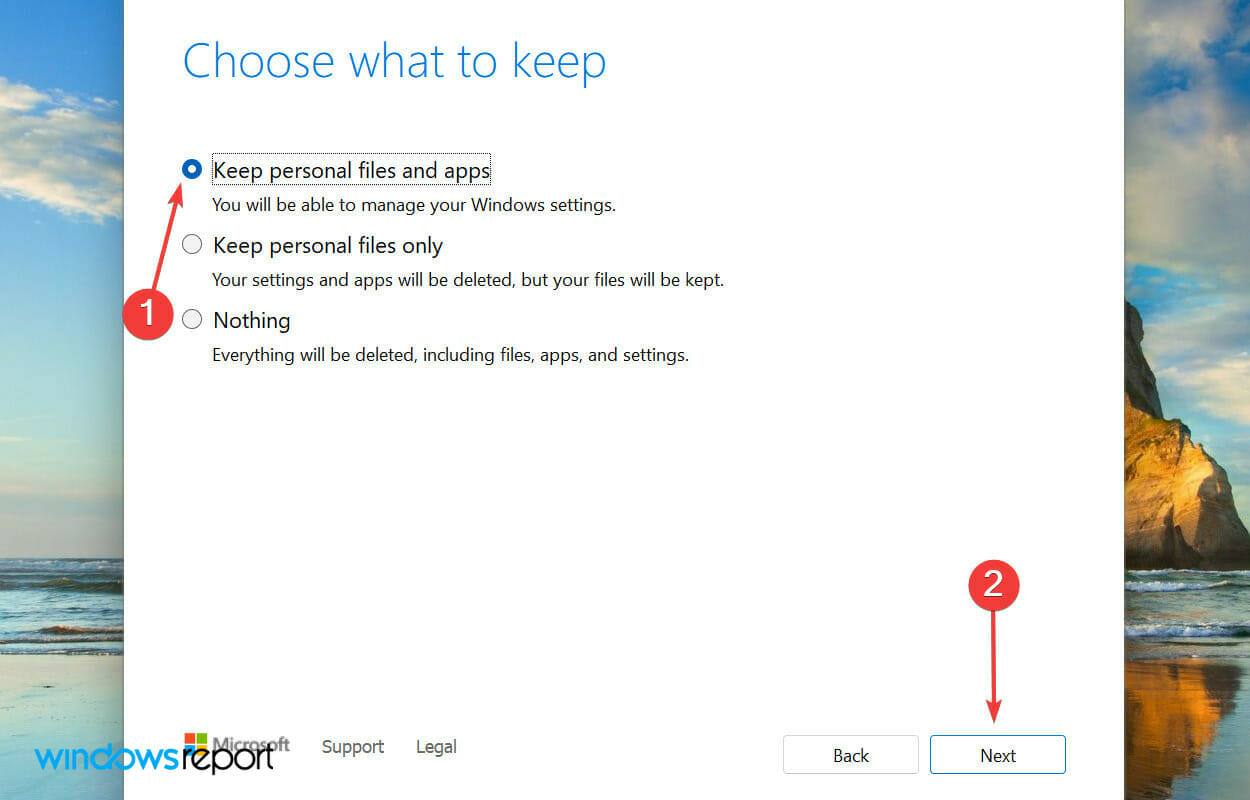
- Выберите вариант « Сохранить личные файлы и приложения » и нажмите « Далее » внизу.

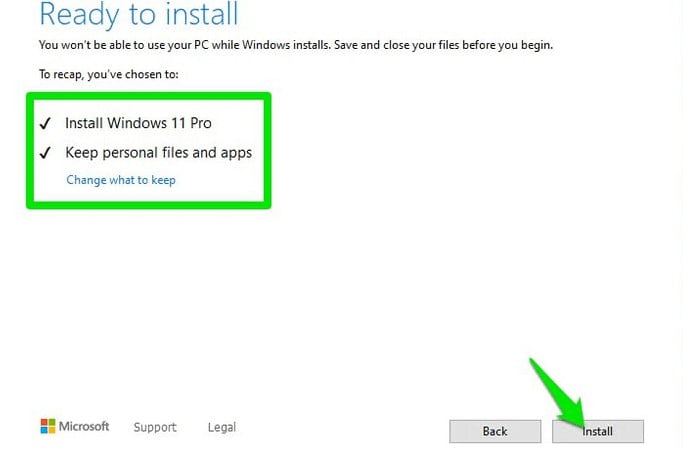
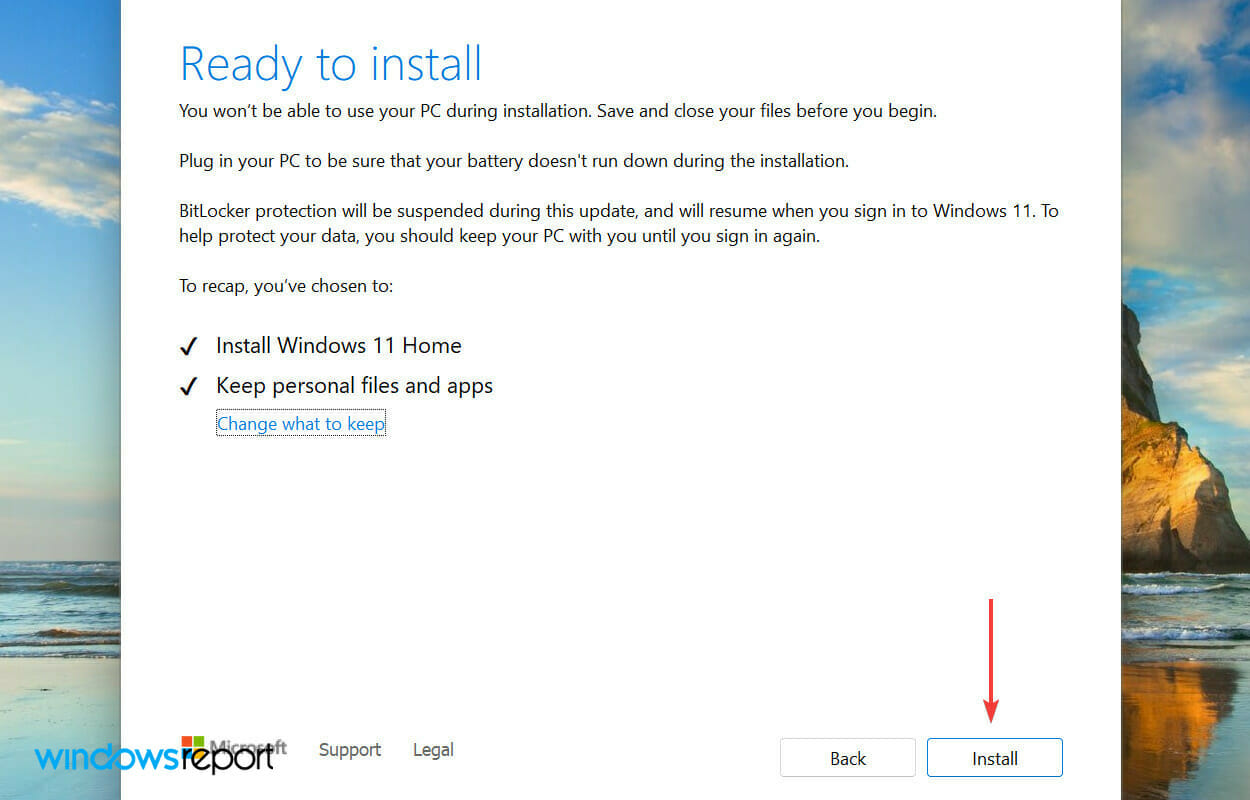
- Последний шаг — нажать « Установить » .

Обновление на месте — это эффективный процесс исправления, который можно использовать для устранения широкого спектра ошибок, в том числе некоторых из самых сложных, не затрагивая файлы и приложения, хранящиеся в системе.
Как установить/загрузить. NET Framework 3.5 в Windows 11?
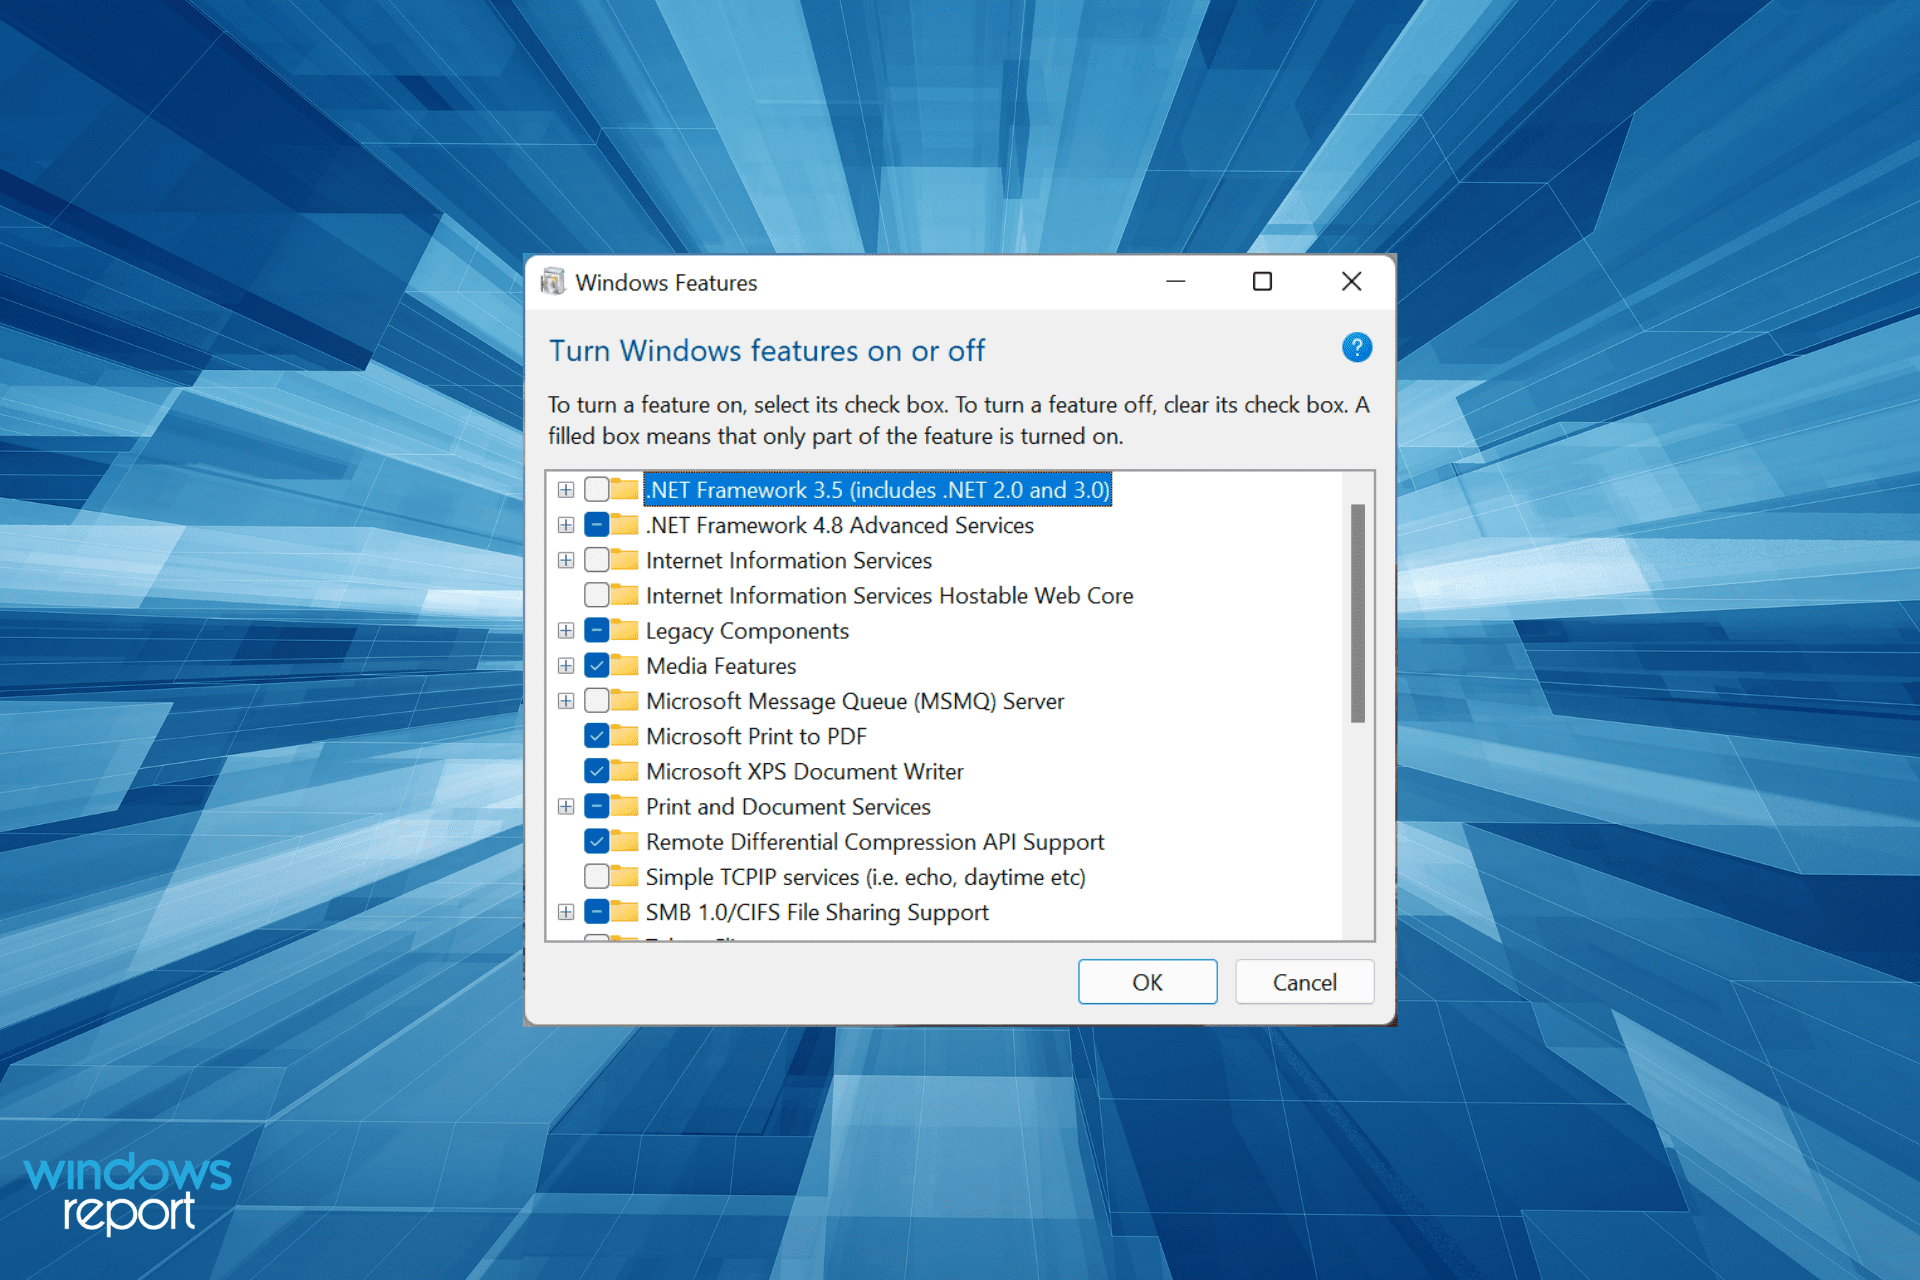
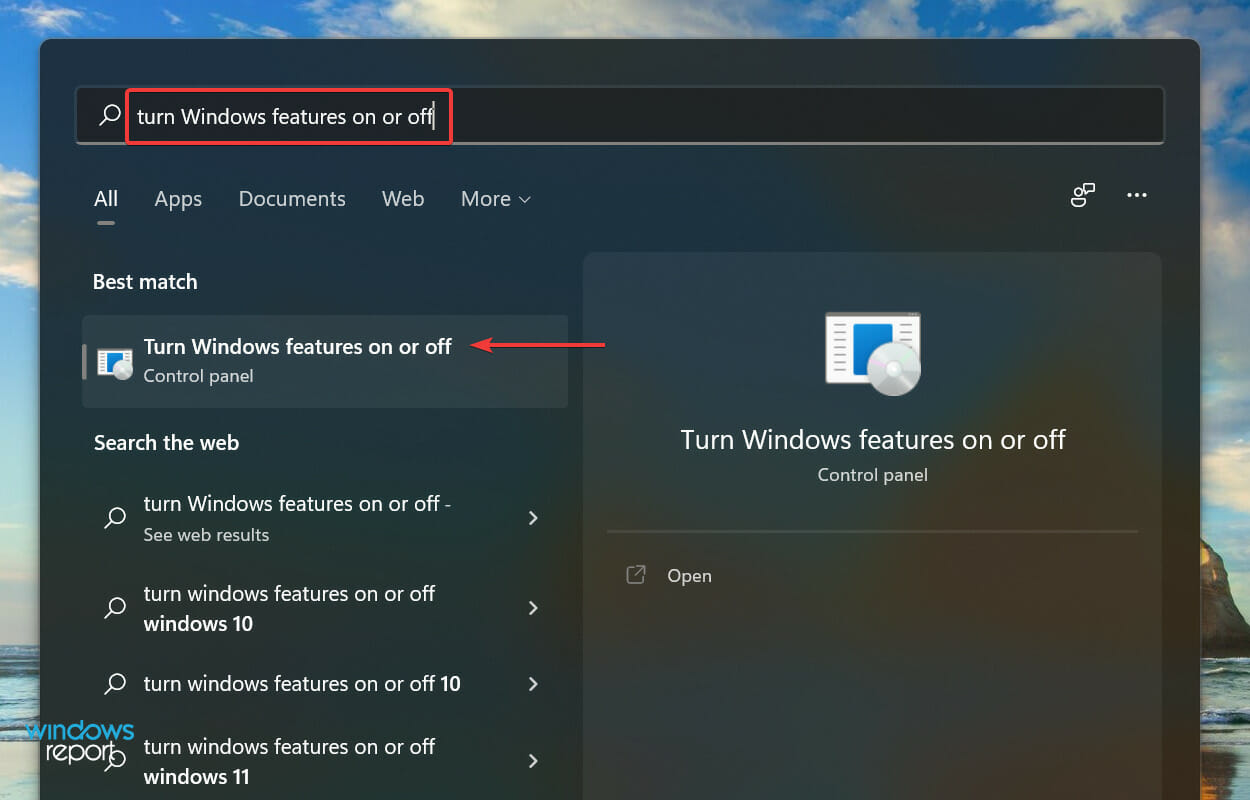
- Нажмите Windows+ S, чтобы открыть меню поиска , введите Включение или отключение функций Windows в текстовом поле вверху и щелкните соответствующий результат поиска.

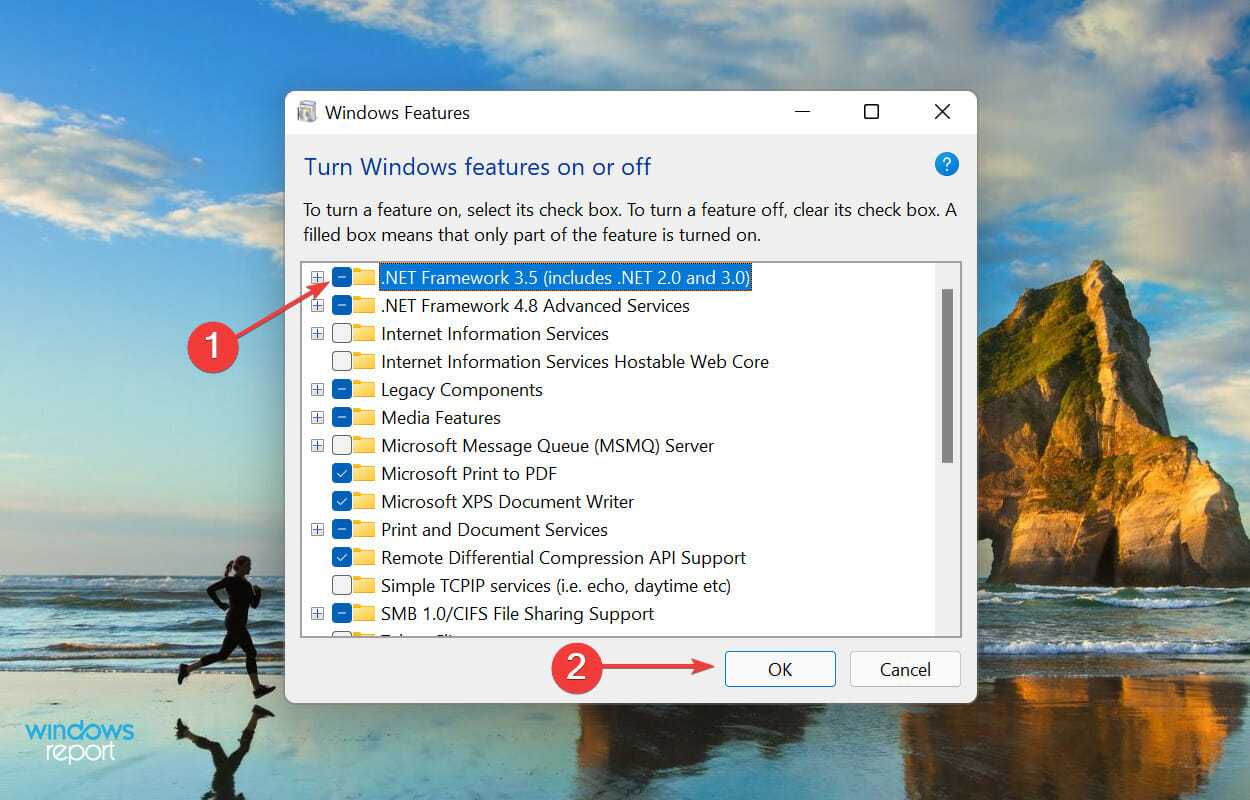
- Установите флажок для .NET Framework 3.5 и нажмите OK внизу.

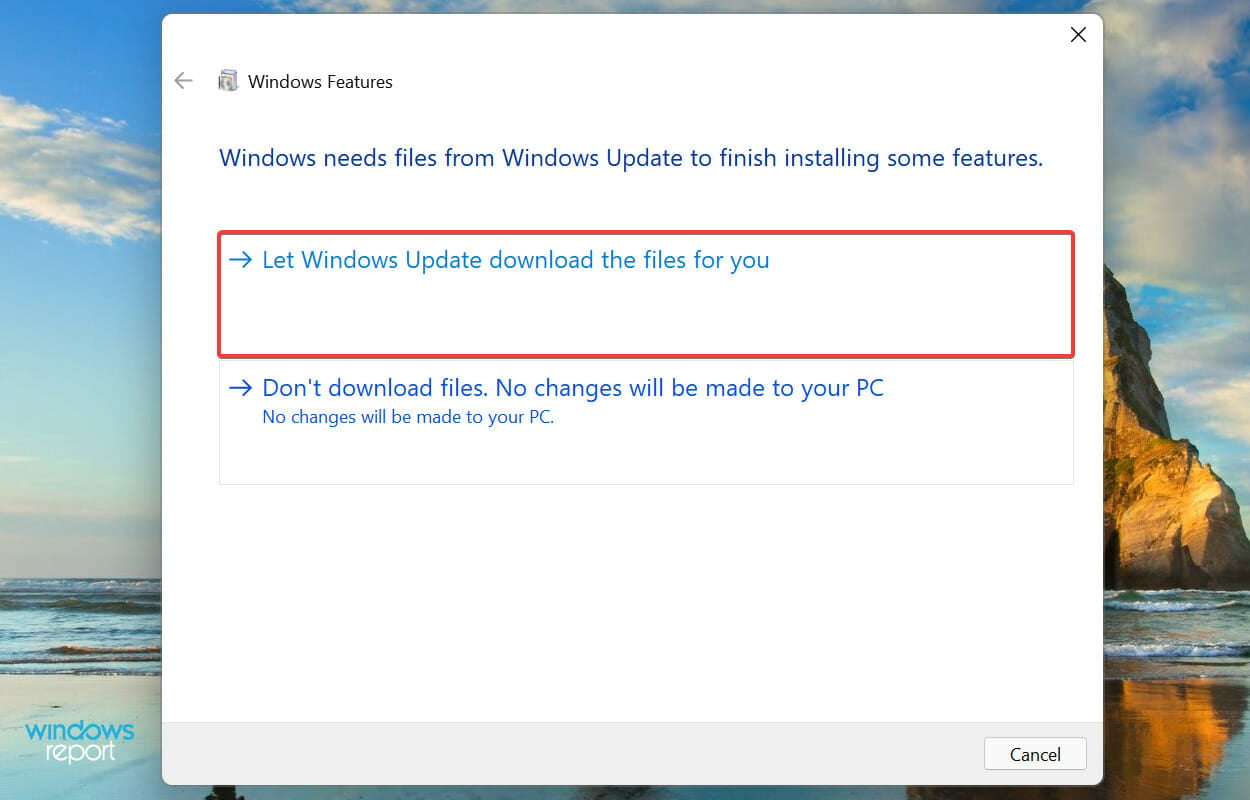
- Затем выберите Разрешить Центру обновления Windows загружать файлы для вас из двух перечисленных здесь вариантов.

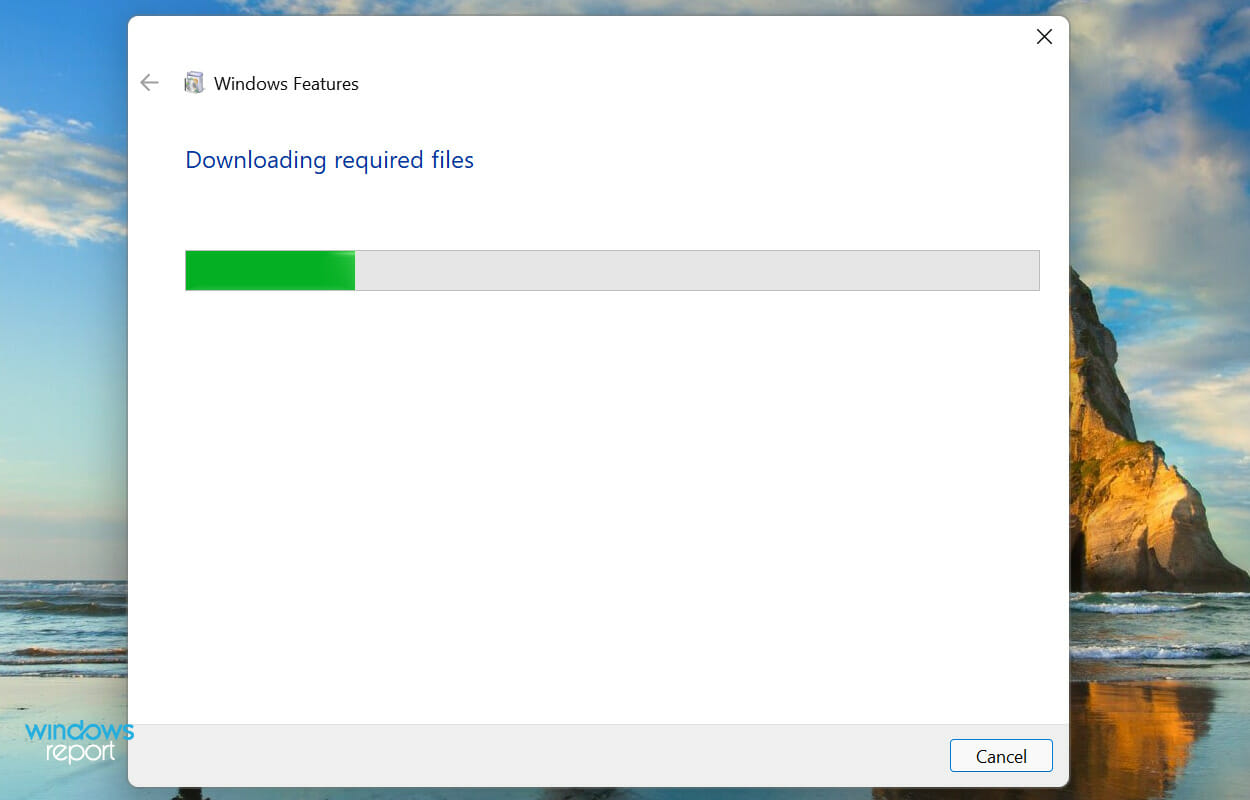
- Подождите, пока необходимые файлы будут загружены, и после этого перезагрузите компьютер, чтобы изменения вступили в силу.

Вот как вы можете установить. NET Framework 3.5 в Windows 11 за несколько простых шагов в кратчайшие сроки. Это все способы исправить ошибку 0x80071AB1 в Windows 11 и установить. NET Framework, чтобы устранить проблемы с запуском приложений.
Не стесняйтесь сообщить нам, какое исправление сработало, и рассказать о своем опыте работы с Windows 11 в разделе комментариев ниже.
0x80071ab1 (ОШИБКА_LOG_GROWTH_FAILED) — это ошибка Windows, о которой становится известно после попытки установить обновления, связанные с .NET Framework 3.5. Известно, что это происходит в Windows 11 — новой версии ОС, выпущенной Microsoft совсем недавно. Пользователи могут внезапно увидеть эту ошибку в любой момент установки обновления. Повторная попытка выполнить процесс снова, скорее всего, приведет к той же ошибке без дальнейшего развития. Как и многие другие проблемы такого рода, код 0x80071ab1 может быть вызван повреждением или отсутствием системных файлов, сбоем или повреждением компонентов обновления Windows, а также другими системными проблемами. Ниже мы прольем свет на все возможные причины, а также на решения для них. Следуйте внимательно, так как некоторые методы потребуют дополнительного внимания и самоотверженности.

Скачать средство восстановления Windows
Скачать средство восстановления Windows

Существуют специальные утилиты для восстановления Windows, которые могут решить проблемы, связанные с повреждением реестра, неисправностью файловой системы, нестабильностью драйверов Windows. Мы рекомендуем вам использовать Advanced System Repair Pro для исправления «Ошибка Центра обновления Windows 0x80071ab1» в Windows 11, Windows 10, Windows 8 или Windows 7.
1. Запустите средство устранения неполадок Центра обновления Windows.
Первый и, возможно, самый простой способ обойти эту проблему — использовать встроенные функции устранения неполадок Windows. Windows 11 унаследовала эту способность сканировать различные сектора на наличие потенциальных проблем и немедленно их исправлять от предыдущих поколений Windows. Обязательно попробуйте его, прежде чем переходить к другим решениям ниже.
- Нажмите Windows Key + I кнопки вместе и перейдите к Система на левой панели.
- Найдите и откройте Устранение неполадок справа. Затем нажмите Другие средства устранения неполадок.
- Рядом с Центр обновления Windows на правой панели нажмите Run и следуйте инструкциям на экране.
Windows уведомит вас, если какие-либо проблемы были решены. Примените найденные исправления и попробуйте загрузить и установить то же обновление, с которым у вас возникли проблемы.
2. Проверьте целостность системных файлов.
Мы упоминали, что отсутствующие или поврежденные системные файлы могут быть причиной возникновения таких ошибок. Таким образом, было бы неплохо перепроверить вашу файловую систему и убедиться, что ничего не пропало. Мы собираемся использовать как SFC (проверка системных файлов), так и DISM (обслуживание образов развертывания и управление ими), чтобы проверить, существует ли такая проблема. Оба сканирования помогут нам обнаружить и восстановить отсутствующие компоненты, если таковые имеются. Обязательно используйте оба сканирования, поскольку они могут по-разному влиять на решение ошибки. Вот как:
С помощью SFC
- Нажмите на лупу поиска и введите Терминал Windows
- Щелкните по найденному правой кнопкой мыши и выберите Запуск от имени администратора. Согласитесь с действием.
- После открытия консоли введите
sfc /scannowкоманду и нажмите Enter. - Когда процесс восстановления будет завершен, перезагрузите компьютер.
С помощью DISM
- Откройте тот же раздел Терминал Windows мы делали выше.
- Скопируйте и вставьте эту команду
DISM.exe /Online /Cleanup-image /Restorehealth. - Нажмите Enter и подождите, пока Windows закончит сканирование и исправление.
- После этого перезагрузите компьютер и снова установите обновление.
После завершения обоих этих сканирований попробуйте снова запустить установку обновлений. Если это не окупится, перейдите к другим альтернативным решениям ниже.
3. Убедитесь, что служба Центра обновления Windows запущена.
Чтобы центр обновления Windows работал правильно, важно также включить его службу. Мы рекомендуем вам проверить это, выполнив следующие несколько шагов:
- Нажмите Windows Key + R кнопки вместе и вставьте
services.msc. - После открытия найдите и щелкните правой кнопкой мыши по службе под названием Центр обновления Windows из списка. Выберите Объявления.
- Затем, рядом с Тип запуска, выберите Автоматически и нажмите на Начать . Если нажать на эту кнопку нельзя и все кажется рабочим, значит служба Центра обновления Windows запущена и не нуждается в какой-либо настройке.
- Наконец, нажмите Применить и OK чтобы сохранить данные изменения.
- Перезагрузите компьютер и проверьте, изменилось ли что-то в лучшую сторону.
4. Сбросьте компоненты Центра обновления Windows.
Если вы продолжаете сталкиваться с той же ошибкой 0x80071ab1, несмотря на использование описанных выше методов, то восстановление всех компонентов Центра обновления Windows с нуля может быть хорошим вариантом. Это позволит воссоздать обновленные компоненты с нуля, убедившись, что ни один из них не поврежден или не содержит ошибок. Вся процедура включает перезапуск служб BITS, Cryptographic, MSI Installer и Windows Update, а также переименование некоторых папок обновлений (SoftwareDistribution и Catroot2). Эти папки содержат временные файлы, необходимые для реализации обновлений Windows. Исходя из этого, мы заставим Windows удалить поврежденные элементы и снова создать компоненты, связанные с обновлением. Для этого следуйте приведенным ниже инструкциям.
Вручную
- Откройте Командная строка , введя
- Щелкните правой кнопкой мыши по Командная строка , а затем выберите Запуск от имени администратора.
- Скопируйте и вставьте этот список команд одну за другой, нажимая Enter после каждой. (Это действие отключит службы, ответственные за Обновления Windows)
- После этого введите следующую команду и нажмите Enter также. Он удалит qmgr * .dat файлы.
- Затем мы должны переименовать вышеупомянутые папки. Просто вставьте эти команды, нажимая Enter после каждой.
- Теперь вставьте и выполните эти команды ниже. Они сбросят как службы BITS, так и службы Windows Update.
- Затем выполните этот список команд одну за другой, чтобы перерегистрировать все важные DLL-файлы.
- Вы также должны выполнить сброс Winstock, еще одну важную часть этого процесса. Просто вставьте эту команду
- Наконец, все, что осталось сделать, это вернуть отключенные службы. Введите эти команды так же, как мы делали ранее.
- На этом все. Перейдите в центр обновления Windows и попробуйте выполнить установку снова.
cmd в поисковую петлю.
net stop bits

net stop wuauserv
Del “%ALLUSERSPROFILE%Application DataMicrosoftNetworkDownloaderqmgr*.dat”
ren %Systemroot%SoftwareDistributionDataStore DataStore.old

ren %Systemroot%SoftwareDistributionDownload Download.old

ren %Systemroot%System32catroot2 catroot2.old
sc.exe sdset bits D:(A;;CCLCSWRPWPDTLOCRRC;;;SY)(A;;CCDCLCSWRPWPDTLOCRSDRCWDWO;;;BA)(A;;CCLCSWLOCRRC;;;AU)(A;;CCLCSWRPWPDTLOCRRC;;;PU)

sc.exe sdset wuauserv D:(A;;CCLCSWRPWPDTLOCRRC;;;SY)(A;;CCDCLCSWRPWPDTLOCRSDRCWDWO;;;BA)(A;;CCLCSWLOCRRC;;;AU)(A;;CCLCSWRPWPDTLOCRRC;;;PU)

cd /d %windir%system32
regsvr32.exe atl.dll

regsvr32.exe urlmon.dll

regsvr32.exe mshtml.dll

regsvr32.exe shdocvw.dll

regsvr32.exe browseui.dll

regsvr32.exe jscript.dll

regsvr32.exe vbscript.dll

regsvr32.exe scrrun.dll

regsvr32.exe msxml.dll

regsvr32.exe msxml3.dll

regsvr32.exe msxml6.dll

regsvr32.exe actxprxy.dll

regsvr32.exe softpub.dll

regsvr32.exe wintrust.dll

regsvr32.exe dssenh.dll

regsvr32.exe rsaenh.dll

regsvr32.exe gpkcsp.dll

regsvr32.exe sccbase.dll

regsvr32.exe slbcsp.dll

regsvr32.exe cryptdlg.dll

regsvr32.exe oleaut32.dll

regsvr32.exe ole32.dll

regsvr32.exe shell32.dll

regsvr32.exe initpki.dll

regsvr32.exe wuapi.dll

regsvr32.exe wuaueng.dll

regsvr32.exe wuaueng1.dll

regsvr32.exe wucltui.dll

regsvr32.exe wups.dll

regsvr32.exe wups2.dll

regsvr32.exe wuweb.dll

regsvr32.exe qmgr.dll

regsvr32.exe qmgrprxy.dll

regsvr32.exe wucltux.dll

regsvr32.exe muweb.dll

regsvr32.exe wuwebv.dll
netsh winsock reset
net start bits

net start wuauserv
5. Используйте Media Creation Tool.
Если по-прежнему нет никаких сигналов в пользу решения проблемы, мы рекомендуем вам попробовать Media Creation Tool — отличную утилиту Microsoft, предназначенную для получения последних доступных обновлений в обход традиционных методов. Если вы изо всех сил пытаетесь установить обновление .NET 3.5 Framework, вам следует попробовать Media Creation Tool. Следуйте инструкциям ниже:
- Сначала вам нужно скачать утилиту с веб-сайта Microsoft.
- Затем запустите загруженный файл.
- После того, как вы согласитесь с Условиями использования, вам будет предложено два варианта на выбор. Выберите Обновить этот компьютер сейчас.
- Выберите Сохранить личные файлы чтобы они не пострадали.
- Наконец, запустите процесс и дождитесь его завершения.
- Надеюсь, этот метод помог вам справиться с ошибкой 0x80071ab1.
Заключение
Обычно это основной набор решений, которые каждый должен попробовать при возникновении таких ошибок, как 0x80071ab1. Мы надеемся, что они помогли вам забыть о боли, которую вы испытывали из-за того, что не могли кормить свою систему новыми доступными обновлениями. Если есть что-то еще, с чем, по вашему мнению, мы можем вам помочь, выполните поиск на нашем веб-сайте, чтобы найти подходящую статью для других проблем, которые вас интересуют. Мы создаем множество контента, чтобы наши пользователи были в курсе и всегда были довольны решениями. .
Ошибка 0x80071AB1 неприятна из-за того, что она не позволяет установить .NET Framework 3.5, без которого не будет работать большинство других программ. Также она может появляться, если пользователь пытается обновить свою операционную систему. Похоже, это довольно популярная и новая ошибка, поэтому о ней известно немного. Тем не менее уже удалось найти несколько эффективных процедур решения. Вроде бы, они работают у большинства пользователей, но мы продолжаем следить за развитием событий.
«Не удалось создать пространство в журнале диспетчера транзакционных ресурсов. Состояние сбоя было записано в журнале событий.
Код ошибки: 0x80071AB1″
Как исправить ошибку 0x80071AB1 на Windows 11?
Установка .NET Framework 3.5 обычно проходит успешно после обновления Windows, но здесь тоже нас может поджидать та же самая ошибка. Если за ней не стоит серьезная поломка системных файлов, должна сработать другая тактика обновления. Это и будет наш первый способ. Если проблема серьезнее, тогда воспользуйтесь второй процедурой.
Обновление Windows 11 на месте
Инструкция по обновлению:
- Создаем загрузочную флешку и подключаем ее к компьютеру. Для этого используйте ISO образ с официального сайта.
- Жмем комбинацию Win + E и переходим в раздел с нашей флешкой.
- На смонтированном накопителе запускаем файл Setup.exe и выдаем необходимое для него разрешение.
- Жмем на кнопку «Изменить способ загрузки обновлений программой установки», затем жмем «Не сейчас» – «Далее» – «Применить».
- Когда появится окно «Установка» нажимаем на «Изменить, что сохранить» и выбираем «Сохранить личные файлы и приложения».
- Жмем на «Установить» и теперь можем попробовать заново установить .Net Framework.
Эту инструкцию неоднократно рекомендовали пользователи. Ссылка на оригинал.
Устранение ошибок
Есть алгоритм действий, который срабатывает у пользователей:
- Удалить содержимое каталогов C:WindowsSoftwareDistributionDownload – там могут быть проблемные обновления, которые не удается установить.
- Просканировать DISM. Вам требуется выполнить серию команд: DISM /Online /Cleanup-image /StartComponentCleanup, DISM /Online /Cleanup-Image /ScanHealth и DISM /Online /Cleanup-Image /RestoreHealth.
- Сканировать SFC. Команда sfc /scannow.
- Сканирование chkdsk C: и icacls c:/windows/winsxs.
- Перезагрузить компьютер.
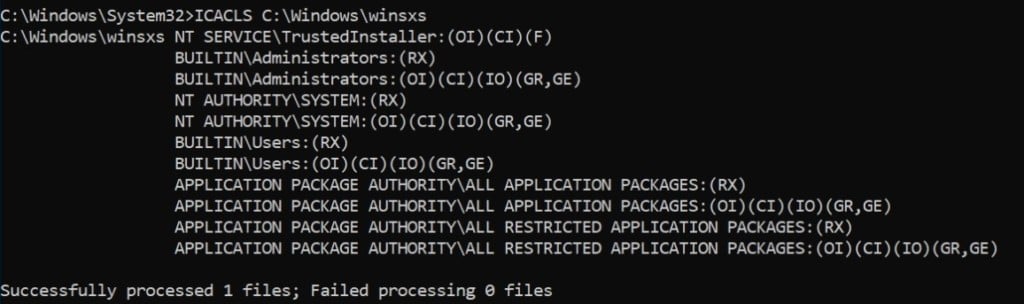
Скорее всего на одном из этапов будет сообщение, что были исправлены некоторые проблемы. После этого стоит попробовать провести установку .Net Framework или обновление Windows 11.
Try out 6 expert-tested methods to get rid of this error
by Kazim Ali Alvi
Kazim has always been fond of technology, be it scrolling through the settings on his iPhone, Android device, or Windows. And at times, unscrewing the device to take… read more
Updated on November 28, 2022
Reviewed by
Vlad Turiceanu

Passionate about technology, Windows, and everything that has a power button, he spent most of his time developing new skills and learning more about the tech world. Coming… read more
- When users try to install .NET Framework to effectively run an application that requires it, the 0x80071AB1 error is encountered.
- The install error — 0x80071ab1 could be caused by a problem with the Windows Update feature.
- To fix the problem, try updating Windows 11, perform a quick SFC scan, or run an in-place upgrade, amongst other fixes listed below.
XINSTALL BY CLICKING THE DOWNLOAD FILE
- Download Restoro PC Repair Tool that comes with Patented Technologies (patent available here).
- Click Start Scan to find Windows 11 issues that could be causing PC problems.
- Click Repair All to fix issues affecting your computer’s security and performance
- Restoro has been downloaded by 0 readers this month.
Windows 11, the most advanced iteration from Microsoft, contrary to popular opinion is prone to errors. And, the worst are the ones that affect basic functioning. In this article, we will be discussing the 0x80071AB1 error.
Note that it is encountered when users try to get the .NET framework, but 0x80071AB1 shows up instead. This poses a major hurdle since a lot of apps require these to function effectively.
To fix the 0x80071AB1 error, we have dedicated this article that explains how the .NET Framework functions along with the most effective methods to eliminate the error.
In the next section, we will walk you through the methods to resolve the 0x80071AB1 error and get .NET Framework.
How can I fix the error code 0x80071ab1 in Windows 11?
- How can I fix the error code 0x80071ab1 in Windows 11?
- 1. Update Windows 11
- 2. Run the Windows Update troubleshooter
- 3. Perform a quick SFC scan
- 4. Run the Windows Update service
- 5. Reset Windows Update components
- 6. Run an in-place upgrade
- How does .NET Framework work?
- How can I install/download .NET Framework 3.5 in Windows 11?
1. Update Windows 11
1. Press Windows + I on your keyboard to launch the Settings app.
1. Select Windows Update from the list of tabs in the navigation pane on the left.
3. Next, click on Check for updates to scan for any updates pertaining to .NET Framework.
4. If any updates are found, download and install them.
5. Check whether the error persists.
The first thing you should do if you encounter error code 0x80071ab1 on your Windows PC is ensure that your device is up to date with the latest updates.
After the introduction of .NET Frameworks 3.5, any updates with respect to these were released through Windows Update. So users now don’t have to do pretty much anything other than regularly check for updates.
It is possible that the error will go away on its own after you update your Windows, and you won’t have to rely on other more complicated methods.
2. Run the Windows Update troubleshooter
- Press Windows + I to launch the Settings app.
- Click on Troubleshoot on the right in the System tab.

- Click on Other troubleshooters.
- Now, locate the Windows Update entry and then click on the Run button next to it.
The built-in troubleshooters offered by Microsoft are pretty good at eliminating a plethora of errors, including the 0x80071AB1 Windows Update error. If .NET Framework didn’t appear in Windows Update in the last method, it could indicate a problem with the update process itself.
Hence, it’s recommended that you run the Windows Update troubleshooter to diagnose and fix the issues preventing .NET Framework from appearing in the update section.
If that did not help, you can give a try to Restoro, which will scan your PC and fix any errors related to missing DLL files, faulty registry entries, or malware.
3. Perform a quick SFC scan
- Press Windows + S to launch the Search menu.
- Enter Windows Terminal in the text field at the top, right-click on the relevant search result, and select Run as administrator from the context menu.
- Click Yes on the UAC (User Account Control) prompt that pops up.
- Next, click on the downward-facing arrow at the top, and select Command Prompt from the list of options in the menu. Alternatively, you can hit Ctrl + Shift + 2 to launch Command Prompt in a new tab.
- Type the following command and hit Enter to run the SFC scan:
sfc /scannow - Wait for the scan to complete, restart the computer, and check if the error is fixed,


Some PC issues are hard to tackle, especially when it comes to corrupted repositories or missing Windows files. If you are having troubles fixing an error, your system may be partially broken.
We recommend installing Restoro, a tool that will scan your machine and identify what the fault is.
Click here to download and start repairing.
The SFC (System File Checker) scan identifies the corrupt system files, and if any are found, replaces them with their cached copy stored on the system.
Corrupt system files are known to cause a bunch of errors including install error 0x80071AB1 in Windows 11.
- Fix update error 0x800f0988 on Windows 11 & 10
- FIX: Windows 10/11 error 0x80071a91
- How to fix Windows 11 update error 0x800f0922
- How to install Hyper-V in Windows 11
4. Run the Windows Update service
- Press Windows + R to launch the Run command, enter services.msc in the text field, and then either click on OK or hit Enter to launch the Services app.
- Now, scroll down, locate the Windows Update service, and double-click on it to launch the Properties. The services here are listed in alphabetical/reverse-alphabetical order, so it shouldn’t be difficult locating the service.
- Click on the Startup type dropdown menu, and select Automatic from the list of options.
- If the service isn’t running, click on the Start button under Service status, wait for it to run, and click on OK to save the changes.
Once done, restart the computer and check if the 0x80071AB1 error is eliminated.
5. Reset Windows Update components
- Right-click on the Start icon in the Taskbar or press Windows + X to launch the Power User/Quick Access menu, and select Windows Terminal (Admin) from the list of options.
- Click Yes on the UAC (User Account Control) prompt that appears.
- Click on the downward arrow at the top, and select Command Prompt from the menu to launch it in a new tab.
- Now, start pasting the following commands one at a time and hit Enter after each to reset Windows Update components These two commands will stop BITS and Windows Update service:
net stop bitsnet stop wuauserv - Next, execute the following command to delete the qmgr*.dat files:
Del “%ALLUSERSPROFILE%Application DataMicrosoftNetworkDownloaderqmgr*.dat” - If this is your first attempt at resetting, skip the following three commands and move to the next step. In case it doesn’t work out, you can execute these in the subsequent attempt:
Ren %Systemroot%SoftwareDistributionDataStore DataStore.bakRen %Systemroot%SoftwareDistributionDownload Download.bakRen %Systemroot%System32catroot2 catroot2.bak - Next, execute the following commands to reset the BITS and Windows Update service:
sc.exe sdset bits D:(A;;CCLCSWRPWPDTLOCRRC;;;SY)(A;;CCDCLCSWRPWPDTLOCRSDRCWDWO;;;BA)(A;;CCLCSWLOCRRC;;;AU)(A;;CCLCSWRPWPDTLOCRRC;;;PU)sc.exe sdset wuauserv D:(A;;CCLCSWRPWPDTLOCRRC;;;SY)(A;;CCDCLCSWRPWPDTLOCRSDRCWDWO;;;BA)(A;;CCLCSWLOCRRC;;;AU)(A;;CCLCSWRPWPDTLOCRRC;;;PU) - Paste the following command and hit Enter:
cd /d %windir%system32 - Now, execute each of the following commands individually to re-register the critical files:

regsvr32.exe atl.dll
regsvr32.exe urlmon.dll
regsvr32.exe mshtml.dll
regsvr32.exe shdocvw.dll
regsvr32.exe browseui.dll
regsvr32.exe jscript.dll
regsvr32.exe vbscript.dll
regsvr32.exe scrrun.dll
regsvr32.exe msxml.dll
regsvr32.exe msxml3.dll
regsvr32.exe msxml6.dll
regsvr32.exe actxprxy.dll
regsvr32.exe softpub.dll
regsvr32.exe wintrust.dll
regsvr32.exe dssenh.dll
regsvr32.exe rsaenh.dll
regsvr32.exe gpkcsp.dll
regsvr32.exe sccbase.dll
regsvr32.exe slbcsp.dll
regsvr32.exe cryptdlg.dll
regsvr32.exe oleaut32.dll
regsvr32.exe ole32.dll
regsvr32.exe shell32.dll
regsvr32.exe initpki.dll
regsvr32.exe wuapi.dll
regsvr32.exe wuaueng.dll
regsvr32.exe wuaueng1.dll
regsvr32.exe wucltui.dll
regsvr32.exe wups.dll
regsvr32.exe wups2.dll
regsvr32.exe wuweb.dll
regsvr32.exe qmgr.dll
regsvr32.exe qmgrprxy.dll
regsvr32.exe wucltux.dll
regsvr32.exe muweb.dll
regsvr32.exe wuwebv.dll
10. Now, execute the following command to reset Winsock:netsh winsock reset
11. The last step is to restart the BITS and Windows Update service. Execute the following two commands to do that:net start bits net start wuauserv
After resetting the Windows Update components, check if the 0x80071AB1 error is fixed and you are able to get the .NET Framework in Windows 11.
6. Run an in-place upgrade

NOTE
To do an in-place upgrade, you need to have administrative privileges on the current user account. Make sure to check that before proceeding. Also, save any open files since the computer will restart and it might lead to loss of data.
- Create a bootable USB drive for Windows 11.
- Once created, connect the drive to the system. Now, press Windows + E to launch File Explorer and double-click on the bootable USB drive.
- Double-click on the setup.exe file to launch it.
- Click Yes on the UAC (User Account Control) prompt.
- Click on Change how Setup downloads updates.
- Next, select Not right now and click on Next to keep the repair process simple and quick.
- Click Accept at the bottom.
- Now, click on Change what to keep.
- Select the option to Keep personal files and apps and click on Next at the bottom.
- The last step is to click on Install.

The in-place upgrade is an effective repair process that can be used to eliminate a wide variety of errors, including some of the most complex ones without affecting the files and apps stored on the system.
How does .NET Framework work?
The .NET Framework, in simple terms, is a collection of thousands of pieces of code that help developers create an application. Since the code is accessible to all, the developers can use this, wherever required, instead of writing it from scratch.
Apart from that, the .NET Framework also provides a runtime environment to developers in order to test their applications. It’s called the Common Language Runtime or CLR, which compiles and executes the code.
We can go for hours just discussing the .NET Framework, but to eliminate the error at hand, a basic understanding of it would suffice.
If you have an application that requires these codes or the .NET Framework, it’s time you install it.
How can I install/download .NET Framework 3.5 in Windows 11?
- Press Windows + S to launch the Search menu, enter Turn Windows features on or off in the text field at the top, and click on the relevant search result.
- Tick the checkbox for .NET Framework 3.5 and click on OK at the bottom.
- Next, select Let Windows Update download the files for you from the two options listed here.
- Wait for the required files to be downloaded, and once done, restart the computer to effectively apply the changes.
That’s how you can install .NET Framework 3.5 in Windows 11 in easy steps within no time. Also, check out how to fix some of the common .NET Framework 3.5 errors. Though the article is for Windows 10, the methods work just as fine on the latest iteration as well.
These are all the ways you can fix the 0x80071AB1 error in Windows 11, and get the .NET Framework installed to eliminate problems in running applications.
In case the .NET Framework 3.5 is missing from your Windows 10 PC, check how to install it.
Do not hesitate to tell us which fix worked to solve the Windows Update error 0x80071ab1 and your experience of Windows 11 thus far, in the comments section below.
![]()
Newsletter
Try out 6 expert-tested methods to get rid of this error
by Kazim Ali Alvi
Kazim has always been fond of technology, be it scrolling through the settings on his iPhone, Android device, or Windows. And at times, unscrewing the device to take… read more
Updated on November 28, 2022
Reviewed by
Vlad Turiceanu
Passionate about technology, Windows, and everything that has a power button, he spent most of his time developing new skills and learning more about the tech world. Coming… read more
- When users try to install .NET Framework to effectively run an application that requires it, the 0x80071AB1 error is encountered.
- The install error — 0x80071ab1 could be caused by a problem with the Windows Update feature.
- To fix the problem, try updating Windows 11, perform a quick SFC scan, or run an in-place upgrade, amongst other fixes listed below.
XINSTALL BY CLICKING THE DOWNLOAD FILE
- Download Restoro PC Repair Tool that comes with Patented Technologies (patent available here).
- Click Start Scan to find Windows 11 issues that could be causing PC problems.
- Click Repair All to fix issues affecting your computer’s security and performance
- Restoro has been downloaded by 0 readers this month.
Windows 11, the most advanced iteration from Microsoft, contrary to popular opinion is prone to errors. And, the worst are the ones that affect basic functioning. In this article, we will be discussing the 0x80071AB1 error.
Note that it is encountered when users try to get the .NET framework, but 0x80071AB1 shows up instead. This poses a major hurdle since a lot of apps require these to function effectively.
To fix the 0x80071AB1 error, we have dedicated this article that explains how the .NET Framework functions along with the most effective methods to eliminate the error.
In the next section, we will walk you through the methods to resolve the 0x80071AB1 error and get .NET Framework.
How can I fix the error code 0x80071ab1 in Windows 11?
- How can I fix the error code 0x80071ab1 in Windows 11?
- 1. Update Windows 11
- 2. Run the Windows Update troubleshooter
- 3. Perform a quick SFC scan
- 4. Run the Windows Update service
- 5. Reset Windows Update components
- 6. Run an in-place upgrade
- How does .NET Framework work?
- How can I install/download .NET Framework 3.5 in Windows 11?
1. Update Windows 11
1. Press Windows + I on your keyboard to launch the Settings app.
1. Select Windows Update from the list of tabs in the navigation pane on the left.
3. Next, click on Check for updates to scan for any updates pertaining to .NET Framework.
4. If any updates are found, download and install them.
5. Check whether the error persists.
The first thing you should do if you encounter error code 0x80071ab1 on your Windows PC is ensure that your device is up to date with the latest updates.
After the introduction of .NET Frameworks 3.5, any updates with respect to these were released through Windows Update. So users now don’t have to do pretty much anything other than regularly check for updates.
It is possible that the error will go away on its own after you update your Windows, and you won’t have to rely on other more complicated methods.
2. Run the Windows Update troubleshooter
- Press Windows + I to launch the Settings app.
- Click on Troubleshoot on the right in the System tab.
- Click on Other troubleshooters.
- Now, locate the Windows Update entry and then click on the Run button next to it.
The built-in troubleshooters offered by Microsoft are pretty good at eliminating a plethora of errors, including the 0x80071AB1 Windows Update error. If .NET Framework didn’t appear in Windows Update in the last method, it could indicate a problem with the update process itself.
Hence, it’s recommended that you run the Windows Update troubleshooter to diagnose and fix the issues preventing .NET Framework from appearing in the update section.
If that did not help, you can give a try to Restoro, which will scan your PC and fix any errors related to missing DLL files, faulty registry entries, or malware.
3. Perform a quick SFC scan
- Press Windows + S to launch the Search menu.
- Enter Windows Terminal in the text field at the top, right-click on the relevant search result, and select Run as administrator from the context menu.
- Click Yes on the UAC (User Account Control) prompt that pops up.
- Next, click on the downward-facing arrow at the top, and select Command Prompt from the list of options in the menu. Alternatively, you can hit Ctrl + Shift + 2 to launch Command Prompt in a new tab.
- Type the following command and hit Enter to run the SFC scan:
sfc /scannow - Wait for the scan to complete, restart the computer, and check if the error is fixed,
Some PC issues are hard to tackle, especially when it comes to corrupted repositories or missing Windows files. If you are having troubles fixing an error, your system may be partially broken.
We recommend installing Restoro, a tool that will scan your machine and identify what the fault is.
Click here to download and start repairing.
The SFC (System File Checker) scan identifies the corrupt system files, and if any are found, replaces them with their cached copy stored on the system.
Corrupt system files are known to cause a bunch of errors including install error 0x80071AB1 in Windows 11.
- Fix update error 0x800f0988 on Windows 11 & 10
- FIX: Windows 10/11 error 0x80071a91
- How to fix Windows 11 update error 0x800f0922
- How to install Hyper-V in Windows 11
4. Run the Windows Update service
- Press Windows + R to launch the Run command, enter services.msc in the text field, and then either click on OK or hit Enter to launch the Services app.
- Now, scroll down, locate the Windows Update service, and double-click on it to launch the Properties. The services here are listed in alphabetical/reverse-alphabetical order, so it shouldn’t be difficult locating the service.
- Click on the Startup type dropdown menu, and select Automatic from the list of options.
- If the service isn’t running, click on the Start button under Service status, wait for it to run, and click on OK to save the changes.
Once done, restart the computer and check if the 0x80071AB1 error is eliminated.
5. Reset Windows Update components
- Right-click on the Start icon in the Taskbar or press Windows + X to launch the Power User/Quick Access menu, and select Windows Terminal (Admin) from the list of options.
- Click Yes on the UAC (User Account Control) prompt that appears.
- Click on the downward arrow at the top, and select Command Prompt from the menu to launch it in a new tab.
- Now, start pasting the following commands one at a time and hit Enter after each to reset Windows Update components These two commands will stop BITS and Windows Update service:
net stop bitsnet stop wuauserv - Next, execute the following command to delete the qmgr*.dat files:
Del “%ALLUSERSPROFILE%Application DataMicrosoftNetworkDownloaderqmgr*.dat” - If this is your first attempt at resetting, skip the following three commands and move to the next step. In case it doesn’t work out, you can execute these in the subsequent attempt:
Ren %Systemroot%SoftwareDistributionDataStore DataStore.bakRen %Systemroot%SoftwareDistributionDownload Download.bakRen %Systemroot%System32catroot2 catroot2.bak - Next, execute the following commands to reset the BITS and Windows Update service:
sc.exe sdset bits D:(A;;CCLCSWRPWPDTLOCRRC;;;SY)(A;;CCDCLCSWRPWPDTLOCRSDRCWDWO;;;BA)(A;;CCLCSWLOCRRC;;;AU)(A;;CCLCSWRPWPDTLOCRRC;;;PU)sc.exe sdset wuauserv D:(A;;CCLCSWRPWPDTLOCRRC;;;SY)(A;;CCDCLCSWRPWPDTLOCRSDRCWDWO;;;BA)(A;;CCLCSWLOCRRC;;;AU)(A;;CCLCSWRPWPDTLOCRRC;;;PU) - Paste the following command and hit Enter:
cd /d %windir%system32 - Now, execute each of the following commands individually to re-register the critical files:
regsvr32.exe atl.dll
regsvr32.exe urlmon.dll
regsvr32.exe mshtml.dll
regsvr32.exe shdocvw.dll
regsvr32.exe browseui.dll
regsvr32.exe jscript.dll
regsvr32.exe vbscript.dll
regsvr32.exe scrrun.dll
regsvr32.exe msxml.dll
regsvr32.exe msxml3.dll
regsvr32.exe msxml6.dll
regsvr32.exe actxprxy.dll
regsvr32.exe softpub.dll
regsvr32.exe wintrust.dll
regsvr32.exe dssenh.dll
regsvr32.exe rsaenh.dll
regsvr32.exe gpkcsp.dll
regsvr32.exe sccbase.dll
regsvr32.exe slbcsp.dll
regsvr32.exe cryptdlg.dll
regsvr32.exe oleaut32.dll
regsvr32.exe ole32.dll
regsvr32.exe shell32.dll
regsvr32.exe initpki.dll
regsvr32.exe wuapi.dll
regsvr32.exe wuaueng.dll
regsvr32.exe wuaueng1.dll
regsvr32.exe wucltui.dll
regsvr32.exe wups.dll
regsvr32.exe wups2.dll
regsvr32.exe wuweb.dll
regsvr32.exe qmgr.dll
regsvr32.exe qmgrprxy.dll
regsvr32.exe wucltux.dll
regsvr32.exe muweb.dll
regsvr32.exe wuwebv.dll
10. Now, execute the following command to reset Winsock:netsh winsock reset
11. The last step is to restart the BITS and Windows Update service. Execute the following two commands to do that:net start bits net start wuauserv
After resetting the Windows Update components, check if the 0x80071AB1 error is fixed and you are able to get the .NET Framework in Windows 11.
6. Run an in-place upgrade
NOTE
To do an in-place upgrade, you need to have administrative privileges on the current user account. Make sure to check that before proceeding. Also, save any open files since the computer will restart and it might lead to loss of data.
- Create a bootable USB drive for Windows 11.
- Once created, connect the drive to the system. Now, press Windows + E to launch File Explorer and double-click on the bootable USB drive.
- Double-click on the setup.exe file to launch it.
- Click Yes on the UAC (User Account Control) prompt.
- Click on Change how Setup downloads updates.
- Next, select Not right now and click on Next to keep the repair process simple and quick.
- Click Accept at the bottom.
- Now, click on Change what to keep.
- Select the option to Keep personal files and apps and click on Next at the bottom.
- The last step is to click on Install.
The in-place upgrade is an effective repair process that can be used to eliminate a wide variety of errors, including some of the most complex ones without affecting the files and apps stored on the system.
How does .NET Framework work?
The .NET Framework, in simple terms, is a collection of thousands of pieces of code that help developers create an application. Since the code is accessible to all, the developers can use this, wherever required, instead of writing it from scratch.
Apart from that, the .NET Framework also provides a runtime environment to developers in order to test their applications. It’s called the Common Language Runtime or CLR, which compiles and executes the code.
We can go for hours just discussing the .NET Framework, but to eliminate the error at hand, a basic understanding of it would suffice.
If you have an application that requires these codes or the .NET Framework, it’s time you install it.
How can I install/download .NET Framework 3.5 in Windows 11?
- Press Windows + S to launch the Search menu, enter Turn Windows features on or off in the text field at the top, and click on the relevant search result.
- Tick the checkbox for .NET Framework 3.5 and click on OK at the bottom.
- Next, select Let Windows Update download the files for you from the two options listed here.
- Wait for the required files to be downloaded, and once done, restart the computer to effectively apply the changes.
That’s how you can install .NET Framework 3.5 in Windows 11 in easy steps within no time. Also, check out how to fix some of the common .NET Framework 3.5 errors. Though the article is for Windows 10, the methods work just as fine on the latest iteration as well.
These are all the ways you can fix the 0x80071AB1 error in Windows 11, and get the .NET Framework installed to eliminate problems in running applications.
In case the .NET Framework 3.5 is missing from your Windows 10 PC, check how to install it.
Do not hesitate to tell us which fix worked to solve the Windows Update error 0x80071ab1 and your experience of Windows 11 thus far, in the comments section below.
![]()
Newsletter
При попытке установить версию .NET Framework, доступную в Центре обновления Windows, если вы получаете сообщение об ошибке 0x80071AB1 (ERROR_LOG_GROWTH_FAILED), этот пост поможет вам решить проблему. Ошибка означает, что когда была предпринята попытка создать пространство в журнале диспетчера транзакционных ресурсов, она не удалась.
Следуйте этим советам, чтобы устранить ошибку и убедиться, что .NET Framework обновлена до последней версии на вашем компьютере с Windows 11/10:
- Запустите средство устранения неполадок Центра обновления Windows
- Очистить папки распространения программного обеспечения
- Установите обновление вручную
- Сбросить агент обновления Windows
- Запустите WU с помощью PowerShell.
Вам понадобится учетная запись администратора для большинства этих предложений.
1]Средство устранения неполадок Центра обновления Windows
Средство устранения неполадок Центра обновления Windows может решить большинство проблем с Центром обновления Windows. Он перезапустит службу, удалит кеш и принудительно загрузит Центр обновления Windows.
- Перейдите в «Настройки» (Win + I) > «Система» > «Устранение неполадок».
- Нажмите «Другое средство устранения неполадок» и найдите Центр обновления Windows в списке.
- Нажмите кнопку «Выполнить» рядом с ним и дайте мастеру завершить процесс.
- После сбоя попробуйте снова установить Центр обновления Windows, и проблема должна быть решена.
2]Очистить папки распространения программного обеспечения
Хотя средство устранения неполадок Центра обновления Windows должно очистить весь кеш или уже загруженные файлы из папки распространения программного обеспечения, вы также можете сделать это вручную, чтобы увеличить вероятность исправления.
- Откройте приглашение «Выполнить» с помощью Win + R
- Введите services.msc и нажмите Shift + Enter для запуска с правами администратора.
- Найдите службу Windows Update и дважды щелкните, чтобы открыть ее.
- Выберите отключить на данный момент.
- Нажмите Win + E, чтобы открыть проводник.
- Перейдите в папку C:WindowsSoftwareDistribution.
- Пожалуйста, выберите все файлы и удалите их.
- Перезапустите службу обновления Windows.
Запустите Центр обновления Windows еще раз, чтобы проверить, решена ли проблема.
3]Установите обновление вручную
Другой способ завершить установку — загрузить его из каталога Центра обновления Майкрософт, а затем установить вручную.
- Откройте Центр обновления Windows из настроек
- Узнайте номер обновления .NET Framework.
- Перейдите в каталог Центра обновления Майкрософт и выполните поиск по номеру обновления.
- Загрузите его на свой компьютер
- Затем дважды щелкните, чтобы запустить программу установки, а затем обновите ее.
4]Сбросить средство обновления Windows
Используйте средство сброса Центра обновления Windows, чтобы сбросить компоненты Центра обновления Windows до значений по умолчанию, а затем попробуйте установить обновление и посмотрите, работает ли оно.
5]Запустите WU с помощью PowerShell
Откройте окно PowerShell с повышенными привилегиями и выполните следующую команду:
wuaclt.exe / updatenow
Как только первая команда будет успешно обработана, введите exit и нажмите Enter еще раз.
Наконец, перезагрузите компьютер и посмотрите, устранена ли проблема.
Я надеюсь, что за этим постом легко следить, и вы смогли исправить ошибку 0x80071AB1 (ERROR_LOG_GROWTH_FAILED) в Windows.
Как очистка папок распространения программного обеспечения помогает при обновлениях?
Windows использует эту папку для загрузки Центра обновления Windows перед его временной установкой. Если обновления повреждены или загружены не полностью, это может привести к ошибкам обновления. Когда вы очищаете его вручную или запускаете средство устранения неполадок Центра обновления Windows, файлы удаляются, а загрузка Windows начинается с загрузки свежей копии обновлений с сервера.
Можно ли отключить Центр обновления Windows, отключив службу Центра обновления Windows?
Временно, да. Однако любая служба или компонент Windows может вызвать повторный запуск службы Центра обновления Windows. Лучший способ для тех, кто хочет обновить Windows, — отложить это через настройки Windows.
Now Windows 11 has grown to be one of the most valuable Operating Systems. This latest version of Microsoft’s Operating System includes many features that users have long requested. However, in the midst of all the features, many users complained of a 0x80071AB1 error while trying to install the .NET Framework. This .NET Framework is a crucial for running certain apps on the system.
Anyway, with the help of some basic tricks, you can get rid of the same error. If you are also affected by the Error Code 0x80071AB, you can follow this guide until the end to get all the potential fixes. So instead of wandering around the internet, move down to get all the detailed solutions. Let’s have a look.
Fix 1: Run Windows Troubleshooter:
If you are getting the Error Code 0x80071AB1 on Windows 11, then as a first try to resolve the same, you need to run the Windows built-in troubleshooter. To do so,
- Firstly, open the Settings app by pressing Windows + I altogether.
- Then select System from the left pane menu and click on the Troubleshooter option.
- Inside the new window, click on the Other troubleshooters.
- And scroll down and click on the Run button beside the Windows Update option.
- Finally, try again to install .Net Framework on your system.
Fix 2: Update Windows:
Sometimes outdated Windows might be the main reason for the Error Code 0x80071AB1 on Windows 11. Here the best effective solution is updating your Windows to the latest version. To do so,
- Firstly, open the Settings app by pressing Windows + I altogether.
- Inside Settings, click on the Windows Update from the left pane menu.

- Then click on the Check for updates option.
- Finally, try again to install .Net Framework on your system.

Fix 3: Run SFC Scan:
The corrupted or damaged system files might cause to arise the Error Code 0x80071AB1 on Windows 11 screen. In this scenario, you need to run the SFC tool to repair those corrupted files. To do so,
- Firstly, type cmd in your system search box and open the Command Prompt window from the search result.
- Inside Command Prompt, type the following commands and press Enter,
Sfc /scannow
- Once you have executed the above command, restart the system and check the result.
Fix 4: Run DISM Scan:
Another solution to tackle the Error Code 0x80071AB1 on Windows 11 is running a DISM scan to restore corrupted system files. To do so,
- Firstly, type cmd in your system search box and open the Command Prompt window from the search result.
- Inside Command Prompt, type the following commands and press Enter,
DISM /Online /Cleanup-Image /CheckHealth
DISM /Online /Cleanup-Image /ScanHealth
DISM /Online /Cleanup-Image /RestoreHealth
- After executing the above commands, restart the system and check now you can install the .Net Framework.
Fix 5: Restart Windows Update Service:
Sometimes simply restarting the Windows Update service might help you to resolve the Error Code 0x80071AB1 on Windows 11. To do so,
- Firstly, press Windows + R to open the RUN dialog box, type services.msc, and click on OK.
- Inside the Services window, locate and select Windows update.
- Double-click on the Windows Update service and select the Properties window.

- In the Properties window, set Startup type as Automatic and Service status as Start.
- Finally, click on Apply and OK button and try again to install .Net Framework.

Fix 6: Run In-Place Upgrade:
Some suffered users finally managed to escape from the Error Code 0x80071AB1 on Windows 11 by running in-place upgradation. So we strongly recommend you to try the same. To do so,
Note: Save your data to any external drive or USB before beginning this process.
- Firstly, create a Bootable USB drive and connect the drive to the system.
- Then press Windows + E simultaneously to open File Explorer on your screen, then double-click on the Bootable USB drive.
- Inside the USB drive window, double-click on the Setup.exe file.
- If any prompt appears, you can click on the Yes button.
- In the newly opened window, click on the Change how Setup downloads updates link.

- On the next window, click on the radio button beside the Not right now and then click on the Next button.
- Then in the deceleration window, click on the Accept button.

- Now from the Install window, click on Change what to keep link.
- In the next screen, select the Keep personal files and apps option.
- Finally, click on the Install button. Once done, restart the system and try to install the .Net Framework again.


Fix 7: Install Windows 11 Installation Assistant:
At times, installing the Windows 11 Installation Assistant might help you to resolve the Error Code 0x80071AB1. To do so,
- Firstly, open your browser and open the Windows 11 Installation Assistant download page.

- Then you need to click on the Download Now button.
- On the next screen, if any updates are available, Windows will let you know, then you can click on Accept and Install button.
- Finally, restart your system and check still you are facing the discussed error.

Fix 8: Reset Windows Update Components:
If any of the above solutions do not help you, then you need to reset the Windows Update component. To do so,
- Firstly, type cmd in your system search box and open the Command Prompt window from the search result.
- Inside Command Prompt, type the following commands and press Enter after each command,
net stop bits
net stop wuauserv
net stop appidsvc
net stop cryptsvc
Del “%ALLUSERSPROFILE%\Application Data\Microsoft\Network\Downloader\*.*”
rmdir %systemroot%\SoftwareDistribution /S /Q
rmdir %systemroot%\system32\catroot2 /S /Q
regsvr32.exe /s atl.dll
regsvr32.exe /s urlmon.dll
regsvr32.exe /s mshtml.dll
netsh winsock reset
netsh winsock reset proxy
net start bits
net start wuauserv
net start appidsvc
net start cryptsvc
- Once executed all the commands, restart the system and see now you can install .Net Framework on your system.
So, these are all about Error Code 0x80071AB1 on Windows 11 and its dependable fixes. However, if you have any queries or doubts after reading this article, then please leave a comment in the below-given comment box.
Обновлено 2023 января: перестаньте получать сообщения об ошибках и замедлите работу вашей системы с помощью нашего инструмента оптимизации. Получить сейчас в эту ссылку
- Скачайте и установите инструмент для ремонта здесь.
- Пусть он просканирует ваш компьютер.
- Затем инструмент почини свой компьютер.

Когда вы копируете файлы или папки из одного места на вашем компьютере в другую папку или диск, может появиться код ошибки 0x800701B1, и операция копирования немедленно завершится ошибкой. Эта проблема может возникнуть при копировании файлов и папок с вашего компьютера на внешний диск или USB-накопитель и наоборот.
Как исправить ошибку копирования 0x800701B1? Несколько факторов провоцируют возникновение этой проблемы. Поэтому и решения должны быть разными.
Если вы также ищете эффективные решения, вы попали в нужное место. В этом руководстве мы покажем вам, как эффективно решить эту проблему разными способами в зависимости от ситуации.
Недостаточная мощность БП: Если у вас средний блок питания и много подключенных устройств, потребляющих электроэнергию, вам следует учитывать, что вашего источника питания может быть недостаточно для питания всех устройств. В этом случае вы можете решить проблему, обновив блок питания или отключив какие-то ненужные устройства.
Несоответствующий / несовместимый драйвер: По мнению некоторых заинтересованных пользователей, вы можете ожидать появления этого кода ошибки, если используете универсальный драйвер для внешнего диска, который вызывает этот код ошибки. В этом случае вы можете решить проблему, переустановив соответствующий драйвер.
Недостаточно порта USB 2.0: В зависимости от типа жесткого диска / SSD, с которым возникает эта проблема, вам может потребоваться подключить его к порту USB 3.0, чтобы обеспечить необходимую скорость передачи данных и производительность.
Как устранить код ошибки 0X800701B1?
Обновление за январь 2023 года:
Теперь вы можете предотвратить проблемы с ПК с помощью этого инструмента, например, защитить вас от потери файлов и вредоносных программ. Кроме того, это отличный способ оптимизировать ваш компьютер для достижения максимальной производительности. Программа с легкостью исправляет типичные ошибки, которые могут возникнуть в системах Windows — нет необходимости часами искать и устранять неполадки, если у вас под рукой есть идеальное решение:
- Шаг 1: Скачать PC Repair & Optimizer Tool (Windows 10, 8, 7, XP, Vista — Microsoft Gold Certified).
- Шаг 2: Нажмите «Начать сканирование”, Чтобы найти проблемы реестра Windows, которые могут вызывать проблемы с ПК.
- Шаг 3: Нажмите «Починить все», Чтобы исправить все проблемы.


Сбросьте драйвер жесткого диска
- Откройте диспетчер устройств.
- Дважды щелкните диски (или контроллеры последовательной шины USB), чтобы развернуть их.
- Затем щелкните USB-накопитель правой кнопкой мыши и выберите «Свойства».
- В появившемся окне перейдите на вкладку Драйвер и нажмите Сбросить драйвер.
Обновление или переустановка драйвера жесткого диска
- Щелкните правой кнопкой мыши кнопку «Пуск» и выберите «Диспетчер устройств».
- В диспетчере устройств дважды щелкните категорию «Диски», чтобы развернуть ее.
- Затем щелкните USB-накопитель правой кнопкой мыши и выберите «Обновить драйвер».
- В появившемся окне выберите Автоматически проверять наличие обновлений драйверов.
- Затем терпеливо дождитесь загрузки и установки последней версии драйвера.
- После установки обновления драйвера перезагрузите компьютер.
- Если ошибка 0x800701B1 возникает снова, перейдите в Диспетчер устройств, щелкните правой кнопкой мыши USB-накопитель и выберите «Удалить устройство».
- После удаления драйвера перезагрузите компьютер, и драйвер будет автоматически переустановлен.
Повторно просканируйте диск в управлении дисками
- Щелкните правой кнопкой мыши кнопку «Пуск» и выберите «Управление дисками» в контекстном меню.
- В разделе «Управление дисками» выберите параметр «Действие» и выберите «Сканировать диск» во всплывающем меню.
- Вам следует дождаться завершения процесса. Затем попробуйте еще раз скопировать и вставить файлы на USB-накопитель.
Запуск CHKDSK из проводника
- Нажмите Win + E, чтобы открыть проводник.
- В проводнике выберите «Этот компьютер» и щелкните правой кнопкой мыши проблемный диск, на котором произошла ошибка с кодом 0x800701B1.
- Затем выберите «Свойства» в контекстном меню.
- В появившемся окне перейдите на вкладку Инструменты.
- В разделе «Проверка ошибок» нажмите Проверить, чтобы проверьте диск на наличие ошибок файловой системы.
- Если Windows обнаружит ошибку, вам будет предложено перезагрузить компьютер, чтобы исправить ее.
- После этого вам останется только дождаться завершения процесса.
Совет экспертов: Этот инструмент восстановления сканирует репозитории и заменяет поврежденные или отсутствующие файлы, если ни один из этих методов не сработал. Это хорошо работает в большинстве случаев, когда проблема связана с повреждением системы. Этот инструмент также оптимизирует вашу систему, чтобы максимизировать производительность. Его можно скачать по Щелчок Здесь
Часто задаваемые вопросы
Ошибка 0X800701B1 «Указано несуществующее устройство» — это проблема Windows 10, которая указывает на то, что диск, к которому вы пытаетесь получить доступ или скопировать, не существует. Обычно это происходит, когда ваш компьютер не может копировать, вставлять или передавать данные на этот диск или с этого диска.
- Перезагрузите компьютер.
- Запустите SFC и CHKDSK.
- Обновите Windows 10.
- Используйте другой порт USB.
- Удалите другие устройства.
- Обновите или переустановите драйверы жесткого диска.
- Ограничьте размер передаваемых файлов.
- Замените внешний жесткий диск.
- Удалите только что добавленное оборудование.
- Перезапустите процесс загрузки Windows.
- Загрузитесь в LKGC (последняя удачная конфигурация).
- Восстановите ноутбук HP с помощью функции восстановления системы.
- Восстановите ноутбук.
- Выполните восстановление загрузки с установочного диска Windows.
- Переустановите Windows.
Сообщение Просмотров: 394