Содержание
- Failed to start recording NVENC Error: init_encoder_h264: nv.nvEncinitializeEncoder(enc->session, &enc->params) failed: 8 (NV_ENC_ERR_INVALID_PARAM)
- Upek Hansaja
- Attachments
- sandrix
- Please post a log with your issue! Here’s how.
- Upek Hansaja
- Please post a log with your issue! Here’s how.
- sandrix
- Upek Hansaja
- sandrix
- Upek Hansaja
Failed to start recording NVENC Error: init_encoder_h264: nv.nvEncinitializeEncoder(enc->session, &enc->params) failed: 8 (NV_ENC_ERR_INVALID_PARAM)

Upek Hansaja
New Member
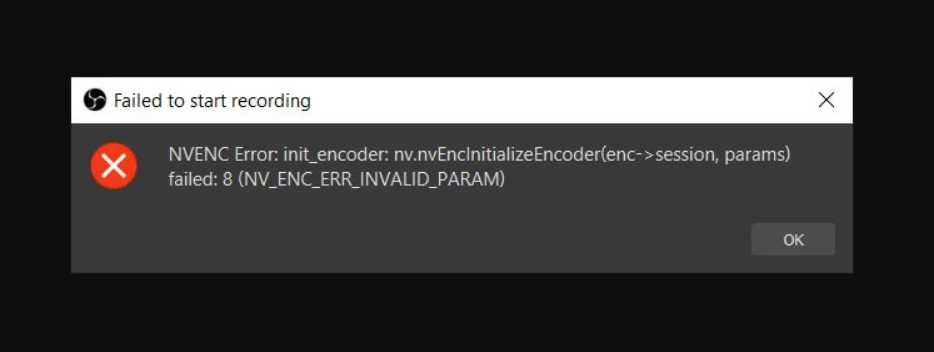
Failed to start recording
NVENC Error: init_encoder_h264: nv.nvEncinitializeEncoder(enc->session, &enc->params) failed: 8 (NV_ENC_ERR_INVALID_PARAM)
When I set Encoder to NVIDIA NVENC H.264 and try to start recording this error msg comes
But a couple of months ago it worked fine 🙁
What can I do about that and how can I overcome that error?
Please Help me to solve this trouble. (
Attachments

sandrix
Member
Please post a log with your issue! Here’s how.
Upek Hansaja
New Member
Please post a log with your issue! Here’s how.
sandrix
Member
15:26:16.999: [jim-nvenc] init_encoder_h264: nv.nvEncInitializeEncoder(enc->session, &enc->params) failed: 8 (NV_ENC_ERR_INVALID_PARAM): ::NV_ENC_TWO_PASS_FULL_RESOLUTION is only supported multipass encoding on this architecture.
Use multipass mode single or full res. It is also better to choose preset P4
If that doesn’t work, you’ll have to revert to OBS 28.0.3
Upek Hansaja
New Member
15:26:16.999: [jim-nvenc] init_encoder_h264: nv.nvEncInitializeEncoder(enc->session, &enc->params) failed: 8 (NV_ENC_ERR_INVALID_PARAM): ::NV_ENC_TWO_PASS_FULL_RESOLUTION is only supported multipass encoding on this architecture.
Use multipass mode single or full res. It is also better to choose preset P4
If that doesn’t work, you’ll have to revert to OBS 28.0.3
Oh..
Thank you very much, dear friend
It working perfectly ❤
But now it seems my voice is not audible at the recording
sandrix
Member
You have 2 input devices. Select the correct default device in Windows and specify it in OBS in the audio section
18:21:44.683: WASAPI: Device ‘Speakers (Realtek High Definition Audio)’ [48000 Hz] initialized
18:21:44.706: WASAPI: Device ‘Microphone (A4tech FHD 1080P PC Camera)’ [48000 Hz] initialized
Check your microphone volume in Windows and make sure it works fine in OBS -20 db to -6

Also, you may not have configured these filters correctly
18:21:44.629: — filter: ‘Noise Suppression’ (noise_suppress_filter_v2)
18:21:44.629: — filter: ‘Noise Gate’ (noise_gate_filter)
18:21:44.629: — filter: ‘Gain’ (gain_filter)
Upek Hansaja
New Member
You have 2 input devices. Select the correct default device in Windows and specify it in OBS in the audio section
18:21:44.683: WASAPI: Device ‘Speakers (Realtek High Definition Audio)’ [48000 Hz] initialized
18:21:44.706: WASAPI: Device ‘Microphone (A4tech FHD 1080P PC Camera)’ [48000 Hz] initialized
Check your microphone volume in Windows and make sure it works fine in OBS -20 db to -6
View attachment 88994
Also, you may not have configured these filters correctly
18:21:44.629: — filter: ‘Noise Suppression’ (noise_suppress_filter_v2)
18:21:44.629: — filter: ‘Noise Gate’ (noise_gate_filter)
18:21:44.629: — filter: ‘Gain’ (gain_filter)
Источник
by Farhad Pashaei
As a technophile, Farhad has spent the last decade getting hands-on experience with a variety of electronic devices, including smartphones, laptops, accessories, wearables, printers, and so on. When… read more
Published on May 15, 2022
- OBS Studio is one of the most widely used applications when it comes to capturing your screen or streaming.
- There are some OBS NVENC errors that you might run into because of bad configuration or outdated drivers.
- You can fix encoding overload in OBS by reducing frame rate, changing the encoder preset, and freeing up your disk space.
XINSTALL BY CLICKING THE DOWNLOAD FILE
This software will repair common computer errors, protect you from file loss, malware, hardware failure and optimize your PC for maximum performance. Fix PC issues and remove viruses now in 3 easy steps:
- Download Restoro PC Repair Tool that comes with Patented Technologies (patent available here).
- Click Start Scan to find Windows issues that could be causing PC problems.
- Click Repair All to fix issues affecting your computer’s security and performance
- Restoro has been downloaded by 0 readers this month.
NVIDIA NVENC is a feature in NVIDIA graphics cards that enables you to perform some tasks, including video encoding but some OBS Studio users have reported NVENC errors.
Thanks to this feature, it offloads the resource-eating task from the CPU to a specific part of the GPU.
Also, it is good to know that many live streaming and recording programs, for instance, vMix, Wirecast, Open Broadcaster, and Bandicam support the encoder.
Moreover, the NVIDIA Encoder enables you to capture your games and share them. This is included in NVIDIA’s GeForce Experience software.
In this article, we explain how you can solve all the OBS Studio NVENC errors you might run into when you are using OBS.
How do I enable hardware encoding (NVENC) in OBS?
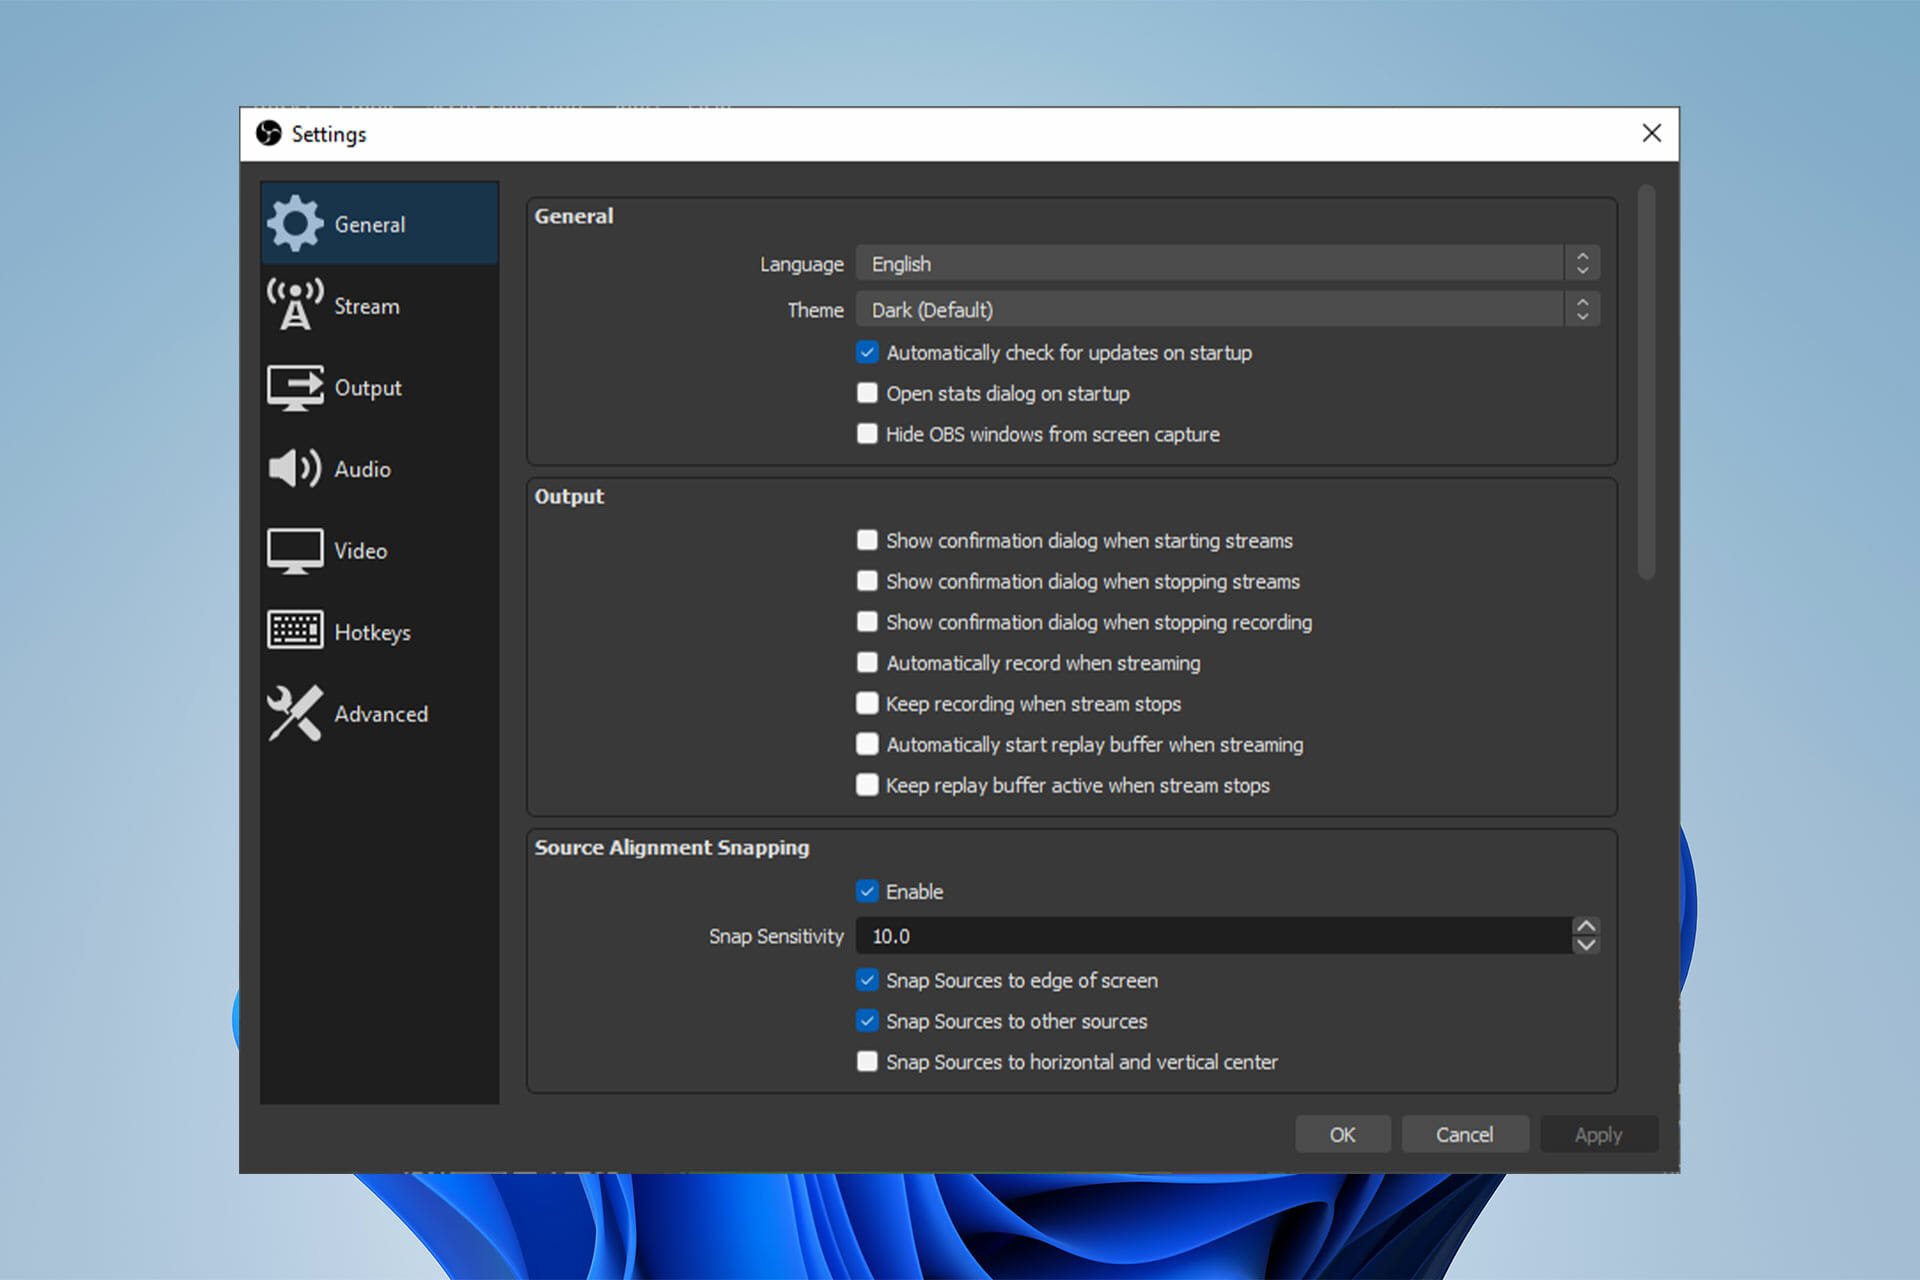
- Start OBS, click on Files then select Settings.

- Next, select Output (located on the side menu).

- Finally, click on NVENC H.264 in the window that opens under the encoder drop-down to enable hardware encoding.


If you’re asking what is NVENC codec, it is a tool for hardware encoding available in both Mac and Windows versions of OBS.
But for the best result, it is recommended by the developers to use encoding on computers running Windows.
Also, it is best used with NVIDIA GPUs. Hardware encoding has been available on NVIDIA cards since early 2012.
How can I fix OBS NVENC errors?
1. Fix the OBS Studio NVENC error unsupported device
- First, open the OBS program.
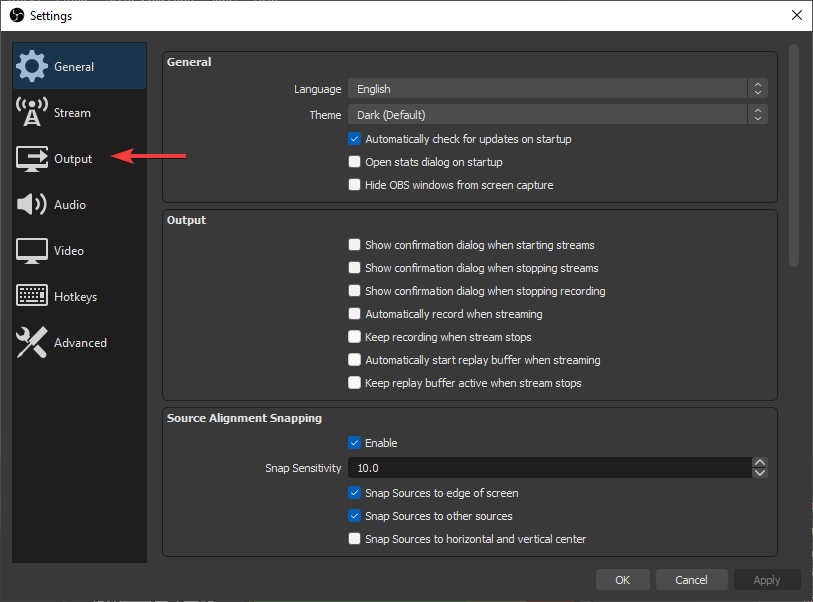
- Click on File and head over to Settings.
- Go to the Output tab.
- Then, find the streaming box.
- Tap on the Encoder and change it to Quicksync (QSV) or x264 instead of NVENC.

- Finally, select OK.
2. Fix the OBS NVENC error: Too many concurrent sessions

OBS NVENC error that says you have too many concurrent sessions means that you have more concurrent encoding sessions than your GPU supports.
Up-to-date GPU drivers can support up to three sessions, while the older drivers cap at two sessions. If you think you do not have this many concurrent sessions, reboot your computer.
3. Fix the OBS NVENC error failed: 8
The complete error message for this issue is accompanied by the NV_ENC_ERR_INVALID_PARAM specification.
The reason for this error is that NVENC does not support resolutions that are higher than 4096 on their largest side and it fails to capture or show anything.
You should set your output resolution to be lower than 4096 on its largest side. Base (canvas) resolution can be the larger one rather than the output (scaled) one if you need it to.
- How to download OBS and start streaming
- How to Add Browser Source to OBS Studio
- Best Chroma Key Settings & Tips on OBS Studio
4. Fix the OBS NVENC error init encoder
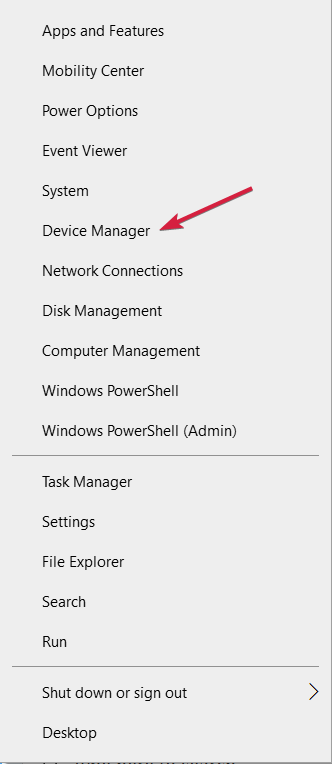
- Right-click the Start button and select Device Manager from the list.

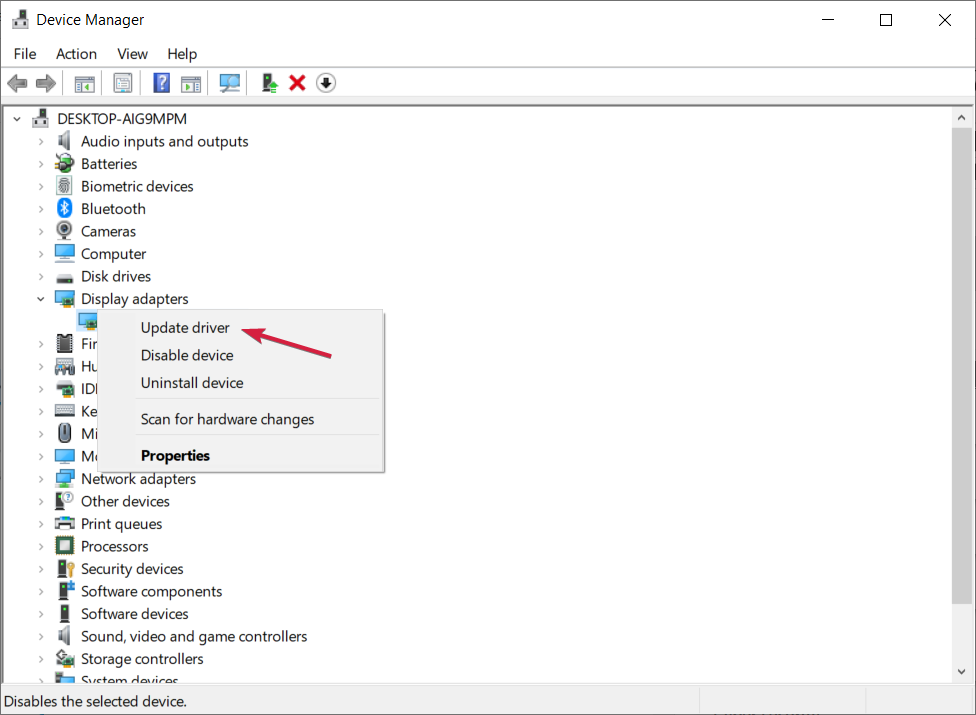
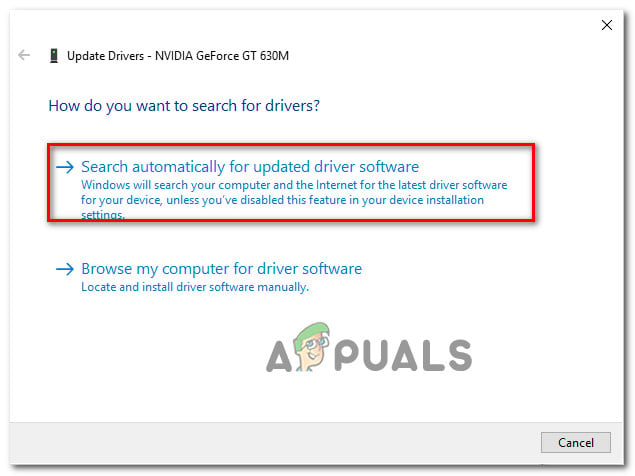
- Expand the Display Adapters section, right-click the NVIDIA driver, and select Update driver.

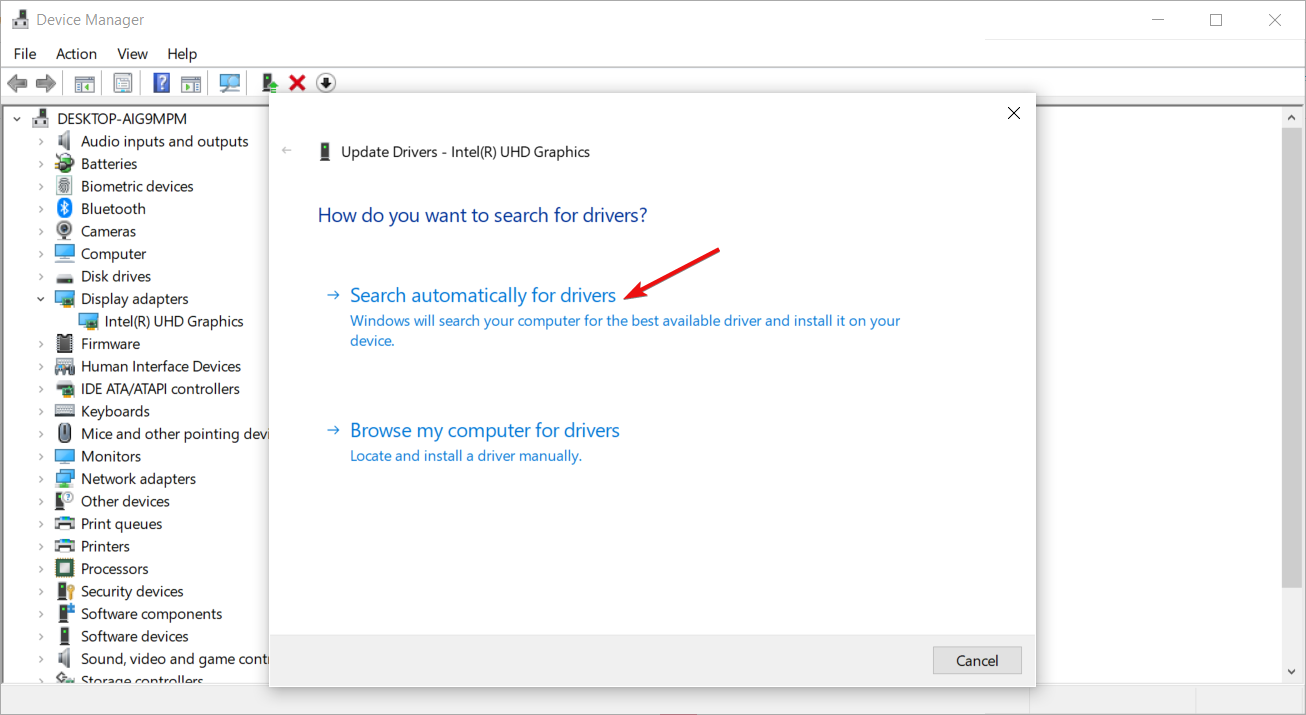
- Click on Search automatically for drivers and the system will look for the best driver.

Some PC issues are hard to tackle, especially when it comes to corrupted repositories or missing Windows files. If you are having troubles fixing an error, your system may be partially broken.
We recommend installing Restoro, a tool that will scan your machine and identify what the fault is.
Click here to download and start repairing.
To fix the Init encoder error, you need to update your NVIDIA driver to its latest version.
If the solution above wasn’t enough, visit the NVIDIA driver download section and get the latest driver from their website.
Make sure to get the corresponding version for your hardware. Otherwise, you risk getting other graphical errors and system problems like BSoDs.
To avoid that, use a tool like DriverFix that detects the hardware you run and automatically downloads corresponding drivers.
Also, replacing the nvEncodeAPI.dll located in the following directory with previous versions of this DLL file can help fix OBS Studio NVENC errors: C:WindowsSysWow64
You need to boot into Safe Mode to be able to do this. Previous versions of nvEncodeAPI.dll can be found in the following location: C:WindowsSystem32DriverStoreFileRepositorynv_disp.inf_amd64_neutral_
5. Fix the OBS NVENC error invalid param
The maximum resolution you can aim for in an NVENC h.264 is 4096×4096. However, NVENC h.265 supports resolutions of up to 8192×8192 pixels.
The point is that h.265 is not supported by streaming services. You can only use it with the FFmpeg output of the OBS. So, you are going to go for the 4096 one mostly.
6. Fix the OBS NVENC codec: Function not implemented
- Go into the icon File and click on Settings to open it.
- A setting window opens on your screen; now select the Output tab.
- Afterward, look for the streaming box.
- Click on the Encoder and change it to Software instead of NVENC.
- Now click on OK.
How can I fix the OBS NVENC Encoding Overload?
One solution that can fix this OBS NVENC error is to reduce the frame rate. If you’re capturing at a high frame rate (48 to 60), you may experience lags.
This can happen for a number of reasons. However, the main reason is that your GPU cannot render the game itself as well as the video you’re streaming.
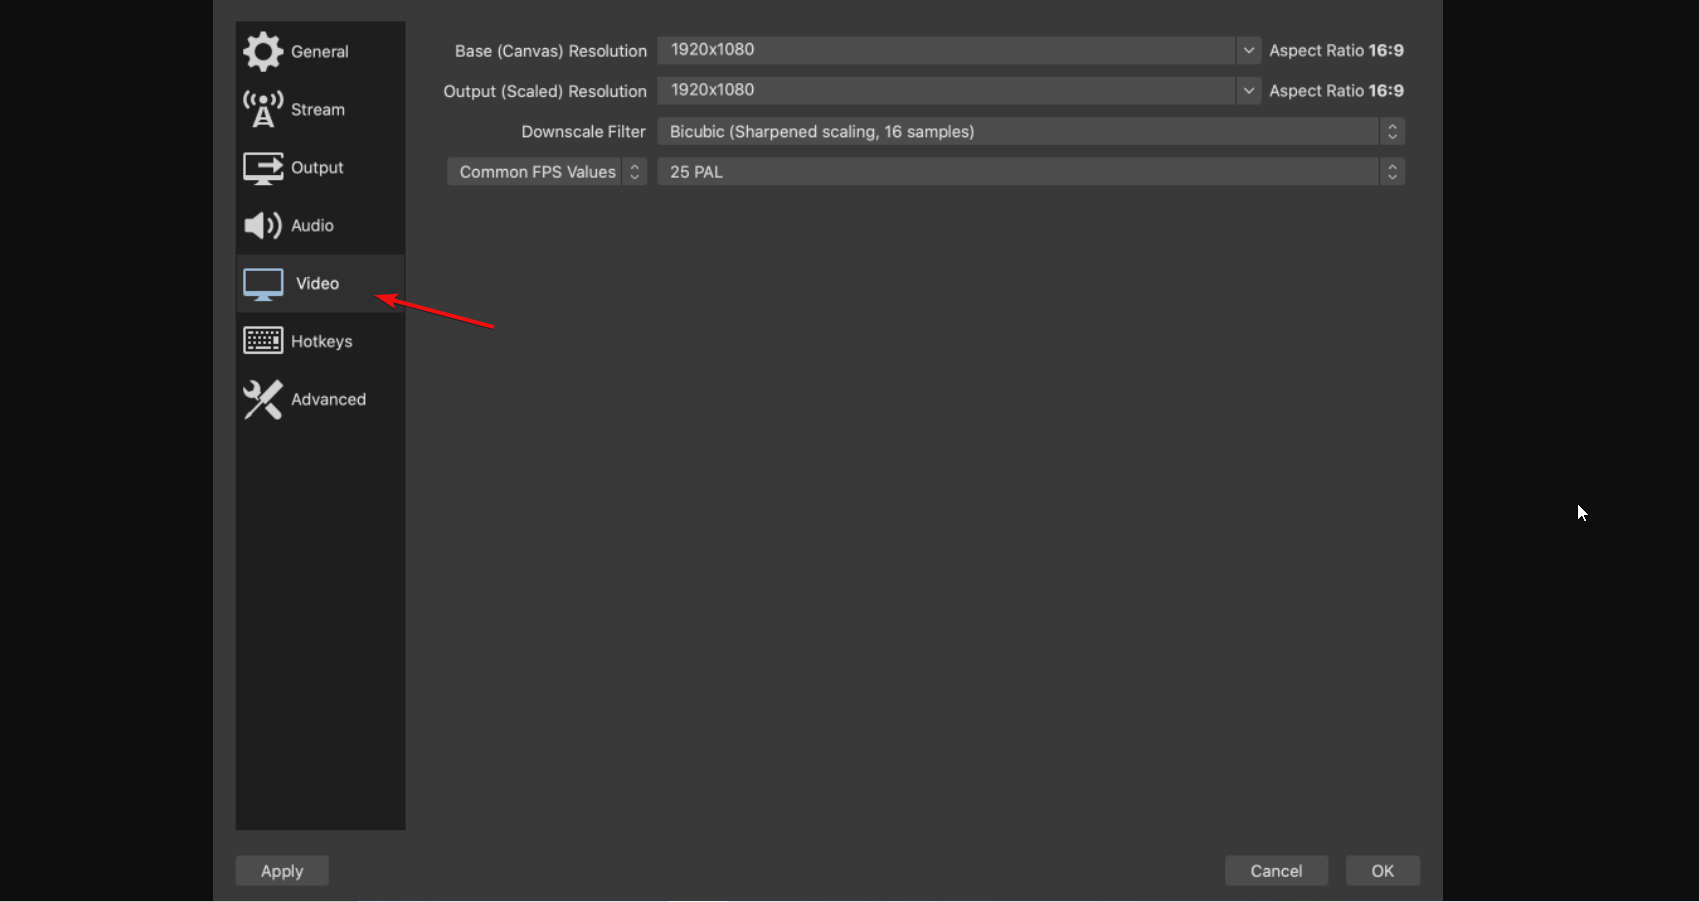
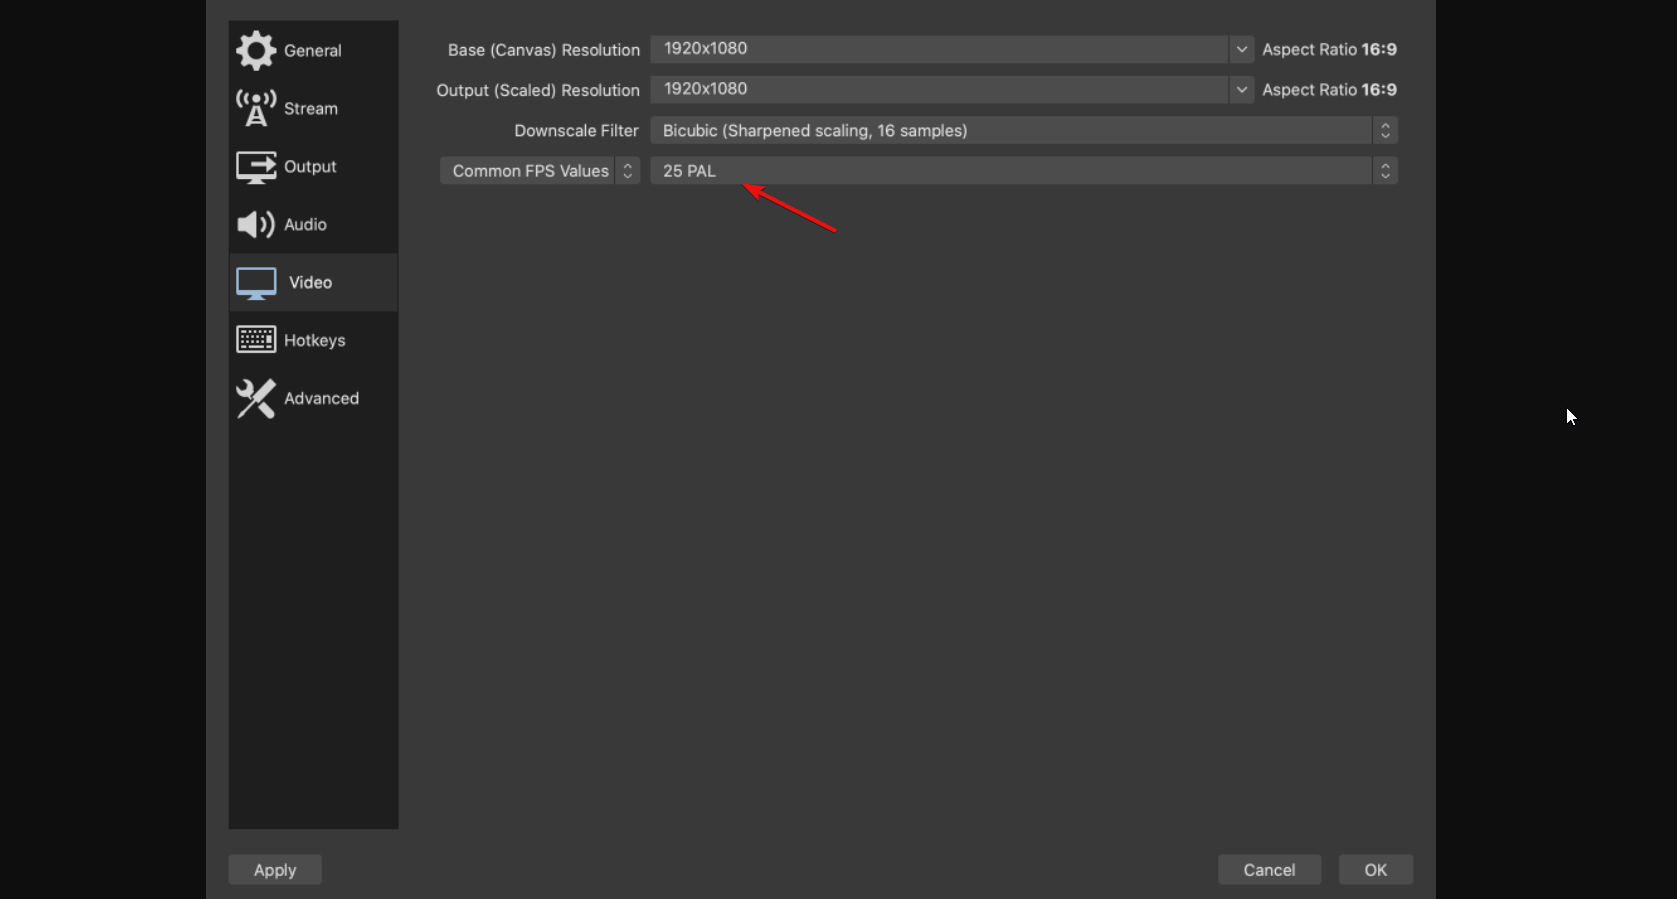
- First, open Settings and click on Video.

- There is a section called Common FPS Values. Select it and choose 30 or less.

- Then, click on OK and close the OBS. Now restart your computer and check your stream to see if the error comes up again.
If you haven’t updated your drivers on OBS NVENC after you open NVIDIA GEFORCE EXPERIENCE, click on the drivers and update them. Make sure to reboot your computer afterward.
You can also use ICQ as the rate control and set the ICQ quality value between 20 (better quality, larger files) and 23 (diminished quality, smaller files).
Remember that OBS uses a fabulous open-source video encoding library – x264. You can set your x264 encoder preset to ultrafast to reduce CPU usage.
Let us know which solution you used to successfully fix OBS Studio NVENC problems in the comments section below.
![]()
Newsletter
NVIDIA NVENC — это функция видеокарт NVIDIA, которая позволяет выполнять некоторые задачи, включая кодирование видео, но некоторые пользователи OBS Studio сообщают об ошибках NVENC.
Благодаря этой функции он переносит ресурсоемкую задачу с ЦП на определенную часть графического процессора.
Кроме того, полезно знать, что многие программы для прямой трансляции и записи, например vMix, Wirecast, Open Broadcaster и Bandicam, поддерживают кодировщик.
Кроме того, NVIDIA Encoder позволяет вам записывать свои игры и делиться ими. Это включено в программное обеспечение NVIDIA GeForce Experience.
В этой статье мы объясним, как вы можете решить все ошибки OBS Studio NVENC, с которыми вы можете столкнуться при использовании OBS.
Как включить аппаратное кодирование (NVENC) в OBS?
- Запустите OBS, нажмите «Файлы», затем выберите «Настройки».

- Затем выберите «Вывод» (расположен в боковом меню).

- Наконец, щелкните NVENC H.264 в окне, которое открывается в раскрывающемся списке кодировщика, чтобы включить аппаратное кодирование.
Если вы спрашиваете, что такое кодек NVENC, это инструмент для аппаратного кодирования, доступный в версиях OBS для Mac и Windows.
Но для лучшего результата разработчики рекомендуют использовать кодировку на компьютерах под управлением Windows.
Кроме того, его лучше всего использовать с графическими процессорами NVIDIA. Аппаратное кодирование доступно на картах NVIDIA с начала 2012 года.
Как я могу исправить ошибки OBS NVENC?
1. Исправить ошибку OBS Studio NVENC неподдерживаемое устройство
- Сначала откройте программу OBS.
- Нажмите «Файл» и перейдите в «Настройки».

- Перейдите на вкладку «Вывод».

- Затем найдите потоковую коробку.
- Нажмите на кодировщик и измените его на Quicksync (QSV) или x264 вместо NVENC.

- Наконец, выберите ОК.
2. Исправьте ошибку OBS NVENC: слишком много одновременных сеансов.

Ошибка OBS NVENC, которая говорит, что у вас слишком много одновременных сеансов, означает, что у вас больше одновременных сеансов кодирования, чем поддерживает ваш графический процессор.
Современные драйверы графического процессора могут поддерживать до трех сеансов, в то время как старые драйверы ограничиваются двумя сеансами. Если вы считаете, что у вас не так много одновременных сеансов, перезагрузите компьютер.
3. Исправить ошибку OBS NVENC не удалось: 8

Полное сообщение об ошибке для этой проблемы сопровождается спецификацией NV_ENC_ERR_INVALID_PARAM.
Причина этой ошибки в том, что NVENC не поддерживает разрешения выше 4096 по самой большой стороне и не может ничего захватить или показать.
Вы должны установить выходное разрешение ниже 4096 по наибольшей стороне. Базовое (холстовое) разрешение может быть больше, чем выходное (масштабированное), если вам это нужно.
4. Исправить ошибку инициализации кодировщика OBS NVENC.
- Щелкните правой кнопкой мыши кнопку «Пуск» и выберите «Диспетчер устройств» из списка.

- Разверните раздел «Видеоадаптеры», щелкните правой кнопкой мыши драйвер NVIDIA и выберите «Обновить драйвер».

- Нажмите «Автоматический поиск драйверов», и система выполнит поиск лучшего драйвера.

Чтобы исправить ошибку кодировщика Init, вам необходимо обновить драйвер NVIDIA до последней версии.
Если приведенного выше решения недостаточно, посетите раздел загрузки драйверов NVIDIA и получите последнюю версию драйвера с их веб-сайта.
Обязательно получите соответствующую версию для вашего оборудования. В противном случае вы рискуете получить другие графические ошибки и системные проблемы, такие как BSoD.
Чтобы избежать этого, используйте такой инструмент, как DriverFix, который определяет используемое вами оборудование и автоматически загружает соответствующие драйверы.
Кроме того, замена nvEncodeAPI.dll, расположенной в следующем каталоге, предыдущими версиями этого DLL-файла может помочь исправить ошибки OBS Studio NVENC:C:WindowsSysWow64
Для этого вам нужно загрузиться в безопасном режиме. Предыдущие версии nvEncodeAPI.dll можно найти по следующему адресу:C:WindowsSystem32DriverStoreFileRepositorynv_disp.inf_amd64_neutral_
5. Исправьте неверный параметр ошибки OBS NVENC.
Максимальное разрешение, к которому вы можете стремиться в NVENC h.264, составляет 4096 × 4096. Однако NVENC h.265 поддерживает разрешение до 8192×8192 пикселей.
Дело в том, что стриминговые сервисы не поддерживают h.265. Вы можете использовать его только с выходом FFmpeg OBS. Итак, вы собираетесь пойти на 4096 в основном.
6. Исправлен кодек OBS NVENC: функция не реализована
- Перейдите в значок «Файл» и нажмите «Настройки», чтобы открыть его.

- На вашем экране откроется окно настроек; теперь выберите вкладку «Вывод».

- После этого найдите потоковую коробку.

- Нажмите на Encoder и измените его на Software вместо NVENC.
- Теперь нажмите ОК.
Как я могу исправить перегрузку кодирования OBS NVENC?
Одним из решений, которое может исправить эту ошибку OBS NVENC, является снижение частоты кадров. Если вы снимаете с высокой частотой кадров (от 48 до 60), могут возникать задержки.
Это может произойти по ряду причин. Однако основная причина заключается в том, что ваш графический процессор не может отображать как саму игру, так и видео, которое вы транслируете.
- Сначала откройте «Настройки» и нажмите «Видео».

- Есть раздел Common FPS Values. Выберите его и выберите 30 или меньше.

- Затем нажмите «ОК» и закройте OBS. Теперь перезагрузите компьютер и проверьте свой поток, чтобы увидеть, появляется ли ошибка снова.
Если вы не обновили свои драйверы в OBS NVENC после открытия NVIDIA GEFORCE EXPERIENCE, щелкните драйверы и обновите их. Не забудьте после этого перезагрузить компьютер.
Вы также можете использовать ICQ в качестве контроля скорости и установить значение качества ICQ от 20 (лучшее качество, файлы большего размера) до 23 (ухудшенное качество, файлы меньшего размера).
Помните, что OBS использует потрясающую библиотеку кодирования видео с открытым исходным кодом — x264. Вы можете установить предустановку кодировщика x264 на сверхбыструю, чтобы снизить нагрузку на ЦП.
Сообщите нам, какое решение вы использовали для успешного устранения проблем OBS Studio NVENC в разделе комментариев ниже.
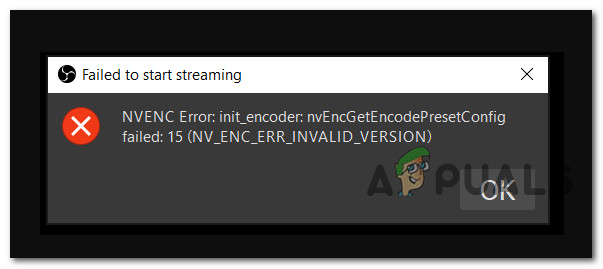
Some Windows users are reporting that they end up encountering the ‘Failed to start streaming‘ error with OBS when attempting to stream content on YouTube. The error message accompanying the error is “NVENC Error: init_encoder: nvEncGetEncodePresetConfig failed: 15 (NV_ENC_ERR_INVALID_VERSION)”
After investigating this particular issue thoroughly, it turns out that there are several different underlying causes that might be causing this particular error code:
- Missing / Corrupted C++ Redist – As it turns out, one of the most common instances that will cause this issue is a scenario in which you’re either missing the Microsoft C++ Redistributable 2017 package or the one that’s currently installed is corrupted. To fix this particular issue, you need to ensure that you install the latest version of the Microsoft C++ Redistributable 2017 package correctly.
- Outdated the graphics driver – Another potential situation that might cause this problem is a severely outdated GPU driver that makes it hard for the OBS software to maintain the streaming connection with YouTube. In this case, all you need to do is update to the latest graphic drivers available.
- Conflict with the In-Game Overlay – If you’re using some kind of DVR software that includes an overlay function, chances are it will conflict with the NVENC encoder feature used by OBS. In this case, you can resolve the conflict by disabling the in-game overlay feature or by uninstalling the conflicting software.
Now that you are intimately familiar with every underlying issue that might cause the ‘Failed to start streaming‘ error, here’s a list of underlying culprits that might be responsible for the apparition of this error code:
Method 1: Installing Microsoft C++ Redistributables for 2017
As it turns out, one of the most important dependencies with the potential of causing this problem is a missing or corrupted Microsoft C++ Redistributable 2017 package. Keep in mind that this Visual C++ package is extremely important to ensuring that OBS is able to establish and maintain a streaming connection with YouTube.
If this scenario is applicable and you suspect that you might be seeing the ‘Failed to start streaming‘ error occurring due to a Visual C++ issue, you should uninstall the current Visual C++ 2017 Reddit package (if it’s already installed) and do a fresh installation from the official Microsoft channels.
Here’s a quick step by step guide that will walk you through the entire process:
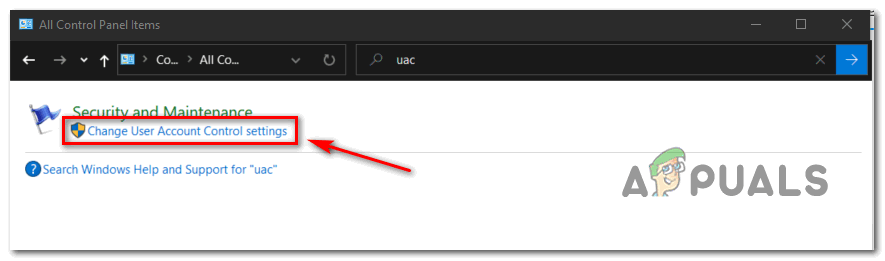
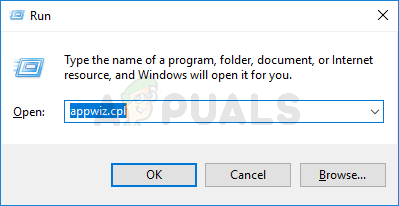
- Press Windows key + R to open up a Run dialog box. Next, type ‘appwiz.cpl’ and press Enter to open up the Programs and Features screen.

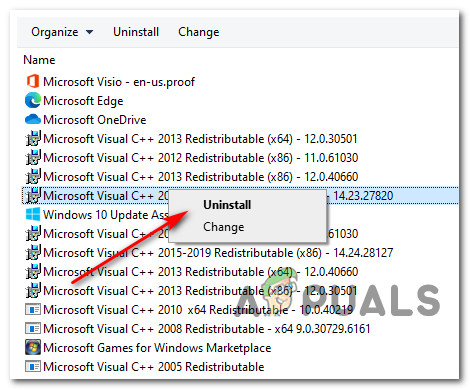
Opening the Programs and Features menu - Once you’re inside the Programs and Features menu, scroll down through the list of installed programs and locate the entry associated with Microsoft Visual C++ 2017 Redistributable.
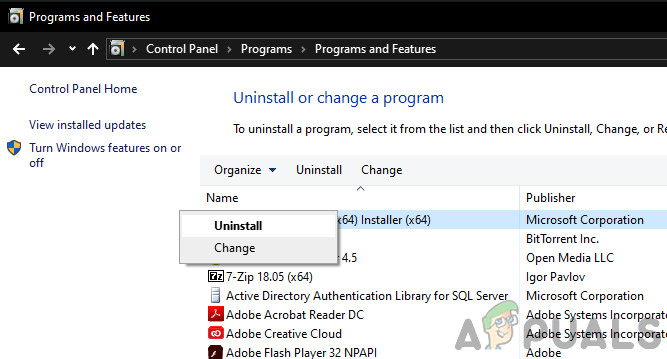
- If you find that the Microsoft Visual C++ 2017 Redistributable is already installed, right-click on it and choose Uninstall from the context menu to get rid of it.

Uninstalling Microsoft Visual C++ 2017 Note: If you don’t have this Visual C++ Redistributable suite installed on your computer, skip this step and the next and move directly to step 5.
- Inside the uninstallation screen of the Visual C++ Redistributable 2017 package, follow the on-screen prompts to complete the installation, then restart your computer and wait for the next startup to complete.
- After your computer boots back up, download one of the Visual C++ 2017 redist packages below depending on your OS architecture (32-bit or 64-bit):
64-Bit Visual C++ 2017 Redistributable
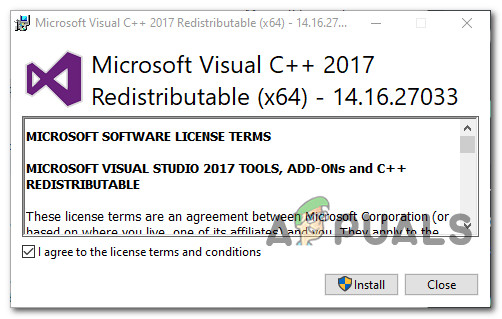
32-Bit Visual C++ 2017 Redistributable - After the download is complete, double-click on the recently downloaded vc_redist installer and click Yes if you’re prompted by the UAC user account prompt. Next, follow the on-screen prompts to complete the installation of the latest version of Microsoft Visual C++ 2017 Redistributable.

Installing Microsoft Visual C++ 2017

If this problem is still not fixed or you were already using the latest Microsoft Visual C++ version, move down to the next potential fix below.
Method 2: Updating the Graphics drivers
Once you’ve made sure that the ‘Failed to start streaming‘ error is not occurring due to a missing Visual C++ dependency, the next thing you should investigate is your graphical drivers.
As it turns out, some affected users are saying that in their case, the main reason why they were unable to establish a streaming connection with OBS on Youtube is a severely outdated instance of the GPU drivers.
In this case, you should be able to fix the problem by following the instructions below to update the current GPU driver to ensure that OBS has every required dependency to stream content on YouTube:
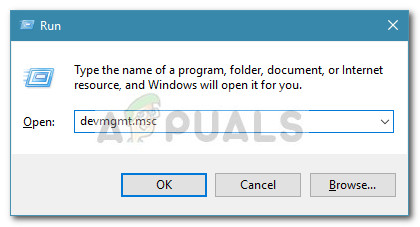
- Open up a Run dialog box by pressing Windows key + R. Next, type ‘devmgmt.msc’ and press Enter to open up the Device Manager utility. Once you are prompted by the UAC (User Account Control) prompt, click Yes to grant admin access.

Opening the Device Manager utility - Once you’re finally inside Device Manager, scroll down through the list of installed devices, then go ahead and expand the drop-down menu that’s specific to Display Adapters.
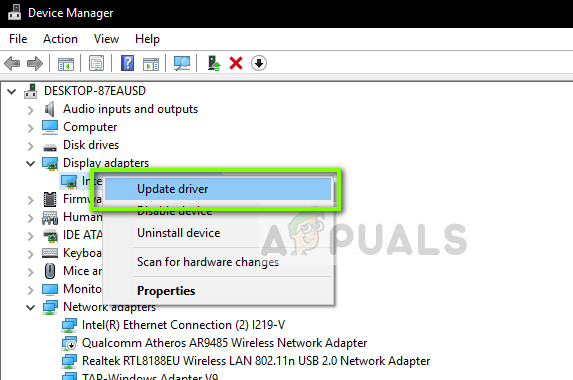
- After you expand the correct menu, right-click on the GPU driver that you’re actively using for demanding rendering activities and choose Update driver from the context menu that just appeared.

Updating the GPU drivers via Device Manager Note: If you are encountering the issue on a laptop with both a dedicated and an integrated solution, our recommendation is to update both GPU drivers to the latest version available.
- Once you get to the next screen, click on Search Automatically for updated driver software.

Search Automatically for updated driver software - Next, wait until the initial scan is complete. then go ahead and follow the on-screen instructions to complete the installation of the new driver version (if a new version is identified).
- If a new driver version is found and installed, reboot your computer and repeat the streaming action in OBS once the next startup is complete to see if the problem is now fixed.
Note: If Device Manager is not able to find a new version to replace the current one, you should also using the proprietary updating software release by your graphics card manufacturer to find, download and install the latest available version automatically:
GeForce Experience – Nvidia
Adrenalin – AMD
Intel Driver – Intel
If you already updated your GPU driver to the latest version and you’re still seeing the same problem, move down to the next potential fix below.
Method 3: Disabling the In-Game Overlay
Keep in mind that if you’re using some kind of DVR software that records the screen and uses some kind of an overlay over your gameplay, there’s a very high chance that the OBS will conflict with it when both of them will attempt to use the NVENC encoder.
If this scenario is applicable, you can fix the problem by disabling the in-game overlay that is conflicting with the OBS software. In most cases, the ‘Failed to start streaming‘ error is confirmed to be caused by the Discord in-game overlay or by Nvidia Overlay.
If you’re using Discord or Nvidia Experience, follow the sub-guides below to disable the overlay function on them.
In case you’re using a different 3rd party overlay tool, follow sub-guide C to uninstall the conflicting software completely from your computer.
A. Disabling the Overlay feature on Nvidia Experience
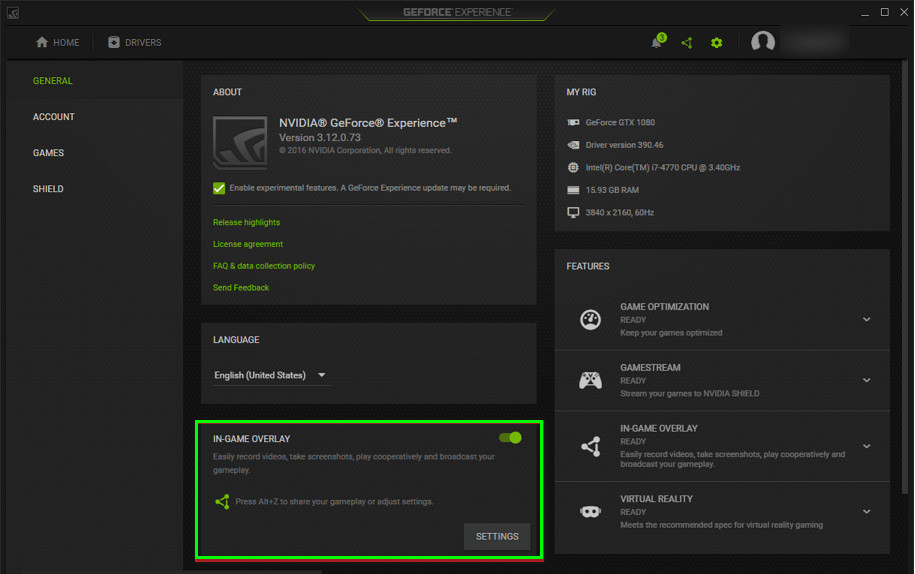
- Start by turning OBS off, then open Nvidia Experience. Inside the next menu, go to the General tab from the list of available options.
- Once you’re inside the next menu, move over to the left menu and turn off the toggle associated with the In-Game overlay.

Disabling the in-game overlay function - After the option is deactivated, save the changes and close the main Nvidia Experience window.
- Open the OBS software again, and initiate another streaming attempt to see if the problem is now fixed.
B. Disabling the overlay feature on Discord
- Open the Discord app conventionally and bring up the main interface from the tray bar icon.
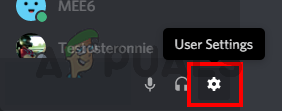
Note: If you can see the screen right-away, open the system tray, and double-click on the icon to bring the Discord window forward. - Once you’re inside the Discord app, look for the User settings (gear icon) in the bottom section of the window.

Accessing the user settings in discord - Once you’re inside the User Settings menu, click on Overlay tab from the vertical menu on the left (under App Settings).

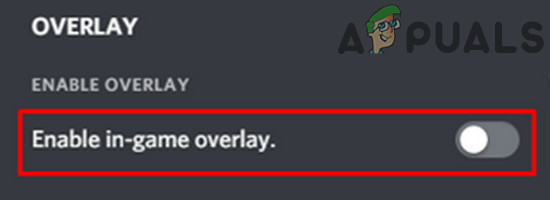
User Settings menu - Once you’re inside the Overlay menu, disable the toggle associated with Enable in-game overlay.

Enabling In-Game overlay - Save the changes, then ODB once again and see if the problem is now fixed.
C. Uninstalling the overlay feature from Programs and Features
- Press Windows key + R to open up a Run dialog box. Next, type ‘appwiz.cpl’ and press Enter to open up the Programs and Features menu.
Opening the Programs and Features menu - Inside the Programs and Features menu, go ahead and scroll down through the list of installed programs and locate the overlay software that you plan on uninstalling.
- When you see it, right-click on it and choose Uninstall from the newly appeared context menu.

Uninstalling Nvidia Experience - Inside the uninstallation screen, follow the on-screen instructions to complete the uninstallation, then restart your computer.
- Once the procedure is complete, launch the game once again and see if the problem is now fixed.

Kevin Arrows
Kevin is a dynamic and self-motivated information technology professional, with a Thorough knowledge of all facets pertaining to network infrastructure design, implementation and administration. Superior record of delivering simultaneous large-scale mission critical projects on time and under budget.
Сегодня расскажем что предпринять если у вас появился сбой вывода в программе OBS. NVEC или AMD. Ошибка может звучать в английском варианте «Failed to open NVENC codec: Function Not Implemented» или Generic error in an external library. Симптомы у них похожи. Либо просто выскакивает окошко с уведомлением как на скриншоте ниже: «Сбой вывода. Подробности отражены в журнале. Примечание: Если вы используете кодировщики NVEC или AMD, убедитесь что у вас установлена последняя версия видеодрайвера.»

Сбой вывода. Не удалось начать запись в OBS
Причины ошибки вывода потока в OBS
Поскольку запись или трансляция стримов потребляют большие ресурсы видеопамяти все ошибки нужно начинать с проверки видеокарты и ее работы. Естественно, первым делом стоит убедиться, что вы загрузили последнюю версию драйверов на официальном сайте и обновили. Для видеокарт от NVIDIA после запуска любой игры или приложения в трее есть иконка, которая позволяет увидеть какая видеокарта задействована в данный момент. При работе с графикой и записи видео или стримов разумеется должна отображаться внешняя видеокарта.
Второе – часто программа конфликтует с продуктами от Adobe запущенными на компьютере в данный момент(Photoshop, InDesign, Premiere Pro, Illustrator или Adobe XD). Сохраните всё, что делали, выключите программу и попробуйте снова запустить запись. Эта ошибка вызвана тем, что графические редакторы задействуют ресурсы видеокарт по максимуму, а если карточка не последних поколений, выделить дополнительную память на стрим или запись она просто не сможет.
Как исправить ошибку вывода?
Если обновление драйверов не помогло, посмотрим что пишут в логах. Закройте все лишние работающие программы. Далее в запущенной программе OBS:
- Переходим в пункт меню «Справка», «Log файлы», «Посмотреть текущий журнал».

Справка, Log файлы, посмотреть текущий журнал
- Листаем в самый них текстового файла. Смотрим есть ли строчка Failed to open NVENC codec или Stream output type «rtmp_output» failed to start!.

Stream output type «rtmp_output» failed to start!
- Обычно такая проблема говорит о том, что не удалось открыть нужный кодек во внешней библиотеке. Из-за этого не удается запустить сам вывод потока.
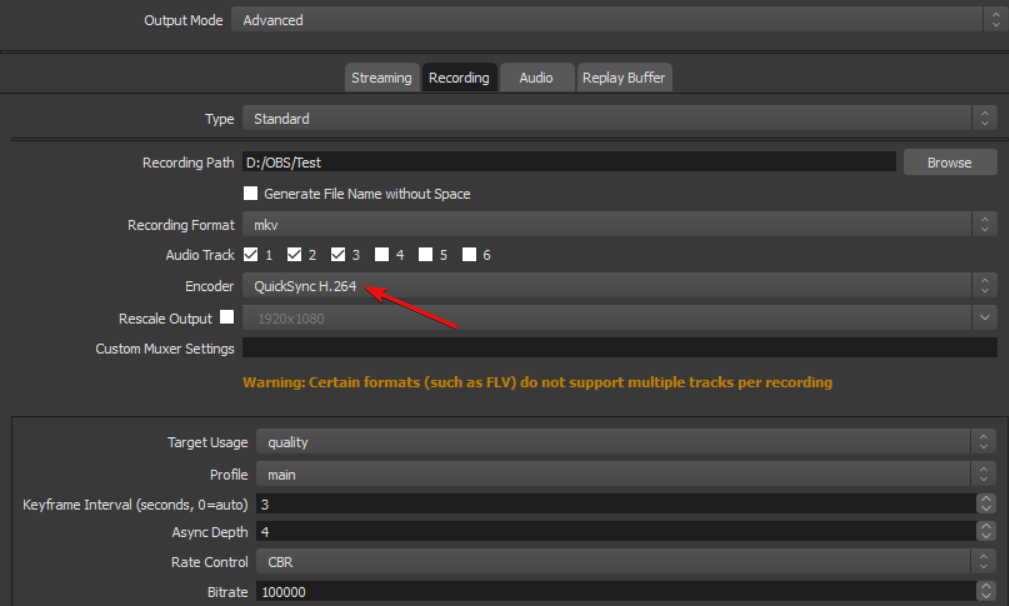
- Закрываем логи, открываем «Файл», «Настройки» и переходим в раздел «Вывод».

Файл, настройки, вывод в программе OBS
- Далее смотрим на строку GPU. Если на компьютере установлена одна видеокарта, а там стоит цифра 1,2 или 3 – устанавливаем значение на 0.

Устанавливаем значение 0 в настройках GPU
- Запускаем трансляцию и проверяем. Если ошибка, можно попробовать переключить кодек с NVENC H.264 на любой другой и перезапустить трансляцию еще раз.

Переключаем кодек с с NVENC H.264 на любой другой


Дополнительно можно обновить саму библиотеку кодеков, если вы до сих пор сидите на Windows XP или 7. Скачать можно с любого сайта. Яндекс предлагает [mask_link href=»https://softportal.pro/codecs/» target=»_blank»]https://softportal.pro/codecs/[/mask_link]. Обновляем кодеки Video Codec x264, которые как раз подходят для стрима и записи в OBS. Заодно можно установить Windows 10 Codec Pack.

Обновляем кодеки Video Codec x264 и Windows 10 Codec Pack
Выводы
Самые распространенные ошибки при работе с OBS связанные со сбоем вывода или ошибкой открытия кодеков «Failed to open NVENC codec» появляются из-за конфликтов при запущенных программах Adobe(поскольку они потребляют ресурсы видеопамяти). Либо проблемой с кодеками. Проверьте в настройках какая видеокарта выставлена. Затем обновите кодеки и если не помогло переключайте текущий кодировщик. Если что-то осталось непонятно задавайте вопросы в комментариях под этой странице и обязательно напишите какой из способов помог вам решить проблему.
Актуальное на этой неделе:

11.04.2022
Если вам на карту неожиданно пришли деньги, что делать?
Когда поступают деньги на карту, владелец обычно знает, что и откуда «падает». Родственник прислал, долг…
Далее

06.04.2022
Как добавить VPN на Андроид через настройки
Ограничения доступа в интернет раздражает и не дает использовать интересные подключения. Проблема решается…
Далее

06.04.2022
Как создать канал в Telegram: пошаговое руководство и советы
Собственный Telegram-канал может завести любой человек. Мессенджер в данном случае никого не ограничивает. При…
Далее

19.03.2022
Код ошибки 60-02 и 01-03 в Сбербанк Онлайн – как исправить?
«Сбербанк онлайн» — это удобный сервис, позволяющий проводить финансовые манипуляции из любой точки мира….
Далее
NVIDIA encoders (NVENC) are popular options for streamers and offline recorders on OBS. But sometimes, the NVENC on some OBS versions returns a ‘failed to open NVENC codec’ error.
OBS users could experience a failed to open NVENC codec error because of an outdated graphics card or old app version. Several types of this error exist, with the failed to open NVENC codec: function not implemented the most common.
Fixing all kinds of failed to open NVENC codec errors is possible. OBS users just need to follow the right steps to resolve the encoding error and stream or record offline.
That’s why this article provides details on how to fix different NVENC codec errors. The information in this post make it easy to use OBS with zero encoding codec issues when streaming or recording content.
Step 1: Open OBS
First, launch OBS from your installed programs list. You can click the Start orb at the bottom left of your screen or search for ‘OBS’ manually.
Step 2: Click File > Settings
After opening OBS, click File > Settings. Clicking Settings opens a window with several options at the side menu.
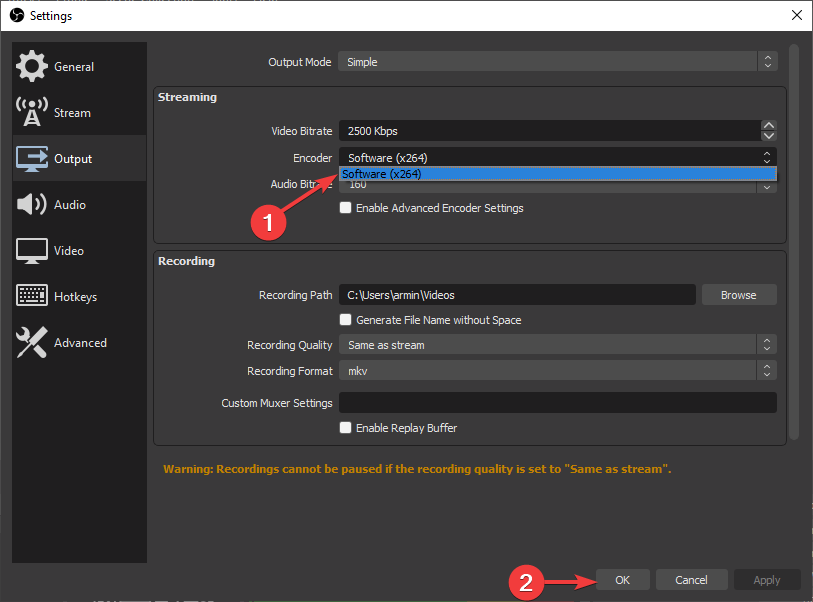
Step 3: Click Output and go to Streaming or Recording
Next, select Output from the list of sidebar menu options. Go to the Streaming or Recording submenus and select Encoding
Step 4: Switch encoding software
While at Encoding, switch the default NVENC encoder to Software (x264) to use your computer’s default encoding software.
Step 5: Click Apply and then OK
Click Apply for the settings to take effect and then click OK.
How to Fix NVENC Codec Error in OBS 25.0.3 or Later
Step 1: Open OBS
Launch OBS from your computer. If you’re running OBS 27 or later, you might not experience settings-related issues with NVENC codec error.
Step 2: Click File
At the top left corner of your OBS window, click on File from the list of top-menu options available. Clicking File reveals a dropdown list with about half-a-dozen options.

Step 3: Click Settings
After clicking on File, click Settings from options in the menu. Clicking Settings opens a window of preferences to tweak OBS default settings.
Several sidebar tabs like Output, Video, Advanced, Audio, etc. are in this section for OBS users to customize.

Step 4: Go to Output > Recording
Next, go to Output on the sidebar menu after accessing Settings. After that, click on Recording from the list of options to reveal another sub-menu with more settings.

Step 5: Select Custom Output
After selecting Recording, choose Type from all options available. Next, choose Custom Output from the dropdown menu and click OK.
If the preset FFMPEG arguments on OBS 25.0.3 have any bugs, this should solve the problem.
How Can I Fix a Failed to Open NVENC Codec with GPU Upgrade?
An incompatible graphics card is a major reason why OBS users experience the NVENC error code. You can get an NVIDIA graphics card on a budget, however, you need to confirm its compatibility with your computer.
And it’s also a smart idea to consult an experienced technician to handle the installation if you can’t DIY.
After the installation, run OBS and select NVENC H .264 as your preferred encoder. It should work without displaying a failed to open error.
How to Fix Failed to Open NVENC Codec: Generic Error in an External Library OBS Ubuntu
Step 1: Open OBS
Launch OBS already installed on your Linux Ubuntu or download the latest version from obsproject.com.
Step 2: Go to File > Settings
Next, click File from the top-left corner of OBS’ window.
Step 3: Click Output > Recording or Streaming > Encoder
After that, click Output from the sidebar of options, and then selecting encoder options from Recording or Streaming.
Step 4: Switch encoder from NVENC to Software (x264)
Switch NVENC H .264 from Recording or Streaming to Software (x264) or any other encoder supported by OBS.
Step 5: Click Apply and OK
After that, click Apply and then OK.
How Can I Fix Failed to Open NVENC Codec: Cannot Allocate Memory?
OBS users can fix failed to open NVENC codec: cannot allocate memory errors through the File Menu. Follow the path: File > Settings > Output. At the Output menu, switch Encoding on Recording and Streaming from NVENC to Software (x264).
How to Fix Failed to Open NVENC Codec: Invalid Argument
Step 1: Update all device drivers
Install a driver pack on your computer or use online sources like DriverEasy to update all system drivers.
Step 2: Test NVENC encoder
Open the File > Settings > Output path to confirm your encoder settings for Streaming and Recording are set to NVENC (H .264).
Try to stream or record offline with your hotkey to check for any problems. If problems persist, go to File > Settings > Output and switch both encoder settings to Software (x264).