Hi all,
I have written a ‘proof-of-concept’ GPU-accelerated H264-encoder for Adobe Media Encoder (CS6). It requires an NVidia 6xx/7xx series «Kepler» GPU (CUDA capability 3.0), and uses the dedicated GPU’s builtin hardware-encoder (NVENC) to offload the H264-encoding process from the host-CPU. This software is «proof-of-concept», so it’s missing some critical features (no interlaced-video support, no AAC-audio or Dolby AC-3 audio), and of course, it could be buggy! But it’s free.
!!!! Disclaimer: NVENC-export is third-party software that is not supported by either Adobe or NVidia. It comes with no warranty — use at your own risk.
Software/hardware Requirements:
(1)Adobe Premiere Pro CS6 or Media Encoder CS6 (Windows version)
Sorry, MacOSX is not supported. (NVidia NVENC SDK doesn’t support MacOSX.)
(1)NVidia Kepler GPU <GKxxx> with 1GB VRAM or more (GTX650 or above, GT650M or above)
(Sorry, NVidia Fermi <GFxxx> is NOT supported, it doesn’t have the NVENC hardware feature)
Note,if you have MPE-acceleration enabled, keep in mind the NVENC-plugin consumes some additional VRAM because it uses your GPU to perform H264-encoding.
Strongly recommend a 2GB card
(2) Microsoft Visual C++ 2010 SP1 x64 redistributables
(download this from Microsoft’s website)
Installation instructions:
In Adobe Premiere Pro CS6:
(1) On your system, locate the installation-directory for Premiere Pro CS6.
Usually, this is C:/Program Files/Adobe/Adobe Premiere Pro CS6
(2) Copy the included file Plug-ins/Common/nvenc_export.prm
to <installation dir>/Plug-ins/Common/
-> To choose the NVENC-plugin in Premiere Pro,
In the format-menu, select <NVENC_export>
In Adobe Media Encoder CS6:
(1) On your system, locate the installation-directory for Media Encoder CS6.
Usually, this is C:/Program Files/Adobe/Adobe Media Encoder CS6
(2) Copy the included file Plug-ins/Common/nvenc_export.prm
to <installation dir>/Plug-ins/Common/
-> To choose the NVENC-plugin in Media Encoder,
in the format-menu, select <NVENC_export>
Performance & quality notes:
(1) How much faster is NVENC-export than Adobe’s built-in Mainconcept H264 encoder?
Depends on your PC system. On my test-system, which is ordinary desktop PC with Intel i5-3570K (4-core 3.4GHz), NVENC-plugin is roughly 4x faster than Mainconcept. On a dual-socket Xeon Ivy Bridge-E system, NVENC would probably only be 2x faster (in Media Encoder.)
(2)How does the video-quality compare?
Comparing similar settings/video-bitrate, Mainconcept performs better at lower-bitrates(less artifacts). At medium-high bitrates, NVENC is comparable to Mainconcept.
(3) How does NVENC-export encode the video?
The plugin fetches videoFrames from the Adobe application, then converts the frames from YUV420 to NV12 surface-format (using host-CPU.) Then it passes the converted frames to the NVENC front-end. From here, NVENC hardware takes over, and handles all aspects of the video compression. When NVENC hardware is done, it calls the plugin to output write the elementary bitstream (to the selected filepath.) NVENC-hardware does NOT encode audio, nor does not multiplex the A/Vbitstreams — this is still done in software (on the host-CPU)
The NVENC hardware block has very little CPU-overhead. But since video-encoding is just 1 step in the entire Adobe rendering path, CPU-usage will likely still be quite high when using NVENC-plugin.
(4) What’s the maximum-size video NVENC-export can handle?
H264 High-profile @ Level 5.1, which works out to roughly 3840×2160 @ 30fps. (Note the actual encoding-speed will probably be less than 30fps.)
(5) How fast is the NVENC-export hardware in Kepler GPU?
Assuming the Adobe application host is infinitely fast (i.e. can send video to plugin in zero-time), NVENC-hardware will encode High-profile (CABAC, 2 refframes, 1-bframe) 1920x1080p video @ ~100fps. At 3840x2160p (4k video), the hardware encode-speed drops to roughly 20-25fps. That is still faster than a desktop PC.
NVENC-speed is generally same across the Kepler family — the high-end Geforce GTX Titan (or GTX780) is no faster than the entry-level Geforce GTX650, because all Kepler models share the same NVENC hardware-block, which is totally separate and independent of the GPU’s 3D-graphics engine.
In premiere Pro 6, MPE acceleration will greatly affect how quickly Adobe can render video to the exporter. So a more powerful Kepler GPU will probalby complete projects faster than a less powerful one (up to NVENC’s performance ceiling.) For more info, please refer to NVidia’s NVENC whitepaper at their developer website (public)
(6) I have a multi-GPU setup, can I encode with multiple GPUs?
No, NVENC targets and uses only a single physical GPU. (You can choose which one.)
Known limitations and problems:
NVENC-plugin is a ‘proof-of-concept’ program — it is not a finished product. So it’s missing some features, and other things are known to be broken:
- Interlaced video encdoing does not work at all (not supported in current consumer Geforce drivers)
- Audio support is very limited: uncompressed PCM)
no AAC or Dolby-Digital
- Multiplexer support is very limited: MPEG-2 TS only, using an included third-party tool TSMuxer.EXE
no MPEG-4 muxing (*.MP4)
- When the muxed MPEG-2 TS file in Windows Media Player (WMP), there is no sound. This is because WMP doesn’t recognize PCM-audio in mpeg-2 ts files. You have 2 choices; you can use a third-party media-player such as MPC-HC or VLC. Or you can postprocess the audio-WAV file into a compatible format (Dolby Digital/AC-3)
- in the pop-up plugin User-interface, the <multiplexer> tab is missing or not shown properly.
(To fix: Select a different codec, then re-select NVENC_export.)
- Doesn’t support older NVidia GPUs (GTX5xx and older, GT630 and lower)
Sorry, NVENC hardware was introduced with NVidia’s Kepler family (2012) Anything older than that will NOT work with the plugin.
Hi, I can’t export h264(nvenc) 10b, h265 works, but when I export h264 10b I get this error.
I’m using a Rtx 3070, Premiere 2021(15.1.0), voukoder 9.2.

The only odd thing is that voukoder is using pixelFormat=p010le, when it should use pixelFormat=yuv444p or yuv420p
Thanks in advance.
[00:58:47] =============================================
[00:58:47] Voukoder 9.2 (9.2.137)
[00:58:47] by Daniel Stankewitz
[00:58:47] ———————————————
[00:58:47] 11th Gen Intel(R) Core(TM) i5-11400 @ 2.60GHz
[00:58:47] 12 logical cores
[00:58:47] 32623 MB system memory
[00:58:47] Display #0 on: NVIDIA GeForce RTX 3070
[00:58:47] ———————————————
[00:58:47] Loading: translations/english.json
[00:58:47] Loading: translations/german.json
[00:58:47] Loading: translations/french.json
[00:58:47] Loading: translations/简体ä¸æ–‡.json
[00:58:47] Loading: translations/russian.json
[00:58:47] Loading: encoders/dca.json
[00:58:47] Loading: encoders/eac3.json
[00:58:47] Loading: encoders/truehd.json
[00:58:47] Loading: encoders/wavpack.json
[00:58:47] Loading: encoders/aac.json
[00:58:47] Loading: encoders/ac3.json
[00:58:47] Loading: encoders/alac.json
[00:58:47] Loading: encoders/ffv1.json
[00:58:47] Loading: encoders/flac.json
[00:58:47] Loading: encoders/h264_amf.json
[00:58:47] — Encoder initialization failed (Code: -1313558101)
[00:58:47] Unloading: encoders/h264_amf.json
[00:58:47] Loading: encoders/h264_nvenc.json
[00:58:47] Loading: encoders/hevc_amf.json
[00:58:47] — Encoder initialization failed (Code: -1313558101)
[00:58:47] Unloading: encoders/hevc_amf.json
[00:58:47] Loading: encoders/hevc_nvenc.json
[00:58:47] Loading: encoders/libfdk_aac.json
[00:58:47] — Encoder initialization failed (Code: -1)
[00:58:47] Unloading: encoders/libfdk_aac.json
[00:58:47] Loading: encoders/libmp3lame.json
[00:58:48] Loading: encoders/libopus.json
[00:58:48] Loading: encoders/libvorbis.json
[00:58:48] Loading: encoders/libvpx.json
[00:58:48] Loading: encoders/libvpx-vp9.json
[00:58:48] Loading: encoders/libx264.json
[00:58:48] Loading: encoders/libx265.json
[00:58:48] Loading: encoders/pcm_s16le.json
[00:58:48] Loading: encoders/pcm_s24le.json
[00:58:48] Loading: encoders/pcm_s32le.json
[00:58:48] Loading: encoders/prores_ks.json
[00:58:48] Loading: encoders/hap.json
[00:58:48] Loading: encoders/h264_qsv.json
[00:58:48] — Encoder initialization failed (Code: -40)
[00:58:48] Unloading: encoders/h264_qsv.json
[00:58:48] Loading: encoders/hevc_qsv.json
[00:58:48] — Encoder initialization failed (Code: -40)
[00:58:48] Unloading: encoders/hevc_qsv.json
[00:58:48] Loading: encoders/libsvtav1.json
[00:58:48] Loading: encoders/vp9_qsv.json
[00:58:48] — Encoder initialization failed (Code: -40)
[00:58:48] Unloading: encoders/vp9_qsv.json
[00:58:48] Loading: encoders/gif.json
[00:58:48] Loading: encoders/bmp.json
[00:58:48] Loading: encoders/png.json
[00:58:48] Unloading: encoders/png.json
[00:58:48] Loading: encoders/tiff.json
[00:58:48] Loading: encoders/qtrle.json
[00:58:48] Loading: encoders/utvideo.json
[00:58:48] Loading: encoders/cfhd.json
[00:58:48] Loading: encoders/prores_aw.json
[00:58:48] Loading: muxers/wv.json
[00:58:48] Loading: muxers/matroska.json
[00:58:48] Loading: muxers/mov.json
[00:58:48] Loading: muxers/mp4.json
[00:58:48] Loading: muxers/webm.json
[00:58:48] Loading: muxers/mp3.json
[00:58:48] Loading: muxers/opus.json
[00:58:48] Loading: muxers/ogg.json
[00:58:48] Loading: muxers/flac.json
[00:58:48] Loading: muxers/adts.json
[00:58:48] Loading: muxers/wav.json
[00:58:48] Loading: muxers/h264.json
[00:58:48] Loading: muxers/hevc.json
[00:58:48] Loading: muxers/mpeg2video.json
[00:58:48] Loading: muxers/mpegts.json
[00:58:48] Loading: muxers/gif.json
[00:58:48] Loading: muxers/image2#bmp.json
[00:58:48] Loading: muxers/image2#png.json
[00:58:48] Loading: muxers/image2#tif.json
[00:58:48] Loading: muxers/avi.json
[00:58:48] Loading: filters/bwdif.json
[00:58:48] Loading: filters/colorspace.json
[00:58:48] Loading: filters/crop.json
[00:58:48] Loading: filters/eq.json
[00:58:48] Loading: filters/hqdn3d.json
[00:58:48] Loading: filters/nlmeans.json
[00:58:48] Loading: filters/pad.json
[00:58:48] Loading: filters/removegrain.json
[00:58:48] Loading: filters/setdar.json
[00:58:48] Loading: filters/setparams.json
[00:58:48] Loading: filters/setsar.json
[00:58:48] Loading: filters/tmix.json
[00:58:48] Loading: filters/unsharp.json
[00:58:48] Loading: filters/yadif.json
[00:58:48] Loading: filters/zscale.json
[00:58:48] Loading: filters/atrim.json
[01:13:00] ———————————————
[01:13:00] Export started
[01:13:00] ———————————————
[01:13:00] Filename: D:VideosInazuma Ed 1-1_4.mp4
[01:13:00] Application: Voukoder (Adobe Premiere)
[01:13:00] — Video ————————————-
[01:13:00] Frame size: 1280×720
[01:13:00] Pixel aspect: 1:1
[01:13:00] Timebase: 1001/30000 (29.97 fps)
[01:13:00] Interlaced: No
[01:13:00] Encoder: h264_nvenc
[01:13:00] Options: _computeCapability=8.6 _pixelFormat=p010le gpu=0 preset=medium profile=main qp=23 rc=constqp
[01:13:00] Side data: <none>
[01:13:00] Filters: <none>
[01:13:00] Passes: 1
[01:13:00] Color range: unknown
[01:13:00] Color space: unknown
[01:13:00] Color primaries: unknown
[01:13:00] Color transfer: unknown
[01:13:00] — Audio ————————————-
[01:13:00] Timebase: 1/48000
[01:13:00] Channels: 2
[01:13:00] Encoder: aac
[01:13:00] Options: _sampleFormat=fltp b=320000 profile=aac_low
[01:13:00] Side data: <none>
[01:13:00] Filters: <none>
[01:13:00] ———————————————
[01:13:00] Opening codec: h264_nvenc with options: gpu=0|preset=medium|profile=main|qp=23|rc=constqp
[01:13:00] Failed opening codec: h264_nvenc
[01:13:00] Unable to open video encoder: h264_nvenc
[01:13:00] Closing encoders …
[01:13:00] Opening encoder failed! Aborting …
NVIDIA NVENC — это функция видеокарт NVIDIA, которая позволяет выполнять некоторые задачи, включая кодирование видео, но некоторые пользователи OBS Studio сообщают об ошибках NVENC.
Благодаря этой функции он переносит ресурсоемкую задачу с ЦП на определенную часть графического процессора.
Кроме того, полезно знать, что многие программы для прямой трансляции и записи, например vMix, Wirecast, Open Broadcaster и Bandicam, поддерживают кодировщик.
Кроме того, NVIDIA Encoder позволяет вам записывать свои игры и делиться ими. Это включено в программное обеспечение NVIDIA GeForce Experience.
В этой статье мы объясним, как вы можете решить все ошибки OBS Studio NVENC, с которыми вы можете столкнуться при использовании OBS.
Как включить аппаратное кодирование (NVENC) в OBS?
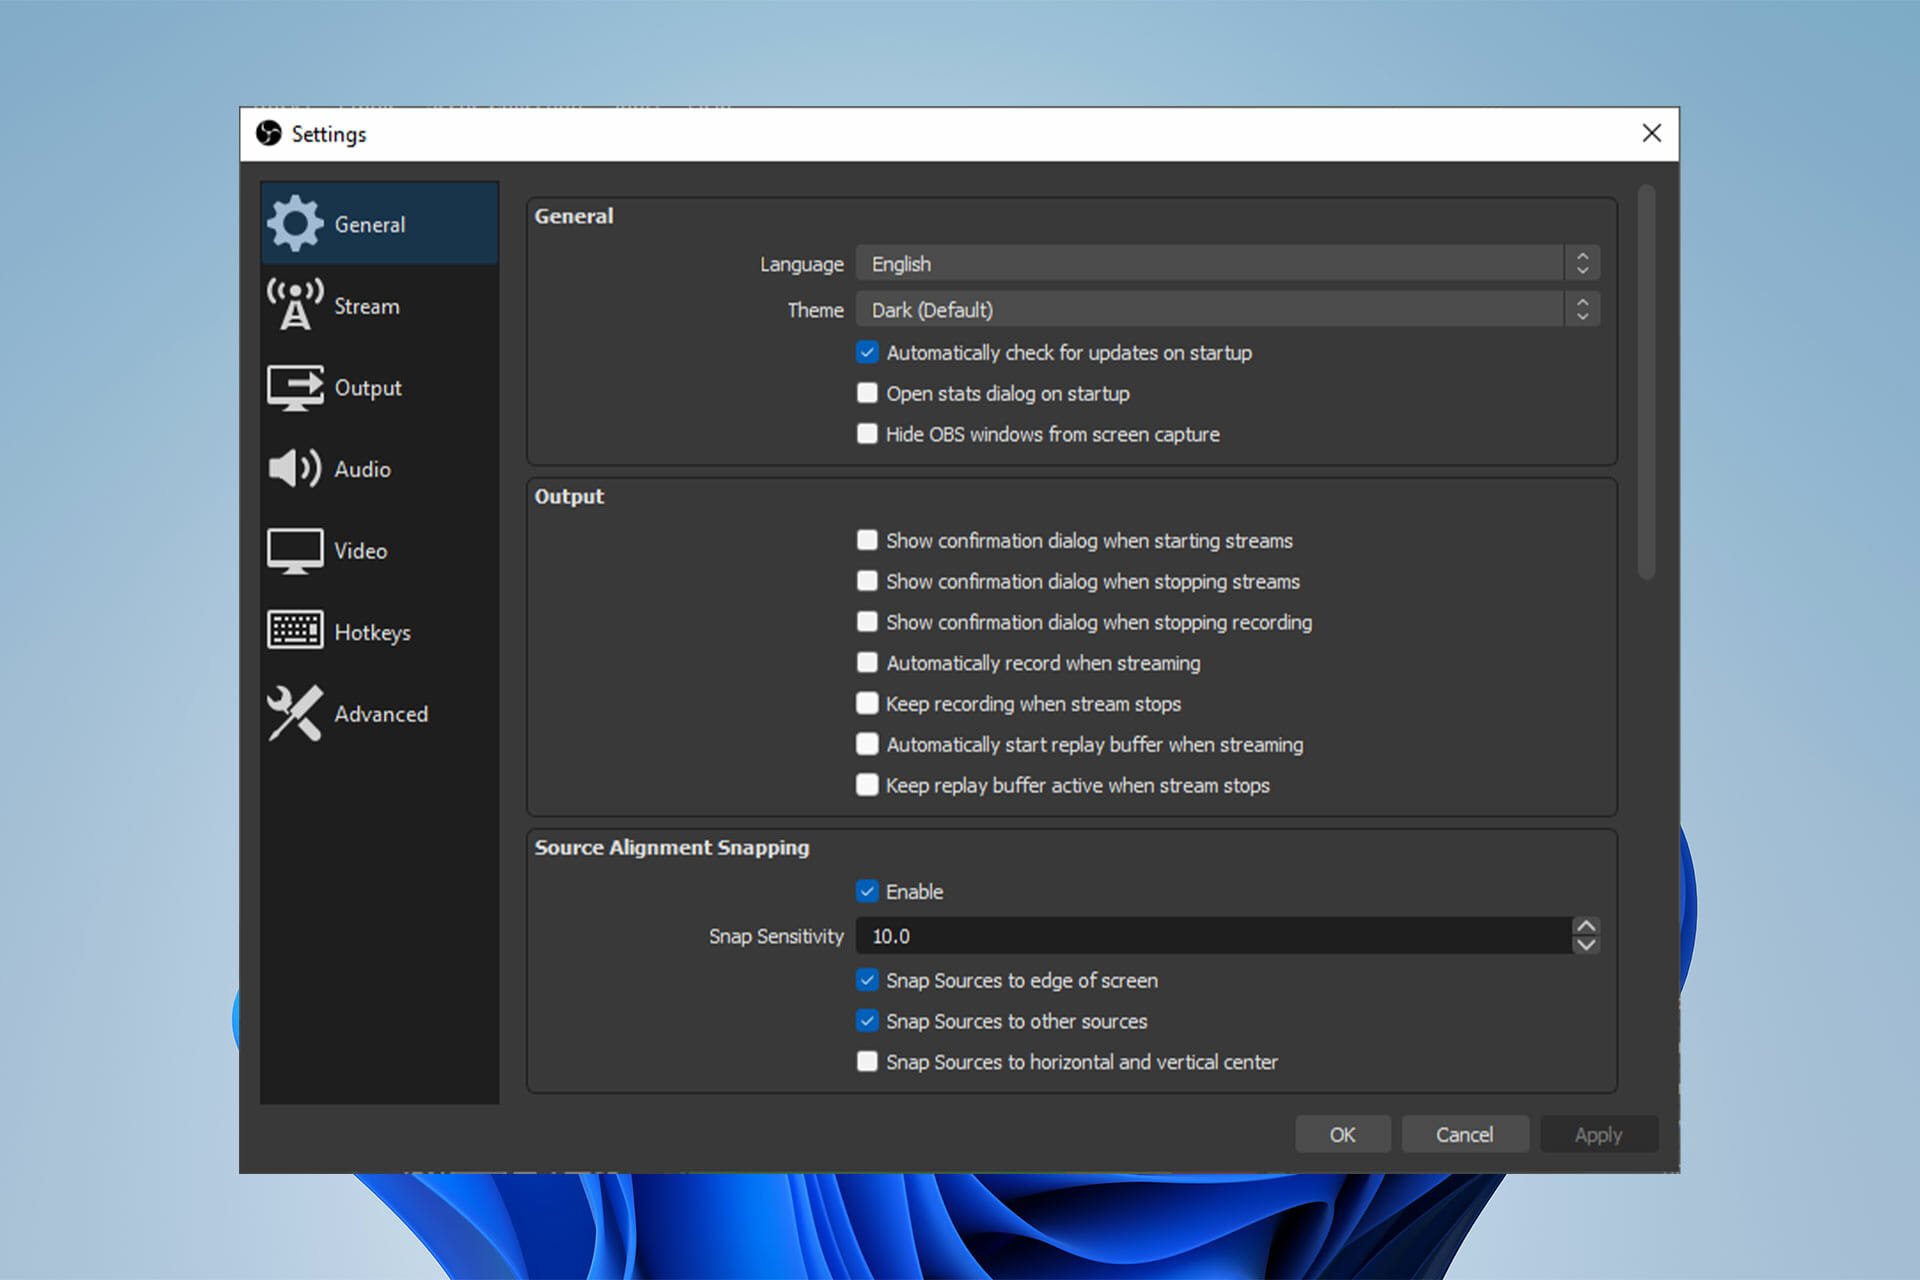
- Запустите OBS, нажмите «Файлы», затем выберите «Настройки».

- Затем выберите «Вывод» (расположен в боковом меню).

- Наконец, щелкните NVENC H.264 в окне, которое открывается в раскрывающемся списке кодировщика, чтобы включить аппаратное кодирование.
Если вы спрашиваете, что такое кодек NVENC, это инструмент для аппаратного кодирования, доступный в версиях OBS для Mac и Windows.
Но для лучшего результата разработчики рекомендуют использовать кодировку на компьютерах под управлением Windows.
Кроме того, его лучше всего использовать с графическими процессорами NVIDIA. Аппаратное кодирование доступно на картах NVIDIA с начала 2012 года.
Как я могу исправить ошибки OBS NVENC?
1. Исправить ошибку OBS Studio NVENC неподдерживаемое устройство
- Сначала откройте программу OBS.
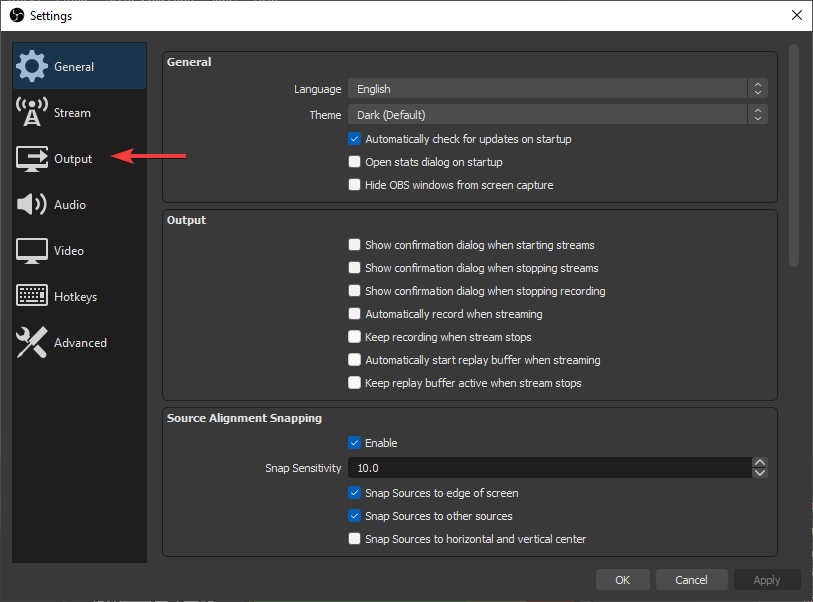
- Нажмите «Файл» и перейдите в «Настройки».

- Перейдите на вкладку «Вывод».

- Затем найдите потоковую коробку.
- Нажмите на кодировщик и измените его на Quicksync (QSV) или x264 вместо NVENC.

- Наконец, выберите ОК.
2. Исправьте ошибку OBS NVENC: слишком много одновременных сеансов.

Ошибка OBS NVENC, которая говорит, что у вас слишком много одновременных сеансов, означает, что у вас больше одновременных сеансов кодирования, чем поддерживает ваш графический процессор.
Современные драйверы графического процессора могут поддерживать до трех сеансов, в то время как старые драйверы ограничиваются двумя сеансами. Если вы считаете, что у вас не так много одновременных сеансов, перезагрузите компьютер.
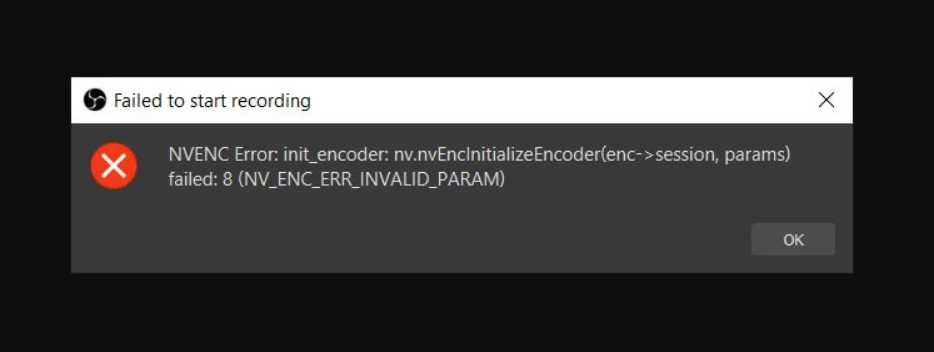
3. Исправить ошибку OBS NVENC не удалось: 8

Полное сообщение об ошибке для этой проблемы сопровождается спецификацией NV_ENC_ERR_INVALID_PARAM.
Причина этой ошибки в том, что NVENC не поддерживает разрешения выше 4096 по самой большой стороне и не может ничего захватить или показать.
Вы должны установить выходное разрешение ниже 4096 по наибольшей стороне. Базовое (холстовое) разрешение может быть больше, чем выходное (масштабированное), если вам это нужно.
4. Исправить ошибку инициализации кодировщика OBS NVENC.
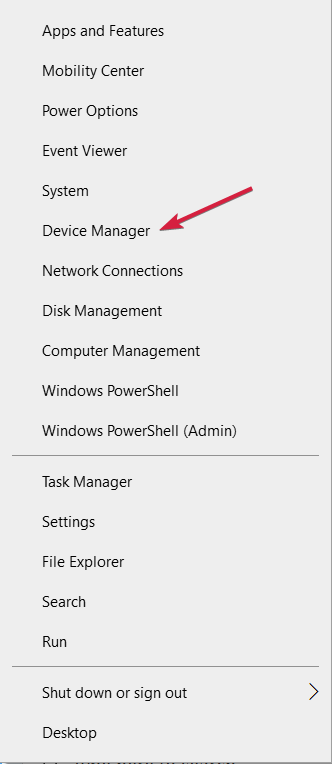
- Щелкните правой кнопкой мыши кнопку «Пуск» и выберите «Диспетчер устройств» из списка.

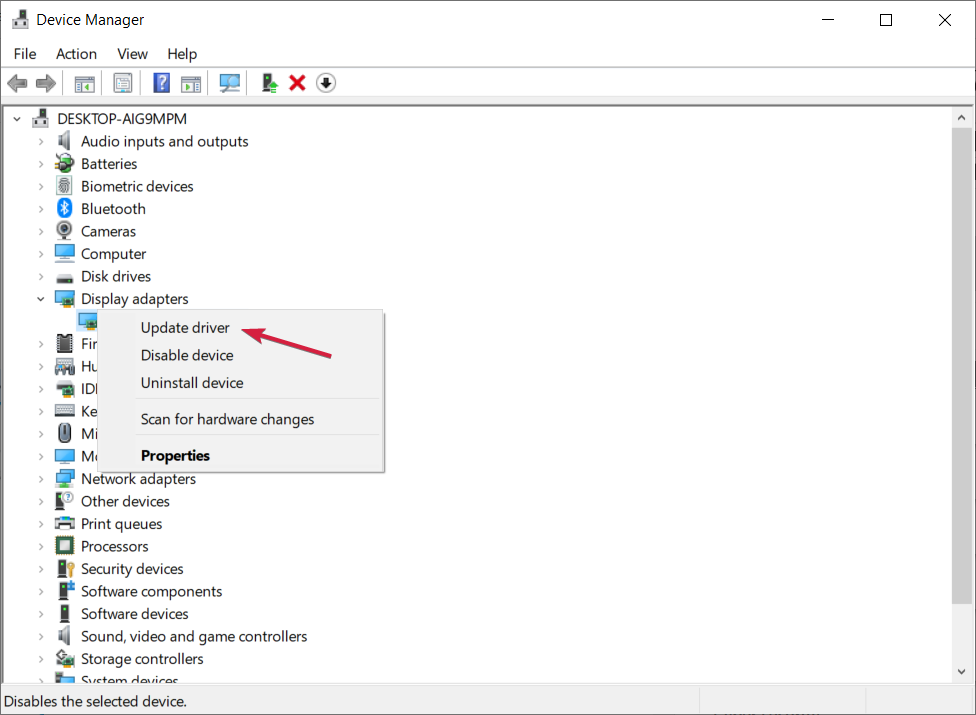
- Разверните раздел «Видеоадаптеры», щелкните правой кнопкой мыши драйвер NVIDIA и выберите «Обновить драйвер».

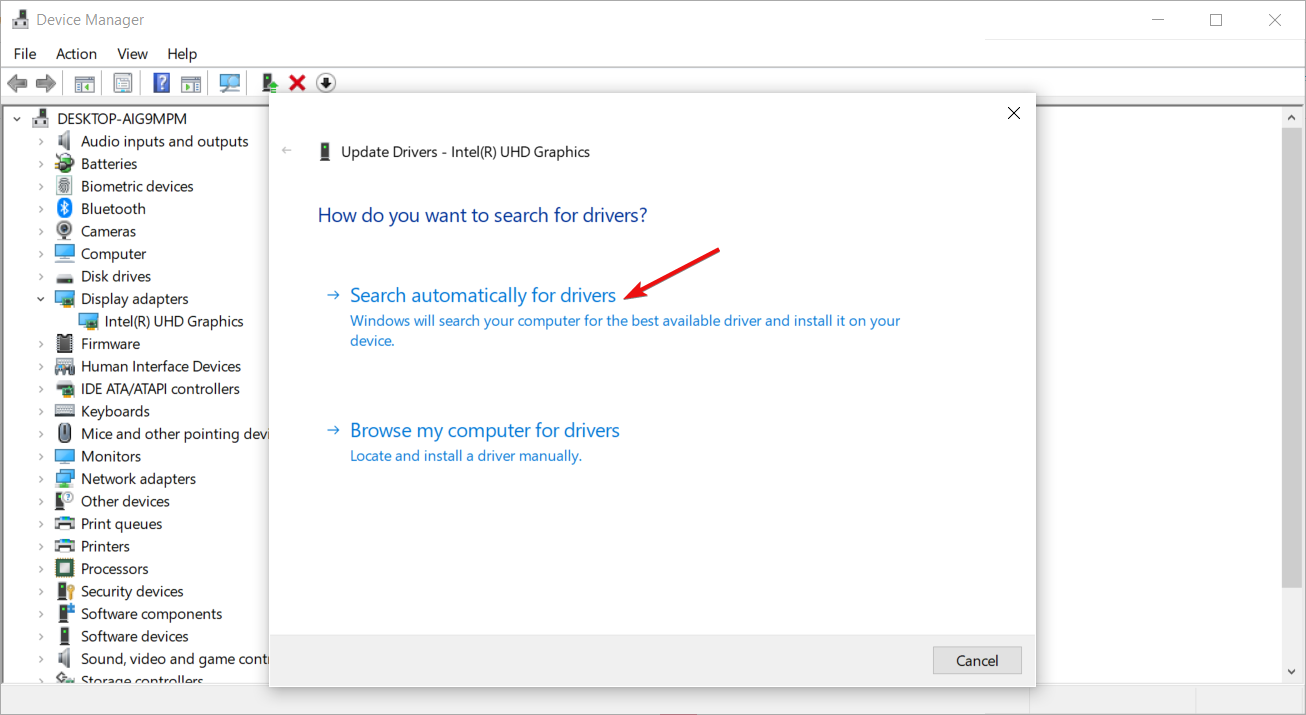
- Нажмите «Автоматический поиск драйверов», и система выполнит поиск лучшего драйвера.

Чтобы исправить ошибку кодировщика Init, вам необходимо обновить драйвер NVIDIA до последней версии.
Если приведенного выше решения недостаточно, посетите раздел загрузки драйверов NVIDIA и получите последнюю версию драйвера с их веб-сайта.
Обязательно получите соответствующую версию для вашего оборудования. В противном случае вы рискуете получить другие графические ошибки и системные проблемы, такие как BSoD.
Чтобы избежать этого, используйте такой инструмент, как DriverFix, который определяет используемое вами оборудование и автоматически загружает соответствующие драйверы.
Кроме того, замена nvEncodeAPI.dll, расположенной в следующем каталоге, предыдущими версиями этого DLL-файла может помочь исправить ошибки OBS Studio NVENC:C:WindowsSysWow64
Для этого вам нужно загрузиться в безопасном режиме. Предыдущие версии nvEncodeAPI.dll можно найти по следующему адресу:C:WindowsSystem32DriverStoreFileRepositorynv_disp.inf_amd64_neutral_
5. Исправьте неверный параметр ошибки OBS NVENC.
Максимальное разрешение, к которому вы можете стремиться в NVENC h.264, составляет 4096 × 4096. Однако NVENC h.265 поддерживает разрешение до 8192×8192 пикселей.
Дело в том, что стриминговые сервисы не поддерживают h.265. Вы можете использовать его только с выходом FFmpeg OBS. Итак, вы собираетесь пойти на 4096 в основном.
6. Исправлен кодек OBS NVENC: функция не реализована
- Перейдите в значок «Файл» и нажмите «Настройки», чтобы открыть его.

- На вашем экране откроется окно настроек; теперь выберите вкладку «Вывод».

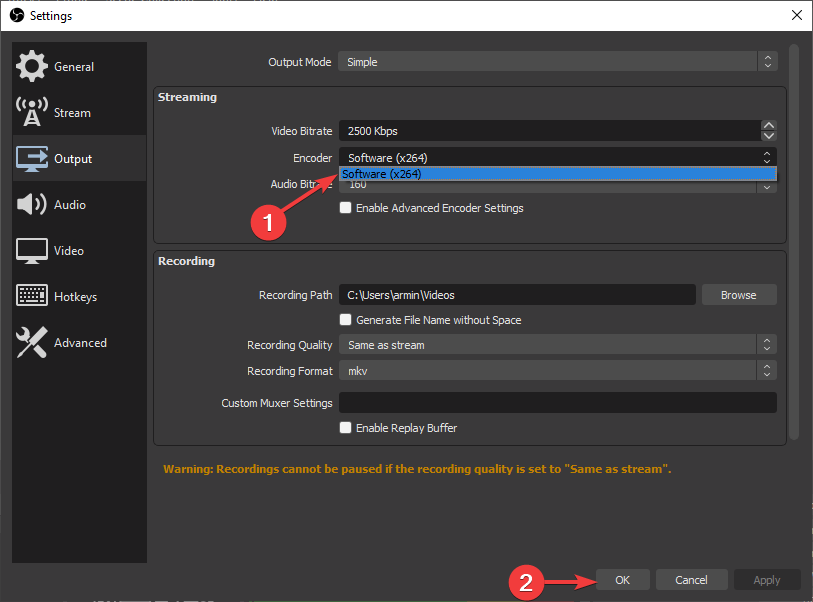
- После этого найдите потоковую коробку.

- Нажмите на Encoder и измените его на Software вместо NVENC.
- Теперь нажмите ОК.
Как я могу исправить перегрузку кодирования OBS NVENC?
Одним из решений, которое может исправить эту ошибку OBS NVENC, является снижение частоты кадров. Если вы снимаете с высокой частотой кадров (от 48 до 60), могут возникать задержки.
Это может произойти по ряду причин. Однако основная причина заключается в том, что ваш графический процессор не может отображать как саму игру, так и видео, которое вы транслируете.
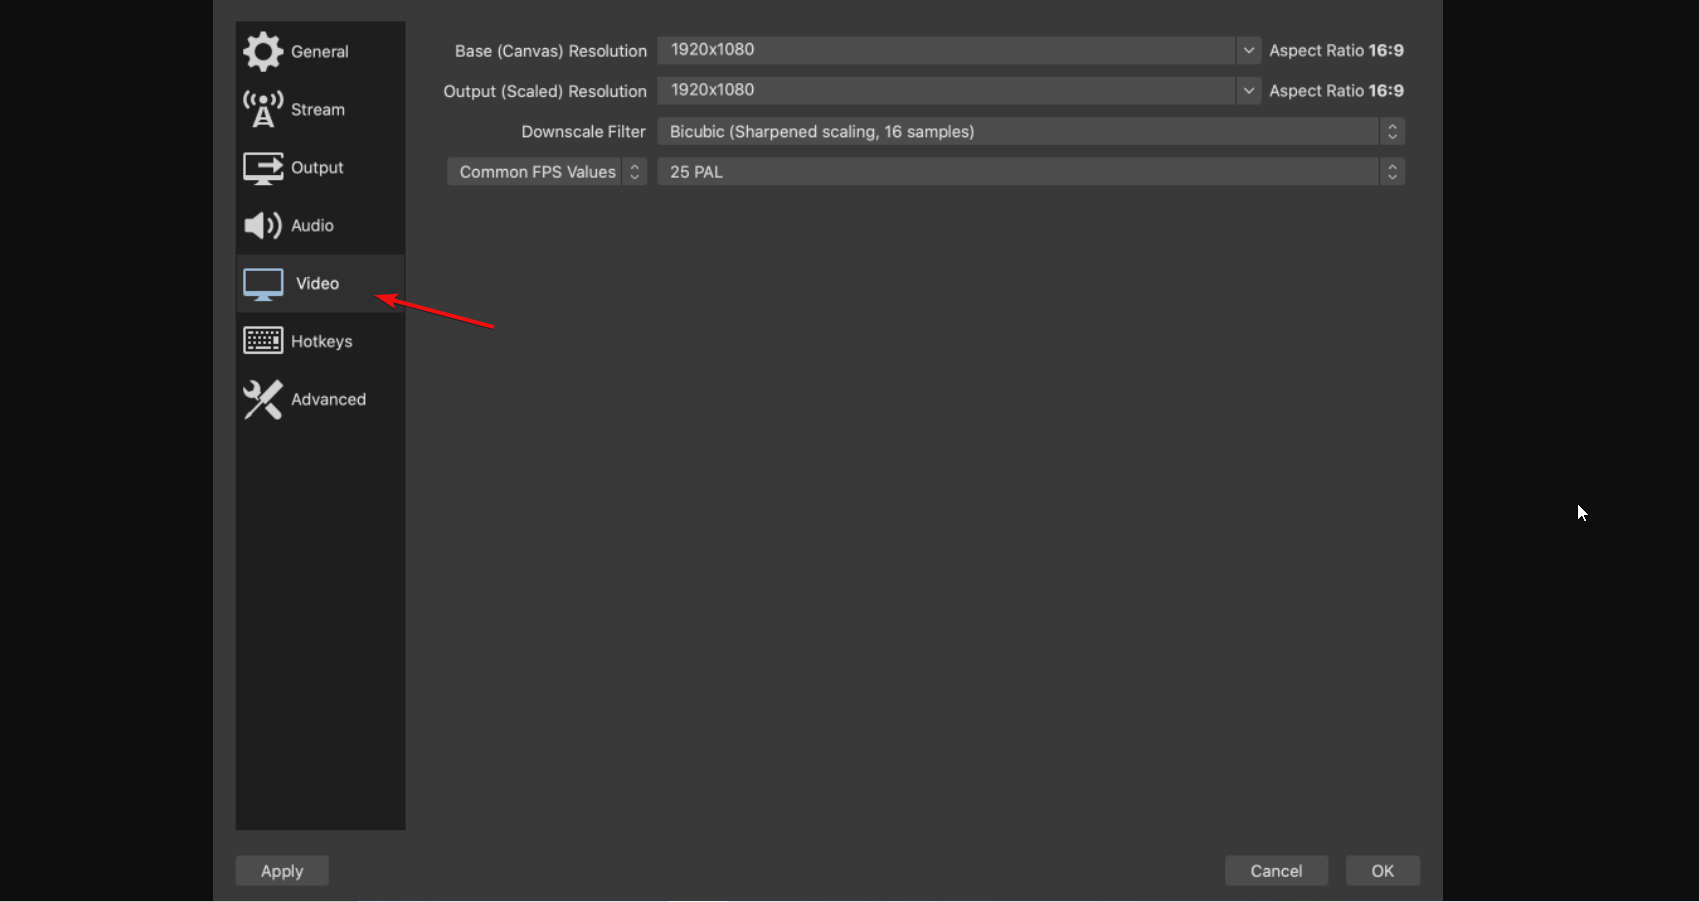
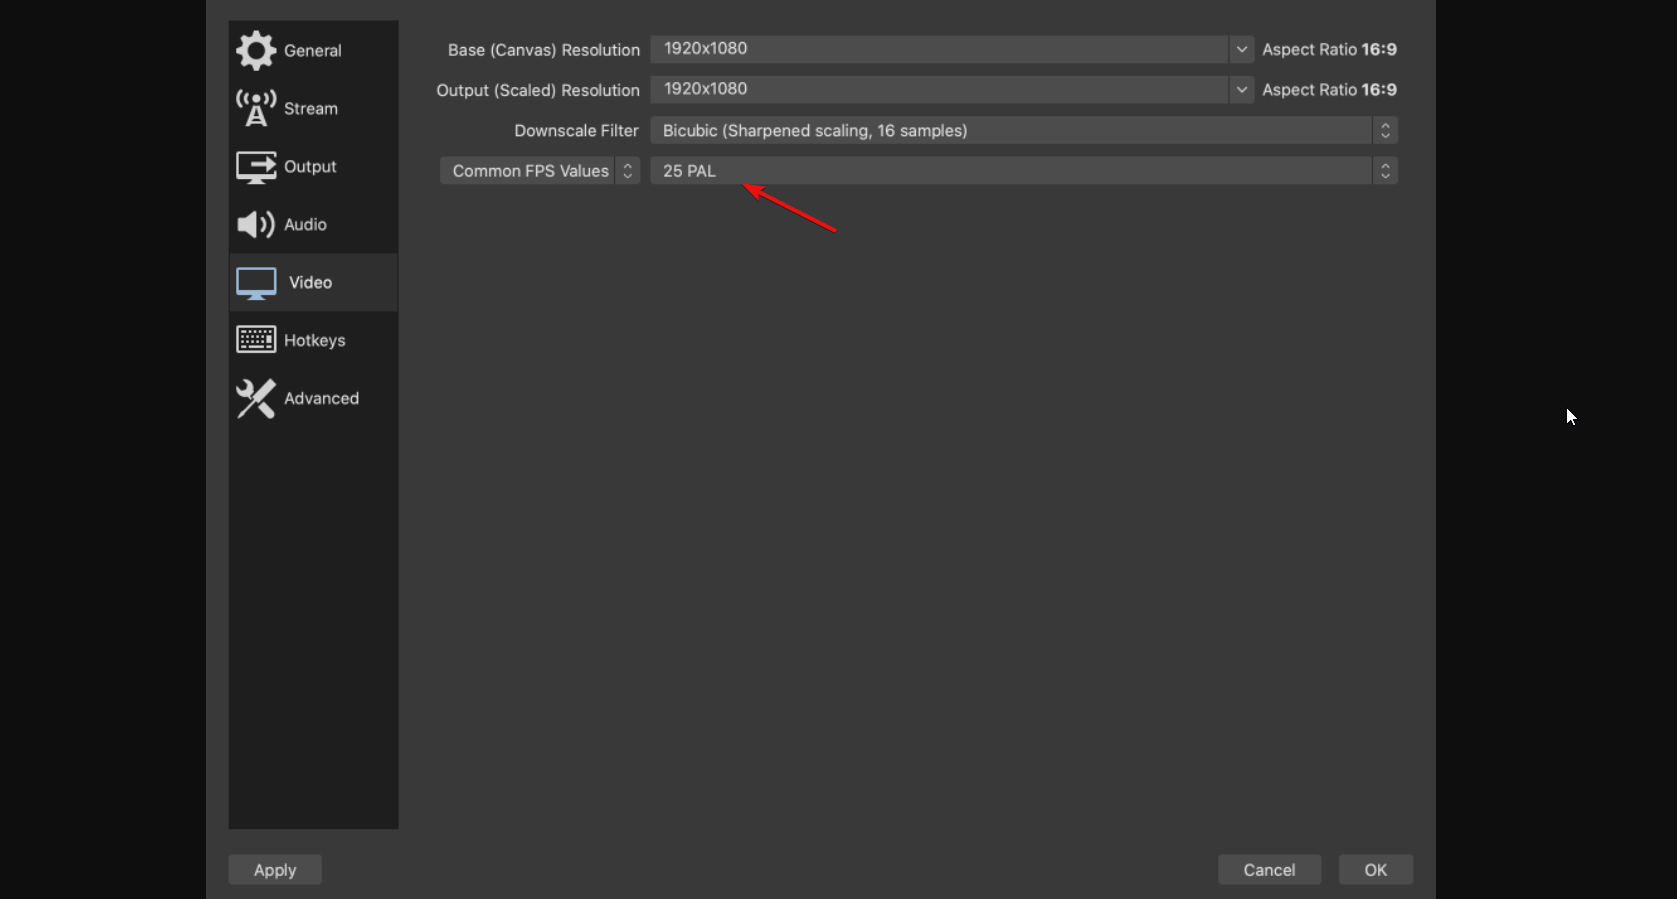
- Сначала откройте «Настройки» и нажмите «Видео».

- Есть раздел Common FPS Values. Выберите его и выберите 30 или меньше.

- Затем нажмите «ОК» и закройте OBS. Теперь перезагрузите компьютер и проверьте свой поток, чтобы увидеть, появляется ли ошибка снова.
Если вы не обновили свои драйверы в OBS NVENC после открытия NVIDIA GEFORCE EXPERIENCE, щелкните драйверы и обновите их. Не забудьте после этого перезагрузить компьютер.
Вы также можете использовать ICQ в качестве контроля скорости и установить значение качества ICQ от 20 (лучшее качество, файлы большего размера) до 23 (ухудшенное качество, файлы меньшего размера).
Помните, что OBS использует потрясающую библиотеку кодирования видео с открытым исходным кодом — x264. Вы можете установить предустановку кодировщика x264 на сверхбыструю, чтобы снизить нагрузку на ЦП.
Сообщите нам, какое решение вы использовали для успешного устранения проблем OBS Studio NVENC в разделе комментариев ниже.
Не секрет, что Premiere Pro неэффективно использует возможности компьютера при экспорте готового видео в один из самых популярных сейчас видео форматов H264 (mp4). Компания Adobe даже в 2019 году продолжает делать вид, что не существует Nvidia NVENC — аппаратного многопоточного кодировщика, реализованного на большинстве современных видеокарт GeForce. Я долго откладывал эту тему, но вот пришло время ее обсудить. На данный момент мне известно о двух бесплатных плагинах для Premiere Pro — NVENC и Voukoder.
https://www.youtube.com/watch?v=yYSSk7OJDWk
Содержание выпуска:
01:47 Установка плагинов кодирования в Premiere Pro и Adobe Media Encoder
02:12 Подготовка тестовой среды
03:03 Используем Voukoder для кодирования
05:38 Начинаем 1-й тест с Voukoder
07:56 Используем NVENC
11:33 Начинаем 2-й тест с NVENC
13:36 И тест стандартного рендера H.264 на CPU
16:14 MediaInfo файлов
16:50 Итоги и выводы
20:08 Немного бомблю от Adobe
Результаты моих предварительных тестов для сравнения:
- 2:40 — Стандартный H.264 в Premiere Pro на CPU
- 1:40 — Voukoder
- 1:50 — NVENC
Как видно, скорость и загрузка ресурсов компьютера при использовании Voukoder и NVENC отличаются несильно, но зато оба значительно выигрывают у процессора. В тоже время ставить и настраивать Voukoder гораздо проще, не нужно ничего дополнительно качать, да и его разработка находится в активной стадии.
Voukoder
Voukoder — опенсорсный проект плагина для Premiere Pro и Media Encoder версии CS6 и старше. Основан на использовании возможностей кодировщика FFmpeg. Кроме NVENC для h.264 и h.265 может делать и ProRes на Windows. Установка состоит всего из одного файла, который нужно скопировать в папку плагинов программы.
- Для Adobe Media Encoder и Adobe Premiere Pro CS6:
C:Program FilesAdobeCommonPlug-insCS6MediaCore - Для Adobe Premiere Pro CC и выше:
C:Program FilesAdobeCommonPlug-ins7.0MediaCore - Или просто кинуть в папку программы
Adobe Premiere Pro CC 2018Plug-InsCommon
Для доступа к NVENC мне пришлось так же обновить драйвера для моей старенькой видеокарты ASUS GTX670-DC2OG-2GD5 до 419.35. Благо, плагин пишет подробный лог с ошибками в файл %TMP%voukoder.log. Заглянул туда — и сразу понятно, в чем проблема.
NVidia GPU-accelerated H264-encoder plugin
Второй многострадальный плагин NVENC раньше обсуждался на форуме Adobe, но недавно ссылки были удалены модераторами, а тема закрыта:
Too many violations of users telling others how to hack the software package using our internal tools in order to support software that is not approved by Adobe. Questionable download links from unsavory sites. Sorry, this content is not suitable for our forums under our community guidelines.
Однако за несколько лет, пока Adobe игнорировал его существование, он успел таки разлететься по сети, и сейчас ссылок на него предостаточно. В отличие от Voukoder производит впечатление утекшей альфы, чем по сути и является. Славится огромным количеством проблем, сложной установкой и кучей версий, которые работают в зависимости от количества звезд на небе и текущей фазы луны. Так для его работы надо (но не обязательно) установить MP4Box из набора GPAC и neroAacEnc.exe — древний кодек ААС для звука.
И пути на все это добро нужно указать плагину в настройках. Сразу записать пресет, а то придется делать это каждый раз. MP4Box на закладке Multiplexer для формата mp4. А neroAacEnc в Audio для AAC.
Плагин кодирует видео в Premiere Pro через NVENC и звук в WAV, потом вызывает neroAacEnc для перекодировки звука и муксит готовый MP4 файл из звука ААС и кодированного видео в MP4Box. Последние две операции вообще-то можно проделать и руками теми инструментами, которые вам больше нравятся.
А еще для Premiere Pro СС 2017 вроде бы нужен какой то самопальный патч gpu_patch.exe, ибо он сам неправильно работает с ядрами GeForce, и из за этого не может запуститься сессия кодировщика видео. В 2018 я этого не делал и все работает.
К сожалению, автор вроде бы забросил дальнейшую разработку, Adobe упавшее знамя не подхватило. Что, кто и чем сейчас занят — загадка. Мне не удалось найти ни домашнюю страницу, ни какие-либо другие вменяемые координаты этого плагина. Но в сети все еще можно найти несколько версий плагина аж от 2016 года, которые то работают, то не работают:
- 1.09
- 1.12
- 1.11 j3
Я проверил 1.09 и 1.11 j3 на Premiere Pro СС 2018, обе вроде что-то кодируют. Дрова были версии 419.35. На всякий случай приложу контрольные суммы файлов md5 для nvenc_export, которые я использовал, так как скачиваются они не пойми откуда:
- nvenc_export_1.09.prm — d9dbaaedbcc3a85b843ec0570b4566fa
- nvenc_export 1.11 — j3.prm — fcae87228bef5977c89a6e300ff93e16
- neroAacEnc.exe — 0f21e58f98491ebd3346fdf3eb887891
Я не проверял. Но вот, что скромно пишет про себя сам разработчик: Cinegy Daniel2 — World’s Fastest Video Codec. Использует возможности Nvidia GPU для заметного ускорения ваших творческих способностей. Плагин для Adobe может импортировать, редактировать, обрабатывать и выводить 8, 10, 12 битный цвет и ускоренный H.264 / HEVC экспорт. Для работы ему нужно Windows 10 x64 и видеокарта NVIDIA с архитектурой Pascal.
Еще один подписчик прислал такой способ, у него не было видно NVENC кодеров после их установки: открываем Adobe Premiere Pro и вызываем консоль Ctrl + F12. Переводим ее в режим Debug Database View
Переводим следующие параметры в нужные состояния:
by Farhad Pashaei
As a technophile, Farhad has spent the last decade getting hands-on experience with a variety of electronic devices, including smartphones, laptops, accessories, wearables, printers, and so on. When… read more
Published on May 15, 2022
- OBS Studio is one of the most widely used applications when it comes to capturing your screen or streaming.
- There are some OBS NVENC errors that you might run into because of bad configuration or outdated drivers.
- You can fix encoding overload in OBS by reducing frame rate, changing the encoder preset, and freeing up your disk space.
XINSTALL BY CLICKING THE DOWNLOAD FILE
This software will repair common computer errors, protect you from file loss, malware, hardware failure and optimize your PC for maximum performance. Fix PC issues and remove viruses now in 3 easy steps:
- Download Restoro PC Repair Tool that comes with Patented Technologies (patent available here).
- Click Start Scan to find Windows issues that could be causing PC problems.
- Click Repair All to fix issues affecting your computer’s security and performance
- Restoro has been downloaded by 0 readers this month.
NVIDIA NVENC is a feature in NVIDIA graphics cards that enables you to perform some tasks, including video encoding but some OBS Studio users have reported NVENC errors.
Thanks to this feature, it offloads the resource-eating task from the CPU to a specific part of the GPU.
Also, it is good to know that many live streaming and recording programs, for instance, vMix, Wirecast, Open Broadcaster, and Bandicam support the encoder.
Moreover, the NVIDIA Encoder enables you to capture your games and share them. This is included in NVIDIA’s GeForce Experience software.
In this article, we explain how you can solve all the OBS Studio NVENC errors you might run into when you are using OBS.
How do I enable hardware encoding (NVENC) in OBS?
- Start OBS, click on Files then select Settings.

- Next, select Output (located on the side menu).

- Finally, click on NVENC H.264 in the window that opens under the encoder drop-down to enable hardware encoding.


If you’re asking what is NVENC codec, it is a tool for hardware encoding available in both Mac and Windows versions of OBS.
But for the best result, it is recommended by the developers to use encoding on computers running Windows.
Also, it is best used with NVIDIA GPUs. Hardware encoding has been available on NVIDIA cards since early 2012.
How can I fix OBS NVENC errors?
1. Fix the OBS Studio NVENC error unsupported device
- First, open the OBS program.
- Click on File and head over to Settings.
- Go to the Output tab.
- Then, find the streaming box.
- Tap on the Encoder and change it to Quicksync (QSV) or x264 instead of NVENC.

- Finally, select OK.
2. Fix the OBS NVENC error: Too many concurrent sessions

OBS NVENC error that says you have too many concurrent sessions means that you have more concurrent encoding sessions than your GPU supports.
Up-to-date GPU drivers can support up to three sessions, while the older drivers cap at two sessions. If you think you do not have this many concurrent sessions, reboot your computer.
3. Fix the OBS NVENC error failed: 8
The complete error message for this issue is accompanied by the NV_ENC_ERR_INVALID_PARAM specification.
The reason for this error is that NVENC does not support resolutions that are higher than 4096 on their largest side and it fails to capture or show anything.
You should set your output resolution to be lower than 4096 on its largest side. Base (canvas) resolution can be the larger one rather than the output (scaled) one if you need it to.
- How to download OBS and start streaming
- How to Add Browser Source to OBS Studio
- Best Chroma Key Settings & Tips on OBS Studio
4. Fix the OBS NVENC error init encoder
- Right-click the Start button and select Device Manager from the list.

- Expand the Display Adapters section, right-click the NVIDIA driver, and select Update driver.

- Click on Search automatically for drivers and the system will look for the best driver.

Some PC issues are hard to tackle, especially when it comes to corrupted repositories or missing Windows files. If you are having troubles fixing an error, your system may be partially broken.
We recommend installing Restoro, a tool that will scan your machine and identify what the fault is.
Click here to download and start repairing.
To fix the Init encoder error, you need to update your NVIDIA driver to its latest version.
If the solution above wasn’t enough, visit the NVIDIA driver download section and get the latest driver from their website.
Make sure to get the corresponding version for your hardware. Otherwise, you risk getting other graphical errors and system problems like BSoDs.
To avoid that, use a tool like DriverFix that detects the hardware you run and automatically downloads corresponding drivers.
Also, replacing the nvEncodeAPI.dll located in the following directory with previous versions of this DLL file can help fix OBS Studio NVENC errors: C:WindowsSysWow64
You need to boot into Safe Mode to be able to do this. Previous versions of nvEncodeAPI.dll can be found in the following location: C:WindowsSystem32DriverStoreFileRepositorynv_disp.inf_amd64_neutral_
5. Fix the OBS NVENC error invalid param
The maximum resolution you can aim for in an NVENC h.264 is 4096×4096. However, NVENC h.265 supports resolutions of up to 8192×8192 pixels.
The point is that h.265 is not supported by streaming services. You can only use it with the FFmpeg output of the OBS. So, you are going to go for the 4096 one mostly.
6. Fix the OBS NVENC codec: Function not implemented
- Go into the icon File and click on Settings to open it.
- A setting window opens on your screen; now select the Output tab.
- Afterward, look for the streaming box.
- Click on the Encoder and change it to Software instead of NVENC.
- Now click on OK.
How can I fix the OBS NVENC Encoding Overload?
One solution that can fix this OBS NVENC error is to reduce the frame rate. If you’re capturing at a high frame rate (48 to 60), you may experience lags.
This can happen for a number of reasons. However, the main reason is that your GPU cannot render the game itself as well as the video you’re streaming.
- First, open Settings and click on Video.

- There is a section called Common FPS Values. Select it and choose 30 or less.

- Then, click on OK and close the OBS. Now restart your computer and check your stream to see if the error comes up again.
If you haven’t updated your drivers on OBS NVENC after you open NVIDIA GEFORCE EXPERIENCE, click on the drivers and update them. Make sure to reboot your computer afterward.
You can also use ICQ as the rate control and set the ICQ quality value between 20 (better quality, larger files) and 23 (diminished quality, smaller files).
Remember that OBS uses a fabulous open-source video encoding library – x264. You can set your x264 encoder preset to ultrafast to reduce CPU usage.
Let us know which solution you used to successfully fix OBS Studio NVENC problems in the comments section below.
![]()