Logging
Every OpenNebula server generates logs with a configurable verbosity (level of detail) and through different means (file, syslog, or standard error output) to allow cloud administrators to troubleshoot the potential problems. Logs are stored in /var/log/one/ on a Front-end Host with a particular component. Some valuable error messages can be also seen by the end-users in :ref:`CLI <cli>` tools or the :ref:`Sunstone GUI <sunstone>`.
Configure Logging System
Follow the guides of each component to find the logs’ location and configuration of log verbosity:
- OpenNebula Daemon: :ref:`logs <oned_conf_service>`, :ref:`configuration <oned_conf>` (parameter
LOG/DEBUG_LEVEL) - Scheduler: :ref:`logs <sched_conf_service>`, :ref:`configuration <sched_conf>` (parameter
LOG/DEBUG_LEVEL) - Monitoring: :ref:`logs <mon_conf_service>`, :ref:`configuration <mon_conf>` (parameter
LOG/DEBUG_LEVEL) - Sunstone: :ref:`logs <sunstone_conf_service>`, :ref:`configuration <sunstone_conf>` (parameter
:debug_level) - FireEdge: :ref:`logs <fireedge_conf_service>`, :ref:`configuration <fireedge_conf>` (parameter
log) - OneFlow: :ref:`logs <oneflow_conf_service>`, :ref:`configuration <oneflow_conf>` (parameter
:debug_level) - OneGate: :ref:`logs <onegate_conf_service>`, :ref:`configuration <onegate_conf>` (parameter
:debug_level)
After changing the logging level, don’t forget to restart the service so that it can take effect.
Important
Logs are rotated on (re)start of a particular component. Find a historic log alongside the current logs with date/time suffixes (e.g., latest /var/log/one/oned.log might have the following historic log /var/log/one/oned.log-20210321-1616319097, or an even older compressed log /var/log/one/oned.log-20210314-1615719402.gz)
Additional Resources
As well as the common service logs, the following are other places to investigate and troubleshoot problems:
-
Virtual Machines: The information specific to a VM will be dumped in the log file
/var/log/one/<vmid>.log. All VMs controlled by OpenNebula have their own directory,/var/lib/one/vms/<VID>if syslog/stderr isn’t enabled. You can find the following information in it:- Deployment description files : Stored in
deployment.<EXECUTION>, where<EXECUTION>is the sequence number in the execution history of the VM (deployment.0for the first host,deployment.1for the second and so on). - Transfer description files : Stored in
transfer.<EXECUTION>.<OPERATION>, where<EXECUTION>is the sequence number in the execution history of the VM, and<OPERATION>is the stage where the script was used, e.g.transfer.0.prolog,transfer.0.epilog, ortransfer.1.cleanup.
- Deployment description files : Stored in
-
Drivers: Each driver can have its
ONE_MAD_DEBUGvariable activated in RC files. If enabled, the error information will be dumped in/var/log/one/name-of-the-driver-executable.log. Log information from the drivers is inoned.log.
OpenNebula Daemon Log Format
The structure of OpenNebula Daemon log messages for a file based logging system is the following:
date [Z<zone_id>][module][log_level]: message body
In the case of syslog it follows the standard:
date hostname process[pid]: [Z<zone_id>][module][log_level]: message
where the zone_id is the ID of the Zone in the federation (0 for single Zone setups), the module is any of the internal OpenNebula components (VMM, ReM, TM, etc.), and the log_level is a single character indicating the log level (I for informational, D for debugging, etc.).
For syslog, OpenNebula will also log the Virtual Machine events like this:
date hostname process[pid]: [VM id][Z<zone_id>][module][log_level]: message
and similarly for stderr logging.
For oned and VM events the formats are:
date [Z<zone_id>][module][log_level]: message
date [VM id][Z<zone_id>][module][log_level]: message
Infrastructure Failures
Virtual Machines
The causes of Virtual Machine errors can be found in the details of VM. Any VM owner or cloud administrator can see the error via the onevm show $ID command (or in the Sunstone GUI). For example:
.. prompt:: bash $ auto

    $ onevm show 0
    VIRTUAL MACHINE 0 INFORMATION
    ID                  : 0
    NAME                : one-0
    USER                : oneadmin
    GROUP               : oneadmin
    STATE               : ACTIVE
    LCM_STATE           : PROLOG_FAILED
    START TIME          : 07/19 17:44:20
    END TIME            : 07/19 17:44:31
    DEPLOY ID           : -

    VIRTUAL MACHINE MONITORING
    NET_TX              : 0
    NET_RX              : 0
    USED MEMORY         : 0
    USED CPU            : 0

    VIRTUAL MACHINE TEMPLATE
    CONTEXT=[
      FILES=/tmp/some_file,
      TARGET=hdb ]
    CPU=0.1
    ERROR=[
      MESSAGE="Error executing image transfer script: Error copying /tmp/some_file to /var/lib/one/0/images/isofiles",
      TIMESTAMP="Tue Jul 19 17:44:31 2011" ]
    MEMORY=64
    NAME=one-0
    VMID=0

    VIRTUAL MACHINE HISTORY
     SEQ        HOSTNAME ACTION           START        TIME       PTIME
       0          host01   none  07/19 17:44:31 00 00:00:00 00 00:00:00
The error message here (see ERROR=[MESSAGE="Error executing image...) shows an error when copying an image (file /tmp/some_file). The source file most likely doesn’t exist. Alternatively, you can check the detailed log of a particular VM in /var/log/one/$ID.log (in this case the VM has ID 0 and the log file would be /var/log/one/0.log)
Recover from VM Failure
The overall state of a virtual machine in a failure condition will show as failure (or fail in the CLI). To find out the specific failure situation you need to check the LCM_STATE of the VM in the VM info tab (or onevm show in the CLI.). Moreover, a VM can be stuck in a transition (e.g. boot or save) because of a host or network failure. Typically these operations will eventually time out and lead to a VM failure state.
The administrator has the ability to force a recovery action from Sunstone or from the CLI, with the onevm recover command. This command has the following options:
--success: If the operation has been confirmed to succeed. For example, the administrator can see the VM properly running in the hypervisor, but the driver failed to inform OpenNebula of the successful boot.--failure: This will have the same effect as a driver reporting a failure. It is intended for VMs that get stuck in transient states. As an example, if a storage problem occurs and the administrator knows that a VM stuck inprologis not going to finish the pending transfer, this action will manually move the VM toprolog_failure.--retry: To retry the previously failed action. It can be used, for instance, if a VM is inboot_failurebecause the hypervisor crashed. The administrator can tell OpenNebula to retry the boot after the hypervisor is started again.--retry --interactive: In some scenarios where the failure was caused by an error in the Transfer Manager actions, each action can be rerun and debugged until it works. Once the commands are successful, asuccessshould be sent. See the specific section below for more details.--delete: No recovery action possible, delete the VM. This is equivalent to the deprecated OpenNebula < 5.0 command:onevm delete.--delete-db: No recover action possible, delete the VM from the DB. It does not trigger any action on the hypervisor.--recreate: No recovery action possible, delete and recreate the VM. This is equivalent to the deprecated OpenNebula < 5.0 command:onevm delete --recreate.
Note also that OpenNebula will try to automatically recover some failure situations using the monitor information. A specific example is that a VM in the boot_failure state will become running if the monitoring reports that the VM was found running in the hypervisor.
Hypervisor Problems
The following list details failure states caused by errors related to the hypervisor.
BOOT_FAILURE: The VM failed to boot but all the files needed by the VM are already in the Host. Check the hypervisor logs to find out the problem and, once fixed, recover the VM with the retry option.BOOT_MIGRATE_FAILURE: same as above but during a migration. Check the target hypervisor and retry the operation.BOOT_UNDEPLOY_FAILURE: same as above but during a resume after an undeploy. Check the target hypervisor and retry the operation.BOOT_STOPPED_FAILURE: same as above but during a resume after a stop. Check the target hypervisor and retry the operation.
Transfer Manager / Storage Problems
The following list details failure states caused by errors in the Transfer Manager driver. These states can be recovered by checking the vm.log and looking for the specific error (disk space, permissions, misconfigured datastore, etc). You can execute --retry to relaunch the Transfer Manager actions after fixing the problem (freeing disk space, etc). You can execute --retry --interactive to launch a Transfer Manager Interactive Debug environment that will allow you to: (1) see all the TM actions in detail (2) relaunch each action until it’s successful (3) skip TM actions.
PROLOG_FAILURE: there was a problem setting up the disk images needed by the VM.PROLOG_MIGRATE_FAILURE: problem setting up the disks in the target host.EPILOG_FAILURE: there was a problem processing the disk images (may be discard or save) after the VM execution.EPILOG_STOP_FAILURE: there was a problem moving the disk images after a stop.EPILOG_UNDEPLOY_FAILURE: there was a problem moving the disk images after an undeploy.PROLOG_MIGRATE_POWEROFF_FAILURE: problem restoring the disk images after a migration in a poweroff state.PROLOG_MIGRATE_SUSPEND_FAILURE: problem restoring the disk images after a migration in a suspend state.PROLOG_RESUME_FAILURE: problem restoring the disk images after a stop.PROLOG_UNDEPLOY_FAILURE: problem restoring the disk images after an undeploy.
Here’s an example of a Transfer Manager Interactive Debug environment (onevm recover <id> --retry --interactive):
.. prompt:: bash $ auto

    $ onevm show 2|grep LCM_STATE
    LCM_STATE           : PROLOG_UNDEPLOY_FAILURE

    $ onevm recover 2 --retry --interactive
    TM Debug Interactive Environment.

    TM Action list:
    (1) MV shared haddock:/var/lib/one//datastores/0/2/disk.0 localhost:/var/lib/one//datastores/0/2/disk.0 2 1
    (2) MV shared haddock:/var/lib/one//datastores/0/2 localhost:/var/lib/one//datastores/0/2 2 0

    Current action (1):
    MV shared haddock:/var/lib/one//datastores/0/2/disk.0 localhost:/var/lib/one//datastores/0/2/disk.0 2 1

    Choose action:
    (r) Run action
    (n) Skip to next action
    (a) Show all actions
    (q) Quit
    > r

    LOG I  Command execution fail: /var/lib/one/remotes/tm/shared/mv haddock:/var/lib/one//datastores/0/2/disk.0 localhost:/var/lib/one//datastores/0/2/disk.0 2 1
    LOG I  ExitCode: 1

    FAILURE. Repeat command.

    Current action (1):
    MV shared haddock:/var/lib/one//datastores/0/2/disk.0 localhost:/var/lib/one//datastores/0/2/disk.0 2 1

    Choose action:
    (r) Run action
    (n) Skip to next action
    (a) Show all actions
    (q) Quit
    > # FIX THE PROBLEM...

    > r

    SUCCESS

    Current action (2):
    MV shared haddock:/var/lib/one//datastores/0/2 localhost:/var/lib/one//datastores/0/2 2 0

    Choose action:
    (r) Run action
    (n) Skip to next action
    (a) Show all actions
    (q) Quit
    > r

    SUCCESS

    If all the TM actions have been successful and you want to
    recover the Virtual Machine to the RUNNING state execute this command:
    $ onevm recover 2 --success

    $ onevm recover 2 --success

    $ onevm show 2|grep LCM_STATE
    LCM_STATE           : RUNNING
Hosts
Host errors can be investigated via the onehost show $ID command. For example:
.. prompt:: text $ auto

    $ onehost show 1
    HOST 1 INFORMATION
    ID                    : 1
    NAME                  : host01
    STATE                 : ERROR
    IM_MAD                : im_kvm
    VM_MAD                : vmm_kvm
    TM_MAD                : tm_shared

    HOST SHARES
    MAX MEM               : 0
    USED MEM (REAL)       : 0
    USED MEM (ALLOCATED)  : 0
    MAX CPU               : 0
    USED CPU (REAL)       : 0
    USED CPU (ALLOCATED)  : 0
    TOTAL VMS             : 0

    MONITORING INFORMATION
    ERROR=[
      MESSAGE="Error monitoring host 1 : MONITOR FAILURE 1 Could not update remotes",
      TIMESTAMP="Tue Jul 19 17:17:22 2011" ]
The error message here (see ERROR=[MESSAGE="Error monitoring host...) shows an error when updating remote drivers on a host. To get more information, you have to check OpenNebula Daemon log (/var/log/one/oned.log) and, for example, see this relevant error:
Tue Jul 19 17:17:22 2011 [InM][I]: Monitoring host host01 (1)
Tue Jul 19 17:17:22 2011 [InM][I]: Command execution fail: scp -r /var/lib/one/remotes/. host01:/var/tmp/one
Tue Jul 19 17:17:22 2011 [InM][I]: ssh: Could not resolve hostname host01: nodename nor servname provided, or not known
Tue Jul 19 17:17:22 2011 [InM][I]: lost connection
Tue Jul 19 17:17:22 2011 [InM][I]: ExitCode: 1
Tue Jul 19 17:17:22 2011 [InM][E]: Error monitoring host 1 : MONITOR FAILURE 1 Could not update remotes
The error message (Could not resolve hostname) explains there is the incorrect hostname of OpenNebula Host, which can’t be resolved in DNS.
Содержание
- Name already in use
- docs / source / installation_and_configuration / opennebula_services / troubleshooting.rst
- n40lab
- A blog about cloud, virtualization, sdn and centos
- OpenNebula (Part I) – Creating a new host
- Настройка отказоустойчивого кластера OpenNebula
- Отключим автозапуск демонов OpenNebula на всех серверах
- Установим необходимые пакеты
- Настройка OpenNebula
- HA для виртуальных машин
- Troubleshooting
Name already in use
docs / source / installation_and_configuration / opennebula_services / troubleshooting.rst
- Go to file T
- Go to line L
- Copy path
- Copy permalink
Copy raw contents
Copy raw contents
Every OpenNebula server generates logs with a configurable verbosity (level of detail) and through different means (file, syslog, or standard error output) to allow cloud administrators to troubleshoot the potential problems. Logs are stored in /var/log/one/ on a Front-end Host with a particular component. Some valuable error messages can be also seen by the end-users in :ref:`CLI ` tools or the :ref:`Sunstone GUI ` .
Configure Logging System
Follow the guides of each component to find the logs’ location and configuration of log verbosity:
After changing the logging level, don’t forget to restart the service so that it can take effect.
Logs are rotated on (re)start of a particular component. Find a historic log alongside the current logs with date/time suffixes (e.g., latest /var/log/one/oned.log might have the following historic log /var/log/one/oned.log-20210321-1616319097 , or an even older compressed log /var/log/one/oned.log-20210314-1615719402.gz )
As well as the common service logs, the following are other places to investigate and troubleshoot problems:
Virtual Machines: The information specific to a VM will be dumped in the log file /var/log/one/ .log . All VMs controlled by OpenNebula have their own directory, /var/lib/one/vms/ if syslog/stderr isn’t enabled. You can find the following information in it:
- Deployment description files : Stored in deployment. , where is the sequence number in the execution history of the VM ( deployment.0 for the first host, deployment.1 for the second and so on).
- Transfer description files : Stored in transfer. . , where is the sequence number in the execution history of the VM, and is the stage where the script was used, e.g. transfer.0.prolog , transfer.0.epilog , or transfer.1.cleanup .
Drivers: Each driver can have its ONE_MAD_DEBUG variable activated in RC files. If enabled, the error information will be dumped in /var/log/one/name-of-the-driver-executable.log . Log information from the drivers is in oned.log .
OpenNebula Daemon Log Format
The structure of OpenNebula Daemon log messages for a file based logging system is the following:
In the case of syslog it follows the standard:
where the zone_id is the ID of the Zone in the federation ( 0 for single Zone setups), the module is any of the internal OpenNebula components ( VMM , ReM , TM , etc.), and the log_level is a single character indicating the log level ( I for informational, D for debugging, etc.).
For syslog, OpenNebula will also log the Virtual Machine events like this:
and similarly for stderr logging.
For oned and VM events the formats are:
The causes of Virtual Machine errors can be found in the details of VM. Any VM owner or cloud administrator can see the error via the onevm show $ID command (or in the Sunstone GUI). For example:
The error message here (see ERROR=[MESSAGE=»Error executing image. ) shows an error when copying an image (file /tmp/some_file ). The source file most likely doesn’t exist. Alternatively, you can check the detailed log of a particular VM in /var/log/one/$ID.log (in this case the VM has ID 0 and the log file would be /var/log/one/0.log )
Recover from VM Failure
The overall state of a virtual machine in a failure condition will show as failure (or fail in the CLI). To find out the specific failure situation you need to check the LCM_STATE of the VM in the VM info tab (or onevm show in the CLI.). Moreover, a VM can be stuck in a transition (e.g. boot or save) because of a host or network failure. Typically these operations will eventually time out and lead to a VM failure state.
The administrator has the ability to force a recovery action from Sunstone or from the CLI, with the onevm recover command. This command has the following options:
- —success : If the operation has been confirmed to succeed. For example, the administrator can see the VM properly running in the hypervisor, but the driver failed to inform OpenNebula of the successful boot.
- —failure : This will have the same effect as a driver reporting a failure. It is intended for VMs that get stuck in transient states. As an example, if a storage problem occurs and the administrator knows that a VM stuck in prolog is not going to finish the pending transfer, this action will manually move the VM to prolog_failure .
- —retry : To retry the previously failed action. It can be used, for instance, if a VM is in boot_failure because the hypervisor crashed. The administrator can tell OpenNebula to retry the boot after the hypervisor is started again.
- —retry —interactive : In some scenarios where the failure was caused by an error in the Transfer Manager actions, each action can be rerun and debugged until it works. Once the commands are successful, a success should be sent. See the specific section below for more details.
- —delete : No recovery action possible, delete the VM. This is equivalent to the deprecated OpenNebula onevm delete .
- —delete-db : No recover action possible, delete the VM from the DB. It does not trigger any action on the hypervisor.
- —recreate : No recovery action possible, delete and recreate the VM. This is equivalent to the deprecated OpenNebula onevm delete —recreate .
Note also that OpenNebula will try to automatically recover some failure situations using the monitor information. A specific example is that a VM in the boot_failure state will become running if the monitoring reports that the VM was found running in the hypervisor.
The following list details failure states caused by errors related to the hypervisor.
- BOOT_FAILURE : The VM failed to boot but all the files needed by the VM are already in the Host. Check the hypervisor logs to find out the problem and, once fixed, recover the VM with the retry option.
- BOOT_MIGRATE_FAILURE : same as above but during a migration. Check the target hypervisor and retry the operation.
- BOOT_UNDEPLOY_FAILURE : same as above but during a resume after an undeploy. Check the target hypervisor and retry the operation.
- BOOT_STOPPED_FAILURE : same as above but during a resume after a stop. Check the target hypervisor and retry the operation.
Transfer Manager / Storage Problems
The following list details failure states caused by errors in the Transfer Manager driver. These states can be recovered by checking the vm.log and looking for the specific error (disk space, permissions, misconfigured datastore, etc). You can execute —retry to relaunch the Transfer Manager actions after fixing the problem (freeing disk space, etc). You can execute —retry —interactive to launch a Transfer Manager Interactive Debug environment that will allow you to: (1) see all the TM actions in detail (2) relaunch each action until it’s successful (3) skip TM actions.
- PROLOG_FAILURE : there was a problem setting up the disk images needed by the VM.
- PROLOG_MIGRATE_FAILURE : problem setting up the disks in the target host.
- EPILOG_FAILURE : there was a problem processing the disk images (may be discard or save) after the VM execution.
- EPILOG_STOP_FAILURE : there was a problem moving the disk images after a stop.
- EPILOG_UNDEPLOY_FAILURE : there was a problem moving the disk images after an undeploy.
- PROLOG_MIGRATE_POWEROFF_FAILURE : problem restoring the disk images after a migration in a poweroff state.
- PROLOG_MIGRATE_SUSPEND_FAILURE : problem restoring the disk images after a migration in a suspend state.
- PROLOG_RESUME_FAILURE : problem restoring the disk images after a stop.
- PROLOG_UNDEPLOY_FAILURE : problem restoring the disk images after an undeploy.
Here’s an example of a Transfer Manager Interactive Debug environment ( onevm recover —retry —interactive ):
Host errors can be investigated via the onehost show $ID command. For example:
The error message here (see ERROR=[MESSAGE=»Error monitoring host. ) shows an error when updating remote drivers on a host. To get more information, you have to check OpenNebula Daemon log ( /var/log/one/oned.log ) and, for example, see this relevant error:
The error message ( Could not resolve hostname ) explains there is the incorrect hostname of OpenNebula Host, which can’t be resolved in DNS.
Источник
n40lab
A blog about cloud, virtualization, sdn and centos
OpenNebula (Part I) – Creating a new host
Ok… so once I’ve installed OpenNebula using the rpm packages it’s time to start playing with it. I encourage you to read the following two pages from OpenNebula official documentation, it’ll help you to understand hosts and which commands are at your disposal:
The first step is adding a host (called haddock.local) to our cluster with the onehost create command. My N40L server is running kvm and openvswitch so the command will be executed as follows (please read Managing hosts for a complete list of available parameters):
If the command was succesfull, it will return with a numeric identifier for your new host. If you want to list all the hosts in the cluster use the onehost list command:
And if you want to get more information about a host, you can use the onehost show command using the identifier for the host (in my case 4)
Easy!…. but in my case, it was not so easy in fact. The first time I created the host the onehost list command showed “err” in my status, so something was wrong. I’ll tell you about the problems I found and how I solved them just in case.
OpenNebula logs will help you a lot, so take a look at /var/log/one directory. I found in the oned.log file this message “Error monitoring host 0 : MONITOR FAILURE 0 Could not update remotes“. Ok, so it seems that the monitoring process couldn’t get access to my localhost. OpenNebula documentation it’s very clear about this “Before adding a host check that you can ssh to it without being prompt for a password”. OpenNebula suggests “sharing the $HOME of oneadmin accross all the servers with NFS or by manually copying the
/.ssh directory”, but I prefer to create ssh keys so no password is asked. The passphrase is empty.
As a root set a password for your oneadmin with passwd oneadmin
Now, let’s copy the ssh public key password to our host, so ssh won’t ask oneadmin user for a password.
If you are running SELinux, you’ll need to run as root the following commands, so SELinux allows you to connect to your localhost using the authorized_keys file. SELinux is difficult and boring but try to keep it enabled… trust me it’s better.
Important: Now, try to ssh your host, if no password is prompted for the oneadmin user everything’s good. Also the host key verification will succeed.
Another problem was shown in the oned.log file. OpenNebula couldn’t write some files to /var/tmp/one directory (“Command execution fail: scp -r /var/lib/one/remotes/. haddock.local:/var/tmp/one“), so I created the /var/tmp/one directory and set the right owner:
And finally, another error, but this is just because I compiled libvirt from the source: “Authorization requires authentication but no agent is available“. The solution is adding oneadmin to the libvirt group. Please read this updated post to know how to solve it.
Wow, it was a bit tricky but maybe I did something wrong, please let me know if you were lucky. In a few days I’ll run my first virtual machine in OpenNebula. Have a good time!
Источник
Настройка отказоустойчивого кластера OpenNebula
Настройка High Available кластера на базе OpenNebula
Данная статья является продолжением серии предыдущих постов.
Я буду использовать pacemaker, corosync и crmsh.
Отключим автозапуск демонов OpenNebula на всех серверах
Добавим ha-clustering репозиторий
/etc/yum.repos.d/network:ha-clustering:Stable.repo
Установим необходимые пакеты
Если конфликтуют пакеты при установке resource-agents , установим дополнительно:
На основном сервере KVM-1, редактируем файл corosync.conf и приводим его к следующему виду:
Копируем конфигурационные файлы на другие сервера кластера:
Если сервис стартует с ошибкой:
Выполняем даунгрейд sudo yum downgrade corosync corosynclib
Проверяем статус работы:
Отключим STONITH (механизм добивания неисправной ноды)
(В конце статьи присутствует ссылка на материал об этом).
Если в работе используется только два сервера, необходимо отключить кворум, чтобы избежать splitbrain ситуации.
В данном случае мы создали виртуальный адрес 192.168.2.111 , добавили три сервиса OpenNebula в кластер и объеденили их в группу Opennebula_HA .
Настройка OpenNebula
На данном этапе необходимо добавить ноды, хранилище и виртуальные сети в наш кластер.
Веб-интерфейс Sunstone будет доступен по адресу http://192.168.2.111:9869 :
1) Создаем кластер;
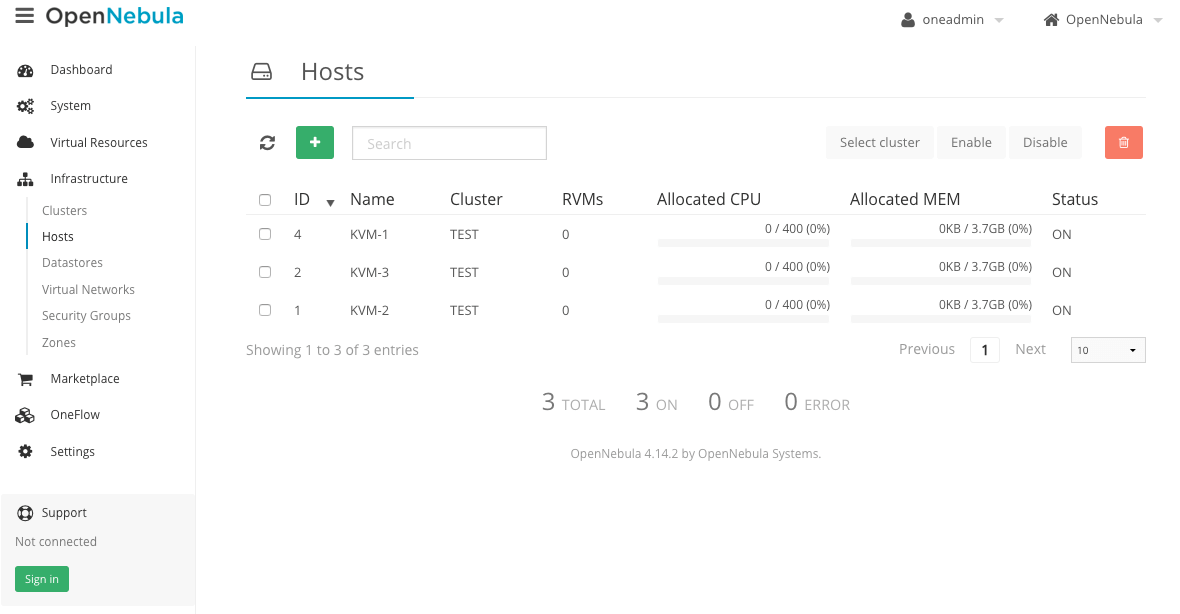
2) Добавляем ноды;
Если в процессе добавления хостов появится ошибка, то исправляем её повторной установкой /usr/share/one/install_gems , либо запускаем onehost sync —force .
Все ноды должны быть активны:
3) Добавляем виртуальную сеть:
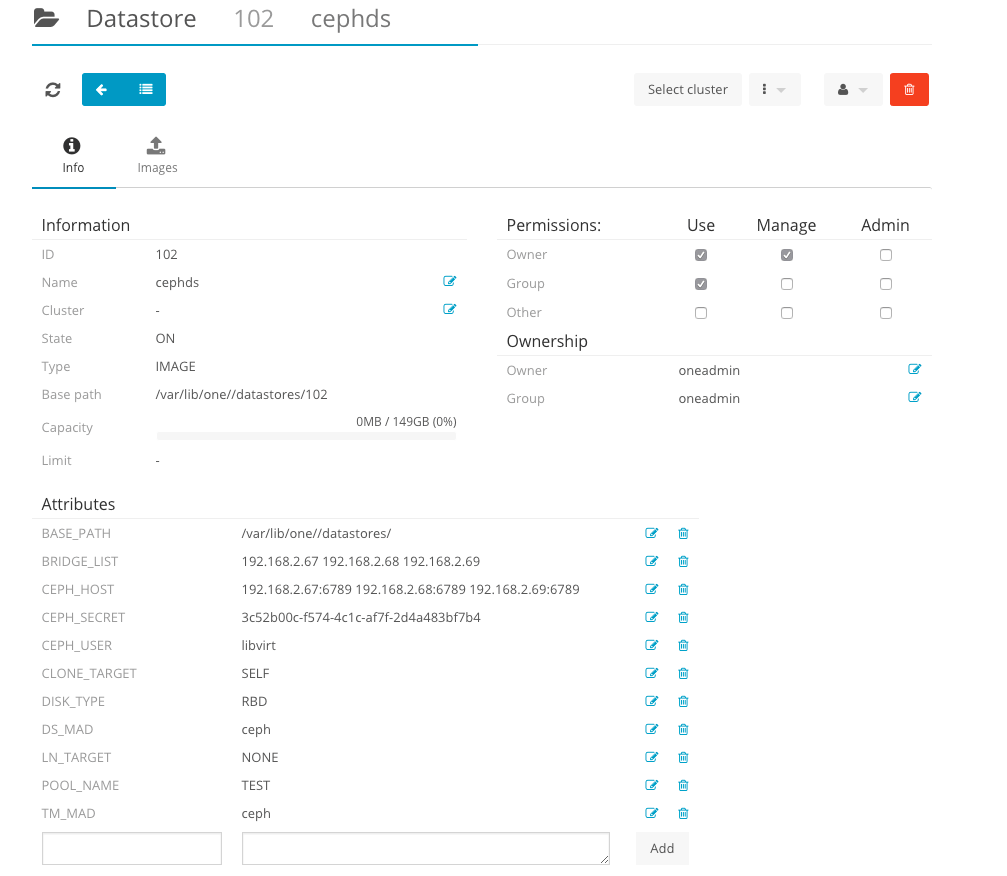
4) Добавляем Ceph хранилище:
4.1) На Frontend ноде (KVM-ADMIN) создаем Ceph пользователя для работы с OpenNebula хостами. В данном примере имя пользователя client.libvirt (само имя пользователя libvirt , префикс client указывает на пользователя в Ceph).
4.2) Создаем пользователя с полными правами rwx для пула TEST:
4.3) Генерируем ключи:
4.4) Теперь нам необходимо скопировать все файлы ключей на OpenNebula хосты.
- ceph.client.libvirt.keyring должен быть размещен в директории /etc/ceph (на всех серверах в том числе и frontend).
- client.libvirt.key может быть размещен в любом месте, где пользователь oneadmin имеет привилегии доступа и сможет создать секретные ключи libvirt.
4.5) Генериреум UUID конмадой uuidgen , полученное значение будет далее использоваться как $UUID .
4.6) Создаем файл secret.xml
$UUID меняем на полученное значение из предыдущего пункта;
Копируем файл secret.xml между всеми KVM нодами OpenNebula.
4.7) Следующие команды должны быть выполнены на всех KVM нодах от пользователя oneadmin в директории с файлами secret.xml и client.libvirt.key .
Проверить установленные значения можно следующей командой:
В завершении добавляем Ceph хранилище в OpenNebula
Также можно добавить Ceph в качестве системного хранилища.
Внимание! Данные действия будут работать только при условии активной cephx авторизации.
Драйвер Ceph работает нормально только с KVM.
По умолчанию используется формат RBD 2 , пропишем данный параметр в конфигурационном файле ceph.conf
Обновим конфигурацию на всех серверах:
HA для виртуальных машин
Для настройки High Availability для виртуальных машин, следуем официальной документации OpenNebula
Аргументы:
-m — миграция виртуального сервера на другой хост. Только для хостов в одном хранилище.
-r — удаление и пересоздание виртуального сервера. Все данные будут утеряны.
-d — удаление виртуального сервера с хоста.
-p — избегать повторного представления хоста, если хост возвращается в строй после N-циклов мониторинга.
В версии 5.2 добавлен функционал fencing .
Читать на docs.opennebula.org
Скопируем конфигурационный файл на другие ноды кластера:
Troubleshooting
Если появляется ошибка вида:
То исправляем её установкой или обновлением пакета ceph-devel .
Источник
hope can get some advise n help….
currently I am installing opennebula 3.4 in debian squeeze everything have being successful where I am able to access the opennebula sunstone webpage localhost:9869 , use one command
but when I tried to create a host the status become error…
hope someone can assist me on this thanks
sample log
 Monitoring host abc (0)
 [InM][I]: Command execution fail: 'if [ -x "/var/tmp/one/im/run_probes" ]; then /var/tmp/one/im/run_probes kvm 0 abc; else                              exit 42; fi'
 [InM][I]: ssh: Could not resolve hostname abc: Name or service not known
 [InM][I]: ExitCode: 255
 [InM][E]: Error monitoring host 0 : MONITOR FAILURE 0 -
![]()
asked Jun 20, 2012 at 7:38
![]()
Refs: http://opennebula.org/documentation:rel3.4:hostsubsystem
OpenNebula’s Frontend and all the Hosts need to be able to resolve,
either by DNS or by /etc/hosts the names of all the other Hosts and
Frontend.
If you don’t have a local DNS server, you should add in the /etc/hosts of every host a few lines mapping the IP address and the hostname of every host, e.g.:
192.168.1.10 opennebula
192.168.1.11 abc
192.168.1.12 cde
answered Jun 20, 2012 at 17:22
![]()
The problem is your DNS configuration. OpenNebula cannot resolve the given hostname.
Maybe you should look into your DNS config and make sure that the names a resolvable.
![]()
answered Jun 20, 2012 at 14:16
![]()
Ok… so once I’ve installed OpenNebula using the rpm packages it’s time to start playing with it. I encourage you to read the following two pages from OpenNebula official documentation, it’ll help you to understand hosts and which commands are at your disposal:
- Hosts & Clusters overview
- Managing hosts
The first step is adding a host (called haddock.local) to our cluster with the onehost create command. My N40L server is running kvm and openvswitch so the command will be executed as follows (please read Managing hosts for a complete list of available parameters):
su oneadmin //You'll need to run commands using the oneadmin user
onehost create haddock.local -i im_kvm -v vmm_kvm -n ovswitch
If the command was succesfull, it will return with a numeric identifier for your new host. If you want to list all the hosts in the cluster use the onehost list command:
[oneadmin@haddock ~]$ onehost list
 ID NAME CLUSTER RVM ALLOCATED_CPU ALLOCATED_MEM STAT
 4 haddock.local - 0 0 / 200 (0%)   0K / 5.6G (0%) on
And if you want to get more information about a host, you can use the onehost show command using the identifier for the host (in my case 4)
[oneadmin@haddock ~]$ onehost show 4
HOST 4 INFORMATION
ID : 4
NAME : haddock.local
CLUSTER : -
STATE : MONITORED
IM_MAD : im_kvm
VM_MAD : vmm_kvm
VN_MAD : ovswitch
LAST MONITORING TIME : 11/26 20:09:59 ...
Easy!…. but in my case, it was not so easy in fact. The first time I created the host the onehost list command showed “err” in my status, so something was wrong. I’ll tell you about the problems I found and how I solved them just in case.
OpenNebula logs will help you a lot, so take a look at /var/log/one directory. I found in the oned.log file this message “Error monitoring host 0 : MONITOR FAILURE 0 Could not update remotes“. Ok, so it seems that the monitoring process couldn’t get access to my localhost. OpenNebula documentation it’s very clear about this “Before adding a host check that you can ssh to it without being prompt for a password”. OpenNebula suggests “sharing the $HOME of oneadmin accross all the servers with NFS or by manually copying the ~/.ssh directory”, but I prefer to create ssh keys so no password is asked. The passphrase is empty.
[oneadmin@haddock ~]$ ssh-keygen
Generating public/private rsa key pair.
Enter file in which to save the key (/var/lib/one/.ssh/id_rsa):
Enter passphrase (empty for no passphrase):
Enter same passphrase again:
Your identification has been saved in /var/lib/one/.ssh/id_rsa.
Your public key has been saved in /var/lib/one/.ssh/id_rsa.pub.
The key fingerprint is:
............................. oneadmin@haddock.local
The key's randomart image is:
+--[ RSA 2048]----+
| . |
| o |
| . o |
+-----------------+
As a root set a password for your oneadmin with passwd oneadmin
Now, let’s copy the ssh public key password to our host, so ssh won’t ask oneadmin user for a password.
[oneadmin@haddock ~]$ ssh-copy-id -i /var/lib/one/.ssh/id_rsa.pub oneadmin@haddock.local
oneadmin@haddock.local's password:
Now try logging into the machine, with "ssh 'oneadmin@haddock.local'", and check in:

.ssh/authorized_keys

to make sure we haven't added extra keys that you weren't expecting.
If you are running SELinux, you’ll need to run as root the following commands, so SELinux allows you to connect to your localhost using the authorized_keys file. SELinux is difficult and boring but try to keep it enabled… trust me it’s better.
#chcon -v --type=ssh_home_t /var/lib/one/.ssh/authorized_keys
#semanage fcontext -a -t ssh_home_t /var/lib/one/.ssh/authorized_keys
Important: Now, try to ssh your host, if no password is prompted for the oneadmin user everything’s good. Also the host key verification will succeed.
Another problem was shown in the oned.log file. OpenNebula couldn’t write some files to /var/tmp/one directory (“Command execution fail: scp -r /var/lib/one/remotes/. haddock.local:/var/tmp/one“), so I created the /var/tmp/one directory and set the right owner:
#mkdir /var/tmp/one
#chown oneadmin:oneadmin /var/tmp/one
And finally, another error, but this is just because I compiled libvirt from the source: “Authorization requires authentication but no agent is available“. The solution is adding oneadmin to the libvirt group. Please read this updated post to know how to solve it.
Wow, it was a bit tricky but maybe I did something wrong, please let me know if you were lucky. In a few days I’ll run my first virtual machine in OpenNebula. Have a good time!