Здравствуйте! Читал ваши статьи об обновлении предыдущих версий Windows до финальной Windows 10 (1803) и хочу спросить, получится ли сделать наоборот, то есть понизить Windows 10 PRO до Windows 8.1, произвести так сказать Даунгрейд. Могу объяснить, зачем мне это нужно. Во-первых, Windows 8.1 сейчас абсолютно доведена разработчиками до ума. Считаю эту OS самой стабильной на сегодня и она редко обновляется. У неё полноценный Microsoft Store. Поддержка до 2023 года, но уверен её ещё продлят. На моём ноутбуке восьмёрка работает просто отлично. Что касается Windows 10, то у меня с ней постоянно возникают какие-то проблемы. Эти постоянные обновления и повышения версий просто добивают. Не ноутбук прям, а проходной двор. Конечно я могу просто удалить Windows 10 и установить заново Windows 8.1, но может это можно сделать простым обновлением или правильнее будет сказать откатом! Может и драйвера с установленными программами и личными файлами сохранятся?
Как понизить Windows 10 Профессиональная до Windows 8.1 PRO
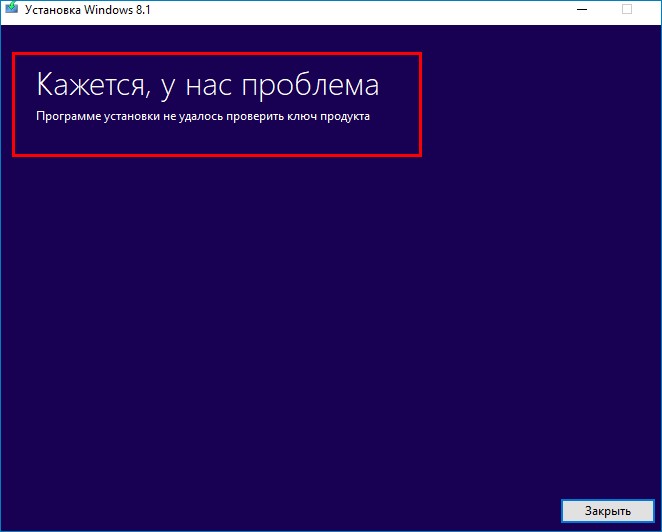
Привет друзья! Официального способа такого «даунгрейда» не существует и если начать понижение версии с помощью официального ISO-образа Windows 8.1 прямо в работающей Windows 10, то мы получим ошибку «Кажется у нас проблема. Программе установки не удалось проверить ключ продукта». Не помогут здесь и дополнительные файлы конфигурации (ei.cfg и pid.txt), ни новый лицензионный ключ от Windows 8.1. Для подобного «обновления» или правильнее будет сказать понижения версии Windows 10 Профессиональная (1803) до Windows 8.1 PRO можно воспользоваться способом, который предложил мой друг Владимир, автор многих статей нашего сайта.
Как избежать данной ошибки? Объясняю подробно.
Все мы знаем, что обновление Windows 8.1, 10 происходит в два этапа. В первую очередь загружается предустановочная среда Windows из файла boot.wim, в этот момент мы вводим ключ продукта и принимаем лицензионное соглашение, жмём кнопку «Далее», после этого OS производит диагностику работающей Windows на предмет возможности обновления. Затем следует второй этап, установщик OS распаковывает на диск (C:) содержимое основного файла-архива операционной системы install.esd и обновляет Windows. Для успеха нашего предприятия, а именно понижения версии Win 10 до Win 8.1, нужно использовать предустановочную среду Windows 10 из файла boot.wim, но с дальнейшей распаковкой файла-архива install.esd от Windows 8.1, только в этом случае понижение произойдёт успешно.
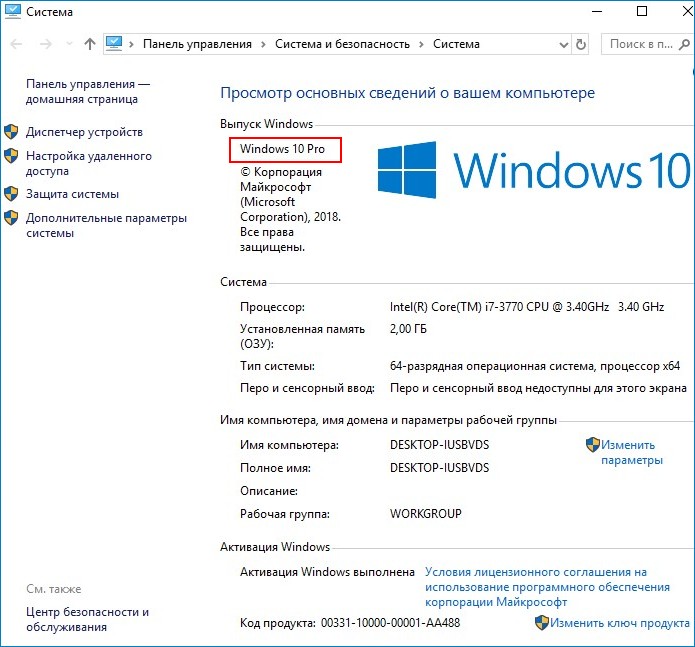
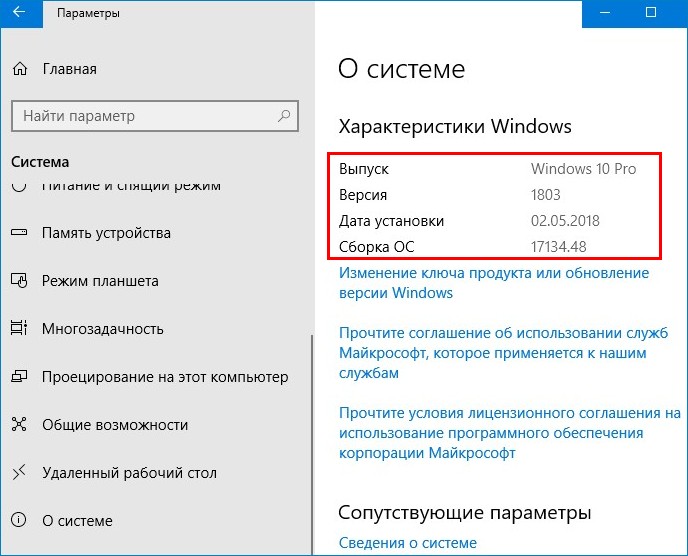
Итак, имеем Windows 10, которая установлена на моём ноутбуке. Понизим её до Windows 8.1
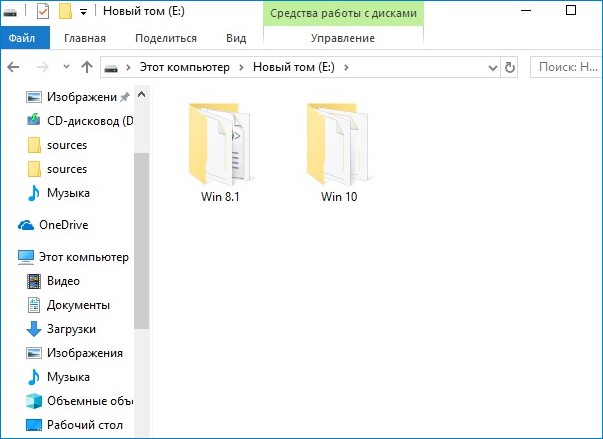
В первую очередь нам нужно создать на рабочем столе или другом разделе HDD две папки с названиями: Win 10 и Win 8.1.
Я создам их на разделе (E:).
Затем скачиваем на официальном сайте Майкрософт оригинальные ISO-образы Win 8.1 и Win 10 PRO, после копируем содержимое образов по своим папкам, то есть файлы ISO-образа Win 8.1 копируем в папку с названием Win 8.1, после то же самое делаем с файлами Windows 10.
Теперь заходим в папку Win 8.1 и открываем каталог sources, копируем здесь архив install.esd со сжатыми файлами Win 8.1.
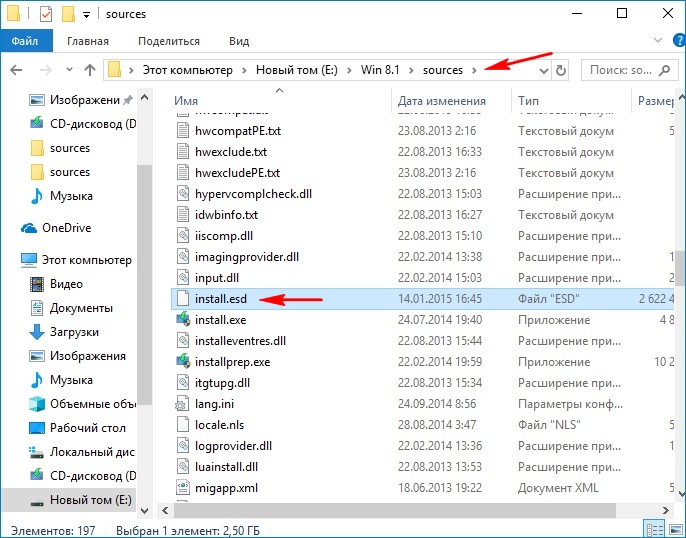
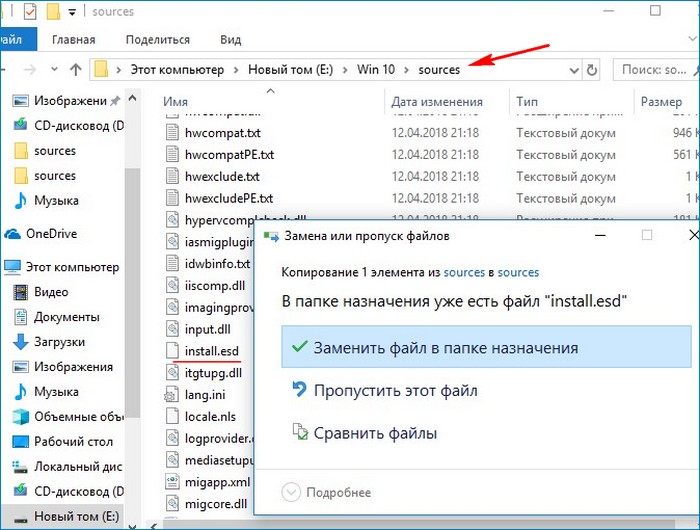
Открываем папку Win 10 и заходим в каталог sources и вставляем скопированный файл install.esd. Замечу, что в данной папке уже находится свой файл install.esd со сжатыми файлами Win 10, его то мы и заменяем на файл от Win 8.1. Жмём на «Заменить файл в папке назначения».
Заходим в папку Win 10, находящуюся на разделе (E:) и запускаем setup.exe.
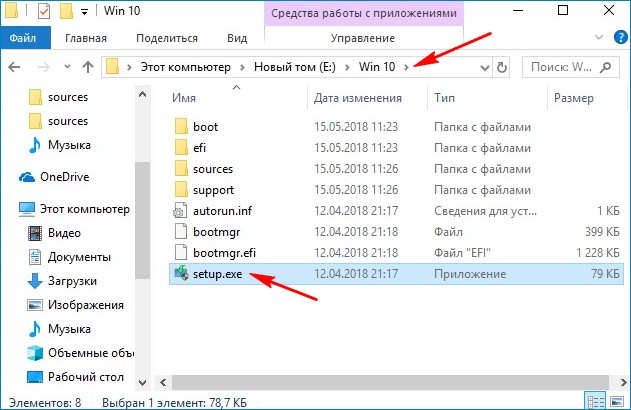
Запускается установщик Windows 10, но обновлять OS он будет до Win 8.1, так как мы заменили файл install.esd в дистрибутиве десятки. Если этого не сделать и запустить обновление привычным нам образом, то понижении версии закончится ошибкой.
Примечание: Простыми словами, мы с вами заменили файл install.esd в дистрибутиве Win 10 файлом install.esd из дистрибутива Windows 8.1. В итоге у нас получился дистрибутив Windows 8.1 с файлом-образом Win 10 — install.esd, только в этом случае понижении версии произойдёт успешно.
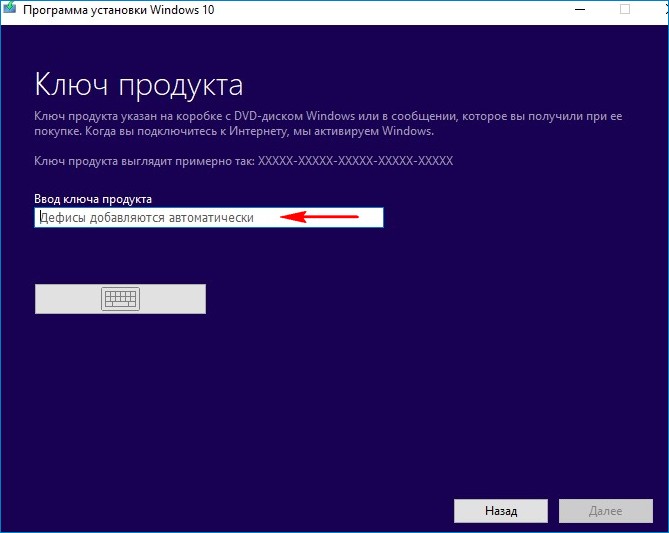
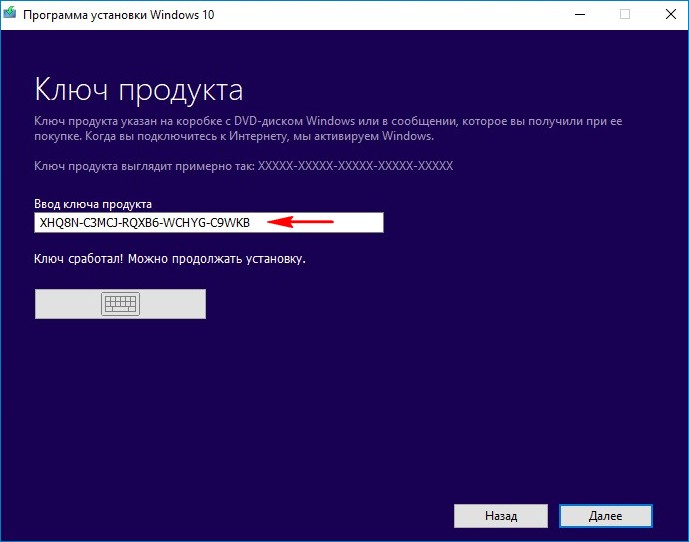
Если у вас есть ключ от лицензионной Windows 8.1, то вводите его. У меня такого ключа нет и я введу ключ от предварительной версии ОС
XHQ8N-C3MCJ-RQXB6-WCHYG-C9WKB
ключ сработал. Далее.
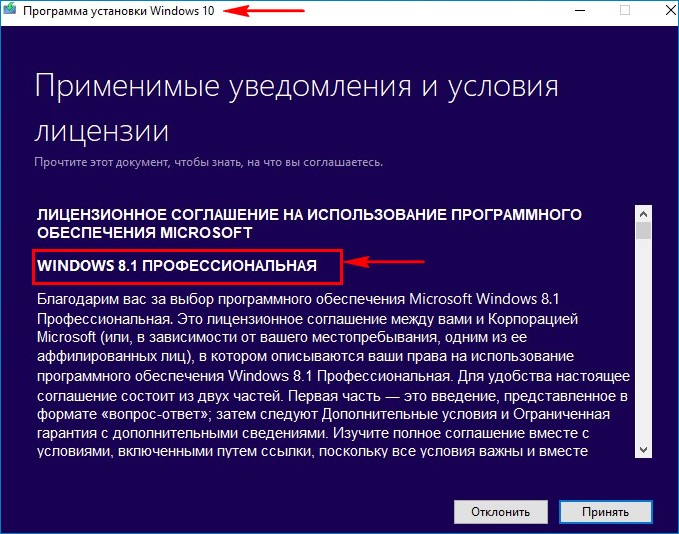
Принимаем условия лицензионного соглашения.
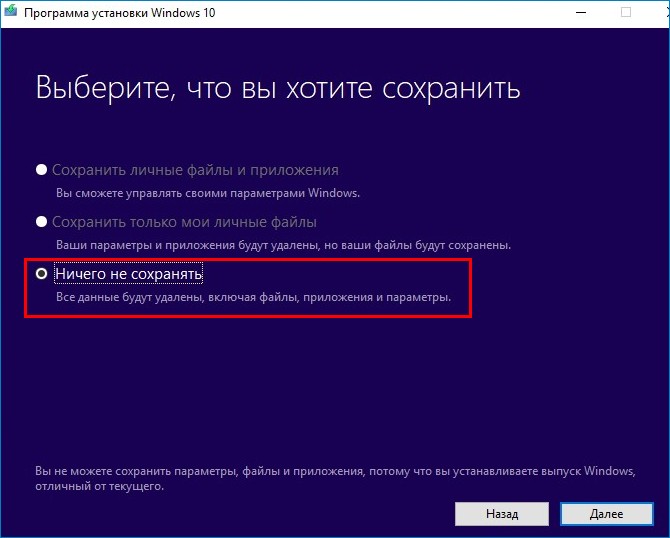
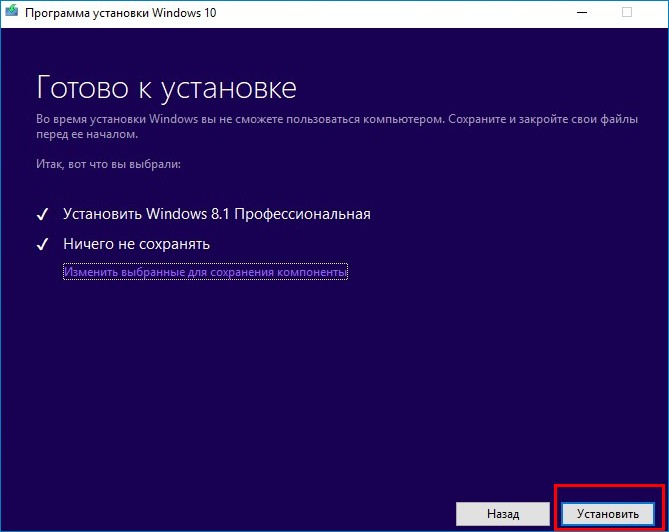
Доступен только вариант «Ничего не сохранять»
Далее.
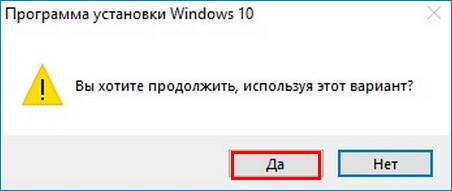
Установить.
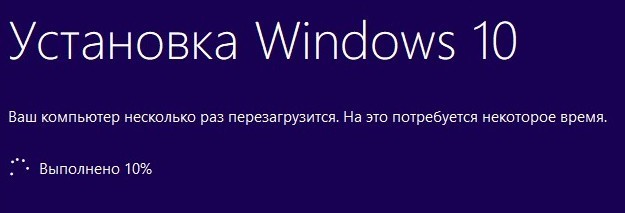
Начинается понижение версии.
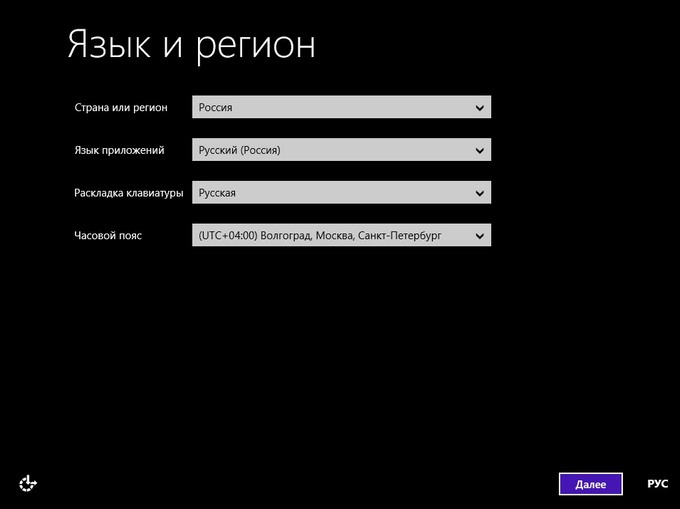
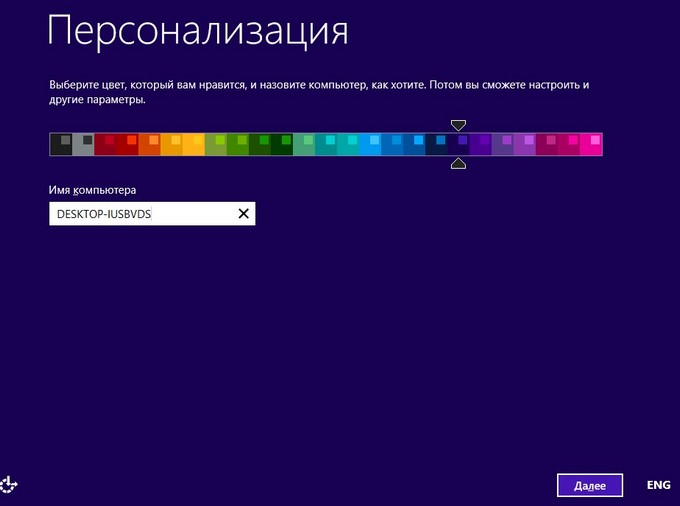
После перезагрузки ноутбука нужно пройти заключительный и уже знакомый вам этап обычной установки ОС. Необходимо выбрать язык, регион, придумать имя компьютеру и имя учётной записи.
Загружается Windows 8.1.

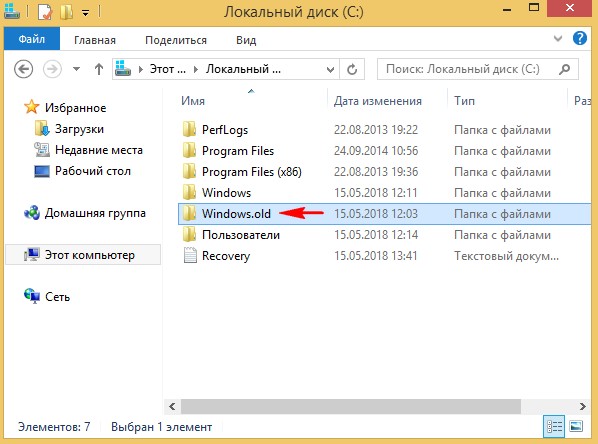
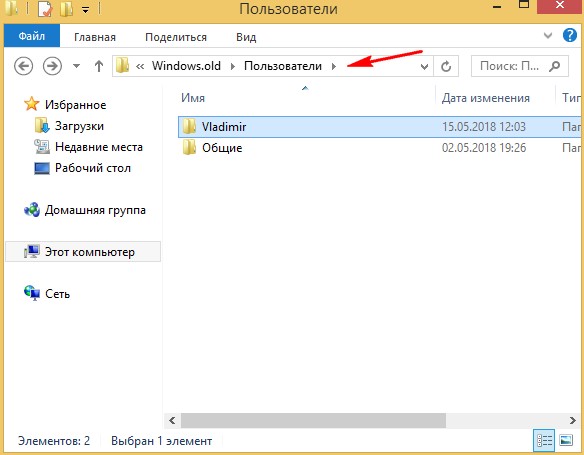
Все мои личные файлы в сохранности и перенесены в папку Windows.old, находящуюся в корне диска (C:).
C:Windows.oldПользователиЛичное имя пользователя.
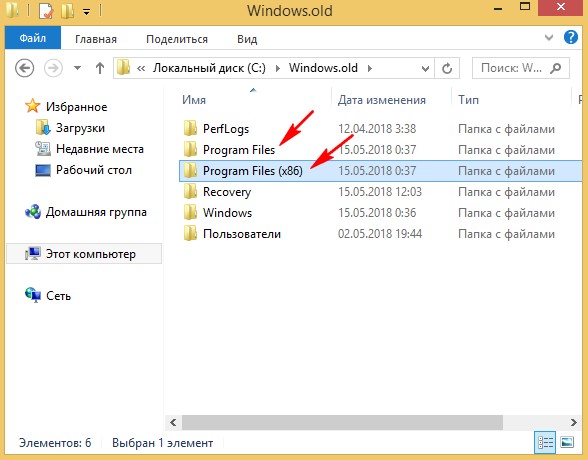
Установленные программы находятся здесь:
C:Windows.oldC:Program Files
C:Windows.oldProgram Files (x86)
но многие из них придётся переустановить заново.
Драйвера на все устройства сохранились и их переустанавливать не нужно.
Если вам известны другие способы понижения версии ОС, то высказывайтесь, будем пробовать.
Здравствуйте! Читал ваши статьи об обновлении предыдущих версий Windows до финальной Windows 10 (1803) и хочу спросить, получится ли сделать наоборот, то есть понизить Windows 10 PRO до Windows 8.1, произвести так сказать Даунгрейд. Могу объяснить, зачем мне это нужно. Во-первых, Windows 8.1 сейчас абсолютно доведена разработчиками до ума. Считаю эту OS самой стабильной на сегодня и она редко обновляется. У неё полноценный Microsoft Store. Поддержка до 2023 года, но уверен её ещё продлят. На моём ноутбуке восьмёрка работает просто отлично. Что касается Windows 10, то у меня с ней постоянно возникают какие-то проблемы. Эти постоянные обновления и повышения версий просто добивают. Не ноутбук прям, а проходной двор. Конечно я могу просто удалить Windows 10 и установить заново Windows 8.1, но может это можно сделать простым обновлением или правильнее будет сказать откатом! Может и драйвера с установленными программами и личными файлами сохранятся?
Как понизить Windows 10 Профессиональная до Windows 8.1 PRO
Привет друзья! Официального способа такого «даунгрейда» не существует и если начать понижение версии с помощью официального ISO-образа Windows 8.1 прямо в работающей Windows 10, то мы получим ошибку «Кажется у нас проблема. Программе установки не удалось проверить ключ продукта». Не помогут здесь и дополнительные файлы конфигурации (ei.cfg и pid.txt), ни новый лицензионный ключ от Windows 8.1. Для подобного «обновления» или правильнее будет сказать понижения версии Windows 10 Профессиональная (1803) до Windows 8.1 PRO можно воспользоваться способом, который предложил мой друг Владимир, автор многих статей нашего сайта.
Как избежать данной ошибки? Объясняю подробно.
Все мы знаем, что обновление Windows 8.1, 10 происходит в два этапа. В первую очередь загружается предустановочная среда Windows из файла boot.wim, в этот момент мы вводим ключ продукта и принимаем лицензионное соглашение, жмём кнопку «Далее», после этого OS производит диагностику работающей Windows на предмет возможности обновления. Затем следует второй этап, установщик OS распаковывает на диск (C:) содержимое основного файла-архива операционной системы install.esd и обновляет Windows. Для успеха нашего предприятия, а именно понижения версии Win 10 до Win 8.1, нужно использовать предустановочную среду Windows 10 из файла boot.wim, но с дальнейшей распаковкой файла-архива install.esd от Windows 8.1, только в этом случае понижение произойдёт успешно.
Итак, имеем Windows 10, которая установлена на моём ноутбуке. Понизим её до Windows 8.1
В первую очередь нам нужно создать на рабочем столе или другом разделе HDD две папки с названиями: Win 10 и Win 8.1.
Я создам их на разделе (E:).
Затем скачиваем на официальном сайте Майкрософт оригинальные ISO-образы Win 8.1 и Win 10 PRO, после копируем содержимое образов по своим папкам, то есть файлы ISO-образа Win 8.1 копируем в папку с названием Win 8.1, после то же самое делаем с файлами Windows 10.
Теперь заходим в папку Win 8.1 и открываем каталог sources, копируем здесь архив install.esd со сжатыми файлами Win 8.1.
Открываем папку Win 10 и заходим в каталог sources и вставляем скопированный файл install.esd. Замечу, что в данной папке уже находится свой файл install.esd со сжатыми файлами Win 10, его то мы и заменяем на файл от Win 8.1. Жмём на «Заменить файл в папке назначения».
Заходим в папку Win 10, находящуюся на разделе (E:) и запускаем setup.exe.
Запускается установщик Windows 10, но обновлять OS он будет до Win 8.1, так как мы заменили файл install.esd в дистрибутиве десятки. Если этого не сделать и запустить обновление привычным нам образом, то понижении версии закончится ошибкой.
Примечание: Простыми словами, мы с вами заменили файл install.esd в дистрибутиве Win 10 файлом install.esd из дистрибутива Windows 8.1. В итоге у нас получился дистрибутив Windows 8.1 с файлом-образом Win 10 — install.esd, только в этом случае понижении версии произойдёт успешно.
Если у вас есть ключ от лицензионной Windows 8.1, то вводите его. У меня такого ключа нет и я введу ключ от предварительной версии ОС
XHQ8N-C3MCJ-RQXB6-WCHYG-C9WKB
ключ сработал. Далее.
Принимаем условия лицензионного соглашения.
Доступен только вариант «Ничего не сохранять»
Далее.
Установить.
Начинается понижение версии.
После перезагрузки ноутбука нужно пройти заключительный и уже знакомый вам этап обычной установки ОС. Необходимо выбрать язык, регион, придумать имя компьютеру и имя учётной записи.
Загружается Windows 8.1.
Все мои личные файлы в сохранности и перенесены в папку Windows.old, находящуюся в корне диска (C:).
C:Windows.oldПользователиЛичное имя пользователя.
Установленные программы находятся здесь:
C:Windows.oldC:Program Files
C:Windows.oldProgram Files (x86)
но многие из них придётся переустановить заново.
Драйвера на все устройства сохранились и их переустанавливать не нужно.
Если вам известны другие способы понижения версии ОС, то высказывайтесь, будем пробовать.
Modded Minecraft can be incredibly complex. Modpacks with upwards of 300 mods exist and it’s impossible for every mod interaction to be vetted ahead of time. In addition, individual hardware and software configurations, driver versions, and other independent factors can all impact stability. As such, crashes can and do happen. This page tries to distill common scenarios and baseline knowledge for troubleshooting crashes you’re experiencing to get you back into your Minecraft world as quickly as possible.
Crash Logs
If you are experiencing game crashes while playing modded Minecraft, the best source of information as to what is happening is the crash log files. There are a couple different files that you may need to look through before finding the information you need.
There are two folders which might contain relevant information. If you are experiencing an actual crash, the crash-reports folder will have a file starting with crash- and then a time stamp of the crash so you can easily determine which file contains the information for that crash.
If that file doesn’t have useful information, doesn’t exist, or you’re not experiencing a full crash, the next place you want to check is the logs folder. This folder holds the logs generated by Minecraft as it runs, and there is a new one generated each time you launch Minecraft. As such, there are many more files here and older ones are archived and zipped up, so you might have to do a little more hunting to find the correct file, but usually latest.log is what you’re looking for. A dedicated server will have fml-server-latest.log instead.
Locating Logs
Twitch

Getting to your Minecraft instance folder from the Twitch app is easy. First, from the Minecraft screen in Twitch, click on the modpack you’re interested in. Now, in the top right corner you’ll see a button labelled «Get More Content» next to which is an ellipsis (three dots) button. Clicking on that button will open a drop-down menu, from which you can choose Open Folder to be taken directly to the folder for that modpack.
Legacy FTB Launcher
From the FTB launcher, choose the Options button. This screen will display an entry for Install Folder; this is where you will find your modpacks. Either manually navigate to that folder or on Windows copy the text and paste it into the address bar of Explorer and it will take you to the correct directory. From there you’ll need to navigate into the individual modpack folders, after which the instructions above about finding the log files will be accurate.
Other
If you are using a different launcher or none at all, you will need to be able to locate your Minecraft modpack directory on your own. Once you do, the same folder structure as described above should exist and you should be able to hunt down your crash logs without issue.
Sharing Logs
If you need to share your log with the community so you can get assistance with someone else, please do not copy and paste it into a discussion thread. The logs are large and if you try to prune them you may omit important details, and some websites mess up the formatting. Instead, share the file via a paste service, of which there are many. Here are a few in no particular order:
- FTB Paste
- Pastebin
- Ubuntu Paste
- Paste.ee
- Gist
Once you’ve put the file on one of these sites, you can simply share the link to the paste rather than the whole file. Also, please note that it is simpler if you use one of these services rather than something like Dropbox, Google Drive, or OneDrive. While these are great for sharing other data, they’re overly complex for this purpose and are the reason the sites above are available.
Interpreting Crash Logs
Understanding all of the details of a crash log is far beyond the scope of this tutorial page, but is also unnecessary in a lot of cases. Try the following to be able to help yourself solve a problem quicker than waiting on help from the internet!
A Java Stacktrace
When Minecraft crashes, it produces what is known as a stacktrace. Put simply, this is a list of what Minecraft was trying to do when things went wrong. Here is a pruned example of one:
---- Minecraft Crash Report ----
// Uh... Did I do that?

Time: 26/02/16 11:04 PM
Description: Ticking block entity

java.lang.NoSuchMethodError: appeng.api.features.IInscriberRegistry.getRecipes()Ljava/util/List;
	at net.bdew.ae2stuff.machines.inscriber.TileInscriber.findFinalRecipe(TileInscriber.scala:128)
	at net.bdew.ae2stuff.machines.inscriber.TileInscriber$$anonfun$1.apply$mcV$sp(TileInscriber.scala:59)
	at net.bdew.lib.Event0$$anonfun$trigger$1.apply(Event.scala:19)
	at net.bdew.lib.Event0$$anonfun$trigger$1.apply(Event.scala:19)
	at scala.collection.immutable.List.foreach(List.scala:383)
	at net.bdew.lib.Event0.trigger(Event.scala:19)
	at net.bdew.lib.tile.TileExtended.func_145845_h(TileExtended.scala:63)
	at net.minecraft.world.World.func_72939_s(World.java:1939)
	at net.minecraft.world.WorldServer.func_72939_s(WorldServer.java:489)
	at net.minecraft.server.MinecraftServer.func_71190_q(MinecraftServer.java:636)
	at net.minecraft.server.dedicated.DedicatedServer.func_71190_q(DedicatedServer.java:334)
	at net.minecraft.server.MinecraftServer.func_71217_p(MinecraftServer.java:547)
	at net.minecraft.server.MinecraftServer.run(MinecraftServer.java:427)
	at net.minecraft.server.MinecraftServer$2.run(MinecraftServer.java:685)
This looks like a big mess but there are a few hints as to what’s going on. First of all, the Description line tells us that the problem is with a «Ticking block entity» — ticking essentially refers to something doing the work that it does (i.e. when a furnace «ticks» it makes a bit of progress towards processing the item it’s working on) and a block is simply that, a block in the world.
The really important pieces are here:
java.lang.NoSuchMethodError: appeng.api.features.IInscriberRegistry.getRecipes()Ljava/util/List;
	at net.bdew.ae2stuff.machines.inscriber.TileInscriber.findFinalRecipe(TileInscriber.scala:128)
This information is going to get us 90% towards understanding what’s going on. In the first line, we see a mention of «IInscriberRegistry» which could mean absolutely anything, but what was I doing when this crash occurred? Oh, I was interacting with an Advanced Inscriber from AE2 Stuff! The second line confirms that as it shows the issue was in «net.bdew.ae2stuff.machines.inscriber…». At this point there’s a hint at what’s going on, but what can be done about it?
Dealing with the issue
This section is not called Solving the issue because sometimes you simply cannot solve the problem and it’s out of your hands. Instead, what should we do to deal with this issue?
- Check for an updated version of the mod
- Check to see if the issue has been reported to the mod author and if not, do so. If it was, can you provide additional detail?
- If the bug was reported, is there a workaround?
- If possible, just avoid doing the thing that causes the crash
These are in order of general effectiveness, but of course there are caveats for every step. Updating the mod is usually the simplest solution but is not always practical, especially if you’re playing on a server with a modpack that you do not control. At the end of the day, you’re going to have to decide how you deal with it. The next section goes into detail on dealing with a specific type of crash.
Updating Java
Keeping your Java up to date can have a few benefits, including getting access to the latest performance increases as well as bug and security fixes. Step by step instructions on how to update your particular system are beyond the scope of this document but you can start at java.com. Please note, if your system supports it (which most modern systems should), you should be using 64-bit Java.
Twitch App
The Twitch App bundles a specific version of Java to ensure that there are no external requirements beyond the app to run Minecraft. However, this means if you update your Java on your system, it will be ignored by instances launched through the Twitch App. Normally this is not a problem, but if you are experiencing an issue and would like to update the Java that Twitch uses, you can do the following:
- Open the Twitch App settings by clicking the three horizontal bars in the top left, choosing File, then settings or keyboard shortcut ctrl-,
- Choose the Minecraft settings submenu on the left
- Scroll to the bottom of the settings where you can provide additional arguments
- Add «-version:1.8+» without quotes
Instances you launch from this point on should use the latest installed Java version on the system. If for some reason this doesn’t work, you can try manually replacing the bundled version following the steps below:
- Install the Java version as you normally would, and note its installation directory. On Windows, this is typically C:Program FilesJava.
- Navigate to the Curse installation directory. The easiest way to find this if you don’t already know where it is to open the Twitch App, choose a Minecraft instance, click on the three dots button, choose Open Folder, and then move up two directories from your instance directory, through Instances, to the Minecraft folder.
- From the Curse Minecraft directory, go into Install, then into Runtime, and then into the jre folder for your system. This should be jre-x64 on a 64-bit system.
- Rename the existing numbered version folder to something else so you can back out this change should you need to. I typically use 1.8.0_25_original.
- From inside the Java installation directory, pick the version you want Twitch to use, for instance jre1.8.0_141 for Java 8 Update 141. Copy that folder to the jre folder from the previous steps.
- Rename the copied folder so it matches the original name exactly, 1.8.0_25 is the version Twitch was bundled with at the time of this writing — no matter which version you’re updating to.
At this point your Minecraft instances launched through the Twitch app should be using the Java version you changed to. You can verify this from within Minecraft by looking at the debug screen, typically bound to the F3 key.
Removing crashing entities
Having gotten to the point where we understand what mod is causing the issue, in certain cases there is a straightforward solution to the problem.
Automatically
Forge includes two configuration options for automatically removing crashing entities, and crashing tile entities. If you open your modpack folder, go into the config folder, and open forge.cfg, under the general section you should find the following lines:
    # Set this to true to remove any Entity that throws an error in its update method instead of closing the server and reporting a crash log. BE WARNED THIS COULD SCREW UP EVERYTHING USE SPARINGLY WE ARE NOT RESPONSIBLE FOR DAMAGES.
    B:removeErroringEntities=false

    # Set this to true to remove any TileEntity that throws an error in its update method instead of closing the server and reporting a crash log. BE WARNED THIS COULD SCREW UP EVERYTHING USE SPARINGLY WE ARE NOT RESPONSIBLE FOR DAMAGES.
    B:removeErroringTileEntities=false
When you change these from false to true, the next time you start your world any entities or tile entities that were going to cause a crash will simply be removed. Note the warnings in the comments before each option, and heed them. These should only be enabled when necessary, not all the time.
Manually
Dealing with removing broken blocks or items from the world manually is beyond the scope of this document. However, the tools to do these things should be mentioned. If you are dealing with a block in the world that is causing a crash and you want to remove it, you can use MCEdit to edit the world while it is offline. Find it at the MCEdit site. If there is a problem with an item or something in someones inventory, a useful tool is NBTExplorer. Find it at its GitHub page.
Getting more help
You’ve tried what you can and are at the end of your abilities but stuff is still broken — not a problem, there are lots of places where the community can help you out. Here are a few places to check out:
- Feed The Beast forums: The main FTB forums (make sure you’re posting in the right place).
- Minecraftforum.net forums: A ton of Minecraft conversation happens here. Dive into the modding forums for more information.
- FTB subreddit: A subreddit dedicated to modded Minecraft discussion. General inquiries are okay here, but if you’re experiencing crashes, please use…
- FTB crashes subreddit …this subreddit. Again, this is not for general help, it is for crashes and every post here should be accompanied by a crash log.
Modded Minecraft can be incredibly complex. Modpacks with upwards of 300 mods exist and it’s impossible for every mod interaction to be vetted ahead of time. In addition, individual hardware and software configurations, driver versions, and other independent factors can all impact stability. As such, crashes can and do happen. This page tries to distill common scenarios and baseline knowledge for troubleshooting crashes you’re experiencing to get you back into your Minecraft world as quickly as possible.
Crash Logs
If you are experiencing game crashes while playing modded Minecraft, the best source of information as to what is happening is the crash log files. There are a couple different files that you may need to look through before finding the information you need.
There are two folders which might contain relevant information. If you are experiencing an actual crash, the crash-reports folder will have a file starting with crash- and then a time stamp of the crash so you can easily determine which file contains the information for that crash.
If that file doesn’t have useful information, doesn’t exist, or you’re not experiencing a full crash, the next place you want to check is the logs folder. This folder holds the logs generated by Minecraft as it runs, and there is a new one generated each time you launch Minecraft. As such, there are many more files here and older ones are archived and zipped up, so you might have to do a little more hunting to find the correct file, but usually latest.log is what you’re looking for. A dedicated server will have fml-server-latest.log instead.
Locating Logs
Twitch
Getting to your Minecraft instance folder from the Twitch app is easy. First, from the Minecraft screen in Twitch, click on the modpack you’re interested in. Now, in the top right corner you’ll see a button labelled «Get More Content» next to which is an ellipsis (three dots) button. Clicking on that button will open a drop-down menu, from which you can choose Open Folder to be taken directly to the folder for that modpack.
Legacy FTB Launcher
From the FTB launcher, choose the Options button. This screen will display an entry for Install Folder; this is where you will find your modpacks. Either manually navigate to that folder or on Windows copy the text and paste it into the address bar of Explorer and it will take you to the correct directory. From there you’ll need to navigate into the individual modpack folders, after which the instructions above about finding the log files will be accurate.
Other
If you are using a different launcher or none at all, you will need to be able to locate your Minecraft modpack directory on your own. Once you do, the same folder structure as described above should exist and you should be able to hunt down your crash logs without issue.
Sharing Logs
If you need to share your log with the community so you can get assistance with someone else, please do not copy and paste it into a discussion thread. The logs are large and if you try to prune them you may omit important details, and some websites mess up the formatting. Instead, share the file via a paste service, of which there are many. Here are a few in no particular order:
- FTB Paste
- Pastebin
- Ubuntu Paste
- Paste.ee
- Gist
Once you’ve put the file on one of these sites, you can simply share the link to the paste rather than the whole file. Also, please note that it is simpler if you use one of these services rather than something like Dropbox, Google Drive, or OneDrive. While these are great for sharing other data, they’re overly complex for this purpose and are the reason the sites above are available.
Interpreting Crash Logs
Understanding all of the details of a crash log is far beyond the scope of this tutorial page, but is also unnecessary in a lot of cases. Try the following to be able to help yourself solve a problem quicker than waiting on help from the internet!
A Java Stacktrace
When Minecraft crashes, it produces what is known as a stacktrace. Put simply, this is a list of what Minecraft was trying to do when things went wrong. Here is a pruned example of one:
---- Minecraft Crash Report ----
// Uh... Did I do that?

Time: 26/02/16 11:04 PM
Description: Ticking block entity

java.lang.NoSuchMethodError: appeng.api.features.IInscriberRegistry.getRecipes()Ljava/util/List;
	at net.bdew.ae2stuff.machines.inscriber.TileInscriber.findFinalRecipe(TileInscriber.scala:128)
	at net.bdew.ae2stuff.machines.inscriber.TileInscriber$$anonfun$1.apply$mcV$sp(TileInscriber.scala:59)
	at net.bdew.lib.Event0$$anonfun$trigger$1.apply(Event.scala:19)
	at net.bdew.lib.Event0$$anonfun$trigger$1.apply(Event.scala:19)
	at scala.collection.immutable.List.foreach(List.scala:383)
	at net.bdew.lib.Event0.trigger(Event.scala:19)
	at net.bdew.lib.tile.TileExtended.func_145845_h(TileExtended.scala:63)
	at net.minecraft.world.World.func_72939_s(World.java:1939)
	at net.minecraft.world.WorldServer.func_72939_s(WorldServer.java:489)
	at net.minecraft.server.MinecraftServer.func_71190_q(MinecraftServer.java:636)
	at net.minecraft.server.dedicated.DedicatedServer.func_71190_q(DedicatedServer.java:334)
	at net.minecraft.server.MinecraftServer.func_71217_p(MinecraftServer.java:547)
	at net.minecraft.server.MinecraftServer.run(MinecraftServer.java:427)
	at net.minecraft.server.MinecraftServer$2.run(MinecraftServer.java:685)
This looks like a big mess but there are a few hints as to what’s going on. First of all, the Description line tells us that the problem is with a «Ticking block entity» — ticking essentially refers to something doing the work that it does (i.e. when a furnace «ticks» it makes a bit of progress towards processing the item it’s working on) and a block is simply that, a block in the world.
The really important pieces are here:
java.lang.NoSuchMethodError: appeng.api.features.IInscriberRegistry.getRecipes()Ljava/util/List;
	at net.bdew.ae2stuff.machines.inscriber.TileInscriber.findFinalRecipe(TileInscriber.scala:128)
This information is going to get us 90% towards understanding what’s going on. In the first line, we see a mention of «IInscriberRegistry» which could mean absolutely anything, but what was I doing when this crash occurred? Oh, I was interacting with an Advanced Inscriber from AE2 Stuff! The second line confirms that as it shows the issue was in «net.bdew.ae2stuff.machines.inscriber…». At this point there’s a hint at what’s going on, but what can be done about it?
Dealing with the issue
This section is not called Solving the issue because sometimes you simply cannot solve the problem and it’s out of your hands. Instead, what should we do to deal with this issue?
- Check for an updated version of the mod
- Check to see if the issue has been reported to the mod author and if not, do so. If it was, can you provide additional detail?
- If the bug was reported, is there a workaround?
- If possible, just avoid doing the thing that causes the crash
These are in order of general effectiveness, but of course there are caveats for every step. Updating the mod is usually the simplest solution but is not always practical, especially if you’re playing on a server with a modpack that you do not control. At the end of the day, you’re going to have to decide how you deal with it. The next section goes into detail on dealing with a specific type of crash.
Updating Java
Keeping your Java up to date can have a few benefits, including getting access to the latest performance increases as well as bug and security fixes. Step by step instructions on how to update your particular system are beyond the scope of this document but you can start at java.com. Please note, if your system supports it (which most modern systems should), you should be using 64-bit Java.
Twitch App
The Twitch App bundles a specific version of Java to ensure that there are no external requirements beyond the app to run Minecraft. However, this means if you update your Java on your system, it will be ignored by instances launched through the Twitch App. Normally this is not a problem, but if you are experiencing an issue and would like to update the Java that Twitch uses, you can do the following:
- Open the Twitch App settings by clicking the three horizontal bars in the top left, choosing File, then settings or keyboard shortcut ctrl-,
- Choose the Minecraft settings submenu on the left
- Scroll to the bottom of the settings where you can provide additional arguments
- Add «-version:1.8+» without quotes
Instances you launch from this point on should use the latest installed Java version on the system. If for some reason this doesn’t work, you can try manually replacing the bundled version following the steps below:
- Install the Java version as you normally would, and note its installation directory. On Windows, this is typically C:Program FilesJava.
- Navigate to the Curse installation directory. The easiest way to find this if you don’t already know where it is to open the Twitch App, choose a Minecraft instance, click on the three dots button, choose Open Folder, and then move up two directories from your instance directory, through Instances, to the Minecraft folder.
- From the Curse Minecraft directory, go into Install, then into Runtime, and then into the jre folder for your system. This should be jre-x64 on a 64-bit system.
- Rename the existing numbered version folder to something else so you can back out this change should you need to. I typically use 1.8.0_25_original.
- From inside the Java installation directory, pick the version you want Twitch to use, for instance jre1.8.0_141 for Java 8 Update 141. Copy that folder to the jre folder from the previous steps.
- Rename the copied folder so it matches the original name exactly, 1.8.0_25 is the version Twitch was bundled with at the time of this writing — no matter which version you’re updating to.
At this point your Minecraft instances launched through the Twitch app should be using the Java version you changed to. You can verify this from within Minecraft by looking at the debug screen, typically bound to the F3 key.
Removing crashing entities
Having gotten to the point where we understand what mod is causing the issue, in certain cases there is a straightforward solution to the problem.
Automatically
Forge includes two configuration options for automatically removing crashing entities, and crashing tile entities. If you open your modpack folder, go into the config folder, and open forge.cfg, under the general section you should find the following lines:
    # Set this to true to remove any Entity that throws an error in its update method instead of closing the server and reporting a crash log. BE WARNED THIS COULD SCREW UP EVERYTHING USE SPARINGLY WE ARE NOT RESPONSIBLE FOR DAMAGES.
    B:removeErroringEntities=false

    # Set this to true to remove any TileEntity that throws an error in its update method instead of closing the server and reporting a crash log. BE WARNED THIS COULD SCREW UP EVERYTHING USE SPARINGLY WE ARE NOT RESPONSIBLE FOR DAMAGES.
    B:removeErroringTileEntities=false
When you change these from false to true, the next time you start your world any entities or tile entities that were going to cause a crash will simply be removed. Note the warnings in the comments before each option, and heed them. These should only be enabled when necessary, not all the time.
Manually
Dealing with removing broken blocks or items from the world manually is beyond the scope of this document. However, the tools to do these things should be mentioned. If you are dealing with a block in the world that is causing a crash and you want to remove it, you can use MCEdit to edit the world while it is offline. Find it at the MCEdit site. If there is a problem with an item or something in someones inventory, a useful tool is NBTExplorer. Find it at its GitHub page.
Getting more help
You’ve tried what you can and are at the end of your abilities but stuff is still broken — not a problem, there are lots of places where the community can help you out. Here are a few places to check out:
- Feed The Beast forums: The main FTB forums (make sure you’re posting in the right place).
- Minecraftforum.net forums: A ton of Minecraft conversation happens here. Dive into the modding forums for more information.
- FTB subreddit: A subreddit dedicated to modded Minecraft discussion. General inquiries are okay here, but if you’re experiencing crashes, please use…
- FTB crashes subreddit …this subreddit. Again, this is not for general help, it is for crashes and every post here should be accompanied by a crash log.
-
#1
FTB Launcher logs:
[11:48:51] [DEBUG] Main.main:170: Launcher arguments: []
[11:48:51] [DEBUG] Main.main:171: Launcher PID: 81036
[11:48:51] [DEBUG] Main.main:182: FTB Launcher CI Build #: 344, Git SHA: b7f7123d76dc
[11:48:51] [INFO] JGoogleAnalyticsTracker$2.run:484: AnalyticsBackgroundThread started
[11:48:51] [INFO] MainHelpers.printInfo:39: FTBLaunch starting up (version 1.4.8 Build: 10408)
[11:48:51] [DEBUG] MainHelpers.printInfo:40: System’s default JVM: (This is not always used to launch MC)
[11:48:51] [DEBUG] MainHelpers.printInfo:41: Java version: 1.8.0_51
[11:48:51] [DEBUG] MainHelpers.printInfo:42: Java vendor: Oracle Corporation
[11:48:51] [DEBUG] MainHelpers.printInfo:43: Java home: C:Program FilesJavajre1.8.0_51
[11:48:51] [DEBUG] MainHelpers.printInfo:44: Java specification: Java Virtual Machine Specification version: 1.8 by Oracle Corporation
[11:48:51] [DEBUG] MainHelpers.printInfo:46: Java vm: Java HotSpot(TM) 64-Bit Server VM version: 25.51-b03 by Oracle Corporation
[11:48:51] [INFO] MainHelpers.printInfo:47: OS: Windows 8.1 6.3 (64-bit)
[11:48:51] [INFO] MainHelpers.printInfo:48: Launcher Install Dir: C:UsersLoOnyBinDesktopFeed the Beast
[11:48:51] [INFO] MainHelpers.printInfo:49: System memory: 13925M free, 16382M total
[11:48:51] [ERROR] OutputOverride.write:45: From Console: Aug 14, 2015 11:48:51 AM java.util.prefs.WindowsPreferences <init>
WARNING: Could not open/create prefs root node SoftwareJavaSoftPrefs at root 0x80000002. Windows RegCreateKeyEx(…) returned error code 5.
[11:48:51] [INFO] JavaFinder.parseJavaVersion:175: The FTB Launcher has found the following Java versions installed:
[11:48:51] [INFO] JavaFinder.parseJavaVersion:177: Java Version: 1.8.0_51 sorted as: 1.8.0_51 64 Bit Java at : C:Program FilesJavajre1.8.0_51binjava.exe
[11:48:51] [INFO] JavaFinder.parseJavaVersion:177: Java Version: 1.8.0_51 sorted as: 1.8.0_51 64 Bit Java at : C:Program FilesJavajre1.8.0_51binjava.exe
[11:48:51] [INFO] JavaFinder.parseJavaVersion:204: Preferred: Java Version: 1.8.0_51 sorted as: 1.8.0_51 64 Bit Java at : C:Program FilesJavajre1.8.0_51binjava.exe
[11:48:51] [DEBUG] OSUtils.getProxy:77: ProxySelector: type: DIRECT, no proxy for http://ftb.cursecdn.com
[11:48:51] [DEBUG] OSUtils.getProxy:77: ProxySelector: type: DIRECT, no proxy for http://www.creeperrepo.net
[11:48:51] [DEBUG] DownloadUtils.run:450: DownloadUtils.run() starting
[11:48:51] [INFO] I18N.addFiles:97: [i18n] Fallback enUS loaded
[11:48:51] [INFO] I18N.setLocale:120: [i18n] enUS English (US) language file loaded!
[11:48:51] [INFO] LoadingDialog.advance:46: Checking installation location
[11:48:51] [INFO] LoadingDialog.advance:46: Loading user data
[11:48:52] [DEBUG] Benchmark.logBenchAs:73: Download Utils Balance (curse) took 781 ms.
[11:48:52] [DEBUG] Benchmark.logBenchAs:73: Download Utils Balance took 812 ms.
[11:48:52] [DEBUG] Benchmark.logBenchAs:73: Download Utils Curse edges.json took 1141 ms.
[11:48:52] [DEBUG] DownloadUtils.run:546: DL ready
[11:48:52] [INFO] DownloadUtils.run:579: Using download server Automatic:CurseCDN on host ftb.cursecdn.com (198.41.209.103)
[11:48:52] [DEBUG] Benchmark.logBenchAs:73: Download Utils Init took 1141 ms.
[11:48:52] [DEBUG] Benchmark.logBenchAs:73: Modpack Loader http://ftb/ImpactFlux.xml took 1328 ms.
[11:48:52] [INFO] ModpackLoader$XmlHtmlRunnable.handleXML:103: Loading modpack information for ImpactFlux.xml…
[11:48:52] [DEBUG] Benchmark.logBenchAs:73: Modpack Loader http://ftb/automata.xml took 1344 ms.
[11:48:52] [INFO] ModpackLoader$XmlHtmlRunnable.handleXML:103: Loading modpack information for automata.xml…
[11:48:53] [DEBUG] Benchmark.logBenchAs:73: Modpack Loader http://ftb/TERRA.xml took 2172 ms.
[11:48:53] [INFO] ModpackLoader$XmlHtmlRunnable.handleXML:103: Loading modpack information for TERRA.xml…
[11:48:53] [DEBUG] Benchmark.logBenchAs:73: Modpack Loader http://ftb/ftbterra.xml took 2390 ms.
[11:48:53] [INFO] ModpackLoader$XmlHtmlRunnable.handleXML:103: Loading modpack information for ftbterra.xml…
[11:48:54] [DEBUG] Benchmark.logBenchAs:73: Modpack Loader http://ftb/modpacks.xml took 2609 ms.
[11:48:54] [INFO] ModpackLoader$XmlHtmlRunnable.handleXML:103: Loading modpack information for modpacks.xml…
[11:48:54] [DEBUG] Benchmark.logBenchAs:73: Modpack Loader http://ftb/thirdparty.xml took 2719 ms.
[11:48:54] [INFO] ModpackLoader$XmlHtmlRunnable.handleXML:103: Loading modpack information for thirdparty.xml…
[11:48:54] [DEBUG] Benchmark.logBenchAs:73: Modpack Loader http://ftb/MindfoldParadox.xml took 3015 ms.
[11:48:54] [INFO] ModpackLoader$XmlHtmlRunnable.handleXML:103: Loading modpack information for MindfoldParadox.xml…
[11:48:54] [DEBUG] Benchmark.logBenchAs:73: Modpack Loader http://ftb/darkness.xml took 3156 ms.
[11:48:54] [INFO] ModpackLoader$XmlHtmlRunnable.handleXML:103: Loading modpack information for darkness.xml…
[11:48:54] [DEBUG] Benchmark.logBenchAs:73: All modpack lists loaded took 3156 ms.
[11:48:54] [DEBUG] OSUtils.getMacAddress:412: Interface: Realtek PCIe GBE Family Controller : eth1
[11:48:55] [INFO] LoadingDialog.advance:46: Creating Console window
[11:48:55] [INFO] LoadingDialog.advance:46: Creating main window
[11:48:55] [DEBUG] AuthlibDLWorker.doInBackground:57: Loading Authlib…
[11:48:55] [INFO] OptionsPane.<init>:172: [i18n] Added 0 enUS to options pane
[11:48:55] [INFO] OptionsPane.<init>:172: [i18n] Added 1 cyGB to options pane
[11:48:55] [INFO] OptionsPane.<init>:172: [i18n] Added 2 daDK to options pane
[11:48:55] [INFO] OptionsPane.<init>:172: [i18n] Added 3 deDE to options pane
[11:48:55] [INFO] OptionsPane.<init>:172: [i18n] Added 4 enGB to options pane
[11:48:55] [INFO] OptionsPane.<init>:172: [i18n] Added 5 enUS to options pane
[11:48:55] [INFO] OptionsPane.<init>:172: [i18n] Added 6 esES to options pane
[11:48:55] [INFO] OptionsPane.<init>:172: [i18n] Added 7 fiFI to options pane
[11:48:55] [INFO] OptionsPane.<init>:172: [i18n] Added 8 frCA to options pane
[11:48:55] [INFO] OptionsPane.<init>:172: [i18n] Added 9 frFR to options pane
[11:48:55] [INFO] OptionsPane.<init>:172: [i18n] Added 10 itIT to options pane
[11:48:55] [INFO] OptionsPane.<init>:172: [i18n] Added 11 maHU to options pane
[11:48:55] [INFO] OptionsPane.<init>:172: [i18n] Added 12 nlNL to options pane
[11:48:55] [INFO] OptionsPane.<init>:172: [i18n] Added 13 noNO to options pane
[11:48:55] [INFO] OptionsPane.<init>:172: [i18n] Added 14 plPL to options pane
[11:48:55] [INFO] OptionsPane.<init>:172: [i18n] Added 15 ptBR to options pane
[11:48:55] [INFO] OptionsPane.<init>:172: [i18n] Added 16 ptPT to options pane
[11:48:55] [INFO] OptionsPane.<init>:172: [i18n] Added 17 ruRU to options pane
[11:48:55] [INFO] OptionsPane.<init>:172: [i18n] Added 18 svSE to options pane
[11:48:55] [INFO] OptionsPane.<init>:172: [i18n] Added 19 zhCN to options pane
[11:48:55] [INFO] I18N.setLocale:120: [i18n] enUS English (US) language file loaded!
[11:48:55] [DEBUG] Benchmark.logBenchAs:73: UnreadNews Init took 1 ms.
[11:48:55] [DEBUG] Benchmark.logBench:59: Waiting for main window took 1082 ms.
[11:48:55] [INFO] MapLoader.run:43: loading map information…
[11:48:55] [INFO] TexturePackLoader.run:43: loading texture pack information…
[11:48:55] [INFO] LoadingDialog.advance:46: Setting up Launcher
[11:48:55] [INFO] LoadingDialog.advance:46: Opening main window
[11:48:55] [DEBUG] Benchmark.logBenchAs:73: Launcher Startup(Modpacks loaded) took 4871 ms.
[11:48:55] [DEBUG] LaunchFrame$14.run:451: Last used packs: direwolf20_17 VoidWorld
[11:48:55] [DEBUG] UpdateChecker.<init>:71: Launcher Install path: C:UsersLoOnyBinDesktopFTB.exe
[11:48:55] [INFO] LoadingDialog.advance:46: Downloading pack data
[11:48:56] [DEBUG] Benchmark.logBenchAs:73: Launcher Startup(main window opened and ready to use) took 5105 ms.
[11:48:56] [DEBUG] Benchmark.logBenchAs:73: MapLoader run took 672 ms.
[11:48:56] [DEBUG] Benchmark.logBenchAs:73: Launcher Startup(maps or texturepacks loaded) took 5496 ms.
[11:48:56] [INFO] MapUtils$6.run:250: Adding map 1 (FTB Trident Default Map)
[11:48:56] [INFO] MapUtils$6.run:250: Adding map 2 (Agrarian Skies Default Map)
[11:48:56] [INFO] MapUtils$6.run:250: Adding map 3 (Agrarian Skies Flat Map)
[11:48:56] [INFO] MapUtils$6.run:250: Adding map 4 (Agrarian Skies Server Map)
[11:48:56] [INFO] MapUtils$6.run:250: Adding map 5 (Direwolf20 Map Ep.0)
[11:48:56] [INFO] MapUtils$6.run:250: Adding map 6 (FTB Pax Challenge)
[11:48:56] [INFO] MapUtils$6.run:250: Adding map 7 (Direwolf20 Map Ep.0)
[11:48:56] [INFO] MapUtils$6.run:250: Adding map 8 (Direwolf20 Map Ep.10)
[11:48:56] [INFO] MapUtils$6.run:250: Adding map 9 (Direwolf20 Map Ep.20)
[11:48:56] [INFO] MapUtils$6.run:250: Adding map 10 (Direwolf20 Map Ep.30)
[11:48:56] [INFO] MapUtils$6.run:250: Adding map 11 (Direwolf20 Map Ep.40)
[11:48:56] [INFO] MapUtils$6.run:250: Adding map 12 (Direwolf20 Map Ep.50)
[11:48:56] [INFO] MapUtils$6.run:250: Adding map 13 (Direwolf20 Map Ep.80)
[11:48:56] [INFO] MapUtils$6.run:250: Adding map 14 (FTB Normal)
[11:48:56] [INFO] MapUtils$6.run:250: Adding map 15 (FTB Insanity)
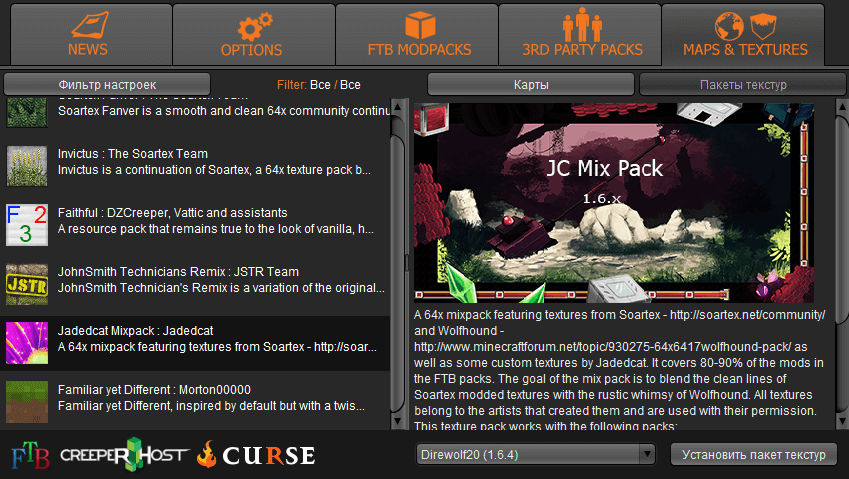
[11:48:56] [INFO] TexturepackPane$6.run:237: Adding texture pack 1 (Soartex Fanver)
[11:48:56] [DEBUG] Benchmark.logBenchAs:73: Texture Pack Load took 860 ms.
[11:48:56] [DEBUG] Benchmark.logBenchAs:73: Launcher Startup(maps and texturepacks loaded) took 5668 ms.
[11:48:56] [INFO] TexturepackPane$6.run:237: Adding texture pack 2 (Jadedcat Mixpack)
[11:48:56] [INFO] TexturepackPane$6.run:237: Adding texture pack 3 (Invictus)
[11:48:56] [INFO] TexturepackPane$6.run:237: Adding texture pack 4 (Faithful)
[11:48:56] [INFO] TexturepackPane$6.run:237: Adding texture pack 5 (JohnSmith Technicians Remix)
[11:48:56] [INFO] TexturepackPane$6.run:237: Adding texture pack 6 (Familiar yet Different)
[11:48:56] [DEBUG] Benchmark.logBench:59: NewsUtils took 1333 ms.
[11:48:57] [DEBUG] UpdateChecker.shouldUpdate:132: updater: buildjenk 344 < betajenk 341|| version 10408 < 10408
[11:48:57] [DEBUG] UpdateChecker.shouldUpdate:133: latest = 10408
[11:48:57] [INFO] AuthlibDLWorker.downloadJars:136: Local Authlib Version is good, skipping Download
[11:48:57] [INFO] AuthlibDLWorker.doInBackground:69: Adding Authlib to Classpath
[11:48:57] [DEBUG] Benchmark.logBenchAs:73: Authlib DL Worker Init took 2127 ms.
[11:49:09] [INFO] LaunchFrame.doLogin:536: Logging in…
[11:49:09] [DEBUG] OSUtils.getProxy:77: ProxySelector: type: DIRECT, no proxy for https://authserver.mojang.com/authenticate
[11:49:09] [DEBUG] AuthlibHelper.authenticateWithAuthlib:67: Email address given
[11:49:09] [INFO] AuthlibHelper.authenticateWithAuthlib:68: Beginning authlib authentication attempt
[11:49:09] [INFO] AuthlibHelper.authenticateWithAuthlib:69: successfully created YggdrasilAuthenticationService
[11:49:09] [DEBUG] AuthlibHelper.authenticateWithAuthlib:76: mojangData was passed to current method
[11:49:09] [DEBUG] AuthlibHelper.authenticateWithAuthlib:79: Loading mojangData into authlib
[11:49:11] [DEBUG] AuthlibHelper.authenticateWithAuthlib:148: Authentication is valid
[11:49:11] [DEBUG] AuthlibHelper.authenticateWithAuthlib:151: loggedIn() && CanPlayOnline()
[11:49:11] [DEBUG] AuthlibHelper.authenticateWithAuthlib:155: Authentication done, returning LoginResponse
[11:49:11] [DEBUG] Benchmark.logBenchAs:73: Login Worker Run took 1968 ms.
[11:49:11] [DEBUG] LaunchFrame$16.done:580: responseStr: good
[11:49:11] [INFO] LaunchFrame$16.done:583: Login complete.
[11:49:11] [DEBUG] User.writeObject:185: starting…
[11:49:11] [DEBUG] LaunchFrame$16.done:587: user data saved
[11:49:11] [DEBUG] LaunchFrame.runGameUpdater:634: ForceUpdate: false
[11:49:11] [DEBUG] LaunchFrame.runGameUpdater:635: installPath: C:UsersLoOnyBinDesktopFeed the Beast
[11:49:11] [DEBUG] LaunchFrame.runGameUpdater:636: pack dir: direwolf20_17
[11:49:11] [DEBUG] LaunchFrame.runGameUpdater:637: pack check path: direwolf20_17version
[11:49:11] [DEBUG] LaunchFrame.checkVersion:612: verFile: 1.7.0 onlineVersion/getPackVer(): 1.7.0 onlineVersion/getVersion(): 1.6.1
[11:49:11] [INFO] MCInstaller.gatherAssets:127: Checking local assets file, for MC version1.7.10 Please wait!
[11:49:11] [DEBUG] MCInstaller.gatherAssets:132: Checking pack libraries
[11:49:11] [DEBUG] MCInstaller.gatherAssets:184: Checking minecraft version json
[11:49:12] [DEBUG] MCInstaller.gatherAssets:199: checking minecraft libraries
[11:49:12] [DEBUG] MCInstaller.gatherAssets:267: Checking minecraft assets
[11:49:16] [DEBUG] MCInstaller.gatherAssets:281: Starting TaskHandler to check MC assets
[11:49:16] [DEBUG] Benchmark.logBenchAs:73: parallel asset check took 172 ms.
[11:49:16] [INFO] MCInstaller.launchMinecraft:328: Setting up native libraries for FTB Presents Direwolf20 v 1.7.0 MC 1.7.10
[11:49:16] [DEBUG] MCInstaller.launchMinecraft:354: packbaseJSON 1.7.10
[11:49:17] [INFO] MCLauncher.syncAssets:286: Syncing Assets:
[11:49:17] [INFO] MCLauncher.launchMinecraft:86: Java Path: C:Program FilesJavajre1.8.0_51binjavaw.exe
[11:49:17] [INFO] MCLauncher.launchMinecraft:87: Pack: FTB Presents Direwolf20 1.7.10
[11:49:17] [INFO] MCLauncher.setMemory:269: Setting MinMemory to 256
[11:49:17] [INFO] MCLauncher.setMemory:271: Setting MaxMemory to 3072
[11:49:17] [DEBUG] MCInstaller.launchMinecraft:428: MC PID: 82988
[11:49:18] [main/INFO] [LaunchWrapper]: Loading tweak class name cpw.mods.fml.common.launcher.FMLTweaker
[11:49:18] [main/INFO] [LaunchWrapper]: Using primary tweak class name cpw.mods.fml.common.launcher.FMLTweaker
[11:49:18] [main/INFO] [LaunchWrapper]: Calling tweak class cpw.mods.fml.common.launcher.FMLTweaker
Exception in thread «main» java.lang.NoClassDefFoundError: com/google/common/collect/Lists
at cpw.mods.fml.common.launcher.FMLTweaker.acceptOptions(FMLTweaker.java:50)
at net.minecraft.launchwrapper.Launch.launch(Launch.java:114)
at net.minecraft.launchwrapper.Launch.main(Launch.java:28)
Caused by: java.lang.ClassNotFoundException: com.google.common.collect.Lists
at java.net.URLClassLoader.findClass(Unknown Source)
at java.lang.ClassLoader.loadClass(Unknown Source)
at sun.misc.Launcher$AppClassLoader.loadClass(Unknown Source)
at java.lang.ClassLoader.loadClass(Unknown Source)
… 3 more
[11:49:19] [DEBUG] Benchmark.logBenchAs:73: UnreadNews Init took 0 ms.
[11:49:37] Logs copied to clipboard
its been doing this for ages even did force update
jikuja
legacy FTB Launcher developer
Launcher Developer
Global Moderator
- Dec 17, 2013
- 1,134
- 111
- 99
-
#2
If you already did force update and it still is not fixed this might be hard to fix. Twy whitelisting <ftb installation>libraries and do force update again. Also try deleting <ftb installation>librariescomgoogleguavaguava17.0guava-17.0.jar and then force update.
Содержание
- Ftb launcher windows 10 как установить
- Как исправить ошибку при загрузке ModPack с помощью FTB Launcher
- Метод 1. Откройте «Feed the Beast» с правами администратора
- Метод 2: переустановка программы запуска Feed the Beast
- Метод 3: установка последней версии Java
- Скачать лаунчер FTB Launcher
- Начинаем игру (основная информация)
- Содержание
- Подготовка
- Установка лаунчера
- Лаунчер приложений от Twitch
- Устаревший лаунчер FTB
- Выбор пакета модификаций
- Приложение Twitch
- Старый лаунчер FTB
- Установка официального пакета
- Установка публичного пакета
- Установка пакета не из списка
- Руководства по модификациям
- Руководства по пакетам модификаций
- Прочие руководства
Ftb launcher windows 10 как установить
Вкратце:
Скачивается последняя версия flblauncher — автор дает ссылку на загрузку образа в описании своих раздач и уже запиленного образа в своих постах обсуждения раздачи (возможно, для скачивания потребуется вход в аккаунт google), или скачать саму раздачу и в UltraISO поменять install.wim/instal.esd, ессно искать надо самую новую раздачу. Затем в Diskpart (diskpart можно запустить в рабочей системе windows: Win+R > cmd > diskpart) делается флешка с одним основным активным разделом fat32:
diskpart
list disk
sel disk x (номер flash-диска)
clean
create part primary
format quick fs=fat32
active
assign
exit
Образ flblauncher монтируется в виртуальный привод (в windows 10 по двойному клику) и его содержимое копируется на флешку.
В папку sources флешки кидаете свой install.wim или install.esd.
Чтобы install.wim не превышал 4Гб (ограничение fat32) можно вытащить нужную редакцию:
Скачать WinAIO Maker Professional.
Распаковать все содержимое образа дистрибутива в какую нибудь папку. Это умеет 7-ZIP.
Запустить WinAIO Maker Professional. В нем:
Select WIMs > указать путь к install.wim в папке с распакованными файлами дистрибутива > из списка доступных редакций удалить ненужные > нажать Save all chages.
Пересобрать образ дистрибутива в UltraISO — подменить install.wim
Install.wim в конечном образе будет иметь размер существенно меньше 4gb.
Ессно, вы также можете использовать саму раздачу автора с подготовленным им самим install.wim
После загрузки с флешки откроется интерфейс flblauncher — дальше установка Windows с выбором опций, или запуск дополнительных инструментов
Как исправить ошибку при загрузке ModPack с помощью FTB Launcher
Некоторые пользователи сталкиваются с сообщением «Ошибка при загрузке пакета модов» при попытке использовать программу запуска «Feed the Beast Launcher» для установки пакета модов в Minecraft. Эта проблема не связана с ОС, поскольку, как сообщается, она возникает в Windows 7, Windows 8.1 и Windows 10.

После изучения этой конкретной проблемы выяснилось, что существует несколько различных причин, которые могут в конечном итоге вызвать эту конкретную ошибку. Вот список потенциальных виновников:
- Отсутствует доступ администратора. Одним из наиболее распространенных случаев, вызывающих эту проблему, является случай, когда у основной программы запуска FTB отсутствует доступ администратора для правильной установки файлов игры и управления ими. В этом случае вы можете решить проблему, принудительно запустив исполняемый файл с правами администратора (или настроив его на запуск таким образом по умолчанию).
- Поврежденная установка FTB. Повреждение установки программы запуска Feed the Beast также может быть причиной этой ошибки. Если этот сценарий применим, вы можете решить проблему, переустановив программу запуска и очистив все остаточные файлы перед повторной установкой.
- Отсутствует зависимость Java. Если вы используете устаревшую версию Java, вероятно, это причина, по которой вы видите эту ошибку каждый раз, когда пытаетесь установить пакет модов с помощью средства запуска FTB. В этом случае вам следует использовать утилиту удаления Java, чтобы удалить все следы текущей установки Java перед установкой последней версии по официальным каналам.
Теперь, когда вы знаете потенциальных виновников, вот список методов, которые некоторые затронутые пользователи использовали для решения проблемы:
Метод 1. Откройте «Feed the Beast» с правами администратора
По словам некоторых затронутых пользователей, эта проблема также может возникать из-за того, что программа запуска FTB не имеет необходимых разрешений для установки модпаков. В большинстве случаев это происходит из-за того, что настройки UAC (Контроль учетных записей пользователей) строже, чем обычно, что не позволяет программе запуска FTB получить права администратора для установки модпаков.
В этом случае вы можете решить проблему, принудительно запустив программу запуска Feed the Beast с правами администратора. Для этого щелкните правой кнопкой мыши исполняемый файл FTB и выберите «Запуск от имени администратора» в контекстном меню.
 Запуск исполняемого файла от имени администратора
После того, как вы открыли средство запуска FTB с правами администратора, повторите действие, которое ранее вызывало ошибку загрузки модпака, и посмотрите, устранена ли проблема.
Примечание. Если вы часто используете эту программу запуска и не хотите повторять эти шаги каждый раз, вам следует подумать о том, чтобы изменить программу запуска для запуска с администратором по умолчанию. Для этого щелкните его правой кнопкой мыши и выберите «Свойства» в контекстном меню.
 Доступ к экрану свойств
Находясь на экране «Свойства», перейдите на вкладку «Совместимость» и установите флажок «Запускать эту программу от имени администратора» (в разделе «Настройки»). Наконец, нажмите Применить, чтобы сохранить изменения.
Если запуск программы запуска с правами администратора не устранил проблему, перейдите к следующему потенциальному исправлению ниже.
Метод 2: переустановка программы запуска Feed the Beast
Как оказалось, эта проблема может быть вызвана каким-либо типом повреждения файла, влияющим на установку программы запуска Feed the Beat. В этом случае вы сможете решить проблему, полностью переустановив программу запуска и убедившись, что вы не оставляете никаких остатков файлов между установками.
Успешность этого метода была подтверждена многими затронутыми пользователями, которые ранее не могли загружать пакеты модов с помощью средства запуска FTB.
Вот краткое пошаговое руководство по переустановке модуля запуска FTB, чтобы исправить ошибку загрузки модпака:
- Нажмите клавишу Windows + R, чтобы открыть диалоговое окно «Выполнить». Затем введите appwiz.cpl в текстовое поле и нажмите Enter, чтобы открыть меню «Программы и компоненты».
 Введите appwiz.cpl и нажмите Enter, чтобы открыть страницу установленных программ.
 - Зайдя в меню «Программы и компоненты», прокрутите список установленных элементов вниз и найдите запись, связанную с Feed the Beast. Когда вы его увидите, щелкните его правой кнопкой мыши и выберите в контекстном меню «Удалить».Удаление приложения FTP
- Как только вы окажетесь на экране удаления, следуйте инструкциям на экране, чтобы завершить процесс, а затем перезагрузите компьютер.
- После завершения следующего запуска посетите официальная страница загрузки панели запуска FTB и нажмите кнопку «Загрузить», связанную с вашей ОС.Покормить зверюгу
- После завершения загрузки щелкните установщик правой кнопкой мыши и выберите в контекстном меню «Запуск от имени администратора».
- Следуйте инструкциям на экране, чтобы завершить установку, запустите программу запуска Feed the Beast и повторите попытку установки пакета модов, чтобы проверить, устранена ли проблема.
 Введите appwiz.cpl и нажмите Enter, чтобы открыть страницу установленных программ.
 Удаление приложения FTP
 Покормить зверюгу
Если та же проблема все еще возникает, перейдите к следующему потенциальному исправлению ниже.
Метод 3: установка последней версии Java
По мнению некоторых пострадавших, ошибка «Ошибка при загрузке пакета модов» также может возникать, если вы используете старую версию Java, которая требуется для программы Feed the Beast Launcher.
К счастью, некоторые затронутые пользователи, которые ранее сталкивались с той же проблемой, подтвердили, что они смогли решить проблему с помощью служебной программы Verify Java and Find Out-of-Date для обновления или установки отсутствующих зависимостей Java.
После установки или обновления среды Java и перезагрузки компьютера подавляющее большинство затронутых пользователей подтвердили, что «Ошибка загрузки модпака» вообще перестала появляться.
Если вы не знаете, как обновить версию Java, следуйте пошаговым инструкциям ниже:
- Откройте браузер по умолчанию и посетите страница загрузки последней версии инструмента удаления Java и нажмите Согласен с условиями и хочу продолжить.Продолжаем установку обновления Java
- После завершения загрузки дважды щелкните только что загруженный исполняемый файл и следуйте инструкциям на экране, чтобы полностью удалить текущую версию JAVA и удалить все оставшиеся файлы.
- После завершения операции перезагрузите компьютер и дождитесь завершения следующего запуска.
- Затем посетите Страница загрузки Java и загрузите последнюю доступную версию, нажав «Принять» и «Начать бесплатную загрузку».Загрузите последнюю версию Java
- После завершения загрузки откройте исполняемый файл и следуйте инструкциям на экране, чтобы завершить установку последней версии Java и перезагрузиться, когда будет предложено.
- Наконец, после завершения запуска ext откройте программу запуска Feed the Beast и посмотрите, сможете ли вы загрузить и установить модпак, не увидев того же кода ошибки.
 Продолжаем установку обновления Java
 Загрузите последнюю версию Java
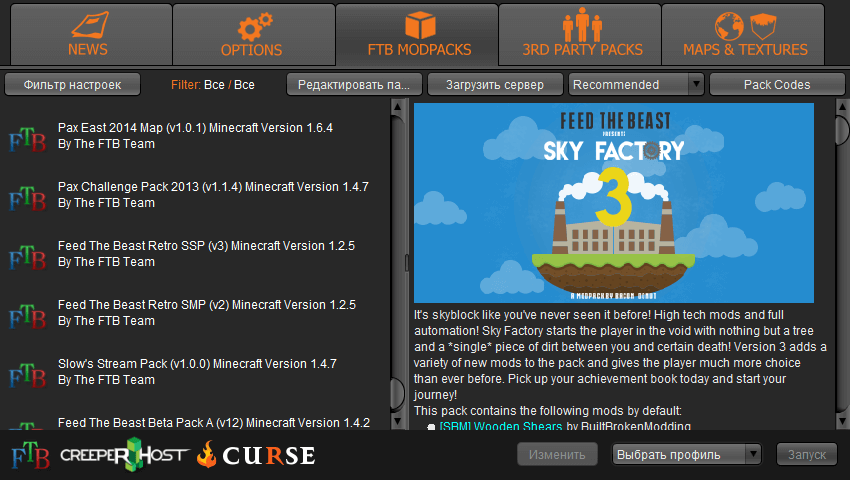
На сайте вы можете скачать FTB Launcher, созданный энтузиастами-моддерами. Как же он появился? Feed The Beast – это группа людей, которая специализируется на создании высококачественных модпаков и карт для Майнкрафт. Они начали с карты в стиле небесных блоков, ориентированной на использование оригинальных модов. Эти карты стали чрезвычайно популярными и для распространения был создан англоязычный FTB Launcher.
Последняя версия FTB Launcher: 1.4.15
Программа разработана таким образом, чтобы быть максимально простой и лёгкой в использовании. При этом она предоставляет расширенные функции тем, кто в них нуждается и позволяет загружать модпаки, устанавливать пакеты текстур или карты самым элементарным способом.
- Лаунчер предлагает модификации для игры, соответствующие самым разным вкусам. В этот перечень входят Regrowth, ME^4 и Crash Landing.
- Программа также даёт вам возможность устанавливать множество различных пакетов текстур и карт, характерных для используемой сборки.
ФТБ Лаунчер скачать можно совершенно бесплатно, чтобы получить доступ к описанным возможностям. Каждый пользователь может собрать свою идеальную игру, не покидая программу. Простота интерфейса достигается удобством расположения разделов.
Главной фишкой данного лаунчера является возможность загружать популярные дополнения прямо из окна программы. Софт получает регулярные обновления, хотя и сменил изначальных разработчиков. Программа экономит время пользователей и открывает простор для игровых приключений. Просто выбирайте разные карты, пробуйте наборы текстур и разнообразные модификации. Именно для этого и был создан Майнкрафт, чтобы каждый игрок мог создать собственную сборку и провести время с максимальным удовольствием.
Софт поддерживает 32-битную и 64-битную Windows, поэтому вы можете выбрать подходящую версию для лучшей совместимости со своей системой. Стоит заметить, что несмотря на обилие модпаков, не все будут доступны сразу. Одни ещё не прошли тестирование, другие требуют специального кода, который можно найти на официальном сайте разработчиков. В этом преимущество, ведь в лаунчер попадают только проверенные и работающие моды. Это позволяет свести ошибки к минимуму на радость всем игрокам. Не стоит расстраивается, если любимого мода не обнаружится – он может появиться позднее.
Начинаем игру (основная информация)
Содержание
Подготовка
Прежде чем начать играть в Feed The Beast, вы должны сделать следующее:
- Приобретите Minecraft на сайте Mojang и создайте аккаунт.
- Установите Minecraft и запустите хотя бы один раз, чтобы удостовериться в работе игры на вашем ПК.
Установка лаунчера
Лаунчер приложений от Twitch
Вышеуказанные шаги описывают работу с устаревшим лаунчером FTB. FTB теперь работает с приложением Twitch, которое можно скачать здесь.
- Скачайте .exe или .app файл отсюда.
- Запустите .exe или .app файл на своём компьютере.
- Войдите в учётную запись, используя свои входные данные Twitch.
Устаревший лаунчер FTB
Когда у вас успешно выполняется сам Minecraft, вы можете приступить к установке лаунчера FTB. Команда FTB не рекомендует использовать этот лаунчер, взамен которому предлагают использовать приложение Twitch; правда, это приложение пока не поддерживает Linux, а также есть несколько старых пакетов модификаций от третьих лиц, которые пока недоступны для скачивания в приложении Twitch.
- Посетите сайт FTB и загрузите файл .exe или .jar отсюда.
- Положите файл .exe или .jar в любую директорию вашего ПК.
- Запустите файл .exe или .jar. Может потребоваться некоторое время для конфигурации при первом запуске.
- Нажмите на кнопку OPTIONS (Опции) и настройте путь установки, использования памяти и размера и расположения окна.
- Создайте профиль, используя ваше имя Mojang (или эл. адрес Mojang) и пароль.
Выбор пакета модификаций
Существует много пакетов модификаций FTB, они перечислены здесь. Приложение Twitch Desktop App может использоваться для установки ряда других пакетов модификаций от других создателей.
Приложение Twitch
- Щёлкните по «Mods» в верхней полосе, а затем по «Minecraft». Если этой кнопки нет, проверьте, что управление модификациями для Minecraft включено в настройках приложения. Вы перейдёте на страницу профилей.
- Щёлкните по «Browse FTB Modpacks» («Поиск среди пакетов FTB»).
- Щёлкните по желаемому пакету модификаций.
- Щёлкните по кнопке «Install» («Установить»), расположенной в верхнем левом углу.
- Вернитесь на страницу профилей.
- Щёлкните по кнопке «Play» («Играть»), чтобы загрузить лаунчер Minecraft.
- Наслаждайтесь игрой в Feed the Beast!
Старый лаунчер FTB
Установка официального пакета
- В главном окне лаунчера выберите пункт «FTB MODPACKS» (Пакеты модификаций FTB).
- Нажмите на один из пакетов слева. Лаунчер отобразит список модификаций, входящих в этот пакет.
- Выбрав пакет модификаций, нажмите кнопку «Запуск».
- Ждите, пока лаунчер загрузит, установит и запустит игру с пакетом модификаций.
- Удачной игры в Feed The Beast!
Установка публичного пакета
- В главном окне лаунчера выберите пункт «3RD PARTY PACKS» (Пакеты модификаций 3-их лиц).
- Нажмите на один из пакетов слева. Лаунчер отобразит список модификаций, входящих в этот пакет.
- Выбрав пакет модификаций, нажмите кнопку «Запуск».
- Ждите, пока лаунчер загрузит, установит и запустит игру.
- Удачной игры в Feed The Beast!
Установка пакета не из списка
- В главном окне лаунчера выберите пункт «3RD PARTY PACKS» (Пакеты модификаций 3-их лиц).
- Нажмите на «Pack Codes» («Коды пакетов») сверху справа.
- Пропишите ваш код и нажмите «Add» («Добавить»)
- Найдя ваш пакет модификаций слева, нажмите на него. Лаунчер отобразит список модификаций , входящих в этот пакет.
- Выбрав пакет модификаций , нажмите кнопку «Запуск».
- Ждите, пока лаунчер загрузит, установит и запустит игру.
- Удачной игры в Feed The Beast!
Руководства по модификациям
Руководства по пакетам модификаций
Прочие руководства
Данные руководства не связаны с модификациями или пакетами модификаций.
Некоторые пользователи сталкиваются с сообщением «Ошибка при загрузке пакета модов» при попытке использовать программу запуска «Feed the Beast Launcher» для установки пакета модов в Minecraft. Эта проблема не связана с ОС, поскольку, как сообщается, она возникает в Windows 7, Windows 8.1 и Windows 10.
Ошибка при загрузке пакета модов с помощью Feed the Beast Launcher
После изучения этой конкретной проблемы выяснилось, что существует несколько различных причин, которые могут в конечном итоге вызвать эту конкретную ошибку. Вот список потенциальных виновников:
- Отсутствует доступ администратора. Одним из наиболее распространенных случаев, вызывающих эту проблему, является случай, когда у основной программы запуска FTB отсутствует доступ администратора для правильной установки файлов игры и управления ими. В этом случае вы можете решить проблему, принудительно запустив исполняемый файл с правами администратора (или настроив его на запуск таким образом по умолчанию).
- Поврежденная установка FTB. Повреждение установки программы запуска Feed the Beast также может быть причиной этой ошибки. Если этот сценарий применим, вы можете решить проблему, переустановив программу запуска и очистив все остаточные файлы перед повторной установкой.
- Отсутствует зависимость Java. Если вы используете устаревшую версию Java, вероятно, это причина, по которой вы видите эту ошибку каждый раз, когда пытаетесь установить пакет модов с помощью средства запуска FTB. В этом случае вам следует использовать утилиту удаления Java, чтобы удалить все следы текущей установки Java перед установкой последней версии по официальным каналам.
Теперь, когда вы знаете потенциальных виновников, вот список методов, которые некоторые затронутые пользователи использовали для решения проблемы:
Метод 1. Откройте «Feed the Beast» с правами администратора
По словам некоторых затронутых пользователей, эта проблема также может возникать из-за того, что программа запуска FTB не имеет необходимых разрешений для установки модпаков. В большинстве случаев это происходит из-за того, что настройки UAC (Контроль учетных записей пользователей) строже, чем обычно, что не позволяет программе запуска FTB получить права администратора для установки модпаков.
В этом случае вы можете решить проблему, принудительно запустив программу запуска Feed the Beast с правами администратора. Для этого щелкните правой кнопкой мыши исполняемый файл FTB и выберите «Запуск от имени администратора» в контекстном меню.
Запуск исполняемого файла от имени администратора
После того, как вы открыли средство запуска FTB с правами администратора, повторите действие, которое ранее вызывало ошибку загрузки модпака, и посмотрите, устранена ли проблема.
Примечание. Если вы часто используете эту программу запуска и не хотите повторять эти шаги каждый раз, вам следует подумать о том, чтобы изменить программу запуска для запуска с администратором по умолчанию. Для этого щелкните его правой кнопкой мыши и выберите «Свойства» в контекстном меню.
Доступ к экрану свойств
Находясь на экране «Свойства», перейдите на вкладку «Совместимость» и установите флажок «Запускать эту программу от имени администратора» (в разделе «Настройки»). Наконец, нажмите Применить, чтобы сохранить изменения.
Если запуск программы запуска с правами администратора не устранил проблему, перейдите к следующему потенциальному исправлению ниже.
Метод 2: переустановка программы запуска Feed the Beast
Как оказалось, эта проблема может быть вызвана каким-либо типом повреждения файла, влияющим на установку программы запуска Feed the Beat. В этом случае вы сможете решить проблему, полностью переустановив программу запуска и убедившись, что вы не оставляете никаких остатков файлов между установками.
Успешность этого метода была подтверждена многими затронутыми пользователями, которые ранее не могли загружать пакеты модов с помощью средства запуска FTB.
Вот краткое пошаговое руководство по переустановке модуля запуска FTB, чтобы исправить ошибку загрузки модпака:
- Нажмите клавишу Windows + R, чтобы открыть диалоговое окно «Выполнить». Затем введите appwiz.cpl в текстовое поле и нажмите Enter, чтобы открыть меню «Программы и компоненты».Введите appwiz.cpl и нажмите Enter, чтобы открыть страницу установленных программ.
- Зайдя в меню «Программы и компоненты», прокрутите список установленных элементов вниз и найдите запись, связанную с Feed the Beast. Когда вы его увидите, щелкните его правой кнопкой мыши и выберите в контекстном меню «Удалить».Удаление приложения FTP
- Как только вы окажетесь на экране удаления, следуйте инструкциям на экране, чтобы завершить процесс, а затем перезагрузите компьютер.
- После завершения следующего запуска посетите официальная страница загрузки панели запуска FTB и нажмите кнопку «Загрузить», связанную с вашей ОС.Покормить зверюгу
- После завершения загрузки щелкните установщик правой кнопкой мыши и выберите в контекстном меню «Запуск от имени администратора».
- Следуйте инструкциям на экране, чтобы завершить установку, запустите программу запуска Feed the Beast и повторите попытку установки пакета модов, чтобы проверить, устранена ли проблема.
Если та же проблема все еще возникает, перейдите к следующему потенциальному исправлению ниже.
Метод 3: установка последней версии Java
По мнению некоторых пострадавших, ошибка «Ошибка при загрузке пакета модов» также может возникать, если вы используете старую версию Java, которая требуется для программы Feed the Beast Launcher.
К счастью, некоторые затронутые пользователи, которые ранее сталкивались с той же проблемой, подтвердили, что они смогли решить проблему с помощью служебной программы Verify Java and Find Out-of-Date для обновления или установки отсутствующих зависимостей Java.
После установки или обновления среды Java и перезагрузки компьютера подавляющее большинство затронутых пользователей подтвердили, что «Ошибка загрузки модпака» вообще перестала появляться.
Если вы не знаете, как обновить версию Java, следуйте пошаговым инструкциям ниже:
- Откройте браузер по умолчанию и посетите страница загрузки последней версии инструмента удаления Java и нажмите Согласен с условиями и хочу продолжить.Продолжаем установку обновления Java
- После завершения загрузки дважды щелкните только что загруженный исполняемый файл и следуйте инструкциям на экране, чтобы полностью удалить текущую версию JAVA и удалить все оставшиеся файлы.
- После завершения операции перезагрузите компьютер и дождитесь завершения следующего запуска.
- Затем посетите Страница загрузки Java и загрузите последнюю доступную версию, нажав «Принять» и «Начать бесплатную загрузку».Загрузите последнюю версию Java
- После завершения загрузки откройте исполняемый файл и следуйте инструкциям на экране, чтобы завершить установку последней версии Java и перезагрузиться, когда будет предложено.
- Наконец, после завершения запуска ext откройте программу запуска Feed the Beast и посмотрите, сможете ли вы загрузить и установить модпак, не увидев того же кода ошибки.
I installed 64 bit java and uninstalled 32 bit java still doesn’t work. Someone please help!
[13:47:08] [ERROR] LauncherConsole$OutputOverride.write:92: From Console: Feb 17, 2014 1:47:08 PM java.util.prefs.WindowsPreferences <init>
WARNING: Could not open/create prefs root node SoftwareJavaSoftPrefs at root 0x80000002. Windows RegCreateKeyEx(…) returned error code 5.
[13:47:08] [ERROR] LauncherConsole$OutputOverride.write:92: From Console: java.io.IOException: Cannot run program «C:Windowssystem32java.exe»: CreateProcess error=5, Access is denied
[13:47:08] [ERROR] LauncherConsole$OutputOverride.write:92: From Console: at java.lang.ProcessBuilder.start(Unknown Source)
[13:47:08] [ERROR] LauncherConsole$OutputOverride.write:92: From Console: at java.lang.Runtime.exec(Unknown Source)
[13:47:08] [ERROR] LauncherConsole$OutputOverride.write:92: From Console: at java.lang.Runtime.exec(Unknown Source)
[13:47:08] [ERROR] LauncherConsole$OutputOverride.write:92: From Console: at net.ftb.util.winreg.RuntimeStreamer.execute(RuntimeStreamer.java:53)
[13:47:08] [ERROR] LauncherConsole$OutputOverride.write:92: From Console: at net.ftb.util.winreg.JavaInfo.<init>(JavaInfo.java:28)
[13:47:08] [ERROR] LauncherConsole$OutputOverride.write:92: From Console: at net.ftb.util.winreg.JavaFinder.findJavas(JavaFinder.java:70)
[13:47:08] [ERROR] LauncherConsole$OutputOverride.write:92: From Console: at net.ftb.util.winreg.JavaFinder.parseWinJavaVersion(JavaFinder.java:99)
[13:47:08] [ERROR] LauncherConsole$OutputOverride.write:92: From Console: at net.ftb.gui.panes.OptionsPane.<init>(OptionsPane.java:116)
[13:47:08] [ERROR] LauncherConsole$OutputOverride.write:92: From Console: at net.ftb.gui.LaunchFrame.<init>(LaunchFrame.java:520)
[13:47:08] [ERROR] LauncherConsole$OutputOverride.write:92: From Console: at net.ftb.gui.LaunchFrame$1.run(LaunchFrame.java:281)
[13:47:08] [ERROR] LauncherConsole$OutputOverride.write:92: From Console: at java.awt.event.InvocationEvent.dispatch(Unknown Source)
[13:47:08] [ERROR] LauncherConsole$OutputOverride.write:92: From Console: at java.awt.EventQueue.dispatchEventImpl(Unknown Source)
[13:47:08] [ERROR] LauncherConsole$OutputOverride.write:92: From Console: at java.awt.EventQueue.access$200(Unknown Source)
[13:47:08] [ERROR] LauncherConsole$OutputOverride.write:92: From Console: at java.awt.EventQueue$3.run(Unknown Source)
[13:47:08] [ERROR] LauncherConsole$OutputOverride.write:92: From Console: at java.awt.EventQueue$3.run(Unknown Source)
[13:47:08] [ERROR] LauncherConsole$OutputOverride.write:92: From Console: at java.security.AccessController.doPrivileged(Native Method)
[13:47:08] [ERROR] LauncherConsole$OutputOverride.write:92: From Console: at java.security.ProtectionDomain$1.doIntersectionPrivilege(Unknown Source)
[13:47:08] [ERROR] LauncherConsole$OutputOverride.write:92: From Console: at java.awt.EventQueue.dispatchEvent(Unknown Source)
[13:47:08] [ERROR] LauncherConsole$OutputOverride.write:92: From Console: at java.awt.EventDispatchThread.pumpOneEventForFilters(Unknown Source)
[13:47:08] [ERROR] LauncherConsole$OutputOverride.write:92: From Console: at java.awt.EventDispatchThread.pumpEventsForFilter(Unknown Source)
[13:47:08] [ERROR] LauncherConsole$OutputOverride.write:92: From Console: at java.awt.EventDispatchThread.pumpEventsForHierarchy(Unknown Source)
[13:47:08] [ERROR] LauncherConsole$OutputOverride.write:92: From Console: at java.awt.EventDispatchThread.pumpEvents(Unknown Source)
[13:47:08] [ERROR] LauncherConsole$OutputOverride.write:92: From Console: at java.awt.EventDispatchThread.pumpEvents(Unknown Source)
[13:47:08] [ERROR] LauncherConsole$OutputOverride.write:92: From Console: at java.awt.EventDispatchThread.run(Unknown Source)
[13:47:08] [ERROR] LauncherConsole$OutputOverride.write:92: From Console: Caused by: java.io.IOException: CreateProcess error=5, Access is denied
[13:47:08] [ERROR] LauncherConsole$OutputOverride.write:92: From Console: at java.lang.ProcessImpl.create(Native Method)
[13:47:08] [ERROR] LauncherConsole$OutputOverride.write:92: From Console: at java.lang.ProcessImpl.<init>(Unknown Source)
[13:47:08] [ERROR] LauncherConsole$OutputOverride.write:92: From Console: at java.lang.ProcessImpl.start(Unknown Source)
[13:47:08] [ERROR] LauncherConsole$OutputOverride.write:92: From Console: … 24 more
[13:47:08] [ERROR] LauncherConsole$OutputOverride.write:92: From Console: Exception in thread «AWT-EventQueue-0»
[13:47:08] [ERROR] LauncherConsole$OutputOverride.write:92: From Console: java.lang.NullPointerException
[13:47:08] [ERROR] LauncherConsole$OutputOverride.write:92: From Console: at net.ftb.util.winreg.JavaInfo.<init>(JavaInfo.java:29)
[13:47:08] [ERROR] LauncherConsole$OutputOverride.write:92: From Console: at net.ftb.util.winreg.JavaFinder.findJavas(JavaFinder.java:70)
[13:47:08] [ERROR] LauncherConsole$OutputOverride.write:92: From Console: at net.ftb.util.winreg.JavaFinder.parseWinJavaVersion(JavaFinder.java:99)
[13:47:08] [ERROR] LauncherConsole$OutputOverride.write:92: From Console: at net.ftb.gui.panes.OptionsPane.<init>(OptionsPane.java:116)
[13:47:08] [ERROR] LauncherConsole$OutputOverride.write:92: From Console: at net.ftb.gui.LaunchFrame.<init>(LaunchFrame.java:520)
[13:47:08] [ERROR] LauncherConsole$OutputOverride.write:92: From Console: at net.ftb.gui.LaunchFrame$1.run(LaunchFrame.java:281)
[13:47:08] [ERROR] LauncherConsole$OutputOverride.write:92: From Console: at java.awt.event.InvocationEvent.dispatch(Unknown Source)
[13:47:08] [ERROR] LauncherConsole$OutputOverride.write:92: From Console: at java.awt.EventQueue.dispatchEventImpl(Unknown Source)
[13:47:08] [ERROR] LauncherConsole$OutputOverride.write:92: From Console: at java.awt.EventQueue.access$200(Unknown Source)
[13:47:08] [ERROR] LauncherConsole$OutputOverride.write:92: From Console: at java.awt.EventQueue$3.run(Unknown Source)
[13:47:08] [ERROR] LauncherConsole$OutputOverride.write:92: From Console: at java.awt.EventQueue$3.run(Unknown Source)
[13:47:08] [ERROR] LauncherConsole$OutputOverride.write:92: From Console: at java.security.AccessController.doPrivileged(Native Method)
[13:47:08] [ERROR] LauncherConsole$OutputOverride.write:92: From Console: at java.security.ProtectionDomain$1.doIntersectionPrivilege(Unknown Source)
[13:47:08] [ERROR] LauncherConsole$OutputOverride.write:92: From Console: at java.awt.EventQueue.dispatchEvent(Unknown Source)
[13:47:08] [ERROR] LauncherConsole$OutputOverride.write:92: From Console: at java.awt.EventDispatchThread.pumpOneEventForFilters(Unknown Source)
[13:47:08] [ERROR] LauncherConsole$OutputOverride.write:92: From Console: at java.awt.EventDispatchThread.pumpEventsForFilter(Unknown Source)
[13:47:08] [ERROR] LauncherConsole$OutputOverride.write:92: From Console: at java.awt.EventDispatchThread.pumpEventsForHierarchy(Unknown Source)
[13:47:08] [ERROR] LauncherConsole$OutputOverride.write:92: From Console: at java.awt.EventDispatchThread.pumpEvents(Unknown Source)
[13:47:08] [ERROR] LauncherConsole$OutputOverride.write:92: From Console: at java.awt.EventDispatchThread.pumpEvents(Unknown Source)
[13:47:08] [ERROR] LauncherConsole$OutputOverride.write:92: From Console: at java.awt.EventDispatchThread.run(Unknown Source)

Feed The Beast (FTB) Launcher был впервые запущен в ноябре 2012 года. Первый релиз лаунчера был представлен на стриме, который смотрело более 9000 человек. С тех пор лаунчер претерпел много изменений, сменились разработчики.
Лаунчер не забросили и он по прежнему обновляется и поддерживает последние версии Майнкрафт. Фишка этого лаучнера в том, что в нем есть большое количество модов, ресурспаков и карт. Вы можете загрузить и установить любой из них в один клик и играть.
Ниже по ссылкам вы сможете скачать последний лицензионный Feed The Beast или пиратский для 32 и 64 битных систем
Файлы без вирусов. Проверено VirusTotal

- 4,3
- 1
- 2
- 3
- 4
- 5
0
Оценка: 4,3/5
(Голосов: 233)
Вместе с FTB Launcher скачивают
Modded Minecraft can be incredibly complex. Modpacks with upwards of 300 mods exist and it’s impossible for every mod interaction to be vetted ahead of time. In addition, individual hardware and software configurations, driver versions, and other independent factors can all impact stability. As such, crashes can and do happen. This page tries to distill common scenarios and baseline knowledge for troubleshooting crashes you’re experiencing to get you back into your Minecraft world as quickly as possible.
Crash Logs
If you are experiencing game crashes while playing modded Minecraft, the best source of information as to what is happening is the crash log files. There are a couple different files that you may need to look through before finding the information you need.
There are two folders which might contain relevant information. If you are experiencing an actual crash, the crash-reports folder will have a file starting with crash- and then a time stamp of the crash so you can easily determine which file contains the information for that crash.
If that file doesn’t have useful information, doesn’t exist, or you’re not experiencing a full crash, the next place you want to check is the logs folder. This folder holds the logs generated by Minecraft as it runs, and there is a new one generated each time you launch Minecraft. As such, there are many more files here and older ones are archived and zipped up, so you might have to do a little more hunting to find the correct file, but usually latest.log is what you’re looking for. A dedicated server will have fml-server-latest.log instead.
Locating Logs
Twitch
Getting to your Minecraft instance folder from the Twitch app is easy. First, from the Minecraft screen in Twitch, click on the modpack you’re interested in. Now, in the top right corner you’ll see a button labelled «Get More Content» next to which is an ellipsis (three dots) button. Clicking on that button will open a drop-down menu, from which you can choose Open Folder to be taken directly to the folder for that modpack.
Legacy FTB Launcher
From the FTB launcher, choose the Options button. This screen will display an entry for Install Folder; this is where you will find your modpacks. Either manually navigate to that folder or on Windows copy the text and paste it into the address bar of Explorer and it will take you to the correct directory. From there you’ll need to navigate into the individual modpack folders, after which the instructions above about finding the log files will be accurate.
Other
If you are using a different launcher or none at all, you will need to be able to locate your Minecraft modpack directory on your own. Once you do, the same folder structure as described above should exist and you should be able to hunt down your crash logs without issue.
Sharing Logs
If you need to share your log with the community so you can get assistance with someone else, please do not copy and paste it into a discussion thread. The logs are large and if you try to prune them you may omit important details, and some websites mess up the formatting. Instead, share the file via a paste service, of which there are many. Here are a few in no particular order:
- FTB Paste
- Pastebin
- Ubuntu Paste
- Paste.ee
- Gist
Once you’ve put the file on one of these sites, you can simply share the link to the paste rather than the whole file. Also, please note that it is simpler if you use one of these services rather than something like Dropbox, Google Drive, or OneDrive. While these are great for sharing other data, they’re overly complex for this purpose and are the reason the sites above are available.
Interpreting Crash Logs
Understanding all of the details of a crash log is far beyond the scope of this tutorial page, but is also unnecessary in a lot of cases. Try the following to be able to help yourself solve a problem quicker than waiting on help from the internet!
A Java Stacktrace
When Minecraft crashes, it produces what is known as a stacktrace. Put simply, this is a list of what Minecraft was trying to do when things went wrong. Here is a pruned example of one:
---- Minecraft Crash Report ----
// Uh... Did I do that?

Time: 26/02/16 11:04 PM
Description: Ticking block entity

java.lang.NoSuchMethodError: appeng.api.features.IInscriberRegistry.getRecipes()Ljava/util/List;
	at net.bdew.ae2stuff.machines.inscriber.TileInscriber.findFinalRecipe(TileInscriber.scala:128)
	at net.bdew.ae2stuff.machines.inscriber.TileInscriber$$anonfun$1.apply$mcV$sp(TileInscriber.scala:59)
	at net.bdew.lib.Event0$$anonfun$trigger$1.apply(Event.scala:19)
	at net.bdew.lib.Event0$$anonfun$trigger$1.apply(Event.scala:19)
	at scala.collection.immutable.List.foreach(List.scala:383)
	at net.bdew.lib.Event0.trigger(Event.scala:19)
	at net.bdew.lib.tile.TileExtended.func_145845_h(TileExtended.scala:63)
	at net.minecraft.world.World.func_72939_s(World.java:1939)
	at net.minecraft.world.WorldServer.func_72939_s(WorldServer.java:489)
	at net.minecraft.server.MinecraftServer.func_71190_q(MinecraftServer.java:636)
	at net.minecraft.server.dedicated.DedicatedServer.func_71190_q(DedicatedServer.java:334)
	at net.minecraft.server.MinecraftServer.func_71217_p(MinecraftServer.java:547)
	at net.minecraft.server.MinecraftServer.run(MinecraftServer.java:427)
	at net.minecraft.server.MinecraftServer$2.run(MinecraftServer.java:685)
This looks like a big mess but there are a few hints as to what’s going on. First of all, the Description line tells us that the problem is with a «Ticking block entity» — ticking essentially refers to something doing the work that it does (i.e. when a furnace «ticks» it makes a bit of progress towards processing the item it’s working on) and a block is simply that, a block in the world.
The really important pieces are here:
java.lang.NoSuchMethodError: appeng.api.features.IInscriberRegistry.getRecipes()Ljava/util/List;
	at net.bdew.ae2stuff.machines.inscriber.TileInscriber.findFinalRecipe(TileInscriber.scala:128)
This information is going to get us 90% towards understanding what’s going on. In the first line, we see a mention of «IInscriberRegistry» which could mean absolutely anything, but what was I doing when this crash occurred? Oh, I was interacting with an Advanced Inscriber from AE2 Stuff! The second line confirms that as it shows the issue was in «net.bdew.ae2stuff.machines.inscriber…». At this point there’s a hint at what’s going on, but what can be done about it?
Dealing with the issue
This section is not called Solving the issue because sometimes you simply cannot solve the problem and it’s out of your hands. Instead, what should we do to deal with this issue?
- Check for an updated version of the mod
- Check to see if the issue has been reported to the mod author and if not, do so. If it was, can you provide additional detail?
- If the bug was reported, is there a workaround?
- If possible, just avoid doing the thing that causes the crash
These are in order of general effectiveness, but of course there are caveats for every step. Updating the mod is usually the simplest solution but is not always practical, especially if you’re playing on a server with a modpack that you do not control. At the end of the day, you’re going to have to decide how you deal with it. The next section goes into detail on dealing with a specific type of crash.
Updating Java
Keeping your Java up to date can have a few benefits, including getting access to the latest performance increases as well as bug and security fixes. Step by step instructions on how to update your particular system are beyond the scope of this document but you can start at java.com. Please note, if your system supports it (which most modern systems should), you should be using 64-bit Java.
Twitch App
The Twitch App bundles a specific version of Java to ensure that there are no external requirements beyond the app to run Minecraft. However, this means if you update your Java on your system, it will be ignored by instances launched through the Twitch App. Normally this is not a problem, but if you are experiencing an issue and would like to update the Java that Twitch uses, you can do the following:
- Open the Twitch App settings by clicking the three horizontal bars in the top left, choosing File, then settings or keyboard shortcut ctrl-,
- Choose the Minecraft settings submenu on the left
- Scroll to the bottom of the settings where you can provide additional arguments
- Add «-version:1.8+» without quotes
Instances you launch from this point on should use the latest installed Java version on the system. If for some reason this doesn’t work, you can try manually replacing the bundled version following the steps below:
- Install the Java version as you normally would, and note its installation directory. On Windows, this is typically C:Program FilesJava.
- Navigate to the Curse installation directory. The easiest way to find this if you don’t already know where it is to open the Twitch App, choose a Minecraft instance, click on the three dots button, choose Open Folder, and then move up two directories from your instance directory, through Instances, to the Minecraft folder.
- From the Curse Minecraft directory, go into Install, then into Runtime, and then into the jre folder for your system. This should be jre-x64 on a 64-bit system.
- Rename the existing numbered version folder to something else so you can back out this change should you need to. I typically use 1.8.0_25_original.
- From inside the Java installation directory, pick the version you want Twitch to use, for instance jre1.8.0_141 for Java 8 Update 141. Copy that folder to the jre folder from the previous steps.
- Rename the copied folder so it matches the original name exactly, 1.8.0_25 is the version Twitch was bundled with at the time of this writing — no matter which version you’re updating to.
At this point your Minecraft instances launched through the Twitch app should be using the Java version you changed to. You can verify this from within Minecraft by looking at the debug screen, typically bound to the F3 key.
Removing crashing entities
Having gotten to the point where we understand what mod is causing the issue, in certain cases there is a straightforward solution to the problem.
Automatically
Forge includes two configuration options for automatically removing crashing entities, and crashing tile entities. If you open your modpack folder, go into the config folder, and open forge.cfg, under the general section you should find the following lines:
    # Set this to true to remove any Entity that throws an error in its update method instead of closing the server and reporting a crash log. BE WARNED THIS COULD SCREW UP EVERYTHING USE SPARINGLY WE ARE NOT RESPONSIBLE FOR DAMAGES.
    B:removeErroringEntities=false

    # Set this to true to remove any TileEntity that throws an error in its update method instead of closing the server and reporting a crash log. BE WARNED THIS COULD SCREW UP EVERYTHING USE SPARINGLY WE ARE NOT RESPONSIBLE FOR DAMAGES.
    B:removeErroringTileEntities=false
When you change these from false to true, the next time you start your world any entities or tile entities that were going to cause a crash will simply be removed. Note the warnings in the comments before each option, and heed them. These should only be enabled when necessary, not all the time.
Manually
Dealing with removing broken blocks or items from the world manually is beyond the scope of this document. However, the tools to do these things should be mentioned. If you are dealing with a block in the world that is causing a crash and you want to remove it, you can use MCEdit to edit the world while it is offline. Find it at the MCEdit site. If there is a problem with an item or something in someones inventory, a useful tool is NBTExplorer. Find it at its GitHub page.
Getting more help
You’ve tried what you can and are at the end of your abilities but stuff is still broken — not a problem, there are lots of places where the community can help you out. Here are a few places to check out:
- Feed The Beast forums: The main FTB forums (make sure you’re posting in the right place).
- Minecraftforum.net forums: A ton of Minecraft conversation happens here. Dive into the modding forums for more information.
- FTB subreddit: A subreddit dedicated to modded Minecraft discussion. General inquiries are okay here, but if you’re experiencing crashes, please use…
- FTB crashes subreddit …this subreddit. Again, this is not for general help, it is for crashes and every post here should be accompanied by a crash log.
Rocio
Guest
-
#1
Title:
FTB_Launcher won’t start
Launcher Version:
Can’t check, latest of 18.02.2015
Modpack:
None
Modpack Version:
None
Log Link:
Details of the issue:
Hello everyone,
I have a problem with the FTB_Launcher.exe, when I try to start it nothing happens.
Only thing that remotely indicates that something is happening is javaw.exe starting in the process tab.
What I have done so far:
• Reinstalled Minecraft, the game runs flawless.
• I have re-downloaded the launcher.
• Re installed java twice and removed all registry entries before installing. Currently using Version 8 Update 73.
• Removed the folder “ftblauncher” in AppDataRoaming
• Removed the folder “ftblauncher” in AppDataLocal
• FTB_Launcher is located here “C:FTBFTB_Launcher.exe”
• Tried the curse version of FTB. Every time I try to install a version of minecraft or a mod, it ends up with “an error occurred, see log file”. (Something like that, don’t remember exactly and don’t know which log they are referring to.)
FTBLauncherLog.txt if this helps
c:ftbFTBLauncherLog.txt: written by FTB Launcher
[19:19:16] [DEBUG] Main.main:171: Launcher arguments: []
[19:19:16] [DEBUG] Main.main:172: Launcher PID: 14760
[19:19:16] [DEBUG] Main.main:183: FTB Launcher CI Build #: 378, Git SHA: 1477cb29a5a0
[19:19:16] [INFO] JGoogleAnalyticsTracker$2.run:484: AnalyticsBackgroundThread started
[19:19:16] [INFO] MainHelpers.printInfo:39: FTBLaunch starting up (version 1.4.11 Build: 10411)
[19:19:16] [DEBUG] MainHelpers.printInfo:40: System’s default JVM: (This is not always used to launch MC)
[19:19:16] [DEBUG] MainHelpers.printInfo:41: Java version: 1.8.0_73
[19:19:16] [DEBUG] MainHelpers.printInfo:42: Java vendor: Oracle Corporation
[19:19:16] [DEBUG] MainHelpers.printInfo:43: Java home: C:Program FilesJavajre1.8.0_73
[19:19:16] [DEBUG] MainHelpers.printInfo:44: Java specification: Java Virtual Machine Specification version: 1.8 by Oracle Corporation
[19:19:16] [DEBUG] MainHelpers.printInfo:46: Java vm: Java HotSpot(TM) 64-Bit Server VM version: 25.73-b02 by Oracle Corporation
[19:19:16] [INFO] MainHelpers.printInfo:47: OS: Windows 7 6.1 (64-bit)
[19:19:16] [INFO] MainHelpers.printInfo:48: Launcher Install Dir: c:ftb
[19:19:16] [INFO] MainHelpers.printInfo:49: System memory: 10959M free, 16351M total
Does anyone know how to fix this?
![]()
-
#2
Try using the jar-version of the launcher and see if that helps
jikuja
legacy FTB Launcher developer
-
#3
Minimize or close all other applications. First run dialog might be scared and hiding behind other windows…
(yeah it’s a bug)
Rocio
Guest
-
#4
Sorry for the late response…
I tried the jar-version and nothing more happened than the exe version.
Run dialog was not hiding behind other windows or other screens. Thought it maybe had some kind of extreme paranoia so i let it work for an half hour, in case it had some kind of extremely slow startup. But nothing… after the ftb launcher has started i expect some kind of icon will appear at the task bar? Yes it has been a long time since i used ftb.
![]()
-
#5
Do you got any antivirus on your machine that might be blocking?
Rocio
Guest
-
#6
Disabled mcafee and tried the exe and jar version again with and without admin privileges, no luck. Just to be clear, i stop javaw.exe from the process tab between everytime i try to start the launcher.
![]()
-
#7
try to add an exception to mcafee, just disable might not be enough (if it’s mcafee that’s blocking).
Rocio
Guest
-
#8
Added exception in Mcafee and tried again but still nothing. I use GlassWire to monitor my network traffic and nothing close to java or ftb tries to access internet when i start the launcher.
![]()
-
#9
What did you add to the exception? (if the process is blocked it will never be able to generate any traffic for you to spot)
Rocio
Guest
-
#10
From McAfee Firewall settings:
Access:
Incoming and outgoing: Opened to all units
Net Guard: Deactivated
In other words, it should have complete access.
I also tried with two different ISP and routers in case there was something in the router settings blocking the access.
![]()
-
#11
try to make exception for java
Rocio
Guest
-
#12
Made an exception for both java.exe and javaw.exe, nothing more happened.
I found out that the timeline in Glasswire was off so I didn’t see java connecting to internet yesterday. Now i can see that every time i try to start ftb, java will download 1.5KB and upload 2.4KB, but nothing more.
Rocio
Guest
-
#13
Ok, so for checking my internet connection, firewall and java i downloaded a «modded» or «offline» version of the ftb launcher (Version 1.4.8). And to my surprise it works! The console is popping up and i can browse between different mod packs. The problem with this offline launcher is that it freezes when i try to create a profile. First i thought it was a bad launcher so i downloaded a different «offline» launcher, but that launcher has the exact same problem. So i am starting to believe that there are some old ftb files, lurking somewhere in the system files, messing up everything.
Does anyone know where the profile files are located? Or if there are other folders or registry entries belonging to ftb anywhere else than the places I listed in post #1? Or any other ideas?
Rocio
Guest
-
#14
I FINALLY SOLVED IT!!
I was working on another project when I figured out that I could not start “System Configuration” to edit what programs started at startup. Therefore, I tried to start my computer in Safety mode, but that resulted in BSOD. I started to suspect a Virus so McAfee did a complete scan of my computer but found nothing. So I tried other programs…
Malwarebytes found nothing
Killerbytes found nothing
AdwCleaner found nothing
RogueKiller found nothing
Junkware Removal Tool found nothing
Spybot found nothing
Kaspersky Rescue disk could not complete its search (Maybe just bad luck)
At last I tried Ad-Aware from Lavasoft, and found a program called “SearchProtect” in Program Files (x86) which I had not installed. Every file from “SearchProtect” where quarantined. After a reboot all my FTB problems was gone and I could open “System Configuration”
Некоторые пользователи сталкиваются с сообщением «Ошибка при загрузке пакета модов» при попытке использовать программу запуска «Feed the Beast Launcher» для установки пакета модов в Minecraft. Эта проблема не связана с ОС, поскольку, как сообщается, она возникает в Windows 7, Windows 8.1 и Windows 10.
Ошибка при загрузке пакета модов с помощью Feed the Beast Launcher
После изучения этой конкретной проблемы выяснилось, что существует несколько различных причин, которые могут в конечном итоге вызвать эту конкретную ошибку. Вот список потенциальных виновников:
- Отсутствует доступ администратора. Одним из наиболее распространенных случаев, вызывающих эту проблему, является случай, когда у основной программы запуска FTB отсутствует доступ администратора для правильной установки файлов игры и управления ими. В этом случае вы можете решить проблему, принудительно запустив исполняемый файл с правами администратора (или настроив его на запуск таким образом по умолчанию).
- Поврежденная установка FTB. Повреждение установки программы запуска Feed the Beast также может быть причиной этой ошибки. Если этот сценарий применим, вы можете решить проблему, переустановив программу запуска и очистив все остаточные файлы перед повторной установкой.
- Отсутствует зависимость Java. Если вы используете устаревшую версию Java, вероятно, это причина, по которой вы видите эту ошибку каждый раз, когда пытаетесь установить пакет модов с помощью средства запуска FTB. В этом случае вам следует использовать утилиту удаления Java, чтобы удалить все следы текущей установки Java перед установкой последней версии по официальным каналам.
Теперь, когда вы знаете потенциальных виновников, вот список методов, которые некоторые затронутые пользователи использовали для решения проблемы:
Метод 1. Откройте «Feed the Beast» с правами администратора
По словам некоторых затронутых пользователей, эта проблема также может возникать из-за того, что программа запуска FTB не имеет необходимых разрешений для установки модпаков. В большинстве случаев это происходит из-за того, что настройки UAC (Контроль учетных записей пользователей) строже, чем обычно, что не позволяет программе запуска FTB получить права администратора для установки модпаков.
В этом случае вы можете решить проблему, принудительно запустив программу запуска Feed the Beast с правами администратора. Для этого щелкните правой кнопкой мыши исполняемый файл FTB и выберите «Запуск от имени администратора» в контекстном меню.
Запуск исполняемого файла от имени администратора
После того, как вы открыли средство запуска FTB с правами администратора, повторите действие, которое ранее вызывало ошибку загрузки модпака, и посмотрите, устранена ли проблема.
Примечание. Если вы часто используете эту программу запуска и не хотите повторять эти шаги каждый раз, вам следует подумать о том, чтобы изменить программу запуска для запуска с администратором по умолчанию. Для этого щелкните его правой кнопкой мыши и выберите «Свойства» в контекстном меню.
Доступ к экрану свойств
Находясь на экране «Свойства», перейдите на вкладку «Совместимость» и установите флажок «Запускать эту программу от имени администратора» (в разделе «Настройки»). Наконец, нажмите Применить, чтобы сохранить изменения.
Если запуск программы запуска с правами администратора не устранил проблему, перейдите к следующему потенциальному исправлению ниже.
Метод 2: переустановка программы запуска Feed the Beast
Как оказалось, эта проблема может быть вызвана каким-либо типом повреждения файла, влияющим на установку программы запуска Feed the Beat. В этом случае вы сможете решить проблему, полностью переустановив программу запуска и убедившись, что вы не оставляете никаких остатков файлов между установками.
Успешность этого метода была подтверждена многими затронутыми пользователями, которые ранее не могли загружать пакеты модов с помощью средства запуска FTB.
Вот краткое пошаговое руководство по переустановке модуля запуска FTB, чтобы исправить ошибку загрузки модпака:
- Нажмите клавишу Windows + R, чтобы открыть диалоговое окно «Выполнить». Затем введите appwiz.cpl в текстовое поле и нажмите Enter, чтобы открыть меню «Программы и компоненты».
Введите appwiz.cpl и нажмите Enter, чтобы открыть страницу установленных программ.
- Зайдя в меню «Программы и компоненты», прокрутите список установленных элементов вниз и найдите запись, связанную с Feed the Beast. Когда вы его увидите, щелкните его правой кнопкой мыши и выберите в контекстном меню «Удалить».
Удаление приложения FTP
- Как только вы окажетесь на экране удаления, следуйте инструкциям на экране, чтобы завершить процесс, а затем перезагрузите компьютер.
- После завершения следующего запуска посетите официальная страница загрузки панели запуска FTB и нажмите кнопку «Загрузить», связанную с вашей ОС.
Покормить зверюгу
- После завершения загрузки щелкните установщик правой кнопкой мыши и выберите в контекстном меню «Запуск от имени администратора».
- Следуйте инструкциям на экране, чтобы завершить установку, запустите программу запуска Feed the Beast и повторите попытку установки пакета модов, чтобы проверить, устранена ли проблема.
Если та же проблема все еще возникает, перейдите к следующему потенциальному исправлению ниже.
Метод 3: установка последней версии Java
По мнению некоторых пострадавших, ошибка «Ошибка при загрузке пакета модов» также может возникать, если вы используете старую версию Java, которая требуется для программы Feed the Beast Launcher.
К счастью, некоторые затронутые пользователи, которые ранее сталкивались с той же проблемой, подтвердили, что они смогли решить проблему с помощью служебной программы Verify Java and Find Out-of-Date для обновления или установки отсутствующих зависимостей Java.
После установки или обновления среды Java и перезагрузки компьютера подавляющее большинство затронутых пользователей подтвердили, что «Ошибка загрузки модпака» вообще перестала появляться.
Если вы не знаете, как обновить версию Java, следуйте пошаговым инструкциям ниже:
- Откройте браузер по умолчанию и посетите страница загрузки последней версии инструмента удаления Java и нажмите Согласен с условиями и хочу продолжить.
Продолжаем установку обновления Java
- После завершения загрузки дважды щелкните только что загруженный исполняемый файл и следуйте инструкциям на экране, чтобы полностью удалить текущую версию JAVA и удалить все оставшиеся файлы.
- После завершения операции перезагрузите компьютер и дождитесь завершения следующего запуска.
- Затем посетите Страница загрузки Java и загрузите последнюю доступную версию, нажав «Принять» и «Начать бесплатную загрузку».
Загрузите последнюю версию Java
- После завершения загрузки откройте исполняемый файл и следуйте инструкциям на экране, чтобы завершить установку последней версии Java и перезагрузиться, когда будет предложено.
- Наконец, после завершения запуска ext откройте программу запуска Feed the Beast и посмотрите, сможете ли вы загрузить и установить модпак, не увидев того же кода ошибки.
Содержание
- Ftb launcher windows 10 как установить
- Как исправить ошибку при загрузке ModPack с помощью FTB Launcher
- Метод 1. Откройте «Feed the Beast» с правами администратора
- Метод 2: переустановка программы запуска Feed the Beast
- Метод 3: установка последней версии Java
- Скачать лаунчер FTB Launcher
- Начинаем игру (основная информация)
- Содержание
- Подготовка
- Установка лаунчера
- Лаунчер приложений от Twitch
- Устаревший лаунчер FTB
- Выбор пакета модификаций
- Приложение Twitch
- Старый лаунчер FTB
- Установка официального пакета
- Установка публичного пакета
- Установка пакета не из списка
- Руководства по модификациям
- Руководства по пакетам модификаций
- Прочие руководства
Ftb launcher windows 10 как установить
Вкратце:
Скачивается последняя версия flblauncher — автор дает ссылку на загрузку образа в описании своих раздач и уже запиленного образа в своих постах обсуждения раздачи (возможно, для скачивания потребуется вход в аккаунт google), или скачать саму раздачу и в UltraISO поменять install.wim/instal.esd, ессно искать надо самую новую раздачу. Затем в Diskpart (diskpart можно запустить в рабочей системе windows: Win+R > cmd > diskpart) делается флешка с одним основным активным разделом fat32:
diskpart
list disk
sel disk x (номер flash-диска)
clean
create part primary
format quick fs=fat32
active
assign
exit
Образ flblauncher монтируется в виртуальный привод (в windows 10 по двойному клику) и его содержимое копируется на флешку.
В папку sources флешки кидаете свой install.wim или install.esd.
Чтобы install.wim не превышал 4Гб (ограничение fat32) можно вытащить нужную редакцию:
Скачать WinAIO Maker Professional.
Распаковать все содержимое образа дистрибутива в какую нибудь папку. Это умеет 7-ZIP.
Запустить WinAIO Maker Professional. В нем:
Select WIMs > указать путь к install.wim в папке с распакованными файлами дистрибутива > из списка доступных редакций удалить ненужные > нажать Save all chages.
Пересобрать образ дистрибутива в UltraISO — подменить install.wim
Install.wim в конечном образе будет иметь размер существенно меньше 4gb.
Ессно, вы также можете использовать саму раздачу автора с подготовленным им самим install.wim
После загрузки с флешки откроется интерфейс flblauncher — дальше установка Windows с выбором опций, или запуск дополнительных инструментов
Как исправить ошибку при загрузке ModPack с помощью FTB Launcher
Некоторые пользователи сталкиваются с сообщением «Ошибка при загрузке пакета модов» при попытке использовать программу запуска «Feed the Beast Launcher» для установки пакета модов в Minecraft. Эта проблема не связана с ОС, поскольку, как сообщается, она возникает в Windows 7, Windows 8.1 и Windows 10.
После изучения этой конкретной проблемы выяснилось, что существует несколько различных причин, которые могут в конечном итоге вызвать эту конкретную ошибку. Вот список потенциальных виновников:
- Отсутствует доступ администратора. Одним из наиболее распространенных случаев, вызывающих эту проблему, является случай, когда у основной программы запуска FTB отсутствует доступ администратора для правильной установки файлов игры и управления ими. В этом случае вы можете решить проблему, принудительно запустив исполняемый файл с правами администратора (или настроив его на запуск таким образом по умолчанию).
- Поврежденная установка FTB. Повреждение установки программы запуска Feed the Beast также может быть причиной этой ошибки. Если этот сценарий применим, вы можете решить проблему, переустановив программу запуска и очистив все остаточные файлы перед повторной установкой.
- Отсутствует зависимость Java. Если вы используете устаревшую версию Java, вероятно, это причина, по которой вы видите эту ошибку каждый раз, когда пытаетесь установить пакет модов с помощью средства запуска FTB. В этом случае вам следует использовать утилиту удаления Java, чтобы удалить все следы текущей установки Java перед установкой последней версии по официальным каналам.
Теперь, когда вы знаете потенциальных виновников, вот список методов, которые некоторые затронутые пользователи использовали для решения проблемы:
Метод 1. Откройте «Feed the Beast» с правами администратора
По словам некоторых затронутых пользователей, эта проблема также может возникать из-за того, что программа запуска FTB не имеет необходимых разрешений для установки модпаков. В большинстве случаев это происходит из-за того, что настройки UAC (Контроль учетных записей пользователей) строже, чем обычно, что не позволяет программе запуска FTB получить права администратора для установки модпаков.
В этом случае вы можете решить проблему, принудительно запустив программу запуска Feed the Beast с правами администратора. Для этого щелкните правой кнопкой мыши исполняемый файл FTB и выберите «Запуск от имени администратора» в контекстном меню.
Запуск исполняемого файла от имени администратора
После того, как вы открыли средство запуска FTB с правами администратора, повторите действие, которое ранее вызывало ошибку загрузки модпака, и посмотрите, устранена ли проблема.
Примечание. Если вы часто используете эту программу запуска и не хотите повторять эти шаги каждый раз, вам следует подумать о том, чтобы изменить программу запуска для запуска с администратором по умолчанию. Для этого щелкните его правой кнопкой мыши и выберите «Свойства» в контекстном меню.
Доступ к экрану свойств
Находясь на экране «Свойства», перейдите на вкладку «Совместимость» и установите флажок «Запускать эту программу от имени администратора» (в разделе «Настройки»). Наконец, нажмите Применить, чтобы сохранить изменения.
Если запуск программы запуска с правами администратора не устранил проблему, перейдите к следующему потенциальному исправлению ниже.
Метод 2: переустановка программы запуска Feed the Beast
Как оказалось, эта проблема может быть вызвана каким-либо типом повреждения файла, влияющим на установку программы запуска Feed the Beat. В этом случае вы сможете решить проблему, полностью переустановив программу запуска и убедившись, что вы не оставляете никаких остатков файлов между установками.
Успешность этого метода была подтверждена многими затронутыми пользователями, которые ранее не могли загружать пакеты модов с помощью средства запуска FTB.
Вот краткое пошаговое руководство по переустановке модуля запуска FTB, чтобы исправить ошибку загрузки модпака:
- Нажмите клавишу Windows + R, чтобы открыть диалоговое окно «Выполнить». Затем введите appwiz.cpl в текстовое поле и нажмите Enter, чтобы открыть меню «Программы и компоненты».Введите appwiz.cpl и нажмите Enter, чтобы открыть страницу установленных программ.
- Зайдя в меню «Программы и компоненты», прокрутите список установленных элементов вниз и найдите запись, связанную с Feed the Beast. Когда вы его увидите, щелкните его правой кнопкой мыши и выберите в контекстном меню «Удалить».Удаление приложения FTP
- Как только вы окажетесь на экране удаления, следуйте инструкциям на экране, чтобы завершить процесс, а затем перезагрузите компьютер.
- После завершения следующего запуска посетите официальная страница загрузки панели запуска FTB и нажмите кнопку «Загрузить», связанную с вашей ОС.Покормить зверюгу
- После завершения загрузки щелкните установщик правой кнопкой мыши и выберите в контекстном меню «Запуск от имени администратора».
- Следуйте инструкциям на экране, чтобы завершить установку, запустите программу запуска Feed the Beast и повторите попытку установки пакета модов, чтобы проверить, устранена ли проблема.
Если та же проблема все еще возникает, перейдите к следующему потенциальному исправлению ниже.
Метод 3: установка последней версии Java
По мнению некоторых пострадавших, ошибка «Ошибка при загрузке пакета модов» также может возникать, если вы используете старую версию Java, которая требуется для программы Feed the Beast Launcher.
К счастью, некоторые затронутые пользователи, которые ранее сталкивались с той же проблемой, подтвердили, что они смогли решить проблему с помощью служебной программы Verify Java and Find Out-of-Date для обновления или установки отсутствующих зависимостей Java.
После установки или обновления среды Java и перезагрузки компьютера подавляющее большинство затронутых пользователей подтвердили, что «Ошибка загрузки модпака» вообще перестала появляться.
Если вы не знаете, как обновить версию Java, следуйте пошаговым инструкциям ниже:
- Откройте браузер по умолчанию и посетите страница загрузки последней версии инструмента удаления Java и нажмите Согласен с условиями и хочу продолжить.Продолжаем установку обновления Java
- После завершения загрузки дважды щелкните только что загруженный исполняемый файл и следуйте инструкциям на экране, чтобы полностью удалить текущую версию JAVA и удалить все оставшиеся файлы.
- После завершения операции перезагрузите компьютер и дождитесь завершения следующего запуска.
- Затем посетите Страница загрузки Java и загрузите последнюю доступную версию, нажав «Принять» и «Начать бесплатную загрузку».Загрузите последнюю версию Java
- После завершения загрузки откройте исполняемый файл и следуйте инструкциям на экране, чтобы завершить установку последней версии Java и перезагрузиться, когда будет предложено.
- Наконец, после завершения запуска ext откройте программу запуска Feed the Beast и посмотрите, сможете ли вы загрузить и установить модпак, не увидев того же кода ошибки.
Скачать лаунчер FTB Launcher
На сайте вы можете скачать FTB Launcher, созданный энтузиастами-моддерами. Как же он появился? Feed The Beast – это группа людей, которая специализируется на создании высококачественных модпаков и карт для Майнкрафт. Они начали с карты в стиле небесных блоков, ориентированной на использование оригинальных модов. Эти карты стали чрезвычайно популярными и для распространения был создан англоязычный FTB Launcher.
Последняя версия FTB Launcher: 1.4.15
Программа разработана таким образом, чтобы быть максимально простой и лёгкой в использовании. При этом она предоставляет расширенные функции тем, кто в них нуждается и позволяет загружать модпаки, устанавливать пакеты текстур или карты самым элементарным способом.
- Лаунчер предлагает модификации для игры, соответствующие самым разным вкусам. В этот перечень входят Regrowth, ME^4 и Crash Landing.
- Программа также даёт вам возможность устанавливать множество различных пакетов текстур и карт, характерных для используемой сборки.
ФТБ Лаунчер скачать можно совершенно бесплатно, чтобы получить доступ к описанным возможностям. Каждый пользователь может собрать свою идеальную игру, не покидая программу. Простота интерфейса достигается удобством расположения разделов.
Главной фишкой данного лаунчера является возможность загружать популярные дополнения прямо из окна программы. Софт получает регулярные обновления, хотя и сменил изначальных разработчиков. Программа экономит время пользователей и открывает простор для игровых приключений. Просто выбирайте разные карты, пробуйте наборы текстур и разнообразные модификации. Именно для этого и был создан Майнкрафт, чтобы каждый игрок мог создать собственную сборку и провести время с максимальным удовольствием.
Софт поддерживает 32-битную и 64-битную Windows, поэтому вы можете выбрать подходящую версию для лучшей совместимости со своей системой. Стоит заметить, что несмотря на обилие модпаков, не все будут доступны сразу. Одни ещё не прошли тестирование, другие требуют специального кода, который можно найти на официальном сайте разработчиков. В этом преимущество, ведь в лаунчер попадают только проверенные и работающие моды. Это позволяет свести ошибки к минимуму на радость всем игрокам. Не стоит расстраивается, если любимого мода не обнаружится – он может появиться позднее.
Начинаем игру (основная информация)
Содержание
Подготовка
Прежде чем начать играть в Feed The Beast, вы должны сделать следующее:
- Приобретите Minecraft на сайте Mojang и создайте аккаунт.
- Установите Minecraft и запустите хотя бы один раз, чтобы удостовериться в работе игры на вашем ПК.
Установка лаунчера
Лаунчер приложений от Twitch
Вышеуказанные шаги описывают работу с устаревшим лаунчером FTB. FTB теперь работает с приложением Twitch, которое можно скачать здесь.
- Скачайте .exe или .app файл отсюда.
- Запустите .exe или .app файл на своём компьютере.
- Войдите в учётную запись, используя свои входные данные Twitch.
Устаревший лаунчер FTB
Когда у вас успешно выполняется сам Minecraft, вы можете приступить к установке лаунчера FTB. Команда FTB не рекомендует использовать этот лаунчер, взамен которому предлагают использовать приложение Twitch; правда, это приложение пока не поддерживает Linux, а также есть несколько старых пакетов модификаций от третьих лиц, которые пока недоступны для скачивания в приложении Twitch.
- Посетите сайт FTB и загрузите файл .exe или .jar отсюда.
- Положите файл .exe или .jar в любую директорию вашего ПК.
- Запустите файл .exe или .jar. Может потребоваться некоторое время для конфигурации при первом запуске.
- Нажмите на кнопку OPTIONS (Опции) и настройте путь установки, использования памяти и размера и расположения окна.
- Создайте профиль, используя ваше имя Mojang (или эл. адрес Mojang) и пароль.
Выбор пакета модификаций
Существует много пакетов модификаций FTB, они перечислены здесь. Приложение Twitch Desktop App может использоваться для установки ряда других пакетов модификаций от других создателей.
Приложение Twitch
- Щёлкните по «Mods» в верхней полосе, а затем по «Minecraft». Если этой кнопки нет, проверьте, что управление модификациями для Minecraft включено в настройках приложения. Вы перейдёте на страницу профилей.
- Щёлкните по «Browse FTB Modpacks» («Поиск среди пакетов FTB»).
- Щёлкните по желаемому пакету модификаций.
- Щёлкните по кнопке «Install» («Установить»), расположенной в верхнем левом углу.
- Вернитесь на страницу профилей.
- Щёлкните по кнопке «Play» («Играть»), чтобы загрузить лаунчер Minecraft.
- Наслаждайтесь игрой в Feed the Beast!
Старый лаунчер FTB
Установка официального пакета
- В главном окне лаунчера выберите пункт «FTB MODPACKS» (Пакеты модификаций FTB).
- Нажмите на один из пакетов слева. Лаунчер отобразит список модификаций, входящих в этот пакет.
- Выбрав пакет модификаций, нажмите кнопку «Запуск».
- Ждите, пока лаунчер загрузит, установит и запустит игру с пакетом модификаций.
- Удачной игры в Feed The Beast!
Установка публичного пакета
- В главном окне лаунчера выберите пункт «3RD PARTY PACKS» (Пакеты модификаций 3-их лиц).
- Нажмите на один из пакетов слева. Лаунчер отобразит список модификаций, входящих в этот пакет.
- Выбрав пакет модификаций, нажмите кнопку «Запуск».
- Ждите, пока лаунчер загрузит, установит и запустит игру.
- Удачной игры в Feed The Beast!
Установка пакета не из списка
- В главном окне лаунчера выберите пункт «3RD PARTY PACKS» (Пакеты модификаций 3-их лиц).
- Нажмите на «Pack Codes» («Коды пакетов») сверху справа.
- Пропишите ваш код и нажмите «Add» («Добавить»)
- Найдя ваш пакет модификаций слева, нажмите на него. Лаунчер отобразит список модификаций , входящих в этот пакет.
- Выбрав пакет модификаций , нажмите кнопку «Запуск».
- Ждите, пока лаунчер загрузит, установит и запустит игру.
- Удачной игры в Feed The Beast!
Руководства по модификациям
Руководства по пакетам модификаций
Прочие руководства
Данные руководства не связаны с модификациями или пакетами модификаций.
I installed 64 bit java and uninstalled 32 bit java still doesn’t work. Someone please help!
[13:47:08] [ERROR] LauncherConsole$OutputOverride.write:92: From Console: Feb 17, 2014 1:47:08 PM java.util.prefs.WindowsPreferences <init>
WARNING: Could not open/create prefs root node SoftwareJavaSoftPrefs at root 0x80000002. Windows RegCreateKeyEx(…) returned error code 5.
[13:47:08] [ERROR] LauncherConsole$OutputOverride.write:92: From Console: java.io.IOException: Cannot run program «C:Windowssystem32java.exe»: CreateProcess error=5, Access is denied
[13:47:08] [ERROR] LauncherConsole$OutputOverride.write:92: From Console: at java.lang.ProcessBuilder.start(Unknown Source)
[13:47:08] [ERROR] LauncherConsole$OutputOverride.write:92: From Console: at java.lang.Runtime.exec(Unknown Source)
[13:47:08] [ERROR] LauncherConsole$OutputOverride.write:92: From Console: at java.lang.Runtime.exec(Unknown Source)
[13:47:08] [ERROR] LauncherConsole$OutputOverride.write:92: From Console: at net.ftb.util.winreg.RuntimeStreamer.execute(RuntimeStreamer.java:53)
[13:47:08] [ERROR] LauncherConsole$OutputOverride.write:92: From Console: at net.ftb.util.winreg.JavaInfo.<init>(JavaInfo.java:28)
[13:47:08] [ERROR] LauncherConsole$OutputOverride.write:92: From Console: at net.ftb.util.winreg.JavaFinder.findJavas(JavaFinder.java:70)
[13:47:08] [ERROR] LauncherConsole$OutputOverride.write:92: From Console: at net.ftb.util.winreg.JavaFinder.parseWinJavaVersion(JavaFinder.java:99)
[13:47:08] [ERROR] LauncherConsole$OutputOverride.write:92: From Console: at net.ftb.gui.panes.OptionsPane.<init>(OptionsPane.java:116)
[13:47:08] [ERROR] LauncherConsole$OutputOverride.write:92: From Console: at net.ftb.gui.LaunchFrame.<init>(LaunchFrame.java:520)
[13:47:08] [ERROR] LauncherConsole$OutputOverride.write:92: From Console: at net.ftb.gui.LaunchFrame$1.run(LaunchFrame.java:281)
[13:47:08] [ERROR] LauncherConsole$OutputOverride.write:92: From Console: at java.awt.event.InvocationEvent.dispatch(Unknown Source)
[13:47:08] [ERROR] LauncherConsole$OutputOverride.write:92: From Console: at java.awt.EventQueue.dispatchEventImpl(Unknown Source)
[13:47:08] [ERROR] LauncherConsole$OutputOverride.write:92: From Console: at java.awt.EventQueue.access$200(Unknown Source)
[13:47:08] [ERROR] LauncherConsole$OutputOverride.write:92: From Console: at java.awt.EventQueue$3.run(Unknown Source)
[13:47:08] [ERROR] LauncherConsole$OutputOverride.write:92: From Console: at java.awt.EventQueue$3.run(Unknown Source)
[13:47:08] [ERROR] LauncherConsole$OutputOverride.write:92: From Console: at java.security.AccessController.doPrivileged(Native Method)
[13:47:08] [ERROR] LauncherConsole$OutputOverride.write:92: From Console: at java.security.ProtectionDomain$1.doIntersectionPrivilege(Unknown Source)
[13:47:08] [ERROR] LauncherConsole$OutputOverride.write:92: From Console: at java.awt.EventQueue.dispatchEvent(Unknown Source)
[13:47:08] [ERROR] LauncherConsole$OutputOverride.write:92: From Console: at java.awt.EventDispatchThread.pumpOneEventForFilters(Unknown Source)
[13:47:08] [ERROR] LauncherConsole$OutputOverride.write:92: From Console: at java.awt.EventDispatchThread.pumpEventsForFilter(Unknown Source)
[13:47:08] [ERROR] LauncherConsole$OutputOverride.write:92: From Console: at java.awt.EventDispatchThread.pumpEventsForHierarchy(Unknown Source)
[13:47:08] [ERROR] LauncherConsole$OutputOverride.write:92: From Console: at java.awt.EventDispatchThread.pumpEvents(Unknown Source)
[13:47:08] [ERROR] LauncherConsole$OutputOverride.write:92: From Console: at java.awt.EventDispatchThread.pumpEvents(Unknown Source)
[13:47:08] [ERROR] LauncherConsole$OutputOverride.write:92: From Console: at java.awt.EventDispatchThread.run(Unknown Source)
[13:47:08] [ERROR] LauncherConsole$OutputOverride.write:92: From Console: Caused by: java.io.IOException: CreateProcess error=5, Access is denied
[13:47:08] [ERROR] LauncherConsole$OutputOverride.write:92: From Console: at java.lang.ProcessImpl.create(Native Method)
[13:47:08] [ERROR] LauncherConsole$OutputOverride.write:92: From Console: at java.lang.ProcessImpl.<init>(Unknown Source)
[13:47:08] [ERROR] LauncherConsole$OutputOverride.write:92: From Console: at java.lang.ProcessImpl.start(Unknown Source)
[13:47:08] [ERROR] LauncherConsole$OutputOverride.write:92: From Console: … 24 more
[13:47:08] [ERROR] LauncherConsole$OutputOverride.write:92: From Console: Exception in thread «AWT-EventQueue-0»
[13:47:08] [ERROR] LauncherConsole$OutputOverride.write:92: From Console: java.lang.NullPointerException
[13:47:08] [ERROR] LauncherConsole$OutputOverride.write:92: From Console: at net.ftb.util.winreg.JavaInfo.<init>(JavaInfo.java:29)
[13:47:08] [ERROR] LauncherConsole$OutputOverride.write:92: From Console: at net.ftb.util.winreg.JavaFinder.findJavas(JavaFinder.java:70)
[13:47:08] [ERROR] LauncherConsole$OutputOverride.write:92: From Console: at net.ftb.util.winreg.JavaFinder.parseWinJavaVersion(JavaFinder.java:99)
[13:47:08] [ERROR] LauncherConsole$OutputOverride.write:92: From Console: at net.ftb.gui.panes.OptionsPane.<init>(OptionsPane.java:116)
[13:47:08] [ERROR] LauncherConsole$OutputOverride.write:92: From Console: at net.ftb.gui.LaunchFrame.<init>(LaunchFrame.java:520)
[13:47:08] [ERROR] LauncherConsole$OutputOverride.write:92: From Console: at net.ftb.gui.LaunchFrame$1.run(LaunchFrame.java:281)
[13:47:08] [ERROR] LauncherConsole$OutputOverride.write:92: From Console: at java.awt.event.InvocationEvent.dispatch(Unknown Source)
[13:47:08] [ERROR] LauncherConsole$OutputOverride.write:92: From Console: at java.awt.EventQueue.dispatchEventImpl(Unknown Source)
[13:47:08] [ERROR] LauncherConsole$OutputOverride.write:92: From Console: at java.awt.EventQueue.access$200(Unknown Source)
[13:47:08] [ERROR] LauncherConsole$OutputOverride.write:92: From Console: at java.awt.EventQueue$3.run(Unknown Source)
[13:47:08] [ERROR] LauncherConsole$OutputOverride.write:92: From Console: at java.awt.EventQueue$3.run(Unknown Source)
[13:47:08] [ERROR] LauncherConsole$OutputOverride.write:92: From Console: at java.security.AccessController.doPrivileged(Native Method)
[13:47:08] [ERROR] LauncherConsole$OutputOverride.write:92: From Console: at java.security.ProtectionDomain$1.doIntersectionPrivilege(Unknown Source)
[13:47:08] [ERROR] LauncherConsole$OutputOverride.write:92: From Console: at java.awt.EventQueue.dispatchEvent(Unknown Source)
[13:47:08] [ERROR] LauncherConsole$OutputOverride.write:92: From Console: at java.awt.EventDispatchThread.pumpOneEventForFilters(Unknown Source)
[13:47:08] [ERROR] LauncherConsole$OutputOverride.write:92: From Console: at java.awt.EventDispatchThread.pumpEventsForFilter(Unknown Source)
[13:47:08] [ERROR] LauncherConsole$OutputOverride.write:92: From Console: at java.awt.EventDispatchThread.pumpEventsForHierarchy(Unknown Source)
[13:47:08] [ERROR] LauncherConsole$OutputOverride.write:92: From Console: at java.awt.EventDispatchThread.pumpEvents(Unknown Source)
[13:47:08] [ERROR] LauncherConsole$OutputOverride.write:92: From Console: at java.awt.EventDispatchThread.pumpEvents(Unknown Source)
[13:47:08] [ERROR] LauncherConsole$OutputOverride.write:92: From Console: at java.awt.EventDispatchThread.run(Unknown Source)