- Печать
Страницы: [1] 2 Все Вниз

Тема: Ubuntu 16.04 Не удалось установить GRUB. (Прочитано 11236 раз)
0 Пользователей и 1 Гость просматривают эту тему.

SergPro

На форуме не нашёл такой проблемы, надеюсь правильно создал тему.
Устанавливаю Ubuntu 16.04 рядом с Виндовс 10. Разметил диски и т.п. Но после всей установки вылетает окошко с «Не удалось установить GRUB» Как бы мне эту проблему решить. Второй день мучаюсь. Надеюсь на помощь. Спасибо за ранее.
ТС не появлялся на Форуме более полугода по состоянию на 14/07/2019 (последняя явка: 16/04/2017). Модератором раздела принято решение закрыть тему.
—zg_nico
« Последнее редактирование: 14 Июля 2019, 03:09:21 от zg_nico »
viktor ne perestukin
Уточни пожалуйста — «Не удалось установить GRUB» во время установки с Live или после установки
SergPro
После установки выдаёт это сообщение.
quatro
SergPro
Да, после установки вылетает ошибка с GRUB.
Пользователь добавил сообщение 01 Ноября 2016, 22:23:54:
Только у меня почему-то нету раздела ESP и отформатированного в FAT32.(для корректной установки)
« Последнее редактирование: 01 Ноября 2016, 22:23:54 от SergPro »
Дюшик
Только у меня почему-то нету раздела ESP и отформатированного в FAT32.(для корректной установки)
Загрузитесь с установочного носителя Ubuntu и покажите вывод команды
sudo parted -l
или скрин с разделами из Gparted.
Или загрузитесь в 10-ку, в строке поиска введите diskmgmt.msc -> OK, сделайте скрин открывшегося окна с разделами диска и покажите скрин.
SergPro
« Последнее редактирование: 03 Ноября 2016, 18:17:46 от SergPro »
mahinist
Дюшик
SergPro,
У вас «простая» разметка диска — MBR. Раздел ESP вам не нужен. Во время установки Ubuntu, вы случайно GRUB устанавливаете не раздел? (и возможно Виндовый). В процессе установки Ubuntu проверьте/установите GRUB на жесткий диск (/dev/sda, а не на /dev/sda1…4).
SergPro
а как Граб поставить туда,куда нужно.? галочку поставить?
Пользователь добавил сообщение 03 Ноября 2016, 20:03:27:
процессе установки Ubuntu проверьте/установите GRUB на жесткий диск (/dev/sda, а не на /dev/sda1…4).
Т.е. внизу будет «Устройство для установки системного загрузчика»
тут и выбираем /dev/sda ?
P.S. по умолчанию у меня было /dev/sda
Пользователь добавил сообщение 03 Ноября 2016, 22:51:46:
На старый нетбук 2009 года установился без проблем (рядом с Виндовс 8.1)
А на современный 2015 года рядом с Виндовс 10 не ставится. Буду разбираться.
Нужна помощь.
« Последнее редактирование: 03 Ноября 2016, 22:51:46 от SergPro »
Дюшик
SergPro,
Возможно вы неправильно загружаетесь с установочной флешки (если устанавливаете с флешки, вы не написАли).
1. Если у вас есть выбор загрузочной флешки, например
UEFI: Kinston 4 GB
Kingston 4 GB
то выбирайте флешку без префикса UEFI.
2. Если первого варианта нет, то зайдите в UEFI-BIOS и поищите параметр типа Boot mode и в нём проверьте/поставьте Legacy only или Legacy first. Всё это может называться по-разному, т.к. UEFI-BIOS очень разные. Вообщем вам нужно режим загрузки сделать строго Legacy (CSM и т.п.).
После выполнения первого или второго пунктов, загрузиться с установочной флешки и попробовать установить GRUB
а) вручную
sudo mount /dev/sdaX /mnt     - где Х цифра раздела с Ubuntu
sudo grub-install --root-directory=/mnt /dev/sda
б) через Boot repair https://help.ubuntu.ru/wiki/boot_repair
в) через Grub Customizer https://help.ubuntu.ru/wiki/grub_customizer
Если всё вышепредложеное «мимо», то можно временно организовать загрузку Ubuntu через Виндовый загрузчик с помощью EasyBCD https://forum.ubuntu.ru/index.php?topic=283187.msg2231636#msg2231636. Потом загрузиться в Ubuntu и пробовать установить GRUB из Ubuntu
sudo grub-install /dev/sda
дальше по результатам.
SergPro
Дюшик
SergPro,
Моё ИМХО. Отделльный раздел boot не нужен и проблему он не решит. Но если вы хотите попробовать установку с разделом boot, то можете поэксперементировать. Моё мнение, что нужно сначала попробовать правильно загрузится с флешки и посмотреть, что получится. Ещё один вариант, который вы можете попробовать, это записать флешку через программу Rufus с настройкой MBR для компьютеров с BIOS и UEFI и установить систему. Есть ещё одна возможная, но маловероятная причина, чтобы её исключить нужен с установочной флешки Ubuntu, вывод команд
sudo parted -l
или
sudo fdisk -l
quatro
SergPro, на старый ноут легко поставил, а на новый не получается?
Так ведь Виндовс-10, а её просто так на диск с разметкой mbr поставить нельзя.Значит либо gpt у тебя, либо Виндовс установлена специальным сложным образом. Какая у тебя разметка? Начни с выяснения этого:
Есть ещё одна возможная, но маловероятная причина, чтобы её исключить нужен с установочной флешки Ubuntu, вывод команд
Код: [Выделить]
sudo parted -l
или
sudo fdisk -l
Вот эту причину считаю наиболее вероятной: незнание того какая разметка диска и из-за этого неправильный способ установки.
Дюшик
anchos,
Про разметку диска сказано в посте №8. 10-ка на MBR диск устанавливается без проблем.
- Печать
Страницы: [1] 2 Все Вверх
I recently bought a shiny new Lenovo Yoga 2 Pro and I want to dual boot it with Ubuntu for studying purposes. Its built-in OS is Windows 8.1 and it has a 256GB SSD.
I’ve made a separate 90GB partition just for Ubuntu and a live USB to install it.
The first time everything seemed to work great, I solved the wifi issued by blacklisting ideapad_laptop, the installation went flawlessly and Ubuntu worked fine.
When I got up the next morning and turned on my laptop it booted into Windows right away without ever showing the GRUB menu. So I tried to reset, and checked my partitions with the Disk Manager and everything looked fine. Since I couldn’t find a solution online I went ahead and formatted the partition to try and install again. This time and every time since, the installation was aborted and I got a fatal error saying:
Unable to install GRUB in /dev/sda
Executing `grub-install /dev/sda` failed.
This is a fatal error.
Can anyone please suggest a solution to this problem?
If any further information is needed I would be happy to provide it.
Thanks.
When installing I get the following in details:
ubuntu kernel: [ 1946.372741] FAT-fs (sda2): error, fat_get_cluster: invalid cluster chain (i_pos 0).
ubuntu grub-installer: error: Running 'grub-install --force failed.
![]()
Braiam
66.2k30 gold badges174 silver badges262 bronze badges
asked May 2, 2014 at 16:56
![]()
3
I just had this problem installing Ubuntu 14.04 from a USB stick to a hard drive.
The problem was the USB stick was /dev/sda, installing to the hard drive /dev/sdb
Even though the installer knew to install to /dev/sdb, it then tried to install grub to the MBR on /dev/sda, and failed. The workaround was to go back to the menu, try again, say NO to automatically install to MBR of first hard drive and manually tell it /dev/sdb.
Then everything worked.
![]()
Zanna♦
68.3k55 gold badges210 silver badges320 bronze badges
answered Jan 9, 2015 at 5:16
![]()
dricketdricket
3593 silver badges2 bronze badges
7
I finally got it working, not sure which of the following did the trick but I:
- Disabled Lenovo Fast Boot in BIOS.
- Disabled Secure Boot in BIOS.
- Booted from Live USB.
- In boot menu Added
backlight=vendorin Try Ubuntu configuration text just beforequiet splash. - Chose Try Ubuntu.
- In terminal ran
sudo rmmod ideapad_laptopto enable wifi. - Ran installation and chose to install updates during installation.
- EFI partition was selected automatically so I assigned 9700MB for swap space and 80GB for Ubuntu.
- After installation completed added
backlight=vendorto/etc/default/grubbeforequiet splashand then ransudo update-grub. - Blacklisted
ideapad_laptopto enable wifi. - Works fine so far. Thanks to everyone for the help!
![]()
Zanna♦
68.3k55 gold badges210 silver badges320 bronze badges
answered May 10, 2014 at 7:55
![]()
vicban3dvicban3d
7562 gold badges7 silver badges12 bronze badges
I got the same error while installing Ubuntu 20.04. Turned out that I had created «logical» instead of «primary» partitions during the installation process for both my EFI and root partition. I ran the installation again, this time configuring both partitions as a «primary» partition, and the error was gone this time.
answered Apr 27, 2020 at 16:33
![]()
3
I had a similar problem. What I did was to leave the installation as it was, then I made sure my drive was in UEFI mode and booted from a live CD and installed boot-repair.
To do this I had to add the yannubuntu repository and then download it with apt-get. This was done the following way:
sudo apt-add-repository ppa:yannubuntu/boot-repair
sudo apt-get update
sudo apt-get install boot-repair
boot-repair
Then, when the program was launched, I checked all the options in Advanced Options > Main Options and clicked Apply.
![]()
Zanna♦
68.3k55 gold badges210 silver badges320 bronze badges
answered Feb 4, 2016 at 20:55
![]()
1
I had this issue when installing Ubuntu (not dual-boot) in my new build. None of the boot options described above would work for me.
I had to disconnect my SSD and all USB devices so that Ubuntu would only recognize the 1T HDD for installation.
![]()
Zanna♦
68.3k55 gold badges210 silver badges320 bronze badges
answered Dec 13, 2015 at 13:46
![]()
1
I don’t have a Lenovo Yoga but I had the same issue on my desktop.
It has SSD and HDD drivers, it was listed like this:
SATA#1 HDD /dev/sda
SATA#2 SSD /dev/sdb
As always I’m trying to install the OS on my SSD. The installer is installing Ubuntu (or Linux Mint) on /dev/sdb but then is trying to install GRUB on /dev/sda. That is a problem.
The solution was to swap the SATA connections, like this:
SATA#1 SSD /dev/sda
SATA#2 HDD /dev/sdb
answered Jun 24, 2018 at 16:49
![]()
megasmegas
2,4877 gold badges27 silver badges35 bronze badges
- Check installation media for corruption
- Check BIOS and disable Secure boot
- Disable Lenovo fast boot
I assume you are installing in UEFI mode, so it might be nescessary to unlock System lock in BIOS. If neither works, I would assume that problem lies in dual boot. I myself am running Ubuntu on Y2P as I type without any problems.
As for blacklisting ideapad_laptop module, you may want to check github.com/pfps/yoga-laptop, as there are some Y2P specific drivers. Still work in progres tho.
answered May 2, 2014 at 17:32
![]()
BuriBuri
112 bronze badges
1
Ran into this very issue while installing on a Poweredge with scsi raid. I found that pulling out the USB drive prior to installing GRUB did the trick.
answered Aug 21, 2015 at 16:04
![]()
1
I have the same laptop and for me everything works fine — but I installed the grub loader into the already existing EFI partition, which had the index 2 at the end of its name — it certainly wasn’t the sda partition though, which was chosen by default. (So I chose my partition for installation above and below, there was the possibility to change the partition for grub installation.)
I used an SD card for installation and started it in UEFI mode, because Windows 8.1 was pre-installed that way, too. (I’m sorry if I’m expressing this in a wrong way, but I only know about all this from reading in different forums before installing Ubuntu 14.04 about three days ago.)
Anyway, everything works fine if you do it this way. Start installation medium in UEFI mode, choose the partition freed for the installation, install grub into the existing EFI partition.
Oh, and also, I didn’t really have to change anything in the BIOS, I had disabled fast boot before and left it that way. It automatically changed something else, I can look that up again, if you want to know.
answered May 10, 2014 at 7:26
![]()
menowmenow
1191 bronze badge
I had a plethora of devices on a bare install and got this on 12.04 (last alternate manual install). Rather than track down where you specify to GRUB, I just acquiesced and moved the boot SSD to the sata-0 port so it would show up as sda.
answered Nov 30, 2015 at 15:14
![]()
1
This problem occured when i tried to give new life to my VERY old hp pavilion dm4. It said it couldn’t install grub and none of the buttons to do anything worked. I freaked out, and force shutdown my computer in the MIDDLE of installation. Luckily, I was able to boot on to the pen drive again. I later figured out that the pen drive had been pulled out a little bit, causing the installer to go nuts. It turned out for me it was a really simple little solution.
![]()
edwinksl
23.3k16 gold badges73 silver badges100 bronze badges
answered Aug 9, 2016 at 4:37
![]()
I had the same problem when installing Ubuntu 15.10 desktop (dual boot on separate partition in Lenovo G40-45 laptop where Windows 10 is already installed and activated).
I had already disabled secure boot (as per my earlier experiences with dual boot — Linux and Windows).
Finally I decided that I would try with secure boot enabled (as I expected things to have improved since 14.xx). AND IT WORKED!!! — without any other adjustments (and without internet connection).
(I installed Windows 10 while secure boot was disabled and then installed Ubuntu with secure boot enabled).
![]()
Zanna♦
68.3k55 gold badges210 silver badges320 bronze badges
answered Nov 11, 2015 at 16:43
![]()
1
It can’t be /dev/sda itself, it have to be some partiton of it. As usual windows make one NTFS, one recovery and one UEFI for boot parition. We have to first identify this UEFI boot partition as to get dual boot working.
My bios is of ASRock. This is how I was able to make it grub install for dual booting.
I think issue was I was trying to use just usb as bootable in the bootable drive options.
Once I chose usb uefi as bootable, I saw immediate change in partitions seen on parition layout GUI.
I was able to see uefi windows boot manager partition at /dev/sda2, (which I identified from windows disk partitons as the one with EFI layout), this was not shown when I was choosing usb without uefi option as bootable drive. I chose this uefi partition as boot partition for my install.
After that grub installed on windows boot manager partition and it and dual boot started working.
answered Mar 1, 2020 at 15:58
![]()
Contents
- Overview
-
GRUB 2 Terminal Commands
- Normal
- grub>
- grub rescue>
-
General Troubleshooting Preparation
- Boot-Repair
-
Search & Set
- How & Where to Search
-
Specific Troubleshooting
- grub>
- grub rescue>
- GRUB
-
Editing the GRUB 2 Menu During Boot
- Key Points About Terminal Menu Editing:
- Menu Editing Examples
- Post Boot Follow Up
- Fallback mode
-
GRUB 2 Errors
-
Selected Problems and Bugs
- External Drive Installs and »grub-pc» Updates
- External Drive Installs and MBR Selection
- Boot Partition is in Logical Volume whose Volume Group contains a snapshot
- insmod fails with «error: no such disk»
-
Selected Problems and Bugs
- Links
This page provides the user with information on options available for repairing GRUB 2 boot issues and specific instructions on how to use the GRUB 2 terminal. The instructions are written for GRUB 1.99, which is the version of GRUB 2 which is included on Ubuntu 11.04, Natty Narwhal, and later. Differences for version 1.98 (Ubuntu 10.4, Lucid Lynx) are noted when the procedures differ.

GRUB 2’s ability to fix boot problems is greatly improved over the original GRUB bootloader. In addition to an automatic fallback mode if booting from a menuentry in a submenu, GRUB 2 allows the user to edit its menu before the operating system is loaded. The rescue mode GRUB 2 terminal can help boot an operating system so that permanent repairs to system files can be made.
The instructions on this page are written for a fully-installed Ubuntu operating system. WUBI boot problems are not covered in detail although they are addressed in several sections.
Overview
GRUB 2 boot problems can leave the system in several states. The user may see one of the following displays on the monitor when a boot fails. The display provides the first indication of what might be causing the failure to boot. Here are the failure prompts and displays, and the possible cause of each:
-
grub> prompt: GRUB 2 loaded modules but was unable to find the grub.cfg file.
-
grub rescue> prompt: GRUB 2 failed to find its grub folder, or failed to load the normal module.
-
grub>: — The grub prompt on a blank screen.
-
GRUB 2 has found the boot information but has been either unable to locate or unable to use an existing GRUB 2 configuration file (usually grub.cfg).
-
-
grub rescue>: — The rescue mode.
-
GRUB 2 is unable to find the grub folder or its contents are missing/corrupted. The grub folder contains the GRUB 2 menu, modules and stored environmental data.
-
-
GRUB — a single word at the top left of the screen, with no prompt and no cursor.
- GRUB has failed to find even the most basic information, usually contained in the MBR or boot sector.
-
Busybox or Initramfs: GRUB 2 began the boot process but there was a problem passing control to the operating system. Possible causes include an incorrect UUID or root= designation in the ‘linux’ line or a corrupted kernel.
-
Frozen splash screen, blinking cursor with no grub> or grub rescue prompt. Possible video issues with the kernel. While these failures are not of GRUB 2’s making, it may still be able to help. GRUB 2 allows pre-boot editing of its menu and the user may restore functionality by adding and/or removing kernel options in a menuentry before booting.
Each of the GRUB 2 failure modes can normally be corrected either from the GRUB 2 terminal or by using an Ubuntu LiveCD. Additionally, there are compatible 3rd party bootable «rescue» CD/USB options which may also work. If using an Ubuntu LiveCD, it is recommended, but not always necessary, to use the same version CD as the system you are trying to repair. This ensures compatability of any modules and configuration files that may be loaded while attempting to repair the system.
GRUB 2 Terminal Commands
 Here are some useful tips and features for use with the GRUB 2 terminal:
-
Turning off the splash image. This may make viewing the terminal easier. Press c at the GRUB 2 menu to get to the command line and then type: set color_normal=white/blue or the color combination you wish to use. «black» as the second entry retains the menu’s transparency and should be avoided as a selection if the user wants to work with a solid background color.
-
TAB completion. This feature is very handy. At any point, pressing the TAB key may complete an entry, if the element is unique, or display available options. Typing a few additional characters and pressing TAB again may allow tab completion to finish the entry.
-
set pager=1 To prevent text from scrolling off the screen, type set pager=1.
-
Help. Type help to view a list of all the commands. Type help x to view help commands beginning with the letter «x». Tab completion and using the up arrow to repeat commands work the same as in a normal terminal.
Normal
When GRUB 2 is fully functional, the GRUB 2 terminal is accessed by pressing c. If the menu is not displayed during boot, hold down the SHIFT key until it appears. If it still does not appear, try pressing the ESC key repeatedly.
From a GRUB 2 terminal with the grub> prompt, a wide variety of commands are available.
- A few of the more important commands:
Command
Result / Example
boot
Initiate the boot sequence, also F10 or CTRL-x
cat
Display the contents of readable files; cat (hd0,1)/boot/grub/grub.cfg
configfile
Load a GRUB 2 configuration file such as grub.cfg; configfile (hd0,5)/boot/grub/grub.cfg
initrd
Loads the initrd.img, necessary for booting; initrd (hd0,5)/initrd.img
insmod
Loads a module; insmod (hd0,5)/boot/grub/normal.mod, or insmod normal
linux
Loads the kernel; insmod /vmlinuz root=(hd0,5) ro
loop
Mount a file as a device; loopback loop (hd0,2)/iso/my.iso
ls
Lists the contents of a partition/folder; ls, ls /boot/grub, ls (hd0,5)/, ls (hd0,5)/boot
lsmod
List loaded modules
normal
Activate the normal module, if loaded
search
Search for a device. Type help search for the available options.
set
Review current settings, or set XXX to set a variable such as colors, prefix, root
vbeinfo
Display GRUB 2 available resolutions
To view the complete command list, type help. For details on a particular command, type help [command]
grub>
When GRUB 2 is unable to boot or display the GRUB 2 menu the system will be left at a GRUB 2 terminal if possible. If the system boots to the grub> prompt, the usual modules and commands are normally available. The user may need to manually load modules using the insmod [module] command before some commands will work.
grub rescue>
In the grub rescue mode, only a limited set of commands are available. These commands are sufficient to investigate the contents of the drives, set prefix (path to the grub folder) and root (partition), load modules and boot.
The rescue mode provides fewer commands than the normal GRUB prompt line, but also provides these additional commands:
-
Command
Result / Example
dump
Clears memory
exit
Exit GRUB 2
normal
Return to the standard «grub>» mode if possible.
Among the commands which can be used in the grub rescue mode:
-
boot
cat
chain
help
insmod
linux
ls
multiboot
normal
search
set
unset
General Troubleshooting Preparation
Boot-Repair
The majority of this guide is devoted to working with the GRUB 2 terminal, which is used to enter commands to attempt to repair a broken bootloader. Boot-Repair is a GUI application which can automatically analyze boot problems and select the proper course of action to repair them. Its simple interface provides beginners as well as experienced Linux users an easy method of repairing the majority of GRUB 2 problems.
Additionally, Boot-Repair contains an automated method to run a boot info script which performs a series of tests and provides a file containing much valuable information regarding the status of the computer’s operating and boot systems. This file can be inspected by community helpers on forums or IRC channels to help diagnose boot problems.
Boot-Repair can be run from a LiveCD or an operating Linux system. To download the package run the following commands:
-
sudo add-apt-repository ppa:yannubuntu/boot-repair && sudo apt-get update
sudo apt-get install -y boot-repair && boot-repair
Visit the Boot-Repair community document for more information.
Boot-Repair is available from the Launchpad repositories and can be run from a CD or a working Linux OS.
Search & Set
A great many boot problems are due to incorrect paths to required files. The GRUB 2 terminal, in either ‘failure’ mode, provides a robust ability to search hard drive(s) and partitions and to inspect their contents.
In order to boot successfully, the root, prefix, linux and initrd variables must be correct. The user must verify the paths and names of these items. If they are incorrect, use the commands below to find and fix them. GRUB 2 variable settings can be viewed with the set command.
In the following examples, X is a hard drive number; Y is a partition number. If a command example includes either of these replace them with the appropriate value.
How & Where to Search
In the graphic below, the text in red are commands to be entered by the user, and text in green is the output of the command on an operating system (i.e. what you would like to see if your Ubuntu installation is on sda1).

-
The first hard drive is 0. The first partition is 1. Thus sda1 becomes (hd0,1), sdb5 is (hd1,5).
-
Use the ls command in the follow manner
- «Tab completion» may work — enter part of the filename and press the TAB key.
|
Command |
Purpose |
|
ls |
Search the entire computer for devices and partitions: (hd0) (hd1) (hd0,1) (hd0,5) (hd1,1) |
|
ls / |
Search the root directory of the device designated as root (use the set command to check root). |
|
ls (hdX,Y) |
View information about a partition — format, size, UUID, etc. |
|
ls (hdX,Y)/ |
View the root contents of a partition. Use this command to look for the presence of vmlinuz and initrd.img symlinks |
|
ls (hdX,Y)/boot/ |
View the contents of a folder |
|
ls (hdX,Y)/boot/ |
Inspect the /boot folder. It should contain the actual kernel (linux-3.2…) and initrd image (initrd.img-3.2….) |
|
ls (hdX,Y)/boot/grub/ |
Inspect the /boot/grub folder. It should contain grub.cfg and many *.mod files. If looking for a specific file, include the name in the search to limit the number of returns. If available, the command set pager=1 will also limit returns to a single screen. |
|
What to Look For |
Where It Should Be (Default Installation) |
Specific / General Search Example |
|
grub.cfg |
(hdX,Y)/boot/grub/ or /boot/grub/ |
ls (hdX,Y)/boot/grub/grub.cfg or ls /boot/grub/ |
|
vmlinuz |
(hdX,Y)/ or / |
ls (hdX,Y)/vmlinuz or ls /vmlinuz or ls / |
|
linux-3.2.0-14* |
(hdX,Y)/boot/ or /boot/ |
ls (hdX,Y)/boot/vmlinuz-3.2.0-14 |
|
initrd |
(hdX,Y)/ or / |
ls (hdX,Y)/ or ls /initrd |
|
initrd.img-3.20-14 |
(hdX,Y)/ or /boot/ |
ls (hdX,Y)/boot/initrd.img-3.20-14 or ls (hdX,Y)/boot/ |
* Note: Use the full kernel name, including -generic, when searching or setting a kernel variable. Using the «TAB completion» technique may eliminate some typing and be more accurate if available.
Use the following commands to set these parameters (if incorrect). Substitute the correct value for X and Y. (Example: set root=(hdX,Y) becomes set root=(hd0,5) )
|
Task |
Command |
Notes |
|
Set the prefix |
set prefix=(hdX,Y)/boot/grub |
Use the actual location of the grub folder |
|
Set root |
set root=(hdX,Y) |
|
|
Set the kernel |
linux /vmlinuz root=/dev/sda1 ro |
Set the kernel if the symlink vmlinuz exists in / |
|
Set the kernel |
linux (hdX,Y)/boot/vmlinuz-3.0.2-14 root=/dev/sda1 ro |
Set the kernel itself |
|
Set the initrd image |
initrd /initrd.img |
Set the initrd image if the symlink exists in / |
|
Set the initrd image |
initrd (hdX,Y)/boot/initrd.img-3.0.2-14 |
Set the initrd image itself |
Specific Troubleshooting
Use the section below based on the type of GRUB 2 terminal prompt displayed on the monitor.
 The commands which follow assume you have determined the proper parameters for prefix, root, linux, and initrd. Review the Search & Set section of this page for guidance .
grub>
Terminal Display: The GRUB 2 header/version information and a grub> prompt.

If GRUB 2 leaves you at the grub> prompt, it has normally found the grub folder and loaded at least some basic modules. The configuration file (grub.cfg) may be missing, misnamed, or corrupted.
Quick Fix:
-
Use the Search & Set section to confirm the correct paths are set. Inspect the contents of the /boot/grub folder. Look for the grub.cfg file. It could be misnamed or missing. If not located in /boot/grub, use the ls command look for another .cfg file or look in /boot or other locations. If you locate the correct .cfg file:
-
configfile /boot/grub/grub.cfg or configfile (hdX,Y)/boot/grub/grub.cfg
If a .cfg with another name is located, substitute its path/filename in the command.
If the configuration file is loaded and not corrupt, when the above command is executed the GRUB 2 menu should appear and the user can make a selection to boot. Once booted into the system, correct the filename or move the configuration file to its proper location. Run update-grub. If the configuration file is not found, a message will be generated and the user must enter the boot commands manually.
Extended Fix:
The following commands should set the root and prefix paths and load the kernel and initrd image. With this information, GRUB 2 does not need a configuration file and should be able to boot the system if the only problem was a corrupted or missing menu.
-
Press ENTER after completing each line. Some entries will not provide feedback. This is normal.
-
If a «file not found» or similar error message is displayed while running these commands, ensure you are using the correct X,Y values and the correct paths are set.
|
1. set root=(hdX,Y) |
Confirm the correct X,Y values and press ENTER. |
|
Example: If the Ubuntu system is on sda5, enter: set root=(hd0,5) |
|
|
2. linux /vmlinuz root=/dev/sdXY ro |
Example: linux /vmlinuz root=/dev/sda5 ro |
|
If the vmlinuz symlink does not exist, use the full path to the kernel in /boot |
|
|
Example: linux /boot/vmlinuz-3.2.0-14-generic root=/dev/sda1 ro |
|
|
If successful, after ENTER there will be a slight delay and no messages. |
-
Wubi users only — substitute these commands in Steps 1 and 2:
-
1.set root=(loop0)
2. linux /vmlinuz root=/dev/sdXY loop=/ubuntu/disks/root.disk ro
|
3. initrd /initrd.img |
Selects the latest initrd image. |
|
If the vmlinuz symlink does not exist, use the full path to the initrd image in /boot |
|
|
If successful, after ENTER there will be a slight delay and no messages. |
|
|
4. boot |
Boot to the latest kernel on the selected partition. |
If the system fails to boot:
-
Attempt to find the GRUB 2 configuration file. The normal name is grub.cfg file. If not found, look for a misnamed .cfg file or in alternate locations. The menu configuration file may contain settings required for a successful boot (such as non-standard kernel options) even if the paths/filenames are correct.
-
Use the set command to confirm the correct root and prefix settngs. Also inspect the folders’ actual contents with the ls command. The grub prompt normally means the GRUB 2 folder is intact but doesn’t guarantee the integrity of other system files.
-
root= should point to the drive and partition on which Ubuntu is installed. If you use the ls / command you should see the main Ubuntu system folders.
-
If the system boots, please refer to the [[#Post-Boot Follow Up|Post Boot Follow Up] section
If the system fails to boot, proceed to the [#grub rescue|grub rescue]] section for more detailed troubleshooting options.
grub rescue>
The GRUB 2 rescue mode is a major enhancement to the GRUB bootloader. The presence of the grub rescue> prompt signifies that GRUB 2 has failed to find the grub folder, the grub.cfg file, and/or the associated modules. The rescue prompt is presented so the user can provide the path to the grub folder, load the necessary modules, and provide the proper boot commands.

A common reason for the grub rescue> prompt is an incorrect path to the grub folder. Reasons for the prompt also include a failure to update GRUB 2 after certain system or partition operations, improper designation of the grub folder location, missing linux or initrd.img symlinks in /, or a failed installation.
To successfully boot from the grub rescue> prompt:
-
The grub folder must exist and contain the necessary GRUB 2 files and modules.
-
The proper paths must be set via the set prefix command.
- Many GRUB 2 commands will not work until the correct path is set.
If the path to the grub folder (normally /boot/grub) is not correct, an unknown command or file not found message is likely.
- Many GRUB 2 commands will not work until the correct path is set.
- The necessary modules must be loaded.
- The kernel cannot be loaded until the ‘linux’ module is loaded.
- A Linux kernel and initrd.img must be located and loaded.
Use the General Troubleshooting Preparation section to locate the correct partitions and file locations. Once the user has confirmed the paths and existence of the proper folders using the Search & Set section, run the following commands:
|
1. set prefix=(hdX,Y)/boot/grub |
Use the values determined earlier. |
|
Example: If the Ubuntu system is on sda5, enter: set prefix=(hd0,5)/boot/grub |
|
|
2.* set root=(hdX,Y) |
Confirm the correct X,Y values and press ENTER. |
|
Example: If the Ubuntu system is on sda5, enter: set root=(hd0,5) |
|
|
3. insmod normal |
Load the normal module. |
|
If the module loads there will be no message. |
|
|
If the module fails to load, try the full path: insmod (hdX,Y)/boot/grub/normal.mod |
|
|
4. normal |
Transition to the normal GRUB 2 mode with increased functionality. |
|
If the module loads there will be no message. |
|
|
If the module loads, HELP, TAB completion and command recall using the UP/DN keys should be available. |
|
|
5. set |
(Optional) Review the current settings. |
|
6. insmod linux |
Load the linux module. An error message usually means the path is incorrect. |
|
7.* linux /vmlinuz root=/dev/sdXY ro |
Selects the latest kernel. |
|
Example: linux /vmlinuz root=/dev/sda5 ro |
|
|
If the vmlinuz symlink does not exist in /, use the full path to the kernel in /boot |
|
|
Example: linux /boot/vmlinuz-3.2.0-14-generic root=/dev/sda1 ro |
|
|
8. initrd /initrd.img |
Selects the latest initrd image. |
|
If the initrd symlink does not exist in /, use the full path to the initrd image in /boot |
|
|
If successful, after ENTER there will be a slight delay and no messages. |
|
|
9. boot |
Boot to the latest kernel on the selected partition. |
-
* Wubi users only — substitute these commands in Steps 2 and 7:
-
1.set root=(loop0)
2. linux /vmlinuz root=/dev/sdXY loop=/ubuntu/disks/root.disk ro
Some additional considerations:
-
The current prefix and root settings may be checked at any time with the set command. To remove a setting, use the unset command.
-
Example: unset prefix
-
-
Modules must be loaded before they can be used. If a module has not been loaded a unknown command error is displayed. If an incorrect path is specified, a file not found error message may be displayed.
-
The linux module must be loaded to be able to load both the kernel and the initrd image unless the normal module is loaded first.
-
If the modules cannot be found in the /boot/grub folder, the user may be able to load them from the /usr/lib/grub/i386-pc folder. The address if Ubuntu was installed on sda1 would be (hd0,1)/usr/lib/grub/i386-pc and the command would be:
-
insmod (hd0,1)/usr/lib/grub/i386-pc/normal.mod
-
Refer to the Post Boot Follow Up section if the system successfully boots.
GRUB
Presence of the word GRUB at the top left of the monitor with no blinking cursor indicates that GRUB 2 can not even find the Master Boot Record (or equivalent) information. Thus, the core.img file, the /boot and /grub folder locations and contents are completely unknown to GRUB 2.

The seriousness of the problem cannot be assessed without the use of another operating system or an Ubuntu LiveCD or equivalent. The Ubuntu partition should be mounted for inspection and the user can then check to see if the system files are intact. If so, the user can use the »ChRoot» procedure from the LiveCD to reinstall GRUB 2 and rewrite the information to the MBR.
Details on this procedure are contained in the Grub2/Installing community documentation.
Following a failed boot, GRUB 2 is designed to display the GRUB 2 menu on the next boot and await user input. This will happen even if the user has set the system to boot without displaying the GRUB 2 menu. This provides the user the opportunity to select a different menu option or edit a menuentry to change boot parameters. While this can cause problems on a server, for most users it is a benefit which will prevent constant rebooting during unmonitored operations.

In addition to its troubleshooting benefits, pre-boot editing of the GRUB 2 menu also allows users to add or remove kernel options, change operating modes, and accomplish other tasks such as testing fonts and splash images. For users who like to experiment, the settings altered via the GRUB 2 terminal are non-persistent and won’t affect future boots.
- If the menu is displayed, the automatic countdown may be stopped by pressing any key other than the ENTER key.
- If the menu is not normally displayed during boot, hold down the SHIFT key as the computer attempts to boot to display the GRUB 2 menu.
- In certain circumstances, if holding the SHIFT key method does not display the menu pressing the ESC key repeatedly may display the menu.
- Press the ‘e’ key to reveal the selection’s settings.
- Use the UP/DN/Left/Right cursor keys to navigate to the desired point for editing.
-
Make a single or numerous changes at any spot in the menu. Do not use ENTER to move between lines.
-
TAB completion is available, which is useful in entering kernel and initrd entries.
- After starting to type the kernel or initrd name, press TAB.
- If additional characters are not added, look at the bottom of the menu as there may be multiple choices. Add characters until only one entry is visible at the bottom, then TAB again.
- When editing is complete:
-
CTRL-x or F10 — boot with the changed settings (highlighted for emphasis).
-
CTRL-c or F2 — jump to the command line to perform diagnostics, load modules, change settings, etc.
-
If an edit is incomplete and GRUB 2 detects an error in the kernel or initrd line it will return to the line when exiting this mode.
-
-
ESC — Discard all changes and return to the main menu.
- The choices are listed at the bottom of the screen as a reminder.
-
- Edits made to the menu in this manner are non-persistent. They remain in effect only for the current boot.
-
Once successfully booted, the changes can be made permanent by editing the appropriate file, saving the file, and running update-grub as ‘root’.
-
- Change a kernel version if one is available but not listed on the GRUB 2 menu.
-
Use the TAB key after entering part of the kernel or initrd version to see which ones are available.
-
-
Add or remove kernel options from the linux line.
-
Remove quiet to display system messages during boot.
-
Remove existing options and add nomodeset to avoid module loading, especially if having video issues.
-
- Boot to the recovery mode even if it is not listed on the menu.
-
Remove existing kernel options from the linux line and add single
-
- Remove references to UUIDs
-
Remove the entire search line
-
On the linux line, replace «root=UUID=<some alphanumeric>» with «root=/dev/sdXY»
-
Post Boot Follow Up
Any changes made from the GRUB 2 terminal are not permanent. After successfully booting into the system the user must take several steps to ensure the problem is permanently fixed.
- Update the GRUB 2 configuration file
-
sudo update-grub
-
-
Reinstall GRUB 2 to the drive’s MBR or equivalent
-
Install to the drive, not to the partition. Example: sda, not sda1
sudo grub-install /dev/sdX
-
-
Inspect the GRUB 2 configuration file. The default is /boot/grub/grub.cfg
-
For problems with booting the main linux kernel, verify the search, linux, and initrd lines in the [### BEGIN /etc/grub.d/10_linux ###] section of the file.
- Ensure the paths and kernel/initrd image versions are correct.
- Confirm the UUID numbers.
-
UUIDs can be checked with the sudo blkid command.
-
- Verify the existence and contents of the system boot folders.
-
/ should contain the symlinks vmlinuz and initrd.img
-
/boot/ should contain the actual kernel (vmlinuz-X.X.X-XX…) and initrd image (initrd.img-X.X.X-XX…)
-
/boot/grub should contain grub.cfg and numerous module files (*.mod)
-
For a corrupted GRUB 2 installation, purging and reinstalling GRUB 2 is very easy if the user has a working Internet connection. Refer to Grub2/Installing#Purging & Reinstalling GRUB 2 for guidance.
Fallback mode
It is possible to configure Grub2 to fall back to a known good menu-entry if the default menu-entry for some reason fails to boot. An example script that can be used for this is available at this webpage (in German).
GRUB 2 Errors
GRUB 2 does not report error numbers. If a number is associated with an error, it is a problem with the transition from GRUB legacy to GRUB 2.
A GRUB 2 error will leave the user at the grub> or grub rescue> prompt, the word GRUB with no cursor, or a hung boot caused by improper system path designations or a corrupted operating system. These issues are addressed earlier on this page — go to the General Troubleshooting Preparation section to start the recovery process.
Selected Problems and Bugs
External Drive Installs and »grub-pc» Updates
Launchpad Bug 496435 Installs of Ubuntu on external drives can cause problems as grub-install uses device names (e.g. sda, sdb) rather than UUIDs in certain circumstances. If connected to another machine when an update of grub-pc is made, the upgrade may be written to the incorrect device and make the computer unbootable.
A workaround is posted on the bug link above.
External Drive Installs and MBR Selection
Launchpad Bug 414996
When installing Ubuntu to a USB drive, the potential exists for GRUB 2 to write to the hard drive’s MBR or split the installation between the hard drive and the USB drive (rather than completely on the USB device). This can render the main drive unbootable.
Workaround: During the final stages of the install there is an «Advanced» button which allows the user to select the install location. See the bug report for more details.
Boot Partition is in Logical Volume whose Volume Group contains a snapshot
Launchpad Bug 563895
When your boot partition (the one providing /boot) is a LV, make sure not to have any LVM snapshots inside the containing VG. At reboot this will render your system unbootable, dropping you in a «grub rescue>«-shell with the following message: «error: no such disk.»
The grub-rescue-shell provided does not help you, because all modules (esp. lvm) are unreachable. You’ll have to boot from a install medium and remove all snapshots that are in the same VG as your boot partition by hand.
This issue is extremely annoying if your server is in a remote datacenter since the origin of the problem cannot be spotted easily and repairing the system may be hard.
While this will be fixed in the upcoming Maverick Meerkat 10.10 release, the current Lucid Lynx LTS 10.04 is affected.
A workaround would be to install ubuntu using a separated non-LVM partition for /boot if you are using LVM snapshots regularly.
There’s some kind of irony that if you’re careful and take a LVM snapshot before upgrading (and possibly rebooting) your system, this will trigger the bug.
insmod fails with «error: no such disk»
Several grub2 modules, such as the linux-module depends on other modules, which is attempted to be auto-loaded. For this to work, the variable $prefix, must be set to where the grub2 modules can be found. Usually, this is accomplished with the command «set prefix=/boot/grub«.
Links
Grub2
Grub2/Displays
Grub2/Installing
Grub2/Submenus
Grub2/Upgrading
Boot-Repair
CategoryBootAndPartition
Многие новые пользователи, которые хотят попробовать Linux и установить его основной системой на свой компьютер, сталкиваются с проблемами во время установки. Поскольку самый популярный дистрибутив — Ubuntu, то и рассматривать будем его.
В этой статье мы рассмотрим почему Uubntu не устанавливается, какие причины могут быть для такого поведения, а также как решить основные проблемы с установкой. Конечно, не все из них решаемы, но что-то можно исправить.
Давайте сначала рассмотрим основные ошибки, которые вы можете получить на определенных этапах установки, как они себя будут проявлять и чем они вызваны:
- Установочный образ не загружается;
- Система загрузилась в Live режиме, но во время установки возникает ошибка;
- Установщик выдал сообщение, что Ubuntu установлена успешно, но после перезагрузки меню запуска не появилось.
Все эти ошибки могут быть вызваны проблемами совместимости Linux с вашим оборудованием. Несмотря на то, что Linux постоянно разрабатывается и ядро добавляется поддержка нового оборудования, некоторые старые устройства могут не поддерживаться. Но также могут быть и другие причины:
- Неверные настройки загрузочного диска в BIOS;
- Образ записан неправильно — если во время записи образа произошел какой-либо сбой, то не удивительно что он загружается;
- Несовместимость драйвера — стандартный драйвер может быть несовместим с вашей видоекартой, такое иногда случается с картами NVIDIA;
- Проблемы со старыми ноутбуками от Dell на этапе сканирования устройств PCMCIA;
- Ошибки на этапе установщика ubiquity самые непонятные, обычно они вызваны несовместимостью оборудования;
- Отсутствие загрузочного меню может означать что загрузчик Grub не был установлен или был установлен не на тот диск.
Теперь пройдемся по решению тех проблем, которые можно решить и поговорим что делать, если проблему решить нельзя.
Что делать если не устанавливается Ubuntu
1. Настройка BIOS
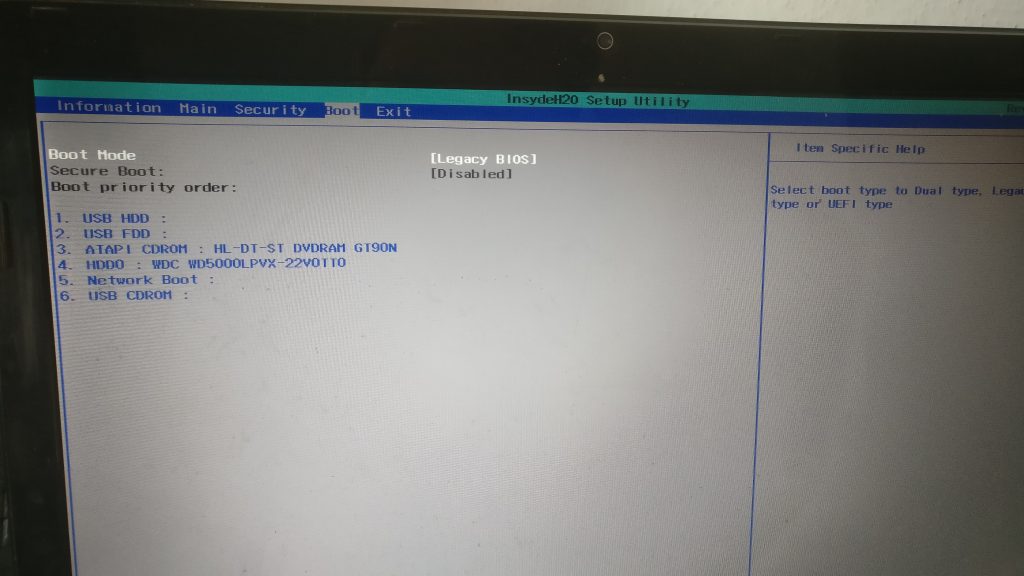
Первое, что необходимо проверить — это какое загрузочное устройство установлено для загрузки в BIOS, на вкладке «Boot». Там должна быть ваша флешка или DVD диск.
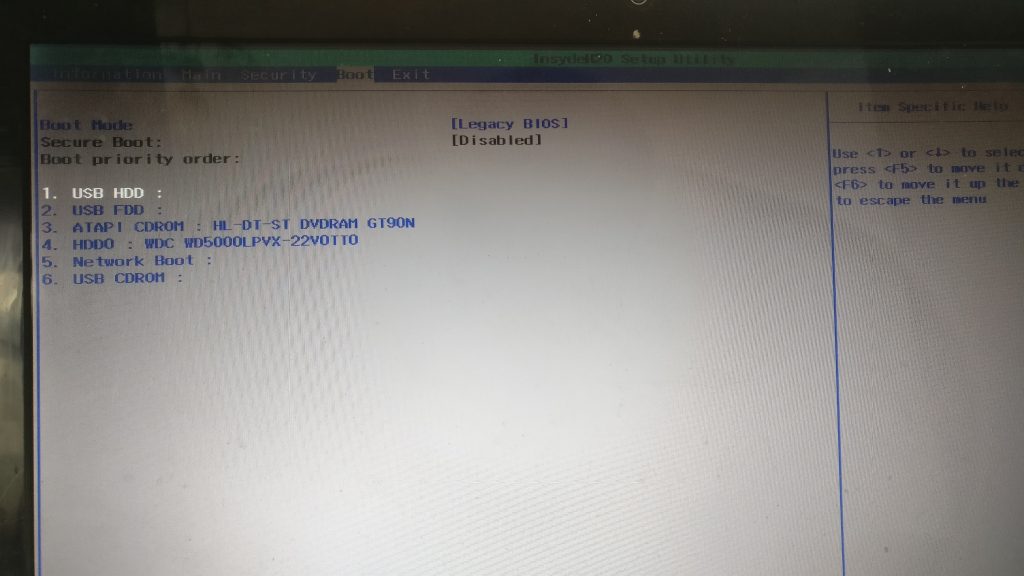
Второе, это режим загрузки, UEFI или BIOS. В принципе, образ должен успешно загружаться независимо от того какой способ вы используете, но если на этапе установки возникают какие-либо ошибки, то, возможно, лучше отключить UEFI и использовать Legasy BIOS, обычно, эта функция тоже находится на вкладке «Boot».
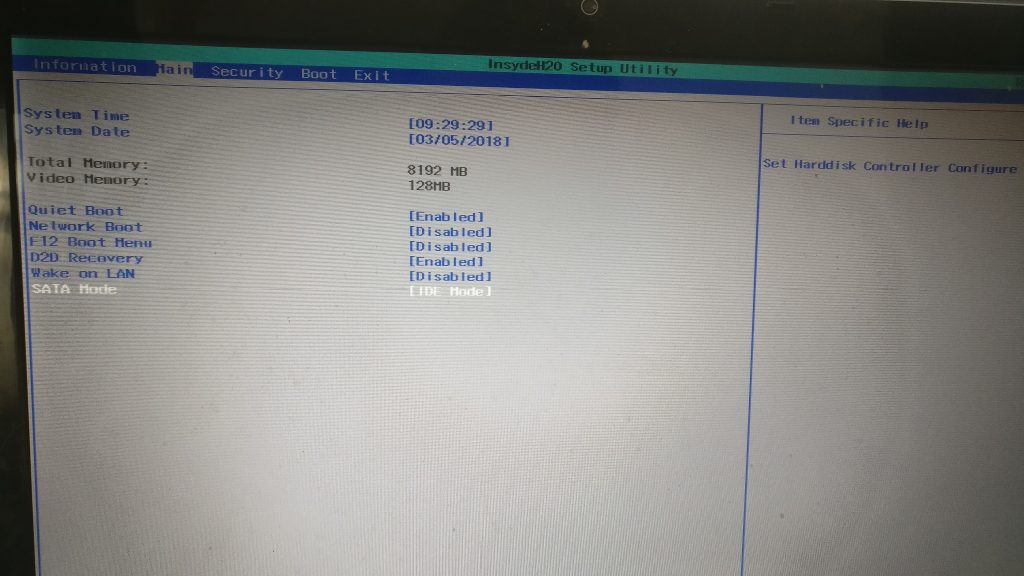
Следующий пункт, на который стоит обратить внимание в BIOS — это способ подключения жесткого диска — «SATA Mode», которую можно найти на вкладке «Main», сейчас по умолчанию используется значение «IDE», но если что-то не работает, можно попробовать изменить на «ACHI».
2. Целостность установочного диска
Дальше необходимо проверить целостность установочного диска. Ошибка могла произойти на этапе загрузки его из сети и на этапе записи на диск. Обычно, на странице загрузки есть не только сам образ, но и файл контрольной суммы, с помощью которого можно определить правильно ли загружен образ. Обычно такой файл имеет название MD5SUMS и лежит в папке с образом.
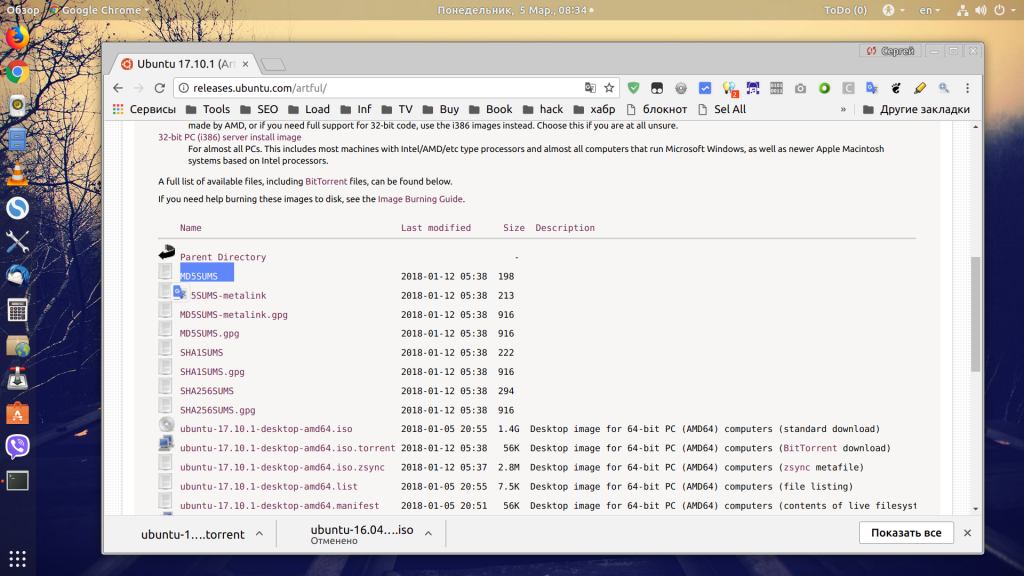
В Linux для подсчета контрольной суммы можно использовать утилиту md5sum:
md5sum ubuntu-17.10.1-desktop-amd64.iso
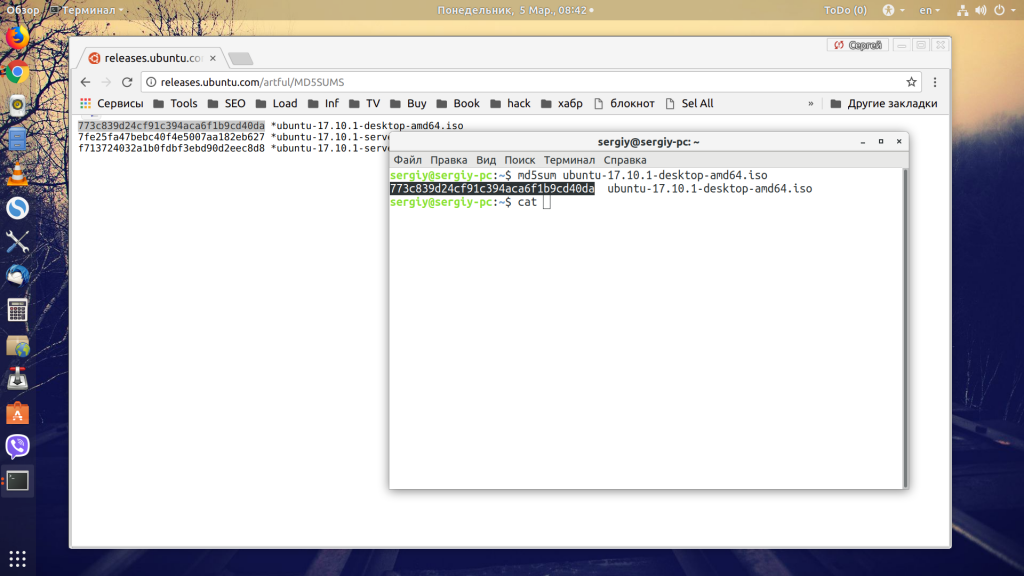
Затем нужно сравнить эту сумму из суммой для этого образа из файла, они должны совпадать. Если не совпадают, значит образ загружен с ошибками. В Windows для подсчета контрольных сумм можно использовать расширение проводника HashCheck Shell Extension.
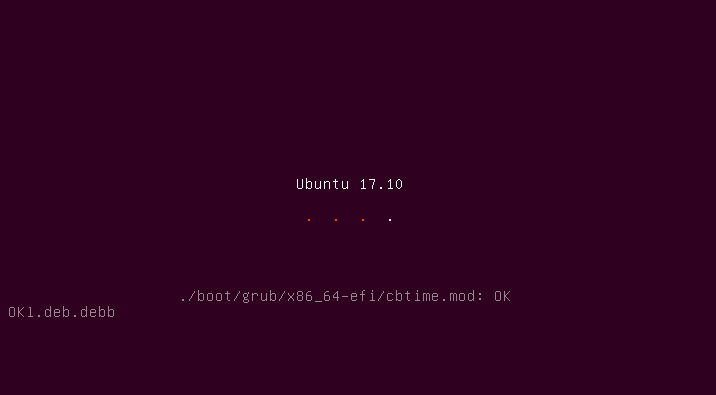
Следующий момент — это проверка правильности записи диска. Для этого можно использовать встроенную в сам образ утилиту проверки. Если BIOS настроена правильно и образ записан, то после перезагрузки компьютера вы увидите такое меню:

Здесь нужно выбрать «Check installation media»:
Утилита проверит все поставляемые пакеты и если все будет хорошо, то выдаст сообщение:
Если же есть ошибки, то опять же, вы нашли проблему и попробуйте перезаписать диск или использовать другой носитель.
3. Проблема с драйверами NVIDIA
Свободный графический драйвер nouveau совместим с большинство карт NVIDIA, но в некоторых случаях с этим драйвером операционная система не запускается и вы будете видеть только черный или фиолетовый экран. Чтобы все-таки обойти проблему не устанавливается Ubuntu 16.04 или другая версия, нужно использовать опцию nomodeset. Для этого в меню загрузки образа нажмите кнопку F6:
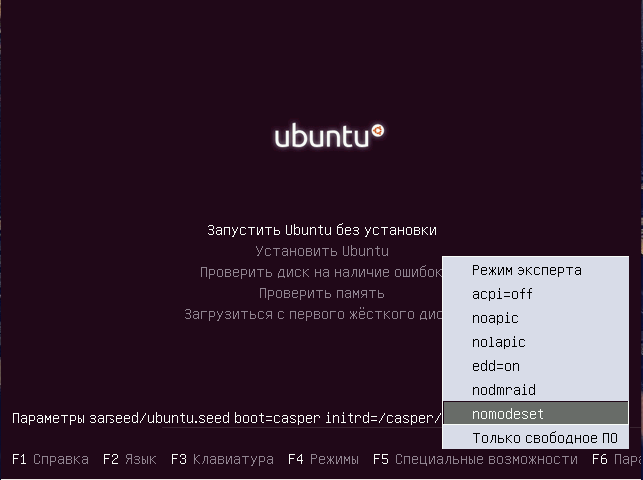
Затем выберите в открывшемся списке «nomodeset» и нажмите «Enter». Система должна загрузиться нормально. Если проблема не была решена можно попробовать еще использовать параметр ядра fb=false. Только его нужно прописать вручную после нажатия F6.
4. Зависание на этапе настройки PCMCIA
Некоторые старые ноутбуки от Dell могут зависать на этапе выполнения сканирования PCMCIA устройств. Если вам не нужны устройства PCMCIA во время установки то вы можете отключить эту возможность с помощью параметра ядра:
start_pcmcia=false
После установки вы можете настроить PCMCIA так, чтобы сканирование не вызывало таких проблем.
5. Система установлена но нет загрузчика
Во-первых, убедитесь, что тот диск, на который вы устанавливали загрузчик выбран первым загрузочным диском в BIOS. Если вы установили загрузчик на /dev/sda, а первым указан /dev/sdb, то будет загружаться загрузчик из /dev/sdb, а до вашего загрузчика дело так и не дойдет.
Второе, на что нужно обратить внимание — это UEFI. Если во время установки был включен режим UEFI, то загрузчик был установлен туда и вам просто нужно выбрать пункт Grub в обычном меню UEFI или настроить UEFI таким образом, чтобы Grub был на первом месте и запускался автоматически.
И последнее, это когда во время установки возникла ошибка установки загрузчика. Система установлена, а не хватает только загрузчика. Тогда можно загрузиться с LiveCD и просто установить его как описано в статье восстановление Grub2. Сначала примонтируйте раздел диска, куда была установлена Ubuntu к папке /mnt, например, /dev/sda1:
sudo mount /dev/sda1 /mnt
Если раздел /boot был вынесен отдельно, то его тоже надо примонтировать. Затем надо примонтировать папки с виртуальными файловыми системами:
sudo mount --bind /dev /mnt/dev
sudo mount --bind /sys /mnt/sys
sudo mount --bind /proc /mnt/proc
Затем переключаемся в окружение chroot нового дистрибутива:
chroot /mnt /bin/bash
Затем осталось установить загрузчик:
sudo grub-install /dev/sda
И генерировать конфигурационный файл:
sudo grub-mkconfig -o /boot/grub/grub.cfg
После этого осталось перезагрузить компьютер и выбрать Ubuntu в меню Grub.
6. Ошибки во время установки
Большинство из таких ошибок вызваны проблемами с оборудованием и лучшее что вы можете сделать в этом случае — это отправить разработчикам отчет о неполадках, если они решат что проблема серьезная, то исправят ее и такая ошибка установки ubuntu больше не будет повторяться. Или же вы можете попытаться спросить совета на форуме, может кто-то из пользователей уже сумел найти решение этой проблеме.
В этом вопросе вам поможет отладочная информация, поскольку без дополнительных данных что-либо сказать сложно. Логи установки можно найти в папке /var/log/installer/ или вытащить из /var/log пока установка незавершена.
Выводы
В этой небольшой статье мы рассмотрели что делать если не устанавливается Ubuntu, теперь вы знаете почему могут возникнуть определенные виды ошибок и как их решить. Конечно, таких ошибок может быть намного больше, если вы знаете решения для других проблем — пишите в комментариях!

Статья распространяется под лицензией Creative Commons ShareAlike 4.0 при копировании материала ссылка на источник обязательна .