Installing a Secure Sockets Layer (SSL) certificate on your WordPress site enables it to use HTTPS to ensure secure connections. Unfortunately, there are a variety of things that can go wrong in the process of confirming a valid SSL certificate and making a connection between your site’s server and a visitor’s browser.
If you’ve encountered an “SSL Handshake Failed” error message and are confused as to what it means, you’re not alone. It’s a common error that doesn’t tell you much on its own. While this can be a frustrating experience, the good news is that there are simple steps you can take to resolve the issue.
In this post, we’ll explain what the SSL Handshake Failed error is and what causes it. Then we’ll provide you with several methods you can use to fix it.
Let’s get started!
An Introduction to the SSL Handshake
Before we dig deeper into what causes a TLS or SSL handshake failure, it’s helpful to understand what the TLS/SSL handshake is. Secure Sockets Layer (SSL) and Transport Layer Security (TLS) are protocols used to authenticate data transfers between servers and external systems such as browsers.
SSL certificates are needed in order to secure your website using HTTPS. We won’t get too in-depth about the difference between TLS vs SSL since it’s a minor one. The terms are often used interchangeably, so for simplicity’s sake, we’ll use “SSL” to refer to both.
With that out of the way, an SSL handshake is the first step in the process of establishing an HTTPS connection. To authenticate and establish the connection, the user’s browser and the website’s server must go through a series of checks (the handshake), which establish the HTTPS connection parameters.
Let us explain: the client (typically the browser) sends a request for a secure connection to the server. After the request is sent, the server sends a public key to your computer and checks that key against a list of certificates. The computer then generates a key and encrypts it, using the public key sent from the server.
To make a long story short, without the SSL handshake, a secure connection won’t be made. This can pose a significant security risk. Plus, there are a lot of moving parts involved in the process.
That means there are many different opportunities for something to go wrong and cause a handshake failure, or even lead to the “your connection is not private” error, causing visitors to leave.
Confronted with the ‘SSL Handshake Failed’ error? 🤝 Get a grip on how to solve it with these 5 methods ⤵️Click to Tweet
Understanding What Causes SSL Handshake Failures
An SSL Handshake Failure or Error 525 means that the server and browser were unable to establish a secure connection. This can happen for a variety of reasons.
Generally, an Error 525 means that the SSL handshake between a domain using Cloudflare and the origin web server failed:

However, it’s also important to understand that SSL errors can happen on the client-side or the server-side. Common causes of SSL errors on the client-side include:
- The wrong date or time on the client device.
- An error with the browser configuration.
- A connection that is being intercepted by a third party.
Some server-side causes include:
- A cipher suite mismatch.
- A protocol used by the client that isn’t supported by the server.
- A certificate that is incomplete, invalid, or expired.
Typically, if the SSL handshake fails, the issue can be attributed to something wrong with the website or server and their SSL configurations.
How to Fix the SSL Handshake Failed Error (5 Methods)
There are several potential causes behind the “SSL Handshake Failed” error. So there’s no simple answer when it comes to how you should fix it.
Fortunately, there are a handful of methods you can use to begin exploring potential issues and resolving them one by one. Let’s take a look at five strategies you can use to try and fix the SSL Handshake Failed error.
1. Update Your System Date and Time
Let’s start with one of the more unlikely causes, but one that is incredibly easy to correct if it is the problem: your computer’s clock.
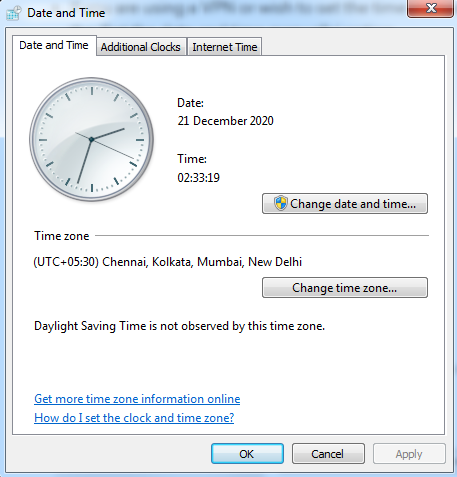
If your system is using the wrong date and time, that may interrupt the SSL handshake. When the system clock is different than the actual time, for example, if it’s set too far into the future, it can interfere with the SSL certificate verification.
Your computer’s clock might have been set incorrectly due to human error or simply due to a glitch in your settings. Whatever the reason, it’s a good idea to check and make sure your system time is correct, and update it if it’s not.
Of course, if your clock is showing the correct information, it’s safe to assume that this isn’t the source of the “SSL Handshake Failed” issue.
2. Check to See If Your SSL Certificate Is Valid
Expiration dates are placed on SSL certificates, to help make sure their validation information remains accurate. Generally, the validity of these certificates lasts for anywhere between six months and two years.
If an SSL certificate is revoked or expired, the browser will detect this and be unable to complete the SSL handshake. If it’s been more than a year or so since you installed an SSL certificate on your website, it might be time to reissue it.
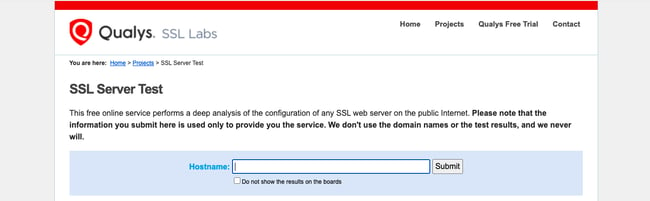
To view the status of your SSL certificate, you can use an SSL certificate checker tool such as the one offered by Qualys:
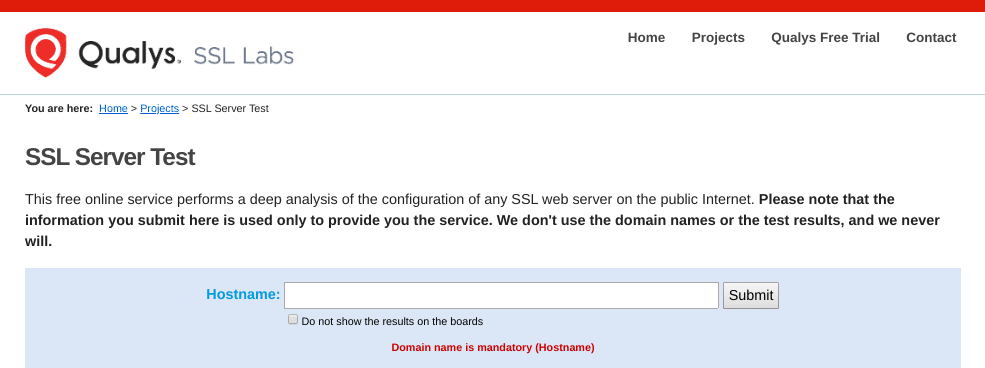
This tool is both reliable and free to use. All you need to do is input your domain name into the Hostname field, and then click on Submit. Once the checker is done analyzing your site’s SSL configuration, it will present you with some results:
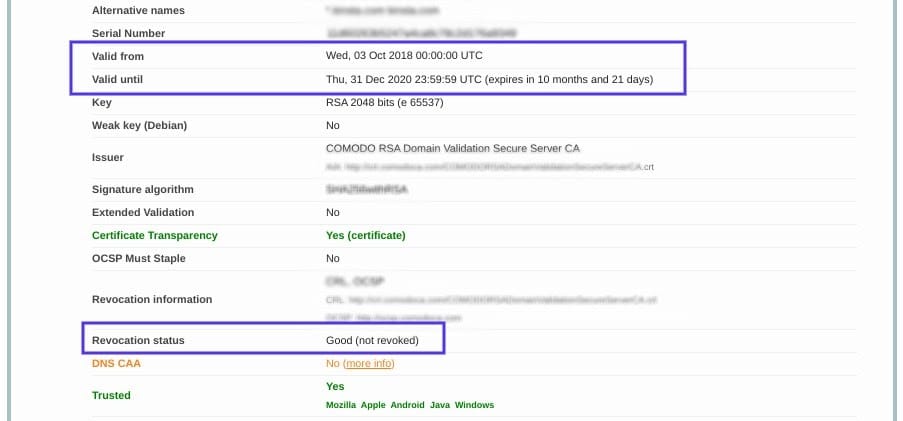
On this page, you can find out if your certificate is still valid and see if it has been revoked for any reason.
In either case, updating your SSL certificate should resolve the handshake error (and is vital for keeping your site and your WooCommerce store secure).
3. Configure Your Browser for the Latest SSL/TLS Protocol Support
Sometimes the best way to determine the root cause of an issue is by process of elimination. As we mentioned earlier, the SSL handshake failure can often occur due to a browser misconfiguration.
The quickest way to determine whether a particular browser is the problem is to try switching to a different one. This can at least help narrow down the problem. You may also try disabling any plugins and resetting your browser back to its default settings.
Another potential browser-related issue is a protocol mismatch. For example, if the server only supports TLS 1.2, but the browser is only configured for TLS 1.0 or TLS 1.1, there’s no mutually-supported protocol available. This will inevitably lead to an SSL handshake failure.
How you can check to see if this problem is occurring varies based on the browser you’re using. As an example, we’ll look at how the process works in Chrome. First, open your browser and go to Settings > Advanced. This will expand a number of menu options.
Under the System section, click on Open your computer’s proxy settings:
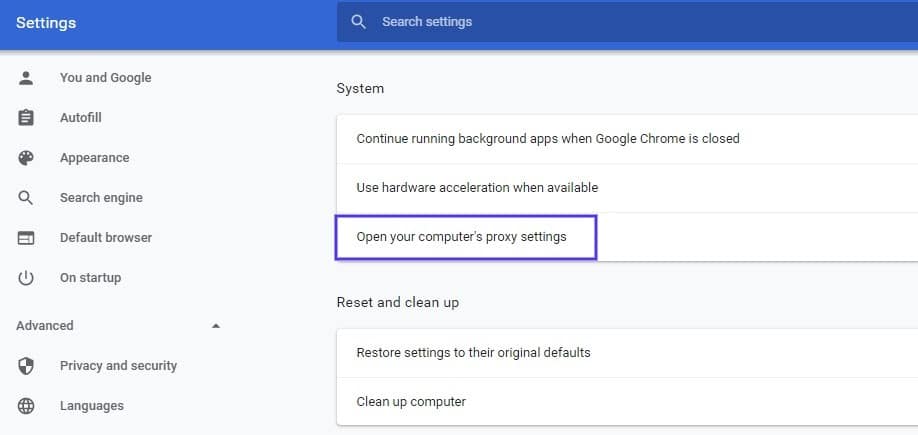
This will open up a new window. Next, select the Advanced tab. Under the Security section, check to see if the box next to Use TLS 1.2 is selected. If not, check that option:
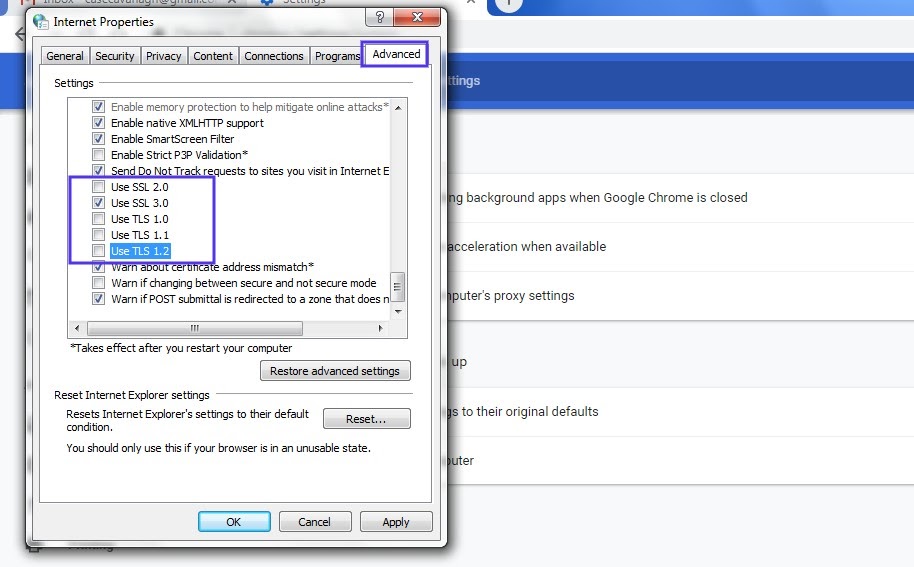
It’s also recommended that you uncheck the boxes for SSL 2.0 and SSL 3.0.
The same applies to TLS 1.0 and TLS 1.1 since they are being phased out. When you’re done, click on the OK button, and check to see if the handshake error has been resolved.
Note that if you’re using Apple Safari or Mac OS there isn’t an option to enable or disable SSL protocols. TLS 1.2 is automatically enabled by default. If you’re using Linux, you can refer to the Red Hat guide on TLS hardening.
4. Verify That Your Server Is Properly Configured to Support SNI
It’s also possible that the SSL handshake failure is being caused by improper Server Name Indication (SNI) configuration. The SNI is what enables a web server to securely host several TLS certificates for one IP address.
Each website on a server has its own certificate. However, if the server isn’t SNI-enabled, that can result in an SSL handshake failure, because the server may not know which certificate to present.
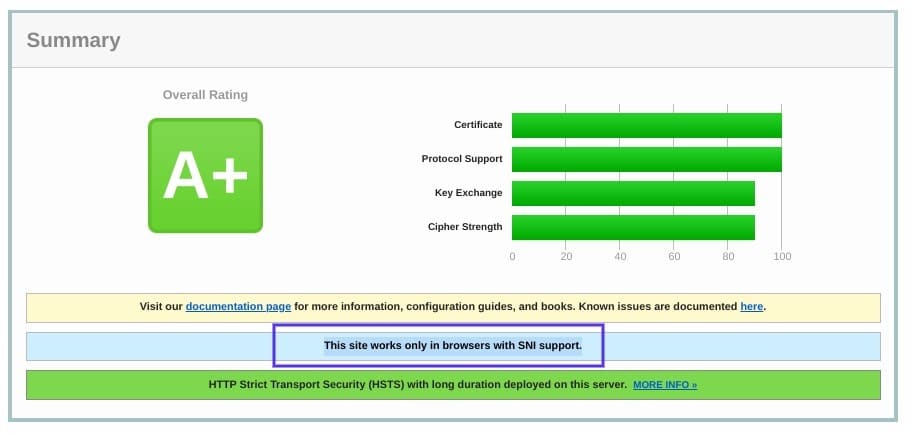
There are a few ways to check and see whether a site requires SNI. One option is to use Qualys’ SSL Server Test, which we discussed in the previous section. Input your site’s domain name, and then click on the Submit button.
On the results page, look for a message that reads “This site works only in browsers with SNI support”:
Another approach for detecting if a server is using SNI is to browse the server names in the ‘ClientHello’ message. This is a more technical process, but it can offer a lot of information.
It involves checking the extended hello header for a ‘server_name’ field, to see if the correct certifications are presented.
If you’re familiar with using tools such as the OpenSSL toolkit and Wireshark, you might find this method preferable. You can use openssl s_client with and without the -servername option:
# without SNI
 $ openssl s_client -connect host:port

 # use SNI
 $ openssl s_client -connect host:port -servername host
If you get two different certificates with the same name, it means that the SNI is supported and properly configured.
However, if the output in the returned certificates is different, or the call without SNI cannot establish an SSL connection, it indicates that SNI is required but not correctly configured. Resolving this issue may require switching to a dedicated IP address.
5. Make Sure the Cipher Suites Match
If you still haven’t been able to identify the cause of the SSL handshake failure, it might be due to a cipher suite mismatch. In case you’re unfamiliar with the term, ‘cipher suites’ refer to a set of algorithms, including ones for key exchange, bulk encryption, and message authentication code, that can be used for securing SSL and TLS network connections.
If the cipher suites that a server uses don’t support or match what’s used by Cloudflare, that can result in an “SSL Handshake Failed” error.
When it comes to figuring out whether there is a cipher suite mismatch, Qualys’ SSL Server Test proves yet again to be a useful tool.
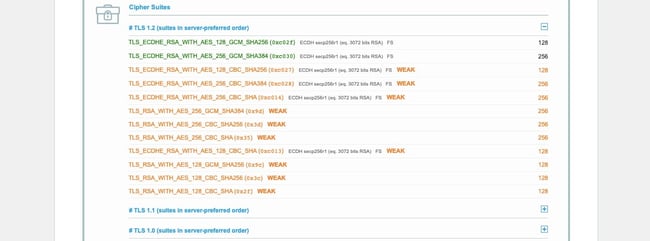
When you input your domain and click on Submit, you’ll see a summary analysis page. You can find the cipher information under the Cipher Suites section:
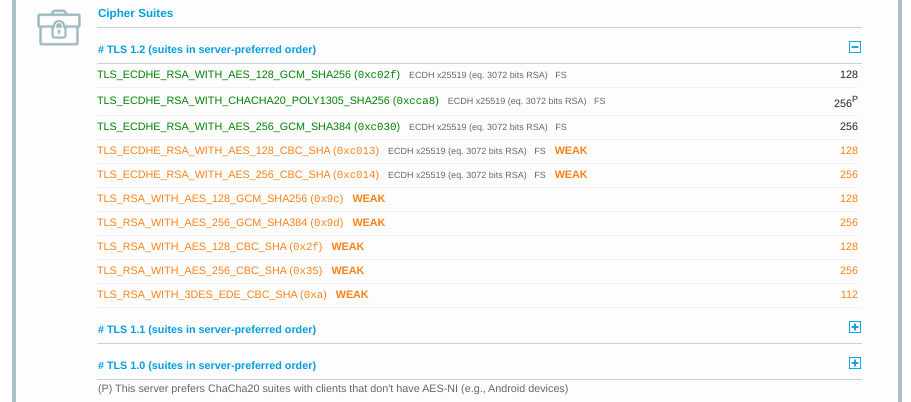
You can use this page to discover which ciphers and protocols the server supports. You’ll want to look out for any that display the ‘weak’ status. In addition, this section also details the specific algorithms for the cipher suites.
To correct this issue, you can compare the results against what your browser supports by using the Qualys SSL/TLS Capabilities of Your Browser tool. For more extensive information and guidance about cipher suites, we also recommend checking out the ComodoSSLStore guide.
Confused by the ‘SSL Handshake Failed’ error message? This guide explains what it is and, most importantly, 5 ways to fix it 🙌Click to Tweet
Summary
One of the most perplexing yet common types of SSL-related problems is the “SSL Handshake Failed” error. Dealing with this error can be stressful since it has many potential causes, including both client- and server-side issues.
However, there are some reliable solutions you can use to identify the problem and resolve it. Here are five ways you can use to fix the SSL Handshake Failed error:
- Update your system date and time.
- Check to see if your SSL certificate is valid (and reissue it if necessary).
- Configure your browser to support the latest TLS/SSL versions.
- Verify that your server is properly configured to support SNI.
- Make sure the cipher suites match.
Get all your applications, databases and WordPress sites online and under one roof. Our feature-packed, high-performance cloud platform includes:
- Easy setup and management in the MyKinsta dashboard
- 24/7 expert support
- The best Google Cloud Platform hardware and network, powered by Kubernetes for maximum scalability
- An enterprise-level Cloudflare integration for speed and security
- Global audience reach with up to 35 data centers and 275 PoPs worldwide
Test it yourself with $20 off your first month of Application Hosting or Database Hosting. Explore our plans or talk to sales to find your best fit.
Installing a Secure Sockets Layer (SSL) certificate on your WordPress site enables it to use HTTPS to ensure secure connections. Unfortunately, there are a variety of things that can go wrong in the process of confirming a valid SSL certificate and making a connection between your site’s server and a visitor’s browser.
If you’ve encountered an “SSL Handshake Failed” error message and are confused as to what it means, you’re not alone. It’s a common error that doesn’t tell you much on its own. While this can be a frustrating experience, the good news is that there are simple steps you can take to resolve the issue.
In this post, we’ll explain what the SSL Handshake Failed error is and what causes it. Then we’ll provide you with several methods you can use to fix it.
Let’s get started!
An Introduction to the SSL Handshake
Before we dig deeper into what causes a TLS or SSL handshake failure, it’s helpful to understand what the TLS/SSL handshake is. Secure Sockets Layer (SSL) and Transport Layer Security (TLS) are protocols used to authenticate data transfers between servers and external systems such as browsers.
SSL certificates are needed in order to secure your website using HTTPS. We won’t get too in-depth about the difference between TLS vs SSL since it’s a minor one. The terms are often used interchangeably, so for simplicity’s sake, we’ll use “SSL” to refer to both.
With that out of the way, an SSL handshake is the first step in the process of establishing an HTTPS connection. To authenticate and establish the connection, the user’s browser and the website’s server must go through a series of checks (the handshake), which establish the HTTPS connection parameters.
Let us explain: the client (typically the browser) sends a request for a secure connection to the server. After the request is sent, the server sends a public key to your computer and checks that key against a list of certificates. The computer then generates a key and encrypts it, using the public key sent from the server.
To make a long story short, without the SSL handshake, a secure connection won’t be made. This can pose a significant security risk. Plus, there are a lot of moving parts involved in the process.
That means there are many different opportunities for something to go wrong and cause a handshake failure, or even lead to the “your connection is not private” error, causing visitors to leave.
Confronted with the ‘SSL Handshake Failed’ error? 🤝 Get a grip on how to solve it with these 5 methods ⤵️Click to Tweet
Understanding What Causes SSL Handshake Failures
An SSL Handshake Failure or Error 525 means that the server and browser were unable to establish a secure connection. This can happen for a variety of reasons.
Generally, an Error 525 means that the SSL handshake between a domain using Cloudflare and the origin web server failed:
However, it’s also important to understand that SSL errors can happen on the client-side or the server-side. Common causes of SSL errors on the client-side include:
- The wrong date or time on the client device.
- An error with the browser configuration.
- A connection that is being intercepted by a third party.
Some server-side causes include:
- A cipher suite mismatch.
- A protocol used by the client that isn’t supported by the server.
- A certificate that is incomplete, invalid, or expired.
Typically, if the SSL handshake fails, the issue can be attributed to something wrong with the website or server and their SSL configurations.
How to Fix the SSL Handshake Failed Error (5 Methods)
There are several potential causes behind the “SSL Handshake Failed” error. So there’s no simple answer when it comes to how you should fix it.
Fortunately, there are a handful of methods you can use to begin exploring potential issues and resolving them one by one. Let’s take a look at five strategies you can use to try and fix the SSL Handshake Failed error.
1. Update Your System Date and Time
Let’s start with one of the more unlikely causes, but one that is incredibly easy to correct if it is the problem: your computer’s clock.
If your system is using the wrong date and time, that may interrupt the SSL handshake. When the system clock is different than the actual time, for example, if it’s set too far into the future, it can interfere with the SSL certificate verification.
Your computer’s clock might have been set incorrectly due to human error or simply due to a glitch in your settings. Whatever the reason, it’s a good idea to check and make sure your system time is correct, and update it if it’s not.
Of course, if your clock is showing the correct information, it’s safe to assume that this isn’t the source of the “SSL Handshake Failed” issue.
2. Check to See If Your SSL Certificate Is Valid
Expiration dates are placed on SSL certificates, to help make sure their validation information remains accurate. Generally, the validity of these certificates lasts for anywhere between six months and two years.
If an SSL certificate is revoked or expired, the browser will detect this and be unable to complete the SSL handshake. If it’s been more than a year or so since you installed an SSL certificate on your website, it might be time to reissue it.
To view the status of your SSL certificate, you can use an SSL certificate checker tool such as the one offered by Qualys:
This tool is both reliable and free to use. All you need to do is input your domain name into the Hostname field, and then click on Submit. Once the checker is done analyzing your site’s SSL configuration, it will present you with some results:
On this page, you can find out if your certificate is still valid and see if it has been revoked for any reason.
In either case, updating your SSL certificate should resolve the handshake error (and is vital for keeping your site and your WooCommerce store secure).
3. Configure Your Browser for the Latest SSL/TLS Protocol Support
Sometimes the best way to determine the root cause of an issue is by process of elimination. As we mentioned earlier, the SSL handshake failure can often occur due to a browser misconfiguration.
The quickest way to determine whether a particular browser is the problem is to try switching to a different one. This can at least help narrow down the problem. You may also try disabling any plugins and resetting your browser back to its default settings.
Another potential browser-related issue is a protocol mismatch. For example, if the server only supports TLS 1.2, but the browser is only configured for TLS 1.0 or TLS 1.1, there’s no mutually-supported protocol available. This will inevitably lead to an SSL handshake failure.
How you can check to see if this problem is occurring varies based on the browser you’re using. As an example, we’ll look at how the process works in Chrome. First, open your browser and go to Settings > Advanced. This will expand a number of menu options.
Under the System section, click on Open your computer’s proxy settings:
This will open up a new window. Next, select the Advanced tab. Under the Security section, check to see if the box next to Use TLS 1.2 is selected. If not, check that option:
It’s also recommended that you uncheck the boxes for SSL 2.0 and SSL 3.0.
The same applies to TLS 1.0 and TLS 1.1 since they are being phased out. When you’re done, click on the OK button, and check to see if the handshake error has been resolved.
Note that if you’re using Apple Safari or Mac OS there isn’t an option to enable or disable SSL protocols. TLS 1.2 is automatically enabled by default. If you’re using Linux, you can refer to the Red Hat guide on TLS hardening.
4. Verify That Your Server Is Properly Configured to Support SNI
It’s also possible that the SSL handshake failure is being caused by improper Server Name Indication (SNI) configuration. The SNI is what enables a web server to securely host several TLS certificates for one IP address.
Each website on a server has its own certificate. However, if the server isn’t SNI-enabled, that can result in an SSL handshake failure, because the server may not know which certificate to present.
There are a few ways to check and see whether a site requires SNI. One option is to use Qualys’ SSL Server Test, which we discussed in the previous section. Input your site’s domain name, and then click on the Submit button.
On the results page, look for a message that reads “This site works only in browsers with SNI support”:
Another approach for detecting if a server is using SNI is to browse the server names in the ‘ClientHello’ message. This is a more technical process, but it can offer a lot of information.
It involves checking the extended hello header for a ‘server_name’ field, to see if the correct certifications are presented.
If you’re familiar with using tools such as the OpenSSL toolkit and Wireshark, you might find this method preferable. You can use openssl s_client with and without the -servername option:
# without SNI
 $ openssl s_client -connect host:port

 # use SNI
 $ openssl s_client -connect host:port -servername host
If you get two different certificates with the same name, it means that the SNI is supported and properly configured.
However, if the output in the returned certificates is different, or the call without SNI cannot establish an SSL connection, it indicates that SNI is required but not correctly configured. Resolving this issue may require switching to a dedicated IP address.
5. Make Sure the Cipher Suites Match
If you still haven’t been able to identify the cause of the SSL handshake failure, it might be due to a cipher suite mismatch. In case you’re unfamiliar with the term, ‘cipher suites’ refer to a set of algorithms, including ones for key exchange, bulk encryption, and message authentication code, that can be used for securing SSL and TLS network connections.
If the cipher suites that a server uses don’t support or match what’s used by Cloudflare, that can result in an “SSL Handshake Failed” error.
When it comes to figuring out whether there is a cipher suite mismatch, Qualys’ SSL Server Test proves yet again to be a useful tool.
When you input your domain and click on Submit, you’ll see a summary analysis page. You can find the cipher information under the Cipher Suites section:
You can use this page to discover which ciphers and protocols the server supports. You’ll want to look out for any that display the ‘weak’ status. In addition, this section also details the specific algorithms for the cipher suites.
To correct this issue, you can compare the results against what your browser supports by using the Qualys SSL/TLS Capabilities of Your Browser tool. For more extensive information and guidance about cipher suites, we also recommend checking out the ComodoSSLStore guide.
Confused by the ‘SSL Handshake Failed’ error message? This guide explains what it is and, most importantly, 5 ways to fix it 🙌Click to Tweet
Summary
One of the most perplexing yet common types of SSL-related problems is the “SSL Handshake Failed” error. Dealing with this error can be stressful since it has many potential causes, including both client- and server-side issues.
However, there are some reliable solutions you can use to identify the problem and resolve it. Here are five ways you can use to fix the SSL Handshake Failed error:
- Update your system date and time.
- Check to see if your SSL certificate is valid (and reissue it if necessary).
- Configure your browser to support the latest TLS/SSL versions.
- Verify that your server is properly configured to support SNI.
- Make sure the cipher suites match.
Get all your applications, databases and WordPress sites online and under one roof. Our feature-packed, high-performance cloud platform includes:
- Easy setup and management in the MyKinsta dashboard
- 24/7 expert support
- The best Google Cloud Platform hardware and network, powered by Kubernetes for maximum scalability
- An enterprise-level Cloudflare integration for speed and security
- Global audience reach with up to 35 data centers and 275 PoPs worldwide
Test it yourself with $20 off your first month of Application Hosting or Database Hosting. Explore our plans or talk to sales to find your best fit.
SSL Handshake Failed error occurs when the client or server fails to establish a secure connection.
Has your SSL handshake failed? For someone who isn’t quite adept in technology, the term ‘SSL handshake’ might seem cryptic or out of the context. If you are in that zone and know nothing about why this error is popping up on your system, then read until the end.

In this article, we shall not only discuss what an SSL handshake is, but we shall also delve deeper into why this error shows up and what you can do to fix it.
What is an SSL handshake?
The SSL handshake involves algorithm agreement, certificate exchange, and the exchange of keys using the shared algorithm. So, the ‘SSL handshake’ is the name given to a securely devised process that helps encrypt client-server communication through cryptographic keys. These keys are exchanged between the server and the client using one out of the two shared algorithms that both the server and the client mutually agreed upon. So, if any glitch occurs during this process, then the ‘SSL handshake failed’ error shows up.
Why does the ‘SSL handshake failed’ error occur?
An SSL handshake error, also known as error 525 occurs when the two endpoints (server and client) are unable to establish a secure connection. This can happen due to several issues, which might be on the server side or the client side. If you are experiencing this error, there is not much to worry about and no matter what’s causing it, we’ll help you fix it in no time. Let us now discuss some ways in which you can fix the SSL handshake error.
How to Fix the “SSL Handshake Failed” Error?
#1. Check your system’s time and date
Before you try any other fix for your SSL handshake error, we strongly recommend that you try correcting your system’s date and time. Silly as it may seem, this works for most people experiencing this sort of error. So, don’t undermine the power of your system’s date and time setting, which might be wrong due to many reasons.
It could be wrong due to pure neglect, a software glitch caused by malware, or simply because you are using a server located in another time zone through a VPN. If you are using a VPN, then it is recommended that you configure the date and time according to the server’s time zone. This refers to the date and time of the location in which the server is located, and not your physical location.
Windows user can reset the date and time in the following manner:
- Click on the ‘Windows’ button.
- Type ‘Date and Time Settings’ and choose the relevant option.
- If you wish to set the time automatically, toggle the ‘set time automatically’ button.
- If you are using a VPN or wish to set the time manually for any other reason, click on the ‘Set the date and time manually’ option.
On Mac, the same can be done by navigating to ‘Menu’ and then to ‘System Preferences’. You will find similar settings for all other Operating Systems.
#2. Update your Web Browser
At all times, you must keep your Operating System and applications up to date. This alone can prevent many errors, including the ‘SSL handshake failed’ error. Chrome users can check that by opening the Chrome browser and clicking on the three vertical dots in the top-right hand corner. Next, click on ‘More Tools’ and if your Chrome browser needs an update, then you’ll find one here. If you don’t, it only means that your Chrome browser is up to date.
#3. Deactivate recently installed plugins or extensions
Most browser plugins and extensions come from unknown developers and could very well be packed with malicious code. So, if you recently installed one of those and have been experiencing the SSL handshake error, then try uninstalling it and clearing your cache and cookies. After you’ve done that, try reconnecting to the same website and check if you can now establish a secure connection.
Chrome users can uninstall the extension by following the below mentioned steps:
- Click on the three vertical dots on the top-right corner
- Click on ‘Settings’
- Select ‘Extensions’
- Choose the extension you recently installed and click on remove

#4. Protocol Mismatch
Many people face the SSL handshake issue due to a protocol mismatch between the server and the client. Basically, there are multiple versions of the SSL/TLS protocol available and for a successful handshake, it is essential that the web server and the browser support the same version.
Often, the SSL handshake error shows up when the server runs on a protocol version that is much higher than that of the client computer. For instance, if the server uses the TLS 1.3 version but the browser’s using the TLS 1.1, then the SSL handshake is likely to fail because servers do not support previous versions. You can fix this by resetting your browser to its default settings and using it without any extensions.
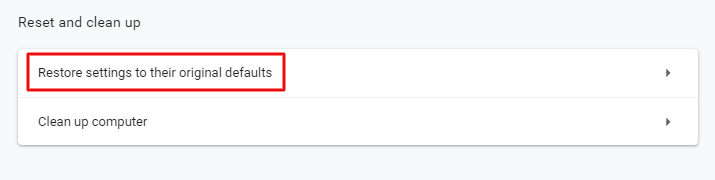
To reset the browser settings to default on your Chrome browser, click on the three vertical dots on the top-right hand corner, choose ‘Settings’ and then ‘System’. Finally, click on the ‘reset settings to original default’ option and you are done.
#5. Expired Certificate
You could be facing the handshake issue simply because you are trying to access a website that does not have a valid SSL certificate. Use our free SSL Certificate checker tool to validate your SSL certificate.
Conclusion:
We have discussed some of the most effective solutions for the SSL handshake problem, which might occur due to the browser or the system settings. In most cases, correcting the time and date settings or removing the trouble-causing extensions from the browser solves the issue.
For server-related concerns, it is only the website owner or administrator who can fix the ‘SSL handshake failed’ problem. Some of the common server-side issues are an invalid SSL certificate, a free SSL certificate from a fraudulent website, problems with the cipher suite, and incorrect installation of the SSL Certificate. In that case, it is recommended that you contact the website owner or administrator for an effective resolution.
Recommended Reading:
- ERR_SSL_PROTOCOL_ERROR
- NET::ERR_CERT_COMMON_NAME_INVALID
- ERR_SSL_VERSION_OR_CIPHER_MISMATCH
- ERR_SSL_VERSION_INTERFERENCE
- ERR_BAD_SSL_CLIENT_AUTH_CERT
Содержание
- Сбои SSL-рукопожатия
- 1. Обзор
- 2. Терминология
- 3. Настройка
- 3.1. Создание Клиента и Сервера
- 3.2. Создание сертификатов на Java
- 4. SSL-рукопожатие
- 4.1. Рукопожатие в одностороннем SSL
- 4.2. Рукопожатие в двустороннем SSL
- 5. Сценарии Сбоя Рукопожатия
- 5.1. Отсутствует сертификат Сервера
- 5.2. Сертификат ненадежного Сервера
- 5.3. Отсутствие Сертификата Клиента
- 5.4. Неверные Сертификаты
- 5.5. Несовместимая версия SSL
- 5.6. Несовместимый набор шифров
- 6. Заключение
- linux-notes.org
- Решение некоторых проблем с handshake (рукопожатием) SSL/TLS
- Ошибка «SSL_do_handshake errors с nginx или haproxy»
Сбои SSL-рукопожатия
Специализированный учебник по сбоям SSL-квитирования и тому, как их исправить.
Автор: Kumar Chandrakant
Дата записи
1. Обзор
Защищенный уровень сокета (SSL) – это криптографический протокол, который обеспечивает безопасность при передаче данных по сети. В этом уроке мы обсудим различные сценарии, которые могут привести к сбою SSL-квитирования, и как это сделать.
Обратите внимание, что наше введение в SSL с использованием JSSE более подробно описывает основы SSL.
2. Терминология
Важно отметить, что из-за уязвимостей безопасности SSL как стандарт заменяется TLS (Transport Layer Security). Большинство языков программирования, включая Java, имеют библиотеки для поддержки как SSL, так и TLS.
С момента создания SSL многие продукты и языки, такие как OpenSSL и Java, имели ссылки на SSL, которые они сохраняли даже после того, как TLS взял верх. По этой причине в оставшейся части этого руководства мы будем использовать термин SSL для обозначения криптографических протоколов.
3. Настройка
Для целей этого урока мы создадим простые серверные и клиентские приложения, использующие API сокетов Java для имитации сетевого подключения.
3.1. Создание Клиента и Сервера
В Java мы можем использовать s pockets для установления канала связи между сервером и клиентом по сети . Сокеты являются частью расширения Java Secure Socket Extension (JSSE) в Java.
Давайте начнем с определения простого сервера:
Сервер, определенный выше, возвращает сообщение “Hello World!” подключенному клиенту.
Далее давайте определим базовый клиент, который будет подключаться к нашему Простому серверу:
Наш клиент печатает сообщение, возвращенное сервером.
3.2. Создание сертификатов на Java
SSL обеспечивает секретность, целостность и подлинность сетевых коммуникаций. Сертификаты играют важную роль в установлении подлинности.
Как правило, эти сертификаты приобретаются и подписываются Центром сертификации, но в этом руководстве мы будем использовать самозаверяющие сертификаты.
Для достижения этой цели мы можем использовать инструмент для ключей, который поставляется с JDK:
Приведенная выше команда запускает интерактивную оболочку для сбора информации для сертификата, такой как Общее имя (CN) и отличительное имя (DN). Когда мы предоставляем все необходимые сведения, он генерирует файл хранилище ключей сервера.jks , который содержит закрытый ключ сервера и его открытый сертификат.
Обратите внимание, что serverkeystore.jks хранится в формате хранилища ключей Java (JKS), который является собственностью Java. В эти дни keytool напомнит нам, что мы должны рассмотреть возможность использования PKCS#12, который он также поддерживает.
Далее мы можем использовать keytool для извлечения открытого сертификата из сгенерированного файла хранилища ключей:
Приведенная выше команда экспортирует открытый сертификат из хранилища ключей в файл server.cer . Давайте используем экспортированный сертификат для клиента, добавив его в хранилище доверия:
Теперь мы создали хранилище ключей для сервера и соответствующее хранилище доверия для клиента. Мы рассмотрим использование этих сгенерированных файлов, когда будем обсуждать возможные сбои при рукопожатии.
Более подробную информацию об использовании хранилища ключей Java можно найти в нашем предыдущем руководстве .
4. SSL-рукопожатие
SSL-квитанции-это механизм, с помощью которого клиент и сервер устанавливают доверие и логистику, необходимые для обеспечения их соединения по сети .
Это очень организованная процедура, и понимание ее деталей может помочь понять, почему она часто терпит неудачу, о чем мы намерены рассказать в следующем разделе.
Типичными шагами в SSL-рукопожатии являются:
- Клиент предоставляет список возможных версий SSL и наборов шифров для использования
- Сервер соглашается с конкретной версией SSL и набором шифров, отвечая своим сертификатом
- Клиент извлекает открытый ключ из сертификата и отвечает зашифрованным “предварительным главным ключом”
- Сервер расшифровывает “предварительный главный ключ”, используя свой закрытый ключ
- Клиент и сервер вычисляют “общий секрет”, используя обмененный “предварительный главный ключ”
- Клиент и сервер обмениваются сообщениями, подтверждающими успешное шифрование и дешифрование с использованием “общего секрета”
Хотя большинство шагов одинаковы для любого SSL-рукопожатия, существует тонкая разница между односторонним и двусторонним SSL. Давайте быстро рассмотрим эти различия.
4.1. Рукопожатие в одностороннем SSL
Если мы обратимся к шагам, упомянутым выше, на втором шаге упоминается обмен сертификатами. Односторонний SSL требует, чтобы клиент мог доверять серверу через свой открытый сертификат. Это оставляет сервер доверять всем клиентам , которые запрашивают соединение. Сервер не может запрашивать и проверять открытый сертификат у клиентов, что может представлять угрозу безопасности.
4.2. Рукопожатие в двустороннем SSL
При использовании одностороннего SSL сервер должен доверять всем клиентам. Но двусторонний SSL добавляет возможность серверу также устанавливать доверенных клиентов. Во время двустороннего рукопожатия и клиент, и сервер должны представить и принять открытые сертификаты друг друга , прежде чем можно будет установить успешное соединение.
5. Сценарии Сбоя Рукопожатия
Проведя этот краткий обзор, мы можем с большей ясностью взглянуть на сценарии сбоев.
SSL-рукопожатие при односторонней или двусторонней связи может завершиться неудачей по нескольким причинам. Мы рассмотрим каждую из этих причин, смоделируем сбой и поймем, как мы можем избежать таких сценариев.
В каждом из этих сценариев мы будем использовать Простой клиент и Простой сервер , которые мы создали ранее.
5.1. Отсутствует сертификат Сервера
Давайте попробуем запустить SimpleServer и подключить его через Simple Client . В то время как мы ожидаем увидеть сообщение “Привет, мир!”, мы представляем исключение:
Теперь это указывает на то, что что-то пошло не так. Исключение SSLHandshakeException выше, абстрактно, указывает, что клиент при подключении к серверу не получил никакого сертификата.
Для решения этой проблемы мы будем использовать хранилище ключей, созданное ранее, передавая их на сервер в качестве системных свойств:
Важно отметить, что системное свойство для пути к файлу хранилища ключей должно быть либо абсолютным путем, либо файл хранилища ключей должен быть помещен в тот же каталог, из которого вызывается команда Java для запуска сервера. Системное свойство Java для хранилища ключей не поддерживает относительные пути.
Помогает ли это нам получить результат, который мы ожидаем? Давайте выясним это в следующем подразделе.
5.2. Сертификат ненадежного Сервера
Когда мы снова запускаем SimpleServer и Simple Client с изменениями в предыдущем подразделе, что мы получаем в качестве вывода:
Ну, это сработало не совсем так, как мы ожидали, но, похоже, это не сработало по другой причине.
Этот конкретный сбой вызван тем, что наш сервер использует самозаверяющий сертификат, который не подписан Центром сертификации (ЦС).
Действительно, каждый раз, когда сертификат подписывается чем-то другим, чем то, что находится в хранилище доверия по умолчанию, мы увидим эту ошибку. Хранилище доверия по умолчанию в JDK обычно поставляется с информацией об обычных используемых автомобилях.
Чтобы решить эту проблему здесь, нам придется заставить Simple Client доверять сертификату, представленному SimpleServer . Давайте воспользуемся хранилищем доверия, которое мы создали ранее, передав их клиенту в качестве системных свойств:
Обратите внимание, что это не идеальное решение. В идеальном сценарии мы должны использовать не самозаверяющий сертификат, а сертификат, сертифицированный Центром сертификации (ЦС), которому клиенты могут доверять по умолчанию.
Давайте перейдем к следующему подразделу, чтобы узнать, получим ли мы ожидаемый результат сейчас.
5.3. Отсутствие Сертификата Клиента
Давайте попробуем еще раз запустить Простой сервер и Простой клиент, применив изменения из предыдущих подразделов:
Опять же, не то, что мы ожидали. Исключение SocketException здесь говорит нам, что сервер не может доверять клиенту. Это связано с тем, что мы установили двусторонний SSL. В нашем Простом сервере у нас есть:
Приведенный выше код указывает на SSLServerSocket требуется для аутентификации клиента через его публичный сертификат.
Мы можем создать хранилище ключей для клиента и соответствующее хранилище доверия для сервера способом, аналогичным тому, который мы использовали при создании предыдущего хранилища ключей и хранилища доверия.
Мы перезагрузим сервер и передадим ему следующие системные свойства:
Затем мы перезапустим клиент, передав эти системные свойства:
Наконец, у нас есть желаемый результат:
5.4. Неверные Сертификаты
Помимо вышеперечисленных ошибок, рукопожатие может завершиться неудачей по целому ряду причин, связанных с тем, как мы создали сертификаты. Одна распространенная ошибка связана с неправильным CN. Давайте рассмотрим детали хранилища ключей сервера, которое мы создали ранее:
Когда мы выполняем приведенную выше команду, мы можем увидеть детали хранилища ключей, в частности владельца:
CN владельца этого сертификата имеет значение localhost. CN владельца должен точно соответствовать хосту сервера. Если есть какое-либо несоответствие, это приведет к исключению SSLHandshakeException .
Давайте попробуем восстановить сертификат сервера с помощью CN как что-либо другое, кроме localhost. Когда мы теперь используем восстановленный сертификат для запуска SimpleServer и SimpleClient , он быстро выходит из строя:
Трассировка исключений выше ясно указывает на то, что клиент ожидал сертификат с именем localhost, который он не нашел.
Обратите внимание, что JSSE по умолчанию не требует проверки имени хоста. Мы включили проверку имени хоста в Простом клиенте с помощью явного использования HTTPS:
Проверка имени хоста является распространенной причиной сбоя и в целом и всегда должна выполняться для повышения безопасности. Для получения подробной информации о проверке имени хоста и ее важности для безопасности с помощью TLS, пожалуйста, обратитесь к этой статье .
5.5. Несовместимая версия SSL
В настоящее время существуют различные криптографические протоколы, включая различные версии SSL и TLS.
Как упоминалось ранее, SSL, в целом, был заменен TLS из-за его криптографической прочности. Криптографический протокол и версия являются дополнительным элементом, который клиент и сервер должны согласовать во время рукопожатия.
Например, если сервер использует криптографический протокол SSL 3, а клиент использует TLS1.3, они не могут договориться о криптографическом протоколе, и будет сгенерировано исключение SSLHandshakeException .
В нашем Простом клиенте давайте изменим протокол на что-то, что не совместимо с протоколом, установленным для сервера:
Когда мы снова запустим наш клиент, мы получим исключение SSLHandshakeException :
Трассировка исключений в таких случаях является абстрактной и не говорит нам о точной проблеме. Для решения этих типов проблем необходимо убедиться, что и клиент, и сервер используют одни и те же или совместимые криптографические протоколы.
5.6. Несовместимый набор шифров
Клиент и сервер также должны договориться о наборе шифров, которые они будут использовать для шифрования сообщений.
Во время рукопожатия клиент представит список возможных шифров для использования, и сервер ответит выбранным шифром из списка. Сервер сгенерирует исключение SSLHandshakeException , если не сможет выбрать подходящий шифр.
В нашем Простом клиенте давайте изменим набор шифров на что-то, что не совместимо с набором шифров, используемым нашим сервером:
Когда мы перезапустим наш клиент, мы получим исключение SSLHandshakeException :
Опять же, трассировка исключений довольно абстрактна и не говорит нам о точной проблеме. Решение такой ошибки заключается в проверке включенных наборов шифров, используемых как клиентом, так и сервером, и обеспечении наличия по крайней мере одного общего набора.
Обычно клиенты и серверы настроены на использование широкого спектра наборов шифров, поэтому вероятность возникновения этой ошибки меньше. Если мы сталкиваемся с этой ошибкой, это обычно связано с тем, что сервер настроен на использование очень избирательного шифра. Сервер может выбрать принудительное применение выборочного набора шифров по соображениям безопасности.
6. Заключение
В этом уроке мы узнали о настройке SSL с помощью сокетов Java. Затем мы обсудили SSL-рукопожатия с односторонним и двусторонним SSL. Наконец, мы рассмотрели список возможных причин, по которым SSL-рукопожатия могут не сработать, и обсудили решения.
Как всегда, код для примеров доступен на GitHub .
Источник
linux-notes.org

Handshake (рукопожатие) SSL/TLS состоит из того, что сервер и клиент идентифицируют друг друга и начинают общение через шифрованный SSL/TLS-туннель (который является безопасным).
Данный процесс и называется handshak-ом или рукопожатием из-за того, что они (сервер и клиент) видятся первый раз. Такой процесс, начинается с идентификации и заканчивается генерированием секретного ключа.
Что такое SSL/TLS-рукопожатие?
SSL handshake – это общение сервера и клиента между собой, где каждый хочет достичь одной и той же цели – безопасно общаться с помощью симметричного шифрования. При таком шифровании у двух сторон один ключ для шифрования и дешифрования сообщений. Такой ключ называется общим секретным – у всех пользователей, которые обмениваются данными, один и тот же ключ.

Принцип работы handshake (рукопожатие) SSL/TLS
Расмотрим диалог сервера и клиента:
Клиент: «Здравствуйте сервер! Я бы хотел установить безопасное соединение между нами. От себя, я отсылаю свои шифры и совместимую SSL/TLS версию».
Сервер: «Здравствуйте, клиент! Я проверил шифр который получил от тебя и SSL/TLS версию, которую ты используешь. Нет повода отсоединятся, так что — продолжаем…. От себя, я хотел бы отправить свой сертификат-файл и публичный ключ. Клиент, проверь их пожалуйста».
Клиент: » Такс, твой сертификат в порядке. Но мне необходимо, чекнуть твой закрытый ключ. Для этого, я сейчас сгенерирую и зашифрую общий секретный ключ с помощью твоего открытого ключа. Выполни расшифровку с помощью своего приватного ключика. Если все пройдет гладко, — ты в свою очередь, создашь главный секрет, который мы в дальнейшем, будем использовать для шифрования и расшифрования информации».
Сервер: «Понял! Все сделано».
С этого момента, когда сервер и клиент доверяют друг другу, то инфу которую они будут передавать между собой, будет зашифрована с помощью главного секрета (После проверок, информация будет зашифрована только через главный секретный ключ).
Клиент: «И так, для тестирования — я отправлю тестовое сообщение, дабы удостоверится, что созданный главный секрет корректно работает. Сервер, ты в свою очередь, когда получишь это тестовое сообщение — отправь мне расшифрованную версию этого сообщения. Если все получится, наши данные — в безопасности».
Сервер: «Да, все прочто отлично. Работает!».
Вот такое вот SSL/TLS-рукопожатие. С этого момента, когда сервер и клиент будут передавать файлы, они будут зашифрованы.
Решение некоторых проблем с handshake (рукопожатием) SSL/TLS
Ошибка «SSL_do_handshake errors с nginx или haproxy»
Если вы загружаете https трафик с haproxy в tcp-режиме, и вы выполняете это с помощью nginx, и вы получаете 502 ошибки, сопровождаемые этими ошибками SSL в журнале ошибок nginx:
То вам нужно отключить опцию proxy_ssl_session_reuse:
По умолчанию nginx пытается повторно использовать сеансы ssl для https upstream; но когда HAProxy циклично обрабатывает tcp-соединения между разными бэкендами, сеанс ssl не будет действителен с одного подключения tcp к другому.
Вот и все, статья «Принцип работы handshake (рукопожатие) SSL/TLS» завершена.
Источник
In person, a handshake can be used to greet someone or finalize an agreement with them. The same is true online.

When devices on a network — say, a browser and a web server — share encryption algorithms, keys, and other details about their connection before finally agreeing to exchange data, it’s called an SSL handshake. During this handshake, the browser and server might ask to see each other’s SSL certificates to verify them.
This handshake is essential for establishing a secure connection before transferring data, so it’s important to understand what an SSL handshake is and what to do if it fails.

The SSL handshake is the process in which a client and server establish the encryption algorithms and secret keys they will use to communicate with each other securely, and exchange and validate each other’s digital certificates.
Note: SSL and TLS are both cryptographic protocols that enable clients and servers operating over a network to communicate with each other securely. TLS has replaced SSL, but SSL is still a more commonly used term so we’ll continue to use it in this post.
SSL Handshake Steps
The exact steps in an SSL handshake vary depending on the version of SSL the client and server decide to use, but the general process is outlined below.
- The client says hello. This “client hello” message lists cryptographic information, including the SSL version to use to communicate with each other. It also lists which encryption algorithms it supports, which are known as Cipher Suites.
- The server responds hello. This “server hello” message contains important information, like which CipherSuite it chose, and its digital certificate. It might also request the client’s certificate.
- The client verifies the server’s certificate. It also sends several byte strings, including one for allowing both the client and the server to compute a secret key for encrypting subsequent messages, including the “finished” messages. If the server sends a client certificate request, it will also send a byte string encrypted with its own private key and digital certificate.
- The server verifies the client’s certificate. This step only takes place if client authentication is required.
- The client says “I’m finished.” This “finished” message indicates that the client has completed its part of the handshake.
- The server says “I’m finished, too.” This “finished” message indicates that the sever has completed its part of the handshake.
For the remainder of the session, the server and client can now exchange messages that are encrypted with the same secret key, which was shared in step three. This is known as symmetric encryption. You can learn more about symmetric encryption, and how it differs from asymmetric encryption, in this post.
The steps above will occur if the process goes smoothly. But what if it doesn’t? Below we’ll walk through how to resolve an “SSL Handshake Failed” error message.
What is SSL Handshake Failed?
SSL Handshake Failed is an error message that occurs when the client or server wasn’t able to establish a secure connection.
This might occur if:
- The client is using the wrong date or time.
- The client is a browser and its specific configuration is causing the error.
- The connection is being intercepted by a third party on the client-side.
- The client and server do not support the same SSL version.
- The client and server are using different Cipher Suites.
- The client or server’s certificate is invalid.
The SSL Handshake Failed error message may appear differently, depending on the client application you’re using or server you’re trying to communicate with. For example, in GitHub, it will look something like this:
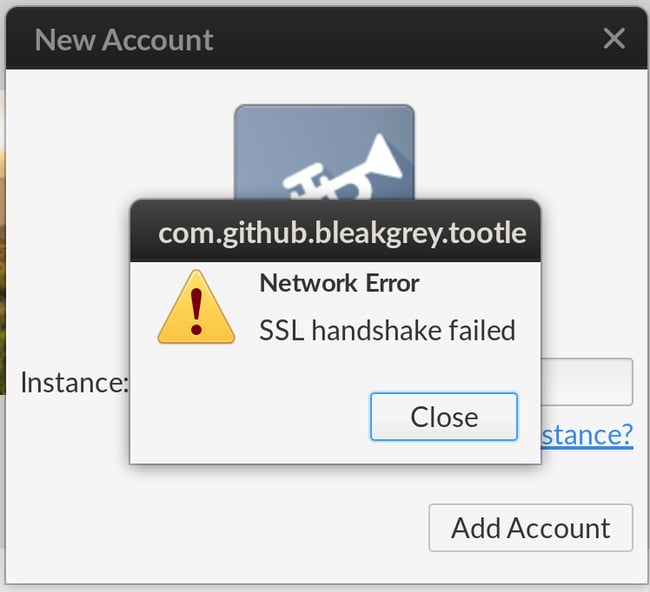
Image Source
If you’re using Cloudflare, on the other hand, an SSL Handshake Failed will appear as a 525 error that looks something like this:
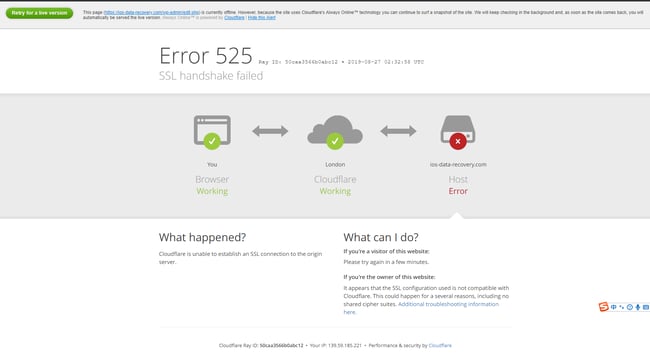
Image Source
Now that you know some of the causes of the SSL Handshake Failed error, let’s look at some solutions.
How to Fix SSL Handshake Failed
- Correct the time and date on the client device.
- Try another browser.
- Add website to allowlist.
- Update browser to use the latest SSL protocol.
- Check browser and server support for Cipher Suites.
- Verify your SSL certificate is accurate and valid.
1. Correct the time and date on the client device.
Let’s start with the easiest fix. If the system time and date is incorrect on your computer or device, then it can cause the SSL Handshake Failed error. That’s because time is essential when it comes to SSL certificates: they have finite lifespans and become invalid past their expiration date.
If you check your system time and date and it’s correct, then move on to the next step.
2. Try another browser.
It’s possible that the browser you’re using is causing the SSL Handshake Failed error. It could be your settings, browser plugins, or another issue. To see if this is the problem, just switch to another browser.
Let’s say you were trying to connect to a website using Google Chrome, and it works just fine in Safari. In that case, you’ll have to narrow down what the problem is. Go back and reset Google Chrome (or whatever browser you were using) to its default settings and disable all your plugins. Then re-configure your settings and enable your plugins one-by-one, testing your ability to connect to the website each time. You should be able to isolate the specific setting or plugin that caused the SSL Handshake Failed that way.
If you try another browser and you still see the SSL Handshake Failed error, then move on to the next step.
3. Add website to allowlist.
It’s also possible that your firewall is causing the SSL Handshake Failed error by intercepting your request for inspection. To rule it out as the cause, you can temporarily deactivate your firewall —but that can leave you vulnerable to attack.
Instead, try adding the website to your allowlist. Here’s the process for Google Chrome:
- On your admin console homepage, go to Devices > Chrome.
- Click Settings> Users & browsers.
- Leave the top organizational unit selected (it’s selected by default). This will apply the setting to all users and enrolled browsers.
- Scroll to URL Blocking and enter the website you are trying to access under Blocked URL exceptions.
- Click Save.
If you try visiting that site again and you still see the SSL Handshake Failed error, then move on to the next step.
4. Update browser to use the latest SSL protocol.
It’s possible that you’re getting the SSL Handshake Failed error because your device (the client) and server do not support the same SSL version, which is resulting in a protocol mismatch. For example, let’s say your browser only supports TLS 1.1 and your server only supports TLS 1.2 or 1.3 (the latest version). If these two try to establish a secure connection, then it will likely result in an SSL Handshake Failed error.
In that case, you’ll need to update your browser. Most updated versions of major browsers like Google Chrome have TLS 1.2 automatically enabled. However, even if it is updated, it’s important to make sure it’s configured to to support the latest TLS version.
Here’s the easiest way to check:
- Visit SSL Labs.
- Navigate to Projects.
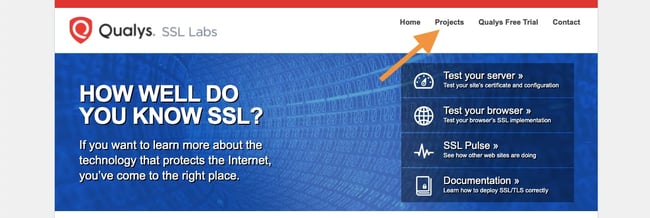
- Click SSL Client Test.

- Under Protocol Support, it will tell you whether your browser supports the latest versions of TLS.

If you verify that your browser and server are using the same protocol, then move on to the next step.
5. Check browser and server support for Cipher Suites.
Another reason you could be getting the SSL Handshake Failed error is that the client and server are using different Cipher Suites. Just like a protocol mismatch, a client and server who do not have mutual support for the same CipherSuite will not be able to establish a secure connection.
You can compare which Cipher Suites your browser support to which the server of the website you’re trying to visit supports by once again visiting SSL Labs.
- First, navigate to Projects.
- Click SSL Client Test.
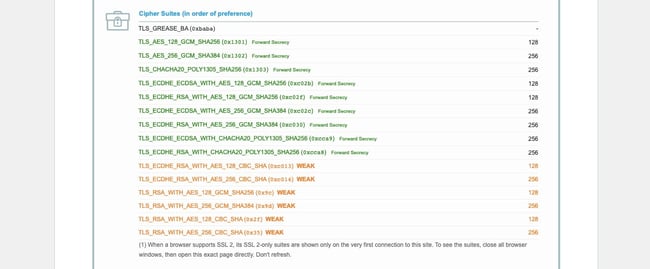
- Scroll down to Protocol Features, where it will list which Cipher Suites your browser supports, in order of preference.
- Now, open SSL Labs in another tab, and navigate to Projects.
- Click SSL Server Test.
- Type in the domain name you are trying to visit that is resulting in the SSL Handshake Failed error.
- Scroll down to Configuration, where it will list which Cipher Suites the server supports, in order of preference.
If you verify that your browser and server are using the same CipherSuite, then move on to the next step.
6. Verify your SSL certificate is accurate and valid.
Any number of issues on an SSL certificate can prevent an SSL handshake from being completed. This may result in an SSL Handshake Failed error or another error message that ultimately means the handshake failed. For example, you might see something like this:
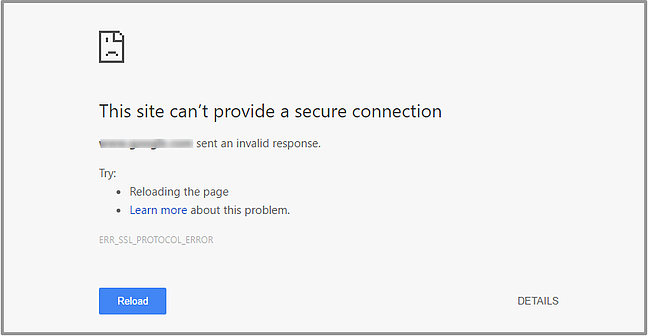
Image Source
If the SSL certificate has an incorrect host name, for example, or it’s past its expiration date, then the handshake will likely fail. So it’s important to ensure your SSL certificate is installed correctly and renewed when needed.
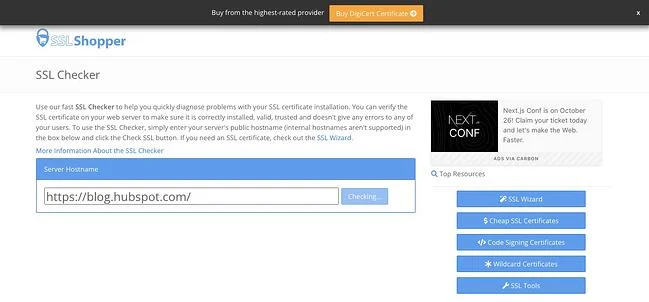
You can use an online tool like the above-mentioned SSL Server Test or SSL Shopper to test that your SSL configuration is installed, valid, and trusted in just a few minutes.
When a Client and Server Don’t Want to Shake Hands
Since an SSL handshake is an essential step in keeping data transferred over the internet secure, it’s important that users understand what the SSL Handshake Failed error means and how to fix it. By following the steps above, you should be able to resolve the issue and establish a secure connection between your device and the server you’re trying to connect to.