Ошибка 339 возникает когда программа требует некоторые файлы для своей нормальной работы, но реестр не может найти эти файлы. Также причина может заключаться в повреждении, удалении, перемещении файлов или в неточностях самого реестра.
Содержание
- Причины ошибки 339 в Windows
- Решения для исправления ошибки 339 в Windows
- Метод №1 Переустановка программы
- Метод №2 Регистрация .ocx файла
- Метод №3 Исправление с помощью “Командной строки”
Причины ошибки 339 в Windows
- Поврежденные файлы с расширением .OCX.
- Программа была установлена некорректно.
- Файлы DLL программы могли быть повреждены или удалены.
- Вредоносное программное обеспечение или заражение вирусами.
Решения для исправления ошибки 339 в Windows
Утерянные или поврежденные файлы с расширением .OCX скорее всего являются главным виновником в этой ситуации. В системе находятся почти 10,000 .ocx файлов и определить, который из них причиняет вам проблемы довольно проблематично. Однако, когда ошибка появляется, то она указывает имя файла доставляющего неудобства.
Метод №1 Переустановка программы
Если вы недавно устанавливали некоторые программы и после этого возникла ошибка, то логично будет произвести переустановку этих утилит. Неправильная установка вполне может послужить причиной различных ошибок.
Метод №2 Регистрация .ocx файла
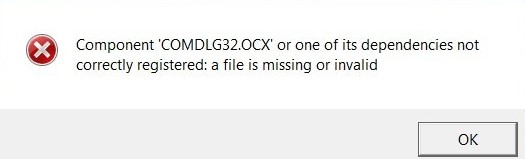
Для регистрации определенного файла сделайте следующее: Нажмите на “Пуск” и выберите “Командная строка(администратор)”. Потом наберите в “Командной строке” команду regsvr32 comdlg32.ocx
После этого, вы получите сообщение об удачной регистрации файла.
Метод №3 Исправление с помощью “Командной строки”
Если ошибка 339 все еще преследует вас, то откройте “Командная строка(администратор)” как было показано в предыдущем и введите поочередно эти команды:
- regsvr32 WindowsSystem32msflxgrd.ocx /u
- regsvr32 WindowsSystem32msflxgrd.ocx
Файл msflxgrd.ocx приведен для примера. В команду нужно вставить то имя файла, из-за которого возникает ошибка 339.
После проделанных действий выйдите из “Командной строки” и проверьте, исправили ли вы проблему.
Содержание
- Скачать MSCOMCTL.OCX и исправить ошибку в Windows 10/7
- Скачать MSCOMCTL.OCX
- Куда кидать файл mscomctl.ocx?
- mscomctl.ocx — как скачать чтобы исправить ошибку?!
- Как исправить ошибку?
- Как исправить ошибку 339 в Windows?
- Причины ошибки 339 в Windows
- Решения для исправления ошибки 339 в Windows
- Метод №1 Переустановка программы
- Метод №2 Регистрация .ocx файла
- Метод №3 Исправление с помощью “Командной строки”
- Как исправить ошибку Component MSCOMCTL.OCX or one of its dependencies not correctly registered?
- Решение ошибки Component MSCOMCTL OCX not correctly registered
- How to Fix Runtime Error 339 Instantly?
- What is Runtime Error 339?
- How to fix Runtime Error 339 in Windows 10
- Run the troubled application as an administrator:
- Anyway, these are the instructions you must follow to run an app as an administrator in Windows:
- Reregister the problematic OCX or DLL file:
- Reinstall the troubled program:
- Get the missing or corrupted file from another computer:
- These instructions cover everything that you have to do here:
- Execute some commands to fix issues:
- Use a registry cleaner:
- Install important applications and components:
- Run the troubled application in compatibility mode for a different Windows build.
Скачать MSCOMCTL.OCX и исправить ошибку в Windows 10/7
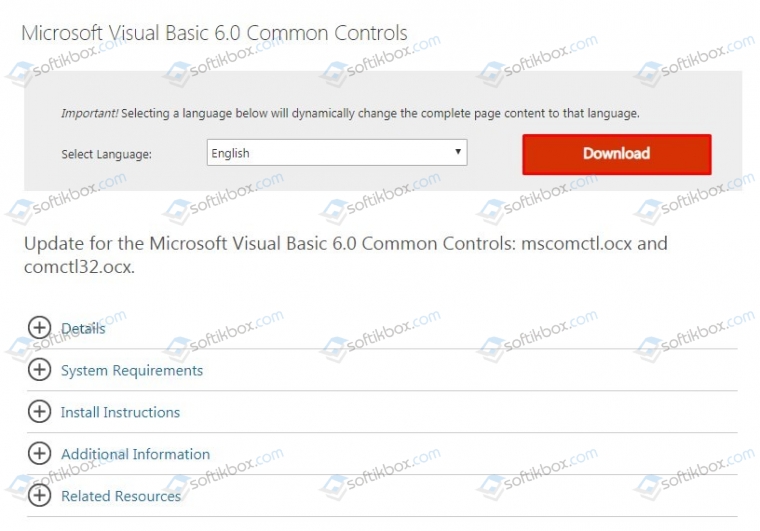
MSCOMCTL.OCX — это модуль управления ActiveX, который требуется некоторым программам для правильной работы. По сути, это набор библиотек, которые предоставляются в среде программирования Microsoft Visual Basic 6.0. Если вы столкнусь с ошибкой «Component MSCOMCTL.OCX or one of its dependencies not correctly registered: a file is missing or invalid«, то не торопитесь скачивать отдельно файл mscomctl.ocx со сторонних источников и закидывать его к себе в систему. Очень много пиратских DLL файлов в интернете, которые могут нанести вашим данным колоссальный ущерб. В этой инструкции о том, как скачать оригинальный файл mscomctl.ocx и зарегистрировать его в системе Windows, чтобы устранить ошибку.
Скачать MSCOMCTL.OCX
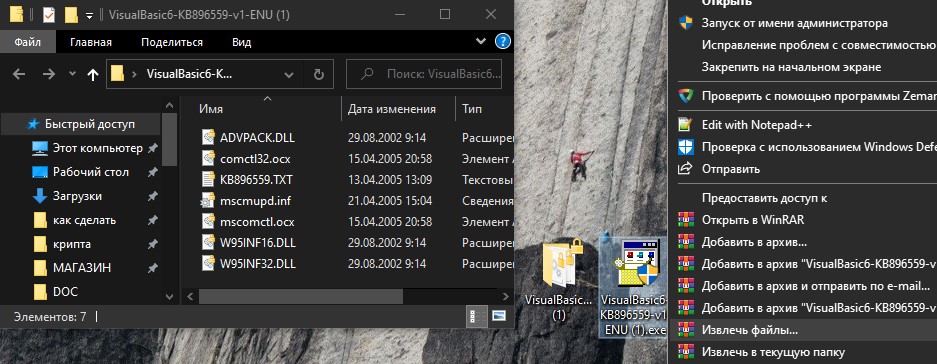
Перейдите на официальный сайт Microsoft и скачайте Visual Basic 6.0 .
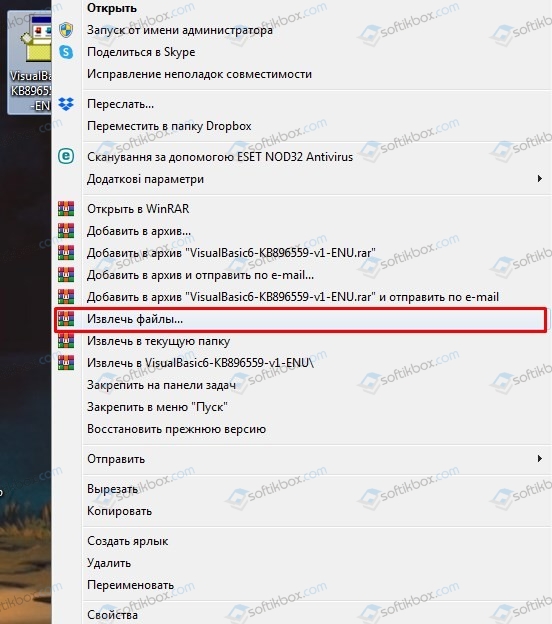
- Не запускайте, а нажмите по нему правой кнопкой мыши и «Извлечь файлы«.
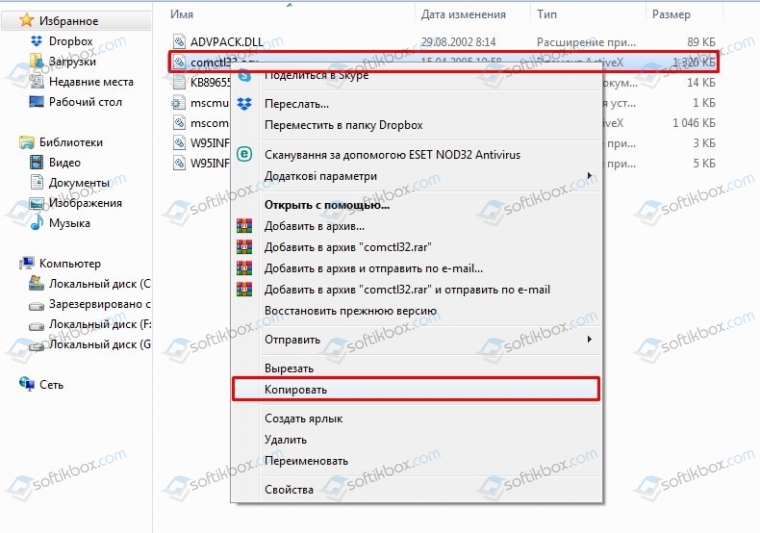
- В извлеченной папке будет находиться сам файл mscomctl.ocx.
Куда кидать файл mscomctl.ocx?
Если вы используете 32-битную Windows 10/7, то файл нужно закинуть по пути:
Если вы используете 64-битную Windows 10/7, то файл нужно закинуть по двум путям:
Источник
mscomctl.ocx — как скачать чтобы исправить ошибку?!

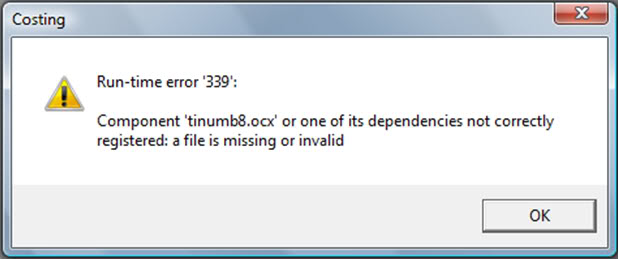
При запуске программ или игр в Windows 7 или Windows 8, Вы можете столкнуться вот с такой ошибкой:
«Runtime error 339: component ‘MSCOMCTL.OCX’ or one of itd depencies not correctly registered: a file is missing or invalid.»
Что в переводе означает:
«Компонент ‘MSCOMCTL.OCX’ или одна из его зависимостей зарегистрирована некорректно: файл отсутствует или содержит ошибки.»
Системный файл MSCOMCTL.OCX — это один из перемещаемых элементов управления ActiveX, являющийся частью библиотеки Microsoft Windows Common Controls. Он тесно связан с MSDN, используется для организации взаимодействия интерфейса с пользователем.
MSCOMCTL.OCX представляет собой разновидность файла OCX, связанного с MSDN Disc 2455.7, который разработан Microsoft для ОС Windows. Последняя известная версия MSCOMCTL.OCX: 1.0.0.0, разработана для Windows. OCX фактически то же самое, что и динамическая библиотека dll.
Причиной появления ошибки могут быть разные: сбой работы самой Виндовс, атака вируса на системные файлы. Часто эта проблема возникает после удаления приложений — какая то программа за собой утянула и системный файлик.
Как исправить ошибку?
Делаем следующее. Скачать файл MSCOMCTL.OCX бесплатно и без рекламы можно здесь.
После этого Вы должны будете скопировать его в следующую системную папку:
Windows 7 и Windows 8 x32 — C:Windowssystem32
На версиях Виндовс x64 — C:WindowsSysWOW64
После того, как библиотека находится в нужной папке, надо нажать комбинацию клавиш Win+R для вызова диалогового окна «Выполнить». В нём нужно написать команду:
REGSVR32 MSCOMCTL.OCX
Если вдруг система будет ругаться — попробуйте ввести команду с ключом -U:
REGSVR32 /U MSCOMCTL.OCX
Нажимаем кнопку ОК и ждём пока завершиться регистрация OCX-файла.
После этого перезагружаем компьютер и проверяем работу. Ошибка не должна больше появляться.
Источник
Как исправить ошибку 339 в Windows?
Ошибка 339 возникает когда программа требует некоторые файлы для своей нормальной работы, но реестр не может найти эти файлы. Также причина может заключаться в повреждении, удалении, перемещении файлов или в неточностях самого реестра.

Причины ошибки 339 в Windows
- Поврежденные файлы с расширением .OCX.
- Программа была установлена некорректно.
- Файлы DLL программы могли быть повреждены или удалены.
- Вредоносное программное обеспечение или заражение вирусами.
Решения для исправления ошибки 339 в Windows
Утерянные или поврежденные файлы с расширением .OCX скорее всего являются главным виновником в этой ситуации. В системе находятся почти 10,000 .ocx файлов и определить, который из них причиняет вам проблемы довольно проблематично. Однако, когда ошибка появляется, то она указывает имя файла доставляющего неудобства.
Метод №1 Переустановка программы
Если вы недавно устанавливали некоторые программы и после этого возникла ошибка, то логично будет произвести переустановку этих утилит. Неправильная установка вполне может послужить причиной различных ошибок.
Метод №2 Регистрация .ocx файла
Для регистрации определенного файла сделайте следующее: Нажмите на “Пуск” и выберите “Командная строка(администратор)”. Потом наберите в “Командной строке” команду regsvr32 comdlg32.ocx
После этого, вы получите сообщение об удачной регистрации файла.
Метод №3 Исправление с помощью “Командной строки”
Если ошибка 339 все еще преследует вас, то откройте “Командная строка(администратор)” как было показано в предыдущем и введите поочередно эти команды:
- regsvr32 WindowsSystem32msflxgrd.ocx /u
- regsvr32 WindowsSystem32msflxgrd.ocx
Файл msflxgrd.ocx приведен для примера. В команду нужно вставить то имя файла, из-за которого возникает ошибка 339.
После проделанных действий выйдите из “Командной строки” и проверьте, исправили ли вы проблему.
Источник
Как исправить ошибку Component MSCOMCTL.OCX or one of its dependencies not correctly registered?

На компьютерах с Windows 7 и Windows 10 пользователи ПК могут столкнуться с ошибкой Component MSCOMCTL.OCX or one of its dependencies not correctly registered: a file is missing or invalid, которая появляется как при запуске операционной системы, так и при открытии какой-то программы. Причина такой неполадки кроется в том, что некоторому софту для нормального функционирования нужен модуль управления ActiveX. В его состав входит файл MSCOMCTL.OCX. Из-за его отсутствия или повреждения может появиться такая ошибка.
Решение ошибки Component MSCOMCTL OCX not correctly registered
Поскольку файл MSCOMCTL.OCX может отсутствовать на ПК или быть повреждённым, то многие пользователи часто загружают его из сети. Однако DLL файлы часто имеют в себе вредоносный код, а поэтому лучше скачать с официального сайта программу Visual Basic 6.0, в состав которой как раз и входит этот файл.
- Нужно нажать правой кнопкой мыши на архиве и выбрать «Извлечь файлы».
- Находим в папке файл mscomctl.ocx. Его нужно скопировать в соответствующие папки.
- Если у вас 32-битная версия Windows 7 или 10, то нужно поместить файл по адресу C:WindowsSystem32.
- Если у вас 64-битная версия операционной системы, то файл mscomctl.ocx нужно поместить по адресу C:WindowsSysWOW64 и C:WindowsSystem32.
- Теперь этот файл нужно зарегистрировать.
ВАЖНО! Даже если у вас на ПК есть файл mscomctl.ocx его можно попробовать перерегистрировать.
- Открываем командную строку с правами Администратора и вводим такие команды. Их нужно вводить по очереди.
- regsvr32 mscomctl.ocx — регистрация файла по пути C:WindowsSystem32.
- CD C:WindowsSysWOW64 — переходим на путь C:WindowsSysWOW64.
- regsvr32 mscomctl.ocx — регистрация файла по пути C:WindowsSysWOW64.
Перезагружаем систему, чтобы изменения вступили в силу. Проверяем, появляется ли ошибка. Если ошибка не исчезла, стоит проверить Windows на целостность системных файлов, а также откатить ОС до более раннего состояния.
Источник
How to Fix Runtime Error 339 Instantly?
Download and try Outbyte PC Repair right now to see what it can do for your Windows.
Developed for Windows 10/11 (8, 7, Vista, XP)
Special offer. See more information about Outbyte and uninstall instructions. Please review EULA and Privacy Policy.

Runtime errors usually manifest themselves on computers that have been used for a long time or an extended period. Runtime errors are said to border on standard or regular events in computing. When compared to other errors or the issues that they define, runtime errors are relatively easy to troubleshoot.
If you pay enough attention to the error code for the runtime error – if you consider the issues or variables that define the error in your case – you will be able to figure out the cause (or source) of the problem and resolve things quickly. In this guide, we intend to examine Runtime Error 339, which is one of the most common errors plaguing computers in recent times.
What is Runtime Error 339?
By definition, runtime errors are errors that occur (or manifest themselves) when programs are running (or executing operations). The term ‘runtime’ is typically used to define the contrast or difference between a specific class of errors and other program error types (for example, syntax errors, compile-time errors, and so on).
Runtime Error 339 is a runtime error that shows up to inform users that an OCX or DLL file is missing and warn them of the issues associated with Windows’ inability to retrieve, access, or use the needed data. The appearance of Runtime Error 339 might also point towards the corruption of certain programs or files.
Most runtime errors – which are associated with missing or corrupted OCX or DLL files – typically come up when users try to install a program, and in rarer cases, they appear when Windows tries to execute operations for a specific application.
These are the most popular error message descriptions or notifications associated with Runtime Error 339:
- Error – Runtime error 339: Component DUZOCX32.OCX is not correctly registered or file is missing.
- Error – Runtime Error 339. Component MSMASK32.ocx or one of its dependencies is not correctly registered; a file is missing or invalid.
- Error – Runtime error ‘339’: Component “FM20.DLL” or one of its dependencies is not correctly registered: a file is missing or invalid.
- Error – Runtime error 339 MSCOMCTL.OCX
After going through the error message descriptions above, you might have come to notice that a specific file or package always appears in the error notification. Something probably went wrong because the stated file was not found or it could not be used.
OCX and DLL files are legitimate files that exist in the Windows operating system environment for various purposes. On a single computer, you might find up to 10,000 OCX files. Some of those files form crucial program parts that are employed to perform specialized tasks or used to maintain the stability of applications in Windows.
Since the appearance of a runtime error is an indicator that something is wrong with an important file, you have to take note of the troubled or problematic file. To fix the error, you will probably have to repair the file or undo the damage done to it.
Consider this error notification: “Runtime error 339: Component MSMASK32.OCX or one of its dependencies is not correctly registered: or file is missing”. From the message description, one can easily figure out that MSMASK32.OCX is the troubled or problematic file.
How to fix Runtime Error 339 in Windows 10
While Runtime Error 339 can manifest itself on machines running any modern version of Windows (Windows XP, Windows Vista, Windows 7, Windows 8 or 8.1, and Windows 10), we intend to use Windows 10 as the base point or reference OS for our fixes.
We will describe the procedures or operations used to resolve Runtime Error 339 on a Windows 10 PC, but users with devices running older versions will be able to use and apply the same solutions.
Ideally, you should begin with the first fix on the list. If it fails, you will have to work your way through the other solutions in the order they have been arranged below.
Run the troubled application as an administrator:
Here, we are considering the possibility that the error notification where Runtime Error 339 appeared only came up because the application involved was not allowed to access certain directories (or folders), use or modify certain files, or perform certain tasks. If any of these assumptions holds true, then the issue will be resolved once Windows grants the app administrator privileges.
When you run an application as an administrator, Windows gets forced to provide the program with admin rights or powers, which it can then use to execute advanced operations or perform top-level tasks without restrictions or disruptions. In that case, the app will be able to do all it needs to do (access folders or make changes to stuff), which means the chances of an error occurring get reduced significantly.
The same proposal applies to other tasks. For example, if you encounter Runtime Error 339 during the installation operation for an application, then the next time, you must run the app installer as an administrator. Similarly, if the error came up when you tried to launch a program (that is already installed), then you have to run the program’s launcher or main executable as an administrator.
Before you continue with the proposed operation, you will do well to check and confirm that you are currently signed in to your computer as the administrator. Otherwise – if you are currently logged in on a regular or standard Windows account – you have to force your way out and then come back in using the admin profile.
Anyway, these are the instructions you must follow to run an app as an administrator in Windows:
- First, you have to locate the installer file, program launcher, or main executable.
You can use the Windows logo button + letter E shortcut to open the File Explorer app quickly and then navigate through the appropriate path to get to the directory where the installer, launcher, or executable for the application is kept.
- Click on the installer, launcher, or executable (to get it highlighted). Right-click on the now highlighted item to see the available options.
- From the list of options displayed, you must choose Run as administrator.
Windows will now work to run the selected app using admin or top-level rights.
If the problem persists, then you must restart your computer and then reattempt the same operation to fix the problem.
If Runtime Error 339 does not come up when you run the troubled app as an administrator, then you might want to configure Windows to always run the application as an administrator to make this fix permanent. This way, you will be able to launch the application normally without having to right-click on it to see some options and so on.
Go through these steps to set Windows to run the troubled app as an administrator (a permanent fix – if applicable):
- Here too, you have to locate the program launcher or main executable for the application that you worked on earlier.
- Click on the launcher or executable (to get it highlighted). Right-click on it to see the available context menu.
- This time, from the options displayed, you have to choose Properties.
The Properties window for the chosen application launcher or executable will be displayed now.
- Click on the Compatibility tab (close to the top of the window) to go there.
- Click on the box for Run this program as an administrator, which is usually the last parameter (close to the bottom of the window).
- Click on the Apply button and then click on the OK button to save the new launch configuration for the problematic or troubled program.
Windows will take note of the changes. Given the new configuration, your system will always launch the program with elevated access, so you will not have to worry about anything.
Note: We advise that you only grant administrative rights to trusted third-party programs. If you give admin powers to a malicious or harmful app, then the application might wreak havoc on your computer – and your antivirus or protection utilities might struggle to restrict or disrupt its operations. Precautions are advised here.
Reregister the problematic OCX or DLL file:
Pro Tip: Run a dedicated PC optimization tool to get rid of incorrect settings, junk files, harmful apps, and security threats that can cause system issues or slow performance.
Here, we want you to deregister the missing or troubled OCX or DLL file and then register it. The processes that make the deregistering and registering operations for the component in view will do enough to induce changes that will fix the inconsistencies or discrepancies causing problems.
Some users confirmed that they managed to resolve Runtime Error 339 by simply reregistering the named OCX or DLL file. If you do what they did, then you too might get the same (good) results from your work.
These are the steps you must go through to reregister the file in view (deregister and then register the component):
- First, you have to open an elevated Command Prompt window. The next steps will be focused on showing you how to do that.
- Click on the Windows icon in the bottom-left corner of your machine’s screen to see the options and objects that make up the Windows Start menu screen (or give the Windows logo button on your device’s keyboard a tap for the same outcome).
- Input Command Prompt into the text box (that appears the moment you begin to type) to run a search task using those keywords as the query.
- Assuming Command Prompt (App) has now appeared as the main entry on the results list returned, you have to right-click on it to see the available context menu.
- From the list of options that show up, you have to select Run as administrator.
Windows will bring up the admin Command Prompt window now.
- Now, you must execute this code (by typing the command in first and then hitting Enter on your device’s keyboard to force Windows to run the command):
(Note: We provided the code for reregistering MSMASK32.OCX. A different OCX or DLL file might be involved in your case. In that case, you will have to replace the MSMASK32.OCX part of the code with the name of the file that was referenced in the notification or error message description that appeared on your screen)
If everything goes well, you will see a message stating that the file was registered successfully or you will see a notification confirming the success of the task.
On the other hand, if the operation fails, then you have to try to deregister the file first and then register it afresh. Continue with the instructions below:
- Execute this code on the Command Prompt window (by typing the command in first and then giving the Enter button a tap to run the code):
regsvr32 MSMASK32.OCX /u
(Note: Replace the MSMASK32.OCX part of the code with the appropriate file or component name – if you have to)
- Now, you must execute this code to reregister the file that got deregistered:
- At this point, regardless of how the operation went, you have to close the Command Prompt window and then restart your computer to finish things.
After the reboot operation, your computer will get the chance to take the changes that occurred into account.
- Now, you must try to recreate Runtime Error 339 by reattempting the task or operation you were busy with when the error message or notification came up to inform you of the problem.
You can initiate the installation process (that failed earlier) for the same program to see how things go this time. You can instruct the application to perform the same task that caused Error 339 to manifest itself on your computer to see what happens.
Reinstall the troubled program:
If you get the message where Runtime Error 339 appears as a key term only when you try to open or use a specific program, then there is a good chance the problem in your case is restricted or limited to the runtime operations for that particular application. Nevertheless, you will do well to confirm things by launching other apps to see if the same issue plays out.
If the assumptions about the runtime issue affecting a single program hold true, then you might be able to fix the problem by simply reinstalling the troubled application. Here, the changes resulting from the uninstallation and installation processes for the app will do enough to make things right with the application code, settings, and other stuff that matters.
To uninstall an application, you have to locate it in the Programs and Features menu in Control Panel and then initiate the removal task from the platform provided. You can do the same thing from the Apps menu in Settings, which is a relatively new application in Windows 10 for such purposes.
If you want to remove an app through the Programs and Features menu in Control Panel, then you must follow these instructions:
- Use the Windows logo button + letter S keyboard to bring up the Search box function for the Windows Start menu screen.
- Type Control Panel into the text field provided to run a search task using those keywords as the query.
- Assuming Control Panel has now emerged as the main entry on the results list returned, you have to click on it to launch the program.
The Control Panel window will be displayed now.
- If the View by parameter is set to Category (in the top-right corner of your screen), then you have to click on the Uninstall a program link (under Programs) to get to your destination.
On the other hand, if the View by parameter is set to Small icons or Large icons, then you have to click on Programs and Features.
- Assuming you are now on the Uninstall or Change a program screen in Control Panel, you have to go through the list of applications there and locate the troubled application (the one affected by Runtime Error 339).
- Click on the application to get it highlighted and then right-click on it to see the available context menu.
- From the small list of options that appear, you must select Uninstall.
The uninstaller or uninstallation wizard window for the chosen application is supposed to come up now.
- You will probably have to click on Uninstall again to proceed. Or you might have to click on the Continue button to get on with the operation here.
- At this point, you have to follow the on-screen directions, carefully go through the prompts and messages, and make the appropriate decisions by clicking on the right buttons (where necessary).
The unwanted application will eventually be removed.
- Now, you must close Control Panel and the windows for other applications. Restart your computer.
If you are more familiar with the Settings application – which means you might prefer to remove an app from the Apps menu there – then these are the instructions you must follow instead:
- First, you have to launch the Settings application. This keyboard shortcut probably provides users with the fastest means of doing so: Window logo button + letter I.
- Once the Settings window gets brought up, you have to click on Apps (on the main screen) to enter the needed menu.
- Now, you must look to the pane close to the right border of the window (under Apps and Features) and then go through the applications listed there to locate the one you intend to remove.
- Click on the troubled application (to get it highlighted) and then click on the Uninstall button (which most likely appeared recently).
- Click on the Uninstall button again on the small dialog or window on your screen – if Windows brings up a prompt to get some form of confirmation for the uninstallation operation for the chosen application.
- Pay attention to the proceedings and follow the on-screen directions to do the job – if this step applies.
The selected application will be gotten rid of eventually.
- Here too, you have to close the Settings app and other applications and then restart your PC to finish things.
After the recommended reboot operation, you have to install the troubled application. We recommend you search for it online and go to its official page. Ideally, you should get the application package or installer executable from trusted or safe sources. We also advise that you download the latest stable version of the app released and get the build designed for your computer or OS configuration.
If you take our recommendations seriously, then you are likely to avoid the hiccups or complications that typically arise during the installation operations for certain apps. Furthermore, the inconsistencies or discrepancies that trigger the issue defined by Runtime Error 339 are likely to be a nonfactor – if everything goes well.
Get the missing or corrupted file from another computer:
The procedure here is as unorthodox as it gets, but it is nevertheless effective. Here, we want you to identify the broken, corrupted, or missing OCX or DLL file that appeared in the notification or error description, get a normal copy of that file from a regular computer, and then place the good copy in the appropriate location on your computer. If you replace the faulty or broken component that triggers the issue defined by Runtime Error 339, then you will have managed to fix the problem – and this is what matters, after all.
Nevertheless, we must warn you of certain things here. You must get the troubled file from a computer that is similar to yours – at least, in terms of Windows version and operating system edition. All the descriptions we made in this guide are based on Windows 10, so both computers (yours and the donor PC) must be running the 64-bit version of Windows 10 or the 32-bit version of the same OS. The donor machine must also be in a perfect or ideal condition. You do not want to get a DLL or OCX file from a computer burdened by the same runtime issues as yours.
To be fair, you might be able to find copies of the troubled OCX or DLL file on some websites, but we are generally against users getting OCX or DLL files (sensitive components) online – since we cannot vouch for the authenticity of the sites or download centers involved. In your quest to replace the bad file on your computer, you might end up downloading a malicious program, which might cause problems even more serious than the one you are currently trying to resolve. Due to the stated risks (and other reasons), you will do well to get the OCX or DLL file from another computer (owned by a friend, for example) instead of obtaining it from the internet.
These instructions cover everything that you have to do here:
- First, you have to deregister the troubled DLL or OCX – since you intend to remove or replace it (with another file).
- Open an admin Command Prompt window. We described the steps on doing this in the second fix in this guide, so you might want to scroll up a bit to go through the same instructions (in case you have forgotten).
- Once the elevated Command Prompt window comes up, you have to execute the following code there:
regsvr32 MSMASK32.OCX /u
(Note: Replace the MSMASK32.OCX part of the code with the appropriate file or component name – if you have to)
Windows will now act to deregister the file or component in view.
At this point, you have to move on to locate the file on your computer, take note of the directory where it resides, and then delete the file. Continue with these instructions:
- Open the File Explorer application by clicking on the application icon, which is likely to be on your taskbar.
Otherwise – if the app icon is missing – this keyboard shortcut provides you with the fastest means of doing the same thing: Window logo button + letter E key.
- Once the File Explorer window gets brought up, you have to double-click on This PC to see your system’s disk.
- Now, you must enter your system’s disk (C:) by double-clicking on it. From your present location (inside your system’s disk), you have to run a search task for the troubled DLL or OCX file.
- Fill the text box in the top-right corner of the File Explorer window with the name of the DLL or OCX file. For example, OCX.
Wait for Windows to search for the file. It might take a while.
If the search task returns no relevant results or if no matches are found, then you have to enable the functions that allow your computer to search hidden and protected folders. You might also need to disable the hidden property of the directories you believe to be housing the file.
- Here, assuming Windows has located the file (that you searched for), you must right-click on the entry to see the available options and then select Open file location.
You will be directed to the folder on your system’s disk where the DLL or OCX file in view resides.
- You have to take note of the directory you are currently in or the path (to get to it) – because you will have to come back here.
- Now, you can delete the DLL or OCX file. Click on it to get it highlighted, right-click on it to see the available options, and then choose Delete.
Windows will now act to get rid of the unwanted or troubled file.
Now, you must leave your computer (the one burdened by issues defined by Runtime Error 339) and go to the donor computer (from which you need to obtain the file). The task we are about to describe must be performed on the donor PC.
- Open the File Explorer window on the second computer by clicking on the application icon on the taskbar there or through the Windows logo button + letter E keyboard shortcut.
- Now, you must enter the system disk there and then search for the troubled DLL or OCX file.
Alternatively, you can navigate through the appropriate path to get to the folder where the needed DLL or OCX file is stored. You are supposed to know the relevant file path, after all – given the work you did earlier on your PC.
- In any case, after you find the needed DLL or OCX file, you have to right-click on it and then choose Copy.
- At this point, you will do well to insert a flash USB drive into the machine you are on currently and then paste the copied DLL or OCX to a folder there.
Once you get the needed DLL or OCX file somewhere on a flash drive, then your work on the second computer (donor PC) is done. You have to eject the drive and take it with you.
It is time you left the donor PC and moved back to your computer to finish the work you started. The next set of instructions is focused on getting the needed file to the appropriate location and activating it:
- Plug the flash drive into your computer. Open the File Explorer application through whatever means necessary.
- After the File Explorer window comes up, you have to go inside the flash drive and then enter the folder housing the DLL or OCX file that you copied from the donor computer.
- Click on the DLL or OCX file to get it highlighted, right-click on it to see the available options, and then choose Copy.
The needed DLL or OCX file will be copied to your computer’s clipboard.
- Now, you have to leave your current location and then navigate through the appropriate path to get to the directory where the DLL or OCX file is supposed to be on your system’s disk.
Perhaps, you now understand why we asked you to take note of the directory or file path earlier.
- Assuming you are now in the appropriate directory, you have to right-click on any spot free of icons or objects to see the available options and then choose Paste.
Windows will now place the copied DLL or OCX file inside your current location.
- You might have to click on the appropriate button to confirm a prompt. Or you might even have to enter the password for the admin account before your system allows the operation to be executed.
Your work is not yet done, though. You still have to do something to force Windows to recognize or take note of the introduced component to ensure that programs that need it are able to call upon and use it.
- Here, you have to open an elevated Command Prompt window (as you did several times in previous procedures) and then execute this code to register the file:
(Note: We provided the code for registering MSMASK32.OCX. A different OCX or DLL file might be involved in your case. In that case, you will have to replace the MSMASK32.OCX part of the code with the name of the relevant file or component.)
- Assuming the execution operation for the command has reached completion – and if everything went well – you have to close the Command Prompt app and other applications.
- Restart your computer.
- Run the necessary checks to verify that Runtime Error 339 has been resolved for good.
- Here too, you have to open an elevated Command Prompt window.
- Click on the Windows icon in the bottom-left corner of your machine’s screen to see the options and objects that make up the Windows Start menu screen (or give the Windows logo button on your device’s keyboard a tap for the same outcome).
- Input Command Prompt into the text box (that appears the moment you begin to type) to run a search task using those keywords as the query.
- Assuming Command Prompt (App) has now appeared as the main entry on the results list returned, you have to right-click on it to see the available context menu.
- From the list of options that show up, you have to select Run as administrator.
- Now, you must execute this code to deregister the named OCX file (by typing the command in first and then hitting the Enter button on your device’s keyboard to force Windows to run the command):
- It is time you executed this one to reregister the named OCX file:
- Well, you must execute these commands too (one after the other):
- regsvr32 \Windows\System32\ comdlg32.ocx /u
- regsvr32 \Windows\System32\ comdlg32.ocx
- If you know other DLL or OCX files, then you will do well to execute commands in this format for them:
- regsvr32 \Windows\System32\ InsertFileNameHere /u
- regsvr32 \Windows\System32\ InsertFileNameHere
- Try to deregister and reregister as many DLL and OCX files or components as you can.
- Assuming you are done with the deregistering and reregistering operations for all the needed components, you have to close the Command Prompt app and other programs.
- Restart your computer – since a reboot operation is the only thing that ensures Windows takes all the changes resulting from your work into account.
- Run some tests to confirm that Runtime Error 339 is no longer in play. Reattempt the task or operation with which you encountered the error message or notification to see what happens this time.
Execute some commands to fix issues:
You are probably already familiar with tasks performed on an elevated Command Prompt window. Well, the work here is more of the same thing, but it is more comprehensive than the previous procedures. We want you to run some commands to fix problems affecting DLL and OCX files. Perhaps, if you resolve the issues affecting as many troubled components as possible on your computer, you will stop seeing Runtime Error 339.
Here, we want you to deregister and then reregister as many DLL and OCX files as you can to make things right. These instructions cover everything you need to do:
Windows will bring up the admin Command Prompt window now.
regsvr32 WindowsSystem32 msflxgrd.ocx /u
regsvr32 WindowsSystem32 msflxgrd.ocx
(Note: You must replace the InsertFileNameHere part of the code with the name of the file or component that you are looking to deregister and then register.)
Other things you can try to resolve Runtime Error 339 on a Windows 10 computer
At this point, if you are yet to apply a fix that does enough to resolve the issues defined by Error 339 on your PC, then you have little choice but to try out procedures on our final list of solutions and workarounds to the problem.
Use a registry cleaner:
A registry cleaner will execute operations to remove the invalid, broken, and corrupted entries from your registry. We advise you to download and run Auslogics Registry Cleaner. After the cleaning operation, you will have to restart your PC to finish things.
Install important applications and components:
There is a good chance you are struggling with Runtime Error 339 because your computer is missing certain programs and components that other apps need to run or work. Some users managed to fix the problems by checking for and installing all the following applications and packages: DirectX, Java, Flash, and Visual C++ Redistributables.
Run the troubled application in compatibility mode for a different Windows build.
Try out as many Windows versions as you can to see if one of them works.
Final Fix: Run a dedicated PC optimization tool to get rid of incorrect settings, junk files, harmful apps, and security threats that can cause system issues or slow performance.
Источник
Что такое ошибка во время выполнения 339?
Ошибка выполнения 339 — это распространенный формат кода ошибки, который появляется, когда компьютер перегружен слишком большим объемом данных.
Однако в некоторых случаях это может произойти из-за отсутствия ключей реестра, файлов DLL или во время установки. Это может привести к внезапному завершению работы некоторых программ, а также к повреждению файлов в системе.
Решения
Загрузка доступна для полного восстановления Runtime Ошибка 339
 Причины ошибок
 Причины ошибок
Этот код ошибки вызывает тревогу, так как является критическим признаком нестабильной системы, сопровождаемой неправильным обслуживанием компьютера. Потенциальные риски, связанные с ошибкой выполнения 339, включают в себя:
- Проблемы с запуском системы
- Низкая производительность ПК
- Отказ системы и сбой
- Повреждение системных файлов
Поэтому, чтобы избежать этих рисков и сбоя системы, рекомендуется немедленно исправить ошибку времени выполнения 339.
Дополнительная информация и ручной ремонт
Если у вас есть проблема Runtime Error 339 на вашем компьютере, вот отличный способ, как вы можете исправить это сразу:
Сканирование на вирусы
Неправильное обслуживание компьютера указывает на то, что ваша система может быть подвержена вирусам и вредоносным программам. Вирусы могут изменять Реестре и приведет к ошибке выполнения 339. Поэтому, во-первых, важно проверить компьютер на наличие вирусов.
Выявление программного обеспечения, вызывающего ошибки
Сканирование поможет вам определить программное обеспечение, которое выдает эту ошибку на вашем компьютере. Как только вы их определили, либо удалите их, либо обновите программу.
Чтобы удалить программу, перейдите на панель управления и нажмите «Добавить / удалить программу», если у вас Windows XP, если нет, то нажмите «Программы и компоненты». Теперь удалите программу из вашей системы.
Получите последнюю версию установщика и переустановите удаленную программу
Получив последнюю версию установщика, запустите ее в своей системе, следуя инструкциям на экране. Установите программу.
Существует также другой способ исправить ошибку времени выполнения 339, загрузив инструмент Ошибка времени выполнения.
Используйте профессиональный инструмент исправления ошибок во время выполнения
Чтобы исправить ошибку, вы также можете использовать профессиональный инструмент Runtime Error Fixer для сканирования на наличие вирусов на вашем компьютере. Это доступно для скачать бесплатно здесь.
Загрузите инструмент и установите его на свой компьютер. Просто просканируйте свой компьютер после установки. После завершения сканирования нажмите кнопку «Восстановить». Этот инструмент устраняет проблемы всего за несколько минут.
Расширенный ремонт системы Pro
Автоматизированное решение для ремонта ПК в один клик
![]()
С Advanced System Repair Pro вы можете легко
Замените поврежденные файлы
Восстановить производительность
Удалить вредоносные программы
СКАЧАТЬ
Advanced System Repair Pro совместим со всеми версиями Microsoft Windows, включая Windows 11.
Поделиться этой статьей:
Вас также может заинтересовать
Windows 10 использует набор правил или стандартов, называемых сетевыми протоколами, при общении через Интернет. Именно эти протоколы обеспечивают правильную передачу данных между компьютерами. Однако, если на вашем компьютере с Windows 10 отсутствует какой-либо сетевой протокол, вы, скорее всего, столкнетесь с такой проблемой, как невозможность просматривать Интернет или обмениваться файлами. Для этого вы можете попробовать запустить средство устранения неполадок входящих подключений: поскольку вам не удалось подключиться к интернет-соединению с помощью ПК, вы можете попробовать запустить средство устранения неполадок входящих подключений, поскольку оно может решить проблему. Чтобы запустить это средство устранения неполадок, выполните следующие действия:
- Нажмите клавиши Win + I, чтобы открыть Настройки.
- После открытия настроек перейдите в раздел «Обновление и безопасность».
- Затем перейдите к панели устранения неполадок, выберите раздел «Входящие подключения» и нажмите кнопку «Запустить средство устранения неполадок», чтобы начать работу.
- Подождите, пока средство устранения неполадок не выполнит свою работу, а затем попробуйте снова подключиться к сети.
Если после запуска средства устранения неполадок входящих подключений вы получите сообщение об ошибке «Сетевой протокол отсутствует», то вот несколько советов, которые необходимо проверить, чтобы исправить это. Обратите внимание, что у вас должны быть права администратора перед тем, как приступить к устранению проблемы
Вариант 1. Попробуйте обновить, откатить или удалить сетевые драйверы.
Вы также можете обновить, откатить или отключить сетевые драйверы, чтобы исправить ошибку «Эта операция не удалась, поскольку ни один адаптер не находится в состоянии, допустимом для этой операции».
- Нажмите клавиши Win + R, чтобы открыть окно «Выполнить», а затем введите «devmgmt.msc”И нажмите Enter, чтобы открыть окно диспетчера устройств.
- Под Диспетчером устройств вы увидите список драйверов. Оттуда найдите сетевые адаптеры и разверните их.
- Затем щелкните правой кнопкой мыши каждый из сетевых драйверов и, в зависимости от ваших предпочтений, вы можете выбрать «Обновить драйвер», «Отключить устройство» или «Удалить устройство».
- После этого перезагрузите компьютер и посмотрите, помогло ли оно исправить ошибку «синий экран» netio.sys.
Вариант 2 — попробуйте сбросить Winsock, TCP / IP и очистить DNS
Вы также можете попробовать сбросить Winsock, TCP / IP, и очистка DNS может помочь вам устранить ошибки. Для этого выполните следующие действия:
- Щелкните правой кнопкой мыши кнопку «Пуск» и выберите «Командная строка (администратор)», чтобы открыть командную строку с повышенными привилегиями.
- После этого выполните каждую из перечисленных ниже команд. И после того, как вы набрали один за другим, вы должны нажать Enter.
- Netsh сброс Winsock — введите эту команду для сброса Winsock
- Netsh Int IP resettcpip.txt сброс — введите эту команду для сброса TCP / IP
- IPCONFIG / flushdns — введите эту команду, чтобы очистить кэш DNS
- Затем перезагрузите компьютер и проверьте, устранена ли проблема.
Вариант 3 — Диагностика сетевого адаптера
Чтобы диагностировать сетевой адаптер, перейдите в Панель управления> Все элементы панели управления> Сетевые подключения и оттуда найдите сетевой адаптер, который может вызывать ошибку. Обратите внимание, что если вы используете соединение Wi-Fi, то это, вероятно, ваш адаптер Wi-Fi, в противном случае он имеет какое-то отношение к вашему адаптеру Ethernet. Просто щелкните правой кнопкой мыши проблемный сетевой адаптер и выберите «Диагностика» для устранения неполадок.
Вариант 4 — Попробуйте выполнить сброс сети
Вы также можете попытаться выполнить сброс сети для решения проблемы. Это сбросит всю конфигурацию сети, включая ваш IP-адрес. Чтобы выполнить сброс сети, выполните следующие действия:
- Нажмите клавиши Win + I, чтобы открыть Настройки.
- Оттуда перейдите в раздел «Сеть и Интернет».
- Затем прокрутите вниз и найдите «Сброс сети» под панелью состояния.
- После этого нажмите «Сброс сети», а затем «Сбросить сейчас», чтобы начать сброс конфигурации сети. После этого проверьте, может ли она исправить ошибку или нет.
Вариант 5. Попробуйте импортировать настройки Winsock с другого компьютера.
Если сброс Winsock или сети не помог устранить проблему, вы можете попробовать импортировать настройки с компьютера, который находится в хорошем состоянии. Вам нужно иметь доступ к реестру, чтобы сделать это, а затем экспортировать и импортировать несколько настроек. Обратитесь к этим шагам, чтобы начать:
- Нажмите клавиши Win + R, чтобы открыть диалоговое окно «Выполнить», введите в поле «Regedit» и нажмите Enter, чтобы открыть редактор реестра.
- После этого перейдите в этот путь реестра: HKEY_LOCAL_MACHINESYSTEMCurrentControlSetServices
- Затем найдите два раздела реестра с именами «Winsock» и «Winsock2», затем щелкните каждый из них правой кнопкой мыши и выберите параметр «Экспорт».
- Теперь скопируйте ключи реестра на USB-накопитель, а затем скопируйте ключи на ПК в отличном состоянии.
- Затем дважды щелкните по каждому из них, и он установит ключи WINSOCK.
Узнать больше
Для слепых или слабовидящих пользователей ПК функция специальных возможностей экранного диктора в Windows 10 позволяет использовать компьютер без дисплея или мыши для выполнения общих задач — он читает и взаимодействует с объектами на экране, такими как текст и кнопки. Экранный диктор можно использовать для чтения и написания электронных писем, просмотра веб-страниц и работы с документами.
В Windows 10 есть множество параметров экранного диктора, которые вы можете настроить. Вы можете изменить его сочетания клавиш, персонализировать голос Экранного диктора, включить предупреждения Caps Lock и многое другое. Вы можете выбрать голос для рассказчика, настроить скорость речи, высоту тона и громкость. Чтобы изменить устройство вывода звука по умолчанию, используемое для воспроизведения голоса диктора в Windows 10:
- Нажмите ⊞ ОКНА + I
- В меню «Настройки» выберите «Легкость доступа».
- Нажмите Рассказчик на левой панели.
- В окне экранного диктора на правой панели переключите кнопку на On для включения экранного диктора при необходимости.
- Прокрутите вниз до Персонализируйте голос диктора .
- Для того, чтобы получить Выберите, где вы слышите голос диктора щелкните раскрывающийся список и выберите из списка нужное устройство вывода звука. Помните, что вы не сможете выбрать, если к вашему компьютеру с Windows 10 не подключено несколько устройств вывода звука.
- По завершении выйдите из настроек.
Если вы хотели бы читать более полезный статьи и советы о посещении различного программного и аппаратного обеспечения errortools.com в день.
Узнать больше
Если вы столкнулись с ошибкой типа «синий экран», которая указывает на файл Wdf01000.sys, этот пост может оказаться полезным. Wdf01000.sys — это файл, связанный с Windows Driver Framework, который управляет системными драйверами. Поэтому, если этот файл окажется поврежденным, драйверы начнут вызывать проблемы в системе, что в конечном итоге приведет к ошибке «Синий экран смерти». Существует множество описаний ошибок, связанных с файлом Wdf01000.sys, например:
- DRIVER_IRQL_NOT_LESS_OR_EQUAL
- SYSTEM_THREAD_EXCEPTION_NOT_HANDLED
- PAGE_FAULT_IN_NONPAGED_AREA
- System_Service_Exception
- KMODE_EXCEPTION_NOT_HANDLED
- DRIVER_VERIFIER_DETECTED_VIOLATION
Хотя шаги по устранению неполадок, которые вы должны предпринять, зависят от типа ошибки BSOD, которую вы получаете, есть несколько вариантов, которые вы можете попытаться устранить ошибки синего экрана, связанные с файлом Wdf01000.sys. Обратитесь к опциям, приведенным ниже.
Вариант 1. Попробуйте запустить инструмент DISM.
Вы можете попробовать запустить инструмент управления развертыванием образов и обслуживания или DISM, чтобы исправить ошибку синего экрана Wdf01000.sys. Используя этот встроенный инструмент, у вас есть различные опции, такие как «/ ScanHealth», «/ CheckHealth» и «/ RestoreHealth».
- Откройте командную строку с правами администратора.
- Затем введите следующие команды и обязательно нажмите Enter сразу после ввода каждой из них:
- Dism / Online / Очистка-изображение / CheckHealth
- Dism / Online / Очистка-изображение / ScanHealth
- exe / Online / Cleanup-image / Восстановление здоровья
- Не закрывайте окно, если процесс занимает некоторое время, поскольку, вероятно, он займет несколько минут.
Вариант 2. Попробуйте обновить или откатить драйверы вашего устройства.
Если первый вариант вам не подошел, то пора либо обновить, либо откатить драйверы устройств. Скорее всего, после того, как вы обновили свой компьютер с Windows, ваш драйвер также нуждается в обновлении. С другой стороны, если вы только что обновили драйверы устройства, вам необходимо откатить драйверы до их предыдущих версий. В зависимости от того, что применимо к вам, следуйте приведенным ниже инструкциям.
- Откройте Диспетчер устройств из меню Win X.
- Затем найдите драйверы устройств и щелкните их правой кнопкой мыши, чтобы открыть окно «Свойства».
- После этого перейдите на вкладку «Драйвер» и нажмите кнопку «Удалить устройство».
- Следуйте опции экрана, чтобы полностью удалить его.
- Наконец, перезагрузите компьютер. Это просто переустановит драйверы устройства автоматически.
Примечание: Вы можете установить специальный драйвер на свой компьютер, если он у вас есть, или вы также можете найти его прямо на веб-сайте производителя.
Вариант 3. Используйте диспетчер проверки драйверов
Диспетчер проверки драйверов — это еще один инструмент в Windows, который может помочь вам решить проблемы, связанные с драйверами. И поэтому, если вы хотите исправить ошибку синего экрана Wdf01000.sys, вам нужно использовать Driver Verifier Manager:
- Введите ключевое слово «Verifier» в поле поиска Cortana для поиска Verifier в Windows 10.
- После этого выберите опцию «Создать пользовательские настройки».
- Убедитесь, что вы проверили все, кроме параметров «Проверка соответствия DDI» и «Рандомизированное моделирование низких ресурсов».
- Далее выберите опцию «Выбрать имена драйверов из списка».
- После этого вы должны выбрать все драйверы от любого неофициального или стороннего поставщика. Проще говоря, вы должны выбрать все драйверы, которые не поставляются Microsoft.
- Затем нажмите кнопку Готово.
- Откройте Командную строку от имени администратора и выполните эту команду — верификатор / запрос настроек
- Команда, которую вы только что выполнили, отобразит настройки Driver Verifier, поэтому, если вы увидите какие-либо из включенных флагов, загрузите ваш компьютер с Windows 10 в безопасном режиме.
- Снова откройте командную строку от имени администратора и выполните эту команду: верификатор / сброс
- Команда сбросит проверку драйвера. После завершения процесса перезагрузите компьютер и проверьте.
Вариант 4 — Запустить проверку системных файлов
Проверка системных файлов или SFC — это встроенная командная утилита, которая помогает восстановить поврежденные и отсутствующие файлы. Он заменяет плохие и поврежденные системные файлы на хорошие системные файлы. Для запуска команды SFC выполните шаги, указанные ниже.
- Нажмите Win + R, чтобы запустить Run.
- Введите CMD в поле и нажмите Enter.
- После открытия командной строки введите ПФС / SCANNOW
Команда запустит сканирование системы, которое займет несколько секунд, прежде чем завершится. Как только это будет сделано, вы можете получить следующие результаты:
- Защита ресурсов Windows не обнаружила нарушений целостности.
- Защита ресурсов Windows обнаружила поврежденные файлы и успешно восстановила их.
- Windows Resource Protection обнаружила поврежденные файлы, но не смогла исправить некоторые из них.
- Перезагрузите компьютер.
Вариант 5. Запустите средство устранения неполадок синего экрана
Средство устранения неполадок с синим экраном — это встроенный инструмент в Windows 10, который помогает пользователям исправлять ошибки BSOD, такие как Wdf01000.sys. Его можно найти на странице средств устранения неполадок настроек. Чтобы использовать его, выполните следующие действия:
- Нажмите клавиши Win + I, чтобы открыть панель «Настройки».
- Затем перейдите в Обновление и безопасность> Устранение неполадок.
- там найдите опцию «Синий экран» с правой стороны, а затем нажмите кнопку «Запустить средство устранения неполадок», чтобы запустить средство устранения неполадок «Синий экран», а затем перейдите к следующим параметрам на экране. Обратите внимание, что вам может потребоваться загрузить ваш компьютер в безопасном режиме.
Узнать больше
Бывают случаи, когда вы обновляете или устанавливаете Windows 10 на старый компьютер, а соотношение сторон экрана в беспорядке. Эта проблема возникает, когда новая версия Windows не поддерживает графический процессор или драйвер не работает в Windows 10. И в таких случаях Windows использует универсальный драйвер, который не поддерживает все разрешения, а также правильное соотношение сторон. Итак, в этом посте вы узнаете, как исправить проблемы с соотношением сторон экрана в Windows 10. Возможно, ваш экран имеет соотношение сторон 16: 9, но после обновления вы изменили разрешение экрана, и теперь установлен на 16:!0. А позже вы обнаружили, что не можете вернуться к предыдущему соотношению сторон. Таким образом, вы заметите, что все на экране может выглядеть растянутым. Вам может быть интересно, можно ли напрямую изменить соотношение сторон в Windows 10, даже если у графического процессора нет совместимого драйвера, но на самом деле это не так. Однако есть и другой способ решения проблемы. Обратитесь к вариантам, приведенным ниже, чтобы начать.
Вариант 1. Попробуйте использовать режим совместимости.
Первое, что вы можете сделать, это запустить драйвер в режиме совместимости. Для этого выполните следующие действия:
- Вам необходимо скачать драйвер и разместить его на рабочем столе.
- После этого щелкните его правой кнопкой мыши и выберите «Свойства».
- Затем перейдите на вкладку «Совместимость», где вы увидите две опции:
- Устранение неполадок совместимости, и пусть Windows выяснит, что работает лучше для вас. Если это не удается, следуйте дальше.
- Вручную выберите версию Windows, чтобы она работала правильно.
- У вас также есть возможность изменить настройки DPI и посмотреть, поможет ли это. Затем нажмите кнопку «Применить» и «ОК».
- Теперь щелкните файл правой кнопкой мыши и выберите параметр «Запуск от имени администратора» для установки. После этого вы сможете изменить соотношение сторон экрана на то, что вы использовали раньше.
Примечание: Если у вас есть другие программы, которые не будут работать в существующей версии Windows, обязательно запустите программу в режиме совместимости.
Вариант 2. Попробуйте запустить средство устранения неполадок совместимости программ.
Вы также можете запустить средство устранения неполадок совместимости программ. Это встроенное средство устранения неполадок доступно в разделе Центр обновления и безопасности Windows. Оттуда выберите Устранение неполадок. Вы найдете список программ для вас, и, поскольку вы уже загрузили файлы драйверов, просто нажмите «Нет в списке», расположенный вверху списка программ. После этого просмотрите и выберите файлы драйверов, а затем дайте программе выполнить свою работу.
Вариант 3. Обновите или откатите драйверы вашего устройства.
Если первый вариант вам не подошел, то пора либо обновить, либо откатить драйверы устройств. Скорее всего, после того, как вы обновили свой компьютер с Windows, ваш драйвер также нуждается в обновлении. С другой стороны, если вы только что обновили драйверы устройства, вам необходимо откатить драйверы до их предыдущих версий. В зависимости от того, что применимо к вам, следуйте приведенным ниже инструкциям.
- Откройте Диспетчер устройств из меню Win X.
- Затем найдите драйверы устройств и щелкните их правой кнопкой мыши, чтобы открыть окно «Свойства».
- После этого перейдите на вкладку «Драйвер» и нажмите кнопку «Удалить устройство».
- Следуйте опции экрана, чтобы полностью удалить его.
- Наконец, перезагрузите компьютер. Это просто переустановит драйверы устройства автоматически.
Примечание: Вы можете установить специальный драйвер на свой компьютер, если он у вас есть, или вы также можете найти его прямо на веб-сайте производителя.
Узнать больше
Если ваш интернет внезапно перестает работать на вашем компьютере с Windows 10 и вы получаете сообщение об ошибке, в котором говорится: «Windows все еще настраивает конфигурацию класса для этого устройства (код 56)», читайте дальше, так как этот пост покажет вам, что вы можете сделать. чтобы решить это. Эта проблема связана с сетевым адаптером, и вы можете увидеть это сообщение об ошибке в меню «Свойства» соответствующего сетевого адаптера в диспетчере устройств. Такого рода проблемы могут быть вызваны многими причинами. Во-первых, это может быть вызвано вашим VPN-подключением, если вы его используете, или устаревшим драйвером. Какой бы ни была причина, вот несколько советов, которые вы должны проверить, чтобы исправить ошибку.
Вариант 1 — проверьте свой VPN
Когда вы устанавливаете виртуальную машину или программное обеспечение VPN на свой компьютер, новая настройка будет добавлена в настройки сетевого подключения и поможет вашему компьютеру использовать настройки адаптера каждый раз при включении VPN. Предполагая, что вы используете соединение Ethernet, но ваша система пытается использовать другой адаптер или настройки, тогда возникают проблемы, и одна из них — ошибка «Windows все еще настраивает конфигурацию класса для этого устройства». Чтобы исправить это, вы можете попытаться временно отключить свою VPN и посмотреть, устранена ли ошибка или нет, и если окажется, что ваша VPN является виновником, вам необходимо удалить ее и установить новую или ее последнюю версию. Чтобы удалить его, выполните следующие действия.
- Нажмите клавиши Win + R, чтобы открыть диалоговое окно «Выполнить»
- Затем введите «appwiz.cpl”И нажмите Enter, чтобы открыть« Программы и компоненты »на панели управления.
- Оттуда найдите службу VPN, которую вы используете, выберите ее и нажмите «Удалить», чтобы удалить ее.
- После этого перезагрузите компьютер и попробуйте снова установить последнюю версию программы. Это должно работать сейчас. Если нет, перейдите к следующей доступной опции ниже.
Вариант 2. Попробуйте обновить, откатить или удалить драйверы сетевого адаптера.
Вы также можете обновить, откатить или отключить сетевые драйверы, чтобы исправить ошибку «Эта операция не удалась, поскольку ни один адаптер не находится в состоянии, допустимом для этой операции».
- Нажмите клавиши Win + R, чтобы открыть окно «Выполнить», а затем введите «devmgmt.MSC”И нажмите Enter, чтобы открыть окно диспетчера устройств.
- Под Диспетчером устройств вы увидите список драйверов. Оттуда найдите сетевые адаптеры и разверните их.
- Затем щелкните правой кнопкой мыши каждый из сетевых драйверов и, в зависимости от ваших предпочтений, вы можете выбрать «Обновить драйвер», «Отключить устройство» или «Удалить устройство».
- После этого перезагрузите компьютер и посмотрите, помогло ли оно исправить ошибку «синий экран» netio.sys.
Вариант 3. Попробуйте запустить средство устранения неполадок сетевого адаптера.
Чтобы запустить средство устранения неполадок сети, выполните следующие действия.
- Откройте панель поиска на своем компьютере и введите «устранение неполадок», чтобы открыть параметры устранения неполадок.
- Затем прокрутите вниз и выберите параметр «Сетевой адаптер» на правой панели.
- Затем нажмите кнопку «Выполнить устранение неполадок».
- После этого ваш компьютер проверит все возможные ошибки и, если возможно, определит причину проблемы.
- Перезагрузите компьютер.
Вариант 4 — Попробуйте сбросить сеть
Вы можете выполнить сброс сети, чтобы решить проблему, если ни один из трех указанных выше вариантов не сработал. Это приведет к сбросу всей конфигурации сети, включая ваш IP-адрес. Чтобы выполнить сброс сети, выполните следующие действия:
- Нажмите клавиши Win + I, чтобы открыть Настройки.
- Оттуда перейдите в раздел «Сеть и Интернет».
- Затем прокрутите вниз и найдите «Сброс сети» под панелью состояния.
- После этого нажмите «Сброс сети», а затем «Сбросить сейчас», чтобы начать сброс конфигурации сети. После этого проверьте, может ли она исправить ошибку или нет.
Узнать больше
 Интересная информация поступила от Microsoft: темная тема Windows 11 будет включать звуковую тему, отличную от стандартной светлой. В темном режиме в Windows 11 системные звуки обычно становятся мягче и немного эхом, создавая более успокаивающее впечатление, соответствующее общему внешнему виду темного режима. Возврат в легкий режим возвращает системные звуки к их нормальному уровню. Тем не менее, несмотря на то, что в светлой модели звук немного громче, чем в темном режиме, Microsoft позаботилась о том, чтобы звук был более успокаивающим, согласно отчету CNBC. Разработчики Windows 11 черпали вдохновение в подходе, называемом спокойной технологией. Кристиан Коэн и Диего Бака из Microsoft написали о технологии спокойствия в посте на Medium. В нем они сказали: «Windows 11 облегчает это благодаря базовым функциям, которые кажутся знакомыми, смягчают ранее пугающий пользовательский интерфейс и усиливают эмоциональную связь». По словам представителя Microsoft в заявлении для CNBC, «новые звуки имеют гораздо более круглую длину волны, что делает их мягче, чтобы они по-прежнему могли предупреждать/уведомлять вас, но не подавляли».
Узнать больше
Что такое код ошибки 0x8007043c?
Вы когда-нибудь сталкивались с всплывающим сообщением об ошибке 0x8007043c на вашем компьютере? Если да, то вы должны знать, что это сообщение об ошибке генерируется, когда какой-либо соответствующий процесс или операция не может быть успешно завершена приложением. Это критическое сообщение об ошибке ОС Windows, которое следует немедленно исправить.
Решения
Причины ошибок
Код ошибки 0x8007043c обычно вызывается по следующим причинам:
- Отсутствующие или поврежденные файлы реестра
- Не удалось обновить установщик Windows
- Вирусы и шпионское ПО
Распространенными признаками этого кода ошибки являются всплывающие сообщения, зависание программы, проблемы с открытием документов и зависание экрана.
Дополнительная информация и ручной ремонт
Как только вы столкнетесь с этой ошибкой на своем компьютере, рекомендуется немедленно исправить ее, поскольку эта ошибка представляет собой высокий риск для безопасности. Вредоносные программы и вирусы печально известны кражей данных. Чтобы исправить ошибку 0x8007043c на вашем ПК, вам не нужно пользоваться услугами ИТ-специалиста. Этот код ошибки оценивается как легко ремонтируемый. Следуя приведенным ниже инструкциям и решениям по исправлению, вы можете легко исправить эту ошибку окна 0x8007043c за пару минут самостоятельно. Вот что вам нужно сделать:
Шаг 1. Сканирование на наличие вирусов и шпионских программ
Чтобы хакеры не могли проникнуть на ваш компьютер и украсть ваши конфиденциальные данные, вы должны сначала просканировать компьютер на наличие вирусов и шпионского ПО. Рекомендуется использовать мощный антивирус, чтобы убедиться, что ваш компьютер полностью чист от вирусов и шпионского ПО.
Шаг 2. Загрузите и установите программу очистки реестра.
После сканирования на наличие вирусов, вы должны сейчас скачать и установить очиститель реестра. Это необходимо, поскольку антивирус не обнаруживает поврежденные записи реестра. Для обнаружения таких записей лучше всего подходит инструмент очистки реестра. После того, как вы загрузите очиститель реестра в свою систему, нажмите кнопку сканирования. Вам придется подождать несколько секунд, пока сканирование не завершится. После завершения сканирования нажмите кнопку «Восстановить», чтобы исправить ошибки. После исправления всех ошибок перезагрузите компьютер. Это важно, потому что изменения реестра вступят в силу только после перезагрузки системы. Выполнив эти 2 простых шага, вы легко устраните ошибку 0x8007043c в своей системе. Однако, чтобы предотвратить повторение этой ошибки, рекомендуется запускать антивирус каждый раз, когда вы используете свой ПК.
Узнать больше
Что такое 0x80040116?
Ms-прогноз это широко используемая и наиболее популярная программа для получения и отправки электронной почты на рабочем месте. Кроме того, он упрощает выполнение бизнес-процессов клиентов благодаря дополнительным функциям, таким как создание записей расписания для отслеживания важных дат и сессий, сохранение сведений об адресах, создание нескольких файлов для обработки важных электронных писем и аксессуаров, а также сохранение черновиков электронных писем, предназначенных пользователями. отправить в будущем. Ms-Outlook помогает людям справляться с функциями и организовываться друг с другом эффективно и экономично. Тем не менее, все может внезапно остановиться, когда пользователь Outlook, вы, увидите экран с информацией о коде проблемы. Это отнимает много времени и раздражает, поскольку не позволяет вам войти в свою учетную запись и может заблокировать вас от просмотра учетной записи электронной почты. Код ошибки 0x80040116 — это знакомая ошибка Outlook, которая без предупреждения появляется на дисплее. Помимо ограничения ваших возможностей использования вашей учетной записи Outlook, это представляет собой серьезную угрозу для личных данных, которые вы храните внутри. Кроме того, существует вероятность потери деталей и информации, сохраненной в вашей учетной записи электронной почты.
Причины ошибок
Найти и определить причину кода ошибки 0x80040116 непросто. Правда в том, что есть несколько различных причин, которые могут активировать эту ошибку. Некоторые из основных причин этой ошибки включают:
- Сломанный документ со списком PST. Ms-outlook использует этот файл для обработки запросов пользователей. Вы можете столкнуться с этим сигналом о проблеме, когда он испортится.
- Запись PST превышает ограничение в 2 гигабайта. Вы в течение многих лет добавляли данные в учетные записи Outlook без каких-либо стираний. Эта ошибка может появиться при достижении предела в 2 ГБ.
- Файл PST поврежден. Обычно это происходит из-за заражения системы вирусом или внезапного выключения системы.
- Проблемы с настройками аккаунта.
Дополнительная информация и ручной ремонт
Ошибка 0x80040116 отображается только в одном из следующих типов:
- «Outlook.pst недоступен — 0x80040116 (где «Outlook.pst» — это имя файла PST)»
- «Отправка и получение сообщения об ошибке (0x80040116): неизвестная ошибка 0x80040116»
- «Outlook.pst недоступен — 0x80040116»
Если у вас есть эта ошибка, рекомендуется исправить ее как можно скорее, чтобы она не мешала вашей производительности и работе. Вам не нужно обращаться к ИТ-специалисту, чтобы решить этот вопрос. Это классифицируется как сигнал ошибки, который легко исправить. Таким образом, вам не нужны глубокие знания в области ИТ, чтобы исправить это. Есть два способа удалить этот сигнал о проблеме. Сотрите часть памяти, если ошибка вызвана избыточными данными. Этот метод работает, если причиной ошибки является размер PST. Однако это вряд ли лучший способ восстановить его, если удаление устаревших данных не является альтернативой. Возможно, лучший и второй вариант — установить и получить Stellar. Phoenix Outlook PST Ремонт. Почему это решение, наиболее эффективное для исправления и устранения проблемы с кодом 0x80040116, заключается в том, что программное обеспечение может устранить неисправность независимо от триггера? Это означает, что вам не нужно разбираться в мельчайших деталях определения сигнала о проблеме, а затем находить уникальный вариант устранения его причины. Подождите, есть еще много! Инструмент исправления Stellar Phoenix Outlook PST совместим со всеми версиями Windows. Следовательно, есть ли у вас 2007, версия 2000 или выпуски Outlook 2010, вам не нужно беспокоиться о совместимости, как с некоторыми другими ресурсами для ремонта. Кроме того, он решает проблему за короткое время, а также восстанавливает все электронные письма, контактные записи и информацию дневника. Это означает, что если вы потеряли информацию в результате кода ошибки 0x80040116, можно вздохнуть с облегчением, так как все будет восстановлено обратно. Что вам нужно сделать, это нажмите здесь., Загрузите и запустите Stellar Phoenix Outlook PST на своем компьютере, чтобы восстановить учетные записи ms-outlook и исправить код ошибки 0x80040116.
Узнать больше
Если вы столкнулись с ошибкой отсутствия sechost.dll в Windows 10, добро пожаловать, вы попали в нужное место, чтобы решить эту проблему и вернуть компьютер в рабочее состояние. Sechost.dll — это файл, который позволяет другим программам функционировать и выполнять свои задачи, а также контролировать и изменять поведение других программ. Файл находится в подпапке Windows System32, это полностью безопасный файл и его нельзя удалять. Однако иногда различные другие причины могут повредить или удалить его. Это руководство познакомит вас с распространенными решениями о том, как восстановить и запустить файл.
-
Обновите драйвер устройства
Вы установили новое устройство и внезапно получаете сообщение об ошибке, что Sechost отсутствует? Обновите драйвер устройства, возможно, файл был поврежден или заменен более старой версией и, следовательно, отмечен как отсутствующий. Обновите драйвер устройства до последней версии, и проблема должна исчезнуть.
-
Повторно зарегистрируйте файл через командную строку
Если Sechost был поврежден, перерегистрация решит проблему, нажмите ⊞ ОКНА + X и выберите Командная строка (администратор), нажмите на нее. тип regsvr32 sechost.dll и нажмите ENTER
Перезагрузите компьютер -
Переустановите приложение
Обычно Sechost выходит из строя или отсутствует из-за установки другого приложения, которое повреждает файл. Переустановите приложение, чтобы попытаться исправить ошибки. Чтобы правильно переустановить приложение, сначала используйте панель управления, чтобы полностью удалить его из системы, а затем установите его снова, надеюсь, на этот раз в системе будет установлена правильная версия Sechost.dll.
-
Проверьте свой жесткий диск
В некоторых случаях неисправность жесткого диска может привести к повреждению или исчезновению нескольких файлов. Чтобы устранить неисправность жесткого диска, запустите check disk из Windows на диске C, чтобы проверить его и найти ошибки.
-
Удалить Центр обновления Windows
Как и в случае с некоторыми приложениями, даже обновление Windows может повредить некоторые файлы из-за неправильной загрузки обновления. Попробуйте удалить последнее обновление и вернуться к предыдущему состоянию Windows, а затем обновить его снова.
-
Решить проблему с Restoro
Restoro — это программное обеспечение премиум-класса для решения проблем с ПК, безопасности и поврежденных файлов, перейдите на Скачать страницу и получите это бесплатно.
Узнать больше
Если вы получаете сообщение об ошибке «Ошибка файловой системы 2147219196» при попытке открыть изображение, получить доступ к файлу или при перемещении папки на вашем компьютере с Windows 10, читайте дальше, так как этот пост поможет вам решить эту ошибку. По словам экспертов, эта ошибка начала появляться сразу после выхода Windows Update v1803. Пользователи, установившие новую версию Windows, столкнулись с той же дилеммой. Эта ошибка может быть вызвана повреждением диска, некоторыми неисправными компонентами Windows или шифрованием файловой системы. Перед устранением проблемы убедитесь, что вы вошли в систему как администратор.
Вариант 1 — обновить Windows
Первое, что вы можете сделать, чтобы устранить ошибку файловой системы -2147219196, — это обновить Windows. Поскольку Microsoft уже знает об этой проблеме, они, возможно, уже выпустили исправление для этого в одном из своих новых обновлений, поэтому обязательно проверьте наличие доступных обновлений на вашем компьютере и сразу же установите его.
- Нажмите Win + S, чтобы открыть Поиск, затем введите «обновление» в поле и в появившихся результатах поиска нажмите «Центр обновления Windows».
- После этого он откроет Центр обновления Windows в разделе «Настройки», а затем нажмите кнопку «Проверить наличие обновлений» и позволит Windows проверять наличие доступных обновлений.
- И если доступны какие-либо обновления, загрузите и установите их на свой компьютер с Windows 10.
- Перезагрузите компьютер и проверьте, исправлена ли ошибка.
Вариант 2. Запустите CHKDSK, чтобы проверить свой диск на наличие ошибок.
Когда дело доходит до некоторых проблем, связанных с жестким диском или съемными устройствами, в Windows может быть полезна утилита, которая называется «chkdsk». Эта утилита проверки ошибок может помочь с несколькими проблемами в системе, включая ошибку файловой системы -2147219196.
- Нажмите клавиши Win + S, чтобы открыть окно поиска.
- Затем введите «командная строка» в поле и в появившихся результатах поиска щелкните правой кнопкой мыши командную строку и выберите «Запуск от имени администратора».
- После открытия командной строки с повышенными правами скопируйте и вставьте следующую команду и нажмите Enter:
CHKDSK / R / F
- Теперь, если вам предложат запустить CHKDSK после перезагрузки компьютера, просто нажмите Y и перезагрузите компьютер.
- Если CHKDSK не может найти никаких ошибок, нажмите клавиши Win + E и перейдите в окно доступа. Оттуда щелкните правой кнопкой мыши соответствующий диск и выберите «Свойства».
- После открытия окна «Свойства» перейдите на вкладку «Инструменты», а затем нажмите кнопку «Проверить» в разделе «Проверка ошибок».
- Дождитесь завершения процесса и перезагрузите компьютер.
- После перезагрузки компьютера попробуйте получить доступ к файлу и проверьте, сохраняется ли ошибка.
Вариант 3 — отключить шифрование файловой системы
Шифрование файловой системы позволяет шифровать диски, чтобы защитить их от доступа с другого компьютера. Это стандартная практика в различных организациях для защиты своих данных. Однако бывают случаи, когда система шифрования файлов создает проблемы для пользователей при доступе к файлам и вместо этого выдает ошибку файловой системы -2147219196, поэтому вам необходимо временно отключить ее для доступа к файлу. Для этого выполните следующие действия.
- Нажмите клавиши Win + R, чтобы открыть диалоговое окно «Выполнить».
- Затем введите «контроль» в поле, чтобы открыть панель управления.
- Оттуда перейдите в раздел «Безопасность» и выберите вариант шифрования диска BitLocker из списка.
- После этого убедитесь, что все ваши диски не зашифрованы, и если какой-либо из них зашифрован, отключите шифрование, выбрав Отключить BitLocker.
- Перезагрузите компьютер, чтобы изменения вступили в силу.
Вариант 4 — запустить сканирование SFC
- Нажмите Win + R, чтобы запустить Run.
- Введите CMD в поле и нажмите Enter.
- После открытия командной строки введите ПФС / SCANNOW
- Перезагрузите компьютер после завершения сканирования.
Узнать больше
![]()
Авторское право © 2022, ErrorTools, Все права защищены
Товарные знаки: логотипы Microsoft Windows являются зарегистрированными товарными знаками Microsoft. Отказ от ответственности: ErrorTools.com не аффилирован с Microsoft и не претендует на прямую аффилированность.
Информация на этой странице предоставлена исключительно в информационных целях.
![]()
Ремонт вашего ПК одним щелчком мыши
Имейте в виду, что наше программное обеспечение необходимо установить на ПК с ОС Windows. Откройте этот веб-сайт на настольном ПК и загрузите программное обеспечение для простого и быстрого устранения ваших проблем.
В этой статье представлена ошибка с номером Ошибка 339, известная как Произошла ошибка при запуске, описанная как Произошла ошибка при запуске. Номер 339 из dvdflick: Компонент ‘mscomct2.ocx или одна из его зависимостей зарегистрированы неправильно: файл отсутствует или недействителен.
О программе Runtime Ошибка 339
Время выполнения Ошибка 339 происходит, когда DVD Flick дает сбой или падает во время запуска, отсюда и название. Это не обязательно означает, что код был каким-то образом поврежден, просто он не сработал во время выполнения. Такая ошибка появляется на экране в виде раздражающего уведомления, если ее не устранить. Вот симптомы, причины и способы устранения проблемы.
Определения (Бета)
Здесь мы приводим некоторые определения слов, содержащихся в вашей ошибке, в попытке помочь вам понять вашу проблему. Эта работа продолжается, поэтому иногда мы можем неправильно определить слово, так что не стесняйтесь пропустить этот раздел!
- Зависимости . Между двумя элементами существует зависимость, если изменения в определении одного элемента могут вызвать изменения в другом.
- Файл — Блок произвольной информации или ресурс для хранения информации, доступный по строковому имени или пути.
- Ocx — OCX — это элемент управления ActiveX, полученный из OLE парадигма
- Запуск . Под запуском обычно понимаются процессы или события, которые происходят в начале программы, в начале выполнения блока кода или при первом запуске устройства. загружается.
- Компонент . Компонент на унифицированном языке моделирования «представляет собой модульную часть системы, которая инкапсулирует ее содержимое и чье воплощение можно заменить в ее среде.
- Число . Число — это математический объект, используемый для подсчета, измерения и маркировки.
Симптомы Ошибка 339 — Произошла ошибка при запуске
Ошибки времени выполнения происходят без предупреждения. Сообщение об ошибке может появиться на экране при любом запуске %программы%. Фактически, сообщение об ошибке или другое диалоговое окно может появляться снова и снова, если не принять меры на ранней стадии.
Возможны случаи удаления файлов или появления новых файлов. Хотя этот симптом в основном связан с заражением вирусом, его можно отнести к симптомам ошибки времени выполнения, поскольку заражение вирусом является одной из причин ошибки времени выполнения. Пользователь также может столкнуться с внезапным падением скорости интернет-соединения, но, опять же, это не всегда так.
 Repair Tool")
(Только для примера)
Причины Произошла ошибка при запуске — Ошибка 339
При разработке программного обеспечения программисты составляют код, предвидя возникновение ошибок. Однако идеальных проектов не бывает, поскольку ошибки можно ожидать даже при самом лучшем дизайне программы. Глюки могут произойти во время выполнения программы, если определенная ошибка не была обнаружена и устранена во время проектирования и тестирования.
Ошибки во время выполнения обычно вызваны несовместимостью программ, запущенных в одно и то же время. Они также могут возникать из-за проблем с памятью, плохого графического драйвера или заражения вирусом. Каким бы ни был случай, проблему необходимо решить немедленно, чтобы избежать дальнейших проблем. Ниже приведены способы устранения ошибки.
Методы исправления
Ошибки времени выполнения могут быть раздражающими и постоянными, но это не совсем безнадежно, существует возможность ремонта. Вот способы сделать это.
Если метод ремонта вам подошел, пожалуйста, нажмите кнопку upvote слева от ответа, это позволит другим пользователям узнать, какой метод ремонта на данный момент работает лучше всего.
Обратите внимание: ни ErrorVault.com, ни его авторы не несут ответственности за результаты действий, предпринятых при использовании любого из методов ремонта, перечисленных на этой странице — вы выполняете эти шаги на свой страх и риск.
Метод 1 — Закройте конфликтующие программы
Когда вы получаете ошибку во время выполнения, имейте в виду, что это происходит из-за программ, которые конфликтуют друг с другом. Первое, что вы можете сделать, чтобы решить проблему, — это остановить эти конфликтующие программы.
- Откройте диспетчер задач, одновременно нажав Ctrl-Alt-Del. Это позволит вам увидеть список запущенных в данный момент программ.
- Перейдите на вкладку «Процессы» и остановите программы одну за другой, выделив каждую программу и нажав кнопку «Завершить процесс».
- Вам нужно будет следить за тем, будет ли сообщение об ошибке появляться каждый раз при остановке процесса.
- Как только вы определите, какая программа вызывает ошибку, вы можете перейти к следующему этапу устранения неполадок, переустановив приложение.
Метод 2 — Обновите / переустановите конфликтующие программы
Использование панели управления
- В Windows 7 нажмите кнопку «Пуск», затем нажмите «Панель управления», затем «Удалить программу».
- В Windows 8 нажмите кнопку «Пуск», затем прокрутите вниз и нажмите «Дополнительные настройки», затем нажмите «Панель управления»> «Удалить программу».
- Для Windows 10 просто введите «Панель управления» в поле поиска и щелкните результат, затем нажмите «Удалить программу».
- В разделе «Программы и компоненты» щелкните проблемную программу и нажмите «Обновить» или «Удалить».
- Если вы выбрали обновление, вам просто нужно будет следовать подсказке, чтобы завершить процесс, однако, если вы выбрали «Удалить», вы будете следовать подсказке, чтобы удалить, а затем повторно загрузить или использовать установочный диск приложения для переустановки. программа.
Использование других методов
- В Windows 7 список всех установленных программ можно найти, нажав кнопку «Пуск» и наведя указатель мыши на список, отображаемый на вкладке. Вы можете увидеть в этом списке утилиту для удаления программы. Вы можете продолжить и удалить с помощью утилит, доступных на этой вкладке.
- В Windows 10 вы можете нажать «Пуск», затем «Настройка», а затем — «Приложения».
- Прокрутите вниз, чтобы увидеть список приложений и функций, установленных на вашем компьютере.
- Щелкните программу, которая вызывает ошибку времени выполнения, затем вы можете удалить ее или щелкнуть Дополнительные параметры, чтобы сбросить приложение.
Метод 3 — Обновите программу защиты от вирусов или загрузите и установите последнюю версию Центра обновления Windows.
Заражение вирусом, вызывающее ошибку выполнения на вашем компьютере, необходимо немедленно предотвратить, поместить в карантин или удалить. Убедитесь, что вы обновили свою антивирусную программу и выполнили тщательное сканирование компьютера или запустите Центр обновления Windows, чтобы получить последние определения вирусов и исправить их.
Метод 4 — Переустановите библиотеки времени выполнения
Вы можете получить сообщение об ошибке из-за обновления, такого как пакет MS Visual C ++, который может быть установлен неправильно или полностью. Что вы можете сделать, так это удалить текущий пакет и установить новую копию.
- Удалите пакет, выбрав «Программы и компоненты», найдите и выделите распространяемый пакет Microsoft Visual C ++.
- Нажмите «Удалить» в верхней части списка и, когда это будет сделано, перезагрузите компьютер.
- Загрузите последний распространяемый пакет от Microsoft и установите его.
Метод 5 — Запустить очистку диска
Вы также можете столкнуться с ошибкой выполнения из-за очень нехватки свободного места на вашем компьютере.
- Вам следует подумать о резервном копировании файлов и освобождении места на жестком диске.
- Вы также можете очистить кеш и перезагрузить компьютер.
- Вы также можете запустить очистку диска, открыть окно проводника и щелкнуть правой кнопкой мыши по основному каталогу (обычно это C

- Щелкните «Свойства», а затем — «Очистка диска».

Метод 6 — Переустановите графический драйвер
Если ошибка связана с плохим графическим драйвером, вы можете сделать следующее:
- Откройте диспетчер устройств и найдите драйвер видеокарты.
- Щелкните правой кнопкой мыши драйвер видеокарты, затем нажмите «Удалить», затем перезагрузите компьютер.
Метод 7 — Ошибка выполнения, связанная с IE
Если полученная ошибка связана с Internet Explorer, вы можете сделать следующее:
- Сбросьте настройки браузера.
- В Windows 7 вы можете нажать «Пуск», перейти в «Панель управления» и нажать «Свойства обозревателя» слева. Затем вы можете перейти на вкладку «Дополнительно» и нажать кнопку «Сброс».
- Для Windows 8 и 10 вы можете нажать «Поиск» и ввести «Свойства обозревателя», затем перейти на вкладку «Дополнительно» и нажать «Сброс».
- Отключить отладку скриптов и уведомления об ошибках.
- В том же окне «Свойства обозревателя» можно перейти на вкладку «Дополнительно» и найти пункт «Отключить отладку сценария».
- Установите флажок в переключателе.
- Одновременно снимите флажок «Отображать уведомление о каждой ошибке сценария», затем нажмите «Применить» и «ОК», затем перезагрузите компьютер.
Если эти быстрые исправления не работают, вы всегда можете сделать резервную копию файлов и запустить восстановление на вашем компьютере. Однако вы можете сделать это позже, когда перечисленные здесь решения не сработают.
Другие языки:
How to fix Error 339 (An error occurred during startup) — An error occurred during startup. Number 339 from dvdflick: Component ‘mscomct2.ocx or one of its dependencies is not correctly registered: A file is missing or invalid.
Wie beheben Fehler 339 (Beim Start ist ein Fehler aufgetreten) — Beim Start ist ein Fehler aufgetreten. Nummer 339 von dvdflick: Komponente ‘mscomct2.ocx oder eine ihrer Abhängigkeiten ist nicht korrekt registriert: Eine Datei fehlt oder ist ungültig.
Come fissare Errore 339 (Si è verificato un errore durante l’avvio) — Si è verificato un errore durante l’avvio. Numero 339 da dvdflick: il componente ‘mscomct2.ocx o una delle sue dipendenze non è registrato correttamente: un file è mancante o non valido.
Hoe maak je Fout 339 (Er is een fout opgetreden tijdens het opstarten) — Er is een fout opgetreden tijdens het opstarten. Nummer 339 van dvdflick: Component ‘mscomct2.ocx of een van zijn afhankelijkheden is niet correct geregistreerd: een bestand ontbreekt of is ongeldig.
Comment réparer Erreur 339 (Une erreur s’est produite lors du démarrage) — Une erreur s’est produite lors du démarrage. Numéro 339 de dvdflick : Le composant ‘mscomct2.ocx ou l’une de ses dépendances n’est pas correctement enregistré : Un fichier est manquant ou invalide.
어떻게 고치는 지 오류 339 (시작하는 동안 오류가 발생했습니다) — 시작하는 동안 오류가 발생했습니다. dvdflick의 번호 339: 구성 요소 ‘mscomct2.ocx 또는 해당 종속성 중 하나가 올바르게 등록되지 않았습니다. 파일이 없거나 잘못되었습니다.
Como corrigir o Erro 339 (Ocorreu um erro durante a inicialização) — Ocorreu um erro durante a inicialização. Número 339 do dvdflick: O componente ‘mscomct2.ocx ou uma de suas dependências não está registrado corretamente: um arquivo está faltando ou é inválido.
Hur man åtgärdar Fel 339 (Ett fel uppstod under start) — Ett fel uppstod vid start. Nummer 339 från dvdflick: Komponenten ‘mscomct2.ocx eller en av dess beroenden är inte korrekt registrerad: En fil saknas eller är ogiltig.
Jak naprawić Błąd 339 (Wystąpił błąd podczas uruchamiania) — Wystąpił błąd podczas uruchamiania. Numer 339 z dvdflick: Komponent „mscomct2.ocx lub jedna z jego zależności nie jest poprawnie zarejestrowany: Brak pliku lub jest on nieprawidłowy.
Cómo arreglar Error 339 (Se produjo un error durante el inicio.) — Se produjo un error durante el inicio. Número 339 de dvdflick: Componente ‘mscomct2.ocx o una de sus dependencias no está registrado correctamente: Falta un archivo o no es válido.
![]() Об авторе: Фил Харт является участником сообщества Microsoft с 2010 года. С текущим количеством баллов более 100 000 он внес более 3000 ответов на форумах Microsoft Support и создал почти 200 новых справочных статей в Technet Wiki.
Об авторе: Фил Харт является участником сообщества Microsoft с 2010 года. С текущим количеством баллов более 100 000 он внес более 3000 ответов на форумах Microsoft Support и создал почти 200 новых справочных статей в Technet Wiki.
Следуйте за нами: ![]()
![]()
![]()

Этот инструмент восстановления может устранить такие распространенные проблемы компьютера, как синие экраны, сбои и замораживание, отсутствующие DLL-файлы, а также устранить повреждения от вредоносных программ/вирусов и многое другое путем замены поврежденных и отсутствующих системных файлов.
ШАГ 1:
Нажмите здесь, чтобы скачать и установите средство восстановления Windows.
ШАГ 2:
Нажмите на Start Scan и позвольте ему проанализировать ваше устройство.
ШАГ 3:
Нажмите на Repair All, чтобы устранить все обнаруженные проблемы.
СКАЧАТЬ СЕЙЧАС
Совместимость
![]()
Требования
1 Ghz CPU, 512 MB RAM, 40 GB HDD
Эта загрузка предлагает неограниченное бесплатное сканирование ПК с Windows. Полное восстановление системы начинается от $19,95.
ID статьи: ACX02431RU
Применяется к: Windows 10, Windows 8.1, Windows 7, Windows Vista, Windows XP, Windows 2000
Contents
- What is Runtime Error 339?
- How to fix Runtime Error 339 in Windows 10
- Run the troubled application as an administrator:
- Anyway, these are the instructions you must follow to run an app as an administrator in Windows:
- Reregister the problematic OCX or DLL file:
- Reinstall the troubled program:
- Get the missing or corrupted file from another computer:
- These instructions cover everything that you have to do here:
- Execute some commands to fix issues:
- Use a registry cleaner:
- Install important applications and components:
- Run the troubled application in compatibility mode for a different Windows build.
Runtime errors usually manifest themselves on computers that have been used for a long time or an extended period. Runtime errors are said to border on standard or regular events in computing. When compared to other errors or the issues that they define, runtime errors are relatively easy to troubleshoot.
If you pay enough attention to the error code for the runtime error – if you consider the issues or variables that define the error in your case – you will be able to figure out the cause (or source) of the problem and resolve things quickly. In this guide, we intend to examine Runtime Error 339, which is one of the most common errors plaguing computers in recent times.
What is Runtime Error 339?
By definition, runtime errors are errors that occur (or manifest themselves) when programs are running (or executing operations). The term ‘runtime’ is typically used to define the contrast or difference between a specific class of errors and other program error types (for example, syntax errors, compile-time errors, and so on).
Runtime Error 339 is a runtime error that shows up to inform users that an OCX or DLL file is missing and warn them of the issues associated with Windows’ inability to retrieve, access, or use the needed data. The appearance of Runtime Error 339 might also point towards the corruption of certain programs or files.
Most runtime errors – which are associated with missing or corrupted OCX or DLL files – typically come up when users try to install a program, and in rarer cases, they appear when Windows tries to execute operations for a specific application.
These are the most popular error message descriptions or notifications associated with Runtime Error 339:
- Error – Runtime error 339: Component DUZOCX32.OCX is not correctly registered or file is missing.
- Error – Runtime Error 339. Component MSMASK32.ocx or one of its dependencies is not correctly registered; a file is missing or invalid.
- Error – Runtime error ‘339’: Component “FM20.DLL” or one of its dependencies is not correctly registered: a file is missing or invalid.
- Error – Runtime error 339 MSCOMCTL.OCX
After going through the error message descriptions above, you might have come to notice that a specific file or package always appears in the error notification. Something probably went wrong because the stated file was not found or it could not be used.
OCX and DLL files are legitimate files that exist in the Windows operating system environment for various purposes. On a single computer, you might find up to 10,000 OCX files. Some of those files form crucial program parts that are employed to perform specialized tasks or used to maintain the stability of applications in Windows.
Since the appearance of a runtime error is an indicator that something is wrong with an important file, you have to take note of the troubled or problematic file. To fix the error, you will probably have to repair the file or undo the damage done to it.
Consider this error notification: “Runtime error 339: Component MSMASK32.OCX or one of its dependencies is not correctly registered: or file is missing”. From the message description, one can easily figure out that MSMASK32.OCX is the troubled or problematic file.
How to fix Runtime Error 339 in Windows 10
While Runtime Error 339 can manifest itself on machines running any modern version of Windows (Windows XP, Windows Vista, Windows 7, Windows 8 or 8.1, and Windows 10), we intend to use Windows 10 as the base point or reference OS for our fixes.
We will describe the procedures or operations used to resolve Runtime Error 339 on a Windows 10 PC, but users with devices running older versions will be able to use and apply the same solutions.
Ideally, you should begin with the first fix on the list. If it fails, you will have to work your way through the other solutions in the order they have been arranged below.
-
Run the troubled application as an administrator:
Here, we are considering the possibility that the error notification where Runtime Error 339 appeared only came up because the application involved was not allowed to access certain directories (or folders), use or modify certain files, or perform certain tasks. If any of these assumptions holds true, then the issue will be resolved once Windows grants the app administrator privileges.
When you run an application as an administrator, Windows gets forced to provide the program with admin rights or powers, which it can then use to execute advanced operations or perform top-level tasks without restrictions or disruptions. In that case, the app will be able to do all it needs to do (access folders or make changes to stuff), which means the chances of an error occurring get reduced significantly.
The same proposal applies to other tasks. For example, if you encounter Runtime Error 339 during the installation operation for an application, then the next time, you must run the app installer as an administrator. Similarly, if the error came up when you tried to launch a program (that is already installed), then you have to run the program’s launcher or main executable as an administrator.
Before you continue with the proposed operation, you will do well to check and confirm that you are currently signed in to your computer as the administrator. Otherwise – if you are currently logged in on a regular or standard Windows account – you have to force your way out and then come back in using the admin profile.
Anyway, these are the instructions you must follow to run an app as an administrator in Windows:
- First, you have to locate the installer file, program launcher, or main executable.
You can use the Windows logo button + letter E shortcut to open the File Explorer app quickly and then navigate through the appropriate path to get to the directory where the installer, launcher, or executable for the application is kept.
- Click on the installer, launcher, or executable (to get it highlighted). Right-click on the now highlighted item to see the available options.
- From the list of options displayed, you must choose Run as administrator.
Windows will now work to run the selected app using admin or top-level rights.
If the problem persists, then you must restart your computer and then reattempt the same operation to fix the problem.
If Runtime Error 339 does not come up when you run the troubled app as an administrator, then you might want to configure Windows to always run the application as an administrator to make this fix permanent. This way, you will be able to launch the application normally without having to right-click on it to see some options and so on.
Go through these steps to set Windows to run the troubled app as an administrator (a permanent fix – if applicable):
- Here too, you have to locate the program launcher or main executable for the application that you worked on earlier.
- Click on the launcher or executable (to get it highlighted). Right-click on it to see the available context menu.
- This time, from the options displayed, you have to choose Properties.
The Properties window for the chosen application launcher or executable will be displayed now.
- Click on the Compatibility tab (close to the top of the window) to go there.
- Click on the box for Run this program as an administrator, which is usually the last parameter (close to the bottom of the window).
- Click on the Apply button and then click on the OK button to save the new launch configuration for the problematic or troubled program.
Windows will take note of the changes. Given the new configuration, your system will always launch the program with elevated access, so you will not have to worry about anything.
Note: We advise that you only grant administrative rights to trusted third-party programs. If you give admin powers to a malicious or harmful app, then the application might wreak havoc on your computer – and your antivirus or protection utilities might struggle to restrict or disrupt its operations. Precautions are advised here.
-
Reregister the problematic OCX or DLL file:
Here, we want you to deregister the missing or troubled OCX or DLL file and then register it. The processes that make the deregistering and registering operations for the component in view will do enough to induce changes that will fix the inconsistencies or discrepancies causing problems.
Some users confirmed that they managed to resolve Runtime Error 339 by simply reregistering the named OCX or DLL file. If you do what they did, then you too might get the same (good) results from your work.
These are the steps you must go through to reregister the file in view (deregister and then register the component):
- First, you have to open an elevated Command Prompt window. The next steps will be focused on showing you how to do that.
- Click on the Windows icon in the bottom-left corner of your machine’s screen to see the options and objects that make up the Windows Start menu screen (or give the Windows logo button on your device’s keyboard a tap for the same outcome).
- Input Command Prompt into the text box (that appears the moment you begin to type) to run a search task using those keywords as the query.
- Assuming Command Prompt (App) has now appeared as the main entry on the results list returned, you have to right-click on it to see the available context menu.
- From the list of options that show up, you have to select Run as administrator.
Windows will bring up the admin Command Prompt window now.
- Now, you must execute this code (by typing the command in first and then hitting Enter on your device’s keyboard to force Windows to run the command):
regsvr32 MSMASK32.OCX
(Note: We provided the code for reregistering MSMASK32.OCX. A different OCX or DLL file might be involved in your case. In that case, you will have to replace the MSMASK32.OCX part of the code with the name of the file that was referenced in the notification or error message description that appeared on your screen)
If everything goes well, you will see a message stating that the file was registered successfully or you will see a notification confirming the success of the task.
On the other hand, if the operation fails, then you have to try to deregister the file first and then register it afresh. Continue with the instructions below:
- Execute this code on the Command Prompt window (by typing the command in first and then giving the Enter button a tap to run the code):
regsvr32 MSMASK32.OCX /u
(Note: Replace the MSMASK32.OCX part of the code with the appropriate file or component name – if you have to)
- Now, you must execute this code to reregister the file that got deregistered:
regsvr32 MSMASK32.OCX
- At this point, regardless of how the operation went, you have to close the Command Prompt window and then restart your computer to finish things.
After the reboot operation, your computer will get the chance to take the changes that occurred into account.
- Now, you must try to recreate Runtime Error 339 by reattempting the task or operation you were busy with when the error message or notification came up to inform you of the problem.
You can initiate the installation process (that failed earlier) for the same program to see how things go this time. You can instruct the application to perform the same task that caused Error 339 to manifest itself on your computer to see what happens.
-
Reinstall the troubled program:
If you get the message where Runtime Error 339 appears as a key term only when you try to open or use a specific program, then there is a good chance the problem in your case is restricted or limited to the runtime operations for that particular application. Nevertheless, you will do well to confirm things by launching other apps to see if the same issue plays out.
If the assumptions about the runtime issue affecting a single program hold true, then you might be able to fix the problem by simply reinstalling the troubled application. Here, the changes resulting from the uninstallation and installation processes for the app will do enough to make things right with the application code, settings, and other stuff that matters.
To uninstall an application, you have to locate it in the Programs and Features menu in Control Panel and then initiate the removal task from the platform provided. You can do the same thing from the Apps menu in Settings, which is a relatively new application in Windows 10 for such purposes.
If you want to remove an app through the Programs and Features menu in Control Panel, then you must follow these instructions:
- Use the Windows logo button + letter S keyboard to bring up the Search box function for the Windows Start menu screen.
- Type Control Panel into the text field provided to run a search task using those keywords as the query.
- Assuming Control Panel has now emerged as the main entry on the results list returned, you have to click on it to launch the program.
The Control Panel window will be displayed now.
- If the View by parameter is set to Category (in the top-right corner of your screen), then you have to click on the Uninstall a program link (under Programs) to get to your destination.
On the other hand, if the View by parameter is set to Small icons or Large icons, then you have to click on Programs and Features.
- Assuming you are now on the Uninstall or Change a program screen in Control Panel, you have to go through the list of applications there and locate the troubled application (the one affected by Runtime Error 339).
- Click on the application to get it highlighted and then right-click on it to see the available context menu.
- From the small list of options that appear, you must select Uninstall.
The uninstaller or uninstallation wizard window for the chosen application is supposed to come up now.
- You will probably have to click on Uninstall again to proceed. Or you might have to click on the Continue button to get on with the operation here.
- At this point, you have to follow the on-screen directions, carefully go through the prompts and messages, and make the appropriate decisions by clicking on the right buttons (where necessary).
The unwanted application will eventually be removed.
- Now, you must close Control Panel and the windows for other applications. Restart your computer.
If you are more familiar with the Settings application – which means you might prefer to remove an app from the Apps menu there – then these are the instructions you must follow instead:
- First, you have to launch the Settings application. This keyboard shortcut probably provides users with the fastest means of doing so: Window logo button + letter I.
- Once the Settings window gets brought up, you have to click on Apps (on the main screen) to enter the needed menu.
- Now, you must look to the pane close to the right border of the window (under Apps and Features) and then go through the applications listed there to locate the one you intend to remove.
- Click on the troubled application (to get it highlighted) and then click on the Uninstall button (which most likely appeared recently).
- Click on the Uninstall button again on the small dialog or window on your screen – if Windows brings up a prompt to get some form of confirmation for the uninstallation operation for the chosen application.
- Pay attention to the proceedings and follow the on-screen directions to do the job – if this step applies.
The selected application will be gotten rid of eventually.
- Here too, you have to close the Settings app and other applications and then restart your PC to finish things.
After the recommended reboot operation, you have to install the troubled application. We recommend you search for it online and go to its official page. Ideally, you should get the application package or installer executable from trusted or safe sources. We also advise that you download the latest stable version of the app released and get the build designed for your computer or OS configuration.
If you take our recommendations seriously, then you are likely to avoid the hiccups or complications that typically arise during the installation operations for certain apps. Furthermore, the inconsistencies or discrepancies that trigger the issue defined by Runtime Error 339 are likely to be a nonfactor – if everything goes well.
-
Get the missing or corrupted file from another computer:
The procedure here is as unorthodox as it gets, but it is nevertheless effective. Here, we want you to identify the broken, corrupted, or missing OCX or DLL file that appeared in the notification or error description, get a normal copy of that file from a regular computer, and then place the good copy in the appropriate location on your computer. If you replace the faulty or broken component that triggers the issue defined by Runtime Error 339, then you will have managed to fix the problem – and this is what matters, after all.
Nevertheless, we must warn you of certain things here. You must get the troubled file from a computer that is similar to yours – at least, in terms of Windows version and operating system edition. All the descriptions we made in this guide are based on Windows 10, so both computers (yours and the donor PC) must be running the 64-bit version of Windows 10 or the 32-bit version of the same OS. The donor machine must also be in a perfect or ideal condition. You do not want to get a DLL or OCX file from a computer burdened by the same runtime issues as yours.
To be fair, you might be able to find copies of the troubled OCX or DLL file on some websites, but we are generally against users getting OCX or DLL files (sensitive components) online – since we cannot vouch for the authenticity of the sites or download centers involved. In your quest to replace the bad file on your computer, you might end up downloading a malicious program, which might cause problems even more serious than the one you are currently trying to resolve. Due to the stated risks (and other reasons), you will do well to get the OCX or DLL file from another computer (owned by a friend, for example) instead of obtaining it from the internet.
These instructions cover everything that you have to do here:
- First, you have to deregister the troubled DLL or OCX – since you intend to remove or replace it (with another file).
- Open an admin Command Prompt window. We described the steps on doing this in the second fix in this guide, so you might want to scroll up a bit to go through the same instructions (in case you have forgotten).
- Once the elevated Command Prompt window comes up, you have to execute the following code there:
regsvr32 MSMASK32.OCX /u
(Note: Replace the MSMASK32.OCX part of the code with the appropriate file or component name – if you have to)
Windows will now act to deregister the file or component in view.
At this point, you have to move on to locate the file on your computer, take note of the directory where it resides, and then delete the file. Continue with these instructions:
- Open the File Explorer application by clicking on the application icon, which is likely to be on your taskbar.
Otherwise – if the app icon is missing – this keyboard shortcut provides you with the fastest means of doing the same thing: Window logo button + letter E key.
- Once the File Explorer window gets brought up, you have to double-click on This PC to see your system’s disk.
- Now, you must enter your system’s disk (C:) by double-clicking on it. From your present location (inside your system’s disk), you have to run a search task for the troubled DLL or OCX file.
- Fill the text box in the top-right corner of the File Explorer window with the name of the DLL or OCX file. For example, OCX.
Wait for Windows to search for the file. It might take a while.
If the search task returns no relevant results or if no matches are found, then you have to enable the functions that allow your computer to search hidden and protected folders. You might also need to disable the hidden property of the directories you believe to be housing the file.
- Here, assuming Windows has located the file (that you searched for), you must right-click on the entry to see the available options and then select Open file location.
You will be directed to the folder on your system’s disk where the DLL or OCX file in view resides.
- You have to take note of the directory you are currently in or the path (to get to it) – because you will have to come back here.
- Now, you can delete the DLL or OCX file. Click on it to get it highlighted, right-click on it to see the available options, and then choose Delete.
Windows will now act to get rid of the unwanted or troubled file.
Now, you must leave your computer (the one burdened by issues defined by Runtime Error 339) and go to the donor computer (from which you need to obtain the file). The task we are about to describe must be performed on the donor PC.
- Open the File Explorer window on the second computer by clicking on the application icon on the taskbar there or through the Windows logo button + letter E keyboard shortcut.
- Now, you must enter the system disk there and then search for the troubled DLL or OCX file.
Alternatively, you can navigate through the appropriate path to get to the folder where the needed DLL or OCX file is stored. You are supposed to know the relevant file path, after all – given the work you did earlier on your PC.
- In any case, after you find the needed DLL or OCX file, you have to right-click on it and then choose Copy.
- At this point, you will do well to insert a flash USB drive into the machine you are on currently and then paste the copied DLL or OCX to a folder there.
Once you get the needed DLL or OCX file somewhere on a flash drive, then your work on the second computer (donor PC) is done. You have to eject the drive and take it with you.
It is time you left the donor PC and moved back to your computer to finish the work you started. The next set of instructions is focused on getting the needed file to the appropriate location and activating it:
- Plug the flash drive into your computer. Open the File Explorer application through whatever means necessary.
- After the File Explorer window comes up, you have to go inside the flash drive and then enter the folder housing the DLL or OCX file that you copied from the donor computer.
- Click on the DLL or OCX file to get it highlighted, right-click on it to see the available options, and then choose Copy.
The needed DLL or OCX file will be copied to your computer’s clipboard.
- Now, you have to leave your current location and then navigate through the appropriate path to get to the directory where the DLL or OCX file is supposed to be on your system’s disk.
Perhaps, you now understand why we asked you to take note of the directory or file path earlier.
- Assuming you are now in the appropriate directory, you have to right-click on any spot free of icons or objects to see the available options and then choose Paste.
Windows will now place the copied DLL or OCX file inside your current location.
- You might have to click on the appropriate button to confirm a prompt. Or you might even have to enter the password for the admin account before your system allows the operation to be executed.
Your work is not yet done, though. You still have to do something to force Windows to recognize or take note of the introduced component to ensure that programs that need it are able to call upon and use it.
- Here, you have to open an elevated Command Prompt window (as you did several times in previous procedures) and then execute this code to register the file:
regsvr32 MSMASK32.OCX
(Note: We provided the code for registering MSMASK32.OCX. A different OCX or DLL file might be involved in your case. In that case, you will have to replace the MSMASK32.OCX part of the code with the name of the relevant file or component.)
- Assuming the execution operation for the command has reached completion – and if everything went well – you have to close the Command Prompt app and other applications.
- Restart your computer.
- Run the necessary checks to verify that Runtime Error 339 has been resolved for good.
-
Execute some commands to fix issues:
You are probably already familiar with tasks performed on an elevated Command Prompt window. Well, the work here is more of the same thing, but it is more comprehensive than the previous procedures. We want you to run some commands to fix problems affecting DLL and OCX files. Perhaps, if you resolve the issues affecting as many troubled components as possible on your computer, you will stop seeing Runtime Error 339.
Here, we want you to deregister and then reregister as many DLL and OCX files as you can to make things right. These instructions cover everything you need to do:
- Here too, you have to open an elevated Command Prompt window.
- Click on the Windows icon in the bottom-left corner of your machine’s screen to see the options and objects that make up the Windows Start menu screen (or give the Windows logo button on your device’s keyboard a tap for the same outcome).
- Input Command Prompt into the text box (that appears the moment you begin to type) to run a search task using those keywords as the query.
- Assuming Command Prompt (App) has now appeared as the main entry on the results list returned, you have to right-click on it to see the available context menu.
- From the list of options that show up, you have to select Run as administrator.
Windows will bring up the admin Command Prompt window now.
- Now, you must execute this code to deregister the named OCX file (by typing the command in first and then hitting the Enter button on your device’s keyboard to force Windows to run the command):
regsvr32 WindowsSystem32 msflxgrd.ocx /u
- It is time you executed this one to reregister the named OCX file:
regsvr32 WindowsSystem32 msflxgrd.ocx
- Well, you must execute these commands too (one after the other):
- regsvr32 \Windows\System32\ comdlg32.ocx /u
- regsvr32 \Windows\System32\ comdlg32.ocx
- If you know other DLL or OCX files, then you will do well to execute commands in this format for them:
- regsvr32 \Windows\System32\ InsertFileNameHere /u
- regsvr32 \Windows\System32\ InsertFileNameHere
(Note: You must replace the InsertFileNameHere part of the code with the name of the file or component that you are looking to deregister and then register.)
- Try to deregister and reregister as many DLL and OCX files or components as you can.
- Assuming you are done with the deregistering and reregistering operations for all the needed components, you have to close the Command Prompt app and other programs.
- Restart your computer – since a reboot operation is the only thing that ensures Windows takes all the changes resulting from your work into account.
- Run some tests to confirm that Runtime Error 339 is no longer in play. Reattempt the task or operation with which you encountered the error message or notification to see what happens this time.
Other things you can try to resolve Runtime Error 339 on a Windows 10 computer
At this point, if you are yet to apply a fix that does enough to resolve the issues defined by Error 339 on your PC, then you have little choice but to try out procedures on our final list of solutions and workarounds to the problem.
-
Use a registry cleaner:
A registry cleaner will execute operations to remove the invalid, broken, and corrupted entries from your registry. We advise you to download and run Auslogics Registry Cleaner. After the cleaning operation, you will have to restart your PC to finish things.
-
Install important applications and components:
There is a good chance you are struggling with Runtime Error 339 because your computer is missing certain programs and components that other apps need to run or work. Some users managed to fix the problems by checking for and installing all the following applications and packages: DirectX, Java, Flash, and Visual C++ Redistributables.
-
Run the troubled application in compatibility mode for a different Windows build.
Try out as many Windows versions as you can to see if one of them works.