So I added google analytics to my site, and the code snippet that google gave me was this:
<!-- Global site tag (gtag.js) - Google Analytics -->
<script async src="https://www.googletagmanager.com/gtag/js?id=UA-124075233-1"></script>
<script>
  window.dataLayer = window.dataLayer || [];
  function gtag(){dataLayer.push(arguments);}
  gtag('js', new Date());

  gtag('config', 'UA-124075233-1');
</script>
So I added it to my <head>, but now I’m receiving the error:
Loading failed for the with source
“https://www.googletagmanager.com/gtag/js?id=UA-124075233-1”.
I’m a bit confused as to why this is happening.
![]()
Eric Aya
69.1k35 gold badges179 silver badges250 bronze badges
asked Aug 22, 2018 at 1:16
![]()
6
I had the same problem. It turned out to be the DuckDuckGo Privacy Essentials browser extension that I was using was blocking the Google tracker request. Just disabling this extension for the site resolved the problem.
I suggest checking to see if you have a similar browser extension that is blocking the request.
answered Oct 31, 2018 at 17:13
![]()
zacawayzacaway
3164 silver badges3 bronze badges
3
I had the same issue but basically it’s just because you’re using a tracker blocker (like Ghostery).
If you’re using one, you will probably see this message in more than just your website.
Try to whitelist your site and see if it works well
answered Jan 10, 2020 at 21:12
![]()
Please check your code, where do you put that code? are you using cms like WordPress? it’s possible you put in the wrong place, for example, you put that code between <?php tag
answered Apr 23, 2019 at 4:03
![]()
Ali.azimiAli.azimi
932 silver badges9 bronze badges
Another thing to check is your adblocker. I used v2rayn for my proxy and blocked some ad sites, and somehow googletagmanager.com was one of them.
answered Aug 22, 2021 at 8:12
![]()
tjysdsgtjysdsg
5666 silver badges18 bronze badges
GOOGLETAGMANAGE.COM — это вирус, который очень навязчив!
- Показывает GOOGLETAGMANAGE.COM нежелательную всплывающую рекламу.
- GOOGLETAGMANAGE.COM перенаправляет щелчки в браузере на вредоносные веб сайты.
- GOOGLETAGMANAGE.COM показывается регулярно, даже если закрываешь браузер.
- GOOGLETAGMANAGE.COM появляется в строке ввода браузера при выборе новой вкладки.
- GOOGLETAGMANAGE.COM меняет настройки поиска в браузере.
- GOOGLETAGMANAGE.COM меняет ярлыки браузера на рабочем столе и в меню, чтобы вместе с запуском браузера показывалась реклама.
Как происходит заражение рекламным вирусом GOOGLETAGMANAGE.COM?
Сегодня я был разбужен звонком мамы. Она просила забежать к ней, потому что что-то странное случилось с ее компьютером. Ну, я конечно не могу отказать маме, поэтому отправился в гости.
Как только я открыл ее браузер, в глаза мне бросилось, что стартовая страница была заменена рекламным сайтом GOOGLETAGMANAGE.COM.
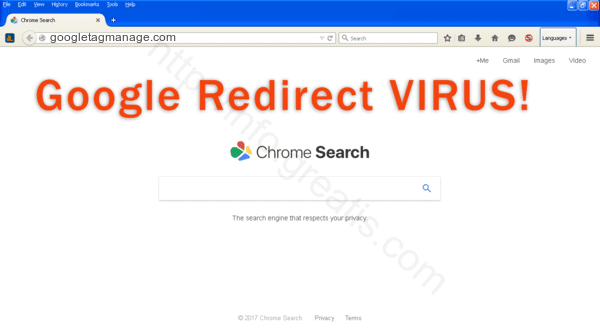
Очевидное изменение! Мама такое в качестве стартовой страницы ни за что бы не поставила! Ведь она предпочитает пустую страничку в качестве страницы по умолчанию. Я решил проверить и ярлык для запуска Firefox. Он, разумеется, тоже был инфицирован вирусом GOOGLETAGMANAGE.COM.
Как избавиться от вируса GOOGLETAGMANAGE.COM?
Обычно подобные вирусы изменяют и поисковик по умолчанию. Я проверил — так и есть! Попытавшись исправить его вручную, я был раздосадован тем, что после перезагрузки все возвращается к зараженному состоянию. Что ж, мне стало все понятно. GOOGLETAGMANAGE.COM представляет из себя вирус перенаправитель, который меняет домашние страницы, поисковики по-умолчанию, а также заменяет содержимое ярлыков браузеров, добавляя дополнительную строчку в конец.
Разумеется, маме я помог и компьютер вылечил. И беседу провел, о недопустимости установки нового программного обеспечения в режиме по-умолчанию. Но, думаю, что простенькая инструкция по избавлению от перенаправителя GOOGLETAGMANAGE.COM будет вам полезна. Поэтому ниже я привожу ее, как ручную, так и автоматическую.
Инструкция по ручному удалению рекламного вируса GOOGLETAGMANAGE.COM
Для того, чтобы самостоятельно избавиться от рекламы GOOGLETAGMANAGE.COM, вам необходимо последовательно выполнить все шаги, которые я привожу ниже:
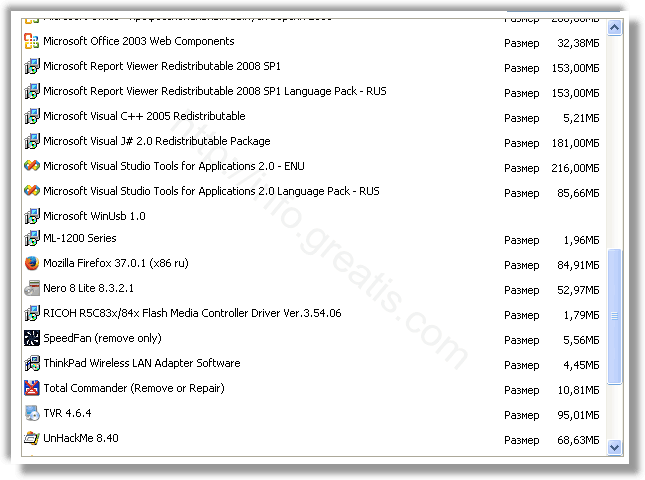
- Поискать «GOOGLETAGMANAGE.COM» в списке установленных программ и удалить ее.
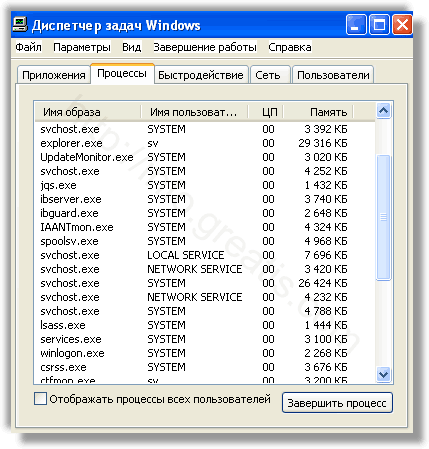
- Открыть Диспетчер задач и закрыть программы, у которых в описании или имени есть слова «GOOGLETAGMANAGE.COM». Заметьте, из какой папки происходит запуск этой программы. Удалите эти папки.
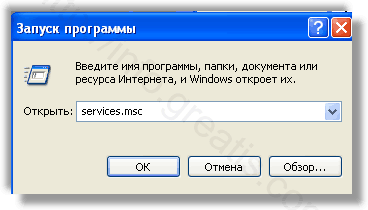
- Запретить вредные службы с помощью консоли services.msc.
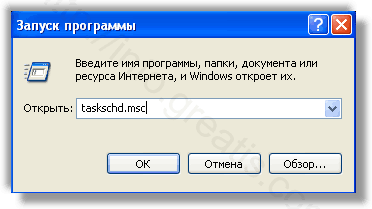
- Удалить ‘Назначенные задания’, относящиеся к GOOGLETAGMANAGE.COM, с помощью консоли taskschd.msc.
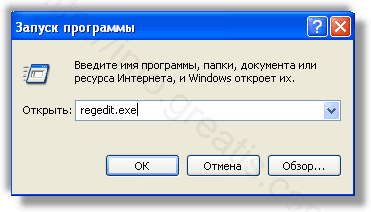
- С помощью редактора реестра regedit.exe поискать ключи с названием или содержащим «GOOGLETAGMANAGE.COM» в реестре.
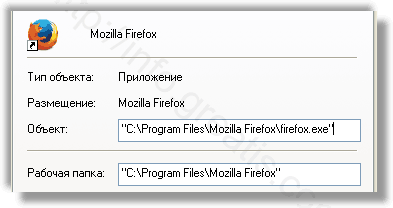
- Проверить ярлыки для запуска браузеров на предмет наличия в конце командной строки дополнительных адресов Web сайтов и убедиться, что они указывают на подлинный браузер.
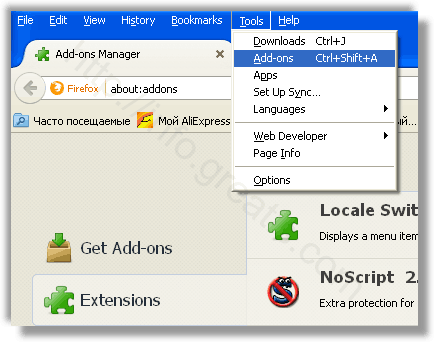
- Проверить плагины всех установленных браузеров Firefox, Internet Explorer, Chrome и т.д. Все неизвестные или подозрительные плагины лучше удалить, либо произвести полный сброс настроек браузера.
- Проверить настройки поиска, домашней страницы. При необходимости сбросить настройки в начальное положение.
- Проверить настройки DNS вашей сети. Рекомендую обратиться к документации, предоставленной вашим провайдером.
- Очистить корзину, временные файлы, кэш браузеров.
Подробнее для Mozilla Firefox…

И все же автоматика лучше!
Если ручной метод — не для вас, и хочется более легкий путь, существует множество специализированного ПО, которое сделает всю работу за вас. Я рекомендую воспользоваться UnHackMe от Greatis Software, выполнив все по пошаговой инструкции.
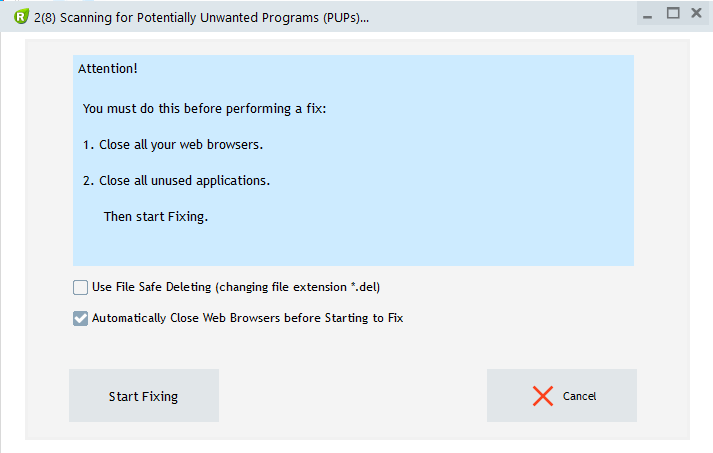
Шаг 1. Установите UnHackMe. (1 минута)
Шаг 2. Запустите поиск вредоносных программ в UnHackMe. (1 минута)
Шаг 3. Удалите вредоносные программы. (3 минуты)
UnHackMe выполнит все указанные шаги, проверяя по своей базе, всего за одну минуту.
При этом UnHackMe скорее всего найдет и другие вредоносные программы, а не только редиректор на GOOGLETAGMANAGE.COM.
При ручном удалении могут возникнуть проблемы с удалением открытых файлов. Закрываемые процессы могут немедленно запускаться вновь, либо могут сделать это после перезагрузки. Часто возникают ситуации, когда недостаточно прав для удалении ключа реестра или файла.
UnHackMe легко со всем справится и выполнит всю трудную работу во время перезагрузки.
И это еще не все. Если после удаления редиректа на GOOGLETAGMANAGE.COM какие то проблемы остались, то в UnHackMe есть ручной режим, в котором можно самостоятельно определять вредоносные программы в списке всех программ.
Итак, приступим:
Шаг 1. Установите UnHackMe (1 минута).
- Скачали софт, желательно последней версии. И не надо искать на всяких развалах, вполне возможно там вы нарветесь на пиратскую версию с вшитым очередным мусором. Оно вам надо? Идите на сайт производителя, тем более там есть бесплатный триал. Запустите установку программы.
- Затем следует принять лицензионное соглашение.
- И наконец указать папку для установки. На этом процесс инсталляции можно считать завершенным.

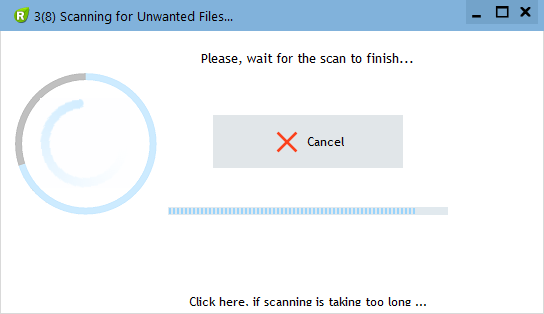
Шаг 2. Запустите поиск вредоносных программ в UnHackMe (1 минута).
- Итак, запускаем UnHackMe, и сразу стартуем тестирование, можно использовать быстрое, за 1 минуту. Но если время есть — рекомендую расширенное онлайн тестирование с использованием VirusTotal — это повысит вероятность обнаружения не только вируса GOOGLETAGMANAGE.COM, но и остальной нечисти.
- Мы увидим как начался процесс сканирования.

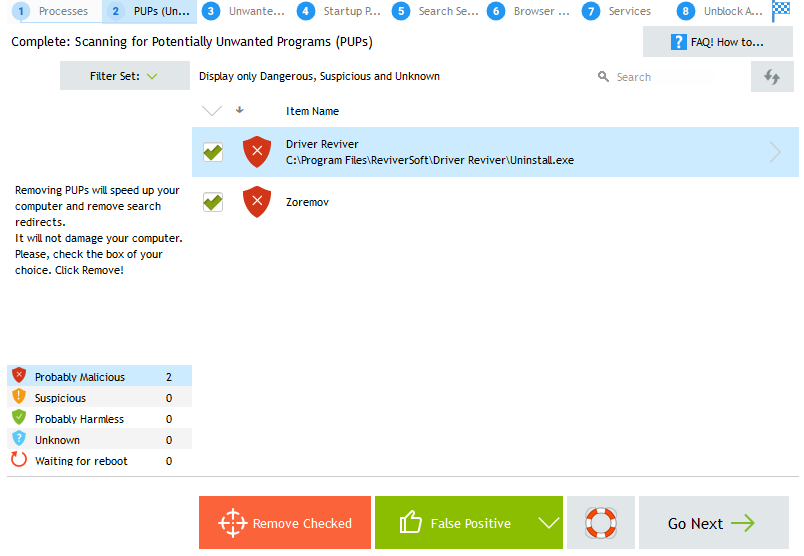
Шаг 3. Удалите вредоносные программы (3 минуты).
- Обнаруживаем что-то на очередном этапе. UnHackMe отличается тем, что показывает вообще все, и очень плохое, и подозрительное, и даже хорошее. Не будьте обезьяной с гранатой! Не уверены в объектах из разряда ‘подозрительный’ или ‘нейтральный’ — не трогайте их. А вот в опасное лучше поверить. Итак, нашли опасный элемент, он будет подсвечен красным. Что делаем, как думаете? Правильно — убить! Ну или в английской версии — Remove Checked. В общем, жмем красную кнопку.
- После этого вам возможно будет предложено подтверждение. И приглашение закрыть все браузеры. Стоит прислушаться, это поможет.
- В случае, если понадобится удалить файл, или каталог, пожалуй лучше использовать опцию удаления в безопасном режиме. Да, понадобится перезагрузка, но это быстрее, чем начинать все сначала, поверьте.
- Ну и в конце вы увидите результаты сканирования и лечения.

Итак, как вы наверное заметили, автоматизированное лечение значительно быстрее и проще! Лично у меня избавление от вируса GOOGLETAGMANAGE.COM заняло 5 минут! Поэтому я настоятельно рекомендую использовать UnHackMe для лечения вашего компьютера от любых нежелательных программ!
[ratings]
And 1 year later… I had the same problem in DNN 7.4.2.
I had something like this in httpdocs/SiteAnalytics.config
<?xml version="1.0" encoding="utf-8" ?>
<AnalyticsEngineConfig>
    <Engines>
        <AnalyticsEngine>
            <EngineType>DotNetNuke.Services.Analytics.GoogleAnalyticsEngine, DotNetNuke</EngineType>
            <ElementId>Head</ElementId>
            <InjectTop>False</InjectTop>
            <ScriptTemplate>

                <!-- Google Tag Manager -->

                <script type="text/javascript">

          (function(w,d,s,l,i){w[l]=w[l]||[];w[l].push({'gtm.start':
                new Date().getTime(),event:'gtm.js'});var f=d.getElementsByTagName(s)[0],
                j=d.createElement(s),dl=l!='dataLayer'?'&l='+l:'';j.async=true;j.src=
                'https://www.googletagmanager.com/gtm.js?id='+i+dl;f.parentNode.insertBefore(j,f);
                })(window,document,'script','dataLayer','<Tracking ID>');

        </script>

        <!-- End Google Tag Manager -->

                <!-- documented... we would like to disable it by now
        <![CDATA[

                <script type="text/javascript">
                  var _gaq = _gaq || [];
                  _gaq.push(['_setAccount', '[TRACKING_ID]']);
                  _gaq.push(['_trackPageview']);
                  [PAGE_URL]

                  (function() {
                    var ga = document.createElement('script'); ga.type = 'text/javascript'; ga.async = true;
                    ga.src = ('https:' == document.location.protocol ? 'https://' : 'http://') + 'stats.g.doubleclick.net/dc.js';
                    var s = document.getElementsByTagName('script')[0]; s.parentNode.insertBefore(ga, s);
                  })();
                </script>

          ]]>
          -->
            </ScriptTemplate>
        </AnalyticsEngine>
    </Engines>
</AnalyticsEngineConfig>
See, by know i am leaving this as a manual change (but, as i am seeing now I think it will be very easy to integrate new google tag manager with DNN functionality and menus).
The change @dubloons proposed doesn’t work for me, so i did it like this:
<?xml version="1.0" encoding="utf-8" ?>
<AnalyticsEngineConfig>
    <Engines>
        <AnalyticsEngine>
            <EngineType>DotNetNuke.Services.Analytics.GoogleAnalyticsEngine, DotNetNuke</EngineType>
            <ElementId>Head</ElementId>
            <InjectTop>False</InjectTop>
            <ScriptTemplate>

                <!-- Google Tag Manager -->
        <![CDATA[
                <script type="text/javascript">

          (function(w,d,s,l,i){w[l]=w[l]||[];w[l].push({'gtm.start':
                new Date().getTime(),event:'gtm.js'});var f=d.getElementsByTagName(s)[0],
                j=d.createElement(s),dl=l!='dataLayer'?'&l='+l:'';j.async=true;j.src=
                'https://www.googletagmanager.com/gtm.js?id='+i+dl;f.parentNode.insertBefore(j,f);
                })(window,document,'script','dataLayer','<Tracking ID>');

        </script>
        ]]>
        <!-- End Google Tag Manager -->

                <!-- documented... we would like to disable it by now
        <![CDATA[

                <script type="text/javascript">
                  var _gaq = _gaq || [];
                  _gaq.push(['_setAccount', '[TRACKING_ID]']);
                  _gaq.push(['_trackPageview']);
                  [PAGE_URL]

                  (function() {
                    var ga = document.createElement('script'); ga.type = 'text/javascript'; ga.async = true;
                    ga.src = ('https:' == document.location.protocol ? 'https://' : 'http://') + 'stats.g.doubleclick.net/dc.js';
                    var s = document.getElementsByTagName('script')[0]; s.parentNode.insertBefore(ga, s);
                  })();
                </script>

          ]]>
          -->
            </ScriptTemplate>
        </AnalyticsEngine>
    </Engines>
</AnalyticsEngineConfig>
As you see, i sourrounded al script tag within CDATA, not just JS code.
will be something like GTM-XXXXXX.
As you can see Tracking ID is hardcoded by know, but thats another issue ;D.
- Status
- Not open for further replies.
-
#1
Last edited by a moderator: Mar 13, 2021

-
- Nov 7, 2011
-
- 69,683
-
- 3,212
-
- 162,240
- 6,866
-
#2
malware scan your system?
browser up to date? windows up to day?
-
#3
what site are you on?
malware scan your system?
browser up to date? windows up to day?
I am not on any site ,script error pops up on desktop at start up. Virus & system up to date. Thanks Mark.
-
#4
- Status
- Not open for further replies.
- Advertising
- Cookies Policies
- Privacy
- Term & Conditions
- Topics

4.5
из 5
на основе 2 оценок
18.01.2019

Вы используете Google Tag Manager (или просто GTM)? Если да, готовы ли вы к худшему, даже если надеетесь на лучшее? Что же делать, если Google Tag Manager не работает, как следует? Обязательно прочитайте данный материал до конца, чтобы убедиться, что вы готовы к возможным проблемам. Дальше будет намного больше возможностей для того, чтобы быстро предпринять необходимые действия для исправления ваших данных.
Если возникают критические ошибки с вашими данными – это сигнал для того, что вам понадобится несколько сетей безопасности. Несмотря на то, что вы можете воспользоваться всеми лучшими практиками, чтобы убедиться, что все идет хорошо с вашей стороны, есть большая вероятность, что иногда что-то все-таки сломается, будет изменено на месте или вы заметите ошибки в данных. В этой статье мы расскажем о нескольких лучших практиках, которые были обнаружены в свое время при использовании GTM. Они помогут быстро исправить в Гугл Тег Менеджер ошибки и вернуть данные в нужное русло. Не пропустите советы по улучшению выдачи Google Ads.
Как устранить неисправности сломанных тегов
Вы заметили, что один из ваших тегов перестал срабатывать. Критическое событие для Google Analytics больше не связано с поступлением данных. Важный маркетинговый пиксель больше не работает. Пиксель конверсии AdWords пропал. Что же делать в таком случае?
К счастью, с помощью Google Tag Manager (GTM) вы можете использовать их режим предварительного просмотра, чтобы точно видеть причину проблемы. Давайте рассмотрим пример ниже:
Ваш тег события не запускается. Что тут сказать – не густо!
Шаг 1: Запустите режим предварительного просмотра GTM.
Шаг 2: Зайдите на ваш сайт после включения режима предварительного просмотра.
Шаг 3: Найдите, какие теги не запускаются, и нажмите на них.
Шаг 4. Определите причину, по которой ваши теги не запускаются.
Аналогично нужно поступать и для отладки других тегов. Определите, когда это должно сработать, проверьте триггер, чтобы увидеть, что не работает, и действуйте до тех пор, пока проблема не решится. Таким образом, настройка Google Tag Manager должна проводиться регулярно и весьма тщательно.
Как вы можете избежать подобного
Лучший способ избежать подобных проблем — выполнить тщательный контроль качества перед публикацией каких-либо новых тегов, убедиться, что ваши триггеры основаны на наиболее надежных элементах, возможных для области, и выполнить развертку маршрутизации в настройках отслеживания, чтобы определить потенциальные причины для беспокойства. Все это нужно сделать перед нажатием кнопки «Опубликовать».
Как откатить вашу версию GTM
Теперь рассмотрим худший сценарий. Допустим, вы случайно опубликовали версию в GTM, которая работает некорректно или, что еще хуже, портит правильное отслеживание. Хотя вы можете подготовиться к тому, что этого никогда не произойдет, есть быстрое решение на случай, что это однажды станет реальностью. Уже только это является причиной для того, чтобы всегда проверять свое отслеживание до и после публикации вашего контейнера (для выявления и устранения проблем!)
Шаг 1. Нажмите «Версии» в GTM.
Шаг 2. Нажмите «Действия» для последнего правильного контейнера GTM.
Шаг 3. Нажмите «Опубликовать» в разделе «Действия».
Итак, ваше отслеживание вернулось к норме. Следующим шагом будет выяснить то, почему трекинг сломался, и опубликовать правильную версию.
Как вы можете избежать подобного
До всех публикаций GTM рабочее пространство должно проверяться несколькими пользователями для обеспечения его правильной работы, и в идеале это должно быть протестировано в нескольких браузерах. Если вы выберете такой подход, это поможет устранить большинство потенциальных проблем.
There are lots of cool things you can do with Google Tag Manager, like track purchases, form submissions, link clicks, etc. All of these are positive actions for the business. But what about negative ones? Errors should be definitely tracked as well as they might provide you with some gems.
In fact, identifying where your visitors/customers are struggling and fixing those issues can be a fast-track to improved conversions.
So what kind of errors can you track with GTM? In this guide, we’ll take a look at 5 different groups of errors that you can track with Google Tag Manager.
Note: this blog post teaches how to track events with Universal Analytics. If you want to get familiar with event tracking in Google Analytics 4, you can also refer to this blog post.
Table of Contents
- #1. Track JavaScript Errors with Google Tag Manager
- #1.1. How to Configure JavaScript Error Trigger in Google Tag Manager
- #1.2. Why is it useful?
- #2. Track 404 Errors with Google Tag Manager
- #2.1. Hit-scoped custom dimension – Referrer
- #2.1.1. Custom Dimension in GA
- #2.1.2. GA Settings Variable
- #2.2. Ask a developer to push the 404 error to the Data Layer
- #2.1. Hit-scoped custom dimension – Referrer
- #3. Checkout Errors
- #4. Form Errors (e.g. Registration and Login forms)
- #4.1. Using Element Visibility trigger to track form errors
- #4.2. Working with an AJAX form? Try this
- #4.2.1. Data Layer Variables
- #4.2.2. Trigger (when the error message is pushed to the Data layer)
- #4.2.2. Google Analytics tag
- #5. Server Error (like 50x, etc.)
- #5.1. Lookup Table Variable
- #5.2. Trigger
- #5.3. Tag
- Checking Error Data in Google Analytics
- Several Tips Regarding Error Naming Convention
- Treating Errors as Negative Goals in Google Analytics
- GA Custom Alerts
- Final words
Errors are listed in no particular order, therefore, don’t think that error #5 is less valuable than #1.

#1. Track JavaScript Errors with Google Tag Manager
GTM has a built-in trigger that captures uncaught JavaScript errors. If you take a look at the list of all possible trigger types in GTM, you can probably easily guess which trigger I’ll be talking about. Yes, it’s a JavaScript Error trigger.
#1.1. How to Configure JavaScript Error Trigger in Google Tag Manager
Uncaught means that an error wasn’t captured and handled by some script on a page. In plain English: if an unexpected error occurs in JavaScript code and that code was not programmed to deal with it in some way, JavaScript Error trigger will track it.
Important: you should not think that this trigger catches ALL possible errors on a page. If a JS error occurs on a page and the script was programmed to handle it by showing a certain error/warning popup to a visitor, such error will not be tracked by GTM.
To get started, go to Triggers > New > Trigger Configuration > JavaScript Error. Leave all the settings as they are and save the trigger.

Also, go to Variables > Configure (in the Built-in Variables section) and enable Error Message, Error URL, Error Line.

When GTM captures an error, you can get 3 data points with it:
- Error message (the text of the JavaScript error message, for example, Uncaught ReferrerceError: testvariable is not defined )
- Error URL (the address of the page where the error occurred)
- Error Line (the line number in the code where the error was detected)
You could send all of those data points to Google Analytics. To do that, go to Tags > New > Universal Analytics and enter the following settings (make sure that you have already enabled the Error Variables in the container):

Note: set the field Non-interaction hit to true. This means that GA will not treat this event as an interaction and the errors that you catch will not affect your bounce rate.
Finally, assign the JavaScript error trigger (that you have previously created) to this Universal Analytics tag. Save the tag, refresh/enable the preview mode.
If you want to test this, you can add this code (temporarily!) to a page via content management system:
<script>
  setTimeout(function(){
      jstestingvarwithalongname.push({'key' : 'value'});
  }, 2000);
</script>
When you save the page and refresh it (but before that, refresh or enable the GTM preview and debug mode), you should see the JavaScript error in the GTM debug console.

Remember, the aforementioned line of code intentionally contains a JS error. Remove it immediately after the test is done.
#1.2. Why is it useful?
If your developer is not tracking JavaScript errors with a dedicated tool (like TrackJS), JavaScript Error tracking with Google Tag Manager is definitely better than nothing (of course, you should not think this is 100% accurate).
You can track JS errors as negative goals and then see the number of sessions that had at least one error (more on negative goals — later in the blog post).
Another idea: Sequence segments. For example, show all the sessions that entered the checkout and then had a JavaScript error but did not make a purchase.

This segment is more useful for those businesses where customers are usually converting in the same session they arrive.
These are just several ideas and everything depends on your imagination.
#2. Track 404 Errors with Google Tag Manager
Another type of error that you can track with Google Tag Manager is 404, a.k.a. Page Not Found. I have a separate blog post (covering other alternatives too) for that but here are some of the highlights + new ideas.
There are several different ways how to tackle 404 error tracking. I’ll mention two:
- Sending a hit-scoped custom dimension to GA (Referrer) and then using it as the secondary dimension in GA reports. This works if “Page not found” error can be distinguished by the page title
- Asking a developer to push the 404 event to the Data Layer
#2.1. Hit-scoped custom dimension – Referrer
This method will be useful if the page title of 404 pages contains “Page not found”, “Page missing” or some other phrase that lets you easily identify that a visitor has landed on a 404 page.
How can you check that? Open a website you’re working on, and add some gibberish at the end of the URL, e.g. https://www.youwebsite.com/posts/somenonsense
Are you redirected to a 404 page? What is the title of the page? (you can check that in the browser tab):

So if you indeed see something meaningful (and related to “page not found”) here, continue reading. By the way, huge thanks to Charles Meaden who mentioned this idea in one of my previous blog posts about the Referrer Variable in Google Tag Manager.
#2.1.1. Custom Dimension in GA
In your Google Analytics, you will need to create a custom dimension. Go to Admin (click the gear icon in the bottom left corner of the GA interface) > Property column (make sure you have selected the needed property) > Custom Definitions > Custom Dimension > New Custom Dimension.
Enter the following settings:
- Name: CD – Referrer (or you can call it just “Referrer”, it’s up to you which Naming Convention to use)
- Scope: Hit

Once you do that, you will see the number (index) of the custom dimension. Remember it. We’ll need it quite soon.

#2.1.2. GA Settings Variable
I really hope that you already are using this variable in your GA/GTM setups. If you don’t, read this guide. If you do, then do the following:
- In the variable (that is used by your Universal Analytics tags), click More Settings > Custom Dimensions
- Enter the index number of your Custom Dimension (for example “5” without quotation marks) in the left column and {{Referrer}} the right one (this variable is enabled in the GTM container by default).

Once this is done, together with every hit (event, pageview, etc.) you will be sending the value of Referrer. In a nutshell, this variable passes the web address of the previous page.
This is useful because you can then better understand where are people coming from to that 404 page and, therefore, will be able to fix the issue sooner.
How can you see that data in GA reports? Go to Behavior > Site Content > All Pages.
Change the primary dimension to Page Title

And then add the CD – Referrer (or whatever you named it) as a secondary dimension.
Finally, in the search field enter “Page not found” (or whatever your website uses as a title of the 404 page).

Voilà! You now have a report of “Page not found” and you also see the previous page that a visitor was on (meaning that those previous pages probably contain broken/outdated links).
Important: this Custom Dimension will NOT affect your past data. Only new hits to GA will be sent together with a “Referrer” custom dimension.
Also, you can create custom GA reports with more dimensions (columns) at the same time:
- Page title
- Page
- CD – Referrer
#2.2. Ask a developer to push the 404 error to the Data Layer
If the previous option did not work for you, here’s another one. Whenever a visitor lands on a page that contains a 404 (page not found) error, ask a developer to activate the following code (preferably, before the GTM container snippet):
<script>
window.dataLayer = window.dataLayer || [];
window.dataLayer.push({
  'event': 'error',
  'errorType': '404 - page not found'
});
</script>
P.S. You are free to use different values for those keys that match your own naming convention.
This code will push the error information to the Data Layer.
Once a developer implements the code, you will need to:
- Create a Custom Event Trigger
- Create a Data Layer Variable
- Create a Google Analytics Event tag that sends the 404 error to GA as an event (non-interaction)
First, let’s start with a trigger. Go to Triggers > New > Custom Event Trigger and enter the following settings:

Enter the value of the “event” key in the “Event name” field. If you used my code example, then enter “error” (without quotation marks).
Then, the Data Layer Variable. Go to Variables > User-defined Variables > New > Data Layer Variable. Enter the following settings if you have precisely copied my code example:

Important: event names are case-sensitive in GTM.
Last but not least, Universal Analytics (GA) tag. Go to Tags > New > Universal Analytics and enter the following settings:

This should also be configured as “Non-interaction hit: true”.
Don’t forget to test the setup with the GTM preview and debug mode + publish the changes after that.
#3. Checkout Errors
The third group of errors that should definitely get your attention is checkout errors. I’d say that these are one of the most important ones because the visitor/user is very close to the conversion (e.g. purchase, signup, etc.).
Your goal is to reduce friction/struggle as much as possible.
What kind of errors should you track? Consult with a developer of that checkout what is possible.
Here are some ideas:
- Form-related errors (like “some required fields are not filled in: first name, address”)
- Form-field-related errors (like “invalid shipping address”)
- Payment-related errors (like “insufficient funds” or “card declined”) (just make sure things like credit card data is not tracked)
After identifying groups of errors that you want to track, ask a developer to push those errors to the Data Layer, here’s a sample code:
<script>
window.dataLayer = window.dataLayer || [];
window.dataLayer.push({
  'event': 'error',
  'errorType': 'checkout error', // this value should depends on the type of error, e.g. form error, checkout error, etc.
  'errorMessage' : 'card declined' // some descriptive message about the error
});
</script>
Then apply the same principle I’ve explained in chapter #2.2. of this blog post, create:
- Custom event trigger
- Data Layer variables (for errorType and errorMessage)
- Google Analytics tag
Here’s what the tag should look like (don’t forget to assign the Custom Event trigger to this tag)

If you have already implemented the 404 tracking with the developer’s help, then you will already have one variable and the trigger. No need to create duplicates for that.
#4. Form Errors (e.g. Registration and Login forms)
There are different ways how to track form errors. Some are more reliable, the others are less. The most robust way is, once again, to cooperate with a developer and ask him/her to push the error data to the Data Layer.
I will not explain this principle all over again. Please revisit chapter #2.2. of this blog post.
In addition to the “Developer + Data Layer” method, here are some other alternatives. Remember, they might be more fragile and cause more significant data inaccuracies:
- Track when the error message of the form appears on the screen
- Using AJAX form? Check the response when the form is submitted (maybe you’ll find something useful there)

#4.1. Using Element Visibility trigger to track form errors
Warning: for this method to work, you will probably need to become familiar with CSS selectors, which is an advanced topic.
So if you have a form that displays an error message (after the form was submitted with an error), here’s what you could do.
First of all, do the right-click on that error message and see what kind of classes or IDs does it have. Once again, I cannot stress this enough: this method will work if you have the right CSS Selector fundamentals in your head.
Here’s an example of what I see after I start inspecting a certain element (P.S. this does not mean that you will see the same thing (because the majority of websites are unique)).

Take a closer look at the class attribute of that error message. One of the classes is wpcf7-validation-errors. We could use that in our GTM trigger.
Go to Triggers > New > Trigger Configuration > Element Visibility and enter the following settings:

In CSS, all classes start with a dot. That’s exactly what we did: we entered .wpcf7-validation-errors. Also, make sure you enable the “Observe DOM changes” setting.
Let’s test whether the trigger works properly. Save the trigger, refresh/enable the GTM Preview and Debug mode, refresh the page with the form and submit the form with one required field missing (or some other error you know).
You should see the Element Visibility event appear on the left side of the Preview mode panel.

Now, how can you access the text of that error message? The neat trick is that Click Text or Form Text, built-in variables in GTM, return the text of the element that was tracked by the Element Visibility trigger. Learn more about this here.
Now, it’s time for a tag. Go to Tags > New > Universal Analytics and enter the following settings:

I recommend tracking all page errors under the same category “error” (with some exception). I’ll explain my naming convention a bit later in this blog post.
As always, error events in GA should be tracked as Non-interaction hit: true.
Where will you see this event in GA?
- Realtime > Events (for debugging). If you don’t see the event, read this guide.
- Behavior > Events > Top Events (keep in mind that the events will not appear here in real-time. You’ll need to wait. Also, don’t forget to include today’s data by adding it in the GA date-picker).

#4.2. Working with an AJAX form? Try this
If your form does not reload the page after it was submitted (or when the error is displayed), there is a chance that the form was built by using the AJAX.
How can you make sure you’re working with an AJAX form? Click this link (credit for this code goes to Bounteous), copy the entire code and paste it into a new Custom HTML tag within your GTM container. Set the tag to fire on All Pages. Save the container, refresh the preview mode and refresh the page where the form is located.
Custom HTML tag will fire on a Pageview event. Don’t worry about that. Now try to submit the form properly. Did the ajaxComplete event appear in the GTM preview mode? Yes? This means you’re working with an AJAX form.

Now try to submit a form with at least one empty required field. Did the ajaxComplete event appear again? If yes, click that event in the preview mode and go to the Data Layer tab.
Scroll down and keep looking for the response section.
Do you see something meaningful there that is related to an error? In my case, I see this (Warning: the data structure of the response might look totally different in your case):

It would be cool to access that status and message values, right? Luckily, we can do that.
#4.2.1. Data Layer Variables
Go to Google Tag Manager > Variables > User-defined Variables > New > Data Layer Variable.
In my example, the status key is in the object response that is in another object called attributes. That is why in the Data Layer Variable, you should enter attributes.response.status (if you have no clue what I’m doing here, read this guide)

Save the variable. Now, it’s time to access the message. Enter attributes.response.message in the Data Layer Variable.

Save the variable.
#4.2.2. Trigger (when the error message is pushed to the Data layer)
Now, it’s time to create a trigger that will be activated when an ajaxComplete will be pushed to the Data Layer and attributes.response.status will equal to validation_failed.

Save the trigger
#4.2.2. Google Analytics tag
And the last step — Universal Analytics tag. Go to Tags > New > Universal Analytics and enter the following settings.

I’ve inserted the attributes.response.message as the Event Label. Every time an AJAX form error will be pushed to the Data Layer, I will pass its text/message to Google Analytics.
Important: If you have named your variables differently (e.g., not dlv – attributes.response.message), then use your naming in the GA tag, not mine.
Save the tag, refresh the preview mode, refresh the page with that form and submit it with an error. Check if the ajaxComplete event was fired and whether it is visible in the GA real-time reports. As for the Standard GA reports, these events will (as usual) appear in the Behavior > Events > Top events report.
#5. Server Error (like 50x, etc.)
When a server error occurs on a page (e.g. “Internal server error” or “Bad Gateway”, etc.), they look like this (pardon me or an old screenshot I found online):

Simple plain text page. However, GTM (or any other snippets) on that page is not available, thus you cannot track them by default. As a solution (I honestly don’t know whether this is the only workaround), you could ask a developer to redirect visitors to a static error page (each error will probably have a unique error page (visually similar but with a different error message)).
For example, if 500 error occurs, a developer could redirect a visitor to a yourwebsite.com/500error.html (or something like that). If 503, then yourwebsite.com/503error.html.
My examples here totally made up. The URLs of your error pages might look totally different. However, keep in mind that only a developer can implement these redirects to error pages.
All error pages could use the same HTML file template with some basic error information and the Google Tag Manager container snippet. The snippet is the key here. Without it, no error tracking will be possible. Some companies even go the extra mile with a custom error page design that might look like this:

If URLs of the error pages contain the error code (e.g. yourwebsite.com/500error.html), you can implement the same method that I’ve explained in #2.1 chapter of this article.
If, however, the URLs aren’t very friendly, e.g., yourwebsite.com/error1.html means 500 error, then you could implement something like this. Create a Lookup Table or Regex Table variable that will check the Page Path and will return a more meaningful/readable value.
#5.1. Lookup Table Variable
For this example, I will use a Lookup Table variable (that will be looking for exact matches).
A hypothetical situation. Our website has 5 error pages for different types of server errors:
- mywebsite.com/error1.html is for error 500 (if you are not familiar with error codes, here they are)
- mywebsite.com/error2.html is for 502
- mywebsite.com/error3.html is for 503, etc.
Here what we could do. In GTM, go to Variables > User-defined Variables > New > Lookup Table. Choose {{Page Path}} as an input variable. Then create separate rows for each error page.
Since we will be working with a {{Page Path}}, we will need to enter what comes after the slash in the URL, e.g. error.html. Let’s do that:

Then, on the right side of each column enter the output that you want to use (in other words, we will turn the ambiguous error.html into 500 error).

If in the future, you plan to implement more error page templates, it’s a good practice to set the “default” value of the table variable. If none of the conditions/rows are met, this variable will default to the {{Page Path}}.

Save the variable.
#5.2. Trigger
Now, let’s create a trigger that will be activated when the visitor loads an error page. Go to Triggers > New >Trigger Configuration > Pageview and enter the following condition:

In our case, Page Path or an error page starts with “error” and ends with “.html”.
#5.3. Tag
Finally, let’s create a Google Analytics event tag that will send the error to GA. Go to Tags > New > Universal Analytics and enter the following settings.

With the help of the Lookup Table variable, you will be sending the actual error codes to GA.
Assign the pageview trigger to this tag, save it. Don’t forget to test and then publish your changes.
Checking Error Data in Google Analytics
Now, it’s time to check your error data in Google Analytics. If you were tracking them as events, you will find them in Behavior > Events > Top Events report. If you followed my naming convention, error Event Category is the one that you should be looking for.

Just keep in mind that:
- This data does not appear immediately. You will still need to wait (sometimes 15 minutes, sometimes hours. Start panicking after 24 hours.).
- By default, GA standard reports do not include today’s data. So don’t forget to include it in the date picker.
If some of the errors are tracked as pageviews (e.g. like in #2.1. chapter), then you will find that data in Behavior > Site Content > All Pages. Switch to Page Title primary dimension and then add any secondary dimension if you need it.
Several Tips Regarding Error Naming Convention
This is NOT some hard rule that you MUST follow. It’s up to you how will you name your events in GA. But my personal preference is to group all errors under the Event Category error. JavaScript errors can be an exception and I can treat them as a separate event category (because there is more information that you can get from the JS error trigger). So, it’s up to you to decide.
Then the Event Action would be the type of an error, e.g.:
- checkout error
- server error
- 404 error
- form error (for general landing page opt-ins)
- registration error
- login error, etc.
Event Label should be used for the description of the error. What exactly was the error? For example:
- If the error is in the checkout, an error message/text would be valuable (like “credit card declined”)
- If the error was server-side, then the error code (e.g. 503) and the location (URL) would be nice (or at least the error code)
- If the error is related to a form, then I’d like to know the error text
You get the idea. But once again, these are just my thoughts. You are free to choose a different naming convention.

Treating Errors as Negative Goals in Google Analytics
Usually, goals are treated as positive (for a business) interactions that a visitor/user completed on a site. But it does not always have to be that way. It also makes sense to track a negative conversion rate (shout out to Mikko who was spreading this message in 2019).
What is the percentage of your sessions where visitors/users/customers had at least one error in the checkout? 20%? I think you should take a closer look at that.
If you want to treat every error (that is event-based) that was tracked on a page (and if you followed my naming convention), you could just go to GA Admin (in the bottom left corner) > View column > Goals and create a goal with the following settings:
- Custom template
- Name – anything you want
- Type – Event
- Event conditions:


This will treat any event of which Event Category equals to error.
If you want to be more specific and track only, say, checkout errors as negative goals, you can enter goal settings similar to these ones:

Once you set the goal, you can find them in multiple reports within Google Analytics, for example, Acquisition > All Traffic > Source/Medium

Or Conversions > Goals > Overview
GA Custom Alerts
I will not dive deeper into how to configure them. Instead, you can read this guide. But I still wanted to mention that such functionality exists. You can configure GA to send you email notifications if the number of certain errors on a page reaches a certain threshold.
Rule of thumb: set alerts only for the most essential problems like server errors or checkout. I would not personally monitor JavaScript errors with an alert because in many cases, users might not even notice that such error has occurred.
If your thresholds for alerts are too low, you will be overwhelmed by the number of notifications and eventually, will start ignoring them. It takes some time to find the proper (not too high but not too low either) threshold.
Final words
These were some of the ideas about Error Tracking with Google Tag Manager. Every business is different, therefore, types of errors that you can/will measure will also be different.
Personally, I always try to track:
- Form-related errors
- Checkout errors
- Registration errors
- 404 errors
The first three are directly related either to revenue or lead acquisition (that may eventually lead to revenue increase). 404 errors are quite easy to track and may help you identify missed opportunities when a visitor lands on your page, finds nothing and bounces.
Got something to add? Use the comments section below!