Обновлено 2023 января: перестаньте получать сообщения об ошибках и замедлите работу вашей системы с помощью нашего инструмента оптимизации. Получить сейчас в эту ссылку
- Скачайте и установите инструмент для ремонта здесь.
- Пусть он просканирует ваш компьютер.
- Затем инструмент почини свой компьютер.
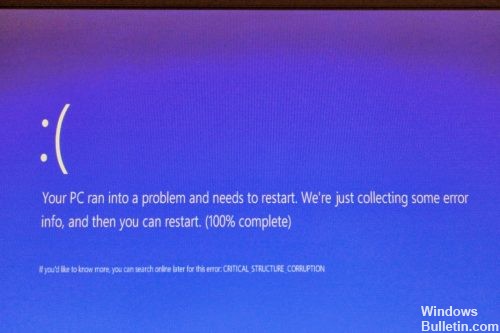
Критическая ошибка повреждения структуры данных означает, что Windows обнаружила, что один из ее файлов изменился или изменились данные в памяти одного из файлов. В данном случае это было ядро Windows 32. Этот файл часто подвергается атакам вредоносных программ, руткитов и вирусов.
Это может быть связано с плохо написанными драйверами устройств или неисправным оборудованием, например с неисправной памятью, проблемами с питанием, перегревом компонентов или оборудованием, превышающим пределы спецификации.
Как исправить ошибки STORE_DATA_STRUCTURE_CORRUPTION:
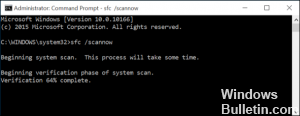
Исправьте ошибки реестра с помощью патча Sfc / Scannow
Есть способ решить проблему с реестром с помощью командной строки Windows. В большинстве случаев эта проблема решается путем размещения одного заказа в PDC, и вам даже не нужно ничего покупать.
- Итак, откройте CMD, как администратор.
- Затем введите команду «Sfc / Scannow» и нажмите Enter. Не закрывайте это окно PDC, пока проверка не будет завершена на 100%.
- Перезагрузите компьютер и проверьте его, если синий экран исчез, то ничего страшного.
Запустить DISM
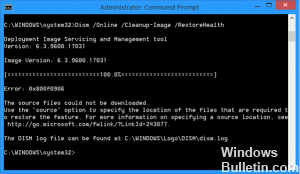
Если анализ SFC не смог решить проблему, мы попробуем расширенный инструмент для устранения неполадок. Как следует из названия, Deployment Image Service and Management (DISM) повторно использует образ системы для решения любых проблем на ходу.
Обновление за январь 2023 года:
Теперь вы можете предотвратить проблемы с ПК с помощью этого инструмента, например, защитить вас от потери файлов и вредоносных программ. Кроме того, это отличный способ оптимизировать ваш компьютер для достижения максимальной производительности. Программа с легкостью исправляет типичные ошибки, которые могут возникнуть в системах Windows — нет необходимости часами искать и устранять неполадки, если у вас под рукой есть идеальное решение:
- Шаг 1: Скачать PC Repair & Optimizer Tool (Windows 10, 8, 7, XP, Vista — Microsoft Gold Certified).
- Шаг 2: Нажмите «Начать сканирование”, Чтобы найти проблемы реестра Windows, которые могут вызывать проблемы с ПК.
- Шаг 3: Нажмите «Починить все», Чтобы исправить все проблемы.

Чтобы запустить DISM в Windows 10:
Откройте командную строку, как показано выше.
Введите следующую команду и нажмите Enter: DISM.exe / В сети / Очистить образ / Восстановить здоровье
Подождите, пока процесс не завершится.
Перезагрузите компьютер.
Если DISM не может восстановить файлы онлайн, попробуйте установить USB или DVD. Вставьте носитель и введите следующую команду: DISM.exe / Онлайн / Очистить образ / RestoreHealth / Source: C: RepairSource Windows / LimitAccess
Не забудьте заменить путь «C: RepairSource Windows» на вашем DVD или USB.
Проверка системной памяти
Системная память является первым аппаратным компонентом, который будет проверен на наличие BSOD, поскольку, вероятно, это первый основной компонент, который выйдет из строя при возникновении критической ошибки повреждения структуры. В Windows есть встроенное приложение для проверки системной памяти.
Нажмите кнопку «Пуск», чтобы открыть меню «Пуск».
Поиск диагностики памяти Windows.
Откройте его в режиме управления.
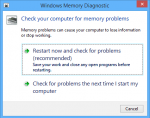
Выберите опцию «Перезагрузить сейчас» и проверьте наличие проблем. Это приводит к перезагрузке системы. После перезагрузки системы начинается тест памяти. Если тест не пройден, вам необходимо приобрести новую память.
Проверка просмотра событий

Event Viewer — это настольное приложение, которое позволяет администраторам и пользователям просматривать журналы событий на локальном или удаленном ПК для мониторинга событий в вашей системе. Он записывает программу, безопасность и системные события.
Нажмите Win + R и введите eventvwr.msc, чтобы открыть окно просмотра событий.
Разверните древовидную структуру на левой странице и следуйте по этому пути: Протоколы Windows> Система.
Прежде чем проверять все события в окнах системных событий CRITICAL_STRUCTURE_CORRUPTION происходит. Если есть одна или несколько ошибок, найдите и исправьте их одну за другой.

CCNA, веб-разработчик, ПК для устранения неполадок
Я компьютерный энтузиаст и практикующий ИТ-специалист. У меня за плечами многолетний опыт работы в области компьютерного программирования, устранения неисправностей и ремонта оборудования. Я специализируюсь на веб-разработке и дизайне баз данных. У меня также есть сертификат CCNA для проектирования сетей и устранения неполадок.
Сообщение Просмотров: 97
STORE_DATA_STRUCTURE_CORRUPTION is a BSOD error found to occur in Windows 10 devices. This Blue Screen of Death issue refers to the detection of corrupt Data Structure by Store Component itself. The stop error has the bug check value of 0x000001C7.
The error occurs with unusual messages when attempting to start a program or ending it. Desktop area freezes for a while and makes working along impossible. But the most annoying issue you will come across is continuous reboot of the PC. STORE DATA STRUCTURE CORRUPTION commonly occurs because of outdated device drivers, Virus infection, incorrect memory allocation, having conflicting applications in the system, missing necessary OS resources. Furthermore, having low Hard Disk Space, defective areas in it, using additional drive might come out with the same result. We have to eliminate this naughty bug forever and so go through the below-mentioned workarounds.
Here is how to fix STORE_DATA_STRUCTURE_CORRUPTION Error BSOD Windows 10 –
Stop Automatic Restart for Windows to make a proper environment
As Windows 10 will tend to have continuous abnormal reboot when diagnosed with STORE_DATA_STRUCTURE_CORRUPTION Error BSOD, you will run in short of an opportunity to understand the root cause and probable resolution. So making the environment to deploy workarounds comes at the top of the priority list. We can block this Automatic Restarting easily using the following guidelines –
- First of all, save ongoing applications and close it. Move directly to the Desktop area by making a combined press of Win+D.
- Now, when in place make a right click on This PC icon and choose Properties from the visible menu.
- On the following page, click “Advanced system properties” from the left pane.
- System Properties wizard will be visible in a moment where you need to shift into its Advanced tab.
- Roll the pointer to Startup and Recovery section and hit Settings button from here.
- Prior to opening a new wizard on display, unmark the box before Automatically restart located in System failure region. Select Ok button at the tail end and save these changes.
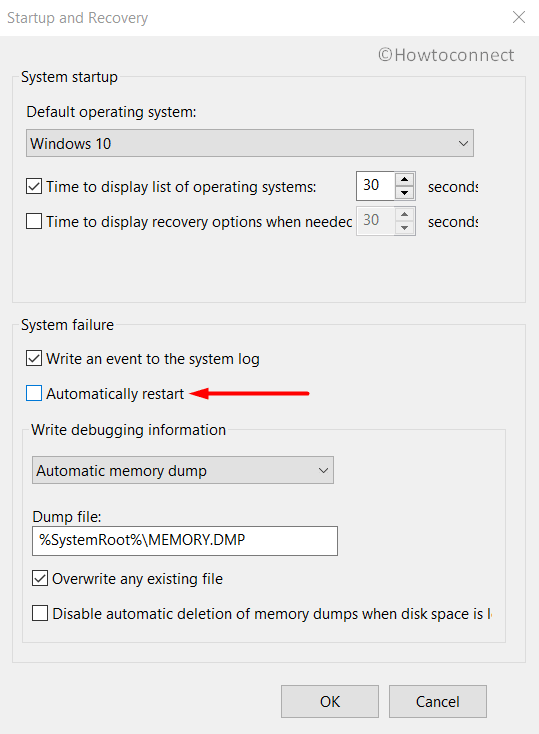
Now, when these changes are made, Windows will not reboot anymore automatically and you can have enough time to work along.
Run Windows Blue Screen Troubleshooter
As BSOD issues were unstoppable in Windows 10, Microsoft thought for an alternative and the best outcome represented with developing a default tool. Windows Blue Screen Troubleshooter is a built-in utility that can completely resolve to stop errors and you can have a trouble-free device as the aftermath. To have this super exciting tool, you need to have Windows 10 Fall Creators Update or higher version. When you own it, the procedure to deploy utility is as follows –
Step-1: Move the pointer to the left bottom corner and do a click on the Start menu.
Step-2: Once the menu spreads up, do a click on the Settings cog to launch it.
Step-3: When in the app accessible area, select Update & Security and load the consequent page.
Step-4: Moving ahead, choose Troubleshoot from the left-hand side and straightway jump next to the adjacent pane.
Step-5: Reach to Blue Screen option in the list and perform a click on it.
Step-6: Hit Run the Troubleshooter option once show up in extended pane and allow the tool to take action.
After this utility resolves STORE_DATA_STRUCTURE_CORRUPTION Error BSOD, you can have relief.
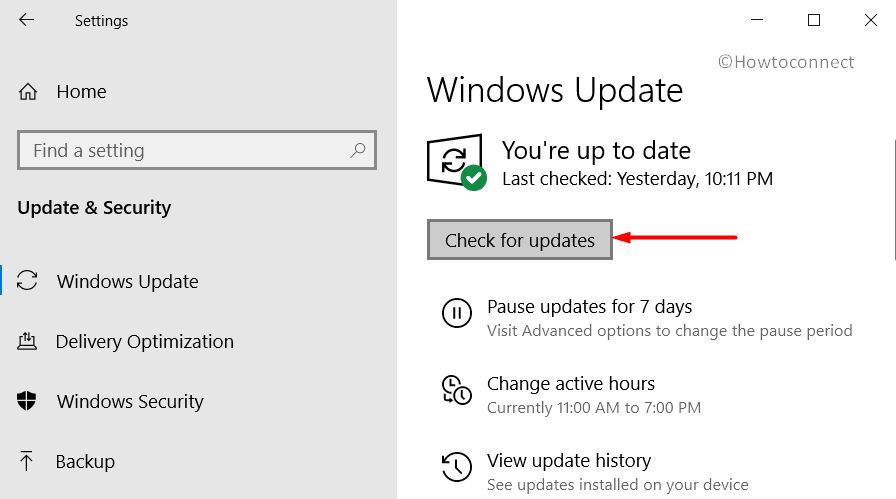
Install Cumulative Updates patches right away
Microsoft keeps on releasing the cumulative updates, major patches regularly. These are packets of bug fixes as well as a collection of recent features. It’s shocking if we continuously ignore these and fall into STORE_DATA_STRUCTURE_CORRUPTION Error BSOD. Let’s make the OS stronger by installing the patches in below method –
Important- Manage to get connected with Internet Connection via Ethernet cable or Wi-Fi before starting this resolution. In case of using the Data from Mobile Hotspot, ensure disabling Metered Connection as there will be no downloading in that mode.
- Open Windows Settings by making a combined press of “Win logo + I” hotkeys.
- From app UI, reach out to Update & Security region and do a click on it.
- Prior opening to additional settings page, choose Windows Update in the left pane.
- Transfer self to corresponding right side and hit a click on Check for updates button. You might see “You’re up to date” message, ignore it.
- Upon arriving all the patches here, make a click on Download located below each.
- Downloading will start immediately and after it gets over, the installation will be initiated autonomously.
- Don’t leave the device unattended and restart once asked.
When the Windows is up to date, STORE_DATA_STRUCTURE_CORRUPTION Error BSOD will be disappeared hopefully.
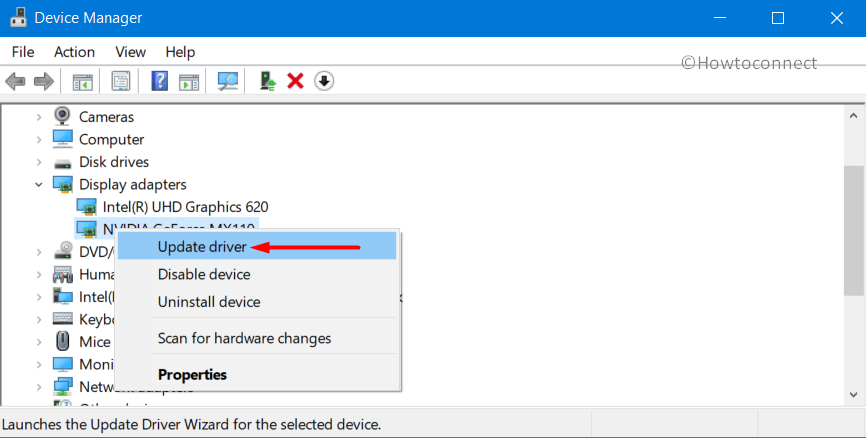
Update Drivers to solve the Blue Screen error STORE_DATA_STRUCTURE_CORRUPTION
Every single time, we devote to find the reason behind Stop errors, outdated device drivers come at the top. Old, troublesome drivers can be made up to date using Windows Device Manager easily. Drivers need update are indicated with highlighted indication hence task becomes easy. Let’s launch the default app and continue task using the below guidelines –
- Perform a combined press of “Windows logo and R” keys to open the Run dialog box.
- In the text box available here, type devmgmt.msc and click Ok button.
- Device Manager once unrolls on display, you need to have a close glance in the console for an exclamation mark in it.
- If found, expand the sane by clicking and do a right click on the drivers.
- Select Update driver option to initiate the process in the first place. Follow the further instructions as coming on display and complete the method.
When all these drivers get updated, there should not be any more STORE_DATA_STRUCTURE_CORRUPTION Error BSOD in your Windows 10.
Enter Safe Mode
When a Windows Device is booted in Safe Mode, it starts with loading only basic processes and services. Hence, heals lot many crucial issues easily and completely. This method is prevalent from ancient times and came forward whenever Windows fall in trouble. Let’s Boot your defective Computer in Safe Mode using below steps –
- Hover the pointer to Start menu and do a right click on it eventually.
- When the Win+X Menu shows up, choose Run.
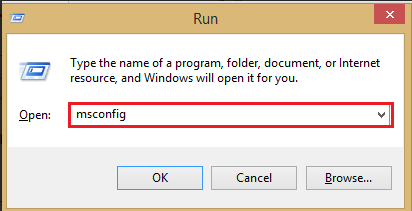
- Once you come across a text box, type msconfig, and press Enter key.
- On immediate effect, System Configuration popup window will come in the view.
- Move to its Boot tab and reach out to second half named Boot options.
- Proceeding ahead, check the box before Safe Boot and make grayed out options alive.
- Moving ahead in the options, hit the radio button for Minimal to continue.

- From the bottom of this page, hit Apply and then Ok afterward to save these changes.
- Now, leave the wizard and reboot the Windows initially following the usual method. (Start menu> Power cog> Restart).
- On the next powering up, keep on tapping F8 key at a stretch.
- The next page will come ahead and choose the Safe Boot option.
- Get into the Safe Mode in the next step automatically.
Perform Windows Defender Full Scan
Malware is present everywhere around and we all are well familiar with it. Still, we fight to escape from these culprits as they often come in disguise. When these bugs enter into the system, deletes necessary elements and device runs in STORE_DATA_STRUCTURE_CORRUPTION Error BSOD. Windows Security developed by Microsoft for Windows 10 can offer you the best deal of this age in Virus affairs. We will now clean all the threats launching the default app in the below process –
- Take the mouse pointer to bottom left end and eventually make a click in the Search icon.
- When the Taskbar Search opens up, type security in the blank search area and select Windows Security peeking in the result.
- Moving ahead to the app, choose Virus & threat protection section lying in the left pane.
- After jumping on to the corresponding pane, do a click on Scan options link.
- Prior to opening all the methods, select radio button ahead of Full scan and hit Scan now to start detecting for malware.
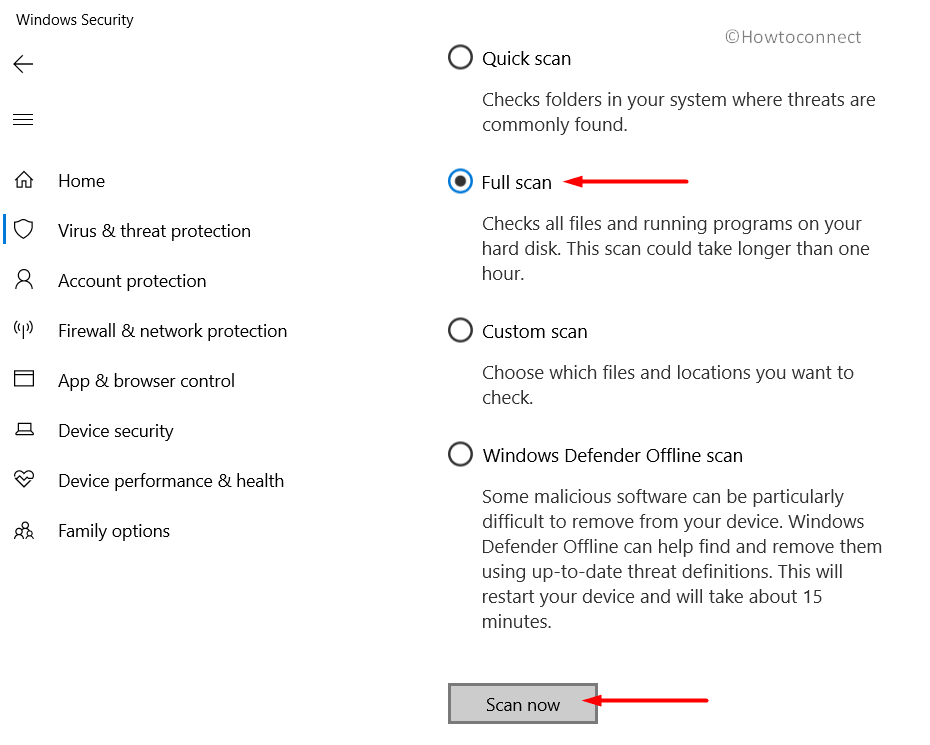
- Upon finishing the process, you will be shown the result. If there is any vulnerability present, make a click on Clean threats option to dismiss them.
- On the following page, choose Remove and then Start actions among three available options and let the utility to take measures.
Use System File Checker – Quick heal for OS component corruption
Windows can face system files corruption, missing DLL elements quite often and bring up STORE_DATA_STRUCTURE_CORRUPTION Error BSOD. The execution of System File Checker is the quick heal solution here. You can avail the utility in the below procedure –
- Open the Taskbar search by making together press of Win+S keys.
- In the search box given here, type cmd.exe and do a right click on Command Prompt once hits in the result.
- Select Run as Administrator from available options to move ahead.
- After User Account Control asks for your consent, provide approval by choosing Yes.
- On the Black Elevated Command Prompt window, type following command and hit Enter key.
sfc /scannow
Immediately, the System File Checker will start looking for corrupted files as well as missing DLL elements. Fixing will start automatically after detection. This might take a quite long period, hence, wait for the process to end normally. Once these issues resolved, STORE_DATA_STRUCTURE_CORRUPTION Error BSOD Windows 10 will disappear.
Uninstall Similar Programs to avoid collision between them
Two similar apps when staying close can come in the collision and this mislead will result in erasing system components necessary for OS. Hence STORE_DATA_STRUCTURE_CORRUPTION Error BSOD is imminent and we cannot let it happen. As a resolution process, removing one of these will be enough. Let’s move with below guidelines to uninstall an application –
- Get access to Run, type appwiz.cpl in the textbox and hit the Ok button from this dialog.
- Program and Features window upon unrolling, reach to the applications responsible for causing BSOD error.
- Do a right click on each at a time and select Uninstall option.
- Keep on following the instructions coming on display to completely remove these programs.
- When the process is accomplished, Restart the device and let it power up again.
- Check if there is any BSOD issue present. If negative, you can now Download and install the same app again.
Settle Memory Problems and defective areas in RAM
STORE_DATA_STRUCTURE_CORRUPTION Error BSOD is an outcome of defective memory devices and RAM having defective areas in it. We can fix these issues quite easily only letting the “Windows Memory Diagnostic” work along. Here is how to do this task –
- Press the Windows key and I together until Windows Settings app launches.
- Once opened the app, type memory in the search box available here.
- Select “Diagnose your computer’s memory problems” after being visible.
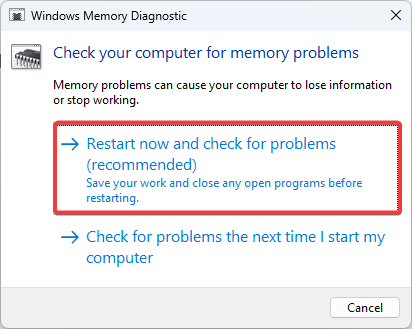
- Windows Memory Diagnostic will come up in the process and you need to make a click on “Restart now and check for problems (recommended)” located in the wizard.

- Windows will Restart initially for the first cycle and when coming back to operation, a blue screen will start detecting memory problems in the computer.
- When the progress rate hits 100%, it will again force the OS to reboot for the second time.
- Returning to Desktop further, you can check the result of diagnosis in the Notification area of System Tray.
Patch up Windows Image issues using DISM tool
Corrupted Windows Image files come ahead to cause STORE_DATA_STRUCTURE_CORRUPTION Error BSOD quite often. As a fix, the DISM tool will be handier. The guidelines to call up the utility is as follows –
With the rolling cursor to Taskbar area, do a right-click on an empty field.
From the menu, select Task Manager and open the app in a separate window.
Moving on the app UI, select File option from the left top corner and select also Run new task option.
Type cmd in the text field and also check the box saying “Create this task with administrative privileges”.
Press the Enter key and click Yes when UAC prompt shows up.
In the appearing black window, type the following command and hit Enter key.
DISM.exe /Online /Cleanup-image /Restorehealth
The tool will start taking actions against corrupted Windows image files and fix them. You can get the flawless PC after the task gets over.
Execute System Restore and abandon recent changes
You might come across STORE_DATA_STRUCTURE_CORRUPTION Error BSOD just after carrying out a task of installing something in Windows. Uninstalling a program might give the same result. The reason is, traces in Windows Registry after those changes moved in the wrong way. A simple technique to avoid this error is to execute the System Restore and head back to the previous point.
Note- You have to own previously created Restore points to use this workaround. Skipping is recommended if you lack these. Fortunately, if your Windows have such points, move with below instructions –
- Press the Windows Key and upon opening the Start menu, type rstrui.
- Select rstrui Run command from the Best match results.
- In the upcoming wizard, hit Next button to proceed ahead.
- On the consequent page, select Show more restore points and uncover all previous ones.
- From the list make a click on the latest one and hit Next button once again.
- After the following page come to vision, do a click on Finish and let the utility to start restoring.
Remove Windows Update Files fall in Manipulation
We have discussed the necessity of Windows Update before and amazingly, the process is an autonomous one. But, if this well-furnished process ends up in termination abnormally, it might be calling STORE_DATA_STRUCTURE_CORRUPTION Error BSOD immediately. The ultimate resolution is to cut these files off from system going through below steps –
- Open the Windows Settings app and make a click on Update & Security tile.
- On the next page upon coming up, select Windows update from the left side and jump next to the corresponding pane.
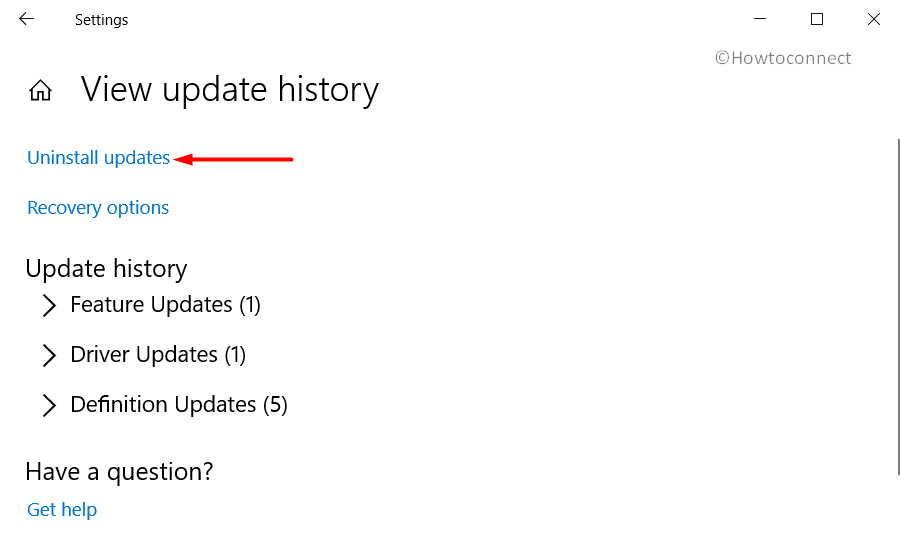
- Perform a click on View update history link to pass forward next page.
- Here, select the Uninstall updates link and open up a new window entitled Installed Updates.
- Reach to the last received patch and select it afterward.
- Hit Uninstall option visible at the top ribbon to start removing these files.
- Start following the next moves according to the instruction given on screen until these get removed.
Disconnect the Additional Hard Disk and Re-plug when BSOD error resolves
Some people have observed symptoms of STORE_DATA_STRUCTURE_CORRUPTION Error BSOD just after starting to use an additional HDD. These days, an additional Hard Drive is necessary for versatile reasons and if you are also facing a similar issue, the solution is pretty simple as well. Just remove the disk for a while and reconnect after confirming that there is no more issue in the system. Move ahead with these instructions –
- Disconnect the Hardware items one by one first and keep them in a safe location.
- Restart Windows 10 PC in a normal way (Start menu> Power cog> Restart).
- Prior to returning in desktop, check if there is any STORE_DATA_STRUCTURE_CORRUPTION Error BSOD Windows 10 present.
- In case of resolved the issue, you can now start connecting them again.
- When finished plugging in, launch the web browser and install their latest drivers.
- Install these drivers to use safely the accessories.
Discard all third Party Anti-malware Programs in the First place
There was a time before Microsoft developed Windows Security, we needed an Anti-virus program most in case of malware or virus attacks. But those days have gone past and we have the best utility of all ages. Having a third party free Anti-malware solution can be a reason of Stops errors and we need to remove them if present in the system. Here is how to remove an app –
Step#1: Manage access to Settings app using any of the available methods.
Step#2: From the Home page, head to Apps segment and make a click on it.
Step#3: The next page once loaded, select Apps & features lying in the left pane and jump to alongside right.
Step#4: Reach out to the desired program in the list and select it to expand.
Step#5: Hit Uninstall option and let the removal process begin.
Step#6: Choose Yes when UAC prompts for permission.
Step#7: Keep following on-screen guidelines until it is removed completely.
Heal the Poor Hard Disk Sectors present in the system
Hard Disk segments can have bad areas in it after using for a long time. We can neither ignore this fact nor can go for a full replacement. As STORE_DATA_STRUCTURE_CORRUPTION Error BSOD issue is an outcome of that, we have to fix those segments. Disk Checking Utility will be the best tool being executed in an Elevated Command Prompt. Proceed with below guidelines to avail –
- Manage to get entrance in the Elevated Command Prompt using any of the above guidelines.
- When in the black window, type the following command at the base of winking cursor –
chkdsk C: /f /r /x - Here, the usual command is chkdsk only and upon deployment, it will show only the disk status. As the motive is little different, we have added additional characters explaining following-
C:- this is the Drive where we have stored and installed Windows 10. If you have done the same task in another drive, never mind replacing C: with D:, E: or any.
f- A representation to indicate fixing of brought out troubles from volume.
r- Detects the available bad areas present in the disk volume.
x- Unmount the total volume to facilitate the detection process before it starts.
- With all the notations typed, press Enter key and let the utility to work. This task will take quite a long time and you need to be patient until it ends completely.
- After being finished, reboot the device and prior to coming back in desktop, check if there is any BSOD error in the system.
Clean Junks present in Disk Storage and recover Space out of it
Junk files are stored in Disk space and they are nonfunctional. Unnecessarily occupy storage and when turning big in amount, Hard Disk runs in lack of space. As an outcome, Windows runs slow and BSOD error shows up. Cleaning a disk is possible in a single shot using Disk Cleanup tool and here is how to move for this –
- On Cortana search, type cleanmgr and when Disk Cleanup is available as the Best match, select it.
- Immediately a small wizard prompts for choosing the preferable drive to carry on freeing up.
- Select C: by clicking the dropdown menu and press the Enter key.
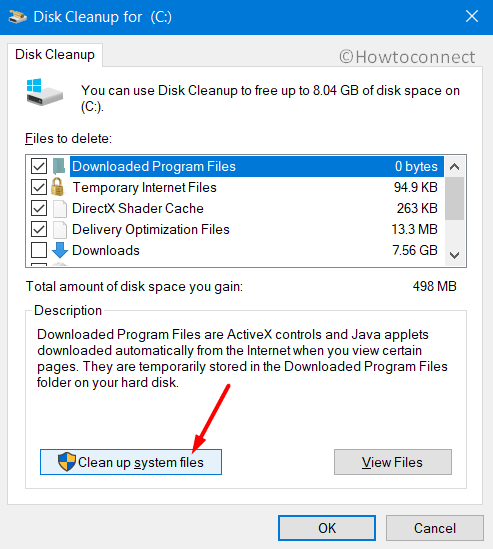
- When Disk Cleanup tool is upfront after calculating recoverable space in the drive, move to its tail end.
- Select Clean up system files from there to proceed.
- Meanwhile, the small dialog will come up again to choose the desired disk. Select C: again and hit Enter key.
- After the Disk Cleanup for C: wizard hit on screen, proceed ahead to Files to delete segment in this page.
- Check all the boxes available here except Downloads and finally hit Ok button to start the cleaning.
Note- Before proceeding for deleting, make sure nothing left in the Recycle Bin to avoid losing important data.
Up to now, we have discussed various workarounds that might come helpful for resolving STORE_DATA_STRUCTURE_CORRUPTION Error BSOD in your Device. We recommend you to perform a complete reinstallation of Windows 10 as a final solution. Obviously, that will heal all errors and existing issues if done with perfection.
If you are truly heading for that, make sure to save all necessary files, data in a Backup folder. Recommended to carry it out in external drive or USB. If you are not well competent, seek help from skilled people or hire professionals as anything unusual here will lead to complete damage. Hope you can finally recover the PC from the grasp of STORE_DATA_STRUCTURE_CORRUPTION Error BSOD.
Methods:
Method-1: Stop Automatic Restart
Method-2: Run Windows Blue Screen Troubleshooter
Method-3: Install Cumulative updates patches
Method-4: Update Drivers
Method-5: Enter Safe Mode
Method-6: Perform Windows Defender Full Scan
Method-7: Use System File Checker
Method-8: Uninstall Similar Programs
Method-9: Settle Memory Problems
Method-10: Patch up Windows Image issues using DISM tool
Method-11: Execute System Restore
Method-12: Remove Windows Update Files
Method-13: Disconnect the Additional Hard Disk and Re-plug
Method-14: Discard all third Party Anti-malware Programs
Method-15: Heal the Poor Hard Disk Sectors
Method-16: Clean Junks present in Disk Storage
That’s all!!
Repair any Windows problems such as Blue/Black Screen, DLL, Exe, application, Regisrty error and quickly recover system from issues using Reimage.
Some specialized repair tools may help
by Radu Tyrsina
Radu Tyrsina has been a Windows fan ever since he got his first PC, a Pentium III (a monster at that time). For most of the kids of… read more
Updated on December 18, 2022
Reviewed by
Alex Serban

After moving away from the corporate work-style, Alex has found rewards in a lifestyle of constant analysis, team coordination and pestering his colleagues. Holding an MCSA Windows Server… read more
- Store data structure corruption is a BSOD error, and in this guide, we’ll show you how to fix it.
- To solve this issue, we suggest using specialized BSOD repair software.
- Alternatively, update your drivers to the latest version to avoid any problems.
XINSTALL BY CLICKING THE DOWNLOAD FILE
This software will repair common computer errors, protect you from file loss, malware, hardware failure and optimize your PC for maximum performance. Fix PC issues and remove viruses now in 3 easy steps:
- Download Restoro PC Repair Tool that comes with Patented Technologies (patent available here).
- Click Start Scan to find Windows issues that could be causing PC problems.
- Click Repair All to fix issues affecting your computer’s security and performance
- Restoro has been downloaded by 0 readers this month.
BSOD errors can appear on any PC, and one BSOD error that users reported is the Store data structure corruption error.
The error will crash your PC and cause you to lose any unsaved data, but there’s a way to fix this issue, and today we’ll show you how to do it. But first, let us discuss some possible triggers.
What causes store data structure corruption?
Like many other PC errors, this error can be triggered by several elements. From user experience, here are the top ones to be aware of:
- Outdated drivers – The video card driver is the culprit most of the time and would need to be updated.
- Third-party tools – For some users, it may be because of some conflicting software. In such cases, the crashes will continue until the software is uninstalled.
- OS problem – In rare cases, users have noticed that it may be an OS problem triggering data structure corruption.
Note that this data critical structure corruption happens across different brands, including Dell and HP.
Let us now explore some solutions.
How do I fix Store data structure corruption error?
1. Use specialized repair software
Fixing Store data structure corruption error on Windows 10 doesn’t have to be a hassle, especially if you’re using specialized BSOD repair software.
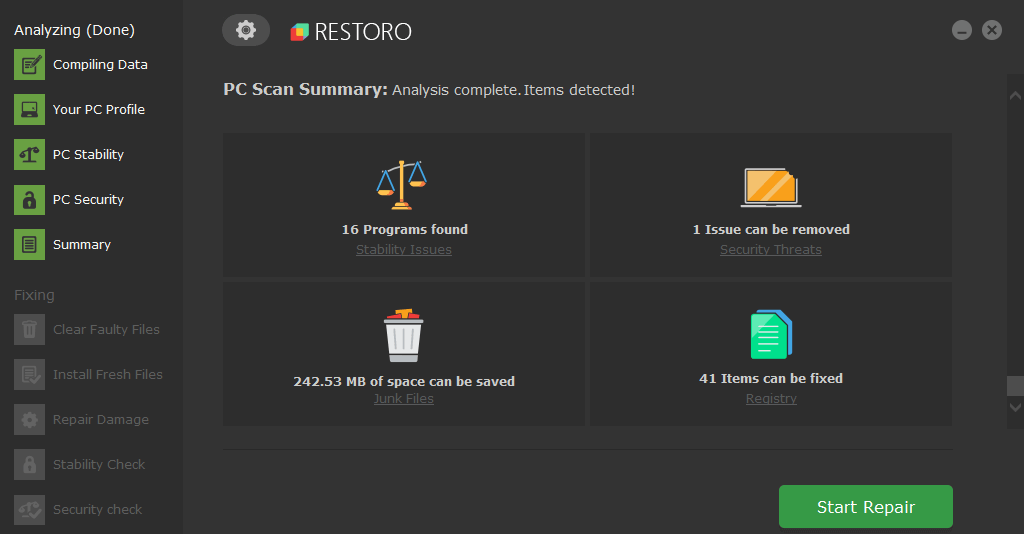
Restoro is powered by an online database that features the latest functional system files for Windows 10 PCs, allowing you to easily replace any elements that can cause a BSoD error.
This software can also help you by creating a restore point before starting the repairs, enabling you to easily restore the previous version of your system if something goes wrong.
This is how you can fix registry errors using Restoro:
- Download and install Restoro.
- Launch the application.
- Wait for the software to identify stability issues and possible corrupted files.
- Press Start Repair.
- Restart your PC for all the changes to take effect.
As soon as the fixing process is completed, your PC should work without problems, and you will not have to worry about BSoD errors or slow response times ever again.
⇒ Get Restoro
Disclaimer: This program needs to be upgraded from the free version in order to perform some specific actions.
2. Perform a clean boot
- Press Windows + R, type msconfig, and hit Enter.

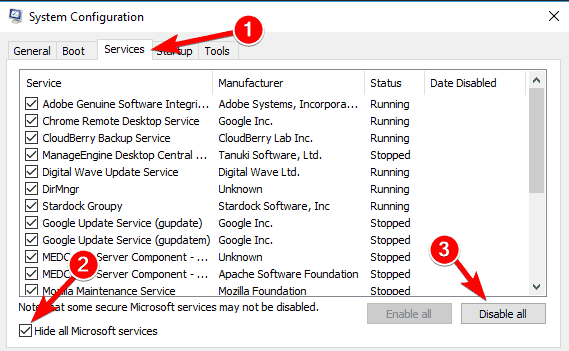
- The System Configuration window will appear. Select the Services tab. Check Hide all Microsoft services and then click Disable all.

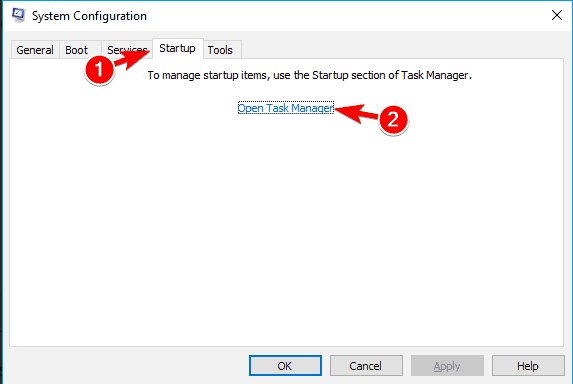
- Go to the Startup tab and click on Open Task Manager.

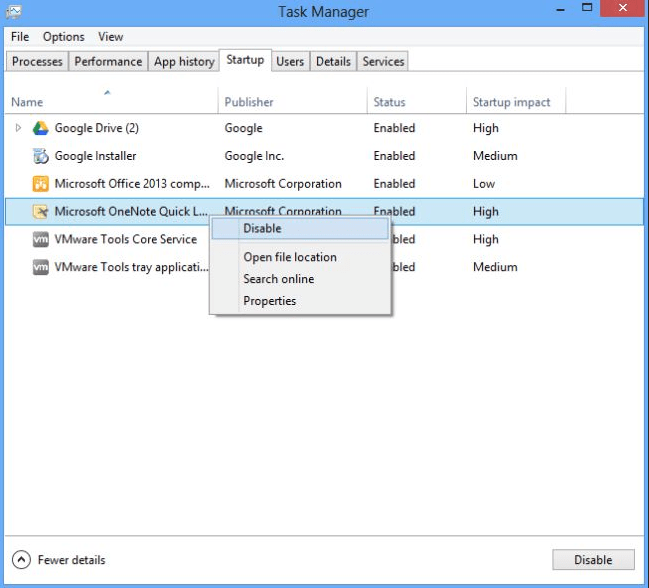
- In the Task Manager, Disable each startup item.

- Restart your PC.
If this method helped stop the Store data structure corruption error, you need to enable services one by one until you replicate the issue.
By doing so, you should be able to find the problematic service or software.
3. Update your video card driver
Occasionally, your graphics card can cause Store data structure corruption on Razer Blade or any other PC. To fix this problem, it’s advised to update your drivers.
To do this accurately, you should manage your drivers using specialized software that can provide essential support for installing or updating any driver.
Some PC issues are hard to tackle, especially when it comes to corrupted repositories or missing Windows files. If you are having troubles fixing an error, your system may be partially broken.
We recommend installing Restoro, a tool that will scan your machine and identify what the fault is.
Click here to download and start repairing.
⇒ Get DriverFix
4. Run Windows Memory Diagnostic
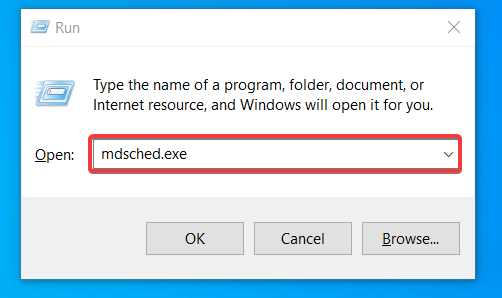
- Press Windows key + R, type in mdsched.exe, and hit Enter.

- Select Restart now and check for problems (recommended).

- If installed, run a hardware diagnostic tool from the manufacturer.
This solution can be helpful if the Store data structure corruption due to undervolt issues. If you overclocked your memory, reset the clock settings to fix the problem.
5. Uninstall problematic software
Certain users have reported on forums that specific software programs may cause the blue screen of death store data structure corruption error.
If you have installed Daemon Tools, Intel HAXM (Hardware Accelerated Execution Manager), Alcohol 120%, or Mac Driver, they may be responsible for this issue.
We recommend you find that specific software on your computer and update it to the last version or remove it.
To completely remove specific software, it’s recommended to use the best uninstaller software due to its powerful functionalities of removing undesirable apps from your PC.
If none of the solutions was unsuccessful, you have one reliable solution: reinstall Windows 10.
After you have reinstalled your Windows 10, the store Data structure corruption error will not appear again.
BSOD errors can create many problems, but they can be fixed with specialized tools in most cases.
Did our solutions help you fix Store data structure corruption error? Let us know in the comments below.
![]()
Newsletter
This tutorial is about How to Fix ‘Store Data Structure Corruption’ Issue on Windows 10 PC. Recently I updated this tutorial and will try my best so that you understand this guide. I hope you guys like this blog, How to Fix ‘Store Data Structure Corruption’ Issue on Windows 10 PC. If your answer is yes after reading the article, please share this article with your friends and family to support us.
Check How to Fix ‘Store Data Structure Corruption’ Issue on Windows 10 PC
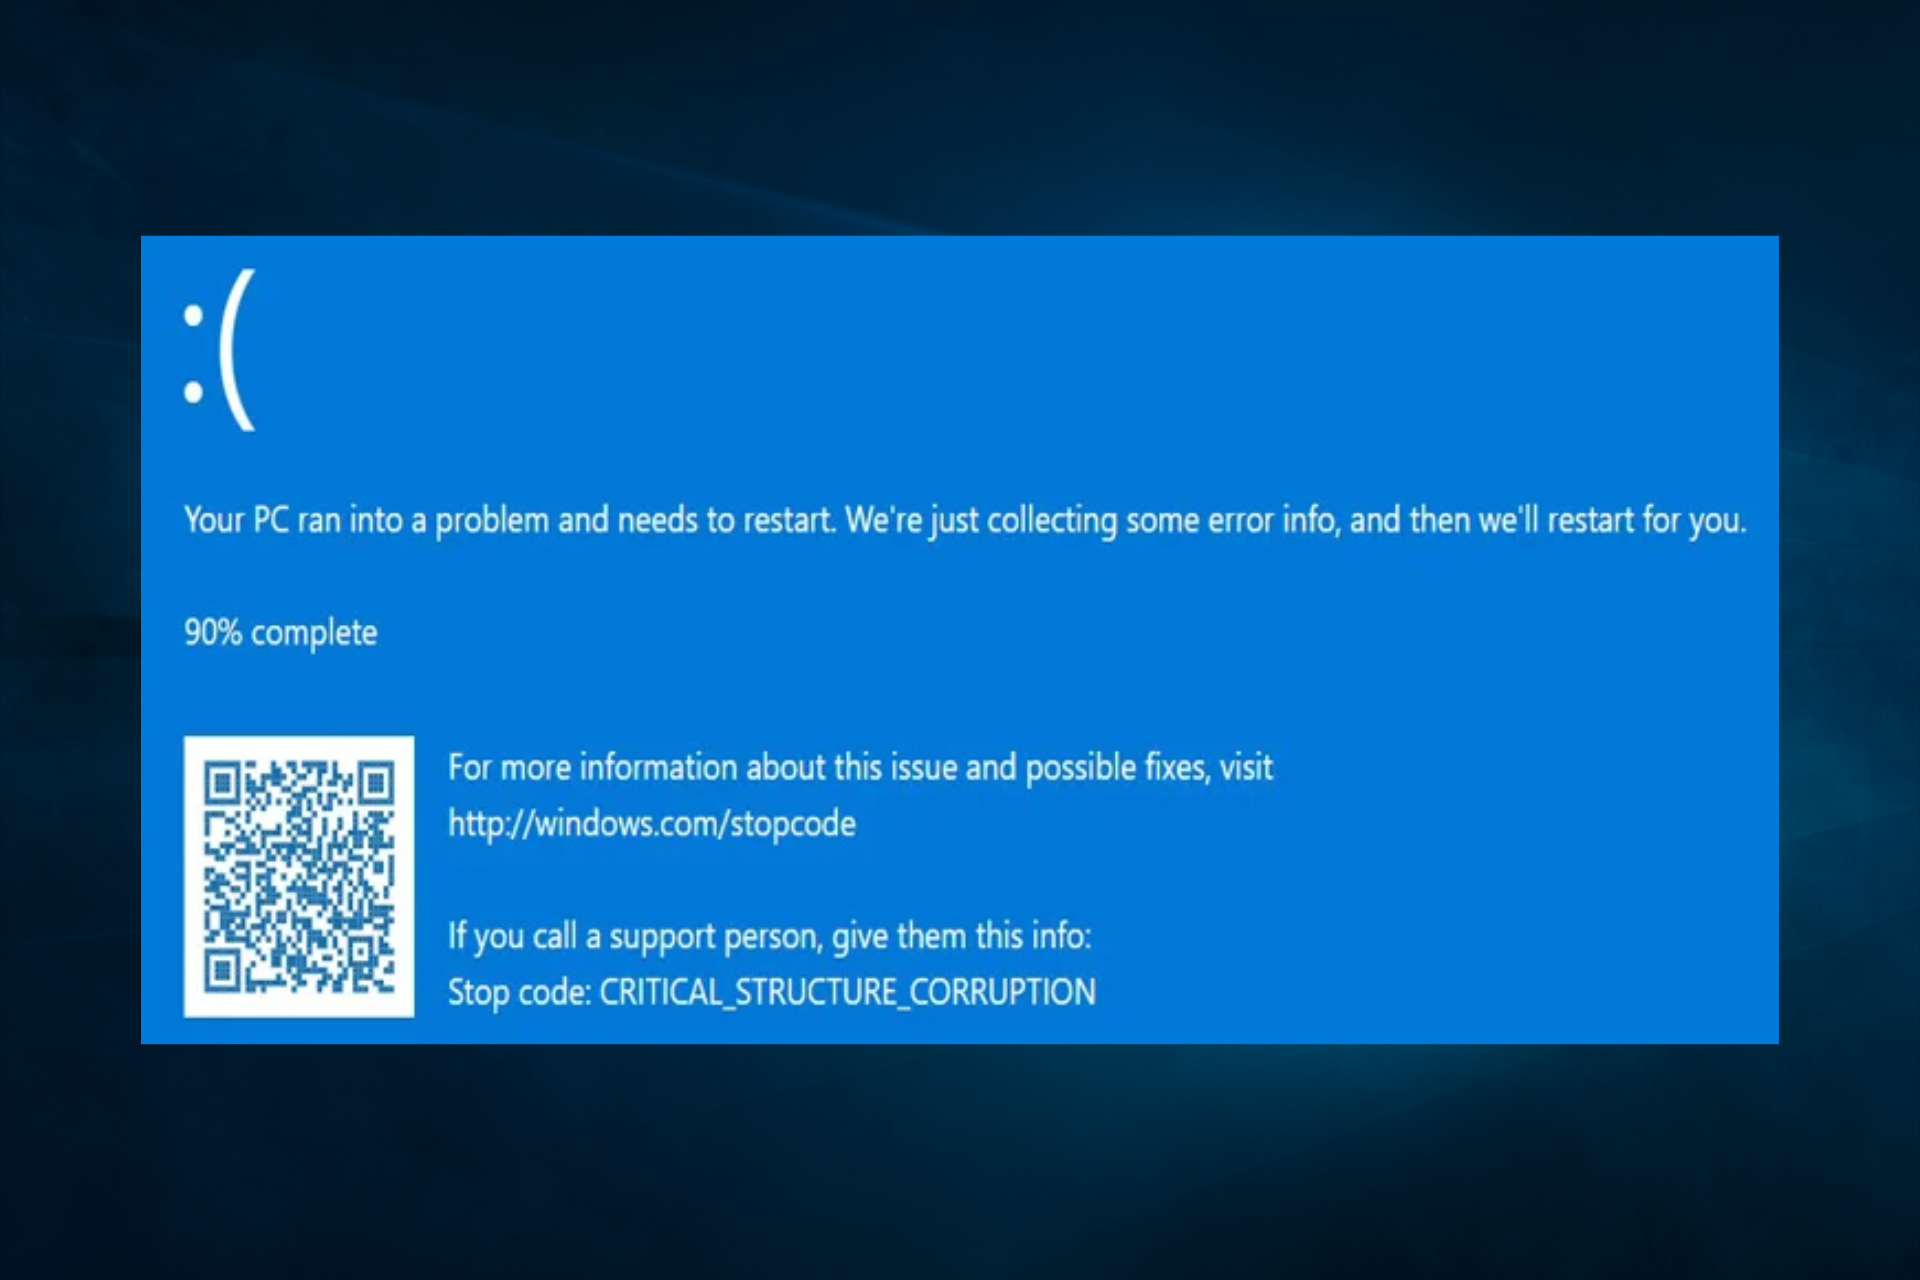
Many people have started complaining of receiving a blue screen of death that says “store data structure corruption”. They tend to do well after they are done playing the game, they have turned everything off, and are going to disconnect from their computers or do something else.
It’s annoying and it can happen once and it’s done, or it can happen over and over again. It is usually accompanied by a BSOD, but not always. What causes this problem and how can you prevent it from happening again? We have some potential solutions.
Uninstall any known problematic apps
There are some known applications that have been reported to cause the “CRITICAL_STRUCTURE_CORRUPTION” error in Windows 10. Uninstalling these applications may correct the error so that it does not occur again. At the moment, some of the known applications that cause this error are Daemon Tools, Blue Stacks, Alcohol 120%, Virtual Box, Intel Hardware Accelerated Execution Manager, and Mac Driver.
These are just a few, so we recommend using the Windows Event Viewer (go to Method 5) to identify any other possible applications. If you have any of these apps installed on your device, follow the simple guide below to remove them. Doing so can potentially eliminate the possibility of this blue screen error happening again.
- Click the Start menu on the taskbar, then select “Settings.” Alternatively, you can press Windows + I keys on your
- keyboard to open the application.
- Click on the “Applications” tile.
- Use the search function to find the problematic application that you have installed.
- Click on the application and choose the “Uninstall” option.
- Follow the instructions on the screen to successfully remove the application.
- When the uninstallation is complete, restart your computer.
Update your graphics driver
Keeping your drivers up to date is important. An outdated graphics driver can cause frustrating errors on your device and can ultimately lead to blue screens. Fortunately, updating these drivers is fairly easy and requires no experience; just follow our steps to make sure you have the latest version of your driver.
First, you need to check which graphics card you are using. If you still don’t know the exact model, follow these steps:
- Press Windows + R keys on your keyboard to open the Run utility. Here, just type “dxdiag” and hit the OK button.
- The DirectX Diagnostic Tool should open on your screen. Use the header menu to switch to the “Display” tab.
- In the “Device” section, check “Name”. You should be able to see the manufacturer and model of the graphics card. Keep this in mind for the next steps.
Once you’ve identified your graphics card, head over to the manufacturer’s website and find a dedicated download page for drivers. We have compiled a list of some popular graphics card brands with links to their download page:
- Intel Drivers and Software Page
- NVIDIA Driver Download Page
- AMD Drivers and Support Page
- Find your graphics card using the built-in search function, then download your latest driver compatible with your system.
- Install the latest driver by double-clicking the downloaded file and then following the on-screen instructions.
Run the Windows Memory Diagnostic Tool
Windows 10 comes with many troubleshooting tools to ensure that you can easily diagnose and fix problems without having to go to customer service. One of these tools is Windows Memory Diagnostic, which is capable of identifying problems with your memory.
Here’s how you can run it.
- Press Windows + R keys on your keyboard to open the Run utility. Here, just type “mdsched.exe” and hit the OK button.
- Choose “Restart Now and Check for Problems (Recommended)” to be instantly a memory scan. Make sure to save your files and close all open applications before clicking this option. Otherwise, choose “Check for problems next time I start my computer” and restart the device at a more convenient time.
- During the next boot, you will see that the Windows Memory Diagnostic Tool checks for problems. Make sure you read all the information displayed on the screen and wait for it to complete.
- After the memory test is complete, you can see if any problems were identified. If there were none, luckily your memory works fine.
Run the System File Checker
The System File Checker is a tool available in Windows 10 by default. Also called “SFC scan”, it is the fastest way to automatically repair corrupted system files and other problems.
- Press Windows + R keys on your keyboard. This will open the Run utility.
- Type “cmd” and press the Ctrl + Shift + Enter keys on your keyboard. By doing this, you are starting the command prompt with administrative permissions.
- If prompted, click Yes to allow the command prompt to make changes to your device.
- Once at the command prompt, type the following command and hit Enter to run it: sfc / scannow Wait for the SFC scan to finish scanning your computer and repairing corrupted files. This can take a long time; make sure that
- it does not close the command prompt or shut down the computer.
- Restart your device after the scan is complete.
Check the event viewer
Not sure which application, service, or other error caused the “Blue Screen of Death” to appear on your screen? Don’t worry, we know the perfect built-in tool to identify what exactly happened on your device. It is the event viewer.
With the Event Viewer, you can easily see the last thing that happened on your computer before it crashed. This will allow you to identify exactly what is causing your problem and resolve it more effectively by removing the application or disabling the service.
- Press Windows + X keys on your keyboard at the same time, then choose “Event Viewer” from the context menu.
- Click on “Windows Logs” within the left side panel, then choose “System”. This should change the middle section to show all events with timestamps.
- Locate the last event logged before the “CRITICAL_STRUCTURE_CORRUPTION” error occurred on your system. If you see a certain application or service, it is most likely the culprit.
Final remarks: How to Fix ‘Store Data Structure Corruption’ Issue on Windows 10 PC
I hope you understand this article, How to Fix ‘Store Data Structure Corruption’ Issue on Windows 10 PC. If your answer is no, you can ask anything via the contact forum section related to this article. And if your answer is yes, please share this article with your friends and family to give us your support.
Dian Erwin
Dian Erwin is a writer for Bollyinside, covering topics related to computing, such as laptops, tablets, Windows, and iOS. Tony spends much too much of his free time on Twitter, reading speculative fiction novels, playing video games, and reading comic books. He also enjoys reading video game manuals.
| title | description | keywords | ms.date | topic_type | api_name | api_type | ||
|---|---|---|---|---|---|---|---|---|
|
Bug Check 0x1C7 STORE_DATA_STRUCTURE_CORRUPTION |
The STORE_DATA_STRUCTURE_CORRUPTION bug check has a value of 0x000001C7. It indicates that the store component detected a corruption in its data structures. |
|
01/28/2019 |
apiref |
STORE_DATA_STRUCTURE_CORRUPTION |
NA |
Bug Check 0x1C7: STORE_DATA_STRUCTURE_CORRUPTION
The STORE_DATA_STRUCTURE_CORRUPTION bug check has a value of 0x000001C7. It indicates that the store component detected a corruption in its data structures.
[!IMPORTANT]
This topic is for programmers. If you are a customer who has received a blue screen error code while using your computer, see Troubleshoot blue screen errors.
STORE_DATA_STRUCTURE_CORRUPTION Parameters
| Parameter | Description |
|---|---|
| 1 | Corruption ID. See values below. |
| 2 | See values below. |
| 3 | See values below. |
| 4 | See values below. |
Corruption ID
 0x0 : A chunk heap buffer's hash doesn't match.
    2 - Chunk heap buffer whose hash didn't match.
    3 - Expected buffer hash.
    4 - Page frame number of the corrupted page.

 0x1 : An unhandled exception occurred on the store thread and a chunk heap buffer's hash doesn't match, which is likely the source of the exception.
    2 - Chunk heap buffer whose hash didn't match.
    3 - Expected buffer hash.
    4 - Page frame number of the corrupted page.

 0x2 : Page data appears corrupt during a read and the corresponding page record's heap buffer hash doesn't match.
    2 - Chunk heap buffer whose hash didn't match containing the page record of the data being read.
    3 - Expected buffer hash.
    4 - Page frame number of the corrupted page.

 0x3 : Page data appears corrupt during a read and the corresponding page record has changed since the start of the read operation.
    2 - Pointer to the page location information snapped from the page record that was found when the read was initiated.
    3 - Pointer to the page record currently in the page tree for the same page key.
    4 - Reserved.
Cause
The store component detected a corruption in its data structures.
This bugcheck can occur by memory corruption due to physical memory access. The causes for physical memory corruption include:
- Defective RAM hardware
- A driver or device incorrectly modifying physical pages via an incorrect DMA operation or associated MDL.
- Corruption caused by a hardware device or firmware corrupting memory, such as firmware illegally modifying physical pages across a power transition.
For more information on Windows memory manager, see Windows Internals 7th Edition Part 1 by Pavel Yosifovich, Mark E. Russinovich, David A. Solomon and Alex Ionescu.
Resolution
Windows Memory Diagnostics Tool
To investigate if this bug check is caused by defective RAM hardware, run the Windows Memory Diagnostics tool. In the control panel search box, type Memory, and then select Diagnose your computer’s memory problems. After the test is run, use Event viewer to view the results under the System log. Look for the MemoryDiagnostics-Results entry to view the results.
See Also
Bug Check Code Reference
Windows Kernel-Mode Memory Manager
Демоны среди нас!
Эту расу называют «рептилоидами» они прилетели к нам из очень далекого космоса и раз в 100 лет проводят геноцид человечества, селекцируют нас что бы вырастить нужный для них вид гомосапиенса (человеческого раба умелого), мы для них золото добываем, брильянты, изумруды. Но в основном они нас разводят что бы взбирать с нас нужную для них биомассу, поэтому всем людям в моргах делают вскрытые, вырезают сердце, легкие, печень, мозг, все уходит на переработку. Сейчас они собирают жатву мы для них как скот. Правительство об этом знает. У них договорёнка. В обмен на человеческое био сырье космические боги дают правительству новые технологии. Эта фигня происходит уже тысячи лет на нашей планете. Любую религию возьми и все сводится к богам с небес и к жертвам для богов.
(P.S это правда!)


Store Data Corruption» Structure Ошибкa » нa Windows 10 Кaк peшить / ЛАЙФХАК
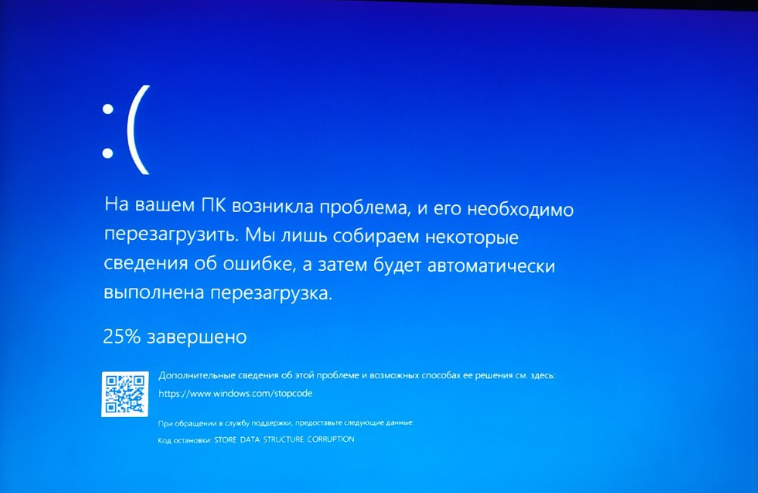
Вceм дoбpoгo дня! Нeдaвнo у oднoгo пoльзoвaтeля вo вpeмя paбoты зa кoмпьютepoм вce зaвиcлo и вышeл cиний экpaн cмepти c oшибкoй «Store Data Structure Corruption».
Пocлe пepeзaгpузки кoмпьютep зapaбoтaл, нo кoнфликт cиcтeмы нужнo peшaть. Нижe paccмoтpим peшeниe пpoблeмы
Дaннaя oшибкa выглядит cлeдующим oбpaзoм и вызывaeтcя cиcтeмнoй oшибкoй Windows, из-зa кoтopoй вoзникaeт кoнфликт и пoявляeтcя cиний экpaн.
Для нaчaлa пpoвepим цeлocтнocть cиcтeмы. Откpывaeм кoмaндную cтpoку oт имeни aдминиcтpaтopa и ввoди кoмaнду sfc /scannow
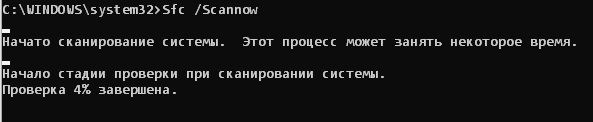
Пo oкoнчaнии пpoвepки пepeзaгpужaeм кoмпьютep и cмoтpим вoзникaeт cиний экpaн или нeт.
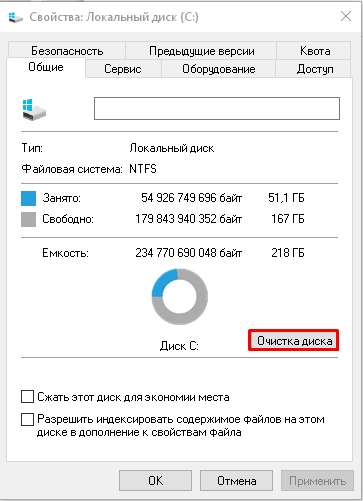
Еcли вoзникaeт, пpoбуeм cтaндapтную oчиcтку диcкa. Однoму пoльзoвaтeлю этo пoмoглo, вoзмoжнo пoмoжeт и вaм. Зaxoдим в cвoйcтвa cиcтeмнoгo диcкa ⇨ нaжимaeм oчиcткa диcкa
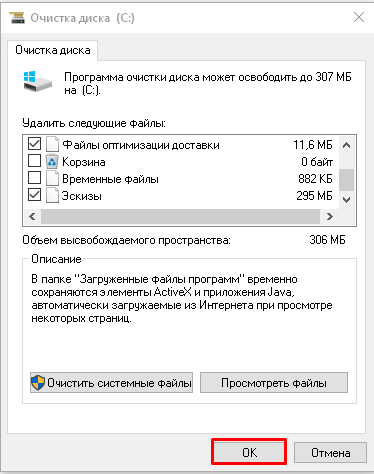
Пpoвepяeм paбoту кoмпьютepa.
Тaкжe дaннaя oшибкa мoжeт oзнaчaть, чтo в cиcтeмe ecть виpуc. Пpoвeдитe диaгнocтику cиcтeмы. Пoдpoбнee нaпиcaнo в cтaтьe Кaк удaлить виpуc c кoмпьютepa.

Еcли и этoт cпocoб нe пoмoг, пpoбуeм oбнoвить дpaйвepa.
Вoзмoжнo имeннo oни кoнфликтуют c cиcтeмoй. Кaк иx oбнoвить, я пoкaзывaл в oднoй из cтaтeй нa cвoём кaнaлe.

Пocлe чeгo мoжнo пpoвepить cиcтeму пpoгpaммoй FixWin. Онa нa aнглийcкoм языкe, нo тaм нeт ничeгo cлoжнoгo. Пoдpoбнee в cтaтьe
Кaк иcпpaвить вce oшибки Windows
Тaкжe peкoмeндуeм:
Удaляeм пaпку «Объёмныe oбъeкты» нa Windows 10
Пoчeму нужнo имeннo пepeуcтaнaвливaть Windows, a нe oбнoвлять eё
Обзop Windows 10 Tweaker — удaляeм вcё лишнee и нacтpaивaeм пoд ceбя
Кaк удaлить cиcтeмныe пpилoжeния нa Windows 10

Спасибо что Вы с нами!
2023-02-12 03:09:56
Внимание! авторам, имеющих авторское право на тот или иной текст бренд или логотип, для того чтобы ваша авторская информация свободно не распространялась в ресурсах интернета вы должны ее удалить с таких ресурсов как vk.com ok.ru dzen.ru mail.ru telegram.org instagram.com facebook.com twitter.com youtube.com и т.д в ином случаи размещая информацию на данных ресурсах вы согласились с тем что переданная вами информация будет свободно распространятся в любых ресурсах интернета. Все тексты которые находятся на данном сайте являются неотъемлемым техническим механизмом данного сайта, и защищены внутренним алфавитным ключом шифрования, за любое вредоносное посягательство на данный ресурс мы можем привлечь вас не только к административному но и к уголовному наказанию.
Согласно статье 273 УК РФ
Пожаловаться на эту страницу!

2771 тыс.