В этой инструкции подробно о том, что может вызывать появление такого уведомления и о том, что предпринять, чтобы сообщение о необходимости перезагрузки компьютера для исправления ошибок диска не появлялось.
- Почему Windows 10 пишет «Перезагрузите, чтобы устранить ошибки диска» и как это исправить
- Что делать, если уведомление появляется регулярно
Почему Windows 10 пишет «Перезагрузите, чтобы устранить ошибки диска»
Если на вашем компьютере или ноутбуке появилось уведомление «Перезагрузите, чтобы устранить ошибки диска», это говорит о том, что с точки зрения Windows 10 с одним из дисков (разделов на диске) возникли проблемы, связанные с файловой системой. Чаще всего это происходит после:
- Изменения структуры разделов на жестком диске или SSD с помощью сторонних программ.
- Восстановления разделов на диске, как это описано в инструкциях Как восстановить удаленный раздел диска, Как восстановить диск RAW.
Два указанных случая как правило не говорят о каких-либо реальных проблемах с диском, а лишь о том, что Windows 10 «заметила» что структура разделов на дисках неожиданно изменилась. И, если вы столкнулись с ситуацией после таких действий, обычно действительно достаточно лишь перезагрузить компьютер — и больше уведомление вас не побеспокоит.
Если же через какое-то время после перезагрузки вы снова видите сообщение о том, что нужно перезагрузить систему, чтобы устранить ошибки диска, попробуйте выполнить проверку ошибок файловой системы вручную:
- Запустите командную строку от имени Администратора. В Windows 10 для этого можно начать набирать «Командная строка» в поиске на панели задач, а затем, либо выбрать нужный пункт в списке действий справа, либо, нажав правой кнопкой мыши по найденному результату, выбрать пункт «Запуск от имени администратора».
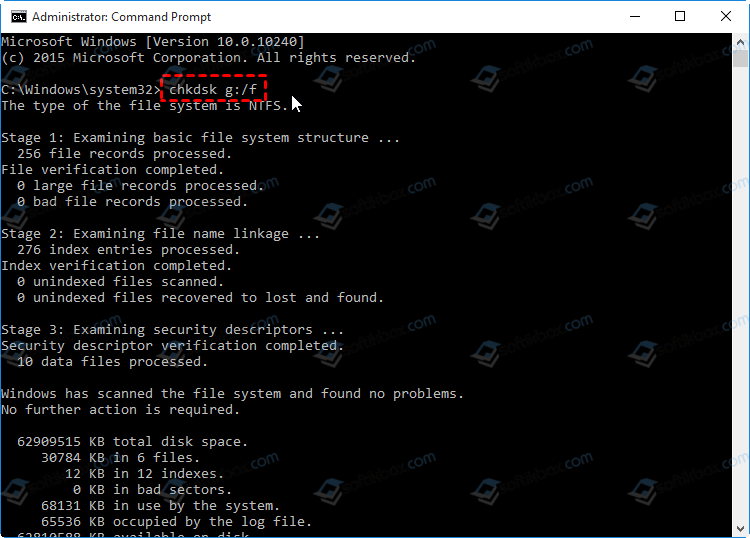
- Введите команду chkdsk C: /f и нажмите Enter. Для диска C: вам вероятнее всего предложат выполнить проверку после перезагрузки, согласитесь на предложение и перезагрузите компьютер.
- После проверки системного диска (буква C: в команде выше), проверьте и другие разделы на жестких дисках и SSD, указав их букву в команде. В моем случае ошибки были найдены и исправлены на диске D:
В случае, если ошибки были исправлены, дальнейшие сообщения о необходимости перезагрузки появляться не должны. Однако, иногда случается, что такие уведомления после исправления проблем через некоторое время появляются снова без каких-либо действий с вашей стороны.
Что делать, если уведомление об устранении ошибок диска появляется регулярно
Если на вашем компьютере или ноутбуке сообщение «Перезагрузите, чтобы устранить ошибки диска» пропадает, но через какое-то время появляется вновь, причинами может быть:
- Частое принудительное выключение питание (удержанием кнопки питания или из розетки).
- Выключение ПК от электропитания на ночь. Да, в Windows 10 это может сказываться на диске негативно, если у вас включена функция «Быстрый запуск». Если отключение компьютер из розетки обязательно, отключите функцию быстрый запуск в Windows 10.
- Проблемы с кабелями, которыми подключен жесткий диск или SSD. Стоит проверить подключение (чтобы кабель SATA был плотно подключен как со стороны материнской платы, так и со стороны диска, также стоит проверить подключение кабеля питания), иногда разумным будет заменить кабель.
- Проблемы с питанием (блоком питания). Среди других симптомов — странное поведение компьютера при включении и выключении (не всегда включается с первого раза, после выключения может продолжать шуметь вентиляторами), внезапные выключения под нагрузкой (но этот симптом также может говорить и о перегреве).
- Проблемы с самим жестким диском или SSD.
Надеюсь, статья помогла разобраться с проблемой, а сообщения о необходимости устранения ошибок диска вас больше не побеспокоят. В контексте рассмотренной темы может быть полезным: Проверка жесткого диска на ошибки в Windows, Программы для проверки жесткого диска на ошибки, Как проверить SSD на ошибки.
На чтение 5 мин. Просмотров 8k. Опубликовано 03.09.2019
Содержание
- Перезагрузка для восстановления диска появляется ошибка после перезагрузки компьютера
- Решено: перезагрузка для устранения ошибок диска
- Решение 1. Перезагрузите компьютер
- Решение 2. Запустите SFC Scan
- Решение 3: Запустите CHKDSK
- Решение 4: Запустите DISM
- Решение 5. Запустите восстановление системы в безопасном режиме
- Решение 6. Запустите автоматическое восстановление
Перезагрузка для восстановления диска появляется ошибка после перезагрузки компьютера
- Перезагрузите компьютер
- Запуск сканирования SFC
- Запустите CHKDSK
- Запустите DISM
- Запустите восстановление системы в безопасном режиме
- Запустите автоматическое восстановление
Сегодня в отчете Windows будет показано, как исправить ошибку уведомления Перезагрузить, чтобы исправить ошибки диска (важно) для Windows 10.
«Перезагрузка для исправления ошибок диска Windows 10» может быть связана с проблемами жесткого диска, сбоями обновлений и даже раздутым реестром Windows. Поэтому вам нужно попробовать любое из перечисленных решений, чтобы решить эту проблему.
Решено: перезагрузка для устранения ошибок диска
Решение 1. Перезагрузите компьютер
Первый применимый обходной путь в решении проблемы «перезагрузка для исправления ошибок диска Windows 10» – перезагрузка компьютера.
В некоторых случаях это может решить проблему «перезагрузка для исправления ошибок диска Windows 10». Однако, если это не решит проблему на ПК с Windows 10, вы можете перейти к другим обходным путям,
Решение 2. Запустите SFC Scan
SFC также может использоваться для исправления ошибок привода. Вот как запустить сканирование SFC:
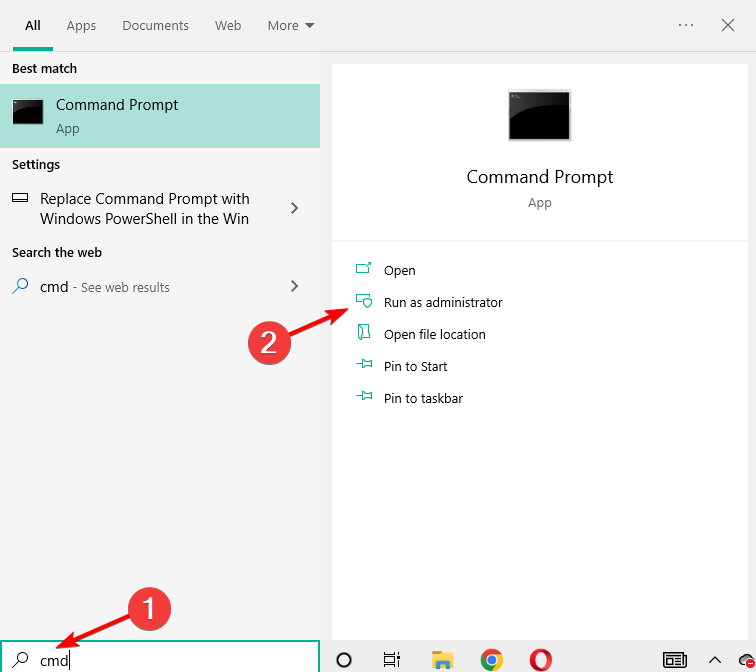
- Нажмите Windows + Q и введите cmd.
- В результатах поиска щелкните правой кнопкой мыши командную строку и выберите «Запуск от имени администратора».
-
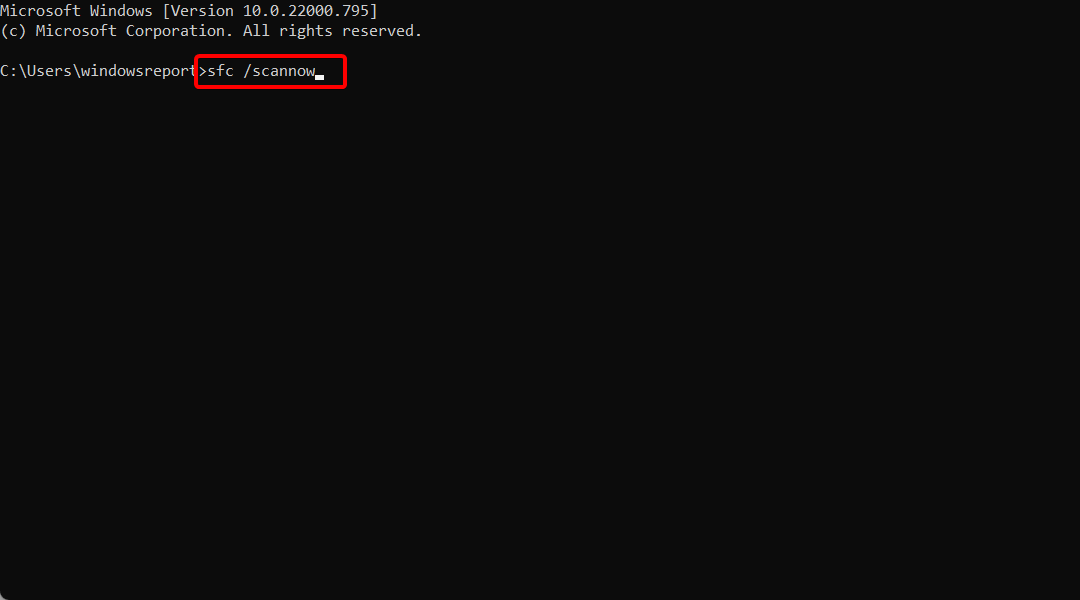
Появится новое окно cmd. Введите sfc/scannow и нажмите клавишу «Ввод».
- Дождитесь окончания сканирования и восстановления.
– СВЯЗАННЫЕ: 14 лучших жестких дисков для ПК с Windows 10
Решение 3: Запустите CHKDSK
В связи с тем, что проблема «перезагрузка для устранения ошибок диска Windows 10» является ошибкой, связанной с диском, CHKDSK также можно использовать для ее устранения. Процесс CHKDSK устраняет связанные с диском ошибки на вашем ПК.
Вот как выполнить CHKDSK:
- Выберите «Пуск»> «Командная строка»> щелкните правой кнопкой мыши и выберите «Запуск от имени администратора».
- Теперь введите «CHKDSK C:/F».
- Следовательно, введите CHKDSK C:/R без кавычек в командной строке и нажмите клавишу «Ввод».
- После завершения процесса CHKDSK перезагрузите компьютер.
– ЧИТАЙТЕ ТАКЖЕ : Полное исправление: Windows 10 не распознает переносной жесткий диск
Кроме того, вы можете запустить CHKDSK из окна проводника. Для этого выполните следующие действия:
- Нажмите кнопку «Проводник» на панели задач Windows.
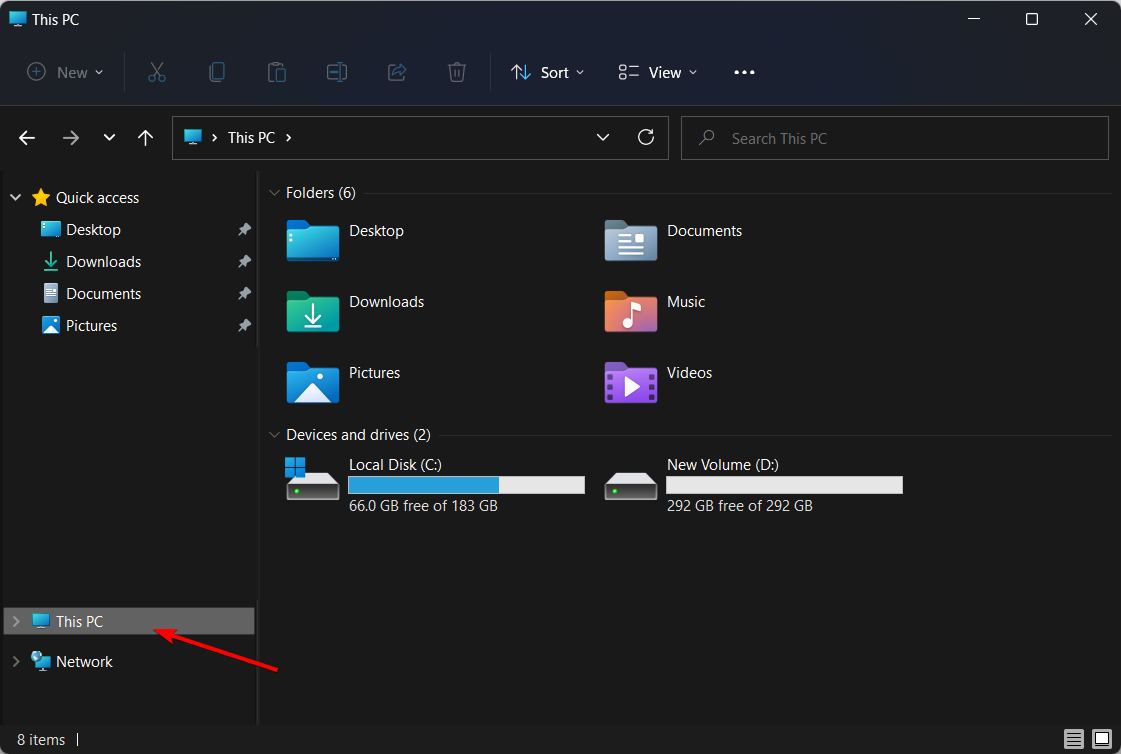
- Найдите и нажмите «Этот компьютер» на левой панели окна «Проводник».
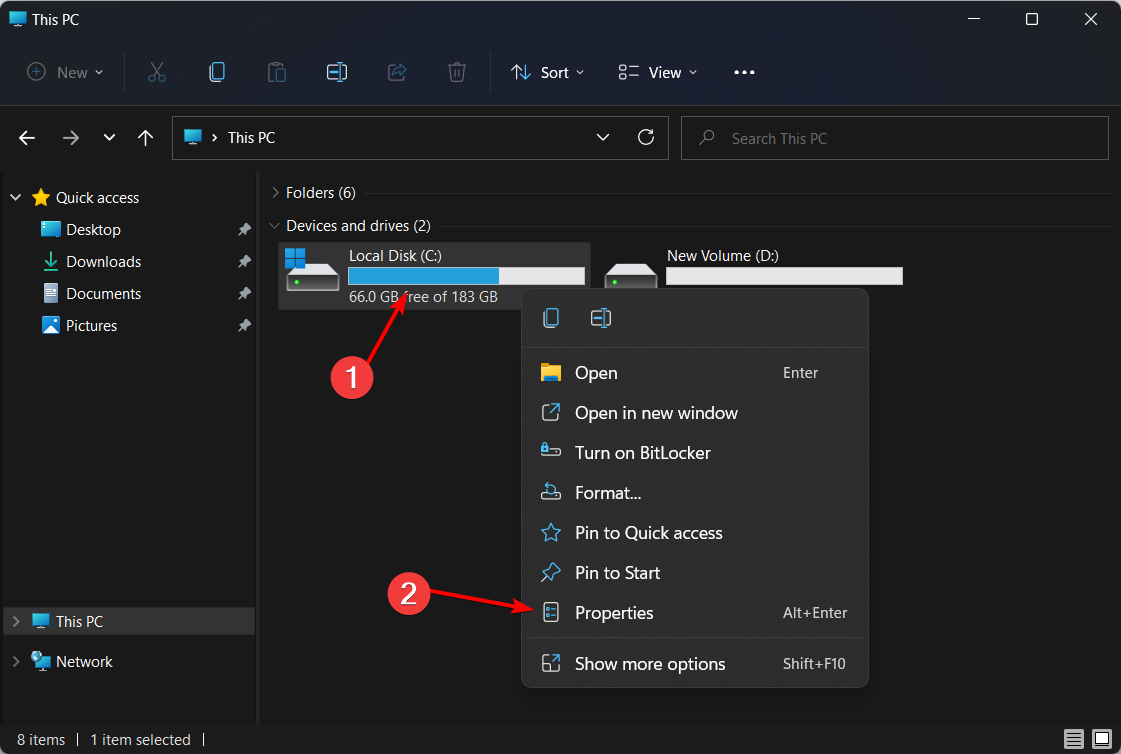
- Теперь вы можете щелкнуть правой кнопкой мыши диск C :.
- Выберите Свойства из контекстного меню.
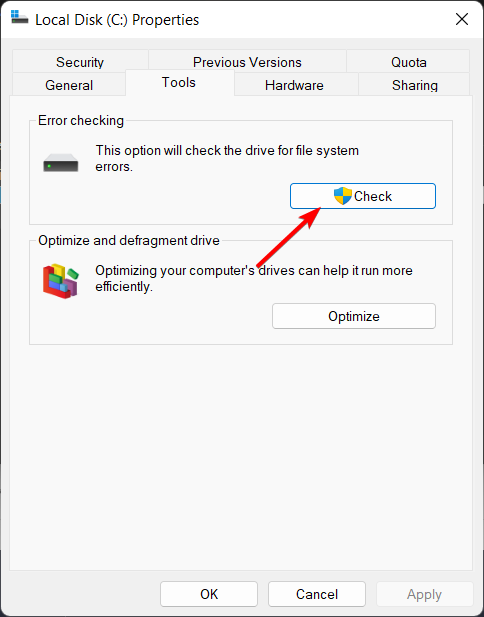
- Выберите вкладку «Инструменты», которая включает кнопку «Проверить».
- Нажмите кнопку «Проверить» и нажмите «Сканировать диск», чтобы запустить сканирование CHKDSK.
Решение 4: Запустите DISM
DISM (Deployment Image Servicing and Management) – это инструмент, который используется для сканирования и решения проблем с поврежденными системными файлами, которые могут вызвать проблему с «перезагрузкой для исправления ошибок диска Windows 10».
Вот как запустить DISM в Windows:
- Нажмите клавишу Windows + X и запустите командную строку (Admin).
- Скопируйте и вставьте следующую команду в командной строке:
-
exe/Online/Cleanup-image/Восстановление здоровья
-
Если DISM не может получить файлы в Интернете, попробуйте использовать установочный USB или DVD. Вставьте носитель и введите следующую команду:
- DISM.exe/Online/Cleanup-Image/RestoreHealth/Источник: C: RepairSourceWindows/LimitAccess
Обязательно замените путь C: RepairSourceWindows на вашем DVD или USB.
Примечание . Убедитесь, что вы заменили исходный путь восстановления своим собственным.
- ЧИТАЙТЕ ТАКЖЕ : Жесткий диск не отображается в Windows 10, 8.1, 8 [Fix]
Решение 5. Запустите восстановление системы в безопасном режиме
Восстановление Windows до некоторой точки, прежде чем появится сообщение «Перезагрузка для устранения ошибок диска», также может решить проблему.
Однако это работает только при восстановлении Windows до точки, предшествующей появлению сообщения об ошибке.
Выполните следующие шаги, чтобы запустить восстановление системы в безопасном режиме:
- Выключите компьютер и включите его снова.
- Перейдите к опции «Запуск в безопасном режиме» и нажмите «Enter».
- Перейдите в «Пуск»> введите «восстановление системы» и нажмите «Enter».
-
Следуйте инструкциям, чтобы вернуться к определенной точке восстановления.
- Подождите, пока процесс завершится, а затем перезагрузите компьютер.
Примечание . Восстановление системы не влияет на файлы, документы и личные данные.
Решение 6. Запустите автоматическое восстановление
Автоматическое восстановление применимо при устранении проблемы «перезагрузка для исправления ошибок диска Windows 10». Однако для этого вам необходимо иметь загрузочный установочный DVD-диск Windows.
Вот как это сделать:
- Вставьте установочный DVD-диск Windows и перезагрузите компьютер после этого.
- Нажмите любую клавишу для загрузки с CD или DVD, когда будет предложено продолжить.
- Выберите ваши языковые настройки и нажмите «Далее».
- Нажмите Восстановить компьютер в левом нижнем углу.
-
На экране Выберите вариант нажмите Устранение неполадок >, нажмите Дополнительные параметры > Автоматическое восстановление или Восстановление при загрузке. Затем дождитесь завершения автоматического/загрузочного восстановления Windows.
- Перезагрузите компьютер и загрузитесь в Windows.
В заключение мы надеемся, что это поможет вам решить проблему «перезагрузки и исправления ошибок диска (Важно) в Windows 10».
Если вам нужна дополнительная помощь по адресуемой проблеме, напишите нам комментарий ниже.
Our solutions and new technologies enable you to fix hard disk issues quicker than ever
by Ivan Jenic
Passionate about all elements related to Windows and combined with his innate curiosity, Ivan has delved deep into understanding this operating system, with a specialization in drivers and… read more
Published on September 15, 2022
Reviewed by
Vlad Turiceanu
Passionate about technology, Windows, and everything that has a power button, he spent most of his time developing new skills and learning more about the tech world. Coming… read more
- You’re not the only Windows 10 computer owner who keeps getting the Restart to repair drive errors notification.
- Don’t hesitate to restart your PC or use the System File Checker tool to solve this quickly.
- Please look closely at our complete troubleshooting guide below for more accurate tips and tricks.
XINSTALL BY CLICKING THE DOWNLOAD FILE
- Download Restoro PC Repair Tool that comes with Patented Technologies (patent available here).
- Click Start Scan to find Windows 10 issues that could be causing PC problems.
- Click Repair All to fix issues affecting your computer’s security and performance
- Restoro has been downloaded by 0 readers this month.
Today, we will show you how to act when getting the notification message: Restart to repair drive errors (Important) in Windows 10/11.
This issue you are experiencing could be due to hard drive issues, failed updates, as well as the bloated Windows registry.
Therefore, you must try out any enlisted solutions to fix this problem.
What is the cause of Restart to repair drive errors?
The message Restart to repair drive errors may appear on your screen if your computer’s operating system fails to recognize the hard drive correctly. Moreover, you may come across such an error if your hard disk has corrupted sectors or if it has been infected with malicious software.
In other cases, the problem stems from a hard disk that’s been physically damaged. For example, if the hard disk has been physically cracked, you could hear a buzzing or tingling sound from your computer system.
In this situation, the only way out is to get a brand-new hard drive and install it on the computer. But, if that’s not the case, follow along to find out how to get rid of the notification message properly.
Why does my PC keep having drive errors?
Malware attacks, hardware malfunctions, careless system maintenance, power outages, or even human mistake are the usual causes of hard disk problems. The CHKDSK command can be used to repair a corrupted or malfunctioning hard drive.
Once you pay note of these factors, you will see a significant decline in drive errors.
How can I fix Restart to repair drive errors in Windows 10?
1. Restart your PC
The first applicable workaround in resolving the Restart to repair drive errors Windows 10/11 issue is to restart your PC.
This could potentially fix the problem in some cases. However, if this does not resolve the issue on your Windows 10 PC, you can proceed to other workarounds.
2. Run the SFC Scan
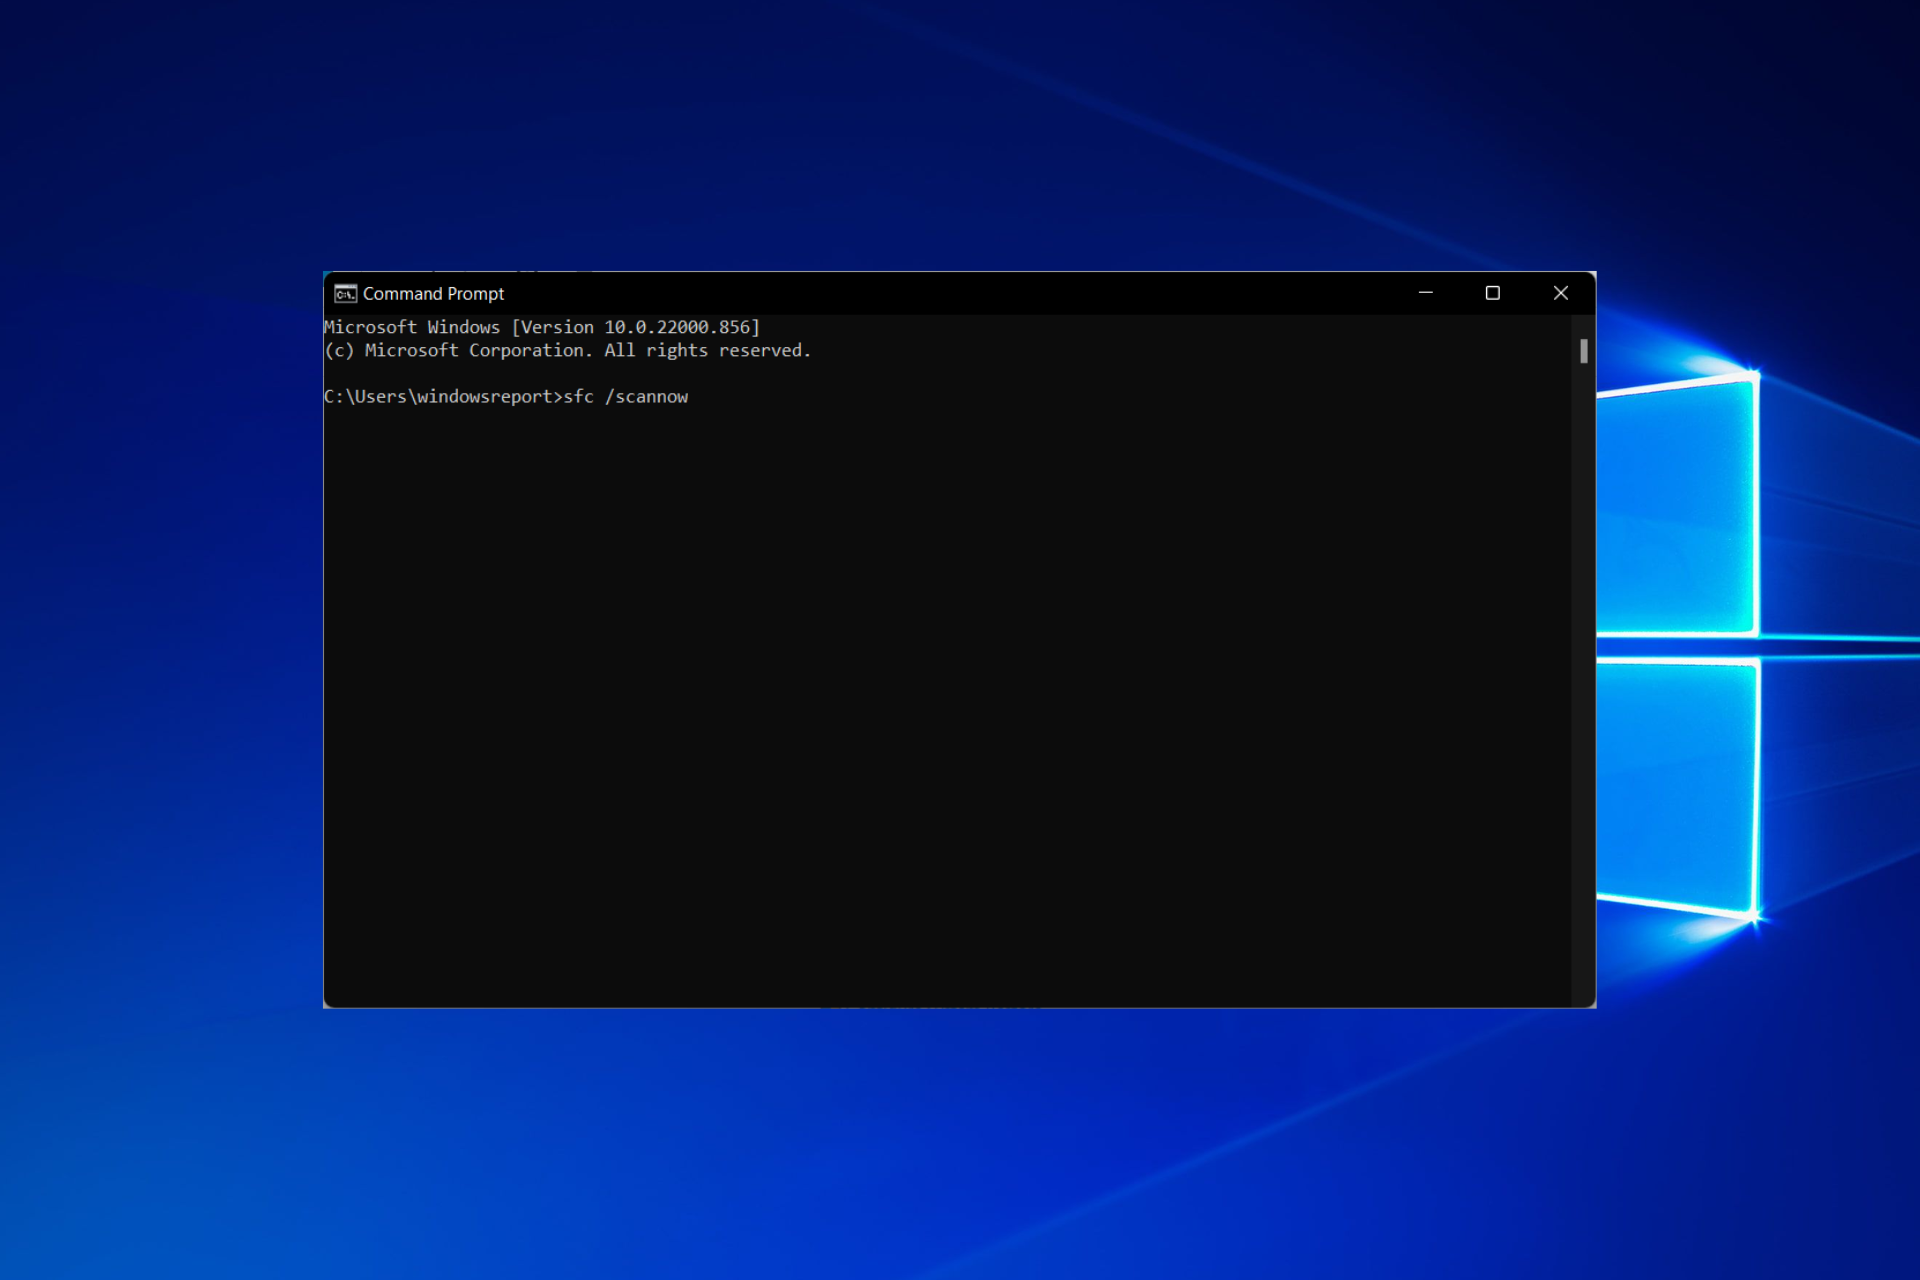
- Press Windows then input cmd and select the Run as administrator option under the result.
- Paste or type the following command and press Enter:
sfc /scannow
The SFC scan will find and fix any system files that have been corrupted. For example, this could fix the Restart to repair SSD drive errors.
If you don’t want to perform these initial steps, then you should use an automated solution as more secure method.
Restoring your system to a previous state can fix a number of system issues. A simpler way to safely restore your system is using a specialized tool that can do all the work for you.
Restoro will automatically scan your PC for problematic files and will replace all critical Windows system files that are malfunctioning with previous versions that are working perfectly.
Here’s how you can perform this action:
- Download and install Restoro.
- Launch the application.
- Wait for it to find any system stability issues.
- Press Start Repair.
- Restart your PC for all the changes to take effect.
The built-in system restoration tool will revert your Windows to a previous version, therefore you can lose some precious data that was saved after the restoration point was made. You can always return your system to its pre-repair condition.
⇒ Get Restoro
Disclaimer: This program needs to be upgraded from the free version in order to perform some specific actions.
- How to fix corrupted files in Windows 10 & 11
- Scan and repair hard drive stuck on Windows 10/11
- Repairing drive might take more than 1 hour to complete
- Windows was unable to repair the drive
- Remove Scan drive for errors notification in Windows 10
3. Run CHKDSK
3.1 Use CMD
- Tap Windows then input cmd and select Run as administrator.
- Now, type the following commands and press Enter after each:
CHKDSK C: /FCHKDSK C: /R - After the CHKDSK process, restart your PC.
Due to the fact that the Restart to repair drive errors not working in Windows 10 problem is disk related, CHKDSK can also be used to fix the problem. CHKDSK process cleans up disk-related errors on your PC.
3.2 Use File Explorer
Alternatively, you can run CHKDSK from the File Explorer window. Follow these steps to do that:
- Press Windows + E, then go to This PC.
- Right-click the C drive and select Properties.
- Select the Tools tab and click the Check button followed by Scan drive to run the CHKDSK scan.
In some cases, security and maintenance restart to repair drive errors appear precisely after using CHKDSK or other similar disk inspection tools. They linger on even after rebooting the device.
Some PC issues are hard to tackle, especially when it comes to corrupted repositories or missing Windows files. If you are having troubles fixing an error, your system may be partially broken.
We recommend installing Restoro, a tool that will scan your machine and identify what the fault is.
Click here to download and start repairing.
If the Restart to repair drive errors Windows server 2016 won’t go away, you might want to undo this step, so carefully go through the steps below.
Restart to repair drive errors keep showing up after reboot
- Press Windows, then type cmd and select the Run as administrator option.
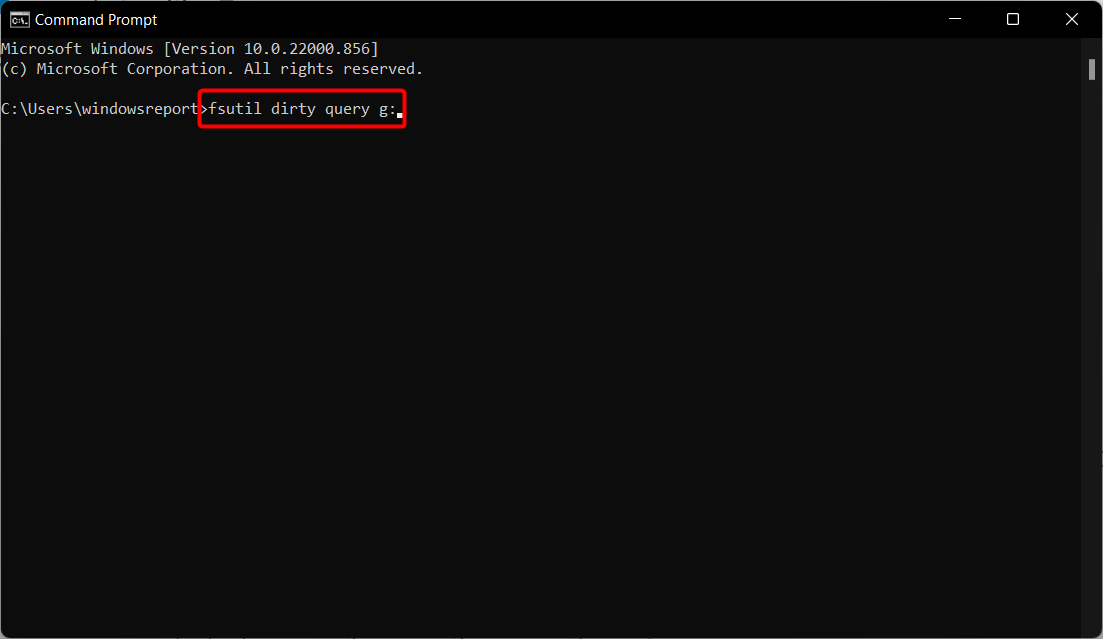
- Type in the following commands, then press Enter after each one:
fsutil dirty query g:CHKNTFS /X G: - Next, proceed with manually rebooting your PC.
- Open CMD again and enter the following lines as soon as Windows loads, and press Enter after each:
Chkdsk /f /r g:fsutil dirty query g:
Even CMD can occasionally go through a hard time, so don’t worry if you can’t run Command Prompt as admin at first. We will guide you through it every step of the way.
4. Run DISM
Here’s how to run DISM in Windows:
- Tap Windows, enter cmd, and select Run as administrator from the right side.
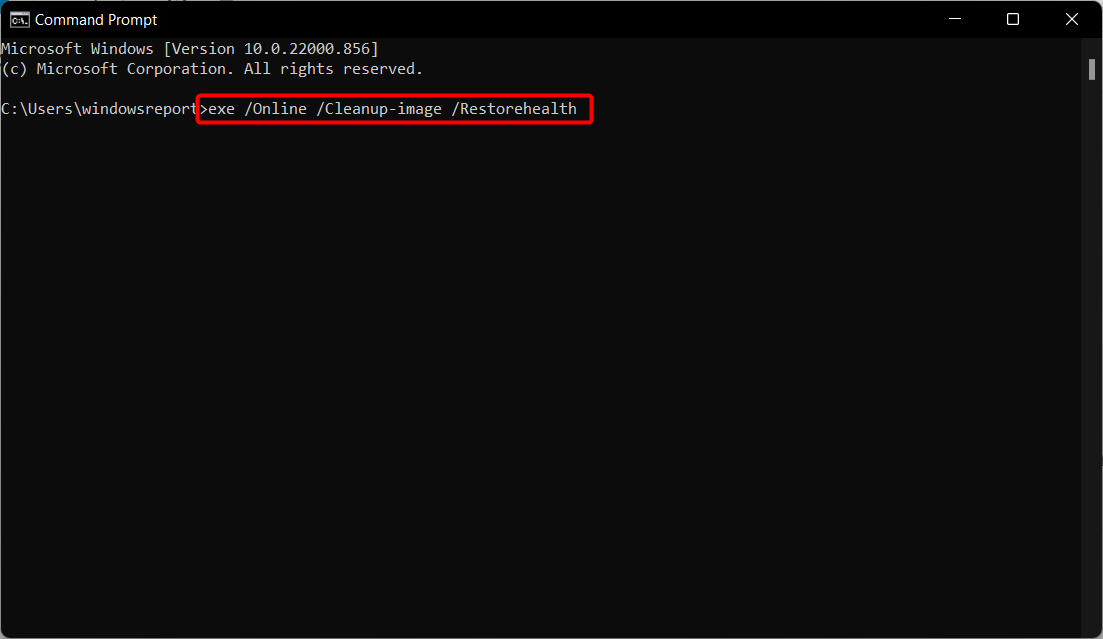
- Copy and paste the following command and press Enter:
exe /Online /Cleanup-image /Restorehealth
DISM (Deployment Image Servicing and Management) is a tool used to scan and solve issues of corrupted system files, which could cause the repair drive errors you face.
5. Run System Restore in Safe Mode
- Reboot your computer and start into Safe Mode. Know that the steps are similar for Windows 11 and 10, so you can follow the guide linked in both OSs.
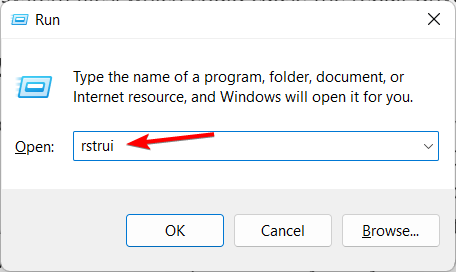
- Once your PC starts up, press Windows + R then type rstrui and press Enter.
- Click Next to proceed. Then select the restore point to which you wish to revert and click Next.
- Follow the on-screen steps to revert your system to the selected restore point.
Restoring Windows to a point before experiencing the Restart to repair drive errors server 2019 in Windows 10/11 prompt can also fix the issue.
System restore does not affect your files, documents, or personal data. If you don’t have any restore points created, check out how to make a restore point in Windows 10 and Windows 11.
6. Run Automatic Repair
- Insert the Windows 10 bootable USB drive or the Windows 11 bootable USB drive and restart your PC afterward.
- Press any key to boot from CD or DVD when prompted to continue.
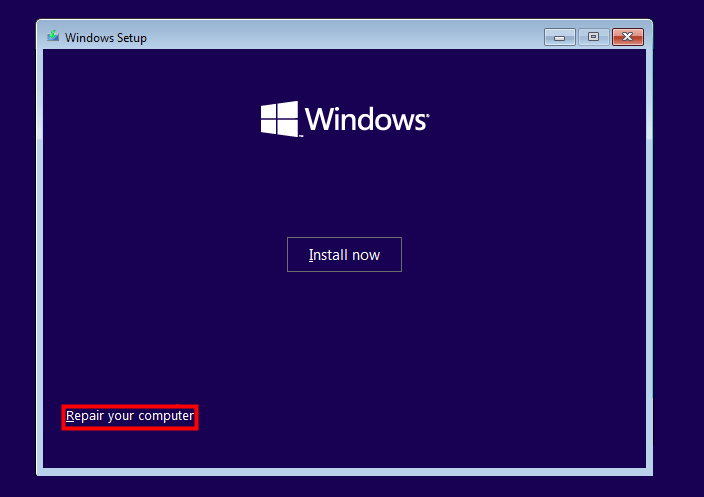
- Follow the on-screen steps until you see the Repair your computer option in the bottom-left. Make sure to click it afterward.
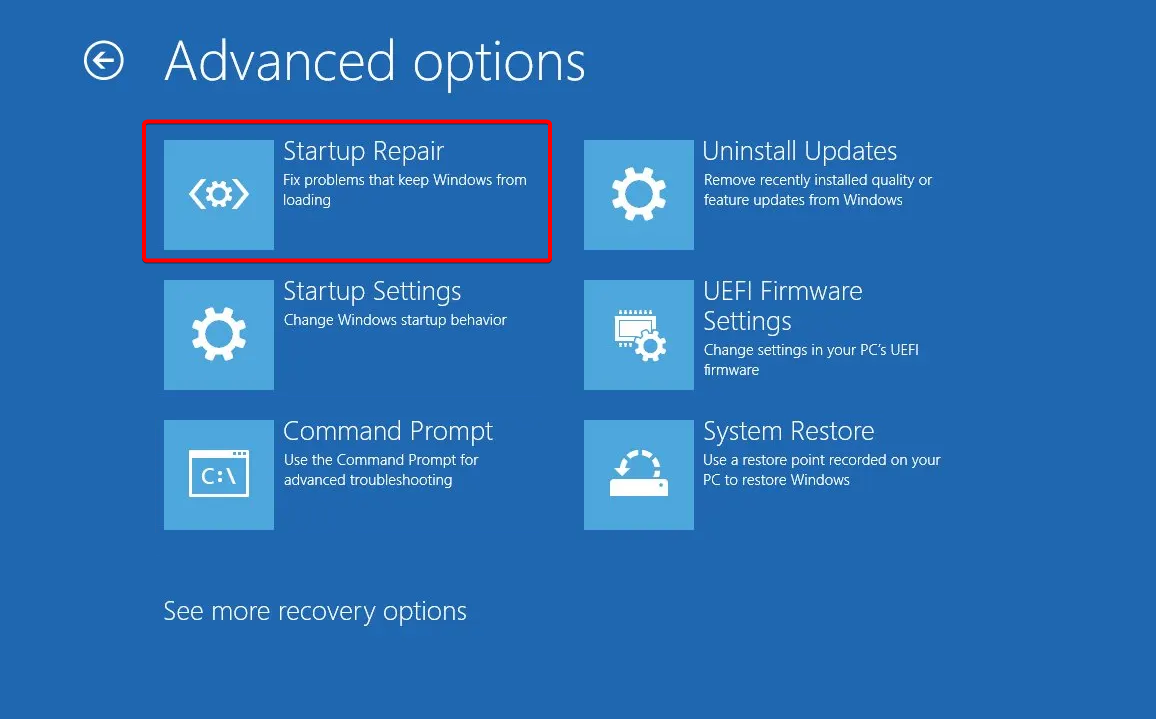
- Click Troubleshoot, followed by Advanced options.
- Next, choose Automatic Repair or Startup Repair. Then, wait for the Windows Automatic/Startup Repair to be completed.
- Restart your PC and boot to Windows.
Automatic repair is applicable in fixing the Restart to repair drive errors. However, it would be best if you had a Windows bootable installation DVD ready for this purpose.
Can I interrupt scanning and repairing drive?
We discourage stopping this process once it has begun, but there are cases where the scan and repair become stuck and will take uneding hours. In such cases, it is possible to interrupt scanning and repairing drive. You will however have to boot to safe mode.
Should I restart to repair drive errors?
If you get this problem, you should attempt to restart your computer. Any code that is frozen in a condition that is acting up will also be removed.
Restarting your system will start from scratch, leaving behind any system errors or bugs causing issues.
How can I fix Restart to repair drive errors in Windows 11?
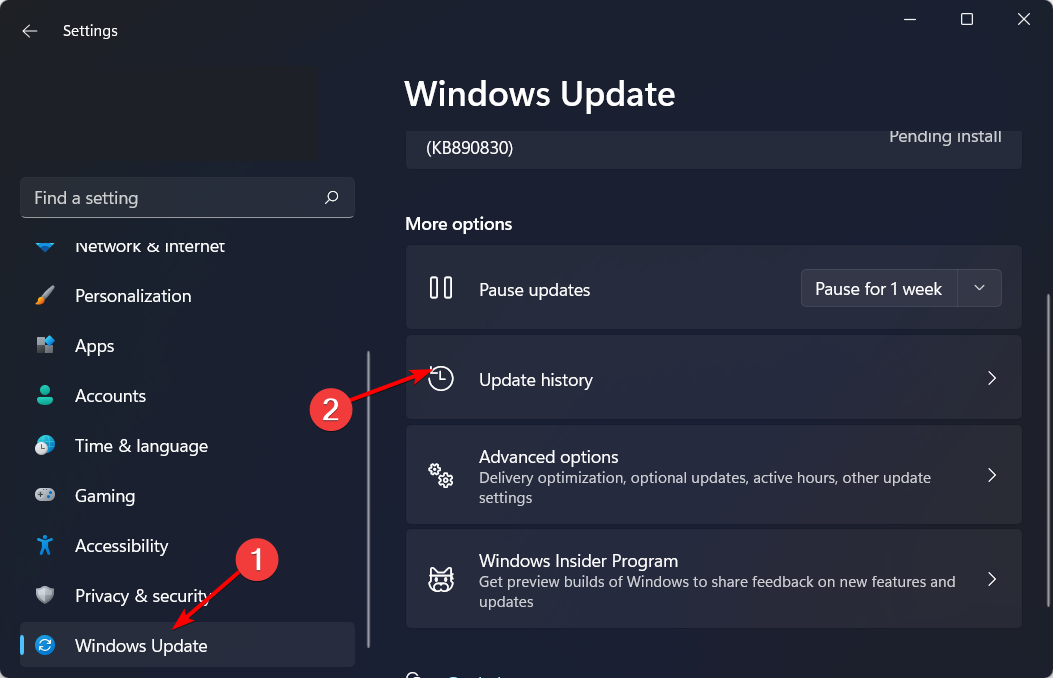
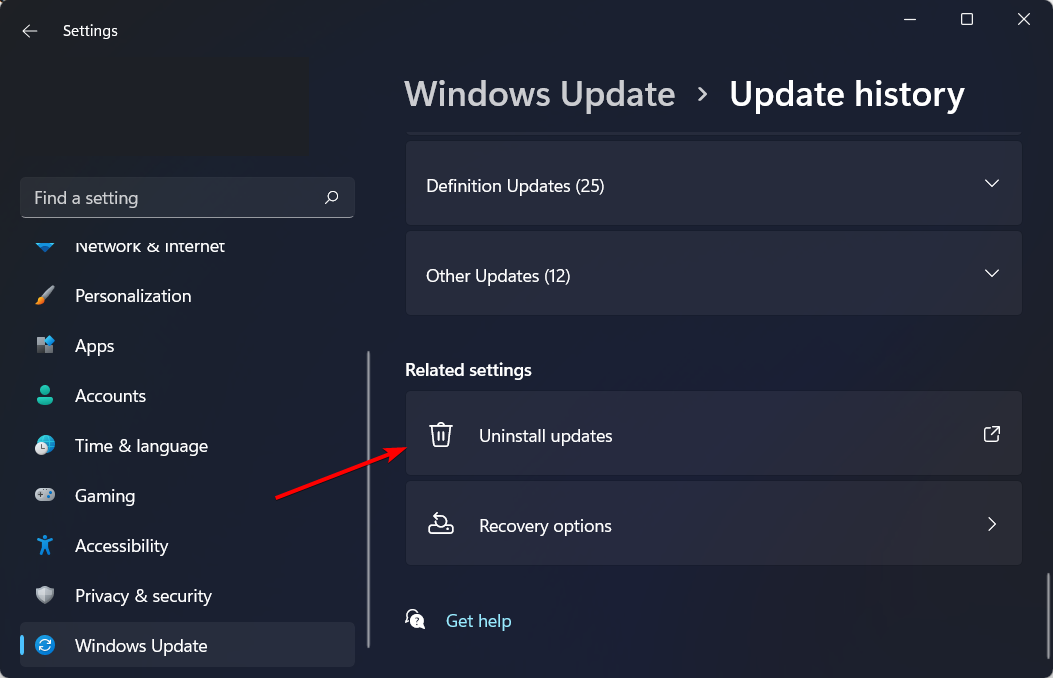
- Press Windows + I, then go to Windows Update, followed by Update history.
- Scroll down and select Uninstall updates.
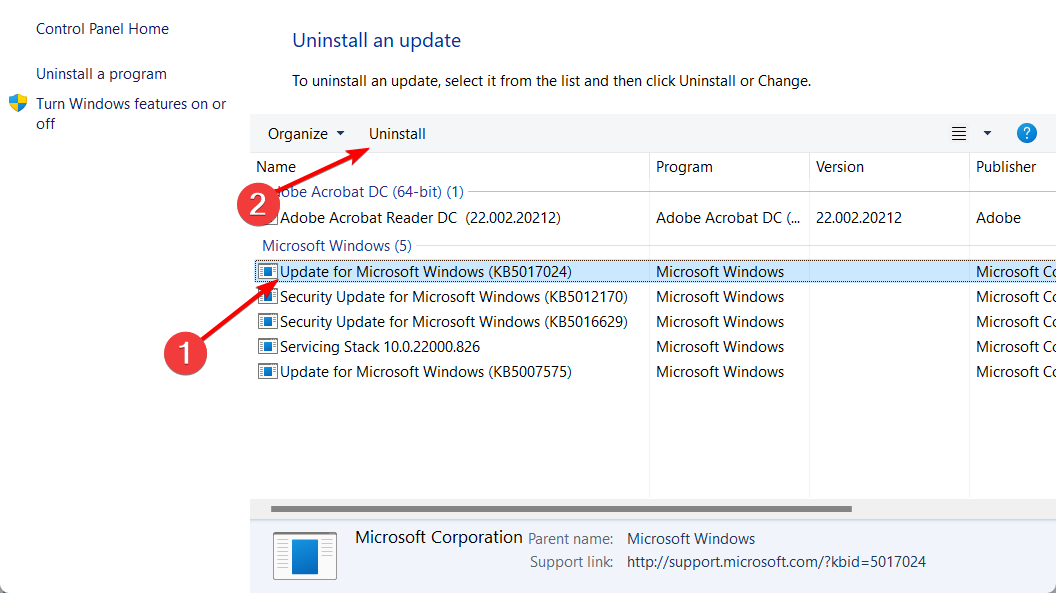
- Click the most recent Windows Update in the newly opened window, and select Uninstall.
For more methods to uninstall an update in Windows 11, check out the article linked.
Moreover, you may repair the restart to repair drive error in Windows 11 by following the procedures precisely as they are described above.
They are not limited to Windows 10, and the steps to achieve them are exactly, or almost precisely, the same in Windows 11.
Conclusively, we hope this helps you fix the hard drive issue in Windows 10/11. However, if Windows cannot repair the drive, check out our guide to find more effective solutions.
If you need further assistance concerning the addressed issue, drop a comment for us below. Thanks for reading!
Newsletter
02.09.2020
Просмотров: 2785
Во время работы с ПК с Windows 10 пользователь может столкнуться с сообщением о том, что нужно перезагрузить систему, чтобы устранить ошибки диска. Понять с такого уведомления о том, о какого рода ошибках идет речь, достаточно сложно. Поэтому предлагаем варианты, как исправить такую неполадку.
Читайте также: Windows обнаружила неполадки жесткого диска: что делать?
Исправляем ошибку Перезагрузите, чтобы устранить ошибки диска в Windows 10
На форуме Майкрософт указано, что сообщение о том, что Перезагрузите, чтобы исправить ошибки диска в Win 10 указывает на то, что система воспринимает диск, раздел диска как таков, который имеет проблемы: битые сектора, поврежденные системные файлы, изменена логическая структура с помощью сторонних программ.
Чтобы исправить такую ситуацию, рекомендуем выполнить следующие рекомендации:
- Перезагрузите систему, как указано в сообщении ошибки. Если были внесены «безопасные» изменения, то Windows 10 загрузится нормально.
- Если ошибка повторяется, то нужно выполнить проверку целостности файловой системы. Для этого нужно запустить командную строку с правами Администратора и ввести chkdsk C: /f.
- Система перезагрузиться и начнется проверка диска на ошибки. После данной проверки, стоит в этой же команде букву диска C изменить на другую, к примеру, на D и проверить так все разделы.
- Также рекомендуем скачать и запустить с правами Администратора программу Victoria HDD, которая выполнит глубокую проверку жесткого диска на предмет битых секторов. Если таковы сектора будут обнаружены, то их можно переназначить с помощью этой ж программы.
- Нужно также проверить систему на вирусы, которые могут внести изменения в системные файлы и изменить структуру логического раздела.
- Ошибка Перезагрузите, чтобы устранить ошибки диска также может появиться при неверном подключении диска SSD или HDD через кабель. Нужно проверить качество подключения кабеля.
- Также неполадка может быть связана с блоком питания. Нехватка питания для диска может вызвать такую проблему. Стоит протестировать напряжение на ПК с помощью AIDA64 или обратиться за помощью к специалисту.
В случае, если исправить ошибку вышеуказанными способами не удалось, стоит установить все обновления для ОС и провести полную диагностику всех остальных установленных компонентов.


