Советы по устранению неполадок Fujifilm Instax Mini 8/9
В этой статье представлены полезные советы по устранению неполадок Fujifilm Instax mini 8/9. Она также покажет вам, как вы можете восстановить потерянные видео и данные камеры.
100% безопасность | Без вредоносных программ | Без рекламы

Theo Lucia
2022-01-05 15:42:43 • Обновлено: Фото/Видео/Аудио решения • Проверенные решения
Сегодня камеры Instax mini 8/9 предоставляют увлекательный способ делать снимки. Хотя эти камеры выглядят забавно и кажутся простыми в обращении, как игрушки, они подвержены проблемам, как и другие типы оборудования.
Хорошей новостью является то, что вы можете устранять проблемы, с которыми вы сталкиваетесь, с Instax mini 8/9. В этой статье вы найдете полезные советы, которые следует применять при обращении с камерой.
Содержание

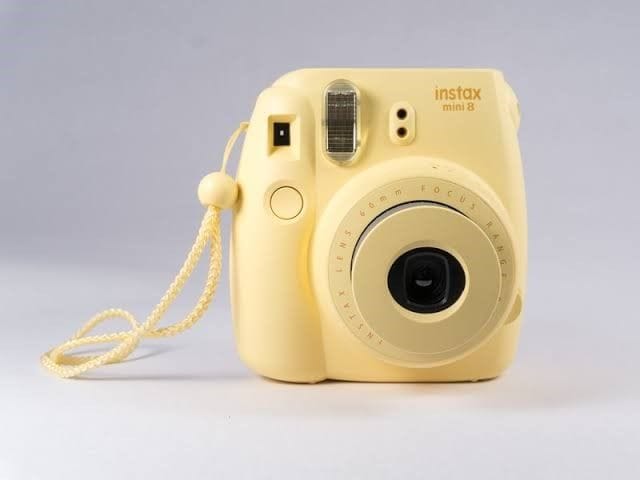
Fujifilm Instax Mini 9 — это также мгновенная камера, которая делает фотографии размером с кредитную карту. Камера Instax Mini 9 имеет пять цветов: зеленый лайм, розовый фламинго, голубой лед, дымчато-белый и синий кобальт.
- Его размеры 116х118х68 мм. Кроме того, он весит 307 г без пленки и батареек.
- Он использует объектив 60 мм, а его максимальная диафрагма составляет F12,7. Это то же самое, что объектив 34 мм на камере с полнокадровым режимом. Кроме того, у него есть насадка для макросъемки, которую вы можете прикрепить к объективу камеры. Эта насадка позволяет сфокусировать камеру на объекте, находящемся на расстоянии от 35 до 50 см.
- Перед камерой находится зеркало, позволяющее узнать свое положение во время селфи.

Оба Instax mini 8 и 9 имеют постоянную выдержку 1/60 секунды. Это означает, что все, что вам нужно сделать, чтобы мгновенно сделать снимок, — это включить камеру, использовать шкалу яркости на основе значков, чтобы выбрать диафрагму, и нажать кнопку спуска затвора.
Устранение неполадок камеры Fujifilm Instax Mini 8/9
Советы по устранению неполадок для камер Instax Mini 8 и 9 включают:
1. Камера отказывается включаться:
Вы можете включить камеру, потому что ее батареи разряжены. Поэтому, чтобы решить эту проблему, просто проверьте аккумуляторный отсек камеры, чтобы убедиться, что аккумуляторы полностью заряжены.
Также убедитесь, что батарейки 2xAA, и убедитесь, что они правильно размещены в отсеке.
2. Объектив застрял:
Устраните эту проблему, выдвинув переключатель, используемый для освобождения объектива. Расширьте линзу до такой степени, чтобы при взгляде сзади вы были уверены, что в ней есть отверстие. После срабатывания спускового переключателя объектив камеры mini 8/9 должен выскочить. Когда на кольце диафрагмы появляется свет, это означает, что камера готова к съемке.
3. Пленка не проявляется и не выходит из камеры: Прорезь для пленки может быть заблокирована, что препятствует выходу пленки из камеры..
- Замените картридж с пленкой на другой, чтобы решить проблему. Если это не сработает, проверьте, не заблокировано ли отверстие для выброса, и удалите любой мусор, найденный в ней.
- Если пленка повреждена, она может не извлекаться правильно из камеры. Чтобы избежать этой проблемы, не прилагайте чрезмерных усилий, не изгибайте и не подвергайте воздействию прямых солнечных лучей, когда камера начинает самостоятельно проявлять снятые вами изображения.
- Всегда проверяйте, что вы загружаете правильную пленку в держатель пленки, потому что, если картридж с пленкой вставлен неправильно, это может повлиять на работу камеры. Прежде чем делать снимок, убедитесь, что пленка всегда находится в держателе пленки.
4. Объектив не открывается и не закрывается:
Если объектив не открывается, это может быть связано с тем, что вы используете неправильную кнопку извлечения..
Чтобы открыть объектив, нажмите кнопку в правом нижнем углу на передней панели камеры..
Чтобы убрать объектив, просто вдавите его обратно в корпус камеры без давления. Перед тем как выполнять любое действие, убедитесь, что объектив ничем не закрыт.
5. Есть проблемы с видоискателем:
Если видоискатель не обеспечивает четкого обзора изображений, которые вы пытаетесь снять, возможно, мешает грязь.
Всегда очищайте видоискатель, чтобы эта проблема не возникла. Для очистки видоискателя от грязи используйте мягкую чистую ткань из микрофибры.
Если размытые изображения появляются из-за трещины в видоискателе, вам следует снять заднюю крышку камеры и заменить ее новой.
6. У вспышки проблемы:
Чтобы устранить проблемы с вспышкой, в первую очередь убедитесь, что лампа-вспышка не повреждена и не отсутствует..
Также убедитесь, что внутренний конденсатор вспышки достаточно заряжен. Если он не может удерживать достаточно заряда, замените его.
Как восстановить и отремонтировать видео Fujifilm Instax
Восстановление записей камеры Fujifilm Instax Mini
Если вы потеряете важные данные с Fujifilm Instax Mini 8/9, вам будет рекомендован отличный инструмент для восстановления данных Recoverit Data Recovery. С помощью Recoverit вы можете получать видео с цифровых камер, карты памяти SD, корзины, жесткого диска, USB и т. д. Вы также можете сканировать и объединять фрагменты видео из одного видео. Вы можете быть уверены, что восстановите большую часть потерянных видео целиком.
100% безопасность | Нет вредоносных программ | Нет рекламы
Соответствующие шаги довольно просты, как будет показано ниже:
Шаг 1: Выберите Расположение.
Выберите место, где вы хотите восстановить потерянные файлы.

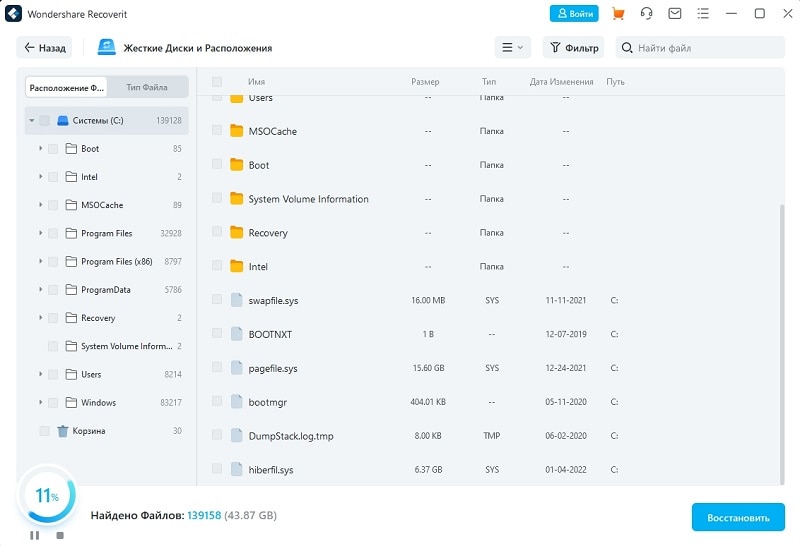
Шаг 2: Просканируйте Расположение
После того, как вы выбрали место, Recoverit начнет сканирование области, чтобы найти ваши потерянные файлы.
На этом этапе вам придется подождать, пока Recoverit просканирует и восстановит ваши потерянные данные. Обычно это занимает несколько секунд или минут, в зависимости от размера файлов.
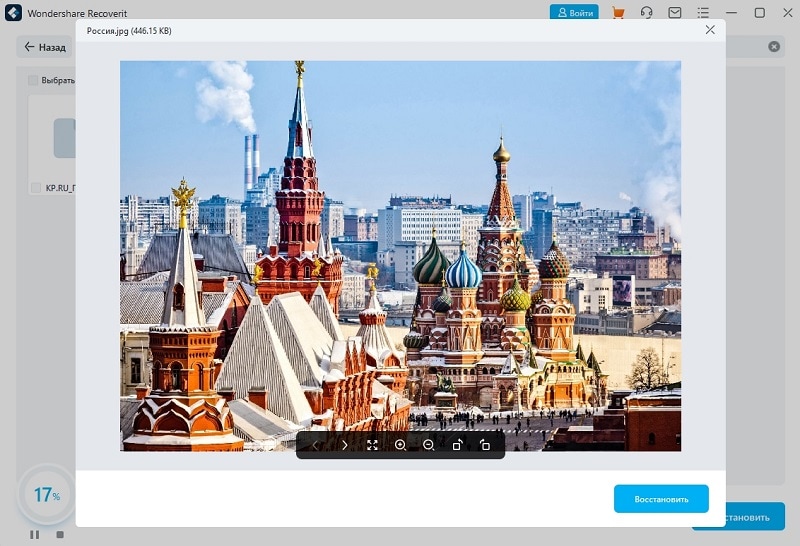
Шаг 3: Предварительный просмотр и Восстановление видео
Здесь вы просматриваете все файлы, которые были отсканированы и извлечены. Затем вы можете продолжить их спасать. Щелкните вкладку «Восстановить», чтобы вернуть данные.
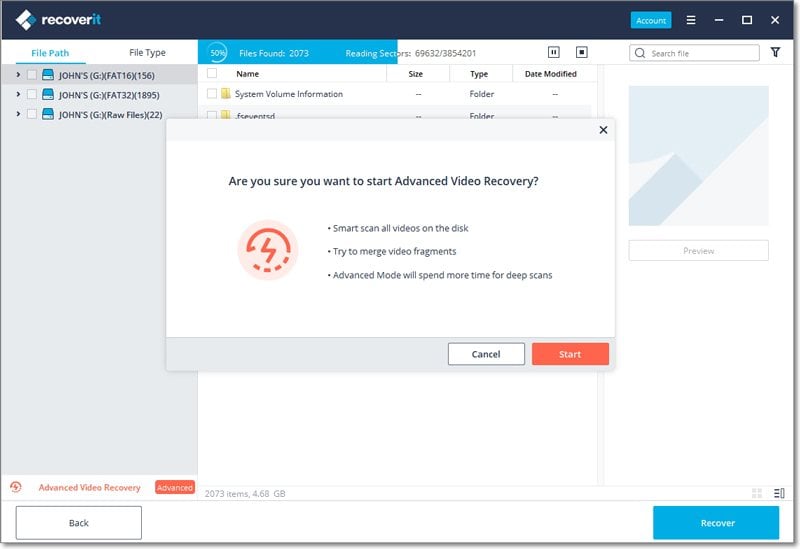
Расширенное Восстановление Видео: Чтобы выполнить расширенное восстановление видео, вам понадобится превосходный инструмент.
Recoverit предоставил вам этот инструмент с помощью функции Расширенное Восстановление Видео. Иногда ваши потерянные видео разбросаны по устройству множеством фрагментов. Эта функция позволяет сканировать, объединять и восстанавливать фрагменты видео.
Просто нажмите кнопку «Расширенное Восстановление Видео», чтобы использовать эту замечательную функцию, как показано ниже:
Ремонт Видео Fujifilm Instax Mini 8/9
Когда дело доходит до восстановления поврежденных видео с вашего Instax mini 8/9, вам понадобится функция восстановления видео. Этот инструмент восстанавливает видео во всех основных форматах файлов, таких как MOV, M4V, MP4, MTS, M2TS, FLV, AVI и 3GP. Нет ограничений на размер файлов для восстановления.
Инструмент поддерживает ремонт в двух режимах. Быстрое восстановление позволяет восстанавливать видеофайлы с небольшими ошибками. Между тем, Advanced Repair использует образец видео, чтобы исправить ваши файлы с серьезными повреждениями.
Шаг 1: Добавьте ваши поврежденные видео
Запустите приложение на вашем компьютере. Чтобы восстановить поврежденные видеофайлы, вы можете добавить их, нажав кнопку «Добавить» или «Добавить видео и начать восстановление».

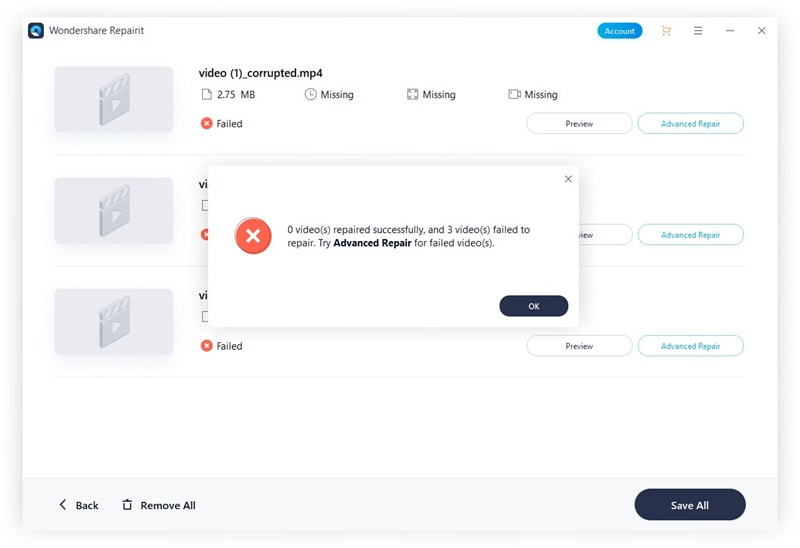
Шаг 2: Восстановите свои видео
Как только вы добавили все поврежденные видео, нажмите «Восстановить», чтобы начать процесс восстановления видео.

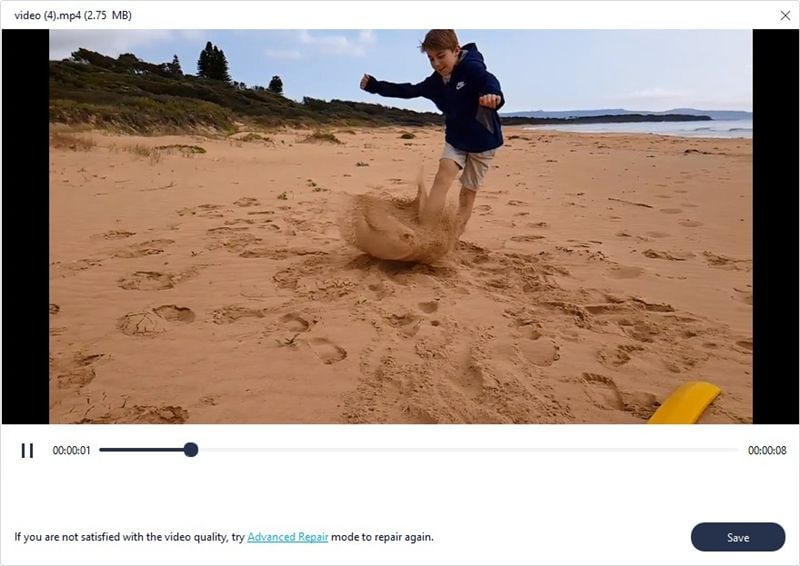
Шаг 3: Предварительный просмотр видео
На ремонт потребуется некоторое время, и после его завершения на экране появится напоминание с информацией об успешном исправлении. Нажмите ОК, чтобы закрыть операцию.
Шаг 4: Расширенный режим для глубокого ремонта (опционально)
Если видео сильно повреждены и не могут быть восстановлены, перейдите в расширенный режим восстановления. Просто нажмите кнопку «Расширенный ремонт».
Затем добавьте образец видео и исправьте его сейчас.

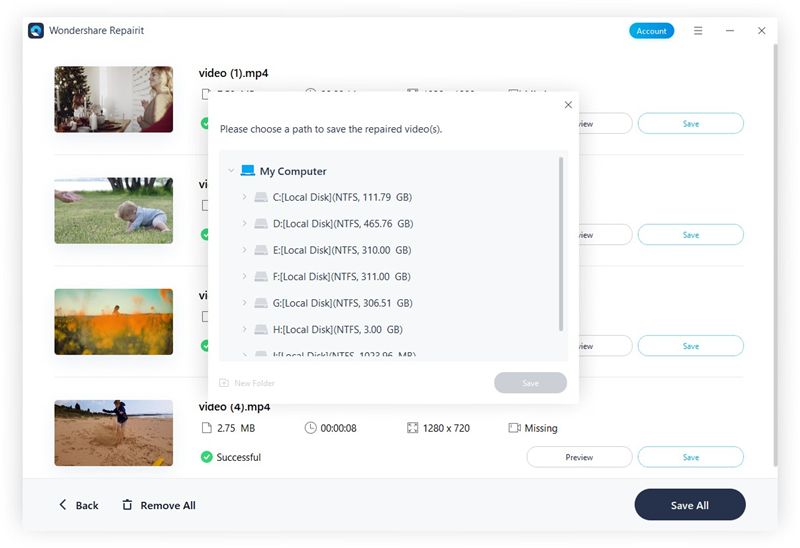
Шаг 5: Сохраните отремонтированное видео
Расширенное восстановление выполнит процесс восстановления и выдаст сообщение об успешном завершении, когда оно будет завершено. Теперь вы можете воспроизводить эти видео, и на экране вы не увидите никаких ошибок.
Вывод
В этой статье вы познакомились с камерами Instax mini 8/9. Советы по устранению неполадок, восстановлению данных и ремонту видео Fujifilm Instax mini 8/9 довольно просты, как вы видели в статье. Теперь вы можете самостоятельно решать проблемы с камерой.
100% безопасность | Нет вредоносных программ | Нет рекламы
Источник
почему на моем instax mini 8 горит красный индикатор?
Краткий ответ
- Красный свет на Instax Mini 8 – это сигнал, указывающий на то, что камера не находится в режиме съемки.
Полное руководство по Fujifilm Instax Mini 9
Устранение неполадок FujiFilm Instax Mini 8 (все индикаторы мигают РЕШЕНО |MINI 8 VS MINI 11 |ALICIABLIFESTYLE
Есть несколько вещей, которые вы можете сделать, чтобы попытаться исправить красный свет на вашем Instax Mini 8. Во-первых, убедитесь, что аккумулятор полностью заряжен . Если это не так, попробуйте зарядить его на некоторое время. Если это не сработает, попробуйте протереть объектив камеры мягкой тканью. Если это по-прежнему не работает, возможно, вам придется отнести камеру в ремонт.
Красный цвет означает, что фотография переэкспонирована и, скорее всего, будет размытой.
Лучший способ узнать, не сломался ли мой Instax Mini 8 Ваш Instax Mini 8 сломался, чтобы попытаться сделать снимок. Если камера не делает снимок, скорее всего, она сломана.
S означает “снимок” на Instax Mini 8. Когда вы делаете снимок, число в правом нижнем углу экрана увеличивается на единицу.
Есть несколько причин, по которым ваша камера может мигать красным. Одна из возможностей заключается в том, что батарея разряжена и ее необходимо заменить. Другая причина может заключаться в том, что карта памяти заполнена и ее необходимо очистить. Если ни одно из этих решений не устраняет проблему, возможно, камеру необходимо отремонтировать.
Есть несколько причин, по которым ваши фотографии в Instax могут быть темными. Одна из возможностей заключается в том, что вы неправильно используете вспышку. Убедитесь, что вы держите камеру близко к объекту и направляете ее прямо на него. Если фотография все еще слишком темная, попробуйте отрегулировать настройку экспозиции. Вы также можете попробовать использовать пленку другого типа.
Да — вы можете отключить вспышку на Instax Mini 8, нажав кнопку вспышки на задней панели камеры и повернув ее так, чтобы молния была направлена вниз.
Есть несколько вещей, из-за которых ваши фотографии Instax Mini 8 могут стать белыми. Одна из возможностей заключается в том, что пленка старая или с истекшим сроком годности. Другая возможность заключается в том, что батареи в вашей камере разряжены и их необходимо заменить. Наконец, также возможно, что ваш объектив загрязнен и нуждается в чистке..
Снимки хранятся около 10 лет, если их не хранить в прохладном темном месте.
На этот вопрос нет однозначного ответа, поскольку он зависит от ряда факторов, таких как частота использования и уход за камерой. Однако, как правило, срок службы камер Instax составляет около 10 лет.
Есть несколько причин, по которым ваши полароидные снимки могут быть переэкспонированы. Одна из возможностей заключается в том, что экспонометр в вашей камере неисправен и не точно измеряет количество присутствующего света. Другая возможность заключается в том, что вы не используете правильную чувствительность пленки для условий освещения. Если вы используете медленную пленку при ярком освещении, ваши фотографии будут переэкспонированы.
Чтобы делать хорошие снимки с помощью Instax Mini 8, сначала нужно убедиться, что объектив чист и на нем нет отпечатков пальцев. Вы также должны настроить фокус на правильное расстояние, поворачивая кольцо фокусировки на объективе. Если вы фотографируете человека, обязательно поместите его в центр кадра, а если вы фотографируете пейзаж, обязательно поместите горизонт в центр кадра.
Кто-то делает, кто-то нет. Лично я никогда не встряхивал свою пленку Instax, но знаю некоторых людей, которые это делают, и у них не было никаких проблем.
Instax Mini 8 имеет три различных настройки: пейзаж, макро и портрет. Режим “Пейзаж” предназначен для съемки удаленных объектов, режим “Макро” — для съемки объектов вблизи, а режим “Портрет” — для съемки людей.
Instax Mini 8 — это камера, которая использует мгновенную пленку для создания отпечатков. Камера проста в использовании — просто наведи и снимай. Отпечатки небольшие, но они прекрасно отражают момент.
Источник
Please check the following items before considering a problem to
be a malfunction. If the problem persists even after taking action,
please contact our service center for repair or visit the website
below.
FUJIFILM website: http://www.fujifilm.com/
If the following problem occurs���
Problem
Possible causes and solutions
I cannot turn on
The battery may be exhausted. Please
the camera.
charge the camera.
The battery is
If you use the camera in a very cold
exhausted
environment, the battery will drain quickly.
quickly.
Please keep the camera warm before
shooting.
Camera shuts
The battery level may be low. Please charge
down during
the camera.
use.
Charging does
• Make sure that the USB power adapter
not start.
plug is properly connected to the power
outlet.
• Turn off the camera when charging it. If
power is on camera will not charge.
It takes too long
At low temperatures, charging may take
to charge.
some time.
The self-timer
Charge the battery in a temperature range of
lamp flashes
+5 °C to +40 °C. If you cannot charge the
while charging.
battery within this range, please contact our
support center.
I cannot shoot
• Make sure that the power is on.
when I press the
• If the battery level is low, please charge
shutter button.
the camera.
• If the internal memory or memory card is
full, insert a new memory card or delete
unnecessary images.
• Use a memory card formatted with this
unit.
• If the contact surface of the memory card
(gold part) is dirty, wipe it with a soft, dry
cloth.
• The memory card may be broken. Please
insert a new memory card.
I cannot focus
Use the AF/AE lock to shoot subjects that are
the camera.
difficult to focus on.
The flash does
Check that the suppressed flash setting has
not fire.
not been selected. Select a setting other
than the suppressed flash setting.
Even though the
• Check that you are not too far from the
flash fired, the
subject. Please shoot within the flash
image is dark.
range. Approximately 50 cm to 1.5 m.
• Hold the camera correctly so that you do
not obstruct the flash with your fingers.
22
Problem
Possible causes and solutions
The image is
• If the lens has dirt on it such as
blurred.
fingerprints, clean the lens.
• Make sure that the AF frame is green
before taking a photo.
The camera
• There may be a temporary malfunction.
does not work
Please press the reset button. If it still does
properly.
not work properly, please contact our
repair service center for repair.
• The battery may be exhausted. Please
charge the camera.
The film pack
• Please use FUJIFILM instant film «INSTAX
does not load or
mini» (other films cannot be used).
does not load
• Align the yellow mark on the film pack
smoothly.
with the yellow alignment mark on the
camera body to load the film.
The film does
• The film may be misaligned due to shocks
not unload.
such as vibration or dropping. Please load
a new film pack.
• If the film is jammed, turn off the camera
and turn it on again. If the problem
persists, remove the jammed film and
then load a new film pack.
Some or all of
Do not open the film door until all film
the finished
exposures have been used. Unexposed film
prints are white.
will be prematurely exposed if the door is
opened. Prematurely exposed film will be
white with no images.
The print is
• Do not shake, bend, fold or hold the print
uneven.
immediately after it is printed.
• Do not obstruct the film ejection slot.
Содержание
- Почему instax не печатает фото?
- Почему Полароид не печатает фото?
- Почему не появляются фото Инстакс?
- Что делать если Инстакс мини не работает?
- Сколько проявляются фотографии на Полароид?
- Как достать картридж из instax?
- Как фотографировать на instax MINI 11?
- Как работать с Полароидом?
- Как фотографировать на Fujifilm Instax Mini 9?
- Как включить Инстакс?
- Какие батарейки в Инстакс мини?
- Что такое полароидные снимки?
- Сколько стоит Polaroid 636 Closeup?
- Что делать, если на камере Instax mini индикаторы мигают красным
- Частые ошибки в работе с устройствами Instax
- Почему не проявляется фото Instax
- Instax mini 9: дизайн, технические характеристики и особенности
- Распространенные трудности с печатью снимков на «Инстакс»
- Почему instax не печатает фото?
- Почему Полароид не печатает фото?
- Почему не появляются фото Инстакс?
- Что делать если Инстакс мини не работает?
- Сколько проявляются фотографии на Полароид?
- Как достать картридж из instax?
- Как фотографировать на instax MINI 11?
- Как работать с Полароидом?
- Как фотографировать на Fujifilm Instax Mini 9?
- Как включить Инстакс?
- Какие батарейки в Инстакс мини?
- Что такое полароидные снимки?
- Сколько стоит Polaroid 636 Closeup?
Почему instax не печатает фото?
Почему Полароид не печатает фото?
Почему на полароид или instax не проявляется фото.
Такое случается, если крышку фотоаппарата открывали, после того как вышел первый защитный кадр. Если же открыть фотоаппарат все таки нужно по каким то причинам, делайте это в полной темноте, так пленка останется не засвеченой.
Почему не появляются фото Инстакс?
Фото может не проявляться, если пленка засвечена. Такое случается, если крышку камеры открывали, когда фотобумага была внутри уже без защитной пленки. Проблему можно решить заменой картриджа. Фотографии могут быть засвеченными или получаться очень темными, если неправильно выставлен режим съемки.
Что делать если Инстакс мини не работает?
Устранить неполадку можно, включив питание и установив новые батареи. Важно помнить, что замена должна осуществляться только при включенном питании. В противном случае после включения питания Instax mini будет мигать красным даже с новыми батареями. Вторая причина может крыться в выходе устройства из строя.
Сколько проявляются фотографии на Полароид?
Правда ли что фотографии на классический полароид теперь проявляются по 30-40 минут, раньше было быстрее? Да, цветные фотографии проявляются сейчас около 30 минут, черно-белые — 10, раньше на старых кассетах проявка происходила гораздо быстрее.
Как достать картридж из instax?
Внутри вы увидите маленький жёлтый маркер в верхнем правом углу. Поместите картридж в камеру, сопоставив два жёлтых маркера. Если пытаться вставить плёнку по-другому, есть риск повредить картридж. Затем закройте заднюю крышку, убедившись, что замочек защёлкнулся.
Как фотографировать на instax MINI 11?
Включение FujiFilm Instax mini 11
Фотоаппарат включается одной кнопкой, вы нажимаете на кнопку под объективом, объектив выдвигается и фотоаппарат готов для съемки. Выключить фотоаппарат тоже просто — объектив нужно задвинуть назад, фотоаппарат выключится.
Как работать с Полароидом?
Polaroid имеет систему одноступенчатой фотографии с использованием принципа диффузного переноса для непосредственного воспроизведения на фоточувствительной поверхности изображения, записанного на линзе фотоаппарата. Иными словами, фоточувствительная поверхность одновременно выступает и как пленка, и как фотография.
Как фотографировать на Fujifilm Instax Mini 9?
Как пользоваться Fujifilm Instax Mini 9
- Не забудьте менять режим на основе горящего светового индикатора. …
- Всегда ли нужно использовать те режимы, которые подсказывает световой индикатор? …
- В помещении снимайте только в режиме «домик», при этом вспышка срабатывает не дальше 1.5-2 м. …
- Ночью фотографировать на Fujifilm Instax Mini 9 нет никакого смысла.
Как включить Инстакс?
Нажмите на замок задней крышки, чтобы открыть ее. Ухватитесь за прямоугольные отверстия кассеты и аккуратно извлеките ее. Нажмите кнопку включения питания, чтобы включить камеру. Индикатор зарядки вспышки слева от окуляра начнет мигать (указывает на то, что вспышка заряжается).
Какие батарейки в Инстакс мини?
В базовую комплектацию фотоаппаратов Fujifilm Instax Mini включены батарейки CR2 в количестве 2 шт. Новые батарейки понадобятся вам, если ранее используемые батарейки сели (фотоаппарат не включается).
Что такое полароидные снимки?
Всем известно, что Polaroid — это снимок, готовый через несколько минут после нажатия кнопки фотоаппарата. Но, с другой стороны, он обладает и еще одной крайне значимой особенностью: каждый полароидный снимок уникален, его нельзя повторить. Разница между ним и обычной фотографией — как между рисунком и гравюрой.
Сколько стоит Polaroid 636 Closeup?
Polaroid 636 Close Up — модель 90х годов. Минимум настроек, корпус сделан из ударопрочной пластмассы. Самая распространённая модель в России. 2 990 руб.
Источник
Что делать, если на камере Instax mini индикаторы мигают красным
Что делать, если индикаторы камеры Instax mini мигают красным? Если вы столкнулись с таким вопросом, не стоит паниковать. Чтобы устранить имеющуюся проблему, необходимо в первую очередь выявить ее причину. Перечислим основные возможные ситуации.

- В видоискателе мигает индикатор и не срабатывает кнопка затвора. Самая простая причина — зарядка вспышки. В данном случае никаких действий предпринимать не стоит. Достаточно дождаться, когда загорится индикатор на диске регулировки яркости.
- Горит красная лампочка в Instax mini 8 или 9. Если в видоискателе загорелся индикатор, это может свидетельствовать о низком заряде батарей и необходимости их замены. К слову, источником питания камер моментальной печати Instax являются две щелочные батареи типа AA. Их заряда хватает на 100 ярких снимков.
- Мигают все индикаторы на диске регулировки яркости. В данном случае причин может быть две.
- Первая связана с низким зарядом батарей, вследствие чего вспышка долго заряжается. Устранить неполадку можно, включив питание и установив новые батареи. Важно помнить, что замена должна осуществляться только при включенном питании. В противном случае после включения питания Instax mini будет мигать красным даже с новыми батареями.
- Вторая причина может крыться в выходе устройства из строя. В этом случае после замены источников питания все индикаторы погаснут. Следует выключить питание фотоаппарата мгновенной печати и обратиться в сервисную службу для устранения поломки.

Чтобы избежать подобных проблем и продлить срок службы камеры моментальной печати обязательно перед использованием ознакомьтесь с инструкцией. А при возникновении вопросов воспользуйтесь консультацией специалистов.
Источник
Частые ошибки в работе с устройствами Instax
Представим идеальный день. Все дела удалось сделать вовремя, есть время встретиться с друзьями или просто погулять. Ты берешь с собой свою камеру instax, картриджи. Ведь все самые запоминающиеся моменты обязательно нужно запечатлеть на пленку. Делаешь тот самый кадр, но вместо потрясающего снимка, получаешь одни негативные эмоции. Бывало так? Давай разберем самые распространенные ошибки при использовании камер instax, чтобы твой идеальный день ничего не испортило.
Неправильно вставленный картридж
Здесь все легко. Для того, чтобы камера и дальше радовала тебя снимками необходимо вставлять картридж желтой полосой вверх. В правом верхнем углу увидишь короткую желтую ленточку на самом корпусе, при правильном расположении картриджа, получается одна длинная. Всегда проверяй правильное расположение картриджа, ведь гаджет может не только не включиться, но и выйти из строя.
На фотокарточках не можешь различить изображение за белой пеленой? Скорее всего, пленка засветилась. Нельзя открывать крышку камеры до того, как не сделаешь все 10 снимков. Также нельзя фотографировать с уже открытой крышкой. Не следует переставлять картриджи из одного устройства в другое, в случае, если картридж уже был вскрыт. Обязательно проверяй срок годности всей пленки. Нет гарантий, что снимок получится с испорченными комплектующими.
Камеры instax, как и любая электроника, не любят перепады температур. Нет, конечно, они с удовольствием отправятся за тобой на любой конец света, чтобы помочь сохранить в памяти заветные мгновения, но при большом «минусе» точно захотят оказаться в компании туристов, которые греются у камина, а при большом «плюсе» — в спасающей тени под пальмой. На прогулке по воде или при купании у водопада лучше поместить гаджет в чехол или водонепроницаемый пакет.
Береги свою камеру, и вы вместе сможете посетить еще не один город и даже страну!
У бренда instax есть три формата снимков для камер моментальной печати. Это mini (небольшая вертикальная прямоугольная карточка, которая поместится даже в кошелек), square (так популярный сейчас квадратный снимок), wide (широкий горизонтальный формат, идеальный для съемок больших компаний).
Для каждого из форматов есть определенные модели камер, которые помогут сделать снимки. В камеру серии mini нельзя пытаться вставить квадратный картридж, точно так же любимая многими фотографами камера instax WIDE 300 не сможет сделать снимок square или mini-фотокарточку.
Съемка при плохом освещении
Гаджеты моментальной печати instax очень технологичны. Даже в аналоговых моделях есть функция автоматической настройки экспозиции, помогающая выставлять настройки с учетом уровня окружающего освещения и вспышка. Но все равно нужно учитывать, что камера не сможет сделать яркий снимок в ночное время при отсутствии искусственного освещения.
Но если есть большое желание провести ночную фотосессию, то в этом случае вам помогут два портативных принтера моментальной печати. Просто сделайте фотографию на смартфон и распечатайте через приложение на instax mini Link или instax SP-3. Эти ребята справляются даже с самыми сложными задачами 💪.
Устройство не подключается к приложению
Ряд моделей устройств моментальной печати instax имеют помощников — приложения, которые увеличивают их возможности. Так, принтер instax mini Link, заручившись поддержкой одноименной программы может не только печатать фотографии, но и кадры из видео, а камера Instax mini LiPlay незамедлительно продемонстрирует свои гибридные свойства мобильного принтера моментальной печати, а еще в приложении больше рамочек для редактирования фото (думаем, ты оценишь 😉).
Бывают ситуации, когда соединение прерывается или не устанавливается. В таком случае, мы рекомендуем перезагрузить все устройства, «забыть» подключения или их удалить из памяти и попробовать заново.
Если у тебя есть вопросы по работе камеры, то обязательно спрашивай. Мы постараемся оперативно помочь здесь или в аккаунтах в социальных сетях. А если ты все еще выбираешь свою первую камеру, то советуем заглянуть на официальный сайт !
Источник
Почему не проявляется фото Instax
Фотокамеры Fujifilm Instax mini – компактные и простые в управлении гаджеты, которые позволяют делать, редактировать (в зависимости от модели) и моментально распечатывать снимки. Для устройств выпускаются картриджи с фирменной фотобумагой Fujifilm нескольких форматов с разнообразным дизайном рамок. Небольшие снимки становятся предметами коллекционирования, украшения интерьера и сувенирами на память.

Instax mini 9: дизайн, технические характеристики и особенности
Камеры Instax пользуются популярностью у любителей ламповых эффектов, которые пленка придает изображению. Легкость в настройке и эксплуатации делает устройства доступными для широкой аудитории пользователей. Однако иногда из-за незнания нюансов возникают вопросы, например «Почему не проявляется фото Instax?». У этой проблемы может быть несколько причин и решений, которые мы и рассмотрим в данной статье.
Распространенные трудности с печатью снимков на «Инстакс»
- После установки нового картриджа перед началом съемки необходимо удалить защитную пластину. Ее можно принять за первую карточку, но это еще не сама фотобумага. Для снятия защитной пленки нужно отщелкнуть первый кадр, и она с характерным жужжанием появится из камеры. После этого фотоаппарат готов к работе.
- Вставлять картридж с пленкой нужно так, чтобы желтая полоска на нем соединилась с желтой полоской на корпусе.
- Фото может не проявляться, если пленка засвечена. Такое случается, если крышку камеры открывали, когда фотобумага была внутри уже без защитной пленки. Проблему можно решить заменой картриджа.
- Фотографии могут быть засвеченными или получаться очень темными, если неправильно выставлен режим съемки. Световой индикатор покажет, как переключить камеру, чтобы добиться наилучшего результата.
- Если снимки получаются темными, несмотря на все настройки в процессе съемки, нужно попробовать заменить картридж.
- Печать может остановиться, не завершившись, а карточка остаться наполовину в камере, если сели батарейки. В этом случае нужно извлечь ее и заменить аккумуляторы.
Если замена картриджа, батареек и смена режима съемки не помогают, и вопрос, почему не проявляется фото Instax, остался актуальным, остается обратиться в сервисный центр, где точно разберутся с проблемой. Также можно воспользоваться помощью консультанта, в том числе онлайн и по телефону, чтобы узнать больше о характеристиках своей камеры, особенностях съемки моментальной фотографии и других нюансах.
Источник
Почему instax не печатает фото?
Почему Полароид не печатает фото?
Почему на полароид или instax не проявляется фото.
Такое случается, если крышку фотоаппарата открывали, после того как вышел первый защитный кадр. Если же открыть фотоаппарат все таки нужно по каким то причинам, делайте это в полной темноте, так пленка останется не засвеченой.
Почему не появляются фото Инстакс?
Фото может не проявляться, если пленка засвечена. Такое случается, если крышку камеры открывали, когда фотобумага была внутри уже без защитной пленки. Проблему можно решить заменой картриджа. Фотографии могут быть засвеченными или получаться очень темными, если неправильно выставлен режим съемки.
Что делать если Инстакс мини не работает?
Устранить неполадку можно, включив питание и установив новые батареи. Важно помнить, что замена должна осуществляться только при включенном питании. В противном случае после включения питания Instax mini будет мигать красным даже с новыми батареями. Вторая причина может крыться в выходе устройства из строя.
Сколько проявляются фотографии на Полароид?
Правда ли что фотографии на классический полароид теперь проявляются по 30-40 минут, раньше было быстрее? Да, цветные фотографии проявляются сейчас около 30 минут, черно-белые — 10, раньше на старых кассетах проявка происходила гораздо быстрее.
Как достать картридж из instax?
Внутри вы увидите маленький жёлтый маркер в верхнем правом углу. Поместите картридж в камеру, сопоставив два жёлтых маркера. Если пытаться вставить плёнку по-другому, есть риск повредить картридж. Затем закройте заднюю крышку, убедившись, что замочек защёлкнулся.
Как фотографировать на instax MINI 11?
Включение FujiFilm Instax mini 11
Фотоаппарат включается одной кнопкой, вы нажимаете на кнопку под объективом, объектив выдвигается и фотоаппарат готов для съемки. Выключить фотоаппарат тоже просто — объектив нужно задвинуть назад, фотоаппарат выключится.
Как работать с Полароидом?
Polaroid имеет систему одноступенчатой фотографии с использованием принципа диффузного переноса для непосредственного воспроизведения на фоточувствительной поверхности изображения, записанного на линзе фотоаппарата. Иными словами, фоточувствительная поверхность одновременно выступает и как пленка, и как фотография.
Как фотографировать на Fujifilm Instax Mini 9?
Как пользоваться Fujifilm Instax Mini 9
- Не забудьте менять режим на основе горящего светового индикатора. …
- Всегда ли нужно использовать те режимы, которые подсказывает световой индикатор? …
- В помещении снимайте только в режиме «домик», при этом вспышка срабатывает не дальше 1.5-2 м. …
- Ночью фотографировать на Fujifilm Instax Mini 9 нет никакого смысла.
Как включить Инстакс?
Нажмите на замок задней крышки, чтобы открыть ее. Ухватитесь за прямоугольные отверстия кассеты и аккуратно извлеките ее. Нажмите кнопку включения питания, чтобы включить камеру. Индикатор зарядки вспышки слева от окуляра начнет мигать (указывает на то, что вспышка заряжается).
Какие батарейки в Инстакс мини?
В базовую комплектацию фотоаппаратов Fujifilm Instax Mini включены батарейки CR2 в количестве 2 шт. Новые батарейки понадобятся вам, если ранее используемые батарейки сели (фотоаппарат не включается).
Что такое полароидные снимки?
Всем известно, что Polaroid — это снимок, готовый через несколько минут после нажатия кнопки фотоаппарата. Но, с другой стороны, он обладает и еще одной крайне значимой особенностью: каждый полароидный снимок уникален, его нельзя повторить. Разница между ним и обычной фотографией — как между рисунком и гравюрой.
Сколько стоит Polaroid 636 Closeup?
Polaroid 636 Close Up — модель 90х годов. Минимум настроек, корпус сделан из ударопрочной пластмассы. Самая распространённая модель в России. 2 990 руб.
Источник
Гибридная камера мгновенной печати FUJIFILM BODM1P102-200 Instax Mini LiPlay

Перед использованием
Перед использованием камеры убедитесь, что у вас есть следующее.
Входящие в комплект аксессуары
- USB-кабель для зарядки (1)
- Наручный ремешок (1)
- Руководство пользователя (1)
Эта книга представляет собой краткое руководство по использованию «instax mini LiPlay».
Подробное руководство по «instax mini LiPlay» можно найти по следующему адресу: web сайте и загрузите цифровое руководство пользователя (полная версия).
https://instax.com/mini_liplay/support/manuals/
Вы также можете отсканировать следующий QR-код, чтобы загрузить цифровое руководство пользователя (полная версия).

Сам текстовый QR-код является зарегистрированным товарным знаком и словесным знаком Denso Wave Incorporated.
Примечания по утилизации камеры
В этой камере используется встроенный литий-ионный аккумулятор.
При утилизации камеры соблюдайте местные правила и утилизируйте ее надлежащим образом.
Пожалуйста, обратитесь к прилагаемому листу КОНТАКТНАЯ ИНФОРМАЦИЯ для запроса.
Если ваша страна или регион не указаны в таблице, обратитесь к местному дистрибьютору.
ВНИМАНИЕ: Не извлекайте встроенный аккумулятор самостоятельно; в противном случае вы можете получить травму.
Утилизация электрического и электронного оборудования в частных домах
Утилизация бывшего в употреблении электрического и электронного оборудования (Применимо в Европейском Союзе и других европейских странах с системами раздельного сбора отходов) Этот символ на изделии, в руководстве и в гарантии и/или на его упаковке указывает на то, что данное изделие не подлежит утилизации. относятся к бытовым отходам. Вместо этого его следует отнести в соответствующий пункт сбора для утилизации электрического и электронного оборудования. Обеспечив правильную утилизацию этого продукта, вы поможете предотвратить потенциальные негативные последствия для окружающей среды и здоровья человека, которые в противном случае могли бы быть вызваны неправильным обращением с отходами этого продукта. Переработка материалов поможет сохранить природные ресурсы. Для получения более подробной информации об утилизации этого продукта обратитесь в местную городскую администрацию, службу по утилизации бытовых отходов или в магазин, где вы приобрели продукт. В странах за пределами ЕС: Если вы хотите утилизировать этот продукт, обратитесь в местные органы власти и узнайте о правильном способе утилизации.
Названия деталей
Фронт

- Слот для выброса пленки
- Кнопка спуска затвора
- Вспышка/автоспуск lamp
- Крючок для ремня
- USB-порт
- Кнопка (Звук)
- объектив
- Зеркало для селфи
- Пленочный дверной замок
- Пленка дверь
- (Кнопка быстрого доступа для выбора кадра 1)
- Кнопка сброса1
задний
- (Кнопка быстрого доступа для выбора кадра 2)
- (Кнопка быстрого доступа для выбора кадра 3)
- Слот для Micro SD карты
- (Кнопка питания
- Микрофон
- Кнопка выбора динамика
- Кнопка МЕНЮ/ОК
- (Кнопка назад
- Кнопка (воспроизведение)
- Кнопка (Печать)
- ЖК монитор

Если камера не работает должным образом, нажмите кнопку сброса, чтобы перезагрузить камеру.
Замена батареи


Об этой камере
Основные особенности
- «instax mini LiPlay» — самый компактный продукт instax, доступный на рынке.
- Вы можете идеально расположить изображение с помощью ЖК-монитора и сохранить изображение в память камеры или на карту памяти micro SD.
- Вы можете выбрать изображение из своей фототеки и распечатать его с помощью функции печати instax.
- Вы можете редактировать свои фотографии, используя 10 фоторамок и 6 фильтров.
- Вы можете сохранить свои изображения с записанным звуком.
- Стильный и роскошный дизайн.
- Оснащен передним зеркалом для удобного позиционирования селфи.
Функции, доступные в приложении для смартфона
- Аудио функция
Запишите звук с помощью камеры, преобразуйте его в QR-код и распечатайте QR-код на изображении. Звук воспроизводится, когда QR-коды, напечатанные с помощью функции печати instax, считываются вашим смартфоном. - Удаленное управление камерой
Управляйте камерой со своего смартфона для удаленной съемки изображений. - Функция быстрого доступа
Вы можете выбрать фоторамки на своем смартфоне и назначить рамки 3 кнопкам быстрого доступа, расположенным сбоку камеры. - Прямая печать
Перенесите изображение со смартфона на камеру и распечатайте его с помощью функции печати instax. Перед отправкой изображения вы можете использовать приложение для смартфона, чтобы переместить, повернуть, увеличить или обрезать изображение.
Зарядка аккумулятора
- Выключите камеру перед зарядкой аккумулятора. Аккумулятор не будет заряжаться, если камера включена.
- Будьте осторожны, чтобы правильно подключить кабель, как указано.

Подключите камеру с помощью прилагаемого USB-кабеля к USB-адаптеру переменного тока (поставляется со смартфоном), затем подключите USB-адаптер переменного тока к внутренней розетке.
- Время зарядки составляет от 2 до 3 часов.
Индикация состояния зарядки
- Во время зарядки: Автоспуск лamp загорается.
- Зарядка завершена: Автоспуск лamp уходит.
- Ошибка зарядки: Автоспуск лamp мигает.
ВАЖНОЕ ЗАМЕЧАНИЕ ПО БЕЗОПАСНОСТИ
Этот продукт был разработан с учетом требований безопасности и
также обеспечивать безопасное обслуживание при правильном обращении в соответствии с Руководством пользователя и предоставленными инструкциями. Важно, чтобы и продукт, и
Пленка «instax mini» обрабатывается надлежащим образом и используется только для печати изображений в соответствии с инструкциями в Руководстве пользователя и в инструкциях к пленке «instax mini». Для вашего удобства и безопасности, пожалуйста, следуйте тому, что написано в Руководстве пользователя. Также рекомендуется хранить Руководство пользователя в безопасном, легкодоступном месте, где вы можете обратиться к нему в случае необходимости.
ПРЕДУПРЕЖДЕНИЕ
- Этот символ указывает на опасность, которая может привести к травме или смерти. Пожалуйста, следуйте этим инструкциям.
- Камера нагревается, испускает дым, издает запах гари или выглядит ненормально.
- Камера упала в воду, или внутрь камеры попали посторонние предметы, такие как вода или металл.
- Поскольку аккумулятор встроен в камеру, не подвергайте его нагреванию, не бросайте в открытый огонь, не пытайтесь ронять и не подвергайте ударам. Это может привести к взрыву камеры.
- Никогда не пытайтесь разбирать этот продукт. Вы можете получить травму.
- Если с камерой что-то не так, никогда не пытайтесь ремонтировать ее самостоятельно. Вы можете получить травму.
- Если этот продукт упал или поврежден так, что видна внутренняя часть, не прикасайтесь к нему. Обратитесь к дилеру FUJIFILM. Не прикасайтесь к деталям или выступающим частям внутри задней крышки. Вы можете получить травму.
- Никогда не мочите этот продукт и не трогайте его мокрыми руками. Это может привести к поражению электрическим током.
- Как только аккумулятор полностью зарядится, сразу же отсоедините кабель USB.
- Хранить в недоступном для маленьких детей месте. Этот продукт может вызвать травму в руках ребенка.
- Не накрывайте и не заворачивайте камеру или адаптер переменного тока тканью или одеялом. Это может привести к накоплению тепла и деформации корпуса или стать причиной возгорания.
Простой уход за камерой
- Уход за камерой
- Не открывайте дверцу пленки, пока не израсходуете пленку; в противном случае остальная часть пленки экспонируется и становится белой, и пленку больше нельзя использовать.
- Ваша камера — хрупкий объект. Не подвергайте его воздействию воды, песка или песчаных материалов и не роняйте его.
- Не используйте ремешок, предназначенный для сотовых телефонов или других подобных электронных устройств. Эти ремни обычно
слишком слаб, чтобы надежно удерживать камеру. В целях безопасности используйте только ремни, предназначенные для вашей камеры, и используйте их только по назначению и в соответствии с инструкциями. - Не используйте растворители, такие как разбавитель или спирт, для удаления грязи.
- Не оставляйте камеру под прямыми солнечными лучами или в жарких местах, например в автомобиле. Не оставляйте это в damp места на длительный срок.
- Газ, отпугивающий моль, например нафталин, может повредить камеру и отпечатки. Храните камеру и отпечатки в безопасном и сухом месте.
- Обратите внимание, что диапазон температур, в котором можно использовать камеру, составляет от +5 °C до +40 °C.
- Примите все меры к тому, чтобы печатные материалы не нарушали авторские права, права на изображение, неприкосновенность частной жизни или другие личные права и не оскорбляли общественную порядочность. Действия, нарушающие права других лиц, противоречащие общественной порядочности или причиняющие неудобства, могут быть наказуемы по закону или иным образом преследоваться в судебном порядке.
- Обращение с ЖК-монитором
Поскольку ЖК-монитор можно легко поцарапать или повредить острыми или твердыми предметами, рекомендуется прикрепить к монитору защитный лист (имеется в продаже).- Зарядка аккумулятора
Аккумулятор при поставке не заряжен. Полностью зарядите аккумулятор перед использованием.
Зарядите аккумулятор с помощью прилагаемого USB-кабеля. Время зарядки увеличивается при температуре окружающей среды ниже +10 °C или выше +35 °C. Не пытайтесь заряжать аккумулятор при температуре выше +40 °C или при температуре ниже +5 °C, так как аккумулятор не будет заряжаться.
Срок службы батареи
При нормальной температуре аккумулятор можно заряжать около 300 раз. Заметное уменьшение времени, в течение которого аккумулятор будет удерживать заряд, указывает на то, что срок его службы подошел к концу.
- Зарядка аккумулятора
- Предостережения: обращение с аккумулятором
Аккумулятор и корпус камеры могут нагреваться на ощупь после продолжительного использования. Это нормально. - Сертификационные знаки, полученные камерой, находятся внутри пленочной камеры.
- Предостережения во время печати

instax mini» Уход за пленкой и печатью
См. Инструкции по использованию пленки FUJIFILM Instant Film «instax mini». Следуйте всем инструкциям по безопасному и правильному использованию.
- Храните пленку в прохладном месте. Не оставляйте пленку в местах с экстремально высокой температурой (например, в закрытом автомобиле) на много часов.
- Не прокалывайте, не рвите и не разрезайте пленку «instax mini». Если пленка повреждена, не используйте ее.
- Когда вы загружаете пачку пленки, используйте ее как можно скорее.
- Если пленка хранилась в месте с очень высокой или низкой температурой, доведите ее до комнатной температуры перед началом печати изображений.
- Обязательно используйте пленку до истечения срока годности или даты «Использовать до».
- Избегайте досмотра зарегистрированного багажа в аэропорту и других сильных рентгеновских лучей. На неиспользованной пленке может появиться эффект запотевания и т.п. Мы рекомендуем взять камеру и/или пленку в самолет в качестве ручной клади. (Для получения дополнительной информации свяжитесь с каждым аэропортом.)
- Избегайте яркого света и храните проявленные отпечатки в прохладном и сухом месте.
- Не прокалывайте и не разрезайте эту пленку, так как она содержит небольшое количество едкой пасты (высокощелочной). Никогда не позволяйте детям или животным брать пленку в рот. Также обратите внимание, чтобы паста не попала на кожу или одежду.
- В случае попадания пасты внутри пленки на кожу или одежду немедленно смойте ее большим количеством воды. Если паста попала в глаза или рот, немедленно промойте это место большим количеством воды и обратитесь к врачу. Обратите внимание, что щелочь внутри пленки остается активной в течение примерно 10 минут после того, как изображение было напечатано. См. Инструкции по использованию пленки FUJIFILM Instant Film «instax mini». Следуйте всем инструкциям для безопасного и правильного использования.
Меры предосторожности при обращении с пленкой и отпечатками
Подробнее см. Инструкции и предупреждения на FUJIFILM Instant Film «instax mini».
Информация для отслеживания в Европе
- Производитель: Корпорация FUJIFILM
- Адрес Город: 7-3, Акасака 9-Чомэ, Минато-ку, Токио
- Страна: ЯПОНИЯ Авторизованный представитель в Европе:
ФУДЖИФИЛЬМ ЕВРОПА ГМБХ
- Адрес Город: Дюссельдорф Heesenstrasse 31, 40549
- Страна: Германия
Устройства Bluetooth®: предостережения
ВАЖНО: Прочтите следующие примечания, прежде чем использовать встроенный в продукт передатчик Bluetooth.
- Используйте только как часть сети Bluetooth.
FUJIFILM не несет ответственности за ущерб, возникший в результате несанкционированного использования. Не используйте в приложениях, требующих высокой степени надежности, напримерample в медицинских устройствах или других системах, которые могут прямо или косвенно влиять на человеческую жизнь. При использовании устройства на компьютере и
другие системы, которые требуют большей степени надежности, чем сети Bluetooth, обязательно примите все необходимые меры предосторожности для обеспечения безопасности и предотвращения сбоев. - Используйте только в той стране, в которой было приобретено устройство.
Это устройство соответствует правилам, регулирующим устройства Bluetooth в стране, в которой оно было приобретено. При использовании устройства соблюдайте все правила размещения. FUJIFILM не несет ответственности за проблемы, связанные с использованием в других юрисдикциях. - Беспроводные данные (изображения) могут быть перехвачены третьими лицами.
Безопасность данных, передаваемых по беспроводным сетям, не гарантируется. - Не используйте устройство в местах, подверженных воздействию магнитных полей, статического электричества или радиопомех.
Не используйте передатчик вблизи микроволновых печей или в других местах, подверженных воздействию магнитных полей, статического электричества или радиопомех, которые могут помешать приему беспроводных сигналов. Взаимные помехи могут возникать, когда передатчик используется рядом с другими беспроводными устройствами, работающими в диапазоне 2.4 ГГц. - Передатчик Bluetooth работает в диапазоне 2.4 ГГц. Стандартная мощность составляет 3.16 мВт.
- Это устройство работает на той же частоте, что и коммерческие, образовательные, медицинские устройства и беспроводные передатчики.
Он также работает на той же частоте, что и лицензионные передатчики, и специальные нелицензированные низковольтные передатчики.tage передатчики, используемые в системах слежения за радиочастотной идентификацией для сборочных линий и в других подобных приложениях. - Чтобы предотвратить взаимодействие с вышеуказанными устройствами, соблюдайте следующие меры предосторожности.
Перед использованием этого устройства убедитесь, что передатчик радиочастотной идентификации не работает. Если вы заметили, что это устройство вызывает помехи в низковольтныхtage системы отслеживания радиочастотной идентификации, обратитесь к представителю FUJIFILM. - По закону могут быть наказаны:
- Разборка или модификация данного устройства.
- Удаление этикеток сертификации устройств.
- Информация о товарных знаках
Словесный знак и логотипы Bluetooth® являются зарегистрированными товарными знаками, принадлежащими Bluetooth SIG, Inc., и любое использование таких знаков компанией FUJIFILM осуществляется по лицензии.
Если у вас есть какие-либо вопросы об этом изделии, обратитесь к авторизованному дистрибьютору FUJIFILM или посетите веб-сайт webсайт ниже:
http://www.fujifilm.com/
Документы / Ресурсы
Рекомендации
BODM1P302-100
User's Guide (Full version)
[INSTANT PRINT
+
 DIGITAL TECHNOLOGIES]
INSTAX MINI HM1
NA_EN


2
Table of Contents
Before Use ����������������������������������������������������������������������������������� 3
Notes on Disposing of the Camera ����������������������������������������3
About This Camera �������������������������������������������������������������������� 3
Main Features ������������������������������������������������������������������������������������3
Functions Available with INSTAX® Mini LiPlay Smartphone
App ������������������������������������������������������������������������������������������������������3
Part Names ����������������������������������������������������������������������������������4
LCD Monitor ��������������������������������������������������������������������������������5
Using the Cross Key �������������������������������������������������������������������6
Attaching the Strap ������������������������������������������������������������������� 6
Charging the Battery ����������������������������������������������������������������7
Charging Status Indication �������������������������������������������������������������7
Powering on/off ������������������������������������������������������������������������� 7
Checking the Battery Level �������������������������������������������������������������7
Initial Settings ���������������������������������������������������������������������������� 8
Loading/Unloading INSTAX® Mini Instant Film Pack ��������10
Loading INSTAX® Mini Instant Film Pack ����������������������������������� 10
Unloading a Used INSTAX® Mini Instant Film Pack  ����������������� 10
Basic Shooting and Playback ������������������������������������������������11
Shooting ������������������������������������������������������������������������������������������ 11
Playing Back Images���������������������������������������������������������������������� 11
Changing the Playback Screen Display ������������������������������������� 11
Printing ��������������������������������������������������������������������������������������12
Remaining Film Indicator ������������������������������������������������������������� 13
Selecting the Frame and Filter ����������������������������������������������13
Selecting the Frame ���������������������������������������������������������������������� 13
Selecting the Filter������������������������������������������������������������������������� 13
Adding Sound to Images �������������������������������������������������������14
Adding Sound When Shooting ��������������������������������������������������� 14
Adding Sound When Playing Back ��������������������������������������������� 15
Various Types of Shooting �����������������������������������������������������15
Shoot Using the Self-timer ����������������������������������������������������������� 15
Shooting Using the Flash ������������������������������������������������������������� 16
Taking a Photo of Yourself (Selfie) ���������������������������������������������� 16
Shooting Using the AF/AE Lock �������������������������������������������������� 16
Printing from Print History ����������������������������������������������������17
Using a Memory Card �������������������������������������������������������������17
Inserting a Memory Card �������������������������������������������������������������� 17
Using the Shooting Menu ������������������������������������������������������18
Using the Playback Menu ������������������������������������������������������19
Using the Set-up Menu ����������������������������������������������������������� 19
Functions Available by Linking with INSTAX® Mini
LiPlay Smartphone App ���������������������������������������������������������20
Sound Function ������������������������������������������������������������������������������ 20
Remote Shooting Function ���������������������������������������������������������� 20
Shortcut Function �������������������������������������������������������������������������� 20
Direct Print Function ��������������������������������������������������������������������� 20
Specifications ���������������������������������������������������������������������������21
Troubleshooting ����������������������������������������������������������������������22
IMPORTANT SAFETY NOTICE �������������������������������������������������23
Common Sense Camera Care ������������������������������������������������������ 23
Bluetooth® Device Cautions �������������������������������������������������������� 24


3
NA_EN

Before Use
Before using the camera, check you have the following.
Supplied Accessories
•  USB cable for charging (1)
•  Strap (1)
•  User’s Guide
 (1)
Note that USB AC adapter is not included, but is typically provided
with your smartphone.
Notes on Disposing of the Camera
A built-in lithium ion battery is used for this camera�
When you dispose of the camera, follow your local regulations and
dispose of it properly.
Do not attempt to remove the built-in battery. Injury may result.
For proper disposal in the United States at product end-of-life,
please contact 1-800-800-3854 Option #1 INSTAX.
About This Camera
Main Features
 ● Smallest INSTAX® product available on the market�
 ● You can take a photo while looking at the LCD monitor and
save it on the camera memory or on your micro SD card�
 ● You can select a photo from your photo library and print it
using the INSTAX® print feature�
 ● You can edit your photos by using 10 Frames and 6 Filters�
 ● You can save your photo with the recorded sound�
 ● Equipped with selfie mirror for easy taking of selfies�
Functions Available with INSTAX® Mini LiPlay
Smartphone App
Navigate to your Smartphone App store and download the FREE
FUJIFILM INSTAX® Mini LiPlay Smartphone App. (See p. 8) Using
INSTAX® Mini LiPlay Smartphone App you can:
 ● Sound Function
Record sound with the camera, convert it to QR code and print
the QR code on a photo (Print With Sound). Sound is played
when QR codes printed with the INSTAX® Print Feature are read
with your smartphone.
 ● Remote Shooting Function
Control the camera with your smartphone for remote shooting
of photos.
 ● Shortcut Function
Press any of the 3 shortcut buttons located on the side of the
camera to use a Frame on your photo. You can use INSTAX® Mini
LiPlay Smartphone App to assign your favorite templates to the
3 shortcut buttons.
 ● Direct Print
Transfer a photo from your smartphone to the camera, and print
it with the INSTAX® print feature. Before sending the photo, you
can use INSTAX® Mini LiPlay Smartphone App to move, rotate,
zoom in, or zoom out the photo.


4
Part Names
Front
1
2
3
4
5
6
8
7
Rear
1
2
3
FI L M
1
2
3
9
10
11
12
13
14
15
16
17
18
19
20
21
22
23
24
1  Film ejection slot
2  Shutter button
3  Flash/Self-timer lamp
4  Strap hook
5  USB port
6  (Sound) button
7  Lens
8  Selfie mirror
9  Film door lock
10  Film door
11  (Shortcut 1) button
12  Reset button*
13  (Shortcut 2) button
14  (Shortcut 3) button
15  Micro SD card slot
16  (Power) button
17  Microphone
18  Speaker
19  Cross key ( )
20  MENU/OK button
21  (Back) button
22  (Playback) button
23  (Print) button
24  LCD monitor
*If the camera does not work properly, press the reset button to
reset the camera. Keep in mind the camera will not work properly
if the battery is not properly charged.


5
NA_EN

LCD Monitor
When you turn on the power, the Shooting Screen displays on the
LCD monitor.
•  To switch from the Shooting Screen to the Playback Screen,
press   (Playback).
•  To switch from the Playback Screen to the Shooting Screen,
press the shutter button.
While the Shooting Screen or Playback Screen is displayed, press
 (Back) to display the following information on the LCD monitor.
Shooting Screen
1
2
3
4
5
7
6
8
9
10
No Frame
No Filter
Playback Screen
12
13
11
No Frame
No Filter
1  Current date and time
2  Exposure
3  Frame name
4  Filter name
5  Number of images available*
6  Number of Print With Sound images waiting to be sent to
INSTAX® Mini LiPlay Smartphone App
7  Remaining film indicator
8  Bluetooth connection status indicator
9  Battery level indicator
10  Flash indicator
11  Frame No. indicator
12  Shooting date/time information
13  Transmission status indicator of Print With Sound images
*When using the internal memory,   is displayed. The icon
displays in red when the number of further images that can be
saved to internal memory is 10 or less.
 ■ Cross Key Guide Display
When starting up or switching screens (Shooting Screen
Playback Screen), the Cross Key Guide appears for a short time.
Shooting Screen Playback Screen
Cross Key Guide


6
Using the Cross Key
The   (up, down, left, and right) keys are used to select
Menu Items, etc. or to recall the functions assigned to the
 keys. The [MENU/OK] button is used to display the Menu or to
make a selection.
2 4
1
3
5
1   Move up
2   Move left
3   Move down
4   Move right
5  Menu display/Make selection
Attaching the Strap
Attach the strap as shown below.
•  To avoid dropping the camera, put the strap around your wrist
when carrying it or taking photos. The camera may be damaged
if dropped.


7
NA_EN

Charging the Battery
 Turn off the camera before charging the battery. Battery will not
charge if the camera is powered on.
 Be careful to properly attach cable as indicated.
FIL M
Connect the camera and a USB AC adapter supplied with your
smartphone using the supplied USB cable, then connect the USB
AC adapter to an indoor power outlet.
•  Charging time is approximately 2 to 3 hours.
Charging Status Indication
While charging Self-timer lamp lights up.
Charging finished Self-timer lamp goes off.
Charging error Self-timer lamp flashes.
Charging from a PC:
•  Connect the camera and PC directly. Do not connect via a
USB hub or keyboard.
•  If the PC goes into sleep mode while charging, charging is
discontinued. To continue charging, exit sleep mode and then
reconnect the USB cable.
•  The battery may not be able to charge depending on the
specifications and settings or conditions of the PC .
Note
•  The battery cannot be removed.
•  The battery is not fully charged when shipped. Be sure to
charge the battery before use.
•  For notes about the battery, please refer to “Common Sense
Camera Care”. (See p. 23)
Powering on/off
Press and hold   (Power) to power on or off.
Checking the Battery Level
The battery level is displayed on the LCD monitor when pressing
 (Back) on the Shooting Screen or Playback Screen.
Display Battery level
There is enough remaining charge.
The remaining charge is half or less. Charging is
recommended.
There is not enough remaining charge. Please
charge as soon as possible.
•  When the battery level is low, the   icon displays at the
bottom right of the LCD monitor.
•  When the battery runs out completely, the   icon appears on
the LCD monitor and the power is turned off.
•  If you do not operate the camera for a certain period of time,
it will turn off automatically. You can also set the time until
the power is turned off. (See p. 20)
•  During Shooting Mode, press   (Playback) to display the
Playback Screen and enter Playback Mode.
•  Fully press the shutter button during Playback Mode to
display the Shooting Screen and select Shooting Mode.


8
Initial Settings
When turning on the power for the first time after purchase, the
screen to set the language, date and time, and pairing with a
smartphone is displayed automatically.
App Installation Instructions
Please install INSTAX® Mini LiPlay Smartphone App on your
smartphone before carrying out pairing registration.
•  If you are using an Android OS smartphone, please search for
INSTAX® Mini LiPlay Smartphone App in Google Play Store
and install it.
*Requirements for Android OS smartphones: Android Ver.
5.0 or higher with Google Play Store installed
•  If you are using an iOS smartphone, please search for INSTAX®
Mini LiPlay Smartphone App in the App Store and install it.
*Requirements for iOS smartphones: iOS Ver. 10 or higher
Depending on your smartphone model, you may not be able to
use INSTAX® Mini LiPlay Smartphone App even if you have
installed it and your smartphone meets the above requirements.
This setting can also be configured later� If you want to
configure the settings later or reconfigure the settings, set
the [言語/LANG�], [DATE/TIME] and [Bluetooth SETTINGS] in the
SET-UP MENU�
1
Turn on the power
• When you turn on the power for the first time after
purchase, the Language Setting (言語/LANG.) Screen is
displayed.
2
Select the language you wish to use and press
[MENU/OK]
ENGLISH
FRANCAIS
DEUTSCH
NO
3
Set the date order and press [MENU/OK]
YY.MM.DD
DD.MM.YY
DATE/TIME
MM/DD/YY
NO
4
Set the year, month, day, hour, and minute and press
[MENU/OK]
Move the cursor by using    , then change the number
using    .
DATE/TIME
YY.MM.DD
NO
SET
Next, configure the pairing settings.
5
Press [MENU/OK]
Bluetooth
SETTINGS
NO
PAIRING
Pair this product
with a smartphone
to use the functions
linked to this product's
smartphone app.
• If you do not wish to set pairing, press   (Back) to finish
the Initial Settings.
6
Launch INSTAX® Mini LiPlay Smartphone App and
press [SETTINGS]
Refer “App Installation Instructions”. (See p. 8)


9
NA_EN

7
Press [Bluetooth settings] on INSTAX® Mini LiPlay
Smartphone App
8
Press [Connect] on INSTAX® Mini LiPlay Smartphone
App
• You can confirm camera’s OWN NAME by accessing the
Set-up Menu (See p. 19). Next, select the menu items in
the following order: [Bluetooth SETTINGS], [INFORMATION],
[OWN NAME].
9
Allow pairing
10
Confirm that Pairing Registration is complete
PAIRING
REGISTRATION
PAIRING
COMPLETE
xxxx-xxxx
When Pairing Registration is complete, the screen changes
to the Shooting Screen.


10
Loading/Unloading INSTAX® Mini Instant Film
Pack
Loading INSTAX® Mini Instant Film Pack
1
Slide the film door lock and open the film door
FI LM
1
2
3
FIL M
2
1
2
Insert INSTAX® Mini Instant Film Pack by aligning the
yellow marks
1
2
3
2
1
3
Close the film door
1
2
3
FI LM
4
Remove the black film cover that is automatically
rejected
FILM
Unloading a Used INSTAX® Mini Instant Film Pack
1
Slide the film door lock and open the film door
FI LM
1
2
3
FIL M
2
1
2
Grasp the rectangular holes on INSTAX® Mini Instant
Film Pack, then pull the film pack out from the
camera
FI LM
2
1
1
2
3


11
NA_EN

Basic Shooting and Playback
Shooting
The following steps describe the basic shooting procedure.
1
Turn on the power
2
Configure the Frame and Filter, etc� as needed
3
Decide the composition to shoot
4
Press the shutter button halfway to focus on the
subject
When the subject is in focus
A beep sounds and the green AF Frame displays on the LCD
monitor.
When the subject is not in focus
The red AF Frame displays on the LCD monitor. Either
change the composition or use the AF/AE Lock. (See p. 16)
5
While pressing the shutter button halfway, press the
button down further (full press)
The photo is taken and the image is saved to the internal
memory or memory card.
• For the procedure to print an image you have taken, please
refer to “Printing”. (See p. 12)
•  When shooting, steady your arms against your body and hold
the camera firmly with both hands.
•  Be careful not to touch the camera lens when pressing the
shutter button.
•  When pressing the shutter button fully, press it gently so that
the camera does not move or shake.
•  Be careful not to cover the flash or lens with your fingers or
the strap.
•  In low light or backlit conditions, the flash may fire when you
fully press the shutter button. You can change the Flash
Settings so that the flash does not fire. (See p. 16)
Notes on the internal memory
•  When the internal memory is full, the shutter does not release
and you cannot shoot photos. Please delete some images or
use a memory card.
•  Images in the internal memory may be corrupted or lost due
to malfunction of the camera.
•  It is recommended that you copy important images to
another media format (Hard disk, CD-R, CD-RW, DVD-R, etc.)
as a backup. Refer to “[COPY]”. (See p. 19)
•  If you submit your camera for repair, we cannot guarantee the
integrity of the data in the internal memory.
•  When repairing the camera, we may need to check the data in
the internal memory.
Playing Back Images
You can play back images on the LCD monitor.
1
Turn on the power
2
Press   (Playback)
The last image taken is displayed.
3
Press   or   to select the image you want to play
back
• Press the shutter button fully to return to the Shooting
Screen.
Changing the Playback Screen Display
You can zoom in the image and change the number of images
displayed on the LCD monitor.
 ■ Zooming Images
1
Select the image you want to zoom in and press
[MENU/OK]
The Playback Menu is displayed.
ZOOM
ERASE SOUND
PLAYBACK MENU
PRINT HISTORY
ERASE


12
2
Press   or   to select [ZOOM]
3
Press [MENU/OK]
The Zoom Screen is displayed.
4
Zoom in or zoom out the image with   and
Move
• Press   or   on the Zoom Screen to switch to the Move
Screen and move the screen position using  . To
return to the Zoom Screen, press   (Back).
• If you press [MENU/OK] while the Zoom Screen or Move
Screen is displayed, the screen returns to the Playback
Screen.
• You can also print with the image zoomed in or zoomed
out.
 ■ Change the Number of Images Displayed
While displaying the Playback Screen, press   (Playback) to
change the number of images displayed.
One Image Display
Four Image DisplayNine Image Display
Printing
You can print the images using the following procedure.
1
Turn on the power
2
Press   (Playback)
The last image taken is displayed.
3
Press   or   to select the image you want to print
4
Configure settings such as Frame and Zoom as
needed
5
Press   (Print)
6
Press   or   to select [PRINT] or [PRINT WITH
SOUND]
Note
To Print With Sound, it is necessary to link with the Sound
Function of INSTAX® Mini LiPlay Smartphone App. Properly
download the App to ensure the Sound Function is enabled.
(See p. 8)
PRINT WITH SOUND
PRINT
BACK
7
Press [MENU/OK]
Printing starts.
• To Print With Sound, use   to change the print
position of the QR Code as needed.
• To cancel printing, select [BACK] or press   (Back).
8
When the sound of the film unloading stops, hold
the top of the film and remove it
Note
Be careful not to obstruct the film ejection slot with your fingers
or the strap.


13
NA_EN

Remaining Film Indicator
The remaining number of INSTAX® Mini Instant Film sheets is
indicated by the dots at the bottom of the screen. Each time a
image is printed, a dot changes to a small square dot. The dots
display in red when the number of available INSTAX® Mini Instant
Film sheets is 2 or less.
Ten sheets remaining
Five sheets remaining
Two sheets remaining
No sheets remaining; Film pack is entirely used up
•  For handling of INSTAX® Mini Instant Film, please refer to the
FUJIFILM INSTAX® Mini Instant Film instruction manual.
•  Film development takes about 90 seconds (the time varies
depending on the temperature).
Selecting the Frame and Filter
Selecting the Frame
Follow the procedure below to select the Frame type.
1
On the Shooting Screen or Playback Screen, press
The following guide is displayed.
No Frame
2
Press   or   to select the Frame type
3
Press   or [MENU/OK]
The Frame is applied and the display returns to the previous
screen.
• Press   (Back) to return to the previous screen without
applying the Frame.
• To cancel the Frame you have applied, select "No Frame"
under Frame type.
You can also press a shortcut button to select the Frame
assigned to that button.
Selecting the Filter
Follow the procedure below to select the Filter type.
1
On the Shooting Screen, press
The following guide is displayed.
No Filter
2
Press   or   to select the Filter type


14
3
Press   or [MENU/OK]
The Filter is applied and the display returns to the previous
screen.
• Press   (Back) to return to the previous screen without
applying the Filter.
• To cancel the Filter you have applied, select "No Filter"
under Filter type.
Adding Sound to Images
This camera can attach recorded sound to images.
Adding Sound When Shooting
1
On the Shooting Screen, press and hold   (Sound)
Sound Mode starts, and a recording animation is displayed
at the bottom of the screen.
• When you press and hold   (Sound) for the first time after
turning on the power, the Sound Mode Function
description is displayed for a short time before Sound
Mode starts.
2
Press the shutter button halfway to focus on the
subject
3
When ready to record sound, press the button down
further (full press)
Sound will be recorded for 5 seconds before and after fully
pressing down the shutter button.
• To exit Sound Mode, press   (Sound) again.


15
NA_EN

Adding Sound When Playing Back
1
On the Single Image Playback Screen, press and
hold    (Sound)
Sound Mode starts, and a recording icon is displayed in the
center of the screen.
• Sound is recorded for about 10 seconds after you press and
hold   (Sound).
• Note that each image can only be assigned 1 sound
message. If you press and hold   (Sound) while displaying
an Image With Sound, the message "Are you sure you want
to overwrite this recording?" is displayed. To overwrite,
select [CONFIRM]. Otherwise, select [BACK].
2
Press   button to confirm the recorded sound
The recording is played back.
PLAY
• Press   to pause the sound during playback, or press   to
stop playback.
• Press [MENU/OK] during playback to display the Adjust
Playback Volume Screen. You can also adjust the volume by
pressing   or  .
Various Types of Shooting
Shoot Using the Self-timer
Use the Self-timer for group photos including the photographer or
to prevent the camera from shaking when the shutter button is
pressed.
1
On the Shooting Screen, press
The following guide is displayed.
SELF-TIMER
OFF
2 SEC
10 SEC
2
Press   or   to select [2 SEC] or [10 SEC]
3
Press [MENU/OK] or
An icon corresponding to the Self-timer that has been set
displays in the upper right of the screen.
• Press   (Back) to return to the previous screen without
applying the setting.
4
Fully press the shutter button
If you selected [2 SEC]:
When you press the shutter button, the self-timer lamp
blinks.
If you selected [10 SEC]:
When you press the shutter button, the self-timer lamp
lights up and blinks for 3 seconds before shooting.
Press   (Back) to cancel the Self-timer.


16
Shooting Using the Flash
Use the flash to shoot at night or in a dark environment. You can
change the settings so that the flash does not fire.
1
On the Shooting Screen, press
The following guide is displayed.
AUTO
FLASH
FORCED
FLASH
SUPPRESSED
FLASH
2
Press   or   to select the Flash Setting
• For details about the Flash Settings, please refer to “Types
of Flash”.
3
Press [MENU/OK] or
4
Fully press the shutter button
•  If you press the shutter button during flash charging, the
self-timer lamp blinks and the shutter does not release.
 ■ Types of Flash
Auto Flash
The flash fires automatically if the surroundings are dark. This
setting is suitable for most situations.
Forced Flash
The flash fires regardless of the surrounding brightness. Use
when the subject is dark due to backlighting.
Suppressed Flash
The flash does not fire even when the surroundings are dark.
This setting is suitable for shooting in places where flash
photography is prohibited.
It is recommended to stabilize the camera on a table, etc. when
shooting in the dark.
Taking a Photo of Yourself (Selfie)
You can take a photo of yourself using the selfie mirror.
1
Hold the camera firmly with the front edge of the
lens 30 cm to 50 cm from your face
• Hold the camera firmly, as it is particularly vulnerable to the
effects of camera shake in a dark environment.
2
Check the composition with the selfie mirror and
shoot
•  Do not stare at the flash when shooting. Staring at the flash
may temporarily make it difficult to see.
Shooting Using the AF/AE Lock
When shooting, holding the shutter button halfway to lock the
focus is called "AF Lock", and deciding the brightness and fixing it
is called "AE Lock". This is useful when you want to place the
subject outside the center of the screen when shooting. Both AF
and AE Lock will occur when you activate the AF/AE Lock. There is
no way to activate one without the other.
1
Press the shutter button halfway to focus on the
subject
When you press the shutter button halfway, AF and AE are
locked.
2
Change the composition while pressing the shutter
button halfway
3
Press the shutter button fully to shoot
It is recommended to use the AE/AF Lock when shooting the
following subjects, as they can be difficult to focus on.
•  Shiny subjects such as a mirror or car body
•  Subjects that are moving at high speed
•  Subjects on the other side of a glass
•  Dark subjects that absorb light without reflecting it such as
hair or fur
•  Non-solid subjects such as smoke or flames
•  Subject with little contrast with the background (such as a
person wearing clothes with the same color as the
background)
•  When there is a large contrast difference in the AF Frame and
the subject is close to it (such as a subject in front of a
background with a strong contrast)


17
NA_EN

Printing from Print History
You can recall images printed in the past and retain the settings
(such as image effects) for printing.
You can print the images you have taken using the following
procedure.
1
Press [MENU/OK] on the Playback Screen
The Playback Menu is displayed.
2
Press   or   and select [PRINT HISTORY]
3
Press [MENU/OK]
4
Press   or   to select the image you want to print
5
Press  (Print)
6
Press   or   to select [PRINT] or [PRINT WITH
SOUND]
Note
To Print With Sound, it is necessary to link with the Sound
Function of INSTAX® Mini LiPlay Smartphone App.
PRINT WITH SOUND
PRINT
BACK
7
Press [MENU/OK]
Printing starts.
• To Print With Sound, use   to change the print
position of the QR Code as needed.
• To cancel printing, select [BACK] or press   (Back).
8
When the sound of the film unloading stops, hold
the top of the film and remove it
Note
Be careful not to obstruct the film ejection slot with your fingers
or the strap.
Using a Memory Card
The camera can save about 45 images in the internal memory, but
you can save more images by using a memory card.
Notes on Memory Card Use with the INSTAX® Mini LiPlay Camera
•  Micro SD and micro SDHC memory cards are compatible with
this camera. Using a memory card other than the specified type
may cause damage to the camera.
•  Because memory cards are small, infants and children may
accidentally swallow them. Keep out of reach of infants and
children. Please consult your doctor immediately if an infant or
child swallows a memory card.
•  Do not turn off the camera or remove the memory card while
formatting the memory card or recording or erasing images,
sounds or other data� Doing so may damage the memory
card�
•  Do not use or store a memory card in an environment prone to
strong static electricity or electrical noise.
•  If you insert a memory card charged with static electricity into
the camera, the camera may malfunction. If this happens, turn
off the power and then turn it on again.
•  Do not put a memory card in your pants pocket. When you sit
down, stress may be applied to the memory card causing it to
break.
•  When you remove a memory card after prolonged use, it may
be warm, but this is not a malfunction.
•  Do not put labels, etc. on memory cards. Labels that are not
intact or that are peeling off may cause the camera to
malfunction.
Notes on Memory Card Use With Your PC
•  Be sure to use the camera to format unused memory cards and
memory cards used on your PC and other devices before use.
•  When you format a memory card with the camera, shoot and
record images, a folder is automatically created. Do not use a
computer to change or delete the memory card folder names or
file names. The memory card may become unusable by the
camera.
•  Do not use the PC to delete images from the memory card.
Always use the camera to delete images from the memory card.
•  When editing an image file, copy or move the image file from
the memory card to your PC, hard disk, flash drive, etc. for
editing.
Inserting a Memory Card
1
Open the card slot cover
1
2
3
FILM
2
3


18
2
Insert the memory card all the way in until it clicks in
the correct orientation as shown below
1
2
3
FILM
2
3

3
Close the card slot cover
1
2
3
FILM
2
3

•  When removing a memory card, push the memory card with
your finger and slowly release your finger. The lock is released
and the memory card can be removed.
Note
When removing a memory card, it may pop out quickly if you
release your finger suddenly. Please release your finger gently.
Using the Shooting Menu
You can change various settings related to shooting from the
Shooting Menu.
1
Press [MENU/OK] on the Shooting Screen
The Shooting Menu displays.
AF ILLUMINATOR
EXPOSURE
PRINT SETTINGS
Bluetooth
SETTINGS
SHOOTING MENU
2
Press   or   to select the item to set
• For a description of each item, please refer to “Shooting
Menu Items”.
3
Change the settings
4
Press [MENU/OK]
The settings are applied and the display returns to the
Shooting Screen.
 ■ Shooting Menu Items
[AF ILLUMINATOR]
If you select ON, the AF Illuminator will be lit during the period
from when you press the shutter button halfway until the subject
is in focus, making it easier to focus on dark subjects.
•  Depending on the scene, it may be difficult to focus even if the
flash is used.
•  When shooting close to the subject, the effect of the AF
Illuminator may not be sufficient.
•  Do not use the AF Illuminator close to human eyes.
[EXPOSURE]
Exposure is used when the subject is too bright or too dark, or
when the contrast between the subject and the background
(difference in brightness) is large. Change the exposure value and
adjust the brightness of the image.
•  The set exposure value is retained even after moving the image
data to a PC, etc.
For a description of the following items, please refer to “Using the
Set-up Menu”. (See p. 19)
[PRINT SETTINGS] / [Bluetooth SETTINGS] / [CROSS KEY GUIDE] /
[DATE/TIME] / [言語/LANG.] / [SOUND SET-UP] / [PLAYBACK
VOLUME] / [AUTO POWER OFF] / [RESET] / [FRAME DATA RESET] /
[FORMAT] / [FIRMWARE UPGRADE]


19
NA_EN

Using the Playback Menu
You can change various settings related to playback from the
Playback Menu.
1
Press [MENU/OK] on the Playback Screen
The Playback Menu is displayed.
ZOOM
ERASE SOUND
PLAYBACK MENU
PRINT HISTORY
ERASE
2
Press   or   to select the item
• For a description of each item, please refer to “Playback
Menu Items”.
3
Change the settings
4
Press [MENU/OK]
The settings are applied and the display returns to the
previous screen.
 ■ Playback Menu Items
[ZOOM]
Please refer to “Zooming Images”. (See p. 11)
[ERASE SOUND]
Erases only the sound from images with sound.
[PRINT HISTORY]
•  Display up to last 50 images that were printed.
•  Select an image and press   (Print) to start printing.
•  You can clear the Print History one image at a time by pressing
[MENU/OK].
[ERASE]
You can erase images one by one or erase them all at once.
[IMAGE ROTATE]
Display an image rotated by 90 degrees.
[COPY]
Copy images from the internal memory to a memory card or from
a memory card to the internal memory.
Follow the procedure below.
1.
Select [COPY] from the Playback Menu
2.
Select the copy destination and press [MENU/OK]
3.
Select [FRAME] or [ALL FRAMES] and press [MENU/OK]
If you selected [ALL FRAMES], copying starts. If you selected
[FRAME], proceed to step 4.
4.
Press   or   to select the image to copy
5.
Press   or   to select [COPY]
6.
Press [MENU/OK]
For a description of the following items, please refer to “Using the
Set-up Menu”. (See p. 19)
[PRINT SETTINGS] / [Bluetooth SETTINGS] / [CROSS KEY GUIDE] /
[DATE/TIME] / [言語/LANG.] / [SOUND SET-UP] / [PLAYBACK
VOLUME] / [AUTO POWER OFF] / [RESET] / [FRAME DATA RESET] /
[FORMAT] / [FIRMWARE UPGRADE]
Using the Set-up Menu
Follow the procedure below to change settings with the Set-up
Menu.
1
On the Shooting Screen or Playback Screen, press
[MENU/OK]
2
Press   or   to select the item to set
• For a description of each item, please refer to “Set-up Menu
Items”.
3
Change the settings
4
Press [MENU/OK]
The settings are applied and the display returns to the
previous screen.
 ■ Set-up Menu Items
[PRINT SETTINGS]
Change the print position and print color of the QR Code printed
on Print With Sound.
Note
To Print With Sound, it is necessary to link with the Sound
Function of INSTAX® Mini LiPlay Smartphone App.
[Default QR Code Position]:
Change the default QR code position.
[QR Code Color]:
Change the QR Code printing color.
[Bluetooth SETTINGS]
Please install INSTAX® Mini LiPlay Smartphone App on your
smartphone before pairing registration.
[PAIRING REGISTRATION]:
When you connect with your smartphone via Bluetooth for the
first time, you will need to pair the devices. Please refer to the
following procedure for pairing.
1.
Select [Bluetooth SETTINGS] from the Playback Menu
2.
Select [PAIRING REGISTRATION] and press [MENU/OK]
3.
Press [SETTINGS] on INSTAX® Mini LiPlay Smartphone App
4.
Press [Bluetooth settings] on INST
AX® Mini LiPlay Smartphone
App
5.
Press [Connect]
6.
Allow pairing
[DELETE PAIRING REG�]:
You can delete information of a smartphone registered for pairing.
[INFORMATION]:
Displays the Bluetooth address, name, and registered terminal
name of the main unit.
[CROSS KEY GUIDE]
Sets whether to show or hide the Cross Key Guide.


20
[DATE/TIME]
Set the date and time.
[言語/LANG�]
Set the language to be displayed on the LCD monitor.
[SOUND SET-UP]
Set the volume of the operation sound, shutter volume and start
up sound.
Select [OFF] if you want to turn off the sound.
[PLAYBACK VOLUME]
Set the playback volume of the recorded sounds.
[AUTO POWER OFF]
Set the time until the power is turned off automatically when the
camera is not operated.
[RESET]
Reset the settings to the default settings.
The date and time set in Date/Time are not reset.
[FRAME DATA RESET]
Reset the default Frame settings used for the shortcut buttons.
[FORMAT]
Select and format the camera's internal memory or a memory card
inserted in the card slot. All saved images will be deleted.
[FIRMWARE UPGRADE]
Upgrade the firmware version.
Insert the memory card containing the firmware into the card slot
and follow the instructions on the screen.
Download the latest firmware from the FUJIFILM website.
Functions Available by Linking with INSTAX®
Mini LiPlay Smartphone App
The following functions can be used by linking with INSTAX® Mini
LiPlay Smartphone App.
Sound Function
You can convert the sound recorded by the camera into a QR Code
and print it together with an image (Print With Sound). You can
change the print position of the QR Code.
•  The sound is played when the QR Code printed on the Print With
Sound image is read by a smartphone, etc.
•  You can play or delete the sound of images with sound that you
have printed in the past using INSTAX® Mini LiPlay Smartphone
App.
Note
If you delete an Image With Sound using INSTAX® Mini LiPlay
Smartphone App, the sound will no longer be able to be played
even if the QR Code is read.
Remote Shooting Function
You can set the Flash and Self-timer with INSTAX® Mini LiPlay
Smartphone App and shoot remotely.
Shortcut Function
The 3 shortcut buttons on the side of the camera can be freely set
to the Frames selected in INSTAX® Mini LiPlay Smartphone App.
Direct Print Function
You can send an image from your smartphone to the camera and
print it with the INSTAX® Printing Function. Before sending, you
can move, rotate and zoom the image with INSTAX® Mini LiPlay
Smartphone App.


21
NA_EN

Specifications
 ■ Camera Function
Image sensor 1/5 type CMOS primary color filter
Number of recorded
pixels
2560 × 1920 pixels
Storage media Internal memory,
micro SD/micro SDHC memory card
Storage capacity Approximately 45 images in internal
memory; approximately 850 images per
1 GB in micro SD/micro SDHC memory
card
Recording method DCF compliant Exif Ver 2.3
Focus distance f = 28 mm (35 mm film equivalent)
Aperture F2.0
Auto focus Single AF (with AF Illuminator)
Shooting distance 10 cm and beyond
Shutter speed
1/4 second to 1/8000 second (automatic
switching)
Shooting sensitivity ISO100 to 1600 (automatic switching)
Exposure control Program AE
Exposure −2.0 EV to +2.0 EV (1/3 EV step)
Metering method TTL 256 split metering, multi metering
White balance Auto
Flash Auto Flash / Forced Flash/Suppressed
Flash
Shooting range with flash: Approximately
50 cm to 1.5 m
Self-timer Approximately 2 seconds / approximately
10 seconds
Image effects 6 Filters, 10 Frames (3 available with
shortcuts)
Sound recording Possible to record sound when shooting
or playing back single image. Possible to
overwrite.
 ■ Print Function
Film used FUJIFILM INSTAX® Mini Instant Film (sold
separately)
Number of films 10 films/pack
Film size 86 mm
 ×
54 mm
Screen size 62 mm
 ×
46 mm
Print pixel count 800
 ×
600 dots
Print resolution 12.5 dots / mm (318 dpi, 80 μm dot pitch)
Print gradation RGB gradation of 256 colors
Printable image
format
JPEG images taken with this unit
Print output time Approximately 12 seconds
Print function Images in the internal memory and
images in the memory card can be
printed
Reprint Reprint is possible for images stored in
Print History (up to 50)
 ■ Other
Smartphone app
linked functions
Sound Playback Function from printed
images, Smartphone Image Print
Function, Remote Shooting Function,
Frame Selection Function
LCD monitor 2.7-inch TFT color LCD monitor
Pixel count: Approximately 230,000 dots
External interface Micro USB Micro-B (for charging only)
Power supply Lithium ion battery (internal type: not
removable)
Charging function Built-in battery
Possible number of
printed images
Approximately 100 (from full charge)
(The number of prints depends on the
usage conditions.)
Charging time Approximately 2-3 hours
(Charging time depends on the
temperature.)
Main unit
dimensions
82.5 mm × 122.9 mm × 36.7 mm
(excluding projecting parts)
Main unit weight Approximately 255 g
Operating
environment
Temperature: +5 ºC to +40 ºC (+41 ºF to
+104 ºF)
Humidity: 20% to 80% (no condensation)
*The above specifications are subject to change for performance
improvement.


22
Troubleshooting
Please check the following items before considering a problem to
be a malfunction. If the problem persists even after taking action,
please contact the FUJIFILM service center for repair in your
country or visit the website below.
FUJIFILM website: http://www.fujifilm.com/
If the following problem occurs���
Problem Possible causes and solutions
I cannot turn on
the camera.
The battery may not be charged. Please
charge the camera.
The battery
loses its charge
quickly.
If you use the camera in a very cold
environment, the battery will drain quickly.
Please keep the camera warm before
shooting.
The power cut
off during use.
The battery level may be low. Please charge
the camera.
Charging does
not start.
•  Make sure that the USB power adapter
plug is properly connected to the power
outlet.
•  Turn off the camera when charging it. If
power is on camera will not charge.
It takes too long
to charge.
At low temperatures, charging may take
some time.
The self-timer
lamp flashes
while charging.
Charge the battery in a temperature range of
+5 °C to +40 °C (+41 ºF to +104 ºF).
I cannot shoot
when I press the
shutter button.
•  Make sure that the power is on.
•  If the battery level is low, please charge
the camera.
•  If the internal memory or memory card is
full, insert a new memory card or delete
unnecessary images.
•  Use a memory card formatted with this
unit.
•  If the contact surface of the memory card
(gold part) is dirty, wipe it with a soft, dry
cloth.
•  The memory card may be broken. Please
insert a new memory card.
I cannot focus
the camera.
Use the AF/AE Lock to shoot subjects that
are difficult to focus on.
The flash does
not fire.
Is Suppressed Flash selected in the Flash
Settings? Select a setting other than
Suppressed Flash.
Even though the
flash fired, the
image is dark.
•  Are you too far from the subject? Please
shoot within the range where flash
photography is possible.
•  Hold the camera correctly so that you do
not obstruct the flash with your fingers.
Problem Possible causes and solutions
The image is
blurry.
•  If the lens has fingerprints on it, clean the
lens.
•  Make sure that the AF Frame is green
before taking a photo.
•  Make sure to hold the camera steady,
particularly in dark environments.
The camera
does not work
properly.
•  There may be a temporary malfunction.
Please press the reset button. If it still does
not work properly, please contact our
repair service center for repair.
•  The battery may not be charged. Please
charge the camera.
The film pack
does not load or
does not load
smoothly.
•  Please use FUJIFILM INSTAX® Mini Instant
Film (other films cannot be used).
•  Align the yellow mark on the film pack
with the camera alignment mark (yellow)
and load it.
The film does
not unload.
•  The film may be misaligned due to shock
such as vibration or dropping. Please load
a new film pack.
•  If the film is jammed, turn off the camera
and turn it on again. If the problem
persists, remove the jammed film and
then load a new film pack.
Some or all of
the finished
prints are white.
Do not open the film door until the film is
used up. If the film door is opened with film
remaining, the film is exposed and the
exposed area becomes white.
The print is
uneven.
•  Do not shake, bend, fold or hold the print
immediately after it is printed.
•  Do not obstruct the film ejection slot.


23
NA_EN

IMPORTANT SAFETY NOTICE
 This product has been designed with safety in mind, and to
provide safe service when handled correctly and in accordance
with the User’s Guide and instructions� It is important that both
the product and the FUJIFILM INSTAX® Mini Instant Film are
handled properly and used only to print photos as instructed in
the User’s Guide and in INSTAX® Mini Instant Film instructions�
For your ease and safety, strictly follow the instructions in the
User’s Guide� Keep the User’s Guide in a safe, convenient place
for easy future reference as needed�
WARNING
This symbol indicates danger, which could result in product
damage, or personal injury or death. Follow the instructions
indicated to avoid damage to the camera or injury.
WARNING
  If one of the following cases occur, immediately unplug the
USB cable, turn the camera off and refrain from any further
use of the camera:
•  The camera becomes hot, emits smoke, has a burnt smell, or
otherwise seems abnormal�
•  The camera is dropped into water, or is exposed to rain or
otherwise wet weather conditions, sand, dirt or metal get
inside the camera�
 The camera has a built-in battery� Do not subject it to heat,
expose it to an open flame, drop it, or otherwise apply impact
to it� Doing so may cause the camera to explode, resulting in
injury�
WARNING
 Never  attempt to take this product apart� You may be injured�
 All repairs should be handled solely by FUJIFILM� Injury may
result from attempts to self-assess or repair this camera�
 If this product is dropped or damaged so that the inside is
showing, do not touch it� Contact FUJIFILM Corporation�
 Do not touch any parts which are inside the back cover� You
may be injured�
  Never get this product wet or handle it with wet hands� Doing
so may result in electric shock and injury�
 Promptly unplug the USB cable once battery is fully charged�
 Keep out of the reach of small children� This product could
cause injury in the hands of a child�
 Do not cover or wrap the camera or the AC power adapter in a
cloth or blanket, or otherwise place the camera in the sun or
an environment where heat may build up� This could distort
the casing and cause a fire�
The “CE” mark certifies that this product satisfies the
requirements of the EU (European Union) regarding
safety, public health, environment and consumer
protection. (“CE” is the abbreviation of Conformité
Européenne.)
Common Sense Camera Care
 ■ Camera Care
1.
Do not open the film door until you have used up the film;
otherwise, the rest of the film is exposed and turns white�
The film can no longer be used�
2.
Your camera is a precision instrument. Do not get it wet or
drop it. Also, do not expose it to sand, dust or dirt.
3.
Do not use a strap made for cellular phones or other similar
electronic products. These straps are usually too weak to
hold your camera securely. For safety, use only straps
designed for your camera, and use only as specifically
intended and instructed.
4.
Do not use cleaning products or solvents such as those with
bleach or alcohol to remove dirt.
5.
In hot weather, do not leave your camera in hot places such
as in a car or on the beach. Do not leave it in damp places or
places where weather exposure could result.
6.
Moth repellent gas such as naphthalene may affect your
camera and prints. Store your camera and photo prints in a
place where exposure to harmful cleaning or other
household elements will be avoided.
7.
Note that the temperature range within which your camera
can be used is +5 °C to +40 °C (+41 °F to +104 °F).
8.
Take great care to ensure that printed materials do not
violate copyright, image rights, privacy or other personal
rights and do not offend public decency. Actions that violate
the rights of others, are contrary to public decency or
constitute a nuisance may be punishable by law or
otherwise legally actionable.
 ■ Handling the LCD Monitor
As the LCD monitor can be easily damaged, do not scratch the
surface with a solid material. To avoid the LCD monitor getting
damaged, we recommend you attach a protective, clear plastic
sheet (commercially available) on the monitor.
 ■ Charging the Battery
The battery is not charged at shipment� Charge the battery
completely before use�
Charge the battery using the supplied USB cable. Refer
“Charging the Battery”. (See p. 7) Charging times will
increase at ambient temperatures below +10 °C (+50 °F) or
above +35 °C (+95 °F). Do not attempt to charge the battery in
environments where temperature is above +40 °C (+104 °F) or
temperature is below +5 °C (+41 °F), as the battery will not
properly charge and the camera may be damaged.
 ■ Battery Life
At normal temperatures, the battery can be recharged about
300 times. A noticeable decrease in the length of time the
battery will hold a charge indicates that it has reached the end
of its service life.
 ■ Cautions: Handling the Battery
The battery and camera body may become warm to the touch
after extended use. This is normal.


24
 ■ Certification marks applicable to the camera are located
inside the film chamber�
 ■ Cautions During Printing
Do not shake the
camera while
printing.
Do not drop the
camera while
printing.
Do not cover the
film ejection slot
while printing.
 ■ INSTAX® Mini Instant Film and Photo Care
See FUJIFILM INSTAX® Mini Instant Film for film use instructions.
Follow all instructions for safe and proper use.
1.
Keep the film in a cool place. Do not leave the film in a place
where the temperature is extremely high (e.g., in a closed
car) for many hours.
2.
Do not puncture, tear, or cut the film. If film becomes
damaged, do not use.
3.
When you load a film pack, use the film as soon as possible.
4.
If the film has been kept in a place where the temperature is
extremely high or low, bring it to room temperature before
loading or starting to print photos.
5.
Be sure to use the film before the expiration date.
6.
Avoid airport checked luggage inspection and other strong
X-ray illumination. The effect of fogging, etc. may appear on
unused film. Carrying your camera and film onto an aircraft
in your carry-on luggage is recommended. (Check with each
airport for more information.)
7.
Avoid strong light, and keep the developed prints in a cool
and dry place.
8.
Do not puncture or cut the film as it contains a small amount
of caustic paste (high alkaline). Never let children or animals
put the film into their mouth. Also pay attention so that the
paste does not come into contact with skin or clothes.
9.
In case the paste inside the film comes into contact with skin
or clothes, immediately wash off with plenty of water. If the
paste comes into contact with the eyes or mouth,
immediately wash the area with plenty of water and contact
a doctor. Note that the alkaline inside the film remains active
for about 10 minutes after the photo has been printed.
 ■ Cautions on Handling the Film and Prints
For details, refer to the instructions and warnings on FUJIFILM
INSTAX® Mini Instant Film.
Bluetooth® Device Cautions
IMPORTANT: Read the following notices before using the
product’s built-in Bluetooth transmitter�
 ■ Use only as part of a Bluetooth network�
FUJIFILM Corporation and its affiliates do not accept liability for
damages resulting from unauthorized use. Do not use in
applications requiring a high degree of reliability, for example in
medical devices or other systems that may directly or indirectly
impact human life. When using the device in computer and
other systems that demand a greater degree of reliability than
Bluetooth networks, be sure to take all necessary precautions to
ensure safety and prevent malfunction.
 ■ Use only in the country in which the device was intended for
sale�
This device conforms to regulations governing Bluetooth
devices in the country in which it was intended for sale by an
authorized FUJIFILM product dealer. Observe all location
regulations when using the device. FUJIFILM Corporation and its
affiliates do not accept liability for problems arising from use in
other jurisdictions.
 ■ Wireless data (images) may be intercepted by third parties�
The security of data transmitted over wireless networks is not
guaranteed.
 ■ Do not use the device in locations subject to magnetic fields,
static electricity, or radio interference�
Do not use the transmitter in the vicinity of microwave ovens or
in other locations subject to magnetic fields, static electricity, or
radio interference that may prevent reception of wireless
signals. Mutual interference may occur when the transmitter is
used in the vicinity of other wireless devices operating in the 2.4
GHz band.


25
NA_EN

 ■ The Bluetooth transmitter operates in the 2�4 GHz band� The
standard output is 3�16 mW�
 ■ This device operates on the same frequency as commercial,
educational, and medical devices and wireless transmitters�
It also operates on the same frequency as licensed transmitters
and special unlicensed low-voltage transmitters used in radio-
frequency identification tracking systems for assembly lines and
in other similar applications.
 ■ To prevent interference with the above devices, observe the
following precautions�
Confirm that the radio-frequency identification transmitter is
not in operation before using this device. If you notice that this
device causes interference in low-voltage radio-frequency
identification tracing systems, refrain from further use of this
device and contact a FUJIFILM representative.
 ■ The following may be punishable by law:
– Disassembly or modification of this device.
– Removal of device certification labels.
 ■ Trademark Information
The Bluetooth® word mark and logos are registered trademarks
owned by the Bluetooth SIG, Inc., and any use of such marks by
FUJIFILM is under license.
For customers in the USA:
FCC Statement
This device complies with part 15 of the FCC Rules. Operation is
subject to the following two conditions: (1) This device may not
cause harmful interference, and (2) this device must accept any
interference received, including interference that may cause
undesired operation.
For more information, access the website below.
http://www.fujifilm.com/products/instant_photo/cameras/instax_
mini_liplay/
CAUTION
This device has been tested and found to comply with the limits
for a Class B digital device, pursuant to Part 15 of the FCC Rules.
These limits are designed to provide reasonable protection against
harmful interference in a residential installation. This device
generates, uses, and can radiate radio frequency energy and, if not
installed and used in accordance with the instructions, may cause
harmful interference to radio communications. However, there is
no guarantee that interference will not occur in a particular
installation. If this device does cause harmful interference to radio
or television, which can be determined by turning the device off
and on, the user is encouraged to try to correct the interference by
one or more of the following measures:
•  Reorient or relocate the receiving antenna.
•  Increase the separation between the device and receiver.
•  Connect the device into an outlet on a circuit different from that
to which the receiver is connected.
•  Consult the dealer or an experienced radio/TV technician for
help.
Changes or modifications of this device will void the Limited
Product Warranty and may void any authority to further use this
device.
This transmitter must not be co-located or operated in conjunction
with any other antenna or transmitter.
The available scientific evidence does not show that any health
problems are associated with using low power wireless devices.
There is no proof, however, that these low power wireless devices
are absolutely safe. Low power Wireless devices emit low levels of
radio frequency energy (RF) in the microwave range while being
used. Whereas high levels of RF can produce health effects (by
heating tissue), exposure of low-level RF that does not produce
heating effects causes no known adverse health effects. Many
studies of low-level RF exposures have not found any biological
effects. Some studies have suggested that some biological effects
might occur, but such findings have not been confirmed by
additional research. The “INSTAX mini HM1” has been tested and
found to comply with FCC radiation exposure limits set forth for an
uncontrolled environment and meets the FCC radio frequency (RF)
Exposure Guidelines.
Notes on the Grant
To comply with Part 15 of the FCC Rules, this product must be used
with a FUJIFILM-specified ferrite-core USB cable (provided along
with the camera).
For customers in Canada :
CAN ICES-3 (B)/NMB-3 (B)
This device contains licence-exempt transmitter(s)/receiver(s) that
comply with Innovation, Science and Economic Development
Canada’s licence-exempt RSS(s). Operation is subject to the
following two conditions:
1.
This device may not cause interference.
2.
This device must accept any interference, including
interference that may cause undesired operation of the device.
The available scientific evidence does not show that any health
problems are associated with using low power wireless devices.
There is no proof, however, that these low power wireless devices
are absolutely safe. Low power Wireless devices emit low levels of
radio frequency energy (RF) in the microwave range while being
used. Whereas high levels of RF can produce health effects (by
heating tissue), exposure of low-level RF that does not produce
heating effects causes no known adverse health effects. Many
studies of low-level RF exposures have not found any biological
effects. Some studies have suggested that some biological effects
might occur, but such findings have not been confirmed by
additional research. The “INSTAX mini HM1” has been tested and
found to comply with ISED radiation exposure limits set forth for
an uncontrolled environment and meets RSS-102 of the ISED radio
frequency (RF) Exposure rules.
Disposal of Electric and Electronic Equipment in
Private Households
Disposal of used Electrical & Electronic Equipment
(Applicable in the European Union and other
European countries with separate collection
systems)
This symbol on the product, or in the manual and in the warranty,
and/or on its packaging indicates that this product shall not be
treated as household waste.
Instead it should be taken to an applicable collection point for the
recycling of electrical and electronic equipment.
By ensuring this product is disposed of correctly, you will help
prevent potential negative consequences to the environment and
human health, which could otherwise be caused by inappropriate
waste handling of this product.
The recycling of materials may help to conserve natural resources.
For more detailed information about recycling of this product,
please contact your local city recycling office, your household
waste disposal service or the authorized FUJIFILM dealer from
which you purchased the product.


26
For proper disposal in the United States at product end-of-life,
please contact 1-800-800-3854 Option #1 INSTAX.
In Countries outside of EU: If you wish to discard this product,
please contact your local authorities and ask for the correct way of
disposal.
Information for FUJIFILM in the United States
FUJIFILM North America Corp.
200 Summit Lake Drive
Valhalla, New York 10595, USA
Information for FUJIFILM in Canada
FUJIFILM Canada Inc.
600 Suffolk Court, Mississauga, Ontario L5R 4G4, Canada
If you have any inquiries about this product, please contact a
FUJIFILM authorized dealer, or access the website below.
http://www.fujifilm.com/
инструкцияFujifilm Instax mini LiPlay

EN
DE
FR
ES
TW
KO
PT
RU
IT
NL
PL
CS
SK
HU
BODM1P102-200
User’s Guide/Safety Precautions
Bedienungsanleitung/Sicherheitsmaßnahmen
Guide d’utilisation/Précautions de sécurité
Manual de instrucciones/Precauciones de seguridad
使用說明書/安全注意事項
사용설명서/안전을 위한 주의사항
Manual de Utilização/Precauções de segurança
Руководство пользователя/меры предосторожности
Guida per l’Utente/Precauzioni per la sicurezza
Gebruikershandleiding/Veiligheidsmaatregelen
Instrukcja obsługi/Wskazówki bezpieczeństwa
Uživatelská příručka/Bezpečnostní opatření
Používateľská príručka/Bezpečnostné pokyny
Használati útmutató/Biztonsági óvintézkedések
BO-DM1_14lang.indb 1 2019/2/14 16:22:45
Посмотреть инструкция для Fujifilm Instax mini LiPlay бесплатно. Руководство относится к категории Фотокамеры, 4 человек(а) дали ему среднюю оценку 8.3. Руководство доступно на следующих языках: русский, английский. У вас есть вопрос о Fujifilm Instax mini LiPlay или вам нужна помощь? Задайте свой вопрос здесь

Главная
| Fujifilm | |
| Instax mini LiPlay | 1012179 | |
| Фото камера | |
| 4547410413182 | |
| русский, английский | |
| Руководство пользователя (PDF), Техническая спецификация (PDF) |
Технические характеристики
| Цвет товара | Белый |
| Тип дисплея | ЖК |
| Совместимые карты памяти | MicroSD (TransFlash) |
| Размер изображения | 62 x 46 mm |
| Поставляемые кабели | USB |
| Встроенный микрофон | Да |
| Максимальное число установки диафрагмы | 2 |
| Фокусировка | Авто |
| Нормальное фокусное расстояние | 10 — ∞ m |
| Баланс белого | Авто |
| Автоспуск | Да |
| Задержка автоcпуска | 2, 10 s |
| Размер пленки | 86 x 54 mm |
| Поддерживаемые форматы изображения | JPEG |
| Время распечатывания (мин.) | 12 s |
| Диагональ экрана | 2.7 « |
| Диапазон температур при эксплуатации | 5 — 40 °C |
| Встроенный экран | Да |
Энергопитание
| Питание от батареи | Да |
| Аккумуляторная батарея | Да |
| Технология батареи | Литий-ионная (Li-Ion) |
| Время работы батареи (упаковок пленки) | 10 |
| Время подзарядки батареи | 3 h |
Порты и интерфейсы
| USB порт | Да |
| Тип USB коннектора | Micro-USB B |
Сеть
Вспышка
| Встроенная вспышка | Да |
| Режимы вспышки | Flash off, Flash on, Suppressed |
| Диапазон вспышки | 0.5 — 1.5 m |
Затвор
| Наивысшая скорость выдержки камеры | 1/8000 s |
| Самая низкая скорость выдержки камеры | 0.25 s |
Содержимое упаковки
| Наручный ремешок | Да |
| Руководство пользователя | Да |
Экспозиция
| Коррекция световой экспозиции | ± 2EV (1/3EV step) |
Вес и размеры
| Вес | 255 g |
| Высота | 122.9 mm |
| Глубина | 36.7 mm |
| Ширина | 82.5 mm |
показать больше
Не можете найти ответ на свой вопрос в руководстве? Вы можете найти ответ на свой вопрос ниже, в разделе часто задаваемых вопросов о Fujifilm Instax mini LiPlay.
Не нашли свой вопрос? Задайте свой вопрос здесь