Разбираемся.
Project Zomboid – популярный микс «выживача» и RPG в сеттинге зомби-апокалипсиса, который до сих пор популярен у игроков, несмотря на изначальный релиз в 2013 году. Игра до сих пор обновляется и пользуется популярностью у игроков.
Одна из фишек Проекта Зомбоид – создание собственных серверов и игра на серверах других игроков. Рассказываем, как создать сервер в Проджект Зомбоид. Благо разработчики упростили этот процесс по сравнению с релизной версии Project Zomboid.
Как создать сервер в Проект Зомбоид
Чтобы создать сервер в Project Zomboid выполните следующие действия:
- В нижнем правом углу главного меню нажмите на кнопку «сервер»
- Появится окно для настройки сервера Проджект Зомбоид. В этом окне впишите любое нужно вам название сервера, а затем выберите требуемую память сервера в соответствующем пункте меню
- Сколько выбрать памяти для сервера Project Zomboid? Зависит от того, сколько игроков будет находиться на сервере. Считается, что 1 Гб памяти сервера должно хватить на трех человек
- Если вы хотите изменить настройки сервера Project Zomboid по умолчанию, нажмите на кнопку «изменить настройки» рядом с названием вашего сервера. В этом меню доступно огромное количество настроек сервера: моды, ПвП, Приват базы, чат и другие важные для некоторых игроков пункты
- Если вы создаете сервер первый раз, то в принципе можно оставить настройки сервера Проект Зомбоид по умолчанию: разработчики сделали дефолтные настройки достаточно сбалансированными. После того, как вы поиграете достаточное количество раз, можете менять аспекты геймплея более осознанно
- Чтобы запустить сервер в Проджект Зомбоид, после настройки всех нужных вам параметров нажмите на кнопку «запуск» в нижнем правом углу
Вот та же самая инструкция в картинках:


* * *
Теперь вы знаете, как создать сервер в Проект Зомбоид. Делитесь советами по созданию и настройке серверов в комментариях, а также читайте больше материалов по игре.
Читы для Project Zomboid – чит-коды и консольные команды для Проект Зомбоид
Оружейный магазин в Project Zomboid – оружие в Проект Зомбоид
Install Project Zomboid Dedicated Server
To install a new pzserver, first you have to choose a system username for that server. Each pzserver instance needs a different username. Let’s assume you want to use the username pzserver1. Run the following command to create the new user, and replace pzserver1 with whatever username you choose:
sudo useradd --create-home --shell /bin/bash pzserver1
Set a password for user pzserver1:
Add user pzserver1 to group pzst:
sudo usermod -aG pzst pzserver1
Login as user pzserver1:
Type this to get the list of available commands:
Now that you’re connected as pzserver1, you can run the following command to install your new pzserver:
Start pzserver:
When you run pzserver start for the first time, it will ask you to choose a username/password for the admin user and the port of the server.
Configuring Project Zomboid Dedicated Server
Configuring Ports
If you will run multiple pzservers on the same machine, you have to configure a different port for each server. Furthermore, each server needs exactly one port, plus one extra port per player configured on the server. So for example if you have a pzserver running on port 16261 and you configure 32 players, your other pzservers can’t use a port in the range 16261-16293.
Run the following command to edit pzserver configuration:
And change the value of the DefaultPort option according to your needs:
If you need to use RCON, you have to set the option RCONPassword and RCONPort. You also have to use a different port for each of your pzservers. So for example if using RCON your configuration should look like this:
RCONPort=27015
RCONPassword=yourRconPassword
Adding Mods
If you want to enable mods on your server you have to edit the configuration and add your mods to the WorkshopItems option. For each mod you have to add the Workshop ID of the mod, using semicolon ( ; ) as delimiter. The Workshop ID can be found on Steam Workshop when visiting the page for the mod.
For example if you want to install the mod Just Throw Them Out The Window, available here:
https://steamcommunity.com/sharedfiles/filedetails/?id=2659216714
you just have to copy-paste the value of the id field of your browser address bar, in this case 2659216714. Let’s assume you also want to add the mod Quick Item Action available here:
https://steamcommunity.com/sharedfiles/filedetails/?id=2642486124
whose Workshop ID is 2642486124. Then your configuration should look like this:
WorkshopItems=2659216714;2642486124
Sandbox Settings
In order to edit your server sandbox settings run the following command:
Spawn Points and Regions
If you want to change the spawn points where player can land in the game run the following command:
For spaw regions, run the following command:
Restarting Project Zomboid Dedicated Server
If you need to restart your pzserver run the following command:
Stopping Project Zomboid Dedicated Server
If you want to stop your pzserver run the following command:
Killing Project Zomboid Dedicated Server
In case your pzserver is not responding to other commands, you might want to kill the process.
Beware though because it won’t perform a clean shutdown of the pzserver!!!
WARNING: Data loss is to be expected if you use this command!
WARNING: It might very well corrupt your saved game!
WARNING: Only use this command as a last resort!
Project Zomboid has been out for a while, but how do you start a server to play with your friends? This guide will show you how to set up a Project Zomboid Dedicated Server using SteamCMD and get you on your way to playing Project Zombod!
Hosting your own server will require you to make changes to your router, this can interfere with normal operation, proceed with caution.
Step 1: Server Requirements
- Make sure you are running Windows 10
- 10GB of storage is available
- Make sure that you have at least 4GB of RAM to run the server.
- (Preferably) A wired internet connection. Wifi can get unstable and can cause issues with people connecting to your server.
- A Static IP address on your computer (Not sure how to do this? check out this guide!).
Step 2: Installing SteamCMD
The following steps will guide to through the SteamCMD installation:
- Download the Latest SteamCMD Zip file.
- Create a folder for SteamCMD. (In this guide, we will use C:steamcmd)
- Extract the contents of the steamcmd.zip to the folder you have created
- You should now have something like the screenshot below:

To make sure that you’ve done everything correctly, please do the following:
- Press + R to open a run window.
- Type CMD and press enter.

- Execute the following 2 commands:

If an output is shown as the example above, good job! You’ve now got SteamCMD up and running! For now exit this window by typing:
Step 3: Preparing the folder
Now you’ve got SteamCMD up and running; it is time to prepare the folder. This step is quite simple.
- Open up windows explorer with + E.
- Navigate to the Desktop folder
- Create a folder called ProjectZomboid (you can name this folder anything you want, but for the sake of clarity, we’ll use this name)
- Go into the ProjectZomboid Folder
- Take note of the path you are currently in by clicking on the navigation bar:
![]()
Now you are almost ready to start your server. We will use two batch scripts for this guide, one to install/update and the other to run the server.
The install/upgrade script
- In the ProjectZomboid folder, you’ve just created, open up a notepad.
- Copy and Paste the following in that file:
Note:
Be sure to change the «C:ProjectZomboid» to match where you put the ProjectZomboid folder.
"C:steamcmdsteamcmd.exe" +login anonymous +force_install_dir "C:ProjectZomboid" +app_update 380870 validate +quit- Click on Save As
- Give it the same name and type as the image below:

- Save the install_server.bat in the Project Zomboid folder.
Step 4: Running the Project Zomboid Dedicated Server
Now all files are in order and we are ready to move forward and start the server!
- Right Click the install_server.bat and select “ Run as administrator“
- This will install the server in the right directory (the process can take a while depending on PC speed).
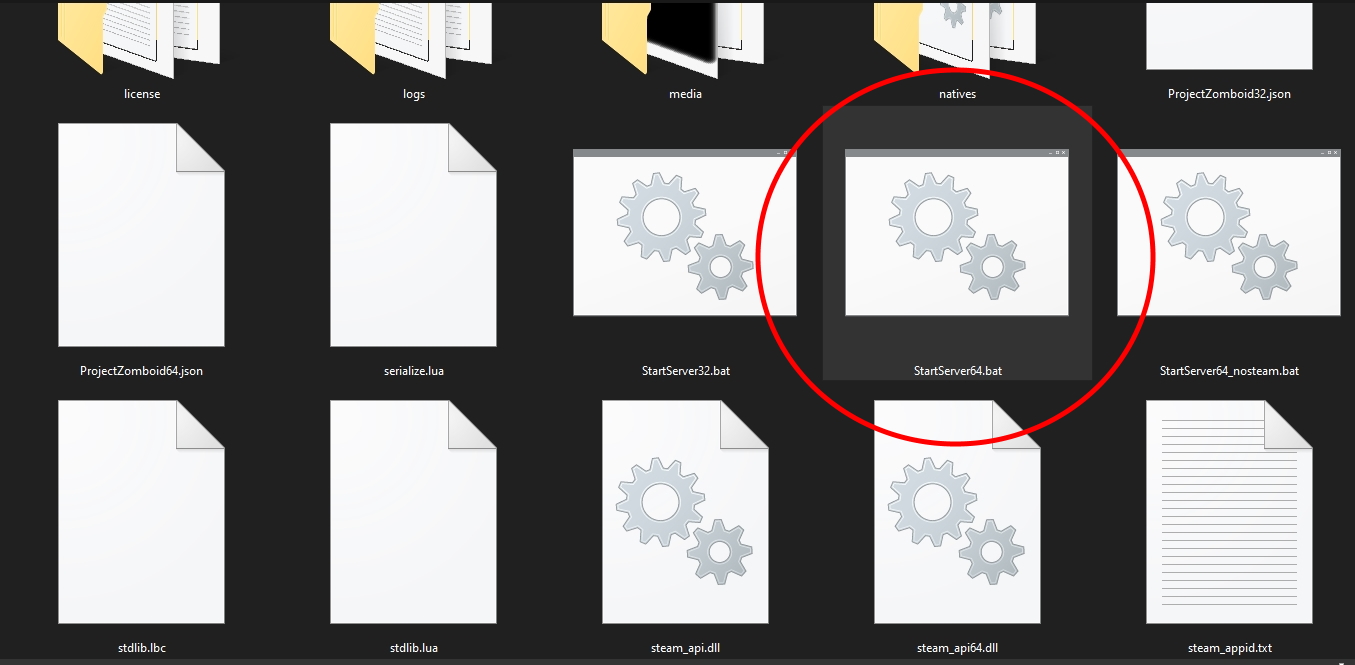
Now, if you’ve done everything correctly, your folder should now look like this:

- Start the Project Zomboid Dedicated Server by Double Clicking the StartServer64.bat
Now the server is running! Let’s move forward with connecting to the server.
You’ll be prompted to set the Administrator password of the server when you start it for the first time:
Note:
The server logs will show some errors, most of them can be safely ignored and will not impact gameplay.

Enter a secure password and share that password with your friends so they can join the server.
Step 5: Firewall Rules
Before you and your friends can connect to the Project Zomboid server, you’ll need to make changes to your firewall to allow connections on specific ports.
By default, a Project Zomboid server uses the following ports:
|
Default Port |
Port Usage |
Description |
|---|---|---|
|
16261 |
Client Port |
This port must be opened for client connections. |
|
16262 |
Direct Connect |
Table Body |
Now you can add these port exceptions to the firewall by hand, but let’s not; that takes way too much time. Let’s do something different:
- Press + R to open a run window.
- Type PowerShell and press Ctrl+Shift+Enter to run it as administrator.
- Type the following three commands:
netsh advfirewall firewall add rule name="ProjectZomboid Port 16261" dir=in action=allow protocol=UDP localport=16261
netsh advfirewall firewall add rule name="ProjectZomboid Port 16262" dir=in action=allow protocol=UDP localport=16262
And now your firewall has been magically configured!
Step 6: Port forwarding
Now, let’s move forward by port forwarding. Before doing that, you would want to set a static IP address on your computer.
After you’ve done that, you can move forward with the actual port forwarding:
First, you’ll need to know what the IP addresses of your computer and router are. This can be done by doing the following:
- Press + R to open a run window.
- Type CMD and press Enter. (This should open a black window.)
- Please type “ipconfig” and press enter.
You’ll see some information about the network settings:

You’ll want to make a note of the “Default Gateway” & IPv4 address; in my case, it is:
- Default Gateway: 192.168.2.254
- IPv4 address: 192.168.2.202
You’ll need to enter this address in your browser and log in to your router. Visit this site to find your specific model and were to find the Port Forward settings.
Once you’ve navigated to the Port Forwarding rules, please enter the following information:
|
Rule Name |
IP Address |
Port Range |
Protocol |
|---|---|---|---|
|
Project Zomboid Client Port |
-Your IPv4 Address- |
16261 |
UDP |
|
Project Zomboid Direct Connect |
-Your IPv4 Address- |
16262 |
UDP |
Now hit save, and your Project Zomboid server is open to the public!
But your friends still don’t know where to find you. For that, you’ll need your public IP address. You can use a site like www.whatismyip.com to get your public IP address.
Step 7: Connecting to your Project Zomboid server
Woohoo! You’ve made it to the last step! You’re in the home stretch.
Now you can finally boot up Project Zomboid.
Once in the main menu, click on Join.

This will pop up a new window.
In this window, you can enter the following:
Only YOU can use «localhost» as the address, your friends will need to enter you public IP address.
You can find your public IP address on www.whatsmyip.com

- Favorite Name: A name you can easily recognize your server by.
- IP: The IP of your server (You need to enter “localhost” your friends need your public IP).
- Local IP: You can leave this empty
- Port: 16261
- Server Password: The server password set in step 4.
- Description: Optional, you can leave this empty for now.
- Account Username: Zomboid Account Username.
- Account Password: Zomboid Account Password
That’s it! You now have a running Project Zomboid server using SteamCMD!

Barotrauma Dedicated Server Set up Guide Barotrauma has been out for a while, but how do you start a server to play

Satisfactory Multiplayer Lag Fix Satisfactory Multiplayer has had some issues with stability and lagging with its multiplayer option. Now you can do

No Comments on Project Zomboid Dedicated Server Set up Guide
Leave A Comment
Готовы к новому забегу и новому выделенному серверу Project Zomboid? Нет ничего лучше, чем попытаться выжить в толпе, царапающей ваши двери, с несколькими близкими друзьями. Будь то смех, когда ваш друг спотыкается о забор и быстро превращается в открывающийся ночной буфет, или планирование идеальной базы для раскрашивания в яркие цвета и украшения украденными микроволновками, всегда лучше, когда у вас есть контроль над всеми правилами вашего прохождения.
Поэтому, если вы и ваши друзья хотите, чтобы ваши зомби были бегунами, никогда не возрождались или даже чтобы ящики с боеприпасами появлялись в каждом холодильнике, вам нужно настроить свой собственный выделенный сервер в Project Zomboid. Вот как это сделать.
- Первое, что нужно сделать, это зайти в Steam, чтобы загрузить программное обеспечение для выделенного сервера. Вам придется отфильтровать «Инструменты» вместо «Игры» и найти выделенный сервер Project Zomboid, чтобы установить его. Пока у вас есть Project Zomboid, он у вас автоматически. Это всего 3 ГБ, так что это не займет много времени.
- После установки перейдите в «Свойства», затем выберите «Локальные файлы» и «Обзор», после чего вы попадете в папку установки.
- В папке установки найдите файл «StartServer64.bat» и запустите его.
- В открывшемся окне командной строки он на мгновение запустится, а затем попросит вас создать пароль администратора, а затем повторно ввести его для подтверждения.
- Вам также может быть предложено разрешить выделенный сервер через брандмауэр, поэтому дайте разрешение, если его попросят.
- Когда сервер будет завершен и запущен, вы увидите уведомление внутри окна, информирующее вас о том, что сервер запущен, а затем еще несколько строк.
- Не забудьте оставить командную строку открытой, чтобы сервер не работал. Теперь вы можете запустить сам Project Zomboid.
- В главном меню выберите опцию Host.

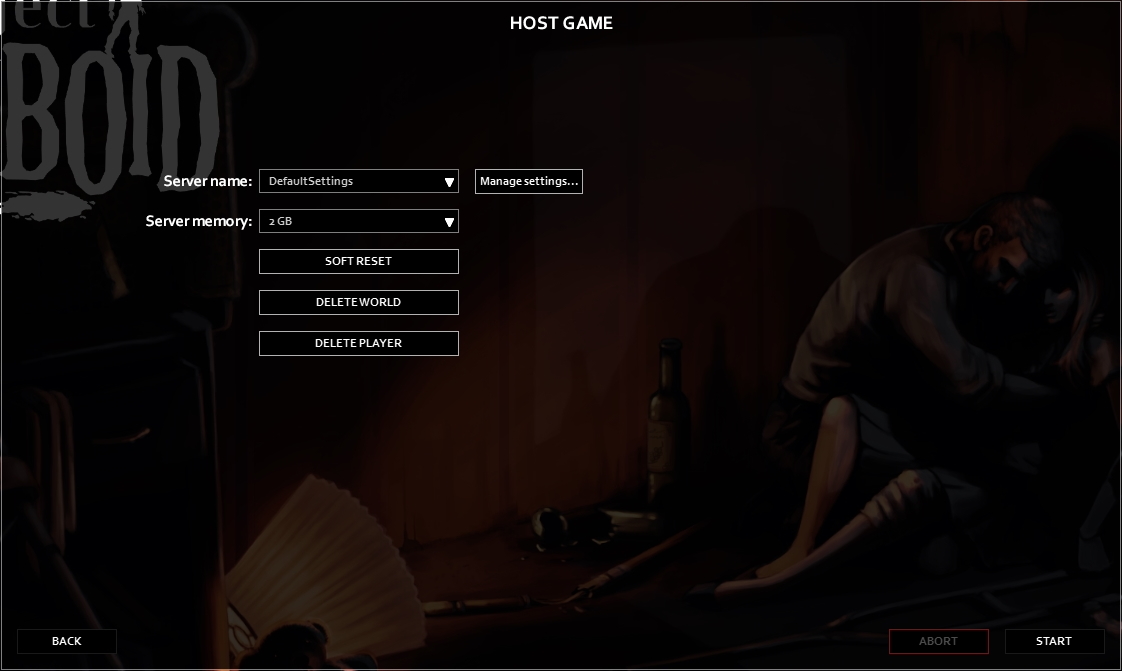
- Отсюда настройте свою оперативную память — 2 ГБ вполне достаточно для вас и пары друзей — и используйте «Управление настройками», чтобы изменить буквально все на вашем сервере, от того, как действуют зомби, до используемой карты, серверных модов, PVP и правил грабежа. и нерестится.
- Ваше первое редактирование должно состоять в том, чтобы перейти к «Управление настройками», «Редактировать выбранные настройки», а затем «Сведения» (выбор по умолчанию) и изменить имя и пароль для вашего сервера, чтобы вы знали, что это такое, и могли сообщить друзьям.
- Сходите с ума, настроив что-нибудь еще, что вы хотели бы, а затем приступайте к действию!
Как мне найти сервер, если я не собираюсь его размещать?
Все, что вам нужно сделать, это выбрать «Присоединиться» в главном меню, а затем щелкнуть вкладку «Интернет», и у вас будет возможность просматривать доступные общедоступные серверы в любое время. Каждый сервер будет отображать, какие моды он использует (если они есть), а хорошо поддерживаемые будут иметь описание, которое включает такие вещи, как правила или общее представление о том, на что похожи настройки серверов. Относитесь к этому списку как к каталогу вариантов, которые можно обсудить с друзьями или решить самостоятельно, и обязательно проверьте, сколько игроков также находится на сервере.