In this article, we will discuss the Message Box Widget of the PyQT5 module. It is used to display the message boxes. PyQt5 is a library used to create GUI using the Qt GUI framework. Qt is originally written in C++ but can be used in Python. The latest version of PyQt5 can be installed using the command:
pip install PyQt5
What is a Message Box?
Message Boxes are usually used for declaring a small piece of information to the user. It gives users a pop-up box, that cannot be missed, to avoid important errors and information being missed by the users and in some cases, the user cannot continue without acknowledging the message box.
Based on the applications there are four types of message boxes. The following is the syntax for creating a message box. For any of the boxes, instantiation needs to be done.
Syntax:
msg_box_name = QMessageBox()
Now according to the requirement an appropriate message box is created.
Types of Message Box
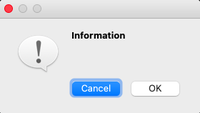
Information Message Box
This type of message box is used when related information needs to be passed to the user.
Syntax:
msg_box_name.setIcon(QMessageBox.Information)
Question Message Box
This message box is used to get an answer from a user regarding some activity or action to be performed.
Syntax:
msg_box_name.setIcon(QMessageBox.Question)
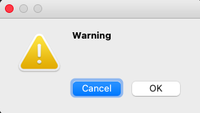
Warning Message Box
This triggers a warning regarding the action the user is about to perform.
Syntax:
msg_box_name.setIcon(QMessageBox.Warning)
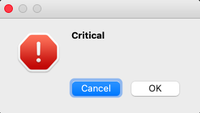
Critical Message Box
This is often used for getting the user’s opinion for a critical action.
Syntax:
msg_box_name.setIcon(QMessageBox.Critical)
Creating a simple Message Box using PyQt5
Now to create a program that produces a message box first import all the required modules, and create a widget with four buttons, on clicking any of these a message box will be generated.
Now for each button associate a message box that pops when the respective button is clicked. For this first, instantiate a message box and add a required icon. Now set appropriate attributes for the pop that will be generated. Also, add buttons to deal with standard mechanisms.
Given below is the complete implementation.
Program:
Python
import sys
from PyQt5.QtWidgets import *
def window():
app = QApplication(sys.argv)
w = QWidget()
b1 = QPushButton(w)
b1.setText("Information")
b1.move(45, 50)
b2 = QPushButton(w)
b2.setText("Warning")
b2.move(150, 50)
b3 = QPushButton(w)
b3.setText("Question")
b3.move(50, 150)
b4 = QPushButton(w)
b4.setText("Critical")
b4.move(150, 150)
b1.clicked.connect(show_info_messagebox)
b2.clicked.connect(show_warning_messagebox)
b3.clicked.connect(show_question_messagebox)
b4.clicked.connect(show_critical_messagebox)
w.setWindowTitle("PyQt MessageBox")
w.show()
sys.exit(app.exec_())
def show_info_messagebox():
msg = QMessageBox()
msg.setIcon(QMessageBox.Information)
msg.setText("Information ")
msg.setWindowTitle("Information MessageBox")
msg.setStandardButtons(QMessageBox.Ok | QMessageBox.Cancel)
retval = msg.exec_()
def show_warning_messagebox():
msg = QMessageBox()
msg.setIcon(QMessageBox.Warning)
msg.setText("Warning")
msg.setWindowTitle("Warning MessageBox")
msg.setStandardButtons(QMessageBox.Ok | QMessageBox.Cancel)
retval = msg.exec_()
def show_question_messagebox():
msg = QMessageBox()
msg.setIcon(QMessageBox.Question)
msg.setText("Question")
msg.setWindowTitle("Question MessageBox")
msg.setStandardButtons(QMessageBox.Ok | QMessageBox.Cancel)
retval = msg.exec_()
def show_critical_messagebox():
msg = QMessageBox()
msg.setIcon(QMessageBox.Critical)
msg.setText("Critical")
msg.setWindowTitle("Critical MessageBox")
msg.setStandardButtons(QMessageBox.Ok | QMessageBox.Cancel)
retval = msg.exec_()
if __name__ == '__main__':
window()
Output
This article covers the PyQt5 widget, QMessageBox.
QMessageBox is a useful PyQt5 widget used to create dialogs. These dialogs can be used for a variety of purposes and customized in many ways to display different messages and buttons.
In this PyQt5 tutorial you’ll also find a complete list of all methods, buttons types and options for the QMessageBox widget.
Creating a QMessageBox
Below we are just going to create a simple QMessageBox widget. It’s going to be a bare-bone messagebox with no added features or customization.
msg = QMessageBox(win)
msg.setWindowTitle("Message Box")
msg.setText("This is some random text")

x = msg.exec_()
And below is the output. If you want to display a simple message on screen, this is the way to do so.
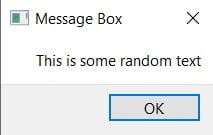
Now compare this simple messagebox to the advanced and feature-rich message-boxes we are going to create below.
QMessageBox Icons
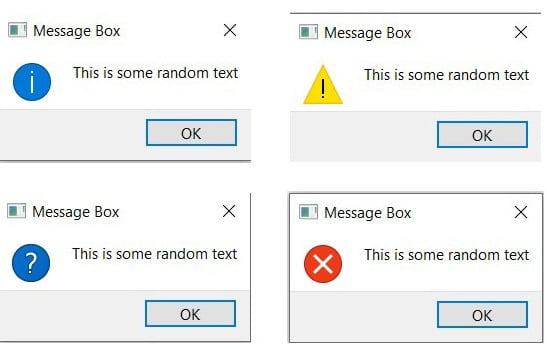
QMessageBox has 4 different types of icons that can be used by calling the setIcon() function. Decide which one to use depending on type of message you wish to display.
- QMessageBox.Question
- QMessageBox.Information
- QMessageBox.Warning
- QMessageBox.Critical
All you have to do is pass one of the above to the setIcon() function as shown below.
msg.setIcon(QMessageBox.Question)
Below are all four different messages that can be displayed.
QMessageBox Buttons
Uptil now we’ve been using the default “OK” button that QMessageBox offers. However, there are actually over a dozen different buttons that QMessageBox offers for our use. Below is an example of us utilizing some of the buttons.
Using the setStandardButtons() function, we can pass whichever button-type we want. (See the list of complete button types below)
def show_popup():
    msg = QMessageBox(win)
    msg.setWindowTitle("Message Box")
    msg.setText("This is some random text")
    msg.setIcon(QMessageBox.Question)
    msg.setStandardButtons(QMessageBox.Cancel|QMessageBox.Ok
                          |QMessageBox.Retry)
    msg.setInformativeText("This is some extra informative text")
    x = msg.exec_()
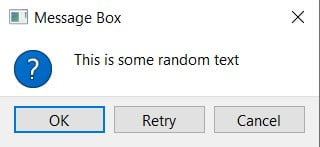
You may have noticed this already, but the order the buttons has no impact on how they appear on the message box.
Default Button
Look at the above image again. You’l have noticed that there is a blue outline around the “OK” button. This is the symbol of the default button.
Using the setDefaultButton() function we can change the default button. Adding the following line to our code will cause the blue highlight to be around the “Cancel” button.
msg.setDefaultButton(QMessageBox.Cancel)
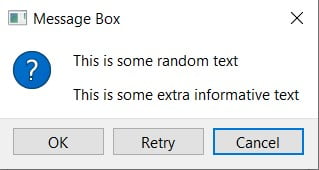
Here’s a complete list of different buttons types you can use with Messages.
- QMessageBox.Ok
- QMessageBox.No
- QMessageBox.Yes
- QMessageBox.Cancel
- QMessageBox.Close
- QMessageBox.Abort
- QMessageBox.open
- QMessageBox.Retry
- QMessageBox.Ignore
- QMessageBox.Save
- QMessageBox.Retry
- QMessageBox.Apply
- QMessageBox.Help
- QMessageBox.Reset
- QMessageBox.SaveAll
- QMessageBox.YesToAll
- QMessageBox.NoToAll
Detailed and Informative Text
By default you only have one area in the QMessageBox where you display Text. However, there are two more additional areas that we can unlock to add more text.
The first is an additional text section on the messagebox window itself. It’s like an additional line of text you can add called informative text. You only need to call the setInformativeText() function to add this new area of text.
The second is displayed on an area that expands from the QMessageBox. This is called “Detailed Text”. Setting up this section will automatically create a button that is used to show this area. You only need the setDetailedText() function to create this area.
def show_popup():
    msg = QMessageBox(win)
    msg.setWindowTitle("Message Box")
    msg.setText("This is some random text")
    msg.setIcon(QMessageBox.Question)

    msg.setStandardButtons(QMessageBox.Cancel|QMessageBox.Ok)
    msg.setDefaultButton(QMessageBox.Ok)

    msg.setDetailedText("Extra details.....")
    msg.setInformativeText("This is some extra informative text")
    x = msg.exec_()

app = QApplication(sys.argv)
win = QMainWindow()
win.setGeometry(400,400,300,300)
win.setWindowTitle("CodersLegacy")

button = QtWidgets.QPushButton(win)
button.setText("A Button")
button.clicked.connect(show_popup)
button.move(100,100)

win.show()
sys.exit(app.exec_())
In case it didn’t make sense before, look the code and compare to how the output below has changed.
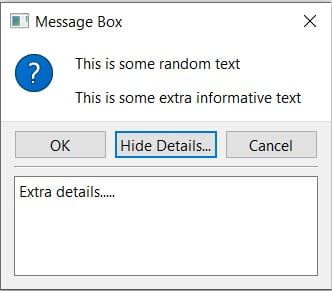
Clicking the Hide/Show Details button will hide/show the extra area below the messagebox respectively.
Retrieving QMessageBox Values
We’ve discussed alot of different customizations and features above, but we haven’t actually linked any of these different features and buttons to our code.
For example, if we have 3 different buttons on our messagebox, how will we know which one was pressed? This is what we’ll be exploring in this section. The code for this is shown below. Make sure to read it before moving forward.
from PyQt5 import QtWidgets
from PyQt5.QtWidgets import QApplication, QMainWindow, QMessageBox
import sys

def show_popup():
    msg = QMessageBox()
    msg.setWindowTitle("Message Box")
    msg.setText("This is some random text")

    msg.setIcon(QMessageBox.Question)
    msg.setStandardButtons(QMessageBox.Cancel|QMessageBox.Ok)
    msg.buttonClicked.connect(popup)

    x = msg.exec_()

def popup(i):
    print(i.text())

app = QApplication(sys.argv)
win = QMainWindow()
win.setGeometry(400,400,300,300)
win.setWindowTitle("CodersLegacy")

button = QtWidgets.QPushButton(win)
button.setText("A Button")
button.clicked.connect(show_popup)
button.move(100,100)

win.show()
sys.exit(app.exec_())
Using the buttonClicked.connect() method, we can cause a function to be triggered whenever a button on the message box is clicked. In this case, we’ve linked our messagebox to a function called popup. Notice that popup() takes a parameter i.
When the messagebox button is clicked it automatically passes the button that was clicked to the function declared in buttonClicked.connect(). Calling the text() function on this button will return it’s text value.
Head over to our main PyQt5 section to learn more about the other great widgets!
This marks the end of the PyQt5 QMessageBox article. Any suggestions or contributions for CodersLegacy are more than welcome. Questions regarding the article content can be asked in the comments section below.
When creating a Python GUI, you may want to show the message box QMessageBox at some point. The QMessageBox is a dialog that shows an informational message. It can optionally ask the user to click any of the buttons that show inside it.
Pyqt comes with messagebox support in both PyQt4 and PyQt5. The class to be used is QMessageBox.
In this tutorial you’ll learn how to show a message box on buton click.
Related course: Create PyQt Desktop Appications with Python (GUI)
QMessageBox example
The first thing to do, if you haven’t done so, is to install the PyQt GUI module.
Import QMessageBox from the PyQt5 widgets
from PyQt5.QtWidgets import QMessageBox
A messagebox can easily be added to the window using the code:
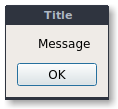
QMessageBox.about(self, "Title", "Message")
The code below create a window with a button. If you click on the button it shows a messagebox.
The messagebox is created with QMessageBox.about(self,title,message). This sets the window title and message too.
import sys
from PyQt5 import QtCore, QtWidgets
from PyQt5.QtWidgets import QMainWindow, QLabel, QGridLayout, QWidget
from PyQt5.QtWidgets import QPushButton
from PyQt5.QtWidgets import QMessageBox
from PyQt5.QtCore import QSize

class MainWindow(QMainWindow):
    def __init__(self):
        QMainWindow.__init__(self)

        self.setMinimumSize(QSize(300, 200))
        self.setWindowTitle("PyQt messagebox example - pythonprogramminglanguage.com")

        pybutton = QPushButton('Show messagebox', self)
        pybutton.clicked.connect(self.clickMethod)
        pybutton.resize(200,64)
        pybutton.move(50, 50)

    def clickMethod(self):
        QMessageBox.about(self, "Title", "Message")

if __name__ == "__main__":
    app = QtWidgets.QApplication(sys.argv)
    mainWin = MainWindow()
    mainWin.show()
    sys.exit( app.exec_() )
Related course: Create PyQt Desktop Appications with Python (GUI)
QMessageBox types
There are several types of icons that can be set in PyQt messagebox, they are: information, question, warning and critical.
Depending on the type of message box you want to show, you can change it to the one you need for your application.
msg.setIcon(QMessageBox.Information)
msg.setIcon(QMessageBox.Question)
msg.setIcon(QMessageBox.Warning)
msg.setIcon(QMessageBox.Critical)
QMessageBox buttons
You can set the default buttons shown in a message box. You can do that with the method setStandrdButtons(), then add the buttons you need.
msg.setStandardButtons(QMessageBox.Ok | QMessageBox.Cancel)
It comes with a whole range of buttons:
- QMessageBox.Ok
- QMessageBox.Open
- QMessageBox.Save
- QMessageBox.Cancel
- QMessageBox.Close
- QMessageBox.Yes
- QMessageBox.No
- QMessageBox.Abort
- QMessageBox.Retry
- QMessageBox.Ignore
You can test which button is clicked by capturing its return value:
ret = QMessageBox.question(self, 'MessageBox', "Click a button", QMessageBox.Yes | QMessageBox.No | QMessageBox.Cancel, QMessageBox.Cancel)

if ret == QMessageBox.Yes:
    print('Button QMessageBox.Yes clicked.')
If you are new to Python PyQt, then I highly recommend this book.
Download PyQt Examples
QMessageBox is a commonly used modal dialog to display some informational message and optionally ask the user to respond by clicking any one of the standard buttons on it. Each standard button has a predefined caption, a role and returns a predefined hexadecimal number.
Important methods and enumerations associated with QMessageBox class are given in the following table −
| Sr.No. | Methods & Description |
|---|---|
| 1 |
setIcon() Displays predefined icon corresponding to severity of the message
|
| 2 |
setText() Sets the text of the main message to be displayed |
| 3 |
setInformativeText() Displays additional information |
| 4 |
setDetailText() Dialog shows a Details button. This text appears on clicking it |
| 5 |
setTitle() Displays the custom title of dialog |
| 6 |
setStandardButtons() List of standard buttons to be displayed. Each button is associated with QMessageBox.Ok 0x00000400 QMessageBox.Open 0x00002000 QMessageBox.Save 0x00000800 QMessageBox.Cancel 0x00400000 QMessageBox.Close 0x00200000 QMessageBox.Yes 0x00004000 QMessageBox.No 0x00010000 QMessageBox.Abort 0x00040000 QMessageBox.Retry 0x00080000 QMessageBox.Ignore 0x00100000 |
| 7 |
setDefaultButton() Sets the button as default. It emits the clicked signal if Enter is pressed |
| 8 |
setEscapeButton() Sets the button to be treated as clicked if the escape key is pressed |
Example
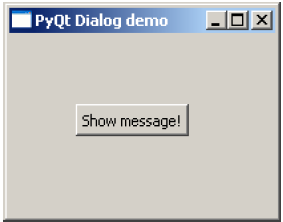
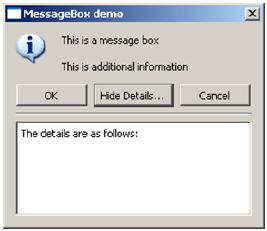
In the following example, click signal of the button on the top level window, the connected function displays the messagebox dialog.
msg = QMessageBox()
msg.setIcon(QMessageBox.Information)
msg.setText("This is a message box")
msg.setInformativeText("This is additional information")
msg.setWindowTitle("MessageBox demo")
msg.setDetailedText("The details are as follows:")
setStandardButton() function displays desired buttons.
msg.setStandardButtons(QMessageBox.Ok | QMessageBox.Cancel)
buttonClicked() signal is connected to a slot function, which identifies the caption of source of the signal.
msg.buttonClicked.connect(msgbtn)
The complete code for the example is as follows −
import sys
from PyQt4.QtGui import *
from PyQt4.QtCore import *

def window():
   app = QApplication(sys.argv)
   w = QWidget()
   b = QPushButton(w)
   b.setText("Show message!")

   b.move(50,50)
   b.clicked.connect(showdialog)
   w.setWindowTitle("PyQt Dialog demo")
   w.show()
   sys.exit(app.exec_())

def showdialog():
   msg = QMessageBox()
   msg.setIcon(QMessageBox.Information)

   msg.setText("This is a message box")
   msg.setInformativeText("This is additional information")
   msg.setWindowTitle("MessageBox demo")
   msg.setDetailedText("The details are as follows:")
   msg.setStandardButtons(QMessageBox.Ok | QMessageBox.Cancel)
   msg.buttonClicked.connect(msgbtn)

   retval = msg.exec_()
   print "value of pressed message box button:", retval

def msgbtn(i):
   print "Button pressed is:",i.text()

if __name__ == '__main__':
   window()
The above code produces the following output −

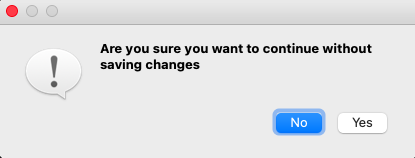
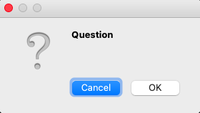
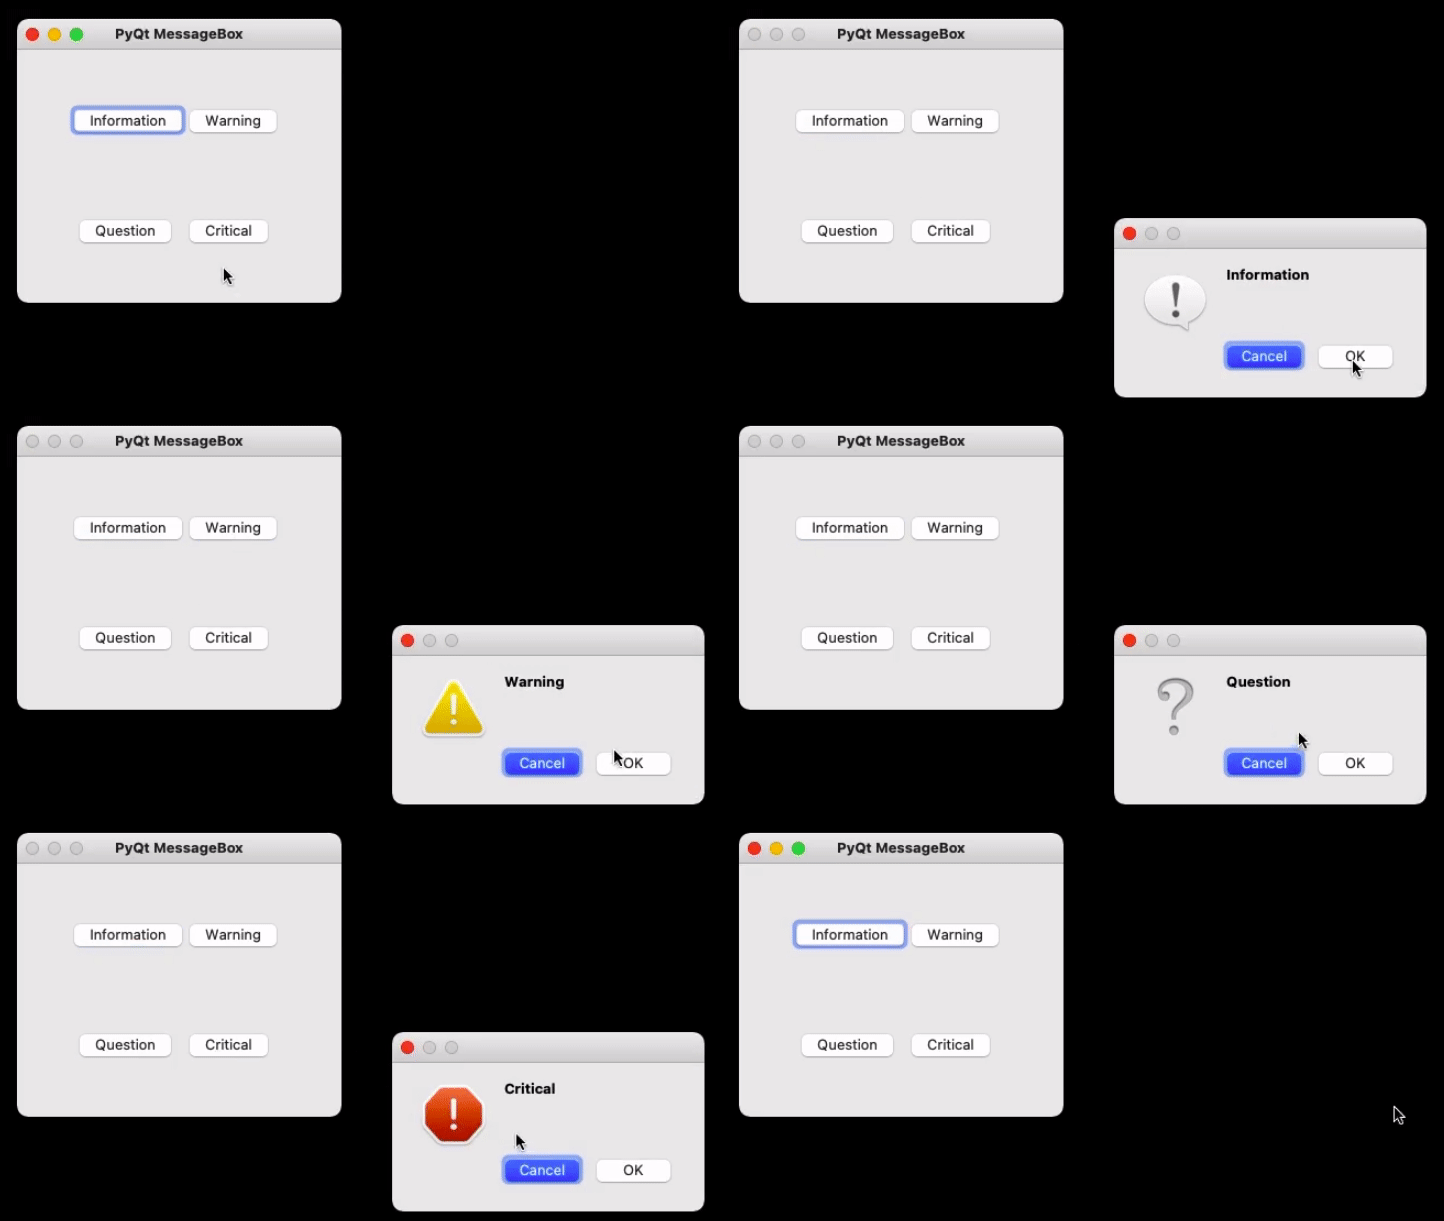
 Question
 Information
 Warning
 Critical