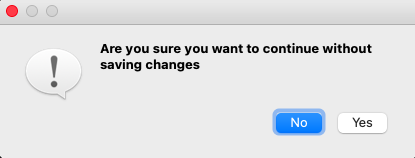
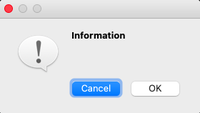
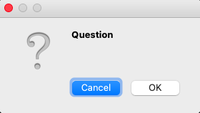
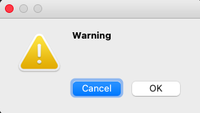
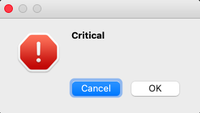
This article covers the PyQt5 widget, QMessageBox.
QMessageBox is a useful PyQt5 widget used to create dialogs. These dialogs can be used for a variety of purposes and customized in many ways to display different messages and buttons.
In this PyQt5 tutorial you’ll also find a complete list of all methods, buttons types and options for the QMessageBox widget.
Creating a QMessageBox
Below we are just going to create a simple QMessageBox widget. It’s going to be a bare-bone messagebox with no added features or customization.
msg = QMessageBox(win)
msg.setWindowTitle("Message Box")
msg.setText("This is some random text")

x = msg.exec_()
And below is the output. If you want to display a simple message on screen, this is the way to do so.
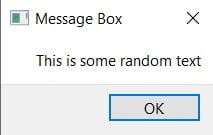
Now compare this simple messagebox to the advanced and feature-rich message-boxes we are going to create below.
QMessageBox Icons
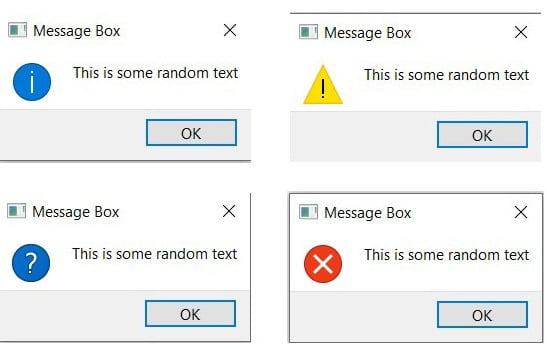
QMessageBox has 4 different types of icons that can be used by calling the setIcon() function. Decide which one to use depending on type of message you wish to display.
- QMessageBox.Question
- QMessageBox.Information
- QMessageBox.Warning
- QMessageBox.Critical
All you have to do is pass one of the above to the setIcon() function as shown below.
msg.setIcon(QMessageBox.Question)
Below are all four different messages that can be displayed.
QMessageBox Buttons
Uptil now we’ve been using the default “OK” button that QMessageBox offers. However, there are actually over a dozen different buttons that QMessageBox offers for our use. Below is an example of us utilizing some of the buttons.
Using the setStandardButtons() function, we can pass whichever button-type we want. (See the list of complete button types below)
def show_popup():
    msg = QMessageBox(win)
    msg.setWindowTitle("Message Box")
    msg.setText("This is some random text")
    msg.setIcon(QMessageBox.Question)
    msg.setStandardButtons(QMessageBox.Cancel|QMessageBox.Ok
                          |QMessageBox.Retry)
    msg.setInformativeText("This is some extra informative text")
    x = msg.exec_()
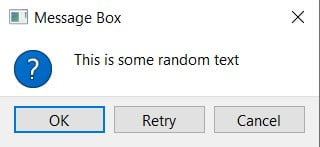
You may have noticed this already, but the order the buttons has no impact on how they appear on the message box.
Default Button
Look at the above image again. You’l have noticed that there is a blue outline around the “OK” button. This is the symbol of the default button.
Using the setDefaultButton() function we can change the default button. Adding the following line to our code will cause the blue highlight to be around the “Cancel” button.
msg.setDefaultButton(QMessageBox.Cancel)
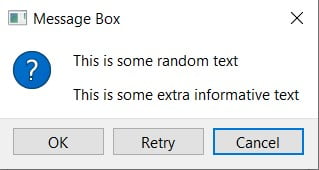
Here’s a complete list of different buttons types you can use with Messages.
- QMessageBox.Ok
- QMessageBox.No
- QMessageBox.Yes
- QMessageBox.Cancel
- QMessageBox.Close
- QMessageBox.Abort
- QMessageBox.open
- QMessageBox.Retry
- QMessageBox.Ignore
- QMessageBox.Save
- QMessageBox.Retry
- QMessageBox.Apply
- QMessageBox.Help
- QMessageBox.Reset
- QMessageBox.SaveAll
- QMessageBox.YesToAll
- QMessageBox.NoToAll
Detailed and Informative Text
By default you only have one area in the QMessageBox where you display Text. However, there are two more additional areas that we can unlock to add more text.
The first is an additional text section on the messagebox window itself. It’s like an additional line of text you can add called informative text. You only need to call the setInformativeText() function to add this new area of text.
The second is displayed on an area that expands from the QMessageBox. This is called “Detailed Text”. Setting up this section will automatically create a button that is used to show this area. You only need the setDetailedText() function to create this area.
def show_popup():
    msg = QMessageBox(win)
    msg.setWindowTitle("Message Box")
    msg.setText("This is some random text")
    msg.setIcon(QMessageBox.Question)

    msg.setStandardButtons(QMessageBox.Cancel|QMessageBox.Ok)
    msg.setDefaultButton(QMessageBox.Ok)

    msg.setDetailedText("Extra details.....")
    msg.setInformativeText("This is some extra informative text")
    x = msg.exec_()

app = QApplication(sys.argv)
win = QMainWindow()
win.setGeometry(400,400,300,300)
win.setWindowTitle("CodersLegacy")

button = QtWidgets.QPushButton(win)
button.setText("A Button")
button.clicked.connect(show_popup)
button.move(100,100)

win.show()
sys.exit(app.exec_())
In case it didn’t make sense before, look the code and compare to how the output below has changed.
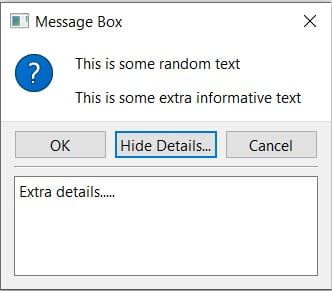
Clicking the Hide/Show Details button will hide/show the extra area below the messagebox respectively.
Retrieving QMessageBox Values
We’ve discussed alot of different customizations and features above, but we haven’t actually linked any of these different features and buttons to our code.
For example, if we have 3 different buttons on our messagebox, how will we know which one was pressed? This is what we’ll be exploring in this section. The code for this is shown below. Make sure to read it before moving forward.
from PyQt5 import QtWidgets
from PyQt5.QtWidgets import QApplication, QMainWindow, QMessageBox
import sys

def show_popup():
    msg = QMessageBox()
    msg.setWindowTitle("Message Box")
    msg.setText("This is some random text")

    msg.setIcon(QMessageBox.Question)
    msg.setStandardButtons(QMessageBox.Cancel|QMessageBox.Ok)
    msg.buttonClicked.connect(popup)

    x = msg.exec_()

def popup(i):
    print(i.text())

app = QApplication(sys.argv)
win = QMainWindow()
win.setGeometry(400,400,300,300)
win.setWindowTitle("CodersLegacy")

button = QtWidgets.QPushButton(win)
button.setText("A Button")
button.clicked.connect(show_popup)
button.move(100,100)

win.show()
sys.exit(app.exec_())
Using the buttonClicked.connect() method, we can cause a function to be triggered whenever a button on the message box is clicked. In this case, we’ve linked our messagebox to a function called popup. Notice that popup() takes a parameter i.
When the messagebox button is clicked it automatically passes the button that was clicked to the function declared in buttonClicked.connect(). Calling the text() function on this button will return it’s text value.
Head over to our main PyQt5 section to learn more about the other great widgets!
This marks the end of the PyQt5 QMessageBox article. Any suggestions or contributions for CodersLegacy are more than welcome. Questions regarding the article content can be asked in the comments section below.
In this article, we will discuss the Message Box Widget of the PyQT5 module. It is used to display the message boxes. PyQt5 is a library used to create GUI using the Qt GUI framework. Qt is originally written in C++ but can be used in Python. The latest version of PyQt5 can be installed using the command:
pip install PyQt5
What is a Message Box?
Message Boxes are usually used for declaring a small piece of information to the user. It gives users a pop-up box, that cannot be missed, to avoid important errors and information being missed by the users and in some cases, the user cannot continue without acknowledging the message box.
Based on the applications there are four types of message boxes. The following is the syntax for creating a message box. For any of the boxes, instantiation needs to be done.
Syntax:
msg_box_name = QMessageBox()
Now according to the requirement an appropriate message box is created.
Types of Message Box
Information Message Box
This type of message box is used when related information needs to be passed to the user.
Syntax:
msg_box_name.setIcon(QMessageBox.Information)
Question Message Box
This message box is used to get an answer from a user regarding some activity or action to be performed.
Syntax:
msg_box_name.setIcon(QMessageBox.Question)
Warning Message Box
This triggers a warning regarding the action the user is about to perform.
Syntax:
msg_box_name.setIcon(QMessageBox.Warning)
Critical Message Box
This is often used for getting the user’s opinion for a critical action.
Syntax:
msg_box_name.setIcon(QMessageBox.Critical)
Creating a simple Message Box using PyQt5
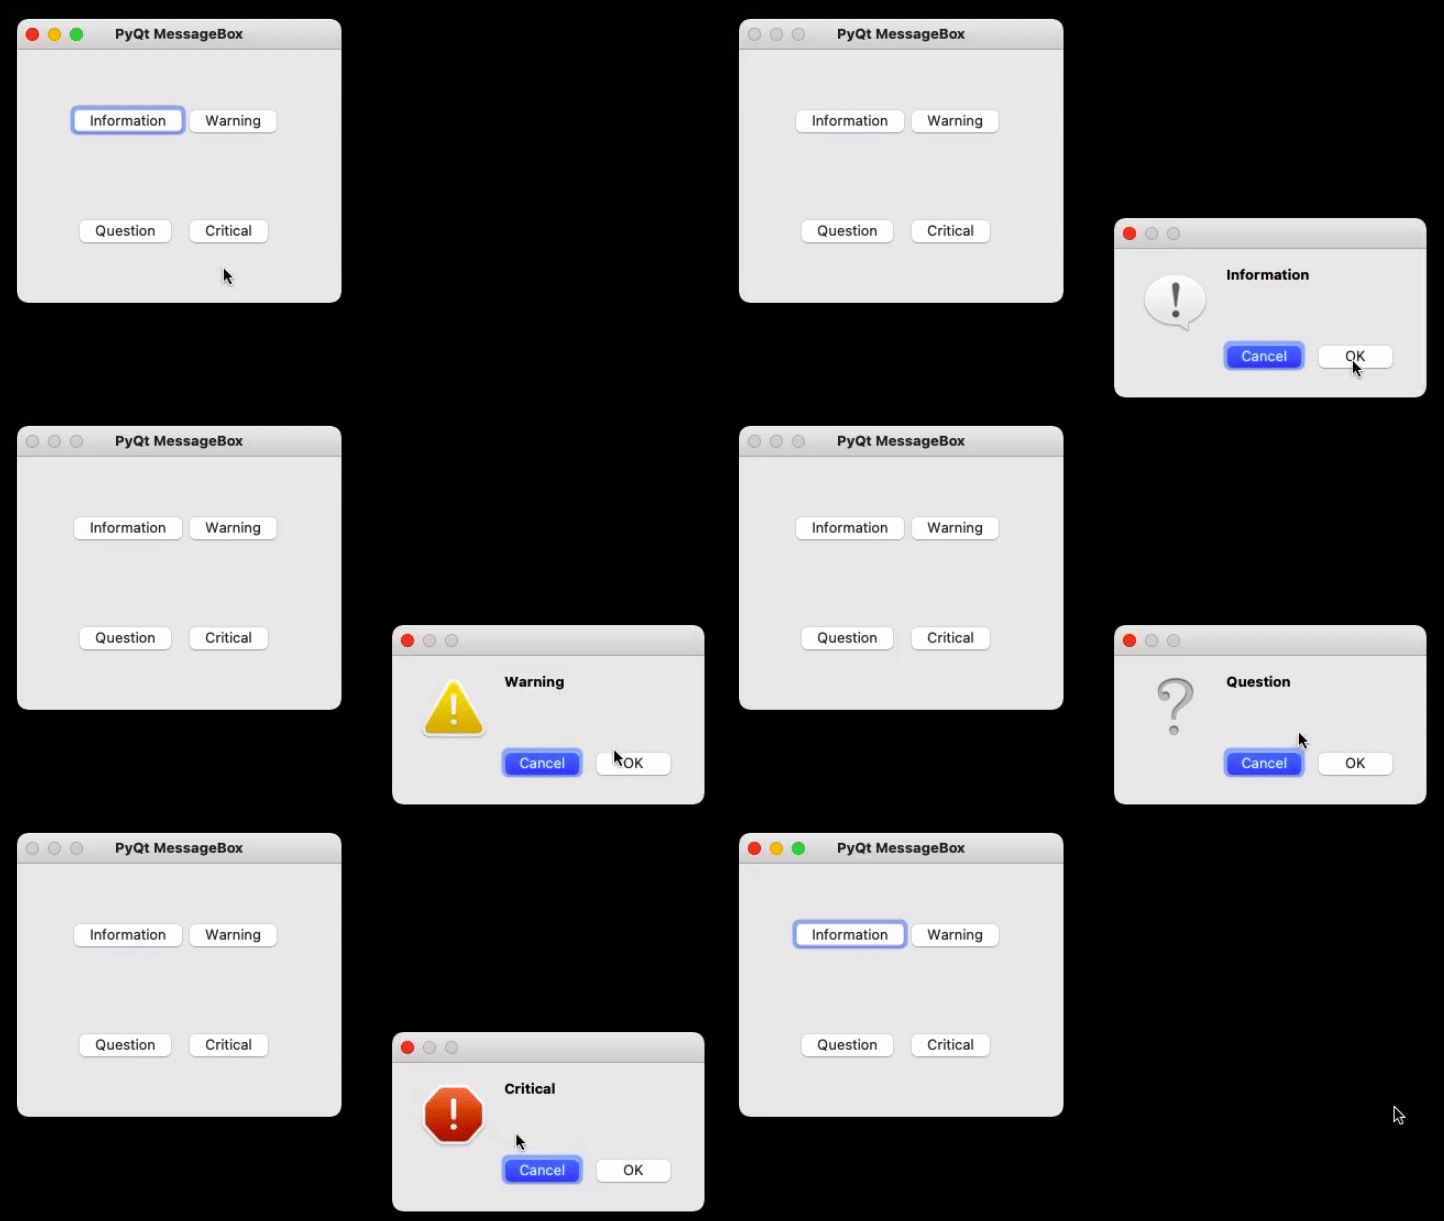
Now to create a program that produces a message box first import all the required modules, and create a widget with four buttons, on clicking any of these a message box will be generated.
Now for each button associate a message box that pops when the respective button is clicked. For this first, instantiate a message box and add a required icon. Now set appropriate attributes for the pop that will be generated. Also, add buttons to deal with standard mechanisms.
Given below is the complete implementation.
Program:
Python
import sys
from PyQt5.QtWidgets import *
def window():
app = QApplication(sys.argv)
w = QWidget()
b1 = QPushButton(w)
b1.setText("Information")
b1.move(45, 50)
b2 = QPushButton(w)
b2.setText("Warning")
b2.move(150, 50)
b3 = QPushButton(w)
b3.setText("Question")
b3.move(50, 150)
b4 = QPushButton(w)
b4.setText("Critical")
b4.move(150, 150)
b1.clicked.connect(show_info_messagebox)
b2.clicked.connect(show_warning_messagebox)
b3.clicked.connect(show_question_messagebox)
b4.clicked.connect(show_critical_messagebox)
w.setWindowTitle("PyQt MessageBox")
w.show()
sys.exit(app.exec_())
def show_info_messagebox():
msg = QMessageBox()
msg.setIcon(QMessageBox.Information)
msg.setText("Information ")
msg.setWindowTitle("Information MessageBox")
msg.setStandardButtons(QMessageBox.Ok | QMessageBox.Cancel)
retval = msg.exec_()
def show_warning_messagebox():
msg = QMessageBox()
msg.setIcon(QMessageBox.Warning)
msg.setText("Warning")
msg.setWindowTitle("Warning MessageBox")
msg.setStandardButtons(QMessageBox.Ok | QMessageBox.Cancel)
retval = msg.exec_()
def show_question_messagebox():
msg = QMessageBox()
msg.setIcon(QMessageBox.Question)
msg.setText("Question")
msg.setWindowTitle("Question MessageBox")
msg.setStandardButtons(QMessageBox.Ok | QMessageBox.Cancel)
retval = msg.exec_()
def show_critical_messagebox():
msg = QMessageBox()
msg.setIcon(QMessageBox.Critical)
msg.setText("Critical")
msg.setWindowTitle("Critical MessageBox")
msg.setStandardButtons(QMessageBox.Ok | QMessageBox.Cancel)
retval = msg.exec_()
if __name__ == '__main__':
window()
Output
Subscribe to Tech With Tim!
This PyQt5 Tutorial will show you how to create message boxes/popup windows using pyqt. We will use the QMessageBox class to accomplish this.
Creating a Basic GUI
I’ve started this tutorial by creating a very minimal GUI that contains one button. This way we can use the button press to trigger a popup/mesagebox.
This is what my GUI looks like:
Importing QMessageBox
To make our lives a little easier we will start by importing the QMessageBox class. This way each time we want to reference it we can use it directly.
from PyQt5.QtWidgets import QMessageBox
Creating a MessageBox
Note: I’m placing the code seen below inside the method that is linked to my button press. This way when the button is clicked a messagebox will appear on the screen.
Everytime we create a new popup window we need to create a new instance of QMessageBox.
Then we can start changing some properties of the messagebox like the title and the text.
msg.setWindowTitle("Tutorial on PyQt5")
msg.setText("This is the main text!")
The method names are pretty intuitive so I’ll pass on explaining them.
We will add some more to our messagebox later but for now lets test it out. To actually see the messagebox when we run the code we need to add one last line to the end of our method:
x = msg.exec_() # this will show our messagebox
And this is what we get when we click the button!
Adding an Icon
A nice feature that our message boxes have it the ability to add an icon!
msg.setIcon(QMessageBox.Critical)
List of Icons
— QMessageBox.Critical
— QMessageBox.Warning
— QMessageBox.Information
— QMessageBox.Question
Here’s what our messagebox looks like with the Critical icon.
Adding/Changing Buttons
Now it’s time to change the buttons that show up in our QMessageBox. To do this we need to first select from a list of buttons that we’d like.
List of Buttons
— QMessageBox.Ok
— QMessageBox.Open
— QMessageBox.Save
— QMessageBox.Cancel
— QMessageBox.Close
— QMessageBox.Yes
— QMessageBox.No
— QMessageBox.Abort
— QMessageBox.Retry
— QMessageBox.Ignore
We can add any combinations of these buttons to our message box by using the following:
msg.setStandardButtons(QMessageBox.Retry | QMessageBox.Ignore | QMessageBox.Cancel) # seperate buttons with "|"
We can also set the button that will be highlighted by default by using:
msg.setDefaultButton(QMessageBox.Ignore) # setting default button to Cancel
Now our messagebox looks like this!
Getting Button Pressed
Now that we’ve learned how to add more than one button is probably important to determine which button the user is clicking.
To do this we need to create a new method/function that takes one argument. This argument will be the button widget that was clicked.
    def popup_clicked(self, i):
        print(i.text())  # will print out the text on the button clicked
No we can link our messagebox to trigger that method when any button is pressed.
msg.buttonClicked.connect(self.popup_clicked)
Now when we click a button on the messagebox it’s text will be printed out to the console.
Other Properties
A few other things we can add are listed below:
Informative Text
This is the text that shows below the main text.
msg.setInformativeText("informative text, ya!")
Detail Text
This will generate a new button that will allow us to expand the message box and view more details.
msg.setDetailedText("details")
Full Code
from PyQt5 import QtCore, QtGui, QtWidgets
from PyQt5.QtWidgets import QMessageBox

class Ui_MainWindow(object):
	...
	def show_popup(self):
		msg = QMessageBox()
		msg.setWindowTitle("Tutorial on PyQt5")
		msg.setText("This is the main text!")
		msg.setIcon(QMessageBox.Question)
		msg.setStandardButtons(QMessageBox.Cancel|QMessageBox.Retry|QMessageBox.Ignore|)
		msg.setDefaultButton(QMessageBox.Retry)
		msg.setInformativeText("informative text, ya!")

		msg.setDetailedText("details")

		msg.buttonClicked.connect(self.popup_button)

	def popup_button(self, i):
		print(i.text())
5 ответов
Qt включает в себя класс диалога для сообщений об ошибках QErrorMessage который вы должны использовать, чтобы ваш диалог соответствовал системным стандартам. Чтобы показать диалог, просто создайте объект диалога, затем вызовите .showMessage(). Например:
error_dialog = QtWidgets.QErrorMessage()
error_dialog.showMessage('Oh no!')
Вот минимальный рабочий пример скрипта:
import PyQt5
from PyQt5 import QtWidgets

app = QtWidgets.QApplication([])

error_dialog = QtWidgets.QErrorMessage()
error_dialog.showMessage('Oh no!')

app.exec_()
mfitzp
24 окт. 2016, в 19:04
Поделиться
Все вышеперечисленные варианты не работали для меня, используя Komodo Edit 11.0. Просто вернул «1» или, если не был реализован «-1073741819».
Полезным для меня было: решение Ванлока.
def my_exception_hook(exctype, value, traceback):
    # Print the error and traceback
    print(exctype, value, traceback)
    # Call the normal Exception hook after
    sys._excepthook(exctype, value, traceback)
    sys.exit(1)

# Back up the reference to the exceptionhook
sys._excepthook = sys.excepthook

# Set the exception hook to our wrapping function
sys.excepthook = my_exception_hook
ZF007
13 нояб. 2017, в 20:15
Поделиться
Следующее должно работать:
msg = QMessageBox()
msg.setIcon(QMessageBox.Critical)
msg.setText("Error")
msg.setInformativeText(e)
msg.setWindowTitle("Error")
Это не тот же тип сообщения (разные GUI), но довольно близко. e — выражение для ошибки в python3
Надеюсь, что это помогло,
Narusan
24 окт. 2016, в 18:21
Поделиться
Не забудьте вызвать .exec() _ для отображения ошибки:
msg = QMessageBox()
msg.setIcon(QMessageBox.Critical)
msg.setText("Error")
msg.setInformativeText('More information')
msg.setWindowTitle("Error")
msg.exec_()
NShiell
08 янв. 2019, в 12:47
Поделиться
Чтобы показать окно сообщения, вы можете вызвать это определение:
from PyQt5.QtWidgets import QMessageBox

def clickMethod(self):
    QMessageBox.about(self, "Title", "Message")
Karam Qusai
17 апр. 2019, в 10:06
Поделиться
Ещё вопросы
- 0Можно ли обнаружить отмену отправки формы HTML
- 0Предпочтительный выбор и визуальный разделитель в Symfony 2
- 1Как отобразить изображение, которое сохраняется в папке, и как вернуть путь от контроллера к просмотру?
- 0Объедините 2 массива, где значение становится ключом
- 0Поток Oauth 2 для приложения AngularJS
- 1Кажется, instanceof не работает — что не так с моим кодом?
- 1Автозаполнение формы входа в Facebook
- 0Получить существующий результат поиска в блоке Magento
- 1Как украсить TableCellRenderer инструкциями, связанными с графикой?
- 0Themerolleover JQuery тема с областью не применяется к кнопке DatePicker
- 1Открытие соединения и получение ответа занимает слишком много времени
- 0R RMySQL извлекает большие строки как строки
- 0Firefox не будет загружать мой CSS
- 0ASP.NET MVC4 руководство ajax пост без проверки
- 1Где разместить пользовательские данные
- 0Vimeo Advanced API, удаление приложений
- 1Конвертировать строку в pandas dataframe
- 1Как удалить пакет, установленный с помощью URL-адреса проекта git?
- 0Различия между передачей по значению и передачей по ссылке в c ++
- 0Чтобы получить имя из типа входного файла и отображать в теге ap через javascript.
- 1Android Api — получить номер мобильного телефона из контактов
- 0Переместить (добавить / удалить) строки tr между таблицей данных и простой таблицей DOM
- 0Объединить MySQL Queries в таблицу
- 1новичок, установка приложения на телефон Samsung
- 0jQuery — анимируйте div без деформации контента.
- 0Вызовите две пользовательских функции Jquery один за другим без участия Ajax
- 0Функция сортировки массива самосортировки в пользовательском классе C ++
- 1Вызвать событие нажатия клавиш в Android?
- 1Android: как использовать мой файл
- 1Вопросы о Node.js. SChema и модели
- 0Onclick, динамически добавляемый с javascript к элементу td, не работает
- 0Триггерное событие ввода в угловых
- 0Обрабатывать событие касания в перемещенном слое в проекте cocos2d-x cpp?
- 0как я могу передать значение функции после события
- 1изменить элементы списка c: forEach, используя JavaScript
- 0SQL ГДЕ В СОЕДИНЕНИИ
- 0Конфликтующие анимации JQuery
- 0Директива не присваиваемое выражение, когда проект построен с ворчанием (настройки Yeoman)
- 0bower.json и package.json интерполяция
- 0Загрузить данные JSON в функцию «Готов к документу»
- 0получение среднего значения частей изображения
- 0Угловая директива Предварительная загрузка
- 0Как искать структуру JSON
- 0AngularJS будет повторять и выбирать управление обновлением всех экземпляров
- 0Как сделать Bootstrap модальным с прокручиваемым содержимым и максимальной высотой?
- 1Организация данных в DynamoDB в виде списка карт
- 1Получить RadGrid Выбранный элемент Индекс строки
- 1Проверьте интернет-магазин Shopify со многими возможными секретами
- 1Создание структуры класса фильтра для использования с DataGrid
- 0PHP — Как использовать переменную суммы внутри цикла
Глава 4 Окно сообщений QMessageBox
4.1 Различные типы окон сообщений
4.2 Взаимодействие с окнами сообщений
4.3 Резюме
Добавление различных окон сообщений в программу, чтобы указать, что это может улучшить пользовательский опыт.
4.1 Различные типы окон сообщений
import sys
from PyQt5.QtWidgets import QApplication, QWidget, QPushButton, QMessageBox


class Demo(QWidget):
    def __init__(self):
        super(Demo, self).__init__()
        self.button = QPushButton('information', self)
        self.button.clicked.connect(self.show_messagebox)      # 1

    def show_messagebox(self):
        QMessageBox.information(self, 'Title', 'Content',
                                QMessageBox.Yes | QMessageBox.No | QMessageBox.Cancel)  # 2


if __name__ == '__main__':
    app = QApplication(sys.argv)
    demo = Demo()
    demo.show()
    sys.exit(app.exec_())
1. Создайте экземпляр QPushButton и соедините сигнал щелчка с пользовательской функцией слота show_messagebox, чтобы при нажатии кнопки сигнал испускался и функция слота запускалась;
2. В функции слота мы создаем информационное окно (информацию), основное использование которого выглядит следующим образом:
QMessageBox.information(QWidget, ‘Title’, ’Content‘, buttons)Первый параметр заполняется значением self, что указывает на то, что информационное поле принадлежит нашему демонстрационному окну, второй тип параметра является строкой, которая заполняется в заголовке информационного окна, третий тип параметра также является строкой, которая заполняется Содержимое подсказки информационного поля; последний параметр — кнопка, которая будет добавлена в информационное окно. В примере кода мы добавили три кнопки: Да, Нет и Отмена. Несколько кнопок соединены с помощью |. Общие типы кнопок следующие: несколько:
QMessageBox.Ok

QMessageBox.Yes

QMessageBox.No

QMessageBox.Close

QMessageBox.Cancel

QMessage.Open

QMessage.Save
Окончательный рабочий скриншот выглядит следующим образом:
После нажатия появится окно с подсказкой:
Примечание. Я работаю на компьютере Mac, поэтому заголовок информационного окна здесь не отображается.
Если кнопка указанного информационного окна не отображается, в информационное поле по умолчанию будет добавлена соответствующая кнопка:
QMessageBox.information(self, 'Title', 'Content')Снимок экрана выглядит следующим образом:
В дополнение к информационному окну (информация), есть следующие, использование аналогично (обратите внимание, значок меняется в окне сообщения):
QMessageBox.question Вопросы и ответы
окно предупреждения QMessageBox.warning
Блок ошибок QMessageBox.ctitical
QMessageBox.about
4.2 Взаимодействие с окнами сообщений
В приведенном выше примере программа отвечает, закрывая окно сообщения независимо от того, какую кнопку пользователь нажал. Однако пользователи захотят нажимать разные кнопки, и программа будет реагировать по-разному. Вот простой пример:
import sys
from PyQt5.QtWidgets import QApplication, QWidget, QPushButton, QMessageBox


class Demo(QWidget):
    def __init__(self):
        super(Demo, self).__init__()
        self.button = QPushButton('Click Me!', self)
        self.button.clicked.connect(self.show_messagebox)

    def show_messagebox(self):
        choice = QMessageBox.question(self, 'Change Text?', 'Would you like to change the button text?',
                             QMessageBox.Yes | QMessageBox.No)  # 1

        if choice == QMessageBox.Yes:                           # 2
            self.button.setText('Changed!')
        elif choice == QMessageBox.No:                          # 4
            pass


if __name__ == '__main__':
    app = QApplication(sys.argv)
    demo = Demo()
    demo.show()
    sys.exit(app.exec_())
1. После нажатия кнопки в окне сообщения она вернется к этой кнопке, и результат возвращенной кнопки будет сохранен в выборе;
2. Если нажать Да, измените текст кнопки;
3. Если нет, ничего не делать.
Снимок экрана выглядит следующим образом:
После нажатия кнопки Да текст кнопки изменится:
4.3 Резюме
1. Типы окон сообщений:
информационное поле; информационное поле; окно с предупреждением; окно с критической ошибкой;
2. Синтаксическая форма (кнопки можно не указывать):
QMessageBox.information(QWidget, ‘Title’, ’Content‘, buttons)3. При взаимодействии с окном сообщения вы можете использовать переменную для сохранения информации о кнопке, возвращаемой окном сообщения, а затем использовать суждение, чтобы реагировать по-разному.
———————————————————————-
Любимые друзья могут присоединиться к этой группе общения Python QQ, чтобы учиться вместе: 820934083

