Pillow это одна из самых популярных библиотек Python для работы с изображениями. Ранее эта библиотека называлась PIL и последний ее релиз был в 2009, после чего разработчики продолжили ее развитие под названием Pillow. В этой статье будет рассмотрен пример вставки текста и изображения в новую или существующую картинку.
Pillow устанавливается отдельно:
pip install PillowСоздание и открытие изображения
Для открытия и создания изображения используется модуль Image. На следующем примере мы откроем существующее изображение:
from PIL import Image

im = Image.open('d:/beach.jpeg')
# Откроет изображение в новом окне
im.show()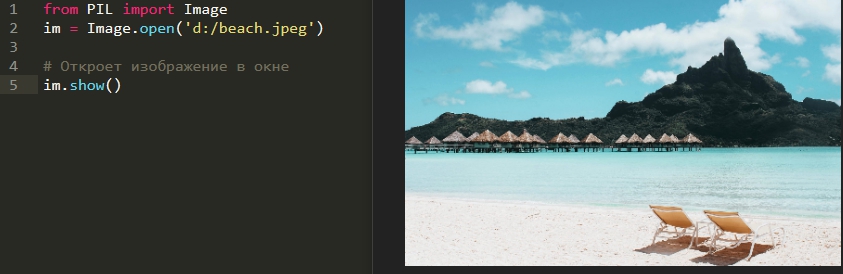
В следующем примере мы создадим изображение, где мы должны указать:
- Цветовую модель. Например RGB,RGBA,CMYK,HCL и т.д.;
- Размер изображения в кортеже;
- По умолчанию изображение создается с черным фоном. Для его изменения нужно заполнить атрибут color.
from PIL import Image

im = Image.new('RGB', (200,200), color=('#FAACAC'))
# Откроет изображение в новом окне
im.show()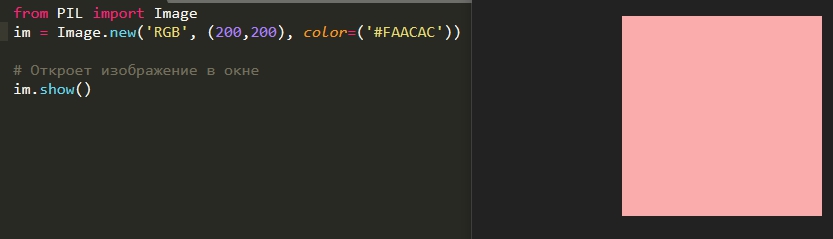
Сохранить изображение можно через save:
from PIL import Image

im = Image.new('RGB', (200,200), color=('#FAACAC'))
im.save('D:/new_pic.jpg')
Добавление текста к изображению
Для изменения изображение используется класс ImageDraw. В следующем примере мы создадим объект этого класса с текстом, где нужно указать:
- Расположение текста. В примере ниже это (100, 100);
- Сам текст;
- Цвет текста.
from PIL import Image, ImageDraw

im = Image.new('RGB', (200,200), color=('#FAACAC'))
draw_text = ImageDraw.Draw(im)
draw_text.text(
    (100,100),
    'Test Text',
    fill=('#1C0606')
    )
im.show()
Если использовать кириллические символы, может появится ошибка:
- AttributeError: ‘ImageFont’ object has no attribute ‘getmask2’
- UnicodeEncodeError: ‘latin-1’ codec can’t encode characters
Для исправления ошибки вы можете использовать свой шрифт через класс ImageFont. Вы так же сможете указать размер шрифта:
from PIL import Image, ImageDraw, ImageFont

im = Image.new('RGB', (200,200), color=('#FAACAC'))
# Создаем объект со шрифтом
font = ImageFont.truetype('D:/Roboto/Roboto-Black.ttf', size=18)
draw_text = ImageDraw.Draw(im)
draw_text.text(
    (100, 100),
    'Текст 18px',
    # Добавляем шрифт к изображению
    font=font,
    fill='#1C0606')
im.show()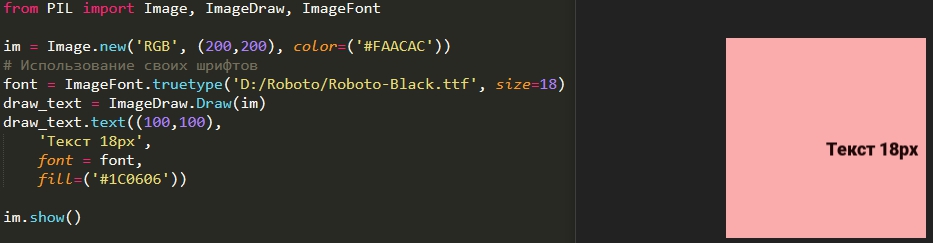
Вставка изображения
Для создания водяного знака, например, откройте второе изображение и используйте функцию paste. При этом первый параметр с watermark будет использовать всю область изображения, а второй установит прозрачность (альфа-канал):
from PIL import Image

im = Image.open('d:/beach.jpeg')
# Изображение для водяного знака
watermark = Image.open('d:/logo.png')
im.paste(watermark, (25,25), watermark)

im.show()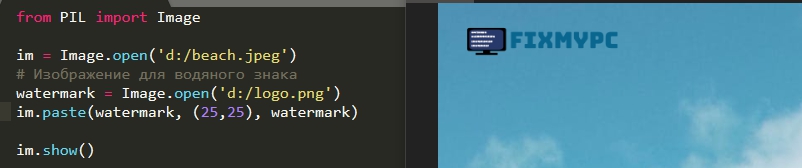
Определение высоты и ширины
Если вы планируете открывать множество изображений, разных размеров и добавлять текст, например в правый нижний угол вы можете вычислить это местоположение. Объекты Image содержат размеры:
# Ширина и высота
im.size
# Ширина
im.width
# Высота
im.height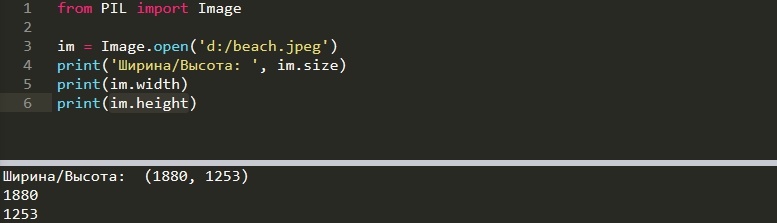
Если вы используете водяные знаки, то можно просто вычесть из основного изображения размеры водяного знака и получить корректное расположение в правом угле:
from PIL import Image

im = Image.open('d:/beach.jpeg')
watermark = Image.open('d:/logo.png')
# Вычисляем расположение watermark
position = (im.width - watermark.width,
             im.height - watermark.height)
im.paste(watermark, position, watermark)

im.show()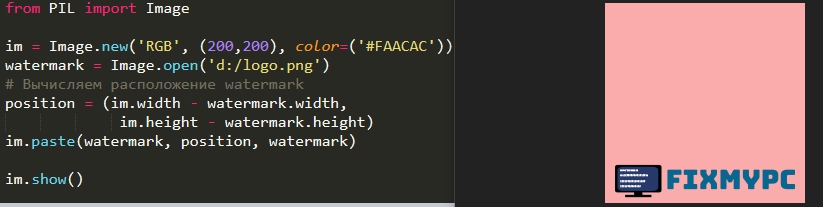
…
Теги:
#python
#pillow
In this article, we will see how to write text on images with the Python Pillow module.
Installation
This module is not preloaded with Python. So to install it execute the following command in the command-line:
pip install pillow
Stepwise implementation:
Step 1: Import Pillow library
To complete this task the functions required from the Pillow library are: Image, ImageDraw, ImageFont. All these functions are imported as:
from PIL import Image, ImageDraw, ImageFont
Step 2: Open an image
In this step, the image on which we are going to add text is imported and open by using the “Image.open(‘Image_name’)”. In the given case the gfg logo is used to add the text on it. The image name is gfg_logo.jpeg. So, it is written as:
img = Image.open(‘gfg_logo.jpeg’)
Step 3: Image Conversion
In this step, we convert our image into an editable format by using “ImageDraw.Draw(‘variable used to store the image in above step’)”. In the given case this is written as:
d1 = ImageDraw.Draw(img)
Step 4: Font style.
This step is optional. It is for those who want their text to look cool or stylish because someone won’t select any font style then the system takes the default font style. At first download the font style file from https://ttfonts.net/font/1004_Mistral.htm . After downloading the file use the function ImageFont.truetype(‘adddress_of_font_style’, font_style). In given cases this is written as:
myFont = ImageFont.truetype(‘/home/raghav/PycharmProjects/gfg/Mistral.ttf’, 20)
Step 5: Render the text
This is the main step in which the whole properties of the font get decided. This is written as:
d1.text((65, 10), “Sample text”, fill =(255, 0, 0),font=myFont)
- Starting Coordinates: Pillow library uses a Cartesian pixel coordinate system, with (0,0) in the upper left corner.
- Text: String between single or double quotations
- Text color in RGB format: For the color, you want you can check it to Google for its RGB color code and use.
- Font style: Download the font from Google and use it.
Step 6: Show and Save result.
The final step is to display the modified image on the screen for this img.show() function is used and to store the image img.save(“results.jpeg”) is used.
Below is the implementation:

Input Image
Python3
from PIL import Image, ImageDraw, ImageFont
img = Image.open('gfg_logo.jpeg')
d1 = ImageDraw.Draw(img)
myFont = ImageFont.truetype('/home/raghav/PycharmProjects/gfg/Mistral.ttf', 20)
d1.text((65, 10), "Sample text", fill =(255, 0, 0),font=myFont)
img.show()
img.save("results.jpeg")
Output:
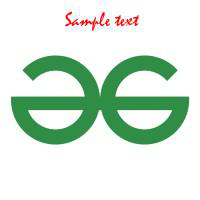
Image after modification
Example 1: To change the location of the text change the coordinates in step 5.
The dimensions are changed from (65,100) to (65,170). So, the location of text goes down because from (x,y) coordinates the value of y-coordinate gets increased as shown in the output.
Python3
from PIL import Image, ImageDraw, ImageFont
img = Image.open('gfg_logo.jpeg')
d1 = ImageDraw.Draw(img)
myFont = ImageFont.truetype('/home/raghav/PycharmProjects/gfg/Mistral.ttf', 20)
d1.text((65, 170), "Sample text", fill =(255, 0, 0),font=myFont)
img.show()
img.save("results.jpeg")
Output:
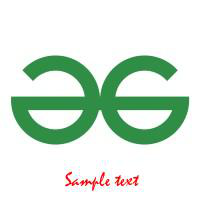
Image after changing it’s coordinates
Example 2: To change the color of the text again change in step 5.
There are RGB colour code on which Pillow work (R,G,B) R for RED, G for GREEN, B for Blue. In above case the R and B value is 0 and G value is 255 i.e. Maximum. So, the colour of text changes to green as shown in output.
Python3
from PIL import Image, ImageDraw, ImageFont
img = Image.open('gfg_logo.jpeg')
d1 = ImageDraw.Draw(img)
myFont = ImageFont.truetype('/home/raghav/PycharmProjects/gfg/Mistral.ttf', 20)
d1.text((65, 170), "Sample text", fill =(0, 255, 0),font=myFont)
img.show()
img.save("results.jpeg")
Output:
Image after changing colour of text
Example 3: To change the text change the text field in step 5.
Python3
from PIL import Image, ImageDraw, ImageFont
img = Image.open('gfg_logo.jpeg')
d1 = ImageDraw.Draw(img)
myFont = ImageFont.truetype('/home/raghav/PycharmProjects/gfg/Mistral.ttf', 20)
d1.text((65, 170), "Sample text 2", fill=(0, 255, 0), font=myFont)
img.show()
img.save("results.jpeg")
Output:
Image after changing text field
Example 4: To change the size of the text go to step 4 and change the size.
Python3
from PIL import Image, ImageDraw, ImageFont
img = Image.open('gfg_logo.jpeg')
d1 = ImageDraw.Draw(img)
myFont = ImageFont.truetype('/home/raghav/PycharmProjects/gfg/Mistral.ttf', 30)
d1.text((65, 170), "Sample text", fill = (0, 255, 0),font=myFont)
img.show()
img.save("results.jpeg")
Output:
Image after changing text size
Example 5: To change the text font go to step 4.
Python3
from PIL import Image, ImageDraw, ImageFont
img = Image.open('gfg_logo.jpeg')
d1 = ImageDraw.Draw(img)
myFont = ImageFont.truetype('/home/raghav/PycharmProjects/gfg/00006_44s.ttf', 30)
d1.text((0, 170), "Sample text", fill =(0, 255, 0),font=myFont)
img.show()
img.save("results.jpeg")
Output:

Image after changing font style
In this article, we will see how to write text on images with the Python Pillow module.
Installation
This module is not preloaded with Python. So to install it execute the following command in the command-line:
pip install pillow
Stepwise implementation:
Step 1: Import Pillow library
To complete this task the functions required from the Pillow library are: Image, ImageDraw, ImageFont. All these functions are imported as:
from PIL import Image, ImageDraw, ImageFont
Step 2: Open an image
In this step, the image on which we are going to add text is imported and open by using the “Image.open(‘Image_name’)”. In the given case the gfg logo is used to add the text on it. The image name is gfg_logo.jpeg. So, it is written as:
img = Image.open(‘gfg_logo.jpeg’)
Step 3: Image Conversion
In this step, we convert our image into an editable format by using “ImageDraw.Draw(‘variable used to store the image in above step’)”. In the given case this is written as:
d1 = ImageDraw.Draw(img)
Step 4: Font style.
This step is optional. It is for those who want their text to look cool or stylish because someone won’t select any font style then the system takes the default font style. At first download the font style file from https://ttfonts.net/font/1004_Mistral.htm . After downloading the file use the function ImageFont.truetype(‘adddress_of_font_style’, font_style). In given cases this is written as:
myFont = ImageFont.truetype(‘/home/raghav/PycharmProjects/gfg/Mistral.ttf’, 20)
Step 5: Render the text
This is the main step in which the whole properties of the font get decided. This is written as:
d1.text((65, 10), “Sample text”, fill =(255, 0, 0),font=myFont)
- Starting Coordinates: Pillow library uses a Cartesian pixel coordinate system, with (0,0) in the upper left corner.
- Text: String between single or double quotations
- Text color in RGB format: For the color, you want you can check it to Google for its RGB color code and use.
- Font style: Download the font from Google and use it.
Step 6: Show and Save result.
The final step is to display the modified image on the screen for this img.show() function is used and to store the image img.save(“results.jpeg”) is used.
Below is the implementation:
Input Image
Python3
from PIL import Image, ImageDraw, ImageFont
img = Image.open('gfg_logo.jpeg')
d1 = ImageDraw.Draw(img)
myFont = ImageFont.truetype('/home/raghav/PycharmProjects/gfg/Mistral.ttf', 20)
d1.text((65, 10), "Sample text", fill =(255, 0, 0),font=myFont)
img.show()
img.save("results.jpeg")
Output:
Image after modification
Example 1: To change the location of the text change the coordinates in step 5.
The dimensions are changed from (65,100) to (65,170). So, the location of text goes down because from (x,y) coordinates the value of y-coordinate gets increased as shown in the output.
Python3
from PIL import Image, ImageDraw, ImageFont
img = Image.open('gfg_logo.jpeg')
d1 = ImageDraw.Draw(img)
myFont = ImageFont.truetype('/home/raghav/PycharmProjects/gfg/Mistral.ttf', 20)
d1.text((65, 170), "Sample text", fill =(255, 0, 0),font=myFont)
img.show()
img.save("results.jpeg")
Output:
Image after changing it’s coordinates
Example 2: To change the color of the text again change in step 5.
There are RGB colour code on which Pillow work (R,G,B) R for RED, G for GREEN, B for Blue. In above case the R and B value is 0 and G value is 255 i.e. Maximum. So, the colour of text changes to green as shown in output.
Python3
from PIL import Image, ImageDraw, ImageFont
img = Image.open('gfg_logo.jpeg')
d1 = ImageDraw.Draw(img)
myFont = ImageFont.truetype('/home/raghav/PycharmProjects/gfg/Mistral.ttf', 20)
d1.text((65, 170), "Sample text", fill =(0, 255, 0),font=myFont)
img.show()
img.save("results.jpeg")
Output:
Image after changing colour of text
Example 3: To change the text change the text field in step 5.
Python3
from PIL import Image, ImageDraw, ImageFont
img = Image.open('gfg_logo.jpeg')
d1 = ImageDraw.Draw(img)
myFont = ImageFont.truetype('/home/raghav/PycharmProjects/gfg/Mistral.ttf', 20)
d1.text((65, 170), "Sample text 2", fill=(0, 255, 0), font=myFont)
img.show()
img.save("results.jpeg")
Output:
Image after changing text field
Example 4: To change the size of the text go to step 4 and change the size.
Python3
from PIL import Image, ImageDraw, ImageFont
img = Image.open('gfg_logo.jpeg')
d1 = ImageDraw.Draw(img)
myFont = ImageFont.truetype('/home/raghav/PycharmProjects/gfg/Mistral.ttf', 30)
d1.text((65, 170), "Sample text", fill = (0, 255, 0),font=myFont)
img.show()
img.save("results.jpeg")
Output:
Image after changing text size
Example 5: To change the text font go to step 4.
Python3
from PIL import Image, ImageDraw, ImageFont
img = Image.open('gfg_logo.jpeg')
d1 = ImageDraw.Draw(img)
myFont = ImageFont.truetype('/home/raghav/PycharmProjects/gfg/00006_44s.ttf', 30)
d1.text((0, 170), "Sample text", fill =(0, 255, 0),font=myFont)
img.show()
img.save("results.jpeg")
Output:
Image after changing font style
Pillow supports drawing text on your images in addition to shapes. Pillow uses its own font file format to store bitmap fonts, limited to 256 characters. Pillow also supports TrueType and OpenType fonts as well as other font formats supported by the FreeType library.
In this chapter, you will learn about the following:
- Drawing Text
- Loading TrueType Fonts
- Changing Text Color
- Drawing Multiple Lines of Text
- Aligning Text
- Changing Text Opacity
- Learning About Text Anchors
While this article is not completely exhaustive in its coverage of drawing text with Pillow, when you have finished reading it, you will have a good understanding of how text drawing works and be able to draw text on your own.
Let’s get started by learning how to draw text.
Drawing Text
Drawing text with Pillow is similar to drawing shapes. However, drawing text has the added complexity of needing to be able to handle fonts, spacing, alignment, and more. You can get an idea of the complexity of drawing text by taking a look at the text() function’s signature:
def text(xy, text, fill=None, font=None, anchor=None, spacing=4, align='left', direction=None,
	     features=None, language=None, stroke_width=0, stroke_fill=None, embedded_color=False)
This function takes in a lot more parameters than any of the shapes you can draw with Pillow! Let’s go over each of these parameters in turn:
xy– The anchor coordinates for the text (i.e. where to start drawing the text).text– The string of text that you wish to draw.fill– The color of the text (can a tuple, an integer (0-255) or one of the supported color names).font– AnImageFontinstance.anchor– The text anchor alignment. Determines the relative location of the anchor to the text. The default alignment is top left.spacing– If the text is passed on tomultiline_text(), this controls the number of pixels between lines.align– If the text is passed on tomultiline_text(),"left","center"or"right". Determines the relative alignment of lines. Use the anchor parameter to specify the alignment toxy.direction– Direction of the text. It can be"rtl"(right to left),"ltr"(left to right) or"ttb"(top to bottom). Requires libraqm.features– A list of OpenType font features to be used during text layout. Requires libraqm.language– The language of the text. Different languages may use different glyph shapes or ligatures. This parameter tells the font which language the text is in, and to apply the correct substitutions as appropriate, if available. It should be a BCP 47 language code. Requires libraqm.stroke_width– The width of the text strokestroke_fill– The color of the text stroke. If you don’t set this, it defaults to thefillparameter’s value.embedded_color– Whether to use font embedded color glyphs (COLR or CBDT).
You probably won’t use most of these parameters are on a regular basis unless your job requires you to work with foreign languages or arcane font features.
When it comes to learning something new, it’s always good to start with a nice example. Open up your Python editor and create a new file named draw_text.py. Then add this code to it:
# draw_text.py

from PIL import Image, ImageDraw, ImageFont


def text(output_path):
    image = Image.new("RGB", (200, 200), "green")
    draw = ImageDraw.Draw(image)
    draw.text((10, 10), "Hello from")
    draw.text((10, 25), "Pillow",)
    image.save(output_path)

if __name__ == "__main__":
    text("text.jpg")
Here you create a small image using Pillow’s Image.new() method. It has a nice green background. Then you create a drawing object. Next, you tell Pillow where to draw the text. In this case, you draw two lines of text.
When you run this code, you will get the following image:

That looks pretty good. Normally, when you are drawing text on an image, you would specify a font. If you don’t have a font handy, you can use the method above or you can use Pillow’s default font.
Here is an example that updates the previous example to use Pillow’s default font:
# draw_text_default_font.py

from PIL import Image, ImageDraw, ImageFont


def text(output_path):
    image = Image.new("RGB", (200, 200), "green")
    draw = ImageDraw.Draw(image)
    font = ImageFont.load_default()
    draw.text((10, 10), "Hello from", font=font)
    draw.text((10, 25), "Pillow", font=font)
    image.save(output_path)

if __name__ == "__main__":
    text("text.jpg")
n this version of the code, you use ImageFont.load_default() to load up Pillow’s default font. Then you apply the font to the text, you pass it in with the font parameter.
The output of this code will be the same as the first example.
Now let’s discover how to use a TrueType font with Pillow!
Loading TrueType Fonts
Pillow supports loading TrueType and OpenType fonts. So if you have a favorite font or a company mandated one, Pillow can probably load it. There are many open source TrueType fonts that you can download. One popular option is Gidole, which you can get here:
- https://github.com/larsenwork/Gidole
The Pillow package also comes with several fonts in its test folder. You can download Pillow’s source here:
- https://github.com/python-pillow/Pillow
This book’s code repository on Github includes the Gidole font as well as a handful of the fonts from the Pillow tests folder that you can use for the examples in this chapter:
- https://github.com/driscollis/image_processing_with_python
To see how you can load up a TrueType font, create a new file and name it draw_truetype.py. Then enter the following:
# draw_truetype.py

from PIL import Image, ImageDraw, ImageFont


def text(input_image_path, output_path):
    image = Image.open(input_image_path)
    draw = ImageDraw.Draw(image)
    y = 10
    for font_size in range(12, 75, 10):
        font = ImageFont.truetype("Gidole-Regular.ttf", size=font_size)
        draw.text((10, y), f"Chihuly Exhibit ({font_size=}", font=font)
        y += 35
    image.save(output_path)

if __name__ == "__main__":
    text("chihuly_exhibit.jpg", "truetype.jpg")
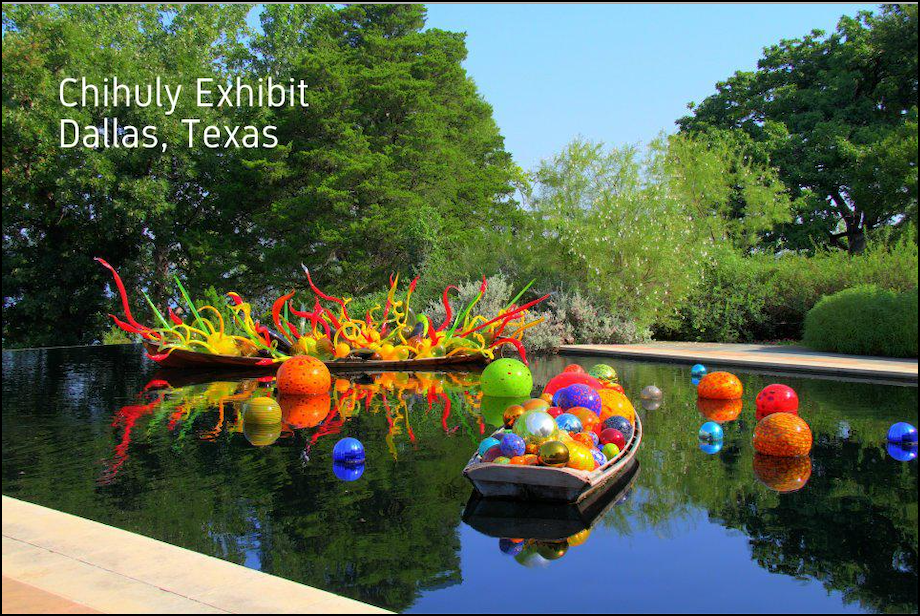
For this example, you use the Gidole font and load an image taken at the Dallas Arboretum in Texas:

Then you loop over several different font sizes and write out a string at different positions on the image. When you run this code, you will create an image that looks like this:

That code demonstrated how to change font sizes using a TrueType font. Now you’re ready to learn how to switch between different TrueType fonts.
Create another new file and name this one draw_multiple_truetype.py. Then put this code into it:
# draw_multiple_truetype.py

import glob
from PIL import Image, ImageDraw, ImageFont


def truetype(input_image_path, output_path):
    image = Image.open(input_image_path)
    draw = ImageDraw.Draw(image)
    y = 10
    ttf_files = glob.glob("*.ttf")
    for ttf_file in ttf_files:
        font = ImageFont.truetype(ttf_file, size=44)
        draw.text((10, y), f"{ttf_file} (font_size=44)", font=font)
        y += 55
    image.save(output_path)

if __name__ == "__main__":
    truetype("chihuly_exhibit.jpg", "truetype_fonts.jpg")
Here you use Python’s glob module to search for files with the extension .ttf. Then you loop over those files and write out the font name on the image using each of the fonts that glob found.
When you run this code, your new image will look like this:
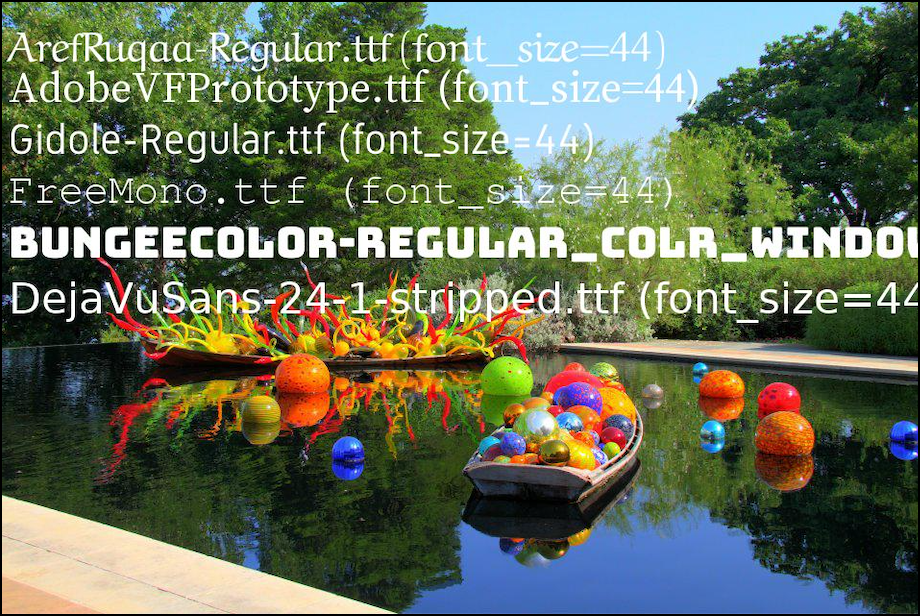
This demonstrates writing text with multiple formats in a single code example. You always need to provide a relative or absolute path to the TrueType or OpenType font file that you want to load. If you don’t provide a valid path, a FileNotFoundError exception will be raised.
Now let’s move on and learn how to change the color of your text!
Changing Text Color
Pillow allows you to change the color of your text by using the fill parameter. You can set this color using an RGB tuple, an integer or a supported color name.
Go ahead and create a new file and name it text_colors.py. Then enter the following code into it:
# text_colors.py

from PIL import Image, ImageDraw, ImageFont


def text_color(output_path):
    image = Image.new("RGB", (200, 200), "white")
    draw = ImageDraw.Draw(image)
    colors = ["green", "blue", "red", "yellow", "purple"]
    font = ImageFont.truetype("Gidole-Regular.ttf", size=12)
    y = 10
    for color in colors:
        draw.text((10, y), f"Hello from Pillow", font=font, fill=color)
        y += 35
    image.save(output_path)

if __name__ == "__main__":
    text_color("colored_text.jpg")
In this example, you create a new white image. Then you create a list of colors. Next, you loop over each color in the list and apply the color using the fill parameter.
When you run this code, you will end up with this nice output:
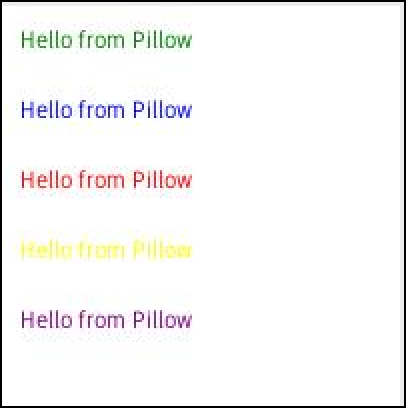
This output demonstrates how you can change the color of your text.
Now let’s learn how to draw multiple lines of text at once!
Drawing Multiple Lines of Text
Pillow also supports drawing multiple lines of text at once. In this section, you will learn two different methods of drawing multiple lines. The first is by using Python’s newline character: n.
To see how that works, create a file and name it draw_multiline_text.py. Then add the following code:
# draw_multiline_text.py

from PIL import Image, ImageDraw, ImageFont


def text(input_image_path, output_path):
    image = Image.open(input_image_path)
    draw = ImageDraw.Draw(image)
    font = ImageFont.truetype("Gidole-Regular.ttf", size=42)
    text = "Chihuly ExhibitnDallas, Texas"
    draw.text((10, 25), text, font=font)
    image.save(output_path)

if __name__ == "__main__":
    text("chihuly_exhibit.jpg", "multiline_text.jpg")
For this example, you create a string with the newline character inserted in the middle. When you run this example, your result should look like this:

Pillow has a built-in method for drawing multiple lines of text too. Take the code you wrote in the example above and copy and paste it into a new file. Save your new file and name itdraw_multiline_text_2.py.
Now modify the code so that it uses the multiline_text() function:
# draw_multiline_text_2.py

from PIL import Image, ImageDraw, ImageFont


def text(input_image_path, output_path):
    image = Image.open(input_image_path)
    draw = ImageDraw.Draw(image)
    font = ImageFont.truetype("Gidole-Regular.ttf", size=42)
    text = """
    Chihuly Exhibit
    Dallas, Texas"""
    draw.multiline_text((10, 25), text, font=font)
    image.save(output_path)

if __name__ == "__main__":
    text("chihuly_exhibit.jpg", "multiline_text_2.jpg")
In this example, you create a multiline string using Python’s triple quotes. Then you draw that string onto your image by calling multiline_text().
When you run this code, your image will be slightly different:
The text is positioned down and to the right of the previous example. The reason is that you used Python’s triple quotes to create the string. It retains the newline and indentation that you gave it. If you put this string into the previous example, it should look the same.
The multiline_text() doesn’t affect the end result.
Now let’s learn how you can align text when you draw it.
Aligning Text
Pillow lets you align text. However, the alignment is relative to the anchor and applies to multiline text only. You will look at an alternative method for aligning text without using the align parameter in this section as well.
To get started with align, create a new file and name it text_alignment.py. Then add the following code:
# text_alignment.py

from PIL import Image, ImageDraw, ImageFont


def alignment(output_path):
    image = Image.new("RGB", (200, 200), "white")
    draw = ImageDraw.Draw(image)
    alignments = ["left", "center", "right"]
    y = 10
    font = ImageFont.truetype("Gidole-Regular.ttf", size=12)
    for alignment in alignments:
        draw.text((10, y), f"Hello fromn Pillow", font=font,
                align=alignment, fill="black")
        y += 35
    image.save(output_path)

if __name__ == "__main__":
    alignment("aligned_text.jpg")
Here you create a small, white image. Then you create a list of all of the valid alignment options: “left”, “center”, and “right”. Next, you loop over these alignment values and apply them to the same multiline string.
After running this code, you will have the following result:
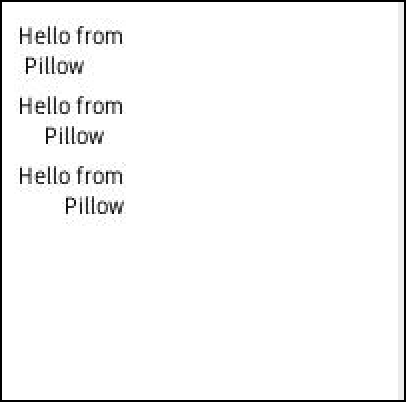
Looking at the output, you can kind of get a feel for how alignment works in Pillow. Whether or not that works for your use-case is up for you to decide. You will probably need to adjust the location of where you start drawing in addition to setting the align parameter to get what you really want.
You can use Pillow to get the size of your string and do some simple math to try to center it though. You can use either the Drawing object’s textsize() method or the font object’s getsize() method for that.
To see how that works, you can create a new file named center_text.py and put this code into it:
# center_text.py

from PIL import Image, ImageDraw, ImageFont


def center(output_path):
    width, height = (400, 400)
    image = Image.new("RGB", (width, height), "grey")
    draw = ImageDraw.Draw(image)
    font = ImageFont.truetype("Gidole-Regular.ttf", size=12)
    text = "Pillow Rocks!"
    font_width, font_height = font.getsize(text)

    new_width = (width - font_width) / 2
    new_height = (height - font_height) / 2
    draw.text((new_width, new_height), text, fill="black")
    image.save(output_path)

if __name__ == "__main__":
    center("centered_text.jpg")
In this case, you keep track of the image’s size as well as the string’s size. For this example, you used getsize() to get the string’s width and height based on the the font and the size of the font.
Then you took the image width and height and subtracted the width and height of the string and divided by two. This should get you the coordinates you need to write the text in the center of the image.
When you run this code, you can see that the text is centered pretty well:
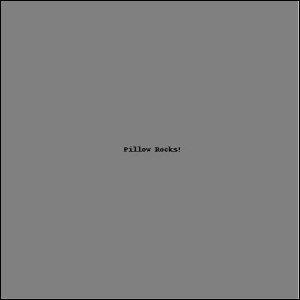
However, this starts to fall about as you increase the size of the font. The more you increase it, the further off-center it is. There are several alternative solutions on StackOverflow here:
- https://stackoverflow.com/questions/1970807/center-middle-align-text-with-pil
The main takeaway though is that you will probably end up needing to calculate your own offset for the font that you are using. Typesetting is a complicated business, after all.
Now let’s find out how to change your text’s opacity!
Changing Text Opacity
Pillow supports changing the text’s opacity as well. What that means is that you can make the text transparent, opaque or somewhere in between. This only works with images that have an alpha channel.
For this example, you will use this flower image:
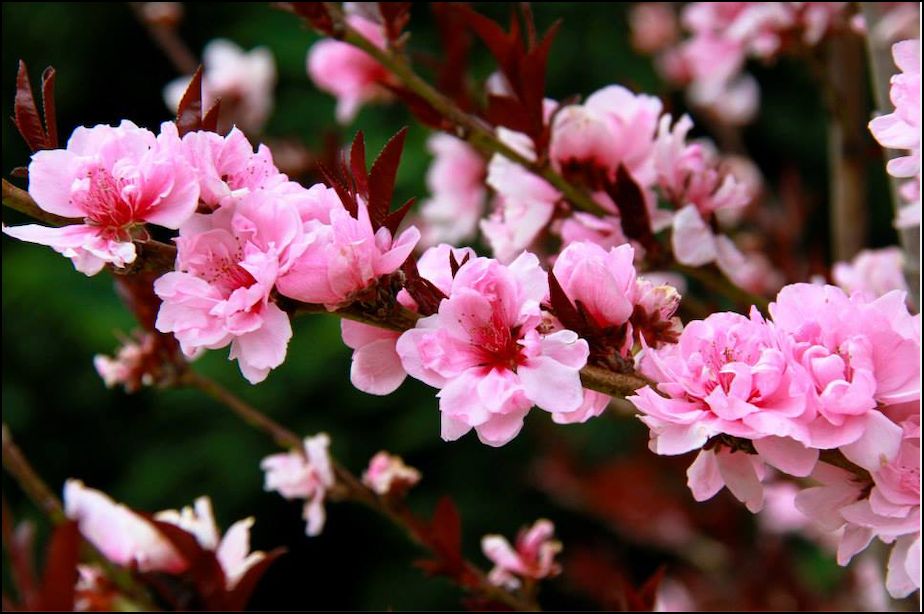
Now create a new file and name it text_opacity.py. Then add the following code to your new file:
# text_opacity.py

from PIL import Image, ImageDraw, ImageFont


def change_opacity(input_path, output_path):
    base_image = Image.open(input_path).convert("RGBA")

    txt_img = Image.new("RGBA", base_image.size, (255,255,255,0))
    font = ImageFont.truetype("Gidole-Regular.ttf", 40)
    draw = ImageDraw.Draw(txt_img)

    # draw text at half opacity
    draw.text((10,10), "Pillow", font=font, fill=(255,255,255,128))

    # draw text at full opacity
    draw.text((10,60), "Rocks!", font=font, fill=(255,255,255,255))

    composite = Image.alpha_composite(base_image, txt_img)
    composite.save(output_path)

if __name__ == "__main__":
    change_opacity("flowers_dallas.png", "flowers_opacity.png")
In this example, you open the flower image and convert it to RGBA. Then you create a new image that is the same size as the flower image. Next, you load the Gidole font and create a drawing context object using the custom image you just created.
Now comes the fun part! You draw one string and set the alpha value to 128, which equates to about half opacity. Then you draw a second string on the following line and tell Pillow to use full opacity. Note that in both of these instances, you are using RGBA values rather than color names, like you did in your previous code examples. This gives you more versatility in setting the alpha amount.
The last step is to call alpha_composite() and composite the txt_img onto the base_image.
When you run this code, your output will look like this:

This demonstrates how you can change the opacity of your text with Pillow. You should try a few different values for your txt_img to see how it changes the text’s opacity.
Now let’s learn what text anchors are and how they affect text placement.
Learning About Text Anchors
You can use the anchor parameter to determine the alignment of your text relative to the xy coordinates you give. The default is top-left, which is the la (left-ascender) anchor. According to the documentation, la means left-ascender aligned text.
The first letter in an anchor specifies it’s horizontal alignment while the second letter specifies its vertical alignment. In the next two sub-sections, you will learn what each of the anchor names mean.
Horizontal Anchor Alignment
There are four horizontal anchors. The following is an adaptation from the documentation on horizontal anchors:
l(left) – Anchor is to the left of the text. When it comes to horizontal text, this is the origin of the first glyph.m(middle) – Anchor is horizontally centered with the text. In the case of vertical text you should uses(baseline) alignment instead, as it doesn’t change based on the specific glyphs used in the text.r(right) – Anchor is to the right of the text. For horizontal text this is the advanced origin of the last glyph.s– baseline (vertical text only). For vertical text this is the recommended alignment, because it doesn’t change based on the specific glyphs of the given text
Vertical Anchor Alignment
There are six vertical anchors. The following is an adaptation from the documentation on vertical anchors:
a(ascender / top) – (horizontal text only). Anchor is at the ascender line (top) of the first line of text, as defined by the font.t(top) — (single-line text only). Anchor is at the top of the text. For vertical text this is the origin of the first glyph. For horizontal text it is recommended to use a (ascender) alignment instead, because it won’t change based on the specific glyphs of the given text.m(middle) – Anchor is vertically centered with the text. For horizontal text this is the midpoint of the first ascender line and the last descender line.s— baseline (horizontal text only). Anchor is at the baseline (bottom) of the first line of text, only descenders extend below the anchor.b(bottom) – (single-line text only). Anchor is at the bottom of the text. For vertical text this is the advanced origin of the last glyph. For horizontal text it is recommended to used(descender) alignment instead, because it won’t change based on the specific glyphs of the given text.d(descender / bottom) – (horizontal text only). Anchor is at the descender line (bottom) of the last line of text, as defined by the font.
Anchor Examples
Anchors are hard to visualize if all you do is talk about them. It helps a lot if you create some examples to see what really happens. Pillow provides an example in their documentation on anchors along with some very helpful images:
- https://pillow.readthedocs.io/en/stable/handbook/text-anchors.html
You can take their example and adapt it a bit to make it more useful. To see how, create a new file and name it create_anchor.py. Then add this code to it:
# create_anchor.py

from PIL import Image, ImageDraw, ImageFont


def anchor(xy=(100, 100), anchor="la"):
    font = ImageFont.truetype("Gidole-Regular.ttf", 32)
    image = Image.new("RGB", (200, 200), "white")
    draw = ImageDraw.Draw(image)
    draw.line(((0, 100), (200, 100)), "gray")
    draw.line(((100, 0), (100, 200)), "gray")
    draw.text((100, 100), "Python", fill="black", anchor=anchor, font=font)
    image.save(f"anchor_{anchor}.jpg")

if __name__ == "__main__":
    anchor(anchor)
You can run this code as-is. The default anchor is “la”, but you explicitly call that out here. You also draw a cross-hair to mark where the xy position is. If you run this with other settings, you can see how the anchor affects it.
Here is a screenshot from six different runs using six different anchors: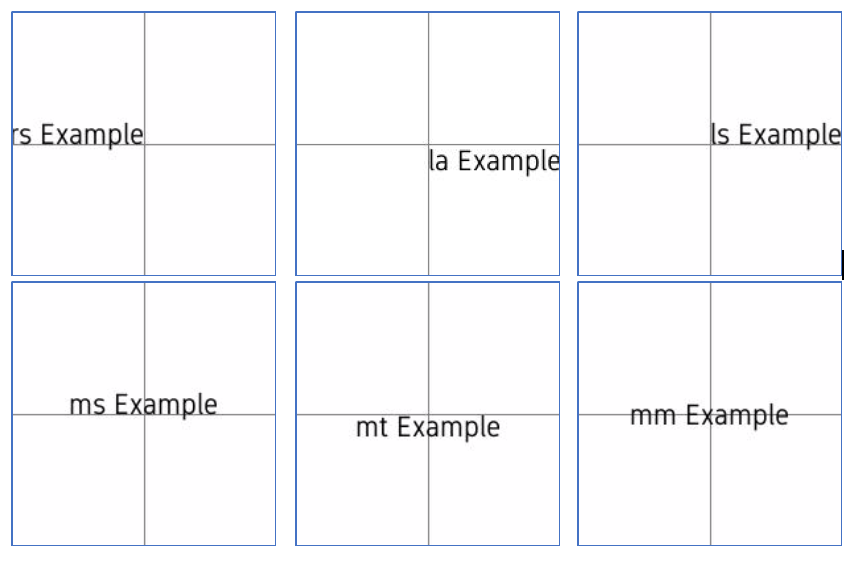
You can try running this code with some of the other anchors that aren’t shown here. You can also adjust the position tuple and re-run it again with different anchors. You could even create a loop to loop over the anchors and create a set of examples if you wanted to.
Wrapping Up
At this point you have a good understanding of how to draw text using Pillow. In fact, you learned how to do all of the following:
- Drawing Text
- Loading TrueType Fonts
- Changing Text Color
- Drawing Multiple Lines of Text
- Aligning Text
- Changing Text Opacity
- Learning About Text Anchors
- Creating a Text Drawing GUI
You can now take what you have learned and practice it. There are lots of examples in this article that you can use as jumping off points to create new applications!
Библиотека изображений Python, или PIL (Python Imaging Library) нужна для обработки графики в Python. Фредрик Лунд является автором одного из лучших блогов, посвященных Python. Однако он перестал обновляться в далеком 2009 году, незадолго до последнего релиза PIL. К счастью, нашлись разработчики Python, что подхватили проект, создав форк PIL под названием Pillow. Pillow стал заменой оригинальной библиотеки PIL. Он также поддерживает Python 3, чего PIL так и не достиг.
Содержание статьи
- Установка Pillow в Python
- Открытие изображения в Python с Pillow
- Получение информации об изображении через Pillow
- Обрезка изображений через Pillow (crop)
- Поворачивание изображения — метод rotate() Pillow
- Отображение картинки в Tkinter Python
- Загрузка изображения из URL в Pillow
- Создание рисунка в Pillow
- ImageFont — Пишем текст на изображение используя Pillow
- Использование фильтров в Pillow
- Конвертирование из JPG в PNG пример Pillow
- Создаем черно-белое изображение GrayScale в Pillow
- Изменение размера изображения в Pillow resize()
Обратите внимание на то, что PIL и Pillow не могут быть установлены одновременно. В документации есть определенные предупреждения, где перечисляются различия между PIL и Pillow. Они обновляются время от времени, поэтому лучше ознакомиться с последними изменениями на официальной странице.
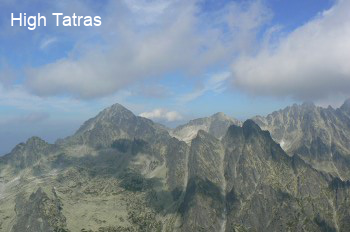
Изображения которые используются в уроке:
- tatras.jpg
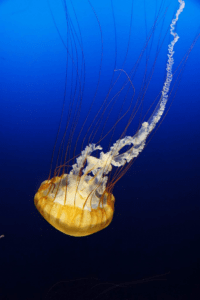
- jelly.png
Установить Pillow в Python можно через pip или easy_install. Установка через pip выполняется следующим образом:
Обратите внимание, что при работа на Linux или Mac может потребоваться запускать команду через sudo т.е. от имени администратора.
Есть вопросы по Python?
На нашем форуме вы можете задать любой вопрос и получить ответ от всего нашего сообщества!
Telegram Чат & Канал
Вступите в наш дружный чат по Python и начните общение с единомышленниками! Станьте частью большого сообщества!
Паблик VK
Одно из самых больших сообществ по Python в социальной сети ВК. Видео уроки и книги для вас!
Открытие изображения в Python с Pillow
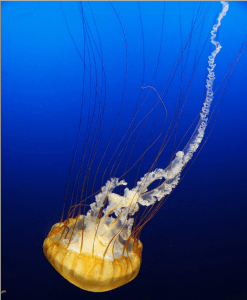
Через Pillow можно легко открыть изображение и отобразить его на экране через внешнюю программу. Взглянем на пример:
|
from PIL import Image image = Image.open(‘jelly.jpg’) image.show() |
Метод show() в основном используется для отладки. В примере импортируется модуль Image и открывается указанное изображение. На Unix метод открытия сохраняет изображения во временном PPM файле и открывает его через утилиту xv. К примеру, на установленной у меня системе Linux картинка открывается через ImageMagick. На Windows изображение сохранится во временной файле BMP и откроется через простую программу вроде Paint.
Получение информации об изображении через Pillow
С помощью Pillow также можно получить подробную информацию об изображении. Рассмотрим небольшой пример:
|
1 2 3 4 5 6 7 8 9 10 11 12 13 14 15 16 17 18 19 20 21 22 23 24 25 26 27 28 29 30 31 32 33 34 35 36 37 38 39 40 41 42 43 |
>>> from PIL import Image >>> image = Image.open(‘jelly.jpg’) >>> r, g, b = image.split() >>> histogram = image.histogram() [384761, 489777, 557209, 405004, 220701, 154786, 55807, 35806, 21901, 16242] >>> exif = image._getexif() exif {256: 1935, 257: 3411, 271: u‘Panasonic’, 272: u‘DMC-LX7’, 274: 1, 282: (180, 1), 283: (180, 1), 296: 2, 305: u‘PaintShop Pro 14.00x00x00x00x00x00x00x00x00x00x00x00x00x00x00x00x00x00x00x00x00’, 306: u‘2016:08:21 07:54:57’, 36867: u‘2016:08:21 07:54:57’, 36868: u‘2016:08:21 07:54:57’, 37121: ‘x01x02x03x00’, 37122: (4, 1), 37381: (124, 128), 37383: 5, 37384: 0, 37385: 16, 37386: (47, 10), 40960: ‘0100’, 40961: 1, 40962: 3968, 40963: 2232, 41495: 2, 41728: ‘x03’, 41729: ‘x01’, 41985: 0, 41986: 0, 41987: 0, 41988: (0, 10), 41989: 24, 41990: 0, 41991: 0, 41992: 0, 41993: 0, 41994: 0} |
В данном примере показано, как извлечь значение RGB (red, green, blue) изображения. Также показано, как получить гистограмму изображения. Обратите внимание, что здесь вывод немного урезан, изначально он был намного больше. Вы можете построить график гистограммы, используя другой пакет Python — matplotlib.
Приведенный выше пример демонстрирует, как извлечь информацию EXIF из изображения. Опять же, здесь вывод этого метода несколько сокращен, поскольку он содержит слишком много информации, которая не имеет особого значения для статьи.
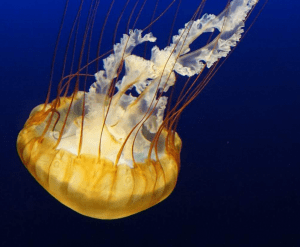
Обрезка изображений через Pillow (crop)
Pillow также можно использовать для обрезки изображения. Это довольно легкий процесс, хотя он постигается методом проб и ошибок. Попробуем обрезать нашу картинку с медузой через Image.crop():
|
from PIL import Image image = Image.open(‘jelly.jpg’) cropped = image.crop((0, 80, 200, 400)) cropped.save(‘/path/to/photos/cropped_jelly.png’) |
Обратите внимание, здесь просто нужно открыть изображение, после чего вызвать метод crop(). Потребуется передать координаты x/y того, что нужно обрезать, например (x1, y1, x2, y2).
В Pillow пиксель 0 является верхним левым уровнем. С увеличением значения x идет смещение вправо. С увеличением значения y идет смещение вниз. После запуска вышеуказанного кода будет получено следующее изображение:

Довольно унылый результат. Я ведь хотел получить «голову» медузы. Для быстрого получения правильных координат можно использовать Gimp или Photoshop. Он поможет определить координаты для следующего обрезания.
|
from PIL import Image image = Image.open(‘jelly.jpg’) cropped = image.crop((177, 882, 1179, 1707)) cropped.save(‘/path/to/photos/cropped_jelly2.png’) |
При запуске кода результатом станет следующее обрезанное изображение:
Намного лучше!
Программа обрезает картинку, после чего новая версия сохраняется на диск. Метод crop() принимает кортерж с четырьмя элементами, которые представляют координаты пикселей (левый верхний, правый верхний, левый нижний, правый нижний).
Поворачивание изображения — метод rotate() Pillow
Image.rotate() возвращает развернутую копию изображения.
|
from PIL import Image import sys try: tatras = Image.open(«tatras.jpg») except IOError: print(«Unable to load image») sys.exit(1) rotated = tatras.rotate(180) rotated.save(‘tatras_rotated.jpg’) |
Данная программа поворачивает изображения на 180 градусов и сохраняет файл результат в виде новой картинки на диск.
Отображение картинки в Tkinter Python
Следующий код нужен для отображения картинки в программе Tkinter.
|
1 2 3 4 5 6 7 8 9 10 11 12 13 14 15 16 17 18 19 20 21 22 23 24 25 26 27 28 29 30 31 32 33 34 35 36 37 38 39 40 41 42 43 44 45 46 47 48 49 50 51 52 53 |
#!/usr/bin/python3 # -*- coding: utf-8 -*- from PIL import Image, ImageTk from tkinter import Tk from tkinter.ttk import Frame, Label import sys class Example(Frame): def __init__(self): super().__init__() self.loadImage() self.initUI() def loadImage(self): try: self.img = Image.open(«tatrs.jpg») except IOError: print(«Unable to load image») sys.exit(1) def initUI(self): self.master.title(«Label») tatras = ImageTk.PhotoImage(self.img) label = Label(self, image=tatras) # reference must be stored label.image = tatras label.pack() self.pack() def setGeometry(self): w, h = self.img.size self.master.geometry((«%dx%d+300+300») % (w, h)) def main(): root = Tk() ex = Example() ex.setGeometry() root.mainloop() if __name__ == ‘__main__’: main() |
Программа показывает картинку в виджет label тулкит от Tkinter.
|
from PIL import Image, ImageTk |
ImageTk является изображением, совместимым с Tkinter. Может использоваться везде, где Tkinter ожидает получения объекта изображения.
|
tatras = ImageTk.PhotoImage(self.img) |
Здесь мы создаем изображение.
|
label = Label(self, image=tatras) |
Изображению передаются параметру image виджета label.
Во избежание скапливания мусора отсылки на изображения должны сохраняться.
|
w, h = self.img.size self.master.geometry((«%dx%d+300+300») % (w, h)) |
Размер окна совпадает с размером изображения.
Загрузка изображения из URL в Pillow
В следующем примере показано, как получить изображение, указав его URL адрес.
|
1 2 3 4 5 6 7 8 9 10 11 12 13 14 15 16 17 18 |
from PIL import Image import requests import sys url = ‘https://i.ytimg.com/vi/vEYsdh6uiS4/maxresdefault.jpg’ try: resp = requests.get(url, stream=True).raw except requests.exceptions.RequestException as e: sys.exit(1) try: img = Image.open(resp) except IOError: print(«Unable to open image») sys.exit(1) img.save(‘sid.jpg’, ‘jpeg’) |
Код читает изображение через его URL и сохраняет его на диск.
Мы используем библиотеку requests для загрузки изображения.
|
resp = requests.get(url, stream=True).raw |
Изображение читается как данные raw.
Картинка создается из ответного объекта response.
|
img.save(‘sid.jpg’, ‘jpeg’) |
И в конечном итоге изображение сохраняется.
Создание рисунка в Pillow
У Pillow есть базовые возможности для создания 2D графики. Модуль ImageDraw предоставляет простую 2D графику для объектов Image. Мы можем создавать новые изображения, аннотации к ним, ретушировать существующие фото, а также сразу генерировать графику для веб.
|
from PIL import Image, ImageDraw # Создаем белый квадрат img = Image.new(‘RGBA’, (200, 200), ‘white’) idraw = ImageDraw.Draw(img) idraw.rectangle((10, 10, 100, 100), fill=‘blue’) img.save(‘rectangle.png’) |
В примере создается новое изображение, на котором нарисован голубой прямоугольник поверх белого фона.
|
img = Image.new(‘RGBA’, (200, 200), ‘white’) |
Создается новое изображение, у которого режим «RGBA», размер 200х200 и белый фон.
|
idraw = ImageDraw.Draw(img) |
Из картинки создается объект ImageDraw. Теперь на нем можно что-то нарисовать.
|
idraw.rectangle((10, 10, 100, 100), fill=‘blue’) |
С помощью метода rectangle() на площади созданного изображения мы нарисовали голубой прямоугольник.
ImageFont — Пишем текст на изображение используя Pillow
В следующем коде показано, как в Python можно написать текст на изображении с помощью Pillow.
На сайте есть отдельная статья по нанесению водяного знака на изображение:
- Как ставить водяные знаки на изображениях при помощи Python
|
1 2 3 4 5 6 7 8 9 10 11 12 13 14 15 16 17 |
from PIL import Image, ImageDraw, ImageFont import sys try: tatras = Image.open(«tatras.jpg») except: print(«Unable to load image») sys.exit(1) idraw = ImageDraw.Draw(tatras) text = «High Tatras» font = ImageFont.truetype(«arial.ttf», size=18) idraw.text((10, 10), text, font=font) tatras.save(‘tatras_watermarked.png’) |
Для создания рисунка используется модуль ImageDraw.
|
font = ImageFont.truetype(«arial.ttf», size=18) |
Создается шрифт Arial с размером 18.
|
idraw.text((10, 10), text, font=font) |
Сам текст наносится через метод text(). По умолчанию цвет шрифта белый.
Использование фильтров в Pillow

Оригинальное изображение с медузой
Pillow позволяет использовать множество различных фильтров для обработки изображения. Они являются частью модуля ImageFilter. Давайте рассмотрим несколько примеров использования метода filter():
|
from PIL import ImageFilter from PIL import Image image = Image.open(‘jelly.jpg’) blurred_jelly = image.filter(ImageFilter.BLUR) blurred_jelly.save(‘/path/to/photos/blurry_jelly.png’) |
Программа берет определенное изображение, создает на его основе размытую картинку, используя ImageFilter.BLUR, и сохраняет полученный результат на диск с помощью метода save(). Итоговое фото со слегка размытой медузой:
Размытая картинка с медузой
Однако в подобающем большинстве случаев размывать изображение нет нужды, наоборот — требуется увеличить резкость. Pillow меняет резкость картинки следующим образом:
|
from PIL import ImageFilter from PIL import Image image = Image.open(‘/path/to/photos/jelly.jpg’) blurred_jelly = image.filter(ImageFilter.SHARPEN) blurred_jelly.save(‘/path/to/photos/sharper_jelly.png’) |
Результат после запуска кода выше:

Картинка с медузой после применения фильтра резкости
Кроме того, для увеличения резкости фотографий в Python можно использовать модуль ImageEnhance.
Можно использовать и другие фильтры — DETAIL, EDGE_ENHANCE, EMBOSS, SMOOTH и так далее. В коде для одного изображения также можно одновременно использовать несколько фильтров.
Для сравнения эффектов от использования фильтров можете скачать изображения, которые были представлены в примерах выше.
Конвертирование из JPG в PNG пример Pillow
В Python Pillow метод save() позволяет конвертировать изображение в другой формат.
|
from PIL import Image import sys try: tatras = Image.open(«tatras.jpg») except IOError: print(«Unable to load image») sys.exit(1) tatras.save(‘tatras.png’, ‘png’) |
Программа считывает изображение JPG и конвертирует его в PNG формат. Это делает в следующей строчке:
|
tatras.save(‘tatras.png’, ‘png’) |
Второй параметр метода save() нужен для уточнения итогового формата изображения.
Создаем черно-белое изображение GrayScale в Pillow
С помощью метода Image.convert() можно сделать оригинальное изображение черно-белым.
|
from PIL import Image import sys try: tatras = Image.open(«tatras.jpg») except IOError: print(«Unable to load image») sys.exit(1) grayscale = tatras.convert(‘L’) grayscale.show() |
Программа читает изображение и трансформирует его в черно-белое. За это отвечает следующая строка:
|
grayscale = tatras.convert(‘L’) |
Первый параметр метода convert() является модом. Мод 'L' представляет черно-белый вариант.
Изменение размера изображения в Pillow resize()
Можно изменить длину и ширину изображения при помощи метода resize(). В данном примере будут показаны три примера изменения размера:
- Изменение размера изображения имея ширину и высоту;
- Изменение ширины с учетом пропорций для высоты;
- Изменение высоты пропорционально ширине.
Изменение размера изображения имея ширину и высоту
|
from PIL import Image # Меняем размер изображения на новый. tatras = Image.open(«tatras.jpg») tatras = tatras.resize((100, 100), Image.ANTIALIAS) |
Изменение ширины с учетом пропорций для новой высоты изображения
|
from PIL import Image tatras = Image.open(«tatras.jpg») width, height = tatras.size new_width = 680 # ширина new_height = int(new_width * height / width) tatras = tatras.resize((new_width, new_height), Image.ANTIALIAS) tatras.show() |
Изменение высоты изображения, пропорционально обновляем и ширину
|
from PIL import Image tatras = Image.open(«tatras.jpg») width, height = tatras.size new_height = 680 # Высота new_width = int(new_height * width / height) tatras = tatras.resize((new_width, new_height), Image.ANTIALIAS) tatras.show() |
Заключение
С пакетом Pillow вы можете сделать гораздо больше, чем описано в этой короткой статье. Pillow поддерживает преобразования и улучшение изображений, возможность печати фото и многое другое. Я настоятельно рекомендую прочитать документацию Pillow, чтобы получить полное представление обо всем, что вы можете сделать.

Являюсь администратором нескольких порталов по обучению языков программирования Python, Golang и Kotlin. В составе небольшой команды единомышленников, мы занимаемся популяризацией языков программирования на русскоязычную аудиторию. Большая часть статей была адаптирована нами на русский язык и распространяется бесплатно.
E-mail: vasile.buldumac@ati.utm.md
Образование
Universitatea Tehnică a Moldovei (utm.md)
- 2014 — 2018 Технический Университет Молдовы, ИТ-Инженер. Тема дипломной работы «Автоматизация покупки и продажи криптовалюты используя технический анализ»
- 2018 — 2020 Технический Университет Молдовы, Магистр, Магистерская диссертация «Идентификация человека в киберпространстве по фотографии лица»
В Python для открытия изображения, редактирования изображения, сохранения этого изображения в разных форматах есть одна дополнительная библиотека под названием Python Imaging Library (PIL) . Используя этот PIL, мы можем выполнять так много операций с изображениями, как создание нового изображения, редактирование существующего изображения, поворот изображения и т. Д. Для добавления текста мы должны следовать данному подходу.
Подход
- Модуль импорта
- Открыть целевое изображение
- Добавить свойство текста с помощью объекта изображения
- Показать это отредактированное изображение
- Сохраните это изображение
Syntax: obj.text( (x,y), Text, font, fill)
Parameters:
- (x, y): This X and Y denotes the starting position(in pixels)/coordinate of adding the text on an image.
- Text: A Text or message that we want to add to the Image.
- Font: specific font type and font size that you want to give to the text.
- Fill: Fill is for to give the Font color to your text.
Помимо этого, нам потребовался некоторый модуль из PIL для выполнения этой задачи. Нам нужен ImageDraw, который может добавлять к изображению 2D-графику (фигуры, текст). Кроме того, нам потребовался модуль ImageFont для добавления пользовательского стиля и размера шрифта. Ниже приводится реализация добавления текста к изображению.
Используемое изображение:
Пример 1. Добавьте простой текст к изображению. (без пользовательского стиля шрифта)
Python3
from PIL import Image
from PIL import ImageDraw
img = Image. open ( 'car.png' )
I1 = ImageDraw.Draw(img)
I1.text(( 28 , 36 ), "nice Car" , fill = ( 255 , 0 , 0 ))
img.show()
img.save( "car2.png" )
Выход:
Здесь вы можете видеть, что мы успешно добавили текст к изображению, но он не отображается должным образом, поэтому мы можем добавить параметр Font, чтобы задать собственный стиль.
Пример 2: Добавьте простой текст к изображению. (С индивидуальным стилем шрифта)
Python3
from PIL import Image
from PIL import ImageDraw
from PIL import ImageFont
img = Image. open ( 'car.png' )
I1 = ImageDraw.Draw(img)
myFont = ImageFont.truetype( 'FreeMono.ttf' , 65 )
I1.text(( 10 , 10 ), "Nice Car" , font = myFont, fill = ( 255 , 0 , 0 ))
img.show()
img.save( "car2.png" )
Выход:
Внимание компьютерщик! Укрепите свои основы с помощью базового курса программирования Python и изучите основы.
Для начала подготовьтесь к собеседованию. Расширьте свои концепции структур данных с помощью курса Python DS. А чтобы начать свое путешествие по машинному обучению, присоединяйтесь к курсу Машинное обучение — базовый уровень.