Скачайте код уроков с GitLab: https://gitlab.com/PythonRu/tkinter-uroki
Окна уведомлений
Распространенный сценарий применения диалоговых окон — уведомление пользователей о событиях, которые происходят в приложении: сделана новая запись или произошла ошибка при попытке открыть файл. Рассмотрим базовые функции Tkinter, предназначенные для отображения диалоговых окон.
В этой программе будет три кнопки, где каждая показывает определенное окно со своим статическим названием и сообщением. Сам по себе этот тип окон имеет лишь кнопку для подтверждения о прочтении и закрытия:
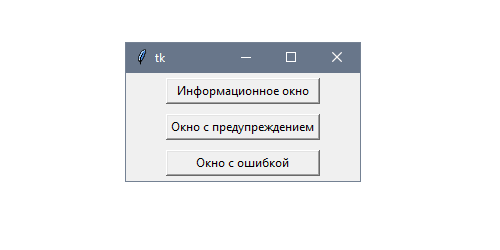
При запуске этого примера стоит обратить внимание на то, что каждое окно воспроизводит соответствующий платформе звук и показывает перевод метки в зависимости от языка системы:
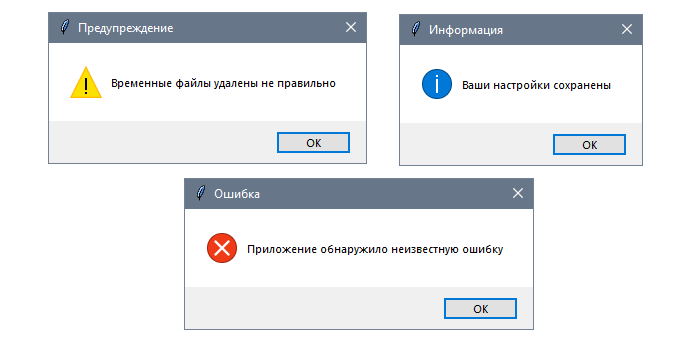
Эти диалоговые окна открываются с помощью функций showinfo, showwarning и showerror из модуля tkinter.messagebox:
import tkinter as tk
import tkinter.messagebox as mb
class App(tk.Tk):
def __init__(self):
super().__init__()
btn_info = tk.Button(self, text="Информационное окно",
command=self.show_info)
btn_warn = tk.Button(self, text="Окно с предупреждением",
command=self.show_warning)
btn_error = tk.Button(self, text="Окно с ошибкой",
command=self.show_error)
opts = {'padx': 40, 'pady': 5, 'expand': True, 'fill': tk.BOTH}
btn_info.pack(**opts)
btn_warn.pack(**opts)
btn_error.pack(**opts)
def show_info(self):
msg = "Ваши настройки сохранены"
mb.showinfo("Информация", msg)
def show_warning(self):
msg = "Временные файлы удалены не правильно"
mb.showwarning("Предупреждение", msg)
def show_error(self):
msg = "Приложение обнаружило неизвестную ошибку"
mb.showerror("Ошибка", msg)
if __name__ == "__main__":
app = App()
app.mainloop()
Как работают окна с уведомлениями
В первую очередь нужно импортировать модуль tkinter.messagebox, задав для него алиас mb. В Python2 этот модуль назывался tkMessageBox, поэтому такой синтаксис позволит изолировать проблемы совместимости.
Каждое окно обычно выбирается в зависимости от информации, которую нужно показать пользователю:
showinfo— операция была завершена успешно,showwarning— операция была завершена, но что-то пошло не так, как планировалось,showerror— операция не была завершена из-за ошибки.
Все три функции получают две строки в качестве входящих аргументов: заголовок и сообщение.
Сообщение может быть выведено на нескольких строках с помощью символа новой строки n.
Окна выбора ответа
Другие типы диалоговых окон в Tkinter используются для запроса подтверждения от пользователя. Это нужно, например, при сохранении файла или перезаписывании существующего.
Эти окна отличаются от ранее рассмотренных тем, что значения, возвращаемые функцией, зависят от кнопки, по которой кликнул пользователь. Это позволяет взаимодействовать с программой: продолжать или же отменять действие.
В этой программе рассмотрим остальные диалоговые функции из модуля tkinter.messagebox. Каждая кнопка включает метки с описанием типа окна, которое откроется при нажатии:
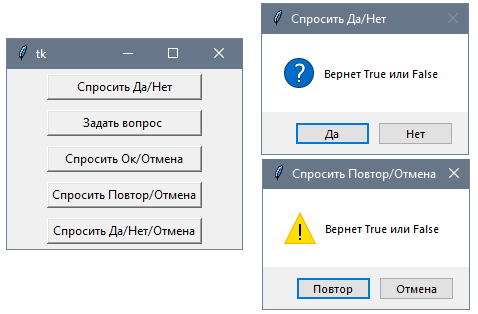
У них есть кое-какие отличия, поэтому стоит попробовать каждое из окон, чтобы разобраться в них.
Как и в прошлом примере сначала нужно импортировать tkinter.messagebox с помощью синтаксиса import … as и вызывать каждую из функций вместе с title и message:
import tkinter as tk

import tkinter.messagebox as mb

class App(tk.Tk):

    def __init__(self):

        super().__init__()

        self.create_button(mb.askyesno, "Спросить Да/Нет",

                           "Вернет True или False")

        self.create_button(mb.askquestion, "Задать вопрос ",

                           "Вернет 'yes' или 'no'")

        self.create_button(mb.askokcancel, "Спросить Ок/Отмена",

                           "Вернет True или False")

        self.create_button(mb.askretrycancel, "Спросить Повтор/Отмена",

                           "Вернет True или False")

        self.create_button(mb.askyesnocancel, "Спросить Да/Нет/Отмена",

                           "Вернет True, False или None")

    def create_button(self, dialog, title, message):

        command = lambda: print(dialog(title, message))

        btn = tk.Button(self, text=title, command=command)

        btn.pack(padx=40, pady=5, expand=True, fill=tk.BOTH)

if __name__ == "__main__":

    app = App()

    app.mainloop()
Как работают вопросительные окна
Чтобы избежать повторений при создании экземпляра кнопки и функции обратного вызова определим метод create_button, который будет переиспользоваться для каждой кнопки с диалогами. Команды всего лишь выводят результат функции dialog, переданной в качестве параметра, что позволит видеть значение, которое она возвращает в зависимости от нажатой пользователем кнопки.
Выбор файлов и папок
Диалоговые окна для выбора файлов позволяют выбирать один или несколько файлов из файловой системы. В Tkinter эти функции объявлены в модуле tkinter.filedialog, который также включает окна для выбора папок. Он также позволяет настраивать поведение нового окна: например, фильтрация по расширению или выбор папки по умолчанию.
В этом приложении будет две кнопки. Первая, «Выбрать файл», откроет диалоговое окно для выбора файла. По умолчанию в окне будут только файлы с расширением .txt:
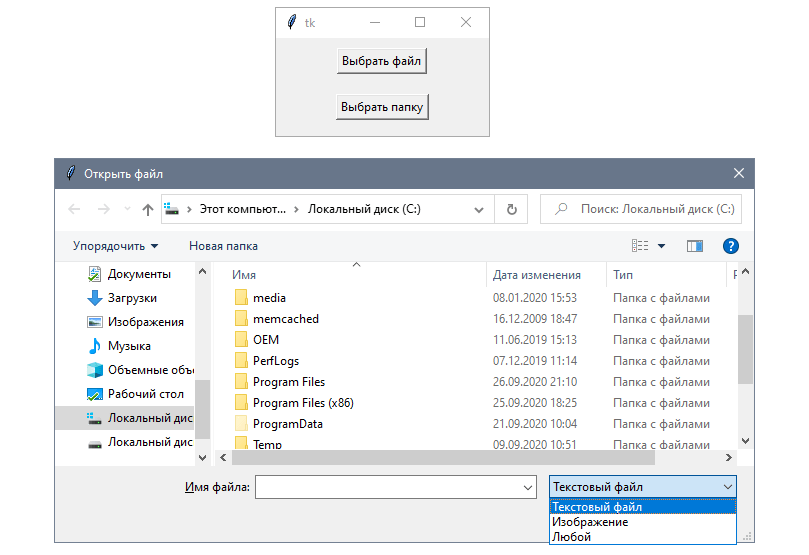
Вторая — «Выбор папки». Она будет открывать похожее диалоговое окно для выбора папки.
Обе кнопки будут выводить полный путь к выбранным файлу или папке и не делать ничего, если пользователь выберет вариант Отмена.
Первая кнопка будет вызывать функцию askopenfilename, а вторая — askdirectory:
import tkinter as tk

import tkinter.filedialog as fd

class App(tk.Tk):

    def __init__(self):

        super().__init__()

        btn_file = tk.Button(self, text="Выбрать файл",

                             command=self.choose_file)

        btn_dir = tk.Button(self, text="Выбрать папку",

                             command=self.choose_directory)

        btn_file.pack(padx=60, pady=10)

        btn_dir.pack(padx=60, pady=10)

    def choose_file(self):

        filetypes = (("Текстовый файл", "*.txt"),

                     ("Изображение", "*.jpg *.gif *.png"),

                     ("Любой", "*"))

        filename = fd.askopenfilename(title="Открыть файл", initialdir="/",

                                      filetypes=filetypes)

        if filename:

            print(filename)

    def choose_directory(self):

        directory = fd.askdirectory(title="Открыть папку", initialdir="/")

        if directory:

            print(directory)

if __name__ == "__main__":

    app = App()

    app.mainloop()
Поскольку пользователь может отменить выбор, также добавим условные инструкции, которые перед выводом в консоль будут проверять, не возвращает ли окно пустую строку. Такая валидация нужна для любого приложения, которое в дальнейшем будет работать с вернувшимся путем, считывая и копируя файлы или изменяя разрешения.
Как работают окна выбора файлов и папок
Создадим первое диалоговое окно с помощью функции askopenfilename, которая возвращает строку с полным путем к файлу. Она принимает следующие опциональные аргументы:
title— название для диалогового окна.initialdir— начальная папка.filetypes— последовательность из двух строк. Первая — метка с типом файла в читаемом формате, а вторая — шаблон для поиска совпадения с названием файла.multiple— булево значение для определения того, может ли пользователь выбирать несколько файлов.defaultextension— расширение, добавляемое к файлу, если оно не было указано явно.
В этом примере задаем корневую папку в качестве начальной, а также название. В кортеже типов файлов есть следующие три варианта: текстовые файлы, сохраненные с расширением .txt, изображения с .jpg, .gif и .png, а также подстановочный знак («*») для всех файлов.
Стоит обратить внимание на то, что эти шаблоны не обязательно соответствуют формату данных в файле, поскольку есть возможность переименовать его с другим расширением:
        filetypes = (("Текстовый файл", "*.txt"),

                     ("Изображение", "*.jpg *.gif *.png"),

                     ("Любой", "*"))

        filename = fd.askopenfilename(title="Открыть файл", initialdir="/",

                                      filetypes=filetypes)
Функция askdirectory также принимает параметры title и initialdir, а также булев параметр mustexist для определения того, должны ли пользователи выбирать существующую папку:
directory = fd.askdirectory(title="Открыть папку", initialdir="/")
Модуль tkinter.filedialog включает вариации этих функций, которые позволяют прямо получать объекты файлов.
Например, askopenfile возвращает объект файла, который соответствует выбранному вместо того чтобы вызывать open с путем возвращающим askopenfilename. Но при этом все еще придется проверять, не было ли окно отклонено перед вызовом файловых методов:
import tkinter.filedialog as fd
filetypes = (("Текстовый файл", "*.txt"),)
my_file = fd.askopenfile(title="Открыть файл", filetypes=filetypes)
if my_file:
print(my_file.readlines())
my_file.close()
Сохранение данных в файл
Помимо выбора существующих файлов и папок также есть возможность создавать новые, используя диалоговые окна Tkinter. Они позволят сохранять данные, сгенерированные приложением, позволяя пользователям выбирать название и местоположение нового файла.
Будем использовать диалоговое окно «Сохранить файл» для записи содержимого виджета Text в текстовый файл:
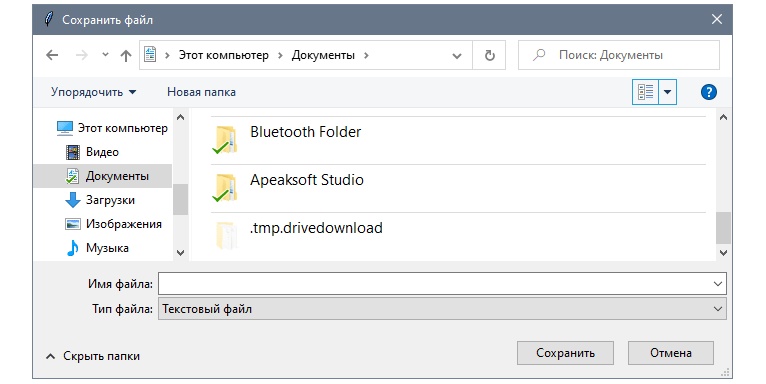
Для открытия такого диалогового окна используется функция asksavefile из модуля tkinter.filedialog. Она создает объект файла с режимом записи ('w') или None, если окно было закрыто:
import tkinter as tk

import tkinter.filedialog as fd

class App(tk.Tk):

    def __init__(self):

        super().__init__()

        self.text = tk.Text(self, height=10, width=50)

        self.btn_save = tk.Button(self, text="Сохранить", command=self.save_file)

        self.text.pack()

        self.btn_save.pack(pady=10, ipadx=5)

    def save_file(self):

        contents = self.text.get(1.0, tk.END)

        new_file = fd.asksaveasfile(title="Сохранить файл", defaultextension=".txt",

                                    filetypes=(("Текстовый файл", "*.txt"),))

        if new_file:

            new_file.write(contents)

            new_file.close()

if __name__ == "__main__":

    app = App()

    app.mainloop()
Как работает сохранение фалов
Функция asksavefile принимает те же опциональные параметры, что и askopenfile, но также позволяет добавить расширение файла по умолчанию с помощью параметра defaultextension.
Чтобы пользователи случайно не перезаписывали существующие файлы, это окно автоматически предупреждает, если они пытаются сохранить новый файл с тем же названием, что и у существующего.
С помощью объекта файла можно записать содержимое виджета Text. Нужно лишь не забывать закрывать файл для освобождения ресурсов, которые использовал объект:
contents = self.text.get(1.0, tk.END)

new_file.write(contents)

new_file.close()
Благодаря последней программе стало понятно, что askopenfile возвращает объект файла, а не его название. Также есть функция asksaveasfilename, которая возвращает путь к выбранному файлу. Ее можно использовать для изменения пути или выполнения валидации перед открытием файла для записи.
Последнее обновление: 24.09.2022
Окна сообщений
Tkinter имеет ряд встроенных окон для разных ситуаций, в частности, окна сообщений, функционал которых заключен в модуле tkinter.messagebox.
Для отображения сообщений этот модуль предоставляет следующие функции:
-
showinfo(): предназначена для отображения некоторой информации
-
showerror(): предназначена для отображения ошибок
-
showwarrning(): предназначена для отображения предупреждений
Все эти функции принимают три параметра:
showinfo(title, message, **options)
showerror(title, message, **options)
showwarrning(title, message, **options)
-
title: заголовок окна
-
message: отображаемое сообщение
-
options: настройки окна
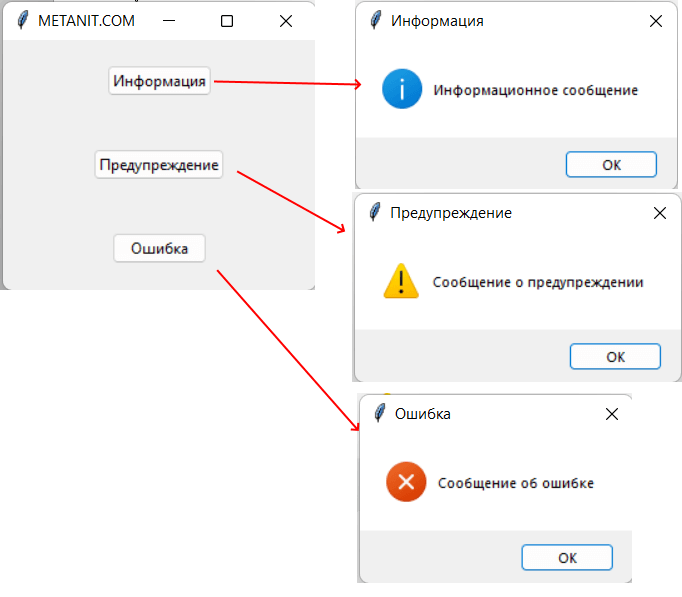
В реальности различие между этими типами сообщений заключается лишь в изображении, которое отображается рядом с текстом сообщения:
from tkinter import *
from tkinter import ttk
from tkinter.messagebox import showerror, showwarning, showinfo

root = Tk()
root.title("METANIT.COM")
root.geometry("250x200")

def open_info():
    showinfo(title="Информация", message="Информационное сообщение")

def open_warning():
    showwarning(title="Предупреждение", message="Сообщение о предупреждении")

def open_error():
    showerror(title="Ошибка", message="Сообщение об ошибке")

info_button = ttk.Button(text="Информация", command=open_info)
info_button.pack(anchor="center", expand=1)

warning_button = ttk.Button(text="Предупреждение", command=open_warning)
warning_button.pack(anchor="center", expand=1)

error_button = ttk.Button(text="Ошибка", command=open_error)
error_button.pack(anchor="center", expand=1)

root.mainloop()
Здесь по нажатию на каждую из трех кнопок отображается соответствующее сообщение:
Окна подтверждения операции
Модуль tkinter.messagebox также предоставляет ряд функций для подтверждения операции, где пользователю предлагается
нажать на одну из двух кнопок:
-
askyesno()
-
askokcancel()
-
askretrycancel()
Все эти функции принимают те же три параметра title, message и options. Отличие между ними только в том, что кнопки имеют разный текст. В случае нажатия на кнопку подтверждения, функция возвращает значение True, иначе возвращается False
from tkinter import *
from tkinter import ttk
from tkinter.messagebox import showinfo, askyesno

root = Tk()
root.title("METANIT.COM")
root.geometry("250x200")

def click():
    result = askyesno(title="Подтвержение операции", message="Подтвердить операцию?")
    if result: showinfo("Результат", "Операция подтверждена")
    else: showinfo("Результат", "Операция отменена")

ttk.Button(text="Click", command=click).pack(anchor="center", expand=1)

root.mainloop()
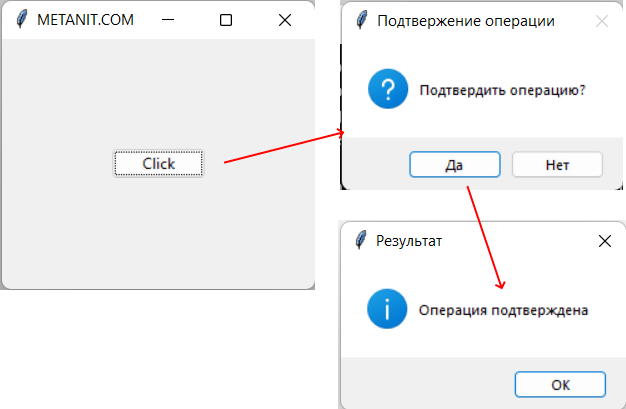
В данном случае по нажатию на кнопку вызывается функция askyesno(), которая отображает диалоговое окно с двумя кнопками «Да» и «Нет».
В зависимости от того, на какую кнопку нажмет пользователь, функция возвратит True или False. Получив результат функции, мы можем проверить его и выполнить те или иные действия.
Особняком стоит функция askquestion — она также отображает две кнопки для подтверждения или отмены действия (кнопки «Yes»(Да) и «No»(Нет)),
но в зависимости от нажатой кнопки возвращает строку: «yes» или «no».
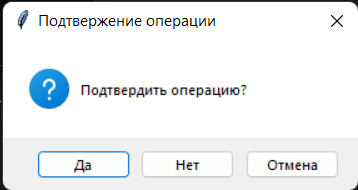
Также отдельно стоит функция askyesnocancel() — она отображает три кнопки: Yes (возвращает True), No (возвращает False) и Cancel
(возвращает None):
from tkinter import *
from tkinter import ttk
from tkinter.messagebox import showinfo, askyesnocancel

root = Tk()
root.title("METANIT.COM")
root.geometry("250x200")

def click():
    result =  askyesnocancel(title="Подтвержение операции", message="Подтвердить операцию?")
    if result==None: showinfo("Результат", "Операция приостановлена")
    elif result: showinfo("Результат", "Операция подтверждена")
    else : showinfo("Результат", "Операция отменена")

ttk.Button(text="Click", command=click).pack(anchor="center", expand=1)

root.mainloop()
В этом случае диалоговое окно предоставит выбор из трех альтернатив
Настройка окон
Дополнительно все вышерассмотренные функции принимают ряд параметров, которые могут применяться для настройки окон. Некоторые из них:
-
detail: дополнительный текст, который отображается под основным сообщением -
icon: иконка, которая отображается рядом с сообщением. Должна представлять одно из втроенных изображений: info, error, question или warning -
default: кнопка по умолчанию. Должна представлять одно из встроенных значений: abort, retry, ignore, ok, cancel, no, yes
from tkinter import *
from tkinter import ttk
from tkinter.messagebox import OK, INFO, showinfo
root = Tk()
root.title("METANIT.COM")
root.geometry("250x200")
def click():
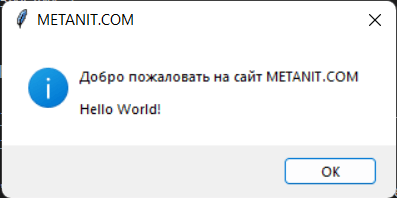
showinfo(title="METANIT.COM", message="Добро пожаловать на сайт METANIT.COM",
detail="Hello World!", icon=INFO, default=OK)
ttk.Button(text="Click", command=click).pack(anchor="center", expand=1)
root.mainloop()
При нажатии на кнопку отобразится следующее окно:
Диалоговые окна
Пакет tkinter содержит несколько модулей, предоставляющих доступ к уже готовым диалоговым окнам. Это окна различных сообщений, выбора по принципу «да-нет», открытия и сохранения файлов и др. В этом уроке рассмотрим примеры окон из модулей messagebox и filedialog пакета tkinter.
Модули пакета необходимо импортировать отдельно. То есть вы импортируете содержимое tkinter (например, from tkinter import *) и отдельно входящий в состав пакета tkinter модуль. Способы импорта на примере messagebox и пример вызова одной из функций модуля:
-
import tkinter.messagebox→tkinter.messagebox.askyesno() -
from tkinter.messagebox import *→askyesno() -
from tkinter import messagebox→messagebox.askyesno() -
from tkinter import messagebox as mb(вместо mb может быть любой идентификатор) →mb.askyesno()
В уроке мы будем использовать последний вариант.
Модуль messagebox – стандартные диалоговые окна
Окно выбора «да» или «нет» – askyesno:
from tkinter import *
from tkinter import messagebox as mb


def check():
    answer = mb.askyesno(
        title="Вопрос",
        message="Перенести данные?")
    if answer:
        s = entry.get()
        entry.delete(0, END)
        label['text'] = s


root = Tk()
entry = Entry()
entry.pack(pady=10)
Button(text='Передать', command=check).pack()
label = Label(height=3)
label.pack()

root.mainloop()
Нажатие «Да» в диалоговом окне возвращает в программу True, «Нет» вернет False (также как закрытие окна через крестик). Таким образом в коде можно обработать выбор пользователя. В данном случае если последний соглашается, то данные переносятся из поля в метку.
Опции title и message являются позиционными, так что можно указывать только значения: askyesno("Вопрос", "Перенести данные?").
Подобные окна генерируются при использовании функции askokcancel с надписями на кнопках «ОК» и «Отмена», askquestion (возвращает не True или False, а строки ‘yes’ или ‘no’), askretrycancel («Повторить», «Отмена»), askyesnocancel («Да», «Нет», «Отмена»).
Другую группу составляют окна с одной кнопкой, которые служат для вывода сообщений различного характера. Это showerror, showinfo и showwarning.
…
def check():
    s = entry.get()
    if not s.isdigit():
        mb.showerror(
            "Ошибка",
            "Должно быть введено число")
    else:
        entry.delete(0, END)
        label['text'] = s
…
Модуль filedialog – диалоговые окна открытия и сохранения файлов
Рассмотрим две функции из модуля filedialog – askopenfilename и asksaveasfilename. Первая предоставляет диалоговое окно для открытия файла, вторая – для сохранения. Обе возвращают имя файла, который должен быть открыт или сохранен, но сами они его не открывают и не сохраняют. Делать это уже надо программными средствами самого Python.
from tkinter import *
from tkinter import filedialog as fd


def insert_text():
    file_name = fd.askopenfilename()
    f = open(file_name)
    s = f.read()
    text.insert(1.0, s)
    f.close()


def extract_text():
    file_name = fd.asksaveasfilename(
        filetypes=(("TXT files", "*.txt"),
                   ("HTML files", "*.html;*.htm"),
                   ("All files", "*.*")))
    f = open(file_name, 'w')
    s = text.get(1.0, END)
    f.write(s)
    f.close()


root = Tk()
text = Text(width=50, height=25)
text.grid(columnspan=2)
b1 = Button(text="Открыть", command=insert_text)
b1.grid(row=1, sticky=E)
b2 = Button(text="Сохранить", command=extract_text)
b2.grid(row=1, column=1, sticky=W)

root.mainloop()
Опция filetype позволяет перечислить типы файлов, которые будут сохраняться или открываться, и их расширения.
Примечание. В приведенном коде при размещении текстового поля методом grid не указаны аргументы row и column. В таких случаях подразумевается, что их значениями являются нули.
Практическая работа
В приведенной в уроке программе с функциями askopenfilename и asksaveasfilename генерируются исключения, если диалоговые окна были закрыты без выбора или указания имени файлов.
Напишите код обработки данных исключений. При этом для пользователя должно появляться информационное диалоговое окно с сообщением о том, что файл не загружен или не сохранен.
Добавьте кнопку «Очистить», которая удаляет текст из поля. Перед удалением пользователь должен подтвердить свои намерения через соответствующее диалоговое окно.
Курс с примерами решений практических работ:
pdf-версия,
android-приложение.
Improve Article
Save Article
Improve Article
Save Article
Python offers multiple options for developing GUI (Graphical User Interface). Out of all the GUI methods, tkinter is the most commonly used method. It is a standard Python interface to the Tk GUI toolkit shipped with Python. Python with tkinter is the fastest and easiest way to create the GUI applications. Creating a GUI using tkinter is an easy task.
Note: For more information, refer to Python GUI – tkinter
MessageBox Widget
Python Tkinter – MessageBox Widget is used to display the message boxes in the python applications. This module is used to display a message using provides a number of functions.
Syntax:
messagebox.Function_Name(title, message [, options])
Parameters:
There are various parameters :
- Function_Name: This parameter is used to represents an appropriate message box function.
- title: This parameter is a string which is shown as a title of a message box.
- message: This parameter is the string to be displayed as a message on the message box.
- options: There are two options that can be used are:
- default: This option is used to specify the default button like ABORT, RETRY, or IGNORE in the message box.
- parent: This option is used to specify the window on top of which the message box is to be displayed.
Function_Name:
There are functions or methods available in the messagebox widget.
- showinfo(): Show some relevant information to the user.
- showwarning(): Display the warning to the user.
- showerror(): Display the error message to the user.
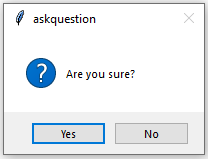
- askquestion(): Ask question and user has to answered in yes or no.
- askokcancel(): Confirm the user’s action regarding some application activity.
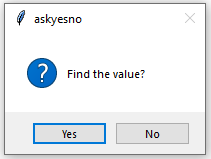
- askyesno(): User can answer in yes or no for some action.
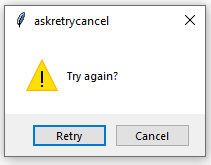
- askretrycancel(): Ask the user about doing a particular task again or not.
Example:
from tkinter import *
from tkinter import messagebox
root = Tk()
root.geometry("300x200")
w = Label(root, text ='GeeksForGeeks', font = "50")
w.pack()
messagebox.showinfo("showinfo", "Information")
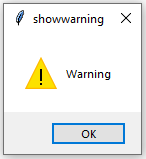
messagebox.showwarning("showwarning", "Warning")
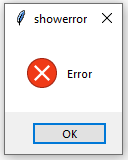
messagebox.showerror("showerror", "Error")
messagebox.askquestion("askquestion", "Are you sure?")
messagebox.askokcancel("askokcancel", "Want to continue?")
messagebox.askyesno("askyesno", "Find the value?")
messagebox.askretrycancel("askretrycancel", "Try again?")
root.mainloop()
Output: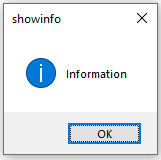

Summary: in this tutorial, you’ll learn how to show various message boxes using the tkinter.messagebox module.
Introduction to tkinter.messagebox module
When developing a Tkinter application, you often want to notify users about the events that occurred.
For example, when users click the save button, you want to notify them that the record has been saved successfully.
If an error occurred, for example, the database server is not reachable, you can notify users of the error.
When the update has been completed but the record already exists, you may want to show a warning.
To cover all of these scenarios, you can use various functions from the tkinter.messagebox module:
showinfo()– notify that an operation completed successfully.showerror()– notify that an operation hasn’t completed due to an error.showwarrning()– notify that an operation completed but something didn’t behave as expected.
All of these functions accept two arguments:
Code language: Python (python)
showinfo(title, message) showerror(title, message) showwarrning(title, message)
- The
titleis displayed on the title bar of the dialog. - The
messageis shown on the dialog.
To span the message multiple lines, you can add the new line character 'n'.
Tkinter messagebox examples
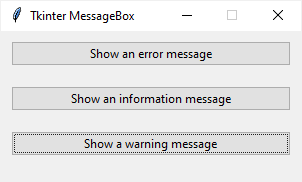
The following program consists of three buttons. When you click a button, the corresponding message box will display.
Code language: Python (python)
import tkinter as tk from tkinter import ttk from tkinter.messagebox import showerror, showwarning, showinfo # create the root window root = tk.Tk() root.title('Tkinter MessageBox') root.resizable(False, False) root.geometry('300x150') # options = {'fill': 'both', 'padx': 10, 'pady': 10, 'ipadx': 5} ttk.Button( root, text='Show an error message', command=lambda: showerror( title='Error', message='This is an error message.') ).pack(**options) ttk.Button( root, text='Show an information message', command=lambda: showinfo( title='Information', message='This is an information message.') ).pack(**options) ttk.Button( root, text='Show an warning message', command=lambda: showwarning( title='Warning', message='This is a warning message.') ).pack(**options) # run the app root.mainloop()
How it works.
First, import the tkinter, tkinter.ttk, and tkinter.messagebox modules:
Code language: Python (python)
import tkinter as tk from tkinter import ttk from tkinter.messagebox import showerror, showwarning, showinfo
Second, create the root window and initialize its properties:
Code language: Python (python)
# create the root window root = tk.Tk() root.title('Tkinter MessageBox') root.resizable(False, False) root.geometry('300x150')
Third, create three buttons and assign a lambda expression to the command option of each button. Each lambda expression shows a corresponding message box.
Code language: Python (python)
ttk.Button( root, text='Show an error message', command=lambda: showerror( title='Error', message='This is an error message.') ).pack(**options) ttk.Button( root, text='Show an information message', command=lambda: showinfo( title='Information', message='This is an information message.') ).pack(**options) ttk.Button( root, text='Show an warning message', command=lambda: showwarning( title='Warning', message='This is a warning message.') ).pack(**options)
Finally, display the root window.
Code language: Python (python)
root.mainloop()
Summary
- Use
showinfo(),showerror(),showwarrning()functions from thetkinter.messageboxmodule to show an information, error, and warning message.
Did you find this tutorial helpful ?
What is Tkinter Messagebox?
Tkinter Messagebox is a module in python which provides a different set of dialogues that are used to display message boxes, showing errors or warnings, widgets to select files or change colors which is a pop-up box with a relevant message being displayed along with a title based on the requirement in python applications with an icon and interrupts the user flow to take input from the user is called Tkinter Messagebox and has different functions that are used to display the relevant messages based on the application requirements like info message, warning message, error message, or taking input from the user.
Syntax:
import  tkinter
from tkinter import messagebox
messagebox.functionname(title, message [,options])
Explanation: In the above syntax, we have imported the Tkinter library, and from that, we imported the messagebox module using which we can call different functions and display the relevant messages along with title based on the application requirement.
Attributes of Tkinter Messagebox
In the previous section, we have discussed the syntax of the Tkinter messagebox. Now we will discuss in detail the parameters or attributes being used in the syntax. There are four attributes in the syntax: function name, title, message, and options.
- Function name: The function name represents the proper name for the message box function.
- Title: Title is a message which will be displayed in the dialogue box of the message in the title bar.
- Message: Messages is a text used to display a message to the appropriate function name.
- Options: Options are like a choice by which we can customize the message box, which is standard. Some of the options are default and parent. The default option is used to mention default operations or message boxes buttons such as ABORT, IGNORE or RETRY in the message box. Parent option is used to mention a parental window on top of which message box will be displayed.
Methods of Tkinter Messagebox
Let’s have a look at different functions available with Tkinter messagebox such as showinfo(), showwarning(), showerror(), askquestion(), askokcancel(), askyesno(), and, askretrycancel(). The above functions used to show appropriate message boxes, and all the functions have the same kind of syntax but with different functionalities. All the functions which we are going to discuss are with python3 and above.
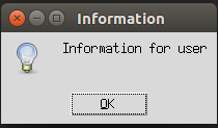
1. showinfo()
We use this messagebox function when we want to show some related or relevant information to the user. Let us try to create an information message box with an example below.
Code:
import tkinter
from tkinter import messagebox
top =  tkinter.Tk()
top.geometry("150x150")
messagebox.showinfo("Information","Information for user")
top.mainloop()
Explanation: In the above example, we created a Tkinter object top using tkinter.Tk() and used messagebox with showinfo() function to display the information message.
Output:
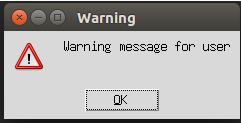
2. showwarning()
We use this messagebox function when we want to display a warning message to the user. Let us create a warning message to the user by using an example as below:
Code:
import tkinter
from tkinter import messagebox
top =  tkinter.Tk()
top.geometry("150x150")
messagebox.showwarning("Warning","Warning message for user")
top.mainloop()
Explanation: In the above example, we created a Tkinter object top using tkinter.Tk() and used a messagebox with a showwarning() function to display the user’s warning message.
Output:
3. showerror()
We use this messagebox function when we want to display an error message to the user. Let us create an error message to the user by using an example as below:
Code:
import tkinter
from tkinter import messagebox
top =  tkinter.Tk()
top.geometry("150x150")
messagebox.showerror("Error","Error message for user")
top.mainloop()
Explanation: In the above example, we created a Tkinter object top using tkinter.Tk() and used a messagebox with showerror() function to display the user’s warning message.
Output:

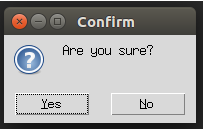
4. askquestion()
We use this messagebox function when we want to ask the user some questions, which can be answered by using yes or no. Let us create a program to ask the user a question whether the user wants to confirm it or not by using an example as below:
Code:
import tkinter
from tkinter import messagebox
top =  tkinter.Tk()
top.geometry("150x150")
messagebox.askquestion("Confirm","Are you sure?")
top.mainloop()
Explanation: In the above example, we created a Tkinter object top using tkinter.Tk() and used messagebox with askquestion() function to ask the user a question Confirm with a message Are you sure?
Output:
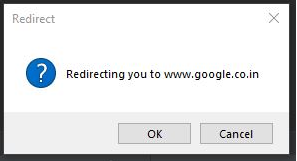
5. askokcancel()
We use this messagebox function when we want to confirm the user’s responses regarding the application behavior or activity. Let us create a program to confirm users response regarding an application by using an example as below:
Code:
import tkinter
from tkinter import messagebox
top =  tkinter.Tk()
top.geometry("150x150")
messagebox.askokcancel("Redirect","Redirecting you to www.google.co.in")
top.mainloop()
Explanation: In the above example, we created a Tkinter object top using Tkinter.Tk() and used a messagebox with the askokcancel() function to get the user’s response regarding the application activity.
Output:
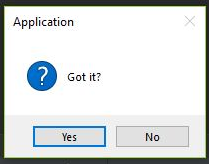
6. askyesno()
We use this messagebox function when we want to ask the user regarding some question that can be answered by using yes or no. Let us create a program to ask user regarding some question, and the user will answer by saying yes or no by using an example as below:
Code:
import tkinter
from tkinter import messagebox
top =  tkinter.Tk()
top.geometry("150x150")
messagebox.askyesno("Application","Got it?")
top.mainloop()
Explanation: In the above example, we created a Tkinter object top using tkinter.Tk() and used messagebox with askyesno() function to ask the user regarding some question with a message Got it?
Output:
Examples to Implement Tkinter Messagebox
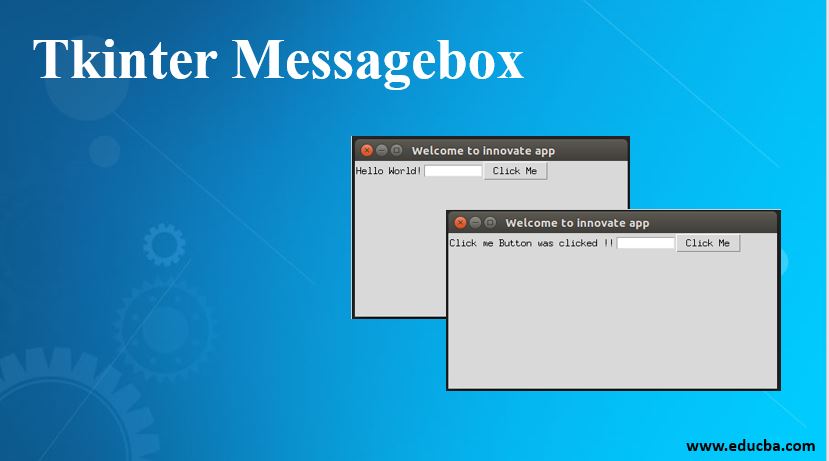
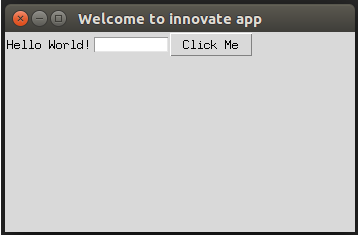
Let us create an application using labels, grid, and Entry class to take input from it and apply the action after a button click as the below example.
Code:
import tkinter
from tkinter import *
top = tkinter.Tk()
top.title("Welcome to innovate app")
top.geometry("350x200")
labl = Label(top, text=”Hello World!”)
labl.grid(column=0, row=0)
txt = Entry(top, width=10)
txt.grid(column=1, row=0)
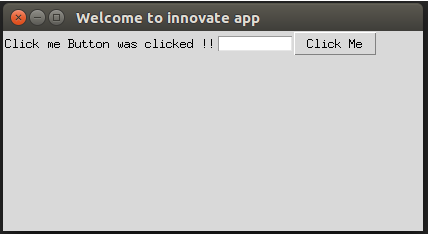
def click():
labl.configure(text="Click me Button was clicked ! !")
btn = Button(top, text ="Click Me", command=click)
btn.grid(column=2, row=0)
top.mainloop()Explanation: In the above example, we have created a Tkinter object top using tkinter.Tk() and the function click() where we are configuring the label with the text “Click me Button was clicked!!” and we have created a title to the Tkinter object, created a grid to display the output as below:
Output:
Conclusion
Finally, it’s an overview of the Tkinter messagebox module in python. So far, we have discussed what messagebox, its syntax, its attributes, and functions supported in the module, describing functions in detail, and finally explaining with an example using showinfo() function using the pack() method. I hope after reading this article, you will have a good understanding of the Tkinter messagebox module, its functions, and how to use them based on the application requirement.
Recommended Articles
This is a guide to Tkinter Messagebox. Here we discuss Syntax, the attributes, different methods and examples to implement with appropriate syntax and sample code. You can also go through our other related articles to learn more –
- Tkinter Scrollbar
- Python Tkinter Label
- Tkinter Listbox
- Tkinter Menubutton