Reshade display depth не работает


| 1,358 | уникальных посетителей |
| 18 | добавили в избранное |

I am making sourcemod in SDK 2013 branch and I want to improve Source graphic a bit so i installed ReShade but then i realised something is wrong with AO, so i started to tweak settings with another depth buffers, disabling HUD.
But, i found a way to fix it a bit, that why i wanted to create this tutorial 😀
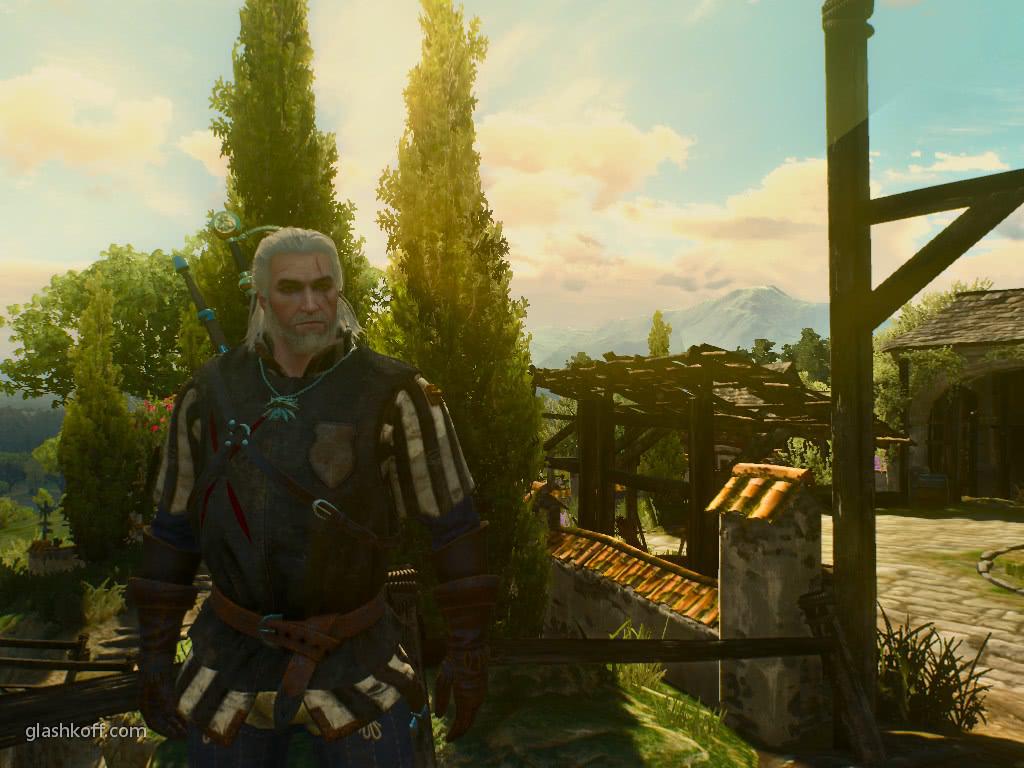
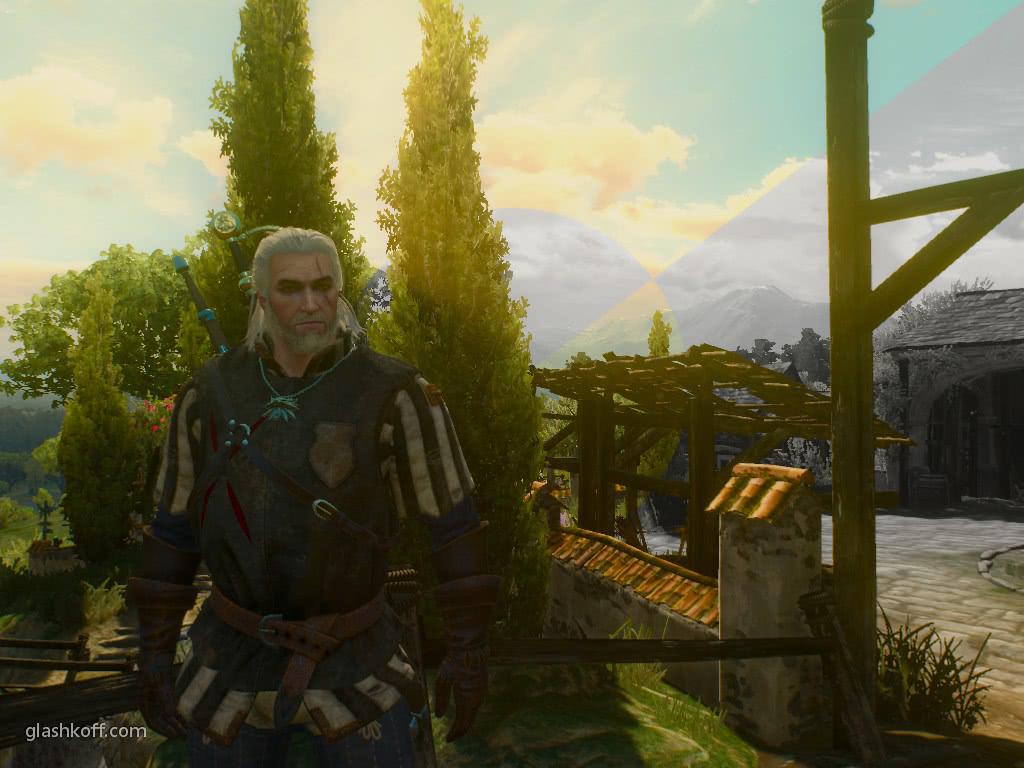
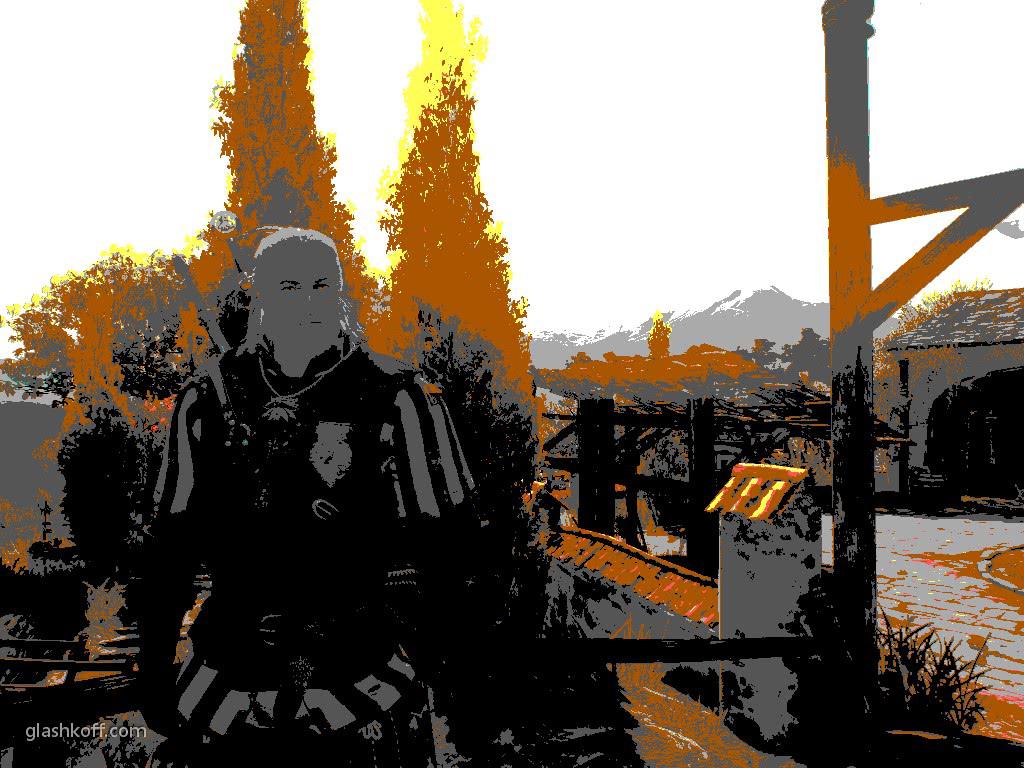
So you want to have this?
|
No Problem! Follow my steps to fix messed DepthBuffer
Why i need DepthBuffer for ReShade?:
- In easy words it has «informations» about depth on your ingame screen ( how far props/walls/sky is from player`s camera ) and ReShade needs these informations for SSAO, Depth Of Field and all depth related shaders
Why DepthBuffer in Source is «broken» for ReShade?:
- VGUI ( HUD elements: health, ammo, crosshair ) makes it solid color so it has no depth information. You can fix it by typing r_drawvgui 0 in console ( but who wants to play without HUD ? ) or by choosing right Depth Buffer from DX9 Tab in ReShade but it still needs some fixes
MSAA makes it solid color aswell so you need to disable Antialiasing in game options ( but you can enable Anti-Aliasing in ReShade so git gut )
When 3D Skybox is enabled ( it usually is ) DepthBuffer will flicker ( switching between playable area and 3D Skybox`s architecture ) when player is moving and looking around ( from what i saw it switch when your crosshair is on hidden 3D Skybox area but not always ) so you need to disable 3D Skybox architecture by typing r_3dsky 0 in console or SSAO will turns ON and OFF on player`s movement
- Color Correction can make it solid sometimes, so turn it OFF ( but in my case i can have it enabled and everything is fine )
NOTE: There are just some tricks to make it work. It is not a full DepthBuffer repair and they have also some cons! You need to disable 3D Skybox or DepthBuffer will flickers when you are moving! I have not found any solution for this yet. If you have a solution to keep 3D Skybox enabled, write a comment. Thank you 😀
I will show you how to make it work for Half-Life 2, but it should works for all Source Engine games/mods in most cases.
You can download it here: https://reshade.me/
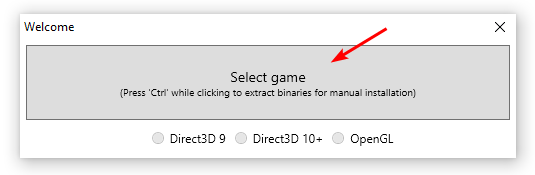
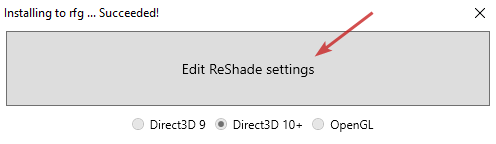
> Open ReShade Setup
> Click Select game to install
> Find your game .exe ( hl2.exe in most cases ) it should be in C:Program Files (x86)Steamsteamappscommonhalf-life 2 by default ( or in your Source SDK Base if you are working with source mod ) and click on it
> Check «Direct3D 9» API below in ReShade setup
> When window Do you want do download collection. shows up, click YES and Check All effects so you can tweak with some cool settings later
> Open your game folder ( folder where you installed ReShade and where hl2.exe is )
> Copy these files:
- reshade-shaders folder
- d3d9.dll
- ReShade.ini
> Paste them in your game «bin» folder hl2/bin ( «bin» folder is in same place where hl2.exe is ) or in Source SDK Base/bin if you have a sourcemod
> You should see that ReShade is working if you see it on top
> First of all open Options —> Video —> Advanced: Turn Anti-Aliasing to None and Disable Color Correction
> Click «Home» key to open ReShade
> Tutorial will appear, you can read this or just Skip Tutorial
> In ReShade window go to Home tab ( it is on top )
Next
> Create your own Preset by clicking » + » on the right and write name for your Preset ( you should not use DefaultPreset )
Next
> In Home tab find DisplayDepth [DisplayDepth.fx] and active it
Next
> Go to DX9 tab and active Copy Depth Buffers Before Clear Operation
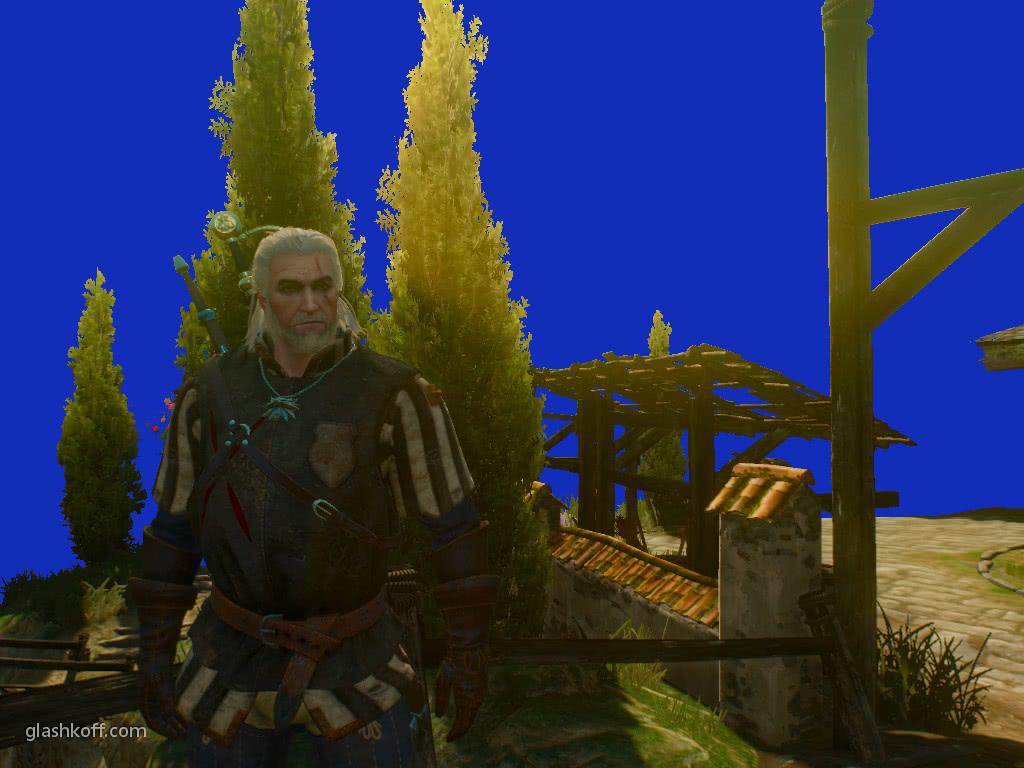
You can see something is going on
Left: Normal map ( is reversed )
Right: Depth map ( still broken, only view model is visible )
Next
> Go back to DisplayDepth in Home tab and change RESHADE_DEPTH_INPUT_IS_REVERSED from 1 to
Next
> Click Edit global preprocessor definitions you should have here RESHADE_DEPTH_INPUT_IS_REVERSED 0, but if there is nothing, in Current Preset ( or Global if you want to have many presets ) click on «+» and in first window write RESHADE_DEPTH_INPUT_IS_REVERSED and in second window and then click Reload on bottom
> You can deactive DisplayDepth [DisplayDepth.fx] now
> We are almost done! Go back to Home tab, find MXAO [MXAO.fx] and active it
Next
> AO will flickers sometimes, so you need to disable 3D Skybox. Write r_3dsky 0 in console
Maybe someone will find solution for this 😀
And you have fixed DepthBuffer! You can tweak with MXAO settings or active another depth related shader like Depth Of Field —> DOF.fx shaders, active FXAA.fx to have Anti-Aliasing
In MXAO there is not a big difference between Medium AO quality and higher and my fps stay the same on my PC when its on Medium, but when on Maximum i lose 100fps and i barely see any visual quality in FullHD resolution, so not worth for me go higher than medium 😀
Источник
Depth buffer detection modifications
Ok, so let’s be orderly. Here are the last builds ok my dlls. Can you tell me wich one are the best (RE4HD, L4D2 and source engins games) ? By advance, thks.
Based on L4D2 testing, the above builds can be divided into two groups depending on the resulting behavior:
1) Correct depth map is retrieved when the Flashlight is OFF, «skybox» depth map is retrieved when the Flashlight is ON, silhouette issues are present, shadow issues are absent
— 90 (Reshade-4009a4b8633b41f8aa2546468e1daade297c3cf2)
— 104 (Reshade-3b13969c5519529642169f2fd339353e0bfd11e0)
2) These are worse than builds from the 1st group. «skybox» depth map is retrieved when the Flashlight is OFF, «rotated» depth map is retrieved when the Flashlight is ON (it can be seen on one of screenshots I’ve posted previously), silhouette issues are absent, shadow issues are absent too
— 93 (Reshade-851bb7b6e1371d66673481a5a46ffdc310a81075)
— 96 (Reshade-307a0f7cc754214ed92f3367633623fd9b7b15b9)
— 97 (Reshade-68c989e3cf1498b04eb04006272fe37d17ace52b)
— 100 (Reshade-41ec1bf24bc6120696e79cd7dff39dd13ba09b75)
— 101 (Reshade-5dc247f8020f7426952b10a682d87adadbc721db)
In the end, none of these builds are better than the build 85 which is able to retrieve the correct depth map when the Flashlight is both ON and OFF (but there are serious shadow issues when the Flashlight is ON).
More DX9 games have been tested with the build 85:
1) Aarklash: Legacy
The depth map can be successfully retrieved after selecting «DepthBufferClearingNumber = 0» and «DepthBufferClearingFlagNumber = 2». But there are «character model colorization» issues (seems like character models are being colorized by semi-transparent selection marker color).
2) Batman: Arkham Asylum
The depth map is retrieved and the game works pretty good in general after selecting «DepthBufferClearingNumber = 0» and «DepthBufferClearingFlagNumber = 6». But there are occasional depth test issues that can mostly be seen in foggy areas as black/white/green «reminder» flashes. I’ve even crashed one time (it might have been related to the game itself though).
3) Mirror’s Edge (the 1st one from series)
There is no way to retrieve the correct depth map so far. Different parts of depth map can be seen when changing «Before clearing» settings.
4) Styx: Master of Shadows (the 1st one from series)
The depth map is retrieved after selecting «DepthBufferClearingNumber = 0» and «DepthBufferClearingFlagNumber = 5» but there are evident depth test issues. For example, in the main menu (when you see Styx sitting on the castle wall), try switching between the «Post-processing» and «Before clearing» modes while looking at the fire above Styx (i.e. there is something like a burning torch above him).
5) Trine 2 — Complete Story
An interesting and unexpected finding in this game. The correct depth map can be retrieved even in the «Post-processing» mode when setting «RestrictDepthBufferDimensions = 0». But different shadow issues appear in this case (main character’s shadow is frozen and then disappears, etc.). There are no «Before clearing» settings that allow to retrieve the correct depth map if «RestrictDepthBufferDimensions = 1» (either different parts or shrunk depth map can be seen instead).
Thanks, thalixte! This will make it much easier to track changes. I’ll try to focus all of my testing on RE4.
UPDATE: I tried all 7 versions of the files you linked to. The one I’ve been using wasn’t among those and still works the best for me. I’ll post my full findings when I have more time but I did notice there were some common issues between a few of these versions. One big problem I encountered testing some of these was if I chose a setting that didn’t work NONE of the settings would work after that unless I quit and restarted the game. So if I had a preset with values for Depth Buffer Clearing Number and Depth Buffer Clearing Flag Number that didn’t work then no other settings would work no matter what I entered. So when I was testing a new .dll it would appear that version didn’t work at all. I had to try and guess which settings would most likely work. Through trial and error Depth Buffer Clearing Numbers between Third and Eighth are the most «compatible.»
The most common Depth Buffer Clearing Numbers that were empty were the First, Second, and Ninth. The Third Depth Buffer Clearing Number almost always had an issue once you raised your weapon to aim. One of two things would happen: either the screen would flicker while the laser beam on the weapon disappeared or the screen would go black causing the depth buffer to be lost no matter what settings you choose after that. I’d have to restart game to get it back.
The oddest thing I encountered was with Reshade-851bb7b6e1371d66673481a5a46ffdc310a81075 using
Depth Buffer Clearing Number = None
Depth Buffer Clearing Flag Number = 1
where only Leon’s hair and laser beam on his weapon would appear when I tried to aim.
NONE of these versions had depth buffer access in the area where you’re supposed to take the boat across the lake. I’ll try to upload my save files so you can take a look at that area to see what makes it different than the rest.
Hey! This thread took my attention, and was hoping for some fixes for Source engine based games. Didn’t test everything yet, but the results are interesting. Going to upload a video to share my experiments in Garry’s Mod.
Summary: the only best solution is still the r_drawvgui 0 which hides all GUI elements, including menus. Not a convenient solution, but works.
With Depth Buffer Clear Number settings, the effects are highly varied. At some settings, water reflections ruin it (disabling water reflections using console commands helped). Some settings do absolutely nothing. In some cases, flash light disables or inverts depth buffer. One of the settings works only on the background (Source engine does a weird job with background models with the «3d skybox» feature)
r_depthoverlay draws the depth texture of the engine itself, interesting to see, how low resolution it is, also the very gradient is very rough. And the 3D sky looks weird, the depth overlay shows the closer part of it as it was very close to the camera.
Going to try the 7 uploaded DLL versions on Source based games. Tried the latest d3d9 branch from github, but didn’t really work. No effect at all (needs further testing).

Note that the black borders on the screenshot are because of a shader I made to fix some border artifacts when running the game borderless, completely unrelated to your changes.
I’ve used these settings:

Other settings messed with the depth testing, this seems to work flawlessly.
Although for some reason, which could be completely unrelated, using this makes it impossible to go back to the game (on fullscreen) after alt-tabbing. If I try it, nothing happens (but the screen freezes) and I’m forced to stop the process. This sometimes happens when I use both this build and Flawless Widescreen at the same time and the game is full screen, it maybe be conflicting with that in some way, and sometimes it happens even if the game is windowed (it makes the window freeze). It might be just a fault on the poor port anyways.
Is this already on one of the branches in your repo? I wanted to merge into mine if possible (I like blending multiple cutting edge features into a single build).
Just tested the game (at the very beginning). No problem in my case. Could you test those settings:
[DEPTH_BUFFER_DETECTION]
DepthBufferRetrievalMode=1
DepthBufferClearingNumber=0
DepthBufferTextureFormat=44
So, from the beginning, yes, those settings work. However, I did observe that I could also select DepthBufferClearingNumber=2, and everything was fine.
Also, the DepthBufferTextureFormat setting apparently can be left at unknown, as it had no effect (between unknown and 44, other values weren’t tested) in these tests.
Then, I checked out sarif industries, which doesn’t appear to work at all with those settings, and works intermittently with others, notably DepthBufferClearingNumber must be set to «1». No other settings work.
Then, much the same in detroit, except DepthBufferClearingNumber must be set to «2», and there is intermittent breakage depending on where you are standing. In all videos, it isn’t shown, but I have found consistently that DepthBufferTextureFormat can be set to unknown or 44 and it has no discernable impact on the result.
With Depth Buffer Clear Number settings, the effects are highly varied. At some settings, water reflections ruin it (disabling water reflections using console commands helped). Some settings do absolutely nothing. In some cases, flash light disables or inverts depth buffer. One of the settings works only on the background (Source engine does a weird job with background models with the «3d skybox» feature)
I can confirm build «Reshade-4009a4b8633b41f8aa2546468e1daade297c3cf2.zip» works on Mass Effect 1:
.
Other settings messed with the depth testing, this seems to work flawlessly.
.
Although for some reason, which could be completely unrelated, using this makes it impossible to go back to the game (on fullscreen) after alt-tabbing. If I try it, nothing happens (but the screen freezes) and I’m forced to stop the process. This sometimes happens when I use both this build and Flawless Widescreen at the same time and the game is full screen, it maybe be conflicting with that in some way, and sometimes it happens even if the game is windowed (it makes the window freeze). It might be just a fault on the poor port anyways.
It’s normal that only specific combinations of «Before clearing» settings are working fine in some games and don’t work in others (poorly selected settings could even break the game rendering completely or cause occasional visual glitches). I.e. the lists with «Before clearing» settings are kind of universal and designed for you guys to go through and carefully select settings which are working fine in a specific game you play. Hope this explains things a bit.
BTW, Mass Effect 1-3 are indeed working fine starting from early builds with thalixte’s Depth Buffer-related changes.
luluco250, regarding freezes that you experience, do they happen when you use the original ReShade 3.1.2?
PS: thalixte, sorry for being your advocate
BTW, Mass Effect 1-3 are indeed working fine starting from early builds with thalixte’s Depth Buffer-related changes.
Right, I’ll look it up then.
luluco250, regarding freezes that you experience, do they happen when you use the original ReShade 3.1.2?
Pretty sure it’s completely unrelated, because I was just able to use the game for an extended period of time with thalixte’s build, even when working with the game in the background. I think it was just a random coincidence that I was getting freezes on it but not on vanilla ReShade.
Also, made a video to showcase the depth buffer working.
@OtisInf: i tested TitanFall2 with your great camera tools. Unfortunately, i cannot reproduce your issues. In my rig, the depth buffer displays correctly, even when i am in camera mod and i pause the time, then disable the pause. have you a specific sequence where the pb occurs ?
It happens when I pause the game with numpad 0, then enable camera, then enable display depth (so I see the depth buffer), and I move the camera with the camera tools (not the game!): the depth buffer stays the same. To get the depth buffer updated, I have to click reload on reshade. In fact, if I enable display depth I don’t see anything, I have to click reload to get things working in the reshade window.
This is also the same btw with the normal game I now notice: enable displaydepth: nothing changes when the camera is moved. Windowed or full screen, doesn’t matter. Perhaps it’s a weird setting of the game itself, no idea. I’ve everything maxed, vsync to triple buffered, adaptive resolution fps target to 60, adaptive supersampling switched off.
Testing the new .dll’s in dx9 mode (all 32 bit) on Deus Ex Human Revolution
41ec1bf24bc6120696e79cd7dff39dd13ba09b75 — All white — but when I press pause the depth buffer is present — even in places where the main dll (the latest dxgi32) wasn’t showing all depth buffer output (i.e. all white except for phonebooth letter stenciling), however unrestricting viewport and changing DepthBufferClearingFlagNumber to 7 shows this:

5dc247f8020f7426952b10a682d87adadbc721db — same as above.
68c989e3cf1498b04eb04006272fe37d17ace52b — This one i tinkered with and found that changing the following values provides seemingly better buffer access in more places, but it still flickers out and shows something like the screenshot above. Also, massive ghosting, and textures disappearing.
[DEPTH_BUFFER_DETECTION]
DepthBufferRetrievalMode=1
DepthBufferClearingNumber=9
DepthBufferTextureFormat=0
DepthBufferClearingFlagNumber=0
RestrictDepthBufferDimensions=1
307a0f7cc754214ed92f3367633623fd9b7b15b9 — same as first (41ec1bf24bc6120696e79cd7dff39dd13ba09b75 )
851bb7b6e1371d66673481a5a46ffdc310a81075 — No access (either all white or all black) — all white except fifth — and that only displays something similar to the screenshot if viewport restriction is disabled.
4009a4b8633b41f8aa2546468e1daade297c3cf2 — No access (either all white or all black)
If I was religious about this it’d be more beneficial to use a spreadsheet for each configuration, lol.
Also, before I forget:
Thalixte: great stuff
Isn’t it taxing though to copy the textures around at that stage (as in: loss in performance?)
- thalixte
- Topic Author
- Offline
Just tested the game (at the very beginning). No problem in my case. Could you test those settings:
[DEPTH_BUFFER_DETECTION]
DepthBufferRetrievalMode=1
DepthBufferClearingNumber=0
DepthBufferTextureFormat=44
So, from the beginning, yes, those settings work. However, I did observe that I could also select DepthBufferClearingNumber=2, and everything was fine.
Also, the DepthBufferTextureFormat setting apparently can be left at unknown, as it had no effect (between unknown and 44, other values weren’t tested) in these tests.
Then, I checked out sarif industries, which doesn’t appear to work at all with those settings, and works intermittently with others, notably DepthBufferClearingNumber must be set to «1». No other settings work.
Then, much the same in detroit, except DepthBufferClearingNumber must be set to «2», and there is intermittent breakage depending on where you are standing. In all videos, it isn’t shown, but I have found consistently that DepthBufferTextureFormat can be set to unknown or 44 and it has no discernable impact on the result.
- thalixte
- Topic Author
- Offline
@OtisInf: i tested TitanFall2 with your great camera tools. Unfortunately, i cannot reproduce your issues. In my rig, the depth buffer displays correctly, even when i am in camera mod and i pause the time, then disable the pause. have you a specific sequence where the pb occurs ?
It happens when I pause the game with numpad 0, then enable camera, then enable display depth (so I see the depth buffer), and I move the camera with the camera tools (not the game!): the depth buffer stays the same. To get the depth buffer updated, I have to click reload on reshade. In fact, if I enable display depth I don’t see anything, I have to click reload to get things working in the reshade window.
This is also the same btw with the normal game I now notice: enable displaydepth: nothing changes when the camera is moved. Windowed or full screen, doesn’t matter. Perhaps it’s a weird setting of the game itself, no idea. I’ve everything maxed, vsync to triple buffered, adaptive resolution fps target to 60, adaptive supersampling switched off.
- thalixte
- Topic Author
- Offline
Thanks, thalixte! This will make it much easier to track changes. I’ll try to focus all of my testing on RE4.
UPDATE: I tried all 7 versions of the files you linked to. The one I’ve been using wasn’t among those and still works the best for me. I’ll post my full findings when I have more time but I did notice there were some common issues between a few of these versions. One big problem I encountered testing some of these was if I chose a setting that didn’t work NONE of the settings would work after that unless I quit and restarted the game. So if I had a preset with values for Depth Buffer Clearing Number and Depth Buffer Clearing Flag Number that didn’t work then no other settings would work no matter what I entered. So when I was testing a new .dll it would appear that version didn’t work at all. I had to try and guess which settings would most likely work. Through trial and error Depth Buffer Clearing Numbers between Third and Eighth are the most «compatible.»
The most common Depth Buffer Clearing Numbers that were empty were the First, Second, and Ninth. The Third Depth Buffer Clearing Number almost always had an issue once you raised your weapon to aim. One of two things would happen: either the screen would flicker while the laser beam on the weapon disappeared or the screen would go black causing the depth buffer to be lost no matter what settings you choose after that. I’d have to restart game to get it back.
The oddest thing I encountered was with Reshade-851bb7b6e1371d66673481a5a46ffdc310a81075 using
Depth Buffer Clearing Number = None
Depth Buffer Clearing Flag Number = 1
where only Leon’s hair and laser beam on his weapon would appear when I tried to aim.
NONE of these versions had depth buffer access in the area where you’re supposed to take the boat across the lake. I’ll try to upload my save files so you can take a look at that area to see what makes it different than the rest.
Источник
ReShade — это бесплатный набор фильтров, которые можно навесить на любую игру. Фильтры там не абы какие, а на все случаи жизни: усиление резкости, сглаживание пиксельных «лесенок», цветокоррекция и многое другое. Но обо всём по порядку.
Многие эффекты в играх создаются с помощью шейдеров. Это такие мини-программки, которые оперируют с игровыми объектами, добавляя туман, отражения, капли воды и множество других красивостей.
В разных играх встречаются разные шейдеры. В старых вообще шейдеров почти нет. ReShade призван исправить эту несправедливость.
По сути Решейд — это набор из программных библиотек (ReShade32.dll, ReShade64.dll и д.р.), которые, будучи помещёнными в каталог с игрой, позволяют запускать в игре сторонние шейдеры. В комплекте уже есть набор из более чем полусотни, в интернете можно найти ещё. Можно подключить и шейдеры от SweetFX — более старого проекта с аналогичным функционалом (полная совместимость не гарантируется). ReShade, в отличии от оного, позволяет непосредственно в игре отрегулировать параметры шейдеров.
Совместимость ReShade с играми
Поддерживаются вышедшие между 2004 годом и нашими днями игры, но не все, а использующие DirectX версий 9, 10 и 11, а также OpenGL. Игры на DirectX 8, вышедшие где-то между 2000 и 2003 годами, можно перевести на рельсы девятого DX подкидыванием в каталог игры библиотеки d3d8to9, но это не всегда срабатывает.
Самую новую DirectX 12 фильтры Решейда пока не поддерживают, там слишком много изменилось по сравнению с 11-й. Что это за технология такая и чем отличаются версии, я рассказал в статье «DirectX – что это такое, как оно работает, где скачать», но сейчас это не важно — если заработает, то заработает.
Влияние на производительность
[ig_notice style=»notice»]Разные шейдеры по-разному влияют на частоту кадров (FPS) игры. Более того, в зависимости от настроек определённого фильтра FPS может упасть сильно или незначительно.[/ig_notice]
В настройках Решейда можно включить параметр «Show FPS» и отслеживать в реальном времени частоту кадров, счётчики будут в правом верхнем углу экрана.
Индикатора два: собственно частота кадров (верхнее) и пересчёт в миллисекундах (одна мс = 1/100 сек). При частоте кадров в 60 FPS на отрисовку одного кадра тратится 16 мс. То есть после того, как вы дёрнули мышкой, игре потребуется 0,016 секунды на то, чтобы показать это на экране. Чем выше кадровая частота, тем плавнее движения в игре и тем резвее игра откликается на ваши действия мышью и нажатия клавиш клавиатуры.
Баны за ReShade в онлайн-играх
В мире живёт много людей с ограниченными возможностями, в частности по зрению. ReShade может усилить резкость и яркость картинки, изменить пропорции, сдвинуть цветовой спектр — всё, чтобы такие игроки получили возможность наслаждаться играми.
Увы, чтобы навесить фильтры, ReShade вмешивается в программный код запущенных игр (иначе никак). Это легко распознаётся античитами. Слишком часто у нечестных товарищей с нормальным зрением возникает идея использовать ReShade и другие софтины для получения преимущества, поэтому разработчики игр делают всё возможное, чтобы читеры не мешали игрокам.
Так что, пожалуйста, не подключайте Решейд к онлайн-играм вроде PUBG (Playerunknown’s Battlegrounds), Counter-Strike: Global Offensive, World of Warcraft, Dota 2, Call of Duty, Battlefield, Battlefront и другим. Я вас предупредил.
В синглах использовать Решейд вроде бы можно. Я давно играю в Skyrim через Steam с улучшенной графикой и меня не забанили. Никаких гарантий дать не могу, всё на ваш страх и риск.
Где скачать ReShade
Конечно же, ReShade лучше всего скачивать из проверенного источника: официального сайта. Где-то в середине страницы будет кнопка Download.
Программа работает на Windows 7 SP1, 8, 8.1 и 10. Также требуется последняя версия компонентов DirectX, обновление нужно скачать с сайта Microsoft.
Как установить ReShade в игру
1. Запустите загруженный с официального сайта инсталлятор ReShade.
2. Нажмите «Select game».
3. Откроется окно для указания исполняемого файла игры.
[ig_toggle label=»Вероятные места нахождения каталога с игрой»]
Если у вас лицензионные игры из Steam:
C:Program filesSteamsteamappscommonимя_игры
C:Program files (x86)Steamsteamappscommonимя_игры
Если используете Origin (например, игры серий Battlefield, Dragon Age, Mass Effect, Assassin’s Creed):
C:Program FilesOrigin gamesимя_игры
C:Program Files (x86)Origin gamesимя_игры
Игры, честно купленные на сайте GOG.com, многие инди и прочие почти всегда находятся в каталогах C:Program Filesимя_игры и C:Program Files (x86)имя_игры.
Простой способ узнать папку, в которой хранится исполняемый файл: нажмите правой кнопкой по ярлыку игры на Рабочем столе и в открывшемся меню выбрать пункт «Расположение файла». Работает с играми не из Steam и Origin.
[/ig_toggle]
4. Текст на кнопке изменится на «Select rendering API». Нужно указать, какое графическое API использует игра. API — это программный интерфейс приложения, набор команд для взаимодействия с чем-либо, в данном случае с видеокартой и процессором. Часто инсталлятор делает выбор за вас, у меня с игрой Shadowrun Returns:
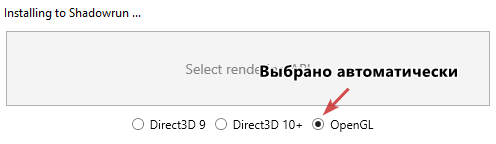
Иногда нужно выбрать самостоятельно. Если игра вышла после 2012 года, скорее всего это Direct3D 10+. Для более старых игр — Direct3D 9, а OpenGL используется чаще в инди-проектах, «маленьких» играх и старых вроде Quake 3, Jedi Outcast.
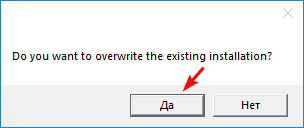
Если в игре Решейд не заработает, повторите все шаги по установке, выбрав другой режим. Инсталлятор спросит: «Записать поверх предыдущей остановки?». Ответьте «Да» и дальше как обычно.
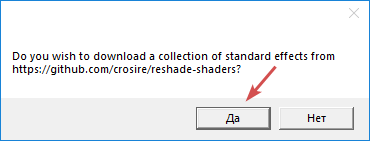
5. Появится запрос на скачивание коллекции эффектов из интернета. Ответьте «Да«.
6. Появится выбор эффектов. Ничего страшного не произойдёт, если загрузите все. Разве что инициализация эффектов при запуске игры займёт большее время.
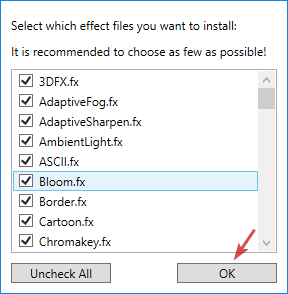
Нажимайте «OK» и ждите — в зависимости от скорости интернет-соединения загрузка может занять несколько минут.
7. Затем нажмите «Edit ReShade settings«, чтобы открыть параметры, влияющие на поведение ReShade.
Здесь рекомендую поставить галку на «Skip tutorial», чтобы при запуске игры не возникало лишних окон.
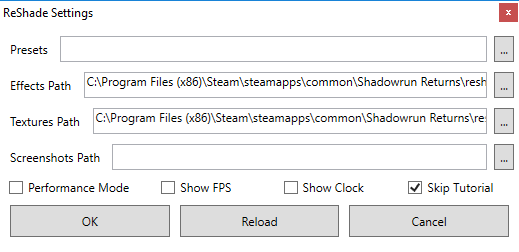
Подробнее о каждой настройке:
Presets — это указание готового набора настроек. Например, игроки создали множество вариантов настройки фильтров для Skyrim, GTA 5 и Witcher 3, их распространяют отдельно от ReShade. Пресеты можно выбрать потом из игры, если распаковать их в каталог с ней.
Effects Path и Textures Path нужны для нестандартных настроек фильтров. Лучше не трогать.
Screenshots Path — здесь можно указать каталог, в который будут сохраняться скриншоты (снимки экрана) игрового процесса при нажатии клавиши Print Screen. Это полезный бонус от ReShade, помогающий делать снимки в играх, где сторонними программами это сделать невозможно (бывают и такие).
Perfomance Mode — включение быстрого режима работы фильтров. Возможность редактирования свойств эффектов отключается, при запуске игры будут подгружаться только те фильтры, которые вы включили в пресете. Частота кадров в секунду чуть-чуть повысится. Эту настройку можно включить из окна Решейда в игре после того, как настроите фильтры.
Show FPS — показ частоты кадров в углу экрана и времени на отрисовку кадра. Полезно для объективной оценки влияния фильтров и их параметров на плавность игрового процесса.
Show Clock — показ текущего времени (зачем, не знаю).
Skip Tutorial — пропуск назойливых пошаговых подсказок, появляющихся при первом запуске окна ReShade в игре.
[ig_notice style=»notice»]Все настройки можно включить и в самой игре. Рекомендую поставить галку только на Skip Tutorial и, если вы не можете «на глаз» измерить производительность, Show FPS.[/ig_notice]
Нажатие «OK» закроет окно настроек, можно закрывать окно установки и запускать игру.
Как настроить графику с помощью ReShade
Если вы верно указали графическое API, в верхней части экрана игры при её запуске появится информация о загрузке фильтров:

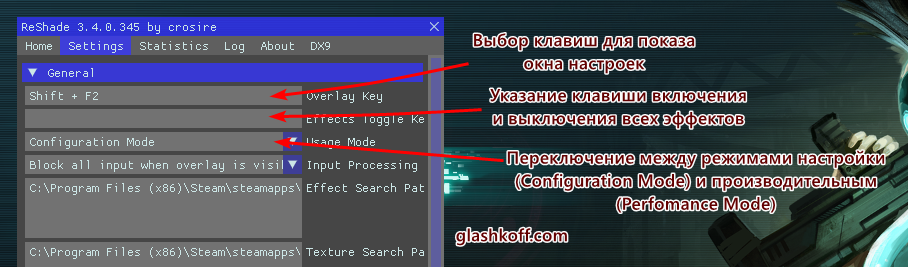
Спустя некоторое время, когда все настройки будут прочтены, он сменится на подсказку нажать Shift+F2.

Нажимайте это сочетание, слева вверху экрана откроется окно настроек, внутри будут несколько вкладок: Home, Settings, Statistics и другие.
Вкладка Home
На вкладке Home находится выбор предустановок, список доступных фильтров и возможность их тонкой настройки. При желании можно назначить переключение фильтров по нажатию клавиши.

О том, какие фильтры бывают, я расскажу ниже. Для их настройки нужно ставить галки в списке, щёлкать по названию фильтра и тонко подстраивать каждый из них, регулируя параметры в нижней части окна.
Многие параметры представлены в виде десятичной дроби вида 0.010. В качестве разделителя используется только точка, не пишите там запятую.
[ig_notice style=»notice»]У большинства свойств есть описание на английском языке. Для просмотра наведите курсор на значение параметра.[/ig_notice]
Результат изменений обычно виден сразу. В очень редких случаях приходится нажимать кнопку Reload. Например, когда будете изменять приоритет слоёв-фильтров.
Чтобы сохранить настройки фильтров, создайте пресет: нажмите «+», введите произвольное название и нажмите Enter.

После этого все изменения будут сохраняться автоматически в выбранный пресет.
Вкладка Settings
Здесь часть настроек совпадает с настройками в инсталляторе. Самые важные в верхней части окна.
Другие вкладки
В Statistics можно наблюдать график изменения частоты кадров, видеть разрешения в пикселях слоев с фильтрами и другую служебную информацию, позволяющую оценить влияние на скорость частоты кадров.
Также служебная информация о выполнении функций отображается во вкладке Log. About показывает информацию о том, где можно скачать исходники ReShade, лицензиях используемых компонентов. Последняя вкладка нужна для изменения поведения выбранного графического API, не трогайте там ничего, если шейдеры работают.
Как работают шейдеры ReShade
Для изменения графики ReShade создаёт каждому шейдеру отдельный слой. Их можно перемещать, хватая курсором мыши. Так как картинка игры на самом деле не плоская, а имеет глубину (так называемый Z- или W-буфер), в играх (не всех) можно сделать эффект размытия заднего плана или применить фильтр только к близким объектам.
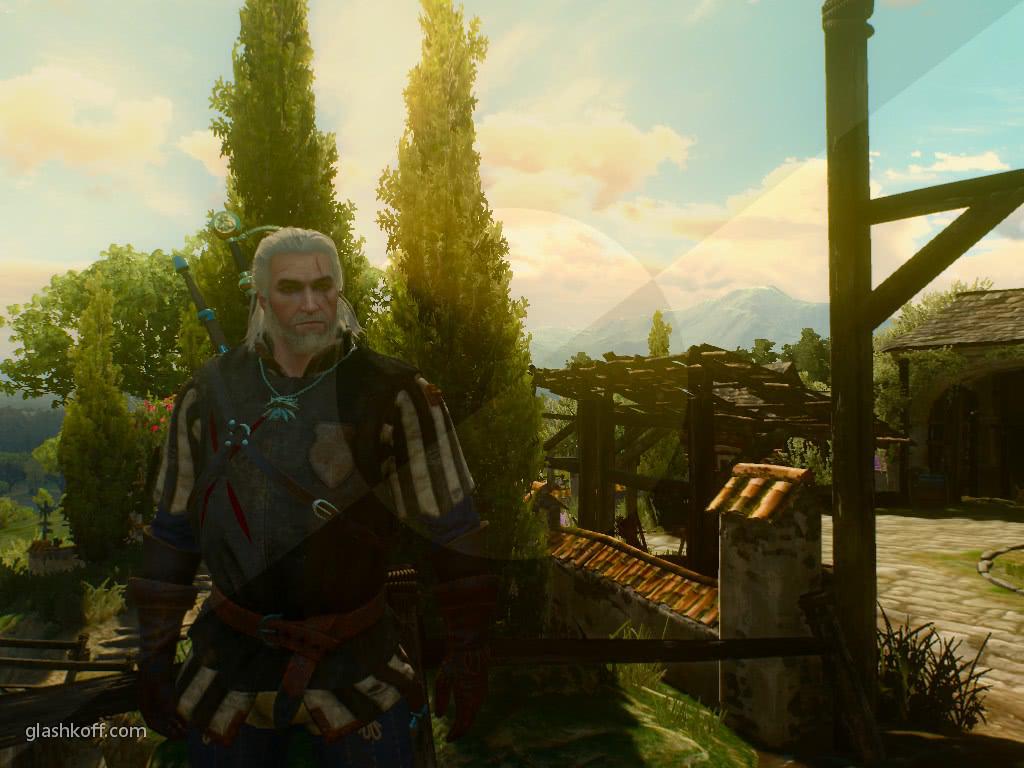
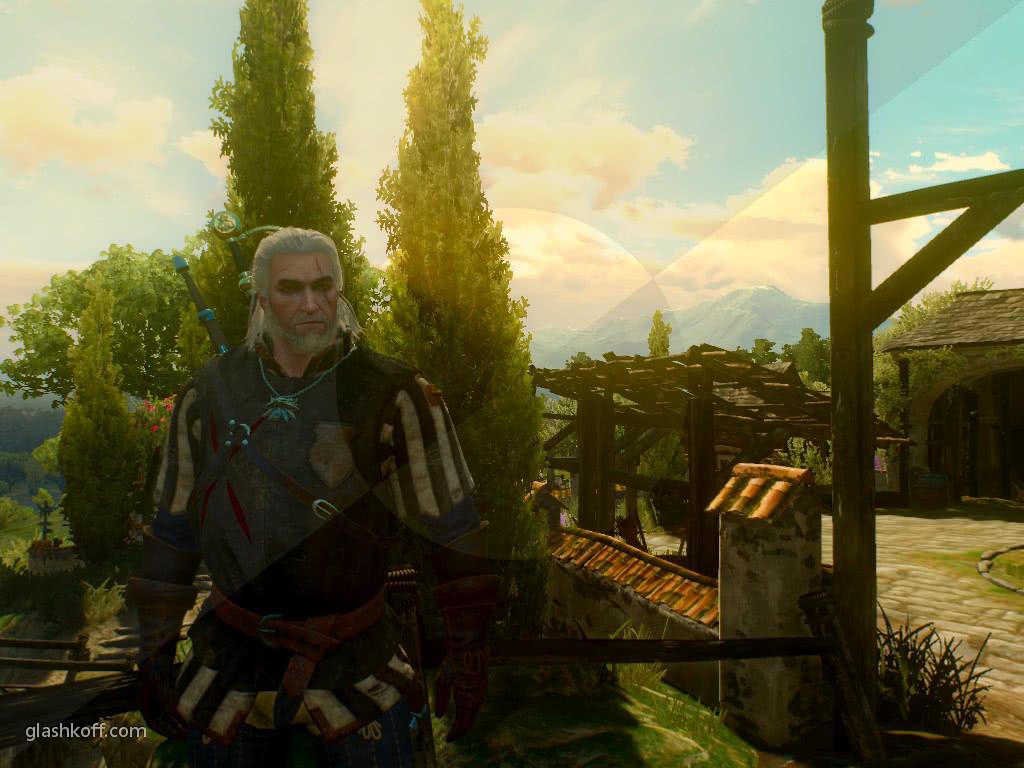
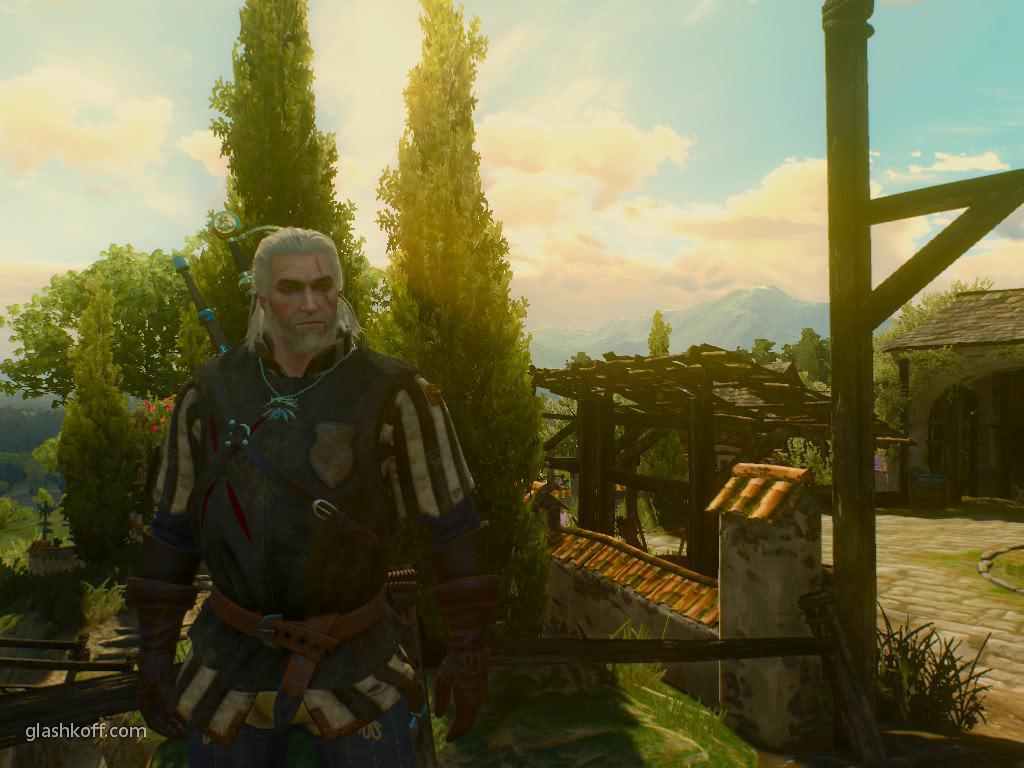
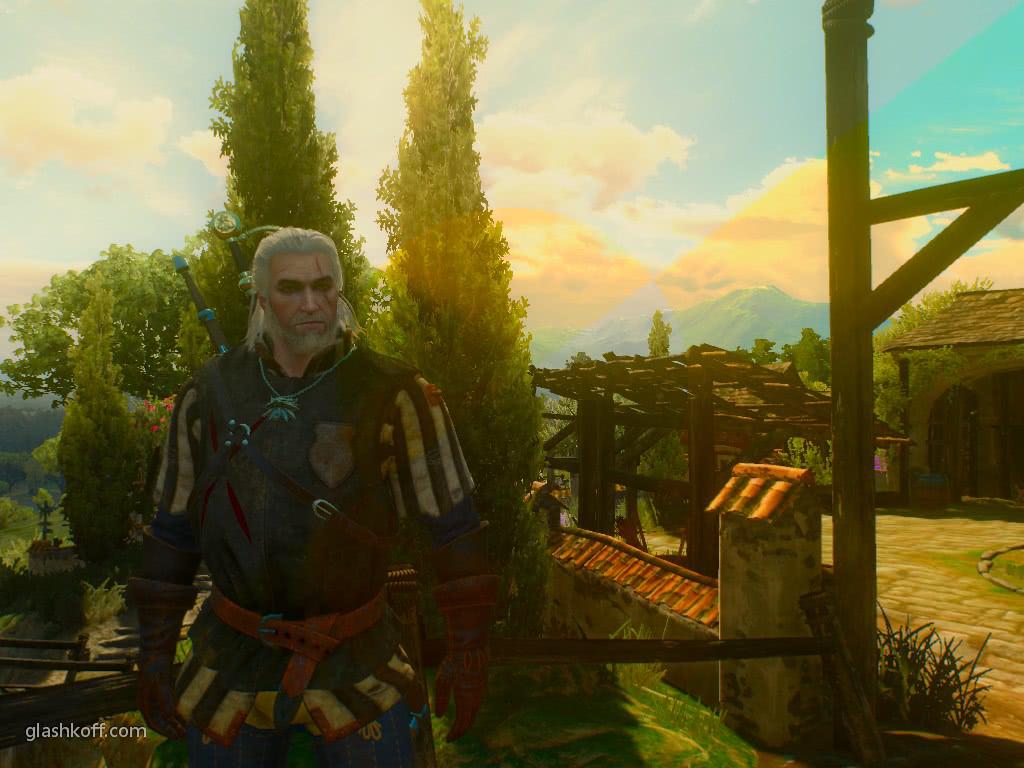
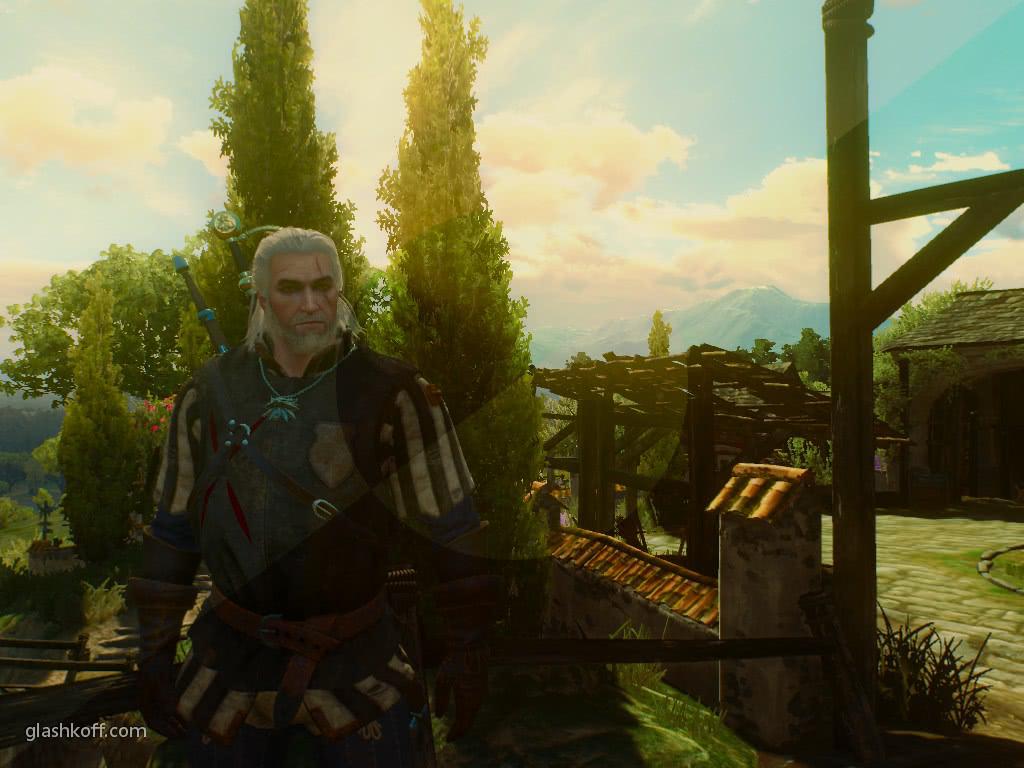
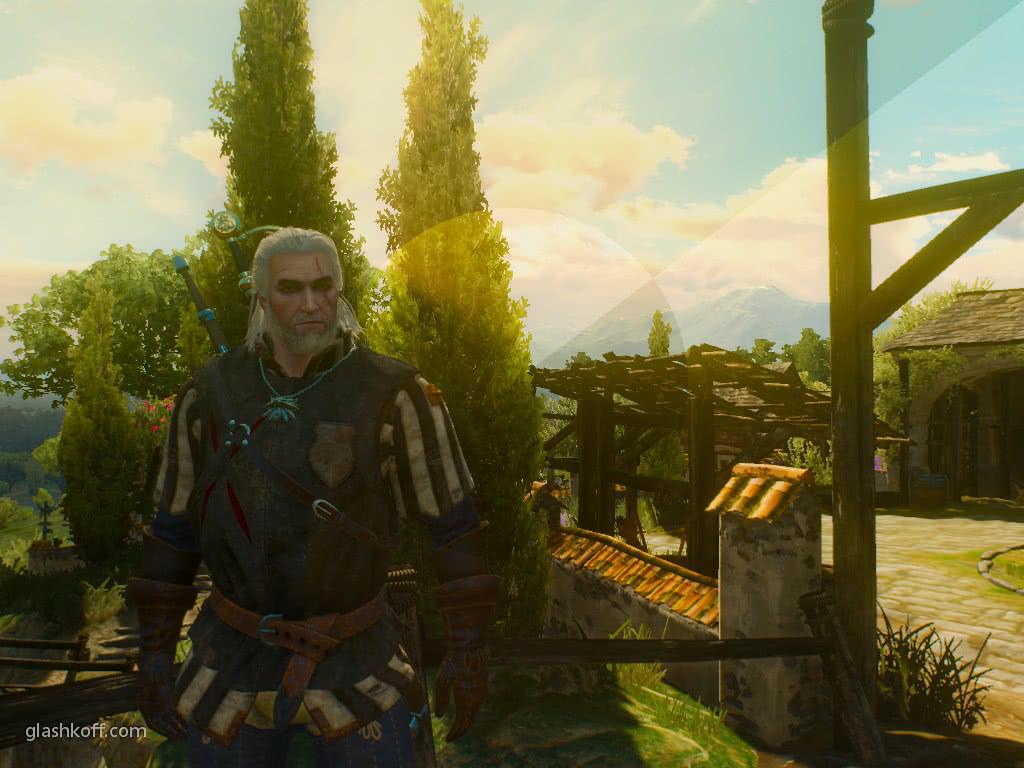
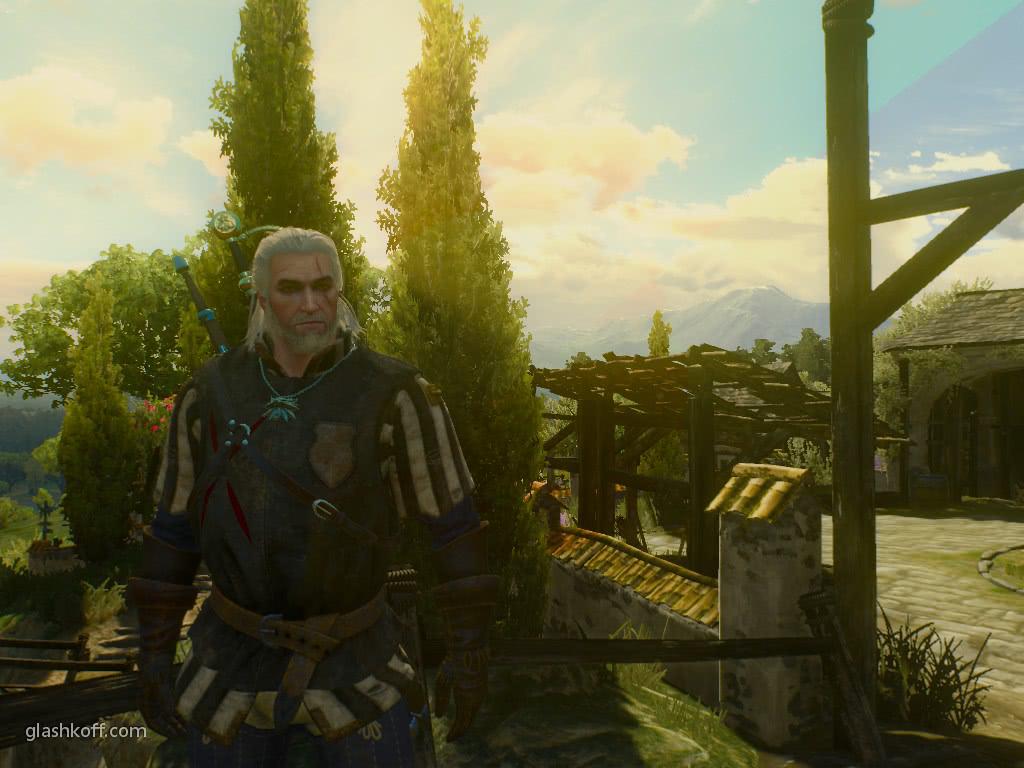
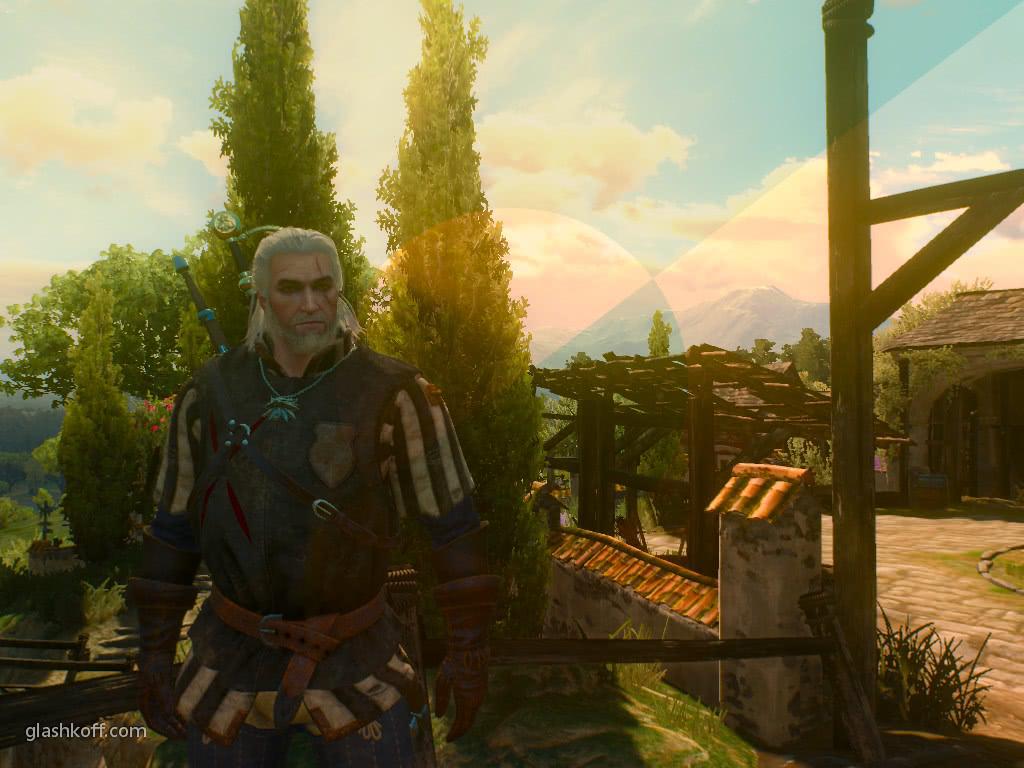
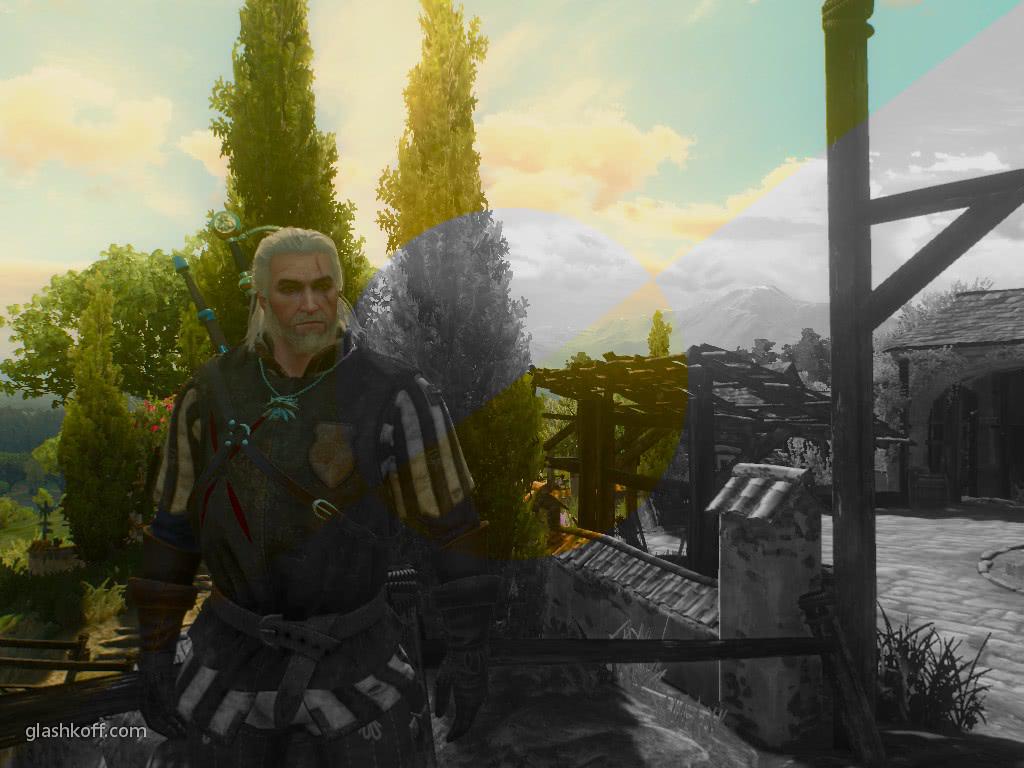
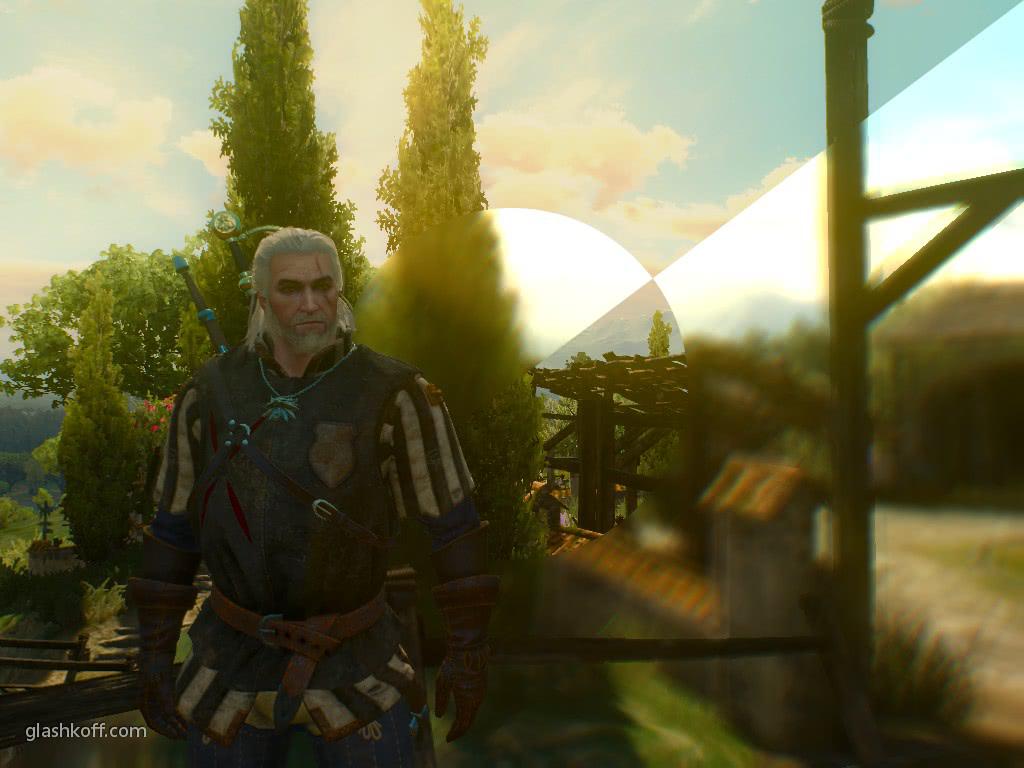
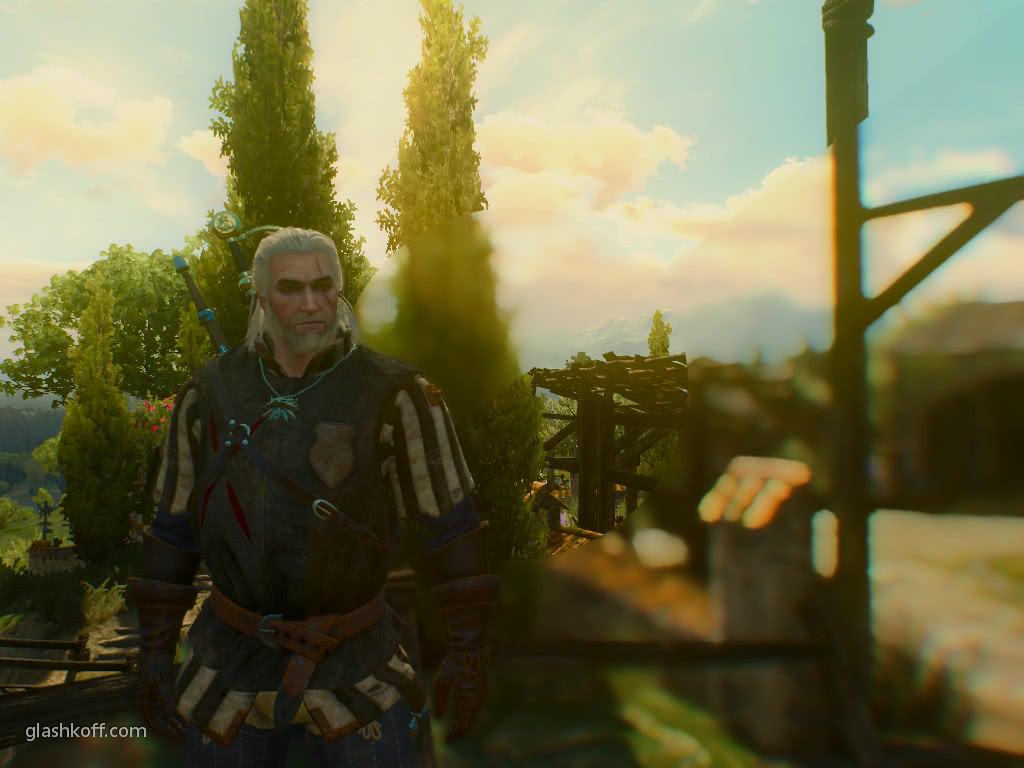
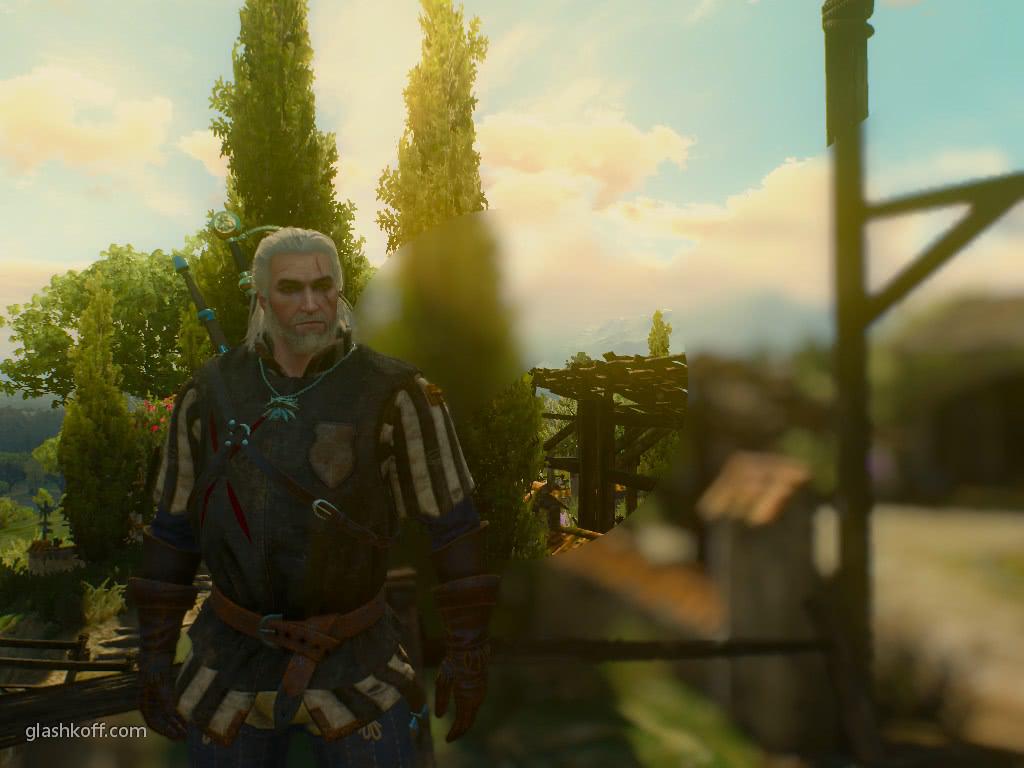
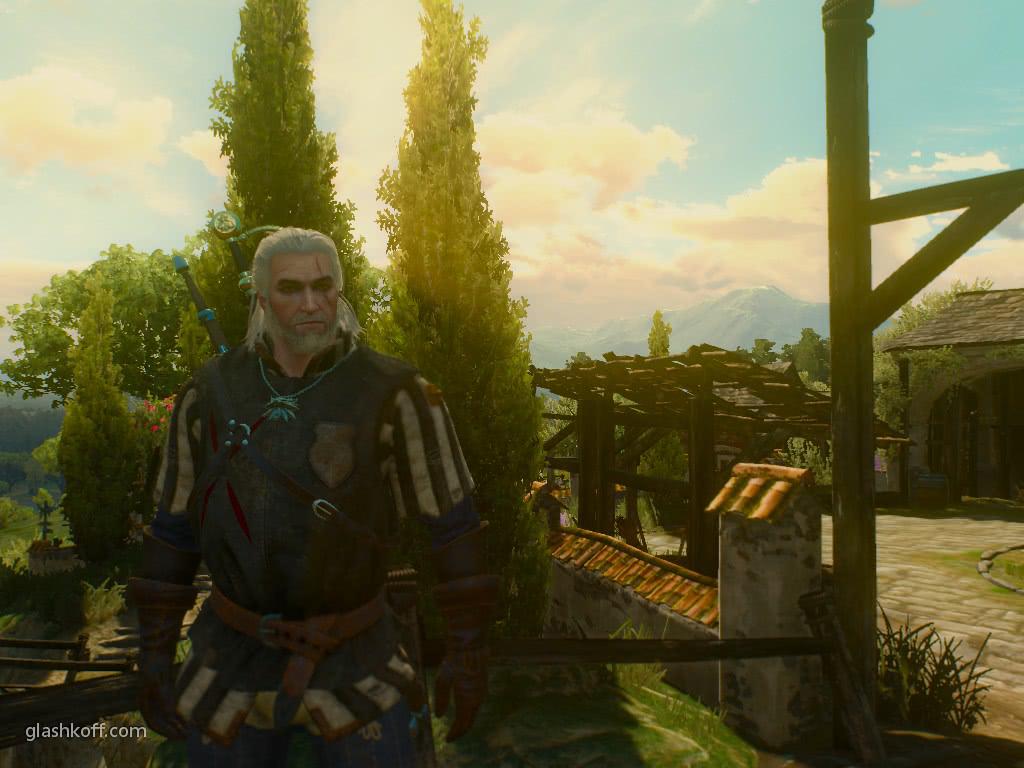
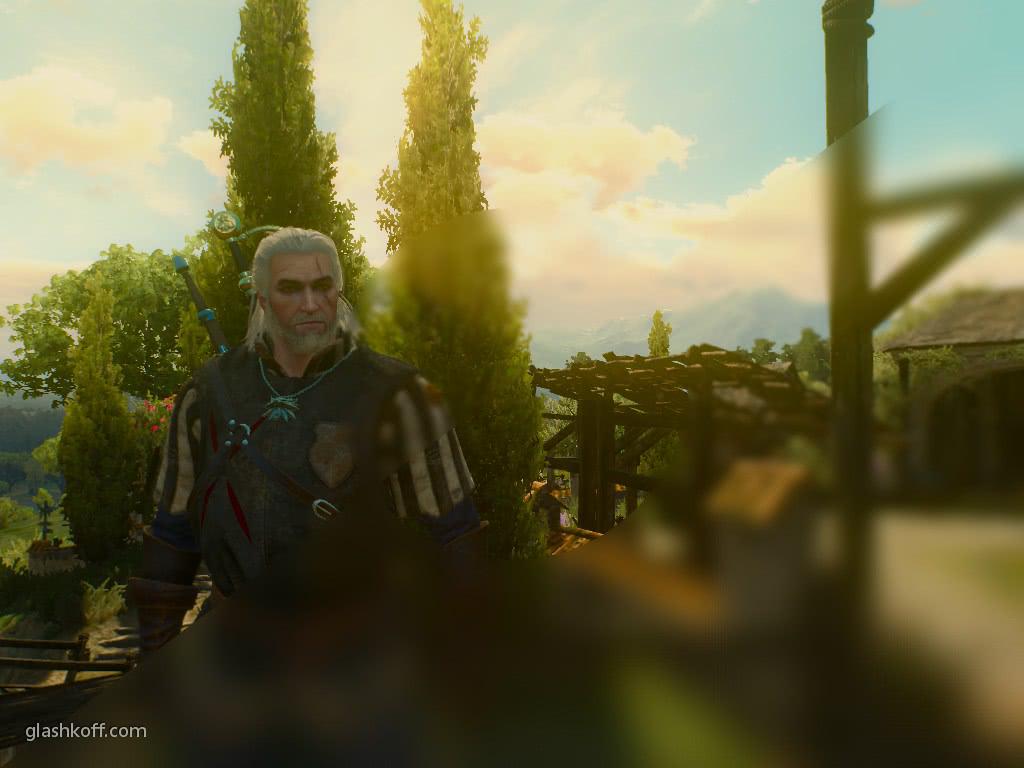
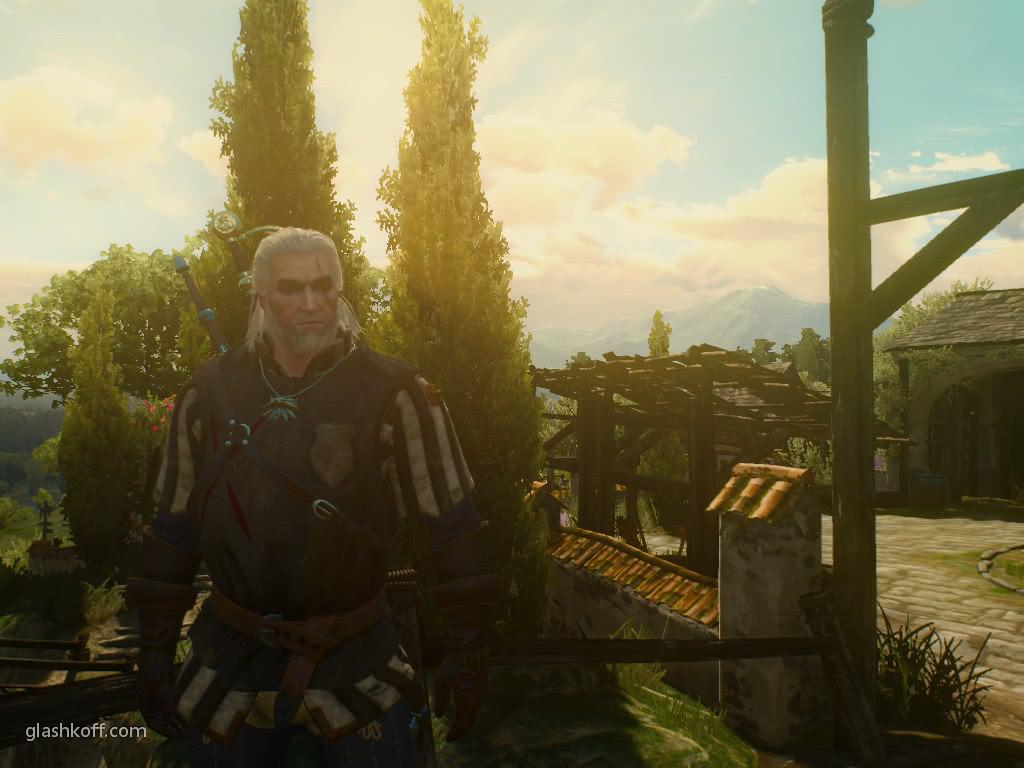
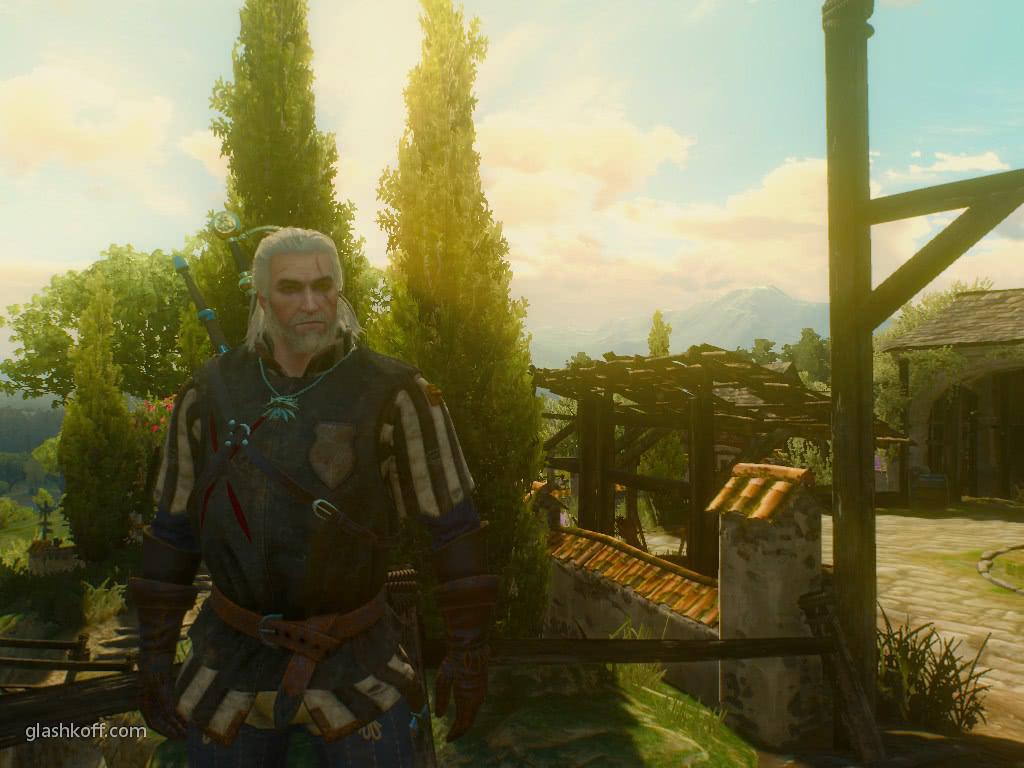
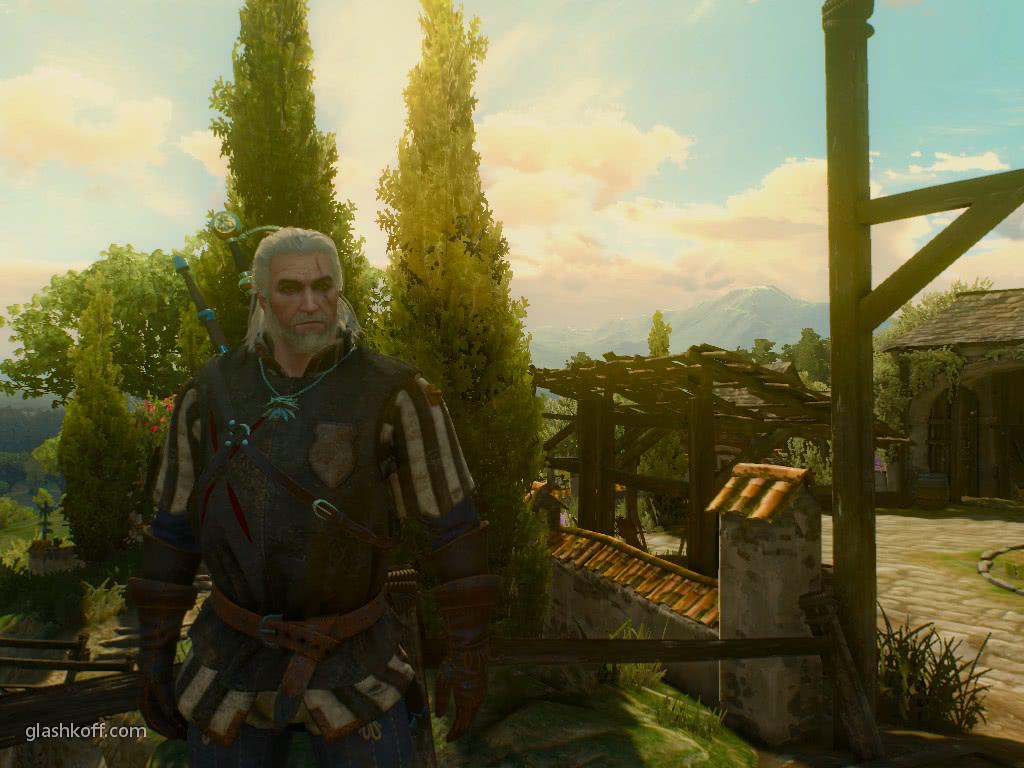
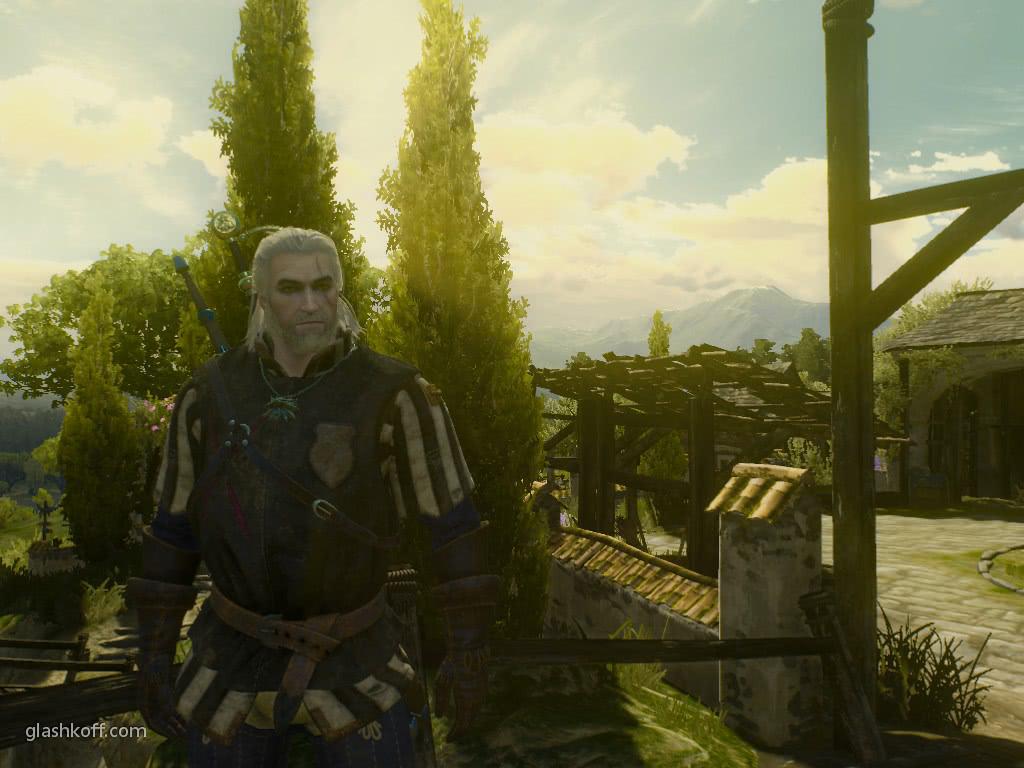
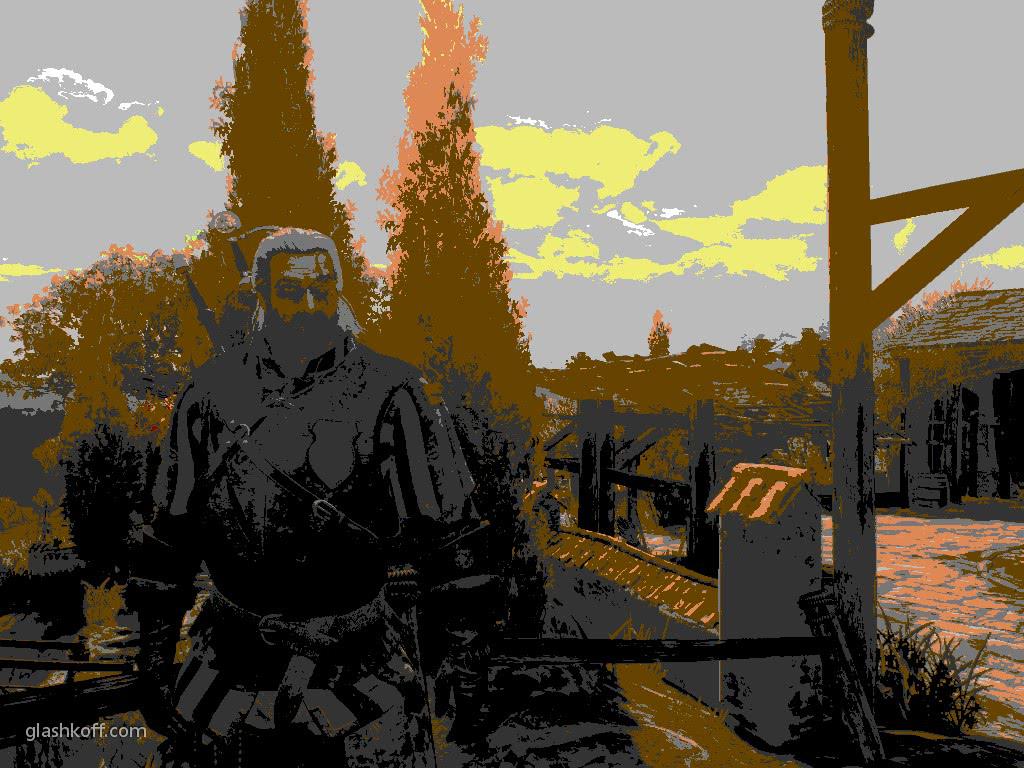
Так выглядит оригинальное изображение (здесь и далее — на примере Witcher 3):

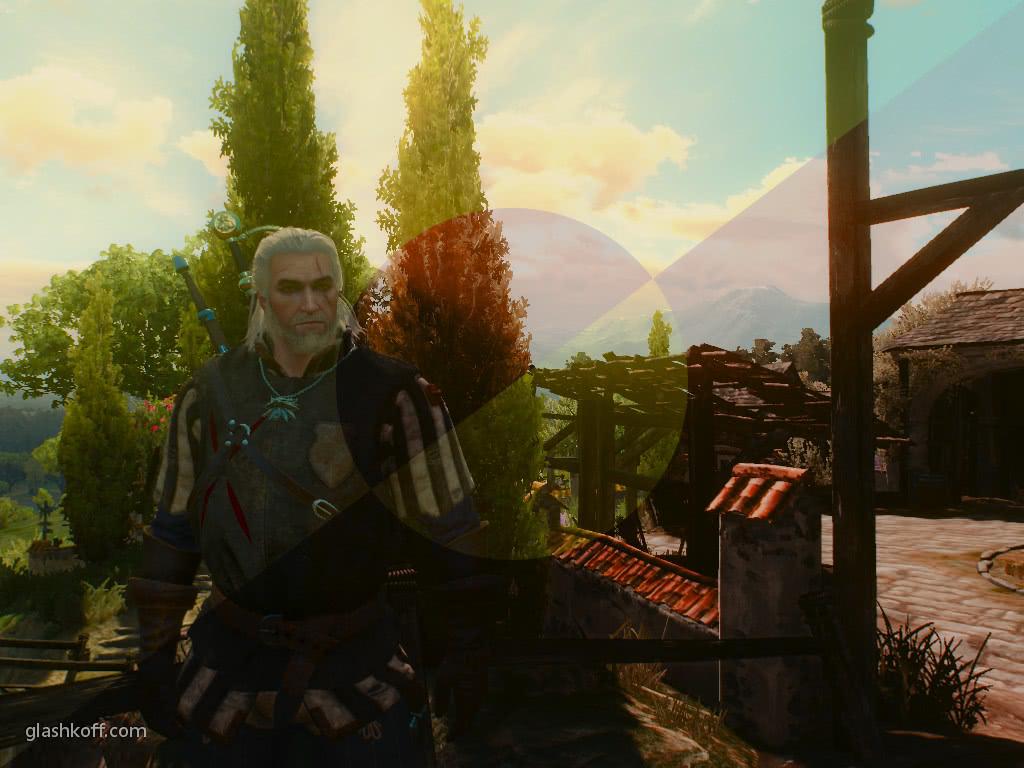
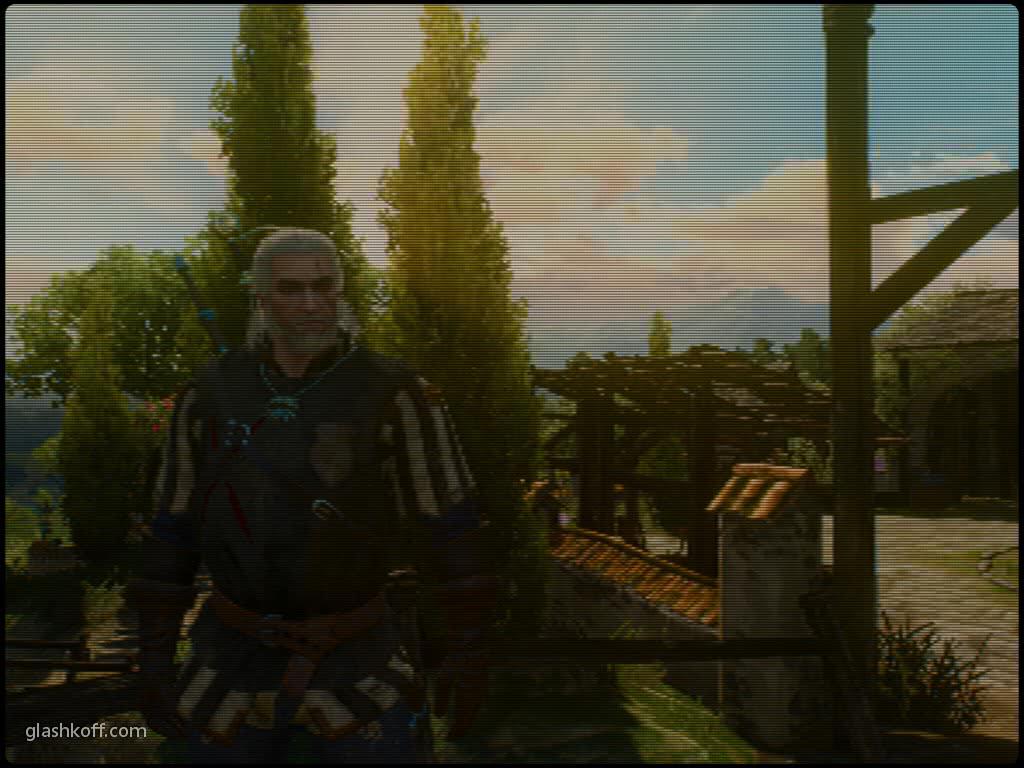
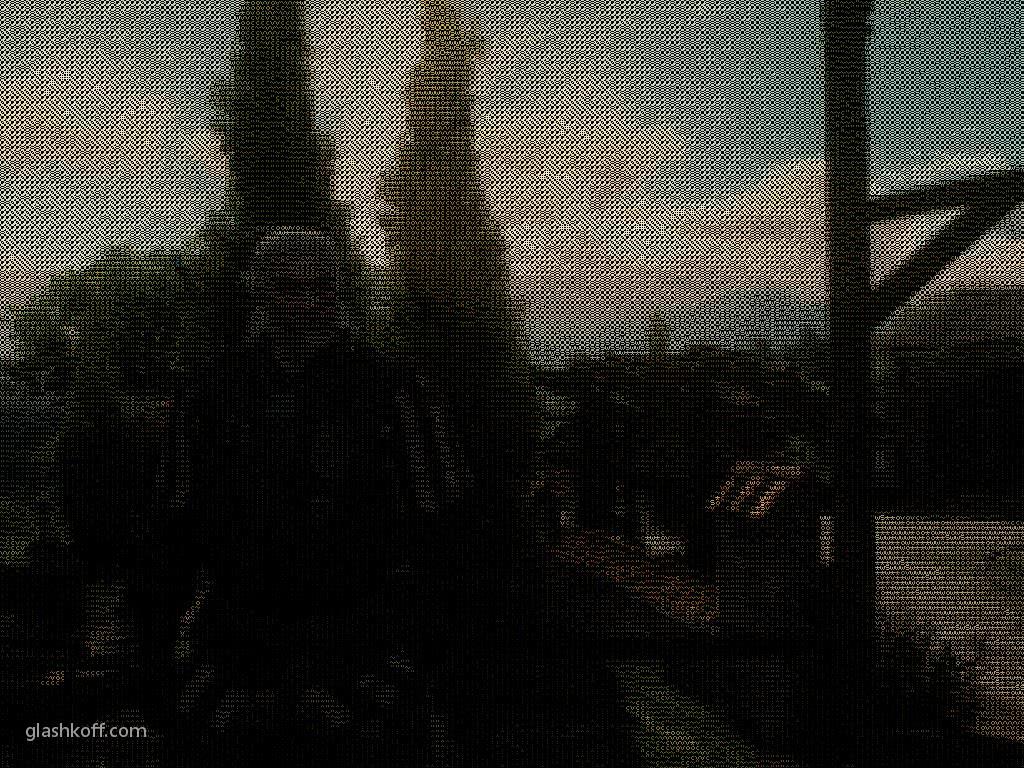
А вот результат работы фильтра DisplayDepth (DisplayDepth.fx), показывающего глубину картинки:
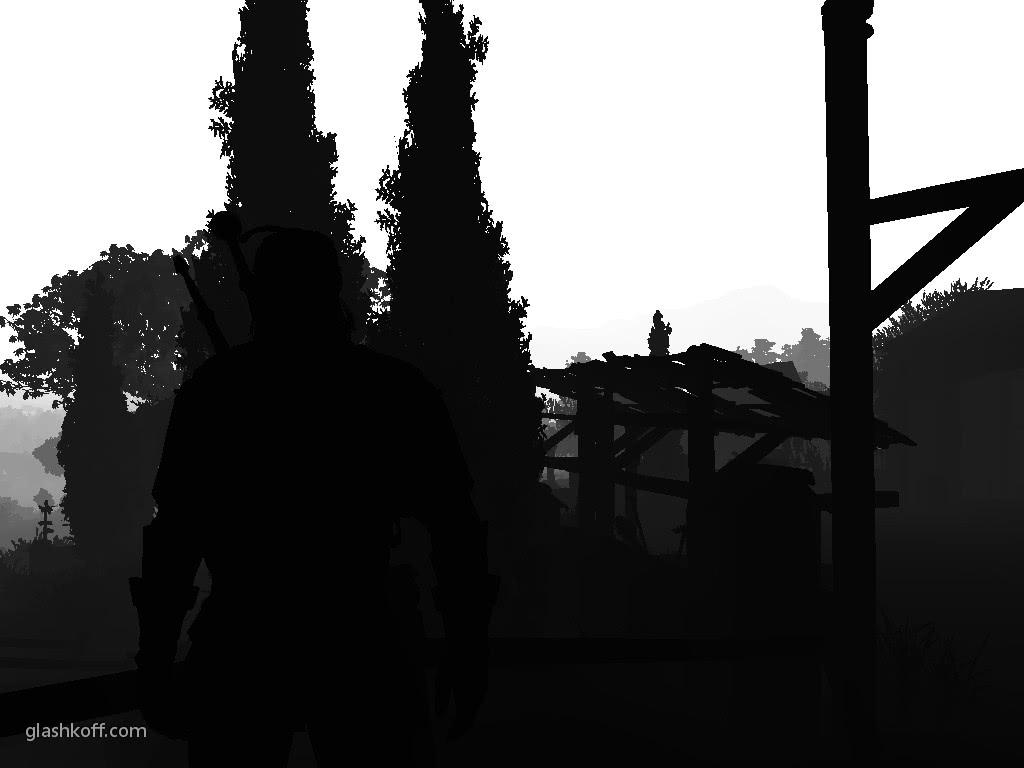
Чем светлее — тем дальше объекты. Наличие объёма очевидно. Значит, в третьем Ведьмаке будут корректно работать шейдеры размытия дальнего плана и тумана.
Интерфейс (UI) игры — счётчики жизни, патронов, маны и т.д. — увы, сложно отделить от игровых объектов. Чтобы на них не накладывались эффекты, в ReShade используются два вида шейдеров:
1. Шейдер-маска UIMask.fx, делающая «дырки» в эффектах на местах экранных элементов при условии, что они никуда не сдвигаются.
2. Детектор UIDetect.fx, определяющий наличие UI на экране и переключающий видимость эффектов в зависимости от его присутствия.
Оба шейдера требуют вдумчивой настройки, простого включения недостаточно. Справка к ним доступа внутри файлов шейдеров (ищите их в подкаталоге «reshade-shadersShaders» игры, достаточно открыть их Блокнотом. К сожалению, про них рассказать не могу, ибо тогда инструкция увеличится вдвое.
Яркость, контраст, цветокоррекция
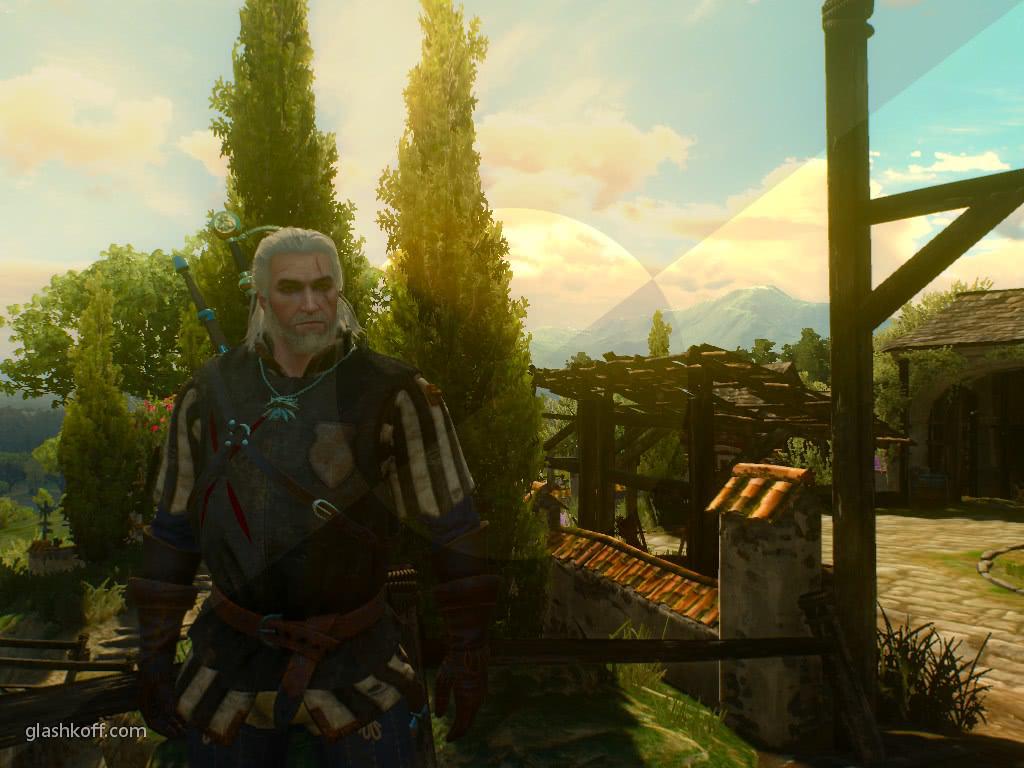
[ig_notice style=»notice»]На картинках — совмещённые скриншоты. Слева вверху и по центру справа — оригинал, справа внизу и по центру слева — результат работы эффекта.[/ig_notice]
Curves (Curves.fx) увеличивает контрастность изображения, при этом не трогая яркие и тёмные участки, чтобы не пропала детализация в тенях и небе.
Работающие в Photoshop или GIMP будут чувствовать себя как дома: фильтр использует кривую типа S. Следующий фильтр также аналогичен фотошоповскому «Уровни».
Levels (Levels.fx) — сдвигает точки белого и чёрного. Поможет добиться нормальной картинки в играх, где нет настоящего чёрного цвета (всё белесое, словно в тумане) или белый цвет слишком «серый».
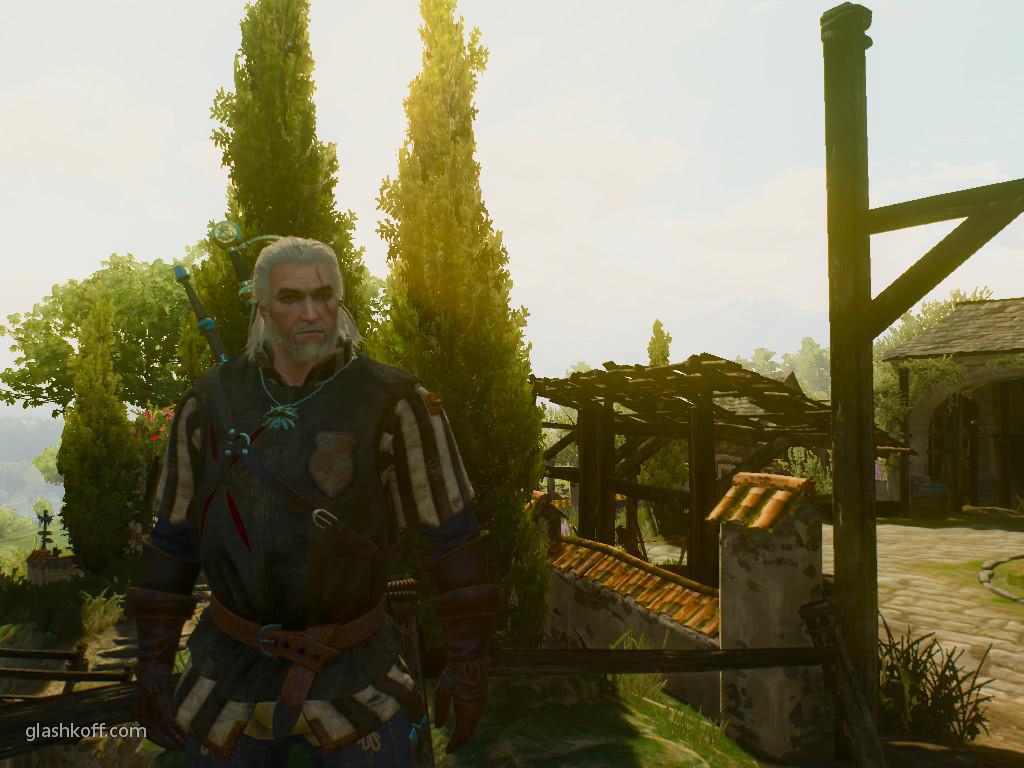
Без изменения настроек результаты Levels практически не видны.
Tonemap (Tonemap.fx) — регулировка яркости, цветности, гаммы. По умолчанию ничего не изменяет, смысла показывать скриншот нет.
LiftGammaGain (LiftGammaGain.fx) пригодится для коррекции гаммы по отдельным цветовым каналам: красному, зелёному и синему. Теоретически может исправить стилизацию некоторых игр под определённый цветовой оттенок.
Vibrance (Vibrance.fx) — один из моих любимых шейдеров. Он насыщает блеклые цвета, не трогая яркие. Настройки по умолчанию практически не заметны:
Чтобы понять, как он влияет на цвета, вот вам усиление в 10 раз:
Третьему Ведьмаку, в принципе, этот фильтр ReShade ни к чему, особенно в Туссенте, цвета и так сочные. Зато must have для Skyrim и The Witcher: Enhanced Edition, где всё серо и уныло.
Colorfullnes (Colorfullnes.fx) — альтернатива предыдущему шейдеру Vibrance.
LUT (LUT.fx) и MultiLUT (MultiLUT.fx) — обалденные шейдеры, если разобраться, как ими пользоваться.
«Луты» — это готовые наборы правил цветокоррекции для переноса отснятой камерой картинки на монтажный стол без потери цвета и сохранения деталей в тенях и светлых участках кадра. В контексте игровых шейдеров луты позволяют придать картинке «киношный» вид. Если вы умеете пользоваться Фотошопом или другим графическим редактором сложнее Паинта, инструкция со созданию собственного лута находится здесь. Можно сделать скриншоты игры, в графическом редакторе изменить гамму, яркость, цветовые оттенки так, как вам хочется, и перенести коррекцию в игру с помощью текстуры лута.
DPX (DPX.fx) — имитация пост-обработки кинокадра на оборудовании Cineon компании Kodak 25-летней давности. Кому-то нравится.
Technicolor (Technicolor.fx) — имитация системы цветной киносъёмки «Техниколор».

Technicolor2 (Technicolor2.fx) — альтернативная реализация предыдущего эффекта. Даёт иную картинку, агрессивнее меняя цвета.

FilmicPass (FilmicPass.fx) — ещё один вариант имитации киношной пост-обработки.
Не особо понимаю востребованность шейдеров придания кинематографичности, потому что он убивает естественность картинки. Когда-то пробовал GTA 5 Redux — всё в холодных оттенках, картинка скучная.
ColorMatrix (ColorMatrix.fx) — редактирование цветов с помощью цветовой матрицы. По сути меняет яркость цветовых каналов: красного, зеленого и синего.
Clarity (Clarity.fx) — фильтр «ясности». Судя по результату, способен избавить картинку от «туманности».
Tint (Sepia.fx) — наложение цветового оттенка. По умолчанию шейдер настроен на сепию.
Monochrome (Monochrome.fx) — изображение становится чёрно-белым.
Зачем он нужен — непонятно. Наверное, чтобы был.
Сглаживание, размытие, резкость
FXAA (FXAA.fx) — самый примитивный и самый быстрый из фильтров антиалиасинга (сглаживания пикселей), имеющийся в ReShade. Убирает пиксельную «лесенку», возникающую на границах объектов. В моих примерах эту лесенку можно заметить на слегка наклонённом столбе справа.

К сожалению, FXAA размывает всю картинку, поэтому буквы тоже станут размытыми.
SMAA (SMAA.fx) — продвинутая реализация сглаживания и более тяжёлая в плане производительности. Шейдер пытается выделить объекты в кадре и размыть их границы, не стирая мелкие детали кадра.

Из-за работы алгоритма антиалиасинга буквы, являясь контрастными объектами, своеобразно меняются, чуть округляясь, но не расплываясь, их читаемость не ухудшается.
HQ4X (HQ4X.fx) — сглаживание близлежащих пикселей с дорисовкой недостающих частей. В обычных играх картинка размывается. Алгоритм HQ4X пригодится для сглаживания объектов в пиксельных играх, там результат будет приятным глазу.
GaussianBlur (GaussianBlur.fx) — просто размытие.

SurfaceBlur (SurfaceBlur.fx) — снижение детализации объектов без размытия контрастных контуров. По умолчанию результат не заметен, для скриншота усилил эффект в 10 раз.

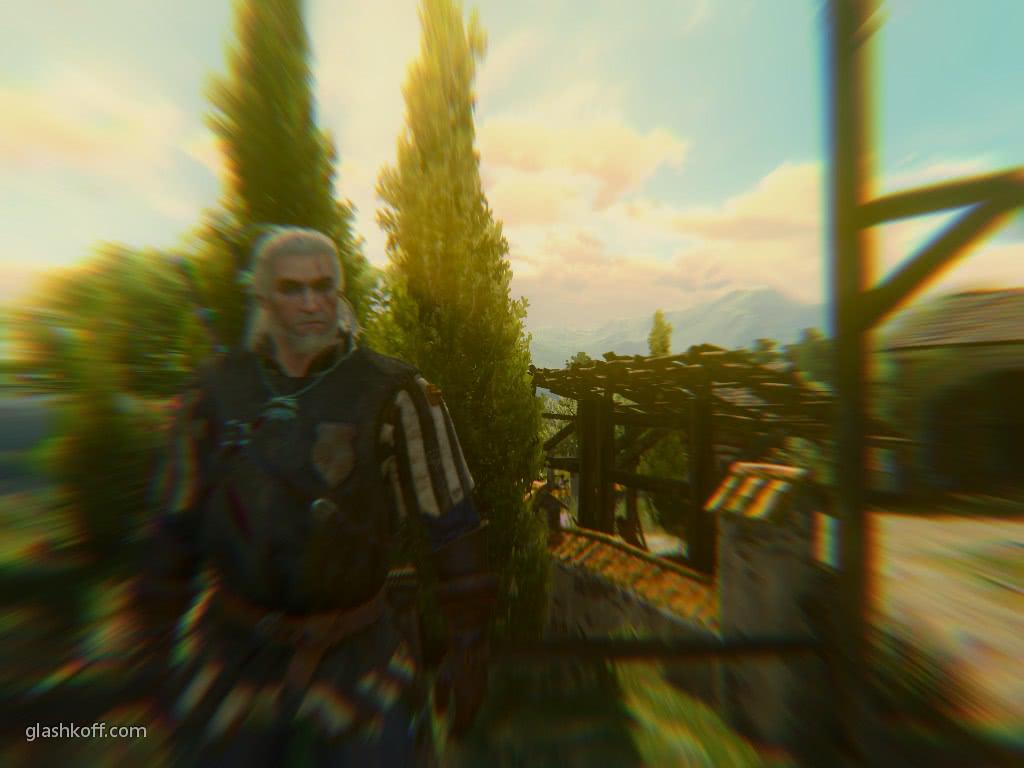
RingDOF (DOF.fx) — потеря резкости у дальних объектов с эффектом хроматической аберрации (смотрите на столб, там появились цветные полосы).
Этот и другие DOF (Depth of field) шейдеры сильно снижают частоту кадров и требуют настройки, потому что точка фокуса не всегда сходится на персонаже.

MagicDOF (DOF.fx) не имеет цветовых искажений.
GP65CJ042DOF (DOF.fx) размывает с осветлением.
MatsoDOF (DOF.fx) имитирует, как мне кажется, камеру с восьмиугольной диафрагмой. Сильно снижает кадровую частоту.
MartyMcFlyDOF (DOF.fx) — очередной эффект размытия. На мой взгляд, даёт неестественный глазу результат.
LightDof_AutoFocus (LightDoF.fx) — максимально облегчённый на функции шейдер расфокусировки, не сильно снижающий производительность по сравнению с аналогами. С третьим Ведьмаком у меня не заработал. Наверное, нужно искать правильную точку фокусировки.
LightDoF_Far (LightDoF.fx) — из серии «лёгких» шейдеров расфокусировки. Размывает дальние объекты.

LightDoF_Near (LightDoF.fx) — размытие близких объектов. На скриншоте ниже это почти не заметно, эффект заметен на руках протагониста в играх от первого лица.
DepthHaze (DepthHaze.fx) — размывает и слегка осветляет дальние, очень дальние, планы.
MotionBlur (FakeMotionBlur.fx) — размытие в движении. Работает так себе, играть становится некомфортно.
TiltShift (TiltShift.fx) — размытие по краям экрана для создания эффекта миниатюры.
LumaSharpen (LumaSharpen.fx) — фильтр усиления резкости изображения. На мой взгляд, работает лучше альтернатив. Настройки по умолчанию почти не влияют на картинку, для скриншота усилил в 10 раз.

AdaptiveSharpen (AdaptiveSharpen.fx), HighPassSharp (HighPassSharpen.fx), Mode1 (FineSharp.fx), Mode2 (FineSharp.fx), Mode3 (FineSharp.fx) и FilmicAnamorphSharpen (FilmicAnamorphSharpen.fx) — тоже усиление резкости. Так как результаты сильно отличаются от шейдера к шейдеру и от игры к игре, делать скриншоты не вижу смысла.
Кстати, шейдеры резкости пригодятся игре Sims 4, ReShade там пригодится для компенсации работы фильтра сглаживания или ему на замену, слишком уж некачественное сглаживание в игре реализовано по умолчанию (как и в прошлых играх серии).
Художественные эффекты
Сюда я отнёс шейдеры, значительно меняющие картинку, придающую им определённую стилистику, меняющие имеющийся в игре стиль.
KNearestNeighbors (Denoise.fx) и NonLocalMeans (Denoise.fx) убирают точечный шум. По возможности отключайте шум в самой игре, потому что шейдер подавления шума ощутимо снижает частоту кадров.
Vignette (Vignette.fx) добавляет виньетирование, снижая яркость кадра по краям.

AdaptiveFog (AdaptiveFog.fx) добавляет в игры туман, всегда виднеющийся вдали.
BloomAndLensFlares (Bloom.fx) — размытие ярких участков кадра (обычно это источники света, но не всегда) и добавление бликов на виртуальной линзе игровой камеры. Для наглядности я усилил параметр fBloomAmount.
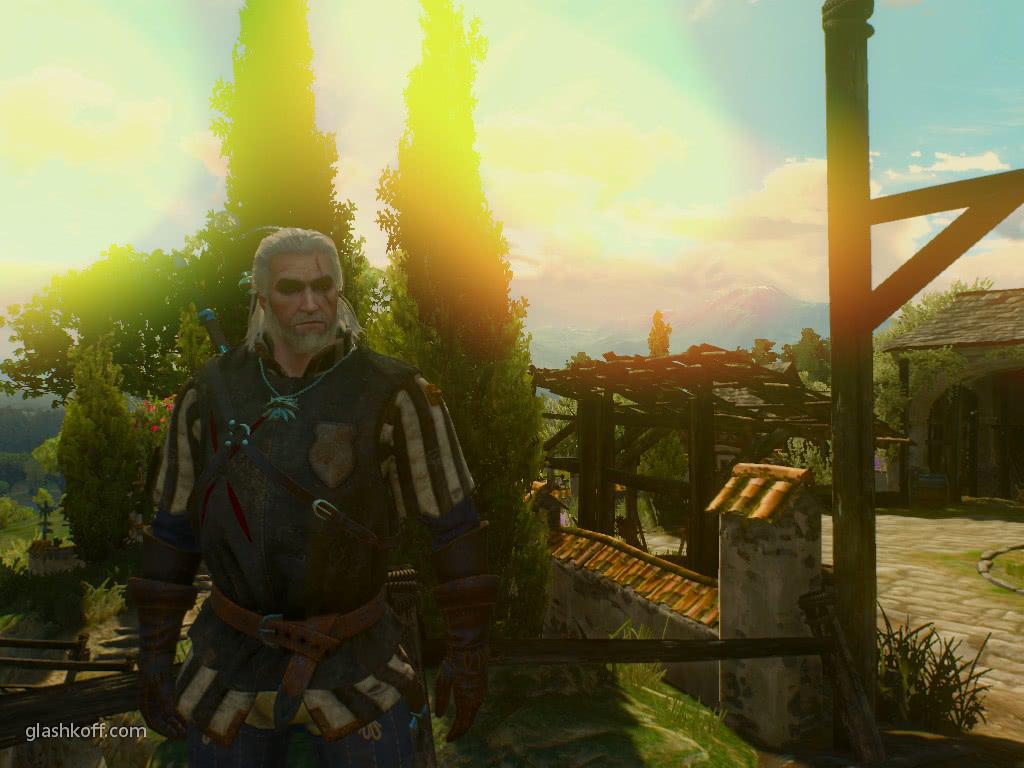
ChromaticAberration (Prism.fx) — хроматические аберрации, имитация физического эффекта прохода света через призму внутри камеры. Для наглядности усилил эффект в 10 раз.
CA (ChromaticAbberation.fx) — эффект цветовых искажений аналогично предыдущему, но, на мой взгляд, менее реалистичный.

AmbientLight (AmbientLight.fx) — похожий на BloomAndLensFlares эффект, мягко размывающий яркие участки кадра.
MagicBloom (MagicBloom.fx) — ещё один способ размытия ярких участков экрана.
HDR (FakeHDR.fx) — фильтр псевдо-HDR эффекта, который по идее должен восстанавливать детализацию в слишком тёмных и ярких участках кадра. На практике затемняет изображение и только.
EyeAdaption (EyeAdaption.fx) — шейдер для создания эффекта адаптации глаз к свету.
FilmGrain (FilmGrain.fx) и FilmGrain2 (FilmGrain2.fx) — эффекты зернистости плёнки. Многие авторы пресетов ReShade для GTA 5 и других игр включают что-то из них, так как это добавляет «кинематографичности».

MXAO (MXAO.fx) — включение эффекта самозатенения объектов. Всё становится объёмнее, а FPS падает вдвое.
К сожалению, MXAO работает не так хорошо, как SSAO и аналогичные технологии самозатенения. Всё же улучшить графику в старых играх шейдер может, нужно экспериментировать с настройками.
ReflectiveBumpmapping (ReflectiveBumpMapping.fx) — добавляет отражения объектам в кадре.

После тщательной настройки ReflectiveBumpmapping может улучшить картинку в старых играх без поддержки отражений, но в современных бесполезен.
Deband (Deband.fx) убирает цветовую лесенку у градиентов. Те, кто играл в 16-битном цветовом режиме, помнят, что это за напасть такая. Да и в современных играх артефакт нет-нет да встречается.
Emphasize (Emphasize.fx) — выделение цветом ближайших объектов. Как DOF, только вместо размытия — выцветание.
Chromakey (Chromakey.fx) — установка синего экрана на отдалении от камеры.
Border (Border.fx) — добавление полос у краёв экрана. Некоторые авторы шейдерных паков используют Border.fx для создания «кинематографичной» картинки. На мой взгляд чёрные полосы сверху и снизу экрана только мешают.
Cartoon (Cartoon.fx) пытается превратить картинку в рисунок. Не так успешно, как используемый в играх серии Borderlands шейдер, но кому-то нравится.
Daltonize (Daltonize.fx) убирает некоторые цвета.
PerfectPerspective (PerfectPerspective.fx) — шейдер наклоняет изображение и меняет FOV (точку обзора) картинки. Теоретически может пригодиться обладателям очков виртуальной реальности для компенсации искажений линз. Сам не проверял, подходящего устройства нет.
AdvancedCRT (CRT.fx) — для имитации монитора с электронно-лучевой трубкой. Комбинация с шейдером PerfectPerspective вышибет ностальгическую слезу.
LeiFx_Tech (3DFX.fx) — якобы имитация рендеринга на легендарных видеокартах 3dfx. Что-то не припоминаю подобного эффекта.
EGAfilter (EGAFilter.fx) — для тех, кто скучает по видеокартам стандартов EGA и TGA, в ReShade есть фильтр уменьшения количества экранных цветов до 16-ти.
Nostalgia (Nostalgia.fx) — ещё один шейдер для создания 4-битного кадра.
ASCII (ASCII.fx) — для скучающих по текстовым играм и фанатам Матрицы. Хотя по мне в Dwarf Fortress или Ultima поиграть, чем использовать такой шейдер в играх, для этого не предназначенных.
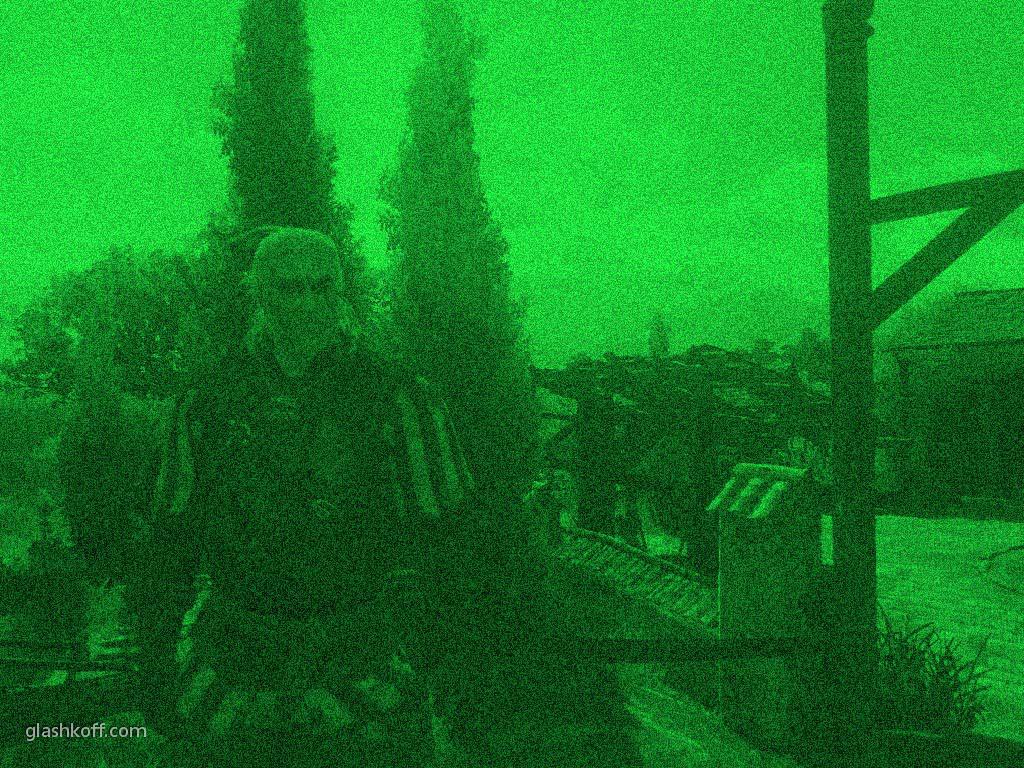
Nightvision (NightVision.fx) — для ностальгирующих по… прибору ночного зрения?
GlitchB (Glitch.fx) — для имитации сбоящей видеокарты и вызывания тошноты. Людям с эпилепсией этот фильтр включать нельзя!
Как удалить ReShade
Удалите из каталога с игрой файл dxgi.dll, d3d9.dll или opengl32.dll (будет один из них) и подкаталог reshade-shaders. Всё, этого достаточно.
Какие шейдеры лучшие
[ig_notice style=»notice»]Правильный ответ: зависит от игры и вас. Вкусы у всех разные, графика в играх тоже.[/ig_notice]
Самый часто используемый мною шейдер — сглаживание пикселей SMAA (SMAA.fx). Во многих играх доступен либо убогий FXAA, размывающий картинку, либо ресурсоёмкий MSAA. Я их отключаю и использую SMAA.
Иногда подключаю LumaSharpen (LumaSharpen.fx) или AdaptiveSharpen (AdaptiveSharpen.fx) для повышения резкости изображения.
Для корректировки цвета и яркости использую Curves (Curves.fx) и Tonemap (Tonemap.fx). И, конечно, Vibrance (Vibrance.fx) для усиления тусклых цветов.
В старых играх подключаю BloomAndLensFlares (Bloom.fx) или AmbientLight (AmbientLight.fx).
Если у вас остались вопросы — спрашивайте в комментариях.
Let me start by explaining what ReShade is for those who are unfamiliar with it. (If you are well acquainted with ReShade — skip to the bottom) Here’s a quote from the official website:
Quote
ReShade is an advanced, fully generic post-processing injector for games and video software developed by crosire. Imagine your favorite game with ambient occlusion, real depth of field effects, color correction and more … ReShade exposes an automated and generic way to access both frame color and depth information (latter is automatically disabled during multiplayer to prevent exploitation) and all the tools to make it happen.
In simple terms it allows you to improve a game’s graphics, or simply apply and adjust some fancy or weird effects on the fly in-game.
Here is a simple video demonstration of how ReShade works (Spoiler Alert for those who have not completed The Second Dream). The video quality does not really allow you to catch all the details but it certainly is enough to understand the principles of operation and what you can do with the game’s visual output with very little effort.
Spoiler
What this build of ReShade is and why you would want to use it over the original:
Slightly edited code of the original ReShade that I’ve built for my own use. Codename Debbie. Debbie comes from DBE which stands for Depth Buffer Enabled.
The reason for using it lies in the same quote above:
Quote
way to access both frame color and depth information (latter is automatically disabled during multiplayer to prevent exploitation)
This means that shaders that can potentially drastically improve game graphics (like MXAO, Depth-of-Field, Reflective Bumpmapping etc.) cannot function because they depend on having access to the depth buffer. In respect of Warframe this means that those shaders will not work outside your Obriter or hubs, unless you are playing solo, i.e. they will be disabled the moment you load into any mission with a squad. This build will let you use those shaders regardless of network activity.
Disabling depth buffer access is originally done to prevent potential exploits in competitive online games and possible resulting restrictions on the use of ReShade by online game developers. The most obvious exploit for competetive online games that involves depth buffer would be a wallhack. However, it would require a good amount of expertise on the part of the user to make use of that access to depth buffer because simply having ReShade with access to depth buffer doesn’t really do anything by itself. And people who have the expertise to exploit that don’t really need ReShade to do it in the first place.
Is it safe to use?
As far as I’m aware, DE stated that ReShade is officially accepted. I don’t see how access to depth buffer could ever be exploited in Warframe outside of PvP, but that is such a small niche and let me repeat myself — it requires expertise — and if a person can do it, that person doesn’t need ReShade for that (and that person can most certainly make those tiny modifications to the ReShade code that I have). So from that point of view I believe this build should be just as safe to use as the original. As concerns security — I did not include any malware or anything. But don’t take my word for it, use your own judgment.
Requirements and version info:
Includes binaries for both 32 and 64bit systems. Built from modified source of the original ReShade with maximum performance optimization.
Download:
ReShade_v4.3.0.563Debbie.zip
Installation:
1. Download and install ReShade from the official website (reshade.me). When asked choose to download shaders.
2. Replace the library installed by ReShade to the directory containing your game executable
with the library from this distribution (renaming it accordingly).
E.g.: ReShade installed a dxgi.dll into your game directory. Make a backup copy of that file and
delete the original. Copy ReShade64.dll or ReShade32.dll from this distribution to that directory as dxgi.dll.
3.**(is currently required for Warframe only)**: Change the new file’s properties to make it read-only.
This is done to prevent the game launcher from deleting the injector’s library.
Presets:
I have included my own Warframe presets into the archive, but I recommend you to create a custom one for yourself once you get acquainted with how ReShade works. You can also find presets from other users on the net.
TLDR for those who very well know what ReShade is and how it works:
This build enables depth buffer access regardless of network activity. As a result, shaders relying on the z-buffer (like MXAO, DoF, Reflective Bumpmapping etc.) always remain in effect.
Leave any comments or feedback below. If you’re having troubles with installation — feel free to ask for guidance as well.
Edited June 8, 2019 by DarthKadra
version update
NETWORK ACTIVITY DETECTED OVERRIDE — RESHADE FORUM
1 year 5 months ago #4 by anontsuki. Replied by anontsuki on topic Network activity detected override. It’s probably frowned upon talking about it, but yes, you can …
From reshade.me
User Interaction Count 3
Estimated Reading Time 1 min
RESOLVED INSTANT CRASH ON STARTUP — TEAMSPEAK
Hello, As soon as i start my ts3 client, it instantly crashes. Renaming the ts3client directory in appdata fixed it but then all my data is lost.
From forum.teamspeak.com
RESHADE-UNLOCKED VS RESHADE — COMPARE DIFFERENCES AND REVIEWS?
crt-royale-reshade — A port of crt-royale from libretro to ReShade . dxvk — Vulkan-based implementation of D3D9, D3D10 and D3D11 for Linux / Wine . ffxiv-material-ui — Material UI …
From libhunt.com
RESHADE VS RESHADE-UNLOCKED — COMPARE DIFFERENCES AND REVIEWS?
Activity is a relative number indicating how actively a project is being developed. Recent commits have higher weight than older ones. Recent commits have higher weight than older ones. For …
From libhunt.com
RESHADE 3.0 NO DEPTH BUFFER IN ONLINE GAMES
Ariane Aster. World. Cerberus. Main Class. Red Mage Lv 90. Reshade itself disables its own depth buffer when it detects network activity, because you can use it to see …
From forum.square-enix.com
76 RETIREMENT PLAN GLITCH FALLOUT
76 percentage points lower than returns on defined-benefit plans, according to the consulting firm Towers Watson Get the latest news and analysis in the stock market today, …
From lfb.asl5.piemonte.it
DXVK VS RESHADE-UNLOCKED — COMPARE DIFFERENCES AND REVIEWS?
reshade — A generic post-processing injector for games and video software. Ultimate-ASI-Loader — ASI Loader is the tool that loads custom libraries with the file extension .asi into any game …
From libhunt.com
TBN CBD OFFER — MHY.ROZMOWYNIEUCZESANE.PL
shell mill speeds and feeds. hardin county texas jobs vizio led strips; construction workwear. slayers unleashed breathing; chopped mercury for sale
From mhy.rozmowynieuczesane.pl
LIGHT DOV : RESHADE
Press J to jump to the feed. Press question mark to learn the rest of the keyboard shortcuts
From reddit.com
STEAM COMMUNITY :: SCREENSHOT :: FAKE ATMOSPHERE: RESHADE …
Steam Community: Elite Dangerous. FAKE atmosphere: RESHADE depth fog. Downside: it disables on its own when it detects the game’s network activity. which in ED is continuous.
From steamcommunity.com
RESHADE-UNLOCKED VS OVERLAYDISABLEDRESHADE — LIBHUNT.COM
Activity is a relative number indicating how actively a project is being developed. Recent commits have higher weight than older ones. For example, an activity of 9.0 indicates that a project is …
From libhunt.com
TITANIUM NETWORK FREELY SURF
Start browsing from here FreeVPN allows you to browse the Internet freely without any censorship limitations, since your Internet data is encrypted and a network of global VPN …
From plm.fioriadomicilio.roma.it
DX12 HOOK — UXP.ROZMOWYNIEUCZESANE.PL
16 hours ago · I have tried disabling the water puddles, as well as installing the FTX Global Textures fix, to no avail. Freeware P3Dv4/v5 Downloads & Add-ons. Nov 22, 2021 · Good …
From uxp.rozmowynieuczesane.pl
RESHADE COMPLAINS ABOUT HIGH NETWORK ACTIVITY #110
When MT is installed, Reshade Depth filters, such as RTGI, stopped working due to «high network» activity. Check for update is disabled as well but no luck. Please let me know …
From github.com
NOT-SMELLY-GARBAGE/RESHADE-UNLOCKED — GITHUB
TAGS FOR SEARCHES depth buffer bypass reshade depth buffer bypass no network detector reshade reshade no network detection network detection removed …
From github.com
QUANTV RESHADE — VHTPXM.ROZMOWYNIEUCZESANE.PL
Installation: 1) Install QuantV 2) Install a High preset from the QuantV archive that comes with the modification. 3) Transfer files from my archive to the root folder with the game. Attention: …
From vhtpxm.rozmowynieuczesane.pl
NYFD DEATH 2022 — UDWE.ROZMOWYNIEUCZESANE.PL
Belinda Norton, a PE teacher and mum-of-two, has shared her one tip for 2022 . The fitness professional said eating more real, raw, whole grown foods. I was concerned for his safety, of …
From udwe.rozmowynieuczesane.pl
COMPUTER REBOOT WHEN USING RESHADE??? : RESHADE — REDDIT.COM
ReShade is a generic post-processing injector for games and video software and the successor to SweetFX. It can be used to apply post-processing filters to make your games and videos …
From reddit.com
RESHADE — DISCOVERY SHARING. — FALLOUT 4 GENERAL DISCUSSION
I open this subject to discuss and share the different ReShade profiles we happen to find and test. I’ll begin with this one : No More Washed Out Wasteland — NMWOW — ReShade …
From loverslab.com
MISC — INMERSIVE FILTER — ACC STYLE + SOL + RESHADE [PHOTOREALISM]
The only way to fix that is using the modded version of Reshade setup made by Matsilagi, you can get this version on oficial reshade discord or PGHub by Pascal Glither. The …
From racedepartment.com
RESHADE (DEPTH BUFFER ENABLED) FOR WARFRAME
TLDR for those who very well know what ReShade is and how it works: This build enables depth buffer access regardless of network activity. As a result, shaders relying on …
From forums.warframe.com
LDSBHT
Uploaded on: 2019-02-06 The 51-year-old, who now works as an adult performer on OnlyFans, has Benvenuto su GTA5-Mods Through natural selection, the best-adapted organisms …
From qiy.fioriadomicilio.roma.it
COME FOLLOW ME OBJECT LESSON
Easy to follow , volunteer friendly Top 50 Bible Object Lessons create opportunities for children to remember the main theme using science and everyday objects . Teach kids key Bible stories …
From hgmw.rozmowynieuczesane.pl
4.5 — PAGE 10 — RESHADE FORUM
Tridef3D (similar to Reshade+Superdepth3D) works fine with Diablo 3 and Destiny 2 (online games wich running with Battle-Net launcher), but it doesn’t works with Tom Clancy’s …
From reshade.me
PYMODBUS CLIENT SYNC INSTALL
Search: Easy Modbus Python. 1-2) [universe] unofficial interface to the Diaspora social network (Python 2) python-dib-utils (0 Just install with pip as per usual The Python GIL, or Global …
From jhl.okna-krasnik.pl
JUST ANOTHER RESHADE (RTGI AND NONE-RTGI VERSION) — NEXUS MODS
For the RTGI version you need to install Reshade 5.0.2 and to install it in directx 10/11/12 mode but after you install copy all files from RTGI the folder from Pascal Glicher and …
From nexusmods.com
RESHADE — GITHUBMEMORY
reshade repo activity. Recently we have received many complaints from users about site-wide blocking of their own and blocking of their own activities please go to the settings off state, …
From githubmemory.com
RELEASES · NOT-SMELLY-GARBAGE/RESHADE-UNLOCKED · GITHUB
reshade no network detection network detection removed reshade depth buffer unlocker. Assets 4. ReShade.4.9.0.Modded.exe . 2.82 MB. ReShade.4.9.1.Modded.exe. 2.84 …
From github.com
RESHADE HIGH NETWORK ACTIVITY DISCOVERED : RESHADE — REDDIT
reshade high network activity discovered. Hey im currently using the 4.9.1 version of reshade and I’m trying to use the RTG shader for the ‚‘RaYTraCiNG,, Look but I can’t use it in borderlands TPS and in many other because it don’t let me chose the option that u need to tweak to get the result .. it’s like = reshade high network …
From reddit.com
GIANT FOOD IN WARRENTON, VA 20186 — HOURS GUIDE
Giant Food in Warrenton, VA 20186. 41 W Lee Hwy, #27 Warrenton, Virginia 20186 (540) 347-1078. Get Directions > 4.3 based on 61 votes. Hours. Hours may fluctuate. For detailed hours …
From hoursguide.com
ESO REDEFINED AT THE ELDER SCROLLS ONLINE NEXUS — UI ADDONS, …
Experience Tamriel like never before, with completely reworked visuals that removes the blue tint from the game. Designed to be playable on all zones and dungeons.
From nexusmods.com
GITHUB — MORTALITAS/GSHADE: GSHADE IS A HEAVILY MODIFIED FORK OF …
GShade is a highly modified ReShade fork & package with a selectively network-unlocked depth buffer and numerous improvements. Note that all shaders in this repository are strictly …
From github.com
R/RESHADE — WHY IS THE DEPTH BUFFER DISABLED WHEN HIGH …
PampersFinn12. · just now. GTA Online often gets the depth buffer revealed, when the mission not loads and certain functions like weapon choice on foot, car horn, pause menu, map are …
From reddit.com
WORKING AROUND «DETECTING HIGH NETWORK ACTIVITY»? : …
The Reshade client is detecting high network activity and disabling the depth buffer, and as a result it looks like my Raytracing is simply turned off. I can’t focus / calibrate it if Reshade is …
From reddit.com
RESHADE-UNLOCKED VS LLGL — COMPARE DIFFERENCES AND REVIEWS?
dxvk — Vulkan-based implementation of D3D9, D3D10 and D3D11 for Linux / Wine . reshade — A generic post-processing injector for games and video software.. REFramework — Scripting …
From libhunt.com
STEAM COMMUNITY :: SCREENSHOT :: VANILLA HIGH SETTINGS, RESHADE …
Steam Community: Conan Exiles. Vanilla HIGH settings, ReShade Post-Processing (High-Pass Sharpen, Luma Sharpen, MXAO)
From steamcommunity.com
RESHADE-UNLOCKED/RUNTIME_D3D10.CPP AT MAIN · …
A generic post-processing injector for games and video software. — Reshade-Unlocked/runtime_d3d10.cpp at main · mczero80/Reshade-Unlocked
From github.com
![]()
-
News
-
Forums
-
Sim Racing Games
-
Assetto Corsa
-
Assetto Corsa Mods
You should upgrade or use an alternative browser.
![]()
Misc Inmersive Filter — ACC style + SOL + RESHADE [Photorealism]
v13
Login or Register an account to download this content
-
Thread starterel_mattpro
-
Start dateJun 10, 2018
-
523 -
149634
-
#462
![]()
-
#463
![]()
-
#465
Hi @el_mattpro , since SOL 2.0 alpha1 is out, will you consider updating your filter again? Since it has been screwed by the new settings and it is no longer usable (the .lua file, version without reshade). A pity…
It is actually why i’m reinstalling Assetto Corsa again, i’ll try to work on it this week, i’ve been really bussy these months praying for CSP or SOL to not destroy my filter….again, but you know… this is a never ending story, update here, update there, everything brokes, start again hahahaha
![]()
-
#466
Actually I think it might be working fine by default (it looks correct in debug mode as per your install example) but I can’t see past the end of my car LOL. Is this supposed to be adaptive / auto focus for driving with or only for photos? It also blurs out things like the in game ESC menu, is that expected?

Last edited: Sep 20, 2020
![]()
-
#468
So I’ve tried setting this lower but the lowest I can go without finding a config file (I’m guessing) to adjust it smaller than 0.7 and it still turns my brake lights from red to orange. Setting to actual 0 gets me back to red brake lights but is this then undoing all the work of ReShade?
Until i release a fix for the new sol version ( i just reinstalled the game to start to work on it), lower the Sepia % to 0 or -1 / -2% to get rid of the Brake lights without modifying HUE, but lower hue will help as well. As for the DOF (blurry thing) in reshade, simply disable quint_ADOF or cinematicDOF.fx as it is made for screenshots
![]()
-
#469
For the aggressive DOF I ended up just re-enabling MSAA in video settings to disable the DX11 part, though is this robbing me of the fake ray tracing as well? Would it be better to do as you have suggested and disable the DOF section in ReShade? Although without DOF on how do I know which resolution selection under DX11 is the correct one? Sorry for all the questions, just not 100% across everything with this mod yet.
![]()
-
#470
![]()
-
#471
![]()
-
#472
Also, can’t wait till this is updated to Sol 2.0. I’m using Sol as the filter until this is fixed but using your reshade settings. Looks nice.
Last edited: Oct 11, 2020
![]()
-
#473
![]()
![]()
-
#475
-
#476
but I can not get the depth buffer to work,
I get the following error when I click on «D3D11» button in the reshade menu:
«High network activity discovered. Access to depth buggers is disabled to prevent exploitation.»
I saw in some older thread that there was a modded version of reshade 4.6.1 but I couldn’t install that one, the installer keeps disappearing without an error message.
Any tips` on how to fix?

thank you
![]()
-
#477
I am using imnersivefilter v13 + ReShade_4.8.2,
but I can not get the depth buffer to work,
I get the following error when I click on «D3D11» button in the reshade menu:
«High network activity discovered. Access to depth buggers is disabled to prevent exploitation.»
I saw in some older thread that there was a modded version of reshade 4.6.1 but I couldn’t install that one, the installer keeps disappearing without an error message.Any tips` on how to fix?
View attachment 419279
thank you
The only way to fix that is using the modded version of Reshade setup made by Matsilagi, you can get this version on oficial reshade discord or PGHub by Pascal Glither. The modified version allow the internet connection between the game and the injected reshade files. This was locked on the stock version of reshade to avoid any anti-cheat Ban for using reshade
![]()
-
#478
Hovewer quality of rendering is poor. Generally whole scene looks like without anti-aliasing. When I turn on MSAA to x4 I have no access to depth buffer but scene looks much better.


I use reShader 4.8.2, Sol 1.6.2, Shader Patch 1.60.
What I should adjust to achieve more smooth edges?
Last edited: Nov 27, 2020
-
#479
I configured everything using manual and everything seems to work. (I mean there is no visible errors in logs).
Hovewer quality of rendering is poor. Generally whole scene looks like without anti-aliasing. When I turn on MSAA to x4 I have no access to depth buffer but scene looks much better.View attachment 422701
View attachment 422707
I use reShader 4.8.2, Sol 1.6.2, Shader Patch 1.60.
What I should adjust to achieve more smooth edges?
Same problem, I made a workaround instead.
Go to SMAA from the Reshade menu and set the Edge Detection Type to Color edge detection, to make sure you see any changes try changing the debug views. One thing though some of your UI might be affected but hey if it looks good it works for me
Last edited: Nov 30, 2020
![]()
-
#480
Same problem, I made a workaround instead.
Go to SMAA from the Reshade menu and set the Edge Detection Type to Color edge detection, to make sure you see any changes try changing the debug views. One thing though some of your UI might be affected but hey if it looks good it works for me
@GLeEP
You are right. I also figured this out.
Hovewer I would like to understand what is going on here.
I also tried to manipulate with settings like Sharpening (or something similar — I don’t remember now) but there is no visible difference.
Last edited: Nov 30, 2020
-
News
-
Forums
-
Sim Racing Games
-
Assetto Corsa
-
Assetto Corsa Mods