Summary
While trying to build Firefox 59.0.2 for i686 under a Manjaro Linux (Arch-like) Docker-based build container, rustc panics with «Cannot allocate memory» while compiling the gkrust crate.
I’m reporting because the backtrace asked me to. 
Details
On first look this would appear to be rustc trying to allocate more than ~3GB RAM during the LTO step as seen https://bugzilla.mozilla.org/show_bug.cgi?id=1417268#c13, and a similar thing last occurred with rustc 1.22 (https://bbs.archlinux32.org/viewtopic.php?id=643).
Monitoring RAM usage during the failing compilation step appears to show it remaining fairly constant at ~1.3GB RES for a «long» period (~50% time before failure), jumping to ~1.5GB RES, then jumping again to 1.7GB and 2.0GB (~80% TBF), before finally (~95% TBF) rapidly increasing in ~100MB steps and panicking somewhere around ~3GB RES.
I am able to successfully build 64-bit Firefox 59.0.2, as well as both 32- and 64-bit Firefox ESR 52.7.3 with the same build container setup, so it looks to be something specific between i686 rustc and FF 59’s use of the gkrust crate.
I have not set any resource limits for Docker.
Steps which might reproduce
git clone https://github.com/jonathonf/manjaro-32-build.git
mkdir firefox && cd $_
curl -L -f "https://git.archlinux.org/svntogit/packages.git/snapshot/packages/firefox.tar.gz" -o - | bsdtar --strip-components 3 --include="*/firefox/trunk/" -xvf -
../manjaro-32-build/run.sh
Failing command with flags
/usr/bin/rustc —crate-name gkrust lib.rs —color always —crate-type staticlib —emit=dep-info,link -C opt-level=2 -C panic=abort -C lto —cfg feature=»bindgen» —cfg feature=»cubeb-remoting» —cfg feature=»cubeb_pulse_rust» —cfg feature=»gkrust-shared» —cfg feature=»no-static-ideograph-encoder-tables» —cfg feature=»servo» —cfg feature=»simd-accel» -C metadata=651646389c08113e -C extra-filename=-651646389c08113e —out-dir /build/src/mozilla-unified/obj-i686-pc-linux-gnu/toolkit/library/i686-unknown-linux-gnu/release/deps —target i686-unknown-linux-gnu -C linker=/build/src/mozilla-unified/build/cargo-linker -L dependency=/build/src/mozilla-unified/obj-i686-pc-linux-gnu/toolkit/library/i686-unknown-linux-gnu/release/deps -L dependency=/build/src/mozilla-unified/obj-i686-pc-linux-gnu/toolkit/library/release/deps —extern gkrust_shared=/build/src/mozilla-unified/obj-i686-pc-linux-gnu/toolkit/library/i686-unknown-linux-gnu/release/deps/libgkrust_shared-f2bb0c738944c0f6.rlib -C opt-level=2 -C debuginfo=2
Backtrace
 8:40.67    Compiling gkrust v0.1.0 (file:///build/src/mozilla-unified/toolkit/library/rust)
35:17.52 thread 'rustc' panicked at 'called `Result::unwrap()` on an `Err` value: Custom { kind: Other, error: StringError("Cannot allocate memory") }', libcore/result.rs:945:5
35:17.53 stack backtrace:
35:17.71    0: 0xf747766a - rust_metadata_std_ae049937c58eac2695c432bfa6d5d39f
35:17.71    1: 0xf746f0fb - rust_metadata_std_ae049937c58eac2695c432bfa6d5d39f
35:17.71    2: 0xf7474224 - rust_metadata_std_ae049937c58eac2695c432bfa6d5d39f
35:17.71    3: 0xf7473f4f - rust_metadata_std_ae049937c58eac2695c432bfa6d5d39f
35:17.71    4: 0xf74746a1 - std::panicking::rust_panic_with_hook::hb8beb8efb6b91903
35:17.71    5: 0xf7474515 - rust_metadata_std_ae049937c58eac2695c432bfa6d5d39f
35:17.71    6: 0xf7474496 - std::panicking::begin_panic_fmt::he4dfe7a67e7c0076
35:17.71    7: 0xf74743fb - rust_begin_unwind
35:17.71    8: 0xf74e226e - core::panicking::panic_fmt::he2c3b98e9730a002
35:17.71    9: 0xf04c7497 - <unknown>
35:17.71   10: 0xf04f5667 - <unknown>
35:17.71   11: 0xf04f4320 - <unknown>
35:17.71   12: 0xf0593809 - <unknown>
35:17.71   13: 0xf05912b1 - <rustc_trans::LlvmTransCrate as rustc_trans_utils::trans_crate::TransCrate>::join_trans_and_link::hd108c8a9e5d89c4d
35:17.71   14: 0xf762d843 - rustc_driver::driver::compile_input::hd9c20dd67b35c276
35:17.71   15: 0xf764a9b5 - rustc_driver::run_compiler::h2b965134b6c46ea8
35:17.71   16: 0xf756d933 - rust_metadata_rustc_driver_9af17ad1a24b9c2356fb6a6c6e5db9d5
35:17.71   17: 0xf748bdd2 - __rust_maybe_catch_panic
35:17.71   18: 0xf75a7b93 - <unknown>
35:17.71   19: 0xf7482bfa - rust_metadata_std_ae049937c58eac2695c432bfa6d5d39f
35:17.71   20: 0xf5854e55 - start_thread
35:17.71   21: 0xf73366b5 - __GI___clone
35:17.71   22:        0x0 - <unknown>
35:17.75
35:17.75 error: internal compiler error: unexpected panic
35:17.75
35:17.75 note: the compiler unexpectedly panicked. this is a bug.
35:17.75
35:17.75 note: we would appreciate a bug report: https://github.com/rust-lang/rust/blob/master/CONTRIBUTING.md#bug-reports
35:17.75
35:17.75 note: rustc 1.25.0 running on i686-unknown-linux-gnu
35:17.75
35:17.94 error: Could not compile `gkrust`.
35:17.94
35:17.94 To learn more, run the command again with --verbose.
35:17.94 make[4]: *** [/build/src/mozilla-unified/config/rules.mk:972: force-cargo-library-build] Error 101
35:17.94 make[3]: *** [/build/src/mozilla-unified/config/recurse.mk:73: toolkit/library/rust/target] Error 2
35:17.94 make[2]: *** [/build/src/mozilla-unified/config/recurse.mk:33: compile] Error 2
35:17.94 make[1]: *** [/build/src/mozilla-unified/config/rules.mk:434: default] Error 2
35:17.94 make: *** [client.mk:168: build] Error 2
35:17.97 0 compiler warnings present.
35:18.04 Failed to parse ccache stats output: stats zero time                     Thu Apr  5 15:52:33 2018
35:18.04 Notification center failed: Install notify-send (usually part of the libnotify package) to get a notification when the build finishes.
rustc --version --verbose
rustc 1.25.0
binary: rustc
commit-hash: unknown
commit-date: unknown
host: i686-unknown-linux-gnu
release: 1.25.0
LLVM version: 6.0
Packaging files
rustc: https://www.archlinux.org/packages/community/x86_64/rust/
firefox: https://www.archlinux.org/packages/extra/x86_64/firefox/
This post adds support for heap allocation to our kernel. First, it gives an introduction to dynamic memory and shows how the borrow checker prevents common allocation errors. It then implements the basic allocation interface of Rust, creates a heap memory region, and sets up an allocator crate. At the end of this post, all the allocation and collection types of the built-in alloc crate will be available to our kernel.
This blog is openly developed on GitHub. If you have any problems or questions, please open an issue there. You can also leave comments at the bottom. The complete source code for this post can be found in the post-10 branch.
Table of Contents
-
Local and Static Variables
- Local Variables
- Static Variables
-
Dynamic Memory
- Common Errors
- Allocations in Rust
- Use Cases
-
The Allocator Interface
- The GlobalAlloc Trait
- A DummyAllocator
- The #[global_allocator] Attribute
- The #[alloc_error_handler] Attribute
- Creating a Kernel Heap
- Using an Allocator Crate
- Adding a Test
- Summary
- What’s next?
🔗Local and Static Variables
We currently use two types of variables in our kernel: local variables and static variables. Local variables are stored on the call stack and are only valid until the surrounding function returns. Static variables are stored at a fixed memory location and always live for the complete lifetime of the program.
🔗Local Variables
Local variables are stored on the call stack, which is a stack data structure that supports push and pop operations. On each function entry, the parameters, the return address, and the local variables of the called function are pushed by the compiler:

The above example shows the call stack after the outer function called the inner function. We see that the call stack contains the local variables of outer first. On the inner call, the parameter 1 and the return address for the function were pushed. Then control was transferred to inner, which pushed its local variables.
After the inner function returns, its part of the call stack is popped again and only the local variables of outer remain:

We see that the local variables of inner only live until the function returns. The Rust compiler enforces these lifetimes and throws an error when we use a value for too long, for example when we try to return a reference to a local variable:
fn inner(i: usize) -> &'static u32 {
    let z = [1, 2, 3];
    &z[i]
}
(run the example on the playground)
While returning a reference makes no sense in this example, there are cases where we want a variable to live longer than the function. We already saw such a case in our kernel when we tried to load an interrupt descriptor table and had to use a static variable to extend the lifetime.
🔗Static Variables
Static variables are stored at a fixed memory location separate from the stack. This memory location is assigned at compile time by the linker and encoded in the executable. Statics live for the complete runtime of the program, so they have the 'static lifetime and can always be referenced from local variables:
![The same outer/inner example, except that inner has a static Z: [u32; 3] = [1,2,3]; and returns a &Z[i] reference](https://os.phil-opp.com/heap-allocation/call-stack-static.svg)
When the inner function returns in the above example, its part of the call stack is destroyed. The static variables live in a separate memory range that is never destroyed, so the &Z[1] reference is still valid after the return.
Apart from the 'static lifetime, static variables also have the useful property that their location is known at compile time, so that no reference is needed for accessing them. We utilized that property for our println macro: By using a static Writer internally, there is no &mut Writer reference needed to invoke the macro, which is very useful in exception handlers, where we don’t have access to any additional variables.
However, this property of static variables brings a crucial drawback: they are read-only by default. Rust enforces this because a data race would occur if, e.g., two threads modified a static variable at the same time. The only way to modify a static variable is to encapsulate it in a Mutex type, which ensures that only a single &mut reference exists at any point in time. We already used a Mutex for our static VGA buffer Writer.
🔗Dynamic Memory
Local and static variables are already very powerful together and enable most use cases. However, we saw that they both have their limitations:
- Local variables only live until the end of the surrounding function or block. This is because they live on the call stack and are destroyed after the surrounding function returns.
- Static variables always live for the complete runtime of the program, so there is no way to reclaim and reuse their memory when they’re no longer needed. Also, they have unclear ownership semantics and are accessible from all functions, so they need to be protected by a
Mutexwhen we want to modify them.
Another limitation of local and static variables is that they have a fixed size. So they can’t store a collection that dynamically grows when more elements are added. (There are proposals for unsized rvalues in Rust that would allow dynamically sized local variables, but they only work in some specific cases.)
To circumvent these drawbacks, programming languages often support a third memory region for storing variables called the heap. The heap supports dynamic memory allocation at runtime through two functions called allocate and deallocate. It works in the following way: The allocate function returns a free chunk of memory of the specified size that can be used to store a variable. This variable then lives until it is freed by calling the deallocate function with a reference to the variable.
Let’s go through an example:
![The inner function calls allocate(size_of([u32; 3])), writes z.write([1,2,3]);, and returns (z as *mut u32).offset(i). On the returned value y, the outer function performs deallocate(y, size_of(u32)).](https://os.phil-opp.com/heap-allocation/call-stack-heap.svg)
Here the inner function uses heap memory instead of static variables for storing z. It first allocates a memory block of the required size, which returns a *mut u32 raw pointer. It then uses the ptr::write method to write the array [1,2,3] to it. In the last step, it uses the offset function to calculate a pointer to the i-th element and then returns it. (Note that we omitted some required casts and unsafe blocks in this example function for brevity.)
The allocated memory lives until it is explicitly freed through a call to deallocate. Thus, the returned pointer is still valid even after inner returned and its part of the call stack was destroyed. The advantage of using heap memory compared to static memory is that the memory can be reused after it is freed, which we do through the deallocate call in outer. After that call, the situation looks like this:
![The call stack contains the local variables of outer, the heap contains z[0] and z[2], but no longer z[1].](https://os.phil-opp.com/heap-allocation/call-stack-heap-freed.svg)
We see that the z[1] slot is free again and can be reused for the next allocate call. However, we also see that z[0] and z[2] are never freed because we never deallocate them. Such a bug is called a memory leak and is often the cause of excessive memory consumption of programs (just imagine what happens when we call inner repeatedly in a loop). This might seem bad, but there are much more dangerous types of bugs that can happen with dynamic allocation.
🔗Common Errors
Apart from memory leaks, which are unfortunate but don’t make the program vulnerable to attackers, there are two common types of bugs with more severe consequences:
- When we accidentally continue to use a variable after calling
deallocateon it, we have a so-called use-after-free vulnerability. Such a bug causes undefined behavior and can often be exploited by attackers to execute arbitrary code. - When we accidentally free a variable twice, we have a double-free vulnerability. This is problematic because it might free a different allocation that was allocated in the same spot after the first
deallocatecall. Thus, it can lead to a use-after-free vulnerability again.
These types of vulnerabilities are commonly known, so one might expect that people have learned how to avoid them by now. But no, such vulnerabilities are still regularly found, for example this use-after-free vulnerability in Linux (2019), that allowed arbitrary code execution. A web search like use-after-free linux {current year} will probably always yield results. This shows that even the best programmers are not always able to correctly handle dynamic memory in complex projects.
To avoid these issues, many languages, such as Java or Python, manage dynamic memory automatically using a technique called garbage collection. The idea is that the programmer never invokes deallocate manually. Instead, the program is regularly paused and scanned for unused heap variables, which are then automatically deallocated. Thus, the above vulnerabilities can never occur. The drawbacks are the performance overhead of the regular scan and the probably long pause times.
Rust takes a different approach to the problem: It uses a concept called ownership that is able to check the correctness of dynamic memory operations at compile time. Thus, no garbage collection is needed to avoid the mentioned vulnerabilities, which means that there is no performance overhead. Another advantage of this approach is that the programmer still has fine-grained control over the use of dynamic memory, just like with C or C++.
🔗Allocations in Rust
Instead of letting the programmer manually call allocate and deallocate, the Rust standard library provides abstraction types that call these functions implicitly. The most important type is Box, which is an abstraction for a heap-allocated value. It provides a Box::new constructor function that takes a value, calls allocate with the size of the value, and then moves the value to the newly allocated slot on the heap. To free the heap memory again, the Box type implements the Drop trait to call deallocate when it goes out of scope:
{
    let z = Box::new([1,2,3]);
    […]
} // z goes out of scope and `deallocate` is called
This pattern has the strange name resource acquisition is initialization (or RAII for short). It originated in C++, where it is used to implement a similar abstraction type called std::unique_ptr.
Such a type alone does not suffice to prevent all use-after-free bugs since programmers can still hold on to references after the Box goes out of scope and the corresponding heap memory slot is deallocated:
let x = {
    let z = Box::new([1,2,3]);
    &z[1]
}; // z goes out of scope and `deallocate` is called
println!("{}", x);
This is where Rust’s ownership comes in. It assigns an abstract lifetime to each reference, which is the scope in which the reference is valid. In the above example, the x reference is taken from the z array, so it becomes invalid after z goes out of scope. When you run the above example on the playground you see that the Rust compiler indeed throws an error:
error[E0597]: `z[_]` does not live long enough
 --> src/main.rs:4:9
  |
2 |     let x = {
  |         - borrow later stored here
3 |         let z = Box::new([1,2,3]);
4 |         &z[1]
  |         ^^^^^ borrowed value does not live long enough
5 |     }; // z goes out of scope and `deallocate` is called
  |     - `z[_]` dropped here while still borrowed
The terminology can be a bit confusing at first. Taking a reference to a value is called borrowing the value since it’s similar to a borrow in real life: You have temporary access to an object but need to return it sometime, and you must not destroy it. By checking that all borrows end before an object is destroyed, the Rust compiler can guarantee that no use-after-free situation can occur.
Rust’s ownership system goes even further, preventing not only use-after-free bugs but also providing complete memory safety, as garbage collected languages like Java or Python do. Additionally, it guarantees thread safety and is thus even safer than those languages in multi-threaded code. And most importantly, all these checks happen at compile time, so there is no runtime overhead compared to hand-written memory management in C.
🔗Use Cases
We now know the basics of dynamic memory allocation in Rust, but when should we use it? We’ve come really far with our kernel without dynamic memory allocation, so why do we need it now?
First, dynamic memory allocation always comes with a bit of performance overhead since we need to find a free slot on the heap for every allocation. For this reason, local variables are generally preferable, especially in performance-sensitive kernel code. However, there are cases where dynamic memory allocation is the best choice.
As a basic rule, dynamic memory is required for variables that have a dynamic lifetime or a variable size. The most important type with a dynamic lifetime is Rc, which counts the references to its wrapped value and deallocates it after all references have gone out of scope. Examples for types with a variable size are Vec, String, and other collection types that dynamically grow when more elements are added. These types work by allocating a larger amount of memory when they become full, copying all elements over, and then deallocating the old allocation.
For our kernel, we will mostly need the collection types, for example, to store a list of active tasks when implementing multitasking in future posts.
🔗The Allocator Interface
The first step in implementing a heap allocator is to add a dependency on the built-in alloc crate. Like the core crate, it is a subset of the standard library that additionally contains the allocation and collection types. To add the dependency on alloc, we add the following to our lib.rs:
// in src/lib.rs

extern crate alloc;
Contrary to normal dependencies, we don’t need to modify the Cargo.toml. The reason is that the alloc crate ships with the Rust compiler as part of the standard library, so the compiler already knows about the crate. By adding this extern crate statement, we specify that the compiler should try to include it. (Historically, all dependencies needed an extern crate statement, which is now optional).
Since we are compiling for a custom target, we can’t use the precompiled version of alloc that is shipped with the Rust installation. Instead, we have to tell cargo to recompile the crate from source. We can do that by adding it to the unstable.build-std array in our .cargo/config.toml file:
# in .cargo/config.toml

[unstable]
build-std = ["core", "compiler_builtins", "alloc"]
Now the compiler will recompile and include the alloc crate in our kernel.
The reason that the alloc crate is disabled by default in #[no_std] crates is that it has additional requirements. When we try to compile our project now, we will see these requirements as errors:
error: no global memory allocator found but one is required; link to std or add
       #[global_allocator] to a static item that implements the GlobalAlloc trait.

error: `#[alloc_error_handler]` function required, but not found
The first error occurs because the alloc crate requires a heap allocator, which is an object that provides the allocate and deallocate functions. In Rust, heap allocators are described by the GlobalAlloc trait, which is mentioned in the error message. To set the heap allocator for the crate, the #[global_allocator] attribute must be applied to a static variable that implements the GlobalAlloc trait.
The second error occurs because calls to allocate can fail, most commonly when there is no more memory available. Our program must be able to react to this case, which is what the #[alloc_error_handler] function is for.
We will describe these traits and attributes in detail in the following sections.
🔗The GlobalAlloc Trait
The GlobalAlloc trait defines the functions that a heap allocator must provide. The trait is special because it is almost never used directly by the programmer. Instead, the compiler will automatically insert the appropriate calls to the trait methods when using the allocation and collection types of alloc.
Since we will need to implement the trait for all our allocator types, it is worth taking a closer look at its declaration:
pub unsafe trait GlobalAlloc {
    unsafe fn alloc(&self, layout: Layout) -> *mut u8;
    unsafe fn dealloc(&self, ptr: *mut u8, layout: Layout);

    unsafe fn alloc_zeroed(&self, layout: Layout) -> *mut u8 { ... }
    unsafe fn realloc(
        &self,
        ptr: *mut u8,
        layout: Layout,
        new_size: usize
    ) -> *mut u8 { ... }
}
It defines the two required methods alloc and dealloc, which correspond to the allocate and deallocate functions we used in our examples:
- The
allocmethod takes aLayoutinstance as an argument, which describes the desired size and alignment that the allocated memory should have. It returns a raw pointer to the first byte of the allocated memory block. Instead of an explicit error value, theallocmethod returns a null pointer to signal an allocation error. This is a bit non-idiomatic, but it has the advantage that wrapping existing system allocators is easy since they use the same convention. - The
deallocmethod is the counterpart and is responsible for freeing a memory block again. It receives two arguments: the pointer returned byallocand theLayoutthat was used for the allocation.
The trait additionally defines the two methods alloc_zeroed and realloc with default implementations:
- The
alloc_zeroedmethod is equivalent to callingallocand then setting the allocated memory block to zero, which is exactly what the provided default implementation does. An allocator implementation can override the default implementations with a more efficient custom implementation if possible. - The
reallocmethod allows to grow or shrink an allocation. The default implementation allocates a new memory block with the desired size and copies over all the content from the previous allocation. Again, an allocator implementation can probably provide a more efficient implementation of this method, for example by growing/shrinking the allocation in-place if possible.
🔗Unsafety
One thing to notice is that both the trait itself and all trait methods are declared as unsafe:
- The reason for declaring the trait as
unsafeis that the programmer must guarantee that the trait implementation for an allocator type is correct. For example, theallocmethod must never return a memory block that is already used somewhere else because this would cause undefined behavior. - Similarly, the reason that the methods are
unsafeis that the caller must ensure various invariants when calling the methods, for example, that theLayoutpassed toallocspecifies a non-zero size. This is not really relevant in practice since the methods are normally called directly by the compiler, which ensures that the requirements are met.
🔗A DummyAllocator
Now that we know what an allocator type should provide, we can create a simple dummy allocator. For that, we create a new allocator module:
// in src/lib.rs

pub mod allocator;
Our dummy allocator does the absolute minimum to implement the trait and always returns an error when alloc is called. It looks like this:
// in src/allocator.rs

use alloc::alloc::{GlobalAlloc, Layout};
use core::ptr::null_mut;

pub struct Dummy;

unsafe impl GlobalAlloc for Dummy {
    unsafe fn alloc(&self, _layout: Layout) -> *mut u8 {
        null_mut()
    }

    unsafe fn dealloc(&self, _ptr: *mut u8, _layout: Layout) {
        panic!("dealloc should be never called")
    }
}
The struct does not need any fields, so we create it as a zero-sized type. As mentioned above, we always return the null pointer from alloc, which corresponds to an allocation error. Since the allocator never returns any memory, a call to dealloc should never occur. For this reason, we simply panic in the dealloc method. The alloc_zeroed and realloc methods have default implementations, so we don’t need to provide implementations for them.
We now have a simple allocator, but we still have to tell the Rust compiler that it should use this allocator. This is where the #[global_allocator] attribute comes in.
🔗The #[global_allocator] Attribute
The #[global_allocator] attribute tells the Rust compiler which allocator instance it should use as the global heap allocator. The attribute is only applicable to a static that implements the GlobalAlloc trait. Let’s register an instance of our Dummy allocator as the global allocator:
// in src/allocator.rs

#[global_allocator]
static ALLOCATOR: Dummy = Dummy;
Since the Dummy allocator is a zero-sized type, we don’t need to specify any fields in the initialization expression.
When we now try to compile it, the first error should be gone. Let’s fix the remaining second error:
error: `#[alloc_error_handler]` function required, but not found
🔗The #[alloc_error_handler] Attribute
As we learned when discussing the GlobalAlloc trait, the alloc function can signal an allocation error by returning a null pointer. The question is: how should the Rust runtime react to such an allocation failure? This is where the #[alloc_error_handler] attribute comes in. It specifies a function that is called when an allocation error occurs, similar to how our panic handler is called when a panic occurs.
Let’s add such a function to fix the compilation error:
// in src/lib.rs

#![feature(alloc_error_handler)] // at the top of the file

#[alloc_error_handler]
fn alloc_error_handler(layout: alloc::alloc::Layout) -> ! {
    panic!("allocation error: {:?}", layout)
}
The alloc_error_handler function is still unstable, so we need a feature gate to enable it. The function receives a single argument: the Layout instance that was passed to alloc when the allocation failure occurred. There’s nothing we can do to resolve the failure, so we just panic with a message that contains the Layout instance.
With this function, the compilation errors should be fixed. Now we can use the allocation and collection types of alloc. For example, we can use a Box to allocate a value on the heap:
// in src/main.rs

extern crate alloc;

use alloc::boxed::Box;

fn kernel_main(boot_info: &'static BootInfo) -> ! {
    // […] print "Hello World!", call `init`, create `mapper` and `frame_allocator`

    let x = Box::new(41);

    // […] call `test_main` in test mode

    println!("It did not crash!");
    blog_os::hlt_loop();
}
Note that we need to specify the extern crate alloc statement in our main.rs too. This is required because the lib.rs and main.rs parts are treated as separate crates. However, we don’t need to create another #[global_allocator] static because the global allocator applies to all crates in the project. In fact, specifying an additional allocator in another crate would be an error.
When we run the above code, we see that our alloc_error_handler function is called:
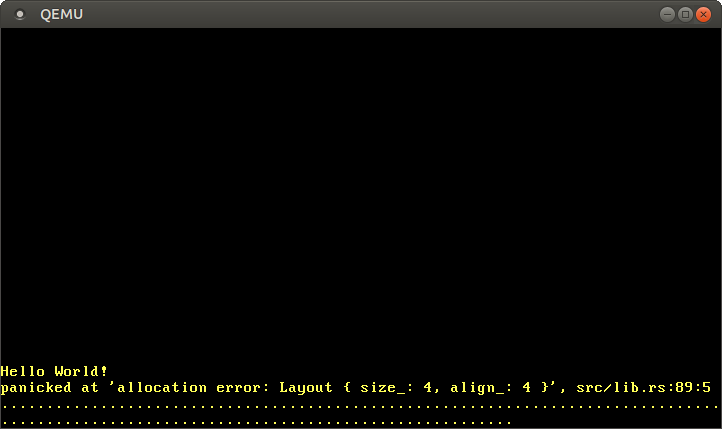
The error handler is called because the Box::new function implicitly calls the alloc function of the global allocator. Our dummy allocator always returns a null pointer, so every allocation fails. To fix this, we need to create an allocator that actually returns usable memory.
🔗Creating a Kernel Heap
Before we can create a proper allocator, we first need to create a heap memory region from which the allocator can allocate memory. To do this, we need to define a virtual memory range for the heap region and then map this region to physical frames. See the “Introduction To Paging” post for an overview of virtual memory and page tables.
The first step is to define a virtual memory region for the heap. We can choose any virtual address range that we like, as long as it is not already used for a different memory region. Let’s define it as the memory starting at address 0x_4444_4444_0000 so that we can easily recognize a heap pointer later:
// in src/allocator.rs

pub const HEAP_START: usize = 0x_4444_4444_0000;
pub const HEAP_SIZE: usize = 100 * 1024; // 100 KiB
We set the heap size to 100 KiB for now. If we need more space in the future, we can simply increase it.
If we tried to use this heap region now, a page fault would occur since the virtual memory region is not mapped to physical memory yet. To resolve this, we create an init_heap function that maps the heap pages using the Mapper API that we introduced in the “Paging Implementation” post:
// in src/allocator.rs

use x86_64::{
    structures::paging::{
        mapper::MapToError, FrameAllocator, Mapper, Page, PageTableFlags, Size4KiB,
    },
    VirtAddr,
};

pub fn init_heap(
    mapper: &mut impl Mapper<Size4KiB>,
    frame_allocator: &mut impl FrameAllocator<Size4KiB>,
) -> Result<(), MapToError<Size4KiB>> {
    let page_range = {
        let heap_start = VirtAddr::new(HEAP_START as u64);
        let heap_end = heap_start + HEAP_SIZE - 1u64;
        let heap_start_page = Page::containing_address(heap_start);
        let heap_end_page = Page::containing_address(heap_end);
        Page::range_inclusive(heap_start_page, heap_end_page)
    };

    for page in page_range {
        let frame = frame_allocator
            .allocate_frame()
            .ok_or(MapToError::FrameAllocationFailed)?;
        let flags = PageTableFlags::PRESENT | PageTableFlags::WRITABLE;
        unsafe {
            mapper.map_to(page, frame, flags, frame_allocator)?.flush()
        };
    }

    Ok(())
}
The function takes mutable references to a Mapper and a FrameAllocator instance, both limited to 4 KiB pages by using Size4KiB as the generic parameter. The return value of the function is a Result with the unit type () as the success variant and a MapToError as the error variant, which is the error type returned by the Mapper::map_to method. Reusing the error type makes sense here because the map_to method is the main source of errors in this function.
The implementation can be broken down into two parts:
-
Creating the page range:: To create a range of the pages that we want to map, we convert the
HEAP_STARTpointer to aVirtAddrtype. Then we calculate the heap end address from it by adding theHEAP_SIZE. We want an inclusive bound (the address of the last byte of the heap), so we subtract 1. Next, we convert the addresses intoPagetypes using thecontaining_addressfunction. Finally, we create a page range from the start and end pages using thePage::range_inclusivefunction. -
Mapping the pages: The second step is to map all pages of the page range we just created. For that, we iterate over these pages using a
forloop. For each page, we do the following:-
We allocate a physical frame that the page should be mapped to using the
FrameAllocator::allocate_framemethod. This method returnsNonewhen there are no more frames left. We deal with that case by mapping it to aMapToError::FrameAllocationFailederror through theOption::ok_ormethod and then applying the question mark operator to return early in the case of an error. -
We set the required
PRESENTflag and theWRITABLEflag for the page. With these flags, both read and write accesses are allowed, which makes sense for heap memory. -
We use the
Mapper::map_tomethod for creating the mapping in the active page table. The method can fail, so we use the question mark operator again to forward the error to the caller. On success, the method returns aMapperFlushinstance that we can use to update the translation lookaside buffer using theflushmethod.
-
The final step is to call this function from our kernel_main:
// in src/main.rs

fn kernel_main(boot_info: &'static BootInfo) -> ! {
    use blog_os::allocator; // new import
    use blog_os::memory::{self, BootInfoFrameAllocator};

    println!("Hello World{}", "!");
    blog_os::init();

    let phys_mem_offset = VirtAddr::new(boot_info.physical_memory_offset);
    let mut mapper = unsafe { memory::init(phys_mem_offset) };
    let mut frame_allocator = unsafe {
        BootInfoFrameAllocator::init(&boot_info.memory_map)
    };

    // new
    allocator::init_heap(&mut mapper, &mut frame_allocator)
        .expect("heap initialization failed");

    let x = Box::new(41);

    // […] call `test_main` in test mode

    println!("It did not crash!");
    blog_os::hlt_loop();
}
We show the full function for context here. The only new lines are the blog_os::allocator import and the call to the allocator::init_heap function. In case the init_heap function returns an error, we panic using the Result::expect method since there is currently no sensible way for us to handle this error.
We now have a mapped heap memory region that is ready to be used. The Box::new call still uses our old Dummy allocator, so you will still see the “out of memory” error when you run it. Let’s fix this by using a proper allocator.
🔗Using an Allocator Crate
Since implementing an allocator is somewhat complex, we start by using an external allocator crate. We will learn how to implement our own allocator in the next post.
A simple allocator crate for no_std applications is the linked_list_allocator crate. Its name comes from the fact that it uses a linked list data structure to keep track of deallocated memory regions. See the next post for a more detailed explanation of this approach.
To use the crate, we first need to add a dependency on it in our Cargo.toml:
# in Cargo.toml

[dependencies]
linked_list_allocator = "0.9.0"
Then we can replace our dummy allocator with the allocator provided by the crate:
// in src/allocator.rs

use linked_list_allocator::LockedHeap;

#[global_allocator]
static ALLOCATOR: LockedHeap = LockedHeap::empty();
The struct is named LockedHeap because it uses the spinning_top::Spinlock type for synchronization. This is required because multiple threads could access the ALLOCATOR static at the same time. As always, when using a spinlock or a mutex, we need to be careful to not accidentally cause a deadlock. This means that we shouldn’t perform any allocations in interrupt handlers, since they can run at an arbitrary time and might interrupt an in-progress allocation.
Setting the LockedHeap as global allocator is not enough. The reason is that we use the empty constructor function, which creates an allocator without any backing memory. Like our dummy allocator, it always returns an error on alloc. To fix this, we need to initialize the allocator after creating the heap:
// in src/allocator.rs

pub fn init_heap(
    mapper: &mut impl Mapper<Size4KiB>,
    frame_allocator: &mut impl FrameAllocator<Size4KiB>,
) -> Result<(), MapToError<Size4KiB>> {
    // […] map all heap pages to physical frames

    // new
    unsafe {
        ALLOCATOR.lock().init(HEAP_START, HEAP_SIZE);
    }

    Ok(())
}
We use the lock method on the inner spinlock of the LockedHeap type to get an exclusive reference to the wrapped Heap instance, on which we then call the init method with the heap bounds as arguments. Because the init function already tries to write to the heap memory, we must initialize the heap only after mapping the heap pages.
After initializing the heap, we can now use all allocation and collection types of the built-in alloc crate without error:
// in src/main.rs

use alloc::{boxed::Box, vec, vec::Vec, rc::Rc};

fn kernel_main(boot_info: &'static BootInfo) -> ! {
    // […] initialize interrupts, mapper, frame_allocator, heap

    // allocate a number on the heap
    let heap_value = Box::new(41);
    println!("heap_value at {:p}", heap_value);

    // create a dynamically sized vector
    let mut vec = Vec::new();
    for i in 0..500 {
        vec.push(i);
    }
    println!("vec at {:p}", vec.as_slice());

    // create a reference counted vector -> will be freed when count reaches 0
    let reference_counted = Rc::new(vec![1, 2, 3]);
    let cloned_reference = reference_counted.clone();
    println!("current reference count is {}", Rc::strong_count(&cloned_reference));
    core::mem::drop(reference_counted);
    println!("reference count is {} now", Rc::strong_count(&cloned_reference));

    // […] call `test_main` in test context
    println!("It did not crash!");
    blog_os::hlt_loop();
}
This code example shows some uses of the Box, Vec, and Rc types. For the Box and Vec types, we print the underlying heap pointers using the {:p} formatting specifier. To showcase Rc, we create a reference-counted heap value and use the Rc::strong_count function to print the current reference count before and after dropping an instance (using core::mem::drop).
When we run it, we see the following:
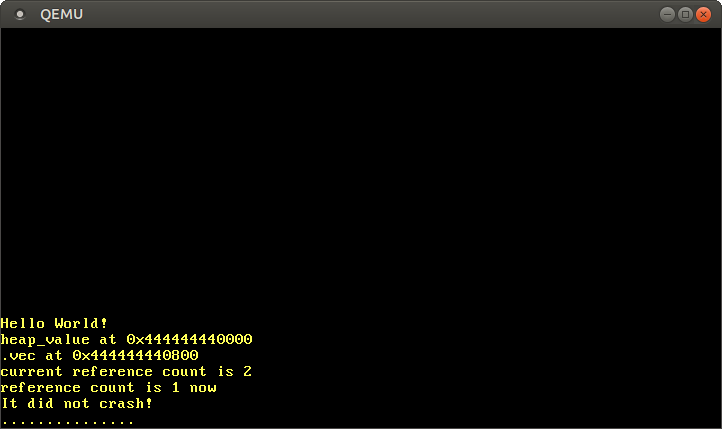
As expected, we see that the Box and Vec values live on the heap, as indicated by the pointer starting with the 0x_4444_4444_* prefix. The reference counted value also behaves as expected, with the reference count being 2 after the clone call, and 1 again after one of the instances was dropped.
The reason that the vector starts at offset 0x800 is not that the boxed value is 0x800 bytes large, but the reallocations that occur when the vector needs to increase its capacity. For example, when the vector’s capacity is 32 and we try to add the next element, the vector allocates a new backing array with a capacity of 64 behind the scenes and copies all elements over. Then it frees the old allocation.
Of course, there are many more allocation and collection types in the alloc crate that we can now all use in our kernel, including:
- the thread-safe reference counted pointer
Arc - the owned string type
Stringand theformat!macro LinkedList- the growable ring buffer
VecDeque - the
BinaryHeappriority queue BTreeMapandBTreeSet
These types will become very useful when we want to implement thread lists, scheduling queues, or support for async/await.
🔗Adding a Test
To ensure that we don’t accidentally break our new allocation code, we should add an integration test for it. We start by creating a new tests/heap_allocation.rs file with the following content:
// in tests/heap_allocation.rs

#![no_std]
#![no_main]
#![feature(custom_test_frameworks)]
#![test_runner(blog_os::test_runner)]
#![reexport_test_harness_main = "test_main"]

extern crate alloc;

use bootloader::{entry_point, BootInfo};
use core::panic::PanicInfo;

entry_point!(main);

fn main(boot_info: &'static BootInfo) -> ! {
    unimplemented!();
}

#[panic_handler]
fn panic(info: &PanicInfo) -> ! {
    blog_os::test_panic_handler(info)
}
We reuse the test_runner and test_panic_handler functions from our lib.rs. Since we want to test allocations, we enable the alloc crate through the extern crate alloc statement. For more information about the test boilerplate, check out the Testing post.
The implementation of the main function looks like this:
// in tests/heap_allocation.rs

fn main(boot_info: &'static BootInfo) -> ! {
    use blog_os::allocator;
    use blog_os::memory::{self, BootInfoFrameAllocator};
    use x86_64::VirtAddr;

    blog_os::init();
    let phys_mem_offset = VirtAddr::new(boot_info.physical_memory_offset);
    let mut mapper = unsafe { memory::init(phys_mem_offset) };
    let mut frame_allocator = unsafe {
        BootInfoFrameAllocator::init(&boot_info.memory_map)
    };
    allocator::init_heap(&mut mapper, &mut frame_allocator)
        .expect("heap initialization failed");

    test_main();
    loop {}
}
It is very similar to the kernel_main function in our main.rs, with the differences that we don’t invoke println, don’t include any example allocations, and call test_main unconditionally.
Now we’re ready to add a few test cases. First, we add a test that performs some simple allocations using Box and checks the allocated values to ensure that basic allocations work:
// in tests/heap_allocation.rs
use alloc::boxed::Box;

#[test_case]
fn simple_allocation() {
    let heap_value_1 = Box::new(41);
    let heap_value_2 = Box::new(13);
    assert_eq!(*heap_value_1, 41);
    assert_eq!(*heap_value_2, 13);
}
Most importantly, this test verifies that no allocation error occurs.
Next, we iteratively build a large vector, to test both large allocations and multiple allocations (due to reallocations):
// in tests/heap_allocation.rs

use alloc::vec::Vec;

#[test_case]
fn large_vec() {
    let n = 1000;
    let mut vec = Vec::new();
    for i in 0..n {
        vec.push(i);
    }
    assert_eq!(vec.iter().sum::<u64>(), (n - 1) * n / 2);
}
We verify the sum by comparing it with the formula for the n-th partial sum. This gives us some confidence that the allocated values are all correct.
As a third test, we create ten thousand allocations after each other:
// in tests/heap_allocation.rs

use blog_os::allocator::HEAP_SIZE;

#[test_case]
fn many_boxes() {
    for i in 0..HEAP_SIZE {
        let x = Box::new(i);
        assert_eq!(*x, i);
    }
}
This test ensures that the allocator reuses freed memory for subsequent allocations since it would run out of memory otherwise. This might seem like an obvious requirement for an allocator, but there are allocator designs that don’t do this. An example is the bump allocator design that will be explained in the next post.
Let’s run our new integration test:
> cargo test --test heap_allocation
[…]
Running 3 tests
simple_allocation... [ok]
large_vec... [ok]
many_boxes... [ok]
All three tests succeeded! You can also invoke cargo test (without the --test argument) to run all unit and integration tests.
🔗Summary
This post gave an introduction to dynamic memory and explained why and where it is needed. We saw how Rust’s borrow checker prevents common vulnerabilities and learned how Rust’s allocation API works.
After creating a minimal implementation of Rust’s allocator interface using a dummy allocator, we created a proper heap memory region for our kernel. For that, we defined a virtual address range for the heap and then mapped all pages of that range to physical frames using the Mapper and FrameAllocator from the previous post.
Finally, we added a dependency on the linked_list_allocator crate to add a proper allocator to our kernel. With this allocator, we were able to use Box, Vec, and other allocation and collection types from the alloc crate.
🔗What’s next?
While we already added heap allocation support in this post, we left most of the work to the linked_list_allocator crate. The next post will show in detail how an allocator can be implemented from scratch. It will present multiple possible allocator designs, show how to implement simple versions of them, and explain their advantages and drawbacks.
-

- Регистрация:
- 27 дек 2019
- Сообщения:
- 1
- Симпатии:
- 0
Привет, пару дней назад я купил МОЩНЫЙ новый компьютер (Ryzen 3800 и Radeon 5700 XT Gaming X, 32 GB оперативы). Теперь, когда я пытаюсь запустить Rust, он запускается, как будто на заднем плане, я вижу игру только в меню alt + tab, когда в этом меню я выбираю раст, ничего не происходит, затем я нажимаю alt + enter (оконный режим) и картинка появляется. Я типа в меню, но только в оконном режиме, но хотя бы могу взаимодействовать.
Но все это время мой моеик ведет себя дико, появляются горизонтальные полосы(тупо рвет монитор), все очень отстает, когда я пытаюсь вернуться в полноэкранный режим, картинка снова исчезает. Затем я закрываю RUST, но мой компьютер становится очень медленным, все глючит, все еще может появляться рванность на экране. Комп нереально лагает, тупит, как будто не знаю че произошло. Долго приходит в себя.
Я должен ждать или перезагрузить его.
Ничего подобного не происходит в других играх, только в Rust. WFT?Как это исправить? В чем проблема? Как мне играть в RUST?
На моем старом ПК, который был хуже в разы, ничего такого не было, только може что фпс 20.
Что я должен делать??
Комп новый,не дешевый, ему всего пару дней, в других играх все нормально работает и четко. Только в расте такие траблы что не запускается + рвет экран + еще и после таких недозапусков комп ну ооооооооочень ненормально себя ведет.
Помогите…P.S. вроде как пофиксил. Решение : в настройках графики Radeon выбрал Стандартный профиль ( до этого был гейминг профиль и там включена функция AntiLag, видать из-за неё такие рофлы.)
-
Команда форума
- Регистрация:
- 11 ноя 2014
- Сообщения:
- 1.532
- Симпатии:
- 873
Странно. Откройте Setup.bin любым архиватором и распакуйте.
-
- Регистрация:
- 3 сен 2018
- Сообщения:
- 1
- Симпатии:
- 0
У меня возникли проблемы(скрины есть).Хотелось бы связаться(Дискорд,Вк).
Вложения:
-
Команда форума
- Регистрация:
- 11 ноя 2014
- Сообщения:
- 1.532
- Симпатии:
- 873
Зайти можно только на пиратские сервера.
-
- Регистрация:
- 5 июл 2019
- Сообщения:
- 1
- Симпатии:
- 0
Rust вылетает сразу же после загрузки сервера. Захожу на Alkad и у меня вылетает Rust сразу. GameWer запущен. Стим запущен, по минимальным подхожу, даже и почти по рекомендованным.
UPD: Вылетает без захода на сервер, загружается, примерно 80-99%, и сразу на рабочий стол.
UPD2:
i5 7400
1050 ti
16gb
windows 10 (v1803 )Вложения:
-
Команда форума
- Регистрация:
- 11 ноя 2014
- Сообщения:
- 1.532
- Симпатии:
- 873
Steam должен быть запущен.Could not allocate memory: System out of memory!
Не хватило оперативной памяти, закройте всё лишнее.
-
- Регистрация:
- 26 янв 2020
- Сообщения:
- 1
- Симпатии:
- 0
После установки, при первом запуске от администратора. Ошибка 404. Инет работает.
Вложения:
-
Команда форума
- Регистрация:
- 11 ноя 2014
- Сообщения:
- 1.532
- Симпатии:
- 873
В актуальной версии игры, такой ошибки не может быть.
-
- Регистрация:
- 1 фев 2020
- Сообщения:
- 3
- Симпатии:
- 0
помогите пожалуйста,с компа могу войти через этот аккаунт,с ноутбука пишут это,раньше не было таких проблем

Вложения:
-
- Регистрация:
- 7 фев 2020
- Сообщения:
- 1
- Симпатии:
- 0
Что делать если после того как я запустил игру когда загрузка загружается у меня выходит с лаунчера на главное меню не выдавая никакой ошибке?
-
- Регистрация:
- 14 фев 2020
- Сообщения:
- 2
- Симпатии:
- 0
Что делать если после обновления 2215 11.02.2020 стало оченьдолго заходит в игру и на сервера а на сервера с процедуркой вообще зависает игра. Что делать?
-
- Регистрация:
- 14 фев 2020
- Сообщения:
- 1
- Симпатии:
- 0
При заходе в игре загружаеться до 75 процентов и вылетает помогите пж
-
- Регистрация:
- 16 фев 2020
- Сообщения:
- 1
- Симпатии:
- 0
Здравствуйте,У меня такая ошибка (Хэш контрольной суммы не совпадает с оригинальным файлом!
Пожалуйста, проверьте версию Вашей программы!
Помогите пожалуйста,Буду благодарен
-
Команда форума
- Регистрация:
- 11 ноя 2014
- Сообщения:
- 1.532
- Симпатии:
- 873
Скачайте подходящий по версию вашей игры патч.
-
- Регистрация:
- 16 фев 2020
- Сообщения:
- 4
- Симпатии:
- 0
-
Команда форума
- Регистрация:
- 11 ноя 2014
- Сообщения:
- 1.532
- Симпатии:
- 873
Игра не поддерживает ни OpenGL ни DirectX 9, удалите параметры запуска.


Поделиться этой страницей
Last week, we looked at how to apply our PL metalanguage to formally specify a low-level language, WebAssembly. There, the goal was to see a real world analog to all the work you did with formalizing the lambda calculus. However, the type theories we developed were all in the same vein of type safety that you’re used to from prior programming language experience—make sure this variable is an int, that expression is a list, and so on.
For the next three weeks, we’re shifting away from formalisms of existing type theories to exploration of exciting new type theories. We’re going to look at different kinds of invariants we can encode in our type systems, like memory safety, data race avoidance, provably correct state machines, and more. At each step, we’re going to ask: what’s a source of bugs in systems programming? And how can we use a type system to statically identify those bugs? We’re going to focus more on conceptual understanding of these type theories than explicit formalism.
To aid in this exploration, we are going to shift to our third programming language: Rust. Rust is perfect for this course because it sits squarely at the intersection of programming language theory and systems programming, using functional programming ideas to improve the correctness and speed of systems software. In learning Rust, I really want you to identify connections between Rust and its precursors, C (which you know from before) and OCaml (which you know now from this course). Don’t learn Rust from scratch—map it onto the set of concepts you have, and realize you already know most of Rust!
Beyond the surface differences, Rust has two main features that distinguish it from OCaml and C: borrow checking and traits. Over the next three weeks, we will explore the many ways in which these features can be applied to improve systems programming. Today, we’re going to start with borrow checking and its most essential application: ensuring memory safety.
Part of the reason WebAssembly is simple to formalize is because its type system is inexpressive. Like most assembly languages, it only has numeric types, lacking any concept of composite data structures (e.g. algebraic data types, recursive types, polymorphic types). That means when using memory in WebAssembly, there’s no meaningful notion of an “uninitialized” value, since any (in-bounds) memory address is a valid number.
By contrast, in the lambda calculus, we also had no concerns about uninitialized values because there was only ever one way of constructing or accessing values. But in languages like C, memory represents a way to “back door” into accessing values created by the program. Memory is interpretable as both a sequence of numbers, but also a container for more complex data types if you squint hard enough. If we aren’t careful, we can easily convert between these two representations in unsafe ways. For example, this is valid C program:
#include <stdio.h>

struct point_t { int x; int y; };

int main() {
  struct point_t p;
  p.x = 5;
  p.y = 65;

  struct point_t p2;

  int* ptr = (int*) &p;
  printf("%dn", *ptr);                // 5
  printf("%dn", *(ptr + 1));          // 65
  printf("%cn", *((char*)(ptr + 1))); // A
  printf("%dn", *((int*)(&p2 + 1)));  // 5

  return 0;
}
It’s worth appreciating how horrendous this is. I can take a valid pointer to a real value (a point), cast it to a different type of a different size and perform arbitrary arithmetic on the pointer. I simultaneously rely on multiple assumptions about the size of types, the layout of structs, and even the relative layout of two variables on the stack!
Ideally, when programming with memory, we want two program properties:
- Memory safety is the property of a program where memory pointers used always point to valid memory1, i.e. allocated and of the correct type/size. Memory safety is a correctness issue—a memory unsafe program may crash or produce nondeterministic output depending on the bug.
- Memory containment (a term of my own invention2) is the property of a program where memory does not leak, i.e. if a piece of memory is allocated, either it is reachable from the root set of the program, or it will be deallocated eventually. Memory containment is a performance issue—a leaky program may eventually run out of memory3.
In garbage-collected (GC) languages (e.g. Python and Java), memory safety is guaranteed for all data allocated within the language runtime, assuming a correct implementation of the garbage collector. These languages abstract away memory as an implementation detail, e.g. there are no raw pointers in Python. Memory containment is guaranteed for tracing garbage collectors (like Java), but not necessarily for reference counting garbage collectors (like Python) in the presence of cycles.
In non-GC languages, i.e. low-level languages like C, C++ and Rust, these memory properties must either be guaranteed by the compiler via static analysis (C++ RAII, Rust’s borrow checker), or they must be carefully managed by the programmer at runtime (malloc/free, new/delete).
Difficulty of memory safety
It is a worthwhile exercise to work through an example of moderate complexity to understand the depth of problems that can occur when dealing with memory in C, and to appreciate how modern static analysis tools can prevent such bugs. Below, I have provided an implementation of a vector library (or resizable array) specialized for integers written in C. It contains at least 7 bugs relating to the properties of memory safety and containment. Take a few minutes to find them, and then we will compare it with an equivalent Rust implementation4.
#include <stdio.h>
#include <stdlib.h>
#include <assert.h>

// There are at least 7 bugs relating to memory on this snippet.
// Find them all!

// Vec is short for "vector", a common term for a resizable array.
// For simplicity, our vector type can only hold ints.
typedef struct {
  int* data;     // Pointer to our array on the heap
  int  length;   // How many elements are in our array
  int  capacity; // How many elements our array can hold
} Vec;

Vec* vec_new() {
  Vec vec;
  vec.data = NULL;
  vec.length = 0;
  vec.capacity = 0;
  return &vec;
}

void vec_push(Vec* vec, int n) {
  if (vec->length == vec->capacity) {
    int new_capacity = vec->capacity * 2;
    int* new_data = (int*) malloc(new_capacity);
    assert(new_data != NULL);

    for (int i = 0; i < vec->length; ++i) {
      new_data[i] = vec->data[i];
    }

    vec->data = new_data;
    vec->capacity = new_capacity;
  }

  vec->data[vec->length] = n;
  ++vec->length;
}

void vec_free(Vec* vec) {
  free(vec);
  free(vec->data);
}

void main() {
  Vec* vec = vec_new();
  vec_push(vec, 107);

  int* n = &vec->data[0];
  vec_push(vec, 110);
  printf("%dn", *n);

  free(vec->data);
  vec_free(vec);
}
Don’t look past here until you’re ready to see the answers.
Let’s review. Here’s the bugs:
-
vec_new:vecis stack-allocated. This is an example of a dangling pointer. The lineVec vec;allocates the struct on the current stack frame and returns a pointer to that struct, however the stack frame is deallocated when the function returns, so any subsequent use of the pointer is invalid. A proper fix is to either heap allocate (malloc(sizeof(Vec))) or change the type signature to return the struct itself, not a pointer. -
vec_new: initial capacity is 0. Whenvec_pushis called, the capacity will double, but2 * 0 = 0, resulting in no additional memory being allocated, so space for at least 1 element needs to be allocated up front. -
vec_push: incorrect call tomalloc. The argument to malloc is the size of memory in bytes to allocate, howevernew_capacityis simply the number of integers. We need tomalloc(sizeof(int) * new_capacity). -
vec_push: missing free on resize. When the resize occurs, we reassignvec->datawithout freeing the old data pointer, resulting in a memory leak. -
vec_free: incorrect ordering on thefrees. After freeing the vector container, thevec->datapointer is no longer valid. We should free the data pointer and then the container. -
main: double free ofvec->data. We should not be freeing the vector’s data twice, instead only lettingvec_freedo the freeing. -
main: iterator invalidation ofn. This is the most subtle bug of the lot. We start by taking a pointer to the first element in the vector. However, after callingvec_push, this causes a resize to occur, freeing the old data and allocating a new array. Hence, our oldnis now a dangling pointer, and dereferencing it in theprintfis memory unsafe. This is a special case of a general problem called iterator invalidation, where a pointer to a container is invalidated when the container is modified.
Wow! We managed to pack a lot of bugs into a single program. Still, this program is valid C code; it will successfully compile with no extra flags. All of this is to show that memory safety is a hard problem. Manual memory management, as in C/C++, is easy to get wrong, and the causes can be subtle. The null pointer is, after all, the billion dollar mistake.
Automatic memory mangement, then, has clear upsides. That’s why every major programming language today outside C, C++, and Rust use a garbage collector, because it makes programmers significantly more productive and less bug-prone while imposing an acceptable runtime overhead. However, a garbage collector is not a panacea for memory management. Garbage collectors are an issue if:
- You have significant memory constraints. Programmers for embedded devices prefer to carefully craft programs for minimal memory footprint when their device has only 64KB of RAM.
- You have real-time performance constraints. Most tracing garbage collectors involve some kind of unpredictable stop-the-world overhead, which can be killer for apps that have functionality that needs to be always running. I know there are people in high-frequency trading paid absurd sums of money solely to optimize the Java GC.
- You want high performance computation. Careful control over memory layouts can provide avoid cache thrashing by improving spatial locality, or permit vectorized operations over adjacent memory regions. Low-level memory control can often reduce accidental/unnecessary memory allocations.
- You have more than one garbage collectors. Garbage collectors rarely interoperate with one another, and they usually assume complete control of a system.
What if we could have the best of both worlds: automated, yet static garbage collection. A tool that can automatically determine allocation and deallocation points at compile time that will never cause a segfault. In Rust, this tool is called the borrow checker, and today we’ll look at how it works.
Rust vs. OCaml
Before we dive into the borrow checker, let’s briefly get a feel for Rust’s syntax and semantics. On its surface, Rust is a reskinned OCaml with a swirl of C. For example, this OCaml program:
let f (m : int) (n : int) : int =
  let mm = 2 * m in
  mm + n

let main () =
  Printf.printf "%d" (f 3 5)
Is the same as this Rust program:
fn f(m: i32, n: i32) -> i32 {
  let mm = 2 * m;
  mm + n
}

fn main() {
  println!("{}", f(3, 5));
}
Note that Rust does not have currying, but it is expression-oriented. You should treat the semicolon in let x = y; z like the in keyword in OCaml—it defines an expression, not a statement as in C. Rust also has strings, algebraic data types, recursive types, and polymorphism just like OCaml.
// Polymorphic record for points. Equivalent to type 'a point = {x : 'a; y : 'a}.
struct Point<T> {
  x: T, y: T
}

// Polymorphic function. T: ToString means "all types T where T has a to_string
// method." ToString is a trait, which we will discuss in depth next class.
fn point_print<T: ToString>(p: Point<T>) {
  println!("({}, {})", p.x.to_string(), p.y.to_string());
}

// Polymorphic recursive sum type for lists. Note that we have to wrap the
// recursive reference in a Box<...>. This ensures the type has a known size in
// memory (more on this later).
enum List<T> {
  Nil,
  Cons(T, Box<List<T>>)
}

fn main() {
  let p1: Point<i32> = Point { x: 1, y: 2 };
  let p2: Point<f32> = Point { x: 3.1, y: 4.2 };
  point_print(p1); // (1, 2)
  point_print(p2); // (3.1, 4.2)

  // Rust has type inference, so it can infer the type of `l` as List<i32>.
  let l = List::Cons(5, Box::new(List::Nil));
  // Rust has match statements just like OCaml.
  let n = match l {
    List::Cons(n, _) => n,
    List::Nil => -1
  };
  println!("{}", n); // 5
}
However, our OCaml-driven expectations start to diverge once we attempt a particular kind of programming pattern:
fn main() {
  let s: String = "Hello world".to_string();
  let s2: String = s;
  println!("{} {}", s, s2);
}
If we run this by the compiler, it says:
error[E0382]: use of moved value: `s`
 --> test.rs:4:21
  |
3 |   let s2: String = s;
  |       -- value moved here
4 |   println!("{} {}", s, s2);
  |                     ^ value used here after move
  |
  = note: move occurs because `s` has type `std::string::String`, which does not implement the `Copy` trait
Here, we’ve run into our first conflict with the borrow checker.
Borrow checking
The Rust Book already has some excellent sections explaining the basics of the borrow checker. Read through all of What is Ownership? and References and Borrowing before proceeding.
Guaranteed memory safety
Tying this back to the motivation: how do these features ensure memory safety? Let’s take a look at a few examples of programs that should be memory un-safe and see how Rust identifies their errors.
Dangling pointers
fn foo() -> &i32 {
  let n = 0;
  &n
}
error[E0106]: missing lifetime specifier
 --> test.rs:1:13
  |
1 | fn foo() -> &i32 {
  |             ^ expected lifetime parameter
  |
  = help: this function's return type contains a borrowed value, but there is no value for it to be borrowed from
  = help: consider giving it a 'static lifetime
Here, we attempt to return a pointer to a value owned by n, where the pointer would nominally live longer than the owner. Rust identifies that it’s impossible to return a pointer to something without a “value for it to be borrowed from.”
Use-after-free
use std::mem::drop; // equivalent to free()

fn main() {
  let x = "Hello".to_string();
  drop(x);
  println!("{}", x);
}
error[E0382]: use of moved value: `x`
 --> test.rs:6:18
  |
5 |   drop(x);
  |        - value moved here
6 |   println!("{}", x);
  |                  ^ value used here after move
  |
  = note: move occurs because `x` has type `std::string::String`, which does not implement the `Copy` trait
Due to Rust’s ownership semantics, when we free a value, we relinquish ownership on it, which means subsequent attempts to use the value are no longer valid. THis also protects against double frees, since two calls to drop would encounter a similar ownership type error.
Iterator invalidation
fn push_all(from: &Vec<i32>, to: &mut Vec<i32>) {
  for elem in from.iter() {
    to.push(*elem);
  }
}

fn main() {
  let mut vec = Vec::new();
  push_all(&vec, &mut vec);
}
error[E0502]: cannot borrow `vec` as mutable because it is also borrowed as immutable
 --> test.rs:9:23
  |
9 |   push_all(&vec, &mut vec);
  |             ---       ^^^- immutable borrow ends here
  |             |         |
  |             |         mutable borrow occurs here
  |             immutable borrow occurs here

error: aborting due to previous error
Because Rust enforces uniqueness of mutable borrows, it’s impossible to accidentally cause an iterator invalidation above where the from.iter() would become invalid after pushing to to when from == to.
Malloc bugs
It’s worth noting that because Rust automatically inserts allocs/frees, the compiler will always get the size of the allocation correct, and always free the memory at some point.
Содержание
- Как исправить ошибку “На компьютере недостаточно памяти”
- Способ №1. Обслуживание системы
- Способ №2. Увеличение файла подкачки
- Способ №3. Восстановление реестра
- Способ №4. Очистка временных файлов
- Способ №5. Закройте “тяжелые” программы
- Похожие статьи про восстановление данных:
- Как автоматически освободить место на жестком диске?
- 20 способов ускорить Windows 10
- Что такое SSD и как он работает
- Memory allocation for * bytes failed: причины и решения.
- СПРАВКА
- Memory allocation for * bytes failed: аппаратные ограничения
- Чуть подробнее…
- Memory allocation for * bytes failed: решения
- Memory allocation for * bytes failed: ограничения со стороны системы
- Memory allocation for * bytes failed: решения
- Memory allocation for * bytes failed: фрагментация памяти?
- Memory allocation for * bytes failed: решения
- Error allocating memory как исправить windows 10 x64
- Ошибки распределения памяти могут быть вызваны медленным ростом файла страницы
- Симптомы
- Причина
- Обходной путь
- Статус
- Дополнительная информация
- Memory allocation errors can be caused by slow page file growth
- Symptoms
- Cause
- Workaround
- Status
- More information
Как исправить ошибку “На компьютере недостаточно памяти”

В этой статье мы расскажем вам о 4 эффективных способах исправления ошибки Windows 10 “На компьютере недостаточно памяти”.

Содержание статьи:
Способ №1. Обслуживание системы
Чтобы исправить возникшую неполадку, воспользуйтесь приведенной ниже инструкцией:
1. Запустите Панель управления. Вы можете быстро найти данную утилиту просто начав писать ее название в меню Пуск.

2. Переключите вид отображения параметров на Крупные значки и найдите меню Устранение неполадок. Для более быстрого доступа к нему вы можете ввести название утилиты в диалоговом окне Поиск в панели управления.

3. В левом углу вы увидите список расширенных возможностей открытого окна. Выберите параметр Просмотр всех категорий.

4. Перед вами появится список всех доступных служб. Найдите в нем параметр Обслуживание системы и откройте его.

5. В появившемся окне диагностики неполадок нажмите Далее и устраните все возникшие на компьютере ошибки.

Способ №2. Увеличение файла подкачки
Иногда ответ на вопрос нехватки памяти может крыться в размере файла подкачки. Давайте разберем как его правильно настроить.
1. Откройте утилиту Выполнить при помощи клавиш Win + R.
2. В появившемся окне введите sysdm.cpl и нажмите ОК.

3. Откройте вкладку Дополнительно и в меню Быстродействие кликните по клавише Параметры.

4. В открывшемся окне откройте вкладку Дополнительно и в меню Виртуальная память кликните по клавише Изменить.

5. Снимите галочку с параметра Автоматически выбирать объем файла подкачки для всех дисков.
6. Укажите для системного диска (обычно это диск С:) Размер по выбору системы, нажмите Задать, ОК и перезапустите компьютер.

Обычно перезагрузка требуется только при уменьшении размера файла подкачки. Поэтому если вы его увеличивали, нет необходимости перезагружать компьютер.
Способ №3. Восстановление реестра
Иногда причиной возникшей неполадки может стать ошибка внутри реестра, которая может повлечь за собой повреждение и других системных функций. Ниже мы рассмотрим способ исправления повреждений реестра.
1. Воспользуйтесь комбинацией клавиш Win + R, чтобы открыть утилиту Выполнить. В диалоговом окне введите cmd и нажмите ОК.
Альтернативным способом запуска cmd является поиск утилиты при помощи меню Пуск и ее запуск от имени администратора.

2. В открывшемся окне командной строки введите команду sfc /scannow. Она проведет полное сканирование вашей системы, процесс которого может отнять некоторое время.

3. Дождитесь завершения проверки системы и перезапустите компьютер. Таким образом все поврежденные файлы будут удалены или исправлены.
Способ №4. Очистка временных файлов
Мы часто недооцениваем влияние временных файлов на загруженность нашей системы и очень зря, ведь они могут существенно повлиять на быстродействие наших компьютеров. Поэтому настоятельно рекомендуем вам проводить периодическую очистку таких документов.
1. Откройте меню Пуск.
2. В диалоговом окне введите команду Очистка диска и запустите найденную утилиту.

3. Выберите диск, который вы хотите очистить.

4. Кликните по клавише Очистить системные файлы и подтвердите корректность выбранного диска.

5. После того как вы ознакомитесь с данными о размере пространства, которое будет освобождено с помощью очистки, нажмите ОК и подтвердите запрос об удалении.
6. По завершению процесса перезапустите компьютер.
Способ №5. Закройте “тяжелые” программы
Нередко причиной нехватки памяти становятся грузные приложения, которые отнимают большое количество ресурсов компьютера, из-за чего он не может полноценно функционировать. В таком случае единственным доступным способом исправления неполадки является их отключение или же приобретение большего количества оперативной памяти.
1. Откройте приложение Диспетчер задач при помощи комбинации клавиш Ctrl + Alt + Del. Альтернативным и не менее удобным способом его запуска является щелчок правой кнопкой мыши по Панели задач и выбор Диспетчера из списка доступных вариантов.

2. Во вкладке Процессы отсортируйте приложения по графе Память. Это действие поможет расположить в топе списка самые “тяжелые” приложения, отнимающие большое количество ОЗУ. Завершите их процессы.

Похожие статьи про восстановление данных:

Как автоматически освободить место на жестком диске?
Иногда каждому из нас хочется каким-нибудь образом автоматизировать ту или иную сферу жизни. Сегодня.

20 способов ускорить Windows 10

Что такое SSD и как он работает
SSD (Solid State Drive) — давно не новый товар на рынке комплектующих для ПК, но его популярно.
Источник
Memory allocation for * bytes failed: причины и решения.
Прогресс и маркетинг дарят компьютерному пользователю стабильность в ценах на компьютерные составляющие и всё более оптимальную в подходе к этим составляющим операционную систему. Однако некоторых пользователей даже сегодня продолжает настигать «ошибка 2000-х» в виде аварийно захлопнувшегося приложения с сообщением Windows Memory allocation for * bytes failed. Так почему на фоне нередко переизбытка установленной RAM и запредельного по размерам pagefile.sys эта ошибка всё ещё досаждает некоторым из нас?

Проблема пришла к нам из тех времён, когда пользователи стали активно переходить с Windows XP на более современную Windows Vista и 7, пытаясь при этом сохранить прежнюю конфигурацию компьютера. Ошибка Memory allocation for * bytes failed — ни что иное как эхо ещё более коварной ошибки Unable to allocate memory, которая мучила владельцев «отстающих» сборок. Массовый переход производителей на 64-х битные версии процессоров, многоканальные проходы RAM решили проблему практически полностью. Однако…
СПРАВКА
К сожалению, вследствие ограниченного перевода локализаций Windows, пользователь не всегда способен правильно оценивать обстановку. А на неё Windows нередко прямо и указывает. В нашем случае ошибка Memory allocation for * bytes failed говорит о том, что оперативной памяти в указанном размере было отказано в выделении для этого приложения. Это значит, что отвечающая за перераспределение памяти процедура Управления памятью (Memory Management) просто не справляется с обязанностями. Учитывая границы зависимости MM, которые включают и аппаратные компоненты компьютера (RAM, чипсет, тип хранилища — SSD) и уровень приложений (объекты и структуры данных), можно предположить, что корни проблемы именно у вас никогда уже не решатся переустановкой Windows.
Memory allocation for * bytes failed: аппаратные ограничения
Ниже следуют наиболее вероятные причины ошибки. Они налагаются со стороны именно физического уровня аппаратного обеспечения:
Чуть подробнее…
Доступная память — самое простое объяснение. Если объём требуемой памяти превышает объёмы установленной, запросу со стороны программы системой будет отказано. Конечно, Windows и другие ОС сами себе создали уловку: они считают, что общая память складывается из нескольких факторов:
Этими показателями и объясняются очень многие «НО», из-за которых Windows не «отстёгивает» память, которую программа просит.
Memory allocation for * bytes failed: решения


Memory allocation for * bytes failed: ограничения со стороны системы
 Тот случай, когда памяти много, а толку мало. Размер адресного пространства для конкретного процесса априори небольшой. Так память распределяется виртуальным Менеджером памяти, о котором мы уже упомянули: создаётся цепочка адресов памяти, которая связана с конкретным адресным пространством. А у адресного пространства всегда ограниченные границы значений. Так, для 32-х битных систем — это всегда лишь 4 Гб. Но это, вопреки обычному мнению, ещё и не весь предел накладываемым ограничениям. Системные адреса в процессе сеанса наносятся на адресное пространство, тем самым ещё более занижая свободное место. Так что порой, вопреки заявленным минимальным требованиям к «железу», операционная система Windows 7 (даже установленная «начисто»), например, оставит процессам не более 2—2,5 Гб оперативной памяти из 4-х Гб.
Memory allocation for * bytes failed: решения
И думать нечего: переходим на 64 бита. На всех платформах. А 32-х битные сборки пора перевозить в гараж. Тем более, у 64-х битных систем огромные преимущества в вопросах безопасности.
Memory allocation for * bytes failed: фрагментация памяти?
Отсюда начинается очень скользкая тема. Некогда популярные ремонтные утилиты нередко предлагали пользователям в числе прочего и такую функцию как дефрагментация оперативной памяти. Скользкая потому, что моё личное мнение таково: часто шкура выделки не стоит. При нормально работающей системе такие программы если не мешают, то просто бесполезны. На старых системах — да. С объёмом RAM 1,5 — 2 Гб — безусловно. Но сейчас даже смартфоны мощнее. И с такими характеристиками комфортно можно работать разве что в Windows Millenium. В том виде, как эта проблема существовала, она современных пользователей (с, прежде всего, достаточным объёмом памяти) уже не касается (кому интересно — подробности в ссылке): она целиком и полностью ложится на плечи разработчиков. И даже принудительная фрагментация оперативной памяти самой Windows во время загрузки программы-тяжеловеса не должна вызывать ошибки Memory allocation for * bytes failed. Однако… Проверьте, не использует ли ваша «проблемная» программа библиотеку Microsoft Foundation Classes (MFC).
Memory allocation for * bytes failed: решения
Источник
Error allocating memory как исправить windows 10 x64
Что такое ошибка «Недостаточно памяти» при копировании файлов? Как вы знаете, и жесткий диск, и оперативная память играют важную роль в выполнении любой операции на компьютере, поскольку для выполнения каждого процесса или задачи, выполняемой в системе, требуется некоторое хранилище ОЗУ, а также хранилище жесткого диска. Однако бывают случаи, когда вы можете получить следующие сообщения об ошибках при попытке скопировать файлы из одного места в другое:
«Недостаточно памяти или системных ресурсов, закройте некоторые окна или программы и попробуйте снова».
Эти ошибки вызваны ограничением кучи рабочего стола, когда памяти больше не хватает для завершения операции при копировании файлов. Если вы столкнетесь с какой-либо из этих ошибок, в этом посте вам будут предложены некоторые возможные исправления, которые могут увеличить его лимит, и, надеюсь, исправят эту ошибку на вашем компьютере с Windows 10.
Вы можете попробовать закрыть все открытые окна и программы, а затем снова попытаться скопировать файл и посмотреть, поможет ли это. Если нет, то переходите к приведенным ниже инструкциям. Но прежде чем вы это сделаете, убедитесь, что вы сначала создали точку восстановления системы. Таким образом, вы можете отменить внесенные вами изменения в любое время, если есть какие-то нежелательные изменения, которые вы хотите отменить. После создания точки восстановления системы выполните действия, указанные ниже.
Шаг 1: Нажмите клавиши Win + R, чтобы открыть служебную программу «Выполнить», введите в поле «Regedit» и нажмите «Ввод», чтобы открыть редактор реестра.
Шаг 2: Затем перейдите к этому разделу реестра: ComputerHKEY_LOCAL_MACHINESYSTEMCurrentControlSetControlSession ManagerSubSystems
Шаг 3: Теперь дважды щелкните DWORD с именем Windows, чтобы изменить его.
Шаг 4: Измените значения SharedSection в поле Value Data. Он должен быть в формате «SharedSection = aaaa, bbbb, cccc». Обратите внимание, что вам нужно изменить значение «bbbb» и «cccc». Поэтому, если вы используете операционную систему x86, установите значение bbbb на 12288 а затем установите значение для cccc равным 1024, С другой стороны, если вы используете операционную систему x64, установите для bbbb значение 20480 и значение cccc для 1024.
Шаг 5: Закройте редактор реестра и перезагрузите компьютер, чтобы изменения вступили в силу.
С другой стороны, есть еще один инструмент, который может помочь в устранении ошибки Out of Memory. Этот инструмент, называемый в Windows средством диагностики памяти, может помочь устранить ошибку нехватки памяти, проверяя и автоматически исправляя любые проблемы, связанные с памятью. Чтобы запустить его, выполните следующие действия:
Примечание: После того, как вы выберете предпочтительный вариант, ваш компьютер перезагрузится и проверит наличие проблем с памятью. Если он обнаружит какие-либо проблемы, он автоматически их исправит.
Поздравляем, вы только что самостоятельно исправили ошибку «Недостаточно памяти» при копировании файлов в Windows 10. Если вы хотите читать более полезный статьи и советы о посещении различного программного и аппаратного обеспечения errortools.com в день.
Вот как исправить ошибку «Недостаточно памяти» при копировании файлов в Windows 10 на компьютер. С другой стороны, если ваш компьютер испытывает проблемы, связанные с системой, которые необходимо исправить, существует решение в один клик, известное как Ресторо вы можете проверить, чтобы решить их.
Выполните полное сканирование системы, используя Ресторо. Для этого следуйте приведенным ниже инструкциям.
Источник
Ошибки распределения памяти могут быть вызваны медленным ростом файла страницы
В этой статье предусмотрен обход ошибок, которые возникают при частом выделении памяти приложениями.
Применяется к: Windows 10 — все выпуски
Исходный номер КБ: 4055223
Симптомы
Приложения, которые часто выделяют память, могут испытывать случайные ошибки из памяти. Такие ошибки могут привести к другим ошибкам или неожиданному поведению в затронутых приложениях.
Причина
Сбои в распределении памяти могут возникать из-за задержки, связанные с ростом размера файла страницы для поддержки дополнительных требований к памяти в системе. Возможной причиной этих сбоев является настройка размера файла страницы в качестве «автоматического». Автоматический размер файла страницы начинается с небольшого файла страницы и автоматически растет по мере необходимости.
Система IO состоит из многих компонентов, включая фильтры файловой системы, файловые системы, фильтры громкости, фильтры хранения и т. д. Определенные компоненты в данной системе могут привести к вариативности в росте файлов страниц.
Обходной путь
Чтобы решить эту проблему, необходимо вручную настроить размер файла страницы. Для этого выполните следующие действия:
Статус
Корпорация Майкрософт подтвердила, что это проблема в Windows 10.
Дополнительная информация
При использовании компиляторов Microsoft Visual C++ (cl.exe) могут возникнуть такие ошибки сборки, как следующие:
Дополнительные сведения об ошибках компиляторов Visual C++ и о том, как их обойти, см. в материале Precompiled Header (PCH) issues and recommendations.
Источник
Memory allocation errors can be caused by slow page file growth
This article provides a workaround for errors that occur when applications frequently allocate memory.
Symptoms
Applications that frequently allocate memory may experience random «out-of-memory» errors. Such errors can result in other errors or unexpected behavior in affected applications.
Cause
Memory allocation failures can occur due to latencies that are associated with growing the size of a page file to support additional memory requirements in the system. A potential cause of these failures is when the page file size is configured as «automatic.» Automatic page-file size starts with a small page file and grows automatically as needed.
The IO system consists of many components, including file system filters, file systems, volume filters, storage filters, and so on. The specific components on a given system can cause variability in page file growth.
Workaround
To work around this issue, manually configure the size of the page file. To do this, follow these steps:
Status
Microsoft has confirmed that this is a problem in Windows 10.
More information
You might see intermittent build errors like the following if you encounter this problem when using the Microsoft Visual C++ compiler (cl.exe):
For more information about the Visual C++ compiler errors and how to work around them, see Precompiled Header (PCH) issues and recommendations.
Источник
Recommend Projects
-

React
A declarative, efficient, and flexible JavaScript library for building user interfaces.
-
Vue.js
🖖 Vue.js is a progressive, incrementally-adoptable JavaScript framework for building UI on the web.
-
Typescript
TypeScript is a superset of JavaScript that compiles to clean JavaScript output.
-
TensorFlow
An Open Source Machine Learning Framework for Everyone
-
Django
The Web framework for perfectionists with deadlines.
-
Laravel
A PHP framework for web artisans
-
D3
Bring data to life with SVG, Canvas and HTML. 📊📈🎉
Recommend Topics
-
javascript
JavaScript (JS) is a lightweight interpreted programming language with first-class functions.
-
web
Some thing interesting about web. New door for the world.
-
server
A server is a program made to process requests and deliver data to clients.
-
Machine learning
Machine learning is a way of modeling and interpreting data that allows a piece of software to respond intelligently.
-
Visualization
Some thing interesting about visualization, use data art
-
Game
Some thing interesting about game, make everyone happy.
Recommend Org
-
Facebook
We are working to build community through open source technology. NB: members must have two-factor auth.
-
Microsoft
Open source projects and samples from Microsoft.
-
Google
Google ❤️ Open Source for everyone.
-
Alibaba
Alibaba Open Source for everyone
-
D3
Data-Driven Documents codes.
-
Tencent
China tencent open source team.