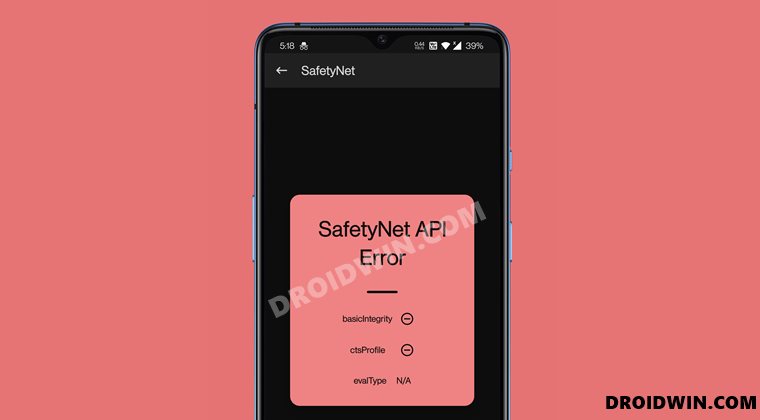
In this guide, we will show you the steps to fix the Magisk Safetynet API error. While rooting a device does bring in a plethora of goodies, on the flip side it has its fair share of disadvantages as well. Right there at the top is the issue of the safetynet flag getting triggered. When that happens, the failure of basicIntegrity check and cts profile mismatch error are two common phenomena.
In simpler words, it would then lead to your inability to run banking and monetary-related apps as well as games like Pokemon Go among others. In this regard, new methods keep on coming that aids in bypassing these security checks. And as of now as well, there is a working method available. But before you actually try it out, you would have to first check if the Safetynet issue is actually there on your device or not.
That could pretty easily be carried out right from the Magisk Manager itself (or the Magisk App, as is now known as beginning with version 22). However, some users are facing an API issue while carrying out this task. If you are also getting bugged with the Magisk Safetynet API error, then this guide shall help you fix it. Follow along.
- How to Pass Magisk SafetyNet on Rooted Android 11
- How to Fix ctsProfile Mismatch Error on Rooted Android
- Pass SafetyNet test after installing Xposed or EdXposed
- How to Edit Build.Prop and Enable Camera2 API without Root
The below instructions are listed under separate sections for ease of understanding. Make sure to follow in the exact same sequence as mentioned. Droidwin and its members wouldn’t be held responsible in case of a thermonuclear war, your alarm doesn’t wake you up, or if anything happens to your device and data by performing the below steps.
STEP 1: Switch to Magisk Canary
First and foremost, it is recommended that you switch to the Canary build of Magisk. This is a testing build of Magisk and might be a little bit unstable (though I haven’t experienced anything as such). So refer to the below steps to make this switch right away:

- Launch the Magisk App
- tap on the Settings icon situated at the top right.
- Then go to the Update Channel section
- Finally, select Canary from the list.
That’s it. In most cases, this is enough to fix the Magisk Safetynet API error. If that doesn’t happen with you, then please proceed with the other steps given below.
STEP 2: Ensure Magisk App Updation
It has been a general notion that users don’t tend to update the Magisk app since it is already providing administrative privileges well as good. However, that is not usually the case, and using an older build could well lead to compatibility issues as well. So it is recommended that you update to the latest version right away.

For that, launch the Magisk App and if you see an Update button next to App, tap on it and do so right away. If you are already on the latest build, well and good. let’s now move over to the next step to fix the Magisk Safetynet API error.
STEP 3: Delete Magisk Data
Next up, you will have to delete the app data and cache as well. Here’s how it could be carried out:

- Head over to the Settings page on your device.
- Then go to Apps and Notifications > App Info.
- Scroll to the magisk app and go to its Storage and Cache section.
- Within that, tap on the Clear Storage/Clear Data option and wait for the process to complete.
STEP 4: Re-Download Magisk SafetyNet API

- Connect your device to the internet.
- Launch the Magisk App and tap on Check SafetyNet.
- Magisk will now ask to download the Proprietary Code, tap OK.
- Once downloaded, the SafetyNet test result will be right in front of you.
That’s it. These were the steps to fix the Magisk Safetynet API error. If you have any queries concerning the aforementioned steps, do let us know in the comments. We will get back to you with a solution at the earliest.
About Chief Editor

Sadique Hassan
administrator
A technical geek by birth, he always has a keen interest in the Android platform right since the birth of the HTC Dream. The open-source environment always seems to intrigue him with the plethora of options available at his fingertips. “MBA by profession, blogger by choice!”
Когда дело доходит до бессистемного корневого доступа с функцией сокрытия меры безопасности Google SafetyNet на устройствах Android, Magisk лучший. Используя Magisk и Magisk Manager, вы можете легко включить root-доступ на любом из ваших Android-устройств без возиться с системными разделами, что означает, что вы по-прежнему будете получать обновления программного обеспечения, вы по-прежнему можете использовать банковские операции приложения и т. д. Но как исправить ошибку Magisk SafetyNet API, если вы столкнулись с ней.
Хорошо, укоренение Ваш Android-телефон, очевидно, приносит с собой массу плюсов и неограниченные возможности настройки. Но у него также есть изрядное количество проблем или ошибок, если вы каким-то образом не выполняете шаги рутирования должным образом или даже SafetyNet обнаруживает какие-либо изменения или настройки на уровне подсистемы с помощью Magisk. Итак, если сработает флаг функции SafetyNet, вот что произойдет.
Содержание страницы
- Что такое Magisk Safetynet API?
-
Как устранить ошибку Magisk Safetynet API
- 1. Обновите приложение Magisk
- 2. Проверить сертификат PlayStore
- 3. Перейти на Magisk Canary
- 4. Проверьте SafetyNet еще раз
Что такое Magisk Safetynet API?
Если вы какое-то время пользуетесь Android или являетесь его стойким фанатом в течение многих лет, то вы должны были знать о рутировании и Magisk. Он предлагает бессистемный root-доступ для изменения подсистемы вашего Android-устройства без фактического вмешательства в системный раздел или системные файлы.
Таким образом, исходные системные файлы останутся нетронутыми, и, следовательно, ваше устройство не может быть обнаружено системой безопасности Google. SafetyNet от Google — одна из главных мер безопасности, которая предварительно загружена на последние устройства Android и предназначена для предотвращения использования ненужных сторонних инструментов или файлов путем настройки системы. SafetyNet может легко обнаружить любое вмешательство или изменение системы вашего устройства с помощью внешних приложений или инструментов.
Это в основном предотвращает доступ вашего устройства к незащищенным приложениям или файлам, чтобы повысить безопасность и конфиденциальность данных. Сеть безопасности Google обнаруживает рутированное устройство даже с помощью Magisk и иногда блокирует доступ к определенным приложениям. работает или открывается должным образом, например, любое из банковских приложений, Google Pay, Netflix, Pokemon GO, и т.п.
Как устранить ошибку Magisk Safetynet API
Здесь мы поделились всеми пошаговыми методами решения такой проблемы. Итак, не теряя больше времени, давайте перейдем к делу.
1. Обновите приложение Magisk
Это одна из распространенных причин для большинства пользователей приложения Magisk, что они даже не проверяют наличие доступных обновлений и даже не устанавливают обновления целую вечность. Как и в случае с любыми другими мобильными приложениями, если вы не устанавливаете обновления какое-то время, приложение начинает вести себя странно, что может вызвать несколько проблем. Для этого:
- Откройте приложение Magisk Manager на рутированном устройстве.
- Нажмите на ОБНОВИТЬ рядом с опцией Magisk Update.
- Точно так же не забудьте нажать на ОБНОВИТЬ рядом с опцией Magisk Manager> При появлении запроса выберите УСТАНОВИТЬ. [Если он запрашивает разрешение на установку неизвестных приложений, не забудьте нажать на ОК принадлежащий «Разрешить из этого источника» переключать]
- Подождите, пока процесс завершится.
- После этого нажмите «Открыть» и проверьте наличие проблемы.
2. Проверить сертификат PlayStore
- Просто откройте приложение Magisk и убедитесь, что Шкура магиска вариант.
- Теперь проверьте (поставьте галочку) на Магазин игр и закройте Magisk.
- Затем перейдите к устройству Настройки меню> Приложения (Установленные приложения)> Искать Google Play магазин.
- Далее откройте Магазин игр из списка приложений> Перейти к Хранилище приложений.
- Просто очистите Данные приложения а также Кэш приложения из Магазин игр.
- Перезагрузите телефон и попробуйте проверить, в чем проблема.
3. Перейти на Magisk Canary
Также настоятельно рекомендуется переключиться на последнюю сборку Magisk Canary на вашем устройстве, чтобы получить больше функций, улучшений и стабильности, чем в предыдущих сборках. Для этого:
- Открой Приложение Magisk > Нажмите на Настройки в правом верхнем углу.
- Перейти к Обновить канал > Выбрать Канарейка из списка.
Обязательно загрузите последнюю версию Magisk прямо с github: topjohnwu / Magisk это легко исправит ошибки API SafetyNet.
На момент написания этой статьи в Magisk v23.0 были исправлены ошибки API SafetyNet.
4. Проверьте SafetyNet еще раз
- Если у вас ничего не работает, попробуйте удалить хранилище / данные приложения Magisk и кеш приложения с устройства. Настройки меню> Программы > Управление приложениями > Информация о приложении > Очистить данные приложения а также Очистить кеш приложения.
- После этого перезагрузите устройство, чтобы изменить эффекты.
- Теперь обязательно откройте Приложение Magisk. Убедитесь, что ваше устройство подключено к Интернету.
- Нажмите на Проверить SafetyNet кнопка> При появлении запроса выберите ОК к Скачать проприетарный код.
- После загрузки Magisk покажет результаты теста SafetyNet на экране.
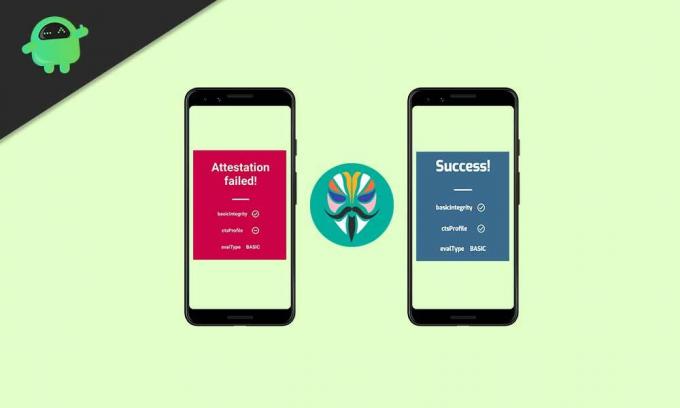
- Если это показывает ‘Успех’ с отмеченными флажками basicIntegrity и ctsProfile (отмечены галочкой), что означает, что мера безопасности SafetyNet была успешно пропущена на вашем Android-устройстве с root-правами Magisk.
- Наслаждаться! Теперь вы больше не получите ошибку API Magisk SafetyNet.
Вот и все, ребята. Мы надеемся, что вы нашли это руководство полезным. Для дополнительных запросов вы можете оставить комментарий ниже.
New issue
Have a question about this project? Sign up for a free GitHub account to open an issue and contact its maintainers and the community.
By clicking “Sign up for GitHub”, you agree to our terms of service and
privacy statement. We’ll occasionally send you account related emails.
Already on GitHub?
Sign in
to your account
Closed
palmbeach05 opened this issue
Apr 15, 2021
· 9 comments
Comments
![]()
Device: Moto G7 Power
Android version: 10
Magisk version name: e136fb3
Magisk version code: 22102
In the past 24 hrs, Magisk Check SafetyNet gives an error. Magisk properly installed and patched. External root checker verifies root. Issue seems to be across multiple devices. Tried the advice from Didgeridoohan given from here #4183 but issue persists. Internet connection is good.


![]()
Devices: OnePlus 5T, OnePlus 7T McLaren
Version: 22102
Same issue across my devices.
![]()

Is a safetynet issues or magisk safetynet test issues. 😬
Redmi Note 8 — Rom: Proyect Sakura
![]()
Same problem here huawei y9 2019
In the last 24 hours safetynet was work correctly. Now it’s given Error!


![]()
Getting the API error from Magisk, but other safetynet checkers still work (and pass, phew)
![]()
Device: OnePlus 7TPro
Android version: 11
Magisk version name: e136fb3 (22102)
Magisk version code: 22102 (20)
Same issue as above but RootChecker verifies that SafetyNet passes. Reset my phone to try again and now I am unable to get SafetyNet to pass on both Stable and Canary.
![]()
Magisk = API error (N/A)
Root checker = fail (can’t access Google Play Services)
Safetynet Helper Sample = pass
This is all pretty weird tbh
![]()
Please have some patience and wait for a fix.
More than likely, if I’m not much mistaken, this’ll all be cleared up tomorrow. Usually when that happens, the Safetynet API key has had it’s quota exhausted
![]()
realKarthikNair, e8035669, storm1er, matham, jh0bc, and Snuupy reacted with laugh emoji
![]()
Already fixed for the next Canary. It’s superficial only, the device still passes if it did before.
Status codes for the SafetyNet API.
Constant Summary
| int |
RECAPTCHA_INVALID_KEYTYPE |
Cannot start the reCAPTCHA service because type of site key is not valid. |
| int |
RECAPTCHA_INVALID_PACKAGE_NAME |
Cannot start the reCAPTCHA service because calling package name is not matched with site key. |
| int |
RECAPTCHA_INVALID_SITEKEY |
Cannot start the reCAPTCHA service because site key parameter is not valid. |
| int |
SAFE_BROWSING_API_NOT_AVAILABLE |
An internal error occurred causing the call to |
| int |
SAFE_BROWSING_API_NOT_INITIALIZED |
|
| int |
SAFE_BROWSING_MISSING_API_KEY |
The API key required for calling |
| int |
SAFE_BROWSING_UNSUPPORTED_THREAT_TYPES |
None of the input threat types to |
| int |
UNSUPPORTED_SDK_VERSION |
User device SDK version is not supported. |
| int |
VERIFY_APPS_INTERNAL_ERROR |
An internal error occurred while using the Verify Apps API. |
| int |
VERIFY_APPS_NOT_AVAILABLE |
Verify Apps is not supported on this device. |
| int |
VERIFY_APPS_NOT_ENABLED |
Cannot list potentially harmful apps because Verify Apps is not enabled. |
Inherited Constant Summary
From class com.google.android.gms.common.api.CommonStatusCodes
| int |
API_NOT_CONNECTED |
The client attempted to call a method from an API that failed to connect. |
| int |
CANCELED |
The result was canceled either due to client disconnect or |
| int |
DEVELOPER_ERROR |
The application is misconfigured. |
| int |
ERROR |
The operation failed with no more detailed information. |
| int |
INTERNAL_ERROR |
An internal error occurred. |
| int |
INTERRUPTED |
A blocking call was interrupted while waiting and did not run to completion. |
| int |
INVALID_ACCOUNT |
The client attempted to connect to the service with an invalid account name specified. |
| int |
NETWORK_ERROR |
A network error occurred. |
| int |
RESOLUTION_REQUIRED |
Completing the operation requires some form of resolution. |
| int |
SERVICE_DISABLED |
This constant was deprecated. This case handled during connection, not during API requests. No results should be returned with this status code. |
| int |
SERVICE_VERSION_UPDATE_REQUIRED |
This constant was deprecated. This case handled during connection, not during API requests. No results should be returned with this status code. |
| int |
SIGN_IN_REQUIRED |
The client attempted to connect to the service but the user is not signed in. |
| int |
SUCCESS |
The operation was successful. |
| int |
SUCCESS_CACHE |
The operation was successful, but was used the device’s cache. |
| int |
TIMEOUT |
Timed out while awaiting the result. |
Inherited Method Summary
From class java.lang.Object
| Object |
clone() |
| boolean |
equals(Object arg0) |
| void |
finalize() |
| final Class<?> |
getClass() |
| int |
hashCode() |
| final void |
notify() |
| final void |
notifyAll() |
| String |
toString() |
| final void |
wait(long arg0, int arg1) |
| final void |
wait(long arg0) |
| final void |
wait() |
Constants
public static final int
RECAPTCHA_INVALID_KEYTYPE
Cannot start the reCAPTCHA service because type of site key is not valid.
Please register new site key with the key type set to «reCAPTCHA Android» via
//g.co/recaptcha/androidsignup.
Constant Value: 12008
public static final int
RECAPTCHA_INVALID_PACKAGE_NAME
Cannot start the reCAPTCHA service because calling package name is not matched with
site key.
Please add the new package name to your site key via reCAPTCHA Admin Console or choose to disable the
package name validation for your key.
Constant Value: 12013
public static final int
RECAPTCHA_INVALID_SITEKEY
Cannot start the reCAPTCHA service because site key parameter is not valid.
Constant Value: 12007
public static final int
SAFE_BROWSING_API_NOT_AVAILABLE
public static final int
SAFE_BROWSING_API_NOT_INITIALIZED
public static final int
SAFE_BROWSING_MISSING_API_KEY
public static final int
SAFE_BROWSING_UNSUPPORTED_THREAT_TYPES
public static final int
UNSUPPORTED_SDK_VERSION
User device SDK version is not supported.
Constant Value: 12006
public static final int
VERIFY_APPS_INTERNAL_ERROR
An internal error occurred while using the Verify Apps API.
Constant Value: 12004
public static final int
VERIFY_APPS_NOT_AVAILABLE
Verify Apps is not supported on this device.
Constant Value: 12003
public static final int
VERIFY_APPS_NOT_ENABLED
Cannot list potentially harmful apps because Verify Apps is not enabled.
The developer may call
enableVerifyApps()
Constant Value: 12005
В этом руководстве мы покажем вам, как исправить ошибку Magisk Safetynet API. Несмотря на то, что рутирование устройства приносит множество плюсов, с другой стороны, оно имеет и немало недостатков. Прямо здесь, наверху, стоит проблема срабатывания флага сети безопасности. Когда это происходит, сбой базовой проверки целостности и ошибка несоответствия профиля cts являются двумя распространенными явлениями.
Проще говоря, это приведет к тому, что вы не сможете запускать банковские и финансовые приложения, а также такие игры, как Pokemon Go и другие. В связи с этим продолжают появляться новые методы, которые помогают обойти эти проверки безопасности. И на данный момент также есть рабочий метод. Но прежде чем вы действительно попробуете это, вам нужно сначала проверить, действительно ли проблема с сетью безопасности существует на вашем устройстве или нет.
Это можно довольно легко сделать прямо из самого Magisk Manager (или приложения Magisk, как теперь известно, начиная с версии 22). Однако некоторые пользователи сталкиваются с проблемой API при выполнении этой задачи. Если вы также получаете ошибку из-за ошибки API Magisk Safetynet, это руководство поможет вам ее исправить. Следуйте вместе.
Приведенные ниже инструкции перечислены в отдельных разделах для простоты понимания. Обязательно следуйте в той же последовательности, как указано. Droidwin и его участники не будут нести ответственность в случае термоядерной войны, если ваш будильник не разбудит вас, или если что-то случится с вашим устройством и данными, выполнив следующие шаги.
ШАГ 1: переключитесь на Magisk Canary
Прежде всего, рекомендуется перейти на канарскую сборку Magisk. Это тестовая сборка Magisk, и она может быть немного нестабильной (хотя я ничего подобного не испытывал). Поэтому обратитесь к следующим шагам, чтобы сделать этот переключатель сразу:
- Запустите приложение Magisk
- нажмите на значок настроек, расположенный в правом верхнем углу.
- Затем перейдите в раздел «Обновить канал».
- Наконец, выберите Canary из списка.
Вот и все. В большинстве случаев этого достаточно, чтобы исправить ошибку API Magisk Safetynet. Если этого не произошло с вами, выполните другие действия, описанные ниже.
ШАГ 2: Убедитесь, что приложение Magisk обновлено
Принято считать, что пользователи не стремятся обновлять приложение Magisk, поскольку оно уже предоставляет административные привилегии. Однако обычно это не так, и использование более старой сборки также может привести к проблемам совместимости. Поэтому рекомендуется сразу обновиться до последней версии.
Для этого запустите приложение Magisk, и если вы видите кнопку «Обновить» рядом с приложением, нажмите на нее и сделайте это прямо сейчас. Если вы уже используете последнюю сборку, ну и хорошо. давайте теперь перейдем к следующему шагу, чтобы исправить ошибку API Magisk Safetynet.
ШАГ 3: Удалить данные Magisk
Далее вам нужно будет удалить данные приложения и кеш. Вот как это можно было бы осуществить:
- Перейдите на страницу настроек на вашем устройстве.
- Затем перейдите в «Приложения и уведомления» > «Информация о приложении».
- Прокрутите до приложения magisk и перейдите в раздел «Хранилище и кэш».
- При этом нажмите на опцию «Очистить хранилище/Очистить данные» и дождитесь завершения процесса.
ШАГ 4. Повторно загрузите API Magisk SafetyNet
- Подключите ваше устройство к Интернету.
- Запустите приложение Magisk и нажмите «Проверить SafetyNet».
- Теперь Magisk попросит загрузить собственный код, нажмите «ОК».
- После загрузки результаты теста SafetyNet будут прямо перед вами.
Вот и все. Это были шаги по исправлению ошибки Magisk Safetynet API. Если у вас есть какие-либо вопросы относительно вышеупомянутых шагов, сообщите нам об этом в комментариях. Мы вернемся к вам с решением в ближайшее время.
Are you facing the Magisk SafetyNet Failed Issue and struggling to resolve it with the latest update by Google? Well, then this article will ease your pain a little bit, we have done the hard part of researching for the solution and have written a detailed and simplified step-by-step guide to the Fix Magisk SafetyNet Failed Issue.
So here we go, after years of fun messing around using Magisk, it seems that Google FINALLY decided to «fix» SafetyNet to something useful, and that is to use key attestation to verify device status (after 3 years since introduced to Android’s platform!)
— John Wu (@topjohnwu) March 11, 2020
We are going to use quite a few workarounds to make this possible to bypass the SafetyNet even after the new update. But if none works then last option will be to go back to Stock ROM.
Also Read: 10 Best Magisk Modules For Your Rooted Phone
What is SafetyNet?
SafetyNet is the Topmost Security measure that ensures the device is safe to run a number of the android applications mostly Banking applications. Recently Google has modified its working mechanism to enhance the safety of the android platform.
You might hear about Google Pay or Samsung Pay which is introduced in most countries now. This app will check the SafetyNet and if it confirms that then it’ll work. Like this one, most of the banking applications follow an equivalent procedure to run their apps on the android device.
Also Read: Why Magisk Over SuperSU for Rooting your Android Device?

There are two parts to the SafetyNet check, CTS Profile and Basic Integrity.
Examples of when CTS Profile Match will report as false (failed):
- Uncertified device (the manufacturer hasn’t applied for Google certification)
- Unlocked bootloader
- Signs of system integrity compromise (rooting, etc)
- Signs of other attacks (Xposed, EdXposed, etc)
Examples of when Basic Integrity will report as false (failed):
- Signs of system integrity compromise (rooting, etc)
- Signs of other attacks (Xposed, EdXposed, etc)
So, if any of the any test fails then the system creates the SafetyNet Failed Issue.
Also Read: 5 Best Android Custom Roms Available Right Now
Methods to Fix SafetyNet Failed Issue

Method 1
Required Files
- Latest Version of Magisk [Download]
- Hidden Core Xposed Module [Download]
- Magisk RIRU-Core Module [Download]
- EdXposed Yahfa [Download]
- EdXposed Manager [Download]
- RIRU Manager [Download]
Now, if you have downloaded all the required files, then you are good to go. Make sure you move all the files to different folder; it will ease your navigation while the process.
- In the first step, we need to install the RIRU Core Module, for doing so, go to Magisk Manager and swipe from the left side, & go to the Modules section, and then tap on the Plus Button.
- Now, after tapping on the Plus Button, the file manager will pop up.
- Then, navigate to the folder and select the Magisk RIRU Core Module zip. It will now start installing the module.
- After installation, Magisk will ask you to reboot for the changes to work.
- Now, we need to install RIRU Manager so that we can check whether the RIRU Core module is successfully installed or not, for doing so, go to file manager, and to the folder, you saved all the downloaded files.
- I think you already know how to install an apk file.
- After installing the RIRU manager, reboot the device.
- After reboot, open your app drawer and search for the app RIRU.
- Open it and if it says, ‘Everything Looks Fine’, then you’re can proceed to the next steps.
- Now again open Magisk Manager and install the EdXposed Yahfa Module, in a similar way we installed RIRU Core Module.
- After installation, Magisk will ask you to reboot for the changes to work.
- Now, we need to install the EdXposed Manager apk.
- Now open the EdXposed Manager, if you don’t see any types of error, then you are good to go.
- In the final step, we will have to install the HiddenCore Module. Install it via Magisk Manager and reboot the device.
- If everything works as expected, then you will see the green signal while testing SafetyNet. Both ctsProfile and basicintegrity will be passed.
Method 2
If you have enabled the USB debugging mode for any reasons, then turn it off as sometimes it causes the system to fail the SafetyNet test. For turning off USB debugging mode, follow the below steps:
If your device’s developer mode is turned off for some odd reasons, then turn it on by tapping multiple times on the build number which can be found in the About Phone section.
- Open your phone’s settings and go to the About Phone section.
- Scroll down and find the Developers Options.
- Open it and then scroll down and search for USB Debugging.
- Toggle the switch towards the left to turn it off.
- No, reboot the device.
- If everything works as expected, then you will see the green signal while testing SafetyNet. Both ctsProfile and basicintegrity will be passed.
Method 3
In this method, we will be changing the SELinux mode to Enforcing. A few users reported that this method worked in their case, so there is no harm in trying. For changing the SELinux mode, follow the below steps:
- Download SELinuxModeChanger from here.
- Run the application and set SELinux to Enforcing.
- Reboot the device so that changes can take place.
- Check the SELinux status in the About Device menu to see if it has changed.
Note: It may wipe your data, so proceed with caution.
Also Read: How to Take TWRP Backup Directly On PC With ADB
Method 4
You can try installing a custom Kernel. Why are we saying this? Well, the CTS is used by Google to verify that the device and its firmware meet the certification standards.
We will suggest using Fanco Kernel, if compatible with your ROM.
Also Read: How to Install Custom Kernel on Your Android Smartphone Easily
Conclusion
Ther you go, you have come to the final part of the details guide on how to Fix Magisk SafetyNet Failed Issue. We hope that you succesfully passed the SafetyNet Test on your device.
If you have any further doubts regarding the Magisk SafetyNet Failed Issue, then make sure to comment down below. And you solved the Magisk SafetyNet Failed issue by following our guide then make sure to share it your friends who is/are facing the same issue.
Peace 😉