В данной статье мы попытались собрать абсолютно все способы решения проблемы в Magisk «SafetyNet не пройден: несовпадение профиля CTS».
Большинство пользователей которые ранее пользовались SuperSU переходят на новый Magisk, так как он имеет довольно множество плюшек, о которых мы говорили ранее.
Одной из главных достоинств Magisk — это возможность прятать от банковских и других приложений наличие Root прав, так как при их обнаружение, они останавливают свою работу.
Но многие пользователи, что установили Magisk Manager, столкнулись с проблемой «SafetyNet не пройден: несовпадение профиля CTS» и в этой статье мы предложим вариантов как ее исправить.
Ниже будут представлены 6 шагов для исправления «SafetyNet не пройден».
Шаг 1 — Избавиться от SuperSU
Если вы получали Root права с помощью ZIP файла SuperSU или CF Auto Root, который установил SuperSU на ваш Android, а после решили поменять на Magisk, то это может быть первой проблемой с SafetyNet.
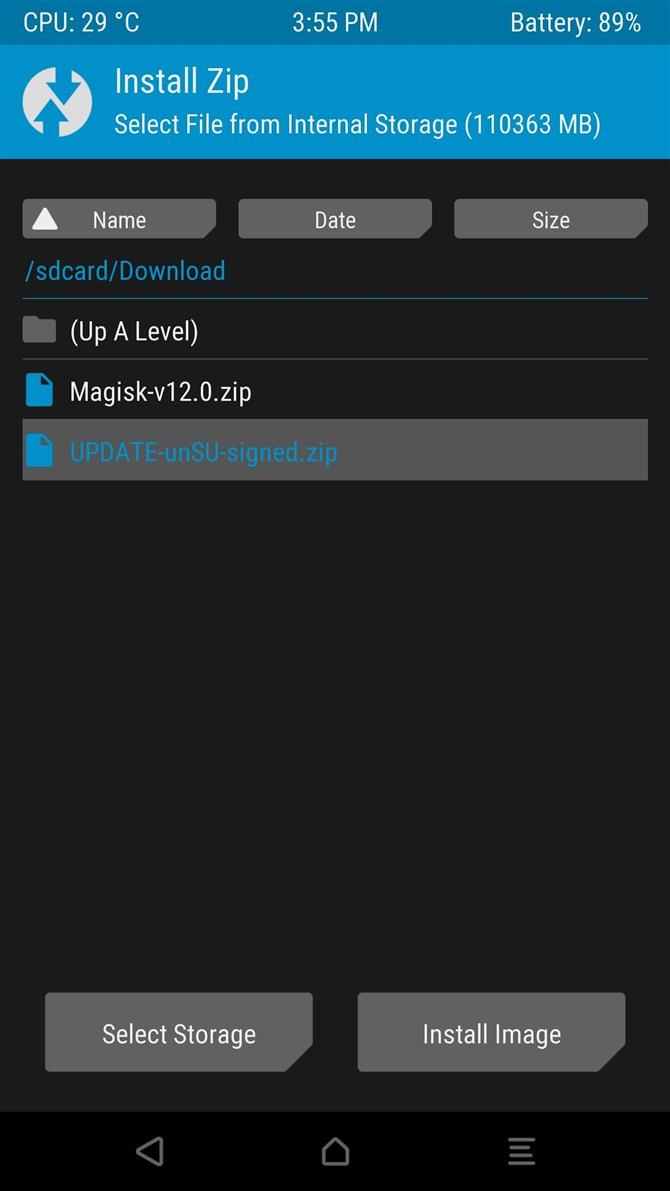
Удалите SuperSu из вашего смартфона или планшета, а после прошить в Recovery файл UPDATE-unSU-signed.zip чтобы полностью вычистить все из системы.
Шаг 2 — Изменить режим SELinux
Попробуйте установить режим работы SELinux в «Permissive», а после вернуть обратно «Enforcing» и перезагрузить Android.
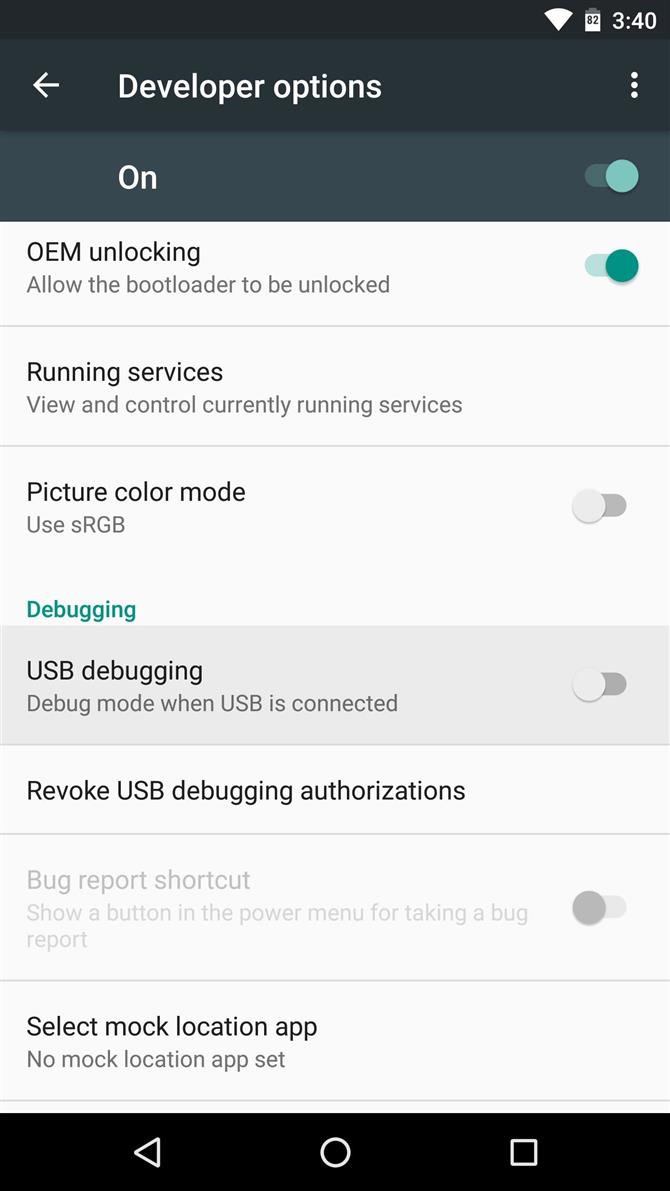
Шаг 3 — Отключить «отладку по USB»
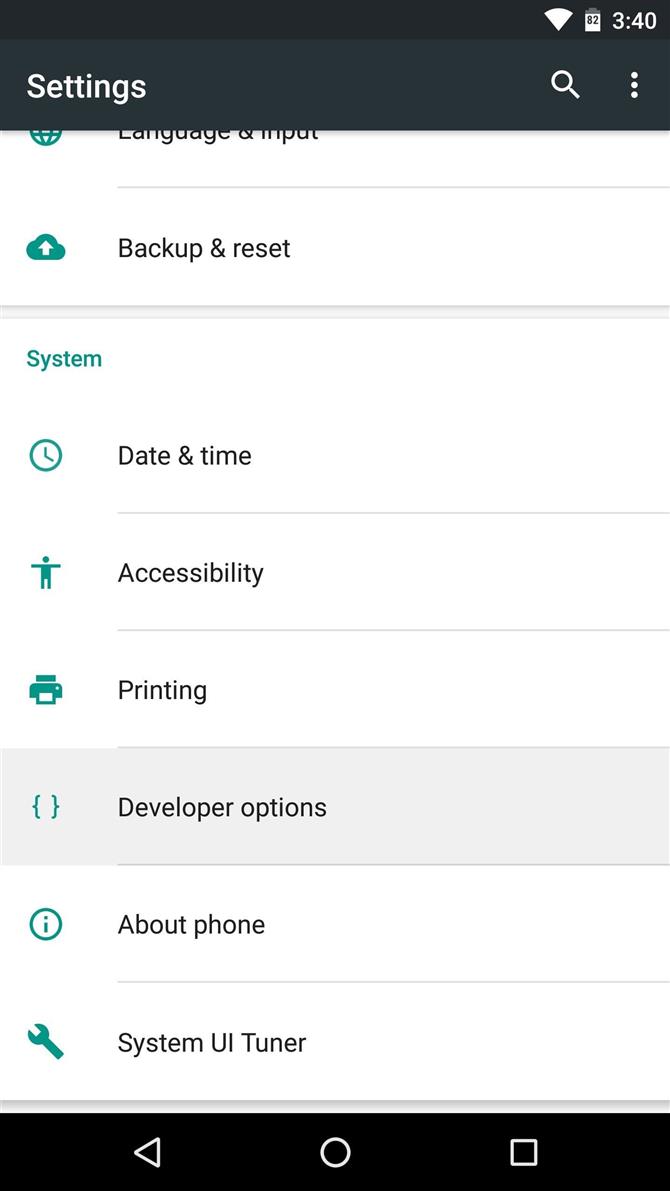
Если у вас до последнего момента у вас была включена «отладка по USB«, тогда перейдите в меню «Настройки»-> «Для разработчиков» и отключить «отладку» и перезагрузить Android.
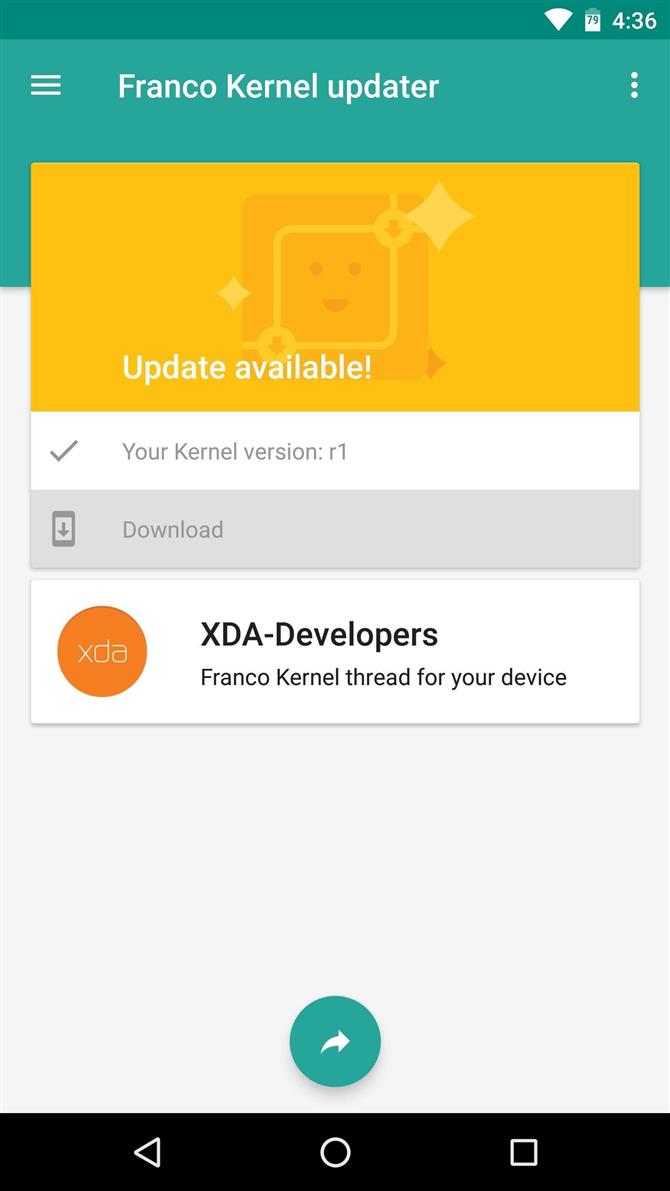
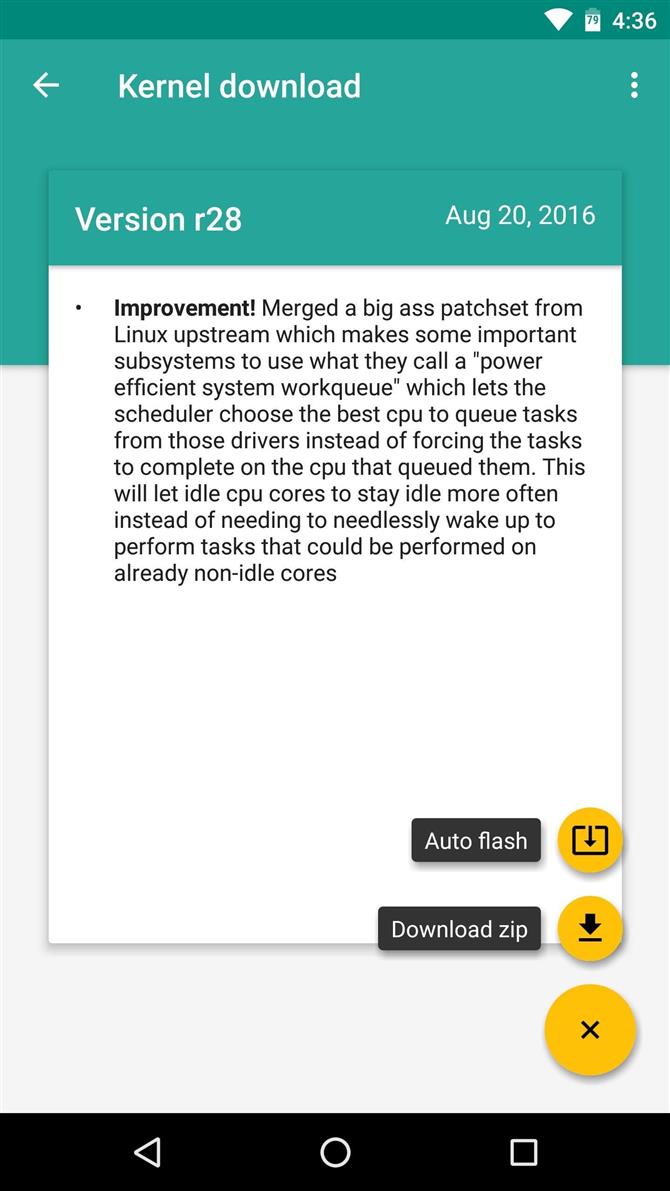
Шаг 4 — Используете другое ядро
Поищите в сети интернет стороннее ядро для своего Android, после чего проверьте не исчезла ли проблема в Magisk «SafetyNet не пройден: несовпадение профиля CTS».
Шаг 5 — Другие проблемы
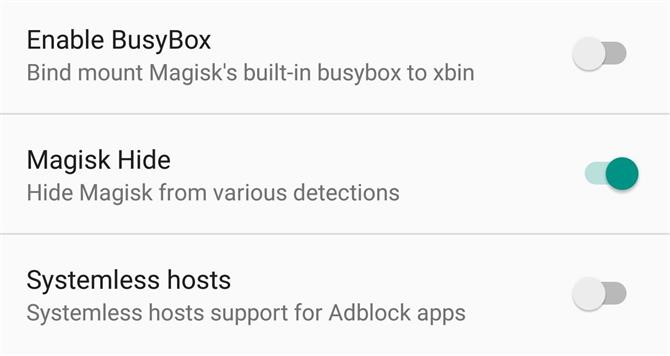
Перейдите в меню настроек Magisk и отключите Busybox и Systemless hosts и перезагрузите Android.
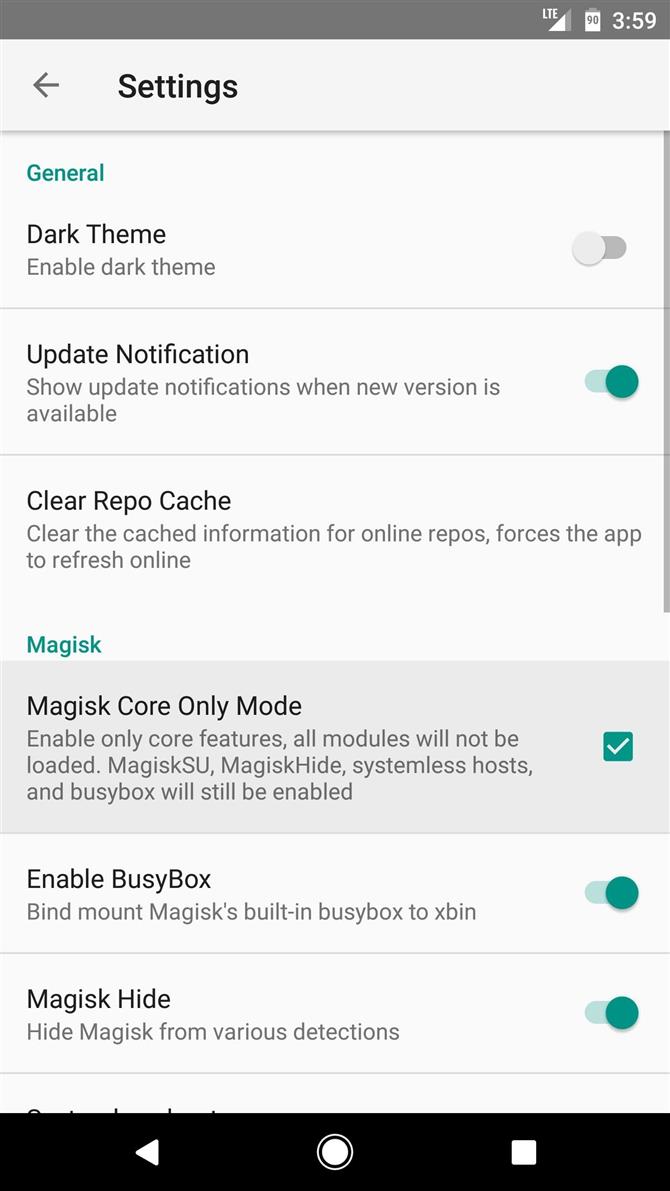
Шаг 6 — включить режим Magisk Core Only Mode
Если все предыдущее шаги вам не помогли, тогда попробуйте включить режим работы Magisk Core Only Mode, который отключает дополнительные возможности Magisk.
Шаг 7 — добавить строки build.prop
С оригинальной прошивки (если вы используете кастом) в файле build.prop, который находиться в разделе /system, скопируйте поля со значения:
- ro.build.description=xxxx
- ro.build.fingerprint=xxxx
И добавьте их в файл build.prop установленной прошивки.
Шаг 8 — ввести команду в терминале
Установите приложение терминал на Android и введите в него следующие команды:
su
 sh /magisk/.core/magiskhide/disable
 sh /magisk/.core/magiskhide/enable
Шаг 9 — Начать все с начала
Если вам ничего не помогло, тогда попробуйте переустановить прошивку на вашим Android, а после получить Root с помощью Magisk, чтобы избавиться от проблемы «SafetyNet не пройден: несовпадение профиля CTS».
Остались еще вопросы? Пишите их в комментариях, рассказывайте, что у вас получилось или наоборот!
Вот и все! Больше статей и инструкций читайте в разделе Статьи и Хаки Android. Оставайтесь вместе с сайтом Android +1, дальше будет еще интересней!
UPDATE – JANUARY, 2023 – UPDATED SAFETYNET FIX BY kdrag0n (Magisk 24 and newer)
Kdrag0n released a new version at the beginning of 2023, and here are the highlights of the v2.4.0 –
- Play Integrity bypass without breaking device checks or causing other issues
- Disabled use of hardware attestation on Pixel 7 and newer (@anirudhgupta109)
- Updated instructions for newer Android and Magisk versions
- Better debugging for future development
Kdrag0n mentioned that he wanted to make sure that this module won’t cause any unnecessary breakage. The spoofing will happen dynamically at runtime and only when necessary, minimizing the adverse effects.
DOWNLOAD UNIVERSAL SAFETYNET FIX v2.4.0
UPDATE – JUNE 2022 – UPDATED SAFETYNET FIX BY kdrag0n (Zygisk only)
After almost six months, Kdrag0n has released the new version of the SafetyNet fix, and this one only supports Zygisk (Magisk 24 and newer). Here are the highlights of this new version –
- Fixed fingerprint on OxygenOS/ColorOS 12
- Support for Magisk 24+ module updates
- Restored support for Android 7
DOWNLOAD UNIVERSAL SAFETYNET FIX v2.3.1
UPDATE – DECEMBER 2021 – UNIVERSAL SAFETYNET FIX BY kdrag0n (Zygisk and Riru versions)
kdrag0n has released new versions of the Universal SafetyNet Fix, both Riru and Zygisk versions. So what to choose?
Well, for those using Magisk Canary, go with the Zygisk Version.
For those using the stable Magisk, go with the Riru version. Remember that if you go with the Riru version of this universal SafetyNet fix, you must install the Riru module through Magisk Manager.
Here are the links to the two versions –
DOWNLOAD UNIVERSAL SAFETYNET FIX v2.2.1 (Zygisk)
DOWNLOAD UNIVERSAL SAFETYNET FIX v2.2.1 (Riru)
Android versions 7–12 are supported, including OEM skins such as Samsung One UI and MIUI.
UPDATE – SEPTEMBER 2021 – NEW FIX FOR SAFETYNET FAILED ISSUE
So recently, for some reason, SafetyNet has started failing even after installing the below-mentioned Universal Fix by kdrag0n. Thanks to TeamFiles on Telegram., we have another fix that works for this new issue. This fix requires you first to download a few files. Here are the ones you need to download and keep on your phone before starting with the steps –
- Riru – Latest Release
- LSPosed – Latest Release
- XPrivacyLua – Download the Apk
You can also download a Zip file that has all these three files included in it. Here is the link to that.
Before starting, make sure you back up everything as this fix has not been tested for all the devices, so it may cause issues in your phone. Also, make sure the latest Stable version of Magisk is there on your phone. We won’t be responsible for any damage happening to your phone.
Here are the steps –
- First, go to Magisk and install the Riru Module. Once the installation succeeds, come back to the modules page. Do not reboot yet!
- Next, install the LSPosed Module. Once that installs successfully, reboot your phone. This is important! Do not reboot in the first step.
- Once the phone reboots, you will see a new LSPosed app installed.
- Now, you need to install the third apk file that you downloaded. Once that installs, go to the LSPosed app and go to Modules.
- There, choose the XPrivacyLua and ensure you “Enable Module.” Initially, make sure the “System Framework” and “Settings Storage” options are checked.
- Now, go to the top right and tap on the three-dot menu. Select “Hide” and uncheck the “System Apps.”
- So now, you need to scroll down and find Google Play Services among all the apps. Just Check that. Now Reboot your phone again.
- When your phone reboots, you must go back to the LSPosed app and ensure that three options are checked in the XPrivacyLua module. There are – “System Framework,” “Settings Storage,” and “Google Play Services.”
- Once that is all right, close LSPosed, and there will be another app installed on your phone named “XPrivacyLua.” Open that. Click “I Agree.”
- Here, find Google Play Services and tap on that. Now, you need to check only one option there. And that’s “Use Tracking.” That should be the last option there.
- Finally, Clear all the data and cache of the Google Play Store and Google Play Services. Also, Hide Magisk and change its name.
- And now, do a final reboot!
And that’s it! If everything goes well, you will no longer have the SafetyNet Failed Issue on your phone, and the Play Store will show Device is Certified. If Banking apps are not working even after fixing the SafetyNet with this method, then you need to check “Use Tracking” for those apps in “XPrivacyLua.” Just like what we did with Play Services. And then, the same steps, i.e., clear data and reboot. For a better understanding, here is the full video tutorial by Munchy –
UPDATE – JULY 4, 2021 – UNIVERSAL FIX FOR SAFETYNET (ALL THANKS TO kdrag0n)
kdrag0n has shared a Universal Fix for Google SafetyNet on Android devices with hardware attestation and unlocked bootloaders. You can now install a Magisk Module that will fix the ctsProfile Failed issue. On the official Github page, kdrag0n has mentioned that –
This Fix defeats both hardware attestation and the new CTS profile updates, without any changes to device or model names, as long as you can pass basic attestation (i.e. fingerprints). No device-specific features (such as the Pixel-exclusive Google Assistant design) will be lost. MagiskHide is required if the device is rooted. Android versions 8–11 are supported. Heavy OEM skins are not officially supported, but they may work depending on your luck and the particular ROM in question.
Anyways, here are the steps –
- Download this Magisk Module (For Android 8-11) – SAFETYNET-FIX-v1.2.0
- Open Magisk and go to the Modules tab
- Install the Magisk Module that you downloaded
- Reboot your phone, and that’s it.
v1.2.0 Changelog:
- Added support for Android 12 Beta 2
- Fixed boot loop after major Android updates
PREVIOUS VERSIONS OF THE FIX –
NOTE – DONT INSTALL MODULE FOR Android 11 on Android 10 and vice versa as it will result in BOOTLOOP !!!
- SAFETYNET-FIX-v1.1.1(ANDROID 8-11)
- SAFETYNET-FIX-v1.1.0 (ANDROID 8 – 11)
- SAFETYNET-FIX-v1.0.2 (ANDROID 11)
- SAFETYNET-FIX-v1.0.2 (ANDROID 10)
- SAFETYNET-FIX-v1.0.0 (ANDROID 11)
UPDATE – HERE IS ANOTHER METHOD THAT WILL HOPEFULLY HELP YOU FIX THE CTS PROFILE FALSE ISSUE
NOTE – TRY THESE STEPS ON YOUR OWN RISK. WE WON’T BE RESPONSIBLE IF ANYTHING GOES WRONG.
Here are the steps –
- First, go to the Google Play Store & download “Termux,” an Android terminal emulator and Linux environment app.
- Next, open Magisk Manager & from the left side menu and select the “Downloads” option.
- There, you need to Install two Magisk Modules – Busybox for Android NDK & MagiskHide Props Config.
- You can either Install one Module & then reboot and then Install the other, or Install One, go back, install the second, and then reboot. Both will work.
- Once the phone reboots, we need to do one final thing, which is the most important step. Before moving to the next step, check if both modules are shown as installed or not in Magisk Manager.
- Open the Termux app & then type “su” and press Enter. This will grant Superuser Rights to the app.
- Next, type “props” & press Enter. You will see a lot of options & numbers in front of them to choose from.
- You need to choose the option that says “Edit Device Fingerprint.” It should be the Number “1,” but double-check it on your device.
- Enter that Number & press Enter.
- Again, you’ll see some options & from there, choose the one that says “Pick a certified fingerprint.” This time, instead of numbers, you will see letters in front of each option like “f,” “v,” “s,” “b,” etc. Enter the letter in front of the option (Pick a Certified Fingerprint) & press Enter.
- Now, you’ll see a long list of various Smartphone companies, so from here, you need to choose your phone’s company. For Example, if your phone is the Asus Zenfone Max Pro M1, choose “Asus.” Here also, you need to type the number in front of the company name & then press Enter.
- Now, it’ll show you various devices from that company. If your device is there on the list, you’re good to go. Otherwise, you’re not lucky, so you will have to wait for another method.
- Select the number in front of your Phone’s name & then press Enter.
- Finally, it will ask if you want to continue. If you have followed everything above & selected the right options, write “y” & press Enter.
- Finally, press “y” to reboot your device & press Enter. Now, your phone will reboot.
After all these steps, you will see that in the Magisk Manager, it no longer says “false” in front of the ctsProfile option. Also, in the play store, it’ll say “Device in Certified.” Hopefully, you will also be able to use Payment apps like Google Pay on your device (Hopefully).
Thanks to Crazy Customization (YouTube) for the video tutorial.
UPDATE: 2020 – IN MARCH 2020, GOOGLE MADE SOME CHANGES THAT RESULTED IN MAGISK NOT BEING ABLE TO PASS SAFETYNET. HERE IS A WORKAROUND FOR THAT TO FIX THE CTS PROFILE FALSE ERROR (SAFETYNET FAILED).
We will use Xposed Framework for the Workaround, but you need to have your device rooted via Magisk and have the Magisk Manager installed on your phone since we need the Magisk Modules. Now, there is no way to know if Xposed Framework will work on all the devices, so there are chances of it not working on your device.
First of all, here are all the files that you need to download on your device –
- LATEST MAGISK
- HIDDENCORE XPOSED MODULE
- MAGISK RIRU-CORE MODULE ZIP FILE
- EDEXPOSED SANDHOOK OR YAHFA VERSION (Whichever works for you. We suggest trying Yahfa first).
- EdXPOSED MANAGER APK FILE
- RIRU MANAGER APK
HERE ARE THE STEPS TO FIX THE MAGISK CTS PROFILE FALSE ERROR WITH THE NEW METHOD
- First, Install Riru Manager. If you get the Unknown Sources error, enable ‘Allow from this source and Install it.
- Once you install it, go to Magisk Manager, then, from the left side menu, go to the Modules section. Tap on the Plus Button.
- If you don’t have the ‘Show Internal Storage’ option enabled in File Manager, tap on the three dots in the top right corner and select it. In case it is already enabled, you will see the ‘Hide Internal Storage’ option in its place. So you don’t need to do anything.
- Navigate to the folder in the internal storage where you have all the downloaded files, and then select the ‘MAGISK RIRU-CORE’ ZIP file. Once installed, Reboot the phone. (Check the Modules section in the Magisk Manager to see if the module has been installed properly. You will see a checkmark if it is installed successfully).
- In the App Drawer, you will now see a new app called ‘Riru.’ Open it, and if it says ‘Everything Looks Fine,’ you’re all set to follow the next steps. If you get any errors, try installing Riru Module again.
- Now, once again, go to the Magisk Manager > Modules and then press the Plus button. Now, we need to install the ‘EdExposed Module,’ and as mentioned above, there are two versions to choose from. You have to try and see which one works for your device. We will recommend starting with the ‘Yahfa’ version first. Once again, once installed, reboot the phone. After reboot, once again, confirm if the module is installed properly.
- Go to the File Manager and install the ‘EdExposed Manager’ via the APK file. You will see the App in the App Drawer.
- Open it to see if there are any errors or not. If there are any, the ‘Yahfa’ version didn’t work. So, in that case, go to the Module section, remove the Yahfa version, reboot the phone, and then install the ‘Sandhook’ version.
- Finally, install the ‘HiddenCore’ Xposed Module via its APK file. Now, go to ‘EdExposed Manager,’ swipe from the left side, select the ‘Modules’ option, then enable the ‘HiddenCore’ Module. Now, reboot your phone.
- After Reboot, you should check if the ‘HiddenCore’ module has been enabled successfully in the EdExposed Manager.
Well, that’s it! Now, go to Magisk Manager, tap to start the SafetyNet Check, and see that the ‘ctsProfile’ shows as True! This means we successfully did the SafetyNet Bypass.
NOTE THAT IF THIS METHOD ALSO DOESN’T WORK, THEN WE WILL HAVE TO WAIT FOR THE DEVELOPERS TO FIND ANOTHER FIX FOR THIS.
Props to ‘Munchy‘ for sharing this method on his YouTube Channel.
CONCLUSION
This detailed guide was about fixing the CTS Profile Mismatch Error or Magisk Basic integrity False error even with Magisk installed. If the steps mentioned above don’t work, you need to start from scratch, i.e., flash Stock ROM, install TWRP, flash Magisk ZIP and do the same thing again. Did the steps work for you? Do let us know via the comments section.
What is CTS profile mismatch?
CTS means Compatibility Test Suite & CTS Profile Mismatch is an error that causes SafetyNet check to fail, even if you have Magisk on your device.
What is the SafetyNet Check?
Google Developed SafetyNet & it is an API (Application Programming Interface) that is used to detect if a certain device is in a good state or not.
How Do I Fix How do I fix Magisk SafetyNet?
1. Use MagiskSu2. Try unSU3. Turn OFF USB Debugging4. Set Selinux Back to Enforcing5. Try a Custom Kernel
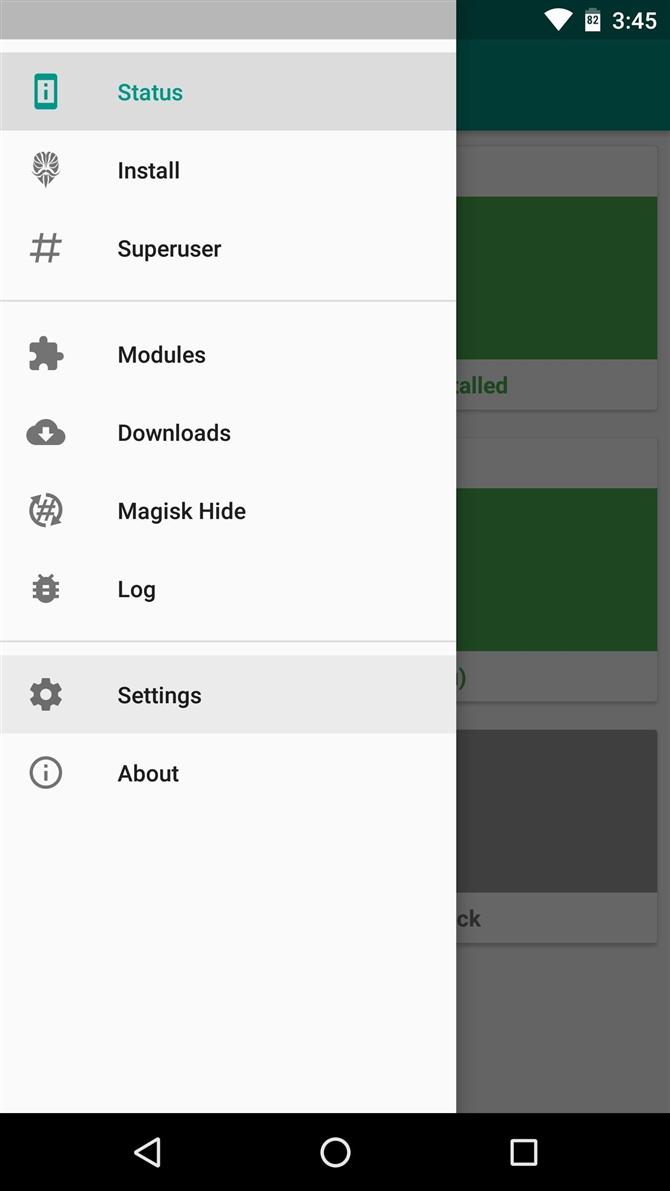
How do I Enable Magisk Hide?
Open Magisk Manager App, then swipe from the left & select Magisk Hide. Now, you can turn on and off it for certain apps.
Из-за новой системы SafeNet от Android некоторые приложения теперь могут блокировать укоренившихся пользователей или не позволять вам вообще обращаться к ним — но по крайней мере на данный момент все еще существуют ограничения.
Вы можете передать большинство проверок SafetyNet с помощью Magisk и без системного корня, но в некоторых случаях тестовый комплект Google Compatibility Test Suite (CTS) остается препятствием.
Если это произошло с вами, существует ряд потенциальных причин: от несовместимых приложений управления корнями до проблем с Magisk Hide.
Прежде чем вы начнете
В этом руководстве предполагается, что вы уже установили Magisk, который представляет собой бессистемную утилиту root, которая может скрыть свое присутствие в SafetyNet.
Когда дело доходит до фактической проверки вашего статуса SafetyNet, самый простой способ сделать это — открыть приложение Magisk Manager и нажать кнопку «Проверка безопасности» в нижней части экрана.
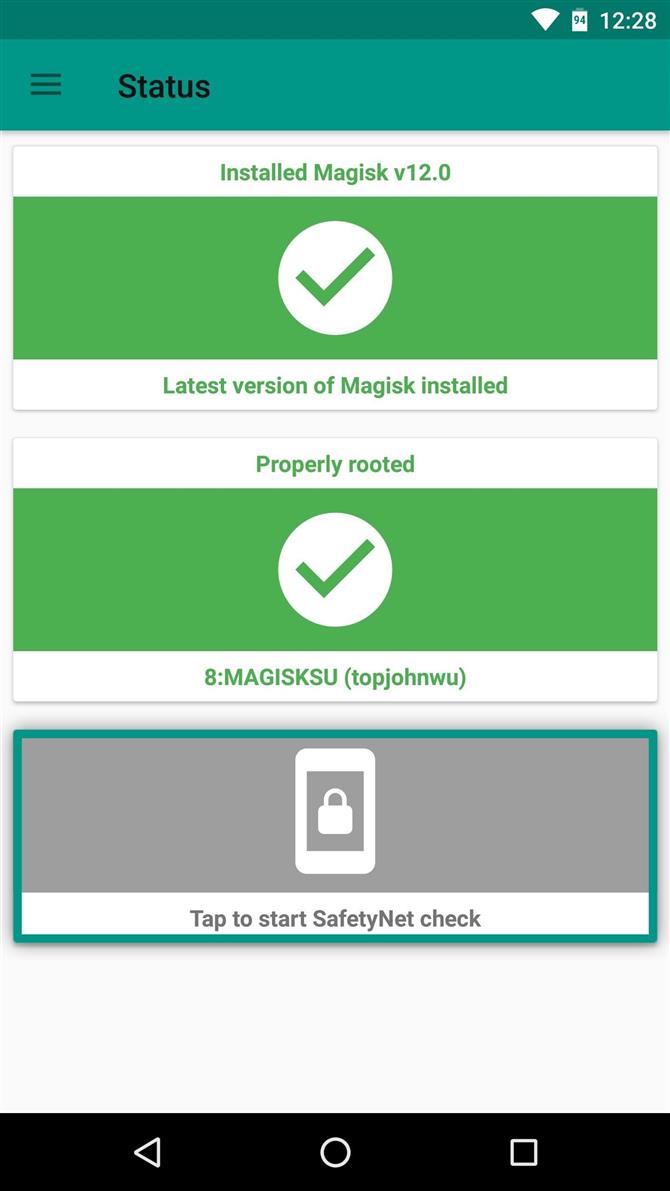
 Проверка статуса SafetyNet в Magisk Manager.
Шаг 1: Избавьтесь от SuperSU и используйте MagiskSU с Magisk Hide
Наиболее вероятной причиной несоответствия профиля CTS является приложение для управления корнями, которое не скрывает себя от SafetyNet.
Скорее всего, вы изначально использовали ваш телефон, используя SuperSU ZIP или CF Auto Root, которые устанавливают SuperSU в качестве приложения для управления корнем по умолчанию.
Поэтому, если это является причиной ваших проблем с CTS, вам нужно будет удалить бинарные файлы SuperSU и заменить их встроенным корневым приложением Magisk.
После того, как вы это сделали, убедитесь, что опция «Магическая Hide» включена в вашем приложении «Магистр».
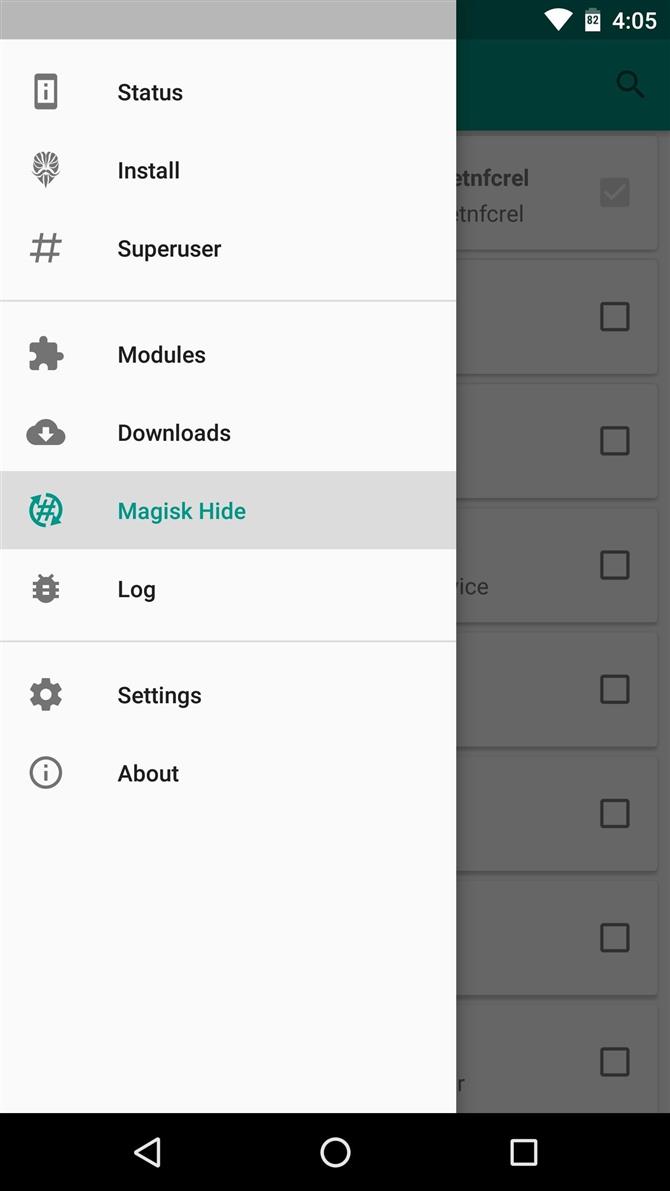
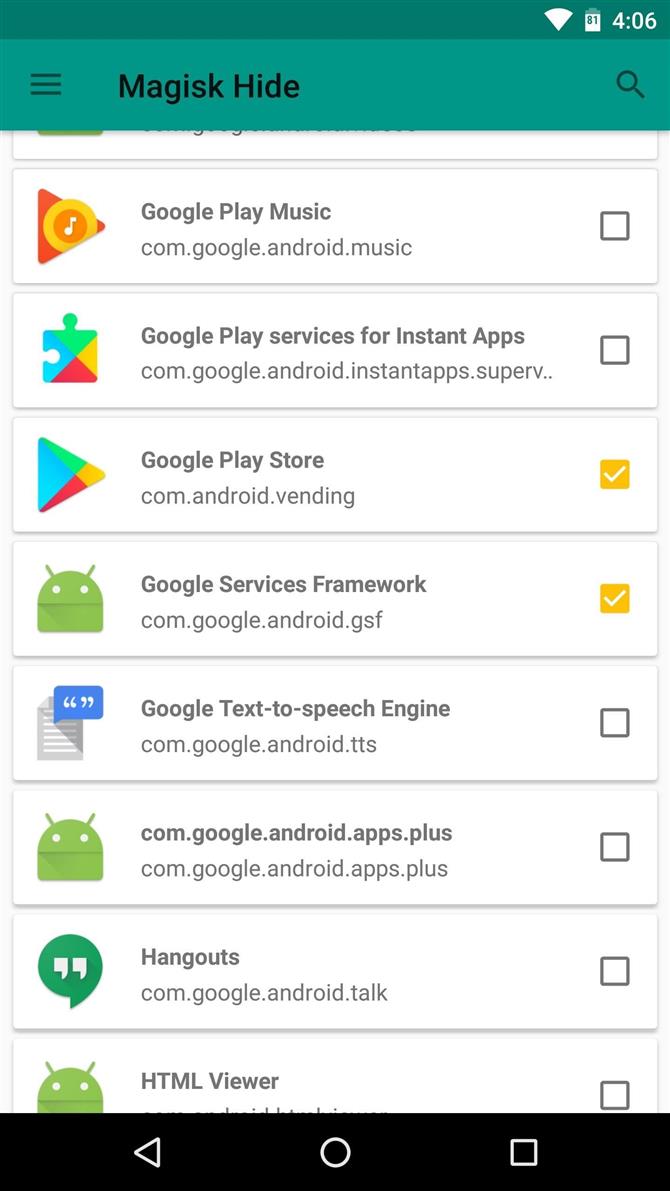
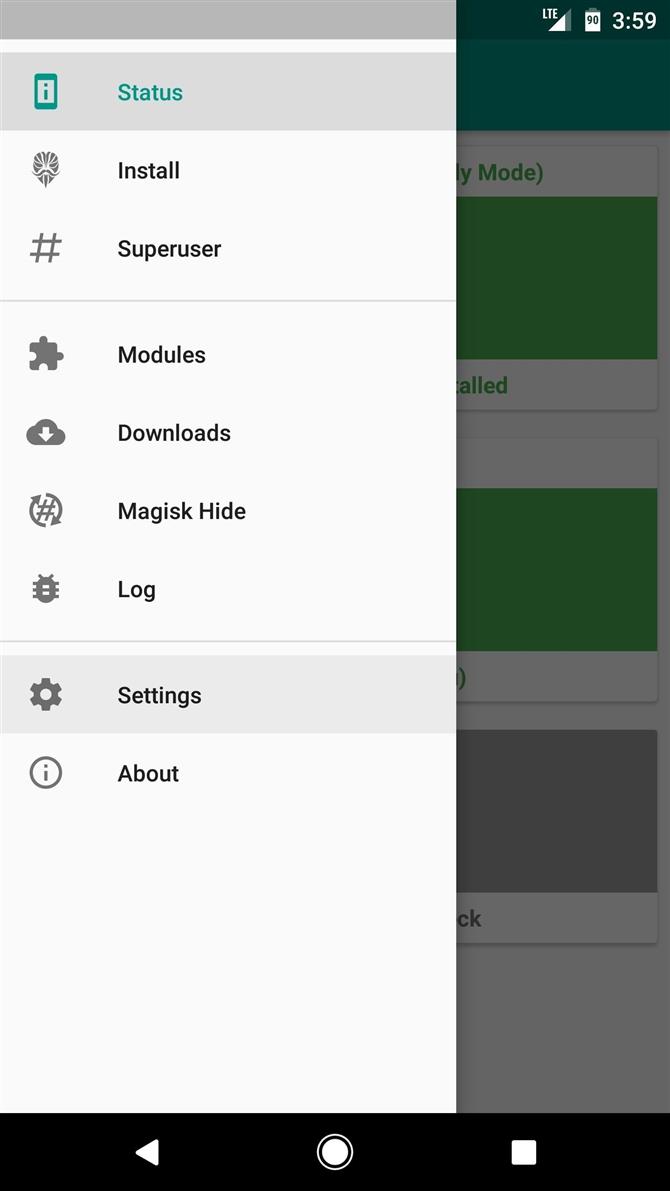
Для этого перейдите в навигационное меню в приложении Magisk Manager и выберите «Скрыть Magisk». Здесь может быть полезно отметить галочки рядом с Google Play Store и Google Services Framework, а также с любым другим приложением
Шаг 2: все еще нет хорошего?
Если вышеупомянутое руководство не устранило проблемы несоответствия профиля CTS, и вы уверены, что вы отменили какие-либо системные моды, возможно, что у вас все еще есть несколько бит данных, оставшихся от SuperSU.
Поэтому, чтобы убедиться, что вы полностью уничтожили SuperSU и его двоичные файлы, вы можете использовать flashable ZIP, созданный разработчиком osm0sis.
- Загрузите unSU, чтобы полностью удалить SuperSU (.zip)
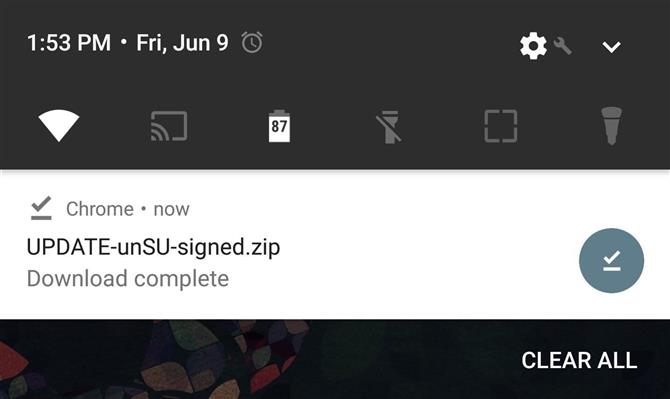
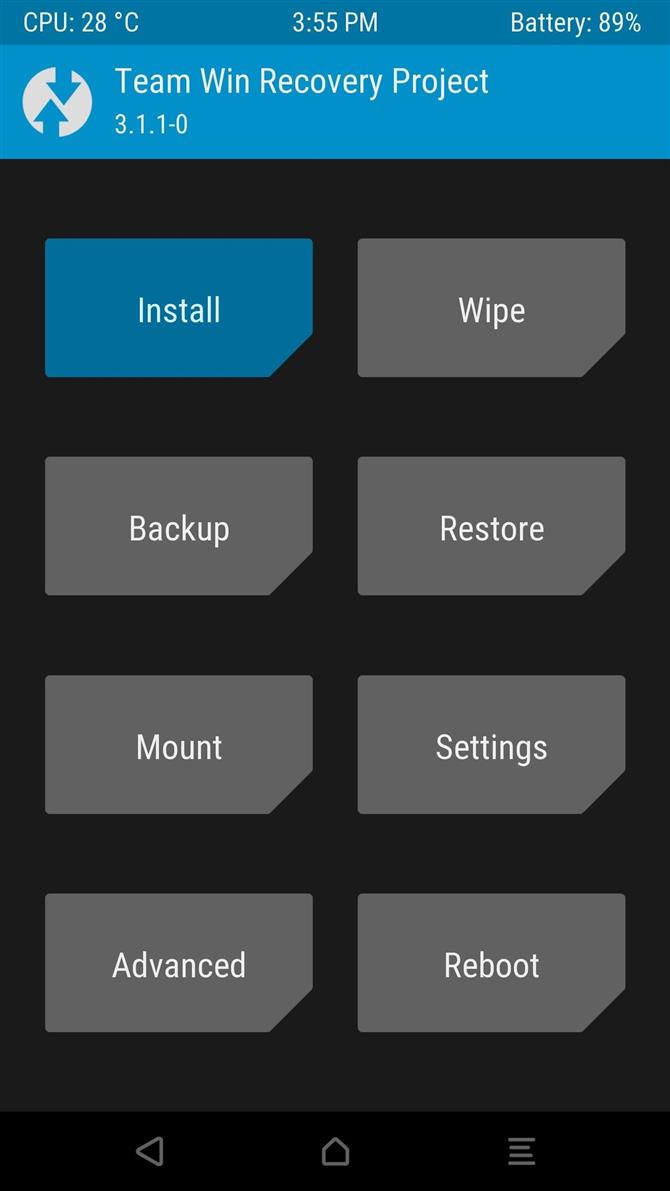
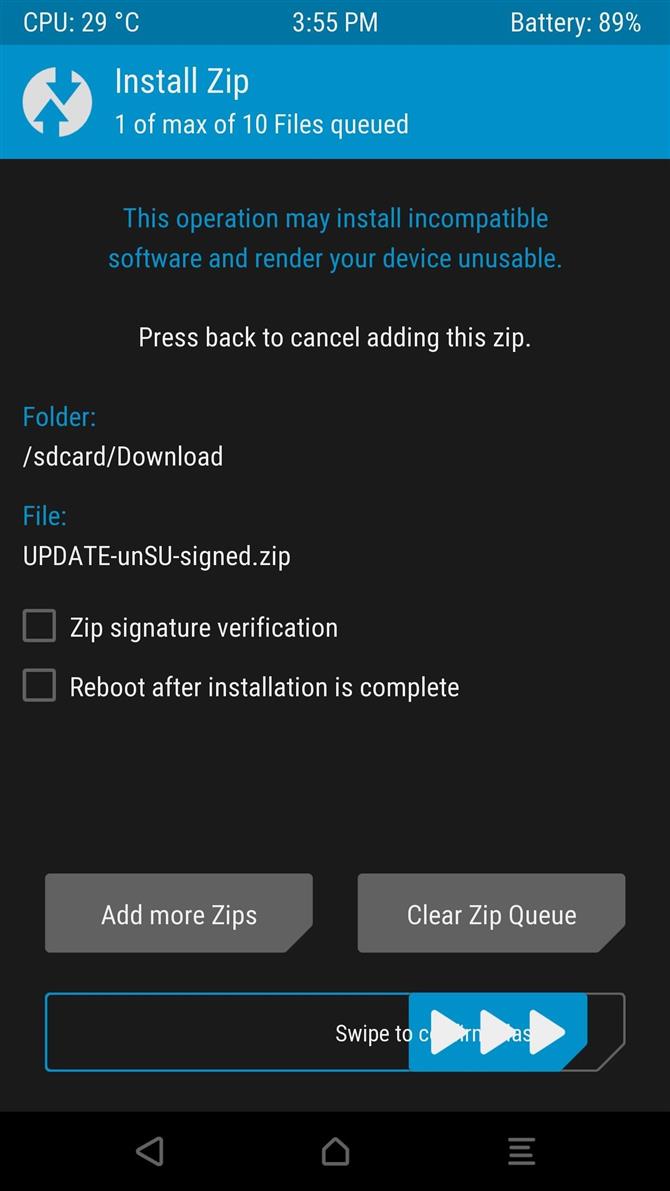
Оттуда нажмите кнопку «Установить» в главном меню TWRP, затем перейдите в папку «Загрузить» и выберите UPDATE-unSU-signed.zip.
Шаг 3: Измените SELinux на принуждение
Если вы все еще застряли, этот следующий шаг довольно прост, хотя это применимо только в том случае, если вы ранее использовали приложение, чтобы установить режим SELinux в «Permissive». «Magisk пытается скрыть ваш статус SELinux от SafetyNet
Итак, откройте какое-либо приложение SELinux mode changer, которое вы использовали для установки режима «Permissive», в первую очередь, затем переключите настройку на «Enforcing» и перезагрузитесь.
Шаг 4: Отключение USB-отладки
По какой-то странной причине довольно распространенная причина проблем SafetyNet с Magisk — это настройка «USB Debugging» в настройках разработчика.
Шаг 5: Пользовательское ПЗУ?
Как я уже упоминал ранее, CTS означает «Комплект тестирования совместимости». Это процесс, который Google использует для проверки того, что устройство и его прошивка соответствуют стандартам сертификации, и, проще говоря, пользовательский диск никогда официально не пройдет этот тест.
Тем не менее, некоторые пользовательские ядра могут помочь с этой проблемой.
Для некоторых пользовательских ПЗУ (особенно ОС Lineage) эта опция может не полностью решить проблему.
Наконец, для пользователей Xiaomi, которые запускают пользовательский ПЗУ, есть еще один вариант.
Шаг 6: Обращайтесь к другим потенциальным проблемам
Прежде чем принять ядерный подход, описанный в шаге 8 ниже, существует несколько менее распространенных проблем, которые могут привести к сбою SafetyNet на основе несоответствия профиля CTS, поэтому они заслуживают внимания.
Во-первых, возможно, что демон Magisk Hide не запускается правильно на вашем телефоне.
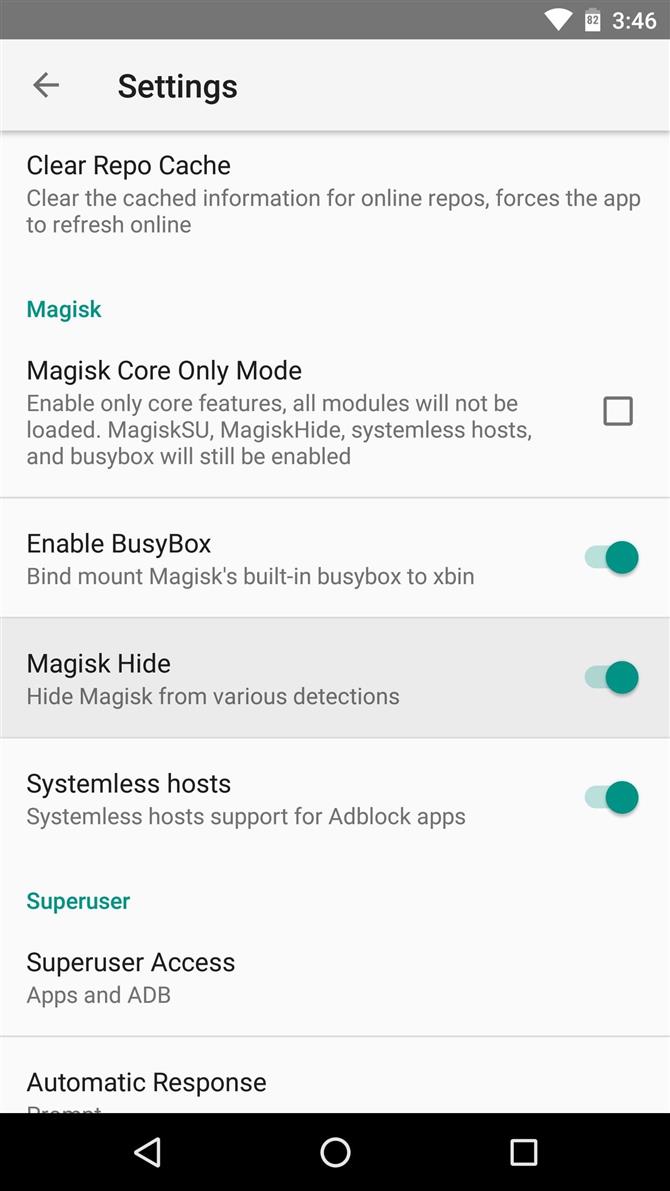
Некоторые пользователи также сообщили, что опции Magisk «Systemless hosts» и «BusyBox» заставили их столкнуться с проблемами с SafetyNet.
Шаг 7: Включить режим Core Core
Как последнее усилие, вы можете попробовать включить параметр «Только основной режим» в настройках Magisk Manager.
Возможно, это не идеальное решение, но после того, как Google обновил SafetyNet для обнаружения Magisk, включение режима «Только Core» кажется единственным исправлением, которое помогает большинству пользователей проходить тест CTS.
Шаг 8: Если все остальное не работает, начните с нуля
Мы сохранили этот шаг для последнего, потому что это универсальное решение, но это больная пилюля для глотания.
Процесс восстановления вашей прошивки будет варьироваться в зависимости от устройства, но если ваш телефон имеет меню загрузчика, которое поддерживает команды Fastboot, мы рассмотрели этот процесс в этом руководстве.
Итак, вы наконец решили проблемы с несоответствием профиля CTS?
В этом руководстве мы покажем вам все возможные способы исправления ошибки несоответствия ctsProfile на любом устройстве Android с root-доступом. Хотя производители смартфонов и Google, в частности, не против настройки и настройки, они следят за тем, чтобы обычные пользователи не оказались на стороне пользовательской разработки всего за несколько кликов.
Таким образом, OEM-производители начинают с блокировки загрузчика на своих устройствах, но они все же оставляют небольшое окно возможностей для технических энтузиастов. Таким образом, они могли затем разблокировать загрузчик устройства и установить множество пользовательских двоичных файлов. Это может включать установку пользовательских ПЗУ, установку пользовательского восстановления, такого как TWRP, или рутирование устройства через Magisk.
После рутирования вы получаете доступ к системному разделу и можете устанавливать модули Magisk, Xposed Framework, темы Substratum и тому подобное. Но это путешествие легче сказать, чем сделать. Начнем с того, что OEM-производители, такие как Nokia и Huawei, чрезвычайно усложнили разблокировку загрузчика.
В том же духе Xiaomi усугубила положение технических энтузиастов, заблокировав режим EDL для обычных пользователей. Точно так же, если вы успешно разблокировали загрузчик и рутировали свое устройство, вам придется согласиться на некоторые компромиссы. Эти компромиссы достигаются благодаря тесту SafetyNet от Google.
Если ваше устройство не пройдет этот тест (что при нормальных обстоятельствах произойдет со всеми рутированными устройствами), то некоторые функции устройства будут ограничены. В результате становится все более важным исправить ошибку несоответствия ctsProfile на вашем корневом устройстве Android. И если вы хотите сделать то же самое на своем устройстве, то это руководство поможет вам.
Что такое ctsProfile и SafetyNet?
SafetyNet — это механизм безопасности, реализованный Google на всех устройствах Android, основной задачей которого является проверка того, проходит ли ваше устройство набор тестов совместимости или нет. Итак, как ваше устройство пройдет этот CTS? Ну, это просто — если на вашем устройстве нет изменений на системном уровне, целостность вашего профиля CTS сохраняется.
В результате SafetyNet выдаст сообщение True. Однако, если вы выполните какую-либо пользовательскую настройку разработки, которая внесет изменения в системный раздел, CTS сразу же выйдет из строя. Другими словами, рутирование вашего устройства приведет к сбою CTS. И, следовательно, тест SafetyNet хорошо выдает результат False как при проверке ctsProfile, так и при проверке basicIntegrity.
Неудачный тест SafetyNet: последствия
Так каковы же последствия провала этого теста? Другими словами, зачем нам вообще нужно исправлять ошибку несоответствия ctsProfile на нашем корневом устройстве Android? Что ж, их довольно много, и большинство из них влияет на повседневное использование приложений. Например, большинство банковских приложений (например, Google Pay) обнаружат, что ваше устройство было взломано (т.е. рутировано).
Ошибка ctsProflie
Следовательно, они откажутся работать на вашем устройстве в целях безопасности. Точно так же некоторые игры, такие как Pokemon GO, не будут работать должным образом. Причина в том, что многие рутированные пользователи подделывали свое фактическое местоположение и ловили самых редких или редких существ! Более того, потоковые сервисы, которые соблюдают сертификат DRM, также сталкиваются с рядом проблем.
Например, в случае с Netflix, Amazon Prime Video и т. п. сертификат WideVine L1 будет понижен до уровня L3. В результате вы не сможете транслировать видео в формате HD. Следовательно, именно по этим причинам многие пользователи. Чтобы преодолеть эти ограничения, вам необходимо исправить ошибку несоответствия ctsProfile на вашем корневом устройстве Android. Итак, без лишних слов, приступим.
Приведенные ниже инструкции были разбиты на отдельные разделы для простоты понимания. Обязательно следуйте в той же последовательности, как указано. Droidwin и его участники не будут нести ответственность в случае термоядерной войны, если ваш будильник не разбудит вас, или если что-то случится с вашим устройством и данными, выполнив следующие шаги.
ШАГ 1. Включите Magisk Hide для сервисов Google Play.
Прежде всего, вам придется скрыть root от всех приложений, служб и платформ Google. Вот как это можно сделать:
- Запустите приложение Magisk Manager на своем устройстве.
- Затем нажмите на значок настроек, расположенный в правом верхнем углу.
- Прокрутите до раздела Magisk и включите переключатель MagiskHide.
- Затем вернитесь в главное меню и коснитесь значка щита, расположенного в нижнем меню.
- Нажмите на MagiskHide, а затем установите флажок «Сервисы Google Play».
- Наконец, включите переключатель рядом с каждым приложением и службой Google.
ШАГ 2. Пройдите базовую целостность Magisk на рутированном Android 11
Прежде чем вы на самом деле перейдете к исправлению ошибки несоответствия ctsProfile на вашем корневом устройстве Android, вам нужно будет пройти базовый тест Magisk на целостность. Для этого обратитесь к нашему подробному руководству: Как пройти Magisk SafetyNet на рутированном Android 11. Выполнив шаги, упомянутые в этом руководстве, вы сможете убедиться, что вы действительно прошли тест или нет.
- Для этого запустите приложение Magisk Manager на своем устройстве.
- Затем нажмите на кнопку «Проверить SafetyNet». Если вы выполняете этот тест впервые, Magisk предложит вам загрузить некоторые дополнительные зависимости, поэтому нажмите «ОК».
- Необходимые дополнения будут загружены в течение нескольких секунд. После этого результаты теста будут прямо перед вами.
- На данный момент вы по-прежнему будете получать сообщение об ошибке аттестации, но почему? Ну, это потому, что мы прошли только тест basicIntegrity, нам еще предстоит пройти тест ctsProfile.
Если вы также посмотрите на скриншот выше, вы заметите галочку рядом с basicIntegrity, но по-прежнему знак минус рядом с ctsProfile. Итак, давайте теперь обратим наше внимание на последний. Итак, вот шаги, чтобы исправить ошибку несоответствия ctsProfile на вашем корневом устройстве Android.
ШАГ 3. Удалите данные сервисов Google Play
Пришло время удалить данные сервисов Google Play. Вот как это можно сделать:
- Перейдите в «Настройки» на вашем Android-устройстве.
- Затем перейдите в Приложения и уведомления.
- Прокрутите до Сервисов Google Play и перейдите в раздел «Хранилище и кеш».
- Нажмите «Очистить хранилище» и, наконец, кнопку «Очистить все данные». Вот и все.
ШАГ 4: проверьте ctsProfile Test через Magisk
Теперь, когда мы выполнили все предварительные условия, пришло время проверить, были ли эти усилия плодотворными или нет. Другими словами, давайте проверим, смогли ли вы исправить ошибку несоответствия ctsProfile на вашем корневом устройстве Android.
- Итак, запустите приложение Magisk Manager на своем устройстве.
- Затем нажмите на кнопку «Проверить SafetyNet». Теперь вы должны получить сообщение об успешном завершении.
- Точно так же рядом с basicIntegrity и ctsProfile будет стоять галочка.
Итак, на этом мы завершаем руководство о том, как исправить ошибку несоответствия ctsProfile на вашем корневом устройстве Android. Если у вас все еще есть какие-либо вопросы относительно вышеупомянутых шагов, сообщите нам об этом в разделе комментариев ниже. Мы вернемся к вам с решением в ближайшее время. В этой заметке, если вы все еще не смогли пройти этот тест, вот несколько других обходных путей, которые вы могли бы попробовать.
Обходные пути для исправления ошибки ctsProfile MisMatch на рутированном Android
Ниже приведены некоторые удобные настройки, которые, как известно, дают желаемые результаты, когда дело доходит до этой проблемы. Имейте в виду, что не существует какого-либо универсального решения для решения этой проблемы. Возможно, вам придется попробовать все нижеперечисленные обходные пути, пока проблема не будет устранена.
Совет 1: Добавьте Google Apps в черный список под Xposed
Xposed Framework, в отличие от Magisk, не работает бессистемно. Поскольку они напрямую вносят изменения в системный раздел, SafetyNet обязательно сработает. Так что если вы используете Xposed, вам придется обойти это ограничение. Для этого рассмотрите возможность добавления всех приложений и служб Google в черный список внутри Xposed Framework.
Для этого обратитесь к нашему подробному руководству: Как пройти тест SafetyNet после установки Xposed или EdXposed. Посмотрите, может ли это исправить ошибку несоответствия ctsProfile на вашем корневом устройстве Android.
Совет 2. Используйте режим «Только ядро» для исправления Magisk ctsProfile
Magisk также поставляется с режимом «Только ядро», который включает только основные функции Magisk, отключая менее важные. Большинство модулей не будут загружены. В этом режиме будут включены только несколько важных функций, таких как MagiskSU, MagiskHide, бессистемные хосты и busybox. С учетом сказанного, если вы хотите включить эту функцию, обратитесь к нашему подробному руководству: Как использовать только основной режим в Magisk Manager?
Итак, все это было из этого руководства о том, как исправить ошибку несоответствия ctsProfile на вашем корневом устройстве Android. Мы будем постоянно обновлять это руководство с дальнейшими настройками, как только нам удастся получить то же самое.
SafetyNet Bypass: Fix CTS Profile Failed issue. Are you getting annoyed by the SafetyNet security measure in a rooted android device and wanna install all the Banking and OTT apps in it? Do you’ve taken tremendous steps to come out from this problem and don’t got succeed in a single one?
If Yes, then you don’t have to get worried for one more second, since here we’ll apprise you about the most useful Magisk Module which is the best measure for this case.
Moreover, we’ll also provide you with this Magisk Module below.
Must go through the complete article carefully and, you’ll definitely evolve a lot to bypass the SafetyNet issue in your Magisk rooted smartphone.

What is SafetyNet?
SafetyNet is one of the sumptuous security standards established by Google Co. Also, it’s an advanced security barrier that is damn hard to bypass easily. It basically blocks the rooted devices to download most of the signed and credential android applications like Banking apps, OTT platforms, Google LLC’s apps, as well as all the trading and money-based platform apps.
Well, it was first only applicable for the banking software, but right now, streaming apps also have adopted this measure and are working on it. It means that you won’t be able to use the fascinating service by Netflix and Amazon Prime until you break Google’s SafetyNet wall.
After lots of holdups, finally, we’re here with a fabulous Magisk Module that will help you in bypassing the SafetyNet Issue conveniently. Yes, you don’t have to process a lot from now for bypassing the SafetyNet and watching your favorite content or paying online bills. It’s right now possible in just a few clicks.
Universal Safety Net Fix is all you need for getting rid of this matter. It’s developed by Deiki, a member of the XDA forum.
Well, this module is only installable for the Magisk Su, which means that it won’t run in any other root manager. So if you’re operating the SuperSu root binaries or any other one, then you need to switch to Magisk Su to bypass the SafetyNet issue.
Universal Safety net Fix is the most convenient module that you can easily download below. If the Magisk App installation process won’t work, then please try to install it on TWRP Recovery mode.
Prerequisites
- The rooted device with Magisk App (Magisk Manager).
- Magisk version must have to be Magisk 20+. – Magisk App 22.0
- Universal SafetyNet Fix Magisk Module – Download (Latest) | Github releases page
- MagiskHide Props Config Module – Download (Latest) | Github releases page
Note – It’s the beta version of the SafetyNet bypasser, so possibly it won’t run on some Android devices. So If you’re unable to install and use it on your smartphone, you can check for it later on the same website.
Since we’ll update it whenever the developer posts one. Be updated!!!
Steps to fix Fix SafetyNet Hardware Attestation on any Android devices
1.) Enable MagiskHide and Pass Basic Attestation
2.) Install Universal Safetynet Fix Module with TWRP (Custom Recovery)
3.) Install MagiskHide Props Config to Pass CTS Profile
Are you looking for the latest working guide to bypass Safetynet issue? If the answer is yes, then you are in right place. Here we are going to show you how to fix Safetynet issue with the simple android app or Magisk module. The module called universal SafetyNet Fix let you run the apps which require the google new security measure aka Safety Net.
Magisk Manager is one of the fastest-growing Non-Playstore App which means unknown sources app which is only designed for the rooting devices systemlessly. One of the Xda forum members has made this app for hiding root access from some of the high-security applications. Topjohnwu is the creator of the Magisk Su. It works as same as Chainfire’s Super Su. But Super Su fails the Safety Net pass so most of the people switch to Magisk Root.
Table Of Contents
- 1 What is SafetyNet?
- 1.1 How to Bypass SafetyNet Issue with Universal Safetynet FIX?
- 1.2 Requirements:-
- 2 Steps to Fix SafetyNet on most of the android devices
- 2.1 How to Install Universal Safetynet Fix with TWRP (Custom Recovery)?
What is SafetyNet?
Safety net is the Topmost Security measure that ensures the device is safe to run some of the android applications mostly Banking applications. Recently it was developed by Google to improve the security of the android platform.
You might hear about Android Pay which is introduced by Google available in some countries now. This app will check the safety net thing and if it confirms that then it will work. As like this one, most of the banking applications follow the same procedure to run their apps on the android device.
Even it spread to Netflix. Only Netflix works when it confirms that the device passes the safety net. By Rooting the device, you will lose the warranty along with the Safety Net pass. That may tend to your device being out of support for these kinds of apps.
How to Bypass SafetyNet Issue with Universal Safetynet FIX?
If you are using the SuperSu root binaries, then you must switch to the Magisk Su. Here is the best guide for installing Magisk Su. After installing Magisk Root binaries then this process will work for you as like a charm.
Fix Safetynet issue possible with the Magisk Module which is called as Universal Safety Net Fix. Deiki is the XDA forum member and the creator of this Module.
Currently, it is in the Beta version so in some of the devices it may not work properly. I recommended you to bookmark this page it will help you to get the app updates quickly. Or you will check the updates from the Magisk Manager.
Requirements:-
- Magisk 20+ (How to Install Magisk Su and Magisk manager Guide here)
- Magisk Manager
- New* Latest Module By Didgeridoohan that will help you to Pass the Safetynet measure. – Download
- Universal Safetynet fix – Download
- One more module suggested by a community member – HiddenCore Module – Download
- PetNoire’s SafetyNet Spoofer – Download
Steps to Fix SafetyNet on most of the android devices
- Download the Universal Safetynet fix flashable zip file from the requirements section according to the Magisk version.
- Open Magisk Manager and drag the menu from left to right.
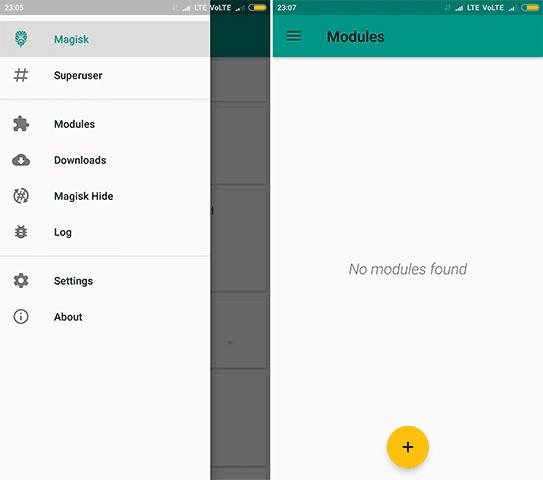
- You will see the Module section. Open it.
- Now, click on the Yellow color + button. It will open the file manager of your device. Select the Universal safety net fix.Zip file.
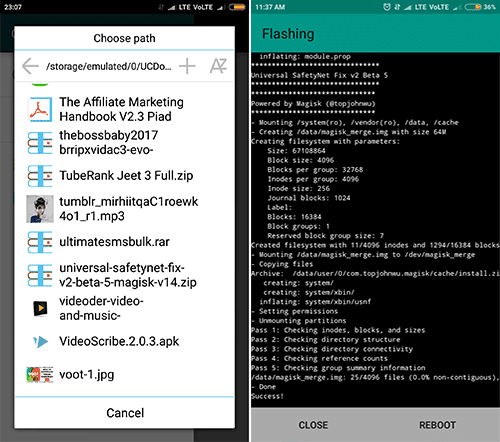
- After that Reboot your device.
How to Install Universal Safetynet Fix with TWRP (Custom Recovery)?
In some of the beta versions, installing directly with the magisk manager is not possible. It will Show some error message when flashing module .zip file. In that case better to flash with custom recovery EG:- TWRP.
- After downloading the above zip file according to the magisk version.
- Now, Boot your device into Custom Recovery mode.
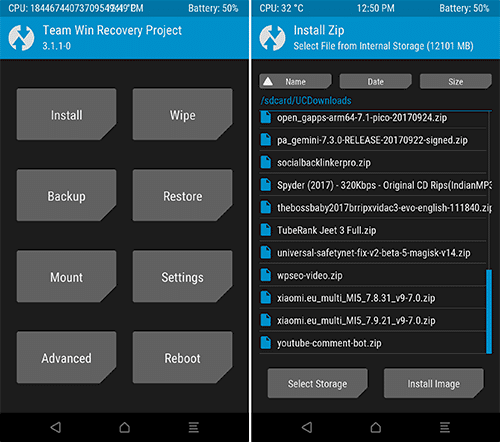
- In the TWRP’s Home select the Install button. Find the required zip file from your Storage.
- Swipe the install Button. It will take some time to complete the installation procedure. Then simply tap on the reboot button.
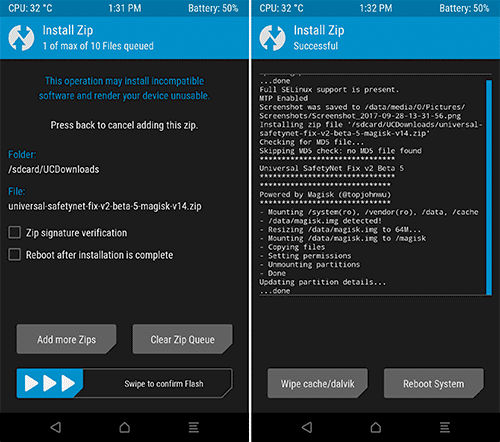
- Now, the phone will open normally and check the Safety net pass on the Magisk Manager App.

Final Words:
Working Guide to bypass Safetynet issue on most of the Android ROMs. I hope this guide will help you as much as I think. So, If you have any further queries regarding bypass Safetynet issue comment below. we will help you out as fast as we can.
If this is useful for you then don’t be shy to share this post with your friends.
Are you facing the Magisk SafetyNet Failed Issue and struggling to resolve it with the latest update by Google? Well, then this article will ease your pain a little bit, we have done the hard part of researching for the solution and have written a detailed and simplified step-by-step guide to the Fix Magisk SafetyNet Failed Issue.
So here we go, after years of fun messing around using Magisk, it seems that Google FINALLY decided to «fix» SafetyNet to something useful, and that is to use key attestation to verify device status (after 3 years since introduced to Android’s platform!)
— John Wu (@topjohnwu) March 11, 2020
We are going to use quite a few workarounds to make this possible to bypass the SafetyNet even after the new update. But if none works then last option will be to go back to Stock ROM.
Also Read: 10 Best Magisk Modules For Your Rooted Phone
What is SafetyNet?
SafetyNet is the Topmost Security measure that ensures the device is safe to run a number of the android applications mostly Banking applications. Recently Google has modified its working mechanism to enhance the safety of the android platform.
You might hear about Google Pay or Samsung Pay which is introduced in most countries now. This app will check the SafetyNet and if it confirms that then it’ll work. Like this one, most of the banking applications follow an equivalent procedure to run their apps on the android device.
Also Read: Why Magisk Over SuperSU for Rooting your Android Device?

There are two parts to the SafetyNet check, CTS Profile and Basic Integrity.
Examples of when CTS Profile Match will report as false (failed):
- Uncertified device (the manufacturer hasn’t applied for Google certification)
- Unlocked bootloader
- Signs of system integrity compromise (rooting, etc)
- Signs of other attacks (Xposed, EdXposed, etc)
Examples of when Basic Integrity will report as false (failed):
- Signs of system integrity compromise (rooting, etc)
- Signs of other attacks (Xposed, EdXposed, etc)
So, if any of the any test fails then the system creates the SafetyNet Failed Issue.
Also Read: 5 Best Android Custom Roms Available Right Now
Methods to Fix SafetyNet Failed Issue

Method 1
Required Files
- Latest Version of Magisk [Download]
- Hidden Core Xposed Module [Download]
- Magisk RIRU-Core Module [Download]
- EdXposed Yahfa [Download]
- EdXposed Manager [Download]
- RIRU Manager [Download]
Now, if you have downloaded all the required files, then you are good to go. Make sure you move all the files to different folder; it will ease your navigation while the process.
- In the first step, we need to install the RIRU Core Module, for doing so, go to Magisk Manager and swipe from the left side, & go to the Modules section, and then tap on the Plus Button.
- Now, after tapping on the Plus Button, the file manager will pop up.
- Then, navigate to the folder and select the Magisk RIRU Core Module zip. It will now start installing the module.
- After installation, Magisk will ask you to reboot for the changes to work.
- Now, we need to install RIRU Manager so that we can check whether the RIRU Core module is successfully installed or not, for doing so, go to file manager, and to the folder, you saved all the downloaded files.
- I think you already know how to install an apk file.
- After installing the RIRU manager, reboot the device.
- After reboot, open your app drawer and search for the app RIRU.
- Open it and if it says, ‘Everything Looks Fine’, then you’re can proceed to the next steps.
- Now again open Magisk Manager and install the EdXposed Yahfa Module, in a similar way we installed RIRU Core Module.
- After installation, Magisk will ask you to reboot for the changes to work.
- Now, we need to install the EdXposed Manager apk.
- Now open the EdXposed Manager, if you don’t see any types of error, then you are good to go.
- In the final step, we will have to install the HiddenCore Module. Install it via Magisk Manager and reboot the device.
- If everything works as expected, then you will see the green signal while testing SafetyNet. Both ctsProfile and basicintegrity will be passed.
Method 2
If you have enabled the USB debugging mode for any reasons, then turn it off as sometimes it causes the system to fail the SafetyNet test. For turning off USB debugging mode, follow the below steps:
If your device’s developer mode is turned off for some odd reasons, then turn it on by tapping multiple times on the build number which can be found in the About Phone section.
- Open your phone’s settings and go to the About Phone section.
- Scroll down and find the Developers Options.
- Open it and then scroll down and search for USB Debugging.
- Toggle the switch towards the left to turn it off.
- No, reboot the device.
- If everything works as expected, then you will see the green signal while testing SafetyNet. Both ctsProfile and basicintegrity will be passed.
Method 3
In this method, we will be changing the SELinux mode to Enforcing. A few users reported that this method worked in their case, so there is no harm in trying. For changing the SELinux mode, follow the below steps:
- Download SELinuxModeChanger from here.
- Run the application and set SELinux to Enforcing.
- Reboot the device so that changes can take place.
- Check the SELinux status in the About Device menu to see if it has changed.
Note: It may wipe your data, so proceed with caution.
Also Read: How to Take TWRP Backup Directly On PC With ADB
Method 4
You can try installing a custom Kernel. Why are we saying this? Well, the CTS is used by Google to verify that the device and its firmware meet the certification standards.
We will suggest using Fanco Kernel, if compatible with your ROM.
Also Read: How to Install Custom Kernel on Your Android Smartphone Easily
Conclusion
Ther you go, you have come to the final part of the details guide on how to Fix Magisk SafetyNet Failed Issue. We hope that you succesfully passed the SafetyNet Test on your device.
If you have any further doubts regarding the Magisk SafetyNet Failed Issue, then make sure to comment down below. And you solved the Magisk SafetyNet Failed issue by following our guide then make sure to share it your friends who is/are facing the same issue.
Peace 😉

-
#1
 We’re aware that the CTS profile is failing for most of you guys out here . It’s not an issue with the ROM or Device . It’s because recently Google made security changes which make sure safety-net fails check when Magisk is installed or when the bootloader is unlocked . We’re not sure if they’re just testing it like before or if they have implemented it already . We will share possible solutions here with everyone as soon as possible .
Update ( Tested on 21.1.6 MIUI 12.5 A11 ) :
1.Tried the Riru method , Riru Cored installed successfully , Edxposed Yafha = Bootloops , EdXposed Sandhook = EdXposed Manager Crashes before starting .
2. Tried Spoofer module — CTS Profile still false
3. Tried tweaking around with Magisk Hide Props — CTS remains false
Not my post
Post is from one of the admins of https://t.me/XiaomiEUK20Pro Group
Sent from my Mi 9T Pro using Tapatalk

-
#2
it seems that safetynet now is working as it should
for apps which check the status on the device you can try the «hidden core modul» -> cts profile -> true
it will fake the status on the device not on the servers ….
Update: @DamonSalvatore07 posted a MagiskModule fix:

Last edited: Jan 13, 2021
-
#3
it seems that safetynet now is working as it should
for apps which check the status on the device you can try the «hidden core modul» -> cts profile -> true
it will fake the status on the device not on the servers ….*** gpay will not work with that module others perhaps will work ***
View attachment 34054
Share the module please !
Sent from my Mi 9T Pro using Tapatalk
-
#4
Share the module please !
Sent from my Mi 9T Pro using Tapatalk
Install edXposed and there you can download it or google it
PS: Please rename the thread: Something like «safetynet / cts profile false»
Last edited: Jan 13, 2021
-
#5
I also have ctsprofile failed, but banking apps and GPay still seem to be working. No edXpose or whatever modules installed, only Magisk. Strange, isn’t it?
-
#6
I installed hiddencore in edxposed and enabled it in edxposed manager and then rebooted. What is the next step? I don’t see any options for CTS profile.
-
#7
I also have ctsprofile failed, but banking apps and GPay still seem to be working. No edXpose or whatever modules installed, only Magisk. Strange, isn’t it?
Yeah all my banking apps and gpay work. All except Macdonalds app. The mac sure takes security seriously
-
#8
Eh, I waste much time to fix that SafetyNet. Yesterday it worked ok. I thought I set something wrong and that’s google changes broke that again. :/
-
#11
Thing is I dont have a root and still have the same issue that device is not certified from today, and Google Pay doesnt allow NFC payments, I paid with this yesterday … So your solution with Magisk is for rooted, I would like to make it work without it.
-
#12
Hmm, I have Play Store Certified, but can’t install Netflix and other Widevine L1 apps. What can I do? Yesterday I haven’t problem with that. I cleaned data and cache, didn’t help.
-
#13
Hmm, I have Play Store Certified, but can’t install Netflix and other Widevine L1 apps. What can I do? Yesterday I haven’t problem with that. I cleaned data and cache, didn’t help.
you can install this magisk module if you have android 11
-
#14
I installed that. SafetyNet has ok status. But I can’t install Netflix with Play Store Certified status.

-
#15
you can install this magisk module if you have android 11
And for Android 10 Xiaomi.eu stable rom ?
-
#16
I installed that. SafetyNet has ok status. But I can’t install Netflix with Play Store Certified status.
on my Mi9 it is working … newest xiaomi version / magisk / magisk hide / magisk hide app and so on …
