Printers are the most used device which has been used by multiple of users across the globe. It helps users in printing all document into a piece of paper within seconds and in pocket-friendly prices. However, these days printers are offered by many different brands, in all the brands, Samsung is the renowned name for offering advanced features and a wide range of printers around the world. Apart from various models and advanced technology features, it’s customer service team is highly trained and experienced. Although Samsung is a reliable and most trusted brand for serving the best quality product and anyone can access the Samsung printers without any difficulty.

Many times, while operating the Samsung printer users might face trouble with the error code 11-1313 which displays and your printer immediately stops working. Generally, this error caused due to misconfigured system files which creates the registry errors within the operating system. Nevertheless, this printer error can cause the program lock-ups, slow performance of the printer and system both. Crashes the active program window or your computer system, the system responds sluggishly and respond very slowly to the mouse and keyboard input.
Causes of Samsung Printer Error Code 11-1313
Whenever users are installing the new program or applications without completely uninstall the old program, this error pops-up on the screen. This error might also cause due to virus and malware infection spread on the system and internally harms your computer system. To prevent the system from viruses and malware install any anti-malware tool to perform a full system scan and detect the malicious program.
Underneath we are providing troubleshooting steps helps you in fixing the Samsung Printer error code. The steps are more time to consume and more difficult to follow. We advise you to apply the steps in the proper sequence as mentioned below to avoid trouble and unwanted errors. The steps are discussed below.
Solution to Get Rid of Samsung Printer Error Code 11-1313
Below are the troubleshooting steps to get rid of the Samsung error code 11-131. There is two method for resolving the error, try using both the method one by one to fix this error code. Here how to do it:
Solution-1: Advanced Solution through Manual Update
- Press the ‘Power’ button in the CPU to start the system.
- Enter the ‘Login Credentials’ to log on as an ‘Administrator’ account.
- After that, click on the Start logo tab to launch the menu icon.
- In the start menu, choose ‘All Programs’ tab.
- Inside the ‘All Programs’ option, pick the ‘Accessories’ option.
- Under the ‘Accessories’ option, select ‘System Tool’ option.
- Then, press the ‘System Restore’ tab.
- Now, hit the ‘System restore to the recent system restore’ option and press the ‘Next’ tab to continue the process.
- Click on the ‘Yes’ in the notification window to confirm the system restore.
- Once restoration is completed, reboot the system to apply all the changes.
Solution-2: Normal Solution through Automatic Update
- You just need to download the Samsung Error Code 11-1313 utility repair tool.
- Click on the ‘Install’ tab to install the tool.
- After that, click on the ‘Scan’ tab to start the scanning process to detect the error.
- Press the ‘Fix’ error button to fix all detected errors.
- Restart the system to apply all the changes.
Aurora is a jack of all trades : an experienced IT technicians, writer, researcher, and a self-professed Software expert. As a single software engineer, she has in-depth knowledge of Pinter’s and she likes to write tutorials, reviews, news, and reports about the same under Epson Printer Support

Published by Ashley leio
I am a certified technical professional with over 5 years of experience in IT industry. I am proficient at troubleshooting errors owing to my extensive knowledge in the domain.
View all posts by Ashley leio
- Sign up
- Sign in
- HP Community
- Archived Topics
- Unanswered Topics — Printers
- printer error code: 11-1313
Options
- Mark Topic as New
- Mark Topic as Read
- Float this Topic for Current User
- Bookmark
- Subscribe
- Mute
- Printer Friendly Page
![]()

Create an account on the HP Community to personalize your profile and ask a question
Your account also allows you to connect with HP support faster, access a personal dashboard to manage all of your devices in one place, view warranty information, case status and more.
![]() This topic has been archived. Information and links in this thread may no longer be available or relevant. If you have a question create a new topic by clicking here and select the appropriate board.
This topic has been archived. Information and links in this thread may no longer be available or relevant. If you have a question create a new topic by clicking here and select the appropriate board.
10-25-2018
04:39 AM
— edited
10-25-2018
04:52 AM

HP Recommended
- Mark as New
- Bookmark
- Subscribe
- Permalink
- Flag Post
Product: samsung xpress M2835DW
My printer said no toner — i changed the toner and the error was printed 11-1313
any ideas on what has happened please.
i have only ever used the samsung toner — no cheap alternatives.
thanks
![]() This topic has been archived. Information and links in this thread may no longer be available or relevant. If you have a question create a new topic by clicking here and select the appropriate board.
This topic has been archived. Information and links in this thread may no longer be available or relevant. If you have a question create a new topic by clicking here and select the appropriate board.
† The opinions expressed above are the personal opinions of the authors, not of HP. By using this site, you accept the Terms of Use and Rules of Participation.

-
English
Open Menu

† The opinions expressed above are the personal opinions of the authors, not of HP. By using this site, you accept the <a href=»https://www8.hp.com/us/en/terms-of-use.html» class=»udrlinesmall»>Terms of Use</a> and <a href=»/t5/custom/page/page-id/hp.rulespage» class=»udrlinesmall»> Rules of Participation</a>.
How To Troubleshoot Samsung Printer Error Code 11-1313?
Samsung printer is known for the best printing services. Using this printing device you not only print your documents but also scan them without any trouble. But as you know every electronics device has some common issues. Sometimes the users of Samsung printer encounter Samsung printer error code 11-1313. If you are one of those who are suffering from this error then you don’t need to worry. The experts are always here to help. They will give you one of the best solutions to solve this error. For more help, you can contact the experts at any time. They are available around the clock for instant solutions. Therefore, you contact the Samsung printer support team at any time.
Causes of Samsung printer error code 11-1313
There are several causes of this error. Before removing this error, you need to know the causes behind this error. Some of the causes of this error are mentioned below:
- The error occurs when users are installing the new program without completely uninstall the old program.
- This error occurs due to virus and malware infection spread on the system.
- Due to an outdated version of the Samsung printing device, you may face this error.
Solutions to solve Samsung printer
After knowing the causes of this error, you need to remove this error as soon as possible. If you don’t know the best solutions so don’t worry. You can apply the given solutions to fix this problem without any trouble.
Solution number 1. Advanced solutions through a manual update
- Hit on the ‘Power’ button in the CPU to start the system.
- Insert the ‘Login Credentials’ to log on as an ‘Administrator’ account.
- After doing this, you need to click on the start logo tab to open the menu icon.
- In the start menu, select the ‘all programs’ tab.
- Inside the ‘All programs’ option, select the ‘Accessories’ option.
- Under the “Accessories” option choose the ‘system tool’ option.
- After that, under the ‘Accessories’ option, choose ‘system tool’ options and press the next tab to continue the procedure.
- HIt on the yes in the notification window to confirm the system restore.
- Once the restoration is completed, you need to reboot the PC to apply the entire changes.
Solution number 2. Normal solution through automatic update
- You need to download the Samsung error 11-1313 utility repair tool.
- Then hit on the ‘install’ tab to install the tool.
- After doing this, you need to hit on the ‘Scan’ tab to start the scanning process to detect the error.
- Click on the ‘fix’ error button to fix the entire detected errors.
- Restart the system to apply the changes.
Through the help of given solutions, you can easily solve all the problems without any difficulty. The experts are available around the clock to provide the best troubleshooting steps. To get instant solutions, call the experts through Samsung printer customer care service phone number + (1)-888-846-5560. If you find any busy tune in this number then you can drop an email on our official id to contact us.
Error Code 11 1313

We have collected for you the most relevant information on Error Code 11 1313, as well as possible solutions to this problem. Take a look at the links provided and find the solution that works. Other people have encountered Error Code 11 1313 before you, so use the ready-made solutions.
printer error code: 11-1313 — HP Support Community — 6874897
- https://h30434.www3.hp.com/t5/LaserJet-Printing/printer-error-code-11-1313/td-p/6874897
- Oct 25, 2018 · printer error code: 11-1313 — HP Support Community — 6874897. My printer said no toner — i changed the toner and the error was printed 11-1313 any ideas on what has happened please. i have only ever used the — 6874897. Sign up. Sign in.
How to Get Rid of Samsung Printer Error Code 11-1313?
- https://ashleyleio.blogspot.com/2019/04/how-to-get-rid-of-samsung-printer-error.html
- Many times, while operating the Samsung printer users might face trouble with the error code 11-1313 which displays and your printer immediately stops working. Generally, this error caused due to misconfigured system files which creates the registry errors within the operating system.
Canon Knowledge Base — Paper Jam — Support Code 1313
- https://support.usa.canon.com/kb/index?page=content&id=ART143004
- May 13, 2015 · If the paper jams as the machine pulls in the printed paper, remove the paper following the procedure below. Important. If the printed paper piles up on the paper output slot, the machine may pull it in and the paper is jammed inside the machine.
Solution to Get Rid of Samsung Printer Error Code 11-1313 .
- https://issuu.com/jenifferleio12/docs/solution_to_get_rid_of_samsung_prin
- Apr 27, 2019 · Causes of Samsung Printer Error Code 11-1313 Whenever users are installing the new program or applications without completely uninstall the old program, this error pops-up on the screen.
Dell Printer Error Codes — Dell Community
- https://www.dell.com/community/Printers/Dell-Printer-Error-Codes/td-p/3009418
- #DellRockstar Welcome to Dell Community! #DellWorld 2012 #DellWorld 2015 #Dell EMC World 2016 #MicrosoftMVP — Windows Expert-Consumer April 1, 2012 to March 31, 2015
How to resolve PCL6 Errror — undefined XL COde — Dell .
- https://community.spiceworks.com/topic/2110664-how-to-resolve-pcl6-errror-undefined-xl-code
- Feb 14, 2018 · Hi, I get a PCL6 Errror — undefined XL COde. Position: 0X5A (90) System: ../xlpgp_6.36.03?xL_pa. Line: 836. Verion: PCL6 6.36.03 09-27-2012. Everytime I try to print labels on a
Samsung Xpress M283x series Manuals ManualsLib
- https://www.manualslib.com/products/Samsung-Xpress-M283x-Series-3654408.html
- Samsung Xpress M283x series Pdf User Manuals. View online or download Samsung Xpress M283x series User Manual
workcentre 3225 — Incomplete session by time out / error .
- https://forum.support.xerox.com/t5/General-Information/workcentre-3225-Incomplete-session-by-time-out-error-code-11/td-p/210835
- May 15, 2014 · I’m at a loss, that fault isn’t at all formatted how Xerox does a fault code, and perfectly matches Samsung devices.. What print driver/ppd are you using ? Is there any chance you installed it on an actual Mac as an Airprint device instead of as a printer, or did this happen after updating to High Sierra and Apple replaced the Xerox printer with their Airprint driver?
Printer prints message: PCL6 ERROR — FALSE instead of .
- https://www.dell.com/community/Desktops-General-Read-Only/Printer-prints-message-PCL6-ERROR-FALSE-instead-of-document/td-p/497021
- Printer prints message: PCL6 ERROR — FALSE instead of document I was in the middle of printing some word documents when the printer started acting funny. Sometimes the print icon comes up on the system tray and the printer light blinks then the icon disappears and the light stops blinking — no print come out.
Printer Samsung M2020 ERROR CODE : 11-1112 — HP Support .
- https://h30434.www3.hp.com/t5/Samsung/Printer-Samsung-M2020-ERROR-CODE-11-1112/td-p/6426461
- Nov 18, 2017 · Printer do not want to print anything (including test page). PWG ERROR — Incomplete Session by time out POSITION : 0x562 (1378) SYSTEM : h6fwsim/os_hook LINE : 1543 VERSION : SPL 5.73 06-16-2013 ERROR CODE : 11-1112
Error Code 11 1313 Fixes & Solutions
We are confident that the above descriptions of Error Code 11 1313 and how to fix it will be useful to you. If you have another solution to Error Code 11 1313 or some notes on the existing ways to solve it, then please drop us an email.
Источник
How to Get Rid of Samsung Printer Error Code 11-1313?
Printers are the most used device which has been used by multiple of users across the globe. It helps users in printing all document into a piece of paper within seconds and in pocket-friendly prices. However, these days printers are offered by many different brands, in all the brands, Samsung is the renowned name for offering advanced features and a wide range of printers around the world. Apart from various models and advanced technology features, it’s customer service team is highly trained and experienced. Although Samsung is a reliable and most trusted brand for serving the best quality product and anyone can access the Samsung printers without any difficulty.
Many times, while operating the Samsung printer users might face trouble with the error code 11-1313 which displays and your printer immediately stops working. Generally, this error caused due to misconfigured system files which creates the registry errors within the operating system. Nevertheless, this printer error can cause the program lock-ups, slow performance of the printer and system both. Crashes the active program window or your computer system, the system responds sluggishly and respond very slowly to the mouse and keyboard input.
Causes of Samsung Printer Error Code 11-1313
Whenever users are installing the new program or applications without completely uninstall the old program, this error pops-up on the screen. This error might also cause due to virus and malware infection spread on the system and internally harms your computer system. To prevent the system from viruses and malware install any anti-malware tool to perform a full system scan and detect the malicious program.
Underneath we are providing troubleshooting steps helps you in fixing the Samsung Printer error code. The steps are more time to consume and more difficult to follow. We advise you to apply the steps in the proper sequence as mentioned below to avoid trouble and unwanted errors. The steps are discussed below.
Solution to Get Rid of Samsung Printer Error Code 11-1313
Below are the troubleshooting steps to get rid of the Samsung error code 11-131. There is two method for resolving the error, try using both the method one by one to fix this error code. Here how to do it:
Solution-1: Advanced Solution through Manual Update
- Press the ‘Power’ button in the CPU to start the system.
- Enter the ‘Login Credentials’ to log on as an ‘Administrator’ account.
- After that, click on the Start logo tab to launch the menu icon.
- In the start menu, choose ‘All Programs’ tab.
- Inside the ‘All Programs’ option, pick the ‘Accessories’ option.
- Under the ‘Accessories’ option, select ‘System Tool’ option.
- Then, press the ‘System Restore’ tab.
- Now, hit the ‘System restore to the recent system restore’ option and press the ‘Next’ tab to continue the process.
- Click on the ‘Yes’ in the notification window to confirm the system restore.
- Once restoration is completed, reboot the system to apply all the changes.
Solution-2: Normal Solution through Automatic Update
- You just need to download the Samsung Error Code 11-1313 utility repair tool.
- Click on the ‘Install’ tab to install the tool.
- After that, click on the ‘Scan’ tab to start the scanning process to detect the error.
- Press the ‘Fix’ error button to fix all detected errors.
- Restart the system to apply all the changes.
Aurora is a jack of all trades : an experienced IT technicians, writer, researcher, and a self-professed Software expert. As a single software engineer, she has in-depth knowledge of Pinter’s and she likes to write tutorials, reviews, news, and reports about the same under Epson Printer Support
Источник
Ashley blogs
Search This Blog
How to Get Rid of Samsung Printer Error Code 11-1313?
- Press the ‘Power’ button in the CPU to start the system.
- Enter the ‘Login Credentials’ to log on as an ‘Administrator’ account.
- After that, click on the Start logo tab to launch the menu icon.
- In the start menu, choose ‘All Programs’ tab.
- Inside the ‘All Programs’ option, pick the ‘Accessories’ option.
- Under the ‘Accessories’ option, select ‘System Tool’ option.
- Then, press the ‘System Restore’ tab.
- Now, hit the ‘System restore to the recent system restore’ option and press the ‘Next’ tab to continue the process.
- Click on the ‘Yes’ in the notification window to confirm the system restore.
- Once restoration is completed, reboot the system to apply all the changes.
- You just need to download the Samsung Error Code 11-1313 utility repair tool.
- Click on the ‘Install’ tab to install the tool.
- After that, click on the ‘Scan’ tab to start the scanning process to detect the error.
- Press the ‘Fix’ error button to fix all detected errors.
- Restart the system to apply all the changes.
- Get link
- Other Apps
Labels
- Get link
- Other Apps
Comments

Get solutions for all epson printer support related issues and queries and troubleshoot them with the help of experts available at Epson printer customer support toll-free phone number. Avail 24/7 customer service.
canon printer is offline mac? If yes then get in touch with us and resolve your issue within shortest time span. If you want to know more then you can visit our website canon printer offline anytime.
Is your kindle won’t connect to wifi? If yes then get in touch with us and get a best and quick guide on how to connect to wifi with kindle. We are here to resolve your all kindle issues within shortest time span. You can also visit our website kindle help guides.
If you are unable to resolve kindle errors then get kindle support service from our experts. You can call on toll-free kindle support phone number and for more information visit our website.
If it is to fix Epson printer error-01 then in that case it is advisable that you turn off your printer manage the transportation lockage procedure further manage the CD tray also check the cartridge of the printer. If you still need more information or help then ask for it from the experts.
Epson Printer Contact Number UK
Looking for Configuring a tp link modem call on 1800987893 , visit on:
Configuring a tp link modem
Do you want to get rid of canon printer won’t connect to wifi error? Then take quick help from the experts. Who are experts in their respective field and are offering services round the clock. For more information visit our website canon printer offline.
If you can’t connect kindle to wifi then don’t worry we are here with you. We will help you to fix the Kindle won’t connect to wifi problem very soon. Our team is very dedicated and skilled and we are available round the clock to help you. To know more check out our website kindle help guides.
Looking for technical number, visit on: technical number
Getting kindle won’t connect to wifi error? Looking for expert help? Then get connected with us. We provide you with the best solution within the shortest time span. We are available round the clock to help you. To know more visit our website Ebook Helpline.
Do you know why you are facing a canon printer won’t connect to wifi error? If you want to know the actual reason behind this error then get connected with us. Our experts will tell you about this error and will resolve this error soon. To know more visit our website Printer Offline Error.
Looking for buffalo support, visit on buffalo support
Источник
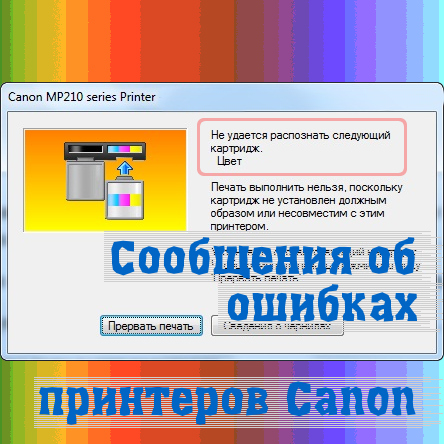
Коды ошибок и сообщения об ошибке струйных принтеров и МФУ Canon
Что означают коды ошибок принтеров Canon Pixma вы можете посмотреть в этой статье. Обычно в сообщении это “Support code” или “Код поддержки”. Если ваш принтер не имеет экрана, код ошибки можно увидеть при подключении к компьютеру или, подсчитывая количество миганий светодиодов на передней панели устройства (но цветовая индикация показывает не все коды). По номерам можно определить неисправность на большинстве современных принтеров и МФУ Canon: iP2700, iP4700, iP7240, MG5340, MG5140, MG5540, iP4940, MG5440, MG6440, MX924, iP4840, MG5240, iX6540, iX6840, MG6140, MG6240, MG6450, MX884, MG5640, MG6640, MG8140, MG6240, MG8240, MG6140, MP980, MP990, MP620, MP630, iP2840, MG6840, MG5740, TS5040, TS6040, MG7740, TS8040, TS9040, TS6140, TS6240, TS8140, TS8240, TS9140, TS9540, TS9541C, TR7540, TR8540, iP100, iP110 и многих других.
Коды ошибок (Support/Service code)
Сообщения об ошибках
Коды ошибок для Canon Pixma MP190, MP240, MP250, MP260, MP270, MP490, MP540, MP550, MP560, MP620,PIXMA MP630, MP640, MP980, MP990, MX320, MX330, MX700, MX7600, MX850, MX860:
| Код | Описание |
|---|---|
| #001 | Paper Jam – замятие бумаги |
| #037 | Image Memory Full – переполнение памяти |
| ##111 | Memory error – ошибка памяти |
| ##322 | Printer (LBP) Fixing Unit Trouble – неисправность термоблока (печки) |
| ##323 | Printer (LBP) BD (Beam Detect) Trouble – невозможность детектирования луча лазера |
| ##324 | Printer (LBP) Scanner Trouble – неиcправность лазерного блока |
| ##335 | Data transmission error between the system control section and printer control section – ошибка обмена данными между главной платой и блоком управления печати (ошибка может возникать и из-за некорректно работающего драйвера) |
| ##336 | BJ head abnormal temperature error – ненормальная температура печатающей головки |
| ##337 | BJ head temperature sensor error – ошибка термодатчика печатающей головки |
| ##342, 343 | Cleaning absorption waste ink capacity full – переполнение чернильного абсорбера |
| ##345 | BJ cartridge head cleaning error – ошибка очистки печатающей головки (ошибка парковки) |
| ##346 | Inside temperature error – ошибка внутренней температуры (перегрев) |
| ##348 | Ink detection sensor error – ошибка датчика определения уровня чернил |
| ##352 | Printer control EEPROM head information error – ошибка контроля EEPROM головки |
| ##355 | A motor to lift up for CD-R print is malfunctioned – неисправен мотор лифта для печати на CD (узел «раскрытия» тракта протяжки для прохождения «подставки» CD) |
| ##356 | ASF cam sensor error – ошибка сенсора кулачка (эксцентрика) узла ручной подачи |
| ##357 | ASF paper feed (AP) position error – An error occurred in the AP motor during purging operation – Ошибка позиции (исходного положения) узла подачи. Связана с работой двигателя узла прокачки |
| ##358 | USB Host VBUS overcurrent error – перегрузка по току линий USB |
| ##359 | Paper feed position error – ошибка узла переключения подачи бумаги |
| ##360 | Paper feed cam sensor error – ошибка сенсора кулачка (эксцентрика) узла переключения подачи при подаче из передней кассеты. Также возникает при замятии в верхней (ручной) подаче, если значение счетчика отработки более 60% |
| ##361 | Valve sensor error – ошибка датчика клапанов блокировки кап при прочистке (прокачке) сопел |
| ##362 | Motor driver malfunctioned error – неисправность м/сх драйвера двигателя |
Расшифровка основных ошибок
Ошибка: код поддержки 1000 – Оранжевый индикатор мигает 2 раза
В заднем лотке принтера для бумаги нет бумаги.
Решение
- Вставьте бумагу в задний лоток.
- Нажмите кнопку [Возобновить/Отмена] на устройстве, чтобы продолжить работу.
Если эти действия не помогли устранить ошибку, обратитесь в сервисный центр для ремонта.
Источник
Коды ошибок стиральных машин Samsung с дисплеем
|
Что появляется на дисплее |
Код ошибки |
Что значит ошибка |
Почему появилась ошибка |
Как устранить ошибку |
|---|---|---|---|---|
|
|
5E |
Не сливается вода из машины. |
Засорился сливной шланг; Засор в канализации; Засорились шланги внутри машины; Засорился сливной фильтр; Согнут или сдавлен сливной шланг; Не работает сливной насос; Замерзла вода в машине (машину хранили при минусовой температуре). |
Инструкция |
|
|
5C |
|||
|
|
E2 |
|||
|
|
H1 |
Не нагревается вода. |
Неправильно подключили машину к электросети; Не работает нагреватель стирки; Не работает нагреватель сушки. |
Инструкция |
|
|
HC |
|||
|
|
E5 |
|||
|
|
E6 |
|||
|
|
4E |
Не заливается вода в машину. |
Закрыт кран подачи воды для машины или нет воды в доме; Согнут или сдавлен заливной шланг; Засорился заливной фильтр; Сработала защита заливного шланга «Аква стоп / Aqua Stop». |
Инструкция |
|
|
4C |
|||
|
|
E1 |
|||
|
|
4C2 |
В машину заливается горячая вода – выше 50 °С. |
Заливной шланг подключен к крану горячей воды. |
Инструкция |
|
|
SUD |
В баке слишком много пены. |
Положили слишком много порошка; Положили порошок, который не подходит для машины системы автомат; Положили некачественный или поддельный порошок. |
Инструкция |
|
|
5D (SD) |
|||
|
|
UE |
Машина не может равномерно распределить вещи в барабане. |
Белье сбилось в кучу или перекрутилось между собой; В машине мало вещей: одна или две; В машине слишком много белья. |
Инструкция |
|
|
UB |
|||
|
|
E4 |
|||
|
|
LE |
Из машины самопроизвольно сливается вода. |
Низко лежит сливной шланг; Сливной шланг неправильно подключили к канализации; Есть отверстие или трещина в баке, из которого вытекает вода. |
Инструкция |
|
|
LC |
|||
|
|
E9 |
|||
|
|
3E |
Мотор перегружен, заблокирован посторонним предметом или сломался. |
Перегрузка электродвигателя из-за большого количества белья; Не работает электродвигатель. |
Инструкция |
|
|
3C |
|||
|
|
EA |
|||
|
|
UC |
Нестабильное напряжение в электросети (слишком низкое или высокое). |
На машину подается напряжение меньше 200 +/- 4 Вольта, или выше 250 +/- 4 Вольта более 30 секунд. |
Инструкция |
|
|
9C |
|||
|
|
DE |
Дверца люка не закрыта. |
Неплотно закрыта дверца люка; Не работает механизм закрытия дверцы люка. |
Инструкция |
|
|
DC |
|||
|
|
ED |
|||
|
|
DС3 |
Дверца «Add Door» (для дополнительной загрузки белья в процессе стирки) не закрыта или не открывается. |
Перед запуском стирки не закрыли дверцу «Add Door»; Не работает блокировка / разблокировка дверцы «Add Door». |
Инструкция |
|
|
DDC |
Неправильно открыли дверцу «Add Door» (для дополнительной загрузки белья) во время стирки. |
Дверцу «Add Door» открыли во время стирки без нажатия кнопки «Пуск/Пауза». |
Инструкция |
|
|
LE1 |
На дно машины попала вода. |
Протекает сливной фильтр (неплотно закрыт или поврежден); Вытекает вода из контейнера для порошка; Протекают внутренние соединительные шланги или сливной шланг; Протекает вода из дверцы (повреждена манжета). |
Позвоните в службу поддержки или зарегистрируйте заявку на ремонт через Онлайн-сервис. |
|
|
LC1 |
|||
|
|
TE |
Нет сигнала от датчика температуры. |
Поврежден датчик или его проводка. |
Инструкция |
|
|
TC |
|||
|
|
EC |
|||
|
|
0E |
В машине слишком много воды. |
Неправильно подключен сливной шланг к канализации; Клапан для залива воды заблокировался в открытом состоянии. |
Инструкция |
|
|
0F |
|||
|
|
0C |
|||
|
|
E3 |
|||
|
|
1Е |
Нет сигнала от датчика уровня воды. |
Поврежден датчик или его проводка. |
Инструкция |
|
|
1C |
|||
|
|
E7 |
|||
|
|
BE |
Не работают кнопки / кнопка на панели управления. |
Западают («залипают») пластиковые кнопки на панели управления. |
Инструкция |
|
|
BC2 |
|||
|
|
EB |
|||
|
|
AE |
Ошибка связи. |
Нет сигнала между платами управления. |
Инструкция |
|
|
AC |
|||
|
|
AC6 |
|||
|
|
CE |
Температура воды перед сливом выше или равна 55 °С. |
Заливной шланг подключен к крану горячей воды. |
Если заливной шланг подключен к крану холодной воды, то позвоните в службу поддержки или зарегистрируйте заявку на ремонт через Онлайн-сервис. |
|
|
AC |
|||
|
|
AC6 |
|||
|
|
8E |
Не работает датчик вибрации «VRT+». |
Поврежден датчик или его проводка. |
Позвоните в службу поддержки или зарегистрируйте заявку на ремонт через Онлайн-сервис. |
|
|
8C |
|||
|
|
EE |
Не работает датчик температуры сушки (появляется только у машин с функцией сушки белья). |
Поврежден датчик или его проводка. |
Позвоните в службу поддержки или зарегистрируйте заявку на ремонт через Онлайн-сервис. |
|
|
FE |
Не работает вентилятор / фен сушки (появляется только у машин с функцией сушки белья). |
Не работает вентилятор / фен сушки. |
Позвоните в службу поддержки или зарегистрируйте заявку на ремонт через Онлайн-сервис. |
|
|
FC |
|||
|
|
SDC |
Не работает автоматический дозатор (появляется только у машин с функцией Wi-Fi). |
Не работает автоматический дозатор. |
Позвоните в службу поддержки или зарегистрируйте заявку на ремонт через Онлайн-сервис. |
|
|
6C |
Неисправен привод или проводка автоматического дозатора (появляется только у машин с функцией Wi-Fi). |
Не работает привод или проводка автоматического дозатора. |
Позвоните в службу поддержки или зарегистрируйте заявку на ремонт через Онлайн-сервис. |
|
|
2H |
Оставшееся время до конца стирки. |
Более 99-ти минут до окончания стирки (2Н — 2 часа, 3Н — 3 часа и.т.д.). |
Инструкция |
|
|
3H |
|||
|
|
4H |
|||
|
|
Hot |
Высокая температура внутри барабана (появляется только у машин с функцией сушки белья). |
Температура внутри барабана выше 70 °C. |
Не отключайте стиральную машину. Подождите, пока температура понизится в барабане и сообщение «Hot» исчезнет. |
|
|
A0…A9 |
Включен заводской тестовый режим. |
Включен заводской тестовый режим. |
Инструкция |
|
|
PoF |
Во время стирки отключили электричество (ошибка появляется после подачи электричества). |
Во время стирки отключили электричество. |
Нажмите кнопку «Старт / Пауза», для продолжения стирки. |
|
|
BC |
Машина не может запустить мотор. |
Не работает триак (симистор) включения вращения мотора. |
Позвоните в службу поддержки или зарегистрируйте заявку на ремонт через Онлайн-сервис. |


Коды ошибок стиральных машин Samsung без дисплея
|
Какие индикаторы загораются |
Код ошибки |
Что значит ошибка |
Почему появилась ошибка |
Как устранить ошибку |
|---|---|---|---|---|
Загораются индикаторы всех режимов стирки + нижний индикатор температуры. |
4E |
Не заливается вода в машину. |
Закрыт кран подачи воды для машины или нет воды в доме; Согнут или сдавлен заливной шланг; Засорился заливной фильтр-сеточка; Сработала защита заливного шланга «Аква стоп / Aqua Stop». |
Инструкция |

Загораются индикаторы всех режимов стирки + второй снизу индикатор температуры. |
5Е |
Не сливается вода из машины. |
Засорился сливной шланг; Засор в канализации; Засорились шланги внутри машины; Засорился фильтр сливного насоса (сливной фильтр); Согнут или сдавлен сливной шланг; Не работает сливной насос; Замерзла вода в машине (машину хранили при минусовой температуре). |
Инструкция |

Загораются индикаторы всех режимов стирки + два нижних индикатора температуры. |
0E |
В машине слишком много воды. |
Неправильно подключен сливной шланг к канализации; Клапан для залива воды заблокировался в открытом состоянии. |
Инструкция |

Загораются индикаторы всех режимов стирки + второй сверху индикатор температуры. |
UE |
Машина не может равномерно распределить вещи в барабане. |
Белье сбилось в кучу или перекрутилось между собой; В машине мало вещей: одна или две; В машине слишком много белья. |
Инструкция |
Загораются индикаторы всех режимов стирки + нижний и второй сверху индикатор температуры. |
HE |
Не нагревается вода. |
Неправильно подключили машину к электросети; Не работает нагреватель (ТЭН) стирки; Не работает нагреватель (ТЭН) сушки. |
Инструкция |

Загораются индикаторы всех режимов стирки + два центральных индикатора температуры. |
||||

Загораются индикаторы всех режимов стирки + все индикаторы температуры. |
DE |
Дверца люка не закрыта. |
Неплотно закрыта дверца люка; Не работает механизм закрытия дверцы люка. |
Инструкция |

Загораются индикаторы всех режимов стирки + три нижних индикатора температуры. |
1Е |
Нет сигнала от датчика уровня воды. |
Поврежден датчик или его проводка. |
Инструкция |

Загораются индикаторы всех режимов стирки + верхний индикатор температуры. |
4C2 |
В машину заливается горячая вода — выше 50 °С. |
Заливной шланг подключен к крану горячей воды. |
Инструкция |
Загораются индикаторы всех режимов стирки + нижний и верхний индикатор температуры. |
LE |
Из машины самопроизвольно сливается вода. |
Низко лежит сливной шланг; Сливной шланг неправильно подключили к канализации; Есть отверстие или трещина в баке, из которого вытекает вода; Вода вытекает из бункера (контейнера) для порошка или из сливного шланга (при его повреждении). |
Инструкция |

Загораются индикаторы всех режимов стирки + верхний и второй снизу индикатор температуры. |
Нет сигнала от таходатчика (измеряет частоту вращения барабана) |
Поврежден датчик или его проводка. |
Позвоните в службу поддержки или зарегистрируйте заявку на ремонт через Онлайн-сервис. |
|
Загораются индикаторы всех режимов стирки + два нижних и верхний индикатор температуры. |
BE |
Не работают кнопки / кнопка на панели управления. |
Западают («залипают») пластиковые кнопки на панели управления. |
Позвоните в службу поддержки или зарегистрируйте заявку на ремонт через Онлайн-сервис. |

Загораются индикаторы всех режимов стирки + два нижних и верхний индикатор температуры. |
TE |
Нет сигнала от датчика температуры. |
Поврежден датчик или его проводка. |
Инструкция |
Коды сброса ошибок копиров, принтеров и МФУ Xerox
В данной таблице предоставлены коды сброса ошибок популярных моделей аппаратов разных производителей. В левой колонке указана модель аппарата, в правой — метод сброса. Для большинства моделей данной фирмы вход в сервисный режим одинаков — удерживая «0» включить агрегат.
Другие способы входа в сервисный режим
| Xerox 5845, 5855 | Либо включить аппарат с одновременно нажатыми кнопками [Прерывание] и [2] либо на включенном аппарате нажать и удерживать эти кнопки более 2 сек. Если аппарат неисправен — вход осуществляется кнопками [Прерывание] и [5], с ограничением функций (последовательно появляющиеся сообщения о неисправностях сбрасываются двойным нажатием клавиши [Стоп]). Далее аппарат запрашивает четырёхзначный код доступа: это либо 8765 (по умолчанию), либо последние четыре цифры счётчика копий в обратном порядке (если счётчик копий показывает 01234567 — код входа 7654). |
| Xerox N17 24/32/40 3225/4025 |
Есть 3 диагностических режима: 1 — проверяются выключатели, датчики и выводятся параметры фьюзера; вход: (2+6), после «IOT?» нажать «7»; 2 — печатается тест-лист «сетка» в симплексе или дуплексе; вход: (2+6), после «IOT?» нажать «4»; 3 — меняются параметры и настройки принтера (NVRAM); вход: (2+6), после «IOT?» нажать (4+7), «7» сразу же отпустить; «4» держать до появления «3» на дисплее, затем отпустить. |
| XD102. 155 XE60. 84 XC800. 1255 |
stop – auto – stop – auto иногда записывают как C – Density select – C – Density select (что то же самое) |
| WC PE 16(e) | набираем на клавиатуре [menu] — [#] — [1934] — [menu]; после входа в сервисное меню появится надпись «TECH» |
Для выхода из режима дважды нажимаем кнопку «Сброс» или выключаем и снова включаем аппарат.
Возможные проблемы
| Xerox 5201/5203/5305/5306 XC351/355/356 | Обнуление счетчика фоторецептора. Признак — моргают все лампы, в готовность не выходит.
|
| Xerox ХC520/540/560/580 | Сброс ошибки Н3/Н4.
|
| Xerox N17, N2125 24/32/40 3225/4025 N2025/2825 Phaser 5400 |
Эти модели имеют счетчик фьюзера. По его окончании аппарат просит заменить набор регламентных работ или «Maintenance Kit». Этот счетчик тоже можно сбросить, если печка в порядке: (2+6), вкл. питание, дождаться «IOT?», не позднее 5 сек. после появления «IOT?» нажать (0+5) и держать до появления сообщения о сбросе «Reset Complete. Please Reboot». Выключите и включите принтер. Рекомендация: все же лучше не просто сбрасывать счетчик, а устанавливать набор, в который входят фьюзер в сборе, ролик переноса, ролики подачи (6 или 15), протирочная салфетка |
| WC РE16(e)
Samsung SCX 4016/4116/4216(F) |
Сброс сообщения «Нет тонера» после заправки — есть два варианта: 1. Поставить в паз на передней части картриджа предохранитель на 1/16А (0.0625А), при первом же включении аппарат пережгёт предохранитель и сообщение сбросится. Известны случаи, что работало и с предохранителем до 0.5А; но если МФУ предохранитель не сможет сжечь, будет ошибка CRU FUSE ERROR, которая уходит после установки более слабого предохранителя. 2. Через сервисное меню: для входа в сервисное меню 4216/PE16 набираем на клавиатуре : [menu] — [#] — 1934 — [menu], (для 4016/4116 — [menu] — [upper level] — [Стрелка влево] — [Стрелка вправо] — [upper level] — [enter]). После входа в сервисное меню появится надпись TECH; с помощью клавиш [Стрелка влево] — [Стрелка вправо] находим запись «New cartridge», выбираем «Yes». Для выхода из сервисного меню просто выключаем и включаем МФУ (или для 4216/PE16 набираем на клавиатуре [menu] — [#] — 1934). |
| Xerox 4030 | Процедура одинакова для обоих картриджей: удерживая кнопку сброса, находящуюся рядом со шнуром питания; включите принтер. |
| Xerox 5017/5316/5317 | Сброс барабана (ошибка J7): на платке с EPROM запаиваем F2, а вместо F1 включаем тестер в режиме измерения тока на пределе 3 mA с защитой. Делаем 101 копию, и – привет! |
| DC 212/214 | Сброс ошибки U4. Войдите в диагностический режим и подождите 30 сек, пока аппарат завершит инициализацию. Введите диагностический код [401] и нажмите кнопку «Старт». Выйдите из диагностики, выключите аппарат. Подождите 10 сек, включите аппарат. Подождите 30 сек. Если код U4 появился снова, повторите процедуру сброса. Если после 3-х процедур код появляется вновь, но Вы уверены в работоспособности фьюзера — замените главную плату. |
| WC Pro 320 | Сброс кода U4 (печная ошибка) – код 10-1, введите 0 и нажмите кнопку [Старт] |
| WC Pro 610 | Тонер: включите аппарат, откройте крышку; нажмите [MENU], [6], [3], [CLEAR], [ENTER] Барабан: включите аппарат, откройте крышку; нажмите [MENU], [6], [4], [CLEAR], [ENTER] |
| XD155df | после сброса счётчика 24-7 в 26-38 пропиши 1 – больше считать не будет. |
| XE 60/80 | Сброс OPC Cartridge: при включенном питании откройте переднюю крышку; удерживая кнопку [Copy Contrast], закройте крышку и продолжайте держать кнопку 3 секунды. |
| Xerox 5845 | При включении требует ввести пользовательский код или кликнуть администратора. Надо войти в «АДМИНИСТРАТОР» (код 11111), затем ввести новый счет; или заблокировать аудитрон. |
НИКОГДА не используйте никаких других диагностических кодов и процедур, потому что это может привести к непредсказуемым последствиям.
Имейте в виду, что сброс ошибки не гарантирует вас от всех остальных бед, поэтому при первой же возможности завезите копировальный аппарат в сервисную фирму, чтобы там удалили отработку, произвели необходимую чистку и регулировки.
Источник
Коды ошибок
копировальных аппаратов Xerox


Если Ваш копировальный аппарат Xerox выдал на индикации некий код, то узнать причину возникновения ошибки Вы можете в этом разделе.
Но код ошибки — это лишь следствие сбоя в работе аппарата
Xerox 1012, 1012(RE)
| Код ошибки | Описание |
|---|---|
| E1 | Jam between paper feed and fuser |
| E3 | Jam in fuser |
| E5 | Clam shell open |
| E6 | Paper feed section cover is open |
| J1 | Toner cartridge near empty |
| J3 | Drum cartridge not seated properly |
| J7 | Waste toner full (replace drum cartridge) |
| L6 | Key counter out |
| L8 | Exposure area overheat |
| U1 | No clock pulse (drive problem) |
| U2 | Scan problem |
| U3 | Lens/mirror problem (RE model only) |
| U4 | Heat problem |
| U8 | Exposure lamp control circuit problem |
Xerox 1020
| Код ошибки | Описание |
|---|---|
| LL | Probable bad heater lamp |
Xerox 1025
| Код ошибки | Описание |
|---|---|
| A1 | DF jam |
| C1 | PF jam cass. 1 |
| C2 | PF jam cass. 2 |
| C3 | PF jam cass. 3 |
| C9 | Bypass jam |
| E1-1 | Paper jam before exit switch |
| E1-2 | Paper jam |
| E1-5 | Paper jam |
| E1-6 | Paper jam |
| E3-3 | Paper jam at exit switch |
| E3-4 | Paper jam at exit switch |
| E5 | Front door open |
| F1 | Collator jam |
| F5 | Collator interlock |
| F8 | No power to collator |
| F9 | Collator bin home switch |
| J7 | 250 copies since toner waste was full |
| L5 | Original cass. not present after clearing interrupt |
| L6 | Key counter |
| L8 | Platen glass too hot |
| U1 | Main motor clock pulse |
| U2 | Scan problem |
| U3-1 | Lens problem |
| U4-1 | Open thermistor |
| U4-2 | Low temperature |
| U4-4 | Temperature |
| U4-5 | Main PWB |
| U6-1 | Main PWB |
| U6-2 | Main PWB |
| U6-3 | Main board battery |
| U6-4 | Initialization |
| U8 | Exposure lamp |
Xerox 1035
| Код ошибки | Описание |
|---|---|
| A9 | Scanner location |
| C1 | Paper feed — upper cassette |
| C2 | Paper feed — lower cassette |
| C9 | Bypass jam |
| E5 | Clam shell is open |
| L6 | Key counter |
| U1 | Off/On |
| U2 | Optics |
| U4 | Low fuser temperature |
Xerox 1038
| Код ошибки | Описание |
|---|---|
| A1 | DF jam |
| C1 | PF jam cass. 1 |
| C2 | PF jam cass. 2 |
| C3 | PF jam cass. 3 |
| C9 | Bypass jam |
| E1-1 | Paper jam before exit switch |
| E1-2 | Paper jam |
| E1-5 | Paper jam |
| E1-6 | Paper jam |
| E3-3 | Paper jam at exit switch |
| E3-4 | Paper jam at exit switch |
| E5 | Front door open |
| F1 | Collator jam |
| F5 | Collator interlock |
| F8 | No power to collator |
| F9 | Collator bin home switch |
| J7 | 250 copies since toner waste was full |
| L5 | Original cass. not present after clearing interrupt |
| L6 | Key counter |
| L8 | Platen glass too hot |
| U1 | Main motor clock pulse |
| U2 | Scan problem |
| U3-1 | Lens problem |
| U4-1 | Open thermistor |
| U4-2 | Low temperature |
| U4-4 | Temperature |
| U4-5 | Main PWB |
| U6-1 | Main PWB |
| U6-2 | Main PWB |
| U6-3 | Main board battery |
| U6-4 | Initialization |
| U8 | Exposure lamp |
Xerox 2830
| Код ошибки | Описание |
|---|---|
| A9 | Scanner location |
| C1 | Paper feed — upper cassette |
| C2 | Paper feed — lower cassette |
| C9 | Bypass jam |
| E5 | Clam shell is open |
| E5 | Clam shell open |
| L6 | Key counter |
| U1 | Off/On |
| U2 | Optics |
| U4 | Low fuser temperature |
Xerox 5011, 5012, 5014
| Код ошибки | Описание |
|---|---|
| C8 | Bypass jam/no paper |
| C9 | Bypass jam |
| E1 | Jam |
| E3 | Fuser jam |
| E5 | Clamshell open |
| E6 | PF section cover open |
| J1 | Toner cartridge amost empty |
| J3 | Copy cart (drum unit) missing/not seated right |
| J7 | Copy cartridge has run 18,000 copies |
| J8 | Copy cartridge. Improperly seated or possible only one of two fuses in the cartridge blew |
| L6 | Key counter |
| L8 | Exposure glass too hot |
| U1 | Drive problem |
| U2 | Scan problem |
| U3 | Lens or mirror drive problem |
| U4 | Fuser problem. Heat lamp, thermoswitch, SSR, thermistor |
| U6 | Battery on main board |
| U8 | Exposure lamp or exposure lamp circuit |
Xerox 5016, 5017, 5316, 5317
| Code | Description |
|---|---|
| A1-1 | Document feeder feed jam |
| A1-2 | Document feeder belt jam |
| A2-1 | Document feeder exit jam |
| A2-2 | Duplex jam |
| A3 | DAD interlock |
| A5 | Duplex and DAD right side interlock |
| A6 | Copier jams after |
| A9 | Document feed belt drive motor |
| C1-3 | Top cassette misfeed |
| C2-3 | Middle cassette misfeed |
| C3-3 | Bottom cassette misfeed |
| C9-3 | Bypass misfeed |
| E1-11 to E1-14 | Paper jam in machine. Did not reach exit switch soon enough |
| E1-6 | Paper path jam |
| E3-31 to E3-34 | Exit switch jam |
| E3-6 | Fuser jam |
| E5 | Front door interlock |
| E6 | Right side interlock or TTM interlock |
| F1 | Sorter jam |
| F5 | Sorter interlock |
| F8 | Sorter board to copier main board communication problem |
| F9 | Sorter bins |
Xerox 5018, 5028
| Code | Description |
|---|---|
| A1 | Document is ADF |
| A1-8 | Main board received reset signal |
| A2 | ADF jams |
| A6, A7 | ADF jams |
| A9 | ADF jams |
| C1 — C4 | Feed jam |
| C5-1 to C5-4 | Jams in various areas |
| C5-2 | Jams in various areas |
| C5-3 | Jams in various areas |
| C5-4 | Duplex jam |
| E0 | Machine has reset |
| E1 | Jam |
| E1-E0 | Registration jam |
| E1-E5 | Clamshell interlock |
| E1-E6 | Right side interlock |
| E1-E7 | Two tray interlock |
| E1-E8 | Sorter interlock |
| E1-E9 | Copy cartridge interlock |
| E2 | Reset signal happened |
| E3 | Jam |
| E4 | Exit jam |
| E4-10 | Exit jam |
| E4-5 | Clamshell interlock |
| E4-6 | Right side interlock |
| E4-7 | Two tray interlock. Duplex interlock |
| E4-8 | Sorter interlock |
| E4-9 | Copy cartridge interlock |
| E5 | Clamshell interlock |
| E6 | Right side interlock |
| E7 | Duplex interlock |
| E9 | Copy cartridge interlock |
| F3-1 | Sorter bin home switch |
| F3-2 | Sorter cam switch |
| F3-3 | Sorter cam switch |
| J1-1 | Add toner |
| J1-2 | Temporary low toner signal |
| J2-0 | Replace copy cartridge |
| L2 | 2000 copies left on copy cartridge |
| L3 | ADF to machine communication problem |
| L4 (flashing) | 1000 copies left on fuser web |
| rr | Bad EPROM on main board |
| U0 | Main board |
| U2 | Scan problem |
| U2-1 | Scan home |
| U3-00 | Cam drive problem |
| U3-01 | Cam movement slow |
| U3-04 | Main board to duplex communication |
| U3-09 | Cam problem |
| U3-12 | Jogger problem |
| U3-19 | Cam problem |
| U3-21 | Cam problem |
| U3-23 | Cam problem |
| U3-29 | Cam problem |
| U3-32 | Cam problem |
| U3-34 | Cam problem |
| U3-39 | Cam problem |
| U3-43 | Cam problem |
| U3-45 | Cam problem |
| U3-49 | Cam problem |
| U3-54 | Cam problem |
| U3-56 | Cam problem |
| U3-59 | Cam problem |
| U4-1 | Fuser problem. Long warm up |
| U4-2 | Low fuser temperature after warm up |
| U4-3 | High fuser temperature |
| U4-4 | Open fuser thermistor |
| U4-6 | Replace fuser web |
| U4-7 | Thermistor signal problem |
| U7-1 | Copy cartridge belt drive problem |
| U9-3 | Exposure lamp problem |
| U9-4 | Toner motor |
| U9-5 | Problem in warm up |
Xerox 5312, 5313, 5314
| Код ошибки | Описание |
|---|---|
| C1 | Upper paper feed problem. Did not reach feed sensor |
| C2 | Lower paper feed problem. Did not reach feed sensor |
| E1 | Exit jam. Paper did not reach exit sensor |
| E3 | Exit jam. Paper still on exit sensor |
| J1 | Add toner |
| J3 | Copy cartridge (drum unit) not installed |
| J7 | Copy cartridge (drum unit) must be replaced |
| J8 | Copy cartridge (drum unit) problem |
| L6 | Problem with an accessory. Installed but not initialized |
| U1 | Drive problem. Main motor, gear etc. |
| U2 | Scan problem |
| U3 | Main board dip switches wrong. Lens drive problem |
| U4 | Fuser problem. Heat lamp, thermal switch, overheat, thermistor. |
| U6 | EPROM error |
| U8 | Auto exposure sensor. No exposure lamp or weak lamp |
Xerox 5318, 5320, 5322
| Code | Description |
|---|---|
| A1-11 | Original ready switch |
| A1-12 | Feed sensor |
| A1-1 to A1-32 | All indicate a paper path problem, etc. in the ADF |
| A1-21 | Original ready switch and document registration sensor or both the document feed sensor and document registration sensor |
| A1-22 | ADF registration sensor |
| A1-23 | Original did not reach ADF registration sensor quickly enough |
| A1-24 | ADF sensor stuck down too long |
| A1-25 | ADF sensor actuated at the wrong time during single sheet feed |
| A1-26 | ADF sensor not actuated quickly enough in sheet feed mode |
| A1-31 | In reverse, ADF sensor is not actuated soon enough |
| A1-32 | In reverse, ADF sensor is actuated too long |
| A2 | ADF exit problems |
| A2-1 | Original ready sensor and ADF exit switch are actuated or ADF feed in sensor and ADF exit switch are both actuated |
| A2-2 | ADF exit switch |
| A2-3 | ADF exit switch is not actuated on time |
| A3 | Irregular size documents |
| A3-1 | Wrong size original sensed in 1:1 mode |
| A3-2 | Wrong size original sensed in the 2:1 mode |
| A5 | ADF interlock |
| A5 | ADF interlock |
| A6 | ADF single sheet document reset. |
| A6-1 | Reset original |
| A6-2 | Reset sheet feeder |
| A7 | Document cover interlock |
| A8 | ADF exit interlock |
| C1 | Tray 1 jam |
| C1-2 | Paper feed problem in tray 1 |
| C1-3 | Paper does not reach registration |
| C2 | Tray 2 jam |
| C3 | Tray 3 jam |
| C3-1 | Paper feed problem from tray 3 |
| C3-2 | Paper feed problem from tray 3 |
| C3-3 | Paper feed problem from tray 1 |
| C6-1 | Duplex paper feed problem |
| C6-2 | Duplex and/or tray 1 paper feed problem |
| C6-3 | Paper feed problem from tray 1 |
| C7-1 | Paper feed problem from HCF |
| C7-2 | Paper feed problem from HCF on tray 1 |
| C7-3 | Paper feed problem from tray 1 |
| C8 | Paper stays in tray or duplex or HCF |
| C8-1 | Paper on tray 1 feed sensor |
| C8-2 | Paper on tray 2 feed sensor |
| C8-3 | Paper on tray 3 feed sensor |
| C8-4 | Paper on HCF feed sensor |
| C8-5 | Paper in duplex section |
| C9 | Bypass feed problem |
| C9-3 | Paper from bypass did not reach registration sensor quickly enough |
| E1-10 to E1-25 | Internal jam |
| E1-6 | Paper on registration sensor |
| E2 | Reset signal happened. Might read E-2 something else. |
| E3-30 to E4-14 | Exit jam |
| E3-30 to E3-35 | Exit switch actuated too long |
| E3-6 | Exit jam |
| E3-6 | Paper on exit switch |
| E4-10 to E4-14 | Inverter sensor not actuated. |
| E4-10 to E4-45 | Paper did not reach inverter switch soon enough |
| E4-15 | Inverter sensor |
| E4-40 to E4-45 | Duplex entry sensor |
| E4-6 | Paper on inverter switch |
| E4-6 | Inverter sensor |
| E5 | Front door interlock |
| E6-1 | Tray 1 interlock |
| E6-2 | 2 tray or duplex interlock |
| E6-3 | HCF interlock |
| E7-2 | Duplex inverter interlock |
| E7-3 | Duplex interlock |
| E8-10 to E8-15 | Paper on duplex feed sensor is not actuated soon enough |
| E8-6 | Paper in duplex |
| E8-6 to E8-15 | Duplex entry sensor |
| F1-1 | Paper did not reach sorter |
| F1-2 | Paper stayed on sorter feed sensor |
| F1-6 | Sorter exit sensor |
| F3 | Paper size not available for sort/stack |
| F5 | Sorter interlock |
| H2-1 | Communication problem between main board and duplex board |
| H2-2 | Side guard sensor problem |
| H3-1 | Communication problem between main board and HCF |
| H3-2 | Upper limit sensor problem on HCF |
| H6-1 | ADF size sensor |
| H6-2 | ADF nudgeer sensor |
| H6-3 | Belt drive motor does not have 24 volts. Black toner is empty, but 100 copies have been run without changing toner |
| J1 | Black toner is empty, but 100 copies have been run without changing toner |
| J3 | Replace copy cartridge |
| J3 | No copy cartridge (drum unit) |
| J7 | Copy cartrige must be replaced |
| J8-1 | Wrong copy cartridge installed |
| J8-2 | Copy cartridge EEPROM must be changed |
| L6 | Auditron or other counter problem |
| L6 | Key counter not installed |
| L8 | Platen glass temperature is too high |
| L9 | Communication problem between interimage erase/edge lamps and main board |
| U1-1 | Main motor drive problem |
| U2-1 | Scan home problem |
| U2-1 to U2-4 | Scan home sensor |
| U2-2 | Scan home problem or optics problem |
| U2-3, U2-4 | Scan home problem |
| U3-1 | Lens sensor problem |
| U4-1 | Fuser thermistor open |
| U4-2 | Fuser did not warm up properly |
| U4-3 | Fuser temperature too high |
| U4-4 | Fuser problem. Staying on too long |
| U4-6 | High fuser temperature |
| U5-1 | Sorter bin home switch not activated |
| U5-2 | Sorter bin home switch stayed actuated |
| U5-3 | Sorter bin home switch |
| U5-4 | Sorter bin home switch |
| U6-1 | ROM problem |
| U6-2 | RAM problem |
| U6-3 | Low battery |
| U6-4 | Incorrect value in NVM. Reinitialize main board with code 20-96 |
| U8-1 | Exposure lamp problem |
| U8-2 | Communication problem main board and exposure board |
| U8-3 | Exposure lamp or exposure lamp board problem |
| U8-4 to U8-6 | Problem with exposure lamp, lamp sensor, lamp board |
Xerox 5328
| Code | Description |
|---|---|
| A1 | Document in ADF |
| A1-8 | Main board received reset signal |
| A2 | ADF jams |
| A6 | ADF registration jam |
| A7 | ADF interlock |
| A9 | Tray 1 jam |
| C1 | Tray 2 jam |
| C2 | Tray 3 jam |
| C3 | Bypass feed jams |
| C4 | Machine has reset |
| E1 | Jam |
| E1-5 | Clamshell interlock |
| E1-6 | Right side interlock |
| E1-7 | Two tray interlock, or duplex interlock |
| E1-8 | Sorter interlock |
| E1-9 | Copy cartridge interlock |
| E1 or E1-0 | Registration jam |
| E2 | Reset signal happened |
| E3 | Jam in transfer area |
| E4 | Exit jam |
| E4-0 | Exit jam |
| E4-5 | Clamshell interlock |
| E4-6 | Right side interlock |
| E4-7 | Two tray interlock |
| E4-8 | Sorter interlock |
| E4-9 | Copy cartridge interlock |
| E5 | Clamshell interlock |
| E6 | Right side interlock |
| E9 | Copy cartridge interlock |
| F3-1 | Sorter bin home switch |
| F3-2 | Sorter cam switch |
| F3-3 | Sorter cam switch |
| F5 | Sorter interlock |
| J1-1 | Add toner |
| J1-2 | Temporary low toner signal |
| J2-1, J2-2 | Replace copy cartridge |
| J5, J6 | ADF to machine communications problem |
| L2 | 2000 copies left on cartridge |
| L3 | ADF to machine communications problem |
| L4 | (flashing) 1000 copier left on fuser web |
| L6 | Auditron or other counter problem |
| LL | Main board. Try simulation 1.1 to initialize |
| rc | Wrong operation panel installed |
| rr | Bad EPROM on main board. Try 1.1 |
| U0 | Main board |
| U2 | Scan problem |
| U2-1 | Scan home |
| U2-2 | Scan home or scan encoder |
| U2-4 | Scan home or scan dual page sensor |
| U2-7 | Scan home |
| U4-1 | Fuser problem. Long warm up |
| U4-2 | Low fuser temperature after warm up |
| U4-3 | High fuser temperature |
| U4-4 | Open fuser thermistor |
| U4-6 | Replace fuser web. |
| U4-7 | Thermistor signal problem |
| U7-1 | Copy cartridge belt drive problem |
| U9-3 | Exposure lamp problem |
| U9-4 | Toner motor |
| U9-5 | Problem in warm-up |
Xerox 5330
| Code | Description |
|---|---|
| A1-1 to A1-32 | All indicate a paper path problem, etc. in the ADF. |
| A2 | ADF exit problems |
| A3 | Irregular size documents |
| A5 | ADF interlock |
| A6 | ADF single sheet document reset. |
| A7 | Platen interlock |
| A8 | ADF exit interlock |
| C1 | Tray 1 jam |
| C2 | Tray 2 jam |
| C3 | Tray 3 jam |
| C6-1, C6-2 | Jams related to duplex |
| C6-3 | Registration sensor, re tray 1 |
| C7-1, C7-2 | HCF feed problems |
| C7-3 | Tray 1 feed problem |
| C8 | Paper stays in tray or duplex or HCF |
| C9 | Bypass feed problem |
| E1-10 to E1-25 | Internal jam |
| E1-6 | Paper on registration sensor |
| E2 | Reset signal happened. Might read E-2 something else. |
| E3-30 to E4-14 | Exit jam |
| E3-6 | Exit jam |
| E4-10 to E4-14 | Inverter sensor not actuated. |
| E4-15 | Inverter sensor |
| E4-40 to E4-45 | Duplex entry sensor |
| E4-6 | Inverter sensor |
| E5 | Front door interlock |
| E6-1 | Tray 1 interlock |
| E6-2 | 2 tray or duplex interlock |
| E6-3 | HCF interlock |
| E7-2, E7-3 | Duplex interlock |
| E8-6 to E8-15 | Duplex entry sensor |
| F1-1 | Sorter entry sensor |
| F1-6 | Sorter exit sensor |
| F3 | Paper size not available for sort/stack |
| F5 | Sorter interlock |
| J1 | Add toner |
| J3 | Replace copy cartridge |
| J7 | Replace copy cartridge |
| J8-1 | Wrong copy cartridge installed |
| J8-2 | Copy cartridge EEPROM |
| L6 | Auditron or other counter problem |
| L8 | Platen glass temperature is too high |
| L9 | Communication problem between interimage erase/edge lamps and main board |
| U1-1 | Main motor drive problem |
| U2-1 to U2-4 | Scan home sensor |
| U3-1 | Lens sensor |
| U4-1 | Open fuser thermistor |
| U4-2 | Fuser did not warm up properly |
| U4-3 | Fuser temperature too high |
| U4-4 | Fuser problem. Staying on too long |
| U4-6 | High fuser temperature |
| U5-1 | Sorter bin home switch not activated |
| U5-2 | Sorter bin home switch stayed actuated |
| U5-3 | Sorter bin home switch |
| U5-4 | Sorter bin home switch |
| U6-1 | ROM problem |
| U6-2 | RAM problem |
| U6-3 | Low battery |
| U6-4 | Incorrect value in NVM. Reinitialize main board with code 20-96 |
| U8-1 to U8-6 | Problem with exposure lamp, lamp sensor, lamp board |
Xerox 5340, 5343
| Code | Description |
|---|---|
| 00-009; 030 to 033 | A door was opened while paper was being fed |
| 00-047 | Paper in duplex |
| 00-1 | Auditron |
| 00-2 | Diagnostic error |
| 00-3 | Faults error |
| 00-4 | Ric error |
| 00-5 | Job manager system error |
| 00-6 | LLM interface |
| 00-7 | Standby error |
| 00-8 | Communications error |
| 00-9 | Xerographic error |
| 01-300 | Front interlock |
| 01-310 | Right upper interlock |
| 01-315 | Left upper interlock |
| 01-320 | Left lower interlock |
| 01-325 | Fuser interlock |
| 02-910 | Key counter missing |
| 02-920 | Wrong combination of accessories |
| 03-321, 322, 326, 327 | LLM to ISIL communications problems |
| 03-328 | IOT communications problem with duplex or tray 4 |
| 03-330 | IOT communications problems with HCF |
| 03-335, 03-336 | LLM communications problems with edit |
| 03-340 | NVM memory |
| 03-341, 03-347 | Communications problems between IOT and sorter |
| 03-350, 03-354 | Communications problem with LLM and user interface |
| 03-363, 03-364 | Communications problem between LLM & optics |
| 03-370, 03-373 | Communications problem between LLM & DADF |
| 03-380, 384 | |
| 03-416, 03-422 | RAM memory problem |
| 03-424, 426 | NVM memory problem |
| 03-430, 432 | Billing problem |
| 03-439 | GRAIB communications problem |
| 03-440 | RIC communications problem |
| 03-441 | RIC NVM problem |
| 03-442 | Modem |
| 03-443, 03-458 | RIC problems |
| 03-460 | Serial communications processor problem |
| 04-300 | Main motor or drive problem |
| 05-100, 05-108 | DADF registration sensor |
| 05-110 | DADF exit sensor |
| 05-115, 120 | DADF jams |
| 05-305 | DADF document drive |
| 05-310, 312 | DADF document sensor |
| 05-316 | DADF registration sensor jam |
| 05-325 | DADF exit sensor |
| 05-335, 341, 345 | DADF interlock switches |
| 06-300, 06-310 | Scan problems |
| 06-315 | Scan drive |
| 06-320A, 320B, 320C, 325 | Scan problem |
| 06-330 | Lens drive |
| 06-340 | Exposure control problem |
| 06-342 | LLM CPU problem |
| 06-344, 06-350 | Exposure cvontrol problem |
| 06-352 | IOT CPU problem |
| 07-300, 315, 330, 345 | Tray faults |
| 07-360, 07-370 | HCF problems |
| 07-375, 380A, 380B | Duplex problems |
| 08-100, 08-110 | Feed problems. Lead edge of copy paper is late getting to feed sensor of tray 1 |
| 08-115, 08-162 | Feed problem. Lead edge of copy paper is late getting to registration sensor |
| 08-165 | Paper jam at registration sensor |
| 08-310, 08-370 | Paper at a sensor when power is turned on |
| 08-330 | DADF nudger sensor |
| 08-380 | Registration side to side problem with home position |
| 08-390 | Nip |
| 09-300 | Copy cartridge finished (drum unit) |
| 09-310 | Add black toner Add color toner |
| 09-320 | Add color toner |
| 09-330 | Wrong copy cartridge (wrong drum unit) |
| 09-340 | Drum cartridge not installed properly |
| 09-350 | Waste toner full |
| 100 | A fault has occurred |
| 10-100 | Exit jam |
| 10-105 | Exit jam |
| 10-110 | Vertical sensor jam |
| 10-120, 122, 125 | Duplex jam |
| 10-150, 155 | Too much or not enough paper in duplex tray |
| 10-300 | Fuser thermistor |
| 10-302 | Low fuser temperature |
| 10-304 | Bad fuser temp |
| 10-308 | High fuser temperature or open thermistor |
| 10-310 | High fuser temperature |
| 10-312 | Fuser not up to temperature after energy save |
| 10-314 | Fuser problem |
| 10-320 | Fuser web finished |
| 10-330, 335, 340 | Exit switch, vertical sensor switch actuated when power is turned on |
| 11-100, 11-116 | Sorter jam |
| 11-150, 11-176 | Sorter auto stapler jam |
| 11-310, 314, 316 | Sorter interlock |
| 11-325A, B, C, D, E, F, G | Sorter index |
| 11-352, 354, 356 | Sorter auto stapler interlocks |
| 11-365A, B, C, D, E | Sorter auto stapler bin |
| 11-370, 371, 372A, 373A, 373B, 374 | Sorter auto stapler staple failure, staple home problem or tamper home problem |
| 11-385A, 385B, 390A,B,C,D,E, 396A | Sorter auto stapler staple failure, staple home problem or tamper home problem |
| 301 | Fuser web must be replaced |
| 302 | Copy cartridge (drum unit) must be replaced |
| 501 | Tray 1 must be rebuilt |
| 502 | Tray 2 must be rebuilt |
| 503 | Tray 3 must be rebuilt |
| 504 | Tray 4 must be rebuilt |
| 505 | HCF must be rebuilt |
| 506 | Bypass must be rebuilt |
| 507 | Duplex unit must be rebuilt |
| 508 | Replace black developer |
| 509 | Replace red developer |
| 510 | Replace green developer |
| 512 | Replace brown developer |
| 513 | Copy cartridge (drum unit) will need replacing soon |
| 514 | Fuser web will need replacing soon |
| 515 | DADF belt should be replaced |
| 516 | DADF feed rollers should be replaced |
| 517 | Replace exposure lamp |
| 518 | Replace suction filter |
| 519 | Replace ozone filter |
| 520 | Replace optics filter |
| 521 | Replace particle filter |
| 522 | Replace upper fuser roller |
| 523 | Replace fuser pawls |
| 524 | Replace pressure roller |
| 525 | Replace pressure roller pawls |
| 900-905 | Key operator calls |
Xerox 5345
| Код ошибки | Описание |
|---|---|
| 01-01 | Frequency monitoring and zero cross problem |
| 01-02 | Interlock |
| 01-03 | AC power problem |
| 01-04 | Finisher interlock |
| 01-05 | 24v problem |
| 03-01 | Optics to main board communication problem |
| 03-02 | Software reset problem |
| 03-03 | Could be punched holes in the lead edge of the original |
| 03-04 | Software problem |
| 03-06 | Low battery |
| 03-07 | NVM not initialized or is missing or defective |
| 03-17 | Communication problem between main board and finisher board |
| 03-18 | Initializes one NVM counter to agree to others |
| 03-19 | All three NVM counter to agree with others |
| 03-20 | Main board/interface board problems |
| 03-21 | Problem with RIC NVM |
| 03-22 | RIC modem problem |
| 03-23 | RIC real time clock failure. |
| 03-25 | RIC NVM problem or not initialized |
| 03-27 | NVM problem |
| 03-28 | Watchdog software problem |
| 03-29 | Microprocessor crystal not at correct frequency |
| 03-30 | No software response from finisher after 20 seconds have elapsed |
| 06-01 | Lens did not reach 1.1 position |
| 06-02 | 1/2 rate scanner problem |
| 06-03 | Scan home problem |
| 06-04 | Scan home problem |
| 06-05 | Scan home problem |
| 06-06 | Scan encoder |
| 06-07 | Scan encoder |
| 06-08 | Scan drive boost |
| 06-09 | Scan encoder |
| 06-11 | Scan encoder pulse phases |
| 06-12 | Insufficient scan damping |
| 07-01 | Duplex tray not home during duplexing |
| 07-02 | Tray 2 not home when selected |
| 07-13 | Tray 2 height sensor problem |
| 07-15 | Tray 2 empty |
| 07-16 | Tray 1 door open |
| 07-18 | Tray 1 stack sensor |
| 07-22 | Tray 1 empty |
| 07-26 | Tray 1 bypass switch actuated too long |
| 07-27 | Tray 1 bypass switch deactuated too early |
| 07-30 | Paper in duplex |
| 07-31 | Paper in duplex |
| 07-32 | Duplex tray empty, when paper should be there |
| 08-10 | Paper did not reach tray 2 input tray sensor |
| 08-11 | Paper did not reach duplex input sensor |
| 08-12 | Paper did not reach tray 1 |
| 08-14 | Paper did not leave tray 2 input sensor quickly enough |
| 08-18 | Trail edge did not reach tray 2 input sensor quickly enough |
| 08-19 | Trail edge did not reach tray 1 input sensor quickly enough |
| 08-20 | Paper in duplex |
| 08-21 | Paper in tray 2 input |
| 08-22 | Paper in tray 2 or duplex at wrong time |
| 08-23 | Paper at tray 1 input at wrong time |
| 08-24 | Paper in tray 1 at wrong time |
| 08-28 | Upper and lower nips problem |
| 09-08 | Low toner condition |
| 09-12 | Drum signals are out of range |
| 09-13 | Unstable drum patch readings |
| 09-15 | Patch is too dark |
| 09-16 | Patch is too light |
| 09-17 | Open toner container access cover |
| 09-18 | Low toner level |
| 09-21 | Low toner sensor disconnected |
| 09-22 | Low toner condition, even after machine has been theoretically, adding toner |
| 10-02 | Low fuser temperature |
| 10-03 | High fuser temperature |
| 10-06 | Paper did not reach out put switch |
| 10-07 | Paper stayed on output switch |
| 10-10 | Paper did not reach decurler sensor |
| 10-11 | Paper did not reach decurler sensor |
| 10-12 | Paper on decurler sensor |
| 10-13 | Paper did not reach duplex entry sensor in time |
| 10-14 | Paper did not reach duplex entry sensor in time |
| 10-15 | Paper on entry sensor at wrong time |
| 10-17 | Fuser temperature is too high and fuser relay has deactuated |
| 12-01 | Paper at finisher input sensor |
| 12-02 | Paper did not reach finisher |
| 12-03 | Paper reached finisher too soon |
| 12-05 | Paper at stapler |
| 12-06 | Paper at stapler |
| 12-07 | Paper did not reach stapler |
| 12-08 | Paper did not reach stapler |
| 12-10 | Complied motor not working properly |
| 12-15 | Eject motor problem and/or eject encoder |
| 12-20 | Stacker motor problem |
| 12-21 | Stacker interlock |
| 12-22 | Stacker bottom sensor |
| 12-23 | Stacker bottom sensor |
| 12-24 | Stacker bottom sensor senses full |
| 12-25 | Stack height sensor |
| 12-26 | Stack height sensor |
| 12-27 | Stack height sensor |
| 12-30 | Offset home sensor |
| 12-31 | Offset home sensor |
| 12-32 | OCT switch |
| 12-35 | Eject nip carriage |
| 12-36 | Eject cam interlock |
| 12-37 | Eject nip carriage open timing |
| 12-38 | Eject cam interlock |
| 12-40 | Tamper motor |
| 12-41 | Tamper home problem |
| 12-42 | Tamper home sensor |
| 12-43 | Staple load sensor |
| 12-44 | Tamper home sensor |
| 12-45 | Tamper home sensor |
| 12-50 | Low on staples |
| 12-51 | Stapler home sensor |
| 12-52 | Stapler home sensor |
| 12-53 | Eject cam interlock |
| 33-37 | Too few documents |
| 55-01 | RDH interlock switch open during use |
| 55-04 | Paper on bypass sensor |
| 55-05 | Paper at vacuum timing sensor |
| 55-06 | Paper on output sensor |
| 55-10 | No paper reached S31 |
| 55-20 | Paper did not leave S31 at correct time |
| 55-24 | Set counter arm problem |
| 55-25 | Documents in input tray not detected |
| 55-27 | Lead edge did not reach S35 at correct time |
| 55-2955-30 | Trail edge did not reach S35 at correct time |
| 55-31 | S32, ADF registration sensor did not see paper at correct time |
| 55-32 | S32 did not see trail edge at correct time |
| 55-33 | S36 One too many documents |
| 55-36 | One too many documents |
| 55-39 | Hole count problem on document feeder belt |
| 55-40 | Document belt travel problem |
| 55-41 | Document belt mistracking or skewing |
| 55-45 | Paper at inverter sensor |
| 55-47 | Inverter sensor did not see paper lead edge at correct time |
| 55-49 | More than 50 sheets in input tray |
| 55-50 | Right side interlock |
| 55-51 | Left side interlock |
| 55-55 | Document on glass |
| 93-93 | NVM has to be initialized after new software installed |
Xerox 5350, 5352
| Code | Description |
|---|---|
| 00-009, 030, 031, 032, 033 | A door was opened while paper was being fed |
| 00-047 | Paper in duplex |
| 00-1 | Auditron |
| 00-2 | Diagnostic error |
| 00-3 | Faults error |
| 00-4 | Ric error |
| 00-5 | Job manager system error |
| 00-6 | LLM interface |
| 00-7 | Standby error |
| 00-8 | Communications error |
| 00-9 | Xerographic error |
| 01-300 | Front interlock |
| 01-310 | Right upper interlock |
| 01-315 | Left upper interlock |
| 01-320 | Left lower interlock |
| 01-325 | Fuser interlock |
| 02-910 | Key counter missing |
| 02-920 | Wrong combination of accessories |
| 03-321, 322, 326, 327 | LLM to ISIL communications problems |
| 03-328 | IOT communications problem with duplex or tray 4 |
| 03-330 | IOT communications problems with HCF |
| 03-335, 336 | LLM communications problems with edit |
| 03-340 | NVM memory |
| 03-341-347 | Communications problems between IOT and sorter |
| 03-350-354 | Communications problem with LLM and user interface |
| 03-363, 364 | Communications problem between LLM & optics |
| 03-370-03-373 | Communications problem between LLM & DADF |
| 03-380, 384 | |
| 03-416-422 | RAM memory problem |
| 03-424, 426 | NVM memory problem |
| 03-430, 432 | Billing problem |
| 03-439 | GRAIB communications problem |
| 03-440 | RIC communications problem |
| 03-441 | RIC NVM problem |
| 03-442 | Modem |
| 03-443-458 | RIC problems |
| 03-460 | Serial communications processor problem |
| 04-300 | Main motor or drive problem |
| 05-100-108 | DADF registration sensor |
| 05-110 | DADF exit sensor |
| 05-115, 120 | DADF jams |
| 05-305 | DADF document drive |
| 05-310, 312 | DADF document sensor |
| 05-316 | DADF registration sensor jam |
| 05-325 | DADF exit sensor |
| 05-335, 341, 345 | DADF interlock switches |
| 06-300-310 | Scan problems |
| 06-315 | Scan drive |
| 06-320A, 320B, 320C, 325 | Scan problem |
| 06-330 | Lens drive |
| 06-340 | Exposure control problem |
| 06-342 | LLM CPU problem |
| 06-344-350 | Exposure cvontrol problem |
| 06-352 | IOT CPU problem |
| 07-300, 315, 330, 345 | Tray faults |
| 07-360-370 | HCF problems |
| 07-375, 380A, 380B | Duplex problems |
| 08-100-110 | Feed problems. Lead edge of copy paper is late getting to feed sensor of tray 1 |
| 08-115-162 | Feed problem. Lead edge of copy paper is late getting to registration sensor |
| 08-165 | Paper jam at registration sensor |
| 08-310-370 | Paper at a sensor when power is turned on |
| 08-330 | DADF nudger sensor |
| 08-380 | Registration side to side problem with home position |
| 08-390 | Nip |
| 09-300 | Copy cartridge finished (drum unit) |
| 09-310 | Add black toner Add color toner |
| 09-320 | Add color toner |
| 09-330 | Wrong copy cartridge (wrong drum unit) |
| 09-340 | Drum cartridge not installed properly |
| 09-350 | Waste toner full |
| 100 | A fault has occurred |
| 10-100 | Exit jam |
| 10-105 | Exit jam |
| 10-110 | Vertical sensor jam |
| 10-120, 122, 125 | Duplex jam |
| 10-150, 155 | Too much or not enough paper in duplex tray |
| 10-300 | Fuser thermistor |
| 10-302 | Low fuser temperature |
| 10-304 | Bad fuser temp |
| 10-308 | High fuser temperature or open thermistor |
| 10-310 | High fuser temperature |
| 10-312 | Fuser not up to temperature after energy save |
| 10-314 | Fuser problem |
| 10-320 | Fuser web finished |
| 10-330, 335, 340 | Exit switch, vertical sensor switch actuated when power is turned on |
| 11-100-116 | Sorter jam |
| 11-150-176 | Sorter auto stapler jam |
| 11-310, 314, 316 | Sorter interlock |
| 11-325A,B,C,D,E,F,G | Sorter index |
| 11-352, 354, 356 | Sorter auto stapler interlocks |
| 11-365A,B,C,D,E | Sorter auto stapler bin |
| 11-370,371,372A,373A,373B,374 | Sorter auto stapler staple failure, staple home problem or tamper home problem |
| 11-385A,385B,390A,B,C,D,E,396A | Sorter auto stapler staple failure, staple home problem or tamper home problem |
| 301 | Fuser web must be replaced |
| 302 | Copy cartridge (drum unit) must be replaced |
| 501 | Tray 1 must be rebuilt |
| 502 | Tray 2 must be rebuilt |
| 503 | Tray 3 must be rebuilt |
| 504 | Tray 4 must be rebuilt |
| 505 | HCF must be rebuilt |
| 506 | Bypass must be rebuilt |
| 507 | Duplex unit must be rebuilt |
| 508 | Replace black developer |
| 509 | Replace red developer |
| 510 | Replace green developer |
| 512 | Replace brown developer |
| 513 | Copy cartridge (drum unit) will need replacing soon |
| 514 | Fuser web will need replacing soon |
| 515 | DADF belt should be replaced |
| 516 | DADF feed rollers should be replaced |
| 517 | Replace exposure lamp |
| 518 | Replace suction filter |
| 519 | Replace ozone filter |
| 520 | Replace optics filter |
| 521 | Replace particle filter |
| 522 | Replace upper fuser roller |
| 523 | Replace fuser pawls |
| 524 | Replace pressure roller |
| 525 | Replace pressure roller pawls |
| 900-905 | Key operator calls |
Xerox 5355
| Код ошибки | Описание |
|---|---|
| 01-01 | Frequency monitoring and zero cross problem |
| 01-02 | Interlock |
| 01-03 | AC power problem |
| 01-04 | Finisher interlock |
| 01-05 | 24v problem |
| 03-01 | Optics to main board communication problem |
| 03-02 | Software reset problem |
| 03-03 | Could be punched holes in the lead edge of the original |
| 03-04 | Software problem |
| 03-06 | Low battery |
| 03-07 | NVM not initialized or is missing or defective |
| 03-17 | Communication problem between main board and finisher board |
| 03-18 | Initializes one NVM counter to agree to others |
| 03-19 | All three NVM counter to agree with others |
| 03-20 | Main board/interface board problems |
| 03-21 | Problem with RIC NVM |
| 03-22 | RIC modem problem |
| 03-23 | RIC real time clock failure. |
| 03-25 | RIC NVM problem or not initialized |
| 03-27 | NVM problem |
| 03-28 | Watchdog software problem |
| 03-29 | Microprocessor crystal not at correct frequency |
| 03-30 | No software response from finisher after 20 seconds have elapsed |
| 06-01 | Lens did not reach 1.1 position |
| 06-02 | 1/2 rate scanner problem |
| 06-03 | Scan home problem |
| 06-04 | Scan home problem |
| 06-05 | Scan home problem |
| 06-06 | Scan encoder |
| 06-07 | Scan encoder |
| 06-08 | Scan drive boost |
| 06-09 | Scan encoder |
| 06-11 | Scan encoder pulse phases |
| 06-12 | Insufficient scan damping |
| 07-01 | Duplex tray not home during duplexing |
| 07-02 | Tray 2 not home when selected |
| 07-13 | Tray 2 height sensor problem |
| 07-15 | Tray 2 empty |
| 07-16 | Tray 1 door open |
| 07-18 | Tray 1 stack sensor |
| 07-22 | Tray 1 empty |
| 07-26 | Tray 1 bypass switch actuated too long |
| 07-27 | Tray 1 bypass switch deactuated too early |
| 07-30 | Paper in duplex |
| 07-31 | Paper in duplex |
| 07-32 | Duplex tray empty, when paper should be there |
| 08-10 | Paper did not reach tray 2 input tray sensor |
| 08-11 | Paper did not reach duplex input sensor |
| 08-12 | Paper did not reach tray 1 |
| 08-14 | Paper did not leave tray 2 input sensor quickly enough |
| 08-18 | Trail edge did not reach tray 2 input sensor quickly enough |
| 08-19 | Trail edge did not reach tray 1 input sensor quickly enough |
| 08-20 | Paper in duplex |
| 08-21 | Paper in tray 2 input |
| 08-22 | Paper in tray 2 or duplex at wrong time |
| 08-23 | Paper at tray 1 input at wrong time |
| 08-24 | Paper in tray 1 at wrong time |
| 08-28 | Upper and lower nips problem |
| 09-08 | Low toner condition |
| 09-12 | Drum signals are out of range |
| 09-13 | Unstable drum patch readings |
| 09-15 | Patch is too dark |
| 09-16 | Patch is too light |
| 09-17 | Open toner container access cover |
| 09-18 | Low toner level |
| 09-21 | Low toner sensor disconnected |
| 09-22 | Low toner condition, even after machine has been theoretically, adding toner |
| 10-02 | Low fuser temperature |
| 10-03 | High fuser temperature |
| 10-06 | Paper did not reach out put switch |
| 10-07 | Paper stayed on output switch |
| 10-10 | Paper did not reach decurler sensor |
| 10-11 | Paper did not reach decurler sensor |
| 10-12 | Paper on decurler sensor |
| 10-13 | Paper did not reach duplex entry sensor in time |
| 10-14 | Paper did not reach duplex entry sensor in time |
| 10-15 | Paper on entry sensor at wrong time |
| 10-17 | Fuser temperature is too high and fuser relay has deactuated |
| 12-01 | Paper at finisher input sensor |
| 12-02 | Paper did not reach finisher |
| 12-03 | Paper reached finisher too soon |
| 12-05 | Paper at stapler |
| 12-06 | Paper at stapler |
| 12-07 | Paper did not reach stapler |
| 12-08 | Paper did not reach stapler |
| 12-10 | Complied motor not working properly |
| 12-15 | Eject motor problem and/or eject encoder |
| 12-20 | Stacker motor problem |
| 12-21 | Stacker interlock |
| 12-22 | Stacker bottom sensor |
| 12-23 | Stacker bottom sensor |
| 12-24 | Stacker bottom sensor senses full |
| 12-25 | Stack height sensor |
| 12-26 | Stack height sensor |
| 12-27 | Stack height sensor |
| 12-30 | Offset home sensor |
| 12-31 | Offset home sensor |
| 12-32 | OCT switch |
| 12-35 | Eject nip carriage |
| 12-36 | Eject cam interlock |
| 12-37 | Eject nip carriage open timing |
| 12-38 | Eject cam interlock |
| 12-40 | Tamper motor |
| 12-41 | Tamper home problem |
| 12-42 | Tamper home sensor |
| 12-43 | Staple load sensor |
| 12-44 | Tamper home sensor |
| 12-45 | Tamper home sensor |
| 12-50 | Low on staples |
| 12-51 | Stapler home sensor |
| 12-52 | Stapler home sensor |
| 12-53 | Eject cam interlock |
| 33-37 | Too few documents |
| 55-01 | rdh interlock switch open during use |
| 55-04 | Paper on bypass sensor |
| 55-05 | Paper at vacuum timing sensor |
| 55-06 | Paper on output sensor |
| 55-10 | No paper reached S31 |
| 55-20 | Paper did not leave S31 at correct time |
| 55-24 | Set counter arm problem |
| 55-25 | Documents in input tray not detected |
| 55-27 | Lead edge did not reach S35 at correct time |
| 55-2955-30 | Trail edge did not reach S35 at correct time |
| 55-31 | S32, ADF registration sensor did not see paper at correct time |
| 55-32 | S32 did not see trail edge at correct time |
| 55-33 | S36 One too many documents |
| 55-36 | One too many documents |
| 55-39 | Hole count problem on document feeder belt |
| 55-40 | Document belt travel problem |
| 55-41 | Document belt mistracking or skewing |
| 55-45 | Paper at inverter sensor |
| 55-47 | Inverter sensor did not see paper lead edge at correct time |
| 55-49 | More than 50 sheets in input tray |
| 55-50 | Right side interlock |
| 55-51 | Left side interlock |
| 55-55 | Document on glass |
| 93-93 | NVM has to be initialized after new software installed |
Xerox XC520, 540, 560, 580
| Код ошибки | Описание |
|---|---|
| H2 | Fuser thermistor |
| H3 | Fuser temperature too high. Must be reset in diagnostics |
| H4 | Fuser temperature too low. Must be reset in diagnostics |
| L3 | Scan problem |
| L4 | Min motor drive problem |
| L8 | Exposure lamp not lightning or not enough light reaching auto exposure sensor |
| P | Paper did not feed |
Xerox 5622
| Code | Description |
|---|---|
| A1-1 to A1-32 | All indicate a paper path problem, etc. in the ADF |
| A2 | ADF exit problems |
| A3 | Irregular size documents |
| A5 | ADF interlock |
| A6 | ADF single sheet document reset |
| A7 | Platen interlock |
| A8 | ADF exit interlock |
| C1 | Tray 1 jam |
| C2 | Tray 2 jam |
| C3 | Tray 3 jam |
| C6-1, C6-2 | Jams related to duplex |
| C6-3 | Registration sensor, re tray 1 |
| C7-1, C7-2 | HCF feed problems |
| C7-3 | Tray 1 feed problem |
| C8 | Paper stays in tray or duplex or HCF |
| C9 | Bypass feed problem |
| E1-10 to E1-25 | Internal jam |
| E1-6 | Paper on registration sensor |
| E2 | Reset signal happened. Might read E-2 something else |
| E3-30 to E4-14 | Exit jam |
| E3-6 | Exit jam |
| E4-10 to E4-14 | Inverter sensor not actuated |
| E4-15 | Inverter sensor |
| E4-40 to E4-45 | Duplex entry sensor |
| E4-6 | Inverter sensor |
| E5 | Front door interlock |
| E6-1 | Tray 1 interlock |
| E6-2 | 2 tray or duplex interlock |
| E6-3 | HCF interlock |
| E7-2, E7-3 | Duplex interlock |
| E8-6 to E8-15 | Duplex entry sensor |
| F1-1 | Sorter entry sensor |
| F1-6 | Sorter exit sensor |
| F3 | Paper size not available for sort/stack |
| F5 | Sorter interlock |
| J1 | Add toner |
| J3 | Replace copy cartridge |
| J7 | Replace copy cartridge |
| J8-1 | Wrong copy cartridge installed |
| J8-2 | Copy cartridge EEPROM |
| L6 | Auditron or other counter problem |
| L8 | Platen glass temperature is too high |
| L9 | Communication problem between interimage erase/edge lamps and main board |
| U1-1 | Main motor drive problem |
| U2-1 to U2-4 | Scan home sensor |
| U3-1 | Lens sensor |
| U4-1 | Open fuser thermistor |
| U4-2 | Fuser did not warm up properly |
| U4-3 | Fuser temperature too high |
| U4-4 | Fuser problem. Staying on too long |
| U4-6 | High fuser temperature |
| U5-1 | Sorter bin home switch not activated |
| U5-2 | Sorter bin home switch stayed actuated |
| U5-3, U5-4 | Sorter bin home switch |
| U6-1 | ROM problem |
| U6-2 | RAM problem |
| U6-3 | Low battery |
| U6-4 | Incorrect value in NVM. Reinitialize main board with code 20-96 |
| U8-1 to U8-6 | Problem with exposure lamp, lamp sensor, lamp board |
|
||
|
||
Решение проблем с включением принтера HP LaserJet 1010 за 1010 рублей |
||
|
||
| Восстановление качества печати, в струйных принтерах EPSON, HP, CANON за 749 рублей |  |
Установка СНПЧ за 999 рублей |
|
Мы осуществляем ремонт принтеров HP следующих моделей: Мы осуществляем ремонт плоттеров HP следующих моделей: Мы осуществляем ремонт принтеров Xerox следующих моделей: Мы осуществляем ремонт принтеров Canon следующих моделей: Источник Adblock |
Если у вашей СМА Самсунг есть дисплей, ошибка обычно будет появляться в виде комбинации символов с буквой E (Error). На механических моделях ошибки будут обозначены комбинацией лампочек.
Если Вы знаете, в какой детали проблема, купите её у Самоделкина. Запчасти для стиральных машин Samsung по доступной цене, с гарантией, быстрая доставка по России. Консультации бесплатно.
Код
Описание проблемы
Возможные неисправности
Возможные методы решения
5Е (SE), Е2, 5С
У машин, не оснащенных дисплеем, все лампочки режимов стирки мигают или горят непрерывно, индикация температурного режима — 40 градусов
Ошибка в процессе слива: стиральная машина Samsung не производит слива воды
- Выход из строя сливного насоса (помпы).
- Засорился сливной патрубок.
- Вышла из строя плата управления (электронный контроллер).
- Несправны проводка или контакты в цепи помпы.
- Разобрать сливной фильтр и устранить его засор.
- Убедиться, что отсутствует засор в канализации
- Устранить или исключить, как причину, перегибы или засоры в сливном шланге.
- Исключить возможность засора сливного насоса.
- Выключить и включить машину заново (возможно, произошел разовый сбой в работе модуля управления).
Н1, Н2, НЕ, НЕ1, НЕ2, Е5, Е6, НС, НС1, НС2
У стиральных машин без дисплея мигание индикаторов всех режимов стирки и горят лампочки температуры 30°С, 40°С или 60°С
Происходит ошибка при нагреве воды при стирке: стиральная машина Самсунг не греет или, наоборот, очень сильно нагревает воду
- Вышел из строя ТЭН.
- Произошел сбой (дефектация) температурного датчика (термостата).
- Произошла поломка управляющей платы (контроллера стиральной машины).
- Имеется неисправность проводки или контактов в цепях нагревательного элемента.
- Убедиться, что стиральная машина правильно подключена к электросети.
- Выключить и включить СМ заново, если проблема больше не проявит себя, то, вероятно, произошел временный сбой модуля управления.
- Если данные причины исключены — вероятно, речь идет о более серьёзных поломках (неисправности ТЭНа, контроллера или температурного датчика).
DE, ED, DOOR, DE1, DE2, DC, DC1, DC2
Мигание всех лампочек режимов стирки у моделей без дисплея, все температурные индикаторы включены.
Ошибка блокирования люка стиральной машины Samsung: не закрывается или не открывается дверца
- Вышло из строя устройство блокировки люка (УБЛ).
- Неисправность платы управления (электронного контроллера).
- Деформированы или чем-то блокированы петли дверцы люка.
- Произошло механическое повреждение запорного механизма люка.
- Отошли контакты или повредилась проводка в цепи блокировки люка.
- Дверца люка закрыта недостаточно плотно: проверьте плотность ее закрытия и убедитесь в отсутствии инородных предметов, которые могли бы туда попасть
- Осмотреть петли, крепящие люк к машине. Он должен двигаться легко из без помех.
- Открыть люк и закройте его снова, Запустите стирку заново. Если все в порядке, то, возможно это был временный сбой электронного модуля.
4E (ЧЕ), Е1, 4С
При отсутствии дисплея в модели мигают лампочки всех режимов стирки и горит температурный индикатор холодной воды 30°С (первый снизу).
Ошибка залива воды: стиральная машина Samsung не набирает воду
- Возможно, неисправен клапан подачи воды в стиральную машину.
- Вышла из строя плата управления стиральной машиной (электронный контроллер).
- Неисправен датчик уровня воды (т. н., прессостат) — он не «понимает», что в машине не производится залив воды.
- Отошли контакты в цепи заливного клапана.
- Проверить, осуществляется ли подача воды в водопроводе.
- Убедиться в том, что запорный вентиль, через который осуществляется подача воды открыт.
- Проверить шланги на предмет перегибов, перекрутов и прочих видов деформации. Если они есть — устранить неисправность
- Убедиться, что фильтр-сеточка заливного клапана не имеет засоров и известкования. Если да, то ее стоит вынуть и промыть, удалить известь.
- В случае, если указанные рекомендации не помогли — проблема может иметь более сложную причину.
SUd
5d (Sd)
Повышенное пенообразование (много пены)
- Неисправен или вышел из строя датчик уровня воды (прессостат).
- Произошел сбой в датчике пенообразования (ошибка актуальна только для усовершенствованных, новейших и дорогих моделей Самсунг, например, WD80K52E0AX, WW90M74LNOO, WW10M86KNOA).
- Частично засорился сливной патрубок, в силу чего вода уходит, а пена остается внутри машины.
- Вышла из строя или дала временный сбой управляющая электронная плата (контроллер) стиральной машины.
- Устранить частичный засор сливного фильтра, вытащив его и промыв тщательно водой и неагрессивными моющими средствами.
- Убедиться в отсутствии частичных засоров сливного шланга, открутив и промыв его под краном водой высокой температуры.
- Убедиться, что правильно выбрано моющее средство (оно предназначено для машин- автоматов, а не ручной стирки и добавляется его достаточное, но не чрезмерное количество).
- Убедиться, что выбран адекватный характеру ткани режим стирки: пушистые, перстяные вещи, а так же пористые материалы (например, тюль) требуют выбора специального режима.
- Использовать только качественный порошок от проверенного производителя.
UE, Е4, UB
У старых моделей Самсунг мигают лампочки на всех режимах стирки; включен температурный индикатор 60°С
Машина не вращает барабан по причине неправильной нагрузки на его ось и останавливается на режиме отжима
- Сбой электронного контроллера (платы управления).
- Вышел из строя по причине износа или деформации подшипник СМ.
- Истерся или слетел приводной ремень, вращающий барабан.
- Неисправен тахогенератор (таходатчик).
- Истерлись и вышли из строя электромагнитные щетки мотора.
- Оценить количество загруженного в машину белья: его не должно быть много, в противном случае возможны сбои в работе барабана, износ и непригодность приводного ремня, подшипников и проч., а так же его не должно быть мало.
- Распределить белье в барабане ровно, не допуская его закручивания в комки, так как в таком случае оно точно будет создавать дисбаланс в баке.
- Убедиться, что машинка установлена правильно, ровно, точно по горизонтали (воспользуйтесь уровнем).
LE, E1, E9, LC, C1
У моделей без дисплея мигают лампочки на всех режимах стирки и светятся крайние (нижний и верхний) индикаторы температуры холодной воды 30°С и 95°С
Вода протекает наружу из стиральной машины или происходит «самослив» — машина набирает и тут же сливает воду из бака.
- Повреждена манжета люка и вода течет из-за нее.
- Деформирован сливной патрубок.
- Сбоит или неисправен датчик уровня воды (прессостат).
- Неисправна плата управления стиральной машины (электронный контроллер).
- Сработал аквастоп (актуально для моделей, оснащенных функцией защиты от протечек).
- Деформирован сливной шланг.
- Если речь идет о новой или переустановленной стиральной машине, возможна ошибка подключения техники.
- Распаялись контакты в цепи аквастопа или прессостата.
- Убедиться в том, что плотно закручен сливной фильтр стиральной машины.
- Убедиться, что конец шланга слива подключен правильно к канализации или опущен в ванну.
- Исследовать все стыки шлангов машины с системой канализации и водопровода.
- Убедиться, что соединения патрубков плотно подогнаны и не текут.
- Возможно, течет не вода, а пена: сменить стиральный порошок на подходящий и отрегулировать его количество при следующей стирке.
- Если отмеченные выше способы самопомощи не сработали, вероятно, причина в более серьезной неисправности.
3Е. ЕА, 3Е1, 3Е2, 3Е3, 3Е4, 3C, 3C1, 3C2, 3C3, 3C4
В стиральных машинах старых моделей без дисплея мигают лампочки на всех режимах стирки и включены индикаторы температуры 40°С и 95°С
Стиральная машина плохо отжимает белье: барабан меняет скорость вращения, плохо вращается или наоборот вращается очень быстро
- Вышел из строя таходатчик (тахогенератор или датчик Холла), он не может исправно работать, а потому на электронный модуль отправляется соответствующая команда.
- Неисправность мотора стиральной машины.
- Вышел из строя приводной ремень.
- Неисправны щетки электродвигателя
- Произошел сбой в работе управляющей платы.
- Есть замыкание в проводке или контактах в цепи тахогенератора (датчика Холла).
- Отменить стирку и оценить количество загруженных вещей (возможно, причина в перегрузке бельём).
- Запустить процесс стирки заново, понаблюдать за работой СМ. Если ошибка не выдается, вероятно был разовый сбой платы управления.
- Если указанные меры не привели к устранению ошибки — имеется более сложная проблема.
bE (6Е), bE1, bE2, bE3, bC, bC2, b2
Eb (у моделей машин Самсунг, произведенных до 2007 года)
У машин без дисплея (например, модель S1021), мигают одновременно индикаторы всех режимов стирки и включены все, кроме второй сверху лампочки температуры; 30°С (холодная вода), 40°С и 95°С
Машина начинает после запуска сразу полоскать и включается один из данных кодов ошибки, либо она вообще не начинает работу, включая код ошибки немедленно
- Неисправен симистор управления мотором.
- Вышел из строя тахогенератор (таходатчик или датчик Холла).
- Запала или неисправна по другой причине кнопка включения или одна из клавиш на панели управления.
- «Сбоит» управляющая электронная плата.
- Неисправность проводки или контактов в цепи двигателя или панели управления.
- Проверить машину на предмет западания кнопок на передней панели.
- Выключить и включить машину заново, дабы убедиться, что нет временного сбоя платы управления.
- Проверить правильность подключения СМ к электросети, а также исправность и целостность розетки, шнура и вилки.
- Если указанные меры ни к чему не привели, проблема кроется в более серьезной неисправности.
tE, Ec, tE1, tE2, tE3, tC, tC1, tC2, tC3, tC4
У машин без дисплея старых марок мигают индикаторы всех режимов стирки и горят две верхних лампочки температуры: 60°С и 95°С
Машина не нагревает воду вообще или наоборот греет сильно
- Сбой в работе термодатчика (термостата или термистора): от него не идет сигнал в блок управления.
- Вышел из строя нагревательный элемент (ТЭН)
- Сбой платы управления (контроллера);
- Вышел из строя датчик температуры (термостат или термистор) ТЭНа сушки. Актуально только для моделей Samsung c сушкой, например, WD70J5410AW, WD80K52E0ZW, WD80K52E0ZX и т.д.
- Выход из строя других температурных датчиков в моделях стиральных машин с сушкой (термистора протока конденсата, температурного датчика корпуса вентилятора).
- Проводка или контакты в цепи нагрева воды или при сушке
Для самостоятельного решения проблемы можно рекомендовать отключить машину и запустить процесс стирки заново, уточнив, не произошло ли случайного разового сбоя в управляющем модуле стиральной машины (контроллере). Поскольку здесь речь идет о важных компонентах техники, никакие другие меры по самостоятельному ремонту не будут эффективны. Чаще всего при выходе из строя указанных деталей их приходится менять на новые.
1Е (IE)
Е7
1С (IC)
У старых моделей мигают индикаторы всех режимов стирки и горят лампочки температуры 30°С (холодная вода), 40°С и 60°С (три снизу).
Для этого вида ошибок всегда характерно неправильное количество воды в машине. Она не набирает воду вообще или набирает ее недостаточно много, не хочет сливать воду из переполненного бака, белье мокрое, в баке остается вода.
Внимание: в ряде случаев может ощущаться запах гари!
- Вышел из строя датчик (реле) уровня воды, прессостат, а потому стиральная машина «не понимает». Какое количество воды находится внутри бака.
- Проблема с платой управления (контроллером).
- Нарушение в работе проводки или контактов в цепи прессостата.
- Убедиться, что не пережат водонаборный шланг.
- Уточнить, не отсоединилась или перегнулась трубка прессостата (датчика уровня воды). Для этого придется частично разобрать стиральную машину, как минимум, сняв верхнюю крышку стиральной машины (у моделей с горизонтальной загрузкой: WD80K52E0AX, WD806U2GAGD и проч.).
- Выключить машину и начать процесс стирки заново, так как это может быть случайный сбой в работе контроллера.
Внимание: повторное включение стиральной машины, если она не набирает воду, чревато перегоранием ТЭНа. Тем более не стоит повторно включать аппарат, если уже при первой индикации ошибки чувствуется запах гари. Необходимо немедленно отключить машину от электропитания.
ОЕ (0E), OF (0F), Е3, ОС (0C)
У моделей без дисплея мигают лампочки на всех режимах стирки и включены температурные индикаторы 30°С и 40°С
Стиральная машина набирает слишком много воды.
- Неисправен клапан залива, а потому машина переливает воду.
- Вышел из строя прессостат (датчик или реле определения уровня воды в стиральной машине);
- Произошел сбой управляющей платы (контроллера) стиральной машины.
- Повреждены проводка или контакты в электроцепи прессостата.
- Использовать только моющие средства для автоматической стирки, а не ручной.
- Тщательно регулировать количество порошка: слишком большая дозировка стирального порошка вполне может приводить к этой проблеме.
- Использовать только качественный стиральный порошок.
- Убедиться в правильности подключения слива стиральной машины к канализации.
Uc, 9C,9Е1, 9Е2
У машин без дисплея мигают все верхние индикаторы, в том числе, индикатор блокировки замка
Стиральная машина внезапно остановила стирку (на любой стадии цикла) или не включается вообще.
- Сбой в работе платы управления (контроллера)
- Ошибка электропитания (происходит, если выключено питание от сети. Если это произошло внезапно по причине отключения света, после подачи электричества ошибка пропадет сама).
- Стиральная машина среагировала на слишком высокое или низкое напряжение в сети.
- Не производить подключения к электросети через удлинитель.
- Не пользоваться стиральной машиной без внешнего адаптера. Высокотехнологичные модели очень чувствительны к скачкам напряжения, а потому есть риск поломки.
- Проверить проводку и не использовать старые или слабые розетки.
- У6едиться, что нет проблем с напряжением в сети и подачей электричества (на примере другого электроприбора).
2Н
3Н
4Н
Стиральная машина исправно выполняет работу, но дисплей показывает данные символы.
Не является признаком ошибки.
- 2Н — до конца стирки осталось от 100 до 180 минут (не путать с Н2 — индикацией ошибки нагрева воды!).
- 3Н — 180-240 минут до конца стирки.
- 4Н — не менее 240 минут.
- Ждать окончания стирки.
- Часто появляется при выборе длительного режима стирки и показывает сколько минут осталось до окончания цикла.
- Во избежание ошибки, если это принципиально, просто стоит выставлять более короткий режим.
АЕ
13Е
АС
ACb (АС6)
Машина не реагирует на нажатие кнопок, либо начинает процесс стирки, а потом останавливается. Она может не включаться вообще, либо отстирывает один цикл, а после не стирает
- Наиболее часто так выдает себя ошибка связи между платой управления и системой индикации.
- Может давать сбой модуль управления (контроллер).
- Испытывает проблемы сам модуль индикации.
- Произошел обрыв проводки или разъединение контактов между модулями.
- Проверить кнопки на предмет залипания.
- Если не помогло — выключить и включить процесс стирки заново. При отсутствии эффекта можно считать, что причина сбоя весьма серьезна.
FE
FC
Актуальна только для моделей машин Самсунг, оснащенных сушкой (например, WD80K5410OW, WD80K52E0AW, WD70J5410AW)
Стиральная машина не сушит белье или прерывает внезапно процесс сушки
- Сбой в работе вентилятора сушки.
- Однократный сбой в работе управляющего модуля.
- Неисправность проводки или контактов в цепи вентилятора.
- Выключить и включить машину заново на режиме «Сушка».
- Если результат неудовлетворительный, сбой требует профессиональной диагностики.
ЕЕ
Корректна только для стиральных машин с функцией сушки (например, WD90N74LNOA, WD806U2GAGD и другие модели)
Стиральная машина не сушит или не досушивает до конца белье
- Неисправен датчик температуры сушки стиральной машины.
- Вышел из строя или имеется сбой в работе ТЭНа именно сушки.
- Запустить процесс сушки заново, если все нормально, то, скорее всего, произошел разовый сбой модуля управления или датчика температуры сушки.
- Проверить проводку и контакты в цепи нагрева сушки.
ddC (DDC)
актуальна только для стиральных машин Samsung с функцией «Add Door» (например, WW 10M86KNOA AddWash, WD80K52E0ZX)
Стиральная машина прекратила стирку
Некорректное использование дверцы «Add Door» при дополнительной загрузке забытого белья уже во время стирки.
При использовании дверцы «Add Door» необходимо, нажав предварительно кнопку «Пуск/Пауза», дождаться полной остановки машины, доложить забытые вещи. Для продолжения стирки закрыть дверцу и нажать кнопку «Пуск/Пауза».
dC3
Ошибка блокировки дверцы «Add Door». Актуально только для стиральных машин, оборудованных этой функцией (например, WD80K5410OS, WW70K62E00S, WW90K54H0UX)
Не закрыт или наоборот не открывается люк (дверца) дополнительной загрузки белья. Процесс стирки остановился.
- Устройство блокировки дверцы (УБЛ) «Add Door» вышло из строя.
- Имеются различные механические повреждения дверцы дополнительной загрузки белья(замка, петли),
- Сбой управляющей платы.
- Неисправны проводка или контакты устройства блокировки люка «Add Door».
- Закрывать дверцу «Add Door» пред стиркой, а так же после дополнительного помещения белья.
- Осмотреть дверцу на предмет попадания в запорное устройство инородных тел, а так же петли и крепления люка.
- Отключить машинку кнопкой «Питание», а затем включите снова. Это поможет, если причиной стал однократный сбой электронной платы.
8Е,8Е1, 8C, 8C1
Актуальны для новых стиральных машин моложе 2013 года, оснащенных датчиком вибрации (в старых моделях это — тахогенератор)
Барабан стиральной машины крутится с неадекватной выбранной программе скоростью (не крутится вообще, крутится быстрее или медленнее, чем положено), вещи плохо отжаты.
- Вышел из строя датчик вибрации.
- Неисправность в работе мотора.
- Выход из строя щеток мотора,
- Сбой в работе платы управления (электронного контроллера).
- Проблема с проводкой или контактами в цепи датчика вибрации VRT+
Выключить и включить машину заново. Так можно исключить вероятность временного сбоя в работе платы управления. Во всех остальных случаях речь идет о более серьезных проблемах.
PoF
PF
Машина перестала стирать, погасли все индикаторы. Теперь выдает одну из этих ошибок.
Вероятнее всего отключили электричество в сети, а затем возобновили его подачу
Для продолжения программы нажмите «Старт / Пауза».
A0..A9
B0
C0
D0
E0
Аппарат выдает одну из этих ошибок, стирка не производится.
Не является ошибкой — произошло включение заводского тестового режима
Для решения проблемы одновременно нажать и удерживать в течение 10 секунд кнопки: «Температура» и «Опция».
Hot
(актуально для моделей с сушкой).
Внутри стиральной машины держится высокая температура (больше 70 градусов) во время сушки
Не является ошибкой. Машина сообщает о том, что процесс сушки производится в штатном режиме.
Не выключать стиральную машину, дать ей возможность продолжить процесс сушки. Дождаться окончания. При снижении температуры внутри стиральной машины сообщение исчезнет само.
СЕ, АС, ACb (AC6), 4С2
В машинах без дисплея мигают все режимы стирки и горит верхний температурный индикатор 95° (или Bio 60°).
Машина набирает и сразу же, не стирая, сливает воду.
Температура воды при этом слишком высокая.
- Неисправен температурный датчик.
- Произошел сбой в проводке или нарушены контакты в цепи нагрева.
- Испытывает проблемы в работе нагревательный элемент (ТЭН).
- Сбой платы управления.
- Проверить правильность установки аппарата, а конкретно, убедиться. Что наливной шланг подключён к холодной, а не к горячей воде.
- Выключить машинку и запустить процесс стирки заново, чтобы исключить возможность временного сбоя управляющего модуля.
6С, SdC (5dC)
Ошибка автоматического дозатора (появляется только у машин Самсунг с функцией Wi-Fi, например, WW65K42E00SDLP, WW70R62LATX)
Не работает дозатор
- Неисправен привод автодозатора.
- Терпит сбой проводка или контакты в цепи автоматического дозатора.
Запустить процесс стирки заново, тем самым исключив вероятность временного сбоя в работе платы управления.