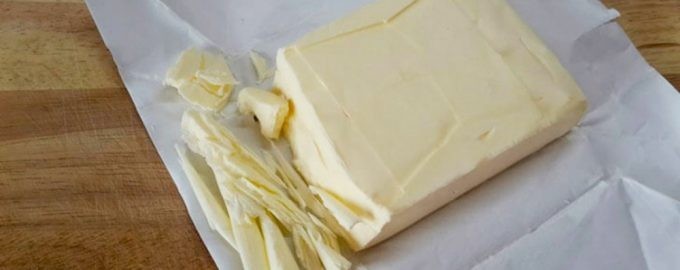
Многие любят завтракать свежим тостом с маслом и чашечкой кофе. Однако хуже всего в этой ситуации, когда кусок масла слишком охлажден, и при попытке отрезать кусочек он просто рассыпается. Давайте разберемся, почему так происходит и что из этого следует.
Почему крошится сливочное масло
Натуральное масло изготовлено из чистых сливок и молока, где дополнительные ингредиенты не требуются. Оно будет легко резаться при доставании из холодильника и хорошо намазываться на хлеб. Если у вас возникла с этим проблема, то, скорее всего, продукт содержит добавки. Это сделано для того, чтобы удешевить его стоимость. Однако это уже не классическое сливочное масло, а его дешевый аналог – спред.
Кусок будет расслаиваться при нарезании, если:
- В составе большой процент воды.
- При изготовлении была нарушена технология производства.
- Продукт повторно замораживался-размораживался. Такая процедура испортит даже натуральное масло.
- Нарушена технология хранения.
Эти причины расслаивания наблюдаются чаще всего у фабричного продукта. Почему же расслаивается домашнее масло, которое вы купили на рынке?
Здесь ответ кроется в другом. Вероятнее всего, при его изготовлении была плохо вымыта сыворотка. Дело в том, что после сбивания масла его нужно тщательно промыть в большом количестве воды, тщательно разминая. В противном случае структура продукта будет нарушена, и он будет рассыпаться при попытке отрезать кусочек.
Как выбрать настоящее масло, которое не будет крошиться
Когда мы стоим перед полкой магазина, то нередко приходим в замешательство, увидев на полке «масло» сывороточное, сливочное, экстра, деликатесное или бутербродное. Все они выглядят одинаково, но большинство из них только притворяются маслом.
Производители часто прибегали к подделкам, выдавая их за полноценный сливочный продукт, что способствовало принятию правил, закрепленных в Законе о качестве торговли агропродовольственными товарами. Согласно правилам, настоящее масло – это продукт, содержащий минимум 82% молочного жира и около 750 калорий на 100 грамм. Оставшаяся часть должна быть водой. Все смеси масел и загустителей должны быть четко обозначены на упаковке, не называть их в составе – незаконно.
Несмотря на это, также были случаи, когда производитель фальсифицировал реальное содержание молочного жира, а растительные смеси продавались в упаковках с маслом. Как избежать подобных маркетинговых уловок и купить натуральный продукт?
Название – еще не все
Во-первых, давайте рассмотрим цену. Хорошее масло не может стоить дешево. Он не может быть дешевым, как промышленно производимый маргарин, изготовленный из недорогих отвержденных растительных масел.
При покупке также стоит читать этикетки и смотреть на упаковку. На этикетке должно быть указано «масло», и оно должно содержать не менее 82% молочного жира. Более низкая стоимость, добавление эмульгаторов или растительных масел – явный признак того, что мы покупаем подделку (даже если цена выше). И помните, что сливочное масло никогда не будет продаваться в пластиковой таре.
Доверяйте своим чувствам
Цвет и запах также важны. Настоящее масло имеет почти белый цвет и интенсивный, приятный маслянистый аромат. Подделки имеют желтоватый, искусственный цвет и кисловатый запах маргарина.
Чувство осязания также поможет. Если кубик в холодильнике мягкий, это явный признак того, что он не имеет ничего общего с маслом. Натуральный продукт должен быть твердым и цельным. Когда вы достаете его из морозильной камеры и пытаетесь отрезать кусочек, то он крошится, а не распределяется. Необходимо подождать некоторое время, чтобы он приобрел мягкую текстуру.
Вы можете узнать сливочное масло по вкусу: оно обладает нежным молочным вкусом и тает на языке. Маргарин, напротив, оставляет жирное и кислое послевкусие. Значительная разница также будет заметна при плавлении. Сливочное масло образует белую пену и довольно быстро сгорает, поэтому мы не рекомендуем его для длительной жарки.
Если вы все еще не можете распознать настоящий продукт, то всегда можете сделать его сами. Все, что вам нужно, это правильные сливки, немного времени и силы, чтобы взбивать его долгое время.
Польза настоящего масла
У сливочного масла много положительных качеств. Одно из самых важных – то, что оно получается в результате естественного процесса, называемого взбиванием. Сливочное масло – это традиционный продукт, который нашел множество кулинарных применений. Считается, что его потребление способствует лучшему усвоению питательных веществ из пищи и содержит больше питательных веществ и витаминов естественного происхождения. Молочный жир является источником витаминов A, D и E. Витамин А способствует хорошему зрению, а витамин D играет важную роль в формировании костей.
Витамины А и Е также обладают антиоксидантным действием и очень эффективны несмотря на то, что присутствуют в небольших количествах, поскольку образуют синергетическую систему. Однако стоит помнить, что их содержание непостоянно и зависит от времени года. Их меньше зимой и больше летом, когда коровы пасутся.
Сливочное масло обладает ценными питательными свойствами. Это источник легко перевариваемого и хорошо усваиваемого животного жира, который не содержит никаких ингредиентов или химических добавок. Поэтому масло, как натуральный жир, легко усваиваемый и способствующий образованию клеток, рекомендуется детям до 7 лет (по данным Института матери и ребенка), беременным и кормящим женщинам. После этого его следует употреблять в ограниченных количествах – не более 3 чайных ложек в день.
Еще одним преимуществом продукта является содержание конъюгированной линолевой и масляной кислоты. Они предотвращают возникновение рака, а также линолевая кислота способствует уменьшению количества жира в организме. Молочный жир, содержащийся в продукте, является самым легкоусвояемым жиром животного происхождения, к тому же он обладает приятным вкусом, высокой питательной ценностью и идеально сбалансирован по составу.
Масло немасляное: почему крошится фабричное и домашнее сливочное масло?
Автор:
28 октября 2019 17:09
Горячая каша, ароматная отварная картошечка с укропом и обычный бутерброд к утреннему чаю сложно представить себе без этого продукта, который еще и благотворно сказывается на состоянии кожи, работе сосудов и головного мозга. Но когда крошится масло сливочное, а каждая минута на счету, очень хочется понять причину, чтобы избежать потери времени, денег и хорошего настроения в будущем.
Состав натурального масла и причины его крошения

Источник:
Масло – это продукт, который делается из молока и сливок. Все. Больше никаких посторонних добавок в составе быть не должно, поэтому даже извлеченный из холодильника кусок должен хорошо резаться и без проблем намазываться на хлеб.
Не слишком добросовестные производители с целью удешевления и снижения производственных затрат добавляют в масло воду и растительные жиры. В результате получается состав, имеющий к маслу лишь отдаленное отношение – спред или маргарин. Такой продукт крошится, если:
Что касается домашнего масла, которое продают на рынке, то летом оно более эластичное из-за натуральных кормов, которые едят коровы. С наступлением холодов животных переводят на сухие корма, что сказывается и на характеристиках молочной продукции.
Как выбрать качественное масло

Источник:
Конечно, попробовать продукт, что называется, на зубок в супермаркете невозможно. Поэтому при выборе надо учитывать комплекс критериев:

Источник:
Чтобы окончательно убедиться в качестве масла, можно провести дома простой эксперимент: поместить небольшой кусочек в горячую воду. Натуральный продукт должен раствориться полностью, а маргарин или спред расслоятся на отдельные составляющие. От приобретения брикетов этого производителя в будущем лучше отказаться, подыскав более достойную альтернативу. Ну и, конечно, натуральное масло по определению не может стоить дешево, ведь для производства 1 кг нужно как минимум 20 л молока. Этот факт тоже необходимо брать в расчет при покупке.
Источник:
Ссылки по теме:
Новости партнёров
реклама
Skip to content
Почему крошится сливочное масло
На чтение 2 мин. Опубликовано 05.02.2019
Ответ на этот вопрос ищите в составе продукта. В классической рецептуре масло содержит исключительно молочные жиры (коровье молоко и сливки). Если ингредиенты натуральные, оно даже при низких температурах хорошо режется.
Производители с целью удешевления затрат на изготовление, разбавляют классический состав растительными жирами или водой. Получается спред или маргарин.
- Так, сливочный продукт, в составе которого содержится большой процент воды, при попытке разрезать начнет крошиться.
- Раскалывается он ввиду неправильного температурного режима при хранении.
- Если технологические условия производства не соблюдаются и нарушается соотношение влаги и жира, брикет тоже будет разваливаться на кусочки.
Часто для выпечки используют маргарин, чтобы удешевить приготовление, но это негативно сказывается на вкусе.
? Как выбрать качественное сливочное масло:
- Маркировка и состав. Попробовать масло в магазине невозможно, поэтому нужно внимательно изучить состав. Если помимо классических ингредиентов присутствуют «заменители молочных жиров», различные ароматизаторы, стабилизаторы – перед вами маргарин. Производиться оно по ГОСТу (Р 52969-2008) либо техническим условиям (ТУ).
- Жирность не должна быть выше 82,2%, а все что ниже – любительское, крестьянское либо бутербродное.
- Срок годности не более одного месяца. Продлить «жизнь» до года могут консерванты и растительные жиры.
- Выбирайте брикеты в фольгированной упаковке, она защищает от вредного воздействия солнечных лучей.
- Качественный продукт имеет светло-желтый оттенок. Насыщенный цвет говорит, что производитель добавил краситель, а белый — сигнализирует о примеси растительных жиров.
- Запах и вкус. Натуральное быстро тает, оно без запаха , с легким молочно-сливочным послевкусием.
- Продукт хорошего качества полностью растворяется в горячей воде.
Поскольку на приготовление 1 кг затрачивают более 20 литров молока, готовый продукт не может дешево стоить.
? «Контрольная закупка» — выбор хорошего масла
![]()
Download Article
![]()
Download Article
Butter is a key ingredient in many recipes and is crucial for creating delicious baked goods. Many recipes call for softened butter, but you may have forgotten to leave a stick out at room temperature. If you need to soften butter quickly, there are many ways to do it. Just be careful not to heat the butter too much or else it will melt!
-

1
Measure the amount of butter you need. Cut and measure your butter before you soften it since the stick could deform. Consult the recipe you’re using to see how much butter you need before using a measuring spoon or kitchen scale to get the exact amount you need.[1]
- If the butter is still in its wrapper, you may be able to see the measurements printed on the side so you can accurately cut it.
-
2
Cut the butter into 1 in (2.5 cm) cubes. Use a sharp knife to cut the measured butter into small chunks. Make sure the chunks are about the same size so they all soften evenly. Separate the cubes from one another so they don’t stick together since that could slow down how fast they soften.[2]
- The increased surface area of the butter will allow it to soften faster.
Advertisement
-
3
Leave the butter at room temperature for 10-20 minutes. Set the chunks of butter on a plate and cover them with a tray or aluminum foil so nothing can get into the butter. Keep the butter in a place out of direct sunlight so it doesn’t melt. Leave the butter for about 20 minutes so it’s soft and easily spreadable.[3]
Tip: You can keep a whole stick of butter out at room temperature if you don’t want to worry about running out of softened butter when you need it.


Advertisement
-
1
Place the butter between 2 sheets of wax paper. Lay out a piece of wax paper on a flat countertop and set the amount of butter you need in the middle of the sheet. Put another layer of wax paper on top of the butter and press it down firmly so it stays in place. Make sure the wax paper pieces are the same size so the butter doesn’t squeeze out the side.[4]
- You may choose to cut the butter into cubes beforehand if you want.
-
2
Hit the butter with a rolling pin 3-4 times to pound it down. Keep the wax paper in place with your non-dominant hand and hold a rolling pin by one of the handles with your other hand. Hit the butter firmly with your rolling pin 3-4 times to start the flattening process. Hit the butter until it’s a uniform thickness throughout.[5]
Warning: Only hit butter if you pulled it directly out of the fridge or freezer since butter that’s already soft may splatter out the sides of the paper.
-
3
Roll the butter flat with the rolling pin. Once the butter is slightly flattened after hitting it, hold your rolling pin with both hands and spread it out like you would with dough. Aim to get the butter between 1⁄8–1⁄4 in (0.32–0.64 cm) thick to maximize the surface area. When you’re finished, peel off the top layer of wax paper.[6]
-
4
Leave the butter at room temperature for about 5 minutes. The butter should feel relatively soft after you roll it out, but leave it on your counter for another 5 minutes. Once the butter is completely soft, peel it off of the wax paper and mix it in with the rest of your ingredients.[7]
- Softened butter could possibly stick to the wax paper. If you need to, scrape the butter with a knife to get it off completely.

Advertisement
-
1
Measure the amount of butter you need for your recipe. Look at the side of the butter’s wrapper to see the measurements. Use a knife to cut the amount of butter you need for your recipe. If the butter is out of the wrapper, use measuring spoons or a kitchen scale to find the amount that you need.[8]
-
2
Grate the butter into a bowl. Use the side of a box grater that has the largest holes so the butter pieces are the right size and shape for baking. Hold the grater and butter over a clean bowl so the pieces can fall in easily. Press the butter into the side of the grater with a firm amount of pressure to grate it into the bowl. Continue grating the butter until all of the pieces are in the bowl.[9]
- Only move the butter up and down rather than moving the grater. This will make it easier for you to grate.
- Grating works best if the butter comes directly out of the fridge or freezer.
Tip: Hold the butter by a piece of its wrapper if you don’t want to get your fingers greasy.
-
3
Let the butter pieces soften for 5 minutes before adding it to your recipe. Leave the butter pieces in the bowl and let them heat up to room temperature for about 5 minutes. This will ensure that they’re soft and mix well with any other ingredients you’re using.[10]
- Grated butter works best for making crumbles or shortbread since it mixes thoroughly with the other ingredients.
- You can grate the butter directly in the bowl with your other ingredients if you want.


Advertisement
-
1
Heat 2 c (470 ml) of water in a pot. Put the water in a small pot and warm it up over medium heat. Keep heating the water until it starts steaming, and then reduce the temperature to low heat.[11]
- You don’t need to bring the water to a boil or else it may get too hot.
-
2
Set a glass or metal bowl on top of the pot. Put a heat-safe bowl over the pot to cover it. Make sure the bowl covers the opening on the pot entirely or else it may not heat up as well. Let the bowl heat up for 1-2 minutes so it’s warm to the touch.[12]
- If you have a special double boiler pot, you can use that as well.
-
3
Put your butter into the bowl to soften it. Place the amount of butter you need for your recipe inside the bowl and watch it carefully. The steam from the pot will heat up the bowl and start to soften the butter. Test the softness of the butter with a spoon to see if it’s still hard or not. When the butter breaks apart easily with a spoon, take the bowl off the pot.[13]
- Be sure to remove the bowl before the butter starts to melt.
Warning: A metal or glass bowl will get hot, so use an oven mitt or pot holder when you need to touch it.


Advertisement
-
1
Cut the butter into 1⁄2 inch (1.3 cm) squares. Measure out the amount of butter you need for your recipe and cut it off the stick with a chef’s knife. Then use your knife to cut the pieces into 1⁄2 in (1.3 cm) chunks so it softens faster. Put all of the chunks in a microwave-safe container.[14]
- You don’t need to cut the butter, but it will make it soften faster in your microwave.
-
2
Put the butter in your microwave for 5 seconds. Set the container of butter in the center of the microwave and turn it on for 5 seconds. Watch the butter as the microwave runs to make sure it doesn’t melt. After the microwave is finished, test the hardness of your butter with your finger or a spoon. See if the cubes feel solid in the center or if they’re soft.[15]
- In most microwaves, your butter won’t be fully softened after the first 5 seconds.
Tip: If you can change the intensity of your microwave, then set it to low to help prevent your butter from melting.
-
3
Use 5 seconds increments until the butter is soft but not melted. If your butter still feels hard after the first time you microwave it, put it in for another 5 seconds. Be sure to watch the butter so it doesn’t start melting. When the butter feels soft throughout, take it out and incorporate it in your recipe.[16]
- Butter can melt quickly in a microwave, so be ready to stop the machine at a moment’s notice.


Advertisement
Add New Question
-
Question
What is the best way to soften butter without a microwave?

Sarena Nelson is a Private Chef and the Founder of Chef Sarena, based in Palm Springs, California. With over 10 years of experience, she specializes in customized menus for private events, has worked in 5-star restaurants, and has helped small restaurants redesign their menus. She earned her degree from Le Cordon Bleu School of Culinary Arts in Pasadena, California.
Private Chef
Expert Answer
Support wikiHow by
unlocking this expert answer.There are lots of different ways! It always helps to have a butter dish out on the counter so you always have some soft butter on hand. You can also soften your butter on the stovetop, or stick it in a butter bell—this is a device that helps the butter stay fresh by keeping it at a certain temperature.
-
Question
How can I tell when butter is softened enough for baking with?
This answer was written by one of our trained team of researchers who validated it for accuracy and comprehensiveness.
wikiHow Staff Editor
Staff Answer
Support wikiHow by
unlocking this staff-researched answer.Check the wrapper; properly softened butter will leave a residue of fat on the wrapping (cold butter won’t do this). Press the butter with your finger––properly softened butter will form a small dent but still keeps the shape of the stick. Or, try bending the butter gently; softened butter will have a little give, unlike cold butter; it shouldn’t break or crack––if it does, it is too softened and needs to be refrigerated a little again. Butter that is still too cold or that is softened too much will cause the baked goods to be either too hard (cold butter) or too dense (overly soft butter). Aim for cool room temperature softened butter.
-
Question
How long does it take to soften butter?
This answer was written by one of our trained team of researchers who validated it for accuracy and comprehensiveness.
wikiHow Staff Editor
Staff Answer
Support wikiHow by
unlocking this staff-researched answer.At room temperature, a stick of butter will take about 30 minutes to soften. Small amounts take less time, while larger amounts may take longer. Heating butter can speed up the softening time but it’s very easy to overheat and melt it, so go easy if using one of the heating methods suggested above.


See more answers
Ask a Question
200 characters left
Include your email address to get a message when this question is answered.
Submit
Advertisement
-
Use unsalted butter while you’re baking so it doesn’t affect the flavor of your baked goods.
-
Leave a whole stick of butter on a plate or tray at room temperature so you always have softened butter whenever you need to use it.
Advertisement
-
Do not allow butter to melt when softening since it may negatively impact your baking.
Advertisement
Things You’ll Need
- Cutting board
- Chef’s knife
- Plate
- Knife
- Wax paper
- Rolling pin
- Box grater
- Bowl
- Pot
- Glass or metal bowl
- Oven mitt
- Chef’s knife
- Microwave-safe bowl
- Microwave
![]()
Thanks for reading our article! If you’d like to learn more about softening butter, check out our in-depth interview with Sarena Nelson.
References
About This Article
Article SummaryX
To soften butter quickly, heat it in the microwave for 5-second intervals until it’s soft enough. You can also cut the butter up into small pieces before leaving it out to soften, which will help it soften faster. If you’re in a rush but you don’t have a microwave, put the butter in a sealable plastic bag and then flatten it with a rolling pin until it’s about 1/4 inch thick. Once you’re done flattening the butter, it should be softened! For more tips, including how to heat the butter on a stovetop if you don’t have a microwave, read on!
Did this summary help you?
Thanks to all authors for creating a page that has been read 178,366 times.
Did this article help you?
![]()
Download Article
![]()
Download Article
Butter is a key ingredient in many recipes and is crucial for creating delicious baked goods. Many recipes call for softened butter, but you may have forgotten to leave a stick out at room temperature. If you need to soften butter quickly, there are many ways to do it. Just be careful not to heat the butter too much or else it will melt!
-
1
Measure the amount of butter you need. Cut and measure your butter before you soften it since the stick could deform. Consult the recipe you’re using to see how much butter you need before using a measuring spoon or kitchen scale to get the exact amount you need.[1]
- If the butter is still in its wrapper, you may be able to see the measurements printed on the side so you can accurately cut it.
-
2
Cut the butter into 1 in (2.5 cm) cubes. Use a sharp knife to cut the measured butter into small chunks. Make sure the chunks are about the same size so they all soften evenly. Separate the cubes from one another so they don’t stick together since that could slow down how fast they soften.[2]
- The increased surface area of the butter will allow it to soften faster.
Advertisement
-
3
Leave the butter at room temperature for 10-20 minutes. Set the chunks of butter on a plate and cover them with a tray or aluminum foil so nothing can get into the butter. Keep the butter in a place out of direct sunlight so it doesn’t melt. Leave the butter for about 20 minutes so it’s soft and easily spreadable.[3]
Tip: You can keep a whole stick of butter out at room temperature if you don’t want to worry about running out of softened butter when you need it.
Advertisement
-
1
Place the butter between 2 sheets of wax paper. Lay out a piece of wax paper on a flat countertop and set the amount of butter you need in the middle of the sheet. Put another layer of wax paper on top of the butter and press it down firmly so it stays in place. Make sure the wax paper pieces are the same size so the butter doesn’t squeeze out the side.[4]
- You may choose to cut the butter into cubes beforehand if you want.
-
2
Hit the butter with a rolling pin 3-4 times to pound it down. Keep the wax paper in place with your non-dominant hand and hold a rolling pin by one of the handles with your other hand. Hit the butter firmly with your rolling pin 3-4 times to start the flattening process. Hit the butter until it’s a uniform thickness throughout.[5]
Warning: Only hit butter if you pulled it directly out of the fridge or freezer since butter that’s already soft may splatter out the sides of the paper.
-
3
Roll the butter flat with the rolling pin. Once the butter is slightly flattened after hitting it, hold your rolling pin with both hands and spread it out like you would with dough. Aim to get the butter between 1⁄8–1⁄4 in (0.32–0.64 cm) thick to maximize the surface area. When you’re finished, peel off the top layer of wax paper.[6]
-
4
Leave the butter at room temperature for about 5 minutes. The butter should feel relatively soft after you roll it out, but leave it on your counter for another 5 minutes. Once the butter is completely soft, peel it off of the wax paper and mix it in with the rest of your ingredients.[7]
- Softened butter could possibly stick to the wax paper. If you need to, scrape the butter with a knife to get it off completely.
Advertisement
-
1
Measure the amount of butter you need for your recipe. Look at the side of the butter’s wrapper to see the measurements. Use a knife to cut the amount of butter you need for your recipe. If the butter is out of the wrapper, use measuring spoons or a kitchen scale to find the amount that you need.[8]
-
2
Grate the butter into a bowl. Use the side of a box grater that has the largest holes so the butter pieces are the right size and shape for baking. Hold the grater and butter over a clean bowl so the pieces can fall in easily. Press the butter into the side of the grater with a firm amount of pressure to grate it into the bowl. Continue grating the butter until all of the pieces are in the bowl.[9]
- Only move the butter up and down rather than moving the grater. This will make it easier for you to grate.
- Grating works best if the butter comes directly out of the fridge or freezer.
Tip: Hold the butter by a piece of its wrapper if you don’t want to get your fingers greasy.
-
3
Let the butter pieces soften for 5 minutes before adding it to your recipe. Leave the butter pieces in the bowl and let them heat up to room temperature for about 5 minutes. This will ensure that they’re soft and mix well with any other ingredients you’re using.[10]
- Grated butter works best for making crumbles or shortbread since it mixes thoroughly with the other ingredients.
- You can grate the butter directly in the bowl with your other ingredients if you want.
Advertisement
-
1
Heat 2 c (470 ml) of water in a pot. Put the water in a small pot and warm it up over medium heat. Keep heating the water until it starts steaming, and then reduce the temperature to low heat.[11]
- You don’t need to bring the water to a boil or else it may get too hot.
-
2
Set a glass or metal bowl on top of the pot. Put a heat-safe bowl over the pot to cover it. Make sure the bowl covers the opening on the pot entirely or else it may not heat up as well. Let the bowl heat up for 1-2 minutes so it’s warm to the touch.[12]
- If you have a special double boiler pot, you can use that as well.
-
3
Put your butter into the bowl to soften it. Place the amount of butter you need for your recipe inside the bowl and watch it carefully. The steam from the pot will heat up the bowl and start to soften the butter. Test the softness of the butter with a spoon to see if it’s still hard or not. When the butter breaks apart easily with a spoon, take the bowl off the pot.[13]
- Be sure to remove the bowl before the butter starts to melt.
Warning: A metal or glass bowl will get hot, so use an oven mitt or pot holder when you need to touch it.
Advertisement
-
1
Cut the butter into 1⁄2 inch (1.3 cm) squares. Measure out the amount of butter you need for your recipe and cut it off the stick with a chef’s knife. Then use your knife to cut the pieces into 1⁄2 in (1.3 cm) chunks so it softens faster. Put all of the chunks in a microwave-safe container.[14]
- You don’t need to cut the butter, but it will make it soften faster in your microwave.
-
2
Put the butter in your microwave for 5 seconds. Set the container of butter in the center of the microwave and turn it on for 5 seconds. Watch the butter as the microwave runs to make sure it doesn’t melt. After the microwave is finished, test the hardness of your butter with your finger or a spoon. See if the cubes feel solid in the center or if they’re soft.[15]
- In most microwaves, your butter won’t be fully softened after the first 5 seconds.
Tip: If you can change the intensity of your microwave, then set it to low to help prevent your butter from melting.
-
3
Use 5 seconds increments until the butter is soft but not melted. If your butter still feels hard after the first time you microwave it, put it in for another 5 seconds. Be sure to watch the butter so it doesn’t start melting. When the butter feels soft throughout, take it out and incorporate it in your recipe.[16]
- Butter can melt quickly in a microwave, so be ready to stop the machine at a moment’s notice.
Advertisement
Add New Question
-
Question
What is the best way to soften butter without a microwave?
Sarena Nelson is a Private Chef and the Founder of Chef Sarena, based in Palm Springs, California. With over 10 years of experience, she specializes in customized menus for private events, has worked in 5-star restaurants, and has helped small restaurants redesign their menus. She earned her degree from Le Cordon Bleu School of Culinary Arts in Pasadena, California.
Private Chef
Expert Answer
Support wikiHow by
unlocking this expert answer.There are lots of different ways! It always helps to have a butter dish out on the counter so you always have some soft butter on hand. You can also soften your butter on the stovetop, or stick it in a butter bell—this is a device that helps the butter stay fresh by keeping it at a certain temperature.
-
Question
How can I tell when butter is softened enough for baking with?
This answer was written by one of our trained team of researchers who validated it for accuracy and comprehensiveness.
wikiHow Staff Editor
Staff Answer
Support wikiHow by
unlocking this staff-researched answer.Check the wrapper; properly softened butter will leave a residue of fat on the wrapping (cold butter won’t do this). Press the butter with your finger––properly softened butter will form a small dent but still keeps the shape of the stick. Or, try bending the butter gently; softened butter will have a little give, unlike cold butter; it shouldn’t break or crack––if it does, it is too softened and needs to be refrigerated a little again. Butter that is still too cold or that is softened too much will cause the baked goods to be either too hard (cold butter) or too dense (overly soft butter). Aim for cool room temperature softened butter.
-
Question
How long does it take to soften butter?
This answer was written by one of our trained team of researchers who validated it for accuracy and comprehensiveness.
wikiHow Staff Editor
Staff Answer
Support wikiHow by
unlocking this staff-researched answer.At room temperature, a stick of butter will take about 30 minutes to soften. Small amounts take less time, while larger amounts may take longer. Heating butter can speed up the softening time but it’s very easy to overheat and melt it, so go easy if using one of the heating methods suggested above.
See more answers
Ask a Question
200 characters left
Include your email address to get a message when this question is answered.
Submit
Advertisement
-
Use unsalted butter while you’re baking so it doesn’t affect the flavor of your baked goods.
-
Leave a whole stick of butter on a plate or tray at room temperature so you always have softened butter whenever you need to use it.
Advertisement
-
Do not allow butter to melt when softening since it may negatively impact your baking.
Advertisement
Things You’ll Need
- Cutting board
- Chef’s knife
- Plate
- Knife
- Wax paper
- Rolling pin
- Box grater
- Bowl
- Pot
- Glass or metal bowl
- Oven mitt
- Chef’s knife
- Microwave-safe bowl
- Microwave
![]()
Thanks for reading our article! If you’d like to learn more about softening butter, check out our in-depth interview with Sarena Nelson.
References
About This Article
Article SummaryX
To soften butter quickly, heat it in the microwave for 5-second intervals until it’s soft enough. You can also cut the butter up into small pieces before leaving it out to soften, which will help it soften faster. If you’re in a rush but you don’t have a microwave, put the butter in a sealable plastic bag and then flatten it with a rolling pin until it’s about 1/4 inch thick. Once you’re done flattening the butter, it should be softened! For more tips, including how to heat the butter on a stovetop if you don’t have a microwave, read on!
Did this summary help you?
Thanks to all authors for creating a page that has been read 178,366 times.
Did this article help you?
Почему масло одного производителя крошится, а другого – легко намазывается на хлеб? Важно понимать, что в состав натурального сливочного масла входят только сливки и больше ничего. Поэтому при положительной температуре оно всегда будет иметь мягкую структуру и при нажатии легко продавится. Твердую форму держит только некачественный продукт или спреды.
Настоящее сливочное масло является производным молока и поэтому состоит исключительно из молочного жира. Оно должно содержать в основном пастеризованные сливки – подкисленные в случае сладкосливочного масла 82,5% или не подкисленные в случае масла жирностью три четверти. Различные методы производства также означают, что масло типа «экстра» содержит значительно меньше лактозы (до пяти раз меньше), чем обычное сливочное. Другие виды продукта включают деликатесное, отборное и столовое масло, имеют различное содержание молочного жира, но всегда менее 80 процентов. Маргарин, например, содержит всего 3 процента.
Основные причины, почему крошится масло
Натуральный продукт будет крошиться при нарушении температурного режима во время хранения, после заморозки или при содержании влаги в продукте. Такая проблема чаще всего встречается в домашнем продукте.
В остальных же случаях он будет крошиться из-за добавок, которые используются в составе для удешевления. Это относится к спредам и маргарину.
Почему маргарин крошится, а масло – нет?
Масло и маргарин – два вида жиров, широко используемых при приготовлении пищи. Сливочное масло – натуральный продукт, который содержит много насыщенных жиров. При его производстве сливки с высокой жирностью взбивают до отделения масляной составляющей. При изготовлении маргарина осуществляется процесс гидрогенизации растительного или рыбьего жира, который является ненасыщенным.
Действительно, маргарин изготавливается из полезных ненасыщенных жиров, однако процесс гидрогенизации, используемый для превращения его из жидкого в твердое состояние, включает «насыщающие жиры», а также требует нескольких добавок для стабилизации, в итоге превращаясь в «ненатуральный» продукт.
Насыщенные жиры при комнатной температуре обычно имеют твердую форму. А ненасыщенные – жидкую. Процесс гидрогенизации, который используется при производстве маргарина, делает ненасыщенный жир «насыщенным», и продукт приобретает твердую форму, сохраняя ее даже при комнатной температуре. Однако ненасыщенные жиры не могут при комнатной температуре в домашних условиях перейти обратно в жидкое состояние, в отличие от насыщенных. Собственно, поэтому маргарин и некоторые спреды будут крошиться, а натуральное масло просто станет более эластичным.
Каким должно быть настоящее масло?
Натуральный продукт, несмотря на высокую калорийность, также содержит ценные для здоровья вещества – легкоусвояемый животный жир, витамины А, Д, Е, белок и кальций. В составе также содержится линолевая кислота, которая считается соединением с противораковыми свойствами.
Следует помнить, что питательные вещества, содержащиеся в натуральных продуктах, лучше усваиваются по сравнению с теми продуктами, в которые питательные вещества добавлены в технологическом процессе. Поэтому польза сливочного масла с натуральным составом больше, чем у любого спреда. Кроме того, благодаря тому, что продукт изготовлен полностью из натуральных компонентов, он является безопасной и в то же время чрезвычайно аппетитной добавкой к вашему ежедневному рациону.