На чтение 5 мин. Просмотров 462 Опубликовано 28.04.2021
Если на вашем компьютере есть аудиоустройство Conexant и вы обновили его до Windows 10, существует небольшая вероятность того, что компьютер больше не сможет воспроизводить звук после обновления. Эта проблема, как известно, поражает значительный процент всех пользователей аудиоустройств Conexant, которые обновляют свои компьютеры до Windows 10. Причина этой проблемы почти во всех случаях заключается в том, что аудиодрайверы Conexant на пораженном компьютере несовместимы с Windows 10 и Windows не смогли обновить драйверы во время обновления до Windows 10.
Эту проблему можно решить, просто обновив аудиодрайверы Conexant на зараженном компьютере, но поскольку это не происходило автоматически произойдет во время обновления Windows 10, вам придется сделать это вручную. Для этого вам нужно сначала загрузить пакет драйверов для аудиоустройства Conexant на вашем компьютере, который не только новее, чем уже установленный, но и гарантированно совместим с Windows 10. Поскольку Conexant не выпускает драйверы. для его аудиоустройств на его собственном веб-сайте, вам придется загрузить новый пакет драйверов с официального веб-сайта поддержки производителя компьютера (например, Acer или HP).
Содержание
- Метод 1. Обновление драйвера вручную
- Метод 2: Отключить улучшения звука
- M метод 3: откат драйвера
- Метод 4: Использование звука высокой четкости
- M этод 5: Изменение настроек памяти
Метод 1. Обновление драйвера вручную
После загрузки нового пакета драйверов для аудиоустройства Conexant на затронутом компьютере вам потребуется установить его. Чтобы установить новый пакет драйверов, вы
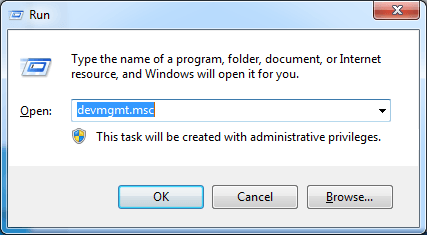
- Нажмите клавишу с логотипом Windows + R , чтобы открыть a Выполнить
- Введите devmgmt.msc в диалоговое окно Выполнить и нажмите Enter , чтобы запустить Диспетчер устройств .
- В Диспетчере устройств дважды щелкните значок Звуковые, видео и игровые контроллеры , чтобы развернуть его.
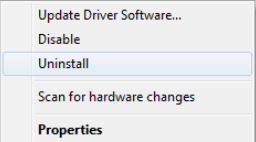
- Щелкните правой кнопкой мыши аудиоустройство Conexant и выберите Обновить программное обеспечение драйвера… в контекстном меню.
- Нажмите Искать на моем компьютере драйверы .
- Щелкните Обзор ….
- Перейдите в папку, в которой находится новый пакет драйверов, и щелкните папку, чтобы выбрать ее.
- Нажмите OK .
- Нажмите Далее и дождитесь, пока мастер найдет новый водитель er и установите его.

Один раз был установлен новый пакет драйверов для звукового устройства Conexant на пораженном компьютере, перезагрузите его, и, если все пойдет хорошо, звук будет восстановлен.
Метод 2: Отключить улучшения звука
В некоторых случаях, если вы включили определенные улучшения звука, проблема может возникнуть. Поэтому на этом этапе мы отключим все улучшения звука.. Для этого:
- Щелкните правой кнопкой мыши значок «Динамик» в нижнем левом углу экрана и выберите «Открыть настройки звука» .

- В правом верхнем углу выберите «Открыть панель управления звуком» и щелкните правой кнопкой мыши на
- Выберите «Свойства» из списка и нажмите «Улучшения. ” на следующей вкладке.
- Установите флажок« Отключить все улучшения »и нажмите « Применить ».
- Выберите « ОК » , чтобы закрыть окно и проверить, сохраняется ли проблема.


Примечание. Вы также можете попробовать загрузить компьютер в чистую загрузку и проверьте, помогает ли это решить проблему.
M метод 3: откат драйвера
В некоторых случаях драйвер может быть неправильно установлен и совместим с оборудованием, используемым компьютером, из-за которого возникает эта проблема. Поэтому на этом этапе мы откатим драйвер, а затем проверим, сохраняется ли проблема. Для этого:
- Нажмите «Windows» + «R» , чтобы открыть окно «Выполнить».
- Введите «Devmgmt.msc» и нажмите
- Разверните вкладку «Звуковые, видео и игровые контроллеры» и щелкните правой кнопкой мыши звуковой драйвер.
- Выберите « Свойства » из списка и щелкните вкладку « Драйвер ».
- Щелкните « Драйвер отката » и следуйте инструкциям на экране, чтобы вернуться к предыдущей версии драйвера.
- После отката драйвера проверьте , сохраняется ли проблема.


Метод 4: Использование звука высокой четкости
Сторонние драйверы очень глючны в Windows 10, и это можно увидеть, наблюдая за множеством пользовательских запросов. на веб-сайте Microsoft о проблемах с драйверами. Это может быть проблема с вашим компьютером, и возможно, вы используете глючные драйверы. Поэтому на этом этапе мы будем использовать стандартные аудио драйверы HD High Definition для вашего компьютера. Чтобы использовать их:
- Нажмите «Windows» + «R» , чтобы открыть команду «Выполнить». запрос.
- Введите «Devmgmt.msc» и нажмите «Enter».
- Разверните вкладку « Звуковые, видео и игровые контроллеры » и щелкните правой кнопкой мыши звуковой драйвер.
- Выберите «Свойства» из списка и нажмите вкладку «Драйвер» .
- Нажмите «Обновить драйвер» , а затем выберите « Искать на моем компьютере программное обеспечение драйвера «.
- После этого на следующем экране щелкните параметр« Позвольте мне выбрать из списка »и выберите «Аудиоустройство высокой четкости» на следующем экране.
- Нажмите «Далее» и следуйте инструкциям на экране, чтобы установить драйвер вместо стороннего.
- Проверьте, работает ли звук после этого.
Примечание. Если это не сработает, выберите Nvidia High Definition Audio на шестом шаге и проверьте еще раз.


M этод 5: Изменение настроек памяти
В некоторых случаях настройки вашей памяти могут влиять на драйвер, не позволяя ему использовать достаточно ОЗУ для поддержания работы звука. Поэтому на этом этапе мы изменим настройки памяти и установим для нее определенное количество. Для этого:
- Нажмите «Windows» + «R , чтобы открыть окно« Выполнить ».
- Введите «msconfig» и нажмите «Enter».
- Щелкните вкладку «Загрузка» , а затем нажмите кнопку «Дополнительно» .
- В расширенных параметрах отметьте параметр «Максимальный объем памяти» и введите
- Нажмите «ОК» , а затем закройте окно.
- Проверьте, сохраняется ли проблема.

Hello zip19709,
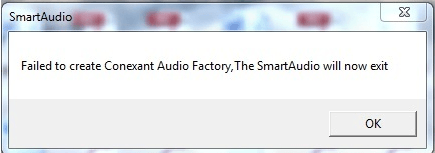
Every time when you start your computer, if you get error message saying “Failed to create Conexant Audio Factory, The SmartAudio will now exit”, you can find the solutions here how to fix this issue.
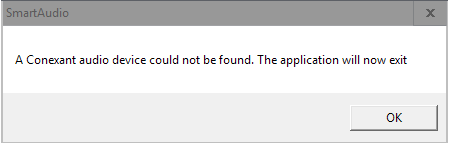
The error message may also appear like this: A Conexant audio device could not be found. The application will now exit.
This issue would occur if service “CxUtilSvc” is not running when you start Windows. “CxUtilSvc” is short for “Conexant Utility Service”. It is developed by Conexant Systems, Inc, the manufacturer of Conexant sound card. So if this service isn’t started, you would meet the issue. You can check and see if the service starts. Start it if necessary then the problem issue should resolve.
Following steps are for your reference how to start service “CxUtilSvc”.
1. Press Win+R (Windows key and R key) at the same time. A Run dialog will appear.
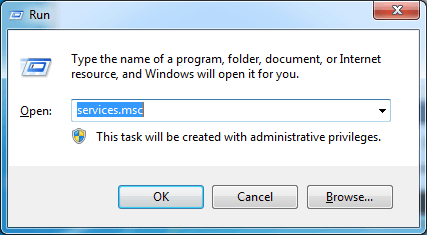
2. Type services.msc in the run box. Click on OK button. Then Services window will open.
3. In Services window, check the list for “CxUtilSvc” and double click on it. The Properties window will open.
4. In Properties window, click on the Start button if the service is stopped.
Change the Startup Type value to Automatic.
5. Click on Apply and OK button.
6. Restart your computer.
The error would also occur due to driver issues. The audio driver you have installed may be corrupted or incompatible with your operating system. To resolve the problem, you can try uninstalling the Conexant audio driver and installing it again.
You can follow steps below to uninstall the Conexant driver.
1. Press Win+R (Windows key and R key) at the same time. A Run dialog will appear.
2. Type devmgmt.msc in the run box. Click on OK button. Then Device Manager window will open.
3. Expand category Sound, video and game controllers. Under this category, you will find Conexant High Definition SmartAudio Drivers. Right-click on it and then select Uninstall.
4. In the Uninstall window, check the box next to Delete the driver software for this device. Then click on OK button.

5. After uninstalling the driver, restart the computer. Usually, the windows will load the audio driver automatically after it reboots. Then update the driver to the latest version.
Conexant High-Definition (HD) Audio Driver
http://h20564.www2.hp.com/hpsc/swd/public/detail?sp4ts.oid=8693767&swItemId=ob_174693_1&swEnvOid=419…
Hope this helps, for any further queries reply to the post and feel free to join us again
**Click the White Thumbs Up Button on the right to say Thanks**
Make it easier for other people to find solutions by marking a Reply ‘Accept as Solution’ if it solves your problem.
Thank You,
GBL84
I am not an HP Employee
На чтение 4 мин. Просмотров 13.4k. Опубликовано 03.09.2019
Содержание
- 6 решений для исправления проблем Conexant HD Audio в Windows 10
- Как исправить проблемы с аудио драйвером Conexant HD
- Решение 1. Обновите драйверы
- Решение 2 – Отключить улучшения звука
- Решение 3 – Изменить максимальный объем памяти
- Решение 4 – Изменить формат звука по умолчанию
- Решение 5 – Переустановите драйвер Conexant HD
- Решение 6 – Запустите средство устранения неполадок аудио
6 решений для исправления проблем Conexant HD Audio в Windows 10
- Обновите драйверы
- Отключить улучшения звука
- Изменить максимальный объем памяти
- Изменить формат звука по умолчанию
- Переустановите драйвер Conexant HD .
- Запустите средство устранения неполадок со звуком
В зависимости от вашей звуковой карты или текущей версии звукового драйвера в Windows 10 могут возникать некоторые проблемы со звуком. На этот раз пользователи Conexant HD Audio заметили проблемы со звуком после обновления до Windows 10.
Если вы один из них, я собрал несколько способов решения этой проблемы. Дайте нам знать, какой из них работал для вас.
Как исправить проблемы с аудио драйвером Conexant HD

Решение 1. Обновите драйверы
Я предполагаю, что вы уже проверили, установлены ли ваши драйверы Conexant HD Audio. Тем не менее, я решил включить этот шаг в качестве фактического решения, просто чтобы убедиться, что ваши драйверы обновлены.
Если вы не обновляли свои драйверы, я рекомендую вам обратиться к диспетчеру устройств и проверить наличие обновлений ваших драйверов.
Теперь вы можете выбрать автоматический поиск обновленного драйвера или поиск компьютера, если у вас есть файл драйвера. Следуйте инструкциям на экране и не забудьте перезагрузить компьютер. В некоторых случаях требуется перезагрузка, чтобы новый драйвер работал.
 Есть также некоторые другие решения, которые не строго привязаны к Conexant HD Audio. Многие люди сообщили, что они решили проблему для них. Итак, ознакомьтесь со следующими решениями.
– СВЯЗАННЫЕ: Исправлено: ошибка «Аудиоустройство отключено» в Windows 10
Решение 2 – Отключить улучшения звука
Первое, что вы можете попробовать, чтобы заставить ваш Conexant HD Audio снова работать, это отключить улучшения звука. Это очень простое решение, и все, что вам нужно сделать, это:
-
Щелкните правой кнопкой мыши значок Динамики на панели задач и откройте Устройства воспроизведения.
- Откройте устройство воспроизведения по умолчанию, дважды щелкнув по нему
- Перейдите на вкладку Расширения и установите флажок Отключить все улучшения .
- Нажмите OK и перезагрузите компьютер

Теперь попробуйте, если ваш Conexant HD Audio работает, если нет, попробуйте некоторые из следующих решений.
Решение 3 – Изменить максимальный объем памяти
Другим обходным решением, которое может помочь вам избавиться от проблемы со звуком в Conexant HD Audio (и других аудиодрайверах, в том числе), является изменение максимального объема памяти при загрузке. Вот что вам нужно сделать, чтобы изменить максимальную память:
- Перейдите в Поиск, введите msconfig и откройте Конфигурация системы
- Перейдите на вкладку Boot
-
Нажмите Дополнительные параметры
-
Установите для Максимальный объем памяти значение 3072 (это лучший вариант)
- Перезагрузите компьютер.


– СВЯЗАН: полное исправление. Аудио Skype не работает в Windows 10, 8.1, 7 .
Решение 4 – Изменить формат звука по умолчанию
Если ни одно из вышеуказанных решений не сработало, вы также можете попробовать другое. Возможно, изменение формата звука по умолчанию поможет вам. Вот что вам нужно сделать, чтобы изменить стандартный звуковой формат вашей системы:
- Щелкните правой кнопкой мыши значок Динамики на панели задач и откройте Устройства воспроизведения .
- Откройте устройство воспроизведения по умолчанию, дважды щелкнув по нему
- Перейдите на вкладку Дополнительно .
-
Измените битрейт в разделе Формат звука по умолчанию , пока не найдете тот, который работает
- Нажмите ОК.

Вот и все, мы уже показали вам, как решить проблемы с микрофоном Conexant HD, и теперь, я надеюсь, эта статья также поможет вам решить проблемы со звуком.
Решение 5 – Переустановите драйвер Conexant HD
Иногда, просто переустановка драйвера Conexant HD может решить проблему. Вот как это сделать:
- Нажмите клавишу с логотипом Windows, введите в поле поиска «Диспетчер устройств» и откройте его.
- Разверните раздел «Звуковые, видео и игровые устройства»
-
Щелкните правой кнопкой мыши на «Conexant Smart Audio HD» и выберите «Удалить драйвер»
- Теперь перейдите в View> Scan для изменений оборудования. Выбор этой опции позволяет автоматически переустанавливать последние аудио драйверы.

Решение 6 – Запустите средство устранения неполадок аудио
Еще одно быстрое решение – просто запустить встроенный в Windows 10 инструмент устранения неполадок со звуком.Для этого перейдите в Настройки> Обновление и безопасность> Устранение неполадок.

Если у вас есть какие-либо другие проблемы, связанные с Windows 10, вы можете найти решение в разделе исправлений Windows 10.
После обновления системы до Windows 10 или выполнения обновления Windows 10, если у вас нет проблем со звуком в Conexant SmartAudio HD, вы можете попробовать следующие решения
решить проблему.
Решение 1. Обновите драйвер Conexant SmartAudio HD
Проблема, скорее всего, вызвана проблемами с драйверами. Обновление или обновление Windows может удалить драйвер или привести к его несовместимости. Таким образом, обновление драйвера Conexant SmartAudio HD в основном вернет звук.
Обычно вы можете скачать драйверы от производителя устройства или производителя ПК. Conexant не производит самих водителей. Если вы используете фирменный компьютер, перейдите на веб-сайт производителя вашего ПК, чтобы загрузить драйвер. Если нет, вы можете зайти на сайт производителя материнской платы, чтобы загрузить драйвер. Драйверы всегда можно скачать в разделе «Поддержка» или «Скачать» на веб-сайте.
Если вы не знаете, как обновить драйвер вручную, вы можете использовать Водитель Легко чтобы помочь вам. Driver Easy — это средство обновления драйверов, совместимое с Windows 10. Вы можете использовать его для сканирования вашего компьютера, чтобы обнаружить проблемные драйверы на вашем компьютере. Если драйвер Conexant SmartAudio HD отсутствует или устарел, он предоставит вам новый драйвер для обновления.

Driver Easy имеет бесплатную версию и профессиональную версию. Если вы хотите, чтобы все драйверы загружались и устанавливались автоматически, рекомендуется использовать версию Professional. С Профессиональной версией вы можете получить бесплатную гарантию технической поддержки и 30-дневную гарантию возврата денег. Служба поддержки Driver Easy Professional предоставит вам дальнейшую помощь в отношении вашего Conexant SmartAudio HD без проблем со звуком, если вам нужно.
Решение 2. Отключите все улучшения звука
1. Щелкните правой кнопкой мыши значок звука в правом нижнем углу рабочего стола и выберите Устройства воспроизведения.

2. Выберите Компьютерные колонки (Должен показать Conexant SmartAudio HD) и щелкните по нему правой кнопкой мыши. Нажмите свойства во всплывающем меню.

3. Нажмите Улучшения Вкладка. Установите флажок рядом с Отключить все улучшения (Для некоторых версий Windows вы можете увидеть Отключить все звуковые эффекты здесь.), затем нажмите Применять кнопка.

Приведенные выше решения могут помочь решить проблему отсутствия звука в Conexant SmartAudio HD для Windows 10.
[SOLVED] «A Conexant audio device could not be found. The application will now exit» ?
-
Thread starterJ-Po
-
Start dateApr 19, 2021
-
#1
I bought a brand new Lenovo Yoga Thinkpad L13 running Windows 10 a few months ago and yesterday I started getting an annoying pop up that says «A Conexant audio device could not be found. The application will now exit.» I close the pop up and it comes back immediately.
The pop up seems to appear after I wake my computer up from sleep and I’ve also noticed that although my volume still works, it now seems lower than normal (I have to put it all the way up to top volume to hear properly, when I didn’t have to do that before yesterday).
I found something online dated a year ago that said Windows 10 version 2004 (which is what I have) has issues with certain Conexant audio drivers, but it didn’t offer any solutions and I’m not a big techie and I have no idea how to fix this issue.
Can anyone please help?
Thank you!
Jenny

-
- Sep 7, 2013
-
- 25,810
-
- 795
-
- 113,290
- 8,660
-
#2
-
- Jan 27, 2021
-
- 384
-
- 50
-
- 1,890
- 29
-
#3
Last edited: Apr 20, 2021
-
#4
-
- Jan 27, 2021
-
- 384
-
- 50
-
- 1,890
- 29
-
#5
Thank you both — that did the trick!
No problem, I’m glad we could offer assistance!
-
#6
I went to the Lenovo site and updated my drivers and I initiated available Windows 10 updates, and yet I’m still getting the pop-up. Any more ideas?
-
- Jan 27, 2021
-
- 384
-
- 50
-
- 1,890
- 29
-
#7
Oh — shoot. I spoke too soon!I went to the Lenovo site and updated my drivers and I initiated available Windows 10 updates, and yet I’m still getting the pop-up. Any more ideas?
Hi again! Whenever you get a chance, could you share a photo of the pop-up? You can try doing this as well:
- Go to Lenovo’s PC support page: https://pcsupport.lenovo.com/us/en/
- Enter your Laptop serial number in the box and click search/press enter (to find it, press the Windows key + R, type cmd.exe, and press enter. Next type/paste the following command into the prompt: wmic bios get serialnumber — the part underneath «Serial Number» is what you want)
- On the webpage, select «Drivers & Software»
- Next click «Manual Update»
- Click on «Audio» then expand the dropdown menu for the driver listed there (if there are multiple drivers, select the newest one)
- On the dropdown menu, click the Download icon for the driver (not the read me file)
- After it downloads, run the .exe file and follow the prompts to install it.4
Edit: It would also probably be good to reboot your computer after installing drivers.
Last edited: Apr 21, 2021
-
#8
Hi again! Whenever you get a chance, could you share a photo of the pop-up? You can try doing this as well:
- Go to Lenovo’s PC support page: https://pcsupport.lenovo.com/us/en/
- Enter your Laptop serial number in the box and click search/press enter (to find it, press the Windows key + R, type cmd.exe, and press enter. Next type/paste the following command into the prompt: wmic bios get serialnumber — the part underneath «Serial Number» is what you want)
- On the webpage, select «Drivers & Software»
- Next click «Manual Update»
- Click on «Audio» then expand the dropdown menu for the driver listed there (if there are multiple drivers, select the newest one)
- On the dropdown menu, click the Download icon for the driver (not the read me file)
- After it downloads, run the .exe file and follow the prompts to install it.4
Edit: It would also probably be good to reboot your computer after installing drivers.
Hi Cj-tech,
Thank for the very clear instructions!
Here is the pop up:

I followed your instructions. There were 3 downloads listed under «Audio» and I downloaded the top one, then ran a scan for “Automatic updates” and was told I should download the second one, so I did that too.

Yet I’m still getting the pop up and when I look under “Audio” all 3 of the drivers are still listed there as if needing an update. Today I ran a scan under “Automatic” driver update and was told I need this update, so I did that:

Now according to the “Automatic driver update” page, I don’t need any more updates, but those 3 driver updates are STILL listed under “Manual driver update” > “Audio.” Shouldn’t they disappear after I’ve downloaded them and done the updates?

-
- Jan 27, 2021
-
- 384
-
- 50
-
- 1,890
- 29
-
#9
Hi Cj-tech,Thank for the very clear instructions!
Here is the pop up:
No problem, thanks for providing that screenshot.
I followed your instructions. There were 3 downloads listed under «Audio» and I downloaded the top one, then ran a scan for “Automatic updates” and was told I should download the second one, so I did that too.
It looks like you have the right drivers installed.
Yet I’m still getting the pop up and when I look under “Audio” all 3 of the drivers are still listed there as if needing an update. Today I ran a scan under “Automatic” driver update and was told I need this update, so I did that:
Now according to the “Automatic driver update” page, I don’t need any more updates, but those 3 driver updates are STILL listed under “Manual driver update” > “Audio.” Shouldn’t they disappear after I’ve downloaded them and done the updates?
I do not know if they should disappear after you have installed them. They may remain there so you can install older updates if you ever have the need to do so…. It seems to me that the old drivers or software may have been removed and the popup is saying that it can’t find the software. Have you tried clicking the popup if it’s clickable?
You can try running the sound troubleshooter by typing «fix sound» into the search box and selecting it from the list of options.
At one point, I had a similar issue after uninstalling the NVIDIA GeForce Experience program on my laptop. It constantly displayed pop-ups at startup until I reinstalled the program. If you uninstalled anything recently that may be related to the audio issue, you can try to reinstall it.
One method that could work is to re-install Windows 10 which will keep your files and programs but remove unnecessary files (like the one that causes the pop-up). On the official download page, scroll down to and click the button that says «Download Tool Now.» Follow the prompts and choose to «Upgrade this PC Now.» Make sure to select the option to keep all your files and data in one of the later prompts. This will take a few hours, if you need to use your computer, don’t do this right now. If you do decide to try this, make sure to leave the computer plugged in and do not power it down during the process. Also, in the case that something goes wrong (i.e. your files aren’t saved, which is rare), it is always good to have your files saved somewhere else — especially important files.
If nothing in this post works, I do not think I will be able to assist you any further. Best of luck!
-
- Jul 20, 2021
-
- 1
-
- 0
-
- 10
- 0

-
#10
-
#11
Hello @J-Po , did you finally solve your issue with the last instructions from @Cj-tech as I am experiencing the same issue on my new L13 Yoga. Hoping I don’t need to reinstall windows to fix it tho.
Hi there,
Oh shoot! I forgot to come back and mark this as ‘solved,’ but yes my issue was fixed! To be honest, I don’t completely remember what finally did it, but I have a vague memory that I just repeated all of the steps that @Cj-tech recommended a couple of times and then the pop ups stopped (without me having to reinstall windows).
Best of luck to you!
-
#12
Type: ‘Services’ in Windows search box (may or may not have to choose ‘run as administrator’)
Find the two programs below (CxAudioSvc & CxUtilSvc)
Open each one by either double clicking or Right clicking, then open properties
From Properties, click on ‘stop’ from running (can also right click and select ‘stop’)
Change startup type for each one from ‘automatic’ to ‘disabled’


| Thread starter | Similar threads | Forum | Replies | Date |
|---|---|---|---|---|
|
R
|
Question I work as a DJ and latencymon is having issues with my audio, I keep getting crackles and pops when I DJ at work ? | Laptop Tech Support | 17 | Jan 24, 2023 |
|
|
Question clicking sound coming from laptop when playing audio or video | Laptop Tech Support | 5 | Jan 6, 2023 |
|
S
|
Question audio playback delays half a second and skips (sometimes) | Laptop Tech Support | 2 | Jan 5, 2023 |
|
P
|
Question ASUS G513 Audio Crackling/Popping | Laptop Tech Support | 7 | Dec 6, 2022 |
|
|
Question External Mic Inputs on laptop are Not Detected by Windows? | Laptop Tech Support | 0 | Nov 14, 2022 |
|
|
Question Realtek audio issue | Laptop Tech Support | 8 | Nov 10, 2022 |
|
|
Question How to solve an audio bug on a laptop? | Laptop Tech Support | 1 | Oct 22, 2022 |
|
K
|
Question Mouse randomly disconnects along with audio ? | Laptop Tech Support | 1 | Oct 14, 2022 |
|
N
|
Question Can audio vibrations damage a laptop over time? | Laptop Tech Support | 1 | Aug 16, 2022 |
|
|
Question Videos buffer for a long time before they start to play ? | Laptop Tech Support | 2 | Aug 12, 2022 |


- Advertising
- Cookies Policies
- Privacy
- Term & Conditions
- Topics
Hello zip19709,
Every time when you start your computer, if you get error message saying “Failed to create Conexant Audio Factory, The SmartAudio will now exit”, you can find the solutions here how to fix this issue.
The error message may also appear like this: A Conexant audio device could not be found. The application will now exit.
This issue would occur if service “CxUtilSvc” is not running when you start Windows. “CxUtilSvc” is short for “Conexant Utility Service”. It is developed by Conexant Systems, Inc, the manufacturer of Conexant sound card. So if this service isn’t started, you would meet the issue. You can check and see if the service starts. Start it if necessary then the problem issue should resolve.
Following steps are for your reference how to start service “CxUtilSvc”.
1. Press Win+R (Windows key and R key) at the same time. A Run dialog will appear.
2. Type services.msc in the run box. Click on OK button. Then Services window will open.
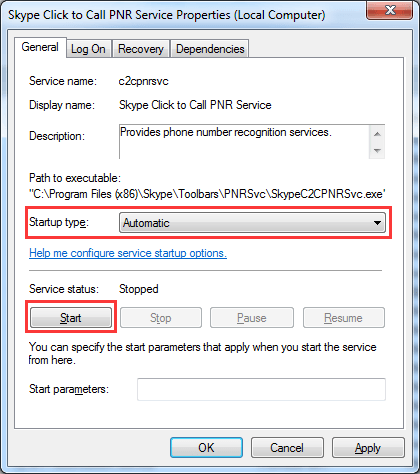
3. In Services window, check the list for “CxUtilSvc” and double click on it. The Properties window will open.
4. In Properties window, click on the Start button if the service is stopped.
Change the Startup Type value to Automatic.
5. Click on Apply and OK button.
6. Restart your computer.
The error would also occur due to driver issues. The audio driver you have installed may be corrupted or incompatible with your operating system. To resolve the problem, you can try uninstalling the Conexant audio driver and installing it again.
You can follow steps below to uninstall the Conexant driver.
1. Press Win+R (Windows key and R key) at the same time. A Run dialog will appear.
2. Type devmgmt.msc in the run box. Click on OK button. Then Device Manager window will open.
3. Expand category Sound, video and game controllers. Under this category, you will find Conexant High Definition SmartAudio Drivers. Right-click on it and then select Uninstall.
4. In the Uninstall window, check the box next to Delete the driver software for this device. Then click on OK button.
5. After uninstalling the driver, restart the computer. Usually, the windows will load the audio driver automatically after it reboots. Then update the driver to the latest version.
Conexant High-Definition (HD) Audio Driver
http://h20564.www2.hp.com/hpsc/swd/public/detail?sp4ts.oid=8693767&swItemId=ob_174693_1&swEnvOid=419…
Hope this helps, for any further queries reply to the post and feel free to join us again
**Click the White Thumbs Up Button on the right to say Thanks**
Make it easier for other people to find solutions by marking a Reply ‘Accept as Solution’ if it solves your problem.
Thank You,
GBL84
I am not an HP Employee
Hello zip19709,
Every time when you start your computer, if you get error message saying “Failed to create Conexant Audio Factory, The SmartAudio will now exit”, you can find the solutions here how to fix this issue.
The error message may also appear like this: A Conexant audio device could not be found. The application will now exit.
This issue would occur if service “CxUtilSvc” is not running when you start Windows. “CxUtilSvc” is short for “Conexant Utility Service”. It is developed by Conexant Systems, Inc, the manufacturer of Conexant sound card. So if this service isn’t started, you would meet the issue. You can check and see if the service starts. Start it if necessary then the problem issue should resolve.
Following steps are for your reference how to start service “CxUtilSvc”.
1. Press Win+R (Windows key and R key) at the same time. A Run dialog will appear.
2. Type services.msc in the run box. Click on OK button. Then Services window will open.
3. In Services window, check the list for “CxUtilSvc” and double click on it. The Properties window will open.
4. In Properties window, click on the Start button if the service is stopped.
Change the Startup Type value to Automatic.
5. Click on Apply and OK button.
6. Restart your computer.
The error would also occur due to driver issues. The audio driver you have installed may be corrupted or incompatible with your operating system. To resolve the problem, you can try uninstalling the Conexant audio driver and installing it again.
You can follow steps below to uninstall the Conexant driver.
1. Press Win+R (Windows key and R key) at the same time. A Run dialog will appear.
2. Type devmgmt.msc in the run box. Click on OK button. Then Device Manager window will open.
3. Expand category Sound, video and game controllers. Under this category, you will find Conexant High Definition SmartAudio Drivers. Right-click on it and then select Uninstall.
4. In the Uninstall window, check the box next to Delete the driver software for this device. Then click on OK button.
5. After uninstalling the driver, restart the computer. Usually, the windows will load the audio driver automatically after it reboots. Then update the driver to the latest version.
Conexant High-Definition (HD) Audio Driver
http://h20564.www2.hp.com/hpsc/swd/public/detail?sp4ts.oid=8693767&swItemId=ob_174693_1&swEnvOid=419…
Hope this helps, for any further queries reply to the post and feel free to join us again
**Click the White Thumbs Up Button on the right to say Thanks**
Make it easier for other people to find solutions by marking a Reply ‘Accept as Solution’ if it solves your problem.
Thank You,
GBL84
I am not an HP Employee