I’m trying to manually add an individual email error message to my model but nothing is displaying in the view.
I think it may be how I’m creating or attached the ObjectError to the BindingResult.
I’m adding the error inside the catch.
Here is the contents of result.errors when I leave email field empty and JSR-303 annotations kick in (error displays in view):
[Field error in object 'user' on field 'email': rejected value []; codes [NotEmpty.user.email,NotEmpty.email,NotEmpty.java.lang.String,NotEmpty]; arguments [org.springframework.context.support.DefaultMessageSourceResolvable: codes [user.email,email]; arguments []; default message [email]]; default message [may not be empty]]
Here is the contents of of result.errors after I manually add the ErrorObject(email error does not display in view):
[Error in object 'email': codes []; arguments []; default message [An account already exists for this email.]]
Controller:
@RequestMapping(value = "/registration", method = RequestMethod.POST)
    public ModelAndView post(@Valid User user, BindingResult result)
    {

        if (result.hasErrors())
        {
            ModelAndView modelAndView = new ModelAndView(
                    Consts.MODEL_RESISTER_PAGE);
            modelAndView.addObject("user", user);
            return modelAndView;
        }
        else
        {
            try
            {
                userService.addUser(user);

                ModelAndView modelAndView = new ModelAndView(
                        Consts.MODEL_CARD_REPORTS_HOME_PAGE);
                modelAndView.addObject("userRegisteredSuccess", Boolean.TRUE);

                return modelAndView;
            }
            catch (DataIntegrityViolationException ex)
            {
                ObjectError error = new ObjectError("email","An account already exists for this email.");

                result.addError(error);

                ModelAndView modelAndView = new ModelAndView(
                        Consts.MODEL_RESISTER_PAGE);

                modelAndView.addAllObjects(result.getModel());
                modelAndView.addObject("user", user);

                return modelAndView;
            }
        }
    }
My Model:
@Entity
public class User implements Serializable
{
    /**
     *
     */
    private static final long serialVersionUID = -5232533507244034448L;

    @Id
    @GeneratedValue(strategy = GenerationType.AUTO)
    private Long id;

    @NotEmpty
    @Size(min=2, max=15)
    private String firstname;

    @NotEmpty
    @Size(min=2, max=15)
    private String surname;

    @NotEmpty
    @Email
    private String email;

    @NotEmpty
    @Size(min=6, max=10)
    private String password;

    public Long getId()
    {
        return id;
    }

    public void setId(Long id)
    {
        this.id = id;
    }

    public String getFirstname()
    {
        return firstname;
    }

    public void setFirstname(String firstname)
    {
        this.firstname = firstname;
    }

    public String getSurname()
    {
        return surname;
    }

    public void setSurname(String surname)
    {
        this.surname = surname;
    }

    public String getEmail()
    {
        return email;
    }

    public void setEmail(String email)
    {
        this.email = email;
    }

    public String getPassword()
    {
        return password;
    }

    public void setPassword(String password)
    {
        this.password = password;
    }
}
File add.html
<form id="registrationForm" action="#" th:action="@{/registration}" th:object="${user}" method="post" class="clearfix">
    <legend>Registration</legend>

    <div class="control-group input" th:class="${#fields.hasErrors('firstname')}? 'control-group input error'">
      <input type="text" th:field="*{firstname}" placeholder="Firstname" />
      <span class="help-block" th:if="${#fields.hasErrors('firstname')}" th:errors="*{firstname}"></span>
    </div>

    <div class="control-group input" th:class="${#fields.hasErrors('surname')}? 'control-group input error'">
      <input type="text" th:field="*{surname}" placeholder="Surname" />
      <span class="help-block" th:if="${#fields.hasErrors('surname')}" th:errors="*{surname}"></span>
    </div>

    <div class="control-group input" th:class="${#fields.hasErrors('email')}? 'control-group input error'">
      <input type="text" th:field="*{email}" placeholder="Email" />
      <span class="help-block" th:if="${#fields.hasErrors('email')}" th:errors="*{email}"></span>
    </div>

    <div class="control-group input" th:class="${#fields.hasErrors('password')}? 'control-group input error'">
        <input type="password" th:field="*{password}" placeholder="Password" />
        <span class="help-block" th:if="${#fields.hasErrors('password')}" th:errors="*{password}"></span>
    </div>

    <div class="clearfix">
      <input type="submit" class="btn btn-success btn-large" value="Register" />
    </div>
</form>
The following example shows how to use Error Handling and Validators in forms using the Spring Web MVC Framework. To start with, let us have a working Eclipse IDE in place and consider the following steps to develop a Dynamic Form based Web Application using the Spring Web Framework.
| Step | Description |
|---|---|
| 1 | Create a project with a name HelloWeb under a package com.tutorialspoint as explained in the Spring MVC — Hello World chapter. |
| 2 | Create Java classes Student, StudentController and StudentValidator under the com.tutorialspoint package. |
| 3 | Create view files addStudent.jsp, result.jsp under the jsp sub-folder. |
| 4 | The final step is to create the content of the source and configuration files and export the application as explained below. |
Student.java
package com.tutorialspoint;

public class Student {
   private Integer age;
   private String name;
   private Integer id;

   public void setAge(Integer age) {
      this.age = age;
   }
   public Integer getAge() {
      return age;
   }

   public void setName(String name) {
      this.name = name;
   }
   public String getName() {
      return name;
   }

   public void setId(Integer id) {
      this.id = id;
   }
   public Integer getId() {
      return id;
   }
}
StudentValidator.java
package com.tutorialspoint;
import org.springframework.validation.Errors;
import org.springframework.validation.ValidationUtils;
import org.springframework.validation.Validator;
public class StudentValidator implements Validator {
@Override
public boolean supports(Class<?> clazz) {
return Student.class.isAssignableFrom(clazz);
}
@Override
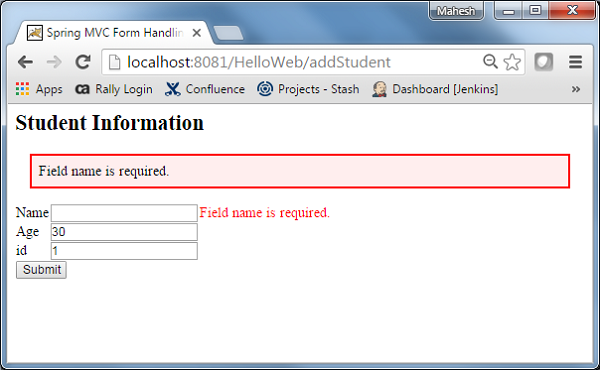
public void validate(Object target, Errors errors) {
ValidationUtils.rejectIfEmptyOrWhitespace(errors,
"name", "required.name","Field name is required.");
}
}
StudentController.java
package com.tutorialspoint;

import org.springframework.beans.factory.annotation.Autowired;
import org.springframework.beans.factory.annotation.Qualifier;
import org.springframework.stereotype.Controller;
import org.springframework.ui.Model;
import org.springframework.validation.BindingResult;
import org.springframework.validation.Validator;
import org.springframework.validation.annotation.Validated;
import org.springframework.web.bind.WebDataBinder;
import org.springframework.web.bind.annotation.InitBinder;
import org.springframework.web.bind.annotation.ModelAttribute;
import org.springframework.web.bind.annotation.RequestMapping;
import org.springframework.web.bind.annotation.RequestMethod;
import org.springframework.web.servlet.ModelAndView;

@Controller
public class StudentController {

   @Autowired
   @Qualifier("studentValidator")
   private Validator validator;

   @InitBinder
   private void initBinder(WebDataBinder binder) {
      binder.setValidator(validator);
   }

   @RequestMapping(value = "/addStudent", method = RequestMethod.GET)
   public ModelAndView student() {
      return new ModelAndView("addStudent", "command", new Student());
   }

   @ModelAttribute("student")
   public Student createStudentModel() {
      return new Student();
   }

   @RequestMapping(value = "/addStudent", method = RequestMethod.POST)
   public String addStudent(@ModelAttribute("student") @Validated Student student,
      BindingResult bindingResult, Model model) {

      if (bindingResult.hasErrors()) {
         return "addStudent";
      }
      model.addAttribute("name", student.getName());
      model.addAttribute("age", student.getAge());
      model.addAttribute("id", student.getId());

      return "result";
   }
}
HelloWeb-servlet.xml
<beans xmlns = "http://www.springframework.org/schema/beans"
   xmlns:context = "http://www.springframework.org/schema/context"
   xmlns:xsi = "http://www.w3.org/2001/XMLSchema-instance"
   xsi:schemaLocation = "
   http://www.springframework.org/schema/beans
   http://www.springframework.org/schema/beans/spring-beans-3.0.xsd
   http://www.springframework.org/schema/context
   http://www.springframework.org/schema/context/spring-context-3.0.xsd">

   <context:component-scan base-package = "com.tutorialspoint" />

   <bean class = "org.springframework.web.servlet.view.InternalResourceViewResolver">
      <property name = "prefix" value = "/WEB-INF/jsp/" />
      <property name = "suffix" value = ".jsp" />
   </bean>

   <bean id = "studentValidator" class = "com.tutorialspoint.StudentValidator" />
</beans>
Here, for the first service method student(), we have passed a blank Studentobject in the ModelAndView object with name «command», because the spring framework expects an object with name «command», if you are using <form:form> tags in your JSP file. So, when student() method is called, it returns addStudent.jsp view.
The second service method addStudent() will be called against a POST method on the HelloWeb/addStudent URL. You will prepare your model object based on the submitted information. Finally, a «result» view will be returned from the service method, which will result in rendering the result.jsp. In case there are errors generated using validator then same view «addStudent» is returned, Spring automatically injects error messages from BindingResult in view.
addStudent.jsp
<%@taglib uri = "http://www.springframework.org/tags/form" prefix = "form"%>
<html>
<head>
<title>Spring MVC Form Handling</title>
</head>
<style>
.error {
color: #ff0000;
}
.errorblock {
color: #000;
background-color: #ffEEEE;
border: 3px solid #ff0000;
padding: 8px;
margin: 16px;
}
</style>
<body>
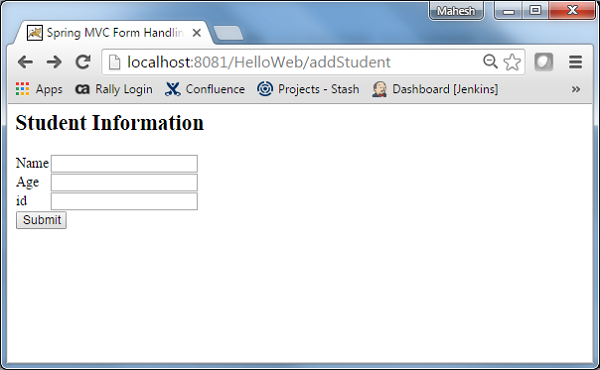
<h2>Student Information</h2>
<form:form method = "POST" action = "/HelloWeb/addStudent" commandName = "student">
<form:errors path = "*" cssClass = "errorblock" element = "div" />
<table>
<tr>
<td><form:label path = "name">Name</form:label></td>
<td><form:input path = "name" /></td>
<td><form:errors path = "name" cssClass = "error" /></td>
</tr>
<tr>
<td><form:label path = "age">Age</form:label></td>
<td><form:input path = "age" /></td>
</tr>
<tr>
<td><form:label path = "id">id</form:label></td>
<td><form:input path = "id" /></td>
</tr>
<tr>
<td colspan = "2">
<input type = "submit" value = "Submit"/>
</td>
</tr>
</table>
</form:form>
</body>
</html>
Here we are using <form:errors /> tag with path=»*» to render error messages. For example
<form:errors path = "*" cssClass = "errorblock" element = "div" />
It will render the error messages for all input validations.
We are using <form:errors /> tag with path=»name» to render error message for name field. For example
<form:errors path = "name" cssClass = "error" />
It will render error messages for the name field validations.
result.jsp
<%@taglib uri = "http://www.springframework.org/tags/form" prefix = "form"%>
<html>
   <head>
      <title>Spring MVC Form Handling</title>
   </head>
   <body>

      <h2>Submitted Student Information</h2>
      <table>
         <tr>
            <td>Name</td>
            <td>${name}</td>
         </tr>
         <tr>
            <td>Age</td>
            <td>${age}</td>
         </tr>
         <tr>
           <td>ID</td>
           <td>${id}</td>
         </tr>
      </table>
   </body>
</html>
Once you are done with creating source and configuration files, export your application. Right click on your application, use Export → WAR File option and save the HelloWeb.war file in Tomcat’s webapps folder.
Now, start your Tomcat server and make sure you are able to access other webpages from webapps folder using a standard browser. Try a URL − http://localhost:8080/HelloWeb/addStudent and we will see the following screen, if everything is fine with the Spring Web Application.
After submitting the required information, click on the submit button to submit the form. You should see the following screen, if everything is fine with the Spring Web Application.
Проверка введенных данных
Этот урок освещает процесс создания web-приложения с поддержкой валидации.
Что вы создадите
Вы создадите простое Spring MVC приложение, которое принимает введенные пользователем данные и проверяет
их, используя стандартные аннотации для валидации. Вы также увидите, как отобразить сообщения об ошибке,
чтобы пользователь повторно ввел правильные данные.
Что вам потребуется
- Примерно 15 минут свободного времени
- Любимый текстовый редактор или IDE
- JDK 6 и выше
-
Gradle 1.11+ или
Maven 3.0+ - Вы также можете импортировать код этого урока, а также просматривать web-страницы прямо из
Spring Tool Suite (STS),
собственно как и работать дальше из него.
Как проходить этот урок
Как и большинство уроков по Spring, вы можете начать с
нуля и выполнять каждый шаг, либо пропустить базовые шаги, которые вам уже знакомы. В любом случае,
вы в конечном итоге получите рабочий код.
Чтобы начать с нуля, перейдите в Настройка проекта.
Чтобы пропустить базовые шаги, выполните следующее:
- Загрузите и
распакуйте архив с кодом этого урока, либо кнонируйте из репозитория с помощью
Git:
git clone https://github.com/spring-guides/gs-validating-form-input.git - Перейдите в каталог
gs-validating-form-input/initial - Забегая вперед, создайте объект Person
Когда вы закончите, можете сравнить получившийся результат с образцом в gs-validating-form-input/complete.
Настройка проекта
Для начала вам необходимо настроить базовый скрипт сборки. Вы можете использовать любую систему сборки,
которая вам нравится для сборки проетов Spring, но в этом уроке рассмотрим код для работы с
Gradle и
Maven. Если вы не знакомы ни с одним из них, ознакомьтесь
с соответсвующими уроками Сборка Java-проекта с использованием Gradle
или Сборка Java-проекта с использованием Maven.
Создание структуры каталогов
В выбранном вами каталоге проекта создайте следующую структуру каталогов; к примеру,
командой mkdir -p src/main/java/hello для *nix систем:
└── src
    └── main
        └── java
            └── hello
Создание файла сборки Gradle
Ниже представлен начальный файл сборки Gradle.
Файл pom.xml находится здесь.
Если вы используете Spring Tool Suite (STS),
то можете импортировать урок прямо из него.
Если вы посмотрите на pom.xml, вы найдете, что указана версия для maven-compiler-plugin.
В общем, это не рекомендуется делать. В данном случае он предназначен для решения проблем с нашей CI системы,
которая по умолчанию имеет старую(до Java 5) версию этого плагина.
build.gradle
buildscript {
    repositories {
        maven { url "http://repo.spring.io/libs-release" }
        mavenLocal()
        mavenCentral()
    }
    dependencies {
        classpath("org.springframework.boot:spring-boot-gradle-plugin:1.1.8.RELEASE")
    }
}

apply plugin: 'java'
apply plugin: 'eclipse'
apply plugin: 'idea'
apply plugin: 'spring-boot'

jar {
    baseName = 'gs-validating-form-input'
    version =  '0.1.0'
}

repositories {
    mavenLocal()
    mavenCentral()
    maven { url "http://repo.spring.io/libs-release" }
}

dependencies {
    compile("org.springframework.boot:spring-boot-starter-thymeleaf")
    compile("org.hibernate:hibernate-validator")
    compile("org.apache.tomcat.embed:tomcat-embed-el")
    testCompile("junit:junit")
}

task wrapper(type: Wrapper) {
    gradleVersion = '1.11'
}
Spring Boot gradle plugin
предоставляет множество удобных возможностей:
-
Он собирает все jar’ы в classpath и собирает единое, исполняемое «über-jar», что
делает более удобным выполнение и доставку вашего сервиса - Он ищет
public static void main()метод, как признак исполняемого класса -
Он предоставляет встроенное разрешение зависимостей, с определенными номерами версий для соответсвующих
Spring Boot зависимостей.
Вы можете переопределить на любые версии, какие захотите, но он будет по умолчанию для Boot
выбранным набором версий
Создание объекта Person
Приложение включает проверку пользовательских имени и возраста, т. о. ва необходимо создать класс, представляющего человека.
src/main/java/hello/Person.java
package hello;

import javax.validation.constraints.Min;
import javax.validation.constraints.NotNull;
import javax.validation.constraints.Size;

public class Person {

    @Size(min=2, max=30)
    private String name;

    @NotNull
    @Min(18)
    private Integer age;

    public String getName() {
        return this.name;
    }

    public void setName(String name) {
        this.name = name;
    }

    public Integer getAge() {
        return age;
    }

    public void setAge(Integer age) {
        this.age = age;
    }

    public String toString() {
        return "Person(Name: " + this.name + ", Age: " + this.age + ")";
    }

}
Класс Person имеет два атрибута: name и age. Они
помечены несколькими стандартными аннотациями валидации.
@Size(min=2, max=30)— длина имени от 2 до 30 символов@NotNull— недопустимость null значения, которое Spring MVC генерирует, если запись пуста@Min(18)— значение должно быть не меньше 18
Создание web контроллера
Теперь, когда вы описали сущность, пришло время создать простой web-контроллер.
src/main/java/hello/WebController.java
package hello;

import javax.validation.Valid;

import org.springframework.stereotype.Controller;
import org.springframework.validation.BindingResult;
import org.springframework.web.bind.annotation.RequestMapping;
import org.springframework.web.bind.annotation.RequestMethod;
import org.springframework.web.servlet.mvc.support.RedirectAttributes;
import org.springframework.web.servlet.config.annotation.ViewControllerRegistry;
import org.springframework.web.servlet.config.annotation.WebMvcConfigurerAdapter;

@Controller
public class WebController extends WebMvcConfigurerAdapter {

    @Override
    public void addViewControllers(ViewControllerRegistry registry) {
        registry.addViewController("/results").setViewName("results");
    }

    @RequestMapping(value="/", method=RequestMethod.GET)
    public String showForm(Person person) {
        return "form";
    }

    @RequestMapping(value="/", method=RequestMethod.POST)
    public String checkPersonInfo(@Valid Person person, BindingResult bindingResult) {
        if (bindingResult.hasErrors()) {
            return "form";
        }
        return "redirect:/results";
    }

}
Этот контроллер имеет GET и POST методы, оба относятся к /.
Метод showForm возвращает шаблон form. Он включает
Person в своей сигнатуре, что позволяет соответствующие атрибуты с Person.
Метод checkPersonInfo принимает два аргумента:
personобъект помечен как@Validдля получения заполненных
атрибутов из формыbindingResultобъектом вы можете проверить на ошибки и вернуть их
Вы можете вернуть все атрибуты из формы, связанной с объектом Person. В коде
вы проверяете на существование ошибок и, если они есть, то отправляете обратно шаблон
form. В данной ситуации все ошибки атрибутов отображены.
Если все атрибуты верны, то браузер перенаправляет на шаблон results.
Создание HTML формы
Теперь вы создадите «главную» страницу.
src/main/resources/templates/form.html
<html>
    <body>
        <form action="#" th:action="@{/}" th:object="${person}" method="post">
            <table>
                <tr>
                    <td>Name:</td>
                    <td><input type="text" th:field="*{name}" /></td>
                    <td th:if="${#fields.hasErrors('name')}" th:errors="*{name}">Name Error</td>
                </tr>
                <tr>
                    <td>Age:</td>
                    <td><input type="text" th:field="*{age}" /></td>
                    <td th:if="${#fields.hasErrors('age')}" th:errors="*{age}">Name Error</td>
                </tr>
                <tr>
                    <td><button type="submit">Submit</button></td>
                </tr>
            </table>
        </form>
    </body>
</html>
Страница содержит простую форму, где каждое поле расположена на отдельной строке таблицы.
Форма предназначена на отправку к /. Она представляет person
объект, который вы видели в GETметоде в web-контроллере. Форма представляет собой известную
bean-backed форму. В ней два поля Person бина,
th:field="*{name}" и th:field="*{age}". Следующие за ними поля
использованы для отображения любых ошибок валидации.
В итоге, вы нажимаете кнопку «Submit». Если введенные пользователем имя и возраст противоречат
ограничениям @Valid, то ему вернется та же страница, но с отображенными ошибками.
Если введенные имя и возраст правильны, то пользователь будет перенаправлен на следующую
web-страницу:
src/main/resources/templates/results.html
<html>
	<body>
		Congratulations! You are old enough to sign up for this site.
	</body>
</html>
Создание Application класса
В этом приложении вы используете язык шаблонов
Thymeleaf.
Этому приложению необходимо больше, чем просто HTML.
src/main/java/hello/Application.java
package hello;

import org.springframework.boot.SpringApplication;
import org.springframework.boot.autoconfigure.EnableAutoConfiguration;
import org.springframework.context.annotation.Bean;
import org.springframework.context.annotation.ComponentScan;
import org.springframework.context.annotation.Configuration;

@Configuration
@ComponentScan
@EnableAutoConfiguration
public class Application {

    public static void main(String[] args) throws Exception {
        SpringApplication.run(Application.class, args);
    }

}
Для активации Spring MVC вы обычно добавляете @EnableWebMvc к
Application классу. Но Spring Boot @EnableAutoConfiguration
уже добавляет эту аннотацию, когда обнаруживает spring-webmvc в вашем
classpath. Это приложение также содержит @ComponentScan, которая находит
аннотированные @Controller классы и их методы.
Thymeleaf конфигурация также обнаруживается через @EnableAutoConfiguration:
по умолчанию шаблоны расположены в templates/ и определяются как представления
без учета суффикса .html в имени файла. Настройки Thymeleaf могут быть изменены
и переопределены различными способами в зависимости от вашей задачи, но мы не будет
рассматривать это в данном уроке.
Сборка исполняемого JAR
Вы можете собрать единый исполняемый JAR-файл, который содержит все необходимые зависимости,
классы и ресурсы. Это делает его легким в загрузке, версионировании и развертывании сервиса как
приложения на протяжении всего периода разработки, на различных средах и так далее.
./gradlew build
Затем вы можете запустить JAR-файл:
java -jar build/libs/gs-validating-form-input-0.1.0.jar
Если вы используете Maven, вы можете запустить приложение, используя mvn spring-boot:run,
либо вы можете собрать приложение с mvn clean package и запустить JAR примерно так:
java -jar target/gs-validating-form-input-0.1.0.jar
Запуск сервиса
Если вы используете Gradle, вы можете запустить ваш сервис из командной строки:
./gradlew clean build && java -jar build/libs/gs-validating-form-input-0.1.0.jar
Если вы используете Maven, то можете запустить ваш сервис таким образом:
mvn clean package && java -jar target/gs-validating-form-input-0.1.0.jar.
Как вариант, вы можете запустить ваш сервис напрямую из Gradle примерно так:
./gradlew bootRun
С mvn — mvn spring-boot:run.
Приложение должно быть поднято и запущено через несколько секунд.
Если вы зайдете на http://localhost:8080/,
то должны увидеть следующее:

Что будет, если вы введете A для имени и 15 для возраста
и нажмете Submit?


Вы увидете это потому, что введенные значения нарушают ограничения в классе Person.
Если вы нажмете Submit c пустым значением поля ввода возраста, то получите другую ошибку.

Ели вы введете правильные имя и возраст, то отобразится results страница!

Итог
Поздравляем! Вы только что разработали простое web-приложение со встроенной проверкой в объекте.
Этим способом вы можете наделить данные соответствующими критериями для корректного ввода пользователем.
С оригинальным текстом урока вы можете ознакомиться на
spring.io.
comments powered by
So you’re developing a REST API with Spring Boot and now you need to know how to handle errors.
Good news: I’ll show you how to do that in this guide.
This is normally the point where I say «It’s easier than you think,» but truth be told if you want to handle errors properly, it’s going to require some up-front planning and extra development.
But once you’ve got the framework in place, you can start handling different errors with ease.
Let’s get started.
When a Status Code Isn’t Enough
After reading those last few sentences you might be thinking to yourself: «Well if it takes that much extra work, I’ll probably just send back an HTTP status code that describes the problem.»
And you certainly could go that route. But is that really enough?
Let’s say your REST API got a request that’s unauthorized. In that case, you’d just send back a 401 (Unauthorized) and leave it at that.
But that status code doesn’t explain why the request is unauthorized.
Were the credentials invalid? Was the JSON token missing? Was it expired? Did it have an invalid signature?
There are plenty of reasons why a request could be considered unauthorized. If your application just sends back a 401 with no explanation that doesn’t offer a whole lot of helpful advice.
Similarly, an invalid request (400) status code by itself just tells the client that the request was invalid. But it doesn’t say why.
In short: you need to send back more than just a status code.
On the Importance of a Response Status
When it comes to sending a response from your API, it’s a great idea to not just send the response itself, but to send a response status along with it.
Why? See above. You need to give your clients as much info as possible. That’s how the user will know how to take corrective action if there’s a problem.
And please note: the response status is not the same as the HTTP status code.
The response status includes a machine-readable code (like «SUCCESS») and some human-readable text (like «Registration successful!»).
The HTTP status code is a 3-digit number like 200 (OK), 400 (Bad Request), or 500 (Internal Server Error).
And yes, you need both the response status and the HTTP status code.
Here’s why: in the event of an unauthorized action (HTTP status code 401), you can send back a response status with a code (like «BAD_CREDENTIALS») and some explanatory text (like «Invalid username or password»).
So to emphasize the recurring theme here: the HTTP status code by itself isn’t good enough.
Now let’s take a look at some examples. Here’s an example of a successful response:
{
    "responseStatus": {
        "statusCode": "OK",
        "message": "Successfully registered!"
    },
    "response": {
        "id": "6164c4391160726f07cc3828",
        "username": "george",
        "firstName": "brian",
        "lastName": "carey",
        "email": "you@toohottohandle.com",
        "phoneNumber": "919-555-1212",
     }
}
And here’s an example of an error response:
{
    "responseStatus": {
        "statusCode": "ERROR",
        "message": "Validation error"
    },
    "response": [
        {
            "field": "lastName",
            "defaultMessage": "must not be null"
        }
    ]
}
Okay. Now that you know the requirements, it’s time to start putting some code together.
The Use Case
The use case for this API (and this guide) is to create an endpoint that handles new user registration.
Users who register will need to provide info in mandatory fields: first name, last name, username, phone number, password, and email address.
If the user doesn’t provide valid info, the API sends back an error response with an HTTP status of 400 (Bad Request). The response body will explain which fields are invalid and why.
Here’s the model class that represents the registration form:
public class Registrant {

    @NotNull
    @Size(min=1, max=32, message="First name must be between 1 and 32 characters")
    private String firstName;

    @NotNull
    @Size(min=1, max=32, message="Last name must be between 1 and 32 characters")
    private String lastName;

    @NotNull
    @Size(min=5, max=12, message="Username must be between 5 and 12 characters")
    private String username;

    @NotNull
    @Size(min=8, max=20, message="Password must be between 8 and 20 characters")
    private String password;

    @NotNull
    @Pattern(regexp = "^[_A-Za-z0-9-\+]+(\.[_A-Za-z0-9-]+)*@[A-Za-z0-9-]+(\.[A-Za-z0-9]+)*(\.[A-Za-z]{2,})$", message="Email address is invalid")
    private String emailAddress;

    @NotNull
    private String phone;

//getters and setters

}
The annotations handle the validations. If you’re unfamiliar with how all of that works, feel free to read all about validation in Spring Boot and then come on back here.
Now that you’ve got the model in place, it’s time to write the code that handles responses.
ResponseStatusCode
First up is ResponseStatusCode. It’s an enum that looks like this:
public enum ResponseStatusCode {
    OK, ERROR, UNAUTHORIZED;
}
Only three (3) status codes to keep things simple. But you’re free to use as many as you want.
You can also create various types of status codes. You might use numerical codes, for example. Or you might name the status codes after the members of your favorite K-Pop band.
It’s up to you.
The important thing is: you need to let the client developers know what each status code means so they can act accordingly.
ResponseStatus
The ResponseStatus class marries a status code to a message.
public class ResponseStatus {

    private ResponseStatusCode statusCode;
    private String message;

    public ResponseStatusCode getStatusCode() {
        return statusCode;
    }
    public void setStatusCode(ResponseStatusCode statusCode) {
        this.statusCode = statusCode;
    }
    public String getMessage() {
        return message;
    }
    public void setMessage(String message) {
        this.message = message;
    }
}
That’s pretty straightforward. And it represents the «responseStatus» field you saw in the example above.
RestResponse
Now you need to create a class that includes the three (3) important parts of every response:
- The response status
- The response itself
- The HTTP status code
Remember: the response status is not the same as the HTTP status code. See above.
Start by creating an interface that defines the methods returning those three (3) pieces of info:
public interface IRestResponse<T> {

    ResponseStatus getResponseStatus();
    T getResponse();
    int getHttpStatusCode();

}
There ain’t nothing too complicated about that.
But note that it’s using a generic (the <T> next to the interface name). What’s that all about?
Go back to the two sample responses above and take a look at the «response» fields. You’ll note that they’re different.
And that makes sense because the response could be anything. It might be a list of field errors or it might be details about a recently created user.
Because the response could be anything, it’s a great idea to use a generic when representing it in code so the compiler will complain if you’re inconsistent with your type references.
Now here’s a concrete implementation of that interface:
public class RestResponse<T> implements IRestResponse<T> {

    private ResponseStatus responseStatus;
    private T response;

    @JsonIgnore
    private int httpStatusCode;

    @Override
    public int getHttpStatusCode() {
        return httpStatusCode;
    }

    public void setHttpStatusCode(int httpStatusCode) {
        this.httpStatusCode = httpStatusCode;
    }

    @Override
    public T getResponse() {
        return response;
    }

    public void setResponse(T response) {
        this.response = response;
    }

    @Override
    public ResponseStatus getResponseStatus() {
        return responseStatus;
    }

    public void setResponseStatus(ResponseStatus responseStatus) {
        this.responseStatus = responseStatus;
    }

    public String toString() {
        return ReflectionToStringBuilder.toString(this);
    }
}
I’ve chosen to create just one implementation, but you might choose to do more than one. For example, you might have one implementation for error responses and another for success responses.
By the way: note the @JsonIgnore on top of httpStatusCode. You should include that so that the response body doesn’t show the HTTP status code. It doesn’t need to display the status code because it gets sent back with the response anyway.
ValidationError
The ValidationError class lives up to its name by representing a field validation error like the one you saw in the sample response above.
@JsonInclude(Include.NON_NULL)
public class ValidationError {

    private String field;
    private String code;
    private String defaultMessage;

//getters and setters

}
I’m not using the code property here but you’re welcome to use it if you need it.
The field property holds the name of the field with the validation error and the defaultMessage property holds the explanatory, human-readable text.
ValidationUtil
The ValidationUtil class includes convenience methods related to valdiation. Here’s a method that converts Spring’s BindingResult object to a List of ValidationError objects.
public class ValidationUtil {

    public static List<ValidationError> convertBindingResultToValidationErrors(BindingResult bindingResult) {
        List<ValidationError> errors = new ArrayList<>();

        if (bindingResult != null) {
            bindingResult.getFieldErrors().forEach(violation -> {
                String message = violation.getDefaultMessage();
                String field = violation.getField();

                ValidationError error = new ValidationError();
                //error.setCode(field);
                error.setDefaultMessage(message);
                error.setField(field);

                errors.add(error);
            });
        }

        return errors;
    }
}
I commented out the line that sets the code because, as I mentioned above, I’m not using that here.
Also note that the method returns an empty List, rather than a null, if there are no errors.
ResponseEntityUtil
The ResponseEntityUtil class includes convenience methods that create ResponseEntity objects.
If you’re unfamiliar with the ResponseEntity class, it’s part of the Spring framework. I use it as a convenient way to send back an HTTP status with a response at the same time.
Here’s a method in ResponseEntityUtil that creates a basic ResponseEntity with the three (3) important elements of a response:
    public static <T> ResponseEntity<IRestResponse<T>> createResponseEntity(IRestResponse<T> response) {
        return ResponseEntity
                    .status(HttpStatus.valueOf(response.getHttpStatusCode()))
                    .body(response);
    }
Once again: note the use of the generic. That’s important here because the T defines the type of response sent back.
Also keep in mind the ReponseEntity also uses a generic. The type parameter in the code above is IRestResponse.
That makes sense because, in this API, every response will include a response status, an HTTP status code, and the response itself. All three (3) of those pieces of info can be gleaned from an IRestResponse object.
The body of the method constructs the ResponseEntity object with the assistance of the status() static method. That method accepts the HTTP status as an int value.
Finally, the method sets the actual response with the body() method. That’s the part that gets included in the response body.
Here are a couple of convenience methods in ResponseEntityUtil for creating error and success response statuses:
    private static ResponseStatus getErrorResponseStatus(String message) {
        ResponseStatus status = new ResponseStatus();
        status.setMessage(message);
        status.setStatusCode(ResponseStatusCode.ERROR);

        return status;
    }


    private static ResponseStatus getSuccessResponseStatus(String message) {
        ResponseStatus status = new ResponseStatus();
        status.setMessage(message);
        status.setStatusCode(ResponseStatusCode.OK);

        return status;
    }
Both of those methods accept a String message that gets sent back with the response status. You saw examples of those messages in the sample responses above.
Here’s a convenience method that sends back a response with validation errors:
    public static ResponseEntity<IRestResponse<List<ValidationError>>> createResponseEntityWithValidationErrors(List<ValidationError> errors) {
        RestResponse<List<ValidationError>> fullResponse = new RestResponse<>();

        if (errors != null && errors.size() > 0) {
            ResponseStatus responseStatus = getErrorResponseStatus("Validation error");

            fullResponse.setResponse(errors);
            fullResponse.setResponseStatus(responseStatus);
            fullResponse.setHttpStatusCode(HttpStatus.BAD_REQUEST.value());
        }

        return createResponseEntity(fullResponse);
    }
That method starts off by creating a response status with the message «Validation error.»
After that, it populates the RestResponse object with the list of errors, the just-created response status, and an HTTP status code of 400 (Bad Request).
Then it invokes the createResponseEntity() method you already saw to construct the ResponseEntity object.
Here’s an example of a convenience method that returns a successful response:
    public static <T> ResponseEntity<IRestResponse<T>> createSuccessfulResponseEntity(String message, int httpStatusCode, T response) {
        ResponseStatus status = getSuccessResponseStatus(message);

        RestResponse<T> fullResponse = new RestResponse<>();
        fullResponse.setResponseStatus(status);
        fullResponse.setHttpStatusCode(httpStatusCode);
        fullResponse.setResponse(response);

        return createResponseEntity(fullResponse);
    }
That method accepts the response status message and the HTTP status code in addition to the response itself.
Why? Because a successful HTTP response status code could be a few different options in the 200’s. And the message itself might vary from one success to another.
Ground Controller to Major Tom
Thus far you’ve laid the groundwork, now let’s put it to use.
Here’s a controller method that creates a new user from a registration page in the application:
    @PostMapping("/")
    public ResponseEntity<IRestResponse<User>> createUser(@Valid @RequestBody Registrant registrant, BindingResult bindingResult) {
        LOG.debug("Registrant is " + registrant);

        List<ValidationError> validationErrors = ValidationUtil.convertBindingResultToValidationErrors(bindingResult);

        //look for any validations not caught by JSR 380
        registrantService.validateRegistrant(registrant, validationErrors);

        User savedUser = registrantService.saveUser(registrant);

        return ResponseEntityUtil.createSuccessfulResponseEntity("Successfully registered!", HttpStatus.CREATED.value(), savedUser);
    }
That’s a standard method that exposes an endpoint in a Spring Boot REST controller.
First, note that the method is annotated with @PostMapping because, like most requests that persist a new entity, it’s accepting an HTTP POST method.
The method returns a type of ResponseEntity. As I pointed out previously, that’s a great tool to use with Spring controllers.
And, of course, the ResponseEntity type parameter is IRestResponse. The IRestResponse definition the type parameter User because that’s what the client will get back in the event of a successful request.
The method, intuitively named createUser() accepts two parameters: a Registrant object and a BindingResult object.
The @Valid annotation in front of Registrant tells Spring to validate it. The @RequestBody annotation tells Spring that it needs to translate the JSON request body to that Java Registrant class you saw several sections ago.
The BindingResult class is where Spring stores the validation results. That’s all handled by the framework.
Inside the method, the code invokes that static convertBindingResultToValidationErrors() method that translates the BindingResult object to a List of ValidationError objects. You saw that method earlier.
Next, the code invokes the validateRegistrant() method on the RegistrantService object. In the event of any validation errors, that method will throw a runtime exception that Spring will translate to an error response. I’ll show you that in a moment.
In the meantime, you might be wondering why there’s another layer of validation. It’s for a good reason, and the comments above that validateRegistrant() line give the game away.
Those cute little annotations in the Registrant class will catch many validation errors. But they won’t catch all of them.
For example, you want to make sure the user doesn’t enter an email address that’s already in use. That doesn’t get handled with those annotations.
So that second layer of validation exists. Now let’s look at the code:
    public void validateRegistrant(Registrant registrant, List<ValidationError> errors) {
        validateUniqueName(errors, registrant);
        validateUniqueEmail(errors, registrant);
        validateRecaptcha(errors, registrant);

        LOG.debug("validation is " + errors);

        if (errors.size() > 0) {
            throw new InvalidRegistrantRequestException(errors);
        }
    }
There you see three additional validation checks (unique name, unique email address, and captcha validation).
You don’t need to know about the details of those methods. Just know that any failure in those validation checks results in a new ValidationError object going into the errors List.
After all the checks, the code looks at errors to see if it’s got anything in it (the size is more than 0). If so, it throws an InvalidRegistrantRequestException. Let’s look at that next.
InvalidRegistrantRequestException
InvalidRegistrantRequestException is a runtime exception. That’s why it doesn’t need to be caught in the code you see above.
Here’s what it looks like:
public class InvalidRegistrantRequestException extends RuntimeException {

    private List<ValidationError> errors;

    public InvalidRegistrantRequestException(List<ValidationError> errors) {
        super("Registrant validation failed!");
        this.errors = errors;
    }

    public List<ValidationError> getErrors() {
        return errors;
    }
}
As you can see, the public constructor accepts a list of validation errors. Those are the errors that get used to create the ResponseEntity object that eventually gets returned to the client.
But how does it get returned? With the aid of an exception handler.
The Exception Handler
The Spring framework makes it easy to handle exceptions and transform them into exactly the types of responses you need to send back to clients. One of the ways it does that is with the assistance of exception handlers.
Back in that same controller class you were looking at earlier, add this method:
    @ExceptionHandler(InvalidRegistrantRequestException.class)
    public ResponseEntity<IRestResponse<List<ValidationError>>> invalidRegistrant(InvalidRegistrantRequestException ex) {
        List<ValidationError> errors = ex.getErrors();
        return ResponseEntityUtil.createResponseEntityWithValidationErrors(errors);
    }
First of all, the way to identify a method that’s an exception handler is with the appropriately named @ExceptionHandler annotation.
But you also have to include the type of exception it handles. You’ll see that in the parentheses.
The method itself is structured like just about any other method in a controller. It accepts various input parameters and returns a ResponseEntity type.
Note that one of the parameters is the exception object itself. Yep, you can do that with an exception handler.
The body of the method uses that exception object to construct an error response using the createResponseEntityWithValidationErrors() method you saw earlier.
So to recap: if there are any validation errors at all, that method above gets called and the client receives an error response.
Back to the Other Part of the Controller
Let’s revisit that other method:
    @PostMapping("/")
    public ResponseEntity<IRestResponse<User>> createUser(@Valid @RequestBody Registrant registrant, BindingResult bindingResult) {
        LOG.debug("Registrant is " + registrant);

        List<ValidationError> validationErrors = ValidationUtil.convertBindingResultToValidationErrors(bindingResult);

        //look for any validations not caught by JSR 380
        registrantService.validateRegistrant(registrant, validationErrors);

        User savedUser = registrantService.saveUser(registrant);

        return ResponseEntityUtil.createSuccessfulResponseEntity("Successfully registered!", HttpStatus.CREATED.value(), savedUser);
    }
If registrantService.validateRegistrant() doesn’t throw an exception, the code above will persist the registrant as a User object.
And then it returns that persisted User object in a success response.
There’s the code. Now it’s time to test it out.
The Postman Always Rings Twice
Now fire up the Spring Boot application with all this wonderful new code. Then launch Postman to do some testing.
Start by creating a request that intentionally leaves out the last name. Like this:
{
    "firstName": "brian",
    "password": "allowishes",
    "emailAddress": "you@toohottohandle.com",
    "phone": "919-555-1212",
    "username": "george"
}
POST that to your endpoint and you should get something like this:
{
    "responseStatus": {
        "statusCode": "ERROR",
        "message": "Validation error"
    },
    "response": [
        {
            "field": "lastName",
            "defaultMessage": "must not be null"
        }
    ]
}
In fact, that’s exactly what I’m getting:

Pay attention to the HTTP status code where you see the red arrow. That’s exactly what it should be (400 for Bad Request).
Now make sure the array works. Take out the first name in addition to the last name and run it again.
You’ll get this:

Cool. So the API returns all validation errors at once. That gives the user the opportunity to fix them all at once.
Now try a successful response.

Awesome. It worked.
I should probably clear those nulls out of the response. But that’s something I can take care of later.
Wrapping It Up
This was a fairly lengthy guide. In the event I missed something, you’re more then welcome to look at the code I have on GitHub.
The utility classes/methods are in their own project and included as a dependency in the API. You can find them here.
If you want to see the API code (still a work in progress as of this writing), you can look at it here.
Then it’s up to you to write some code yourself. Take the patterns that you saw in this article and make them your own.
Have fun!
Photo by Poppy Thomas Hill from Pexels