- Type Parameters:
T— the body type
public class ResponseEntity<T>
extends HttpEntity<T>
Extension of HttpEntity that adds an HttpStatusCode status code.
Used in RestTemplate as well as in @Controller methods.
In RestTemplate, this class is returned by
getForEntity() and
exchange():
 ResponseEntity<String> entity = template.getForEntity("https://example.com", String.class);
 String body = entity.getBody();
 MediaType contentType = entity.getHeaders().getContentType();
 HttpStatus statusCode = entity.getStatusCode();
This can also be used in Spring MVC as the return value from an
@Controller method:
 @RequestMapping("/handle")
 public ResponseEntity<String> handle() {
   URI location = ...;
   HttpHeaders responseHeaders = new HttpHeaders();
   responseHeaders.setLocation(location);
   responseHeaders.set("MyResponseHeader", "MyValue");
   return new ResponseEntity<String>("Hello World", responseHeaders, HttpStatus.CREATED);
 }
Or, by using a builder accessible via static methods:
 @RequestMapping("/handle")
 public ResponseEntity<String> handle() {
   URI location = ...;
   return ResponseEntity.created(location).header("MyResponseHeader", "MyValue").body("Hello World");
 }
- Since:
- 3.0.2
- Author:
- Arjen Poutsma, Brian Clozel
- See Also:
-
getStatusCode()RestOperations.getForEntity(String, Class, Object...)RestOperations.getForEntity(String, Class, java.util.Map)RestOperations.getForEntity(URI, Class)RequestEntity
-
Nested Class Summary
Nested Classes
static interfaceDefines a builder that adds a body to the response entity.
static interfaceDefines a builder that adds headers to the response entity.
-
Field Summary
-
Constructor Summary
Constructors
Create a
ResponseEntitywith a status code only.Create a
ResponseEntitywith headers and a status code.Create a
ResponseEntitywith a body and status code.Create a
ResponseEntitywith a body, headers, and a raw status code.Create a
ResponseEntitywith a body, headers, and a status code. -
Method Summary
accepted()Create a builder with an ACCEPTED status.
created(URI location)Create a new builder with a CREATED status
and a location header set to the given URI.booleanReturn the HTTP status code of the response.
intinthashCode()noContent()notFound()A shortcut for creating a
ResponseEntitywith the given body
and the OK status, or an empty body and a
NOT FOUND status in case of an
Optional.empty() parameter.ok()Create a builder with the status set to OK.
ok(T body)A shortcut for creating a
ResponseEntitywith the given body
and the status set to OK.status(int status)Create a builder with the given status.
Create a builder with the given status.
toString()
-
Constructor Details
-
ResponseEntity
Create a
ResponseEntitywith a status code only.- Parameters:
status— the status code
-
ResponseEntity
Create a
ResponseEntitywith a body and status code.- Parameters:
body— the entity bodystatus— the status code
-
ResponseEntity
Create a
ResponseEntitywith headers and a status code.- Parameters:
headers— the entity headersstatus— the status code
-
ResponseEntity
Create a
ResponseEntitywith a body, headers, and a status code.- Parameters:
body— the entity bodyheaders— the entity headersstatus— the status code
-
ResponseEntity
Create a
ResponseEntitywith a body, headers, and a raw status code.- Parameters:
body— the entity bodyheaders— the entity headersrawStatus— the status code value- Since:
- 5.3.2
-
-
Method Details
-
getStatusCode
Return the HTTP status code of the response.
- Returns:
- the HTTP status as an HttpStatus enum entry
-
getStatusCodeValue
Return the HTTP status code of the response.
- Returns:
- the HTTP status as an int value
- Since:
- 4.3
-
equals
- Overrides:
equalsin classHttpEntity<T>
-
hashCode
public int hashCode()
- Overrides:
hashCodein classHttpEntity<T>
-
toString
- Overrides:
toStringin classHttpEntity<T>
-
status
Create a builder with the given status.
- Parameters:
status— the response status- Returns:
- the created builder
- Since:
- 4.1
-
status
Create a builder with the given status.
- Parameters:
status— the response status- Returns:
- the created builder
- Since:
- 4.1
-
ok
Create a builder with the status set to OK.
- Returns:
- the created builder
- Since:
- 4.1
-
ok
A shortcut for creating a
ResponseEntitywith the given body
and the status set to OK.- Parameters:
body— the body of the response entity (possibly empty)- Returns:
- the created
ResponseEntity - Since:
- 4.1
-
of
A shortcut for creating a
ResponseEntitywith the given body
and the OK status, or an empty body and a
NOT FOUND status in case of an
Optional.empty() parameter.- Returns:
- the created
ResponseEntity - Since:
- 5.1
-
of
- Parameters:
body— the problem detail to use- Returns:
- the created builder
- Since:
- 6.0
-
created
Create a new builder with a CREATED status
and a location header set to the given URI.- Parameters:
location— the location URI- Returns:
- the created builder
- Since:
- 4.1
-
accepted
Create a builder with an ACCEPTED status.
- Returns:
- the created builder
- Since:
- 4.1
-
noContent
Create a builder with a NO_CONTENT status.
- Returns:
- the created builder
- Since:
- 4.1
-
badRequest
- Returns:
- the created builder
- Since:
- 4.1
-
notFound
Create a builder with a NOT_FOUND status.
- Returns:
- the created builder
- Since:
- 4.1
-
unprocessableEntity
- Returns:
- the created builder
- Since:
- 4.1.3
-
internalServerError
- Returns:
- the created builder
- Since:
- 5.3.8
-
Create global or application-level Exception handlers and return Custom Error Messages in Spring REST APIs.
Overview
Effective communication is the key to healthy and efficient relationships. Interestingly, the same applies to any Client and Server relationships. The client’s request may succeed or fail on the server. However, the server should provide the most appropriate status code in either of the outcomes.
Although sending a correct status code is enough for a client to take real action based on the outcome of a request, in case of failures, the client may need more details about what went wrong. For example, failure details like the exception type and an error message can help clients log the error or provide appropriate failure messages to their clients.
This article will teach How to handle different failures and return Custom Error Messages from a Spring REST API. If you don’t know how to handle exceptions in Spring REST API, please read Spring Rest Service Exception Handling.
Return a Generic Error Message using @ResponseStatus
The most basic way of returning an error message from a REST API is to use the @ResponseStatus annotation. We can add the error message in the annotation’s reason field. Although we can only return a generic error message, we can specify exception-specific error messages.
Next is an example of a @ControllerAdvice using @ResponseStatus annotations to return exception-specific error messages.
Code language: Java (java)
@ControllerAdvice public class ApplicationExceptionHandler { @ResponseStatus( value = HttpStatus.NOT_FOUND, reason = "Requested Student Not Found") @ExceptionHandler(StudentNotFoundException.class) public void handleException(StudentNotFoundException e) { } @ResponseStatus( value = HttpStatus.BAD_REQUEST, reason = "Received Invalid Input Parameters") @ExceptionHandler(InputValidationException.class) public void handleException(InputValidationException e) { } @ResponseStatus( value = HttpStatus.GATEWAY_TIMEOUT, reason = "Upstream Service Not Responding, Try Again") @ExceptionHandler(ServiceUnavailableException.class) public void handleException(ServiceUnavailableException e) { } }
The Exception handler class has three exception handlers, each of which returns a specific HTTP Response Status. Each response status specifies a reason field with a particular error message.
To view the error message in the response, ensure you have turned on include-messages in the server configuration. To learn more about Spring Boot server configurations, please visit Spring Boot Embedded Tomcat Configuration.
server: error: include-message: alwaysCode language: YAML (yaml)
Next is an example of a response object the REST API returns. Note that the response object has the specified error message.
Code language: JSON / JSON with Comments (json)
{ "timestamp": "", "status": 404, "error": "Not Found", "message": "Requested Student Not Found", "path": "/students/Jack" }
Although we can specify exception-specific error messages, it is still not informative. Therefore in the following sections, we will learn how to return a more specific error message from Spring REST API.
Return Error Message Using Custom Error Object
Let’s create a class representing the error message and the status code. We will return an instance of that in case of errors.
Next is the Error class representing the status code and a String message. We use a few Lombok annotations that introduce regular getter and setter methods and a constructor using the final fields.
Custom Response Error Class
Code language: Java (java)
@Data @RequiredArgsConstructor public class Error { private final HttpStatus httpStatus; private final String message; }
Now that we have an error model created, we will use it to return a detailed error message from Controller Advice.
Code language: Java (java)
@ExceptionHandler(StudentNotFoundException.class) public ResponseEntity handleException( StudentNotFoundException e) { Error error = new Error(HttpStatus.NOT_FOUND, e.getLocalizedMessage()); return new ResponseEntity<>(error, error.getHttpStatus()); }
The exception handler returns an instance of the Error class populated with the exception message and HTTP Status Code.
Now, we can throw our Not Found Exception with a custom error message.
Code language: Java (java)
throw new StudentNotFoundException ("Student service failed, studentId : " + studentId);
When the REST API cannot find the requested resource, we get a detailed error as a response.
Code language: JSON / JSON with Comments (json)
{ "httpStatus": "NOT_FOUND", "message": "Student service failed, studentId : Jack" }
Return Error Message Using HashMap
Also, instead of creating a dedicated error class, we can return a detailed error message using a simple HashMap. Next is an example of producing and returning a Custom Error Message using Java HashMap.
Code language: Java (java)
@ExceptionHandler(StudentNotFoundException.class) public ResponseEntity<Map<String, String>> handleException(StudentNotFoundException e) { Map<String, String> errorResponse = Map.of( "message", e.getLocalizedMessage(), "status", HttpStatus.NOT_FOUND.toString() ); return new ResponseEntity<>(errorResponse, HttpStatus.NOT_FOUND); }
Handle Bad Request Exceptions
The Bad Request errors are the Client errors where the client’s request doesn’t meet the requirements of the target server. This section will see how to handle Bad Request exceptions and provide a custom or detailed error response.
Type Mismatch Exceptions
The Type Mismatch Exceptions occur when Spring Controller cannot map the request parameters, path variables, or header values into controller method arguments. This section covers the handling of MethodArgumentTypeMismatchException and TypeMismatchException.
Spring throws MethodArgumentTypeMismatchException when the controller argument doesn’t have a required type. On the other hand, Spring throws TypeMismatchException when there is a type mismatch while setting Bean properties. Also, both exceptions provide a detailed error message that we can use to prepare the Error object.
To demonstrate that, next is an example of Handling MethodArgumentTypeMismatchException and TypeMismatchException and returning a detailed error message in Controller Advice.
Code language: Java (java)
@ExceptionHandler({ MethodArgumentTypeMismatchException.class, TypeMismatchException.class }) public ResponseEntity<Map<String, String>> handleException(TypeMismatchException e) { Map<String, String> errorResponse = Map.of( "message", e.getLocalizedMessage(), "status", HttpStatus.BAD_REQUEST.toString() ); return new ResponseEntity<>(errorResponse, HttpStatus.BAD_REQUEST); }
Note that the controller advice catches both exceptions; however, the method arguments accept an exception of type TypeMismatchException because it is the parent of the other exception.
Next, the snippet shows a detailed error message when we call a rest endpoint with an incompatible path variable leading to MethodArgumentTypeMismatchException.
Code language: JSON / JSON with Comments (json)
{ "httpStatus": "BAD_REQUEST", "message": "Failed to convert value of type 'java.lang.String' to required type 'java.lang.Long'; nested exception is java.lang.NumberFormatException: For input String: "Jack"" }
Bean Validation Exceptions
The Bean Validation exceptions occur when the request contents do not pass the provided validations.
The BindException occurs when the binding errors are fatal. While the MethodArgumentNotValidException occurs when validations specified by @Valid fail. Note that the MethodArgumentNotValidException is a subclass of BindException. Thus, we can handle them using the same Spring REST API’s exception handler.
Code language: Java (java)
@ExceptionHandler({ BindException.class, MethodArgumentNotValidException.class }) public ResponseEntity<Map<String, Object>> handleException(BindException e) { List<String> errors = new ArrayList<>(); e.getFieldErrors() .forEach(err -> errors.add(err.getField() + ": " + err.getDefaultMessage())); e.getGlobalErrors() .forEach(err -> errors.add(err.getObjectName() + ": " + err.getDefaultMessage())); Map<String, Object> errorResponse = Map.of( "error", errors, "message", e.getLocalizedMessage(), "status", HttpStatus.BAD_REQUEST.toString() ); return new ResponseEntity<>(errorResponse, HttpStatus.BAD_REQUEST); }
Here we have created a List<String> to represent individual binding errors and add that to the response Map. Instead, we can add a List<String> field to the Error class we created in the previous section and populate the list with individual errors.
Spring throws HttpMediaTypeNotSupportedException, when a POST, PUT, or PATCH endpoint on the server cannot handle the content type sent by the client. The REST Controllers on the server specify the content type they can support. When the media type that a client sends doesn’t match, the client gets this exception back.
To demonstrate, next is an example of handling HttpMediaTypeNotSupportedException and returning a custom error response.
Code language: Java (java)
@ExceptionHandler(HttpMediaTypeNotSupportedException.class) public ResponseEntity<Map<String, String>> handleException( HttpMediaTypeNotSupportedException e) { String provided = e.getContentType().toString(); List<String> supported = e.getSupportedMediaTypes().stream() .map(MimeType::toString) .collect(Collectors.toList()); String error = provided + " is not one of the supported media types (" + String.join(", ", supported) + ")"; Map<String, String> errorResponse = Map.of( "error", error, "message", e.getLocalizedMessage(), "status", HttpStatus.UNSUPPORTED_MEDIA_TYPE.toString() ); return new ResponseEntity<>(errorResponse, HttpStatus.UNSUPPORTED_MEDIA_TYPE); }
As seen in the exception handler above, the instance of HttpMediaTypeNotSupportedException provides detailed information about the incorrect media type we provided and a list of actually supported media types. Thus, we create a custom error message based on the available information.
Code language: JSON / JSON with Comments (json)
{ "error":"text/plain;charset=UTF-8 is not one of the supported media types ( application/octet-stream, text/plain, application/xml, text/xml, application/x-www-form-urlencoded, application/*+xml, multipart/form-data, multipart/mixed, application/json, application/*+json, */*)", "message":"Content type 'text/plain;charset=UTF-8' not supported", "status":"415 UNSUPPORTED_MEDIA_TYPE" }
The above snippet shows a client’s sample error response when it sends a request with an invalid media type.
Handle Request Body Not Readable Exception
Now we will see an example of handling HttpMessageNotReadableException and returning a custom error response. The HttpMessageNotReadableException occurs when the request body is missing or unreadable.
Code language: Java (java)
@ExceptionHandler(HttpMessageNotReadableException.class) public ResponseEntity<Map<String, String>> handleException( HttpMessageNotReadableException e) throws IOException { Map<String, String> errorResponse = Map.of( "message", e.getLocalizedMessage(), "status", HttpStatus.BAD_REQUEST.toString() ); return new ResponseEntity<>(errorResponse, HttpStatus.BAD_REQUEST); }
Handle HTTP Request Method Not Supported Exception
The HttpMethodNotSupportedException occurs when the HTTP endpoint on the REST API does not support the HTTP request method. Let’s write an exception handler for HttpMethodNotSupportedException and return a detailed error message.
Code language: Java (java)
@ExceptionHandler(HttpRequestMethodNotSupportedException.class) public ResponseEntity<Map<String, String>> handleException( HttpRequestMethodNotSupportedException e) throws IOException { String provided = e.getMethod(); List<String> supported = List.of(e.getSupportedMethods()); String error = provided + " is not one of the supported Http Methods (" + String.join(", ", supported) + ")"; Map<String, String> errorResponse = Map.of( "error", error, "message", e.getLocalizedMessage(), "status", HttpStatus.METHOD_NOT_ALLOWED.toString() ); return new ResponseEntity<>(errorResponse, HttpStatus.METHOD_NOT_ALLOWED); }
As seen in the exception handler above, the exception instance provides detailed information about the provided HTTP Method and an array of Supported HTTP Methods. We use it to form a clear error message.
{ "error": "GET is not one of the supported Http Methods (POST)", "message": "Request method 'GET' not supported", "status": "405 METHOD_NOT_ALLOWED" }Code language: JSON / JSON with Comments (json)
The snippet showed an example response when the client attempted to execute a GET endpoint, while the REST API supports only POST.
Default Exception Handler
Similarly, we can create a default exception handler advice that handles all Exception types. Spring attempts to find the most specific handler when we have multiple exception handlers and falls back to the default handler if there is no suitable handler.
Code language: Java (java)
@ExceptionHandler(Exception.class) public ResponseEntity<Map<String, String>> handleException( Exception e) throws IOException { Map<String, String> errorResponse = Map.of( "message", e.getLocalizedMessage(), "status", HttpStatus.INTERNAL_SERVER_ERROR.toString() ); return new ResponseEntity<>(errorResponse, HttpStatus.INTERNAL_SERVER_ERROR); }
Above is an example of writing a default exception handler that returns an error message by the exception instance and an HTTP Status of 500.
Summary
This detailed tutorial taught us how to Return Custom Error Messages in Spring REST API. Firstly, we understood that Spring returns a generic error message and the most suitable HTTP Status Code by default. However, we can write our exception handlers for specific exceptions using @ControllerAdvice and produce a custom and detailed error response.
For more on Spring and Spring Boot Tutorials, please visit Spring Tutorials.

Всем привет! Проверяя задания в учебном центре моей компании, обнаружил, что двумя словами описать то, как можно избавиться от ResponseEntity<?> в контроллерах не получится, и необходимо написать целую статью. Для начала, немного введения.
ВАЖНО! Статья написана для новичков в программировании и Spring в часности, которые знакомы со Spring на базовом уровне.
Что такое ResponseEntity<>? Представим ситуацию — у нас есть интернет магазин. И, при примитивной реализации, мы переходим по продуктам, передавая его Id в качестве параметра@RequestParam. Например, наш код выглядит таким образом:
    @ResponseBody
    @GetMapping("/products")
    public Product getProduct(@RequestParam Long id){
        return productsService.findById(id);
    }
При запросе через адресную строку браузера, вывод будет в виде JSON, таким:
{"id":1,"title":"Milk","price":100}Однако, если мы обратимся к продукту, который у нас отсутствует, например с id=299, то получим следующую картину:

Для пользователя, или даже для фронтендщика, будет абсолютно непонятно, что пошло не так и в чём проблема. Совершая тот же запрос через Postman, ситуация яснее не будет:
{
    "timestamp": "2022-06-30T18:21:03.634+00:00",
    "status": 500,
    "error": "Internal Server Error",
    "path": "/app/api/v1/products"
}
И вот тут мы переходим к ResponseEntity<>. Этот объект представляет собой оболочку для Java классов, благодаря которой мы в полной мере сможем реализовать RESTfull архитектуру. Суть использования сводится к тому, чтобы вместо прямого возвращаемого типа данных в контроллере, использовать оболочку ResponseEntity<> и возвращать конечному пользователю, или, что скорее всего вероятно — фронту, JSON, который бы более-менее подробно описывал ошибку. Выглядит такой код примерно так:
    @GetMapping("/products")
    public ResponseEntity<?> getProductRe(Long id){
        try {
            Product product = productsService.findById(id).orElseThrow();
            return new ResponseEntity<>(product, HttpStatus.OK);
        } catch (Exception e){
            return new ResponseEntity<>(HttpStatus.NOT_FOUND);
        }
    }
Что здесь происходит? Вместо строгого типа Product, мы ставим ResponseEntity<?>, где под ? понимается любой Java объект. Конструктор ResponseEntity позволяет перегружать этот объект, добавляя в него не только наш возвращаемый тип, но и статус, чтобы фронтенд мог понимать, что именно пошло не так. Например, при корректном исполнении программы, передавая id=1, мы увидим просто успешно переданный объект Product с кодом 200, а вот в случае продукта с id = 299 результат уже будет такой:

Всё ещё не красиво, но уже хотя бы понятно, что продукт не найден. Мы имеем статус код 404 и фронт уже как-то может с этим работать. Это здорово, но нам бы хотелось более конкретного описания ошибки и результата. Давайте, в таком случае, создадим новый класс:
public class AppError {
    private int statusCode;
    private String message;

    public int getStatusCode() {
        return statusCode;
    }

    public void setStatusCode(int statusCode) {
        this.statusCode = statusCode;
    }

    public String getMessage() {
        return message;
    }

    public void setMessage(String message) {
        this.message = message;
    }

    public AppError() {
    }

    public AppError(int statusCode, String message) {
        this.statusCode = statusCode;
        this.message = message;
    }
}
Это будет вспомогательный класс. Его задача — принять наше сообщение и переслать его фронту вместе со статусом 404. Как мы это сделаем? Очень просто:
    @GetMapping("/products")
    public ResponseEntity<?> getProduct(Long id){
        try {
            Product product = productsService.findById(id).orElseThrow();
            return new ResponseEntity<>(product, HttpStatus.OK);
        } catch (Exception e){
            return new ResponseEntity<>(new AppError(HttpStatus.NOT_FOUND.value(),
                    "Product with id " + id + " nor found"),
                    HttpStatus.NOT_FOUND);
        }
    }
В этом примере, если мы ловим ошибку, просто отдаём в конструктор ResponseEntity наш кастомный объект и статус 404. Теперь, если мы попробуем получить продукт с id = 299, то ответ будет таким:
{
    "statusCode": 404,
    "message": "Product with id 299 nor found"
}
Отлично! Этого мы и хотели. Стало понятно, в чём проблема. Фронтенд легко распарсит этот JSON и обработает наше сообщение. Однако, сам метод контроллера теперь выглядит не слишком красиво. Да и когда сталкиваешься с чужим кодом, любой из нас сразу хотел бы видеть тип объекта, который будет возвращаться, а не какой-то там ResponseEntity со знаком вопроса в скобочках. Тут мы и переходим к основному материалу статьи.
Как избавиться от ResponseEntity в сигнатуре метода контроллера, при этом сохранив информативность возвращаемой ошибки?
Для этого нам понадобиться глобальный обработчик ошибок, который нам любезно предоставляется в пакете со спрингом. Для начала, создадим какой-то свой кастомный Exception, в котором унаследуемся от RuntimeException:
public class ResourceNotFoundException extends RuntimeException {
    public ResourceNotFoundException(String message) {
        super(message);
    }
}
Здесь ничего особенного. Интересное начинается дальше. Давайте внимательно посмотрим на листинг этого класса:
@ControllerAdvice
@Slf4j
public class GlobalExceptionHandler {
    @ExceptionHandler
    public ResponseEntity<AppError> catchResourceNotFoundException(ResourceNotFoundException e) {
        log.error(e.getMessage(), e);
        return new ResponseEntity<>(new AppError(HttpStatus.NOT_FOUND.value(), e.getMessage()), HttpStatus.NOT_FOUND);
    }
 }
Начнём сверху вниз. @ControllerAdvice используется для глобальной обработки ошибок в приложении Spring. То есть любой Exception, выпадающий в нашем приложении, будет замечен нашим ControllerAdvice. @Slf4j используется для логгирования, заострять внимание мы на этом не будем. Далее создаём собственный класс, назвать его можем как угодно. И вот тут уже интересное — аннотация@ExceptionHandlerнад методом. Эта аннотация позволяет нам указать, что мы хотим перехватывать и обрабатывать исключения определённого типа, если они возникают, и зашивать их в ResponseEntity, чтобы вернуть ответ нашему фронту. В аргументах метода указываем, какую именно ошибку мы собираемся ловить. В данном случае, это наш кастомный ResourceNotFoundException. И возвращать мы будем точно такой же ResponseEntity, как и в примере выше, однако прописываем мы его уже всего 1 раз — в этом классе. Спринг на этапе обработки этой ошибки самостоятельно поймёт, что в методе нашего контроллера вместо нашего класса Product нужно будет вернуть ResponseEntity.
Теперь мы можем убрать из контроллера все ResponseEntity:
    @GetMapping("/products")
    public Product getProduct(Long id){
            return productsService.findById(id);
    }
А логику появления ошибки перенести в сервисный слой:
    public Product findById(Long id) {
        return productsRepository.findById(id).orElseThrow(
                () -> new ResourceNotFoundException("Product with id " + id + " not found"));
    }
Теперь, если продукт не будет найден, выбросится ResourceNotFoundException. Наш глобальный обработчик исключений поймает это исключение, самостоятельно преобразует его в ResponseEntity и вместо Product’a вернут JSON с подробным описанием ошибки, как и прежде:
{
    "statusCode": 404,
    "message": "Product with id 299 not found"
}
Таким образом, мы избавились от ResponseEntity и кучи лишнего кода, переписываемого из метода в метод, при этом сохранив всю функциональность, которую нам предоставляет ResponseEntity.
So you’re developing a REST API with Spring Boot and now you need to know how to handle errors.
Good news: I’ll show you how to do that in this guide.
This is normally the point where I say «It’s easier than you think,» but truth be told if you want to handle errors properly, it’s going to require some up-front planning and extra development.
But once you’ve got the framework in place, you can start handling different errors with ease.
Let’s get started.
When a Status Code Isn’t Enough
After reading those last few sentences you might be thinking to yourself: «Well if it takes that much extra work, I’ll probably just send back an HTTP status code that describes the problem.»
And you certainly could go that route. But is that really enough?
Let’s say your REST API got a request that’s unauthorized. In that case, you’d just send back a 401 (Unauthorized) and leave it at that.
But that status code doesn’t explain why the request is unauthorized.
Were the credentials invalid? Was the JSON token missing? Was it expired? Did it have an invalid signature?
There are plenty of reasons why a request could be considered unauthorized. If your application just sends back a 401 with no explanation that doesn’t offer a whole lot of helpful advice.
Similarly, an invalid request (400) status code by itself just tells the client that the request was invalid. But it doesn’t say why.
In short: you need to send back more than just a status code.
On the Importance of a Response Status
When it comes to sending a response from your API, it’s a great idea to not just send the response itself, but to send a response status along with it.
Why? See above. You need to give your clients as much info as possible. That’s how the user will know how to take corrective action if there’s a problem.
And please note: the response status is not the same as the HTTP status code.
The response status includes a machine-readable code (like «SUCCESS») and some human-readable text (like «Registration successful!»).
The HTTP status code is a 3-digit number like 200 (OK), 400 (Bad Request), or 500 (Internal Server Error).
And yes, you need both the response status and the HTTP status code.
Here’s why: in the event of an unauthorized action (HTTP status code 401), you can send back a response status with a code (like «BAD_CREDENTIALS») and some explanatory text (like «Invalid username or password»).
So to emphasize the recurring theme here: the HTTP status code by itself isn’t good enough.
Now let’s take a look at some examples. Here’s an example of a successful response:
{
    "responseStatus": {
        "statusCode": "OK",
        "message": "Successfully registered!"
    },
    "response": {
        "id": "6164c4391160726f07cc3828",
        "username": "george",
        "firstName": "brian",
        "lastName": "carey",
        "email": "you@toohottohandle.com",
        "phoneNumber": "919-555-1212",
     }
}
And here’s an example of an error response:
{
    "responseStatus": {
        "statusCode": "ERROR",
        "message": "Validation error"
    },
    "response": [
        {
            "field": "lastName",
            "defaultMessage": "must not be null"
        }
    ]
}
Okay. Now that you know the requirements, it’s time to start putting some code together.
The Use Case
The use case for this API (and this guide) is to create an endpoint that handles new user registration.
Users who register will need to provide info in mandatory fields: first name, last name, username, phone number, password, and email address.
If the user doesn’t provide valid info, the API sends back an error response with an HTTP status of 400 (Bad Request). The response body will explain which fields are invalid and why.
Here’s the model class that represents the registration form:
public class Registrant {

    @NotNull
    @Size(min=1, max=32, message="First name must be between 1 and 32 characters")
    private String firstName;

    @NotNull
    @Size(min=1, max=32, message="Last name must be between 1 and 32 characters")
    private String lastName;

    @NotNull
    @Size(min=5, max=12, message="Username must be between 5 and 12 characters")
    private String username;

    @NotNull
    @Size(min=8, max=20, message="Password must be between 8 and 20 characters")
    private String password;

    @NotNull
    @Pattern(regexp = "^[_A-Za-z0-9-\+]+(\.[_A-Za-z0-9-]+)*@[A-Za-z0-9-]+(\.[A-Za-z0-9]+)*(\.[A-Za-z]{2,})$", message="Email address is invalid")
    private String emailAddress;

    @NotNull
    private String phone;

//getters and setters

}
The annotations handle the validations. If you’re unfamiliar with how all of that works, feel free to read all about validation in Spring Boot and then come on back here.
Now that you’ve got the model in place, it’s time to write the code that handles responses.
ResponseStatusCode
First up is ResponseStatusCode. It’s an enum that looks like this:
public enum ResponseStatusCode {
    OK, ERROR, UNAUTHORIZED;
}
Only three (3) status codes to keep things simple. But you’re free to use as many as you want.
You can also create various types of status codes. You might use numerical codes, for example. Or you might name the status codes after the members of your favorite K-Pop band.
It’s up to you.
The important thing is: you need to let the client developers know what each status code means so they can act accordingly.
ResponseStatus
The ResponseStatus class marries a status code to a message.
public class ResponseStatus {

    private ResponseStatusCode statusCode;
    private String message;

    public ResponseStatusCode getStatusCode() {
        return statusCode;
    }
    public void setStatusCode(ResponseStatusCode statusCode) {
        this.statusCode = statusCode;
    }
    public String getMessage() {
        return message;
    }
    public void setMessage(String message) {
        this.message = message;
    }
}
That’s pretty straightforward. And it represents the «responseStatus» field you saw in the example above.
RestResponse
Now you need to create a class that includes the three (3) important parts of every response:
- The response status
- The response itself
- The HTTP status code
Remember: the response status is not the same as the HTTP status code. See above.
Start by creating an interface that defines the methods returning those three (3) pieces of info:
public interface IRestResponse<T> {

    ResponseStatus getResponseStatus();
    T getResponse();
    int getHttpStatusCode();

}
There ain’t nothing too complicated about that.
But note that it’s using a generic (the <T> next to the interface name). What’s that all about?
Go back to the two sample responses above and take a look at the «response» fields. You’ll note that they’re different.
And that makes sense because the response could be anything. It might be a list of field errors or it might be details about a recently created user.
Because the response could be anything, it’s a great idea to use a generic when representing it in code so the compiler will complain if you’re inconsistent with your type references.
Now here’s a concrete implementation of that interface:
public class RestResponse<T> implements IRestResponse<T> {

    private ResponseStatus responseStatus;
    private T response;

    @JsonIgnore
    private int httpStatusCode;

    @Override
    public int getHttpStatusCode() {
        return httpStatusCode;
    }

    public void setHttpStatusCode(int httpStatusCode) {
        this.httpStatusCode = httpStatusCode;
    }

    @Override
    public T getResponse() {
        return response;
    }

    public void setResponse(T response) {
        this.response = response;
    }

    @Override
    public ResponseStatus getResponseStatus() {
        return responseStatus;
    }

    public void setResponseStatus(ResponseStatus responseStatus) {
        this.responseStatus = responseStatus;
    }

    public String toString() {
        return ReflectionToStringBuilder.toString(this);
    }
}
I’ve chosen to create just one implementation, but you might choose to do more than one. For example, you might have one implementation for error responses and another for success responses.
By the way: note the @JsonIgnore on top of httpStatusCode. You should include that so that the response body doesn’t show the HTTP status code. It doesn’t need to display the status code because it gets sent back with the response anyway.
ValidationError
The ValidationError class lives up to its name by representing a field validation error like the one you saw in the sample response above.
@JsonInclude(Include.NON_NULL)
public class ValidationError {

    private String field;
    private String code;
    private String defaultMessage;

//getters and setters

}
I’m not using the code property here but you’re welcome to use it if you need it.
The field property holds the name of the field with the validation error and the defaultMessage property holds the explanatory, human-readable text.
ValidationUtil
The ValidationUtil class includes convenience methods related to valdiation. Here’s a method that converts Spring’s BindingResult object to a List of ValidationError objects.
public class ValidationUtil {

    public static List<ValidationError> convertBindingResultToValidationErrors(BindingResult bindingResult) {
        List<ValidationError> errors = new ArrayList<>();

        if (bindingResult != null) {
            bindingResult.getFieldErrors().forEach(violation -> {
                String message = violation.getDefaultMessage();
                String field = violation.getField();

                ValidationError error = new ValidationError();
                //error.setCode(field);
                error.setDefaultMessage(message);
                error.setField(field);

                errors.add(error);
            });
        }

        return errors;
    }
}
I commented out the line that sets the code because, as I mentioned above, I’m not using that here.
Also note that the method returns an empty List, rather than a null, if there are no errors.
ResponseEntityUtil
The ResponseEntityUtil class includes convenience methods that create ResponseEntity objects.
If you’re unfamiliar with the ResponseEntity class, it’s part of the Spring framework. I use it as a convenient way to send back an HTTP status with a response at the same time.
Here’s a method in ResponseEntityUtil that creates a basic ResponseEntity with the three (3) important elements of a response:
    public static <T> ResponseEntity<IRestResponse<T>> createResponseEntity(IRestResponse<T> response) {
        return ResponseEntity
                    .status(HttpStatus.valueOf(response.getHttpStatusCode()))
                    .body(response);
    }
Once again: note the use of the generic. That’s important here because the T defines the type of response sent back.
Also keep in mind the ReponseEntity also uses a generic. The type parameter in the code above is IRestResponse.
That makes sense because, in this API, every response will include a response status, an HTTP status code, and the response itself. All three (3) of those pieces of info can be gleaned from an IRestResponse object.
The body of the method constructs the ResponseEntity object with the assistance of the status() static method. That method accepts the HTTP status as an int value.
Finally, the method sets the actual response with the body() method. That’s the part that gets included in the response body.
Here are a couple of convenience methods in ResponseEntityUtil for creating error and success response statuses:
    private static ResponseStatus getErrorResponseStatus(String message) {
        ResponseStatus status = new ResponseStatus();
        status.setMessage(message);
        status.setStatusCode(ResponseStatusCode.ERROR);

        return status;
    }


    private static ResponseStatus getSuccessResponseStatus(String message) {
        ResponseStatus status = new ResponseStatus();
        status.setMessage(message);
        status.setStatusCode(ResponseStatusCode.OK);

        return status;
    }
Both of those methods accept a String message that gets sent back with the response status. You saw examples of those messages in the sample responses above.
Here’s a convenience method that sends back a response with validation errors:
    public static ResponseEntity<IRestResponse<List<ValidationError>>> createResponseEntityWithValidationErrors(List<ValidationError> errors) {
        RestResponse<List<ValidationError>> fullResponse = new RestResponse<>();

        if (errors != null && errors.size() > 0) {
            ResponseStatus responseStatus = getErrorResponseStatus("Validation error");

            fullResponse.setResponse(errors);
            fullResponse.setResponseStatus(responseStatus);
            fullResponse.setHttpStatusCode(HttpStatus.BAD_REQUEST.value());
        }

        return createResponseEntity(fullResponse);
    }
That method starts off by creating a response status with the message «Validation error.»
After that, it populates the RestResponse object with the list of errors, the just-created response status, and an HTTP status code of 400 (Bad Request).
Then it invokes the createResponseEntity() method you already saw to construct the ResponseEntity object.
Here’s an example of a convenience method that returns a successful response:
    public static <T> ResponseEntity<IRestResponse<T>> createSuccessfulResponseEntity(String message, int httpStatusCode, T response) {
        ResponseStatus status = getSuccessResponseStatus(message);

        RestResponse<T> fullResponse = new RestResponse<>();
        fullResponse.setResponseStatus(status);
        fullResponse.setHttpStatusCode(httpStatusCode);
        fullResponse.setResponse(response);

        return createResponseEntity(fullResponse);
    }
That method accepts the response status message and the HTTP status code in addition to the response itself.
Why? Because a successful HTTP response status code could be a few different options in the 200’s. And the message itself might vary from one success to another.
Ground Controller to Major Tom
Thus far you’ve laid the groundwork, now let’s put it to use.
Here’s a controller method that creates a new user from a registration page in the application:
    @PostMapping("/")
    public ResponseEntity<IRestResponse<User>> createUser(@Valid @RequestBody Registrant registrant, BindingResult bindingResult) {
        LOG.debug("Registrant is " + registrant);

        List<ValidationError> validationErrors = ValidationUtil.convertBindingResultToValidationErrors(bindingResult);

        //look for any validations not caught by JSR 380
        registrantService.validateRegistrant(registrant, validationErrors);

        User savedUser = registrantService.saveUser(registrant);

        return ResponseEntityUtil.createSuccessfulResponseEntity("Successfully registered!", HttpStatus.CREATED.value(), savedUser);
    }
That’s a standard method that exposes an endpoint in a Spring Boot REST controller.
First, note that the method is annotated with @PostMapping because, like most requests that persist a new entity, it’s accepting an HTTP POST method.
The method returns a type of ResponseEntity. As I pointed out previously, that’s a great tool to use with Spring controllers.
And, of course, the ResponseEntity type parameter is IRestResponse. The IRestResponse definition the type parameter User because that’s what the client will get back in the event of a successful request.
The method, intuitively named createUser() accepts two parameters: a Registrant object and a BindingResult object.
The @Valid annotation in front of Registrant tells Spring to validate it. The @RequestBody annotation tells Spring that it needs to translate the JSON request body to that Java Registrant class you saw several sections ago.
The BindingResult class is where Spring stores the validation results. That’s all handled by the framework.
Inside the method, the code invokes that static convertBindingResultToValidationErrors() method that translates the BindingResult object to a List of ValidationError objects. You saw that method earlier.
Next, the code invokes the validateRegistrant() method on the RegistrantService object. In the event of any validation errors, that method will throw a runtime exception that Spring will translate to an error response. I’ll show you that in a moment.
In the meantime, you might be wondering why there’s another layer of validation. It’s for a good reason, and the comments above that validateRegistrant() line give the game away.
Those cute little annotations in the Registrant class will catch many validation errors. But they won’t catch all of them.
For example, you want to make sure the user doesn’t enter an email address that’s already in use. That doesn’t get handled with those annotations.
So that second layer of validation exists. Now let’s look at the code:
    public void validateRegistrant(Registrant registrant, List<ValidationError> errors) {
        validateUniqueName(errors, registrant);
        validateUniqueEmail(errors, registrant);
        validateRecaptcha(errors, registrant);

        LOG.debug("validation is " + errors);

        if (errors.size() > 0) {
            throw new InvalidRegistrantRequestException(errors);
        }
    }
There you see three additional validation checks (unique name, unique email address, and captcha validation).
You don’t need to know about the details of those methods. Just know that any failure in those validation checks results in a new ValidationError object going into the errors List.
After all the checks, the code looks at errors to see if it’s got anything in it (the size is more than 0). If so, it throws an InvalidRegistrantRequestException. Let’s look at that next.
InvalidRegistrantRequestException
InvalidRegistrantRequestException is a runtime exception. That’s why it doesn’t need to be caught in the code you see above.
Here’s what it looks like:
public class InvalidRegistrantRequestException extends RuntimeException {

    private List<ValidationError> errors;

    public InvalidRegistrantRequestException(List<ValidationError> errors) {
        super("Registrant validation failed!");
        this.errors = errors;
    }

    public List<ValidationError> getErrors() {
        return errors;
    }
}
As you can see, the public constructor accepts a list of validation errors. Those are the errors that get used to create the ResponseEntity object that eventually gets returned to the client.
But how does it get returned? With the aid of an exception handler.
The Exception Handler
The Spring framework makes it easy to handle exceptions and transform them into exactly the types of responses you need to send back to clients. One of the ways it does that is with the assistance of exception handlers.
Back in that same controller class you were looking at earlier, add this method:
    @ExceptionHandler(InvalidRegistrantRequestException.class)
    public ResponseEntity<IRestResponse<List<ValidationError>>> invalidRegistrant(InvalidRegistrantRequestException ex) {
        List<ValidationError> errors = ex.getErrors();
        return ResponseEntityUtil.createResponseEntityWithValidationErrors(errors);
    }
First of all, the way to identify a method that’s an exception handler is with the appropriately named @ExceptionHandler annotation.
But you also have to include the type of exception it handles. You’ll see that in the parentheses.
The method itself is structured like just about any other method in a controller. It accepts various input parameters and returns a ResponseEntity type.
Note that one of the parameters is the exception object itself. Yep, you can do that with an exception handler.
The body of the method uses that exception object to construct an error response using the createResponseEntityWithValidationErrors() method you saw earlier.
So to recap: if there are any validation errors at all, that method above gets called and the client receives an error response.
Back to the Other Part of the Controller
Let’s revisit that other method:
    @PostMapping("/")
    public ResponseEntity<IRestResponse<User>> createUser(@Valid @RequestBody Registrant registrant, BindingResult bindingResult) {
        LOG.debug("Registrant is " + registrant);

        List<ValidationError> validationErrors = ValidationUtil.convertBindingResultToValidationErrors(bindingResult);

        //look for any validations not caught by JSR 380
        registrantService.validateRegistrant(registrant, validationErrors);

        User savedUser = registrantService.saveUser(registrant);

        return ResponseEntityUtil.createSuccessfulResponseEntity("Successfully registered!", HttpStatus.CREATED.value(), savedUser);
    }
If registrantService.validateRegistrant() doesn’t throw an exception, the code above will persist the registrant as a User object.
And then it returns that persisted User object in a success response.
There’s the code. Now it’s time to test it out.
The Postman Always Rings Twice
Now fire up the Spring Boot application with all this wonderful new code. Then launch Postman to do some testing.
Start by creating a request that intentionally leaves out the last name. Like this:
{
    "firstName": "brian",
    "password": "allowishes",
    "emailAddress": "you@toohottohandle.com",
    "phone": "919-555-1212",
    "username": "george"
}
POST that to your endpoint and you should get something like this:
{
    "responseStatus": {
        "statusCode": "ERROR",
        "message": "Validation error"
    },
    "response": [
        {
            "field": "lastName",
            "defaultMessage": "must not be null"
        }
    ]
}
In fact, that’s exactly what I’m getting:

Pay attention to the HTTP status code where you see the red arrow. That’s exactly what it should be (400 for Bad Request).
Now make sure the array works. Take out the first name in addition to the last name and run it again.
You’ll get this:

Cool. So the API returns all validation errors at once. That gives the user the opportunity to fix them all at once.
Now try a successful response.

Awesome. It worked.
I should probably clear those nulls out of the response. But that’s something I can take care of later.
Wrapping It Up
This was a fairly lengthy guide. In the event I missed something, you’re more then welcome to look at the code I have on GitHub.
The utility classes/methods are in their own project and included as a dependency in the API. You can find them here.
If you want to see the API code (still a work in progress as of this writing), you can look at it here.
Then it’s up to you to write some code yourself. Take the patterns that you saw in this article and make them your own.
Have fun!
Photo by Poppy Thomas Hill from Pexels
В части 1 мы рассмотрели варианты обработки исключений, выбрасываемых в контроллере.
Самый гибкий из них — @ControllerAdvice — он позволяет изменить как код, так и тело стандартного ответа при ошибке. Кроме того, он позволяет в одном методе обработать сразу несколько исключений — они перечисляются над методом.
В первой части мы создавали @ControllerAdvice с нуля, но в Spring Boot существует заготовка — ResponseEntityExceptionHandler, которую можно расширить. В ней уже обработаны многие исключения, например: NoHandlerFoundException, HttpMessageNotReadableException, MethodArgumentNotValidException и другие (всего десяток-другой исключений).
Приложение
Обрабатывать исключения будем в простом Spring Boot приложении из первой части. Оно предоставляет REST API для сущности Person:
@Entity
@NoArgsConstructor
@AllArgsConstructor
@Data
public class Person {
    @Id
    @GeneratedValue(strategy = GenerationType.IDENTITY)
    private Long id;

    @Size(min = 3, max = 10)
    private String name;

}
Только в этот раз поле name аннотировано javax.validation.constraints.Size.
А также перед аргументом Person в методах контроллера стоит аннотация @Valid:
@RestController
@RequestMapping("/persons")
public class PersonController {

    @Autowired
    private PersonRepository personRepository;

    @GetMapping
    public List<Person> listAllPersons() {
        List<Person> persons = personRepository.findAll();
        return persons;
    }

    @GetMapping(value = "/{personId}")
    public Person getPerson(@PathVariable("personId") long personId) {
        return personRepository.findById(personId).orElseThrow(() -> new MyEntityNotFoundException(personId));
    }

    @PostMapping
    public Person createPerson(@RequestBody @Valid Person person) {
        return personRepository.save(person);
    }

    @PutMapping("/{id}")
    public Person updatePerson(@RequestBody @Valid Person person, @PathVariable long id) {
        Person oldPerson = personRepository.getOne(id);
        oldPerson.setName(person.getName());
        return personRepository.save(oldPerson);
    }

}
Аннотация @Valid заставляет Spring проверять валидность полей объекта Person, например условие @Size(min = 3, max = 10). Если пришедший в контроллер объект не соответствует условиям, то будет выброшено MethodArgumentNotValidException — то самое, для которого в ResponseEntityExceptionHandler уже задан обработчик. Правда, он выдает пустое тело ответа. Вообще все обработчики из ResponseEntityExceptionHandler выдают корректный код ответа, но пустое тело.
Мы это исправим. Поскольку для MethodArgumentNotValidException может возникнуть несколько ошибок (по одной для каждого поля сущности Person), добавим в наше пользовательское тело ответа список List с ошибками. Он предназначен именно для MethodArgumentNotValidException (не для других исключений).
Итак, ApiError по сравнению с 1-ой частью теперь содержит еще список errors:
@Data
@AllArgsConstructor
@NoArgsConstructor
public class ApiError {
    private String message;
    private String debugMessage;

    @JsonInclude(JsonInclude.Include.NON_NULL)
    private List<String> errors;

    public ApiError(String message, String debugMessage){
        this.message=message;
        this.debugMessage=debugMessage;
    }
}
Благодаря аннотации @JsonInclude(JsonInclude.Include.NON_NULL) этот список будет включен в ответ только в том случае, если мы его зададим. Иначе ответ будет содержать только message и debugMessage, как в первой части.
Класс обработки исключений
Например, на исключение MyEntityNotFoundException ответ не поменяется, обработчик такой же, как в первой части:
@ControllerAdvice
public class RestExceptionHandler extends ResponseEntityExceptionHandler {

   ...

    @ExceptionHandler({MyEntityNotFoundException.class, EntityNotFoundException.class})
    protected ResponseEntity<Object> handleEntityNotFoundEx(MyEntityNotFoundException ex, WebRequest request) {
        ApiError apiError = new ApiError("Entity Not Found Exception", ex.getMessage());
        return new ResponseEntity<>(apiError, HttpStatus.NOT_FOUND);
    }
   ...
}
Но в отличие от 1 части, теперь RestExceptionHandler расширяет ResponseEntityExceptionHandler. А значит, он наследует различные обработчики исключений, и мы их можем переопределить. Сейчас они все возвращают пустое тело ответа, хотя и корректный код.
HttpMessageNotReadableException
Переопределим обработчик, отвечающий за HttpMessageNotReadableException. Это исключение возникает тогда, когда тело запроса, приходящего в метод контроллер, нечитаемое — например, некорректный JSON.
За это исключение отвечает метод handleHttpMessageNotReadable(), его и переопределим:
@Override
protected ResponseEntity<Object> handleHttpMessageNotReadable(HttpMessageNotReadableException ex,
                                                              HttpHeaders headers, HttpStatus status, WebRequest request) {
    ApiError apiError = new ApiError("Malformed JSON Request", ex.getMessage());
    return new ResponseEntity(apiError, status);
}
Проверим ответ, сделав запрос с некорректным JSON-телом запроса (он пойдет в метод updatePerson() контроллера):
PUT localhost:8080/persons/1
{
   11"name": "alice"
}
Получаем ответ с кодом 400 (Bad Request) и телом:
{
    "message": "Malformed JSON Request",
    "debugMessage": "JSON parse error: Unexpected character ('1' (code 49)): was expecting double-quote to start field name; nested exception is com.fasterxml.jackson.core.JsonParseException: Unexpected character ('1' (code 49)): was expecting double-quote to start field namen at [Source: (PushbackInputStream); line: 2, column: 5]"
}
Теперь ответ содержит не только корректный код, но и тело с информативными сообщениями. Если бы мы не переопределяли обработчик, вернулся бы только код 400.
А если бы не расширяли класс ResponseEntityExceptionHandler, все эти обработчики в принципе не были бы задействованы и вернулся бы стандартный ответ из BasicErrorController:
{
    "timestamp": "2021-03-01T16:53:04.197+00:00",
    "status": 400,
    "error": "Bad Request",
    "message": "JSON parse error: Unexpected character ('1' (code 49)): was expecting double-quote to start field name; nested exception is com.fasterxml.jackson.core.JsonParseException: Unexpected character ('1' (code 49)): was expecting double-quote to start field namen at [Source: (PushbackInputStream); line: 2, column: 5]",
    "path": "/persons/1"
}
MethodArgumentNotValidException
Как говорилось выше, чтобы выбросилось это исключение, в контроллер должен прийти некорректный Person. В смысле корректный JSON, но условие @Valid чтоб не выполнялось: например, поле name имело бы неверную длину (а она должна быть от 3 до 10, как указано в аннотации @Size).
Попробуем сделать запрос с коротким name:
POST http://localhost:8080/persons
{
   "name": "al"
}
Получим ответ:
{
    "message": "Method Argument Not Valid",
    "debugMessage": "Validation failed for argument [0] in public ru.sysout.model.Person ru.sysout.controller.PersonController.createPerson(ru.sysout.model.Person): [Field error in object 'person' on field 'name': rejected value [al]; codes [Size.person.name,Size.name,Size.java.lang.String,Size]; arguments [org.springframework.context.support.DefaultMessageSourceResolvable: codes [person.name,name]; arguments []; default message [name],10,3]; default message [размер должен находиться в диапазоне от 3 до 10]] ",
    "errors": [
        "размер должен находиться в диапазоне от 3 до 10"
    ]
}
Тут пошел в ход список ошибок, который мы добавили в ApiError. Мы его заполняем в переопределенном обработчике исключения:
@Override
protected ResponseEntity<Object> handleMethodArgumentNotValid(MethodArgumentNotValidException ex,
                                                              HttpHeaders headers, HttpStatus status, WebRequest request) {
    List<String> errors = ex.getBindingResult()
            .getFieldErrors()
            .stream()
            .map(x -> x.getDefaultMessage())
            .collect(Collectors.toList());

    ApiError apiError = new ApiError("Method Argument Not Valid", ex.getMessage(), errors);
    return new ResponseEntity<>(apiError, status);
}
Вообще говоря, стандартный ответ, выдаваемый BasicErrorController, тоже будет содержать этот список ошибок по полям, если в application.properties включить свойство:
server.error.include-binding-errors=always
В этом случае (при отсутствии нашего RestExceptionHandler с @ControlleAdvice) ответ будет таким:
{
    "timestamp": "2021-03-01T17:15:37.134+00:00",
    "status": 400,
    "error": "Bad Request",
    "message": "Validation failed for object='person'. Error count: 1",
    "errors": [
        {
            "codes": [
                "Size.person.name",
                "Size.name",
                "Size.java.lang.String",
                "Size"
            ],
            "arguments": [
                {
                    "codes": [
                        "person.name",
                        "name"
                    ],
                    "arguments": null,
                    "defaultMessage": "name",
                    "code": "name"
                },
                10,
                3
            ],
            "defaultMessage": "размер должен находиться в диапазоне от 3 до 10",
            "objectName": "person",
            "field": "name",
            "rejectedValue": "al",
            "bindingFailure": false,
            "code": "Size"
        }
    ],
    "path": "/persons/"
}
Мы просто сократили информацию.
MethodArgumentTypeMismatchException
Полезно знать еще исключение MethodArgumentTypeMismatchException, оно возникает, если тип аргумента неверный. Например, наш метод контроллера получает Person по id:
@GetMapping(value = "/{personId}")
   public Person getPerson(@PathVariable("personId") Long personId) throws EntityNotFoundException {
       return personRepository.getOne(personId);
   }
А мы передаем не целое, а строковое значение id:
GET http://localhost:8080/persons/mn
Тут то и возникает исключение MethodArgumentTypeMismatchException. Давайте его обработаем:
@ExceptionHandler(MethodArgumentTypeMismatchException.class)
protected ResponseEntity<Object> handleMethodArgumentTypeMismatch(MethodArgumentTypeMismatchException ex,HttpStatus status,
                                                                  WebRequest request) {
    ApiError apiError = new ApiError();
    apiError.setMessage(String.format("The parameter '%s' of value '%s' could not be converted to type '%s'",
            ex.getName(), ex.getValue(), ex.getRequiredType().getSimpleName()));
    apiError.setDebugMessage(ex.getMessage());
    return new ResponseEntity<>(apiError, status);
}
Проверим ответ сервера (код ответа будет 400):
{
    "message": "The parameter 'personId' of value 'mn' could not be converted to type 'long'",
    "debugMessage": "Failed to convert value of type 'java.lang.String' to required type 'long'; nested exception is java.lang.NumberFormatException: For input string: "mn""
}
NoHandlerFoundException
Еще одно полезное исключение — NoHandlerFoundException. Оно возникает, если на данный запрос не найдено обработчика.
Например, сделаем запрос:
GET http://localhost:8080/pers
По данному адресу у нас нет контроллера, так что возникнет NoHandlerFoundException. Добавим обработку исключения:
@Override
protected ResponseEntity<Object> handleNoHandlerFoundException(NoHandlerFoundException ex, HttpHeaders headers,
                                                               HttpStatus status, WebRequest request) {
    return new ResponseEntity<Object>(new ApiError("No Handler Found", ex.getMessage()), status);
}
Только учтите, для того, чтобы исключение выбрасывалось, надо задать свойства в файле application.properties:
spring.mvc.throw-exception-if-no-handler-found=true
spring.web.resources.add-mappings=false
Проверим ответ сервера (код ответа 404):
{
    "message": "No Handler Found",
    "debugMessage": "No handler found for GET /pers"
}
Если же не выбрасывать NoHandlerFoundException и не пользоваться нашим обработчиком, то ответ от BasicErrorController довольно непонятный, хотя код тоже 404:
{
    "timestamp": "2021-03-01T17:35:59.204+00:00",
    "status": 404,
    "error": "Not Found",
    "message": "No message available",
    "path": "/pers"
}
Обработчик по умолчанию
Этот обработчик будет ловить исключения, не пойманные предыдущими обработчиками:
@ExceptionHandler(Exception.class)
    protected ResponseEntity<Object> handleAllExceptions(Exception ex, WebRequest request) {
        ApiError apiError = new ApiError(HttpStatus.INTERNAL_SERVER_ERROR, "prosto exception", ex);
        return new ResponseEntity<>(apiError, HttpStatus.INTERNAL_SERVER_ERROR);
    }
Заключение
Мы рассмотрели:
- как сделать обработку исключений в едином классе, аннотированном @ControllerAdvice;
- как переопределить формат JSON-ответа, выдаваемого при возникновении исключения;
- как воспользоваться классом-заготовкой ResponseEntityExceptionHandler и переопределить его обработчики так, чтобы тело ответов не было пустым;
Обратите внимание, что все не переопределенные методы ResponseEntityExceptionHandler будут выдавать пустое тело ответа.
Код примера доступен на GitHub.
When you develop a Spring Bool RESTful service, you as a programmer are responsible for handling exceptions in the service. For instance, by properly handling exceptions, you can stop the disruption of the normal flow of the application. In addition, proper exception handling ensures that the code doesn’t break when an exception occurs.
Another important thing is to ensure as a programmer is not to send any exceptions or error stacks to clients. Exception and error messages sent to clients should be short and meaningful.
In this post, I will explain how to gracefully handle exceptions in Spring Boot RESTful services.
Dependency
For this post, we will create a Sprinfg Boot RESTful service that performs CRUD operations on Blog entities. We will use embedded H2 as the database. The following code shows the dependencies of the application in the pom.xml file.
     <dependency>
        <groupId>org.springframework.boot</groupId>
        <artifactId>spring-boot-starter-web</artifactId>
     </dependency>

     <dependency>
        <groupId>org.springframework.boot</groupId>
        <artifactId>spring-boot-starter-data-jpa</artifactId>
     </dependency>

     <dependency>
        <groupId>com.h2database</groupId>
        <artifactId>h2</artifactId>
        <version>1.4.200</version>
     </dependency>
In the context of our Blog RESTful service, the application may encounter several types of exceptions. For example, the database may be down. Another scenario can be a user trying to save an already existing blog. Or a user trying to access a blog yet to be published.
You should handle such scenarios gracefully in the application.
As an example, for database failure, the application throws SQLException. Instead of returning the exception stack trace to client, you should return a meaningful exception message.
The Entity Class
The code for the Blog Entity class is this.
Blog.java
@Entity
public class Blog {
    @Id
    private int blogId;
    private String blogTitle;
    private String blogCreator;
    private int yearOfPost;
// No-Args and Parametrized Constructor
//Getters and Setters
}
It is a JPA Entity class annotated with the @Entity annotation and corresponding getters and setters for the fields.
The Repository
This is the Blog Repository Interface.
BlogRepository.java
package org.springframework.guru.repository;

import org.springframework.guru.model.Blog;
import org.springframework.data.repository.CrudRepository;
import org.springframework.stereotype.Repository;

@Repository
public interface BlogRepository extends CrudRepository<Blog,Integer> {
}
Here, the BlogRepository extends the CrudRepository of Spring Data JPA.
Custom Exception Classes
In our application, we will create custom exception classes. Such classes enable us to customize an exception according to the callers’ needs.
We will create two custom exception classes:
BlogAlreadyExistsException: Is thrown when a user tries to add an already existing blog.BlogNotFoundException: Is thrown when a user tries to access a blog that is not present.
The code of the BlogAlreadyExistsException class is this.
BlogAlreadyExistsException.java
package org.springframework.guru.exception;

public class BlogAlreadyExistsException extends RuntimeException {
    private String message;

    public BlogAlreadyExistsException(String message) {
        super(message);
        this.message = message;
    }

    public BlogAlreadyExistsException() {
    }
}
The code for the BlogNotFoundException class is this.
BlogNotFoundException.java
package org.springframework.guru.exception;

public class BlogNotFoundException extends RuntimeException {
    private String message;

    public BlogNotFoundException(String message) {
        super(message);
        this.message = message;
    }

    public BlogNotFoundException() {
    }
}
The Service
This is the BlogService interface which has various methods to perform operations on Blog entities.
BlogService.java
package org.springframework.guru.service;

import org.springframework.guru.exception.BlogAlreadyExistsException;
import org.springframework.guru.exception.BlogNotFoundException;
import org.springframework.guru.model.Blog;

import java.util.List;

public interface BlogService {

    Blog saveBlog(Blog blog) throws BlogAlreadyExistsException;
    List getAllBlogs() throws BlogNotFoundException;
    Blog getBlogById(int id) throws BlogNotFoundException;
}
In the preceding BlogService interface, the saveBlog() method declares that it throws BlogAlreadyExistsException. The two other methods, getAllBlogs() and getBlogById() declares that they throw BlogNotFoundException.
The service implementation class for BlogService is this.
BlogServiceImpl.java
@Service
public class BlogServiceImpl implements BlogService {
    private BlogRepository blogRepository;

    @Autowired
    public BlogServiceImpl(BlogRepository blogRepository) {
        this.blogRepository = blogRepository;
    }

    @Override
    public Blog saveBlog(Blog blog) {
        if (blogRepository.existsById(blog.getBlogId())) {
            throw new BlogAlreadyExistsException();
        }
        Blog savedBlog = blogRepository.save(blog);
        return savedBlog;
    }

    @Override
    public List getAllBlogs() {
        return (List) blogRepository.findAll();
    }

    @Override
    public Blog getBlogById(int id) throws BlogNotFoundException {
        Blog blog;
        if (blogRepository.findById(id).isEmpty()) {
            throw new BlogNotFoundException();
        } else {
            blog = blogRepository.findById(id).get();
        }
        return blog;
    }
}
The preceding BlogServiceImpl class implements the methods declared in the BlogService interface.
There are two paths in exception handling. One is the code handles the exception using a try-catch block. The other is to propagate back a custom exception to the caller. The preceding service class uses the latter approach.
Line 12 – Line 3 checks if the blog already exists in the database. If true the method throws a BlogAlreadyExistsException. Else, the method saves the Blog object.
Line 27 – Line 28 throws a BlogNotFoundException if the Blog with the specified Id is not present in the database.
The Controller
The code for the BlogController is this.
BlogController.java
@RestController
@RequestMapping("api/v1")
public class BlogController {
    private BlogService blogService;

    @Autowired
    public BlogController(BlogService blogService) {
        this.blogService = blogService;
    }

    @PostMapping("/blog")
    public ResponseEntity saveBlog(@RequestBody Blog blog) throws BlogAlreadyExistsException {
        Blog savedBlog = blogService.saveBlog(blog);
        return new ResponseEntity<>(savedBlog, HttpStatus.CREATED);

    }

    @GetMapping("/blogs")
    public ResponseEntity<List> getAllBlogs() throws BlogNotFoundException {
        return new ResponseEntity<List>((List) blogService.getAllBlogs(), HttpStatus.OK);
    }

    @GetMapping("blog/{id}")
    public ResponseEntity getBlogById(@PathVariable("id") int id) throws BlogNotFoundException {
        return new ResponseEntity(blogService.getBlogById(id), HttpStatus.OK);
    }
The preceding controller class is not handling the custom exceptions. Instead, it throws the exceptions back to the caller – which in our scenario is a REST client. This is not what we want – directly sending back exceptions to clients.
Instead, we should handle the exception and send back a short and meaningful exception message to the client. We can use different approaches to achieve this.
Approach 1: Traditional try-catch Block
The first approach is to use Java try-catch block to handle the exception in the controller methods. The code to handle BlogNotFoundException in the getBlogById() method is this.
@GetMapping("blog/{id}")
public ResponseEntity getBlogById(@PathVariable("id") int id)  {
 try{
    return new ResponseEntity(blogService.getBlogById(id), HttpStatus.OK);
 }
catch(BlogNotFoundException blogNotFoundException ){
  return new ResponseEntity(blogNotFoundException.getMessage(), HttpStatus.CONFLICT);
 }

}
In the preceding code, the call to the BlogService.getBlogById() method is wrapped in a try block. If a method call to getBlogById() throws BlogNotFoundException, the catch block handles the exception. In the catch block, the ResponseEntity object is used to send a custom error message with a status code as a response.
Approach 2: Spring @ExceptionHandler Annotation
Spring provides the @ExceptionHandlerannotation to handle exceptions in specific handler classes or handler methods.
Spring configuration will detect this annotation and register the method as an exception handler. The method will handle the exception and its subclasses passed to the annotation.
@ExceptionHandler(value = BlogAlreadyExistsException.class)
    public ResponseEntity handleBlogAlreadyExistsException(BlogAlreadyExistsException blogAlreadyExistsException) {
        return new ResponseEntity("Blog already exists", HttpStatus.CONFLICT);
    }
When any method in the controller throws the BlogAlreadyExistsException exception, Spring invokes the handleBlogAlreadyExistsException() method. This method returns a ResponseEntity that wraps a custom error message and a status code.
When you run the application and send a POST request to add an existing blog, you will get this output.

Approach 3: Global Exception Handling with @ControllerAdvice
The @ExceptionHandler annotation is only active for that particular class where it is declared. If you want a global exception handler you can use Spring AOP. A global exception handler provides a standard way of handling exceptions throughout the application. In addition, it considerably reduces the amount of code written for exception handling.
The Spring @ExceptionHandler along with @ControllerAdvice of Spring AOP enables a mechanism to handle exceptions globally.
The code for the GlobalExceptionHandler class is this.
GlobalExceptionHandler.java
@ControllerAdvice
public class GlobalExceptionHandler {
    @Value(value = "${data.exception.message1}")
    private String message1;
    @Value(value = "${data.exception.message2}")
    private String message2;
    @Value(value = "${data.exception.message3}")
    private String message3;

    @ExceptionHandler(value = BlogNotFoundException.class)
    public ResponseEntity blogNotFoundException(BlogNotFoundException blogNotFoundException) {
        return new ResponseEntity(message2, HttpStatus.NOT_FOUND);
    }

   @ExceptionHandler(value = Exception.class)
    public ResponseEntity<> databaseConnectionFailsException(Exception exception) {
        return new ResponseEntity<>(message3, HttpStatus.INTERNAL_SERVER_ERROR);
    }
}
The @ControllerAdvice annotation in Line 1 consolidates multiple @ExceptionHandlers into a single, global exception handling component.
The @Value annotation injects exception messages specified in the application.properties file into the fields.
The application.properties file is this.
data.exception.message1=BlogAlreadyExists
data.exception.message2=BlogNotFound
data.exception.message3=DataConnectivityisLost
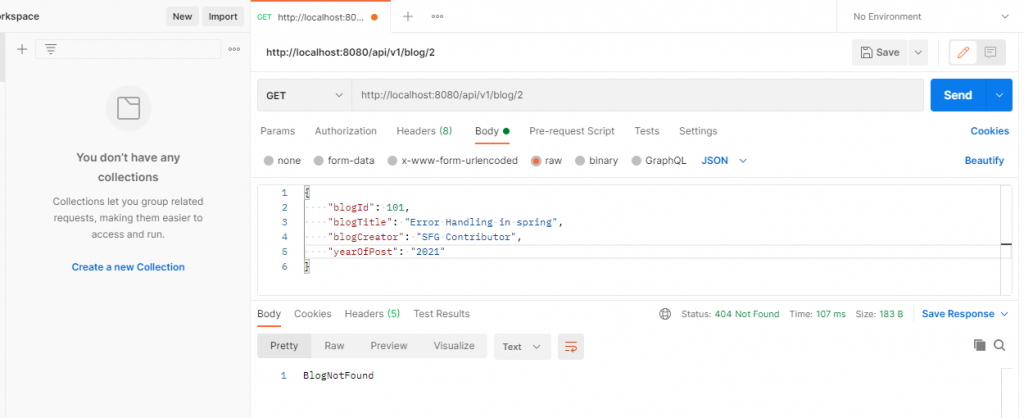
Let’s send a GET Request tolocalhost:8080/api/v1/blog/2 to retrieve an unpublished blog. The response is shown in this Figure.
You can find the source code of this post on Github
For in-depth knowledge on the Spring Framework and Spring Boot, you can check my Udemy Best Seller Course Spring Framework 5: Beginner to Guru