State is the most complex thing in React, and it’s something both beginners and experienced developers struggle to understand. So in this article, we’ll explore all the basics of state in React.
Before understanding state, let’s first understand some fundamentals so it’s easy to wrap your head around state later.
How to Render Data in the UI in React
To render anything on the screen, we use the ReactDOM.render method in React.
It has the following syntax:
ReactDOM.render(element, container[, callback])
elementcan be any HTML element, JSX or a component that returns JSXcontaineris the element on the UI inside which we want to render the datacallbackis the optional function we can pass which gets called once something is rendered or re-rendered on the screen
Take a look at the below code:
import React from "react";
import ReactDOM from "react-dom";

const rootElement = document.getElementById("root");

ReactDOM.render(<h1>Welcome to React!</h1>, rootElement);
Here’s a Code Sandbox Demo.
Here, we’re just rendering a single h1 element to the screen.
To render multiple elements we can do it as shown below:
import React from "react";
import ReactDOM from "react-dom";

const rootElement = document.getElementById("root");

ReactDOM.render(
  <div>
    <h1>Welcome to React!</h1>
    <p>React is awesome.</p>
  </div>,
  rootElement
);
Here’s a Code Sandbox Demo.
We can also take out the JSX and put it in a variable which is the preferred way of rendering content if it gets larger, like this:
import React from "react";
import ReactDOM from "react-dom";

const rootElement = document.getElementById("root");

const content = (
  <div>
    <h1>Welcome to React!</h1>
    <p>React is awesome.</p>
  </div>
);

ReactDOM.render(content, rootElement);
Here’s a Code Sandbox Demo.
Here, we’ve also added an extra pair of round brackets to align the JSX properly and to make it a single JSX expression.
If you want to understand JSX in detail and its various important features, check out my article here.
Now, let’s display a button and some text on the screen:
import React from "react";
import ReactDOM from "react-dom";

const rootElement = document.getElementById("root");

let counter = 0;

const handleClick = () => {
  counter++;
  console.log("counter", counter);
};

const content = (
  <div>
    <button onClick={handleClick}>Increment counter</button>
    <div>Counter value is {counter}</div>
  </div>
);

ReactDOM.render(content, rootElement);
Here’s a Code Sandbox Demo.
As you can see, when we click on the button, the counter value is incremented as you can see in the console. But on the UI it’s not getting updated.
This is because we’re rendering the content JSX only once using the ReactDOM.render method when the page is loaded. And we’re not calling it again – so even though the value of counter is updating, it’s not getting displayed on the UI. So let’s fix this.
import React from "react";
import ReactDOM from "react-dom";

const rootElement = document.getElementById("root");

let counter = 0;

const handleClick = () => {
  counter++;
  console.log("counter", counter);
  renderContent();
};

const renderContent = () => {
  const content = (
    <div>
      <button onClick={handleClick}>Increment counter</button>
      <div>Counter value is {counter}</div>
    </div>
  );

  ReactDOM.render(content, rootElement);
};

renderContent();
Here’s a Code Sandbox Demo.
Here, we’ve moved the content JSX and ReactDOM.render method call inside a renderContent function. Then once it’s defined, we’re calling the function so it will render the content on the UI on page load.
Note that we’ve also added the renderContent function call inside the handleClick function. So every time we click on the button, the renderContent function will be called and we’ll see the updated counter on the UI.
As can you see, it’s working as expected and the counter value is correctly getting displayed on the UI.
You might think that it’s costly to re-render the entire DOM again on every button click – but it’s not. This is because React uses a Virtual DOM algorithm where it checks what has been changed on the UI and only re-renders the elements which were changed. So the entire DOM is not re-rendered again.
Here’s a Preview link for the Code Sandbox to try it yourself.
As you can see in the HTML structure, only the counter value is re-rendered as it’s the only thing flashing in the HTML structure. This is the reason React is so fast and the virtual DOM makes React more useful.
But still, it’s not feasible to call the renderContent function every time we want to update the UI. So React added the concept of State.
Introduction to State in React
State allows us to manage changing data in an application. It’s defined as an object where we define key-value pairs specifying various data we want to track in the application.
In React, all the code we write is defined inside a component.
There are mainly two ways of creating a component in React:
- class-based component
- functional component
We’ll start with class-based components now. Later in this article, we will see a functional component way of creating components.
You should know how to work with class-based components as well as functional components, including hooks.
Instead of directly learning functional components with React hooks, you should first understand class-based components so it’s easy to clear the basics.
You can create a component by using an ES6 class keyword and by extending the Component class provided by React like this:
import React from "react";
import ReactDOM from "react-dom";

class Counter extends React.Component {
  constructor(props) {
    super(props);

    this.state = {
      counter: 0
    };

    this.handleClick = this.handleClick.bind(this);
  }

  handleClick() {
    this.state.counter = this.state.counter + 1;

    console.log("counter", this.state.counter);
  }

  render() {
    const { counter } = this.state;

    return (
      <div>
        <button onClick={this.handleClick}>Increment counter</button>
        <div>Counter value is {counter}</div>
      </div>
    );
  }
}

const rootElement = document.getElementById("root");
ReactDOM.render(<Counter />, rootElement);
Note that the name of the component starts with a capital letter (
Counter).
Here’s a Code Sandbox Demo.
Let’s explore what we’re doing here.
- Inside the constructor function, we’re first calling
superby passingpropsto it. Then we’ve defined the state as an object withcounteras a property of the object. - We’re also binding
this‘s context to thehandleClickfunction so inside thehandleClickfunction we get the correct context forthis. - Then inside the
handleClickfunction, we’re updating thecounterand logging it to the console. - And inside the
rendermethod, we’re returning the JSX that we want to render on the UI.
The counter is correctly getting updated as you can see in the console – but it’s not getting updated on the UI.
This is because we’re directly updating the state inside the handleClick function as:
this.state.counter = this.state.counter + 1So React does not re-render the component (and it’s also a bad practice to directly update state).
Never ever directly update/mutate state in React, as it’s a bad practice and it will cause issues in your application. Also, your component will not be re-rendered on state change if you make a direct state change.
Syntax of setState
To make the state change, React gives us a setState function that allows us to update the value of the state.
The setState function has the following syntax:
setState(updater, [callback])
updatercan either be a function or an objectcallbackis an optional function that gets executed once the state is successfully updated
Calling
setStateautomatically re-renders the entire component and all its child components. We don’t need to manually re-render as seen previously using therenderContentfunction.
How to Use a Function to Update State in React
Let’s modify the above Code Sandbox to use the setState function for updating the state.
Here’s an updated Code Sandbox Demo.
If you check the updated handleClick function, it looks like this:
handleClick() {
  this.setState((prevState) => {
    return {
      counter: prevState.counter + 1
    };
  });

  console.log("counter", this.state.counter);
}
Here, we’re passing a function as a first argument to the setState function and we’re returning a new state object with counter incremented by 1 based on the previous value of counter.
We’re using the arrow function in the above code, but using a normal function will also work.
If you notice, we’re correctly getting the updated value of the counter on the UI. But in the console, we’re getting the previous counter value even though we’ve added console.log after the this.setState call.
This is because the
setStatefunction is asynchronous in nature.
This means that even though we called setState to increment the counter value by 1, it does not happen immediately. This is because when we call the setState function, the entire component gets re-rendered – so React needs to check what all needs to be changed using the Virtual DOM algorithm and then perform various checks for an efficient update of the UI.
This is the reason you may not get the updated value for counter immediately after the call to setState.
This is a very important thing to keep in mind in React, as you will encounter difficult to debug issues if you don’t write your code keeping in mind that
setStateis asynchronous in React.
If you want to get the updated value of the state immediately after the setState call, you can pass a function as the second argument to the setState call which will be executed once the state is updated.
Here’s a Code Sandbox Demo with that change.
As you can see, we’re getting the correct value of counter in the console as soon as it’s updated on the UI.
In the above demo, the handleClick function looks like this:
handleClick() {
  this.setState(
    (prevState) => {
      return {
        counter: prevState.counter + 1
      };
    },
    () => console.log("counter", this.state.counter)
  );
}
So here, for the setState function call, we’re passing two arguments. The first is a function that returns a new state and the second is a callback function that will be called once the state is updated. We’re just logging the updated counter value to the console in the callback function.
Even though React provides a callback function to get the updated state value immediately, it’s recommended that you use it only for quick testing or logging.
Instead, React recommends that you use the componentDidUpdate method, which is a React life cycle method that looks like this:
componentDidUpdate(prevProps, prevState) {
  if (prevState.counter !== this.state.counter) {
    // do something
    console.log("counter", this.state.counter);
  }
}
Here’s a Code Sandbox Demo.
You can find more information about why to use the componentDidUpdate instead of setState callback here.
How to Simplify State and Method Declaration
If you see the constructor code in the above Code Sandbox demos, you will see that it looks like this:
constructor(props) {
  super(props);

  this.state = {
    counter: 0
  };

  this.handleClick = this.handleClick.bind(this);
}
To use the this keyword inside the handleClick event handler, we have to bind it in the constructor like this:
this.handleClick = this.handleClick.bind(this);
Also, to declare the state, we have to create a constructor, add a super call inside it, and then we can declare the state.
This is not just cumbersome but also makes the code unnecessarily complicated.
As the number of event handlers increases, the number of .bind calls also increases. We can avoid doing this using the class properties syntax.
Here’s an updated Code Sandbox Demo with the class properties syntax.
Here, we’ve moved the state directly inside the class like this:
state = {
   counter: 0
};
and the handlerClick event handler is changed to arrow function syntax like this:
handleClick = () => {
  this.setState((prevState) => {
    return {
      counter: prevState.counter + 1
    };
  });
};
As arrow functions do not have their own this context, it will take the context as the class so there is no need to use the .bind method.
This makes the code a lot simpler and easier to understand as we don’t need to keep binding every event handler.
create-react-app already has in-built support for it and you can start using this syntax right now.
We’ll be using this syntax from now onwards, as it is the more popular and preferred way to write React components.
If you want to learn more about this class properties syntax, check out my article here.
How to Use ES6 Shorthand Syntax
If you check the setState function call in the above code sandbox, it looks like this:
this.setState((prevState) => {
  return {
    counter: prevState.counter + 1
  };
});
It’s a lot of code. Just for returning an object from a function, we’re using 5 lines of code.
We can simplify it to a single line as below:
this.setState((prevState) => ({ counter: prevState.counter + 1 }));
Here, we’ve wrapped the object in round brackets to make it implicitly return. This works because if we have a single statement in an arrow function we can skip the return keyword and curly brackets like this:
const add = (a, b) => {
 return a + b;
}

// the above code is the same as below code:

const add = (a, b) => a + b;
But as the opening curly bracket is considered the start of the function body, we need to wrap the object inside round brackets to make it work properly.
Here’s an updated Code Sandbox Demo with this change.
How to Use an Object as a State Updater in React
In the above code, we’ve used a function as the first argument for setState but we can also pass an object as an argument.
Here’s a Code Sandbox Demo.
The component code looks like this:
class User extends React.Component {
  state = {
    name: "Mike"
  };

  handleChange = (event) => {
    const value = event.target.value;
    this.setState({ name: value });
  };

  render() {
    const { name } = this.state;

    return (
      <div>
        <input
          type="text"
          onChange={this.handleChange}
          placeholder="Enter your name"
          value={name}
        />
        <div>Hello, {name}</div>
      </div>
    );
  }
}
Here, we’ve added an input textbox where the user types their name and it’s displayed below the textbox as the user types into the textbox.
In the state, we’ve initialized the name property to Mike and we’ve added an onChange handler to the input textbox like this:
state = {
  name: "Mike"
};

...

<input
  type="text"
  onChange={this.handleChange}
  placeholder="Enter your name"
  value={name}
/>
So when we type anything in the textbox, we’re updating the state with the value typed by passing an object to the setState function.
handleChange = (event) => {
  const value = event.target.value;
  this.setState({ name: value });
}
But which form of
setStateshould we use – what’s preferred? We have to decide whether to pass an object or a function as a first argument to thesetStatefunction.
The answer is: pass an object if you don’t need the prevState parameter to find the next state value. Otherwise pass the function as the first argument to setState.
But you need to be aware of one issue with passing an object as an argument.
Take a look at this Code Sandbox Demo.
In the above demo, the handleClick method looks like this:
handleClick = () => {
  const { counter } = this.state;
  this.setState({
    counter: counter + 1
  });
}
We’re taking the current value of the counter and incrementing it by 1. It works fine, as you can see below:
Now, take a look at this Code Sandbox Demo which is a modified version of the previous Code Sandbox demo.
Our handleClick method looks like this now:
handleClick = () => {
  this.setState({
    counter: 5
  });

  const { counter } = this.state;

  this.setState({
    counter: counter + 1
  });
}
Here, we’re first setting the counter value to 5 and then incrementing it by 1. So the expected value of counter is 6. Let’s see if that’s the case.
As you can see, when we click the button the first time, we expected the counter value to become 5 – but it becomes 1, and on every subsequent click it’s incremented by 1.
This is because, as we have seen previously, the setState function is asynchronous in nature. When we call setState, the value of the counter does not become 5 immediately, so on the next line we’re getting the counter value of 0 to which we’ve initialized the state in the beginning.
So it becomes 1 when we call setState again to increment the counter by 1, and it keeps on incrementing by 1 only.
To fix this issue, we need to use the updater syntax of setState where we pass a function as the first argument.
Here’s a Code Sandbox Demo.
In the above demo, the handleClick method looks like this now:
handleClick = () => {
  this.setState({
    counter: 5
  });

  this.setState((prevState) => {
    return {
      counter: prevState.counter + 1
    };
  });

  this.setState((prevState) => {
    return {
      counter: prevState.counter + 1
    };
  });
}
As you can see, when we first click on the button, the value of counter becomes 7. This is as expected, because first we set it to 5 and then incremented it by 1 twice so it becomes 7. And it remains at 7 even if we click the button multiple times, because on every click we’re re-setting it to 5 and incrementing twice.
This is because inside the handleClick we’re calling setState to set the counter value to 5 by passing an object as the first argument to the setState function. After that, we’ve called two setState calls where we’re using the function as the first argument.
So how does this work correctly?
When React sees a setState call, it schedules an update to make a change to the state because it’s asynchronous. But before it completes the state change, React sees that there is another setState call.
Because of this, React will not re-render immediately with a new counter value. Instead it merges all the setState calls and updates the counter based on the previous value of counter as we’ve used the prevState.counter to calculate the counter value.
And once all the setState calls are completed successfully, only then does React re-render the component. So even if there are three setState calls, React will re-render the component only once, which you can confirm by adding a console.log statement inside the render method.
So the point to remember is that you should be careful when using an object as the first argument to a
setStatecall, as it might result in an unpredictable outcome. Use the function as the first argument to get the correct result based on the previous result.
You might not call setState again and again as we’ve done in the above demo, but you might call it inside another function as shown below:
state = {
 isLoggedIn: false
};

...

doSomethingElse = () => {
 const { isLoggedIn } = this.state;
 if(isLoggedIn) {
   // do something different
 }
};

handleClick = () => {
  // some code
  this.setState({ isLoggedIn: true);
  doSomethingElse();
}
In the above code, we’ve defined an isLoggedIn state and we have two functions handleClick and doSomethingElse. Inside the handleClick function, we’re updating the isLoggedIn state value to true and immediately we’re calling the doSomethingElse function on the next line.
So inside doSomethingElse you might think that you’re going to get the isLoggedIn state as true and the code inside the if condition will be executed. But it will not be executed because setState is asynchronous and the state might not be updated immediately.
That’s why React added lifecycle methods like componendDidUpdate to do something when state or props are updated.
Keep an eye out to check if you’re using the same
statevariable again in the next line or next function to do some operation to avoid these undesired results.
How to Merge setState Calls in React
Take a look at this CodeSandbox Demo.
Here, we have username and counter properties declared in the state like this:
state = {
  counter: 0,
  username: ""
};
and handleOnClick and handleOnChange event handlers declared like this:
handleOnClick = () => {
  this.setState((prevState) => ({
    counter: prevState.counter + 1
  }));
};

handleOnChange = (event) => {
  this.setState({
    username: event.target.value
  });
};
Check the setState calls in the above functions. You can see that inside the handleOnClick function, we’re only setting the state for counter, and inside the handleOnChange function we’re only setting the state for username.
So we don’t need to set the state for both of the state variables at the same time like this:
this.setState((prevState) => ({
    counter: prevState.counter + 1,
    username: "somevalue"
}));
We can update only the one which we want to update. React will manually merge the other state properties so we don’t need to worry about manually merging them ourselves.
As you can see, we’re successfully changing the counter and username independently of each other.
How to Use State in Functional Components in React
Up until now, we’ve seen how to use state in class-based components. Let’s now see how to use it in functional components.
Functional components are similar to class components, except that they do not have state and lifecycle methods. This is why you may have heard them called stateless functional components.
These components only accept props and return some JSX.
Functional components make code shorter and easier to understand and test.
They’re also a little faster to execute, as they don’t have lifecycle methods. They also don’t have the extra data brought by the React.Component class which we extend in class based components.
Take a look at this Code Sandbox Demo.
Here, we’re loading a list of 20 random users from the random user generator API, when the component is loaded inside the componentDidMount method like this:
componentDidMount() {
  axios
    .get("https://randomuser.me/api/?page=0&results=20")
    .then((response) => this.setState({ users: response.data.results }))
    .catch((error) => console.log(error));
}
And once we’ve gotten those users, we’re setting it to the users state and displaying it on the UI.
{users.map((user) => (
  <User key={user.login.uuid} name={user.name} email={user.email} />
))}
Here, we’re passing all the data that we need to display to the User component.
The User component looks like this:
const User = (props) => {
  const { name, email } = props;
  const { first, last } = name;

  return (
    <div>
      <p>
        Name: {first} {last}
      </p>
      <p>Email: {email} </p>
      <hr />
    </div>
  );
};
This User component is a functional component.
A functional component is a function that starts with a capital letter and returns JSX.
Always remember to start your component name with a capital letter like User whether it’s a class-based component or a functional component. That’s how React differentiates it from normal HTML elements when we use them like <User />.
If we use <user />, React will check for the HTML element with the name user. Since there is no such HTML element, you’ll not get the desired output.
In the above User functional component, we get the props passed to the component inside the props parameter of the function.
So instead of using this.props as in class components, we’re using just props.
We never use the this keyword in functional components, so it avoids the various issues associated with this binding.
Therefore, functional components are preferred over class components.
Once we have props, we’re using the object destructuring syntax to get the values out of it and display on the UI.
How to Use State in React Hooks
Starting with version 16.8.0, React introduced hooks. And they’ve completely changed the way we write code in React. Using React Hooks we can use state and lifecycle methods inside functional components.
React hooks are functional components with added state and lifecycle methods.
So now, there is very little to no difference between class-based components and functional components.
Both of them can have state and life cycle methods.
But React hooks are now preferred for writing React components because they make the code shorter and easier to understand.
You will rarely find React components written using class components nowadays.
To declare state using React Hooks, we need to use the useState hook.
The useState hook accepts a parameter which is the initial value of the state.
In class-based components, state is always an object. But when using useState, you can provide any value as the initial value like a number, string, boolean, object, array, null, and so on.
The useState hook returns an array whose first value is the current value of the state. The second value is the function which we will use to update the state similar to the setState method.
Let’s take an example of a class based component which uses state. We will convert it into a functional component using hooks.
import React from 'react';
import ReactDOM from 'react-dom';

class App extends React.Component {
  state = {
    counter: 0
  };

  handleOnClick = () => {
    this.setState(prevState => ({
      counter: prevState.counter + 1
    }));
  };

  render() {
    return (
      <div>
        <p>Counter value is: {this.state.counter} </p>
        <button onClick={this.handleOnClick}>Increment</button>
      </div>
    );
  }
}

ReactDOM.render(<App />, document.getElementById('root'));
Here’s a Code Sandbox Demo which is written using class components.
Let’s convert the above code to use hooks.
import React, { useState } from "react";
import ReactDOM from "react-dom";

const App = () => {
  const [counter, setCounter] = useState(0);

  return (
    <div>
      <div>
        <p>Counter value is: {counter} </p>
        <button onClick={() => setCounter(counter + 1)}>Increment</button>
      </div>
    </div>
  );
};

ReactDOM.render(<App />, document.getElementById("root"));
Here’s a Code Sandbox Demo which is written using React hooks.
As you can see, using React hooks makes the code a lot shorter and easier to understand.
Let’s understand the above code.
- To use the
useStatehook, we need to import it as we have done it in the first line. - Inside the App component, we are calling
useStateby passing0as the initial value and using destructuring syntax. We stored the array values returned byuseStateintocounterandsetCountervariables. - It’s a common convention to prefix the function name used to update the state with the
setkeyword as insetCounter. - When we click the increment button, we are defining an inline function and calling the
setCounterfunction by passing the updated counter value. - Note that as we already have the counter value, we have used that to increment the counter using
setCounter(counter + 1) - Since there is a single statement in the inline on click handler, there is no need to move the code into a separate function. Though you can do that if the code inside the handler becomes complex.
If you want to learn more details about useState and other React hooks (along with examples), then check out my Introduction to React Hooks article.
Thanks for reading!
Want to learn all ES6+ features in detail including let and const, promises, various promise methods, array and object destructuring, arrow functions, async/await, import and export and a whole lot more from scratch?
Check out my Mastering Modern JavaScript book. This book covers all the pre-requisites for learning React and helps you to become better at JavaScript and React.
Check out free preview contents of the book here.
Also, you can check out my free Introduction to React Router course to learn React Router from scratch.
Want to stay up to date with regular content regarding JavaScript, React, Node.js? Follow me on LinkedIn.

Learn to code for free. freeCodeCamp’s open source curriculum has helped more than 40,000 people get jobs as developers. Get started
State is the most complex thing in React, and it’s something both beginners and experienced developers struggle to understand. So in this article, we’ll explore all the basics of state in React.
Before understanding state, let’s first understand some fundamentals so it’s easy to wrap your head around state later.
How to Render Data in the UI in React
To render anything on the screen, we use the ReactDOM.render method in React.
It has the following syntax:
ReactDOM.render(element, container[, callback])
elementcan be any HTML element, JSX or a component that returns JSXcontaineris the element on the UI inside which we want to render the datacallbackis the optional function we can pass which gets called once something is rendered or re-rendered on the screen
Take a look at the below code:
import React from "react";
import ReactDOM from "react-dom";

const rootElement = document.getElementById("root");

ReactDOM.render(<h1>Welcome to React!</h1>, rootElement);
Here’s a Code Sandbox Demo.
Here, we’re just rendering a single h1 element to the screen.
To render multiple elements we can do it as shown below:
import React from "react";
import ReactDOM from "react-dom";

const rootElement = document.getElementById("root");

ReactDOM.render(
  <div>
    <h1>Welcome to React!</h1>
    <p>React is awesome.</p>
  </div>,
  rootElement
);
Here’s a Code Sandbox Demo.
We can also take out the JSX and put it in a variable which is the preferred way of rendering content if it gets larger, like this:
import React from "react";
import ReactDOM from "react-dom";

const rootElement = document.getElementById("root");

const content = (
  <div>
    <h1>Welcome to React!</h1>
    <p>React is awesome.</p>
  </div>
);

ReactDOM.render(content, rootElement);
Here’s a Code Sandbox Demo.
Here, we’ve also added an extra pair of round brackets to align the JSX properly and to make it a single JSX expression.
If you want to understand JSX in detail and its various important features, check out my article here.
Now, let’s display a button and some text on the screen:
import React from "react";
import ReactDOM from "react-dom";

const rootElement = document.getElementById("root");

let counter = 0;

const handleClick = () => {
  counter++;
  console.log("counter", counter);
};

const content = (
  <div>
    <button onClick={handleClick}>Increment counter</button>
    <div>Counter value is {counter}</div>
  </div>
);

ReactDOM.render(content, rootElement);
Here’s a Code Sandbox Demo.
As you can see, when we click on the button, the counter value is incremented as you can see in the console. But on the UI it’s not getting updated.
This is because we’re rendering the content JSX only once using the ReactDOM.render method when the page is loaded. And we’re not calling it again – so even though the value of counter is updating, it’s not getting displayed on the UI. So let’s fix this.
import React from "react";
import ReactDOM from "react-dom";

const rootElement = document.getElementById("root");

let counter = 0;

const handleClick = () => {
  counter++;
  console.log("counter", counter);
  renderContent();
};

const renderContent = () => {
  const content = (
    <div>
      <button onClick={handleClick}>Increment counter</button>
      <div>Counter value is {counter}</div>
    </div>
  );

  ReactDOM.render(content, rootElement);
};

renderContent();
Here’s a Code Sandbox Demo.
Here, we’ve moved the content JSX and ReactDOM.render method call inside a renderContent function. Then once it’s defined, we’re calling the function so it will render the content on the UI on page load.
Note that we’ve also added the renderContent function call inside the handleClick function. So every time we click on the button, the renderContent function will be called and we’ll see the updated counter on the UI.
As can you see, it’s working as expected and the counter value is correctly getting displayed on the UI.
You might think that it’s costly to re-render the entire DOM again on every button click – but it’s not. This is because React uses a Virtual DOM algorithm where it checks what has been changed on the UI and only re-renders the elements which were changed. So the entire DOM is not re-rendered again.
Here’s a Preview link for the Code Sandbox to try it yourself.
As you can see in the HTML structure, only the counter value is re-rendered as it’s the only thing flashing in the HTML structure. This is the reason React is so fast and the virtual DOM makes React more useful.
But still, it’s not feasible to call the renderContent function every time we want to update the UI. So React added the concept of State.
Introduction to State in React
State allows us to manage changing data in an application. It’s defined as an object where we define key-value pairs specifying various data we want to track in the application.
In React, all the code we write is defined inside a component.
There are mainly two ways of creating a component in React:
- class-based component
- functional component
We’ll start with class-based components now. Later in this article, we will see a functional component way of creating components.
You should know how to work with class-based components as well as functional components, including hooks.
Instead of directly learning functional components with React hooks, you should first understand class-based components so it’s easy to clear the basics.
You can create a component by using an ES6 class keyword and by extending the Component class provided by React like this:
import React from "react";
import ReactDOM from "react-dom";

class Counter extends React.Component {
  constructor(props) {
    super(props);

    this.state = {
      counter: 0
    };

    this.handleClick = this.handleClick.bind(this);
  }

  handleClick() {
    this.state.counter = this.state.counter + 1;

    console.log("counter", this.state.counter);
  }

  render() {
    const { counter } = this.state;

    return (
      <div>
        <button onClick={this.handleClick}>Increment counter</button>
        <div>Counter value is {counter}</div>
      </div>
    );
  }
}

const rootElement = document.getElementById("root");
ReactDOM.render(<Counter />, rootElement);
Note that the name of the component starts with a capital letter (
Counter).
Here’s a Code Sandbox Demo.
Let’s explore what we’re doing here.
- Inside the constructor function, we’re first calling
superby passingpropsto it. Then we’ve defined the state as an object withcounteras a property of the object. - We’re also binding
this‘s context to thehandleClickfunction so inside thehandleClickfunction we get the correct context forthis. - Then inside the
handleClickfunction, we’re updating thecounterand logging it to the console. - And inside the
rendermethod, we’re returning the JSX that we want to render on the UI.
The counter is correctly getting updated as you can see in the console – but it’s not getting updated on the UI.
This is because we’re directly updating the state inside the handleClick function as:
this.state.counter = this.state.counter + 1So React does not re-render the component (and it’s also a bad practice to directly update state).
Never ever directly update/mutate state in React, as it’s a bad practice and it will cause issues in your application. Also, your component will not be re-rendered on state change if you make a direct state change.
Syntax of setState
To make the state change, React gives us a setState function that allows us to update the value of the state.
The setState function has the following syntax:
setState(updater, [callback])
updatercan either be a function or an objectcallbackis an optional function that gets executed once the state is successfully updated
Calling
setStateautomatically re-renders the entire component and all its child components. We don’t need to manually re-render as seen previously using therenderContentfunction.
How to Use a Function to Update State in React
Let’s modify the above Code Sandbox to use the setState function for updating the state.
Here’s an updated Code Sandbox Demo.
If you check the updated handleClick function, it looks like this:
handleClick() {
  this.setState((prevState) => {
    return {
      counter: prevState.counter + 1
    };
  });

  console.log("counter", this.state.counter);
}
Here, we’re passing a function as a first argument to the setState function and we’re returning a new state object with counter incremented by 1 based on the previous value of counter.
We’re using the arrow function in the above code, but using a normal function will also work.
If you notice, we’re correctly getting the updated value of the counter on the UI. But in the console, we’re getting the previous counter value even though we’ve added console.log after the this.setState call.
This is because the
setStatefunction is asynchronous in nature.
This means that even though we called setState to increment the counter value by 1, it does not happen immediately. This is because when we call the setState function, the entire component gets re-rendered – so React needs to check what all needs to be changed using the Virtual DOM algorithm and then perform various checks for an efficient update of the UI.
This is the reason you may not get the updated value for counter immediately after the call to setState.
This is a very important thing to keep in mind in React, as you will encounter difficult to debug issues if you don’t write your code keeping in mind that
setStateis asynchronous in React.
If you want to get the updated value of the state immediately after the setState call, you can pass a function as the second argument to the setState call which will be executed once the state is updated.
Here’s a Code Sandbox Demo with that change.
As you can see, we’re getting the correct value of counter in the console as soon as it’s updated on the UI.
In the above demo, the handleClick function looks like this:
handleClick() {
  this.setState(
    (prevState) => {
      return {
        counter: prevState.counter + 1
      };
    },
    () => console.log("counter", this.state.counter)
  );
}
So here, for the setState function call, we’re passing two arguments. The first is a function that returns a new state and the second is a callback function that will be called once the state is updated. We’re just logging the updated counter value to the console in the callback function.
Even though React provides a callback function to get the updated state value immediately, it’s recommended that you use it only for quick testing or logging.
Instead, React recommends that you use the componentDidUpdate method, which is a React life cycle method that looks like this:
componentDidUpdate(prevProps, prevState) {
  if (prevState.counter !== this.state.counter) {
    // do something
    console.log("counter", this.state.counter);
  }
}
Here’s a Code Sandbox Demo.
You can find more information about why to use the componentDidUpdate instead of setState callback here.
How to Simplify State and Method Declaration
If you see the constructor code in the above Code Sandbox demos, you will see that it looks like this:
constructor(props) {
  super(props);

  this.state = {
    counter: 0
  };

  this.handleClick = this.handleClick.bind(this);
}
To use the this keyword inside the handleClick event handler, we have to bind it in the constructor like this:
this.handleClick = this.handleClick.bind(this);
Also, to declare the state, we have to create a constructor, add a super call inside it, and then we can declare the state.
This is not just cumbersome but also makes the code unnecessarily complicated.
As the number of event handlers increases, the number of .bind calls also increases. We can avoid doing this using the class properties syntax.
Here’s an updated Code Sandbox Demo with the class properties syntax.
Here, we’ve moved the state directly inside the class like this:
state = {
   counter: 0
};
and the handlerClick event handler is changed to arrow function syntax like this:
handleClick = () => {
  this.setState((prevState) => {
    return {
      counter: prevState.counter + 1
    };
  });
};
As arrow functions do not have their own this context, it will take the context as the class so there is no need to use the .bind method.
This makes the code a lot simpler and easier to understand as we don’t need to keep binding every event handler.
create-react-app already has in-built support for it and you can start using this syntax right now.
We’ll be using this syntax from now onwards, as it is the more popular and preferred way to write React components.
If you want to learn more about this class properties syntax, check out my article here.
How to Use ES6 Shorthand Syntax
If you check the setState function call in the above code sandbox, it looks like this:
this.setState((prevState) => {
  return {
    counter: prevState.counter + 1
  };
});
It’s a lot of code. Just for returning an object from a function, we’re using 5 lines of code.
We can simplify it to a single line as below:
this.setState((prevState) => ({ counter: prevState.counter + 1 }));
Here, we’ve wrapped the object in round brackets to make it implicitly return. This works because if we have a single statement in an arrow function we can skip the return keyword and curly brackets like this:
const add = (a, b) => {
 return a + b;
}

// the above code is the same as below code:

const add = (a, b) => a + b;
But as the opening curly bracket is considered the start of the function body, we need to wrap the object inside round brackets to make it work properly.
Here’s an updated Code Sandbox Demo with this change.
How to Use an Object as a State Updater in React
In the above code, we’ve used a function as the first argument for setState but we can also pass an object as an argument.
Here’s a Code Sandbox Demo.
The component code looks like this:
class User extends React.Component {
  state = {
    name: "Mike"
  };

  handleChange = (event) => {
    const value = event.target.value;
    this.setState({ name: value });
  };

  render() {
    const { name } = this.state;

    return (
      <div>
        <input
          type="text"
          onChange={this.handleChange}
          placeholder="Enter your name"
          value={name}
        />
        <div>Hello, {name}</div>
      </div>
    );
  }
}
Here, we’ve added an input textbox where the user types their name and it’s displayed below the textbox as the user types into the textbox.
In the state, we’ve initialized the name property to Mike and we’ve added an onChange handler to the input textbox like this:
state = {
  name: "Mike"
};

...

<input
  type="text"
  onChange={this.handleChange}
  placeholder="Enter your name"
  value={name}
/>
So when we type anything in the textbox, we’re updating the state with the value typed by passing an object to the setState function.
handleChange = (event) => {
  const value = event.target.value;
  this.setState({ name: value });
}
But which form of
setStateshould we use – what’s preferred? We have to decide whether to pass an object or a function as a first argument to thesetStatefunction.
The answer is: pass an object if you don’t need the prevState parameter to find the next state value. Otherwise pass the function as the first argument to setState.
But you need to be aware of one issue with passing an object as an argument.
Take a look at this Code Sandbox Demo.
In the above demo, the handleClick method looks like this:
handleClick = () => {
  const { counter } = this.state;
  this.setState({
    counter: counter + 1
  });
}
We’re taking the current value of the counter and incrementing it by 1. It works fine, as you can see below:
Now, take a look at this Code Sandbox Demo which is a modified version of the previous Code Sandbox demo.
Our handleClick method looks like this now:
handleClick = () => {
  this.setState({
    counter: 5
  });

  const { counter } = this.state;

  this.setState({
    counter: counter + 1
  });
}
Here, we’re first setting the counter value to 5 and then incrementing it by 1. So the expected value of counter is 6. Let’s see if that’s the case.
As you can see, when we click the button the first time, we expected the counter value to become 5 – but it becomes 1, and on every subsequent click it’s incremented by 1.
This is because, as we have seen previously, the setState function is asynchronous in nature. When we call setState, the value of the counter does not become 5 immediately, so on the next line we’re getting the counter value of 0 to which we’ve initialized the state in the beginning.
So it becomes 1 when we call setState again to increment the counter by 1, and it keeps on incrementing by 1 only.
To fix this issue, we need to use the updater syntax of setState where we pass a function as the first argument.
Here’s a Code Sandbox Demo.
In the above demo, the handleClick method looks like this now:
handleClick = () => {
  this.setState({
    counter: 5
  });

  this.setState((prevState) => {
    return {
      counter: prevState.counter + 1
    };
  });

  this.setState((prevState) => {
    return {
      counter: prevState.counter + 1
    };
  });
}
As you can see, when we first click on the button, the value of counter becomes 7. This is as expected, because first we set it to 5 and then incremented it by 1 twice so it becomes 7. And it remains at 7 even if we click the button multiple times, because on every click we’re re-setting it to 5 and incrementing twice.
This is because inside the handleClick we’re calling setState to set the counter value to 5 by passing an object as the first argument to the setState function. After that, we’ve called two setState calls where we’re using the function as the first argument.
So how does this work correctly?
When React sees a setState call, it schedules an update to make a change to the state because it’s asynchronous. But before it completes the state change, React sees that there is another setState call.
Because of this, React will not re-render immediately with a new counter value. Instead it merges all the setState calls and updates the counter based on the previous value of counter as we’ve used the prevState.counter to calculate the counter value.
And once all the setState calls are completed successfully, only then does React re-render the component. So even if there are three setState calls, React will re-render the component only once, which you can confirm by adding a console.log statement inside the render method.
So the point to remember is that you should be careful when using an object as the first argument to a
setStatecall, as it might result in an unpredictable outcome. Use the function as the first argument to get the correct result based on the previous result.
You might not call setState again and again as we’ve done in the above demo, but you might call it inside another function as shown below:
state = {
 isLoggedIn: false
};

...

doSomethingElse = () => {
 const { isLoggedIn } = this.state;
 if(isLoggedIn) {
   // do something different
 }
};

handleClick = () => {
  // some code
  this.setState({ isLoggedIn: true);
  doSomethingElse();
}
In the above code, we’ve defined an isLoggedIn state and we have two functions handleClick and doSomethingElse. Inside the handleClick function, we’re updating the isLoggedIn state value to true and immediately we’re calling the doSomethingElse function on the next line.
So inside doSomethingElse you might think that you’re going to get the isLoggedIn state as true and the code inside the if condition will be executed. But it will not be executed because setState is asynchronous and the state might not be updated immediately.
That’s why React added lifecycle methods like componendDidUpdate to do something when state or props are updated.
Keep an eye out to check if you’re using the same
statevariable again in the next line or next function to do some operation to avoid these undesired results.
How to Merge setState Calls in React
Take a look at this CodeSandbox Demo.
Here, we have username and counter properties declared in the state like this:
state = {
  counter: 0,
  username: ""
};
and handleOnClick and handleOnChange event handlers declared like this:
handleOnClick = () => {
  this.setState((prevState) => ({
    counter: prevState.counter + 1
  }));
};

handleOnChange = (event) => {
  this.setState({
    username: event.target.value
  });
};
Check the setState calls in the above functions. You can see that inside the handleOnClick function, we’re only setting the state for counter, and inside the handleOnChange function we’re only setting the state for username.
So we don’t need to set the state for both of the state variables at the same time like this:
this.setState((prevState) => ({
    counter: prevState.counter + 1,
    username: "somevalue"
}));
We can update only the one which we want to update. React will manually merge the other state properties so we don’t need to worry about manually merging them ourselves.
As you can see, we’re successfully changing the counter and username independently of each other.
How to Use State in Functional Components in React
Up until now, we’ve seen how to use state in class-based components. Let’s now see how to use it in functional components.
Functional components are similar to class components, except that they do not have state and lifecycle methods. This is why you may have heard them called stateless functional components.
These components only accept props and return some JSX.
Functional components make code shorter and easier to understand and test.
They’re also a little faster to execute, as they don’t have lifecycle methods. They also don’t have the extra data brought by the React.Component class which we extend in class based components.
Take a look at this Code Sandbox Demo.
Here, we’re loading a list of 20 random users from the random user generator API, when the component is loaded inside the componentDidMount method like this:
componentDidMount() {
  axios
    .get("https://randomuser.me/api/?page=0&results=20")
    .then((response) => this.setState({ users: response.data.results }))
    .catch((error) => console.log(error));
}
And once we’ve gotten those users, we’re setting it to the users state and displaying it on the UI.
{users.map((user) => (
  <User key={user.login.uuid} name={user.name} email={user.email} />
))}
Here, we’re passing all the data that we need to display to the User component.
The User component looks like this:
const User = (props) => {
  const { name, email } = props;
  const { first, last } = name;

  return (
    <div>
      <p>
        Name: {first} {last}
      </p>
      <p>Email: {email} </p>
      <hr />
    </div>
  );
};
This User component is a functional component.
A functional component is a function that starts with a capital letter and returns JSX.
Always remember to start your component name with a capital letter like User whether it’s a class-based component or a functional component. That’s how React differentiates it from normal HTML elements when we use them like <User />.
If we use <user />, React will check for the HTML element with the name user. Since there is no such HTML element, you’ll not get the desired output.
In the above User functional component, we get the props passed to the component inside the props parameter of the function.
So instead of using this.props as in class components, we’re using just props.
We never use the this keyword in functional components, so it avoids the various issues associated with this binding.
Therefore, functional components are preferred over class components.
Once we have props, we’re using the object destructuring syntax to get the values out of it and display on the UI.
How to Use State in React Hooks
Starting with version 16.8.0, React introduced hooks. And they’ve completely changed the way we write code in React. Using React Hooks we can use state and lifecycle methods inside functional components.
React hooks are functional components with added state and lifecycle methods.
So now, there is very little to no difference between class-based components and functional components.
Both of them can have state and life cycle methods.
But React hooks are now preferred for writing React components because they make the code shorter and easier to understand.
You will rarely find React components written using class components nowadays.
To declare state using React Hooks, we need to use the useState hook.
The useState hook accepts a parameter which is the initial value of the state.
In class-based components, state is always an object. But when using useState, you can provide any value as the initial value like a number, string, boolean, object, array, null, and so on.
The useState hook returns an array whose first value is the current value of the state. The second value is the function which we will use to update the state similar to the setState method.
Let’s take an example of a class based component which uses state. We will convert it into a functional component using hooks.
import React from 'react';
import ReactDOM from 'react-dom';

class App extends React.Component {
  state = {
    counter: 0
  };

  handleOnClick = () => {
    this.setState(prevState => ({
      counter: prevState.counter + 1
    }));
  };

  render() {
    return (
      <div>
        <p>Counter value is: {this.state.counter} </p>
        <button onClick={this.handleOnClick}>Increment</button>
      </div>
    );
  }
}

ReactDOM.render(<App />, document.getElementById('root'));
Here’s a Code Sandbox Demo which is written using class components.
Let’s convert the above code to use hooks.
import React, { useState } from "react";
import ReactDOM from "react-dom";

const App = () => {
  const [counter, setCounter] = useState(0);

  return (
    <div>
      <div>
        <p>Counter value is: {counter} </p>
        <button onClick={() => setCounter(counter + 1)}>Increment</button>
      </div>
    </div>
  );
};

ReactDOM.render(<App />, document.getElementById("root"));
Here’s a Code Sandbox Demo which is written using React hooks.
As you can see, using React hooks makes the code a lot shorter and easier to understand.
Let’s understand the above code.
- To use the
useStatehook, we need to import it as we have done it in the first line. - Inside the App component, we are calling
useStateby passing0as the initial value and using destructuring syntax. We stored the array values returned byuseStateintocounterandsetCountervariables. - It’s a common convention to prefix the function name used to update the state with the
setkeyword as insetCounter. - When we click the increment button, we are defining an inline function and calling the
setCounterfunction by passing the updated counter value. - Note that as we already have the counter value, we have used that to increment the counter using
setCounter(counter + 1) - Since there is a single statement in the inline on click handler, there is no need to move the code into a separate function. Though you can do that if the code inside the handler becomes complex.
If you want to learn more details about useState and other React hooks (along with examples), then check out my Introduction to React Hooks article.
Thanks for reading!
Want to learn all ES6+ features in detail including let and const, promises, various promise methods, array and object destructuring, arrow functions, async/await, import and export and a whole lot more from scratch?
Check out my Mastering Modern JavaScript book. This book covers all the pre-requisites for learning React and helps you to become better at JavaScript and React.
Check out free preview contents of the book here.
Also, you can check out my free Introduction to React Router course to learn React Router from scratch.
Want to stay up to date with regular content regarding JavaScript, React, Node.js? Follow me on LinkedIn.
Learn to code for free. freeCodeCamp’s open source curriculum has helped more than 40,000 people get jobs as developers. Get started
Состояние. Управление компонентами-классами
Последнее обновление: 01.04.2022

Объект state описывает внутреннее состояние компонента, он похож на props за тем исключением, что состояние определяется внутри компонента и доступно только из компонента.
Если props представляет входные данные, которые передаются в компонент извне, то состояние хранит такие объекты, которые создаются в компоненте и полностью
зависят от компонента.
Также в отличие от props значения в state можно изменять.
И еще важный момент — значения из state должны использоваться при рендеринге. Если какой-то объект не используется в рендерниге компонента, то нет смысла сохранять его в
state.
Нередко state описывает какие-то визуальные свойства элемента, которые могут изменяться при взаимодействие с пользователем. Например, кнопку нажали, и соответственно можно
изменить ее состояние — придать ей какой-то другой цвет, тень и так далее. Кнопку нажали повторно — можно вернуть исходное состояние.
Стоит отметить, что традиционно объект state применялся только в классах-компонентах. В функциональных же компонентах для управления состоянием применяется
другая архитектура, основанная на хуках.
При использовании класса-компонента единственное место, где можно установить объект state — это конструктор класса:
<!DOCTYPE html>
<html>
<head>
<meta charset="utf-8" />
<title>Hello React</title>
</head>
<body>
<div id="app"></div>
<script crossorigin src="https://unpkg.com/react@18/umd/react.production.min.js"></script>
<script crossorigin src="https://unpkg.com/react-dom@18/umd/react-dom.production.min.js"></script>
<script src="https://unpkg.com/@babel/standalone/babel.min.js"></script>
<script type="text/babel">
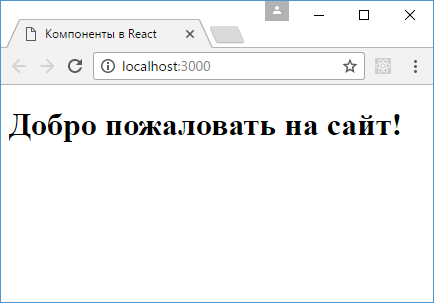
class Hello extends React.Component {
constructor(props) {
super(props);
this.state = {welcome: "Добро пожаловать на сайт!"};
}
render() {
return <h1>{this.state.welcome}</h1>;
}
}
ReactDOM.createRoot(
document.getElementById("app")
)
.render(
<Hello />
);
</script>
</body>
</html>
При определении конструктора компонента в нем должен вызываться конструктор базового класса, в который передается объект props.
Обновление состояния
Для обновления состояния вызывается функция setState():
this.setState({welcome: "Привет React"});
Изменение состояния вызовет повторный рендеринг компонента, в соответствии с чем веб-страница будет обновлена.
В то же время не стоит изменять свойства состояния напрямую, например:
this.state.welcome = "Привет React";
В данном случае изменения повторного рендеринга компонента происходить не будет.
При этом нам не обязательно обновлять все его значения. В процессе работы программы мы можем обновить только некоторые свойства.
Тогда необновленные свойства будут сохранять старые значения.
Пример обновления состояния:
<!DOCTYPE html>
<html>
<head>
<meta charset="utf-8" />
<title>Hello React</title>
<style>
button{
width: 100px;
height:30px;
border-radius: 4px;
margin:50px;
}
.on{
color:#666;
background-color: #ccc;
}
.off{
color:#888;
background-color: white;
}
</style>
</head>
<body>
<div id="app"></div>
<script crossorigin src="https://unpkg.com/react@18/umd/react.production.min.js"></script>
<script crossorigin src="https://unpkg.com/react-dom@18/umd/react-dom.production.min.js"></script>
<script src="https://unpkg.com/@babel/standalone/babel.min.js"></script>
<script type="text/babel">
class ClickButton extends React.Component {
constructor(props) {
super(props);
this.state = {class: "off", label: "Нажми"};
this.press = this.press.bind(this);
}
press(){
let className = (this.state.class==="off")?"on":"off";
this.setState({class: className});
}
render() {
return <button onClick={this.press} className={this.state.class}>{this.state.label}</button>;
}
}
ReactDOM.createRoot(
document.getElementById("app")
)
.render(
<ClickButton />
);
</script>
</body>
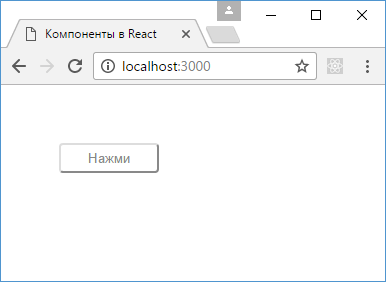
</html>
Здесь определен компонент ClickButton, который по сути представляет кнопку. В состоянии кнопки хранится два свойства — надпись и класс. При нажатии на кнопку мы
будем переключать с одного класса на другой. Событие нажатия кнопки через атрибут onClick связано с методом press(),
в котором переключается класс кнопки.
При этом свойство state.label остается неизменным.
Асинхронное обновление
При наличии нескольких вызовов setState() React может объединять их в один общий пакет обновлений для увеличения производительности.
Так как объекты this.props и this.state могут обновляться асинхронно, не стоит полагаться на значения этих объектов
для вычисления состояния. Например:
this.setState({
  counter: this.state.counter + this.props.increment,
});
Для обновления надо использовать другую версию функции setState(), которая в качестве параметра принимает функцию.
Данная функция имеет два параметра: предыдущее состояние объекта state и объект props на момент применения обновления:
this.setState(function(prevState, props) {
  return {
    counter: prevState.counter + props.increment
  };
});
Например, определим два последовательных вызова setState():
<!DOCTYPE html>
<html>
<head>
    <meta charset="utf-8" />
    <title>METANIT.COM</title>
</head>
<body>
    <div id="app"></div>

    <script crossorigin src="https://unpkg.com/react@18/umd/react.production.min.js"></script>
    <script crossorigin src="https://unpkg.com/react-dom@18/umd/react-dom.production.min.js"></script>
    <script src="https://unpkg.com/@babel/standalone/babel.min.js"></script>
    <script type="text/babel">
        class ClickButton extends React.Component {

           constructor(props) {
               super(props);
               this.state = {counter: 0};
               this.press = this.press.bind(this);
           }
           press(){
			   this.setState({counter: this.state.counter + parseInt(this.props.increment)});
			   this.setState({counter: this.state.counter + parseInt(this.props.increment)});
           }
           render() {
               return <div>
							<button onClick={this.press}>Count</button>
							<div>Counter: {this.state.counter} <br />Increment: {this.props.increment}</div>
						</div>
           }
       }
        ReactDOM.createRoot(
            document.getElementById("app")
        )
        .render(
           <ClickButton increment="1" />
        );
    </script>
</body>
</html>
В props определено свойство increment — значение, на которое будет увеличиваться свойство counter в state
(this.setState({counter: this.state.counter + parseInt(this.props.increment)});). При чем при нажатии кнопки мы предполагаем, что функция setState()
будет вызываться два раза, соответственно значение state.counter при нажатии кнопки должно увеличиваться на 2. Однако в реальности увеличение
происходит лишь на 1:

Теперь изменим код, применив второй вариант функции setState():
<!DOCTYPE html>
<html>
<head>
    <meta charset="utf-8" />
    <title>METANIT.COM</title>
</head>
<body>
    <div id="app"></div>

    <script crossorigin src="https://unpkg.com/react@18/umd/react.production.min.js"></script>
    <script crossorigin src="https://unpkg.com/react-dom@18/umd/react-dom.production.min.js"></script>
    <script src="https://unpkg.com/@babel/standalone/babel.min.js"></script>
    <script type="text/babel">
        class ClickButton extends React.Component {

           constructor(props) {
               super(props);
               this.state = {counter: 0};

               this.press = this.press.bind(this);
           }
		   incrementCounter(prevState, props) {
				  return {
					counter: prevState.counter + parseInt(props.increment)
				  };
			}
           press(){
			   this.setState(this.incrementCounter);
			   this.setState(this.incrementCounter);
           }
           render() {
               return <div>
						<button onClick={this.press}>Count</button>
						<div>Counter: {this.state.counter}<br /> Increment: {this.props.increment}</div>
				</div>
           }
       }

       ReactDOM.createRoot(
            document.getElementById("app")
        )
        .render(
           <ClickButton increment="1" />
       );
    </script>
</body>
</html>
Чтобы избежать повторения, все действия по инкременту вынесены в отдельную функцию — incrementCounter, однако опять же функция setState()
вызывается два раза. И теперь инкремент будет срабатывать два раза при однократном нажатии, собственно как и определено в коде и как и должно быть:


Привет, друзья!
В этой статье я хочу поговорить с вами об управлении состоянием и повторном рендеринге в React.js.
Что такое состояние и зачем им управлять?
Состояние/state можно определить как любые данные, которые влияют на рендеринг/rendering компонентов. Состояние хранится в реактивных переменных/reactive variables ](в терминологии RxJS).
Управление состоянием/state management — это механизм, позволяющий создавать реактивные переменные, фиксировать изменения их значений и уведомлять об этом «заинтересованные» компоненты. Как правило, такой механизм реализуется с помощью паттерна Издатель-Подписчик/Publisher-Subscriber/Pub-Sub.
Реакция компонентов на изменение состояния часто, но далеко не всегда завершается добавлением/модификацией/удалением HTML-элементов в/из DOM. Как известно, операции, связанные с манипулированием DOM, являются очень медленными. Это обуславливает необходимость грамотного управления состоянием приложений.
Состояние бывает 2 видов:
локальное/local: для определения такого состояние используется хукuseState;распределенное/shared: для создания такого состояния используется хукuseContext(часто в сочетании с хукомuseReducer) или библиотеки типаRedux.
В свою очередь, распределенное состояние условно также можно разделить на 2 вида:
совместно размещенное/co-located: такое состояние является общим для группы автономных, т.е. не находящихся в отношенияхпредок-потомок/parent-child, компонентов (useContext/useReducer; в качестве примера библиотеки, реализующей такой подход, можно назватьRecoil);глобальное/global— такое состояние является общим для всего приложения (Redux).
Отличная иллюстрация того, чем следует руководствоваться при определении вида состояния:

Существует еще один подход к управлению состоянием, предназначенный для приложений, где большая часть состояния хранится на сервере. Такой подход предлагает, в частности, библиотека React Query. Управление распределенным состоянием клиента в этом случае, как правило, реализуется за счет кеширования. Условно данный подход можно назвать смешанным/mixed.
Чуть позже мы рассмотрим паттерн, позволяющий управлять состоянием приложения наиболее простым и эффективным способом.
Что такое рендеринг и почему он происходит?
Рендеринг — это вычисление компонентов (их структуры, дочерних компонентов, свойств и других данных), часто завершающаяся добавлением/модификацией/удалением HTML-элементов в/из DOM.
Выполнение кода функции (компонента) не всегда завершается отрисовкой/перерисовкой компонента в DOM. Для определения необходимости в манипулировании DOM React использует множество эвристических техник: объект виртуальный DOM/virtual DOM или, если быть точнее, волокно/fiber, алгоритм согласование DOM/DOM diffing (опять же, в настоящее время речь идет о согласовании волокон), атрибут ключ/key и т.д.
Рендеринг бывает 2 видов:
первоначальный/initial: происходит при инициализации приложения;повторный/rerendering: происходит при определенных условиях (см. ниже).
Для управления первоначальным рендерингом предназначены такие вещи как утилита lazy и компонент верхнего уровня Suspense, позволяющие выполнять разделение кода/code splitting, т.е. загружать (в этом React помогает Webpack) и выполнять только тот JS-код, который используется приложением в данный момент, а также условный рендеринг/conditional rendering компонентов, когда рендерятся только те компоненты, которые «соответствуют» текущему состоянию приложения.
Повторный рендеринг происходит в следующих случаях:
- изменение состояния компонента;
- изменение значений
пропов/props, передаваемых компоненту; - повторный рендеринг родительского компонента.
Отличное визуальное руководство по повторному рендерингу в React.
Потребление контекста/context consuming также приводит к повторному рендерингу компонента. Это происходит при изменении передаваемых через контекст значений, которые используются (потребляются) компонентом. Поскольку чаще всего через контекст передается объект, это происходит почти всегда.
Для управления повторным рендерингом предназначены такие вещи как:
- хук
useCallback, позволяющий запомнить (мемоизировать/memoize) вычисление дорогостоящих с точки зрения производительности функций (обработчиков); - хук
useMemo, который позволяет мемоизировать вычисление объектов (в том числе, передаваемых в качестве пропов другим компонентам) и вложенных элементов, таких как списки; - утилита
memo, позволяющая мемоизировать компоненты за счетповерхностного/shallowсравнения передаваемых им пропов.
Для мониторинга повторного рендеринга предназначены такие вещи как:
профилировщик (профайлер)/profiler— поставляется в комплекте сReact Developer Tools;- утилита
why-did-you-render.
Чуть позже мы рассмотрим примеры использования этих инструментов.
Как сделать хорошо?
Разработаем простое React/TypeScript-приложение и научимся управлять его состоянием, а также контролировать рендеринг его компонентов.
Создаем шаблон приложения с помощью create-react-app:
yarn create react-app my-app --template typescript
# or
npx create-react-app ...
Наше приложение будет состоять из 2 компонентов: RandomString и RandomHexColor. Каждый из этих компонентов будет состоять из 3 компонентов: Container, Button и компонент, объединяющий их в единое целое.
Нам потребуется утилита для создания хранилища состояния (createStore), а также хук для вывода в консоль сообщений о рендеринге компонентов, начиная со второго рендеринга (useLogAfterFirstRender).
Структура директории src будет следующей:
- components
 - RandomHexColor
   - Button.tsx
   - Container.tsx
   - index.tsx
 - RandomString
   - Button.tsx
   - Container.tsx
   - index.tsx
 - index.ts
- hooks
 - useLogAfterFirstRender.ts
- types
 - index.d.ts
- utils
 - createStore.tsx
- App.scss
- App.tsx
- index.tsx
Состояние будет общим (распределенным) для компонентов RandomString и RandomHexColor. Имеет смысл начать с разработки утилиты для создания хранилища.
Вот чем я руководствовался при реализации данной утилиты:
- утилита должна принимать объект (
хранилище/store) с состоянием (state) и сеттерами (setters) — методами для изменениячастей состояния/state slicesили всего состояния; - сеттеры должны мемоизироваться во избежание повторного вычисления, но при этом всегда иметь доступ к актуальному состоянию за счет декорирования;
- провайдеры состояния и сеттеров должны быть автономными, чтобы повторное вычисление состояния не приводило к повторному рендерингу компонентов, потребляющих сеттеры;
- утилита должна возвращать провайдер и хуки для извлечения состояния и сеттеров.
Начнем с определения типов для утилиты (types/index.d.ts) и дочерних компонентов:
// тип для состояния, передаваемого утилите
export type State = { [k: string]: any }
// тип для начальных сеттеров
export type InitialSetters = {
 [k: string]: (s: State, ...args: any[]) => void | Partial<State>
}
// тип для проксированных сеттеров
export type ProxySetters = { [k: string]: (v: any) => void }
// тип для хранилища
export type Store = { state: State; setters: InitialSetters }
// тип для дочерних компонентов
export type Children = { children: React.ReactNode }
Сигнатура объекта хранилища, передаваемого утилите:
const store = {
 state: {
   stateSlice: value
 },
 setters: {
   setter: (state, args) => stateSlice
 }
}
Приступаем к реализации утилиты.
Импортируем хуки и типы:
import React, { createContext, useContext, useMemo, useState } from 'react'
import { State, InitialSetters, ProxySetters, Store, Children } from 'types'
Определяем утилиту для проксирования сеттеров:
const createSetters = (
 setters: InitialSetters,
 setState: React.Dispatch<(prevState: State) => State>
) => {
 const _setters = {} as ProxySetters

 for (const key in setters) {
   _setters[key] = (...args) => {
     setState((state) => {
       const newState = setters[key](state, ...args)

       return { ...state, ...newState }
     })
   }
 }

 return _setters
}
Данная утилита принимает сеттеры и декорирует их таким образом, что они, во-первых, получают состояние в качестве первого аргумента, во-вторых, обновляют состояние, возвращая объект, ключи которого должны совпадать с ключами модифицируемых частей состояния. Сеттер также может вернуть модифицированное состояние в целом.
Определяем утилиту для создания хранилища:
export function createStore(store: Store) {
 // разделяем контексты и провайдеры (ниже)
 const StateContext = createContext<State>(store.state)
 const SetterContext = createContext<ProxySetters>(store.setters)

 const Provider = ({ children }: Children) => {
   const [state, setState] = useState(store.state)
   // это позволит избежать повторного рендеринга компонентов, потребляющих сеттеры (кнопок)
   const setters = useMemo(() => createSetters(store.setters, setState), [])

   return (
     <StateContext.Provider value={state}>
       <SetterContext.Provider value={setters}>
         {children}
       </SetterContext.Provider>
     </StateContext.Provider>
   )
 }

 const useStore = () => useContext(StateContext)
 const useSetter = () => useContext(SetterContext)

 return [Provider, useStore, useSetter] as const
}
Используем данную утилиту для создания хранилища в App.tsx.
Импортируем стили, тип, утилиту и компоненты:
import './App.scss'
import { Store } from 'types'
import { createStore } from 'utils/createStore'
import { RandomString, RandomHexColor } from 'components'
Создаем хранилище:
const store: Store = {
 state: {
   randomString: '',
   randomHexColor: ''
 },
 setters: {
   setRandomString: (_, randomString) => ({ randomString }),
   setRandomHexColor: (_, randomHexColor) => ({ randomHexColor })
 }
}
Наше хранилище содержит 2 реактивные переменные randomString и randomHexColor и 2 метода для изменения значений этих переменных: setRandomString и setRandomHexColor, соответственно.
Создаем хранилище, экспортируем хуки и оборачиваем компоненты в провайдер:
// поскольку утилита возвращает массив,
// мы вольны именовать провайдер и хуки как угодно,
// что способствует совместному размещению состояний,
// позволяя избежать путаницы в провайдерах/хуках
export const [Provider, useStore, useSetter] = createStore(store)

function App() {
 return (
   <Provider>
     <RandomString />
     <RandomHexColor />
   </Provider>
 )
}

export default App
Стили (`App.scss`)
// шрифт
@import url('https://fonts.googleapis.com/css2?family=Montserrat:wght@200;400;600&display=swap');

// переменные
$primary: #0275d8;
$success: #5cb85c;
$warning: #f0ad4e;
$light: #f7f7f7;
$dark: #292b2c;

// миксин для сброса стилей
@mixin reset($font-family, $font-size, $color) {
 margin: 0;
 padding: 0;
 box-sizing: border-box;
 @if $font-family {
   font-family: $font-family;
 }
 @if $font-size {
   font-size: $font-size;
 }
 @if $color {
   color: $color;
 }
}

// миксин для центрирования
@mixin flex-center($column: false) {
 display: flex;
 justify-content: center;
 align-items: center;

 @if $column {
   & {
     flex-direction: column;
   }
 }
}

*,
*::before,
*::after {
 // применяем миксин
 @include reset('Montserrat', 1rem, $dark);
}

#root {
 min-height: 100vh;
 @include flex-center(true);

 // свойство gap не работает в Firefox, поэтому приходится делать так
 div + div {
   margin-top: 1rem;
 }

 .random-string,
 .random-color {
   @include flex-center(true);
 }

 .random-color {
   div {
     width: 120px;
     height: 120px;
     border-radius: 4px;
     box-shadow: 0 1px 2px rgba(0, 0, 0, 0.5);
   }
 }

 button {
   margin: 0.5rem;
   padding: 0.5rem 1rem;
   border: none;
   outline: none;
   border-radius: 4px;
   background-color: $primary;
   color: $light;
   box-shadow: 0 1px 2px rgba(0, 0, 0, 0.3);
   cursor: pointer;
   user-select: none;

   &:active {
     box-shadow: none;
   }
 }

 .color-button {
   background-color: $success;
 }

 .reload-button {
   background-color: $warning;
   color: $dark;
 }
}
Не забываем установить sass: yarn add -D sass или npm i -D sass.
Хук для вывода в консоль сообщений о рендеринге (hooks/useLogAfterFirstRender.ts):
import { useEffect, useRef } from 'react'

export const useLogAfterFirstRender = (message: string) => {
 const firstRender = useRef(true)

 useEffect(() => {
   firstRender.current = false
 }, [])

 if (!firstRender.current) {
   console.log(message)
 }
}
Теперь займемся компонентами.
Контейнер для случайной строки (RandomString/Container.tsx):
import { useStore } from 'App'
import { useLogAfterFirstRender } from 'hooks/useLogAfterFirstRender'

export const Container = () => {
 // извлекаем значение переменной `randomString`
 const { randomString } = useStore()

 useLogAfterFirstRender('Random string container')

 return <p>{randomString || 'qwerty'}</p>
}
Кнопка для установки значения строки (RandomString/Button.tsx):
import { useCallback } from 'react'
import { useSetter } from 'App'
import { useLogAfterFirstRender } from 'hooks/useLogAfterFirstRender'

// функция для генерации случайной строки
const getRandomString = () => Math.random().toString(36).slice(2)

export const Button = () => {
 // извлекаем сеттер для изменения значения переменной `randomString`
 const { setRandomString } = useSetter()

 useLogAfterFirstRender('Random string button')

 // мемоизируем обработчик нажатия кнопки
 const onClick = useCallback(() => {
   const randomString = getRandomString()
   // используем сеттер
   setRandomString(randomString)
 }, [setRandomString])

 return <button onClick={onClick}>Set random string</button>
}
Компонент RandomString (RandomString/index.tsx):
import { Container } from './Container'
import { Button } from './Button'

export const RandomString = () => (
 <div className='random-string'>
   <Container />
   <Button />
 </div>
)
Компонент RandomHexColor:
// RandomHexColor/Container.tsx
import { useStore } from 'App'
import { useLogAfterFirstRender } from 'hooks/useLogAfterFirstRender'

export const Container = () => {
 // извлекаем значение переменной `randomHexColor`
 const { randomHexColor } = useStore()

 useLogAfterFirstRender('Random HEX color container')

 // мемоизируем вычисление стилей
 const containerStyles = useMemo(
   () => ({
     backgroundColor: randomHexColor || 'deepskyblue'
   }),
   [randomHexColor]
 )

 return <div style={containerStyles}></div>
}

// RandomHexColor/Button.tsx
import { useCallback } from 'react'
import { useSetter } from 'App'
import { useLogAfterFirstRender } from 'hooks/useLogAfterFirstRender'

// функция для генерации случайного цвета
const getRandomHexColor = () =>
 `#${((Math.random() * 0xffffff) << 0).toString(16)}`

export const Button = () => {
 // извлекаем сеттер для изменения значения переменной `randomHexColor`
 const { setRandomHexColor } = useSetter()

 useLogAfterFirstRender('Random HEX color button')

 const onClick = useCallback(() => {
   const randomHexColor = getRandomHexColor()
   // используем сеттер
   setRandomHexColor(randomHexColor)
 }, [setRandomHexColor])

 return (
   <button onClick={onClick} className='color-button'>Set random HEX color</button>
 )
}
Выполняем повторный экспорт компонентов (components/index.ts):
export { RandomString } from './RandomString'
export { RandomHexColor } from './RandomHexColor'
Посмотрим, как работает наше приложение. Выполняем команду yarn start или npm start:

Нажимаем на кнопку Set random string:

Ожидаемо меняется значение строки.
Но что это? В консоли мы видим сообщения о повторном рендеринге как компонента RandomString, так и компонента RandomHexColor. Но мы же ничего не делали с RandomHexColor. Почему же он подвергся повторному рендерингу?
Обратите внимание:
- повторный рендеринг не означает перерисовки компонента
Random HEX color container, а лишь его повторное вычисление; - кнопки повторно не рендерятся. Этим мы обязаны мемоизации сеттеров, выполненной при создании хранилища.
Обратимся за помощью к профилировщику для того, чтобы понять, почему происходит повторный рендеринг, казалось бы, незаинтересованного компонента.
Определим отображаемые названия компонентов:
Container.displayName = 'Random string container'
// и т.д.
Переходим во вкладку Profiler инструментов разработчика в браузере.
Настраиваем его: нажимаем на иконку шестеренки View settings и выбираем Highlight updates when components render. на вкладке General и Record why each component rendered while profiling. на вкладке Profiler:
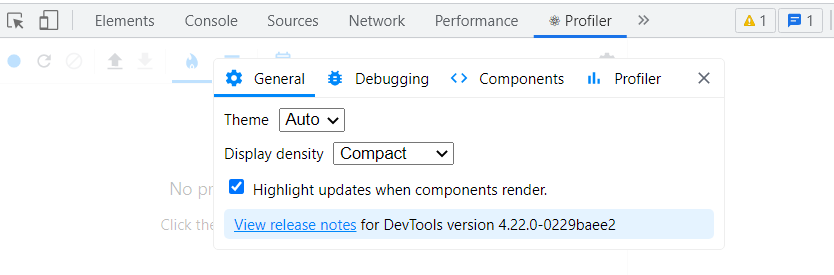
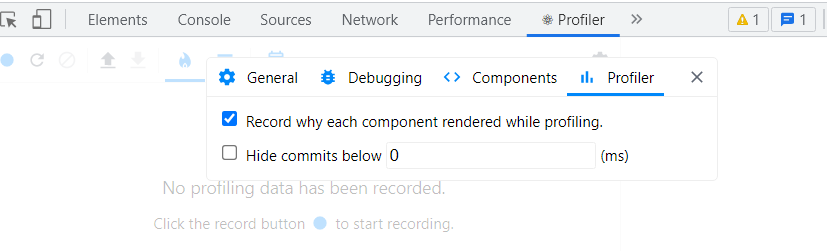
Закрываем панель настроек профилировщика и нажимаем на стрелку Reload and start profiling в левом верхнем углу рядом с иконкой записи:
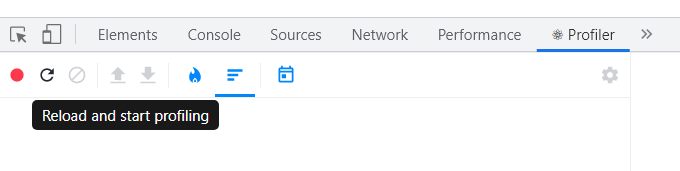
Нажимаем на кнопку Set random string, видим подсветку повторного рендеринга.
Нажимаем на иконку записи для ее остановки и переключаем представление на Ranked chart:

В правом верхнем углу мы видим текущий рендеринг и общее количество рендерингов (1 / 2). Сейчас мы наблюдаем результаты первоначального рендеринга, о чем говорит сообщение при наведении курсора на любой компонент:
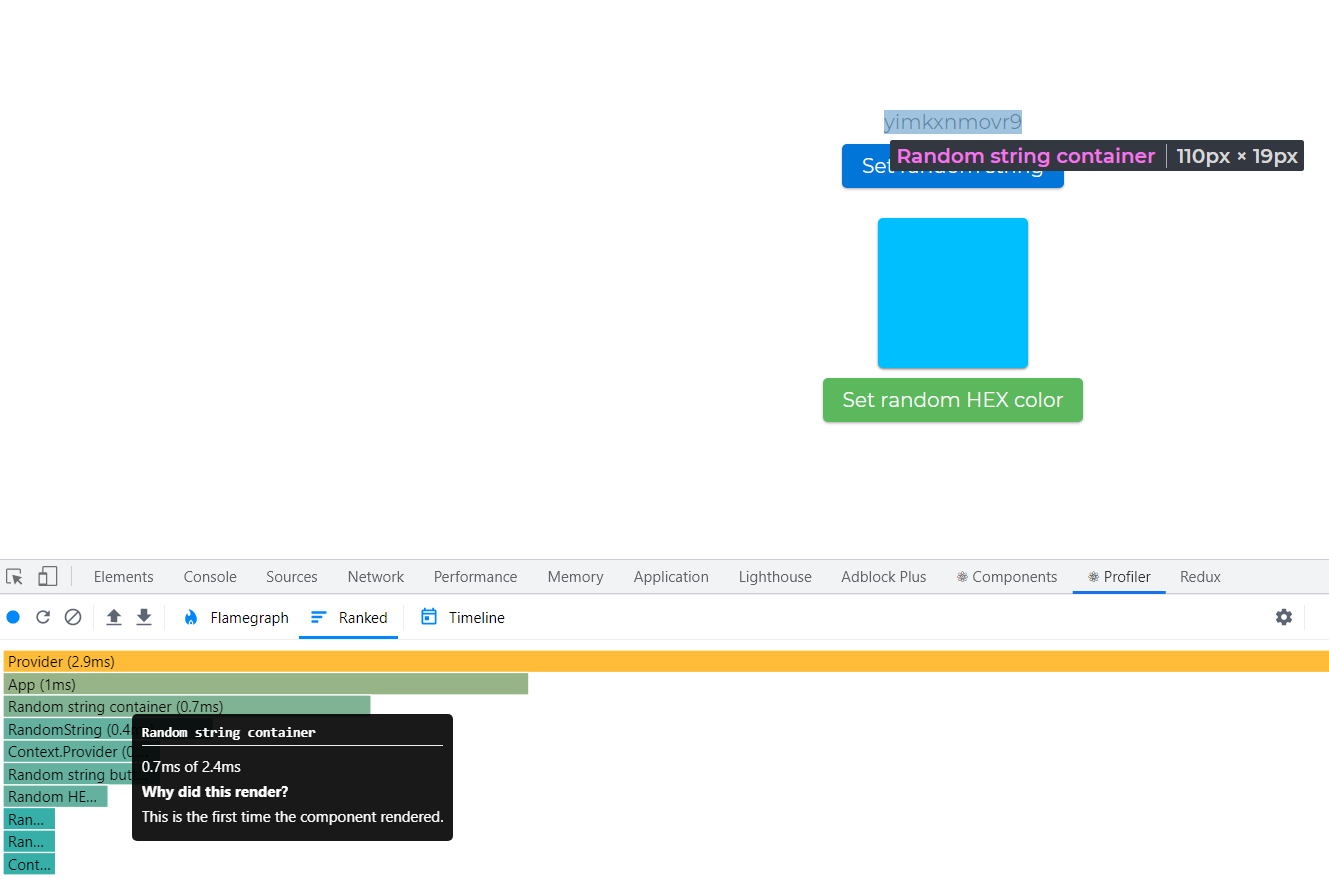
Переключаемся на результаты второго рендеринга и наводим курсор на компонент Random HEX color container:
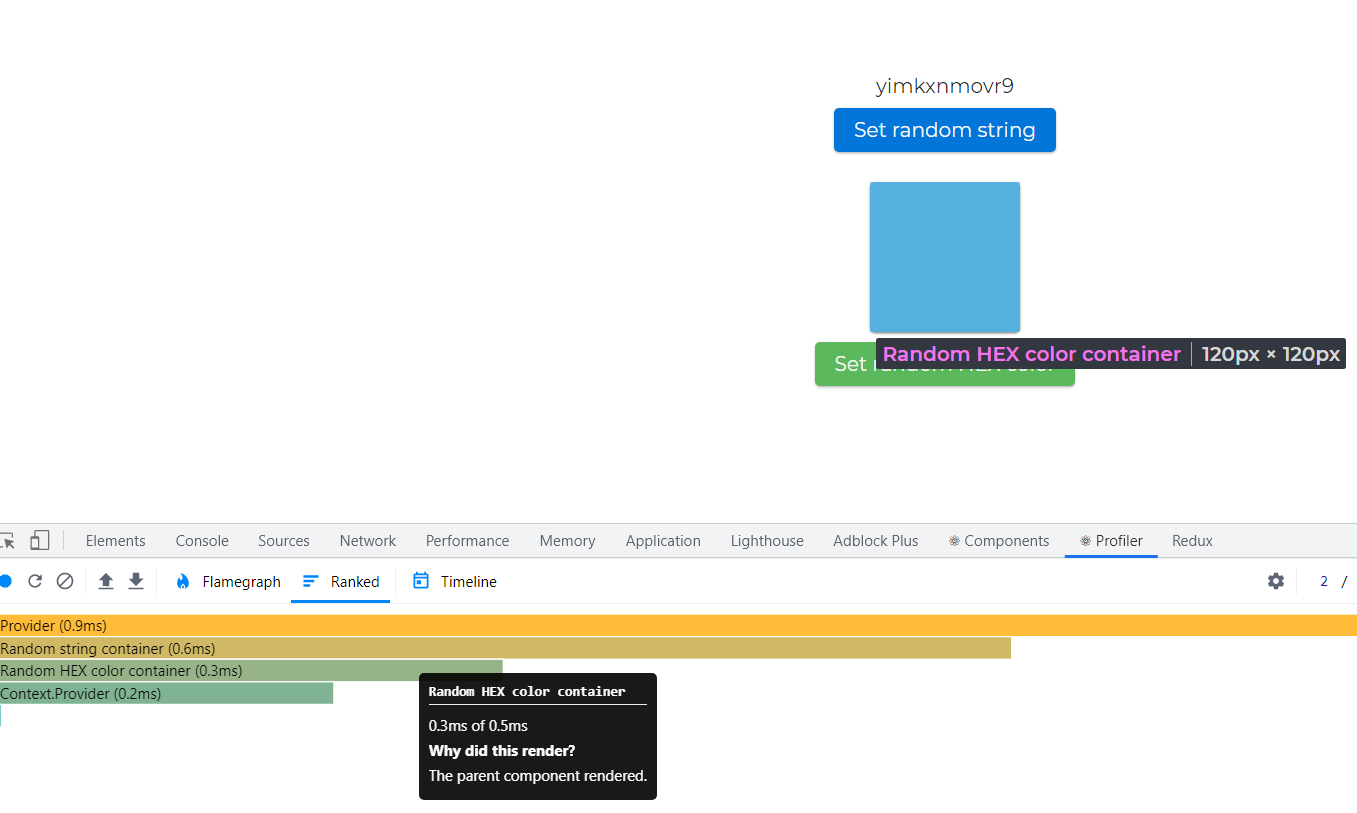
Сообщение говорит нам о том, что повторный рендеринг данного компонента произошел по причине повторного рендеринга его родительского компонента, т.е. провайдера контекста (Context.Provider) (его мы видим ниже). Это верно, но лишь отчасти.
Устанавливаем пакет why-did-you-render:
yarn add -D @welldone-software/why-did-you-render
# or
npm i ...
Подключаем его в src/index.tsx для режима разработки:
if (process.env.NODE_ENV === 'development') {
 const whyDidYouRender = require('@welldone-software/why-did-you-render')
 whyDidYouRender(React, {
   titleColor: 'green',
   diffNameColor: 'blue',
   logOnDifferentValues: true,
   trackHooks: true
 })
}
Обратите внимание: после перехода CRA на react-scripts v4 (где используется новый способ трансформации JSX в JS) данная утилита и ряд других какое-то время не работали. Если у вас возникнут проблемы, связанные с тем, что wdyr не выводит сообщения в консоль, поищите ответ в этом обсуждении.
Регистрируем компонент RandomHexColor/Container:
Container.whyDidYouRender = trueНа всякий случай перезапускаем сервер для разработки.
Снова нажимаем на кнопку Set random string и получаем гораздо более информативное сообщение:

Сначала мы видим, что значение переменной randomString изменилось с "" на "wpkhijfo7xi", затем, что значение, передаваемое через контекст, изменилось с { randomString: '', randomHexColor: '' } на { randomString: 'wpkhijfo7xi', randomHexColor: '' }.
Так вот в чем дело! При изменении значения любой реактивной переменной генерируется новый объект.
Внимание: в подавляющем большинстве случаев, при условии правильного размещения распределенных состояний, это не будет проблемой для производительности приложения.
Однако предположим, что повторное вычисление компонента Random HEX color container крайне нежелательно. Допустим, мы хотим, чтобы этот компонент подвергался повторному рендерингу только при изменении значения переменной randomHexColor. Как нам этого добиться? Существует один способ, но он имеет некоторые побочные эффекты.
Данный способ заключается в мемоизации компонента с помощью memo. Но для того, чтобы у нас появились пропы для сравнения, состояние необходимо поднять/lift до ближайшего родительского компонента. В нашем случае таким компонентом является RandomHexColor/index.tsx. Перепишем его следующим образом:
import { useStore } from 'App'
import { Button } from './Button'
import { Container } from './Container'

export const RandomHexColor = () => {
 const { randomHexColor } = useStore()

 return (
   <div className='random-color'>
     {/* передаем переменную `randomHexColor` как проп */}
     <Container randomHexColor={randomHexColor} />
     <Button />
   </div>
 )
}
Отрефакторим компонент RandomHexColor/Container.tsx:
import { memo } from 'react'
import { useLogAfterFirstRender } from 'hooks/useLogAfterFirstRender'

type Props = {
 randomHexColor: string
}

// мемоизируем компонент
export const Container = memo(({ randomHexColor }: Props) => {
 useLogAfterFirstRender('Random HEX color container')

 const containerStyles = useMemo(
   () => ({
     backgroundColor: randomHexColor || 'deepskyblue'
   }),
   [randomHexColor]
 )

 return <div style={containerStyles}></div>
})
Возвращаемся в браузер и нажимаем Set random string:

Компонент Random HEX color container больше не рендерится при изменении значения переменной randomString, но за все приходится платить: теперь повторно рендерится компонент Random HEX color button, поскольку повторному рендерингу подвергается его предок (RandomHexColor). Другими словами, наша оптимизация нивелировала выгоду от предварительной мемоизации сеттеров.
Мемоизируем компонент Random HEX color button с помощью memo:
import { memo, useCallback, useState } from 'react'
import { useSetter } from 'App'
import { useLogAfterFirstRender } from 'hooks/useLogAfterFirstRender'

// мемоизируем компонент
export const Button = memo(() => {
 const { setRandomHexColor } = useSetter()

 useLogAfterFirstRender('Random HEX color button')

 const onClick = useCallback(() => {
   const randomHexColor = getRandomHexColor()
   setRandomHexColor(randomHexColor)
 }, [setRandomHexColor])

 return (
   <button onClick={onClick} className='color-button'>
     Set random HEX color
   </button>
 )
})
Снова нажимаем Set random string:

Теперь при изменении randomString повторно рендерится только Random string container. Мы добились, чего хотели, но еще раз повторю: наши оптимизации являются преждевременными, в них не было совершенно никакой необходимости.
Последний вопрос: что если нам потребуется выполнить принудительный повторный рендеринг компонента, например, Random HEX color button. Эта задача решается за счет обновления локального состояния. Перепишем данный компонент следующим образом:
import { memo, useCallback, useState } from 'react'
import { useSetter } from 'App'
import { useLogAfterFirstRender } from 'hooks/useLogAfterFirstRender'

const getRandomHexColor = () =>
 `#${((Math.random() * 0xffffff) << 0).toString(16)}`

export const Button = memo(() => {
 const { setRandomHexColor } = useSetter()
 // создаем локальное состояние
 const [, setState] = useState({})

 const forceUpdate = useCallback(() => {
   // обновление состояния повлечет за собой повторный рендеринг
   setState({})
 }, [])

 useLogAfterFirstRender('Random HEX color button')

 const onClick = useCallback(() => {
   const randomHexColor = getRandomHexColor()
   setRandomHexColor(randomHexColor)
 }, [setRandomHexColor])

 return (
   <>
     <button onClick={onClick} className='color-button'>
       Set random HEX color
     </button>
     {/* добавляем кнопку для принудительного рендеринга */}
     <button onClick={forceUpdate} className='reload-button'>
       Force update
     </button>
   </>
 )
})
Нажимаем Force update:

Получаем сообщение о рендеринге Random HEX color button.
Пожалуй, это все, чем я хотел поделиться с вами в этой статье.
Надеюсь, вы узнали что-то новое и не зря потратили время.
Благодарю за внимание и happy coding!


В этом руководстве я объясню, как изменить состояние в компонентах React с помощью встроенного метода setState. Я подробно расскажу о двух разных подходах к использованию этого метода, объясню различия между этими подходами и покажу, когда использовать какой. В конце я расскажу о типичных ошибках, которые могут возникнуть при изменении состояния.
TL; DR
- Используйте функцию
this.setState, чтобы изменить состояние ваших компонентов - Если вы не зависите от старого состояния, передайте методу
this.setStateобъект с новыми значениями - Если вы хотите изменить состояние в зависимости от предыдущих значений, передайте функцию методу
this.setState - Передаваемая функция принимает предыдущее состояние и пропсы в качестве аргументов.
- Если вы работаете с объектами из своего состояния, всегда копируйте их, чтобы избежать непреднамеренных изменений
Все настраивается
Состояние — это просто данные, которые вы хотите сохранить в своем компоненте. В этом руководстве я собираюсь использовать компонент на основе классов со следующей начальной настройкой:
class App extends Component {
  state = {
    counter: 0,
  };

  clickHandler = () => {};
  render() {
    return (
      <React.Fragment>
        <div>{this.state.counter}</div>
        <button onClick={this.clickHandler}>Click!</button>
      </React.Fragment>
    );
  }
}
У меня есть <div> и кнопка. Для метода класса я использую стрелочную функцию, внутри которой я вызываю this.setState, потому что я не хочу терять свой this. Если вы хотите использовать function, ваш код должен быть следующим:
class App extends Component {
  constructor(props) {
    this.clickHandler = this.clickHandler.bind(this);
  }
  state = {
    counter: 0,
  };

  clickHandler = function () {};
  render() {
    return (
      <React.Fragment>
        <div>{this.state.counter}</div>
        <button onClick={this.clickHandler}>Click!</button>
      </React.Fragment>
    );
  }
}
или, немного короче:
class App extends Component {
  constructor(props) {
    this.clickHandler = this.clickHandler.bind(this);
  }
  state = {
    counter: 0,
  };

  clickHandler() {}
  render() {
    return (
      <React.Fragment>
        <div>{this.state.counter}</div>
        <button onClick={this.clickHandler}>Click!</button>
      </React.Fragment>
    );
  }
}
В приведенном выше коде я использую метод .bind для настройки функции с привязанным к ней значением this. Но в следующих примерах я буду придерживаться синтаксиса стрелочной функции, поскольку он более точен и элегантен.
Обновление состояния: основы
Попробуем сгенерировать случайное число и показать его в нашем <div> при нажатии кнопки.
Прежде всего следует упомянуть, что вы не можете напрямую обновлять состояние вашего компонента. Я имею в виду, что это не сработает:
class App extends Component {
  state = {
    counter: 0,
  };

  clickHandler = () => {
    this.state.counter = Math.random();
  };
  render() {
    return (
      <React.Fragment>
        <div>{this.state.counter}</div>
        <button onClick={this.clickHandler}>Click!</button>
      </React.Fragment>
    );
  }
}
Кроме того, вы получите раздражающее предупреждение в консоли, если используете инструменты разработчика React. Вместо того, чтобы напрямую изменять ваше состояние, вам нужно использовать функцию this.setState:
clickHandler = () => {
  this.setState({ counter: Math.random() });
};
Эта функция является функцией, унаследованной вами от класса React.Component, и является частью React API. Он принимает новое состояние вашего компонента. Здесь важно упомянуть, что вам не нужно повторять все свойства, которые есть в вашем состоянии, чтобы изменить только одно значение. Эти два объекта будут объединены функцией this.setState. Рассмотрим следующий пример:
import React, { Component } from 'react';

export default class App extends Component {
  state = {
    counter: 0,
    title: 'setState tutorial',
  };

  clickHandler = () => {
    this.setState({ counter: Math.random() });
  };
  render() {
    return (
      <React.Fragment>
        <h1>{this.state.title}</h1>
        <div>{this.state.counter}</div>
        <button onClick={this.clickHandler}>Click!</button>
      </React.Fragment>
    );
  }
}
В приведенном выше коде я показываю заголовок в теге <h1>, который я храню внутри состояния. Когда кнопка нажата, заголовок не исчезнет.
Обновление состояния в зависимости от предыдущего состояния
Все идет нормально. Но что, если мы хотим увеличить наш предыдущий счетчик при нажатии кнопки? Технически следующий код будет работать так, как задумано:
import React, { Component } from 'react';

export default class App extends Component {
  state = {
    counter: 0,
    title: 'setState tutorial',
  };

  clickHandler = () => {
    this.setState({ counter: ++this.state.counter });
  };
  render() {
    return (
      <React.Fragment>
        <h1>{this.state.title}</h1>
        <div>{this.state.counter}</div>
        <button onClick={this.clickHandler}>Click!</button>
      </React.Fragment>
    );
  }
}
Единственное, что вы могли заметить (если вы последуете по тексту, я настоятельно рекомендую вам это сделать), — это раздражающее предупреждение в консоли. На самом деле, когда мы вызываем ++this.state.counter, мы пытаемся изменить счетчик в нашем предыдущем состоянии и вернуть значение математической операции. Не так хорошо, как хотелось бы. К счастью, React умеет делать подобное. Метод this.setState также принимает функцию, которая затем должна вернуть новое состояние. Кроме того, функция принимает два аргумента: предыдущее состояние и свойства:
import React, { Component } from 'react';

export default class App extends Component {
  state = {
    counter: 0,
    title: 'setState tutorial',
  };

  clickHandler = () => {
    this.setState((prevState, prevProps) => {
      console.log(prevState); // {counter: 0, title: "setState tutorial"}
      return { counter: ++prevState.counter };
    });
  };
  render() {
    return (
      <React.Fragment>
        <h1>{this.state.title}</h1>
        <div>{this.state.counter}</div>
        <button onClick={this.clickHandler}>Click!</button>
      </React.Fragment>
    );
  }
}
Теперь он работает без каких-либо предупреждений. Давайте обсудим, что произошло.
Зачем мне использовать функцию?
Возможно, вы говорите: я могу скопировать значение счетчика и затем увеличить его. Как в примере ниже:
let oldCounter = this.state.counter;
this.setState({ counter: ++oldCounter });
Поскольку числа в javascript являются примитивами, в консоли не будет никаких предупреждений. Но это все еще неправильный путь. Дело в том, что React обновляет состояние асинхронно, даже если метод this.setState вызывается синхронно. Поэтому, когда вы обновляете свое состояние таким образом, вы не можете с уверенностью сказать, что это последняя версия состояния. Здесь это не проблема, так как у нас крошечное приложение, и все обновления происходят почти сразу, но в более крупных приложениях это может вызвать проблемы. Итак, используйте функцию, если вы хотите обновить свое состояние в зависимости от предыдущих значений.
А как насчет объектов?
Ладно, теперь все хорошо, думаете вы. Вы защищены this.setState((prevState, prevProps) => ...). Однако есть еще один подводный камень. В javascript объекты хранятся по ссылкам. Давайте быстро проверим нашу функцию clickHandler:
clickHandler = () => {
  this.setState((prevState, prevProps) => {
    console.log(prevState === this.state); // true
    return { counter: ++prevState.counter };
  });
};
Баам! Объект prevState является тем же this.state. Когда мы имеем дело с примитивами, это не проблема. Но рассмотрим следующий пример:
Counter.js
// Counter.js
import React from 'react';

const Counter = ({ counter, clickHandler }) => {
  return (
    <React.Fragment>
      <div>{counter}</div>
      <button onClick={clickHandler}>Increment the counter above!</button>
    </React.Fragment>
  );
};

export default Counter;
App.js
// App.js
import React, { Component } from 'react';
import Counter from './Counter';

export default class App extends Component {
  state = {
    counters: [0, 0],
  };

  clickHandler = index => {
    this.setState((prevState, prevProps) => {
      let counter = prevState.counters[index];

      const counters = prevState.counters;
      counters[index] = ++counter;
      return {
        counters,
      };
    });
  };
  render() {
    const counters = this.state.counters.map((counter, index) => (
      <Counter
        counter={counter}
        key={index}
        clickHandler={() => this.clickHandler(index)}
      />
    ));
    return <React.Fragment>{counters}</React.Fragment>;
  }
}
В приведенном выше примере у меня есть два счетчика и дополнительный компонент, который отображает в <div> текущий счетчик и кнопку для его увеличения. Когда вы нажимаете кнопку, вы видите, что счетчик увеличивается в два раза. Не то, что мы искали.
Итак, в чем проблема?
В этих строках:
const counters = prevState.counters;
counters[index] = ++counter;
Здесь мы работаем с тем же массивом counters, что и в состоянии out. А массивы — это объекты. Следовательно, мы увеличиваем счетчик в два раза. Чтобы исправить это, нам просто нужно скопировать этот массив:
clickHandler = index => {
  this.setState((prevState, prevProps) => {
    let counter = prevState.counters[index];

    const counters = [...prevState.counters];
    counters[index] = ++counter;
    return {
      counters,
    };
  });
};
Поэтому, работая с объектами, не забывайте копировать их перед выполнением каких-либо операций.
Вывод
- Используйте функцию
this.setState, чтобы изменить состояние ваших компонентов - Если вы не зависите от старого состояния, передайте методу
this.setStateобъект с новыми значениями - Если вы хотите изменить состояние в зависимости от предыдущих значений, передайте функцию методу
this.setState - Передаваемая функция принимает предыдущее состояние и пропсы в качестве аргументов.
- Если вы работаете с объектами из своего состояния, всегда копируйте их, чтобы избежать непреднамеренных изменений
State
1. Что такое state и зачем он нужен?
2. Пример практического применения state
3. Что такое реактивность в программировании?
4. Что класть в state, а что в переменные?
5. Особенности state
6. State и объекты (массивы)
1. Что такое state и зачем он нужен?
Напомню, React это средство создания интерфейсов, а следовательно, он должен уметь возможность удобного управления визуальными компонентами. Механизм state создан именно для этого. Его задача — хранить информацию которая влияет или может влиять, на визуальное состояние компонента и позволять осуществить перерисовку компонента при изменении этой информации. Звучит тяжело, однако давайте рассмотрим конкретный пример.
Возьмем нативный JavaScript. Поставим задачу — при нажатии кнопки, увеличивать число в параграфе 1 и выводить на страницу. Набросаем простой код. В HTML:
<p>1</p>
<button>Go</button>
Для простоты, не указаны классы. Как будет выглядеть код JavaScript?
const p = document.querySelector('p');
let count = 1;

document.querySelector('button').addEventListener('click', function () {
	count++;
	p.textContent = count;
});
Т.е. все действия по получению элементов DOM, по отлову событий, по изменению элементов (p.textContent = ) должен взять на себя программист. Учесть и реализовать все моменты. Даже для такого простого действия нам пришлось получать элементы параграфа и кнопки, работать с их свойствами. При этом мы говорим о выводе одного числа. Если интерфейс сложнее то количество операций, которые придется прописать для обеспечения работы с DOM, будет еще больше.
В данном случае число count – влияет на внешний вид. Его изменение, должно приводить к перерисовке внешнего вида компонента (число на странице меняется). Давайте реализуем подобный код в React.
Для работы со state необходимо импортировать hook useState. В хук положим начальное значение переменной. При импорте хука создадим две переменные, с помощью которых можно обращаться к значению state и сеттер, который сохраняет изменения в state. Итак:
function App() {

// создаем стейт и задаем начальное значение
const [count, setCount] = useState(1);

const buttonCount = () => {
	// изменяем значение
	let temp = count;
	temp++;
	// сохраняем изменения
	setCount(temp);
}

return (
	<div className="App">
		<button onClick = {buttonCount}>Go</button>
		<p>{count}</p>
	</div>
);
}

export default App;
Давайте разберем этот код по шагам. Первая строка:
import {useState} from "react";
это импорт хука. Фигурные скобки применяются для получения импорта единичного значения из модуля.
// создаем стейт и задаем начальное значение
const [count, setCount] = useState(1);
Задаем имя для работы со state, и сеттер — функцию, которая будет изменять значение state. По принятым договоренностям она начинается с префикса set.
Также, здесь задается начальное значение state. В данном случае это число 1.
Перейдем к выводу — коду кнопки:
<button onClick = {buttonCount}>Go</button>
Обратите внимание, как записываются события. Приставка on пишется в lowerCase, а дальше — событие c большой буквы. Имя функции указывается в фигурных скобках. Без ().
Сама функция:
const buttonCount = () => {
	// изменяем значение
	let temp = count;
	temp++;
	// сохраняем изменения
	setCount(temp);
}
написана в стрелочной нотации, однако можно писать и с помощью синтаксиса function.
Получаем значение state в переменную temp, выполняем операции, и фиксируем результат с помощью сеттера.
Возникает вопрос: можно ли менять state напрямую. Например так: count++. Ну, с точки зрения JavaScript менять так константу:
const [count, setCount] = useState(1);
в принципе, не самая лучшая идея, которая вызовет ошибку. В React не рекомендуют изменять state напрямую. Применяйте для этого сеттер.
Вывод данных осуществляет через {} :
Напишите код или запустите unit_05_code_01 и изучите как работает приложение. При каждом клике число будет увеличиваться. Но мы в коде нигде не делаем вывод через textContent, innerHTML, как привыкли в JS. Мы только изменяем стейт, а React выполняет перерисовку компонента самостоятельно. Да, именно в этом и состоит преимущества state.
Итак, когда мы выполняем изменение state, с помощью данной операции setCount(temp) React производит перерисовку компонента. Если в return мы выводим значение state, то значение будет обновлено.
Обратите внимание! Есть особенности работы state – ознакомьтесь с ними в конце этого юнита.
2. Пример практического применения state
В первой части unit мы рассмотрели уже как объявлять и применять state. Давайте решим еще одну задачу, которая позволит углубить понимание state как инструмента для реализации состояния компонента.
Задача. Реализовать range, от 0 до 100, начальное состояние — 0. При перетягивании ползунка должно выводиться значение value на страницу.
Давайте определим, какие данные здесь определяют состояние компонента. Очевидно, что таким значением является value ползунка. Т.е. есть и начальное значение, которое выводится, value определяет как ползунок выглядит в начальный момент ( позиция ползунка) и при изменении состояния ползунка обновляется вывод. Поэтому создаем state:
const [value, setValue] = useState(0);
Дальше пишем return:
 return (
	 <div className="App">
	 	<input type="range" value = {value} onChange = {inputHandler} />
	 	<p>{value}</p>
	 </div>
 );
Обратите внимание на важный момент. Логика компонента завязана на его состояние. Начальное состояние ползунка — 0 . И это хранится в state. Поэтому
value = {value}.
Дальше реализуем функцию inputHandler:
const inputHandler = event => {
	setValue(event.target.value);
}
Запустите приложение и изучите работу. Если необходимо — скачайте код unit_05_code_02.
Для эксперимента, измените в return строку
<input type="range" value = {value} onChange = {inputHandler} />
на
<input type="range" value = "1" onChange = {inputHandler} />
Обратите внимание как ведет себя ползунок. State меняется, но поскольку мы прописали value, то ползунок остается на месте. Т.е. мы потеряли «реактивность».
Реактивность — потяние на котором основан React. Я не давал его в первых юнитах специально, но теперь настало время.
3. Что такое реактивность в программировании?
Скорее всего, до изучения реакт вы изучали JavaScript. Посмотрите на выражение:
let a = 11;
let b = 22;
let c = a + b;
a = 44;
Скажите, чему будет равна c после выполнения этих операций? Правильно, 33. Операция a = 44 никак уже не влияет на переменную c. Такой подход называется императивным. И даже не зная этого названия вы писали программы именно в таком подходе. Если нужно обновить значение переменной c с учетом операции a = 44 то придется еще раз выполнять суммирование.
Императивный подход легко читается и пишется, но требует повышенного внимания к каждой операции.
Существует другой подход — реактивный. В котором рассматриваются взаимосвязанные значения. И если обновится одно из них — обновятся все остальные.
State — пример реактивного подхода. Вывод (render) зависит от данных в state. Обновили данные — выполнится render с учетом изменений.
В примере с ползунком у нас взаимосвязаными являются положение ползунка, value, вывод на страницу value. Связь осуществляется через state. Изменение любым способом value повлияет на компонент и приведет к изменению значений и внешнего вида.
4. Что класть в state, а что в переменные?
Итак, мы определили — state это состояние компонента, те данные, которые влияют на интерфейс, т.е. на то, как отображается компонент. И вывод — одновременно простой и сложный, в state нужно класть те данные, изменение которых должно влиять на интерфейс компонента. Как определить эти данные? На этапе составления документации и проработке архитектуры приложения.
Что будет если все переменные помещать в state? Ничего. Работать будет, но производительность приложения, будет низкая, из-за того что изменение любых данных будет вызывать перерисовку компонента. Разделяйте переменные которые нужны для вычислений и данные, которые влияют на интерфейс компонента.
5. Особенности state и FAQ
5.1 Можно ли объявлять на странице несколько state?
Да, можно. Если совместить примеры кодов выше, то это будет выглядеть так:
function App() {

	// создаем стейт и задаем начальное значение
   const [count, setCount] = useState(1);
   const [value, setValue] = useState(0);

}
т.е. вы используете любое количество state, которое вам необходимо.
5.2 Можно ли не задавать начальное значение, и положить что-то в ходе работы?
Да, можно
const [count, setCount] = useState();
однако в реальной задаче, удобно и более правильно, указывать начальное значение, хотя бы для определения типа данных в стейт и возможных операций над данными.
5.3 Какие типы данных можно помещать в state?
Любые типы данных JavaScript.
5.4 Что перерисовывается при изменении state?
Давайте вернемся к первой задаче со счетчиком и изменим компонент так:
import {useState} from "react";

function App() {

	console.log('Компонент сработал');
	const [count, setCount] = useState(1);

	const buttonCount = () => {
		console.log('Функция сработала');
		let temp = count;
		temp++;
		setCount(temp);
	}

return (
	<div className="App">
		{console.log('return сработал')}
		<button onClick = {buttonCount}>Go</button>
		<p>{count}</p>
	</div>
);
}

export default App;
Интересная конструкция, согласны? Что же происходит при обновлении страницы?
Компонент сработал
return сработал
Все логично. Был обработан компонент, и отработал вывод на страницу. А если мы нажмем кнопку?
Функция сработала
Компонент сработал
return сработал
Т.е. сработает функция buttonCount, а потом компонент заново будет запущен, и отработает return. Т.е. компонент перезапускается полностью! Неожиданно, но логично. Ведь мы не можем запускать “часть” функции в JavaScript.
Сразу возникает вопрос — ведь перезапуск при каждом изменении state это накладно с точки зрения нагрузки? Переходим к следующему вопросу…
5.5 Когда state перерисовывает страницу?
Хороший и важный вопрос. Из сказанного выше можно подумать что написав:
мы тут же вызовем перерисовку страницы. Однако это не так. Возьмем пример из первой задачи и напишем такой код:
const buttonCount = () => {
	let temp = count;
	temp++;
	setCount(555);
	setCount(777);
}
Что произойдет в таком случае? Будет ли отрисовка сразу после команды setCount(555) и мы увидим только его и код не дойдет до 777, либо будет выведено число 777?
Вопрос важный. Давайте разбираться. Мы уже выяснили что изменение state перерисует весь компонент. Вопрос в чем? В данном случае будет перерисовка один раз или два?
Если применить метод из предыдущего вопроса мы увидим, что сначала отработает код
setCount(555);
setCount(777);
И только потом будет компонент перерисован. Т.е. отрисовка пройдет после всех изменений state. Зачем это нужно? Для производительности — тем самым значительно уменьшается количество отрисовок компонента.
Документация говорит следующее: React может сгруппировать несколько вызовов setState() в одно обновление для улучшения производительности и обновлять их асинхронно.
6. State и объекты (массивы)
Особенностью объектов в JS является хранение по ссылке. Т.е. когда вы пишите
внутри переменной arr хранится ссылка на область памяти, где хранятся данные. Поэтому операция типа:
не приводит к появлению нового массива. Внутри arr2 лежит ссылка на область памяти. Т.е. переменные arr, arr2 ссылаются на одну и ту же область. При изменении в массиве arr, мы увидим такие же изменения в arr2.
Хранение по ссылке приводит к интересным следствиям в рамках state. Рассмотрим код:
import {useState} from 'react';

function App() {

	const [arr, setArr] = useState([33, 44]);

const clickHandler = () => {
	let tempArr = arr;
	tempArr.push(55);
	console.log(tempArr);
	setArr(tempArr);
}

return (
	<div className="App">
		<button onClick={clickHandler}>Go</button>
		<div>{arr}</div>
	</div>
);
}

export default App;
В коде создан state объект с начальным значением [33, 44]. При нажатии кнопки button выполняется функция, которая производит push в массив, и записывает новые значения в state. В этом легко убедиться просматривая console. Однако на странице ничего не изменяется:

Рис. 5.1 State не обновляет вывод на странице
Давайте разбираться. Ситуация довольно простая, однако ставит новичка в тупик. Напомню — state вызывает рендер страницы при изменении. Однако когда мы делаем:
внутри переменной tempArr лежит ссылка на объект. В state лежит тоже ссылка на объект. Т.е. и state и tempArr ссылаются на один объект. Операция:
добавляет число 55 в объект, но не меняет ссылку. Т.е. с точки зрения React, state не изменился. И, следовательно, операция:
не поменяла state, и отрисовки не будет.
Важно! Смотреть содержимое state можно через React Developer Tools.
Как вывести массив на страницу? Нужно явно изменить ссылку на объект, чтобы React увидел изменение в state. Так:
const clickHandler = () => {
	let tempArr = [...arr] ;
	tempArr.push(55);
	console.log(tempArr);
	setArr(tempArr);
}
Т.е. мы создаем независимую копию массива и работаем с ней. Данная операция не является оптимальной по скорости. Если массив содержит большое количество данных, то возможен и другой подход — менять другой state, что приведет к перерисовке страницы и к выводу массива в новом состоянии.
Итог
Если разрабатывать интерфейс не с точки зрения «manual» вывода, а с точки зрения состояния и данных необходимых для этого, можно значительно упростить разработку интерфейса, а state React позволяет упростить работу с такими данными состояния и реализует отрисовку при их изменении.
Состояние компонента
Что делает setState?
Метод setState() следит за изменением состояния (state) компонента. state — это объект. Когда состояние меняется, компонент рендерится повторно.
Какая разница между state и props?
props (намеренно сокращённо от англ. «properties» — свойства) и state — это обычные JavaScript-объекты. Несмотря на то, что оба содержат информацию, которая влияет на то, что увидим после рендера, есть существенное различие: props передаётся в компонент (служат как параметры функции), в то время как state находится внутри компонента (по аналогии с переменными, которые объявлены внутри функции).
Несколько полезных ресурсов для дальнейшего изучения, в каких случаях использовать props, а в каких — state:
- Props vs. State
- ReactJS: Props vs State
Почему setState даёт неверное значение?
В React как this.props, так и this.state представляют значения, которые уже были отрендерены, например, то, что видите на экране.
Вызовы setState являются асинхронными, поэтому не стоит рассчитывать, что this.state отобразит новое значение мгновенно после вызова setState. Необходимо добавить функцию, которая сработает только после обновления состояния, если нужно получить новое значение, основанное на текущем состоянии (ниже подробный пример).
Пример кода, который не будет работать так, как ожидаем:
incrementCount() {
  // Примечание: это *не* сработает, как ожидалось.
  this.setState({count: this.state.count + 1});
}

handleSomething() {
  // Допустим, что `this.state.count` начинается с 0.
  this.incrementCount();
  this.incrementCount();
  this.incrementCount();
  // Когда React делает последующий рендер компонента, `this.state.count` будет 1, хотя мы ожидаем 3.

  // Так происходит, потому что функция `incrementCount()` берёт своё значение из `this.state.count`,
  // но React не обновляет `this.state.count`, пока компонент не отрендерится снова.
  // Получается, что `incrementCount()` обращается к текущему значению `this.state.count`, а это 0 каждый раз, и добавляет 1.

  // Как исправить это — разберём ниже!
}
Далее перейдём к исправлению указанной проблемы.
Как обновить состояние значениями, которые зависят от текущего состояния?
Нужно добавить функцию вместо объекта к setState, которая будет срабатывать только на самой последней версии состояния (пример ниже).
В чём разница между добавлением объекта или функции к setState?
Добавление функции даёт вам доступ к текущему состоянию внутри самой функции. Так как setState вызовы «сгруппированы», это помогает связать изменения и гарантирует, что они будут выполняться друг за другом, а не конфликтовать.
incrementCount() {
  this.setState((state) => {
    // Важно: используем `state` вместо `this.state` при обновлении.
    return {count: state.count + 1}
  });
}

handleSomething() {
  // Возьмём снова для примера, что `this.state.count` начинается с 0.
  this.incrementCount();
  this.incrementCount();
  this.incrementCount();

  // Если посмотреть на значение `this.state.count` сейчас, это будет по-прежнему 0.
  // Но когда React отрендерит компонент снова, будет уже 3.
}
Когда setState работает асинхронно?
В настоящее время setState работает асинхронно внутри обработчиков событий.
Это даёт гарантию, например, когда Родитель и Ребёнок вызывают setState во время клика, Ребёнок не будет рендерится дважды. Вместо этого React «откладывает» обновление состояния в самый конец событий в браузере. Это помогает сильно повысить производительность больших приложений.
Но не стоит полностью полагаться на такое поведение. В будущих версиях React будет использовать отложенные обновления состояния по умолчанию не только в обработчиках событий.
Почему React не обновляет this.state синхронно?
Как говорилось ранее, React намеренно «ждёт» пока все компоненты вызовут setState() в своих обработчиках событий прежде чем начать повторный рендер. Это избавляет от ненужных повторных рендеров.
Вы можете задаваться вопросом: почему React не может просто сразу обновить this.state без повторного рендеринга?
На это есть две причины:
- Это нарушит логику работы
propsиstate, а значит станет причиной многих багов, которые будет сложно исправить. - Это сделало бы невозможным реализацию некоторых возможностей, над которыми мы сейчас работаем.
Этот GitHub-комментарий рассматривает конкретные примеры, которые помогут глубже изучить этот вопрос.
Стоит ли использовать такие библиотеки, как Redux или MobX?
Возможно.
Но вообще будет здорово сначала изучить React, прежде чем переходить к библиотекам. Можно создать готовое рабочее приложение, используя только React.