Network request and decoding errors in Swift
This is a listing of raw data returned from different cases of network requests and model decoding in Swift, with emphasis on error cases. Useful for the purpose of mocking error responses.
The Star Wars API is used as reference.
Summary table
| Case | Data | Response | Network error | Decoding |
|---|---|---|---|---|
| 1) Successful | Some | 200 | nil | Ok |
| 2) Non-existing host | nil | nil | NSURLErrorDomain (-1003) |
N/A |
| 3) Non-existing resource | Some | 404 | nil | dataCorrupted |
| 4) Non-existing query | Some | 200(a) | nil | typeMismatch (a) |
| 5) Corrupted data | Some | 200 | nil | dataCorrupted |
| 6) Model mismatch | Some | 200 | nil | keyNotFound |
| 7) Offline mode | nil | nil | NSURLErrorDomain (-1009) |
N/A |
(a) Some APIs return 404 when a non-existing query is used, giving keyNotFound as error when decoding. The sample StarWars API returns a valid response, just ignoring the non-existing query.
Sample output of playground follows.
Exercise 1: Successful request
Data: :
Optional("{"people":"https://swapi.co/api/people/","planets":"https://swapi.co/api/planets/","films":"https://swapi.co/api/films/","species":"https://swapi.co/api/species/","vehicles":"https://swapi.co/api/vehicles/","starships":"https://swapi.co/api/starships/"}")
Response:
<NSHTTPURLResponse: 0x6000000338c0> { URL: https://swapi.co/api/ } { Status Code: 200, Headers {
    "Content-Encoding" =     (
        gzip
    );
    "Content-Type" =     (
        "application/json"
    );
    Date =     (
        "Wed, 16 May 2018 12:09:45 GMT"
    );
    Etag =     (
        "W/"c1df070b0509ebefe72e85d721f40bf0""
    );
    Server =     (
        cloudflare
    );
    Vary =     (
        "Accept, Cookie"
    );
    Via =     (
        "1.1 vegur"
    );
    allow =     (
        "GET, HEAD, OPTIONS"
    );
    "cf-ray" =     (
        "41bdbcbb7f7263df-FRA"
    );
    "expect-ct" =     (
        "max-age=604800, report-uri="https://report-uri.cloudflare.com/cdn-cgi/beacon/expect-ct""
    );
    "x-frame-options" =     (
        SAMEORIGIN
    );
} }
Network error: none
Decoded model:
API(films: https://swapi.co/api/films/, people: https://swapi.co/api/people/, planets: https://swapi.co/api/planets/, species: https://swapi.co/api/species/, starships: https://swapi.co/api/starships/, vehicles: https://swapi.co/api/vehicles/)
Exercise 2: non-existing host
Data: none
Response: none
Network Error :
Error Domain=NSURLErrorDomain Code=-1003 "A server with the specified hostname could not be found." UserInfo={NSUnderlyingError=0x600001055d80 {Error Domain=kCFErrorDomainCFNetwork Code=-1003 "(null)" UserInfo={_kCFStreamErrorCodeKey=8, _kCFStreamErrorDomainKey=12}}, NSErrorFailingURLStringKey=https://nonexisting.co/api/, NSErrorFailingURLKey=https://nonexisting.co/api/, _kCFStreamErrorDomainKey=12, _kCFStreamErrorCodeKey=8, NSLocalizedDescription=A server with the specified hostname could not be found.}
Exercise 3: non-existing resource
Data:
Optional("<!DOCTYPE html>n<html lang="en">nn<head>n<meta charset="utf-8">n<title>n SWAPI - The Star Wars APIn </title>n<meta name="viewport" content="width=device-width, initial-scale=1.0">n<link rel="stylesheet" href="//netdna.bootstrapcdn.com/bootstrap/3.1.1/css/bootstrap.min.css">n<link href="/static/css/bootstrap.css" rel="stylesheet">n<link href="/static/css/custom.css" rel="stylesheet">n<link rel="shortcut icon" href="/static/favicon.ico">n</style>n<script src="//code.jquery.com/jquery-2.1.0.min.js" type="12b2974bbe4f5b3be4eb1eb3-"></script>n<script src="//maxcdn.bootstrapcdn.com/bootstrap/3.3.0/js/bootstrap.min.js" type="12b2974bbe4f5b3be4eb1eb3-"></script>n</script>n</head>n<body>n<nav class="navbar navbar-default" role="navigation">n<div class="container-fluid">n<div class="navbar-header">n<button
(abridged for brevity)
Response:
<NSHTTPURLResponse: 0x60400002eec0> { URL: https://swapi.co/api/chewbacca/ } { Status Code: 404, Headers {
    "Content-Encoding" =     (
        gzip
    );
    "Content-Type" =     (
        "text/html; charset=utf-8"
    );
    Date =     (
        "Wed, 16 May 2018 12:54:30 GMT"
    );
    Server =     (
        cloudflare
    );
    Via =     (
        "1.1 vegur"
    );
    "cf-ray" =     (
        "41bdfe484ca263df-FRA"
    );
    "expect-ct" =     (
        "max-age=604800, report-uri="https://report-uri.cloudflare.com/cdn-cgi/beacon/expect-ct""
    );
    "x-frame-options" =     (
        SAMEORIGIN
    );
} }
Network error: none
Decoding error:
dataCorrupted(Swift.DecodingError.Context(codingPath: [], debugDescription: "The given data was not valid JSON.", underlyingError: Optional(Error Domain=NSCocoaErrorDomain Code=3840 "JSON text did not start with array or object and option to allow fragments not set." UserInfo={NSDebugDescription=JSON text did not start with array or object and option to allow fragments not set.})))
Exercise 4: non-existing query
Data:
Optional("{"count":7,"next":null,"previous":null,"results":[{"title":"A New Hope","episode_id":4,"opening_crawl":"It is a period of civil war.\r\nRebel spaceships, striking\r\nfrom a hidden base, have won\r\ntheir first victory against\r\nthe evil Galactic Empire.\r\n\r\nDuring the battle, Rebel\r\nspies managed to steal secret\r\nplans to the Empire's\r\nultimate weapon, the DEATH\r\nSTAR, an armored space\r\nstation with enough power\r\nto destroy an entire planet.\r\n\r\nPursued by the Empire's\r\nsinister agents, Princess\r\nLeia races home aboard her\r\nstarship, custodian of the\r
(abridged for brevity)
Response:
<NSHTTPURLResponse: 0x6000002237a0> { URL: https://swapi.co/api/films/?nonexisting=query } { Status Code: 200, Headers {
    "Content-Encoding" =     (
        gzip
    );
    "Content-Type" =     (
        "application/json"
    );
    Date =     (
        "Thu, 17 May 2018 09:37:31 GMT"
    );
    Etag =     (
        "W/"a6f57b83572279727b3a9208d0653a82""
    );
    Server =     (
        cloudflare
    );
    Vary =     (
        "Accept, Cookie"
    );
    Via =     (
        "1.1 vegur"
    );
    allow =     (
        "GET, HEAD, OPTIONS"
    );
    "cf-ray" =     (
        "41c51b159f046403-FRA"
    );
    "expect-ct" =     (
        "max-age=604800, report-uri="https://report-uri.cloudflare.com/cdn-cgi/beacon/expect-ct""
    );
    "x-frame-options" =     (
        SAMEORIGIN
    );
} }
Network error: none
Decoding error:
typeMismatch(Swift.Double, Swift.DecodingError.Context(codingPath: [CodingKeys(stringValue: "results", intValue: nil), _JSONKey(stringValue: "Index 0", intValue: 0), CodingKeys(stringValue: "releaseDate", intValue: nil)], debugDescription: "Expected to decode Double but found a string/data instead.", underlyingError: nil))
Exercise 5: corrupted data (non-conforming JSON)
Data: (overriden by playground for sample of corrupted data)
Response:
<NSHTTPURLResponse: 0x600000026fc0> { URL: https://swapi.co/api/ } { Status Code: 200, Headers {
    "Content-Encoding" =     (
        gzip
    );
    "Content-Type" =     (
        "application/json"
    );
    Date =     (
        "Wed, 16 May 2018 12:54:34 GMT"
    );
    Etag =     (
        "W/"c1df070b0509ebefe72e85d721f40bf0""
    );
    Server =     (
        cloudflare
    );
    Vary =     (
        "Accept, Cookie"
    );
    Via =     (
        "1.1 vegur"
    );
    allow =     (
        "GET, HEAD, OPTIONS"
    );
    "cf-ray" =     (
        "41bdfe5c684a6415-FRA"
    );
    "expect-ct" =     (
        "max-age=604800, report-uri="https://report-uri.cloudflare.com/cdn-cgi/beacon/expect-ct""
    );
    "x-frame-options" =     (
        SAMEORIGIN
    );
} }
Network error: none
Decoding error:
dataCorrupted(Swift.DecodingError.Context(codingPath: [], debugDescription: "The given data was not valid JSON.", underlyingError: Optional(Error Domain=NSCocoaErrorDomain Code=3840 "JSON text did not start with array or object and option to allow fragments not set." UserInfo={NSDebugDescription=JSON text did not start with array or object and option to allow fragments not set.})))
Exercise 6: model mismatch / wrong decoding key
Data:
Optional("{"people":"https://swapi.co/api/people/","planets":"https://swapi.co/api/planets/","films":"https://swapi.co/api/films/","species":"https://swapi.co/api/species/","vehicles":"https://swapi.co/api/vehicles/","starships":"https://swapi.co/api/starships/"}")
Response:
<NSHTTPURLResponse: 0x60400002e3e0> { URL: https://swapi.co/api/ } { Status Code: 200, Headers {
    "Content-Encoding" =     (
        gzip
    );
    "Content-Type" =     (
        "application/json"
    );
    Date =     (
        "Wed, 16 May 2018 12:54:35 GMT"
    );
    Etag =     (
        "W/"c1df070b0509ebefe72e85d721f40bf0""
    );
    Server =     (
        cloudflare
    );
    Vary =     (
        "Accept, Cookie"
    );
    Via =     (
        "1.1 vegur"
    );
    allow =     (
        "GET, HEAD, OPTIONS"
    );
    "cf-ray" =     (
        "41bdfe63fc5863af-FRA"
    );
    "expect-ct" =     (
        "max-age=604800, report-uri="https://report-uri.cloudflare.com/cdn-cgi/beacon/expect-ct""
    );
    "x-frame-options" =     (
        SAMEORIGIN
    );
} }
Network error: none
Decoding error:
keyNotFound(CodingKeys(stringValue: "count", intValue: nil), Swift.DecodingError.Context(codingPath: [], debugDescription: "No value associated with key CodingKeys(stringValue: "count", intValue: nil) ("count").", underlyingError: nil))
Exercise 7: request in offline mode (disable host connection in playground to get it)
Data: none
Response: none
Network Error :
Error Domain=NSURLErrorDomain Code=-1009 "The Internet connection appears to be offline." UserInfo={NSUnderlyingError=0x60400005fbf0 {Error Domain=kCFErrorDomainCFNetwork Code=-1009 "(null)" UserInfo={_kCFStreamErrorCodeKey=50, _kCFStreamErrorDomainKey=1}}, NSErrorFailingURLStringKey=https://swapi.co/api/, NSErrorFailingURLKey=https://swapi.co/api/, _kCFStreamErrorDomainKey=1, _kCFStreamErrorCodeKey=50, NSLocalizedDescription=The Internet connection appears to be offline.}
Время прочтения
5 мин
Просмотры 4.1K

Рассмотрим нативное решение для мониторинга сетевого подключения на iOS с помощью Swift 5 и использования Network Link Conditioner.
Примечание
Если вы найдёте статью интересной, то в этом канале я пишу об iOS-разработке.
Большинство реализаций, которые вы можете найти для мониторинга сетевого подключения вашего iOS-устройства, основаны на использовании сторонних зависимостей, таких как Reachability, NetworkReachabilityManager в Alamofire, или же утилит, которые периодически шлют HTTP-запросы для определения статуса сетевого подключения.
Вместо этого я хотел бы представить альтернативный подход, который использует нативный фреймворк, представленный в iOS 12.
Для этой реализации нам понадобится только фреймворк Network. Хотя вы обычно используете его, когда вам нужен прямой доступ к таким протоколам, как TLS, TCP и UDP, мы не будем делать здесь ничего слишком сложного.
Начальная реализация
Давайте начнем создание нашей утилиты NetworkMonitor:
import Network

final class NetworkMonitor {
  static let shared = NetworkMonitor()
  private let monitor: NWPathMonitor

  private init() {
      monitor = NWPathMonitor()
  }

}
Здесь NWPathMonitor является наблюдателем, который будет отслеживать состояние сетевого соединения и реагировать на изменения, которые могут произойти.
Далее, мы создадим несколько свойств для хранения текущего состояния сетевого соединения:
final class NetworkMonitor {
  static let shared = NetworkMonitor()
  private let monitor: NWPathMonitor

  private(set) var isConnected = false

  /// Следующее свойство нужно для проверки, что сетевое соединение
  /// будет дорогим в плане потребления трафика
  ///
  /// Сотовые интерфейсы считаются дорогими. WiFi точки доступа
  /// от других девайсов также могут быть дорогими. Другие интерфейсы
  /// могут оказаться дорогими в будущем
  private(set) var isExpensive = false

  /// curentConnectionType указывает на тип текущего соединения
  /// в сети, к которой мы подключены
  ///
  /// Возможные состояния могут быть `other`, `wifi`, `cellular`,
  /// `wiredEthernet`, or `loopback`
  private(set) var currentConnectionType: NWInterface.InterfaceType?

  private init() {
      monitor = NWPathMonitor()
  }

}
Поскольку эти свойства могут быть только read-only, используется
private(set).
Мы явно не хотим, чтобы эта длительная задача выполнялась в главном потоке нашего приложения, поэтому создадим новую очередь DispatchQueue для управления этой задачей:
private let queue = DispatchQueue(label: "NetworkConnectivityMonitor")Сетевой фреймворк определяет перечисление NWInterface.InterfaceType, которое содержит все типы медиа, которые может поддерживать наше устройство (WiFi, сотовая связь, проводной ethernet и т.д.).
Поскольку это перечисление объявлено в ObjC, у нас нет доступа к свойству allCases, как, например, в случае с перечислениями в Swift. Поэтому добавим соответствие протоколу CaseIterable и реализуем allCases. В результате этого дополнительного шага остальная часть нашей реализации будет намного проще и гораздо более читабельнее.
extension NWInterface.InterfaceType: CaseIterable {
  public static var allCases: [NWInterface.InterfaceType] = [
  .other,
  .wifi,
  .cellular,
  .loopback,
  .wiredEthernet
  ]
}
Последним шагом в нашей реализации является создание функций, отвечающих за запуск и остановку процесса мониторинга:
func startMonitoring() {
  monitor.pathUpdateHandler = { [weak self] path in
  self?.isConnected = path.status != .unsatisfied
  self?.isExpensive = path.isExpensive
  // Identifies the current connection type from the
  // list of potential network link types
  self?.currentConnectionType = NWInterface.InterfaceType.allCases.filter { path.usesInterfaceType($0) }.first
  }
	monitor.start(queue: queue)
}

func stopMonitoring() {
	monitor.cancel()
}
NetworkMonitor в действии
Отслеживание можно запустить из любой точки кода, просто вызвав NetworkMonitor.shared.startMonitoring(), хотя в большинстве случаев вы захотите инициировать этот процесс в AppDelegate. Затем мы можем использовать NetworkMonitor.shared.isConnected для проверки состояния нашего сетевого соединения в режиме реального времени.
Вот наша реализация на данный момент:
import Network

extension NWInterface.InterfaceType: CaseIterable {
    public static var allCases: [NWInterface.InterfaceType] = [
        .other,
        .wifi,
        .cellular,
        .loopback,
        .wiredEthernet
    ]
}

final class NetworkMonitor {
    static let shared = NetworkMonitor()

    private let queue = DispatchQueue(label: "NetworkConnectivityMonitor")
    private let monitor: NWPathMonitor

	private(set) var isConnected = false
	private(set) var isExpensive = false
	private(set) var currentConnectionType: NWInterface.InterfaceType?

    private init() {
        monitor = NWPathMonitor()
    }

    func startMonitoring() {
        monitor.pathUpdateHandler = { [weak self] path in
            self?.isConnected = path.status != .unsatisfied
            self?.isExpensive = path.isExpensive
            self?.currentConnectionType = NWInterface.InterfaceType.allCases.filter { path.usesInterfaceType($0) }.first
        }
        monitor.start(queue: queue)
    }

    func stopMonitoring() {
        monitor.cancel()
    }
}
Добавление поддержки NotificationCenter
Поведение современных приложений для iOS резко меняется при отключении сетевого соединения устройства — на некоторых экранах может появиться уведомление о том, что устройство потеряло соединение, может измениться поведение кэширования приложения или даже нарушатся некоторые пользовательские сценарии.
Для поддержки такого типа поведения нам необходимо расширить нашу реализацию, чтобы отправлять уведомления по всему приложению при изменении статуса подключения.
import Foundation
import Network

extension Notification.Name {
    static let connectivityStatus = Notification.Name(rawValue: "connectivityStatusChanged")
}

extension NWInterface.InterfaceType: CaseIterable {
    public static var allCases: [NWInterface.InterfaceType] = [
        .other,
        .wifi,
        .cellular,
        .loopback,
        .wiredEthernet
    ]
}

final class NetworkMonitor {
    static let shared = NetworkMonitor()

    private let queue = DispatchQueue(label: "NetworkConnectivityMonitor")
    private let monitor: NWPathMonitor

    private(set) var isConnected = false
    private(set) var isExpensive = false
    private(set) var currentConnectionType: NWInterface.InterfaceType?

    private init() {
        monitor = NWPathMonitor()
    }

    func startMonitoring() {
        monitor.pathUpdateHandler = { [weak self] path in
            self?.isConnected = path.status != .unsatisfied
            self?.isExpensive = path.isExpensive
            self?.currentConnectionType = NWInterface.InterfaceType.allCases.filter { path.usesInterfaceType($0) }.first

            NotificationCenter.default.post(name: .connectivityStatus, object: nil)
        }
        monitor.start(queue: queue)
    }

    func stopMonitoring() {
        monitor.cancel()
    }
}

// ViewController.swift
class ViewController: UIViewController {

    override func viewDidLoad() {
        super.viewDidLoad()
        NotificationCenter.default.addObserver(self, selector: #selector(showOfflineDeviceUI(notification:)), name: NSNotification.Name.connectivityStatus, object: nil)
    }

    @objc func showOfflineDeviceUI(notification: Notification) {
        if NetworkMonitor.shared.isConnected {
            print("Connected")
        } else {
            print("Not connected")
        }
    }
}
Весь исходный код находится здесь.
Network Link Conditioner
Раз уж мы заговорили о сетевых технологиях и отладке проблем с подключением, самое время упомянуть о Network Link Conditioner.
С помощью этого инструмента можно имитировать различные сетевые условия на компьютере и, соответственно, в симуляторе iOS. С помощью этого инструмента мы можем не только отслеживать экстремальные ситуации, когда мы полностью онлайн или оффлайн, но и тестировать поведение нашего приложения в различных сетевых условиях.
Вы можете загрузить его с сайта разработчиков Apple или по этой ссылке.
Сама утилита будет находиться в папке Hardware, для установки просто кликните по ней.

После чего вы сможете настраивать нужные вам параметры, как и на реальном устройстве здесь:

Полезные ресурсы
-
Статья с разбором примера приложения для отслеживания сетевого соединения.
-
Пример работы для Network Link Conditioner
-
Страница с дополнительными утилитами от Apple.
Больше историй, подходов к реализации и инструментов для iOS-разработчика можно найти в авторском канале об iOS-разработке.

As developers, we tend to be a rather optimistic bunch of people. At least that’s the impression you get when looking at the code we write — we mostly focus on the happy path, and tend to spend a lot less time and effort on error handling.
Even in this series, we’ve been neglecting error handling. In fact, we’ve mostly ignored it: in the previous post, we replaced any errors with a default value, which was OK for prototyping our app, but this probably isn’t a solid strategy for any app that goes into production.
This time, let’s take a closer look at how we can handle errors appropriately!
Previously…
In case you didn’t read the previous episodes (1, 2) of this series: the use case we’re discussing is the validation logic for a sign-up form. We use Combine to validate the user’s input, and as part of this validation, the app also calls an endpoint on the app’s authentication server to check if the username the user chose is still available. The endpoint will return
trueorfalsedepending on whether the name is still available.
Error handling strategies
Before we dive deeper into how to handle errors, let’s talk about a couple of error handling strategies and whether they are appropriate in our scenario.
Ignoring the error
This might sound like a terrible idea at first, but it’s actually a viable option when dealing with certain types of errors under specific circumstances. Here are some examples:
- The user’s device is temporarily offline or there is another reason why the app cannot reach the server.
- The server is down at the moment, but will be back up soon.
In many cases, the user can continue working offline, and the app can sync with the server once the device comes back online. Of course, this requires some sort of offline capable sync solution (like Cloud Firestore).
It is good practice to provide some user feedback to make sure users understand their data hasn’t been synchronised yet. Many apps show an icon (e.g. a cloud with an upward pointing arrow) to indicate the sync process is still in progress, or a warning sign to alert the user they need to manually trigger the sync once they’re back online.
Retrying (with exponential back-off)
In other cases, ignoring the error is not an option. Imagine the booking system for a popular event: the server might be overwhelmed by the amount of requests. In this case, we want to make sure that the system will not be thrashed by the users hitting “refresh” every couple of seconds. Instead, we want to spread out the time between retries. Using an exponential backoff strategy is both in the user’s and the system’s operator’s best interest: the operator can be sure their server will not be overwhelmed even more by users trying to get through by constantly refreshing, and the users should eventually get their booking through thanks to the app automatically retrying.
Showing an error message
Some errors require the user’s action — for example if saving a document failed. In this case, it is appropriate to show a model dialog to get the user’s attention and ask them how to proceed. For less severe errors, it might be sufficient to show a toast (an overlay that shows for a brief moment and then disappears).
Replacing the entire view with an error view
Under some circumstances, it might even be appropriate to replace the entire UI with an error UI. A well-known example for this is Chrome — if the device is offline, it will display the Chrome Dino to let users know their device is offline, and to help them spend the time until their connection restores with a fun jump-and-run game.
Showing an inline error message
This is a good option in case the data the user has provided isn’t valid. Not all input errors can be detected by a local form validation. For example, an online store might have a business rule that mandates shipments worth more than a certain amount must be shipped using a specific transport provider. It’s not always feasible to implement all of these business rules in the client app (a configurable rules engine definitely might help here), so we need to be prepared to handle these kinds of semantic errors.
Ideally, we should show those kind of errors next to the respective input field to help the user provide the correct input.
Typical error conditions and how to handle them
To give you a better understanding of how to apply this in a real world scenario, let’s add some error handling to the sign-up form we created earlier in this series. In particular, we’ll deal with the following error conditions:
- Device/network offline
- Semantic validation errors
- Response parsing errors / invalid URL
- Internal server errors
Source Code
If you want to follow along, you will find the code for this episode in the following GitHub repository: https://github.com/peterfriese/SwiftUI-Combine-Applied, in the
Networkingfolder. Theserversubfolder contains a local server that helps us simulate all the error conditions we will cover.
Implementing a fallible network API
In the previous post, we implemented an AuthenticationService that interfaces with an authentication server. This helps us to keep everything neatly organised and separated by concerns:
- The view (
SignUpScreen) displays the state and takes the user’s input - The view model (
SignUpScreenViewModel) holds the state the view displays. In turn, it uses other APIs to react to the user’s actions. In this particular app, the view model uses theAuthenticationServiceto interact with the authentication server - The service (
AuthenticationService) interacts with the authentication server. Its main responsibilities are to bring the server’s responses into a format that the client can work with. For example, it converts JSON into Swift structs, and (most relevant for this post) it handles any network-layer errors and converts them into UI-level errors that the client can better work with.
The following diagram provides an overview of how the individual types work together:

If you take a look at the code we wrote in the previous post, you will notice that the checkUserNamerAvailablePublisher has a failure type of Never — that means it claims there is never going to be an error.
func checkUserNameAvailablePublisher(userName: String) -> AnyPublisher<Bool, Never> { ... }
That’s a pretty bold statement, especially given network errors are really common! We were only able to guarantee this because we replaced any errors with a return value of false:
func checkUserNameAvailablePublisher(userName: String)
    -> AnyPublisher<Bool, Never> {
  guard let url = URL(string: "http://127.0.0.1:8080/isUserNameAvailable?userName=(userName)") else {
    return Just(false).eraseToAnyPublisher()
  }

  return URLSession.shared.dataTaskPublisher(for: url)
    .map(.data)
    .decode(type: UserNameAvailableMessage.self, decoder: JSONDecoder())
    .map(.isAvailable)
    .replaceError(with: false)
    .eraseToAnyPublisher()
}
To turn this rather lenient implementation into something that returns meaningful error messages to the caller, we first need to change the failure type of the publisher, and stop glossing over any errors by returning false:
enum APIError: LocalizedError {
  /// Invalid request, e.g. invalid URL
  case invalidRequestError(String)
}

struct AuthenticationService {

  func checkUserNameAvailablePublisher(userName: String)
      -> AnyPublisher<Bool, Error> {
    guard let url =
        URL(string: "http://127.0.0.1:8080/isUserNameAvailable?userName=(userName)") else {
      return Fail(error: APIError.invalidRequestError("URL invalid"))
        .eraseToAnyPublisher()
    }

    return URLSession.shared.dataTaskPublisher(for: url)
      .map(.data)
      .decode(type: UserNameAvailableMessage.self, decoder: JSONDecoder())
      .map(.isAvailable)
//      .replaceError(with: false)
      .eraseToAnyPublisher()
  }

}
We also introduced a custom error type, APIError. This will allow us to convert any errors that might occur inside our API (be it network errors or data mapping errors) into a semantically rich error that we can handle more easily in out view model.
Calling the API and handling errors
Now that the API has a failure type, we need to update the caller as well. Once a publisher emits a failure, the pipeline will terminate — unless you capture the error. A typical approach to handling errors when using flatMap is to combine it with a catch operator:
somePublisher
  .flatMap { value in
    callSomePotentiallyFailingPublisher()
    .catch { error in
      return Just(someDefaultValue)
    }
  }
  .eraseToAnyPublisher()
Applying this strategy to the code in our view model results in the following code:
private lazy var isUsernameAvailablePublisher: AnyPublisher<Bool, Never> = {
  $username
    .debounce(for: 0.8, scheduler: DispatchQueue.main)
    .removeDuplicates()
    .flatMap { username -> AnyPublisher<Bool, Never> in
      self.authenticationService.checkUserNameAvailablePublisher(userName: username)
        .catch { error in 1
          return Just(false) 2
        }
        .eraseToAnyPublisher()
    }
    .receive(on: DispatchQueue.main)
    .share()
    .eraseToAnyPublisher()
}()
And just like that, we end up where we started! If the API emits a failure (for example, the username was too short), we catch the error (1) and replace it with false (2) — this is exactly the behaviour we had before. Except, we wrote a lot more code…
Seems like we’re getting nowhere with this approach, so let’s take a step back and look at the requirements for our solution:
- We want to use the emitted values of the pipeline to drive the state of the submit button, and to display a warning message if the chosen username is not available.
- If the pipeline emits a failure, we want to disable the submit button, and display the error message in the error label below the username input field.
- How exactly we handle the errors will depend on the type of failure, as wel will discuss later in this post.
This means:
- we need to make sure we can receive both failures and successes
- we need to make sure the pipeline doesn’t terminate if we receive a failure
To achieve all of this, we will map the result of the checkUserNameAvailablePublisher to a Result type. Result is an enum that can capture both success and failure states. Mapping the outcome of checkUserNameAvailablePublisherto Result also means the pipeline will no longer terminate in case it emits a failure.
Let’s first define a typealias for the Result type to make our life a little easier:
typealias Available = Result<Bool, Error>
To turn the result of a publisher into a Result type, we can use the following operator that John Sundell implemented in his article The power of extensions in Swift:
extension Publisher {
  func asResult() -> AnyPublisher<Result<Output, Failure>, Never> {
    self
      .map(Result.success)
      .catch { error in
        Just(.failure(error))
      }
      .eraseToAnyPublisher()
  }
}
This allows us to update the isUsernameAvailablePublisher in our view model like this:
private lazy var isUsernameAvailablePublisher: AnyPublisher<Available, Never> = {
  $username
    .debounce(for: 0.8, scheduler: DispatchQueue.main)
    .removeDuplicates()
    .flatMap { username -> AnyPublisher<Available, Never> in
      self.authenticationService.checkUserNameAvailablePublisher(userName: username)
        .asResult()
    }
    .receive(on: DispatchQueue.main)
    .share()
    .eraseToAnyPublisher()
}()
With this basic plumbing in place, let’s look at how to handle the different error scenarios I outlined earlier.
Handling Device/Network Offline Errors
On mobile devices it is pretty common to have spotty connectivity: especially when you’re on the move, you might be in an area with bad or no coverage.
Whether or not you should show an error message depends on the situation:
For our use case we can assume that the user at least has intermittent connectivity. Telling the user that we cannot reach the server would be rather distracting while they’re filling out the form. Instead, we should ignore any connectivity errors for the form validation (and instead run our local form validation logic).
Once the user has entered all their details and submits the form, we should show an error message if the device is still offline.
Catching this type of error requires us to make changes at two different places. First, in checkUserNameAvailablePublisher, we use mapError to catch any upstream errors and turn them into an APIError
enum APIError: LocalizedError {
  /// Invalid request, e.g. invalid URL
  case invalidRequestError(String)

  /// Indicates an error on the transport layer, e.g. not being able to connect to the server
  case transportError(Error)
}

struct AuthenticationService {

  func checkUserNameAvailablePublisher(userName: String)
      -> AnyPublisher<Bool, Error> {
    guard let url = URL(string: "http://127.0.0.1:8080/isUserNameAvailable?userName=(userName)") else {
      return Fail(error: APIError.invalidRequestError("URL invalid"))
        .eraseToAnyPublisher()
    }

    return URLSession.shared.dataTaskPublisher(for: url)
      .mapError { error -> Error in
        return APIError.transportError(error)
      }
      .map(.data)
      .decode(type: UserNameAvailableMessage.self, decoder: JSONDecoder())
      .map(.isAvailable)
      .eraseToAnyPublisher()
  }

}
Then, in our view model, we map the result to detect if it was a failure (1, 2). If so, we extract the error and check if it is a network transport error. If that’s the case, we return an empty string (3) to suppress the error message:
class SignUpScreenViewModel: ObservableObject {

  // ...

  init() {
    isUsernameAvailablePublisher
      .map { result in
        switch result {
        case .failure(let error): 1
          if case APIError.transportError(_) = error {
            return "" 3
          }
          else {
            return error.localizedDescription
          }
        case .success(let isAvailable):
          return isAvailable ? "" : "This username is not available"
        }
      }
      .assign(to: &$usernameMessage) 4

    isUsernameAvailablePublisher
      .map { result in
        if case .failure(let error) = result { 2
          if case APIError.transportError(_) = error {
            return true
          }
          return false
        }
        if case .success(let isAvailable) = result {
          return isAvailable
        }
        return true
      }
      .assign(to: &$isValid) 5
  }
}
In case isUsernameAvailablePublisher returned a success, we extract the Bool telling us whether or not the desired username is available, and map this to an appropriate message.
And finally, we assign the result of the pipeline to the usernameMessage (4) and isValid (5) published properties which drive the UI on our view.
Keep in mind that ignoring the network error is a viable option for this kind of UI — it might be an entirely different story for you use case, so use your own judgement when applying this technique.
So far, we haven’t exposed any errors to the user, so let’s move on to a category of errors that we actually want to make the user aware of.
Handling Validation Errors
Most validation errors should be handled locally on the client, but sometimes we cannot avoid running some additional validation steps on the server. Ideally, the server should return a HTTP status code in the 4xx range, and optionally a payload that provides more details.
In our example app, the server requires a minimum username length of four characters, and we have a list of usernames that are forbiden (such as “admin” or “superuser”).
For these cases, we want to display a warning message and disable the submit button.
Our backend implementatin is based on Vapor, and will respond with a HTTP status of 400 and an error payload for any validation errors. If you’re curious about the implementation, check out the code in routes.swift.
Handling this error scenario requires us to make changes in two places: the service implementation and the view model. Let’s take a look at the service implementation first.
Since we should handle any errors before even trying to extract the payload from the response, the code for handling server errors needs to run after checking for URLErrors and before mapping data:
struct APIErrorMessage: Decodable {
  var error: Bool
  var reason: String
}

// ...

struct AuthenticationService {

  func checkUserNameAvailablePublisher(userName: String) -> AnyPublisher<Bool, Error> {
    guard let url = URL(string: "http://127.0.0.1:8080/isUserNameAvailable?userName=(userName)") else {
      return Fail(error: APIError.invalidRequestError("URL invalid"))
        .eraseToAnyPublisher()
    }

    return URLSession.shared.dataTaskPublisher(for: url)
      // handle URL errors (most likely not able to connect to the server)
      .mapError { error -> Error in
        return APIError.transportError(error)
      }

      // handle all other errors
      .tryMap { (data, response) -> (data: Data, response: URLResponse) in
        print("Received response from server, now checking status code")

        guard let urlResponse = response as? HTTPURLResponse else {
          throw APIError.invalidResponse 1
        }

        if (200..<300) ~= 2 urlResponse.statusCode {
        }
        else {
          let decoder = JSONDecoder()
          let apiError = try decoder.decode(APIErrorMessage.self,
                                               from: data) 3

          if urlResponse.statusCode == 400 { 4
            throw APIError.validationError(apiError.reason)
          }
        }
        return (data, response)
      }

      .map(.data)
      .decode(type: UserNameAvailableMessage.self, decoder: JSONDecoder())
      .map(.isAvailable)
//      .replaceError(with: false)
      .eraseToAnyPublisher()
  }

}
Let’s take a closer look at what the code in this snippet does:
- If the response isn’t a
HTTPURLResonse, we returnAPIError.invalidResponse - We use Swift’s pattern matching to detect if the request was executed successfully, i.e., with a HTTP status code in the range of
200to299 - Otherwise, some error occurred on the server. Since we use Vapor, the server will return details about the error in a JSON payload, so we can now map this information to an
APIErrorMessagestruct and use it to create more meaningful error message in the following code - If the server returns a HTTP status of
400, we know that this is a validation error (see the server implementation for details), and return anAPIError.validationErrorincluding the detailed error message we received from the server
In the view model, we can now use this information to tell the user that their chosen username doesn’t meet the requirements:
init() {
  isUsernameAvailablePublisher
    .map { result in
      switch result {
      case .failure(let error):
        if case APIError.transportError(_) = error {
          return ""
        }
        else if case APIError.validationError(let reason) = error {
          return reason
        }
        else {
          return error.localizedDescription
        }
      case .success(let isAvailable):
        return isAvailable ? "" : "This username is not available"
      }
    }
    .assign(to: &$usernameMessage)
That’s right — just three lines of code. We’ve already done all the hard work, so it’s time to reap the benefits 🎉
Handling Response Parsing Errors
There are many situations in which the data sent by the server doesn’t match what the client expected:
- the response includes additional data, or some fieds were renamed
- the client is connecting via a captive portal (e.g. in a hotel)
In these cases, the client receives data, but it’s in the wrong format. To help the user resolve the situation, we’ll need to analyse the response and then provide suitable guidance, for example:
- download the latest version of the app
- sign in to the captive portal via the system browser
The current implementation uses the decode operator to decode the response payload and throw an error in case the payload couldn’t be mapped. This works well, and any decoding error will be caught and show on the UI. However, an error message like The data couldn’t be read because it is missing isn’t really user friendly. Instead, let’s try to show a message that is a little bit more meaningful for users, and also suggest to upgrade to the latest version of the app (assuming the server is returning additional data that the new app will be able to leverage).
To be able to provide more fine-grained informtion about decoding errors, we need to part ways with the decode operator and fall back to manually mapping the data (don’t worry, thanks to JSONDecoder and Swift’s Codable protocol, this is pretty straighforward):
// ...
.map(.data)
// .decode(type: UserNameAvailableMessage.self, decoder: JSONDecoder())
.tryMap { data -> UserNameAvailableMessage in
  let decoder = JSONDecoder()
  do {
    return try decoder.decode(UserNameAvailableMessage.self,
                              from: data)
  }
  catch {
    throw APIError.decodingError(error)
  }
}
.map(.isAvailable)
// ...
By conforming APIError to LocalizedError and implementing the errorDescription property, we can provide a more user-friendly error message (I included custom messages for the other error conditions as well):
enum APIError: LocalizedError {
  /// Invalid request, e.g. invalid URL
  case invalidRequestError(String)

  /// Indicates an error on the transport layer, e.g. not being able to connect to the server
  case transportError(Error)

  /// Received an invalid response, e.g. non-HTTP result
  case invalidResponse

  /// Server-side validation error
  case validationError(String)

  /// The server sent data in an unexpected format
  case decodingError(Error)

  var errorDescription: String? {
    switch self {
    case .invalidRequestError(let message):
      return "Invalid request: (message)"
    case .transportError(let error):
      return "Transport error: (error)"
    case .invalidResponse:
      return "Invalid response"
    case .validationError(let reason):
      return "Validation Error: (reason)"
    case .decodingError:
      return "The server returned data in an unexpected format. Try updating the app."
    }
  }
}
Now, to make it abundandly clear to the user that they should update the app, we will also display an alert. Here is the code for the alert:
struct SignUpScreen: View {
  @StateObject private var viewModel = SignUpScreenViewModel()

  var body: some View {
    Form {
      // ...
    }

    // show update dialog
    .alert("Please update", isPresented: $viewModel.showUpdateDialog, actions: {
      Button("Upgrade") {
        // open App Store listing page for the app
      }
      Button("Not now", role: .cancel) { }
    }, message: {
      Text("It looks like you're using an older version of this app. Please update your app.")
    })

  }
}
You’ll notice that the presentation state of this alert is driven by a published property on the view model, showUpdateDialog. Let’s update the view model accordingly (1), and also add the Combine pipeline that maps the results of isUsernameAvailablePublisher to this new property:
class SignUpScreenViewModel: ObservableObject {
  // ...

  @Published var showUpdateDialog: Bool = false 1

  // ...

  private lazy var isUsernameAvailablePublisher: AnyPublisher<Available, Never> = {
    $username
      .debounce(for: 0.8, scheduler: DispatchQueue.main)
      .removeDuplicates()
      .flatMap { username -> AnyPublisher<Available, Never> in
        self.authenticationService.checkUserNameAvailablePublisher(userName: username)
          .asResult()
      }
      .receive(on: DispatchQueue.main)
      .share() 3
      .eraseToAnyPublisher()
  }()

  init() {
    // ...

    // decoding error: display an error message suggesting to download a newer version
    isUsernameAvailablePublisher
      .map { result in
        if case .failure(let error) = result {
          if case APIError.decodingError = error 2 {
            return true
          }
        }
        return false
      }
      .assign(to: &$showUpdateDialog)
  }
}
As you can see, nothing too fancy — we essentially just take any events coming in from the isUsernameAvailablePublisher and convert them into a Bool that only becomes true if we receive a .decodingError (2).
We’re now using isUsernameAvailablePublisher to drive three different Combine pipelines, and I would like to explicitly call out that — since isUsernameAvailablePublisher eventually will cause a network request to be fired — it is important to make sure we’re only sending at most one network request per keystroke. The previous post in this series explains how to do this in depth, but it’s worth calling out that using .share() (3) plays a key role.
Handling Internal Server Errors
In some rare cases, the backend of our app might be having some issues — maybe part of the system is offline for maintenance, some process died, or the server is overwhelmed. Usually, servers will return a HTTP status code in the 5xx range to indicate this.
Simulating error conditions
The sample server includes code that simulates some of the error conditions discussed in this article. You can trigger the error conditions by sending specific
usernamevalues:
- Any username with less than 4 characters will result in a
tooshortvalidation error, signalled via a HTTP 400 status code and a JSON payload containing a detailed error message.- An empty username will result in a
emptyNameerror message, indicating the username mustn’t be empty.- Some usernames are forbidden: «admin» or «superuser» will result in an
illegalNamevalidation error.- Other usernames such as “peterfriese”, “johnnyappleseed”, “page”, and “johndoe” are already taken, so the server will tell the client these aren’t available any more.
- Sending “illegalresponse” as the username will return a JSON response that has too few fields, resulting in a decoding error on the client.
- Sending “servererror” will simulate a database problem (
databaseCorrupted), and will be signalled as a HTTP 500 with no retry hint (as we assume that this is not a temporary situation, and retrying would be futile).- Sending “maintenance” as the username will return a
maintenanceerror, along with aretry-afterheader that indicates the client can retry this call after a period of time (the idea here is that the server is undergoing scheduled maintenance and will be back up after rebooting).
Let’s add the code required to deal with server-side errors. As we did for previous error scenarios, we need to add some code to map the HTTP status code to our APIError enum:
if (200..<300) ~= urlResponse.statusCode {
}
else {
  let decoder = JSONDecoder()
  let apiError = try decoder.decode(APIErrorMessage.self, from: data)

  if urlResponse.statusCode == 400 {
    throw APIError.validationError(apiError.reason)
  }

  if (500..<600) ~= urlResponse.statusCode {
    let retryAfter = urlResponse.value(forHTTPHeaderField: "Retry-After")
    throw APIError.serverError(statusCode: urlResponse.statusCode,
                               reason: apiError.reason,
                               retryAfter: retryAfter)
  }

}
To display a user-friendly error messge in our UI, all we need to do is add a few lines of code to the view model:
isUsernameAvailablePublisher
  .map { result in
    switch result {
    case .failure(let error):
      if case APIError.transportError(_) = error {
        return ""
      }
      else if case APIError.validationError(let reason) = error {
        return reason
      }
      else if case APIError.serverError(statusCode: _, reason: let reason, retryAfter: _) = error {
        return reason ?? "Server error"
      }
      else {
        return error.localizedDescription
      }
    case .success(let isAvailable):
      return isAvailable ? "" : "This username is not available"
    }
  }
  .assign(to: &$usernameMessage)
So far, so good.
For some of the server-side error scenarios, it might be worthwhile to retry the request after a short while. For a example, if the server underwent maintenance, it might be back up again after a few seconds.
Combine includes a retry operator that we can use to automatically retry any failing operation. Adding it to our code is a simple one-liner:
return URLSession.shared.dataTaskPublisher(for: url)
  .mapError { ... }
  .tryMap { ... }
  .retry(3)
  .map(.data)
  .tryMap { ... }
  .map(.isAvailable)
  .eraseToAnyPublisher()
However, as you will notice when you run the app, this will result in any failed request to be retried three times. This is not what we want — for example, we want any verification errors to bubble up to the view model. Instead, they will be captured by the retry operator as well.
What’s more, there is no pause between retries. If our goal was to reduce the pressure on a server that is already overwhelmed, we’ve made it even worse by sending not one, but four requests (the original request, plus three retries).
So how can we make sure that
- We only retry certain types of failiures?
- There is a pause before we retry a failed request?
Our implementation needs to be able to catch any upstream errors, and propagate them down the pipeline to the next operator. When we catch a serverError, however, we want to pause for a moment, and them start the entire pipeline again so it can retry the URL request.
Let’s first make sure we can (1) catch all errors, (2) filter out the serverError, and (3) propagate all other errors along the pipeline. The tryCatch operator “handles errors from an upstream publisher by either replacing it with another publisher or throwing a new error”. This is exactly what we need:
return URLSession.shared.dataTaskPublisher(for: url)
  .mapError { ... }
  .tryMap { ... }
  .tryCatch { error -> AnyPublisher<(data: Data, response: URLResponse), Error> in 1
    if case APIError.serverError(_, _, let retryAfter) = error { 2
      // ...
    }
    throw error 3
  }
  .map(.data)
  .tryMap { ... }
  .map(.isAvailable)
  .eraseToAnyPublisher()
When we caught a serverError, we want to wait for a short amount of time, and then restart the pipeline.
We can do this by firing off a new event (using the Just publisher), delaying it for a few seconds, and then using flatMap to kick off a new dataTaskPublisher. Instead of pasting the entire code for the pipeline inside the if statement, we assign the dataTaskPublisher to a local variable:
let dataTaskPublisher = URLSession.shared.dataTaskPublisher(for: url)
  .mapError { ... }
  .tryMap { ... }

return dataTaskPublisher
  .tryCatch { error -> AnyPublisher<(data: Data, response: URLResponse), Error> in
    if case APIError.serverError = error {
      return Just(()) 1
        .delay(for: 3, scheduler: DispatchQueue.global())
        .flatMap { _ in
          return dataTaskPublisher
        }
        .retry(10) 2
        .eraseToAnyPublisher()
    }
    throw error
  }
  .map(.data)
  .tryMap { ... }
  .map(.isAvailable)
  .eraseToAnyPublisher()
A couple of notes about this code:
- The
Justpublisher expects some value it can publish. Since it really doesn’t matter which value we use, we can send anything we want. I decided to send an empty tuple, which is often used in situations when you mean “nothing”. - We retry sending the request 10 times, meaning it will be sent up to 11 times in total (the original call plus the 10 retries).
The only reason why this number is so high is to make it easier to see that the pipeline comes to an end as soon as the server returns a successful result. The demo server can simulate recovering from scheduled maintenance when you send maintenance as the username: it will throw InternalServerError.maintenance (which is mapped to HTTP 500) for every first and second request. Every third request, it will return a success (i.e. HTTP 200). The best way to see this in action is to run the server from inside Xcode (run open the server project and press the Run button). Then, create a Sound breakpoint for the line that contains throw InternalServerError.maintenance:

Everytime the server receives a request for username=maintenace, you will hear a sound. Now, run the sample app and enter maintenance as the username. You will hear the server responding with an error two times, before it will return a success.
Closure
After using a rather lenient approach to handle errors in the recent episode of this series, we took things a lot more serious this time around.
In this episode, we used a couple of strategies to handle errors and expose them to the UI. Error handling is an important aspect of developer quality software, and there is a lot of material out there. However, the aspect of how to expose erorrs to the user isn’t often discussed, and I hope this article provided you with a better understanding of how you can achieve this.
In comparison to the original code, the code became a bit more complicated, and this is something we’re going to address in the next episode when we will look at implementing your own Combine operators. To demonstrate how this works, we will implement an operator that makes handling incremental backoff as easy as adding one line to your Combine pipeline!
Thanks for reading 🔥
by Neo Ighodaro

More often than not, mobile applications need an active internet connection to function properly. It is normal, however, for the internet connection to be lost. In cases like these, it is up to the developer to come up with ways to make the experience bearable, or in the least, notify the user.
In this article, we are going to see how we can detect internet connection issues in Swift, and some ways we can handle it.
Here is the sample application we will be building and how it handles different internet connectivity scenarios:

Requirements
For you to be able to follow along in this article, you will need the following requirements:
- Xcode installed on your machine.
- Knowledge of the Swift programming language.
- Cocoapods installed on your machine.
When you have the above requirements, let’s dive in.
Setting up our workspace
Before we begin, we will create a playground. This is where we will write all our use cases and handle them.
Swift comes with its own Reachability implementation for detecting connection issues, but we will be using a third-party library. We are doing this because it is easier and the API is more expressive than the one built in.
Open Xcode and set up a new project.
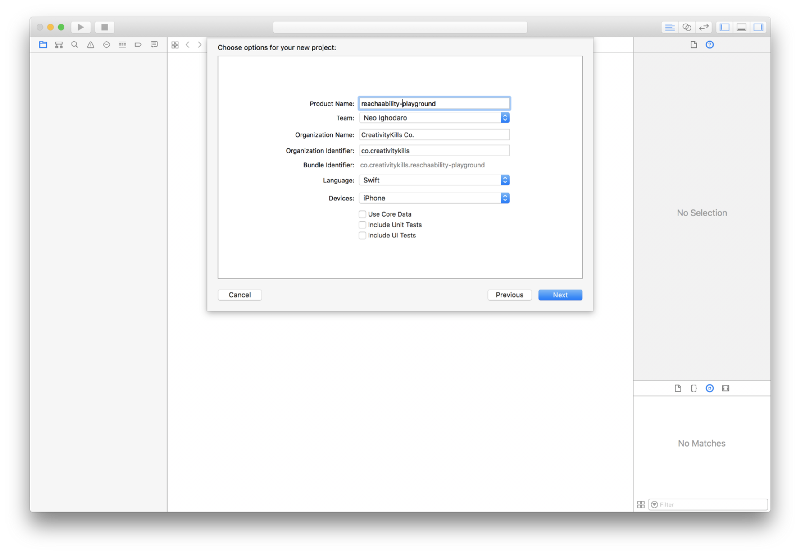
This project will be a simple playground that we can experiment with.
To detect when the connection goes offline we are going to be using the Reachability.swift ****package. It is a “replacement for Apple’s Reachability re-written in Swift with closures”.
Open your terminal and run the command below:
$ pod initThis will create a new Podfile where we can declare the Cocoapods dependencies. Open the Podfile and replace the contents with the code below:
platform :ios, '9.0'target 'project_name' do use_frameworks! pod 'ReachabilitySwift' pod 'Alamofire'endYou need to replace
**project_name**with the name of your project.
Save the file and run the command below to install the Pods to your project:
$ pod installWhen the installation is complete, open the *.xcworkspace file in the root of your project. This will launch Xcode.
Creating our Network Reachability Manager
Create a new NetworkManager class. This class will store the network status and be a simple proxy to the Reachability package. In the file, paste the code below:
import Foundationimport Reachabilityclass NetworkManager: NSObject { var reachability: Reachability! static let sharedInstance: NetworkManager = { return NetworkManager() }() override init() { super.init() // Initialise reachability reachability = Reachability()! // Register an observer for the network status NotificationCenter.default.addObserver( self, selector: #selector(networkStatusChanged(_:)), name: .reachabilityChanged, object: reachability ) do { // Start the network status notifier try reachability.startNotifier() } catch { print("Unable to start notifier") } } @objc func networkStatusChanged(_ notification: Notification) { // Do something globally here! } static func stopNotifier() -> Void { do { // Stop the network status notifier try (NetworkManager.sharedInstance.reachability).startNotifier() } catch { print("Error stopping notifier") } } // Network is reachable static func isReachable(completed: @escaping (NetworkManager) -> Void) { if (NetworkManager.sharedInstance.reachability).connection != .none { completed(NetworkManager.sharedInstance) } } // Network is unreachable static func isUnreachable(completed: @escaping (NetworkManager) -> Void) { if (NetworkManager.sharedInstance.reachability).connection == .none { completed(NetworkManager.sharedInstance) } } // Network is reachable via WWAN/Cellular static func isReachableViaWWAN(completed: @escaping (NetworkManager) -> Void) { if (NetworkManager.sharedInstance.reachability).connection == .cellular { completed(NetworkManager.sharedInstance) } } // Network is reachable via WiFi static func isReachableViaWiFi(completed: @escaping (NetworkManager) -> Void) { if (NetworkManager.sharedInstance.reachability).connection == .wifi { completed(NetworkManager.sharedInstance) } }]In the class above, we have defined a couple of helper functions that will help us get started with network status monitoring. We have a sharedInstance that is a singleton and we can call that if we do not want to create multiple instances of the NetworkManager class.
In the init method, we create an instance of Reachability and then we register a notification using the NotificationCenter class. Now, every time the network status changes, the callback specified by NotificationCenter (which is networkStatusChanged) will be called. We can use this to do something global that is activated when the network is unreachable.
We have defined other helper functions that will generally make running code, depending on the status of our internet connection, a breeze. We have *isReachable*, *isUnreachable*, *isReachableViaWWAN* and *isReachableViaWiFi*.
The usage of one of these helpers will generally look like this:
NetworkManager.isReachable { networkManagerInstance in print("Network is available")}NetworkManager.isUnreachable { networkManagerInstance in print("Network is Unavailable")}This is not an event listener and will only run once. To use a listener to pick up network changes in real-time, you’ll need to use
NetworkManager.sharedInstance.reachability.whenReachable**. We will show an example later in the article.**
Now that we have a manager class, let’s see how we can use this in an application.
Handling Network Availability on Application Launch
Sometimes, your application relies heavily on an internet connection and you need to detect the status on launch. Let’s see how we can handle this using the NetworkManager class.
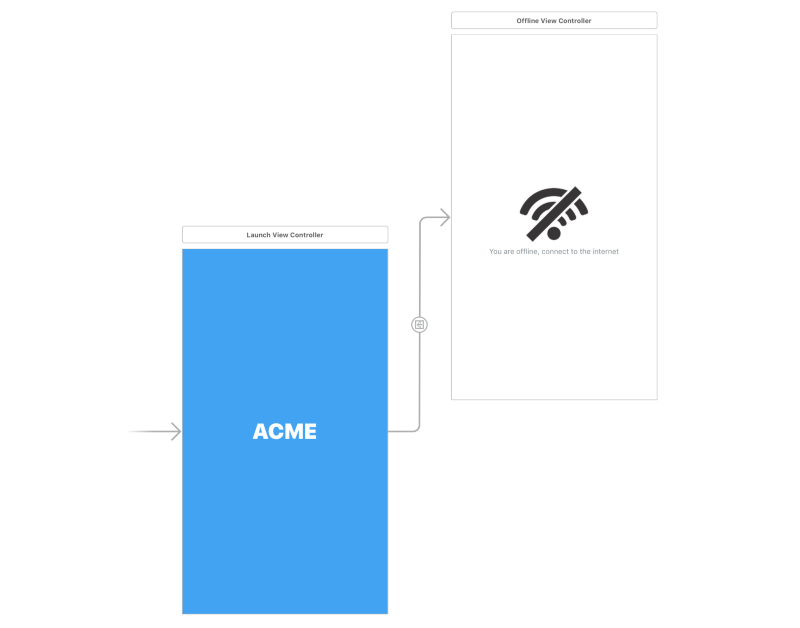
Create a new controller called LaunchViewController. We will treat the first controller view on the storyboard as the launch controller. We will try to detect if the user’s device is online and, if not, we will create an offline page to handle this so the user does not get into the application at all.
In the LaunchController, replace the contents with the following code:
import UIKitclass LaunchViewController: UIViewController { let network: NetworkManager = NetworkManager.sharedInstance override func viewDidLoad() { super.viewDidLoad() NetworkManager.isUnreachable { _ in self.showOfflinePage() } } private func showOfflinePage() -> Void { DispatchQueue.main.async { self.performSegue( withIdentifier: "NetworkUnavailable", sender: self ) } }}In this class, we use our NetworkManager‘s *isUnreachable* method to fire the showOffline method when the network is unavailable. Let us create that view controller. Create a new view controller called OfflineViewController.
Open the Main.storyboard file and set the custom class of the first view to LaunchViewController .
Next, create a new view controller in the storyboard. Set the OfflineViewController as the custom class for this new view controller. Now create a manual segue called NetworkUnavailable between the new view controller and the LaunchViewController. When you are done you should have something similar to this:
Now let’s run the application. Note, though, that before you run your application, your development machine should be offline as the iOS simulator uses the machine’s internet connection. When you run the application, you should get the offline page we created.
Now let us create a view controller that shows up when there is a connection.
Handling Events When the Device Comes Online
Now that we have created an Offline View Controller and it works when the device is offline, let us handle what happens when the device is back online.
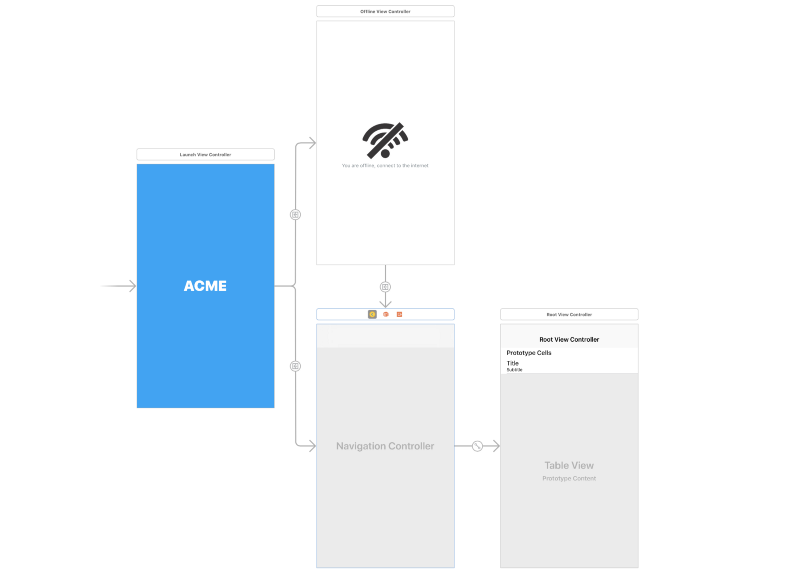
Create a new navigation view controller on the storyboard below the Offline View Controller. We will create a controller that displays the latest Reddit posts. Create a new view controller class called PostsTableViewController. Now make this the custom class for the view controller attached to the Navigation View Controller.
Now create a manual segue called MainController from the Navigation View Controller to the Launch View Controller and the Offline View Controller. You should have something similar to this:
Now, open the LaunchViewController class and at the bottom of the viewDidLoad method add the following:
NetworkManager.isReachable { _ in self.showMainPage()}Then add the method below to the controller:
private func showMainPage() -> Void { DispatchQueue.main.async { self.performSegue( withIdentifier: "MainController", sender: self ) }}This will make sure that when the app is launched, it will check for connectivity and then, if the connection is available, it will present the PostsTableViewController. Otherwise it will present the OfflineViewController.
Great! But what happens when the user has hit the OfflineViewController and then the network comes back online? Let’s handle that scenario.
Open the OfflineViewController and replace the code with the code below:
import UIKit class OfflineViewController: UIViewController { let network = NetworkManager.sharedInstance override func viewDidLoad() { super.viewDidLoad() // If the network is reachable show the main controller network.reachability.whenReachable = { _ in self.showMainController() } } override func viewWillAppear(_ animated: Bool) { super.viewWillAppear(animated) navigationController?.setNavigationBarHidden(true, animated: animated) } override func viewWillDisappear(_ animated: Bool) { super.viewWillDisappear(animated) navigationController?.setNavigationBarHidden(false, animated: animated) } private func showMainController() -> Void { DispatchQueue.main.async { self.performSegue(withIdentifier: "MainController", sender: self) } }}In the controller above, you can see, in the viewDidLoad method, that we set the whenReachable completion to show the main controller. This means that, as long as its offline, you watch for when the device comes back online. When it does, present the PostsTableViewController.
We also override the viewWillAppear and viewWillDisappear methods to ensure the navigation bar does not show on the Offline View Controller.
Fetching Posts from Reddit API in Swift
Now let us add the logic that’ll fetch data from Reddit and display on our PostsTableViewController. Open the file and replace the contents with the code below:
import UIKitimport Alamofirestruct RedditPost { let title: String! let subreddit: String!}class PostsTableViewController: UITableViewController { var posts = [RedditPost]() let network = NetworkManager.sharedInstance override func viewDidLoad() { super.viewDidLoad() navigationItem.title = "Latest Posts" // Fetch the posts and then reload the table fetchPosts { posts in self.posts = posts self.tableView.reloadData() } } private func fetchPosts(completion: @escaping (_ posts: [RedditPost]) -> Void) -> Void { // Send a request to the Reddit API Alamofire.request("https://api.reddit.com").validate().responseJSON { response in switch response.result { case .success(let JSON): let data = JSON as! [String:AnyObject] guard let children = data["data"]!["children"] as? [AnyObject] else { return } var posts = [RedditPost]() // Loop through the Reddit posts and then assign a post to the posts array for child in 0...children.count-1 { let post = children[child]["data"] as! [String: AnyObject] posts.append(RedditPost( title: post["title"] as! String, subreddit: "/r/" + (post["subreddit"] as! String) )) } DispatchQueue.main.async { completion(posts) } case .failure(let error): print(error) } } } override func didReceiveMemoryWarning() { super.didReceiveMemoryWarning() } // MARK: - Table view data source override func numberOfSections(in tableView: UITableView) -> Int { return 1 } // Return the number of posts available override func tableView(_ tableView: UITableView, numberOfRowsInSection section: Int) -> Int { return self.posts.count } override func tableView(_ tableView: UITableView, cellForRowAt indexPath: IndexPath) -> UITableViewCell { let cell = tableView.dequeueReusableCell(withIdentifier: "PostCell", for: indexPath) let post = posts[indexPath.row] as RedditPost cell.textLabel?.text = post.title cell.detailTextLabel?.text = post.subreddit return cell }}In the fetchPosts method, we use Alamofire to send a GET request to the Reddit API. We then parse the response and add it to the RedditPost struct we created at the top of the file. This makes the data we are passing to the tableView consistent.
Handling Events when the Device Goes Offline
Now, let us handle one more scenario. Imagine while viewing the latest Reddit posts, you lose connectivity. What happens? Let’s show the offline page again when that happens.
As was previously done, create a manual segue called NetworkUnavailable from the PostsTableViewController to the OfflineViewController. Now add this code to the bottom of the viewDidLoad method:
network.reachability.whenUnreachable = { reachability in self.showOfflinePage()}Now add the method below to the controller:
private func showOfflinePage() -> Void { DispatchQueue.main.async { self.performSegue(withIdentifier: "NetworkUnavailable", sender: self) }}This will listen for when the device goes offline and, if that happens, it will showOfflinePage.
That’s all! We have been able to handle offline and online events using our NetworkManager in Swift.
Conclusion
In this article, we considered how to make sure your application can handle online and offline events when they happen. You can always implement this any way you wish. If you have any questions or feedback, leave them below in the comments.
The source code to this playground is available on GitHub.
This article was first published on Pusher.
Learn to code for free. freeCodeCamp’s open source curriculum has helped more than 40,000 people get jobs as developers. Get started
Обработка ошибок
Обработка ошибок — это процесс реагирования на возникновение ошибок и восстановление после появления ошибок в программе. Swift предоставляет первоклассную поддержку при генерации, вылавливании и переносе ошибок, устранении ошибок во время выполнения программы.
Некоторые операции не всегда гарантируют полное выполнение или конечный результат. Опционалы используются для обозначения отсутствия значения, но когда случается сбой, важно понять, что вызвало сбой, для того, чтобы соответствующим образом изменить код.
В качестве примера, рассмотрим задачу считывания и обработки данных из файла на диске. Задача может провалиться по нескольким причинам, в том числе: файл не существует по указанному пути, или файл не имеет разрешение на чтение, или файл не закодирован в необходимом формате. Отличительные особенности этих различных ситуаций позволяют программе решать некоторые ошибки самостоятельно и сообщать пользователю какие ошибки она не может решить сама.
Отображение и генерация ошибок
В Swift ошибки отображаются значениями типов, которые соответствуют протоколу Error. Этот пустой протокол является индикатором того, что это перечисление может быть использовано для обработки ошибок.
Перечисления в Swift особенно хорошо подходят для группировки схожих между собой условий возникновения ошибок и соответствующих им значений, что позволяет получить дополнительную информацию о природе самой ошибки. Например, вот как отображаются условия ошибки работы торгового автомата внутри игры:
enum VendingMachineError: Error {
    case invalidSelection
    case insufficientFunds(coinsNeeded: Int)
    case outOfStock
}
Генерация ошибки позволяет указать, что произошло что-то неожиданное и обычное выполнение программы не может продолжаться. Для того чтобы «сгенерировать» ошибку, вы используете инструкцию throw. Например, следующий код генерирует ошибку, указывая, что пять дополнительных монет нужны торговому автомату:
throw VendingMachineError.insufficientFunds(coinsNeeded: 5)Обработка ошибок
Когда генерируется ошибка, то фрагмент кода, окружающий ошибку, должен быть ответственным за ее обработку: например, он должен исправить ее, или испробовать альтернативный подход, или просто информировать пользователя о неудачном исполнении кода.
В Swift существует четыре способа обработки ошибок. Вы можете передать (propagate) ошибку из функции в код, который вызывает саму эту функцию, обработать ошибку, используя инструкцию do-catch, обработать ошибку, как значение опционала, или можно поставить утверждение, что ошибка в данном случае исключена. Каждый вариант будет рассмотрен далее.
Когда функция генерирует ошибку, последовательность выполнения вашей программы меняется, поэтому важно сразу обнаружить место в коде, которое может генерировать ошибки. Для того, чтобы выяснить где именно это происходит, напишите ключевое слово try — или варианты try? или try!— до куска кода, вызывающего функцию, метод или инициализатор, который может генерировать ошибку. Эти ключевые слова описываются в следующем параграфе.
Заметка
Обработка ошибок в Swift напоминает обработку исключений (exceptions) в других языках, с использованием ключевых слов try, catch и throw. В отличие от обработки исключений во многих языках, в том числе и в Objective-C- обработка ошибок в Swift не включает разворачивание стека вызовов, то есть процесса, который может быть дорогим в вычислительном отношении. Таким образом, производительные характеристики инструкции throw сопоставимы с характеристиками оператора return.
Передача ошибки с помощью генерирующей функции
Чтобы указать, что функция, метод или инициализатор могут генерировать ошибку, вам нужно написать ключевое слово throws в реализации функции после ее параметров. Функция, отмеченная throws называется генерирующей функцией. Если у функции установлен возвращаемый тип, то вы пишете ключевое слово throws перед стрелкой возврата (->).
func canThrowErrors() throws -> String
func cannotThrowErrors() -> String
Генерирующая функция передает ошибки, которые возникают внутри нее в область вызова этой функции.
Заметка
Только генерирующая ошибку функция может передавать ошибки. Любые ошибки, сгенерированные внутри non-throwing функции, должны быть обработаны внутри самой функции.
В приведенном ниже примере VendingMachine класс имеет vend(itemNamed: ) метод, который генерирует соответствующую VendingMachineError, если запрошенный элемент недоступен, его нет в наличии, или имеет стоимость, превышающую текущий депозит:
struct Item {
    var price: Int
    var count: Int
}

class VendingMachine {
    var inventory = [
        "Candy Bar": Item(price: 12, count: 7),
        "Chips": Item(price: 10, count: 4),
        "Pretzels": Item(price: 7, count: 11)
    ]
    var coinsDeposited = 0

    func vend(itemNamed name: String) throws {
        guard let item = inventory[name] else {
            throw VendingMachineError.invalidSelection
        }

        guard item.count > 0 else {
            throw VendingMachineError.outOfStock
        }

        guard item.price <= coinsDeposited else {
            throw VendingMachineError.insufficientFunds(coinsNeeded: item.price - coinsDeposited)
        }

        coinsDeposited -= item.price

        var newItem = item
        newItem.count -= 1
        inventory[name] = newItem

        print("Dispensing (name)")
    }
}
Реализация vend(itemNamed: ) метода использует оператор guard для раннего выхода из метода и генерации соответствующих ошибок, если какое-либо требование для приобретения закуски не будет выполнено. Потому что инструкция throw мгновенно изменяет управление программой, и выбранная позиция будет куплена, только если все эти требования будут выполнены.
Поскольку vend(itemNamed: ) метод передает все ошибки, которые он генерирует, вызывающему его коду, то они должны быть обработаны напрямую, используя оператор do-catch, try? или try!, или должны быть переданы дальше. Например, buyFavoriteSnack(person:vendingMachine: ) в примере ниже — это тоже генерирующая функция, и любые ошибки, которые генерирует метод vend(itemNamed: ), будут переноситься до точки, где будет вызываться функция buyFavoriteSnack(person:vendingMachine: ).
let favoriteSnacks = [
    "Alice": "Chips",
    "Bob": "Licorice",
    "Eve": "Pretzels"
]
func buyFavoriteSnack(person: String, vendingMachine: VendingMachine) throws {
    let snackName = favoriteSnacks[person] ?? "Candy Bar"
    try vendingMachine.vend(itemNamed: snackName)
}
В этом примере, функция buyFavoriteSnack(person:vendingMachine: ) подбирает любимые закуски данного человека и пытается их купить, вызывая vend(itemNamed: ) метод. Поскольку метод vend(itemNamed: ) может сгенерировать ошибку, он вызывается с ключевым словом try перед ним.
Генерирующие ошибку инициализаторы могут распространять ошибки таким же образом, как генерирующие ошибку функции. Например, инициализатор структуры PurchasedSnack в списке ниже вызывает генерирующую ошибку функции как часть процесса инициализации, и он обрабатывает любые ошибки, с которыми сталкивается, путем распространения их до вызывающего его объекта.
struct PurchasedSnack {
    let name: String
    init(name: String, vendingMachine: VendingMachine) throws {
        try vendingMachine.vend(itemNamed: name)
        self.name = name
    }
}
Обработка ошибок с использованием do-catch
Используйте инструкцию do-catch для обработки ошибок, запуская блок кода. Если выдается ошибка в коде условия do, она соотносится с условием catch для определения того, кто именно сможет обработать ошибку.
Вот общий вид условия do-catch:
do {
    try выражение
    выражение
} catch шаблон 1 {
    выражение
} catch шаблон 2  where условие {
    выражение
} catch шаблон 3, шаблон 4 where условие {
    выражение
} catch {
    выражение
}
Вы пишете шаблон после ключевого слова catch, чтобы указать какие ошибки могут обрабатываться данным пунктом этого обработчика. Если условие catch не имеет своего шаблона, то оно подходит под любые ошибки и связывает ошибки к локальной константе error. Более подробно о соответствии шаблону см. Шаблоны.
Например, следующий код обрабатывает все три случая в перечислении VendingMachineError, но все другие ошибки должны быть обработаны окружающей областью:
var vendingMachine = VendingMachine()
vendingMachine.coinsDeposited = 8
do {
    try buyFavoriteSnack(person: "Alice", vendingMachine: vendingMachine)
} catch VendingMachineError.invalidSelection {
    print("Ошибка выбора.")
} catch VendingMachineError.outOfStock {
    print("Нет в наличии.")
} catch VendingMachineError.insufficientFunds(let coinsNeeded) {
    print("Недостаточно средств. Пожалуйста вставьте еще (coinsNeeded) монетки.")
} catch {
    print("Неожиданная ошибка: (error).")
}
// Выведет "Недостаточно средств. Пожалуйста вставьте еще 2 монетки.
В приведенном выше примере, buyFavoriteSnack(person:vendingMachine: ) функция вызывается в выражении try, потому что она может сгенерировать ошибку. Если генерируется ошибка, выполнение немедленно переносится в условия catch, которые принимают решение о продолжении передачи ошибки. Если ошибка не генерируется, остальные операторы do выполняются.
В условии catch не нужно обрабатывать все возможные ошибки, которые может вызвать код в условии do. Если ни одно из условий catch не обрабатывает ошибку, ошибка распространяется на окружающую область. Однако распространяемая ошибка должна обрабатываться некоторой внешней областью. В функции nonthrowing условие включения do-catch должно обрабатывать ошибку. В функции throwing либо включающая условие do-catch, либо вызывающая сторона должна обрабатывать ошибку. Если ошибка распространяется на область верхнего уровня без обработки, вы получите ошибку исполнения.
Например, приведенный ниже пример можно записать так, чтобы любая ошибка, которая не является VendingMachineError, вместо этого захватывалась вызывающей функцией:
func nourish(with item: String) throws {
    do {
        try vendingMachine.vend(itemNamed: item)
    } catch is VendingMachineError {
        print("Некорректный вывод, нет в наличии или недостаточно денег.")
    }
}

do {
    try nourish(with: "Beet-Flavored Chips")
} catch {
    print("Unexpected non-vending-machine-related error: (error)")
}
// Выведет "Некорректный вывод, нет в наличии или недостаточно денег."
В nourish(with: ), если vend(itemNamed : ) выдает ошибку, которая является одним из кейсов перечисления VendingMachineError, nourish(with: ) обрабатывает ошибку, печатая сообщение. В противном случае, nourish(with: ) распространяет ошибку на свое место вызова. Ошибка затем попадает в общее условие catch.
Преобразование ошибок в опциональные значения
Вы можете использовать try? для обработки ошибки, преобразовав ее в опциональное значение. Если ошибка генерируется при условии try?, то значение выражения вычисляется как nil. Например, в следующем коде x и y имеют одинаковые значения и поведение:
func someThrowingFunction() throws -> Int {
    // ...
}

let x = try? someThrowingFunction()

let y: Int?
do {
    y = try someThrowingFunction()
} catch {
    y = nil
}
Если someThrowingFunction() генерирует ошибку, значение x и y равно nil. В противном случае значение x и y — это возвращаемое значение функции. Обратите внимание, что x и y являются опциональными, независимо от того какой тип возвращает функция someThrowingFunction().
Использование try? позволяет написать краткий код обработки ошибок, если вы хотите обрабатывать все ошибки таким же образом. Например, следующий код использует несколько попыток для извлечения данных или возвращает nil, если попытки неудачные.
func fetchData() -> Data? {
    if let data = try? fetchDataFromDisk() { return data }
    if let data = try? fetchDataFromServer() { return data }
    return nil
}
Запрет на передачу ошибок
Иногда вы знаете, что функции throw или методы не сгенерируют ошибку во время исполнения. В этих случаях, вы можете написать try! перед выражением для запрета передачи ошибки и завернуть вызов в утверждение того, что ошибка точно не будет сгенерирована. Если ошибка на самом деле сгенерирована, вы получите сообщение об ошибке исполнения.
Например, следующий код использует loadImage(atPath: ) функцию, которая загружает ресурс изображения по заданному пути или генерирует ошибку, если изображение не может быть загружено. В этом случае, поскольку изображение идет вместе с приложением, сообщение об ошибке не будет сгенерировано во время выполнения, поэтому целесообразно отключить передачу ошибки.
let photo = try! loadImage(atPath: "./Resources/John Appleseed.jpg")Установка действий по очистке (Cleanup)
Вы используете оператор defer для выполнения набора инструкций перед тем как исполнение кода оставит текущий блок. Это позволяет сделать любую необходимую очистку, которая должна быть выполнена, независимо от того, как именно это произойдет — либо он покинет из-за сгенерированной ошибки или из-за оператора, такого как break или return. Например, вы можете использовать defer, чтобы удостовериться, что файл дескрипторов закрыт и выделенная память вручную освобождена.
Оператор defer откладывает выполнение, пока не происходит выход из текущей области. Этот оператор состоит из ключевого слова defer и выражений, которые должны быть выполнены позже. Отложенные выражения могут не содержать кода, изменяющего контроль исполнения изнутри наружу, при помощи таких операторов как break или return, или просто генерирующего ошибку. Отложенные действия выполняются в обратном порядке, как они указаны, то есть, код в первом операторе defer выполняется после кода второго, и так далее.
func processFile(filename: String) throws {
    if exists(filename) {
        let file = open(filename)
        defer {
            close(file)
        }
        while let line = try file.readline() {
            // работаем с файлом.
        }
        // close(file) вызывается здесь, в конце зоны видимости.
    }
}
Приведенный выше пример использует оператор defer, чтобы удостовериться, что функция open(_: ) имеет соответствующий вызов и для close(_: ).
Заметка
Вы можете использовать оператор defer, даже если не используете кода обработки ошибок.
Если вы нашли ошибку, пожалуйста, выделите фрагмент текста и нажмите Ctrl+Enter.
Error handling is the process of responding to and recovering from error conditions in your program. Swift provides first-class support for throwing, catching, propagating, and manipulating recoverable errors at runtime.
Some operations aren’t guaranteed to always complete execution or produce a useful output. Optionals are used to represent the absence of a value, but when an operation fails, it’s often useful to understand what caused the failure, so that your code can respond accordingly.
As an example, consider the task of reading and processing data from a file on disk. There are a number of ways this task can fail, including the file not existing at the specified path, the file not having read permissions, or the file not being encoded in a compatible format. Distinguishing among these different situations allows a program to resolve some errors and to communicate to the user any errors it can’t resolve.
Representing and Throwing Errors
In Swift, errors are represented by values of types that conform to the Error protocol. This empty protocol indicates that a type can be used for error handling.
Swift enumerations are particularly well suited to modeling a group of related error conditions, with associated values allowing for additional information about the nature of an error to be communicated. For example, here’s how you might represent the error conditions of operating a vending machine inside a game:
- enum VendingMachineError: Error {
- case invalidSelection
- case insufficientFunds(coinsNeeded: Int)
- case outOfStock
- }
Throwing an error lets you indicate that something unexpected happened and the normal flow of execution can’t continue. You use a throw statement to throw an error. For example, the following code throws an error to indicate that five additional coins are needed by the vending machine:
- throw VendingMachineError.insufficientFunds(coinsNeeded: 5)
Handling Errors
When an error is thrown, some surrounding piece of code must be responsible for handling the error—for example, by correcting the problem, trying an alternative approach, or informing the user of the failure.
There are four ways to handle errors in Swift. You can propagate the error from a function to the code that calls that function, handle the error using a do—catch statement, handle the error as an optional value, or assert that the error will not occur. Each approach is described in a section below.
When a function throws an error, it changes the flow of your program, so it’s important that you can quickly identify places in your code that can throw errors. To identify these places in your code, write the try keyword—or the try? or try! variation—before a piece of code that calls a function, method, or initializer that can throw an error. These keywords are described in the sections below.
Note
Error handling in Swift resembles exception handling in other languages, with the use of the try, catch and throw keywords. Unlike exception handling in many languages—including Objective-C—error handling in Swift doesn’t involve unwinding the call stack, a process that can be computationally expensive. As such, the performance characteristics of a throw statement are comparable to those of a return statement.
Propagating Errors Using Throwing Functions
To indicate that a function, method, or initializer can throw an error, you write the throws keyword in the function’s declaration after its parameters. A function marked with throws is called a throwing function. If the function specifies a return type, you write the throws keyword before the return arrow (->).
- func canThrowErrors() throws -> String
- func cannotThrowErrors() -> String
A throwing function propagates errors that are thrown inside of it to the scope from which it’s called.
Note
Only throwing functions can propagate errors. Any errors thrown inside a nonthrowing function must be handled inside the function.
In the example below, the VendingMachine class has a vend(itemNamed:) method that throws an appropriate VendingMachineError if the requested item isn’t available, is out of stock, or has a cost that exceeds the current deposited amount:
- struct Item {
- var price: Int
- var count: Int
- }
- class VendingMachine {
- var inventory = [
- «Candy Bar»: Item(price: 12, count: 7),
- «Chips»: Item(price: 10, count: 4),
- «Pretzels»: Item(price: 7, count: 11)
- ]
- var coinsDeposited = 0
- func vend(itemNamed name: String) throws {
- guard let item = inventory[name] else {
- throw VendingMachineError.invalidSelection
- }
- guard item.count > 0 else {
- throw VendingMachineError.outOfStock
- }
- guard item.price <= coinsDeposited else {
- throw VendingMachineError.insufficientFunds(coinsNeeded: item.price — coinsDeposited)
- }
- coinsDeposited -= item.price
- var newItem = item
- newItem.count -= 1
- inventory[name] = newItem
- print(«Dispensing (name)«)
- }
- }
The implementation of the vend(itemNamed:) method uses guard statements to exit the method early and throw appropriate errors if any of the requirements for purchasing a snack aren’t met. Because a throw statement immediately transfers program control, an item will be vended only if all of these requirements are met.
Because the vend(itemNamed:) method propagates any errors it throws, any code that calls this method must either handle the errors—using a do—catch statement, try?, or try!—or continue to propagate them. For example, the buyFavoriteSnack(person:vendingMachine:) in the example below is also a throwing function, and any errors that the vend(itemNamed:) method throws will propagate up to the point where the buyFavoriteSnack(person:vendingMachine:) function is called.
- let favoriteSnacks = [
- «Alice»: «Chips»,
- «Bob»: «Licorice»,
- «Eve»: «Pretzels»,
- ]
- func buyFavoriteSnack(person: String, vendingMachine: VendingMachine) throws {
- let snackName = favoriteSnacks[person] ?? «Candy Bar»
- try vendingMachine.vend(itemNamed: snackName)
- }
In this example, the buyFavoriteSnack(person: vendingMachine:) function looks up a given person’s favorite snack and tries to buy it for them by calling the vend(itemNamed:) method. Because the vend(itemNamed:) method can throw an error, it’s called with the try keyword in front of it.
Throwing initializers can propagate errors in the same way as throwing functions. For example, the initializer for the PurchasedSnack structure in the listing below calls a throwing function as part of the initialization process, and it handles any errors that it encounters by propagating them to its caller.
- struct PurchasedSnack {
- let name: String
- init(name: String, vendingMachine: VendingMachine) throws {
- try vendingMachine.vend(itemNamed: name)
- self.name = name
- }
- }
Handling Errors Using Do-Catch
You use a do—catch statement to handle errors by running a block of code. If an error is thrown by the code in the do clause, it’s matched against the catch clauses to determine which one of them can handle the error.
Here is the general form of a do—catch statement:
- do {
- try expression
- statements
- } catch pattern 1 {
- statements
- } catch pattern 2 where condition {
- statements
- } catch pattern 3, pattern 4 where condition {
- statements
- } catch {
- statements
- }
You write a pattern after catch to indicate what errors that clause can handle. If a catch clause doesn’t have a pattern, the clause matches any error and binds the error to a local constant named error. For more information about pattern matching, see Patterns.
For example, the following code matches against all three cases of the VendingMachineError enumeration.
- var vendingMachine = VendingMachine()
- vendingMachine.coinsDeposited = 8
- do {
- try buyFavoriteSnack(person: «Alice», vendingMachine: vendingMachine)
- print(«Success! Yum.»)
- } catch VendingMachineError.invalidSelection {
- print(«Invalid Selection.»)
- } catch VendingMachineError.outOfStock {
- print(«Out of Stock.»)
- } catch VendingMachineError.insufficientFunds(let coinsNeeded) {
- print(«Insufficient funds. Please insert an additional (coinsNeeded) coins.»)
- } catch {
- print(«Unexpected error: (error).»)
- }
- // Prints «Insufficient funds. Please insert an additional 2 coins.»
In the above example, the buyFavoriteSnack(person:vendingMachine:) function is called in a try expression, because it can throw an error. If an error is thrown, execution immediately transfers to the catch clauses, which decide whether to allow propagation to continue. If no pattern is matched, the error gets caught by the final catch clause and is bound to a local error constant. If no error is thrown, the remaining statements in the do statement are executed.
The catch clauses don’t have to handle every possible error that the code in the do clause can throw. If none of the catch clauses handle the error, the error propagates to the surrounding scope. However, the propagated error must be handled by some surrounding scope. In a nonthrowing function, an enclosing do—catch statement must handle the error. In a throwing function, either an enclosing do—catch statement or the caller must handle the error. If the error propagates to the top-level scope without being handled, you’ll get a runtime error.
For example, the above example can be written so any error that isn’t a VendingMachineError is instead caught by the calling function:
- func nourish(with item: String) throws {
- do {
- try vendingMachine.vend(itemNamed: item)
- } catch is VendingMachineError {
- print(«Couldn’t buy that from the vending machine.»)
- }
- }
- do {
- try nourish(with: «Beet-Flavored Chips»)
- } catch {
- print(«Unexpected non-vending-machine-related error: (error)«)
- }
- // Prints «Couldn’t buy that from the vending machine.»
In the nourish(with:) function, if vend(itemNamed:) throws an error that’s one of the cases of the VendingMachineError enumeration, nourish(with:) handles the error by printing a message. Otherwise, nourish(with:) propagates the error to its call site. The error is then caught by the general catch clause.
Another way to catch several related errors is to list them after catch, separated by commas. For example:
- func eat(item: String) throws {
- do {
- try vendingMachine.vend(itemNamed: item)
- } catch VendingMachineError.invalidSelection, VendingMachineError.insufficientFunds, VendingMachineError.outOfStock {
- print(«Invalid selection, out of stock, or not enough money.»)
- }
- }
The eat(item:) function lists the vending machine errors to catch, and its error text corresponds to the items in that list. If any of the three listed errors are thrown, this catch clause handles them by printing a message. Any other errors are propagated to the surrounding scope, including any vending-machine errors that might be added later.
Converting Errors to Optional Values
You use try? to handle an error by converting it to an optional value. If an error is thrown while evaluating the try? expression, the value of the expression is nil. For example, in the following code x and y have the same value and behavior:
- func someThrowingFunction() throws -> Int {
- // …
- }
- let x = try? someThrowingFunction()
- let y: Int?
- do {
- y = try someThrowingFunction()
- } catch {
- y = nil
- }
If someThrowingFunction() throws an error, the value of x and y is nil. Otherwise, the value of x and y is the value that the function returned. Note that x and y are an optional of whatever type someThrowingFunction() returns. Here the function returns an integer, so x and y are optional integers.
Using try? lets you write concise error handling code when you want to handle all errors in the same way. For example, the following code uses several approaches to fetch data, or returns nil if all of the approaches fail.
- func fetchData() -> Data? {
- if let data = try? fetchDataFromDisk() { return data }
- if let data = try? fetchDataFromServer() { return data }
- return nil
- }
Disabling Error Propagation
Sometimes you know a throwing function or method won’t, in fact, throw an error at runtime. On those occasions, you can write try! before the expression to disable error propagation and wrap the call in a runtime assertion that no error will be thrown. If an error actually is thrown, you’ll get a runtime error.
For example, the following code uses a loadImage(atPath:) function, which loads the image resource at a given path or throws an error if the image can’t be loaded. In this case, because the image is shipped with the application, no error will be thrown at runtime, so it’s appropriate to disable error propagation.
- let photo = try! loadImage(atPath: «./Resources/John Appleseed.jpg»)
Specifying Cleanup Actions
You use a defer statement to execute a set of statements just before code execution leaves the current block of code. This statement lets you do any necessary cleanup that should be performed regardless of how execution leaves the current block of code—whether it leaves because an error was thrown or because of a statement such as return or break. For example, you can use a defer statement to ensure that file descriptors are closed and manually allocated memory is freed.
A defer statement defers execution until the current scope is exited. This statement consists of the defer keyword and the statements to be executed later. The deferred statements may not contain any code that would transfer control out of the statements, such as a break or a return statement, or by throwing an error. Deferred actions are executed in the reverse of the order that they’re written in your source code. That is, the code in the first defer statement executes last, the code in the second defer statement executes second to last, and so on. The last defer statement in source code order executes first.
- func processFile(filename: String) throws {
- if exists(filename) {
- let file = open(filename)
- defer {
- close(file)
- }
- while let line = try file.readline() {
- // Work with the file.
- }
- // close(file) is called here, at the end of the scope.
- }
- }
The above example uses a defer statement to ensure that the open(_:) function has a corresponding call to close(_:).
Note
You can use a defer statement even when no error handling code is involved.