Edit this page
How to Customize Form Rendering
Symfony gives you several ways to customize how a form is rendered. In this
article you’ll learn how to make single customizations to one or more fields of
your forms. If you need to customize all your forms in the same way, create
instead a form theme or use any of the built-in
themes, such as the Bootstrap theme for Symfony forms.
Form Rendering Functions
A single call to the form() Twig function is
enough to render an entire form, including all its fields and error messages:
The next step is to use the form_start(),
form_end(),
form_errors() and
form_row() Twig functions to render the
different form parts so you can customize them adding HTML elements and attributes:
The form_row() function outputs the entire field contents, including the
label, help message, HTML elements and error messages. All this can be further
customized using other Twig functions, as illustrated in the following diagram:
The form_label(),
form_widget(),
form_help() and
form_errors() Twig functions give you total
control over how each form field is rendered, so you can fully customize them:
Caution
If you’re rendering each field manually, make sure you don’t forget the
_token field that is automatically added for CSRF protection.
You can also use {{ form_rest(form) }} (recommended) to render any
fields that aren’t rendered manually. See
the form_rest() documentation below for
more information.
Note
Later in this article you can find the full reference of these Twig
functions with more usage examples.
Form Rendering Variables
Some of the Twig functions mentioned in the previous section allow to pass
variables to configure their behavior. For example, the form_label()
function lets you define a custom label to override the one defined in the form:
Some form field types have additional rendering
options that can be passed to the widget. These options are documented with each
type, but one common option is attr, which allows you to modify HTML
attributes on the form element. The following would add the task_field CSS
class to the rendered input text field:
Note
If you’re rendering an entire form at once (or an entire embedded form),
the variables argument will only be applied to the form itself and
not its children. In other words, the following will not pass a
«foo» class attribute to all of the child fields in the form:
If you need to render form fields «by hand» then you can access individual
values for fields (such as the id, name and label) using its
vars property. For example to get the id:
Note
Later in this article you can find the full reference of these Twig
variables and their description.
Form Themes
The Twig functions and variables shown in the previous sections can help you
customize one or more fields of your forms. However, this customization can’t
be applied to the rest of the forms of your app.
If you want to customize all forms in the same way (for example to adapt the
generated HTML code to the CSS framework used in your app) you must create a
form theme.
Form Functions and Variables Reference
Functions
form(form_view, variables)
Renders the HTML of a complete form.
You will mostly use this helper for prototyping or if you use custom form
themes. If you need more flexibility in rendering the form, you should use
the other helpers to render individual parts of the form instead:
form_start(form_view, variables)
Renders the start tag of a form. This helper takes care of printing the
configured method and target action of the form. It will also include the
correct enctype property if the form contains upload fields.
form_end(form_view, variables)
Renders the end tag of a form.
This helper also outputs form_rest() (which is explained later in this
article) unless you set render_rest to false:
form_label(form_view, label, variables)
Renders the label for the given field. You can optionally pass the specific
label you want to display as the second argument.
See «How to Customize Form Rendering» to learn about the variables
argument.
form_help(form_view)
Renders the help text for the given field.
form_errors(form_view)
Renders any errors for the given field.
form_widget(form_view, variables)
Renders the HTML widget of a given field. If you apply this to an entire
form or collection of fields, each underlying form row will be rendered.
The second argument to form_widget() is an array of variables. The most
common variable is attr, which is an array of HTML attributes to apply
to the HTML widget. In some cases, certain types also have other template-related
options that can be passed. These are discussed on a type-by-type basis.
The attributes are not applied recursively to child fields if you’re
rendering many fields at once (e.g. form_widget(form)).
See «How to Customize Form Rendering» to learn more about the variables
argument.
form_row(form_view, variables)
Renders the «row» of a given field, which is the combination of the field’s
label, errors, help and widget.
The second argument to form_row() is an array of variables. The templates
provided in Symfony only allow to override the label as shown in the example
above.
See «How to Customize Form Rendering» to learn about the variables
argument.
form_rest(form_view, variables)
This renders all fields that have not yet been rendered for the given form.
It’s a good idea to always have this somewhere inside your form as it’ll
render hidden fields for you and make any fields you forgot to render easier to
spot (since it’ll render the field for you).
form_parent(form_view)
Returns the parent form view or null if the form view already is the
root form. Using this function should be preferred over accessing the parent
form using form.parent. The latter way will produce different results
when a child form is named parent.
Tests
Tests can be executed by using the is operator in Twig to create a
condition. Read the Twig documentation for more information.
selectedchoice(selected_value)
This test will check if the current choice is equal to the selected_value
or if the current choice is in the array (when selected_value is an
array).
rootform
This test will check if the current form does not have a parent form view.
Form Variables Reference
The following variables are common to every field type. Certain field types
may define even more variables and some variables here only really apply to
certain types. To know the exact variables available for each type, check out
the code of the templates used by your form theme.
Assuming you have a form variable in your template and you want to
reference the variables on the name field, accessing the variables is
done by using a public vars property on the
FormView object:
| Variable | Usage |
|---|---|
action |
The action of the current form. |
attr |
A key-value array that will be rendered as HTML attributes on the field. |
block_prefixes |
An array of all the names of the parent types. |
cache_key |
A unique key which is used for caching. |
compound |
Whether or not a field is actually a holder for a group of children fields (for example, a choice field, which is actually a group of checkboxes). |
data |
The normalized data of the type. |
disabled |
If true, disabled="disabled" is added to the field. |
errors |
An array of any errors attached to this specific field (e.g. form.title.errors).Note that you can’t use form.errors to determine if a form is valid,since this only returns «global» errors: some individual fields may have errors. Instead, use the valid option. |
form |
The current FormView instance. |
full_name |
The name HTML attribute to be rendered. |
help |
The help message that will be rendered. |
id |
The id HTML attribute to be rendered. |
label |
The string label that will be rendered. |
label_attr |
A key-value array that will be rendered as HTML attributes on the label. |
method |
The method of the current form (POST, GET, etc.). |
multipart |
If true, form_enctype will render enctype="multipart/form-data". |
name |
The name of the field (e.g. title) — but not the nameHTML attribute, which is full_name. |
required |
If true, a required attribute is added to the field to activate HTML5validation. Additionally, a required class is added to the label. |
submitted |
Returns true or false depending on whether the whole form is submitted |
translation_domain |
The domain of the translations for this form. |
valid |
Returns true or false depending on whether the whole form is valid. |
value |
The value that will be used when rendering (commonly the value HTML attribute).This only applies to the root form element. |
Tip
Behind the scenes, these variables are made available to the FormView
object of your form when the Form component calls buildView() and
finishView() on each «node» of your form tree. To see what «view»
variables a particular field has, find the source code for the form
field (and its parent fields) and look at the above two functions.
Как настроить отображение формы
Дата обновления перевода: 2023-01-17
Как настроить отображение формы
Symfony предоставляет вам широкий выбор способов настройки отображения
формы. В этом руководстве вы узнаете, как настроить одно или несколько полей
ваших форм. Если вам нужно одинаково настроить все ваши формы, лучшу создайте
тему формы или используйте любую встроенную тему, вроде
темы Bootstrap для форм Symfony
Функции отображения формы
Одного вызова функции Twig form() достаточно
для того, чтобы отобразить целую форму, включая все ее поля и сообщения об ошибках:
Следующий шаг — использовать функции Twig form_start(),
form_end(),
form_errors() и
form_row() для отображения разных частей формы,
чтобы вы могли настроить их, добавляя HTML элементы и атрибуты:
Функция form_row() выводит все содержание полей, включая ярлыки, сообщение помощи,
элементы HTML и сообщения об ошибках. Все это можно в дальнейшем настроить используя другие
функции Twig, как показано в следующей диаграмме:
Функции Twig form_label(),
form_widget(),
form_help() и
form_errors() дают вам полный контроль над тем,
как отображается каждое поле формы, поэтому вы можете полностью их настроить:
Caution
Если вы отображаете каждое поле вручную, убедитесь, что вы не забыли поле
_token, которое автоматически добавляется для CSRF-защиты.
Вы также можете использовать {{ form_rest(form) }} (рекомендовано) для
отображения любых полей, которые не отображаются вручную. См.
документацию form_rest() ниже, чтобы
узнать больше.
Note
Позже в этой статье вы можете найти полный справочник этих функций Twig
с большим количеством примеров использования.
Переменные отображения формы
Некоторые из функций Twig, упомянутые в предыдущем разделе, позволяют передавать
переменные для конфигурации их поведения. К примеру, функция form_label()
позволяет вам определять пользовательский ярлык для переопределения того, который
определен в форме:
Некоторые типы полей форм имеют дополнительные опции
отображения, которые можно передать виджету. Эти опции задокументированы для каждого типа,
но одной общей опцией является attr, которая позволяет вам изменять атрибуты HTML
в элементе формы. Следующее добавит CSS-класс task_field к отображенному полю ввода
текста:
Note
Если вы отображаете сразу всю форму (или всю встроенную форму), аргумент
variables будет применен только к самой форме, но не к ее дочерям. Другими
словами, следующее не передаст атрибут класса «foo» всем дочерним полям формы:
Если вам нужно отобразить поля формы «вручную», вы можете получить доступ к
отдельным значениям полей (например, id, name и label), используя
ее свойство using vars. Например, чтобы получить id:
Note
Позже в этой статье вы можете найти полный справочник этих функций
Twig c примерами использования.
Темы формы
Функции и переменные Twig, показанные в предыдущих разделах, могут помочь вам
настроить одно или более полей ваших форм. Однако, эта настройка не может быть
применена к другим формам вашего приложения.
Если вы хотите настроить все формы одинаково (например, чтобы адаптировать
сгенерированный HTML-код к CSS-фреймворку, используемому в вашем приложении),
вы должны создать тему формы.
Справочник функций и переменных формы
Функции
form(form_view, variables)
Отображает HTML полной формы.
Вы в основном будете использовать этого помощника для прототипов, или если
вы используете пользовательские темы формы. Если вам нужно больше гибкости в
отображении формы, вам лучше стоит использовать другие помощники для отображения
отдельных частей формы:
form_start(form_view, variables)
Отображает стартовый тег формы. Этот помощник заботится о выводе сконфигурированного
метода и целевого действия формы. Он также добавит правильное свойство enctype,
если форма содержит поля загрузки.
form_end(form_view, variables)
Отображает конечный тег формы.
Этот помощний также выводит form_rest() (что объясняется позже в этой статье),
кроме случаев, когда вы устанавливаете render_rest как false:
form_help(form_view)
Отображает текст помощи для заданного поля.
form_errors(form_view)
Отображает любые ошибки для заданного поля.
Caution
В теме формы Bootstrap 4, form_errors() уже включена в form_label().
Прочтите больше об этом в
документации темы Bootstrap 4 .
form_widget(form_view, variables)
Отображает HTML-виджет заданного поля. Если вы примените это ко всей форме или
коллекции полей, каждая низлежащая строка формы будет отображена.
Второй аргументform_widget() — это массив переменных. Наиболее распространенной
переменной является attr, которая представляет собой массив HTML-атрибутов, применяемых
к HTML-виджету. В некоторых случаях, определенные типы также имеют другие опции, связанные
с шаблонами, которые можно передать. Они обсуждаются на основании каждого типа. attributes
не применяются рекурсивно к дочерним полям, если вы отображете несколько полей сразу
(например, form_widget(form)).
См. «Справочник функций и переменных форм шаблонов Twig», чтобы узнать больше об аргументе variables.
form_row(form_view, variables)
Отображает «строку» заданного поля, которая является комбинацией ярлыка,
ошибок, помощи и виджета поля.
Второй аргумент form_row() — это массив переменных. Шаблоны, предоставленные
Symfony позволяют переопределять ярлык только так, как показано в примере выше.
См. «Справочник функций и переменных форм шаблонов Twig», чтобы узнать об аргументе variables.
form_rest(form_view, variables)
Это отображает все поля, которые еще не были отображены для заданной формы.
Хорошей идеей будет всегда иметь эту функцию где-то внутри вашей формы, так как она
будет отображать для вас спрятанные поля, и облегчит обнаружение полей, которые вы
забыли отобразить (так как она будет отображать поле для вас).
form_parent(form_view)
Возвращает просмотр родительской формы или null, если просмотр формы уже
является начальной формой. Исползование этой функции должно быть в приоритете над
доступом к родительской форме с использованием form.parent. Последнее будет
производить разные результаты, если дочерняя форма называется parent.
Тесты
Тесты могут быть проведены используя оператор is в Twig, для создания
условия. Прочтите документацию Twig, чтобы узнать больше информации.
selectedchoice(selected_value)
Этот тест проверит равен ли текущий выбор selected_value или находится
ли текущий выбор в массиве (когда selected_value является массивом).
rootform
Этот тест проверит, имеет ли текущий form родительский просмотр формы.
Справочник переменных формы
Следующие переменные распространены для каждого типа поля. Определенные типы
полей могут определять еще больше переменных, а некоторые переменные здесь на
самом деле применяются только к определенным типам. Чтобы узнать конкретные переменные,
доступные для каждого типа, просмотрите код шаблонов, используемых вашей темой формы.
Предполагая, что у вас есть переменная form в вашем шаблоне, и вы хотите сослаться на
переменные в поле name, доступ к переменным можно получить используя публичное свойство
vars в объекте FormView:
| ?????????? | ?????????? |
|---|---|
action |
???????? ??????? ?????. |
attr |
?????? ???????? ????????, ??????? ????? ????????? ? ???? HTML-????????? ????. |
block_prefixes |
?????? ???? ???? ???????????? ?????. |
cache_key |
?????????? ????, ??????? ???????????? ??? ???????????. |
compound |
???????? ?? ???? ?? ????? ???? ?????????? ???????? ????? (????????, ????choice, ??????? ?? ????? ???? ???????? ??????? ???????). |
data |
??????????????? ?????? ????. |
disabled |
???? true, ? ???? ?????????? disabled="disabled". |
errors |
?????? ????? ??????, c???????? ? ???? ?????????? ????? (????????, form.title.errors).????????, ??? ?? ?? ?????? ???????????? form.errors ??? ??????????? ?????????? ?????,??? ??? ??? ?????? ?????? «??????????» ??????: ????????? ????????? ???? ????? ????? ??????. ?????? ????? ??????????? ????? valid. |
form |
??????? ????????? FormView. |
full_name |
HTML-??????? name ??? ???????????. |
help |
????????? ??????, ??????? ????? ??????????. |
id |
HTML-??????? id ??? ???????????. |
label |
????? ??????, ??????? ????? ?????????. |
label_attr |
?????? ???????? ????????, ??????? ????? ????????? ? ???? HTML-????????? ? ??????. |
method |
????? ??????? ????? (POST, GET, ? ?.?.). |
multipart |
???? true, form_enctype ????????? enctype="multipart/form-data". |
name |
??? ???? (????????, title) — ?? ?? HTML-??????? name, ??????? full_name. |
required |
???? true, ?????? required ??????????? ? ????, ????? ???????????? ?????????HTML-5. ?????????????, ? ?????? ??????????? ????? required. |
submitted |
?????????? true ??? false ? ??????????? ?? ????, ?????????? ?? ??? ?????. |
translation_domain |
????? ????????? ??? ???? ?????. |
valid |
?????????? true ??? false ? ??????????? ?? ????, ??????? ?? ??? ?????. |
value |
????????, ??????? ????? ??????????? ??? ??????????? (???? ????? HTML-??????? value).????????? ?????? ? ???????? ??????????? ?????. |
Tip
За кулисами, эти переменные доступны объекту FormView вашей формы, когда
компонент Форма вызывает buildView() и finishView() на каждом «узле»
вашего древа формы. Чтобы увидеть, какие переменные «просмотра» имеет конкретное
поле, найдите исходные код поля формы (и его родительские поля), и поищите две
вышенаписанные функции.
Symfony gives you a wide variety of ways to customize how a form is rendered.
In this guide, you’ll learn how to customize every possible part of your
form with as little effort as possible whether you use Twig or PHP as your
templating engine.
Form Rendering Basics
Recall that the label, error and HTML widget of a form field can easily
be rendered by using the form_row Twig function or the row PHP helper
method:
- Twig
- PHP
<?php echo $view['form']->row($form['age']) }} ?>
You can also render each of the three parts of the field individually:
- Twig
<div>
    {{ form_label(form.age) }}
    {{ form_errors(form.age) }}
    {{ form_widget(form.age) }}
</div>
- PHP
<div>
    <?php echo $view['form']->label($form['age']) }} ?>
    <?php echo $view['form']->errors($form['age']) }} ?>
    <?php echo $view['form']->widget($form['age']) }} ?>
</div>
In both cases, the form label, errors and HTML widget are rendered by using
a set of markup that ships standard with Symfony. For example, both of the
above templates would render:
<div>
    <label for="form_age">Age</label>
    <ul>
        <li>This field is required</li>
    </ul>
    <input type="number" id="form_age" name="form[age]" />
</div>
To quickly prototype and test a form, you can render the entire form with
just one line:
- Twig
- PHP
<?php echo $view['form']->widget($form) }} ?>
The remainder of this recipe will explain how every part of the form’s markup
can be modified at several different levels. For more information about form
rendering in general, see Rendering a Form in a Template.
What are Form Themes?
Symfony uses form fragments — a small piece of a template that renders just
one part of a form — to render every part of a form — — field labels, errors,
input text fields, select tags, etc
The fragments are defined as blocks in Twig and as template files in PHP.
A theme is nothing more than a set of fragments that you want to use when
rendering a form. In other words, if you want to customize one portion of
how a form is rendered, you’ll import a theme which contains a customization
of the appropriate form fragments.
Symfony comes with a default theme (form_div_layout.html.twig in Twig and
FrameworkBundle:Form in PHP) that defines each and every fragment needed
to render every part of a form.
In the next section you will learn how to customize a theme by overriding
some or all of its fragments.
For example, when the widget of a integer type field is rendered, an input
number field is generated
- Twig
{{ form_widget(form.age) }}
- PHP
<?php echo $view['form']->widget($form['age']) ?>
renders:
<input type="number" id="form_age" name="form[age]" required="required" value="33" />
Internally, Symfony uses the integer_widget fragment to render the field.
This is because the field type is integer and you’re rendering its widget
(as opposed to its label or errors).
In Twig that would default to the block integer_widget from the form_div_layout.html.twig
template.
In PHP it would rather be the integer_widget.html.php file located in FrameworkBundle/Resources/views/Form
folder.
The default implementation of the integer_widget fragment looks like this:
- Twig
{% block integer_widget %}
    {% set type = type|default('number') %}
    {{ block('field_widget') }}
{% endblock integer_widget %}
- PHP
<!-- integer_widget.html.php -->

<?php echo $view['form']->renderBlock('field_widget', array('type' => isset($type) ? $type : "number")) ?>
As you can see, this fragment itself renders another fragment — field_widget:
- Twig
{% block field_widget %}
    {% set type = type|default('text') %}
    <input type="{{ type }}" {{ block('widget_attributes') }} value="{{ value }}" />
{% endblock field_widget %}
- PHP
<!-- FrameworkBundle/Resources/views/Form/field_widget.html.php -->

<input
    type="<?php echo isset($type) ? $view->escape($type) : "text" ?>"
    value="<?php echo $view->escape($value) ?>"
    <?php echo $view['form']->renderBlock('attributes') ?>
/>
The point is, the fragments dictate the HTML output of each part of a form. To
customize the form output, you just need to identify and override the correct
fragment. A set of these form fragment customizations is known as a form “theme”.
When rendering a form, you can choose which form theme(s) you want to apply.
In Twig a theme is a single template file and the fragments are the blocks defined
in this file.
In PHP a theme is a folder and the the fragments are individual template files in
this folder.
Form Theming
To see the power of form theming, suppose you want to wrap every input number
field with a div tag. The key to doing this is to customize the
integer_widget fragment.
Form Theming in Twig
When customizing the form field block in Twig, you have two options on where
the customized form block can live:
| Method | Pros | Cons |
|---|---|---|
| Inside the same template as the form | Quick and easy | Can’t be reused in other templates |
| Inside a separate template | Can be reused by many templates | Requires an extra template to be created |
Both methods have the same effect but are better in different situations.
Method 1: Inside the same Template as the Form
The easiest way to customize the integer_widget block is to customize it
directly in the template that’s actually rendering the form.
{% extends '::base.html.twig' %}

{% form_theme form _self %}

{% block integer_widget %}
    <div class="integer_widget">
        {% set type = type|default('number') %}
        {{ block('field_widget') }}
    </div>
{% endblock %}

{% block content %}
    {# render the form #}

    {{ form_row(form.age) }}
{% endblock %}
By using the special {% form_theme form _self %} tag, Twig looks inside
the same template for any overridden form blocks. Assuming the form.age
field is an integer type field, when its widget is rendered, the customized
integer_widget block will be used.
The disadvantage of this method is that the customized form block can’t be
reused when rendering other forms in other templates. In other words, this method
is most useful when making form customizations that are specific to a single
form in your application. If you want to reuse a form customization across
several (or all) forms in your application, read on to the next section.
Method 2: Inside a Separate Template
You can also choose to put the customized integer_widget form block in a
separate template entirely. The code and end-result are the same, but you
can now re-use the form customization across many templates:
{# src/Acme/DemoBundle/Resources/views/Form/fields.html.twig #}

{% block integer_widget %}
    <div class="integer_widget">
        {% set type = type|default('number') %}
        {{ block('field_widget') }}
    </div>
{% endblock %}
Now that you’ve created the customized form block, you need to tell Symfony
to use it. Inside the template where you’re actually rendering your form,
tell Symfony to use the template via the form_theme tag:
{% form_theme form 'AcmeDemoBundle:Form:fields.html.twig' %}

{{ form_widget(form.age) }}
When the form.age widget is rendered, Symfony will use the integer_widget
block from the new template and the input tag will be wrapped in the
div element specified in the customized block.
Form Theming in PHP
When using PHP as a templating engine, the only method to customize a fragment
is to create a new template file — this is similar to the second method used by
Twig.
The template file must be named after the fragment. You must create a integer_widget.html.php
file in order to customize the integer_widget fragment.
<!-- src/Acme/DemoBundle/Resources/views/Form/integer_widget.html.php -->

<div class="integer_widget">
    <?php echo $view['form']->renderBlock('field_widget', array('type' => isset($type) ? $type : "number")) ?>
</div>
Now that you’ve created the customized form template, you need to tell Symfony
to use it. Inside the template where you’re actually rendering your form,
tell Symfony to use the theme via the setTheme helper method:
<?php $view['form']->setTheme($form, array('AcmeDemoBundle:Form')) ;?>

<?php $view['form']->widget($form['age']) ?>
When the form.age widget is rendered, Symfony will use the customized
integer_widget.html.php template and the input tag will be wrapped in
the div element.
Referencing Base Form Blocks (Twig specific)
So far, to override a particular form block, the best method is to copy
the default block from form_div_layout.html.twig, paste it into a different template,
and the customize it. In many cases, you can avoid doing this by referencing
the base block when customizing it.
This is easy to do, but varies slightly depending on if your form block customizations
are in the same template as the form or a separate template.
Referencing Blocks from inside the same Template as the Form
Import the blocks by adding a use tag in the template where you’re rendering
the form:
{% use 'form_div_layout.html.twig' with integer_widget as base_integer_widget %}
Now, when the blocks from form_div_layout.html.twig are imported, the
integer_widget block is called base_integer_widget. This means that when
you redefine the integer_widget block, you can reference the default markup
via base_integer_widget:
{% block integer_widget %}
    <div class="integer_widget">
        {{ block('base_integer_widget') }}
    </div>
{% endblock %}
Referencing Base Blocks from an External Template
If your form customizations live inside an external template, you can reference
the base block by using the parent() Twig function:
{# src/Acme/DemoBundle/Resources/views/Form/fields.html.twig #}

{% extends 'form_div_layout.html.twig' %}

{% block integer_widget %}
    <div class="integer_widget">
        {{ parent() }}
    </div>
{% endblock %}
Note
It is not possible to reference the base block when using PHP as the
templating engine. You have to manually copy the content from the base block
to your new template file.
Making Application-wide Customizations
If you’d like a certain form customization to be global to your application,
you can accomplish this by making the form customizations in an external
template and then importing it inside your application configuration:
Twig
By using the following configuration, any customized form blocks inside the
AcmeDemoBundle:Form:fields.html.twig template will be used globally when a
form is rendered.
- YAML
# app/config/config.yml

twig:
    form:
        resources:
            - 'AcmeDemoBundle:Form:fields.html.twig'
    # ...
- XML
<!-- app/config/config.xml --> <twig:config ...> <twig:form> <resource>AcmeDemoBundle:Form:fields.html.twig</resource> </twig:form> <!-- ... --> </twig:config> - PHP
// app/config/config.php

$container->loadFromExtension('twig', array(
    'form' => array('resources' => array(
        'AcmeDemoBundle:Form:fields.html.twig',
     ))
    // ...
));
By default, Twig uses a div layout when rendering forms. Some people, however,
may prefer to render forms in a table layout. Use the form_table_layout.html.twig
resource to use such a layout:
- YAML
# app/config/config.yml

twig:
    form:
        resources: ['form_table_layout.html.twig']
    # ...
- XML
<!-- app/config/config.xml --> <twig:config ...> <twig:form> <resource>form_table_layout.html.twig</resource> </twig:form> <!-- ... --> </twig:config> - PHP
// app/config/config.php

$container->loadFromExtension('twig', array(
    'form' => array('resources' => array(
        'form_table_layout.html.twig',
     ))
    // ...
));
If you only want to make the change in one template, add the following line to
your template file rather than adding the template as a resource:
{% form_theme form 'form_table_layout.html.twig' %}
Note that the form variable in the above code is the form view variable
that you passed to your template.
PHP
By using the following configuration, any customized form fragments inside the
src/Acme/DemoBundle/Resources/views/Form folder will be used globally when a
form is rendered.
- YAML
# app/config/config.yml

framework:
    templating:
        form:
            resources:
                - 'AcmeDemoBundle:Form'
    # ...
- XML
<!-- app/config/config.xml --> <framework:config ...> <framework:templating> <framework:form> <resource>AcmeDemoBundle:Form</resource> </framework:form> </framework:templating> <!-- ... --> </framework:config> - PHP
// app/config/config.php

// PHP
$container->loadFromExtension('framework', array(
    'templating' => array('form' =>
        array('resources' => array(
            'AcmeDemoBundle:Form',
     )))
    // ...
));
By default, the PHP engine uses a div layout when rendering forms. Some people,
however, may prefer to render forms in a table layout. Use the FrameworkBundle:FormTable
resource to use such a layout:
- YAML
# app/config/config.yml

framework:
    templating:
        form:
            resources:
                - 'FrameworkBundle:FormTable'
- XML
<!-- app/config/config.xml --> <framework:config ...> <framework:templating> <framework:form> <resource>FrameworkBundle:FormTable</resource> </framework:form> </framework:templating> <!-- ... --> </framework:config> - PHP
// app/config/config.php

$container->loadFromExtension('framework', array(
    'templating' => array('form' =>
        array('resources' => array(
            'FrameworkBundle:FormTable',
     )))
    // ...
));
If you only want to make the change in one template, add the following line to
your template file rather than adding the template as a resource:
<?php $view['form']->setTheme($form, array('FrameworkBundle:FormTable')); ?>
Note that the $form variable in the above code is the form view variable
that you passed to your template.
How to customize an Individual field
So far, you’ve seen the different ways you can customize the widget output
of all text field types. You can also customize individual fields. For example,
suppose you have two text fields — first_name and last_name — but
you only want to customize one of the fields. This can be accomplished by
customizing a fragment whose name is a combination of the field id attribute and
which part of the field is being customized. For example:
- Twig
{% form_theme form _self %}

{% block _product_name_widget %}
    <div class="text_widget">
        {{ block('field_widget') }}
    </div>
{% endblock %}

{{ form_widget(form.name) }}
- PHP
<!-- Main template -->

<?php echo $view['form']->setTheme($form, array('AcmeDemoBundle:Form')); ?>

<?php echo $view['form']->widget($form['name']); ?>

<!-- src/Acme/DemoBundle/Resources/views/Form/_product_name_widget.html.php -->

<div class="text_widget">
      echo $view['form']->renderBlock('field_widget') ?>
</div>
Here, the _product_name_widget fragment defines the template to use for the
field whose id is product_name (and name is product[name]).
Tip
The product portion of the field is the form name, which may be set
manually or generated automatically based on your form type name (e.g.
ProductType equates to product). If you’re not sure what your
form name is, just view the source of your generated form.
You can also override the markup for an entire field row using the same method:
- Twig
{% form_theme form _self %}

{% block _product_name_row %}
    <div class="name_row">
        {{ form_label(form) }}
        {{ form_errors(form) }}
        {{ form_widget(form) }}
    </div>
{% endblock %}
- PHP
<!-- _product_name_row.html.php -->

<div class="name_row">
    <?php echo $view['form']->label($form) ?>
    <?php echo $view['form']->errors($form) ?>
    <?php echo $view['form']->widget($form) ?>
</div>
Other Common Customizations
So far, this recipe has shown you several different ways to customize a single
piece of how a form is rendered. The key is to customize a specific fragment that
corresponds to the portion of the form you want to control (see
naming form blocks).
In the next sections, you’ll see how you can make several common form customizations.
To apply these customizations, use one of the methods described in the
Form Theming section.
Customizing Error Output
Note
The form component only handles how the validation errors are rendered,
and not the actual validation error messages. The error messages themselves
are determined by the validation constraints you apply to your objects.
For more information, see the chapter on validation.
There are many different ways to customize how errors are rendered when a
form is submitted with errors. The error messages for a field are rendered
when you use the form_errors helper:
- Twig
{{ form_errors(form.age) }}
- PHP
<?php echo $view['form']->errors($form['age']); ?>
By default, the errors are rendered inside an unordered list:
<ul>
    <li>This field is required</li>
</ul>
To override how errors are rendered for all fields, simply copy, paste
and customize the field_errors fragment.
- Twig
{% block field_errors %}
{% spaceless %}
    {% if errors|length > 0 %}
    <ul class="error_list">
        {% for error in errors %}
            <li>{{ error.messageTemplate|trans(error.messageParameters, 'validators') }}</li>
        {% endfor %}
    </ul>
    {% endif %}
{% endspaceless %}
{% endblock field_errors %}
- PHP
<!-- fields_errors.html.php -->

<?php if ($errors): ?>
    <ul class="error_list">
        <?php foreach ($errors as $error): ?>
            <li><?php echo $view['translator']->trans(
                $error->getMessageTemplate(),
                $error->getMessageParameters(),
                'validators'
            ) ?></li>
        <?php endforeach; ?>
    </ul>
<?php endif ?>
Tip
See Form Theming for how to apply this customization.
You can also customize the error output for just one specific field type.
For example, certain errors that are more global to your form (i.e. not specific
to just one field) are rendered separately, usually at the top of your form:
- Twig
- PHP
<?php echo $view['form']->render($form); ?>
To customize only the markup used for these errors, follow the same directions
as above, but now call the block form_errors (Twig) / the file form_errors.html.php
(PHP). Now, when errors for the form type are rendered, your customized
fragment will be used instead of the default field_errors.
Customizing the “Form Row”
When you can manage it, the easiest way to render a form field is via the
form_row function, which renders the label, errors and HTML widget of
a field. To customize the markup used for rendering all form field rows,
override the field_row fragment. For example, suppose you want to add a
class to the div element around each row:
- Twig
{% block field_row %}
    <div class="form_row">
        {{ form_label(form) }}
        {{ form_errors(form) }}
        {{ form_widget(form) }}
    </div>
{% endblock field_row %}
- PHP
<!-- field_row.html.php -->

<div class="form_row">
    <?php echo $view['form']->label($form) ?>
    <?php echo $view['form']->errors($form) ?>
    <?php echo $view['form']->widget($form) ?>
</div>
Tip
See Form Theming for how to apply this customization.
Adding a “Required” Asterisk to Field Labels
If you want to denote all of your required fields with a required asterisk (*),
you can do this by customizing the field_label fragment.
In Twig, if you’re making the form customization inside the same template as your
form, modify the use tag and add the following:
{% use 'form_div_layout.html.twig' with field_label as base_field_label %}

{% block field_label %}
    {{ block('base_field_label') }}

    {% if required %}
        <span class="required" title="This field is required">*</span>
    {% endif %}
{% endblock %}
In Twig, if you’re making the form customization inside a separate template, use
the following:
{% extends 'form_div_layout.html.twig' %}

{% block field_label %}
    {{ parent() }}

    {% if required %}
        <span class="required" title="This field is required">*</span>
    {% endif %}
{% endblock %}
When using PHP as a templating engine you have to copy the content from the
original template:
<!-- field_label.html.php -->

<!-- original content -->
<label for="<?php echo $view->escape($id) ?>" <?php foreach($attr as $k => $v) { printf('%s="%s" ', $view->escape($k), $view->escape($v)); } ?>><?php echo $view->escape($view['translator']->trans($label)) ?></label>

<!-- customization -->
<?php if ($required) : ?>
    <span class="required" title="This field is required">*</span>
<?php endif ?>
Tip
See Form Theming for how to apply this customization.
Adding “help” messages
You can also customize your form widgets to have an optional “help” message.
In Twig, If you’re making the form customization inside the same template as your
form, modify the use tag and add the following:
{% use 'form_div_layout.html.twig' with field_widget as base_field_widget %}

{% block field_widget %}
    {{ block('base_field_widget') }}

    {% if help is defined %}
        <span class="help">{{ help }}</span>
    {% endif %}
{% endblock %}
In twig, If you’re making the form customization inside a separate template, use
the following:
{% extends 'form_div_layout.html.twig' %}

{% block field_widget %}
    {{ parent() }}

    {% if help is defined %}
        <span class="help">{{ help }}</span>
    {% endif %}
{% endblock %}
When using PHP as a templating engine you have to copy the content from the
original template:
<!-- field_widget.html.php -->

<!-- Original content -->
<input
    type="<?php echo isset($type) ? $view->escape($type) : "text" ?>"
    value="<?php echo $view->escape($value) ?>"
    <?php echo $view['form']->renderBlock('attributes') ?>
/>

<!-- Customization -->
<?php if (isset($help)) : ?>
    <span class="help"><?php echo $view->escape($help) ?></span>
<?php endif ?>
To render a help message below a field, pass in a help variable:
- Twig
{{ form_widget(form.title, { 'help': 'foobar' }) }}
- PHP
<?php echo $view['form']->widget($form['title'], array('help' => 'foobar')) ?>
Tip
See Form Theming for how to apply this customization.
Learn how to display all the errors of a form with Twig.
Thanks to Twig, now the templating with Symfony is really easy to handle and understand. However, the documentation of symfony doesn’t clear a lot of basics tasks that you probably don’t know how to solve instantly.
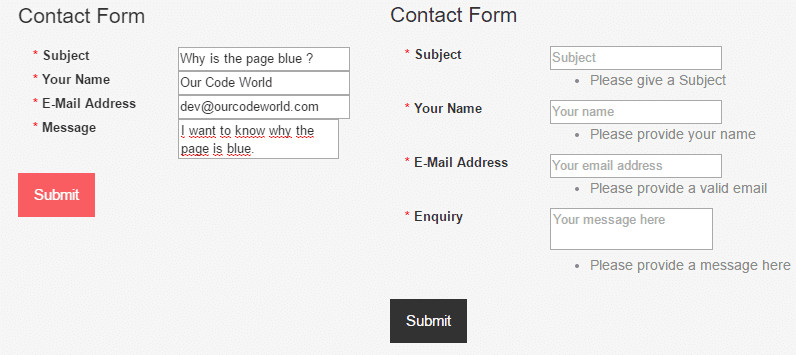
In this case, we’ll show how to get and display the errors of forms in Symfony 3.
List all errors in the form
To list all the errors of a form in a twig view, you’ll need to check first if it has errors checking for form.vars.valid property. Then, loop through every form children and print all the errors on it.
{#
If the form is not valid then :
Note: in this case the form variable is : form
 #}
{% if not form.vars.valid %}
<ul>
    {# Loop through every form item #}
    {% for child in form.children %}
        {# Display the errors of the form item #}
        {%for error in child.vars.errors%}
            <li>{{error.message}}</li>
        {%endfor%}
    {%endfor%}
</ul>
{%endif%}
Single item error
If you still want to display the errors next to the form item, you need to use the form_errors tag which will display the error related to that form item.
{{ form_start(form) }}

    <div>
        {{ form_widget(form.subject) }}
        {{ form_errors(form.subject) }}
    </div>
    <div>
        {{ form_widget(form.name) }}
        {{ form_errors(form.name) }}
    </div>
    <div>
        {{ form_widget(form.email) }}
        {{ form_errors(form.email) }}
    </div>
    <div>
        {{ form_widget(form.message) }}
        {{ form_errors(form.message) }}
    </div>

    <input type="submit" value="Submit">

{{ form_end(form) }}
In this case, when the form is submitted and the form is invalid according to its constraints in the FormType, then you’ll see the error message of every input down of it.
Controller (PHP)
To get all the errors of a form with PHP, you can use the getErrors method, which can be called directly in a form or a form item.
<?php

$form = ...;

// ...

// a FormErrorIterator instance, but only errors attached to this
// form level (e.g. "global errors)
$errors = $form->getErrors();

// a FormErrorIterator instance, but only errors attached to the
// "subject" field
$errors = $form['subject']->getErrors();

// a FormErrorIterator instance in a flattened structure
// use getOrigin() to determine the form causing the error
$errors = $form->getErrors(true);

// a FormErrorIterator instance representing the form tree structure
$errors = $form->getErrors(true, false);
You can choose for this option if you prefer PHP instead of Twig or you want to wrap all your information in the controller and then render it in the view.
Have fun !
With a Subscription, click any sentence in the script to jump to that part of the video!
Login
Subscribe
Checkout Bootstrap’s form documentation. Under validation, they have a cool feature: when your field has an error, you can add a cute icon. I want a cute icon! To get it, we just need to add a has-feedback class to the div around the entire field and add the icon itself.
Right now, each field is surrounded by a div with a form-group class. How can we also add a has-feedback class to this? Answer: override the block that’s responsible for rendering the row part of every field. In other words, the form_row block.
In form_div_layout.html.twig, search for the form_row block. There it is!
|
|
… lines 1 — 243 |
| {%- block form_row -%} | |
| <div> | |
| {{- form_label(form) -}} | |
| {{- form_errors(form) -}} | |
| {{- form_widget(form) -}} | |
| </div> | |
| {%- endblock form_row -%} | |
|
|
… lines 251 — 372 |
But, we might be overriding this in the bootstrap theme — so check there too. Yep, we are: and this is where the form-group class comes from:
|
|
… lines 1 — 184 |
| {% block form_row -%} | |
| <div class=«form-group{% if (not compound or force_error|default(false)) and not valid %} has-error{% endif %}«> | |
| {{- form_label(form) -}} | |
| {{- form_widget(form) -}} | |
| {{- form_errors(form) -}} | |
| </div> | |
| {%- endblock form_row %} | |
|
|
… lines 192 — 246 |
Overriding a Block
Ok! So… how can we override this? Very simple. First, copy the block. Second, go to your templates directory and create a new file called _formTheme.html.twig. The name of this isn’t file is not important. And just so we know when this is working, add a class: cool-class:
| {% block form_row -%} | |
| <div class=«form-group cool-class{% if (not compound or force_error|default(false)) and not valid %} has-error{% endif %}«> | |
| {{- form_label(form) -}} | |
| {{- form_widget(form) -}} | |
| {{- form_errors(form) -}} | |
| </div> | |
| {%- endblock form_row %} |
Finally, we need to point Symfony to this new form theme template. And we already know where to do this: right inside config.yml. After the bootstrap template, add a new line with _formTheme.html.twig:
|
|
… lines 1 — 36 |
| twig: | |
|
|
… lines 39 — 42 |
| form_themes: | |
| — bootstrap_3_layout.html.twig | |
| — _formTheme.html.twig | |
|
|
… lines 46 — 75 |
Because this is after bootstrap, its blocks will override those from bootstrap. Oh, and even though we don’t have it explicitly listed here, Symfony always uses form_div_layout.html.twig as the fallback file.
Ok, go back, and refresh! Inspect any form element. There it is! Our block is now being used.
Using Variables in Blocks
And here’s where things get really interesting. We need to add a class to the div, but only if this field has a validation error. Well check this out: this block is already using a few variables, like compound, force_error and valid:
| {% block form_row -%} | |
| <div class=«form-group cool-class{% if (not compound or force_error|default(false)) and not valid %} has-error{% endif %}«> | |
|
|
… lines 3 — 5 |
| </div> | |
| {%- endblock form_row %} |
But, where are those coming from? And what other stuff can we use?
It turns out that these are the same form variables that we can override from the main, _form.html.twig template. Once you’re inside of a form theme block, these become local variables.
To see this in action, call dump() with no arguments:
| {% block form_row -%} | |
| {{ dump() }} | |
| <div class=«form-group cool-class{% if (not compound or force_error|default(false)) and not valid %} has-error{% endif %}«> | |
|
|
… lines 4 — 6 |
| </div> | |
| {%- endblock form_row %} |
This will print all the variables we can use.
Refresh the page. Ah, now we have a big dump before every single field: revealing all of the variables we have access to. And it doesn’t matter which block you’re overriding: you always have access to this same, big group of variables. We can use these to only add that has-feedback class if there is an error.
Remove the dump. Then, set a new variable called showErrorIcon. Copy all of the logic from the if statement below that controls whether or not the has-error class is added and paste it here:
| {% block form_row -%} | |
| {% set showErrorIcon = (not compound or force_error|default(false)) and not valid %} | |
|
|
… lines 3 — 10 |
| {%- endblock form_row %} |
The most important variable is valid: if this is false, the field failed validation. Don’t worry about the compound variable — we’ll talk about that soon.
Next, at the end of the div, use an inline if statement so that if showErrorIcon is true, we add the has-feedback class:
| {% block form_row -%} | |
| {% set showErrorIcon = (not compound or force_error|default(false)) and not valid %} | |
| <div class=«form-group {% if (not compound or force_error|default(false)) and not valid %} has-error{% endif %}{{ showErrorIcon ? ‘ has-feedback’ : » }}«> | |
|
|
… lines 4 — 9 |
| </div> | |
| {%- endblock form_row %} |
Then, to add the icon, add that same if statement after printing the widget. Add a span with the necessary classes to make this an icon:
| {% block form_row -%} | |
| {% set showErrorIcon = (not compound or force_error|default(false)) and not valid %} | |
| <div class=«form-group {% if (not compound or force_error|default(false)) and not valid %} has-error{% endif %}{{ showErrorIcon ? ‘ has-feedback’ : » }}«> | |
| {{- form_label(form) -}} | |
| {{- form_widget(form) -}} | |
| {% if showErrorIcon %} | |
| <span class=«glyphicon glyphicon-remove form-control-feedback» aria-hidden=«true»></span> | |
| {% endif %} | |
| {{- form_errors(form) -}} | |
| </div> | |
| {%- endblock form_row %} |
Ok, time to try it. Refresh! There’s nothing yet, but there also aren’t any validation errors. Empty the name field and submit. Our beautiful «X»!
But now, set the Subfamily field to «Select a Subfamily» and submit. Ok, the drop-down looks a little funny — the «X» is on top of the arrow. In fact, the Bootstrap docs warn you about this: this icon should only be added to text fields. And other fields, like checkboxes, will look even worse!
So, it’s time to get a little smarter, and only add the cute icon to text fields.
Содержание
- Forms
- Installation
- Usage
- Form Types
- The Form Component
- Installation
- Configuration
- Request Handling
- CSRF Protection
- Twig Templating
- Translation
- Validation
- Accessing the Form Factory
- Creating a simple Form
- Setting default Values
- Rendering the Form
- Changing a Form’s Method and Action
- How to Customize Form Rendering
- Form Rendering Functions
- Form Rendering Variables
- Form Themes
- Form Functions and Variables Reference
- Functions
- form(form_view, variables)
- form_start(form_view, variables)
- form_end(form_view, variables)
- form_label(form_view, label, variables)
- form_help(form_view)
- form_errors(form_view)
- form_widget(form_view, variables)
- form_row(form_view, variables)
- form_rest(form_view, variables)
- form_parent(form_view)
- Tests
- selectedchoice(selected_value)
- rootform
- Form Variables Reference
Forms
Do you prefer video tutorials? Check out the Symfony Forms screencast series.
Creating and processing HTML forms is hard and repetitive. You need to deal with rendering HTML form fields, validating submitted data, mapping the form data into objects and a lot more. Symfony includes a powerful form feature that provides all these features and many more for truly complex scenarios.
Installation
In applications using Symfony Flex, run this command to install the form feature before using it:
Usage
The recommended workflow when working with Symfony forms is the following:
- Build the form in a Symfony controller or using a dedicated form class;
- Render the form in a template so the user can edit and submit it;
- Process the form to validate the submitted data, transform it into PHP data and do something with it (e.g. persist it in a database).
Each of these steps is explained in detail in the next sections. To make examples easier to follow, all of them assume that you’re building a small Todo list application that displays «tasks».
Users create and edit tasks using Symfony forms. Each task is an instance of the following Task class:
This class is a «plain-old-PHP-object» because, so far, it has nothing to do with Symfony or any other library. It’s a normal PHP object that directly solves a problem inside your application (i.e. the need to represent a task in your application). But you can also edit Doctrine entities in the same way.
Form Types
Before creating your first Symfony form, it’s important to understand the concept of «form type». In other projects, it’s common to differentiate between «forms» and «form fields». In Symfony, all of them are «form types»:
Источник
The Form Component
The Form component allows you to create, process and reuse forms.
The Form component is a tool to help you solve the problem of allowing end-users to interact with the data and modify the data in your application. And though traditionally this has been through HTML forms, the component focuses on processing data to and from your client and application, whether that data be from a normal form post or from an API.
Installation
If you install this component outside of a Symfony application, you must require the vendor/autoload.php file in your code to enable the class autoloading mechanism provided by Composer. Read this article for more details.
Configuration
This article explains how to use the Form features as an independent component in any PHP application. Read the Forms article to learn about how to use it in Symfony applications.
In Symfony, forms are represented by objects and these objects are built by using a form factory. Building a form factory is done with the factory method Forms::createFormFactory :
This factory can already be used to create basic forms, but it is lacking support for very important features:
- Request Handling: Support for request handling and file uploads;
- CSRF Protection: Support for protection against Cross-Site-Request-Forgery (CSRF) attacks;
- Templating: Integration with a templating layer that allows you to reuse HTML fragments when rendering a form;
- Translation: Support for translating error messages, field labels and other strings;
- Validation: Integration with a validation library to generate error messages for submitted data.
The Symfony Form component relies on other libraries to solve these problems. Most of the time you will use Twig and the Symfony HttpFoundation, Translation and Validator components, but you can replace any of these with a different library of your choice.
The following sections explain how to plug these libraries into the form factory.
Request Handling
To process form data, you’ll need to call the handleRequest() method:
Behind the scenes, this uses a NativeRequestHandler object to read data off of the correct PHP superglobals (i.e. $_POST or $_GET ) based on the HTTP method configured on the form (POST is default).
If you need more control over exactly when your form is submitted or which data is passed to it, use the submit() method to handle form submissions.
Integration with the HttpFoundation Component
If you use the HttpFoundation component, then you should add the HttpFoundationExtension to your form factory:
Now, when you process a form, you can pass the Request object to handleRequest():
For more information about the HttpFoundation component or how to install it, see The HttpFoundation Component.
CSRF Protection
Protection against CSRF attacks is built into the Form component, but you need to explicitly enable it or replace it with a custom solution. If you want to use the built-in support, first install the Security CSRF component:
The following snippet adds CSRF protection to the form factory:
Internally, this extension will automatically add a hidden field to every form (called _token by default) whose value is automatically generated by the CSRF generator and validated when binding the form.
If you’re not using the HttpFoundation component, you can use NativeSessionTokenStorage instead, which relies on PHP’s native session handling:
You can disable CSRF protection per form using the csrf_protection option:
Twig Templating
If you’re using the Form component to process HTML forms, you’ll need a way to render your form as HTML form fields (complete with field values, errors, and labels). If you use Twig as your template engine, the Form component offers a rich integration.
To use the integration, you’ll need the twig bridge, which provides integration between Twig and several Symfony components:
The TwigBridge integration provides you with several Twig Functions that help you render the HTML widget, label, help and errors for each field (as well as a few other things). To configure the integration, you’ll need to bootstrap or access Twig and add the FormExtension:
The exact details of your Twig Configuration will vary, but the goal is always to add the FormExtension to Twig, which gives you access to the Twig functions for rendering forms. To do this, you first need to create a TwigRendererEngine, where you define your form themes (i.e. resources/files that define form HTML markup).
For general details on rendering forms, see How to Customize Form Rendering.
If you use the Twig integration, read «The Form Component» below for details on the needed translation filters.
Translation
If you’re using the Twig integration with one of the default form theme files (e.g. form_div_layout.html.twig ), there is a Twig filter ( trans ) that is used for translating form labels, errors, option text and other strings.
To add the trans Twig filter, you can either use the built-in TranslationExtension that integrates with Symfony’s Translation component, or add the Twig filter yourself, via your own Twig extension.
To use the built-in integration, be sure that your project has Symfony’s Translation and Config components installed:
Next, add the TranslationExtension to your TwigEnvironment instance:
Depending on how your translations are being loaded, you can now add string keys, such as field labels, and their translations to your translation files.
For more details on translations, see Translations.
Validation
The Form component comes with tight (but optional) integration with Symfony’s Validator component. If you’re using a different solution for validation, no problem! Take the submitted/bound data of your form (which is an array or object) and pass it through your own validation system.
To use the integration with Symfony’s Validator component, first make sure it’s installed in your application:
If you’re not familiar with Symfony’s Validator component, read more about it: Validation. The Form component comes with a ValidatorExtension class, which automatically applies validation to your data on bind. These errors are then mapped to the correct field and rendered.
Your integration with the Validation component will look something like this:
To learn more, skip down to the The Form Component section.
Accessing the Form Factory
Your application only needs one form factory, and that one factory object should be used to create any and all form objects in your application. This means that you should create it in some central, bootstrap part of your application and then access it whenever you need to build a form.
In this document, the form factory is always a local variable called $formFactory . The point here is that you will probably need to create this object in some more «global» way so you can access it from anywhere.
Exactly how you gain access to your one form factory is up to you. If you’re using a service container (like provided with the DependencyInjection component), then you should add the form factory to your container and grab it out whenever you need to. If your application uses global or static variables (not usually a good idea), then you can store the object on some static class or do something similar.
Creating a simple Form
If you’re using the Symfony Framework, then the form factory is available automatically as a service called form.factory , you can inject it as SymfonyComponentFormFormFactoryInterface . Also, the default base controller class has a createFormBuilder() method, which is a shortcut to fetch the form factory and call createBuilder() on it.
Creating a form is done via a FormBuilder object, where you build and configure different fields. The form builder is created from the form factory.
As you can see, creating a form is like writing a recipe: you call add() for each new field you want to create. The first argument to add() is the name of your field, and the second is the fully qualified class name. The Form component comes with a lot of built-in types.
Now that you’ve built your form, learn how to render it and process the form submission.
Setting default Values
If you need your form to load with some default values (or you’re building an «edit» form), pass in the default data when creating your form builder:
In this example, the default data is an array. Later, when you use the data_class option to bind data directly to objects, your default data will be an instance of that object.
Rendering the Form
Now that the form has been created, the next step is to render it. This is done by passing a special form «view» object to your template (notice the $form->createView() in the controller above) and using a set of form helper functions:

That’s it! By printing form_widget(form) , each field in the form is rendered, along with a label and error message (if there is one). While this is convenient, it’s not very flexible (yet). Usually, you’ll want to render each form field individually so you can control how the form looks. You’ll learn how to do that in the form customization article.
Changing a Form’s Method and Action
By default, a form is submitted to the same URI that rendered the form with an HTTP POST request. This behavior can be changed using the FormType Field and FormType Field options (the method option is also used by handleRequest() to determine whether a form has been submitted):
Источник
How to Customize Form Rendering
Symfony gives you several ways to customize how a form is rendered. In this article you’ll learn how to make single customizations to one or more fields of your forms. If you need to customize all your forms in the same way, create instead a form theme or use any of the built-in themes, such as the Bootstrap theme for Symfony forms.
Form Rendering Functions
A single call to the form() Twig function is enough to render an entire form, including all its fields and error messages:
The next step is to use the form_start(), form_end(), form_errors() and form_row() Twig functions to render the different form parts so you can customize them adding HTML elements and attributes:
The form_row() function outputs the entire field contents, including the label, help message, HTML elements and error messages. All this can be further customized using other Twig functions, as illustrated in the following diagram:
The form_label(), form_widget(), form_help() and form_errors() Twig functions give you total control over how each form field is rendered, so you can fully customize them:
If you’re rendering each field manually, make sure you don’t forget the _token field that is automatically added for CSRF protection.
You can also use << form_rest(form) >> (recommended) to render any fields that aren’t rendered manually. See the form_rest() documentation below for more information.
Later in this article you can find the full reference of these Twig functions with more usage examples.
Form Rendering Variables
Some of the Twig functions mentioned in the previous section allow to pass variables to configure their behavior. For example, the form_label() function lets you define a custom label to override the one defined in the form:
Some form field types have additional rendering options that can be passed to the widget. These options are documented with each type, but one common option is attr , which allows you to modify HTML attributes on the form element. The following would add the task_field CSS class to the rendered input text field:
If you’re rendering an entire form at once (or an entire embedded form), the variables argument will only be applied to the form itself and not its children. In other words, the following will not pass a «foo» class attribute to all of the child fields in the form:
If you need to render form fields «by hand» then you can access individual values for fields (such as the id , name and label ) using its vars property. For example to get the id :
Later in this article you can find the full reference of these Twig variables and their description.
Form Themes
The Twig functions and variables shown in the previous sections can help you customize one or more fields of your forms. However, this customization can’t be applied to the rest of the forms of your app.
If you want to customize all forms in the same way (for example to adapt the generated HTML code to the CSS framework used in your app) you must create a form theme.
Form Functions and Variables Reference
Functions
form(form_view, variables)
Renders the HTML of a complete form.
You will mostly use this helper for prototyping or if you use custom form themes. If you need more flexibility in rendering the form, you should use the other helpers to render individual parts of the form instead:
form_start(form_view, variables)
Renders the start tag of a form. This helper takes care of printing the configured method and target action of the form. It will also include the correct enctype property if the form contains upload fields.
form_end(form_view, variables)
Renders the end tag of a form.
This helper also outputs form_rest() (which is explained later in this article) unless you set render_rest to false:
form_label(form_view, label, variables)
Renders the label for the given field. You can optionally pass the specific label you want to display as the second argument.
See «How to Customize Form Rendering» to learn about the variables argument.
form_help(form_view)
Renders the help text for the given field.
form_errors(form_view)
Renders any errors for the given field.
In the Bootstrap 4 form theme, form_errors() is already included in form_label() . Read more about this in the Bootstrap 4 theme documentation.
form_widget(form_view, variables)
Renders the HTML widget of a given field. If you apply this to an entire form or collection of fields, each underlying form row will be rendered.
The second argument to form_widget() is an array of variables. The most common variable is attr , which is an array of HTML attributes to apply to the HTML widget. In some cases, certain types also have other template-related options that can be passed. These are discussed on a type-by-type basis. The attributes are not applied recursively to child fields if you’re rendering many fields at once (e.g. form_widget(form) ).
See «How to Customize Form Rendering» to learn more about the variables argument.
form_row(form_view, variables)
Renders the «row» of a given field, which is the combination of the field’s label, errors, help and widget.
The second argument to form_row() is an array of variables. The templates provided in Symfony only allow to override the label as shown in the example above.
See «How to Customize Form Rendering» to learn about the variables argument.
form_rest(form_view, variables)
This renders all fields that have not yet been rendered for the given form. It’s a good idea to always have this somewhere inside your form as it’ll render hidden fields for you and make any fields you forgot to render easier to spot (since it’ll render the field for you).
form_parent(form_view)
Returns the parent form view or null if the form view already is the root form. Using this function should be preferred over accessing the parent form using form.parent . The latter way will produce different results when a child form is named parent .
Tests
Tests can be executed by using the is operator in Twig to create a condition. Read the Twig documentation for more information.
selectedchoice(selected_value)
This test will check if the current choice is equal to the selected_value or if the current choice is in the array (when selected_value is an array).
rootform
This test will check if the current form does not have a parent form view.
Form Variables Reference
The following variables are common to every field type. Certain field types may define even more variables and some variables here only really apply to certain types. To know the exact variables available for each type, check out the code of the templates used by your form theme.
Assuming you have a form variable in your template and you want to reference the variables on the name field, accessing the variables is done by using a public vars property on the FormView object:
| Variable | Usage |
|---|---|
| action | The action of the current form. |
| attr | A key-value array that will be rendered as HTML attributes on the field. |
| block_prefixes | An array of all the names of the parent types. |
| cache_key | A unique key which is used for caching. |
| compound | Whether or not a field is actually a holder for a group of children fields (for example, a choice field, which is actually a group of checkboxes). |
| data | The normalized data of the type. |
| disabled | If true , disabled=»disabled» is added to the field. |
| errors | An array of any errors attached to this specific field (e.g. form.title.errors ). Note that you can’t use form.errors to determine if a form is valid, since this only returns «global» errors: some individual fields may have errors. Instead, use the valid option. |
| form | The current FormView instance. |
| full_name | The name HTML attribute to be rendered. |
| help | The help message that will be rendered. |
| id | The id HTML attribute to be rendered. |
| label | The string label that will be rendered. |
| label_attr | A key-value array that will be rendered as HTML attributes on the label. |
| method | The method of the current form (POST, GET, etc.). |
| multipart | If true , form_enctype will render enctype=»multipart/form-data» . |
| name | The name of the field (e.g. title ) — but not the name HTML attribute, which is full_name . |
| required | If true , a required attribute is added to the field to activate HTML5 validation. Additionally, a required class is added to the label. |
| submitted | Returns true or false depending on whether the whole form is submitted |
| translation_domain | The domain of the translations for this form. |
| valid | Returns true or false depending on whether the whole form is valid. |
| value | The value that will be used when rendering (commonly the value HTML attribute). This only applies to the root form element. |
Behind the scenes, these variables are made available to the FormView object of your form when the Form component calls buildView() and finishView() on each «node» of your form tree. To see what «view» variables a particular field has, find the source code for the form field (and its parent fields) and look at the above two functions.
Источник
Дата оновлення перекладу 2022-12-12
Компонент Form
Компонент Form дозволяє вам з легкістю створювати, обробляти та використовувати
форми повторно.
Копомнент Form — це інструмент, покликаний допомогти вам вирішити проблему дозволу
кінцевим користувачам взаємодіяти та змінювати дані у вашому додатку. І хоча традиційно
це робилось через HTML-форми, компонент фокусується на обробці даних від та до вашого
клієнту та додатку, незважаючи на те, це дані зі звичайного запису форми, або з API.
Установка
Note
Якщо ви встановлюєте цей компонент поза додатком Symfony, вам потрібно підключити
файл vendor/autoload.phpу вашому коді для включення механізму автозавантаження
класів, наданих Composer. Детальніше можна прочитати у цій статті.
Конфігурація
See also
Ця стаття пояснює, як використовувати функції Форми як незалежного
компоненту в будь-якому додатку PHP. Прочитайте статтю Форми,
щоб отримати розуміння, як використовувати його в додатках Symfony.
В Symfony, форми представлено об’єктами, а ці об’єкти будуються з використанням
фабрики форм. Побудувати фабрику форм просто за допомогою методу Forms::createFormFactory:
Ця фабрика може вже бути використана для створення базових форм, але їй не
вистачає підтримки для дуже важливих функцій:
- Обробка запитів: Підтримка обробки запитів та завантаження файлів;
- CSRF-захист: Підтримка захисту від атак міжсайтової підробки запитів
(CSRF); - Шаблонізація: Інтеграція з рівнем шаблонізації, який дозволяє вам використовувати
фрагменти HTML повторно при відображенні форми; - Перклад: Підтримка перекладу повідомлень про помилки, ярликів полів та інших
рядків; - Валідація: Інтеграція з бібліотекою валідації для генерування повідомлень про
помилки для відправки даних.
Компонент Symfony Form покладається на інші бібліотеки в рішенні цих проблем.
В більшості випадків ви будете використовувати Twig та Symfony
HttpFoundation, компоненти
Translation та Validator,
але ви можете замінити будь-яки з них іншою бібліотекою на власний вибір.
Наступні розділи пояснюються, як підключати ці бібліотеки в фабрику форм.
Обробка запитів
Шоб обробити дані форми, вам знадобиться викликати метод
handleRequest():
За лаштунками використовується об’єкт NativeRequestHandler
для зчитування даних з правильних суперглобальних PHP (тобто $_POST або $_GET),
заснованих на HTTP-методі, сконфігурованому в формі (POST за замовчуванням).
CSRF-захист
Захист від CSRF-атак вбудобваний в компонент Form, але вам потрібно чітко
включити його або замінити користувацьким рішенням. Якщо ви хочете використовувати
вбудовану підтримку, для початку, встановіть компонент Security CSRF:
Наступний відрізок додає CSRF-захист до фабрики форм:
Внутрішньо, це розширення автоматично додасть приховане поле до кожної форми
(за замочуванням, назване _token), значення якої автоматично генерується
CSRF-генератором та валідується при побудові форми.
Tip
Якщо ви не використовуєте компонент HttpFoundation, то замість нього ви можете використовувати
NativeSessionTokenStorage,
який покладається на вбудобвану PHP-обробку сесії:
Ви можете відключити CSRF-захист для форми, використовуючи опцію csrf_protection:
Шаблонізація Twig
Якщо ви використовуєте компонент Форма для обробки HTML-форм, то вам знадобиться
спосіб легко відображати вашу форму у вигляді полів HTML-форми (заповнену значеннями
полів, помилками та ярликами). Якщо ви використовуєте Twig в якості шаблонізатору,
то компонент Форма пропонує багату інтеграцію.
Щоб використовувати інтеграцію, вам знадобиться twig bridge, який надає інтеграцію
між Twig та деякими компонентами Symfony:
Інтеграція TwigBridge надає вам декілька функцій Twig ,
які допомгають вам відображати HTML-віджет, ярлик та помилку для кожного
поля (а також декілька інших речей). Щоб сконфигурувати інтеграцію, вам
знадобиться запустить або отримати доступ до Twig, та додати
FormExtension:
1.30
Twig_FactoryRuntimeLoader було представлено в Twig 1.30.
Точні деталі вашої Конфігурації Twig будуть відрізнятися, але ціль — дозволити
додати FormExtension в Twig, що
надає вам доступ до функції Twig для відображення форм.
Щоб зробити це, спочатку вам необхідно створити
TwigRendererEngine, де ви визначите ваші
теми формы (тобто джерела/файлі, які визначають HTML
розмітку форми).
Щоб дізнатися загальні деталі про відображення форм, див. Як налаштувати відображення форми.
Note
Якщо ви використовуєте інтеграцію Twig, прочтайте «»
нижче, щоб дізнатися деталі про необхідні фільтри перекладу.
Переклад
Якщо ви використовуєте інтеграцію Twig з одним з файлів теми за замочуванням
(наприклад, form_div_layout.html.twig), то існує фільтр Twig (trans),
який використовується для перекладу ярликів, помилок, опціонального тексту та
інших рядків форми.
Щоб додати фільтр Twig trans, ви можете або використати вбудований
TranslationExtension, який
інтегрується з компонентом Symfony Переклад, або додати фільтр Twig
самостійно, через ваше власне розширення Twig.
Шоб використовувати вбудовану інтеграцію, переконайтесь в тому, що у
вашому проекті встановлені компоненти Symfony Переклад та Конфігурація:
Далі, додайте TranslationExtension
до вашого екземпляру TwigEnvironment:
В залежності від того, як завантажуються ваші переклади, ви можете тепер
додати ключі рядків, наприклад, ярлики полів та їх переклади, в ваші файли
перекладів.
Щоб дізнатися більше про переклади, див. Переклади.
Валідація
Компонент Form постачається з тісною (але необов’язковою) інтеграцією з
комонентом Symfony Validator. Якщо ви використовуєте інше рішення для валідації
— це не проблема! Просто візьміть відправлені дані вашої форми (масив чи об’єкт)
та передайте їх через вашу власну систему валідації.
Щоб використовувати інтеграцію з компонентом Symfony Валідатор, спочатку
переконайтеся, що він встановлений у вашому додатку:
Якщо ви не знайомі з цим компонентом, прочитайте більше про нього: Валідація.
Компонент Форма постачається з класом
ValidatorExtension,
який автоматично застосовує валідацію до ваших даних. Ці помилки потім
зв’язуються з відповідним полем та відображаються.
Ваша інтеграція з компонентом Валідація буд виглядати якось так:
Щоб дізнатися більше, перейдіть до розділу .
Доступ до фабрики форм
Вашому додатку необхідна лише одна фабрика форм, і один об’єкт фабрики має
бути використано для створення всіх об’єктів форми у вашому додатку. Це
означає, що вам необхідно створити його в центральній частині початкового
завантаження вашого додатку, а потім отримувати доступ до нього, коли вам
необхідно буде будувати форму.
Note
В цьому документі, фабрика форм завжди є локальною змінною під назвою
$formFactory. Суть в тому, що вам скоріш за все знадобиться створити
цей об’єкт в більш «глобальному» вигляді, щоб ви могли отримати до нього
доступ звідки завгодно.
Те, як саме ви отримаєте доступ до вашої фабрики фори — залежить від вас. Якщо
ви використовуєте сервіс-контейнер (як наданий
компонентом DependencyInjection), то
вам слід додати фабрику форм в ваш контейнер та викликати її, коли вам це буде
потрібно. Якщо ваш застосунок використовує глобальні або статичні змінні (зазвичай
не дуже хороша ідея), то ви можете зберігати об’єкт в деякому статичному класі,
або зробити щось подібне.
Створення простої форми
Tip
Якщо ви використовуєете фреймворк Symfony, то фабрика форм доступна автоматично у
вигляді сервісу під назвою form.factory, ви можете впровадити її як
SymfonyComponentFormFormFactoryInterface. Крім того, базовий клас контролера за
замочуванням має метод createFormBuilder(),
яки є скороченням для отримання фабрики форм та виклика в ній createBuilder().
Створення форми здійснюється через об’єкт FormBuilder,
де ви будуєте та конфігуруєте різні поля. Конструктор форм створюється з фабрики
форм.
- Standalone Use
- Framework Use
Як ви бачите, створення форми — це як написати рецепт: ви викликаєте add()
для кожного нового поля, яке ви хочете створити. Перший аргумент add() — це
ім’я вашого поля, а другий — повне ім’я класу. Компонент Форма постачається з
багатьма вбудованими типами.
Тепер, коли ви побудували вашу форму, дізнайтеся, як
відображати її та
обробляти відправку форми .
Установка значень за замовчуванням
Якщо вам треба, щоб ваша форма завантажувалась з деякими значеннями за замовчуванням
(або якщо ви будуєте форму «редагування), просто передайте дані за замовчуванням при
створенні вашого конструктору форм:
- Standalone Use
- Framework Use
Tip
В цьому прикладі, дані за замовчуванням — масив. Пізніше, коли ви будете
використовувати опцію data_class для прив’язки
даних напряму до об’єктів, ваші дані за замовчуванням будуть екземпляром
цього об’єкту.
Відображення форми
Тепер, коли форма була створена, наступний крок — відобразити її. Це робиться
шляхом передачі спеціального об’єкту форми «view» у ваш шаблон (відмітьте $form->createView()
в контролері вище) та використання набору функцій-хелперів форми:
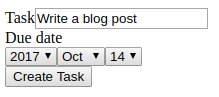
Ось і все! Надрукувавши form_widget(form), ви відобразите кожне поле форми
разом з ярликом та повідомленням про помилку (якщо воно є). І хоча це і легко,
але (поки) не дуже гнучко. Зазвичай, вам треба буде відображати кожне поле форми
окремо, щоб ви могли контролювати те, як виглядає форма. Ви дізнаєтесь, як це
зробити, в статті налаштування форми.
Зміна методу та дії форми
За замовчуванням, форма відправляє по тому ж URI, який відобразив форму з запитом
HTTP POST. Цю поведінку можна змінити, використовуючи опції Поле FormType
та Поле FormType (опція method також використовується handleRequest(),
щоб визначити, чи була відправлена форма):
- Standalone Use
- Framework Use
Обробка відправок форми
Щоб обробити відправки форми, використовуйте метод handleRequest():
- Standalone Use
- Framework Use
Caution
Метод createView() має викликатися після виклику handleRequest(). Інакше,
при використанні подій форми, зміни, зроблені в подіях
*_SUBMIT не будуть застосовуватися до перегляду (на кшталт помилок валідації).
Це визначає загальний «Робочий процес», який містить 3 різних можливості:
-
В початковому запиті GET (тобто, коли користувач заходить на вашу сторінку),
побудуйте вашу форму та відобразіть її;Якщо запит — POST, обробіть відправлені дані (через handleRequest()).
А потім:
- якщо форма не валідна, відобразіть форму (яка тепер міститиме помилки);
- якщо форма валідна, виконайте деякі дії та перенаправте.
На щастя, вам не потрібно вирішувати, чи була відправлена форма. Просто передайте
поточний запит методу handleRequest(). Далі
компонент Форма зробить всю роботу за вас.
Валідація форм
Найпростіший спосіб додати валідацію до вашої форми — через опцію
constraints при побудові кожного поля:
- Standalone Use
- Framework Use
Коли форма прив’язана, ці обмеження валідації будуть застосовані автоматично, а
помилки відобразяться поруч з полями помилок.
Очистка помилок форми
Всі помилки можуть бути очищені вручну методом
clearErrors().
Це зручно, якщо ви хочете валідувати форму без відображення помилок
валідації користувача (наприклад, при частковій відправці AJAX або
динамічній модифікації форм).
Так як очистка помилок робить форму валідною,
clearErrors() має
викликатися лише після перевірки того, що форма валідна.
Дізнайтеся більше
- Как изменить действие и метод формы
- Тема форми Bootstrap 4
- Тема форми Bootstrap 5
- Як обирати групи валідації, засновані на натиснутій кнопці
- Як створити користувацький тип поля форми
- Як створити розширення типу форми
- Як обирати групи валідації, засновані на відправлених даних
- Як і коли використовувати відображувачі даних
- Як використовувати перетворювачі даних
- Як використовувати функцію submit() для обробки відправки форм
- Як відключити валідацію відправлених даних
- Як динамічно модифікувати форми, використовуючи події форм
- Як вбудовувати форми
- Події форми
- Как вбудувати колекцію форм
- Як налаштувати відображення форми
- Як отримати доступ до сервісів або конфігурації зсередини форми
- Як працювати з темами форми
- Як зменшити дублювання коду за допомогою «inherit_data»
- Як відправити форму з декількома кнопками
- Как контролировать отображение в форме
- Створення користувацького вгадувача типу
- Як проводити модульне тестування ваших форм
- Як сконфігурувати порожні дані для класу форми
- Як динамічно конфігурувати групи валідації форм
- Як визначити, які групи валідації використовувати
- Як викоритовувати форму без класу даних
.. index::
   single: Формы
Формы
Работа с формами — одна из наиболее типичных и проблемных задач для web-разработчика.
Symfony2 включает компонент для работы с Формами, который облегчает работу с ними.
В этой главе вы узнаете, как создавать сложные формы с нуля, познакомитесь с
наиболее важными особенностями библиотеки форм.
Note
Компонент для работы с формами — это независимая библиотека, которая может
быть использована вне проектов Symfony2. Подробности ищите по ссылке
Symfony2 Form Component на ГитХабе.
.. index::
   single: Формы; Создание простой формы
Создание простой формы
Предположим, вы работаете над простым приложением — списком ToDo, которое
будет отображать некоторые «задачи». Поскольку вашим пользователям будет
необходимо создавать и редактировать задачи, вам потребуется создать форму.
Но, прежде чем начать, давайте создадим базовый класс Task, который
представляет и хранит данные для одной задачи:
<?php
// src/Acme/TaskBundle/Entity/Task.php
namespace AcmeTaskBundleEntity;

class Task
{
    protected $task;

    protected $dueDate;

    public function getTask()
    {
        return $this->task;
    }
    public function setTask($task)
    {
        $this->task = $task;
    }

    public function getDueDate()
    {
        return $this->dueDate;
    }
    public function setDueDate(DateTime $dueDate = null)
    {
        $this->dueDate = $dueDate;
    }
}
Note
Если вы будете брать код примеров один в один, вам, прежде всего
необходимо создать пакет AcmeTaskBundle, выполнив следующую команду
(и принимая все опции интерактивного генератора по умолчанию):
php app/console generate:bundle --namespace=Acme/TaskBundle
Этот класс представляет собой обычный PHP-объект и не имеет ничего общего с
Symfony или какой-либо другой библиотекой. Это PHP-объект, который выполняет
задачу непосредственно внутри вашего приложение (т.е. является представлением
задачи в вашем приложении). Конечно же, к концу этой главы вы будете иметь
возможность отправлять данные для экземпляра Task (посредством
HTML-формы), валидировать её данные и сохранять в базу данных.
.. index::
   single: Формы; Создание формы в контроллере
Создание формы
Теперь, когда вы создали класс Task, следующим шагом будет создание и
отображение HTML-формы. В Symfony2 это выполняется посредством создания
объекта формы и отображения его в шаблоне. Теперь, выполним необходимые
действия в контроллере:
<?php
// src/Acme/TaskBundle/Controller/DefaultController.php
namespace AcmeTaskBundleController;

use SymfonyBundleFrameworkBundleControllerController;
use AcmeTaskBundleEntityTask;
use SymfonyComponentHttpFoundationRequest;

class DefaultController extends Controller
{
    public function newAction(Request $request)
    {
        // создаём задачу и присваиваем ей некоторые начальные данные для примера
        $task = new Task();
        $task->setTask('Write a blog post');
        $task->setDueDate(new DateTime('tomorrow'));

        $form = $this->createFormBuilder($task)
            ->add('task', 'text')
            ->add('dueDate', 'date')
            ->getForm();

        return $this->render('AcmeTaskBundle:Default:new.html.twig', array(
            'form' => $form->createView(),
        ));
    }
}
Tip
Этот пример показывает, как создать вашу форму непосредственно в коде
вашего контроллера. Позднее, в секции :ref:`book-form-creating-form-classes`,
вы также узнаете, как создавать формы в отдельных классах, что является
более предпочтительным вариантом и сделает ваши формы доступными для
повторного использования.
Создание формы требует совсем немного кода, так как объекты форм в Symfony2
создаются при помощи конструктора форм — «form builder». Цель конструктора
форм — облегчить насколько это возможно создание форм, выполняя всю тяжёлую
работу.
В этом примере вы добавили два поля в вашу форму — task и dueDate,
соответствующие полям task и dueDate класса Task. Вы также
указали каждому полю их типы (например text, date), которые в числе
прочих параметров, определяют — какой HTML таг будет отображен для этого
поля в форме.
Symfony2 включает много встроенных типов, которые будут обсуждаться
совсем скоро (см. :ref:`book-forms-type-reference`).
.. index::
  single: Формы; Отображение формы в шаблоне
Отображение формы
Теперь, когда форма создана, следующим шагом будет её отображение. Отобразить
форму можно, передав специальный объект «form view» в ваш шаблон (обратите
внимание на конструкцию $form->createView() в контроллере выше) и
использовать ряд функций-помощников в шаблоне:
.. configuration-block::

    .. code-block:: html+jinja

        {# src/Acme/TaskBundle/Resources/views/Default/new.html.twig #}

        <form action="{{ path('task_new') }}" method="post" {{ form_enctype(form) }}>
            {{ form_widget(form) }}

            <input type="submit" />
        </form>

    .. code-block:: html+php

        <!-- src/Acme/TaskBundle/Resources/views/Default/new.html.php -->

        <form action="<?php echo $view['router']->generate('task_new') ?>" method="post" <?php echo $view['form']->enctype($form) ?> >
            <?php echo $view['form']->widget($form) ?>

            <input type="submit" />
        </form>

Note
В этом примере предполагается, что вы создали маршрут task_new,
который указывает на контроллер AcmeTaskBundle:Default:new,
который был создан ранее.
Вот и всё! Напечатав form_widget(form), каждое поле формы будет отображено,
так же как метки полей и ошибки (если они есть). Это очень просто, но не
очень гибко (пока что). На практике вам, скорее всего, захочется отобразить
каждое поле формы отдельно, чтобы иметь полный контроль над тем как форма
выглядит. Вы узнаете, как сделать это в секции «:ref:`form-rendering-template`«.
Прежде чем двигаться дальше, обратите внимание на то, как было отображено поле
task, содержащее значение поля task объекта $task («Write a blog post»).
Это — первая задача форм: получить данные от объекта и перевести их в формат,
подходящий для их последующего отображения в HTML форме.
Tip
Система форм достаточно умна, чтобы получить доступ к значению защищённого
(protected) поля task через методы getTask() и setTask() класса
Task. Так как поле не публичное (public), оно должно иметь «геттер» и
«сеттер» методы для того, чтобы компонент форм мог получить данные из
этого поля и изменить их. Для булевых полей вы также можете использовать
«is*» метод (например isPublished()) вместо getPublished().
.. index::
  single: Формы; Обработка отправки форм
Обработка отправки форм
Второй обязанностью форм является перевод данных, отправленных пользователем,
в свойства объекта. Для того чтобы это произошло, отправленные данные должны
быть привязаны к форме. Добавьте в контроллер следующие строки:
<?php
// ...

public function newAction(Request $request)
{
    // создаём новый объект $task (без данных по умолчанию)
    $task = new Task();

    $form = $this->createFormBuilder($task)
        ->add('task', 'text')
        ->add('dueDate', 'date')
        ->getForm();

    if ($request->getMethod() == 'POST') {
        $form->bindRequest($request);

        if ($form->isValid()) {
            // выполняем прочие действие, например, сохраняем задачу в базе данных

            return $this->redirect($this->generateUrl('task_success'));
        }
    }

    // ...
}
Теперь, при отправке формы контроллер привязывает отправленные данные к
форме, которая присваивает эти данные полям task и dueDate объекта
$task. Эта задача выполняется методом bindRequest().
Note
Как только вызывается метод bindRequest(), отправленные данные
тут же присваиваются соответствующему объекту формы. Это происходит вне
зависимости от того, валидны ли эти данные или нет.
Этот контроллер следует типичному сценарию по обработке форм и имеет три возможных
пути:
- При первичной загрузке страницы в браузер метод запроса будет
GET,
форма лишь создаётся и отображается; - Когда пользователь отправляет форму (т.е. метод будет уже
POST) с
неверными данными (вопросы валидации будут рассмотрены ниже, а пока просто
предположим что данные не валидны), форма будет привязана к данным и
отображена вместе со всеми ошибками валидации; - Когда пользователь отправляет форму с валидными данными, форма будет
привязана к данным и у вас есть возможность для выполнения некоторых
действий, используя объект$task(например сохранить его в базе
данных) перед тем как перенаправить пользователя на другую страницу
(например, «thank you» или «success»).
Note
Перенаправление пользователя после успешной отправки формы предотвращает
повторную отправку этих же данных, если пользователь обновит страницу.
.. index::
   single: Формы; Валидация
Валидация форм
В предыдущей секции вы узнали, что форма может быть отправлена с валидными
или не валидными данными. В Symfony2 валидация применяется к объекту, лежащему
в основе формы (например, Task). Другими словами, вопрос не в том, валидна
ли форма, а валиден ли объект $task, после того как форма передала
ему отправленные данные. Выполнив метод $form->isValid(), можно узнать
валидны ли данные объекта $task или же нет.
Валидация выполняется посредством добавление набора правил (называемых ограничениями)
к классу. Для того, чтобы увидеть валидацию в действии, добавьте ограничения для
валидации того, что поле task не может быть пусто, а поле dueDate не может
быть пусто и должно содержать объект DateTime.
.. configuration-block::

    .. code-block:: yaml

        # Acme/TaskBundle/Resources/config/validation.yml
        AcmeTaskBundleEntityTask:
            properties:
                task:
                    - NotBlank: ~
                dueDate:
                    - NotBlank: ~
                    - Type: DateTime

    .. code-block:: php-annotations

        // Acme/TaskBundle/Entity/Task.php
        use SymfonyComponentValidatorConstraints as Assert;

        class Task
        {
            /**
             * @AssertNotBlank()
             */
            public $task;

            /**
             * @AssertNotBlank()
             * @AssertType("DateTime")
             */
            protected $dueDate;
        }

    .. code-block:: xml

        <!-- Acme/TaskBundle/Resources/config/validation.xml -->
        <class name="AcmeTaskBundleEntityTask">
            <property name="task">
                <constraint name="NotBlank" />
            </property>
            <property name="dueDate">
                <constraint name="NotBlank" />
                <constraint name="Type">
                    <value>DateTime</value>
                </constraint>
            </property>
        </class>

    .. code-block:: php

        <?php
        // Acme/TaskBundle/Entity/Task.php
        use SymfonyComponentValidatorMappingClassMetadata;
        use SymfonyComponentValidatorConstraintsNotBlank;
        use SymfonyComponentValidatorConstraintsType;

        class Task
        {
            // ...

            public static function loadValidatorMetadata(ClassMetadata $metadata)
            {
                $metadata->addPropertyConstraint('task', new NotBlank());

                $metadata->addPropertyConstraint('dueDate', new NotBlank());
                $metadata->addPropertyConstraint('dueDate', new Type('DateTime'));
            }
        }
Это всё! Если вы отправите форму с ошибочными значениями — вы увидите
что соответствующие ошибки будут отображены в форме.
HTML5 Валидация
Начиная с HTML5, многие браузеры могут выполнять некоторые валидационные
ограничения на стороне клиента, без отправки формы. Типичным ограничением
является указание атрибута required для полей, которые будут
обязательными. В браузерах, которые поддерживают HTML5, этот атрибут будет
позволять отображать браузерное сообщение об ошибке, если пользователь
попробует отправить форму с пустым соответствующим полем.
Генерированные формы полностью поддерживают эту возможность, добавляя
соответствующие HTML-атрибуты, которые активируют HTML5 клиентскую
валидацию. Тем не менее, валидация на стороне клиента может
быть отключена путём добавления атрибута novalidate к тагу
form или formnovalidate к тагу submit. Это бывает необходимо,
когда вам нужно протестировать ваши серверные ограничения, но,
к примеру, браузер не даёт отправить форму с пустыми полями.
Валидация — это важная функция в составе Symfony2, она описывается
в :doc:`отдельной главе</book/validation>`.
.. index::
   single: Формы; Валидационные группы
Валидационные группы
Tip
Если вы не используете :ref:`валидационные группы <book-validation-validation-groups>`,
вы можете пропустить эту секцию.
Если ваш объект использует возможности :ref:`валидационных групп <book-validation-validation-groups>`,
вам нужно указать, какие группы вы хотите использовать:
<?php
// ...

$form = $this->createFormBuilder($users, array(
    'validation_groups' => array('registration'),
))->add(...)
;
Если вы создаёте :ref:`классы форм<book-form-creating-form-classes>`
(хорошая практика), тогда вам нужно указать следующий код в метод
getDefaultOptions():
<?php
// ...

public function getDefaultOptions(array $options)
{
    return array(
        'validation_groups' => array('registration')
    );
}
В обоих этих примерах, для валидации объекта, для которого создана форма, будет
использована лишь группа registration.
Groups based on Submitted Data
.. versionadded:: 2.1
   The ability to specify a callback or Closure in ``validation_groups``
   is new to version 2.1
Если вам требуется дополнительная логика для определения валидационных групп,
например, на совновании данных, отправленных пользователем, вы можете установить
значением опции validation_groups в массив с callback или замыкание (Closure).
<?php
public function getDefaultOptions(array $options)
{
    return array(
        'validation_groups' => array('Acme\AcmeBundle\Entity\Client', 'determineValidationGroups'),
    );
}
Этот код вызовет статический метод determineValidationGroups() класса Client с текущей формой в качестве
аргумента, после того как данные будут привязаны (bind) к форме, но перед запуском процесса валидации.
Вы также можете определить логику в замыкании Closure, например:
<?php
public function getDefaultOptions(array $options)
{
    return array(
        'validation_groups' => function(FormInterface $form) {
            $data = $form->getData();
            if (EntityClient::TYPE_PERSON == $data->getType()) {
                return array('person')
            } else {
                return array('company');
            }
        },
    );
}
.. index::
   single: Формы; Встроенные типы полей
Встроенные типы полей
В состав Symfony входит большое число типов полей, которые покрывают все
типичные поля и типы данных, с которыми вы столкнётесь:
Вы также можете создавать свои собственные типы полей. Эта возможность
подробно описывается в статье книги рецептов «:doc:`/cookbook/form/create_custom_field_type`«.
.. index::
   single: Формы; Опции полей форм
Опции полей форм
Каждый тип поля имеет некоторое число опций, которые можно использовать для
их настройки. Например, поле dueDate сейчас отображает 3 селектбокса.
Тем не менее, :doc:`поле date</reference/forms/types/date>` можно настроить
таким образом, чтобы отображался один текстбокс (где пользователь сможет
ввести дату в виде строки):
<?php
// ...
->add('dueDate', 'date', array('widget' => 'single_text'))

Все типы полей имеют много различных опций, которые могут быть для них
указаны. Многие из этих опций — специфичны для конкретного типа поля и
более подробную информацию о них можно получить из справочника.
Опция required
Наиболее типичной опцией является опция required, которая может быть
указана для любого поля. По умолчанию, опция required установлена в
true, что даёт возможность браузерам с поддержкой HTML5 использовать
встроенную в них клиентскую валидацию, если поле остаётся пустым. Если вам
этого не требуется, или же установите опцию required в false или
же :ref:`отключите валидацию HTML5<book-forms-html5-validation-disable>`.
Отметим также, что установка опции required в true не влияет
на серверную валидацию. Другими словами, если пользователь отправляет
пустое значение для этого поля (при помощи старого браузера или веб-сервиса)
оно будет считаться валидным, если вы не используете ограничения NotBlank
или NotNull.
Таким образом, опция required — хороша, но серверную валидацию
использовать необходимо всегда.
.. index::
   single: Формы; Автоматическое определение типов полей
Автоматическое определение типов полей
Теперь, когда вы добавили данные для валидации в класс Task, Symfony
теперь много знает о ваших полях. Если вы позволите, Symfony может
определять («угадывать») тип вашего поля и устанавливать его автоматически.
В этом примере, Symfony может определить по правилам валидации, что
task является полем типа text и dueDate — полем типа date:
<?php
public function newAction()
{
    $task = new Task();

    $form = $this->createFormBuilder($task)
        ->add('task')
        ->add('dueDate', null, array('widget' => 'single_text'))
        ->getForm();
}
Автоматическое определение активируется, когда вы опускаете второй аргумент
в методе add() (или если вы указываете null для него). Если вы передаёте
массив опций в качестве третьего аргумента (как в случае dueDate выше),
эти опции применяются к «угаданному» полю.
Caution!
Если ваша форма использует особую группу валидации, определитель
типов полей будет учитывать все ограничения при определении
типов полей (включая ограничения, которые не являются частью
используемых валидационных групп).
.. index::
   single: Формы; Автоматическое определение типов полей
Автоматическое определение опций для полей
В дополнение к определению «типа» поля, Symfony также может попытаться
определить значения опций для поля.
Tip
Когда эти опции будут установлены, поле будет отображено с
использованием особых HTML атрибутов, которые позволяют выполнять
HTML5 валидацию на стороне клиента (например AssertMaxLength).
И, поскольку вам нужно будет вручную добавлять правила валидации
на стороне сервера, эти опции могут быть угаданы исходя из ограничений,
которые вы будете использовать для неё.
required: Опцияrequiredможет быть определена исходя из правил
валидации (т.е. если полеNotBlankилиNotNull) или же на основании
метаданных Doctrine (т.е. если полеnullable). Это может быть очень удобно,
так как правила клиентской валидации автоматически соответствуют правилам
серверной валидации.min_length: Если поле является одним из видов текстовых полей,
опцияmin_lengthможет быть угадана исходя из правил валидации (
если используются ограниченияMinLengthилиMin) или же из
метаданных Doctrine (основываясь на длине поля).max_length: Аналогичноmin_lengthс той лишь разницей, что определяет
максимальное значение длины поля.
Note
Эти опции могут быть определены автоматически, только если вы используете
автоопределение полей (не указываете или передаёте null в качестве второго
аргумента в метод add()).
Если вы хотите изменить значения, определённые автоматически, вы можете
перезаписать их, передавая требуемые опции в массив опций:
->add('task', null, array('min_length' => 4))
.. index::
   single: Формы; Отображение в шаблоне
Отображение формы в шаблоне
Ранее вы увидели, как форму целиком можно отобразить при помощи лишь одной
строки кода. Конечно же, на практике вам потребуется большая гибкость при
отображении:
.. configuration-block::

    .. code-block:: html+jinja

        {# src/Acme/TaskBundle/Resources/views/Default/new.html.twig #}

        <form action="{{ path('task_new') }}" method="post" {{ form_enctype(form) }}>
            {{ form_errors(form) }}

            {{ form_row(form.task) }}
            {{ form_row(form.dueDate) }}

            {{ form_rest(form) }}

            <input type="submit" />
        </form>

    .. code-block:: html+php

        <!-- // src/Acme/TaskBundle/Resources/views/Default/newAction.html.php -->

        <form action="<?php echo $view['router']->generate('task_new') ?>" method="post" <?php echo $view['form']->enctype($form) ?>>
            <?php echo $view['form']->errors($form) ?>

            <?php echo $view['form']->row($form['task']) ?>
            <?php echo $view['form']->row($form['dueDate']) ?>

            <?php echo $view['form']->rest($form) ?>

            <input type="submit" />
        </form>
Давайте более подробно рассмотрим каждую часть:
form_enctype(form)— если хоть одно поле формы является полем для загрузки
файла, эта функция отобразит необходимый атрибутenctype="multipart/form-data";form_errors(form)— Отображает глобальные по отношению к форме целиком ошибки
валидации (ошибки для полей отображаются после них);form_row(form.dueDate)— Отображает текстовую метку, ошибки и HTML-виджет
для заданного поля (например дляdueDate) внутриdivэлемента
(по умолчанию);form_rest(form)— Отображает все остальные поля, которые ещё не были
отображены. Как правило хорошая идея расположить вызов этого хелпера внизу
каждой формы (на случай если вы забыли вывести какое-либо поле или же
не хотите вручную отображать скрытые поля). Этот хелпер также удобен для
активации автоматической защиты от :ref:`CSRF атак<forms-csrf>`.
Основная часть работы сделана при помощи хелпера form_row, который
отображает метку, ошибки и виджет для каждого поля внутри тага div.
В секции :ref:`form-theming` вы узнаете, как можно настроить вывод form_row
на различных уровнях.
Tip
Вы можете получить доступ к данным вашей формы при помощи form.vars.value:
.. configuration-block::

    .. code-block:: jinja

        {{ form.vars.value.task }}

    .. code-block:: html+php

        <?php echo $view['form']->get('value')->getTask() ?>
.. index::
   single: Формы; Отображение каждого поля вручную
Отображение каждого поля вручную
Хелпер form_row очень удобен, так как вы можете быстро отобразить
каждое поле вашей формы (и разметка, используемая для каждой строки
может быть настроена). Но, так как жизнь как правило сложнее, чем нам
хотелось бы, вы можете также отобразить каждое поле вручную. В конечном
итоге вы получите тоже самое что и с хелпером form_row:
.. configuration-block::

    .. code-block:: html+jinja

        {{ form_errors(form) }}

        <div>
            {{ form_label(form.task) }}
            {{ form_errors(form.task) }}
            {{ form_widget(form.task) }}
        </div>

        <div>
            {{ form_label(form.dueDate) }}
            {{ form_errors(form.dueDate) }}
            {{ form_widget(form.dueDate) }}
        </div>

        {{ form_rest(form) }}

    .. code-block:: html+php

        <?php echo $view['form']->errors($form) ?>

        <div>
            <?php echo $view['form']->label($form['task']) ?>
            <?php echo $view['form']->errors($form['task']) ?>
            <?php echo $view['form']->widget($form['task']) ?>
        </div>

        <div>
            <?php echo $view['form']->label($form['dueDate']) ?>
            <?php echo $view['form']->errors($form['dueDate']) ?>
            <?php echo $view['form']->widget($form['dueDate']) ?>
        </div>

        <?php echo $view['form']->rest($form) ?>
Если автоматически созданная метка для поля вам не нравится, вы можете указать её
явно:
.. configuration-block::

    .. code-block:: html+jinja

        {{ form_label(form.task, 'Task Description') }}

    .. code-block:: html+php

        <?php echo $view['form']->label($form['task'], 'Task Description') ?>
Наконец, некоторые типы полей имеют дополнительные опции отображения,
которые можно указывать виджету. Эти опции документированы для каждого
такого типа, но общей для всех опцией является attr, которая позволяет
вам модифицировать атрибуты элемента формы. Следующий пример добавит текстовому
полю CSS класс task_field:
.. configuration-block::

    .. code-block:: html+jinja

        {{ form_widget(form.task, { 'attr': {'class': 'task_field'} }) }}

    .. code-block:: html+php

        <?php echo $view['form']->widget($form['task'], array(
            'attr' => array('class' => 'task_field'),
        )) ?>
Справочник по функциям Twig
Если вы используете Twig, полная справочная информация о функциях, используемых
для отображения форм, доступна в :doc:`справочнике</reference/forms/twig_reference>`.
Ознакомьтесь с этой информацией, для того чтобы узнать больше о доступных хелперах
и опциях, которые для них доступны.
.. index::
   single: Формы; Создание классов форм
Создание классов форм
Как вы уже видели ранее, форма может быть создана и использована
непосредственно в контроллере. Тем не менее, лучшей практикой является
создание формы в отдельном PHP-классе, который может быть использован повторно
в любом месте вашего приложения. Создайте новый класс, который будет содержать
логику создания формы task:
<?php
// src/Acme/TaskBundle/Form/Type/TaskType.php

namespace AcmeTaskBundleFormType;

use SymfonyComponentFormAbstractType;
use SymfonyComponentFormFormBuilder;

class TaskType extends AbstractType
{
    public function buildForm(FormBuilder $builder, array $options)
    {
        $builder->add('task');
        $builder->add('dueDate', null, array('widget' => 'single_text'));
    }

    public function getName()
    {
        return 'task';
    }
}
Этот новый класс содержит все необходимые указания для создания формы задачи
(обратите внимание, что метод getName() должен возвращать уникальный идентификатор
для данной формы). Теперь, вы можете использовать этот класс для быстрого создания
объекта формы в контроллере:
<?php
// src/Acme/TaskBundle/Controller/DefaultController.php

// добавьте use для класса формы в начале файла контроллера
use AcmeTaskBundleFormTypeTaskType;

public function newAction()
{
    $task = // ...
    $form = $this->createForm(new TaskType(), $task);

    // ...
}
Размещение логики формы в отдельном классе означает, что теперь форма может
быть легко использована в другом месте приложения. Это наилучший способ для
создания форм, но выбор конечно же за вами.
Настройка data_class для формы
Каждая форма должна знать имя класса, который будет содержать данные
для неё (например, AcmeTaskBundleEntityTask). Как правило,
эти данные определяются автоматически по объекту, который передаётся
вторым параметром в метод createForm (т.е. $task). Позднее,
когда вы займётесь встраиванием форм, полагаться на автоопреление уже
будет нельзя. Таким образом, хоть и не всегда необходимо, но всё же
желательно явно указывать опцию data_class, добавив следующие
строки в класс формы:
<?php
public function getDefaultOptions(array $options)
{
    return array(
        'data_class' => 'AcmeTaskBundleEntityTask',
    );
}
.. index::
   pair: Формы; Doctrine
Формы и Doctrine
Цель любой формы — преобразование данных из объекта (в нашем случае Task) в
HTML форму и наоборот — преобразование данных, отправленных пользователем, обратно
в объект. По существу, тема по сохранению объекта Task в базе данных
совершенно не относится теме, обсуждаемой в главе «Формы». Тем не менее, если вы
сконфигурировали класс Task для работы с Doctrine (т.е. вы добавили
:ref:`метаданные для отображения<book-doctrine-adding-mapping>` (mapping metadata) для него), его
сохранение после отправки формы можно выполнить в случае, если форма валидна:
<?php
if ($form->isValid()) {
    $em = $this->getDoctrine()->getEntityManager();
    $em->persist($task);
    $em->flush();

    return $this->redirect($this->generateUrl('task_success'));
}
Если, по каким-то причинам у вас нет изначального объекта $task,
вы можете получить его из формы:
$task = $form->getData();
Больше информации по работе с базами данных вы можете получить в главе
:doc:`Doctrine ORM</book/doctrine>`.
Самое главное, что требуется уяснить, когда форма и данные связываются,
данные тут же передаются в объект, лежащий в основе формы. Если вы хотите
сохранить эти данные, вам нужно просто сохранить объект (который уже содержит
отправленные данные).
.. index::
   single: Формы; Встраивание форм
Встроенные формы
Зачастую, когда вы хотите создать форму, вам требуется добавлять в неё
поля из различных объектов. Например, форма регистрации может содержать
данные, относящиеся к объекту User и к нескольким объектам Address.
К счастью, с использованием компонента форм сделать это легко и естественно.
Встраивание одного объекта
Предположим, что каждая задача Task соответствует некоторому объекту
Category. Начнём конечно же с создания класса Category:
<?php
// src/Acme/TaskBundle/Entity/Category.php
namespace AcmeTaskBundleEntity;

use SymfonyComponentValidatorConstraints as Assert;

class Category
{
    /**
     * @AssertNotBlank()
     */
    public $name;
}
Затем создадим свойство category в классе Task:
<?php
// ...

class Task
{
    // ...

    /**
     * @AssertType(type="AcmeTaskBundleEntityCategory")
     */
    protected $category;

    // ...

    public function getCategory()
    {
        return $this->category;
    }

    public function setCategory(Category $category = null)
    {
        $this->category = $category;
    }
}
Теперь ваше приложение нужно подправить с учётом новых требований. Создайте
класс формы для изменения объекта Category:
<?php
// src/Acme/TaskBundle/Form/Type/CategoryType.php
namespace AcmeTaskBundleFormType;

use SymfonyComponentFormAbstractType;
use SymfonyComponentFormFormBuilder;

class CategoryType extends AbstractType
{
    public function buildForm(FormBuilder $builder, array $options)
    {
        $builder->add('name');
    }

    public function getDefaultOptions(array $options)
    {
        return array(
            'data_class' => 'AcmeTaskBundleEntityCategory',
        );
    }

    public function getName()
    {
        return 'category';
    }
}
Конечно целью же является изменение Category для Task непосредственно
из задачи. Для того чтобы выполнить это, добавьте поле category в
форму TaskType, которое будет представлено экземпляром нового класса
CategoryType:
<?php
public function buildForm(FormBuilder $builder, array $options)
{
    // ...

    $builder->add('category', new CategoryType());
}
Поля формы CategoryType теперь могут быть отображены прямо в форме TaskType.
Отобразите поля Category тем же способом как и поля Task:
.. configuration-block::

    .. code-block:: html+jinja

        {# ... #}

        <h3>Category</h3>
        <div class="category">
            {{ form_row(form.category.name) }}
        </div>

        {{ form_rest(form) }}
        {# ... #}

    .. code-block:: html+php

        <!-- ... -->

        <h3>Category</h3>
        <div class="category">
            <?php echo $view['form']->row($form['category']['name']) ?>
        </div>

        <?php echo $view['form']->rest($form) ?>
        <!-- ... -->
Когда пользователь отправляет форму, данные для полей Category будут
использованы для создания экземпляра Category, который будет присвоен
полю category объекта Task.
Объект Category доступен через метод $task->getCategory() и может
быть сохранён в базу данных или использован где требуется.
Встраивание коллекций форм
Вы также можете встроить в вашу форму целую коллекцию форм (например форма Category
с множеством саб-форм Product). Этого можно достичь при использовании поля collection.
Подробнее этот тип поля описан в книге рецептов «:doc:`/cookbook/form/form_collections`» и
справочнике: :doc:`collection</reference/forms/types/collection>`.
.. index::
   single: Формы; Дизайн
   single: Формы; Кастомизация полей
Дизайн форм
Каждая часть отображения формы может быть настроена в соответствии с вашими
требованиями. Вы можете изменить как отображается каждая строка формы, изменить
разметку отображения ошибок и даже настроить как должен отображаться таг
textarea. Вы ничем не ограничены и разные настройки могут быть использованы
в разных местах.
Symfony использует шаблоны для отображения всех частей форм, таких как
метки, таги, input таги, сообщения об ошибках и многое другое.
В Twig каждый такой фрагмент представлен блоком Twig. Для настройки любой части
отображения формы вам просто надо заменить нужный блок.
В PHP каждый фрагмент формы отображается посредством индивидуального
файла шаблона. Для настройки отображения любой части формы вам нужно
заменить существующий шаблон новым.
Для того чтобы понять, как это работает, давайте настроим отображение
фрагмента form_row и добавим атрибут class для элемента div,
который содержит каждую строку. Для того чтобы выполнить это, создайте новый файл
шаблона, который будет содержать новую разметку:
.. configuration-block::

    .. code-block:: html+jinja

        {# src/Acme/TaskBundle/Resources/views/Form/fields.html.twig #}

        {% block field_row %}
        {% spaceless %}
            <div class="form_row">
                {{ form_label(form) }}
                {{ form_errors(form) }}
                {{ form_widget(form) }}
            </div>
        {% endspaceless %}
        {% endblock field_row %}

    .. code-block:: html+php

        <!-- src/Acme/TaskBundle/Resources/views/Form/field_row.html.php -->

        <div class="form_row">
            <?php echo $view['form']->label($form, $label) ?>
            <?php echo $view['form']->errors($form) ?>
            <?php echo $view['form']->widget($form, $parameters) ?>
        </div>
Фрагмент field_row используется при отображении большинства полей при
помощи функции form_row. Для того, чтобы сообщить компоненту форм, чтобы
он использовал новый фрагмент field_row, определённый выше, добавьте
следующую строку в начале шаблона, отображающего форму:
.. configuration-block::

    .. code-block:: html+jinja

        {# src/Acme/TaskBundle/Resources/views/Default/new.html.twig #}

        {% form_theme form 'AcmeTaskBundle:Form:fields.html.twig' %}

        <form ...>

    .. code-block:: html+php

        <!-- src/Acme/TaskBundle/Resources/views/Default/new.html.php -->

        <?php $view['form']->setTheme($form, array('AcmeTaskBundle:Form')) ?>

        <form ...>
Таг form_theme (в Twig) как бы «импортирует» фрагменты, определённые в
указанном шаблоне и использует их при отображении формы. Другими словами,
когда вызывается функция form_row ниже в этом шаблоне, она будет
использовать блок field_row из вашей темы (вместо блока field_row
по умолчанию используемого в Symfony).
Для того чтобы настроить любую часть формы, вам всего лишь нужно переопределить
все необходимые фрагменты. О том, какие блоки или файлы могут быть переопределены,
мы поговорим в следующей секции.
Дополнительную информацию о кастомизации форм ищите в книге рецептов:
:doc:`/cookbook/form/form_customization`.
.. index::
   single: Формы; Именование фрагментов форм
Именование фрагментов форм
В Symfony, каждая отображаемая часть формы — HTML элементы форм, ошибки,
метки и т.д. — определены в базовой теме, которая представляет из себя
набор блоков в Twig и набор шаблонов в PHP.
В Twig все блоки определены в одном файле (form_div_layout.html.twig),
который располагается внутри Twig Bridge. В этом файле вы можете
увидеть любой из блоков, необходимых для отображения любого стандартного
поля.
В PHP каждый фрагмент расположен в отдельном файле. По умолчанию, они располагаются
в директории Resources/views/Form в составе пакета framework (см. на GitHub).
Наименование каждого фрагмента следует одному базовому правилу и разбито на
две части, разделённых подчерком (_). Несколько примеров:
field_row— используется функциейform_rowдля отображения большинства полей;textarea_widget— используется функциейform_widgetдля отображения полей типаtextarea;field_errors— используется функциейform_errorsдля отображения ошибок.
Каждый фрагмент подчиняется простому правилу: type_part. Часть type соответствует
типу поля, которое будет отображено (например, textarea, checkbox, date и т.д.),
часть part соответствует же тому, что именно будет отображаться
(label, widget, errors, и т.д.). По умолчанию есть четыре возможных типов
parts, которые отображаются:
label |
(field_label) |
отображает метку для поля |
widget |
(field_widget) |
отображает HTML-представление для поля |
errors |
(field_errors) |
отображает ошибки для поля |
row |
(field_row) |
отображает цельную строку для поля (label, widget & errors) |
Note
Есть также ещё три типа parts — rows, rest, и enctype —
но заменять их вам вряд ли потребуется, так что и заботиться этом не стоит.
Зная тип поля (например textarea), а также какую часть вы хотите изменить
(например, widget), вы можете составить имя фрагмента, который должен быть
переопределён (например, textarea_widget).
.. index::
   single: Формы; Наследование фрагментов шаблона
Наследование фрагментов шаблона форм
В некоторых случаях фрагмент, который вам нужно настроить, не будет
существовать. Например, в базовой теме нет фрагмента textarea_errors.
Но как же отображаются ошибки для полей textarea?
Ответ на этот вопрос такой: отображаются они при помощи фрагмента field_errors.
Когда Symfony отображает ошибки для textarea, он ищет фрагмент
textarea_errors, прежде чем использовать стандартный фрагмент field_errors.
Любой тип поля имеет родительский тип (для textarea это field) и Symfony
использует фрагмент от родительского типа, если базовый фрагмент не существует.
Таким образом, чтобы переопределить фрагмент ошибок только для полей
textarea, скопируйте фрагмент field_errors, переименуйте его
в textarea_errors и измените его как вам требуется. Для того, чтобы
изменить отображение ошибок для всех полей, скопируйте и измените
сам фрагмент field_errors.
Tip
Родительские типы для всех типов полей можно узнать из справочника:
:doc:`типы полей</reference/forms/types>`.
.. index::
   single: Forms; Global Theming
Глобальная тема для форм
В примере выше вы использовали хелпер form_theme (для Twig), чтобы
«импортировать» изменённые фрагменты форм только в одну форму. Вы также
можете указать Symfony тему форм для всего проекта в целом.
Twig
Для того, чтобы автоматически подключить переопределённые блоки из ранее
созданного шаблона fields.html.twig, измените ваш файл конфигурации
следующим образом:
.. configuration-block::

    .. code-block:: yaml

        # app/config/config.yml

        twig:
            form:
                resources:
                    - 'AcmeTaskBundle:Form:fields.html.twig'
            # ...

    .. code-block:: xml

        <!-- app/config/config.xml -->

        <twig:config ...>
                <twig:form>
                    <resource>AcmeTaskBundle:Form:fields.html.twig</resource>
                </twig:form>
                <!-- ... -->
        </twig:config>

    .. code-block:: php

        <?php
        // app/config/config.php

        $container->loadFromExtension('twig', array(
            'form' => array('resources' => array(
                'AcmeTaskBundle:Form:fields.html.twig',
             ))
            // ...
        ));
Любой блок внутри шаблона fields.html.twig будет использован глобально
в рамках проекта для определения формата отображения форм.
Настройка отображения форм в файле формы при использовании Twig
При использовании Twig, вы также можете изменить блок формы непосредственно
внутри шаблона, где требуется изменение стиля отображения:
{% extends '::base.html.twig' %}

{# import "_self" as the form theme #}
{% form_theme form _self %}

{# make the form fragment customization #}
{% block field_row %}
    {# custom field row output #}
{% endblock field_row %}

{% block content %}
    {# ... #}

    {{ form_row(form.task) }}
{% endblock %}
Таг {% form_theme form _self %} позволяет изменять блоки формы
непосредственно внутри того шаблона, который требует изменений. Используйте
этот метод для быстрой настройки отображения формы, если данное
изменение нигде больше не потребуется.
PHP
Для того, чтобы автоматически подключить изменённые шаблоны из директории
Acme/TaskBundle/Resources/views/Form, созданной ранее, для всех шаблонов,
измените конфигурацию вашего приложения следующим образом:
.. configuration-block::

    .. code-block:: yaml

        # app/config/config.yml

        framework:
            templating:
                form:
                    resources:
                        - 'AcmeTaskBundle:Form'
        # ...


    .. code-block:: xml

        <!-- app/config/config.xml -->

        <framework:config ...>
            <framework:templating>
                <framework:form>
                    <resource>AcmeTaskBundle:Form</resource>
                </framework:form>
            </framework:templating>
            <!-- ... -->
        </framework:config>

    .. code-block:: php

        <?php
        // app/config/config.php

        $container->loadFromExtension('framework', array(
            'templating' => array('form' =>
                array('resources' => array(
                    'AcmeTaskBundle:Form',
             )))
            // ...
        ));
Все фрагменты, определённые в директории Acme/TaskBundle/Resources/views/Form
теперь будут использованы во всём приложении для изменения стиля отображения
форм.
.. index::
   single: Формы; Защита от CSRF атак
Защита от CSRF атак
CSRF — или же Подделка межсайтовых запросов это вид атак, позволяющий
злоумышленнику выполнять запросы от имени пользователей вашего приложения,
которые они делать не собирались (например перевод средств на счёт хакера).
К счастью, такие атаки можно предотвратить, используя CSRF токен в ваших формах.
Хорошие новости! Заключаются они в том, что Symfony по умолчанию добавляет
и валидирует CSRF токен для вас. Это означает, что вы получаете защиту от
CSRF атак не прилагая к этому никаких усилий. Фактически, все формы в этой
главе были защищены от подобных атак.
Защита от CSRF атак работает за счёт добавления в формы скрытого поля,
называемого по умолчанию _token, которое содержит значение, которое
знаете только вы и пользователь вашего приложения. Это гарантирует, что
пользователь — и никто более — отправил данные, которые пришли к вам.
Symfony автоматически валидирует наличие и правильность этого токена.
Поле _token — это скрытое поле и оно автоматически отображается,
если вы используете функцию form_rest() в вашем шаблоне, которая
отображает все поля, которые ещё не были отображены в форме.
CSRF токен можно настроить уровне формы. Например:
<?php
class TaskType extends AbstractType
{
    // ...

    public function getDefaultOptions(array $options)
    {
        return array(
            'data_class'      => 'AcmeTaskBundleEntityTask',
            'csrf_protection' => true,
            'csrf_field_name' => '_token',
            // уникальный ключ для генерации секретного токена
            'intention'       => 'task_item',
        );
    }

    // ...
}
Для того, чтобы отключить CSRF защиту, установите опцию csrf_protection в
false. Настройки также можно выполнить на уровне всего проекта. Дополнительную
информацию можно найти в :ref:`справочнике по настройке форм</reference-frameworkbundle-forms>`.
Note
Опция intention (намерение) не обязательна, но значительно увеличивает
безопасность сгенерированного токена, делая его различным для всех форм.
Использование форм без класса
В большинстве случаев форма привязывается к объекту и поля формы получают
и сохраняют данные в поля этого объекта. Это ровно то, с чем вы работали
ранее в этой главе.
Тем не менее, вам возможно потребуется использовать форму без соответствующего
класса и получать массив отправленных данных, а не объект. Этого просто достичь:
<?php
// удостоверьтесь, что вы добавили use для пространства имён Request:
use SymfonyComponentHttpFoundationRequest
// ...

public function contactAction(Request $request)
{
    $defaultData = array('message' => 'Type your message here');
    $form = $this->createFormBuilder($defaultData)
        ->add('name', 'text')
        ->add('email', 'email')
        ->add('message', 'textarea')
        ->getForm();

        if ($request->getMethod() == 'POST') {
            $form->bindRequest($request);

            // data is an array with "name", "email", and "message" keys
            $data = $form->getData();
        }

    // ... render the form
}
По умолчанию, форма полагает, что вы хотите работать с массивами данных, а
не с объектами. Есть два способа изменить это поведение и связать форму с
объектом:
- Передать объект при создании формы (первый аргумент
createFormBuilder)
или второй аргументcreateForm); - Определить опцию
data_classдля вашей формы.
Если вы этого не сделали, тогда форма будет возвращать данные в виде
массива. В этом примере, так как $defaultData не является объектом
(и не установлена опция data_class), $form->getData() в конечном
итоге вернёт массив.
Tip
Вы также можете получить доступ к значениям POST (в данном случае «name»)
напрямую через объект запроса, например так:
$this->get('request')->request->get('name');
Тем не менее, в большинстве случаев рекомендуется использовать метод
getData(), так как он возвращает данные (как правило объект) после того
как он был преобразован фреймворком форм.
Добавление валидации
А как же быть с валидацией? Обычно, когда вы используете вызов $form->isValid(),
объект валидировался на основании ограничений, которые вы добавили в этот класс.
Но когда класса нет, как добавить ограничения для данных из формы?
Ответом является настройка ограничений вручную и передача их в форму.
Полностью этот подход описан в главе о :ref:`Валидации<book-validation-raw-values>`,
мы же рассмотрим лишь небольшой пример:
<?php
// импорт пространств имён
use SymfonyComponentValidatorConstraintsEmail;
use SymfonyComponentValidatorConstraintsMinLength;
use SymfonyComponentValidatorConstraintsCollection;

$collectionConstraint = new Collection(array(
    'name' => new MinLength(5),
    'email' => new Email(array('message' => 'Invalid email address')),
));

// создание формы без значений по умолчанию и с явным указанием ограничений для валидации
$form = $this->createFormBuilder(null, array(
    'validation_constraint' => $collectionConstraint,
))->add('email', 'email')
    // ...
;
Теперь, когда вы вызываете $form->isValid(), ограничения, указанные выше,
выполняются для данных формы. Если вы используете класс формы, переопределите
метод getDefaultOptions:
<?php
namespace AcmeTaskBundleFormType;

use SymfonyComponentFormAbstractType;
use SymfonyComponentFormFormBuilder;
use SymfonyComponentValidatorConstraintsEmail;
use SymfonyComponentValidatorConstraintsMinLength;
use SymfonyComponentValidatorConstraintsCollection;

class ContactType extends AbstractType
{
    // ...

    public function getDefaultOptions(array $options)
    {
        $collectionConstraint = new Collection(array(
            'name' => new MinLength(5),
            'email' => new Email(array('message' => 'Invalid email address')),
        ));

        $options['validation_constraint'] = $collectionConstraint;
    }
}
Теперь вы можете создавать формы с валидацией, которые возвращают массив
данных вместо объекта. В большинстве случаев же лучше — да и более правильно
— привязывать объекты к вашим формам. Но для простых форм вы можете этого и
не делать.
Заключение
Теперь вы знаете всё необходимое для создания сложных форм для вашего
приложения. При создании форм, не забывайте что первой целью формы
является транслирование данных из объекта (Task) в HTML форму, чтобы
пользователь мог модифицировать эти данные. Второй целью формы является
получение отправленных пользователем данных и передача их обратно в
объект.
Есть ещё много вещей, которые стоит узнать о прекрасном мире форм, таких
как :doc:`загрузка файлов при помощи Doctrine </cookbook/doctrine/file_uploads>`,
или же как создание формы с динамически меняемым числом вложенных форм (
например, список todo, где вы можете добавлять новые поля при помощи Javascript
перед отправкой). Ищите ответы в книге рецептов. Также изучите
:doc:`справочник по типам полей</reference/forms/types>`, который включает
примеры использования полей и их опций.
Читайте также в книге рецептов
- :doc:`/cookbook/doctrine/file_uploads`
- :doc:`Работа с полем File</reference/forms/types/file>`
- :doc:`Создание пользовательского поля </cookbook/form/create_custom_field_type>`
- :doc:`/cookbook/form/form_customization`
- :doc:`/cookbook/form/dynamic_form_generation`
- :doc:`/cookbook/form/data_transformers`
.. toctree::
    :hidden:

    Translation source: 2011-10-02 8892b24
    Corrected from: 2011-10-16 2d0a37a
    Corrected from: 2011-12-06 53a7621