hp-concentra-wrapper-portlet
![]()
Actions
Introduction
The following pages contain a list of System Error Codes and their respective descriptions and recommended corrective actions. Only try one recommended action at a time and then check to see if the Error Code has disappeared. System Error Codes consist of two groups of alphanumeric characters: [XXXXXX]-[YYYYZZZZ]. The first set of 6 characters consists of the System Error and the second set of 8 characters, when present refer to the internal error data.
note:
Before troubleshooting System Errors, if possible, repeat the procedure performed when the error was reported.
note:
When reporting the System Error Code, make sure to supply the full Error Code and the firmware version (displayed during the initialization process when powering on the printer or available in the User’s Printer Setup, Utilities, Statistics menu).
Continuable and non-continuable error codes
Some error codes are continuable, which means that it is possible to press ENTER on the front panel and continue working with the printer. Non-continuable error codes do not allow the printer to continue. In these cases, turn the printer off and on to see if the system error disappears. If the error code reappears, the printer may require an on-site visit to resolve the problem.
System Error groups
The System Errors are organized in groups as follows:
-
Group 01 — Hardware Test Group
-
Group 03 — Laminator Errors and Warnings
-
Group 04 — Intelligent I/O (Jetdirect) Errors
-
Group 06 — Line Sensor Errors
-
Group 08 — Pen Energy and Thermal Management Errors
-
Group 09 — Hard Disk Drive Errors
-
Group 0A — Ink Delivery System Errors
-
Group 0B — Hardware Initialization Errors
-
Group 0C — Drop Detection/Nozzle Recovery Related Errors
-
Group 0D — Miscellaneous Errors
-
Group 0F — Firmware/Software Errors
System Error ffff ffff xxxxxxxx (General Firmware Error)
Explanation
A general firmware error has occurred. The firmware (as a piece of software) has experienced an internal crash.
Recommended action
System Error ffff ffff 02b301b0
Explanation
A firmware error occurred during a Printhead Alignment.
Recommended action
System Error ffff ffff 02ac0099
Explanation
The printer cannot read the ink type information from the ink tubes EEROM.
System Error ffff ffff 01dcxxxx
Explanation
A problem with the I/O card has occurred (normally during power up).
Recommended action
-
Turn the printer off (using the main power switch on the back of the printer) and remove the network cable from the printer’s network card.
-
Turn the printer on.
-
If no error occurs, plug the network cable back into the network card and attempt to print (problem may have been caused by receiving information through the port during the power on sequence).
-
If the error re-appears, turn the printer off (using the main power switch).
-
Loosen the two thumbscrews that attach the HP Jetdirect EIO card.
-
Remove and reinstall the EIO card.
-
Tighten the thumbscrews.
-
Plug in the network cable (if not already plugged in).
-
Turn the printer on.
System Error ffff ffff 030d0170
Explanation
At power up, the printer thinks it is smaller than 42 inches.
Recommended action
Turn the printer off (using the power switch at the back of the printer), and check for obstructions in the Carriage path (Scan-axis) and remove if found. Turn the printer on; if the error continues, call HP for technical support to troubleshoot the problem. Click here for information on contacting HP Customer Care.
System Error ffff ffff 030d0171
Explanation
At power up, the printer thinks it is smaller than 42 inches.
Recommended action
Turn the printer off (using the power switch at the back of the printer), and check for obstructions in the Carriage path (Scan-axis) and remove if found. Turn the printer on; if the error continues, call HP for technical support to troubleshoot the problem. Click here for information on contacting HP Customer Care.
System Error ffff ffff 031609xx
Explanation
The Main PCA was replaced without removing the media from the printer, because the firmware tries to find the last media information in the EEROM. Since the information cannot be found, this error code is displayed.
Recommended action
Remove the media and turn the printer off then on (using the power switch located on the back of the printer). The error code should not appear again.
System Error ffff ffff 03450097
Explanation
The Top cover was opened during the cutting operation, the printer hangs and the Carriage suddenly stops.
Recommended action
System Error ffff ffff 036000bd
Explanation
The Printhead cleaners are incorrectly inserted or there is a problem in the Service Station.
System Error ffff ffff 036e0136
Explanation
A firmware error occurred during a Printhead Alignment.
Recommended action
Turn the printer off, wait 15 seconds and turn the printer back on (using the power switch located on the back of the printer). The error code should not appear again.
System Error 01002D (non-continuable)
Explanation
The Main PCA cannot communicate with the Carriage
System Error 010023 (non-continuable)
Explanation
System Error 010030 034c095e
Explanation
The power supply detects a low spike (e.g. due to a temporary loss of tension). There is nothing wrong with the printer.
Recommended action
Turn the printer off (using the power switch at the back of the printer), wait 15 seconds and turn the printer on. The error should disappear; however, if the error does return, turn the printer off and plug the power cord into a different power socket.
System Error 010040
Explanation
An error has occurred in the Paper-axis quadrature.
System Error 010041
Explanation
An error has occurred in the Scan-axis Encoder quadrature.
System Error 010042
Explanation
An error has occurred in the Service Station-axis Encoder quadrature.
System Error 010090 (continuable)
Explanation
An error has occurred in the Paper-axis Motor Encoder.
Recommended action
Press ENTER on the printer’s front panel to continue. If the error re-appears, turn the printer off (using the power switch at the back of the printer), wait 15 seconds and turn the printer on. If the error continues, call HP for technical support to troubleshoot the problem. Click here for information on contacting HP Customer Care.
System Error 010091 (continuable)
Explanation
An error has occurred in the Paper-axis Motor Encoder.
Recommended action
Press ENTER on the printer’s front panel to continue. If the error re-appears, turn the printer off (using the power switch at the back of the printer), wait 15 seconds and turn the printer on. If the error continues, call HP for technical support to troubleshoot the problem. Click here for information on contacting HP Customer Care.
System Error 010092 (continuable)
Explanation
The Mark Encoder position is not detected on the Drive roller.
Recommended action
System Error 011000
Explanation
System Error 040000 01E603D9
Explanation
A Parallel Port error has occurred. Nothing is wrong with the printer as the error is caused by the PC’s parallel port.
Recommended action
HP recommends printing via the network card because the transmission time via the parallel port is very slow, which may be causing the error.
If using the network card is not possible or acceptable, it is recommended that the parallel port setting in the PC BIOS be set to ECP mode (contact the PC vendor for instructions). This configuration should eliminate or decrease the frequency of this error.
The 040000 class of system errors can also be network or Jetdirect related.
Follow the additional steps below if the problem is not Parallel related or changes to configuration do not solve the issue.
- Turn the printer off and unplug the network cable.
- Turn the printer on.
- When the printer comes ready, print a demo from the the printer’s front panel. If the error does not come up at that time, it is most likely related to the network. Plug the network cable in and print a test page from the workstation.
- If the printer does not come ready, turn the printer off, remove the Jetdirect card, and turn the printer back on.
- If the printer comes to ready, replace the Jetdirect card.
- If the error returns only when the printer is plugged into the network, the issue is most likely a network issue.
Check the network settings (IP address, etc.) on the printer, workstation, and server (if applicable). If everything looks ok, perform a cold reset on the Jetdirect card (through the front panel). Reconfigure the IP address.
- If the error still exists, connect the printer to the workstationusing a peer-to-peer connection, using the printer’s IP address, and bypassing the print server.
If the error goes away, the issue is with the print server. In this case the customer should contact his/her IT support.
System Error 050000 (continuable)
Explanation
The Lens is having problems reading the Mark Encoder on the Drive roller.
Recommended action
System Error 050001 (continuable)
Explanation
The Lens is having problems reading the Mark Encoder on the Drive roller.
Recommended action
System Error 06030C
Explanation
A problem with the Line Sensor has been detected.
System Error 060303
Explanation
A problem with the Line Sensor or the Mark Encoder has been detected.
Recommended action
-
Clean all printhead/carriage electrical contacts
-
Change the lens cover
-
Clean the bottom of the line sensor and carriage
-
Clean the slider rods
-
Clean the drive rollers
-
Clean mark encoder
Cleaning instructions are included in the Maintenance kit that is shipped with the printer.
System Error 06040C
Explanation
The Line Sensor is not correctly connected.
System Error 0A0000 (non-continuable)
Explanation
A problem with the Air Pressurization System (APS) has occurred.
Recommended action
-
Turn the printer off (using the power switch at the back of the printer).
-
Open the cover on the back of the printer to access the ink cartridge assembly (right side of the printer, looking from the back).
-
Ensure the clear plastic tube is connected and not kinked in any way. If the tube is not connected (blue end only), re-connect as needed; also eliminate all kinks noticed in the tube.
-
Turn the printer on. If no error appears, try to print a file (problem is resolved if printer prints the file with no error). If the error re-occurs or the problem persists, turn the printer off and continue with the remaining steps.
-
Turn the printer on, if printer initialization completes (printer goes to a Ready state), continue with Step 6. If the error immediately re-appears call HP for technical support.
-
On the printer’s front panel, scroll to the Cartridges menu.
-
Scroll to Replace ink cartridges and press ENTER.
-
Remove and re-install all six ink cartridges and press ENTER to continue.
-
Press the TOP key (to return to the main menu).
-
Attempt to print.
System Error 0A0010 (non-continuable)
Explanation
A problem with the Air Pressurization System (APS) has occurred.
Recommended action
-
Turn the printer off (using the power switch at the back of the printer).
-
Open the cover on the back of the printer to access the ink cartridge assembly (right side of the printer, looking from the back).
-
Ensure the clear plastic tube is connected and not kinked in any way. If the tube is not connected (blue end only), re-connect as needed; also eliminate all kinks noticed in the tube.
-
Turn the printer on. If no error appears, try to print a file (problem is resolved if printer prints the file with no error). If the error re-occurs or the problem persists, turn the printer off and continue with the remaining steps.
-
Turn the printer on, if printer initialization completes (printer goes to a Ready state), continue with Step 6. If the error immediately re-appears call HP for technical support.
-
On the printer’s front panel, scroll to the Cartridges menu.
-
Scroll to Replace ink cartridges and press ENTER.
-
Remove and re-install all six ink cartridges and press ENTER to continue.
note:
Remove and replace any low or empty cartridges.
-
Press the TOP key (to return to the main menu).
-
Attempt to print.
System Error 0A0020 (non-continuable)
Explanation
An error in calibrating the Air Pressurization System (APS) sensor has occurred.
System Error 0A0030 (non-continuable)
Explanation
A problem in the Depressurizing Air system has occurred.
System Error 0A0040 (non-continuable)
Explanation
Air Pressurization System (APS) failure.
Recommended action
-
Turn the printer off (using the power switch at the back of the printer).
-
Open the cover on the back of the printer to access the ink cartridge assembly (right side of the printer, looking from the back).
-
Ensure the clear plastic tube is connected and not kinked in any way. If the tube is not connected (blue end only), re-connect as needed; also eliminate all kinks noticed in the tube.
-
Turn the printer on. If no error appears, try to print a file (problem is resolved if printer prints the file with no error). If the error re-occurs or the problem persists, turn the printer off and continue with the remaining steps.
-
Turn the printer on. If printer initialization completes (printer goes to a Ready state), continue with Step 6. If the error immediately re-appears call HP for technical support.
-
On the printer’s front panel, scroll to the Cartridges menu.
-
Scroll to Replace ink cartridges and press ENTER.
-
Remove and re-install all six ink cartridges and press ENTER to continue.
-
Press the TOP key (to return to the main menu).
-
Attempt to print.
System Error 0A0050 (non-continuable)
Explanation
An ink leak in the Tubes System has been detected.
Recommended action
Turn the printer off (using the power switch at the back of the printer), wait 20 minutes and turn the printer on (condensation may be causing error and the printer needs time to dry). If the error continues, call HP for technical support to troubleshoot the problem. Click here for information on contacting HP Customer Care.
System Error 0A0060 (non-continuable)
Explanation
An ink leak in the Tubes System has been detected.
Recommended action
Turn the printer off (using the power switch at the back of the printer), wait 20 minutes and turn the printer on (condensation may be causing error and the printer needs time to dry). If the error continues, call HP for technical support to troubleshoot the problem. Click here for information on contacting HP Customer Care.
System Error 0A0070 (continuable)
Explanation
The Backup EEROM contents stored in the Hard Disk Drive are not consistent with the ones required by the firmware.
Recommended action
System Error 0B0000 (non-continuable)
Explanation
The ambient temperature is too high.
Recommended action
Ensure the operating temperature is between 0 and 55 degrees Centigrade. Turn the printer off (using the power switch at the back of the printer), and allow the printer to cool for 15 minutes. Turn the printer on and attempt to print. If the error continues, call HP for technical support to troubleshoot the problem. Click here for information on contacting HP Customer Care.
System Error 0B0001 (non-continuable)
Explanation
A bad humidity reading has occurred.
Recommended action
Turn the printer off (using the power switch at the back of the printer), and wait 15 minutes. Turn the printer on and attempt to print. If the error continues, call HP for technical support to troubleshoot the problem. Click here for information on contacting HP Customer Care.
System Error 0B0002 (non-continuable)
Explanation
Bad IDS pressure reading.
System Error 0B0003 (non-continuable)
Explanation
ADCO Internal channels check failure.
System Error 0B0004 (non-continuable)
Explanation
Air Pressurization System (APS) failure.
System Error 0B0005 (non-continuable)
Explanation
Air Pressurization System (APS) failure.
System Error 0B0006 (non-continuable)
Explanation
The Trailing cable has been incorrectly connected.
System Error 0B0007 (non-continuable)
Explanation
Unable to detect the Vacuum fan.
System Error 0B0008 (non-continuable)
Explanation
Unable to detect the Cooling fan.
System Error 0B0009 (non-continuable)
Explanation
Unable to detect the Aerosol fan (in the right cover).
System Error 0B0010 xxxxxxxx (non-continuable)
Explanation
The Printhead cleaners are incorrectly inserted or there is a problem in the Service Station.
System Error 0B000A (non-continuable)
Explanation
System Error 0B000B (non-continuable)
Explanation
Air Pressurization System failure.
System Error 0B000C (non-continuable)
Explanation
Serial Device ADC test failure.
System Error 0B000D (non-continuable)
Explanation
Serial Device ADC test failure.
System Error 0B000E (non-continuable)
Explanation
At power up, the printer thinks it is smaller than 42 inches.
Recommended action
Turn the printer off (using the power switch at the back of the printer), and check for obstructions in the Carriage path (Scan-axis) and remove if found. Turn the printer on. If the error continues, call HP for technical support to troubleshoot the problem. Click here for information on contacting HP Customer Care.
System Error 0B000F (continuable)
Only applicable to the HP Designjet 5500 series
Explanation
“Unable to detect the Heater.” If this error appears, all settings related to the heater will disappear from the front Panel.
System Error 0C0030 (non-continuable)
Explanation
System Error 0C0032 (continuable)
Explanation
The Drop Detector is not calibrated or the calibration settings have been lost.
Recommended action
Press ENTER on the printer’s front panel to continue (the printer will still function, although the Drop Detector is not calibrated). If the error persists, call HP for technical support to troubleshoot the problem. Click here for information on contacting HP Customer Care.
System Error 0C0040 (non-continuable)
Explanation
An Error has occurred in the Printhead Drop Detection. This error code appears when the printer detects that the same areas of nozzles do not work in different printheads.
Recommended action
-
Turn the printer off, using the main power switch located on the back of the printer.
-
After 10-15 seconds, turn the main power switch on.
-
If no error appears, attempt to verify printer functionality.
-
If the error re-appears, continue with the remaining steps.
-
Attempt to manually recover the printheads:
-
Scroll to the Printhead menu icon (icon on the lower right of the front panel display) and press Enter.
-
Using the Arrow keys, scroll to Recover Printheads and press Enter.
-
Re-cover the offending printhead(s).
-
-
Attempt to verify printer functionality.
System Error 0C00FF (non-continuable)
Explanation
Print Mask could not be generated. The mask generation algorithm could not generate the print mask. Possible causes are memory corruption, print mode definition incompatible with mask restrictions (if using an external RIP).
Recommended action
Turn the printer off, wait 15 seconds and turn the printer back on (the error should disappear). If an External RIP is being used, verify printer functionality by using the HP driver (HP-GL/2 or PostScript®). If no errors occur using the HP driver, the RIP is causing the error (contact RIP vendor). Check the status of all printheads and replace any that display the message “XX21 Replace”. If the error persists, call HP for technical support to troubleshoot the problem. Click here for information on contacting HP Customer Care.
System Error 0C1000 (non-continuable)
Explanation
The primer is not calibrated or the calibration settings have been lost.
System Error 0C1001 (non-continuable)
Explanation
System Error 0D0000 (continuable)
Explanation
No Media Profiles available.
Recommended action
System Error 0D0000 033f019C
Explanation
No Media Profiles available.
Recommended action
If the firmware is upgraded while media is loaded, this system error will appear. Press ENTER to get the message ”No media profiles available”. Unload the media and turn the printer off and back on using the main power switch at the back of the printer.
note:
This problem only appears when upgrading from Non-UV ink firmware to UV ink firmware while the media is loaded.
System Error 0D0002 (continuable)
Explanation
Insufficient memory to initialize HP-GL2/RTL
Recommended action
System Error 0D0003 xxxxxxxx (non-continuable)
Explanation
A problem with the firmware has been detected during a Printhead Alignment.
Recommended action
System Error 0D0004 xxxxxxxx (non-continuable)
Explanation
A Printhead Alignment error has occurred.
Recommended action
Turn the printer off (using the power switch at the back of the printer), wait 15 seconds and turn the printer on.
If rebooting fails to clear this error. Replace any out of warranty or faulty print heads. If error appears again, Call HP Support
System Error 0D0005 03180382 (non-continuable)
Explanation
The printer cannot deactivate the Cutter after cutting the media.
System Error 0FXXXX (non-continuable)
Explanation
An error with the firmware has occurred.
Recommended action
-
Turn the printer off, using the main power switch located on the back of the printer.
-
Disconnect the data cable from the printer (network or parallel).
-
Turn the main power switch on.
-
When the READY message is displayed on the front-panel, scroll to the Printer Setup Options icon and press the Enter key.
-
Using the Arrow keys, scroll to Utilities and press Enter.
-
Scroll to Test Print and press Enter.
-
Scroll to any of the selections and press Enter to start the print.
-
If no error appears, internal printer functionality has been proven. Troubleshoot the Operating System (OS), the file being printed, the data connection or the software program being used.
-
If the error appears, continue with the remaining steps.
-
Attempt to verify functionality.
-
If the problem persists following the upgrade, replace the lens cover:
-
Scroll to the Printer Setup Options icon and press the Enter key.
-
Using the Arrow keys, scroll to Utilities and press Enter.
-
Scroll to Replace Lens Cover and press Enter.
-
Follow the printer’s front-panel instructions to replace the Lens cover (extra Lens covers are included in the Maintenance kit shipped with the printer).
-
-
Attempt to verify functionality. If problems persist, continue with the remaining steps.
-
Using a lint-free cloth lightly dampened with water, clean the Mark encoder located on the drive roller (small white rectangle attached to the left-side of the large black drive roller).
Figure : 5000 series Mark encoder

-
If the Mark encoder is not visible on the left-side of the drive roller, follow the steps below to turn the roller until the Mark encoder is visible:
-
Scroll to the Printer Setup Options icon and press the Enter key.
-
Using the Arrow keys, scroll to Utilities and press Enter.
-
Scroll to Clean Platen and press Enter.
-
Select Manual and press Enter.
-
Press the Up Arrow key to move the drive roller until the Mark encoder is visible.
-
Clean the Mark encoder.
-
-
Attempt to verify functionality.

Turn the printer off (using the power switch at the back of the printer), wait 15 seconds and turn the printer on. If the error persists, upgrade the printer firmware (if upgrade is available).
System Error 0F0200 00b007bc (non-continuable)
note:
This error is sporadic and very rare. In most cases, turning the printer off then on will solve the problem.
Explanation
Internal crash error involving media profiles and memory.
Recommended action
System Error 0F0200 00b007E5 (non-continuable)
Explanation
Internal crash error involving media profiles and memory.
Recommended action
System Error 0F0200 01E603d2 (non-continuable)
Explanation
A Parallel Port error has occurred. Nothing is wrong with the printer as the error is caused by the PC’s parallel port.
Recommended action
HP recommends printing via the network card because the transmission time via the parallel port is very slow, which may be causing the error.
If using the network card is not possible or acceptable, it is recommended that the parallel port setting in the PC BIOS be set to ECP mode (contact the PC vendor for instructions). This configuration should eliminate or decrease the frequency of this error.
System Error 0F0100 03180382 (non-continuable)
Explanation
The printer cannot deactivate the Cutter after cutting the media.
System Error 1f500XX (boot failed)
Explanation
An error has occurred with the Hard Disk Drive (HDD).
System Error e50000 (non-continuable)
Explanation
An error has occurred with the Hard Disk Drive (HDD).
Reseating, adding memory
-
Turn the printer off using the main power switch on the back of the printer.
-
Unplug the power cable from the printer.
-
Remove the DIMM access cover (four T-10 screws) from the back of the printer.
Figure : DIMM cover
-
Locate the memory DIMM(s), two right-most slots (shown below).
Figure : Location of DIMM(s)
note:
J6 — Boot ROM is internal printer firmware. J7 and J8 SDRAM are memory DIMM slots.
-
Release the locking tabs on both ends of the memory DIMM(s).
-
Lower locking tab
-
Upper locking tab
Figure : Releasing locking tabs
-
-
Remove the memory, taking care not to drop the DIMM(s).
-
Re-install the DIMM(s) into the memory slot(s). May also add additional memory DIMM at this time (HP supported memory recommended).
-
Engage the locking tabs to secure the DIMM(s).
-
Secure the DIMM access cover back onto the printer.
-
Plug the power cable back into the printer.
-
Turn the printer on.
-
Following initialization, verify recognized memory through the front panel (Printer Setup, Utilities, Statistics, RAM present=).
-
Ensure the printer recognizes the memory installed.


Upgrading the system software (firmware)
caution:Before performing the firmware upgrade, make sure that the media is unloaded from the printer. Leaving media in the printer can result in error messages during the upgrade, or can cause the upgrade to fail.
If this utility is running on Windows or Mac OS, follow the instructions under section “Downloading the System Maintenance Utility” to update the printer’s system software (firmware).
If the System Maintenance Utility fails to update the system software, or to upgrade the printer from any other operating system (such as UNIX® or DOS), see the section titled “Other operating systems”.
Downloading the System Maintenance Utility
-
On the left navigation bar, select technical support.
-
Select the appropriate 5500 series model.
-
Click system Maintenance.
-
Select the system software (firmware) according to what operating system is in use.
-
Click Download Now at the heading “Full File.”
-
Select Open once the download is complete. Ensure the language is set to English and click OK. All necessary files will be installed. The application will analyze each of the printers that are configured for the computer and report on its current state. If any of the printers are out of date, the application will prompt an update. The update process sends a special file to the printer.
-
Double-click the printer to be upgraded.
-
Select Upgrade. The program will proceed to upgrade the firmware.
note:
Do not turn the power to the printer off, or unplug the unit, until the upgrade is complete.
Other operating systems
note:
If the System Maintenance Utility has been downloaded correctly from www.Designjet.hp.com but problems arise while upgrading printer firmware via the System Maintenance Utility, another download is not necessary. The files can be found in the default directory located in C:Program FilesHewlett-PackardHP Designjet System Maintenance. Proceed to section titled “Upgrade process”.
If the operating system is any other operating system (such as UNIX or DOS), perform the next two steps, then proceed to section titled “Upgrade Process”.
-
Download the System Maintenance Utility as described above.
-
When prompted, save the installation application in the Temp file folder on the C: drive.
-
Open the folder when prompted, once the download is complete. Ensure the language setting is correct and click OK.
-
All necessary files will be installed.
Upgrade process
If the System Maintenance Utility is unable to successfully upgrade firmware to a printer, send the files via DOS by connecting the printer to a PC through the parallel port.
-
Open a DOS session by clicking Start, Programs, Command Prompt/MS DOS.
-
Type C: and press Enter.
-
Type cd Program Files, and press Enter.
-
Type cd Hewlett-Packard, and press Enter.
-
Type cd HP Designjet System Maintenance, and press Enter again. The location should now be C:Program FilesHewlett-PackardHP Designjet System Maintenance.
HP Designjet 5500
-
From the above location, type copy /b DJ5500_Axxxx.FMW LPT1 (the xxxx refers to the most current firmware revision).
note:
Proceed with the following steps before pressing ENTER.
-
At the printer, turn the power to the printer off, using the power switch at the back of the unit.
-
Depress, and hold down the DOWN ARROW and the TOP keys simultaneously, while turning the power to the printer back on. (Use the power switch at the back of the unit.)
-
Continue to hold down the DOWN ARROW and the TOP keys until the front panel display shows a list of four selections.
-
Highlight and select Upgrade Firmware. The front panel will display Firmware Upgrade.
-
Send the copy command from the PC (press Enter on the keyboard), which will send the firmware upgrade file (typed in during Step 1) to the printer. The printer front panel display will indicate the progress of the firmware upgrade.
caution:Do not turn power off or unplug the printer until prompted on the front panel display.
HP Designjet 5500PS
-
From C:Program FilesHewlett-PackardHP Designjet System Maintenance, type copy /b DJ5500PS_Axxxx.FMW LPT1 (the xxxx refers to the most current firmware revision).
note:
Proceed with the following steps before pressing ENTER on the keyboard.
-
Turn the printer off using the main power switch at the back of the printer.
-
Depress, and hold the DOWN ARROW and the TOP key simultaneously, while turning the printer on using the main power switch (may require two people).
-
Continue to hold down the DOWN ARROW and the TOP key until the front panel display shows a list of four selections.
-
Highlight and select Upgrade Firmware. The front panel will display Firmware Upgrade.
-
Send the copy command from the PC (press Enter on the keyboard), which will send the firmware upgrade file (typed in during Step 1) to the printer. The printer front panel display will indicate the progress of the firmware upgrade.
caution:Do not turn power off or unplug the printer until prompted on the front panel display.
Replacing the lens cover
To replace the lens cover, follow the instructions below:
-
Using the Arrow keys on the printer’s front panel, scroll to the Printer setup menu (icon of printer in upper right corner of the display) and press ENTER.
-
Scroll to Utilities, and press ENTER.
-
Scroll to Lens Maintenance, and press ENTER.
-
The printer will display the following messages: Lift the Window, Clean Roller Mark, Replace Lens, and Lower the Window, and press ENTER to continue.
note:
Do not open the printers window until the messages above are displayed on the front panel.
-
Open the printer’s window.
-
Clean the Mark encoder (small slotted white plastic insert on the left end of the roller) using a lint free cloth lightly dampened with water.
Figure : 5000 series Mark encoder
-
Remove the lens cover from the printhead carriage by pulling it straight out of the slot on the right side of the printhead carriage.
-
Install a new lens, and follow the remaining instructions provided by the printer.
note:
Do not throw the old lens away unless damaged. Simply clean the lens with distilled water and carefully wipe it with a lint free cloth. Place the lens back into the printer’s top cover for use at a later time.
HP Customer Care
Call HP for telephone support
We offer telephone support for most Hewlett-Packard products. Depending on the product’s warranty, a fee might be charged.
Three sources of information are readily available to help you find an HP Support Services phone number:
-
The User’s Guide that came with your HP product.
Before calling, please do the following:
-
Review the following troubleshooting suggestions:
-
Read the relevant driver documentation supplied with this printer (for users sending PostScript files or those using Windows).
-
If there are third-party software drivers and RIPs installed, refer to their user documentation.
-
If the problem appears to be related to the software application, first contact the software vendor.
-
-
If there are still difficulties, refer to the HP Support Services booklet shipped with this printer. This document contains a comprehensive list of various support services available to help solve printer problems.
-
Before calling one of the Hewlett-Packard offices, please have the following information available to help them quickly answer questions:
-
The printer product number and the serial number, found on the label at the back of the printer.
-
The type of computer connected to the printer.
-
Any special equipment or software (for example, spoolers, networks, switch-boxes, modems, or special software drivers).
-
The cable being used (by part number) and where it was purchased.
-
The type of interface used on the printer (parallel or network).
-
The name of the software in use, and its version number.
-
Системные ошибки плоттеров HP DesignJet 1050 | 1055
Таблица с кодами ошибок для плоттеров HP DesignJet 1050 и 1055. Некоторые ошибки являютcя временными и разовыми, и для продолжения достаточно нажать Enter.
|
Системные ошибки |
Компонент / Система |
|
0000D8 XXXXXXXX |
External Library Error. Ошибка прошивки |
|
01002D |
Нет связи между главной платой и узлом каретки |
|
010020 |
Ошибка при тесте прошивки DIMM |
|
010021 |
Ошибка теста памяти DRAM DIMM |
|
010023 |
Ошибка при тесте EEROM |
|
010040 |
Ошибка квадратуры энкодера оси протяжки бумаги |
|
010041 |
Ошибка квадратуры энкодера по оси каретки |
|
010042 |
Ошибка энкодера в сервисной станции |
|
010050 XXXXXXXX |
Ошибка обработки PostScript |
|
01009X |
Ошибка энкодера мотора протяжки бумаги |
|
02xxxx |
PostScript/Firmware Error |
|
04Cxxx |
EIO Accessories (EIO Card/Hard Disk Drive) Error |
|
048xxx |
Карта EIO от стороннего поставщика и не соответствует спецификации протокола IIO 2.0 или в карте EIO ошибка прошивки |
|
060301 |
Одна из печатающих головок имеет внутреннюю электрическую проблему |
|
060305 0000000X |
Ошибка термического отключения (в одной из печатающих головок температура поднялась выше нормы). |
|
060309 |
Проблема с напряжением в печатающих головках |
|
06030A |
Ошибка энкодера каретки при поиске меток |
|
06030B |
Измеренная температура окружающей среды выходит за пределы нормального диапазона. |
|
070100 XXXXXXXX |
Ошибка Firmware |
|
080001 |
Ошибка PostScript |
|
09xxxx |
EIO Accessories (EIO Card/Hard Disk Drive) Error |
|
0A0000 |
Давление воздуха ниже минимально необходимого |
|
0A0010 |
Проблема в наддуве воздушной системы |
|
0A0020 |
Ошибка в калибровке датчика APS |
|
0A0030 |
Проблема разгерметизации в воздушной системы |
|
0A0040 |
Сбой инициализации чернильных трубок из-за низкого давления воздуха |
|
0A0050 |
Принтер обнаружил утечку в системе трубок до истечения срока службы системы. |
|
0A0060 |
Принтер обнаружил утечку в системе трубок после окончания срока службы системы. |
|
0A0070 |
Резервное содержимое EEROM, хранящееся в системе трубок, не соответствует тому, которое требуется микропрограммным обеспечением. |
|
0C0030 |
Испорченный Drop Detector |
|
0C0032 |
Drop Detector не откалиброван для всех печатающих головок. |
|
0C1000 |
Primer not Calibratedне откалиброван праймер сервисной станции |
|
0C1001 |
Ошибка выключения праймера |
|
0B0000 |
Несоответствие температуры окружающей среды |
|
0B0001 |
Bad Humidity readкритичная влажность при считывании |
|
0B0002 |
Плохое давление в IDS |
|
0B0003 |
Сбой проверки внутренних каналов ADC0 |
|
0B0004 |
Не обнаружен насос |
|
0B0005 |
Не обнаружен клапан |
|
0B0006 |
Неправильно подсоединен шлейф (кабель) каретки или сгорел предохранитель в электронном модуле |
|
0B0007 |
Не обнаружен вакуумный вентилятор |
|
0B0008 |
Не обнаружен вентилятор охлаждения |
|
0B0009 |
Не обнаружен аэрозольный вентилятор (под правой крышкой) |
|
0B000A |
Ошибка выключения праймера |
|
0B000B |
Насос или датчик давления не работают |
|
0B000C |
Последовательное устройство ADC не прошло тест |
|
0B000D |
Сбой теста источника питания 24 Вольт |
Позже будут готовы все страницы с данным ошибками с описанием.
Мы используем cookie-файлы для наилучшего представления нашего сайта.
Продолжая использовать этот сайт, вы соглашаетесь с использованием cookie-файлов. Принять
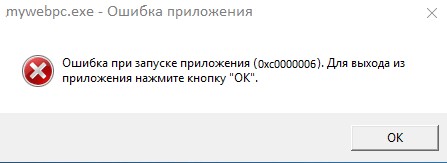
Код ошибки 0xc0000006 появляется при запуске приложений в Windows 10 и может нести в себе различные комментарии к ошибки как «Ошибка приложения», «Bad Image» или «STATUS_IN_PAGE_ERROR». В не зависимости какой у вас комментарий к ошибке, способы решения будут универсальные, просто следуйте по порядку шаг за шагом, чтобы устранить ошибку 0xc0000006 в Windows.
1. Пират?
Более чем уверен, что большинство пользователей получают код ошибки 0xc0000006 при запуске приложений или игр, которые скачали с торрента. Это полностью ваша ответственность, и скорее всего, ниже способы могут не решить проблему, так как автор данного репака мог не упаковать нужные DLL библиотеки. Вам стоит обратить внимание на ветку форума торрента, а именно, как установить данный пиратcкий репак, почитать сообщения других пользователей. Также, можете скачать с другого торрента, так как текущий может быть просто собран коряво.
2. Чистая загрузка
В первую очередь, нужно убедиться, что системе Windows не мешают сторонние службы. Для этого нужно загрузить систему в состояние чистой загрузки.
- Нажмите сочетание кнопок на клавиатуре Win+R и введите msconfig.
- Во вкладке «Общие» снимите галочку «Загружать элементы автозагрузки».
- И установите галочку «Загружать системные службы».
- Далее перейдите во вкладку «Службы» и снизу установите галочку «Не отображать службы Майкрософт».
- Правее нажмите на кнопку «Отключить всё» и нажмите Применить и OK.
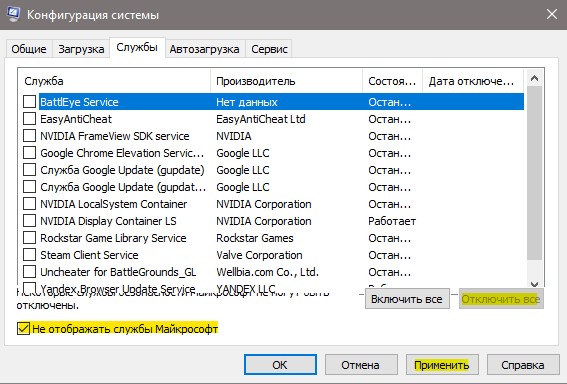
После чего компьютер будет перезагружен в состояние чистой загрузки. Если ошибка 0xc0000006 не будет появляться, то причина в сторонней программе, которая может установить также стороннюю службу и процесс. Вам придется самостоятельно определить программу и удалить её.
2. Сторонний Антивирус
Сторонние антивирусы могут блокировать некоторые запускаемые файлы, тем самым заставляя систему выдать ошибку 0xc0000006. Особенно это касается, если программы скачены с торрентов. Также, сторонний антивирус может фильтровать ваши соединения, так как имеется встроенный брандмауэр. В этом случае, простое отключение антивируса не поможет. Вам нужно полностью удалить антивирус и проверить ошибку.

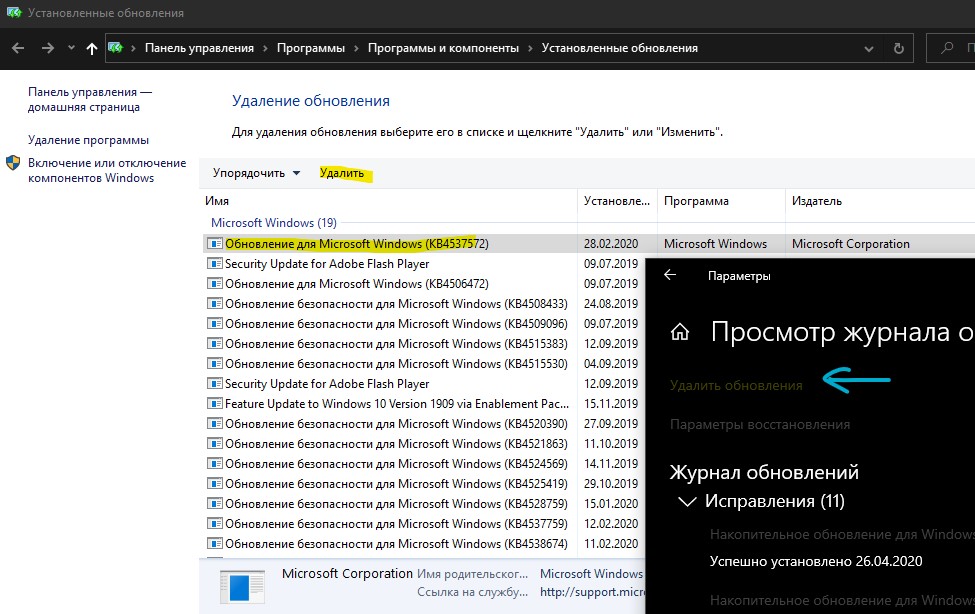
3. Удалить обновление
Если ошибка 0xc0000006 стала появляться после обновления Windows 10, то разумным будет удалить последний установленный патч KB… Для этого:
- Нажмите Win+i и выберите «Обновления и безопасность» > «Просмотр журнала обновлений» > «Удалить обновления».
- Определите по дате установку патча и удалите его.
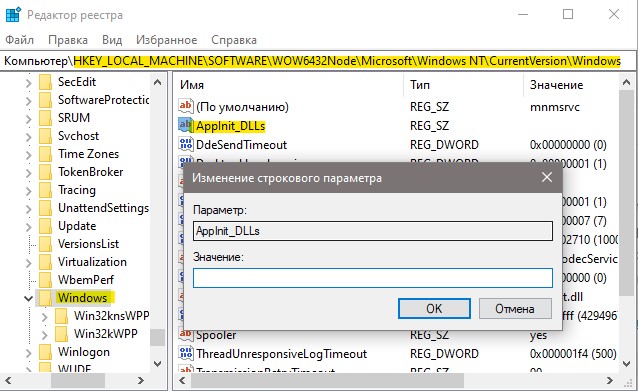
4. Значение AppInit_DLLs
AppInit_DLL это раздел в реестре, который несет в себе список количества сбоев программ. Иногда может создаваться конфликт и выдать ошибку STATUS_IN_PAGE_ERROR с кодом 0xc0000006. Нажмите Win+R и введите regedit, чтобы открыть редактор реестра. В реестре перейдите по пути:
HKEY_LOCAL_MACHINESOFTWAREWOW6432NodeMicrosoftWindows NTCurrentVersionWindows- Нажмите сверху на «Файл» и «Экспорт», чтобы создать копию целого раздела Windows.
- Далее, с правой стороны найдите AppInit_DLLs и щелкните по нему дважды.
- В графе «Значение» удалите всё, т.е. поле должно быть путсм.
- Нажмите OK, и перезагрузите компьютер.
5. Восстановить файлы системы
Поврежденные системные файлы могут выдавать различные ошибки, в том числе и 0xc0000006. Попробуем их восстановить, если это так. Для этого, запустите командную строку от имени администратора и введите ниже команды по порядку, нажимая Enter, после каждой, и дожидаясь окончание процесса.
chkdsk C: /f /rsfc /scannowDISM /Online /Cleanup-Image /RestoreHealth
6. Откат системы
Если у вас включены точки восстановления системы, то вы можете откатить систему назад на пару дней, когда еще ошибки не было. Для этого нажмите Win+R и введите rstrui. Далее просто следуйте рекомендациям на экране помощника.

Смотрите еще:
- Ошибка при запуске приложения (0xc0000005) в Windows 10
- Исправить ошибку при запуске приложения (0xC000007B) в Windows 10
- Ошибка при запуске приложения 0xc0000142 в Windows 10
- NvStreamUserAgent.exe или NVIDIA Share.exe — Ошибка приложения
- Ошибка Bad Image 0xc000012f и 0xc0000020 в Windows 10
[ Telegram | Поддержать ]
Ошибка появляется во время запуска системы.
Решения взяты с форума oszone.ru — в моем случае, ни одно из предложенных решений не было действенным.
Пробовал восстанавливать реестр с папки repair (т.к. восстановление системы было отключено) — система начинает грузиться — но после перезагрузки вновь появляется эта ошибка.
Также проверял автозапуск с помошью программы autoruns — ничего подозрительного не обнаружил.
Пробовал сделать проверку диска
chkdsk /r
Также не помогло.
Т.к. система не была загружена никакими программами, я просто ее переставил заново предварительно отформатировав диск
Итак что же предлагают сделать в данном случае на форуме, приведу избранные цитаты:
Принесли комп…
Победил ошибку спустя 3 часа.
Симптомы: винда и сейфмод — не грузятся, средство восстановления — useless. PROCESS1_INITIALIZATION_FAILED. В доп параметрах стояли нули 0x6b (0x0, 0x0, 0x0, 0x0). Вынь7Па с бубном: советы с сайта мелкософтовцев, анализ минидампа, проверка/замена памяти, проверка на битые сектора винта, проверка на вирусы.
Итог:
— Память не причём была.
— вирусов не обнаружено.
— В минидампе — ссылка на ntkrnlpa.exe. (Unable to load image SystemRootsystem32ntkrnlpa.exe, Win32 error 0n2
*** WARNING: Unable to verify timestamp for ntkrnlpa.exe)
— Совет мелкомягких — удалить bootcat.cache — не прошел. Соответственно, накатить рекомендуемое закрытое обновление не смог.Начал подумывать о накате винды поверх… сложил лапки на пузе. Да, 0x06b — непобедим…
Да ну на…
Решение: заменил bootcat.cache с рабочего компа. Винда стартанула. Ура! Всё работает! Контрольный перезапуск — ппц, всё не работает. Еще одна подмена файла. Думаю, что делать дальше… случайно вспоминаю про закрытый фикс. Накатываю из под винды, перезагрузка — всё работает. Вуаля.
P.S.: Знал бы где упаду — соломки бы подстелил. (соломка — windows updates). Хозяева соломку отключили: «а зачем оно нуна? оО»
P.P.S.: Очень порадовала консоль восстановления вынь7 с её горячим подключением юсб. Не знал, блин… Вообще от семёрки масса положительных эмоций.На правах некропостинга для будущих поколений. Ну и для развеивания мифа о непобедимости.
Кстати я не нашел bootcat.cache на рабочей машине с Windows XP — у меня ошибка была не на семерке
Еще одно полезное сообщение
Столкнулся с данной ошибкой на XP SP3, загрузился с ERD 2005, ерд не опознал винду на жестком, тамошний эксплорер не открывает папку system32, ругаясь на её повреждение. chkdsk /f /r /x c: и вуаля) всё работает, ошибка побеждена.
Кстати у меня, также была проблема с открытием папки %Windir%System32
Словил ошибку 0x0000006B (0xc0000102) на компьютере с WinXP — до этого он 4 года работал без косяков. chkdsk не помог, восстановление системы не помогло. Переустановить получилось — пока нормально вертится
Видимо как и мне времени было жалко на «отлов» ))
Доброго времени суток! Есть ноут Asus A6j, поставил на него семёрку. Всё прекрасно работало, а вот сегодня загрузка винды обернулась синим экраном с ошибкой PROCESS1_INITIALIZATION_FAILED (STOP: 0x0000006B, дальше одни нули). Проверил аварийной флешкой, антивирусами — всё чисто, винт и его содержимое видны, ошибок никаких известных по этой проблеме нет. Тем не менее, нужна винда и не хотелось бы переставлять.
дамп посмотреть не могу, так как система не грузится. в похожих темах ответа не нашёл, так как все файлы на месте и ничего не повреждено.
заменил файл bootcat.cache на аналогичный с ноута и комп включился.
Была речь о каком то фиксе, где его можно найти, чтобы повторно не стряслось?
И позже:
Сервис пак стоит, а при перезагрузке один хрен слетает в синий экран
Так лекарства от этого нет? запуск на один раз и переустановка оси?
В итоге:
PS: нашёл решение на одном сайте американском:
1) запускаетесь с флешки с файловым менеджером на борту
2) подменяете boot.cache на аналогичный с любого живого аппарата
3) с того же живого аппарата копируете папку c:windowssystem32catroot{F750E6C3-38EE-11D1-85E5-00C04FC295EE} с заменой файлов
пока полёт нормальный
Как видно неприятная ошибка — не хотелось бы ее еще раз встретить.
Вы можете оставить комментарий.