-
#1
A fresh install of VM (KVM) don’t stop
- From web interface Stop menu.
- From Web Console Stop or Shutdown
- Only can halt form console..
But it’s worng. If VM it’s freeeze we’ll can stop VM.
Message log:
Error: VM quit/powerdown failed — got timeout
![]()
-
#2
What kind of VM (OS) is that?
-
#3
Search the PID of the machine with:
ps aux | grep «/usr/bin/kvm -id VMID»
Kill it with:
kill -9 PID
Start your machine again with:
qm start VMID
And look if you can stop your machine in GUI or CLI
CLI: qm stop VMID
-
#4
What kind of VM (OS) is that?
Centos x64 y i386…
[B said:
Thijs Simonis]
[/B]
Search the PID of the machine with:
ps aux | grep «/usr/bin/kvm -id VMID»Kill it with:
kill -9 PIDStart your machine again with:
qm start VMIDAnd look if you can stop your machine in GUI or CLI
CLI: qm stop VMID
I don’t like STOP by force brute….
I like shutdown nicely.
Thanks for your tip
-
#5
I am also noticing this issue with CentOS-5.3 x86. Stop works, but shutdown does nothing. I don’t like the idea of brute force either.
Apr 4 16:42:01 proxmox1 pvedaemon[70973]: shutdown VM 100: UPIDroxmox1:0001153D:001C9B7D:4F7CB219:qmshutdown:100:root@pam:
Apr 4 16:42:01 proxmox1 pvedaemon[67891]: <root@pam> starting task UPIDroxmox1:0001153D:001C9B7D:4F7CB219:qmshutdown:100:root@pam:
Apr 4 16:42:31 proxmox1 pvedaemon[70973]: VM quit/powerdown failed — got timeout
Apr 4 16:42:31 proxmox1 pvedaemon[67891]: <root@pam> end task UPIDroxmox1:0001153D:001C9B7D:4F7CB219:qmshutdown:100:root@pam: VM quit/powerdown failed — got timeout
![]()
tom
Proxmox Staff Member
-
#6
did you enable acpid in your VM?
you need to allow anonymous acpi shutdown in all your KVM guest system to shutdown.
-
#7
Yes for me, ACPI Support it’s yes for all machines and for me don’t work neither stop, shutdown or any for halt machine.
EDIT: Today work STOP, but shutdown got time out.
Last edited: Apr 5, 2012
![]()
-
#8
Yes for me, ACPI Support it’s yes for all machines and for me don’t work neither stop, shutdown or any for halt machine.
On Linux you need to run the ACPI Daemon (acpid) inside the guest.
-
#9
On Linux you need to run the ACPI Daemon (acpid) inside the guest.
Yep that was the issue for me. On a side note I was unable to start the daemon while the VM was running. I had to add it to chkconfig then reboot for the daemon to properly start. Shutdown is working as it should.
-
#10
Hallo,
I have the same problem. Stop works, but shutdown doesn’t. Sutdown ends up with the following error in «pve — tasks — status»:
Error: VM quit/powerdown failed — got timeout
Under VM options the «ACPI Support» is activated «yes» und the acpid in the vm is working:
Code:
:~# /etc/init.d/acpid status
acpid is running.
I run the debian-distribution «openmediavault» as a vm with kernel «2.6.32-5-amd64».
What else can be done? What information do you need?
regards
Hoppel
Last edited: Jun 10, 2012
![]()
tom
Proxmox Staff Member
-
#11
install acpid in your guest.
-
#12
Hey Tom,
acpid is allready installed in the newest version in the guest:
Code:
:~# apt-get install acpid
Paketlisten werden gelesen... Fertig
Abhängigkeitsbaum wird aufgebaut
Statusinformationen werden eingelesen... Fertig
acpid ist schon die neueste Version.
0 aktualisiert, 0 neu installiert, 0 zu entfernen und 0 nicht aktualisiert.
What else can be done? Do I need acpid on the pve-host?
acpid is not installed on the host.
Last edited: Jun 10, 2012
![]()
tom
Proxmox Staff Member
-
#13
check «System/Power Management» on OMV gui and enable «Shutdown the system when pressing the power button.»
-
#14
Thanks, this was the solution, Shutdown works.
But I still see the message: Error: VM quit/powerdown failed — got timeout even though it works. Why?
————————————————
EDIT: Curious, after I stopped the omv-vm once, I now get the message: OK while I use the shutdown button. So everything is as it should.
Thank you very much, Tom.
regards
Last edited: Jun 10, 2012
darthanubis
Guest
-
#15
EDIT: Curious, after I stopped the omv-vm once, I now get the message: OK while I use the shutdown button. So everything is as it should..[/QUOTE
What is omv-vm.
-
#16
Hi All experts,
I encountered this issue recently.
my proxmox is 2.3, and creat new VM without any OS, but I can’t shoudown the VM through console, the error log is «TASK ERROR: VM quit/powerdown failed — got timeout». i only force shutdown by qm stop ***.
do you have any suggestion about this issue, i don’t want to force to shutdown VM everytime. thanks.
mo_
Active Member
-
#17
if your VM doesnt have any OS, youre probably still looking at some installer loaded from some ISO. it is VERY likely that installers themselfs will not support ACPI, in fact I know most dont because you always have to press the off button for 3 seconds on a physical machine if the installer hangs because you messed something up.
Long story short: once you actually install some OS and enable ACPI support in it, clean shutdowns will work just fine.
-
#18
Just encounter this error today, not way to stop VM in UI.
And command line also failed:
# qm stop 102
trying to acquire lock…
can’t lock file ‘/var/lock/qemu-server/lock-102.conf’ — got timeout
-
#19
Sorry to necro this thread, but I think I know what the problem is, for future reference:
If you issue a Shutdown command on a VM than cannot process it (no ACPI), the task runs and tries its best before timing out. During this time the /var/lock/qemu-server/lock-100.conf is locked by this task.
If during this time (before the Shutdown task times out), you issue a Stop command to the VM, you become this error message:
trying to acquire lock…
TASK ERROR: can’t lock file ‘/var/lock/qemu-server/lock-100.conf’ — got timeout
In this case, you have to open the still running Shutdown *task* (double click on it in the Tasks pane) and stop it.
Then, re-issue the Stop command to the VM. This time it should work.
Just my 2 cents…
-
#20
Encountered the same error, Shutdown from the Proxmox GUI or from console didn’t work.
After multiple tries, I am able to power off VM after stopping it from the GUI.
Содержание
- VM’s on proxmox won’t shutdown?
- RodinM
- RodinM
- RodinM
- RodinM
- RodinM
- spirit
- madpilot
- ivan901
- ivan901
- RodinM
- giner
- RodinM
- BUG? VM don’t Stop, Shutdown, .
- abkrim
- dietmar
- Thijs Simonis
- abkrim
- adamb
- abkrim
- dietmar
- adamb
- hoppel118
- hoppel118
- hoppel118
- darthanubis
- wdyslam
- chengkinhung
- IT Hero
- [SOLVED] Powerdown VM gets timeout
- Daraiko
- Daraiko
- Daraiko
- About
- Quick Navigation
- Get your subscription!
- Proxmox
- Namespaces
- Page actions
- Contents
- HOWTO: First Steps After Installation
- HOWTO: Update PCI and USB IDs
- HOWTO: Set System Locale
- HOWTO: Change To Software RAID and LVM
- Install Software
- Prepare Disks
- Create RAID Arrays
- Copy Boot Files To RAID Array
- Change Boot Filesystem Tab
- Update GRUB Bootloader
- Prepare First Disk (Part 1)
- Move LVM Data
- Prepare First Disk (Part 2)
- Add Extra (Spare) Disks As Required
- Update GRUB (Again)
- Finish
- HOWTO: Add ISO Files
- HOWTO: Add Virtual Machine (VM)
- Ubuntu Linux
- Windows 7
- HOWTO: RUN VIRTUAL MACHINE IN PROXMOX INSIDE VIRTUALBOX
- HOWTO: RESIZE DISKS
- Shut Down Stop The Virtual Machine
- COMMAND LINE
- START THE VIRTUAL MACHINE
- HOWTO: FIX
- apt update: TASK ERROR: command ‘apt-get update’ failed: exit code 100
- apt-get update: server certificate verification failed
- NFS Share Unmount When Rebooting Server
- Shutdown Error — TASK ERROR: VM quit powerdown failed — got timeout
- HOWTO: ENABLE
- Add CPU Frequency Scaling
- HOWTO: CONVERT:
- From Proxmox RAW Image To VirtualBox Qcow
- OVA IMAGE TO Qcow
- Instructions
- Troubleshooting
VM’s on proxmox won’t shutdown?
RodinM
Active Member

Proxmox Staff Member
Best regards,
Tom
Do you already have a Commercial Support Subscription? — If not, Buy now and read the documentation
RodinM
Active Member
Proxmox Staff Member
works here. tested with win7.
what task log do you get? (see the «tasks» on the bottom of the main interface).
Best regards,
Tom
Do you already have a Commercial Support Subscription? — If not, Buy now and read the documentation
Proxmox Staff Member
I see the issue for Win2008r2 server. using the VM console it shutdowns. using the main windows button, I got:
TASK ERROR: VM quit/powerdown failed — got timeout
Best regards,
Tom
Do you already have a Commercial Support Subscription? — If not, Buy now and read the documentation
RodinM
Active Member
Proxmox Staff Member
as it works here it hard to debug. are you sure that it does not work with a plain win7 (do not add it to ADS, just test with plain iso install)?
also Debian KVM guests works here without problems, as long as acpid is installed (aptitude install acpid).
Best regards,
Tom
Do you already have a Commercial Support Subscription? — If not, Buy now and read the documentation
RodinM
Active Member
RodinM
Active Member
spirit
Famous Member
try to edit the regkey
«Are you looking for a French Proxmox training center?
madpilot
New Member
I too have this problem. Tried the key change but it does not help.
I am using 2.1 with all updates. All the windoze vm’s on our system have the same issue. Currently using winxp, win2k3 and win2k8r2.
Click shutdown, get: TASK ERROR: VM quit/powerdown failed — got timeout
Click shutdown with console open (but not logged in) and it works as advertised, regardless of the suggested registry key.
All linux vm’s with acpid installed shutdown correctly.
ivan901
New Member
ivan901
New Member
RodinM
Active Member
giner
Member
RodinM
Active Member
This solution was already mentioned in some previous posts. It helped partly (with this setting the Windows VM can be shutdown from the console window using the «shutdown» button).
What did help (in 70% cases) is the solution suggested by ivan901 in this post. With this setting the VM can be shutdown (but not always again) using the «shutdown» button in the main gui.
What I mean is shown on 2 screens below 
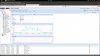
The first screen shows when it works.
The second option shows when it doesn’t.
Источник
BUG? VM don’t Stop, Shutdown, .
abkrim
Active Member
A fresh install of VM (KVM) don’t stop
- From web interface Stop menu.
- From Web Console Stop or Shutdown
- Only can halt form console..
But it’s worng. If VM it’s freeeze we’ll can stop VM.
Error: VM quit/powerdown failed — got timeout
AbdelKarim : Consultor IT
«La educación no son buenas palabras, sino buenas acciones»

dietmar
Proxmox Staff Member
Best regards,
Dietmar
Do you already have a Commercial Support Subscription? — If not, Buy now and read the documentation
Thijs Simonis
New Member
Search the PID of the machine with:
ps aux | grep «/usr/bin/kvm -id VMID»
Kill it with:
kill -9 PID
Start your machine again with:
qm start VMID
And look if you can stop your machine in GUI or CLI
CLI: qm stop VMID
abkrim
Active Member
Thijs Simonis]
[/B]
Search the PID of the machine with:
ps aux | grep «/usr/bin/kvm -id VMID»
Kill it with:
kill -9 PID
Start your machine again with:
qm start VMID
And look if you can stop your machine in GUI or CLI
CLI: qm stop VMID
AbdelKarim : Consultor IT
«La educación no son buenas palabras, sino buenas acciones»
adamb
Renowned Member
I am also noticing this issue with CentOS-5.3 x86. Stop works, but shutdown does nothing. I don’t like the idea of brute force either.
Apr 4 16:42:01 proxmox1 pvedaemon[70973]: shutdown VM 100: UPID roxmox1:0001153D:001C9B7D:4F7CB219:qmshutdown:100:root@pam:
Apr 4 16:42:01 proxmox1 pvedaemon[67891]: starting task UPID roxmox1:0001153D:001C9B7D:4F7CB219:qmshutdown:100:root@pam:
Apr 4 16:42:31 proxmox1 pvedaemon[70973]: VM quit/powerdown failed — got timeout
Apr 4 16:42:31 proxmox1 pvedaemon[67891]: end task UPID roxmox1:0001153D:001C9B7D:4F7CB219:qmshutdown:100:root@pam: VM quit/powerdown failed — got timeout
Proxmox Staff Member
did you enable acpid in your VM?
you need to allow anonymous acpi shutdown in all your KVM guest system to shutdown.
Best regards,
Tom
Do you already have a Commercial Support Subscription? — If not, Buy now and read the documentation
abkrim
Active Member
Yes for me, ACPI Support it’s yes for all machines and for me don’t work neither stop, shutdown or any for halt machine.
EDIT: Today work STOP, but shutdown got time out.
AbdelKarim : Consultor IT
«La educación no son buenas palabras, sino buenas acciones»
dietmar
Proxmox Staff Member
Best regards,
Dietmar
Do you already have a Commercial Support Subscription? — If not, Buy now and read the documentation
adamb
Renowned Member
hoppel118
Active Member
I have the same problem. Stop works, but shutdown doesn’t. Sutdown ends up with the following error in «pve — tasks — status»:
Error: VM quit/powerdown failed — got timeout
Under VM options the «ACPI Support» is activated «yes» und the acpid in the vm is working:
I run the debian-distribution «openmediavault» as a vm with kernel «2.6.32-5-amd64».
What else can be done? What information do you need?
Proxmox Staff Member
install acpid in your guest.
Best regards,
Tom
Do you already have a Commercial Support Subscription? — If not, Buy now and read the documentation
hoppel118
Active Member
acpid is allready installed in the newest version in the guest:
What else can be done? Do I need acpid on the pve-host?
acpid is not installed on the host.
Proxmox Staff Member
Best regards,
Tom
Do you already have a Commercial Support Subscription? — If not, Buy now and read the documentation
hoppel118
Active Member
Thanks, this was the solution, Shutdown works.
But I still see the message: Error: VM quit/powerdown failed — got timeout even though it works. Why?
EDIT: Curious, after I stopped the omv-vm once, I now get the message: OK while I use the shutdown button. So everything is as it should.
Thank you very much, Tom.
darthanubis
Guest
EDIT: Curious, after I stopped the omv-vm once, I now get the message: OK while I use the shutdown button. So everything is as it should. . [/QUOTE
wdyslam
New Member
I encountered this issue recently.
my proxmox is 2.3, and creat new VM without any OS, but I can’t shoudown the VM through console, the error log is «TASK ERROR: VM quit/powerdown failed — got timeout». i only force shutdown by qm stop ***.
do you have any suggestion about this issue, i don’t want to force to shutdown VM everytime. thanks.
Active Member
if your VM doesnt have any OS, youre probably still looking at some installer loaded from some ISO. it is VERY likely that installers themselfs will not support ACPI, in fact I know most dont because you always have to press the off button for 3 seconds on a physical machine if the installer hangs because you messed something up.
Long story short: once you actually install some OS and enable ACPI support in it, clean shutdowns will work just fine.
chengkinhung
Active Member
IT Hero
New Member
Sorry to necro this thread, but I think I know what the problem is, for future reference:
If you issue a Shutdown command on a VM than cannot process it (no ACPI), the task runs and tries its best before timing out. During this time the /var/lock/qemu-server/lock-100.conf is locked by this task.
If during this time (before the Shutdown task times out), you issue a Stop command to the VM, you become this error message:
In this case, you have to open the still running Shutdown *task* (double click on it in the Tasks pane) and stop it.
Then, re-issue the Stop command to the VM. This time it should work.
Источник
[SOLVED] Powerdown VM gets timeout
Daraiko
New Member
I have created a VM with the proxmox iso to do some tests
but every time i press «shutdown» i get the following error:
TASK ERROR: VM quit/powerdown failed — got timeout
i have tried to destroy and recreate it and still same error.
Edit: Thank-you Tom
Proxmox Staff Member
Best regards,
Tom
Do you already have a Commercial Support Subscription? — If not, Buy now and read the documentation
Daraiko
New Member
Thanks for the reply Tom
I used the proxmox 2.1 ISO from proxmox.com
Proxmox Staff Member
Best regards,
Tom
Do you already have a Commercial Support Subscription? — If not, Buy now and read the documentation
Daraiko
New Member
Yes that is correct, not for running Virtual Machines! Simply for testing
Proxmox Staff Member
Best regards,
Tom
Do you already have a Commercial Support Subscription? — If not, Buy now and read the documentation
About
The Proxmox community has been around for many years and offers help and support for Proxmox VE, Proxmox Backup Server, and Proxmox Mail Gateway.
We think our community is one of the best thanks to people like you!
Quick Navigation
Get your subscription!
The Proxmox team works very hard to make sure you are running the best software and getting stable updates and security enhancements, as well as quick enterprise support. Tens of thousands of happy customers have a Proxmox subscription. Get your own in 60 seconds.
Источник
Proxmox
Namespaces
Page actions
Contents
HOWTO: First Steps After Installation
Add the no subscription repository.
HOWTO: Update PCI and USB IDs
HOWTO: Set System Locale
HOWTO: Change To Software RAID and LVM
Do NOT do this if you are using the new 4.x version of Proxmox and have chosen ZFS (RAID) filesystem!
Install Software
Prepare Disks
Create RAID Arrays
Copy Boot Files To RAID Array
Change Boot Filesystem Tab
Do not reboot now as per kbDone’s page!
Update GRUB Bootloader
Prepare First Disk (Part 1)
Move LVM Data
Prepare First Disk (Part 2)
Wait for RAID to sync.
Update GRUB (Again)
Finish
HOWTO: Add ISO Files
Location on disk.
HOWTO: Add Virtual Machine (VM)
Ubuntu Linux
Copy Existing — Physical To Virtual (P2V)
- Boot with SystemRescueCD iso in virtual cdrom
- either use the proxmox console, or set root password and restart ssh, and ssh in
- Partition and Format virtual hard disk drive (1:swap,2:ext4)
- mkdir /mnt/sda2 and mount -v /dev/sda2 /mnt/sda2/
- scp physical:/backup.tar.gz root@virtual:/mnt/sda2/
- sudo tar -xzvpf /mnt/sda2/backup.tar.gz -C /mnt/sda2/ —numeric-owner (close console window for this)
- mount -t proc none /mnt/sda2/proc
- mount -o bind /dev /mnt/sda2/dev
- mount -t sysfs /sys /mnt/sda2/sys
- chroot /mnt/sda2 /bin/bash
- blkid /dev/sda1 /dev/sda2
- nano /etc/mtab /etc/fstab /etc/hosts /etc/network/interfaces (change IP address to different to physical)
- touch /var/lock/aptitude
- aptitude -y -v purge mdadm lm-sensors hddtemp smartmontools cpufrequtils
- rm -rfv /var/lib/smartmontools/
- grub-install /dev/sda
- update-initramfs -u
- update-grub
- exit
- reboot
- When you are happy, then shut down the Physical and change the Virtual IP address, then reboot Virtual 🙂
Windows 7
- Create an ISO of the Windows 7 DVD
- Download the VirtIO Drivers ISO (Changelog)
- Create VM according to the Windows 7 Best Practices page
- CDROM #1 = win7pro-sp1.iso
- CDROM #2 = virtio-win-0.1-81.iso
- CDROM #3 = VMware-tools-windows-9.4.11-2400950.iso
- Start VM and read instructions below
This gives you much better mouse performance and uses less resources (than the default ‘usb tablet mouse’).
The vmmouse driver need a reboot to get activated but then you can enable/disable the ‘usb device tablet’ on the fly.
- extract setup.exe from iso
- extract datas from setup.exe
- setup.exe /A /P C:Extract
- drivers are in C:extractProgram FilesVMwareVMware ToolsVMwareDriversmouse
The qemu-guest-agent is a helper daemon, which is installed in the guest. It is used to exchange information between the host and guest, and to execute command in the guest.
This is a must have!
HOWTO: RUN VIRTUAL MACHINE IN PROXMOX INSIDE VIRTUALBOX
Because VirtualBox does not support KVM Stacking or KVM-in-KVM, you have to use the QEMU option in Proxmox when running inside VirtualBox.
- Install Proxmox VE inside VirtualBox and start Proxmox
- Log in to the Proxmox Web Admin and ‘Create VM’
- VM > Options > KVM Hardware Virtualization = NO, QEMU Agent = YES
HOWTO: RESIZE DISKS
Shut Down Stop The Virtual Machine
Shut down and Stop the VM using the GUI or command line.
Server View > Datacenter > Node > VM > Hardware > Hard Disk > Resize
COMMAND LINE
In this example, we will be increasing the first virtual hard disk sda from 20Gb to 68Gb.
Resize Virtual Hard Disk
Find out the name of the virtual machine and hard disk, using the GUI (shown above), for example 105 and sata0.
Now, you can resize the virtual disk.
Resize Hard Disk Partition
Boot the VM with a live CD such as SystemRescueCD, and then use ‘parted’ to resize the partition (in our case partition #2).
Check Hard Disk Filesystem (I)
Resize Hard Disk Filesystem
Check Hard Disk Filesystem (II)
Poweroff The Virtual Machine
Now, you can shutdown the SystemRescueCD.
START THE VIRTUAL MACHINE
Start the VM using the GUI or command line, login and check your disk size.
HOWTO: FIX
apt update: TASK ERROR: command ‘apt-get update’ failed: exit code 100
To fix, run the following option to apt-get .
and answer questions manually .
apt-get update: server certificate verification failed
To check mountpoint of NFS share.
Disable the NFS share (either in web GUI or on the command line).
To unmount (be patient for up to 10 minutes).
If no success, then.
Shutdown Error — TASK ERROR: VM quit powerdown failed — got timeout
Install the app ‘acpid’ in each of your Linux virtual machines.
HOWTO: ENABLE
Add CPU Frequency Scaling
HOWTO: CONVERT:
From Proxmox RAW Image To VirtualBox Qcow
OVA IMAGE TO Qcow
Instructions
This example shows how to convert the ESET Remote Administrator Virtual Appliance to a Proxmox Virtual Machine.
Open up the OVF file in your editor (it’s XML format) and just check what hardware it requires.
Then, create your new VM in the Proxmox web GUI as per hardware requirements.
Then, copy over the new QCOW2 disk image file we converted OVER the one created by Proxmox.
Then, edit the Proxmox VM config file to change the disk size to match the figure in bold above.
Now, you can go back to the Proxmox web GUI and start the new VM in a Console.
Troubleshooting
If your VM will not start because of this error:-
It is because you are using the new ZFS with Proxmox, which does not support it.
Then change the Cache setting on your VM to Write Through.
Источник
HOWTO: First Steps After Installation
Add the no subscription repository…
echo "deb http://download.proxmox.com/debian/pve buster pve-no-subscription" >>/etc/apt/sources.list
apt-get update
apt-get check
apt-get --simulate dist-upgrade
HOWTO: Update PCI and USB IDs
update-pciids
update-usbids
HOWTO: Set System Locale
dpkg-reconfigure locales (and choose en_GB.utf8)
Thanks — https://wiki.debian.org/Locale
HOWTO: Change To Software RAID and LVM
Do NOT do this if you are using the new 4.x version of Proxmox and have chosen ZFS (RAID) filesystem!
Install Software
aptitude install mdadm
Prepare Disks
sgdisk -R=/dev/sdb /dev/sda
sgdisk -t 2:fd00 /dev/sdb
sgdisk -t 3:fd00 /dev/sdb
sgdisk -R=/dev/sdc /dev/sda
sgdisk -t 2:fd00 /dev/sdc
sgdisk -t 3:fd00 /dev/sdc
parted

GNU Parted 2.3
Using /dev/sda
Welcome to GNU Parted! Type 'help' to view a list of commands.
(parted) print
Model: ATA WDC WD3000FYYZ-0 (scsi)
Disk /dev/sda: 3001GB
Sector size (logical/physical): 512B/512B
Partition Table: gpt
Number  Start   End     Size    File system  Name     Flags
 1      1049kB  2097kB  1049kB               primary  bios_grub
 2      2097kB  537MB   535MB   ext3         primary  boot
 3      537MB   3001GB  3000GB               primary  lvm
(parted)
(parted) select /dev/sdb
Using /dev/sdb
(parted) print
Model: ATA WDC WD3000FYYZ-0 (scsi)
Disk /dev/sdb: 3001GB
Sector size (logical/physical): 512B/512B
Partition Table: gpt
Number  Start   End     Size    File system  Name     Flags
 1      1049kB  2097kB  1049kB               primary  bios_grub
 2      2097kB  537MB   535MB                primary  raid
 3      537MB   3001GB  3000GB               primary  raid
Create RAID Arrays
mdadm --create /dev/md0 --level=1 --raid-disks=2 missing /dev/sdb2
mdadm --create /dev/md1 --level=1 --raid-disks=2 missing /dev/sdb3
cat /proc/partitions /proc/mdstat
Copy Boot Files To RAID Array
mkfs.ext3 /dev/md0
mkdir /mnt/tmp
mount /dev/md0 /mnt/tmp
cp -ax /boot/* /mnt/tmp
umount /mnt/tmp
rmdir /mnt/tmp
Change Boot Filesystem Tab
nano /etc/fstab
/dev/pve/root / ext3 errors=remount-ro 0 1
/dev/pve/data /var/lib/vz ext3 defaults 0 1
/dev/md0 /boot ext3 defaults 0 1
#UUID=46b4d3d6-fdec-43b6-a4cb-3f8f8a9c6c10 /boot ext3 defaults 0 1
/dev/pve/swap none swap sw 0 0
proc /proc proc defaults 0 0
Do not reboot now as per kbDone’s page!
Update GRUB Bootloader
echo 'GRUB_DISABLE_LINUX_UUID=true' >> /etc/default/grub
echo 'GRUB_PRELOAD_MODULES="raid dmraid"' >> /etc/default/grub
echo raid1 >> /etc/modules
echo raid1 >> /etc/initramfs-tools/modules
grub-install /dev/sda
grub-install /dev/sdb
grub-install /dev/sdc   (because we will actually be adding sdc below)
update-grub
update-initramfs -u
Now reboot.
reboot
Prepare First Disk (Part 1)
sgdisk -t 2:fd00 /dev/sda
mdadm --add /dev/md0 /dev/sda2
Move LVM Data
pvcreate /dev/md1
vgextend pve /dev/md1
pvmove /dev/sda3 /dev/md1   <-- this takes a very long time!
vgreduce pve /dev/sda3
pvremove /dev/sda3
Prepare First Disk (Part 2)
sgdisk -t 3:fd00 /dev/sda
mdadm --add /dev/md1 /dev/sda3   <-- this takes a long time as well
cat /proc/mdstat
Wait for RAID to sync.
mdadm --add /dev/md0 /dev/sdc2
mdadm --add /dev/md1 /dev/sdc3
Update GRUB (Again)
grub-install /dev/sda
grub-install /dev/sdb
grub-install /dev/sdc
update-grub
update-initramfs -t -u
sync
Finish
reboot
cat /proc/mdstat
Thanks — http://kbdone.com/proxmox-ve-3-2-software-raid/
HOWTO: Add ISO Files
In the GUI…
Storage View > Datacenter > server > local > content > Upload
Location on disk…
/var/lib/vz/template/iso
HOWTO: Add Virtual Machine (VM)
Server View > Datacenter > server
Create VM
Ubuntu Linux
Copy Existing — Physical To Virtual (P2V)
Physical
- https://help.ubuntu.com/community/BackupYourSystem/TAR
- sudo tar -czvpf /backup.tar.gz —exclude=/backup.tar.gz —one-file-system /
Virtual
STOP PRESS — new method?! — http://www.fsarchiver.org/QuickStart
- Boot with SystemRescueCD iso in virtual cdrom
- either use the proxmox console, or set root password and restart ssh, and ssh in
- Partition and Format virtual hard disk drive (1:swap,2:ext4)
- mkdir /mnt/sda2 and mount -v /dev/sda2 /mnt/sda2/
- scp physical:/backup.tar.gz root@virtual:/mnt/sda2/
- sudo tar -xzvpf /mnt/sda2/backup.tar.gz -C /mnt/sda2/ —numeric-owner (close console window for this)
- mount -t proc none /mnt/sda2/proc
- mount -o bind /dev /mnt/sda2/dev
- mount -t sysfs /sys /mnt/sda2/sys
- chroot /mnt/sda2 /bin/bash
- blkid /dev/sda1 /dev/sda2
- nano /etc/mtab /etc/fstab /etc/hosts /etc/network/interfaces (change IP address to different to physical)
- touch /var/lock/aptitude
- aptitude -y -v purge mdadm lm-sensors hddtemp smartmontools cpufrequtils
- rm -rfv /var/lib/smartmontools/
- grub-install /dev/sda
- update-initramfs -u
- update-grub
- exit
- reboot
Finish
- When you are happy, then shut down the Physical and change the Virtual IP address, then reboot Virtual


Windows 7
Fresh Installation
- Create an ISO of the Windows 7 DVD
dd if=/dev/sr0 of=/var/lib/vz/template/iso/win7pro-sp1.iso
- Download the VirtIO Drivers ISO (Changelog)
- Create VM according to the Windows 7 Best Practices page
- CDROM #1 = win7pro-sp1.iso
- CDROM #2 = virtio-win-0.1-81.iso
- CDROM #3 = VMware-tools-windows-9.4.11-2400950.iso
- Start VM and read instructions below
Mouse Driver
This gives you much better mouse performance and uses less resources (than the default ‘usb tablet mouse’).
The vmmouse driver need a reboot to get activated but then you can enable/disable the ‘usb device tablet’ on the fly.
- extract setup.exe from iso
- extract datas from setup.exe
- setup.exe /A /P C:Extract
- drivers are in C:extractProgram FilesVMwareVMware ToolsVMwareDriversmouse
Mouse Driver (64 Bit) — http://packages.vmware.com/tools/esx/latest/windows/x64/index.html (e.g. VMware-tools-windows-9.4.11-2400950.iso)
Mouse Driver (32 Bit) — http://packages.vmware.com/tools/esx/latest/windows/x86/index.html (e.g. VMware-tools-windows-9.4.11-2400950.iso)
Qemu Agent
The qemu-guest-agent is a helper daemon, which is installed in the guest. It is used to exchange information between the host and guest, and to execute command in the guest.
This is a must have!
http://pve.proxmox.com/wiki/Qemu-guest-agent
Links
Tweaks — https://pve.proxmox.com/wiki/Performance_Tweaks
Thanks — https://pve.proxmox.com/wiki/Windows_7_guest_best_practices
Thanks — https://pve.proxmox.com/wiki/Windows_VirtIO_Drivers#Choose_the_right_driver
HOWTO: RUN VIRTUAL MACHINE IN PROXMOX INSIDE VIRTUALBOX
Because VirtualBox does not support KVM Stacking or KVM-in-KVM, you have to use the QEMU option in Proxmox when running inside VirtualBox.
- Install Proxmox VE inside VirtualBox and start Proxmox
- Log in to the Proxmox Web Admin and ‘Create VM’
- VM > Options > KVM Hardware Virtualization = NO, QEMU Agent = YES
HOWTO: RESIZE DISKS
https://pve.proxmox.com/wiki/Resize_disks
Shut Down Stop The Virtual Machine
Shut down and Stop the VM using the GUI or command line.
GUI
Server View > Datacenter > Node > VM > Hardware > Hard Disk > Resize
COMMAND LINE
In this example, we will be increasing the first virtual hard disk sda from 20Gb to 68Gb.
Resize Virtual Hard Disk
Find out the name of the virtual machine and hard disk, using the GUI (shown above), for example 105 and sata0.
Now, you can resize the virtual disk…
qm resize 105 sata0 +48G
Resize Hard Disk Partition
Boot the VM with a live CD such as SystemRescueCD, and then use ‘parted’ to resize the partition (in our case partition #2)…
parted /dev/sda
(parted) print
(parted) resizepart 2 100%
(parted) print
(parted) quit
Check Hard Disk Filesystem (I)
e2fsck -f /dev/sda2
Resize Hard Disk Filesystem
resize2fs /dev/sda2
Check Hard Disk Filesystem (II)
e2fsck -f /dev/sda2
Poweroff The Virtual Machine
Now, you can shutdown the SystemRescueCD…
poweroff
START THE VIRTUAL MACHINE
Start the VM using the GUI or command line, login and check your disk size.
df -H
http://pve.proxmox.com/wiki/Resize_disks
HOWTO: FIX
apt update: TASK ERROR: command ‘apt-get update’ failed: exit code 100
To fix, run the following option to apt-get …
apt-get update --allow-releaseinfo-change
OR
apt-get update
and answer questions manually …
N: This must be accepted explicitly before updates for this repository can be applied. See apt-secure(8) manpage for details.
Do you want to accept these changes and continue updating from this repository? [y/N] y
apt-get update: server certificate verification failed
https://pve.proxmox.com/wiki/Server_certificate_verification_failed_when_updating
Manually
To check mountpoint of NFS share…
mount
Disable the NFS share (either in web GUI or on the command line)…
pvesm set yournfsharename_inwebgui --disable 1
To unmount (be patient for up to 10 minutes)…
fusermount -uz /path/to/mountpoint
If no success, then…
umount -f -l -vvv /path/to/mountpoint
https://forum.proxmox.com/threads/nfs-share-umount-f-problem-device-is-busy.26777/
Automatically
nano /etc/rc.local.shutdown
#!/bin/sh -e
echo "NFS Shares are unmounting..."
fusermount -uz /mnt/pve/*
exit 0
http://unix.stackexchange.com/questions/98510/run-a-script-at-shutdown-in-debain#98523
Shutdown Error — TASK ERROR: VM quit powerdown failed — got timeout
Install the app ‘acpid’ in each of your Linux virtual machines…
sudo apt install acpid
HOWTO: ENABLE
Add CPU Frequency Scaling
aptitude install cpufrequtils
Thanks — https://wiki.debian.org/HowTo/CpuFrequencyScaling
HOWTO: CONVERT:
From Proxmox RAW Image To VirtualBox Qcow
-rw-r--r-- 1 root root  20G 2015-02-18 12:54 disk-drive-sata0.raw
-rw-r--r-- 1 root root  330 2015-02-18 12:51 qemu-server.conf
qemu-img convert -f raw -O qcow disk-drive-sata0.raw disk-drive-sata0.qcow
-rw-r--r-- 1 root root 9.8G 2015-02-20 11:03 disk-drive-sata0.qcow
-rw-r--r-- 1 root root  20G 2015-02-18 12:54 disk-drive-sata0.raw
-rw-r--r-- 1 root root  330 2015-02-18 12:51 qemu-server.conf
OVA IMAGE TO Qcow
Instructions
This example shows how to convert the ESET Remote Administrator Virtual Appliance to a Proxmox Virtual Machine.
sudo -i
tar -xf era_appliance.ova
qemu-img convert -p -f vmdk ERA_Appliance-disk1.vmdk -O qcow2 ERA_Appliance-disk1.qcow2
qemu-img info ERA_Appliance-disk1.qcow2
image: ERA_Appliance-disk1.qcow2
virtual size: 64G (68719476736 bytes)
disk size: 7.5G
cluster_size: 65536
Format specific information:
    compat: 1.1
    lazy refcounts: false
    corrupt: false
Open up the OVF file in your editor (it’s XML format) and just check what hardware it requires.
Then, create your new VM in the Proxmox web GUI as per hardware requirements.
Then, copy over the new QCOW2 disk image file we converted OVER the one created by Proxmox.
cp -av ERA_Appliance-disk1.qcow2 /var/lib/vz/images/106/vm-106-disk-1.qcow2
Then, edit the Proxmox VM config file to change the disk size to match the figure in bold above.
nano /etc/pve/nodes/proxmox1/qemu-server/106.conf
bootdisk: ide0
cores: 4
ide0: local:106/vm-106-disk-1.qcow2,format=qcow2,size=64G
ide2: none,media=cdrom
memory: 4096
name: eset1
net0: e1000=5E:EF:04:01:CA:45,bridge=vmbr0
numa: 0
onboot: 1
ostype: l26
smbios1: uuid=12936a8c-6417-4e5d-9f7d-f6e06730b72a
sockets: 1
startup: order=7,up=70,down=10
Now, you can go back to the Proxmox web GUI and start the new VM in a Console.
Job, done.
Troubleshooting
If your VM will not start because of this error:-
file system may not support O_DIRECT
It is because you are using the new ZFS with Proxmox, which does not support it.
Then change the Cache setting on your VM to Write Through…
cache=writethrough
Thanks — http://www.jamescoyle.net/how-to/471-zfs-and-glusterfs-network-storage
Links
http://forum.proxmox.com/threads/9309-Convert-OVA-to-working-Proxmox-VM
http://opentox.github.io/installation/2012/08/02/converting-ova-images-to-kvm/
http://matthewmidgett.com/virtualization/5-converting-virtualbox-to-proxmox
http://edoceo.com/notabene/ova-to-vmdk-to-qcow2
HOWTO: Command Line Tools
https://pve.proxmox.com/wiki/Command_line_tools
Check Storage
Settings are kept in…
/etc/pve/storage.cfg
Check the current status with…
pvesm status
This also works to fix an unmounted NFS share (say the NFS server rebooted).
Add A User Using Domain Based Authentication
pveum aclmod / -user joebloggs@DOMAIN -role PVEAuditor
Shell Script To List Status Of Virtual Machines
#!/bin/bash
cd /etc/pve/nodes/<nodename>/qemu-server/
for FILE in *.conf
do
  VMID="${FILE%%.*}"
  echo -n "vm $VMID "
  /usr/sbin/qm status $VMID;
done
Backup All VMs
vzdump --quiet 1 --mailto backupnotify@domain.com --mode snapshot --compress lzo --storage nfs1 --node proxmox1 --all 1
Backup 1 VM
vzdump 219 --mode stop --compress lzo --node proxmox2 --remove 0 --storage nfs1 --mailto backupnotify@domain.com
Shutdown VM
qm shutdown VMID
Thanks — https://pve.proxmox.com/wiki/Virtual_Machine_Startup_and_Shutdown_Behavior
List VMs
qm list
Start VM
qm start VMID
Shutdown VM
qm shutdown VMID
Stop VM
qm stop VMID
HOWTO: DHCP For VMs On Different IP Address Range
https://jay.sh/setting-up-dhcp-for-proxmox-vms/
HOWTO: Change Cron Scheduled Backup Time
sudo nano /etc/pve/vzdump.cron
HOWTO: Change Node IP Address
Use the Web GUI…
Server View > Datacenter > Node > Network > vmbr0 > IP Address > OK > Restart
If you are not able to directly access the Web GUI, use SSH to Port Forward to your computer…
ssh root@proxmox-node -L local-port:remote-server-ip:remote-port
ssh root@123.456.789.0 -L 8006:192.168.1.200:8006
Then, point your web browser to the following address, and hey presto, Web GUI!
https://127.0.0.1:8006
OLD
Update the IP address and DNS IP address in these files…
nano /etc/hosts /etc/network/interfaces /etc/resolv.conf
If it’s a cluster, run this command as well…
/etc/init.d/cman restart
Then, reboot…
reboot
HOWTO: Change Node Hostname Name
WARNING: THIS WORKED FOR ME IN A TEST VIRTUALBOX ENVIRONMENT BUT HAS NOT BEEN TRIED IN PRODUCTION
YOU HAVE BEEN WARNED
THESE INSTRUCTIONS ARE A WORK IN PROGRESS
You may also have to edit some VM .conf files.
nano /etc/hostname /etc/hosts /etc/postfix/main.cf
cd /etc/pve/nodes/
cp -av old new
rm -rfv old
cd /var/lib/rrdcached/db/pve2-node/
cp -av old new
rm -rfv old
reboot
HOWTO: System Update
https://pve.proxmox.com/wiki/Downloads
- Change DNS Server to modem
nano /etc/resolv.conf
nameserver 192.168.0.1
- Shut down all running Virtual Machines
- Turn off Start at Boot for each Virtual Machine (using WebGUI) or…
nano /etc/pve/nodes/proxmox1/qemu-server/*.conf
onboot: 1    <-- delete this line
- Update system software…
screen -rd
apt-get update
apt-get check
apt-get --download-only dist-upgrade
apt-get --simulate dist-upgrade
apt-get --quiet dist-upgrade
(answer YES to Continuing Without Installing GRUB)
grub-mkdevicemap -n
grub-install /dev/sda
grub-install /dev/sdb
grub-install /dev/sdc
update-grub
update-initramfs -t -u
sync
touch /root/misc/system_updated
(exit screen)
reboot
HOWTO: Test ZFS With Virtualbox
…
HOWTO: Cluster
https://www.mattwall.co.uk/2019/06/09/new-proxmox-cluster-pt1.html
https://www.howtoforge.com/tutorial/how-to-configure-a-proxmox-ve-4-multi-node-cluster/
HOWTO: Help
Wiki
https://pve.proxmox.com/wiki/Main_Page
Forum
http://forum.proxmox.com/