![]()
Download Article
![]()
Download Article
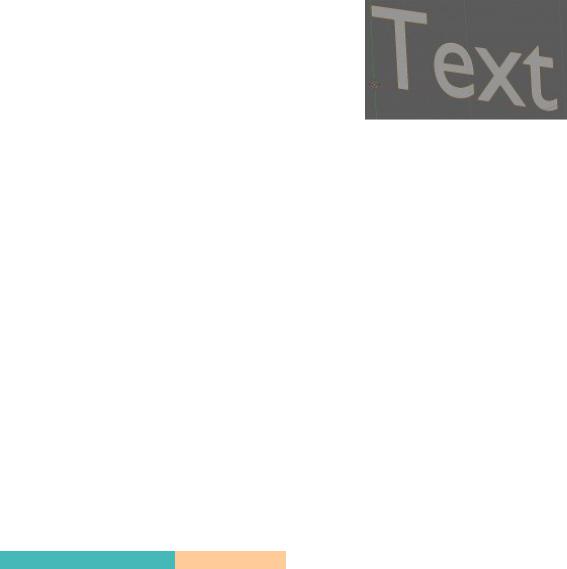
Blender is a powerful free open source 3d program that allows you to create animated films, visual effects, art, 3D printed models, motion graphics, interactive 3D applications, virtual reality, and computer games. This wikiHow will teach you how to create 3d text in blender that you can later use to make a 3d logo or animated intro, for example.
-
1
Open the blender program.
- If you do not have blender installed on your computer, you can go to blender.org and download it to your computer.
Advertisement
-
1
Orbit. Rotate the view around the point of interest.
- Ctrl-Alt-Wheel to rotate the scene around the global Z axis from your current point of view.
- Shift-Alt-Wheel which correspond to vertical MMB dragging
-
2
Roll. Rotate the viewport camera around its local Z axis.
- Use Shift-Ctrl-Wheel.
-
3
Panning. Moves the view up, down, left and right.
- To pan the view, hold down Shift and drag MMB in the 3D View.
-
4
Zoom.
- You can zoom in and out by holding down Ctrl and dragging MMB.
- The hotkeys are NumpadPlus and NumpadMinus.
- If you have a wheel mouse, you can zoom in and out by rotating the wheel.
Advertisement
-

1
Delete the cube in the starting scene.
- Select the cube with the left mouse button (the cube will be highlighted orange when selected).
- Press x on the keyboard.
- Select delete in the pop up menu.
-
2
Add text to the scene.
- Click “Shift + A” on the keyboard; a list will open on the screen.
- Select the “Text” option.
-
3
Edit the text.
- Select the text with the left mouse (the text will be highlighted orange when selected).
- Hit tab to enter edit mode.
- Type whatever you want the text to be.
- Make sure to spell everything right as later you won’t be able to change it.
- Hit tab to exit edit mode once you type what you want.
-
4
Change the font of your text.
- Go to the text tab on the right side («a» icon).
- In the text tab go to the font section.
- Press the little file icon for regular that will say “load a new font from a file” if you hover over it with your cursor.
- Select a font from your computer.
-
5
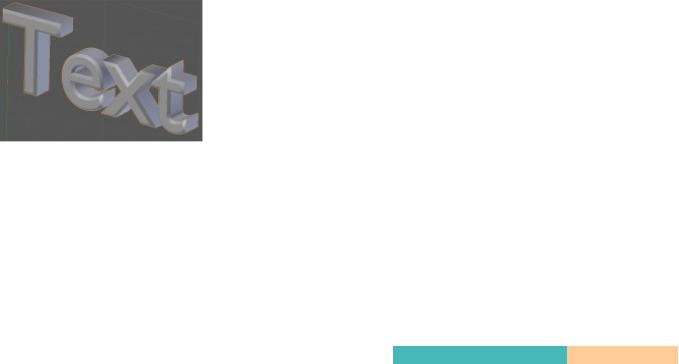
Extrude the text in the text tab.
- Go to the text tab on the right side («a» icon).
- In the geometry section to extrude your text by increasing the number for extrude.
- You can extrude your text to whatever size you want.
-
6
Center the text.
- Select the text with the left mouse (the text will be highlighted orange).
- Then right-click on your mouse and navigate to set origin.
- Then select geometry to origin.
-
7
Rotate the text.
- Select the text with the left mouse (the text will be highlighted orange).
- On your keyboard press R
- then X on the keyboard
- Then type in 90 on the keyboard
- Then press enter
- This will rotate the text 90 degrees on the x-axis
-
8
Convert text to a mesh.
- Make sure your text looks exactly the way you want it to as you will now be creating an object from it.
- Select the text with the left mouse (the text will be highlighted orange)
- Navigate to the object menu
- Go to convert to
- Then select mesh from curve/meta/surf/text
-
9
Remove double vertices from text.
- Select the text with the left mouse (the text will be highlighted orange)
- Then press Tab on your keyboard to be in edit mode
- Then press A to select everything
- Navigate to the mesh menu
- Go to clean up
- Select limited dissolve
- Press tab to exit edit mode
-
10
Change the material of the text.
- Go to the materials tab on the right side
- Press add new
- Then change the base color
- This is also where you can create materials if wanted but that will require the use of nodes which is more complex.
-
11
Position the camera so the text is visible.
- Select the camera with the left mouse (the camera will be highlighted orange)
- Select the move tool in the tool shelf on the left side of the screen
- If the tool shelf is not visible press «T» on your keyboard to toggle the visibility
- Then use the coordinate arrows to move the camera in the X, Y, and Z directions
- Also use the location and rotation tabs in the item panel, in the properties panel located on the right side of the screen
- If the properties panel is not visible press «N» on your keyboard to toggle the visibility
-
12
Check that your text is visible in the camera.
- Navigate to the view tab on the top
- Then viewpoint,
- Then select camera
- This will show you what is visible to the camera
- If your text is not fully visible within the view of the camera, you are going to want to move the position of the camera
-
13
Change the color of the background.
- Go to the world tab on the right side
- Go to the surface section
- Change the background color
-
14
Save your project.
- In the upper left-hand corner, click the file,
- Then click save as
- Choose a location and a name for your project
- Then click save as to save your project
-
15
Render your text.
- Click on the render option on the top left corner of the application screen to have a rendered view of the text.
- This will open a new window where your image will render at.
-
16
Save the rendered image.
- Once the image renders in the new window, go to the top and click the image and save as and save your final text.


Advertisement
Ask a Question
200 characters left
Include your email address to get a message when this question is answered.
Submit
Advertisement
-
Adding and positioning Camera and lighting also play a key role to show the view of the text made and its shadow details.
Thanks for submitting a tip for review!
Advertisement
References
About This Article
Thanks to all authors for creating a page that has been read 10,324 times.
Is this article up to date?
![]()
Download Article
![]()
Download Article
Blender is a powerful free open source 3d program that allows you to create animated films, visual effects, art, 3D printed models, motion graphics, interactive 3D applications, virtual reality, and computer games. This wikiHow will teach you how to create 3d text in blender that you can later use to make a 3d logo or animated intro, for example.
-
1
Open the blender program.
- If you do not have blender installed on your computer, you can go to blender.org and download it to your computer.
Advertisement
-
1
Orbit. Rotate the view around the point of interest.
- Ctrl-Alt-Wheel to rotate the scene around the global Z axis from your current point of view.
- Shift-Alt-Wheel which correspond to vertical MMB dragging
-
2
Roll. Rotate the viewport camera around its local Z axis.
- Use Shift-Ctrl-Wheel.
-
3
Panning. Moves the view up, down, left and right.
- To pan the view, hold down Shift and drag MMB in the 3D View.
-
4
Zoom.
- You can zoom in and out by holding down Ctrl and dragging MMB.
- The hotkeys are NumpadPlus and NumpadMinus.
- If you have a wheel mouse, you can zoom in and out by rotating the wheel.
Advertisement
-
1
Delete the cube in the starting scene.
- Select the cube with the left mouse button (the cube will be highlighted orange when selected).
- Press x on the keyboard.
- Select delete in the pop up menu.
-
2
Add text to the scene.
- Click “Shift + A” on the keyboard; a list will open on the screen.
- Select the “Text” option.
-
3
Edit the text.
- Select the text with the left mouse (the text will be highlighted orange when selected).
- Hit tab to enter edit mode.
- Type whatever you want the text to be.
- Make sure to spell everything right as later you won’t be able to change it.
- Hit tab to exit edit mode once you type what you want.
-
4
Change the font of your text.
- Go to the text tab on the right side («a» icon).
- In the text tab go to the font section.
- Press the little file icon for regular that will say “load a new font from a file” if you hover over it with your cursor.
- Select a font from your computer.
-
5
Extrude the text in the text tab.
- Go to the text tab on the right side («a» icon).
- In the geometry section to extrude your text by increasing the number for extrude.
- You can extrude your text to whatever size you want.
-
6
Center the text.
- Select the text with the left mouse (the text will be highlighted orange).
- Then right-click on your mouse and navigate to set origin.
- Then select geometry to origin.
-
7
Rotate the text.
- Select the text with the left mouse (the text will be highlighted orange).
- On your keyboard press R
- then X on the keyboard
- Then type in 90 on the keyboard
- Then press enter
- This will rotate the text 90 degrees on the x-axis
-
8
Convert text to a mesh.
- Make sure your text looks exactly the way you want it to as you will now be creating an object from it.
- Select the text with the left mouse (the text will be highlighted orange)
- Navigate to the object menu
- Go to convert to
- Then select mesh from curve/meta/surf/text
-
9
Remove double vertices from text.
- Select the text with the left mouse (the text will be highlighted orange)
- Then press Tab on your keyboard to be in edit mode
- Then press A to select everything
- Navigate to the mesh menu
- Go to clean up
- Select limited dissolve
- Press tab to exit edit mode
-
10
Change the material of the text.
- Go to the materials tab on the right side
- Press add new
- Then change the base color
- This is also where you can create materials if wanted but that will require the use of nodes which is more complex.
-
11
Position the camera so the text is visible.
- Select the camera with the left mouse (the camera will be highlighted orange)
- Select the move tool in the tool shelf on the left side of the screen
- If the tool shelf is not visible press «T» on your keyboard to toggle the visibility
- Then use the coordinate arrows to move the camera in the X, Y, and Z directions
- Also use the location and rotation tabs in the item panel, in the properties panel located on the right side of the screen
- If the properties panel is not visible press «N» on your keyboard to toggle the visibility
-
12
Check that your text is visible in the camera.
- Navigate to the view tab on the top
- Then viewpoint,
- Then select camera
- This will show you what is visible to the camera
- If your text is not fully visible within the view of the camera, you are going to want to move the position of the camera
-
13
Change the color of the background.
- Go to the world tab on the right side
- Go to the surface section
- Change the background color
-
14
Save your project.
- In the upper left-hand corner, click the file,
- Then click save as
- Choose a location and a name for your project
- Then click save as to save your project
-
15
Render your text.
- Click on the render option on the top left corner of the application screen to have a rendered view of the text.
- This will open a new window where your image will render at.
-
16
Save the rendered image.
- Once the image renders in the new window, go to the top and click the image and save as and save your final text.
Advertisement
Ask a Question
200 characters left
Include your email address to get a message when this question is answered.
Submit
Advertisement
-
Adding and positioning Camera and lighting also play a key role to show the view of the text made and its shadow details.
Thanks for submitting a tip for review!
Advertisement
References
About This Article
Thanks to all authors for creating a page that has been read 10,324 times.
Is this article up to date?
Введение
Ссылка
Режим: режим Правки (Текст)
Панель: Кривые и поверхности, Шрифт и Символ (контекст Правки)
Меню:

Примеры текста.
Объекты Текст именно такие, какими кажутся: они содержат некоторый текст. Они имеют тот же тип объекта как кривые и поверхности, так как современные шрифты (тексты, заголовки, и т. д.) это векторные, сделанные из кривых (как правило Безье).
Blender использует “шрифт системы” для управления картами шрифтов “код символа –> объект, представляющий их в 3D вид”. Это означает, что не только делает систему шрифтов, а имеет свой встроенный шрифт, но он может использовать внешние шрифты, в том числе шрифты PostScript Type 1, OpenType и TrueType. И последнее, но не наименее важное, он может использовать любые объекты, существующие в текущем .blend файле, как символы…
Тексты в Blender позволяют создавать/рендерить 2D или 3D текст, и затенять, как Вы хотите, с помощью различных вариантов компоновки (как выравнивание и кадры), как мы увидим ниже. По умолчанию, символы просто плоские и заполнены поверхностью, как и любая замкнутая 2D кривая. Но можно конечно выдавить их… И тексты могут следовать за другими кривыми.
Конечно, как только Вам понравится форма вашего текста, вы можете преобразовать его (с Alt-C, в объектном режиме), либо в кривую, либо напрямую в полисетку, что позволяет использовать все мощные возможности этих типов объектов на нем…
(Примеры текста) показывают примеры различных шрифтов в действии, в том числе “синий” шрифт, который был применен к пути кривой.
Примечание
Максимум 50000 символов разрешается в текстовом объекте; однако, будьте предупреждены, что чем больше символов в одном текстовом объекте, тем медленнее объект будет реагировать в интерактивном режиме.
Как вы можете видеть, когда вы переключаетесь между режимами объекта и правки панель шрифт остается прежней. Это означает, что его настройки могут быть применены одинаково в обоих режимах … и это подразумевает, что Вы не можете применить их, как только часть полисетки. Таким образом, шрифт, размер и т. д., являются общими для всех букв в объекте текст. Есть только одно исключение: кнопки управления на панели свойств жирный / курсив, определенные для каждой буквы (это способ использовать до четырех разных шрифтов в тексте).
Для оптимального использования ресурсов, используйте только символы, которые используются занимают память (а не весь набор символов).
Редактирование текста
Ссылка
Режим: Режим правки
Горячие клавиши: смотри ниже

Текст в режиме правки.
Редактирование текста довольно сильно отличается от других типов объектов в Blender, и происходит в основном в двух областях. Во-первых, 3D-вид, конечно, где вы вводите свой текст, и есть несколько сочетаний клавиш, например для применения стилей (см. символ) — заметим, однако, что большинство горячих клавиш Blender, которые Вы знаете в режиме режим правки не работают для текстов! На втором месте — кнопка окно (контекст Правки), специальная панель шрифт.
Меню заголовка окна 3D вида почти не используется, и нет меню специальное… У вас нет ни инструментов преобразования зеркало, и так далее. Однако, вы можете применить к текстам те же модификаторы как для кривых.
Редактирование текста аналогично, использования стандартного текстового редактора, но работает не как полнофункциональная версия и имеет некоторые отличия:
- Выход из режима Правки
-
Tabне вставляет символ табуляции в текст, а входит и выходит в/из режима правки, как и для других типов объектов. - Копирование
-
Чтобы скопировать текст в буфер, используйте
Ctrl-Cили кнопку Копировать на панели инструментов. - Вырезать и копировать
-
Для того чтобы вырезать и копировать текст в/из буфера обмена, используйте
Ctrl-Xили кнопку вырезать на панели инструментов. - Вставить
-
Чтобы вставить текст из буфера, используйте
Ctrl-Vили кнопку Вставить на панели инструментов. - Удалить весь текст
-
Чтобы полностью стереть или удалить текст, используйте
Ctrl-Backspace. - Home/End
-
Кнопки
Homeи :kbd:`End`перемещают курсор в начало и конец строки соответственно. - Следующее/Предыдущее слово
-
Чтобы переместить курсор на границу слова, используйте
Ctrl-LeftилиCtrl-Right.
Текст буфера не взаимодействует с рабочим столом. Он работает только в Blender. Чтобы вставить текст вне Blender, см. Вставка текста ниже.
Вставка текста
Вы можете вставить текст тремя разными способами: из внутреннего текстовый буфера (редактирование текста), или из текстового файла.
Чтобы загрузить текст из текстового файла, используйте инструмент После этого появится файловый браузер окно для навигации и поиска файла в допустимой кодировке utf-8. Как обычно, будьте осторожны, что файл не имеет слишком много символов, иначе интерактивный ответ замедлится.
Специальные символы
Ссылка
Режим: Режим правки
Меню:
Если вам нужны специальные символы (которых нет на клавиатуре) Вы можете вставить многие из их, используя комбинацию из двух других символов. Для этого введите основной символ, нажмите Alt-Backspace, а затем нажмите нужную клавишу “модификатор” для вставки специальных символов. Некоторые примеры приведены ниже:
A, Alt-Backspace, ~ |
ã | A, Alt-Backspace, ' |
á | A, Alt-Backspace, ` |
à |
A, Alt-Backspace, O |
å | E, Alt-Backspace, " |
ë | O, Alt-Backspace, / |
ø |
Преобразование текста в текстовый объект

Используя существующий текстовый блок, вы можете преобразовать его в объект из заголовка текстового редактора выберите , Один объект или Один объект на строку в зависимости от ваших потребностей.
Также можно вставить из буфера обмена или из файла меню Правка, при редактировании 3D текста.
3D полисетка
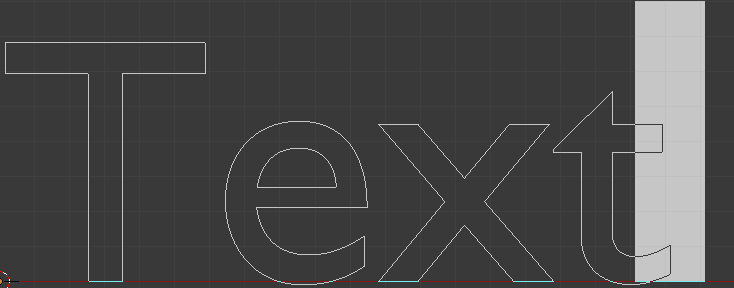
Можно преобразовать текстовый объект в объект 3D-полисетка. Это может быть полезно, так что вы можете редактировать вершины в режим правка, но вы потеряете возможность редактировать сам текст. Для этого идите в режим Режим объекта и выберите текстовый объект. Нажмите Alt-C и выберите Полисетка из Кривой/Мета/Поверхности/Текста. Теперь вы можете вернуться в режим правка и вручную редактировать вершины. Они обычно немного сумбурно, так что может быть полезно использовать ограниченное растворение удаление или Модификатор объекта Аппроксимация для низкой пороговой очистки полисетки.

слева обычный текст, справа текстовый объект.
Выделение текста
Текст в режиме правки.
В режиме Режим правки, ваш текст имеет белый курсор, и как в любом текстовом редакторе, он определяет где будут вставлены новые символы! Вы можете перемещать курсор с помощью клавиш со стрелками или используя кнопки PageUp / PageDown и Home / End.
Удерживая Shift, используйте клавиши со стрелками, чтобы выделить часть текста. Вы можете использовать это, чтобы указать различные материалы, нормальный/жирный/курсив стиль, и не более того…
Форматирование текста
Шрифты
Ссылка
Режим: Режим правки
Панельl: Шрифт (контекст Редактирования)
Панель Шрифт имеет несколько опций для изменения внешнего вида символов.
Загрузка и изменение шрифтов

Загрузка 1 файла шрифта.
Blender поставляется со встроенным шрифтом по умолчанию и отображается в каждом из четырех стилей шрифта, к сожалению встроенный шрифт не понимает русский язык. Встроенный шрифт всегда присутствует и показывается в этом списке как Bfont. Первая иконка содержит раскрывающийся список отображающий загруженные шрифты. Выберите один для каждого стиля шрифта.
Чтобы загрузить другой шрифт нажмите одну из кнопок загрузки на панели Шрифт и выберете действительный шрифт. Окно Файлового браузера*покажет все допустимые шрифты иконкой в виде прописной буквы F, как видно из рисунка *Загрузка 1 файла шрифта.
Примечание
Примечание для UNIX систем
Шрифты обычно располагаются в /usr/lib/fonts, или примерно такого вида каталог /usr/lib/X11/fonts, но не всегда. Они могут быть и в других местах таких как /usr/share/local или /usr/local/share, и возможно с относительными подкаталогами.
Если выбранный шрифт, Blender не может понять, Вы получите сообщение об ошибке Недопустимый шрифт.
Запомните тот же шрифт будет применен ко всем символам с же стилем в тексте, но это все таки надо выбрать отдельный шрифт для каждого стиля. Например, Вам необходимо загрузить шрифт курсив для того чтобы сделать текст курсивом. После того, как шрифт будет загружен, Вы можете применить этот шрифт “стиль” для выделенных символов или всего объекта. Для всего, Вам необходимо загрузить минимум четыре разных вида шрифтов для представления каждого стиля (нормальный, курсив, жирный, полужирный курсив).
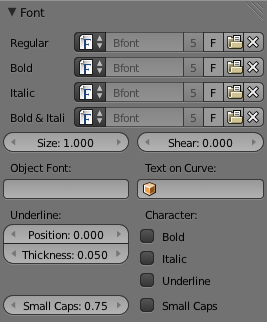
Важно понимать, что Blender не волнует, какой шрифт вы загрузили для “нормального”, “жирного” и др., стилей. Это, примерно как Вы могли бы иметь до четырех разных шрифтов в одном тексте — но Вам придется выбирать между разными стилями одного и того же шрифта, или разных шрифтов. Blender имеет ряд типографских элементов управления для изменения стиля и расположения текста, найти можно на панели шрифт.
Размер и сдвиг
- Размер
-
Регулировка размера всего текста (ни коим образом не контролирует размер каждого символа независимо). Заметим, однако, что символы разных шрифтов (разных стилей, см. ниже) могут иметь разные видимые размеры.

Сдвиг: ‘Blender’ имеет значение сдвига 1, а текст ‘2.59’ имеет значение сдвига 0
- Сдвиг
-
Контролирует наклон всего текста. Даже если это кажется похожим на стиль курсив, это не одно и тоже !
Объекты, как шрифты
Вы также можете “создать” свой собственный “шрифт” внутри Blender! Это довольно сложный процесс, поэтому давайте поподробнее про это:
-
Во-первых, вы должны создать свои символы. Каждый символ-это объект любого типа (сетка, кривая, Мета…). Все они должны иметь имя по следующей схеме:
общий префиксс последующимименем символа(например,ft.aft.bи др.). -
Затем, для объекта текст, необходимо включить кнопку Дублирование вершин (контекст объекта панель Дублирование).
-
Вернитесь в контекст Правки, и на панели шрифт заполните поле Объект шрифт общим префиксом ваших объектов “шрифт”.
Теперь, каждый раз, когда символ в вашем тексте соответствует суффиксу имени объекта “шрифта”, этот объект дублируется на этот символ. Оригинальные символы остаются видимыми. Объекты дублируются так, что их центр позиционируется в нижний правый угол соответствующих символов.
Текст на кривой
С модификатором кривая Вы можете разрешить тексту следовать за кривой.

Текст на кривой
На рисунке (текст на кривой) вы можете увидеть как текст деформируется по кривой (2D круг Безье).
Чтобы применить модификатор кривая к объекту, текст сначала должен быть преобразован в полисетку, используя Alt-C и нажмите кнопку полисетка.
Примечание
Есть также текст на кривой, но модификатор Кривая предлагает больше вариантов.
Подчеркивание
- Подчеркивание
-
Кнопка Подчеркивание переключает подчекнутость текста перед вводом. Текст также может быть установлен на подчеркивание, выбрав его, затем нажать кнопку Подчеркивание на панели инструментов.
- Положение
-
Позволяет Вам смещать по вертикали позицию подчеркнутого.
- Толщина
-
Контролирует толщину подчеркивания.

проверьте параметр символа, например, тип текста жирный текст
Символ

Жирным текст.
- Жирный
-
Кнопка переключается жирность перед вводом. Текст также может быть установлен как жирный, выбрав его затем нажать кнопку жирный панели инструментов.
- Курсив
-
Кнопка переключает курсив перед вводом. Текст также может быть установлен курсив, выбрав его, затем нажать кнопку курсив на панели инструментов.
- Подчеркивание
-
Включает подчеркнутость и контролируется настройками как описано выше
- Капитель
-
печатает маленькие заглавные буквы
Кнопки Blender полужирный и курсив не работают так же, как другие приложения, так как они также служат в качестве заполнителей, чтобы загрузить другие шрифты вручную, которые применяются при определении соответствующего стиля; см. Шрифты.
Чтобы применить атрибут текста полужирный/курсив/подчеркнутый к набору символов, Вы либо включите жирный / курсив / подчеркивание перед тем, как вводить символы, или выделите (выберите) первую и затем переключите полужирный/курсив/подчеркнутый.
Установка регистра букв
Вы можете изменять регистр текста, выбрав его затем нажатием кнопки В верхний регистр или В нижний регистр панели инструментов.
Включите Капитель и получите возможность вводить символы как малые прописные.
Размер Капители может быть изменен в настройки масштаба капители. Обратите внимание, что масштаб капители применяется один и тот же для всех отформатированных символов капители.
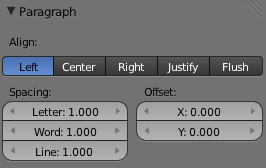
Абзац
Панель настройки Абзац нужна выравнивания и интервала текста.

вкладка абзац
Выравнивание
- Слева
-
Выравнивает текст слева от рамки, опорная точка объекта текст используется в качестве отправной точки.
- Центр
-
Центрирует текст в рамке, опорная точка объекта текст используется в качестве средней точки.
- Справа
-
Выравнивает текст по правому краю рамки, опорная точка объекта текст используется в качестве конечной точки.
- По ширине
-
Только сбрасывает линию при удалении по обтеканию текстом (не по
Return), он использует пробел вместо интервала между символами (кернинг), для заполнения строки. - Вровень
-
Всегда сбрасывает линию, даже когда еще не вошел; он использует интервал между символами (кернинг), чтобы заполнить линии.
Обе операции По ширине и Вровень работают только в пределах рамки.
Интервалы
- Символ
-
Коэффициент, который отвечает за промежуток между символами масштабируется в ширину
- Слово
-
Коэффициент, на котором пробельные символы между словами масштабируется в ширину. Вы также можете контролировать, нажимая
Alt-LeftилиAlt-Rightчтобы уменьшить/увеличить интервал по шагам0.1. - Линия
-
Коэффициент, которых влияет на расстояние по вертикали между строками масштабируется.
Смещение
- Смещение по X и смещение по Y
-
Ну, эти параметры определяют X-и Y-смещение текста относительно его “нормального” позиционирования. Обратите внимание (see текстовые блоки), применяются ко всем рамкам.
Форма
Ссылка
Режим: Режим объекта или Режим правки
Панель: Кривая и Поверхность (в контексте Правки)
Как вы можете видеть на панели Кривая и поверхность, для текстов почти те же параметры, как у кривых.
Разрешение
Разрешение Предпросмотра и Рендера. Смотри разрешение кривой.

параметры формы
- Быстрое редактирование
-
отключает заполнение кривой в режиме редактирования.
Fill (Заполнение)
Параметры заливки управляют как кривая текста будет заполнена, когда текст Выдавят или Скосят на панели геометрия.
- Шрифт
-
Заполняет лицевую сторону поверхности.
- Сзади
-
Заполняет обратную сторону поверхности.
- Заполнять после деформации
-
Заполняет кривые после применения ключей формы и модификаторов.
Текстуры

Настройки текстуры
- Использует UV карту
-
Использует UV значения как сгенерированные текстурные координаты.
- Авто Текстурное Пространство
-
Настройка активного объекта текстуры автоматически при трансформации объекта.
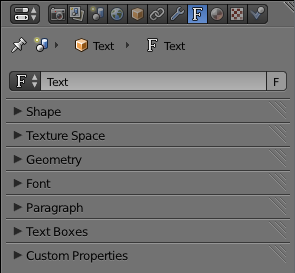
Для создания трехмерного текста в Blender установите 3D-курсор в нужную позицию, нажмите Shift -«A» и выберите «Add» → «Text«. В окне 3D-вида появится плоский 2D объект — слово «Text«. Для изменения текста выделите его и перейдите в Режим Редактирования (клавиша «TAB«). В Окне Свойств перейдите в раздел «Font» где расположены настройки шрифта. Многие настройки шрифта схожи с настройками в текстовых процессорах, но некоторые отличаются.
Вот основные из них:
Панель Shape: Установки качества отображения шрифта (Resolution) и параметры заполнения (Fill). Панель Geometry: Наиболее часто используемые настройки:
Offset сделает текст несколько более толстым; Extrude создаст объем текста (глубину);
bevel сглаживает углы объемного текста.
Вы можете использовать объект-кривую для задания формы основания и формы фаски.
Панель Font: Здесь вы можете выбрать стиль шрифта, который хотите использовать. Шрифт Blender выбран по умолчанию, но вы можете изменить его на любой True-Type шрифт.
|
Содержание главы |
ОГЛАВЛЕНИЕ |
184
Если вы используете Windows, шрифты обычно распологаются в каталоге C: Windows. В Linux шрифты можно найти в каталоге /usr /share /fonts / truetype.
Параметр Shear создаст эффект наклонного шрифта, по аналогии со стилем Italic. Поле «Text to Curve» можно использовать для изменения формы текста вдоль кривой.
Панель Paragraph: Обычные параметры выравнивания и отступа.
Панель Text Boxes: По умолчанию, текст будет продлеваться вправо столько, сколько вы захотите. Здесь вы можете настроить область, по которой текст будет форматироваться (переноситься).
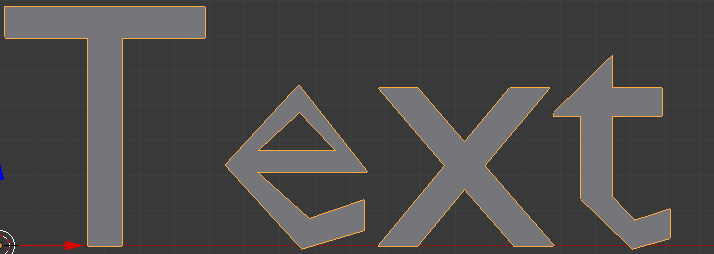
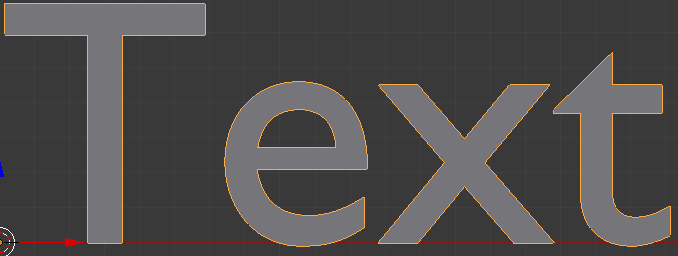
Текст на иллюстрации слева был экструдирован и к нему была добавлена фаска (bevel). Некоторые шрифты при экструдировании будут выглядеть лучше, чем другие. Экспериментируйте!
|
Содержание главы |
ОГЛАВЛЕНИЕ |
185
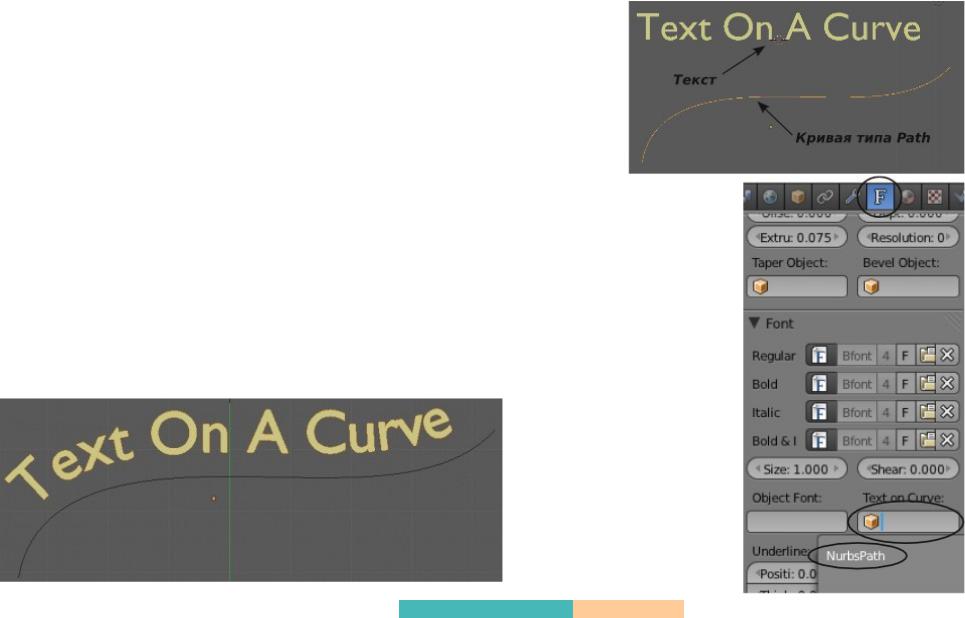
Размещение Текста на Кривой
Blender может изменять форму текста в соответствии с формой Кривой (Curve), которой он следует.
Для создания изогнутого текста нажмите Shift -«A», в меню «Add» выберите «Curve«, затем «Path» (или любой другой вид кривой). Перейдите в Режим Редактирования и по желанию измените форму кривой. Затем выйдите из Режима Редактирования, нажав клавишу Tab.
После создания текста, убедитесь что текст выделен, перейдите в раздел Font в Окне Свойств и найдите поле»Text on Curve«. Щелкните в поле и из появившегося меню выберите нужную вам кривую. Текст примет форму выбранной кривой. Возможно, вам потребуется настроить расстояние между буквами для лучшего внешнего вида текста.
|
Содержание главы |
ОГЛАВЛЕНИЕ |
186
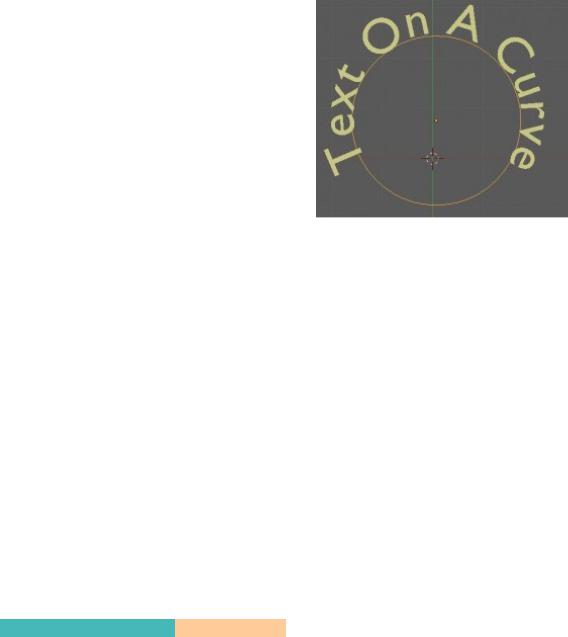
Другие типы кривых могут быть использованы для изменения формы текста точно таким же образом. Чтобы случайно не удалить кривую во время работы, переместите ее в неиспользуемый слой (клавиша «M«).
Когда экструдируете текст для заголовков и лейблов будьте аккуратны с толщиной букв.
Слишком толстый текст может оказаться плохо читаем.
|
Содержание главы |
ОГЛАВЛЕНИЕ |
187
Соседние файлы в предмете [НЕСОРТИРОВАННОЕ]
- #
- #
- #
- #
- #
- #
- #
- #
- #
- #
- #
Здравствуйте. Меня зовут Dziro_12, и сегодня я расскажу про текст в Blender. Перед тем как приступить к работе, откройте User Preferences(CTRL+ALT+U). Передите на вкладку “File” и в строке “Fonts” укажите путь у шрифтам:
- Windows: C:WindowsFonts
- Linux:
- /usr/share/fonts
- /usr/share/X11/fonts
- /usr/local/share/fonts
- ~/.fonts
Чтобы узнать точное расположение шрифтов, откройте etc/fonts/fonts.conf. В разделе <!— Font directory list —> указываются директории, в которых систем будет искать шрифты.
Итак, приступим.
- Добавим текст. Add — Text или SHIFT+A->Text
- Появится текст. Нажмите R/X(90). Перейдите в режим редактирования (TAB). Выйдете из режима редактирования. Русский текст можно ввести, только если данный шрифт поддерживает его.
- Давайте рассмотрим параметры текста:

Shape(Форма)

Resolution(Разрешение): отвечает за качество текста во вьюпорте(Preview) и на рендере(Render).
Display: отключает заполнение в режиме редактирования.
Fill: заполняет текст в зависимости от режима.
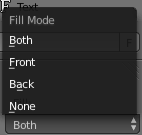
- Both: заполняет весь текст.
- Front: заполняет текст спереди.
- Back: заполняет текст сзади.
- None: не заполняет текст.
Geometry (Геометрия)
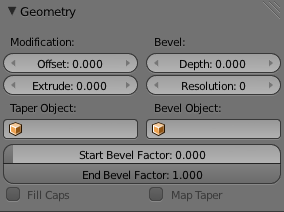
Modification(Модификация):
- Offset(смещение): позволяет делать текст шире или уже.
- Extrude: выдавливает текст.
Bevel(Фаска):
- Depth (глубина фаски): Добавляет фаску к тексту.
- Resolution(Разрешение): Качество фаски.
Taper Object(Сужение по объекту): Чем шире кривая тем шире текст и наоборот.
Bevel Object(выдавливание объекта): выдавливает объект по кривой.
- Bevel Factor: Урезает кривую.
- Start(Bevel Factor) –начало.
- End(Bevel Factor) – конец.
Font:
- Regular: обычный.
- Bold : жирный.
- Italics: курсив.
- Bold & Itlac: Жирный и курсив.
- Size это размер текста.
- Shear – наклон текста.
Paragraph(Параграф)
Align: выравнивание текста.
- Left: по левому краю.
- Center: по центру.
- Right: по правому.
- Justufy: По ширине.
- Flush: выравнивание текста по левому и правому краю.
Spacing:
- Letter: ширина между буквами.
- Word: ширина между словами.
- Line: ширина между строками.
- Offset: Смещение от центра по x и y.
In this article we will take a deep dive into the text object, what options and features we have as well as some common 3D effects that we may want to use our text for in Blender.
To create 3D text, go to the add menu in the 3D viewport and choose text. Press tab, erase the text and type what you want. Next, go to the geometry section in the object data tab and increase the extrude value. Press tab to go to object mode and right click and choose convert to mesh.
Let’s continue to explore.
Introduction to text in Blender
When we talk about text in Blender, we may refer to multiple things.
We may refer to text in Blenders text editor where we write scripts. It can also be text for the video sequence editor in the form of text on screen or perhaps subtitles just to name a few examples.
Here, we focus on the text object, as part of our 3D scene. Whenever I refer to text, it is in the context of the text object if nothing else is mentioned.
We will start with some basics.
How to add or change text in Blender
To add a text object, we press Shift+A in the 3D viewport and choose text. To change the text we then press Tab to go into edit mode. We can now erase the default text and write anything we want.
Something important to understand, is that text objects are based on curve objects. Therefore, many settings are inherited from curve objects. Each letter is made up of one or more curves. Just keep this in mind as we continue to learn more about text.
We only have two modes available with a text object. Object mode and edit mode. In object mode we have our regular transformations available. Move, rotate and scale. We can use these transformations to make basic changes.
Note though that just like with any other kind of object, if we scale or rotate we may have to apply the scale and rotation. This is if our tools and modifiers don’t work as expected.
Related article: How and why do we apply scale in Blender?
When a text object is scaled, applying the scale will readjust the text size to whatever size that fits the scale of the object. Any uniform scaling will be lost and the font will regain its default ratio.
We can also change the text size directly. Find the object data properties in the properties panel, represented by a green lower case «a» icon. Here you will find the text settings.
In the font section we will find the transform subsection. The first property here is the size. This is the value Blender will adjust after we apply a scaled text object.
In this section we also have a shear slider to angle the letters.
Writing text in edit mode
When we press tab and enter edit mode, creating text is just like any other text based application. We can write and move the cursor with the arrow keys.
To select text, we can hold shift while pressing the arrow keys to select more letters forward or backwards.
While in edit mode we also get four extra buttons in the font section.
- Bold
- Italic
- Underline
- Small caps
To use any of these features on our text, we first need to select the text in edit mode. Hold shift and an arrow key to select.
But clicking any of these buttons, even with selected text, will have no effect on the text though. This is because by default, the bold and italic fonts are the same as the regular.
How fonts work in Blender
You have probably already seen where we change the font, right in the font section. There are four input widgets.
- Regular
- Bold
- Italic
- Bold & Italic
By default, all is set to Bfont, Blenders default font. This is why nothing happens when we tried to make part of our text bold or italic.
Whenever we change a font from regular to bold, italic or both, we really change font for the selected portion of the text. Most fonts we use have multiple versions to account for these different styles.
In Blender, we have to browse for these fonts and input them for each text object. This also means that we can input any font we want for the italic or bold version. So if we use multiple fonts in the same text object and know that we don’t need a bold or italic version, we can just insert any font we want and use bold and italic to switch between them.
Press the folder icon in either of the font slots and browse for your font file. You can also click the «F» to choose any font that is already loaded into the blend file.
On Windows, the browser will automatically open to «c:windowsfonts». You can change this folder in the preferences. Go to «Edit→Preferences» and find the «file path» section. At the top is the font folder setting.
While using the browser, if you know the name of a font you can search for it in the top right corner. Searching for a font will filter the view in real-time and generally, you will find all versions available with slightly different names. A trailing «B» often represents the bold version and a trailing «I» the italic.
I will input the Arial font into the bold slot to test. However, the buttons to change style still don’t work. Currently, there seems to be a bug in Blender where pressing these buttons don’t work. But if you are still having problems with the current Blender version as you read this, you can use the shortcut keys.
- Ctrl+B, Bold
- Ctrl+I, Italic
- Ctrl+U, Underline
- Ctrl+P, Small caps
You can change these shortcuts by going into Edit→Preferences and find keymap. Select name and search for «toggle style» and you will filter to only these four keymaps.
The underline and small caps styles don’t have dedicated fonts. These are just style changes. In the transform subsection we also find three related settings. The underline position will raise or lower the underline while underline thickness, increases or decrease the thickness.
The small caps scale changes the size of text with this effect. We can change the slider from 0 to 1, but any number can be typed in. Even negative.
Let’s move on to explore the Paragraph section. Here we will find settings for text alignment. The alignment is in relation to the object origin, and we can change both the horizontal and vertical alignment.
In the spacing subsection we have options to adjust spacing between letters, words and lines. There is also an offset for X and Y. The offsets here probably have more to do with alignment than spacing since it just moves the text in these directions.
Next we have the Text boxes section. For longer texts we can use this to layout our text into different boxes. Text that is so long that it spans multiple boxes will overflow into the next box.
In edit mode we can see an outline of each box making it a bit easier to understand.
The overflow setting will decide what happens to text that does not fit in the boxes. We can have it overflow in the vertical direction of the last box, truncate it, just removing text or size the text to fit inside.
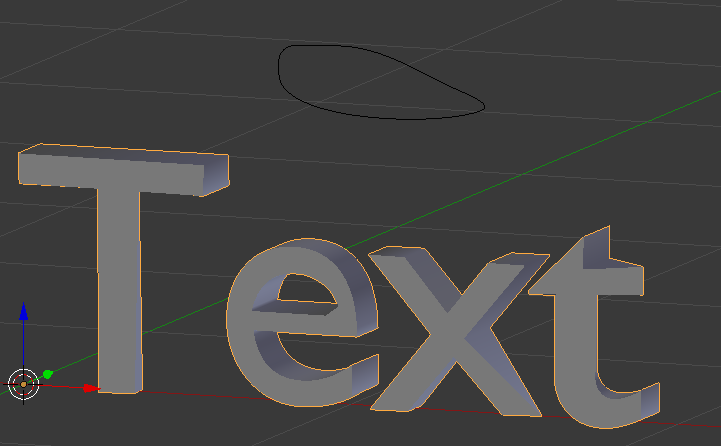
How to make 3D text in Blender
So far, all our text is still 2D. To convert our text into 3D there are two sections in the object data properties that we need. The shape section and the geometry section.
The easiest way to get started is to go straight to the geometry section and increase the extrude slider. As we increase the slider, geometry will be added equally in the local positive and negative Z direction of the text.
You may think that the offset slider will offset the text in the Z direction but this is not the case. Instead, it is offset in the local X and Y direction for each letter. Be careful with this setting as it may quickly create overlapping geometry.
Taper
The taper is a bit odd. My understanding of tapering is that we take one curve, add geometry to it and use another curve to tell the thickness along the first curve.
Blenders text object is based on curves behind the scenes, but we can’t decide where each curve that make up a letter start or end. Therefore, each curve making up the letter gets a taper from start to end according to the taper object. But we can’t control the outcome very much.
If you want some cartoon looking text, try it out. In all other cases, I can’t find a use for this currently. But it helps to deepen the understanding of how letters are built, and that is interesting I think.
Bevel
The bevel settings are pretty straight forward. The depth parameter decides the thickness of our bevel. Careful here, it is easy to get overlapping geometry with too high values.
The resolution tells Blender how many loop cuts to put along each bevel, making it smoother with higher numbers. But going beyond 5 or 6 is probably overkill.
Next we have an object slot. This takes a curve object as input. We can use this to shape the profile of the bevel. But not in the way you might think. This is an example of what we can create with a bevel object and a closed curve.
In this case we also have to go to the shape section and change the fill mode to none.
In this case when we use it together with a curve object we have to be careful with artifacts though. This can be pretty difficult to deal with depending on the shape and scenario.
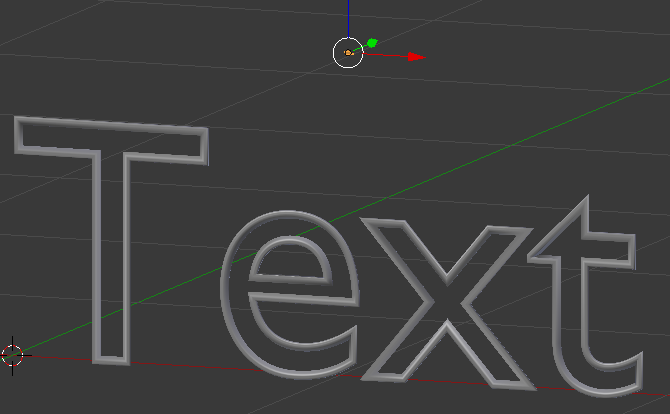
Shape
In the shape section we also have the resolution setting. The resolution preview u parameter will increase the amount of geometry in the letters. For instance this is a text with a resolution of 2 compared to a resolution of 12.
We can change the render U resolution, but with a value of 0 it will inherit the resolution from the preview.
The fast editing will hide the text in edit mode in order to speed up the typing experience. This is generally not needed in my experience.
We already touched on the fill mode. It essentially decides if we want to fill the front, back, both or no part of the surface. In the curve example above we choose to only let the edges remain, and then we created the geometry through the bevel alone.
Convert text to mesh object
To convert a text object to mesh we select the text object in object mode, right click and choose Convert to mesh.
This is a common practice because most times we want to have control over the mesh. A few examples are that we may want to use a different set of modifiers that isn’t available for text object. We may also want to simulate the text. For instance, have the letters fall in a pile with rigid body simulation.
Often, the best way to create and modify the text may be to just write it in a text object, then immediately converting it to mesh just because of the large variety of tools and precise control we get access to.
For example, we can use the bevel modifier and get much more control compared to the bevel feature on the text object.
Before we can start to use all mesh tools, we generally have to create a better topology on our text.
How to create even mesh for a converted text object
In my article on 30 Blender modeling tools I suggested a combination of «beautify faces» followed by a «tris to quads» operation. You can find it in this article.
Related content: More than 30 Blender modeling tools explained
This is a fairly quick way to get a more even geometry in many cases without increasing the amount of geometry. However, if this does not work in our case. For instance, we could have a very complex font to work with. We may try another method. Most likely remeshing or manual retopology. We will look into remeshing here since it will be the way to go in almost ever case, where the above does not work.
In Blender, we have two ways of remeshing. There is a remesh modifier and the remesh tools we find in the object data tab.
In this case I find the remesh modifier easier to work. That is because we get much better feedback on our changes, so we will look into that.
Keep in mind that in order for this method to work we need some depth to our text. We can create it with the extrude setting while our object is still a text object. But if we already converted we can use the extrude tool in edit mode or add a solidify modifier above the remesh in the modifier stack.
Change the mode to sharp and deselect remove disconnected pieces. In my case an Octree depth of 6 worked well and then I adjust the scale.
Here is an example where I animate the scale value between 0.2 and 0.990.
From here we have a much better starting point. But remember to not add more geometry than you need for your text to be even. If you need denser geometry you can always add a subdivision surface modifier set to either simple, or catmull-clark if you want the curvature.
Blender text effects
There is an endless variation of text effects and animations that we can create in Blender. I will show a few simpler ones here that you can use to get your mind spinning.
When doing this we are quite dependent on modifiers and if you are unfamiliar with them you can read more about them here:
Related content: How modifiers work in Blender, an overview
You can also learn some of the most common modifiers here:
Related content: Top 10 Blender modifiers and how they work
Blocks
Let’s start by looking at some block text. Here is an example:
We can achieve this style with a few modifiers.
We will start with an object that has some thickness and is converted to a mesh object. Then we will start by adding modifiers to this object. First we add the remesh modifier to get a workable mesh as described above.
After that we add a bevel modifier. Make sure that clamp overlap is deselected. At this point it does not matter if our topology is a bit overlapping. I changed the width to about 0.05 and set the limit method to «angle».
Next I add another remesh. This time I set it to the blocks method. In my case an octree depth of 8 and a scale of 0.35 worked well.
Boolean
Another type of effect we can create is boolean. This is when we make a text carve into another object. This is the example:
As you can see I used the block text from the example above to carve into a cube object. Another fairly simple but common effect.
In this case we intersect the text with the cube. Then we add a boolean modifier set to difference to the cube object. In my base I used the bool tool add-on to automatically change the draw mode of the text to bounding box. This allow me to see the effect.
Find out more about add-ons here.
Related content: 30 Blender addons (install, manage, free and paid)
You can change the draw mode manually if you go to the object properties tab in the properties panel. That is the yellow icon. Go to viewport display and find «display as» and set it to bounds.
Next I added a bevel modifier to get some better lighting. I also had to check «harden normals» on the bevel modifier and activate auto smooth in the object data properties.
Follow curve
To have an object follow a curve we don’t need to convert the text to mesh.
- Add a curve with the origin exactly on top of your text objects origin.
- You can select the text object, press Shift+S and set cursor to selection, this way the curve will be added to the exact same origin as the text object.
- Go into edit mode for the curve and adjust it to your liking
- Go to object mode and select your text object.
- Go to the font section and find «text on curve», select your curve object here.
- You may have to adjust your spacing. Go to the Paragraph section and find the Spacing subsection. Here you will see Character, Word and line spacing. You likely have to adjust character spacing.
Add text to a surface of another object
The last effect we will look at is how we can take a text and project it onto the surface of another object. Here is the example.
To create this effect, I created a flat text object and converted it to mesh. Then I used the «beautify faces» and «tris to quad» tools in edit mode to even out the geometry.
Next I positioned the text in front of the sphere so that It covered the area I wanted the text to be from an orthographic view.
Then I added a shrinkwrap modifier to the text and set the sphere as the target. Then I set the mode to «target normal project».
From here we add a solidify modifier and increase the depth of the text.
Note that the text is prone to getting skewed a bit when projected on a sphere. If you have a very long text to project such as in my case, the start and end will be visibly smaller when viewed from certain angles.
Another way to do this is to take a string of edges from the sphere and copy those to its own object and convert it to a curve. Then use that as a curve object for the text to follow. It is a bit more involved though.
Create your own font in Blender
We can create our own font in Blender, or at least kind of. The font we create won’t be usable in another application. There are other workflows to achieve that. But if we want to type out our own objects we can do that.
Create a text object and go to the text object properties panel. Find the font section and expand the transform subsection.
Here you will find a setting called «object font». Here you can type the name of your font. I will go with «font-«.
Create a new mesh object and call it «font-a».
Select your text object again, go to the object data properties and find the instancing section. Here, select verts and deselect display instancer.
Now enter edit mode and type «a». Note how your object is displayed instead of the letter «A». We can continue to create the whole alphabet.
If you keep the display instancer setting on, you will get both the letter from the font, and your object. This way we can create kind of an extension to the letters.
If the objects you create are too large, you can increase the spacing between letters. Go to the object data properties and find the paragraph section. In the spacing subsection you will find «character spacing». Increase it to space the objects further apart.
Final thoughts
By now you should have a solid understanding of how to use text objects in Blender. A key to mixing text and 3D is to have a good topology as we convert text to mesh. But understanding how the text object works and what different tools we have available as we move from text object to mesh object is also key.
Thanks for your time.