If you suddenly encounter Error 0x80000003 while trying to execute a random file then read on as this post will show you how you can fix such an error. Obviously, it mostly happens on executable files or .exe files and is most likely caused by the conflict in the execution of some registry files or it could also be caused by missing drivers or it could also be due to some incompatible hardware which is why you’re unable to run the executable file.
When you encounter this error, you will see the following error message on your screen:
“The exception Breakpoint, A breakpoint has been reached, (0x80000003) occurred in the application.”
As you can tell, the Windows Executive STATUS message is a warning and if you are given an option, you must select one of the options from the message box. So if you are running the application in an end-user environment rather than in a development environment, you must contact the supplier of the running application regarding this error message since this shouldn’t be happening when a finished program is running.
Before you get started executing the troubleshooting guide given below, make sure that you create a System Restore Point first since you will be dealing with some critical settings in Windows. Having done this, proceed to the options provided below.
Option 1 – Try to run the CHKDSK utility
Running the CHKDSK utility might also help you resolve Error 0x80000003. If your hard drive has issues with integrity, the update will really fail as the system will think that it’s not healthy and that’s where the CHKDSK utility comes in. The CHKDSK utility repairs hard drive errors that might be causing the problem.
- Open Command Prompt with admin privileges.
- After opening Command Prompt, execute the following command and hit Enter:
chkdsk /f /r
- Wait for the process to be completed and then restart your computer.
Option 2 – Try to run a System File Checker scan
You can also try to run a System File Checker or SFC scan in order to scan your computer for corrupted files that might be the cause behind the Error 0x80000003. Once it finds any corrupted system files, it will automatically fix them. To run System File Checker, here’s what you have to do:
- Tap Win + R to launch Run.
- Type in cmd in the field and tap Enter.
- After opening Command Prompt, type in sfc /scannow
The command will start a system scan which will take a few whiles before it finishes. Once it’s done, you could get the following results:
- Windows Resource Protection did not find any integrity violations.
- Windows Resource Protection found corrupt files and successfully repaired them.
- Windows Resource Protection found corrupt files but was unable to fix some of them.
- Restart your computer after the scan is completed.
Option 3 – Perform a Clean Boot
There are some instances that some conflicting programs installed in your computer might be the one that’s causing the Error 0x80000003 to appear. To identify which program is causing the problem, you need to put your computer in a Clean Boot State. To do so, follow the steps below.
- Log onto your PC as an administrator.
- Type in MSConfig in the Start Search to open the System Configuration utility.
- From there, go to the General tab and click “Selective startup”.
- Clear the “Load Startup items” check box and make sure that the “Load System Services” and “Use Original boot configuration” options are checked.
- Next, click the Services tab and select the “Hide All Microsoft Services” check box.
- Click Disable all.
- Click on Apply/OK and restart your PC. (This will put your PC into a Clean Boot State. And configure Windows to use the usual startup, just simply undo the changes.)
- From there, start to isolate the problem by checking which one of the programs you installed recently is the root cause of the problem.
Option 4 – Run the Memory Diagnostic Tool to check for Memory leaks
- Tap the Win + R keys to open Run and type mdsched.exe and hit Enter to open the Windows Memory Diagnostic Tool.
- After that, it will give two options such as:
- Restart now and check for problems (Recommended)
- Check for problems the next time I start my computer
- Once your computer has restarted, perform a basic scan or you could also go for the “Advanced” options such as “Test mix” or “Pass count”. Simply tap the F10 key to start the test.
Option 5 – Try contacting the developer
If you find that you’re getting Error 0x80000003 on only one particular application, then you can try to contact the developer of the software that’s throwing up this error. All you have to do is search the web for the official support channel of the software and discuss the error from there.
Advanced System Repair Pro
One-click automated PC repair solution
![]()
With Advanced System Repair Pro you can easily
DOWNLOAD
Advanced System Repair Pro is compatible with all versions of Microsoft Windows including Windows 11
Share this article:
You might also like
As you know, the Office Language Packs need to be installed right after installing Office. It also has to be on the correct version of Office so if any of these conditions are not met, you will most likely get error codes 30053-4 or 30053-39 when you install a language pack in Microsoft Office. If you are currently facing this error, read on as this post will help you fix the problem. Here’s the full context of the error message:
“Something went wrong, Sorry, installation cannot continue because no compatible office products are detected.”
When you have to work on two different languages, that’s where the language packs come in handy. You might have to work on one language but when it comes to proofreading or help, you need another language. Note that some language accessory packs offer partial localization which is why some parts of the Office might show the default language.
If you are using Office 365 or Office 2019, 2016, 2013, or 2010, you need to go to the language accessory pack page from office.com and select your language. Once you see the download link, click on it to start downloading the pack. It includes the display in the chosen language, proofing tools for the selected language, as well as the Help in the selected language. Once the installation is complete, follow each one of the given options below to configure the language accessory pack properly.
Option 1 – Select Editing and Proofing language
- You need to open any Office program and navigate to File > Options > Language.
- From there, you need to make sure that the language you want to use is in the list under the Choose Editing Languages section.
- After that, you can add or remove the language that Office uses for editing and proofing tools.
Option 2 – Configure the Display and Help languages
In this option, you can change the default display and help languages for all the Office applications so whatever you choose will be used for all the buttons, menus, and support of all the programs. After you select the language, restart all the Office applications to apply the changes made successfully.
On the other hand, if you are using Office volume license versions, note that only an administrator account can install this if you are using the Volume License version of Microsoft Office 2016. You have to download the ISO image of the language packs, language interface packs, and the proofing tools from the VLSC or Volume Licensing Service Center. This process can be quite complicated so you might have to go to the docs.microsoft.com page to be guided accordingly. After you installed everything correctly, the error code 30053-4 or 30053-39 should now be fixed.
Read More
Open Source Software is developed, tested, or improved through public collaboration and distributed with the idea that the must be shared with others, ensuring an open future collaboration. In other words, it is free software developed and maintained by public contribution. Many open-source projects have reached performance and usability like their paid alternatives, some have even surpassed them. Here we will explore open source alternatives to paid applications, you will find alternatives to paid ones that aim to do the same task.
-
LINUX — alternative to Windows or macOS
When it comes to the operating system, Windows and macOS mostly dominate the home market, but if you go a little deeper into the OS world you will hear this talk about LINUX and its distributions. LINUX is an open-source operating system, it has many various distributions aimed at different types of users and they are also open source as well. Its security and account privileges, as well as complete control over it, make it one of the best-operating systems in the world, many servers that run websites today use LINUX as their choice of operating system mostly due to its superior security features. If LINUX is good enough for big web companies, I am sure it will be at least satisfactory to you as well. Get your LINUX distribution here.

-
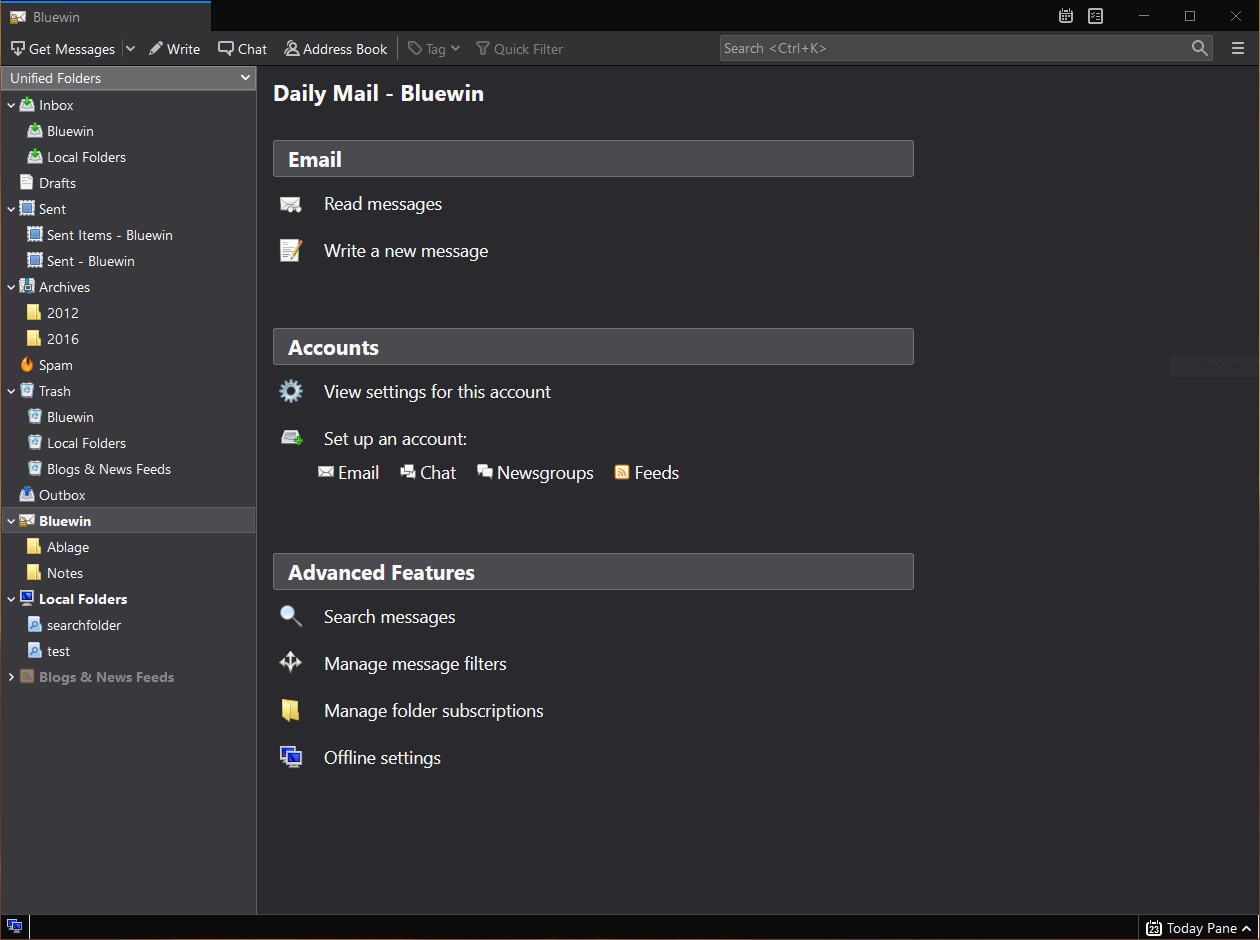
Thunderbird — alternative to outlook
A great alternative to any mail client actually, connect all of your emails into thunderbird and use it as the centralized email client for all of your email needs. Thunderbird does not lack any features that its paid counterparts have and overall it is a great application worth installing. Grab it from here.

-
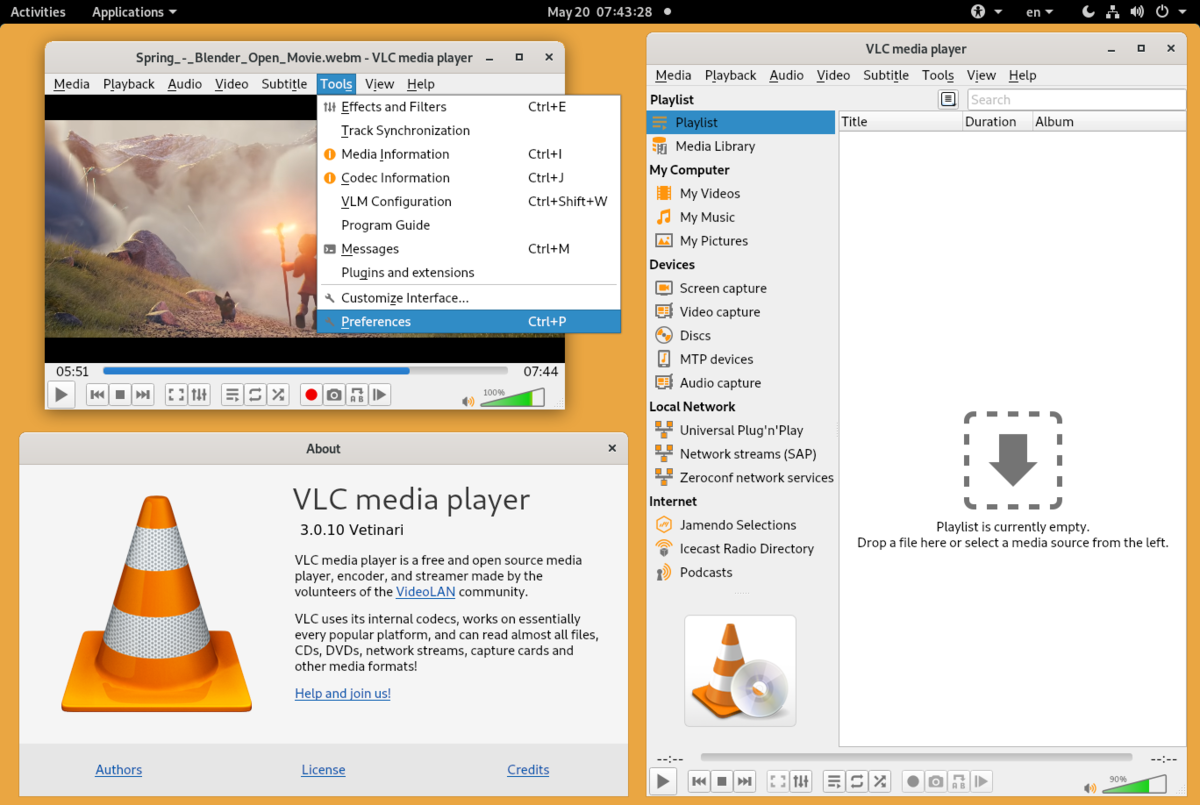
VLC media player — media player able to play almost anything
Are you looking for a great media player alternative to Windows media player or iTunes? Look no further, VLC is a lightweight media player that can play almost any file type, it is customizable and packed with features even its paid counterparts would envy. Its playback features are unmatched by other applications and once you try it, I am sure you will hardly go back from it. Give it a go and grab it from here.

-
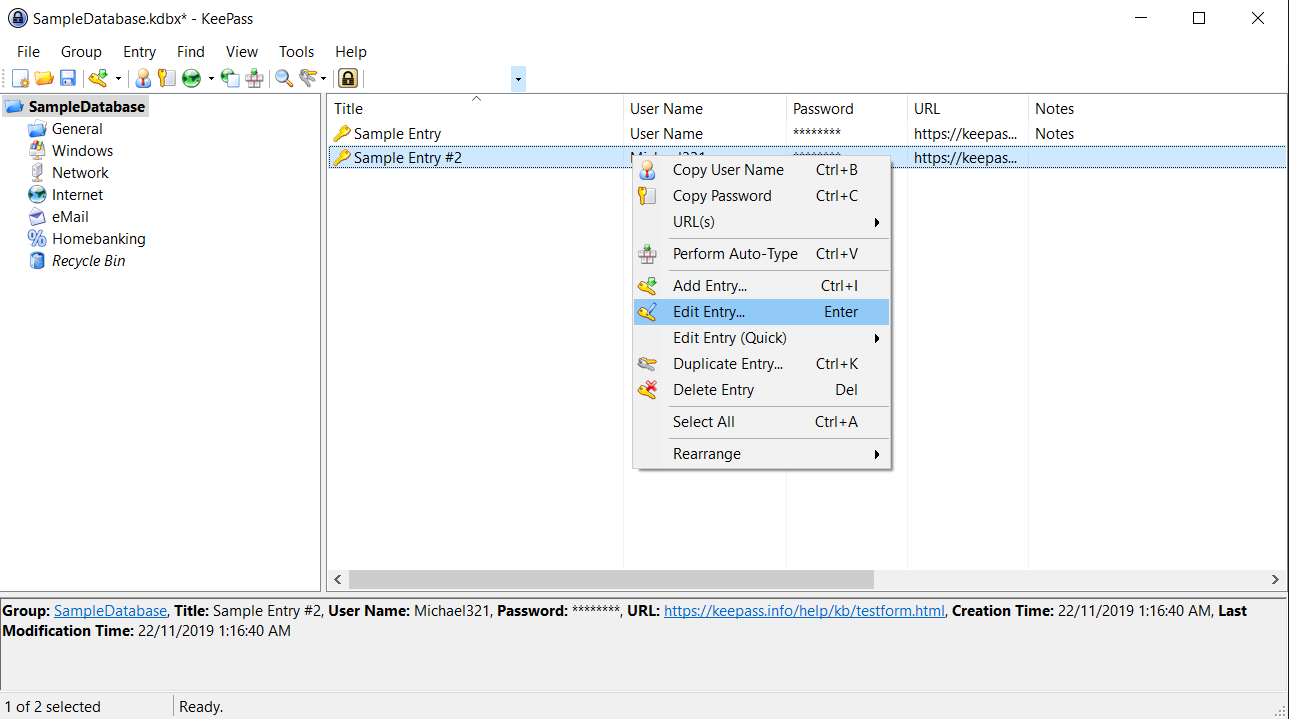
KeePass — password manager
Keepass is a simple, user-friendly lightweight password generator and manager, it uses industry-standard AES encryption and two-factor authentication to keep the details of your accounts safe and secure. you can store him and the database on a USB stick for safekeeping making it a great one to use on a go, wherever you need it. Get it from this link.

-
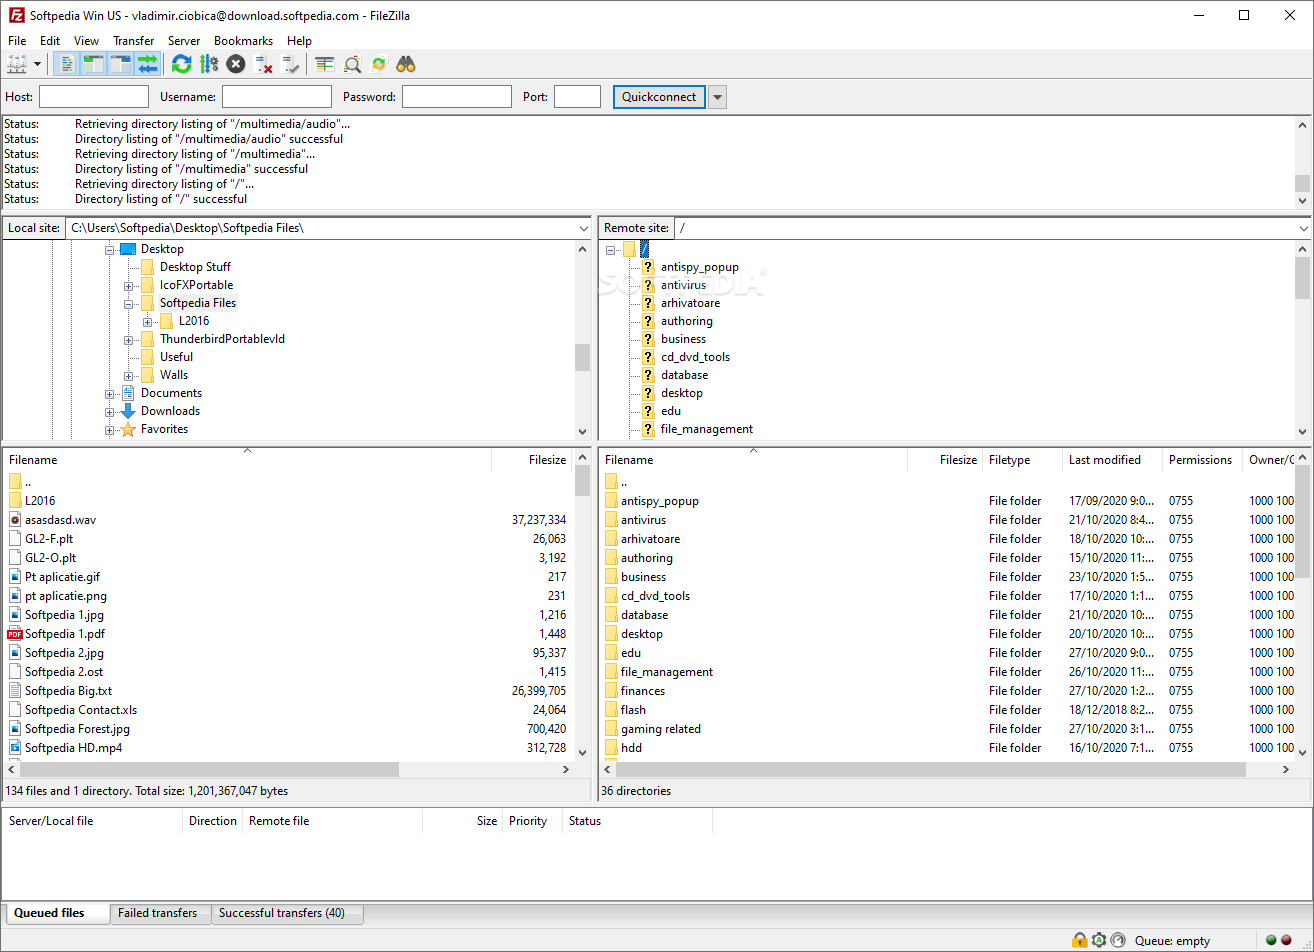
FileZilla — FTP client
A lightweight and future-rich FTP solution. It supports remote file editing and resuming of lost transfers, overall great application which anyone who needs this type of software should not overlook. Download it from its official website.

-
Audacity — alternative to Audition, Fl, apple logic pro,…
Digital audio editor and recording computer software with some great features like recording audio from multiple sources, post-processing of all types of audio, including podcasts by adding effects such as normalization, trimming, and fading in and out. Audacity has a great following and it is well documented, easy to learn and use. Grab it from here.

-
Shortcut — alternative to adobe premiere, avid media composer, DaVinci resolve
The shortcut is a video editor application that demonstrates how long an open-source project can go if enough dedication and work are put into it, started as not so great and not so feature-packed in beginning, today it can easily contend with its paid counterparts with its non-destructive editing, color gradation, keyframing, etc. It is running and using FFmpeg, an open-source video framework that lets it open and works with virtually any video or audio format. Download it from here.

-
Gimp — alternative to adobe photoshop
This one has been around since 1996 and it is one of the best maintained open source applications. With its features like built-in support for layers, filters, and automatic photo enhancement. It also makes it easy to create new graphic design elements and you can really take things to the next level by downloading plug-ins created by the broader GIMP open source community. Gimp is the best pixel manipulation-free tool on the market and with the right skills, it can go side by side with adobe’s flagship product. Check it out here.

-
Inkscape — alternative to adobe illustrator, Corel draw
What is Gimp for photoshop that is Inkscape for illustrator. This free open-source vector graphic tool does not fall behind with its tools in comparison to its paid counterparts and I would highly recommend it for anyone. Features like alpha blending, cloning on-point path manipulations can assure that you can create anything you want inside it. get your copy from here.

-
Libre office — alternative to MS office
Libre office is one of the most quality office suite there, it has spreadsheets, word processor, presentation app, calculation applications, database application, and diagrams. All these applications create and make one great suite that can open Microsoft Office files and even work with them naturally. Completely free and active in development there is no reason, not t use it in your daily routine. Go to its official website and download it for a test run.
-
Amarok — alternative to iTunes
Amarok is an audio player with a broad range of features like integration with multiple Web audio services, dynamic playlists, bookmarks, scripting, context view, and more. get it from here.

-
PDF Creator — alternative to adobe acrobat
As its paid counterpart PDF Creator lets you make PDF files from any application that could print. It works the same way as adobe acrobat and supports encryption and digital signature, it lacks in PDF forms a little but if that is not something that you need, it is a great alternative to acrobat and completely free. Download it from here.

-
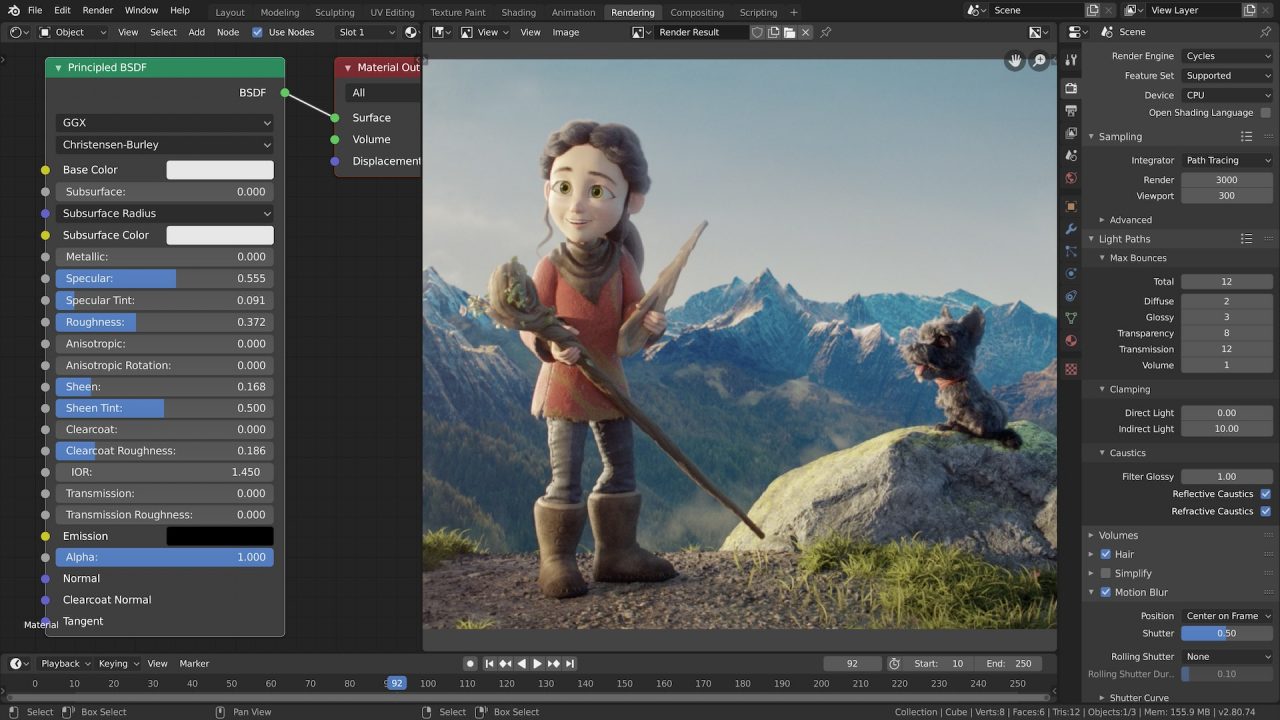
Blender — Alternative to Autodesk Maya, Autodesk 3dmax, foundry Modo, cinema4d,…
3D modeling and animation software is very expensive. From the point of home user long it has been lost dream to have industry quality 3D modeling, animation, and rendering application for an affordable price. Blender has made that dream a possibility, completely free and open-source this package offers everything that its paid counterparts offer, some could even argue that since its open-source nature and availability of full code it offers even more. Why you are still here? Go get it here.
-
Bluefish — alternative to Adobe Dreamweaver
When it comes to web editing and code editing applications, notepad ++ seems like a person go-to application, but if you prefer a more professional suited IDE for web development check out Bluefish, auto-filling, code syntax, and constant development make sure that this application will not go away soon and it is worth investing your time in it. Get it from here.

-
ClamWin — alternative to Kaspersky, BItdefender, Norton
This antivirus has over 600000 users and active database updates also feature a full email scanner, scanning scheduler, and File Explorer integration. It is far better than other freeware alternatives and if you are looking for a free antivirus option look no further, ClamWin is here to stay. Grab it from here.

-
Natron — alternative to adobe aftereffects, foundry nuke
Full-featured node-based composition and effects suite. Natron is a powerful Digital Compositor that can handle all of your 2D/2.5D needs. Its robust OIIO file formats and OpenFX architecture is what makes Natron the most flexible open-source compositor for the visual effects community. Its interface and functionally are the same across all platforms such as macOS, Linux, and Windows. Natron has a powerful keying, roto/roto paint, 2D tracking tools that are staple for all current film production project that requires visual effects. Get natron from here.
-
Clonezilla — alternative to Norton Ghost
When it comes to cloning hard drives usually there is only one application, Norton ghost. Clonezilla tends to change that by offering the same usability as the ghost. Grab your copy from here.

-
FreeCAD — alternative to Autodesk AutoCAD
Autodesk AutoCAD has years of development and dedication of its team behind it to keep it as the best CAD application on the market and it shows. However, if you are not really a hardcore professional who needs all of AutoCAD features and can live without some automation inside it FreeCAD is one of the best free open source options, it will certainly get the job done and with its dynamic simulation and analysis, it is guaranteed that you can achieve same results as in AutoCAD with little more time investment. Get if here.

-
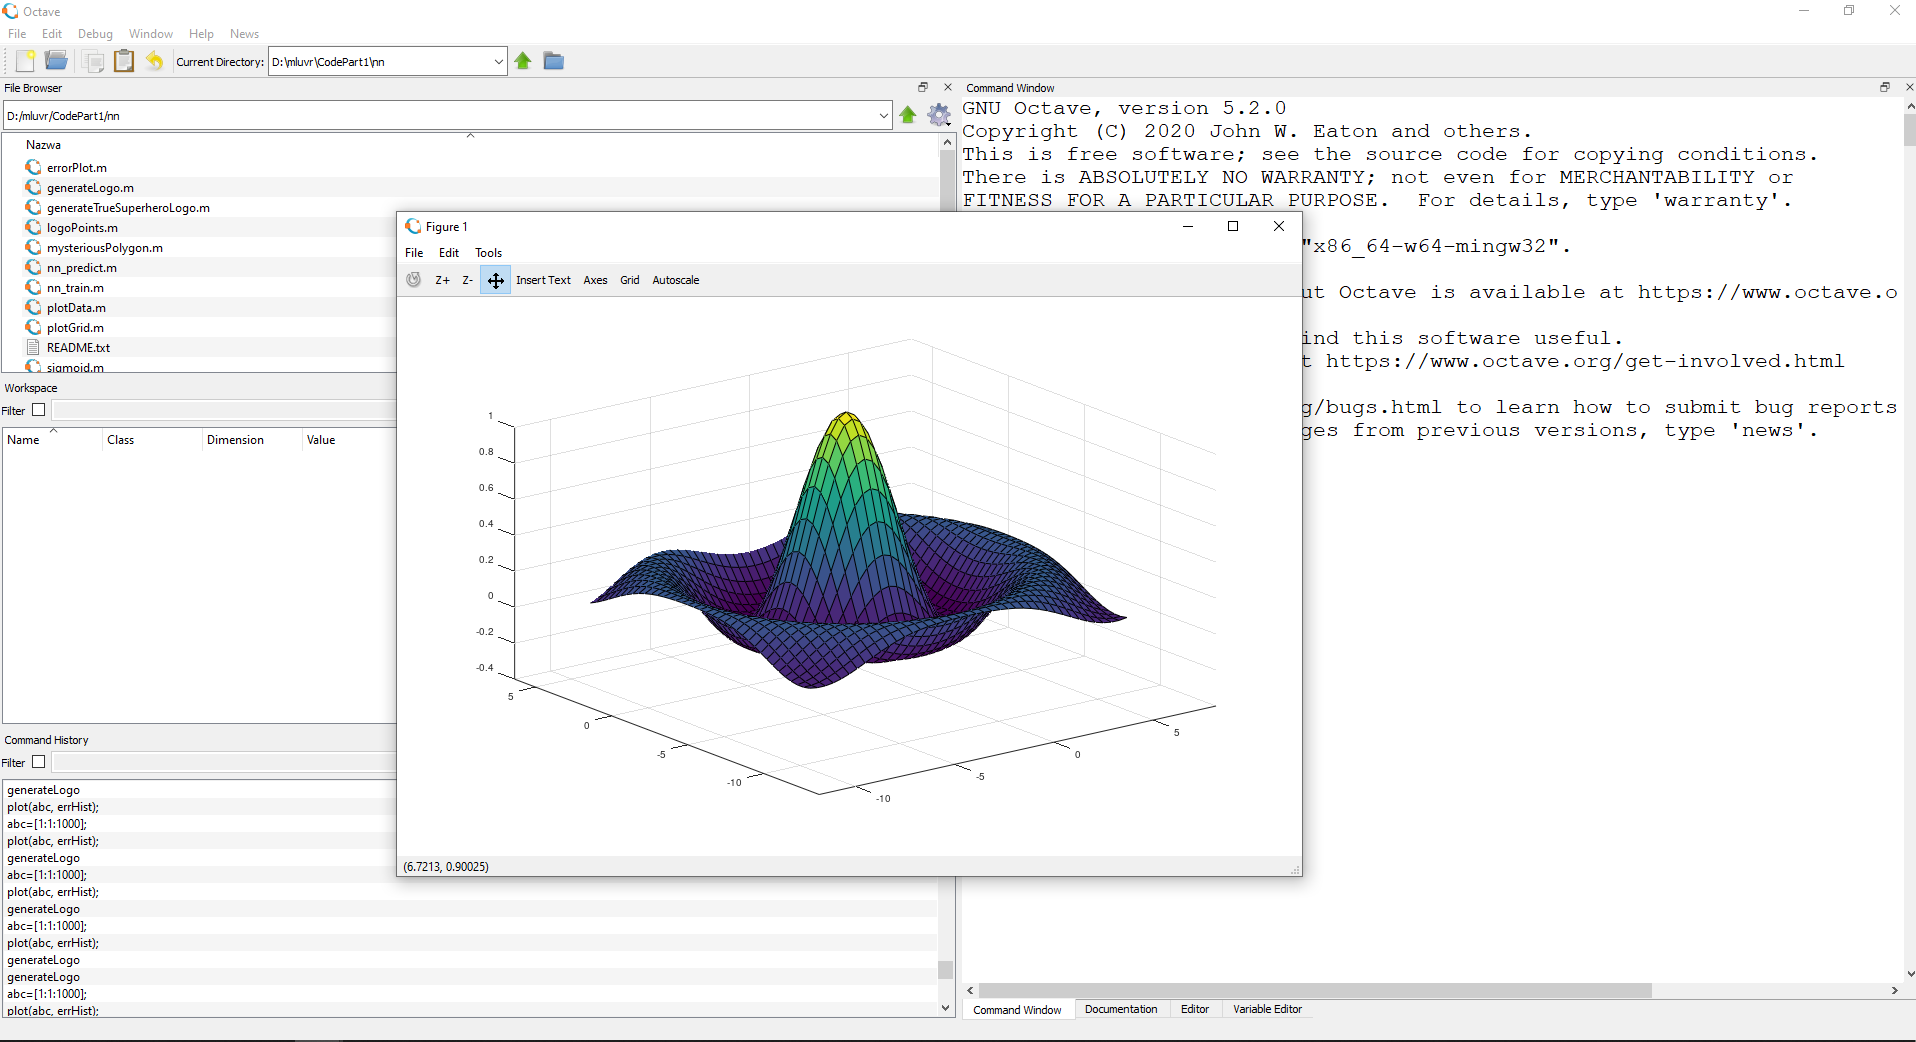
Octave — alternative to MATLAB
Octave is the best open-source educational tool used for numerical computation with an interactive environment. The tool features powerful mathematics-oriented syntax with built-in plotting and visualization tools and also Octave syntax is largely compatible with Matlab. Get your copy from here.

-
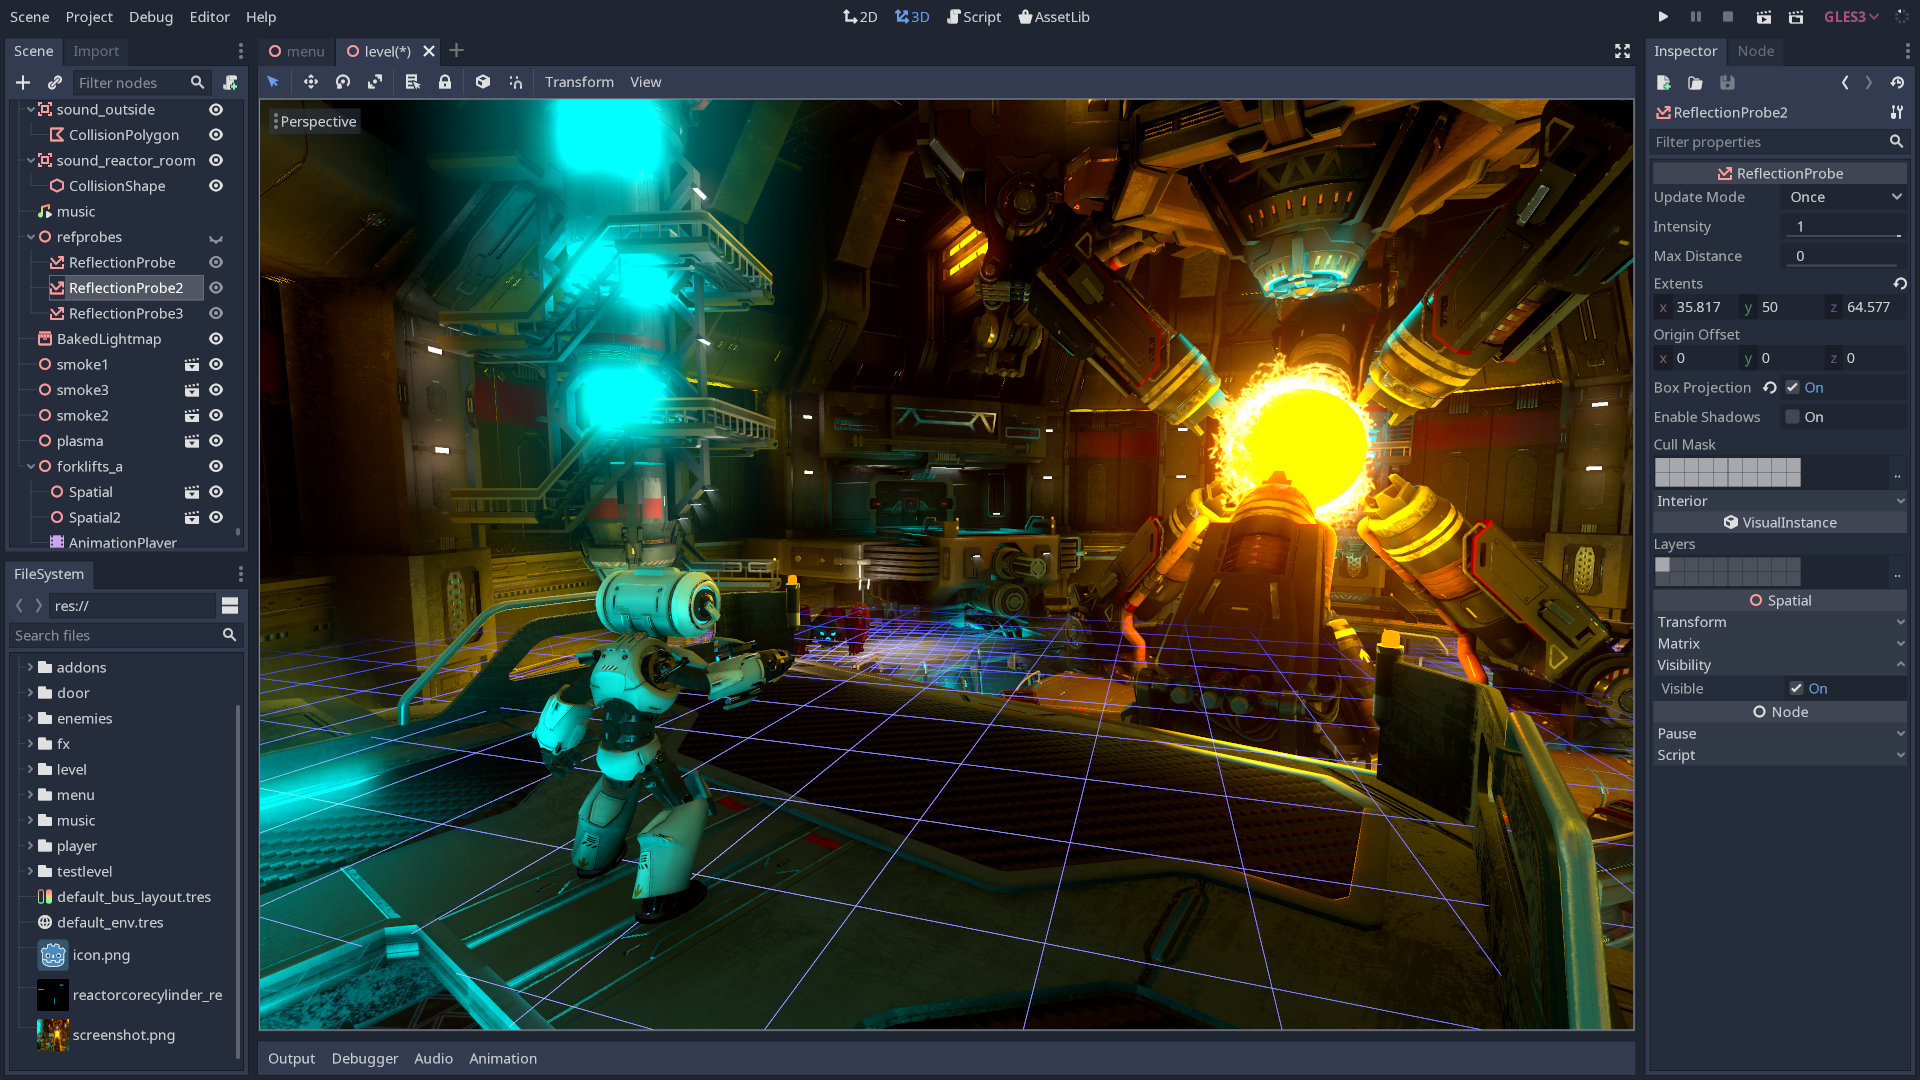
Godot — alternative to Unity3D, Unreal
Godot is a lightweight feature-packed node-based game development engine, completely open-source and free to use for commercial projects. The engine has reached 3.2 version and it is more and more adopted by various independent game makers across the globe, recently there are to of video tutorials and documentation to get you up and running and its open-source nature lets you modify the engine itself in any way that suits and benefits you. Also, any project made with Godot is completely yours, there are no hidden fees or anything similar. Download it from here.

Conclusion
That’s it, my pick for 20 open source alternatives which I believe you should at least try and if you end up with at least one, you have saved some hard-earned money.
And always remember:
- Open-source programs give you complete freedom without any shady terms and conditions.
- Open-source software code is readily available for anyone who wants it, so anyone can use it, share it, modify it for their own needs, and study it.
- No spying eyes, no tracking, and no telemetry
- In some cases, open-source tools offer features or performance benefits that surpass their commercial counterparts.
- No hidden charges, completely free.
If you would like to read more helpful articles and tips about various software and hardware visit errortools.com daily.
Read More
In case you don’t know, the Windows Script Host provides capabilities such as batch files but it also includes many other features like it can be used by a user manual as well as created by the operating system to automate the flow of operations in the system. However, there are a lot of errors that could take place in such a process. One of them is the following error:
“Script: <PATH of the VBS Script>
Line: x
Char: x
Error: The description of the error.
Code: xxxxxxxx
Source: (Source of the error)”
At the time of writing, it isn’t clear yet what the root cause of the error really is but there are several potential fixes you can check out to fix it. You can try to run the System File Checker or set the default value for the .vbs key, or troubleshoot the problem in a Clean Boot State. You could also try to repair Install Windows 10 or scan your computer for malware. For more detailed instructions refer to the following options.
Option 1 – Try to run a System File Checker scan
- In the Windows Start Search, type “command prompt” and right-click on Command Prompt from the search results, and then select the “Run as administrator” option.
- After opening Command Prompt with admin privileges, type the “sfc /scannow” and tap Enter to execute it.
- Once the scan is finished, restart your computer and see if the Windows Script Host error.
Option 2 – Try setting the default value for the .vbs key
- Tap the Win + R keys to open the Run dialog box and type “Regedit” in the field and tap Enter to open the Registry Editor.
- Next, navigate to this registry path: ComputerHKEY_CLASSES_ROOT.vbs
- From there, double click on the default string and change its Value data to “VBSFile”.
- Exit the Registry Editor and restart your computer for the changes to take effect.
Option 3 – Try troubleshooting the problem in a Clean Boot State
Setting your computer in a Clean Boot State can help you diagnose and later troubleshoot the problems in your computer. During this state, the system will start with a minimal number of drivers and startup programs that help in isolating the problem with the interfering software. To put your computer in a Clean Boot State, follow the given steps below.
- Log onto your computer as an administrator.
- Type in MSConfig in the Start Search to open the System Configuration utility.
- From there, go to the General tab and click “Selective startup”.
- Clear the “Load Startup items” check box and make sure that the “Load System Services” and “Use Original boot configuration” options are checked.
- Next, click the Services tab and select the “Hide All Microsoft Services” check box.
- Click Disable all.
- Click on Apply/OK and restart your PC. (This will put your PC into a Clean Boot State. And configure Windows to use the usual startup, just simply undo the changes.)
- From there, start to isolate the problem by checking which one of the programs you installed recently is the root cause of the problem.
Option 4 – Try to repair install Windows 10
- First, you have to click this link and then click the Download Tool Now button.
- Next, click the “Use the tool to create installation media (USB flash drive, DVD, or ISO file)…” option and follow the next given instructions on the screen.
- Now select the ISO file option in step 5.
- After that, you should now have an ISO file.
- Next, go to the location where you’ve downloaded the ISO file.
- Then right-click on the Windows 10 ISO file and select the Open with option and then select File Explorer.
- Now click on “setup.exe” and follow the next instructions that appear on the screen. When asked, you have to select either Nothing (clean install) or Keep personal files only option. Take note that you must not select the “Keep personal files, apps, and Windows settings”.
Option 5 – Try scanning your computer using Windows Defender
It is possible that your computer is infected with malware which could be why you’re getting the Windows Host Script error. Thus, you need to scan your computer using Windows Defender.
- Tap the Win + I keys to open Update & Security.
- Then click on the Windows Security option and open Windows Defender Security Center.
- Next, click on Virus & threat protection > Run a new advanced scan.
- Now make sure that Full Scan is selected from the menu and then click the Scan Now button to get started.
Read More
As you know, one of the basic apps in the Windows 10 operating system is the calculator and it can even be extended to a scientific calculator which makes it really useful for users. However, there are instances when you might encounter some issues while using this app. One of the issues about the Calculator app that’s been reported recently is that the Calculator app is not working. If you encounter the same problem, then you’ve come to the right place as this post will guide you on what you can do to fix the problem.
Based on the reports, users claimed that the issue with the Calculator app occurred right after they’ve installed a feature update, while other users claimed that the Calculator app never really worked on their computers and there are also cases where the app opens but it either freezes or crashes.
According to researchers, the main causes of the problem include a feature update that could’ve altered the settings. It could also be due to problems with the login account or corrupted and missing files, or the problem could also with the calculate app itself. To resolve this problem, here are some suggestions you can follow.
Option 1 – Run the System File Checker Scan
System File Checker or SFC is a built-in command utility that helps in restoring corrupted files as well as missing files. It replaces bad and corrupted system files to good system files that might be the reason why the calculator app is not working properly. To run the SFC command, follow the steps given below.
- Tap Win + R to launch Run.
- Type in cmd in the field and tap Enter.
- After opening Command Prompt, type in sfc /scannow
The command will start a system scan which will take a few whiles before it finishes. Once it’s done, you could get the following results:
- Windows Resource Protection did not find any integrity violations.
- Windows Resource Protection found corrupt files and successfully repaired them.
- Windows Resource Protection found corrupt files but was unable to fix some of them.
- Reboot your computer.
Option 2 – Run the DISM tool
You can also run the DISM Tool as it helps in repairing the Windows System Image as well as the Windows Component Store in Windows 10. Using this built-in tool, you have various options such as the “/ScanHealth”, “/CheckHealth”, and “/RestoreHealth” that could help in fixing the Calculator app.
- Open the Command Prompt with admin privileges.
- Then type in the following commands and make sure to hit Enter right after you type each one of them:
- Dism /Online /Cleanup-Image /CheckHealth
- Dism /Online /Cleanup-Image /ScanHealth
- Dism (.)exe /Online /Cleanup-image /Restorehealth
- Do not close the window if the process takes a while as it will probably take a few minutes to finish.
Option 3 – Try logging into your computer using a different User Account
You might want to try logging into a different User Account since it is possible that the issue could have something to do with your log-in account. Thus, you can isolate this possibility by logging into a different user account. If you don’t have any other user account, simply create a new one by clicking on the Start icon and then go to Settings > Account > Family & other users. From there, go to the Other user’s section and click on the Add someone else to this PC option, and then inputs all the needed information and restarts your computer. Once your computer has restarted, log into your computer using the newly created user account.
Option 4 – Try to reset or reinstall the Calculator app
If the first three given options didn’t work, you might want to reset or reinstall the Calculator app. To do that, follow these steps:
- Click on the Start button and go to Settings > Apps > Apps and features.
- Next, look for the Calculator app from the app list and click on it to see its other options.
- After that, select the Advanced options and go to the Reset section and then click on the Reset button to reset the Calculator app.
Note: You also have the option to reinstall the Calculator app. All you have the option to visit Microsoft Store and from there, uninstall the Calculator app.
Read More
Windows has a built-in Backup and Restore system so if the Windows Backup or Restore fails and you receive any of the errors 0x80070001, 0x81000037, 0x80070003, worry not for this post will guide you in fixing the problem. You might not be able to browse to the folders and files that you want to restore in the File Restore Wizard.
The cause of the error could vary depending on what error code you receive:
- 0x80070001 – If you got this particular error code when trying to back up a specific library or when you accept the default settings in Windows Backup and Restore.
- 0x81000037 – If you got this kind of error code when you try to read from the shadow copy on one of the volumes being backed up.
- 0x80070003 – If you got this error code when trying to restore the folders or files in a library by using the Windows Backup and Restore.
- On the other hand, you cannot use the Browse for files or the Browse for folders functionality.
Note that the Windows Backup or Restore failed, Errors 0x80070001, 0x81000037, 0x80070003 Error code 0x80070001, 0x81000037 occurs during backup while Error code 0x80070003 and “Browse for Files” issue occurs when you try to restore files. Whichever error codes you got, here are some possible fixes that might help.
Option 1 – Fix Windows Backup error codes 0x80070001, 0x81000037
The reason for the Windows Backup error codes 0x80070001, 0x81000037, as mentioned above, is when there is a volume that uses a FAT file system (0x80070001) and when a volume contains compressed files (0x81000037). To fix these errors, you need to remove the “reparse point” also known as SYMBOLIC LINK, and select the absolute path of this location in the Windows Backup configuration user interface. Refer to these steps to remove the reparse point.
- Tap the Win + R keys to open the Run dialog box.
- Then type “cmd” in the field and hit Enter to open Command Prompt.
- Next, type the following command and hit Enter:
DIR /AL /S
- After you enter the command, it will display the JUNCTION list.
- Now to delete the mounted volume reparse point, you have to locate the reparse point you found and right-click on the reparse point icon, and click on Properties.
- Confirm that the folder Type is Mounted Volume in the General tab and then delete this folder.
Option 2 – Fix the Windows Restore Error 0x81000037
When you try to restore a deleted backed-up directory, it fails and the Error code 0x81000037 pops up. You can also encounter this error when you select to restore the files to their original subfolders check box in the File Restore Wizard and you try to restore folders or files to an alternative location, then you will encounter error code 0x81000037 which will be displayed in an error message as shown below:
To fix this error, you need to re-create the missing directory using the following steps:
- Take note of the path for which the error occurs.
- Then create the corresponding folder.
- Now perform the restore operation again.
And since you might have subfolders in the deleted folder, click to clear the “Restore the files to their original subfolders” checkbox when you run the File Restore Wizard.
Option 3 – Cannot use the Browse for files or the Browse for folders functionality
There is no proper fix for this particular error but if you remember the name of the files, you can just search for them. Click on the Search button when using the File Restore functionality and then type the name of the file and when that file appears, select and click on it to restore it.
Read More
When you have to connect to a drive that’s on a different computer or on external storage, that’s where the mapped network drives come in. Mapped network drives make accessing files a lot easier. However, there are times when it won’t work for some reason.
Windows will notify you about the unavailability of mapped network drives in several ways. For one, Windows might display a red X on the network drives or it could be that its status will be unavailable when you try to use it from the Command Prompt or via a notification.
It is recommended that you run a few scripts when you log in to your PC as it may so happen that the network drive takes more than usual to connect. Before you start troubleshooting the problem using the given options below, keep in mind that some workouts might only work under certain scenarios. You might need some network access at logon or you might need access to the Group Policy settings. So you need to choose what you prefer more.
You can try the given workarounds below if the mapped network drives are not showing or connecting or working on your Windows 10 computer. These workarounds use scripts to make sure that you are connected to them as soon as you start to use your PC.
As mentioned, before you can troubleshoot, you need to create scripts first. There are two scripts here namely MapDrives.ps1 which is executed by the second script named MapDrives.cmd and is done at a regular and non-elevated Command Prompt. Follow the steps below to get started.
- You have to create a script file named “MapDrives.cmd” first and then save it on a place where the files are safe. To do that, open a text editor like Notepad and then copy and paste the following script:
PowerShell -Command «Set-ExecutionPolicy -Scope CurrentUser Unrestricted» >> «%TEMP%StartupLog.txt» 2>&1
PowerShell -File «%SystemDrive%ScriptsMapDrives.ps1» >> «%TEMP%StartupLog.txt» 2>&1
- After that, save the file and name it “MapDrives.cmd”.
- Next, create a script file named “MapDrives.ps1” and then copy and paste the following content. Just make sure to save both scripts in the same folder.
$i=3
while($True){
$error.clear()
$MappedDrives = Get-SmbMapping |where -property Status -Value Unavailable -EQ | select LocalPath,RemotePath
foreach( $MappedDrive in $MappedDrives)
{
try {
New-SmbMapping -LocalPath $MappedDrive.LocalPath -RemotePath $MappedDrive.RemotePath -Persistent $True
} catch {
Write-Host «There was an error mapping $MappedDrive.RemotePath to $MappedDrive.LocalPath»
}
}
$i = $i — 1
if($error.Count -eq 0 -Or $i -eq 0) {break}
Start-Sleep -Seconds 30
}
Note: Now that you’ve created the script files, it’s time for you to proceed to the options given below.
Option 1 – Try creating a startup item
Note that this option only works on devices that have network access at login. So if it’s not there, the script will fail to reconnect the network drivers automatically. To create a startup item, here’s what you have to do:
- Open the Startup folder located at %ProgramData%MicrosoftWindowsStart MenuProgramsStartUp.
- From there, copy and paste the MapDrives.cmd.
- After that, open the Scripts folder located at %SystemDrive%Scripts copy-paste MapDrives.ps1 and then copy and paste MapDrives.ps1 in there.
Note: After you complete the steps above, a log file named “StartupLog.txt” will be created in the %TEMP% folder. Now all that’s left for you to do is to log out of your computer and then log back in. This will ensure that the mapped drives are open.
Option 2 – Create a scheduled task
It is possible to create a scheduled task that runs as soon as you log in to your computer. To create a scheduled task, follow the steps below.
- You have to copy the MapDrives.ps1 script file to the scripts folder of Windows located at %SystemDrive%Scripts.
- After that, open the Task Scheduler and select Action > Create Task.
- Next, type a name and description of the task in the General tab.
- Then click on the Change User or Group button and select a local user group and click OK.
- Now check the box labeled “Run with highest privileges” and switch to the Triggers tab.
- From there, create a new trigger with the “At Logon” option in the Begin the task drop-down menu and then click OK.
- After that, switch to the Actions tab and create a new action then choose to Start a program.
- Next, type “Powershell.exe” in the Program/Script field, and in the Add arguments (optional) field, type the following:
-windowsstyle hidden -command .MapDrives.ps1 >> %TEMP%StartupLog.txt 2>&1
- And in the Start in the (optional) field, type “%SystemDrive%Scripts” as the location of the script file.
- Now under the Conditions tab, select the “Start only if the following network connection is available” option and then select Any connection and click OK.
- Restart your computer or log off from your account and then log back in so that the task will be executed.
Option 3 – Use the Group Policy settings
You need this option if the mapped network drives are defined via Group Policy settings. You have to update the action of the drive maps to Replace. As a result, it will delete the existing mapped drive and create the mapping on each logon again. However, any settings on the mapped drive that are changed from the Group Policy settings will be gone on each logon. So if the changes don’t work, you need to run the gpupdate command together with the /force parameter in order to refresh the Group Policy setting quickly.
Read More
What is Search.schooldozer.com? And how does it function?
Search.schooldozer.com is a browser extension that functions as a search engine. It is developed and maintained by “Schooldozer”. It claims to improve users’ browsing experience by providing them with improved search results. However, it does not really do the things it claims to do. In fact, they’re quite the opposite ones – instead of improving the browsing experience, it makes users’ browsing experience unsafe and full of sponsored content. This is in contrast to what it states in its Privacy Policy:
“Install applications the easy way and without the hassle, using the Schooldozer downloader. The Schooldozer platform stems from years of experience with installing applications, resulting in a highly optimized process, yielding faster downloads, better user experience, and more successful installations.”
In addition, once installed Search.schooldozer.com is installed, it will change the default settings of a browser such as the default search engine, homepage, and new tab page. This is why security experts regard this browser extension as a browser hijacker and a potentially unwanted program. The modification of the browser’s settings allows it to control users’ browsing by redirecting them to sponsored sites as well as deliver sponsored content from its affiliated sites in order to gain profit via pay-per-click marketing. And if you think that the ads it displays are harmless, think again for some of these ads can redirect you to suspicious websites that might contain harmful content. What’s more is that this browser hijacker can also keep track and monitor all your browsing activities in order to obtain your browsing data like search queries, what sites you always visit, browsing history, browser type, OS version, and so on. The information collected is then used and may even be shared with its affiliated third parties to deliver more customized and personalized advertisements.
How is Search.schooldozer.com distributed over the web?
Like a typical browser hijacker, Search.schooldozer.com is distributed using the software bundling method where several unknown and unwanted programs are bundled in a software package. Thus when you install any software bundle, make sure to always opt for the Custom or Advanced installation setup rather than the quick setup to avoid installing unwanted programs like Search.schooldozer.com.
To remove Search.schooldozer.com from your computer, follow the removal guide below carefully.
Step 1: Start the removal process by closing all the browsers infected with Search.schooldozer.com. If you’re having a hard time closing them, you can close them using the Task Manager just tap on Ctrl + Shift + Esc.
Step 2: After you open the Task Manager, go to the Processes tab and look for the infected browser’s process and end it.
Step 3: Then close the Task Manager and tap the Win + R keys to open Run and then type in appwiz.cpl to open Programs & Features in Control Panel.
Step 4: From there, look for Search.schooldozer.com or any unfamiliar program that could be related to it under the list of installed programs and once you’ve found it, uninstall it.
Step 5: Edit your Hosts File.
- Tap the Win + R keys to open then type in %WinDir% and then click OK.
- Go to System32/drivers/etc.
- Open the host file using Notepad.
- Delete all the entries that contain Search.schooldozer.com.
- After that, save the changes you’ve made and close the file.
Step 6: Reset all your browsers to default to their default state.
Google Chrome
- Launch Google Chrome, press Alt + F, move to More tools, and click Extensions.
- Look for Search.schooldozer.com or any other unwanted add-ons, click the Recycle Bin button, and choose Remove.
- Restart Google Chrome, then tap Alt + F, and select Settings.
- Navigate to the On Startup section at the bottom.
- Select “Open a specific page or set of pages”.
- Click the More actions button next to the hijacker and click Remove.
Mozilla Firefox
- Open the browser and tap Ctrl + Shift + A to access the Add-ons Manager.
- In the Extensions, menu Remove the unwanted extension.
- Restart the browser and tap keys Alt + T.
- Select Options and then move to the General menu.
- Overwrite the URL in the Home Page section and then restart the browser.
Internet Explorer
- Launch Internet Explorer.
- Tap Alt + T and select Internet options.
- Click the General tab and then overwrite the URL under the homepage section.
- Click OK to save the changes.
Step 7: Hold down Windows + E keys simultaneously to open File Explorer.
Step 8: Navigate to the following directories and look for suspicious files associated to the browser hijacker such as the software bundle it came with and delete it/them.
- %USERPROFILE%Downloads
- %USERPROFILE%Desktop
- %TEMP%
Step 9: Close the File Explorer.
Step 10: Empty the contents of Recycle Bin.
Read More
Can graphic cards wear out over a longer period of time? Recent studies and experience from crypto miners say no but they can die due to different reasons like improper use, low cleaning habits, factory mistakes, etc.
Many gamers and people who use GPU intense applications tend to think that some glitches and hiccups in the software are a sign that graphic card is dying out and that it is time to be replaced. Altho this could be true in many cases these kinds of behavior are mostly due to old drivers and software issues.
Older cards can produce these kinds of results due to their old age and new software is often more demanding than these cards can handle.
So in order to diagnose and be sure that your GPU is indeed dying out lookout for these signs.
The Main Signs of a Dying GPU:
The Computer Crashes and Won’t Reboot
If your computer shutdown while working in the graphic application or while playing the game and the monitor loses signal there is a high chance the graphic card is soon going to be gone. Some motherboards have hardware detection failure and can signal immediate fail. If when turning your computer ON you are greeted with a blue screen with the message that the signal can not be found or you do not have picture at all it is most likely that GPU has failed.
Graphic Glitches While Playing Games
If you are playing the game and all of sudden you get off-color pixels, screen flickering, strange graphic behaviors, random artifacts, or similar and that keeps repeating in multiple games it is likely that GPU days are coming to an end.
Abnormal Fan Noise or Performance
Fans are an essential part of cooling the GPU and over time if they are intensively used they could wear out and need replacing. If however you have not noticed and have not replaced the fans card can sustain overheating damage.
Many cards have cooling fans that are designed to spin at a higher RPM only when the GPU is under load. It prevents bearings in the fans from dying prematurely, so don’t worry if one of your fans is inactive while you are browsing the web.
However, when you play games that utilize software that your card isn’t built to support, the bearings in the fans wear out faster. Once the fans stop working under load, the graphics card can quickly die.
How to Diagnose a Dying Graphics Card
Presented next are essential steps in order to recognize a dying graphic card.
Check Motherboard Error Codes
Many motherboards today completely shut down a component that is no longer working. If your graphics card has died completely, this may be one of the easiest ways to tell. If your motherboard doesn’t have display codes, you can try testing the card in a new system.
- Open the computer case: Use your screwdriver to remove screws on the side panel and gently slide it back.
- Locate the error code display on your motherboard: If you have a motherboard with error codes, they should appear near an outer corner.
- Try to reboot your computer: Record each error number you see after you boot your computer.
- Consult the motherboard manufacturer manual for error codes: Open the manual and locate the list for your error codes. If the code matches a graphics processing unit error, your video card could have died.
Check Hardware for Damage or Debris
A graphics card that has damage or debris on the physical parts might quickly overheat and kill the card.
- Remove the screws holding the GPU in place: There are typically one or two screws holding the card to a bracket on the case.
- Unhook the power cords from the GPU and pull the release tab: Remove the power cords from your GPU by pushing in their tabs and gently rocking them out. Once you remove each cord, gently push or pull up on the release tab near the motherboard.
- Inspect the GPU for damage/debris: Check the card for any dirt or debris buildup and clean it out with a Q-tip. You can replace broken fan pieces from the manufacturer.
Test Your GPU Under Load
Download GPU stress-testing and heat-monitoring software.
- With the card installed, run a stress test.
- As you are running the stress test, run heat-monitoring software: With the stress test running, check your heat-monitoring software for GPU overheating. Any reading over 80 degrees Celsius is too hot.
- Check device manager for outdated drivers: If your GPU is clean, but still running too hot, your software drivers are not installed correctly. To check, type in “device manager” at the bottom of your desktop and click on Device Manager. Find your display adapter and right-click on it to see if it’s working. If your drivers are not working correctly, it is indicated here usually. However, the driver may appear to be functioning even if it says otherwise in the properties.
Keep your graphic card drivers updated
When you don’t have the right driver installed, graphics cards can quickly burn up, and their cooling components may fail faster. That’s why you should always keep drivers updated for each new game you install or play. Older games may also release new software patches, so your GPU drivers should be updated accordingly.
Read More
One of the biggest annoyances in Windows 10 is that it’s upgrading from one version to another. Although these upgrades are necessary to fix some bugs or improve user experience, some of them actually bring bugs into the computers instead. And in one of the recent Windows 10 updates, a lot of issues were found especially for users who use Remote Desktop on a daily basis. The error stacks up as Windows 10 Remote Desktop Protocol client is not working or won’t connect and can’t find the computer HOSTNAME generally. Based on the reports by users who experienced this issue, there are two cases around it:
- Users who try to reach a specific website or folder on the network
Some users encounter this error when they try to run the Network Troubleshooter. Even when they add the server name inside it, it still won’t identify the problem, and unpredictably, the driver seems to appear and disappear every now and then. And even after connecting, the network commands don’t work at all. This is really troublesome for users who have lots of PCs and all the other systems do not appear on the network.
- Remote Desktop isn’t able to find the computer HOSTNAME
Some other users reported that the error appeared when they use the classic remote desktop software. It keeps on failing and throwing the error message, “Remote Desktop can’t find the computer “HOSTNAME”. If this is the same scenario you are having, it means that “HOSTNAME” does not belong to the specified network. So you need to verify the computer name and domain where you are trying to connect to. There are times when it used to work after some users tried connecting to the domain a couple of times. However, when users try to use the UWP version of Remote Desktop, it seems to connect most of the time.
This kind of problem is definitely a DNS issue. It could be that there are two different records on the DNS server which is why it connects and other times it doesn’t. When it is able to resolve the correct address, the drives connect to the PC however, after a couple of minutes, they will suddenly go missing. Using “nslookup” for the hostname, multiple times, you can check this and see if you’ll get identical results all the time.
nslookup [–SubCommand …] [{ComputerToFind| [–Server]}]
If you’ve determined that the drives disappear each time, you may have to change the DNS server or ask your admin to resolve the problem for you.
Alternatively, you can also check out another option that has worked for a lot of users. This second option is disabling the IPv6 on the network adapter. In case you don’t know, Windows 10 prefers IPv6 over IPv4 so if you now have issues using IPv6 to connect to the servers, you can change your computer’s settings so that it’ll only use IPv4 instead of IPv6. To do so, follow these instructions:
- Open Settings > Network and Internet > Ethernet > Change Adapter options.
- From there, right-click on the adapter for where you want to disable it and then select Properties.
- Next, look for the checkbox labeled, “Internet Protocol Version 6 (TCP/IPv6)” then uncheck it.
- Now click on OK and restart your PC to save the changes made.
Read More
 Today most people have Facebook accounts where they keep in touch with friends and family. But large Facebook network of users is also very interesting to another party as well, hackers.
There are many ways hackers can steal your data via direct hacks, trickery, and social engineering in order to get your credentials, emails, and many other things using them to wreak further havoc.
Once a hacker has needed information it is very difficult to minimize impact and all of your information could be compromised from a list of friends to credit card numbers. Keep on reading to learn how can you protect yourself against these attacks and learn about common practices that hackers use in order to steal your data.
Stealing Facebook data via email
A couple of years ago there was a lot of talk about not opening suspicious emails. Well, it still holds today. The difference is that today’s fake emails have become very difficult to differentiate from official ones since hackers put the effort into creating them copying fonts and layout, making them identical to original ones.
So if emails look and feel like original ones how do you know if it is fake? Very simple, you do not click anything in it. If Facebook or for that matter any company wants to contact you they will do via their platform.
Clicking inside a hacker’s email will lead you probably to a fake Facebook website replica where you will have to type in your username and password providing an attacker with your login credentials, etc.
If you receive this kind of mail where there are threats about terminating an account, missing payments, etc. it is always the best thing to go directly to Facebook and see if you have any kind of notifications there. Do not trust any emails that ask for account information, request money, or threaten to suspend your account.
Phishing attacks
As stated previously if you click on the link inside fake mail it will probably lead you to a website replica of the original.
Although hackers can pretty much copy all things from an original website like layout, fonts, colors, etc. There is one thing that he cannot, web address. Take a good look into your browser address bar to see if there is a typo or anything strange in the address of a website.
Also, make sure to check for the secure icon in the web address before signing in.
Fake Facebook buttons
If by any chance and for whatever reason, you end up on a fake Facebook site be vary careful about like and other buttons since buttons themselves behave and act like links inside your browser.
IF when you click on like you get a prompt to sign in, it is almost 100% that you ended up on a phishing fake website.
Password brute force attack
Having complex and long passwords is a must. If your Facebook password is 12345 there is a very high chance that if a hacker wants he can easily guess it via trying out the most used and simple passwords via simple guessing.
To avoid being hacked just for having poor passwords try to think of something longer, combine letters and numerical characters, place special characters inside it or just simply as the best solution use a password manager and create passwords with it.
Password grab outside Facebook
If you use the same password for multiple accounts which is a big no-no and you should not do it then hackers can use passwords from other services and login into your Facebook in order to steal data.
Avoid these situations by having different passwords for different accounts or use a password manager to keep everything in order.
Hacking via key logger
Some time ago we have made an article which explained in detail everything you need to know about key loggers here: https://errortools.com/windows/how-to-know-if-you-have-keylogger-in-windows/
Anyway, this is a more advanced hacking technique in order for hackers to steal your data and it includes placing malicious applications into your system that records your keystrokes and sends them directly to hackers.
Since this is an application best protection against this type of attack is to have a security suite installed and active on your PC or device you use to go to Facebook.
Connecting and surfing on an unsecured network
Using no password and unsecured WI FI or any other type of network is risky at least. You can have all protection installed on your device and have a strong password but hackers also logged in to the same network can track all outgoing stuff going through mentioned network leaving you again exposed to attacks.
It is better to connect to your mobile operator network than on free WI FI, at least there is some level of security in your operator network while free WI FI is completely unsecured.
Getting a virtual private network or VPN is also one thing you could think about for protection since almost all VPN services will encrypt your data thus providing you with a security layer even on unsecured Wi-FI.
Conclusion
Hacking and stealing have come a long way from their infant stages and in today’s world when we use a lot of gadgets and have plenty of online presence taking some steps for security is a must.
I hope that you have found anything here informational and helpful so you can avoid getting your data compromised.
Read More
![]()
Copyright © 2022, ErrorTools. All Rights Reserved
Trademarks: Microsoft Windows logos are registered trademarks of Microsoft. Disclaimer: ErrorTools.com is not affiliated with Microsoft, nor claim direct affiliation.
The information on this page is provided for information purposes only.
![]()
Repair your PC with one click
Please be aware that our software needs to be installed on a PC system with Windows on it, Open this website on a desktop PC and download the software for easy and quick elimination of your issues.
Contents
- Run CHKDSK
- Going through the hard disk’s Properties dialog window:
- Using the Command Prompt
- Follow these steps:
- Run the System File Checker
- This guide will show you the steps to take:
- Sometimes, the scan result might read:
- Perform a System Restore
- Stop overclocking your CPU or GPU
- Set the page file to automatic
- Reinstall the affected application
- Remove Windows updates
- Follow these steps if you run Windows 10:
- Follow these if you run Windows 11:
- Repair game files
- Epic Games:
- Steam:
- Origin:
- Battle.net:
- GOG Galaxy:
- Perform a full malware scan
- Update your system
- Update your device drivers
- Follow these steps to install the program:
- Prevent your antivirus program from blocking the file
- Run the Windows Memory Diagnostic tool
- These steps will show you how:
- Create another administrator account
- Perform a clean boot
- Here’s how to perform a clean boot:
- Conclusion

Windows has an almost infinite supply of errors. You’d think you’ve seen it all until another bizarre error message takes you by surprise. One dreadful problem that has been around for a while and prevents users from opening executable files is the following error message:
“The exception Breakpoint. A breakpoint has been reached. (0x80000003) occurred in the application at location…”
So what does it mean when it says a breakpoint has been reached in Windows 11 or Windows 10?
This error is mostly the result of a Windows registry mix-up that could be triggered by leftover keys of uninstalled applications. There are other possible reasons for the problem, and they include
- Malware attacks
- Problematic Windows updates
- Outdated device drivers
- Malfunctioning hard disk sectors
- Missing or corrupted system files
- Corrupt or missing game files
You may have seen the error showing up when you try to run a game, a launcher, or any other program. It could also appear whenever you boot your system.
But not to worry; the error should be history after you’ve applied the fixes in this article. This post will guide you on how to fix the exception breakpoint error on Windows 11 and Windows 10.
Run CHKDSK
The file might be trying to interact with components stored in faulty hard disk sectors. It’s also possible that the executable file itself is in a bad sector. Run the CHKDSK utility and check if that has resolved the problem.
When you run CHKDSK, the program will scan for faulty sectors on your hard drive and prevent your operating system from writing to such sectors in the future. It can also attempt to recover some readable files from the bad sectors.
There are two main ways to run the utility. We’ll be walking you through each.
Going through the hard disk’s Properties dialog window:
- Open a File Explorer window. Head to the taskbar and click on the folder icon. You can also right-click on the Start button and select File Explorer or tap the Windows logo key + E shortcut.
- Go to the left side of the File Explorer window after it opens and click on the arrow beside This PC.
- Once This PC expands, right-click on the main system disk (usually Local Disk C) under it and click on Properties in the context menu.
- You will see the Properties dialog box.
- Head to the Tools tab.
- Next, go to the Error Checking section and click on Check.
- You’ll see a dialog that says:
“You don’t need to scan this drive
We haven’t found any errors on this drive. You can still scan the drive for errors if you want.”
Next, click the Scan Drive option.
- CHKDSK will now scan your hard disk.
- After the tool completes the process, a dialog displaying the scan results will appear.
Using the Command Prompt
The command-line version of the CHKDSK tool helps you run a more thorough scan and gives you more options. For example, you can prompt the utility to recover readable information.
Follow these steps:
- Open Run by right-clicking the Start button and clicking Run in the Power User menu. You can also use the Windows logo key + R shortcut to summon the Run dialog box.
- After Run appears, type “CMD”, then press Ctrl + Shift + Esc.
- After the User Account Control dialog asks for permission to allow the Command Prompt to make changes to your computer, click on Yes.
- Once you see the Administrator: Command Prompt window, type “chkdsk C: /x /r /f” (without the quotes) into the black screen and press Enter.
Note: If your hard disk’s drive letter isn’t “C,” replace it in the command.
Press Y on your keyboard if you see the following message:
“Chkdsk cannot run because the volume is in use by another process. Would you like to schedule this volume to be checked the next time the system restarts? (Y/N)”
That’s how to fix error code 0x80000003 on Windows 11 and Windows 10, using the CHKDSK tool. If the error still shows up after fixing your hard disk sectors, head to the next solution.
Run the System File Checker
Executable files interact with operating system services and files, such as dynamic link libraries. The error message could be appearing because a related system file is corrupt or missing. System files can be affected by abrupt system shutdowns, malware infection, and improper third-party application or driver installation.
You can find and replace bad or missing system files using the System File Checker. The program is a built-in command-line tool designed to scan protected system files and folders and resolve integrity violations. Before you run it on Windows 10, you’ll have to provide the necessary repair files using the Deployment Image Servicing and Management tool.
This guide will show you the steps to take:
- Open Run by right-clicking the Start button and clicking Run in the Power User menu. You can also use the Windows logo key + R shortcut to launch Run.
- After Run appears, type “CMD”, then press Ctrl + Shift + Esc.
- After the User Account Control dialog asks for permission to allow the Command Prompt to make changes to your computer, click on Yes.
- Once you see the Administrator: Command Prompt window, type “exe /Online /Cleanup-image /Restorehealth” (without the quotes) and hit Enter to run the Deployment Image Servicing and Management tool.
The tool will now deploy the Windows Update client to fetch the repair files.
Suppose you can’t get the Windows Update client to work. In that case, you can use a bootable USB flash drive or Windows 10/11 DVD to fetch the repair files. You’ll no longer use the command above. Type this line instead and hit the Enter button:
DISM.exe /Online /Cleanup-Image /RestoreHealth
/Source:C:RepairSourceWindows /LimitAccess
Replace C:RepairSourceWindows with the folder address of the Windows directory on the bootable media.
- Allow DISM to complete the process, which can take several minutes, then move over to the following line.
- Type “sfc /scannow” (without the quotes) and tap the Enter keyboard button.
- The System File Checker will now scan your operating system’s protected folders for integrity violations. If it finds any broken or missing file, it will automatically replace the file with a cached copy stored in a compressed folder located at C:WindowsSystem32dllcache.
- If the SFC tool successfully carries out the scan, you’ll see a command result that reads, “Windows Resource Protection found corrupt files and successfully repaired them. Details are included in the CBS.Log%WinDir%LogsCBSCBS.log.”
Sometimes, the scan result might read:
“Windows Resource Protection found corrupt files but was unable to fix some of them. Details are included in the CBS.Log %WinDir%LogsCBSCBS.log.”
In this case, you’ll have to read the log file and manually replace the problematic file with a known good copy. The log file will show you the details of the System File Checker scans that you’ve run on your system, including the date of your last scan and the name(s) of the system file(s) that couldn’t be repaired.
Follow these steps carefully:
- Launch the Administrator: Command Prompt window.
- After the window shows up, type or copy and paste this line and hit Enter:
findstr /c:”[SR]” %windir%LogsCBSCBS.log
>”%userprofile%Desktopsfcdetails.txt”
- Go to your desktop and open the sfcdetails file.
- The file displays the SFC scan result in this format:
Date/Time SFC detail
Here’s an example of an entry in the text document showing the details of a file that wasn’t repaired:
2008-09-11 11:09:35, Info CSI 00000008 [SR] Cannot repair member file [l:34{17}]”Accessibility.dll” of Accessibility, Version = 6.0.6000.16386, pA = PROCESSOR_ARCHITECTURE_MSIL (8), Culture neutral, VersionScope neutral, PublicKeyToken = {l:8 b:b03f5f7f11d50a3a}, Type neutral, TypeName neutral, PublicKey neutral in the store, file is missing
After seeing the affected file(s), search for it/them and manually replace it/them. You can copy the necessary replacement file(s) from another computer that is working perfectly. However, to be sure, run the SFC command on that computer.
- Now, follow these steps to replace a problematic file:
Firstly, take ownership of the file. To do that, open an elevated Command Prompt window, type this line, and hit the Enter keyboard button:
takeown /f PathAndFileName
Note that “PathAndFileName” should be replaced with the file’s folder path, including the filename. For example:
takeown /f C:windowssystem32Accessibility.dll
- Next, grant admin access to the file by typing the following lines and hitting the Enter key:
icaclsPathAndFileName /GRANT ADMINISTRATORS:F
Note that “PathAndFileName” should be replaced with the file’s folder path, including the filename. For example:
icacls Accessibility.dll /GRANT ADMINISTRATORS:F
- Now, to replace the file, type the following and hit Enter:
Copy RepairFile Destination
Note that “RepairFile” should be replaced with the folder path to the good system file, and “Destination” should be replaced with the path to the problematic file, including the filename. For example:
copy E:roundAccessibility.dll C:windowssystem32Accessibility.dll
That’s how to fix a breakpoint has been reached on Windows using the SFC tool. If this method didn’t remove the error, head to the next solution.
Perform a System Restore
The breakpoint error may be showing up due to some changes you implemented in your computer. These changes could include:
- A driver update
- A new application
- An uninstalled program
- Windows Update
Suppose you started seeing the error recently, especially after applying any of these changes. In that case, you can reverse them through the System Restore wizard and check if the error will disappear.
Note that you must have created a restore point before you can take your system back to the recorded state. However, Windows often creates restore points automatically, especially after installing an update.
The restore process is similar for Windows 10 and 11, so these steps will guide you if you use any of the operating systems:
- Open the Start menu and type Restore.
- Click on Create a Restore Point in the search results.
- After the System Properties dialog opens, click on the System Restore button under the System Protection tab.
- Click on the Next button after the System Restore window opens.
- Now, you’ll see the list of restore points you created or those automatically created by Windows.
- You can click the “Scan for affected programs” button to check the applications and drivers that the System Restore client will delete.
- After that, click on the Next button, then select Finish.
- Allow Windows to restore your computer.
Launch the program that triggers the error once your computer starts.
Stop overclocking your CPU or GPU
If you’re overclocking your CPU or GPU to boost performance and enjoy smoother gaming or faster video rendering, that could be the cause of the problem. The overclocking program could be putting too much strainon your RAM, GPU, or CPU, and causing serious problems that trigger the error.
What’s more, overclocking may be killing your computer, especially if you do it often. So, power down the overclocking program and check if the error appears again.
Set the page file to automatic
The page file is Windows’ way of expanding your system memory to accommodate more programs and processes. It’s also called a swap file and is a portion of your hard drive that your operating system uses as a make-shift memory when your main memory is full.
Windows normally manages the file itself, but you may have changed the setting and applied a manual, static size for the page file.
There are two options here, and the one you choose depends on your current setting. If Windows is currently managing the page file automatically, you can switch it to manual and see if that solves the problem. If you have a manual configuration, then switch the setting to automatic.
The following steps will guide you on how to change your virtual memory settings on Windows 10 and Windows 11:
- Launch the Start menu and type “Advanced system settings.”
- Click on the first result.
- Once the Advanced tab in the System Properties dialog window launches, click on the Settings button under Performance.
- Switch to the Advanced tab in the Performance Options dialog.
- Head to the Virtual Memory section and click on the Change button.
- If you’re currently using a customized paging file size, check the box next to “Automatically manage paging file size for all drives” and click on the OK button.
- On the other hand, if the automatic option is already selected, uncheck the box and go to the Custom Size section to set a paging file size for your hard drive.
- You can set the size (in megabytes) to 1.5 times your system memory size. That said, you could start by using the recommended size at the bottom of the Virtual Memory dialog window.
Reinstall the affected application
As we mentioned, you may be experiencing the error whenever you launch an application, game launcher, or video game. The problem here could be one of the said program’s installation files.
In this case, removing the program and reinstalling can get rid of the problem.
Let’s show you how to remove programs from a Windows 10 or Windows 11 PC:
- Open the Start menu and type “control panel.”
- After the Control Panel opens, head to Programs and click on Uninstall a Program.
- Once you see the Programs and Features list, scroll down to the app you want to remove and double-click it.
- Confirm your decision to uninstall the program and follow the subsequent prompts.
Remove Windows updates
While updates are published to enhance your computer’s performance and make it more secure, they often cause problems.
Some updates may not be compatible with your PC and may end up triggering the breakpoint error. So, if the error started showing up after you installed a major update, you can remove the update and check if that solves the problem.
Follow these steps if you run Windows 10:
- Press the Windows and S keyboard buttons at the same time to open the search box beside Start.
- Type “Updates” into the text field and click on Check for Updates.
- Click “View update history” under Windows Update.
- When the View Update History page opens, take note of your installed updates and check their dates. You should also note their KB numbers.
- Go to the top of the View Update History page and click on Uninstall Updates.
- You’ll now see a list of recently installed updates.
- Identify the KB number of the update you want to remove and select it.
- Allow Windows to remove the update, then restart your computer.
Follow these if you run Windows 11:
- Press the Windows and S keyboard buttons at the same time to open the search box beside Start.
- Type “Updates” into the text field and click on Check for Updates.
- Select Update History once the Windows Update page opens.
- After the Windows Update > Update History page opens, scroll down, or collapse the update history sections, and click on Uninstall Updates.
- You’ll now see a list of recently installed updates.
- Identify the KB number of the update you want to remove and select it.
- Allow Windows to remove the update, then restart your computer.
Repair game files
Game files may get corrupted due to a game crashing, an improper shutdown, or a malware attack. When game files become damaged or go missing, you’ll start to experience in-game issues, startup problems, and errors like the breakpoint issue.
Thankfully, you can use your launcher to find and fix problematic game files. The application will scan a game’s installation folder and replace any file that isn’t up to date or working properly.
So, if you’re seeing the error whenever you open a game, use your launcher to verify game files.
Let’s show you how to do that on different launchers.
Epic Games:
- Launch the Epic Games Launcher.
- Head to your games library and right-click on the affected game. You can also click on the three dots beside the game.
- Select Manage once the drop-down menu appears.
- Now, click on the Verify option.
Steam:
- Reboot your Windows PC and start Steam.
- After Steam opens, go to your games library and right-click the affected game. You can also select the game and click on its settings icon in the far right.
- Choose Properties from the context menu.
- After the Properties page shows up, click on Local Files in the left pane.
- Go to the Local Files tab and click on Verify Integrity of Game Files.
Origin:
- Launch Origin.
- Head to My Game Library.
- Now, locate the game you want to repair and right-click it.
- Select Repair from the menu.
Battle.net:
- Start the Battle.net application.
- Locate the game’s icon and click on it.
- Click on the cog icon beside the game’s Play button.
- Click on Scan and Repair once you see the context menu.
GOG Galaxy:
- Launch GOG Galaxy.
- Select the game you want to repair.
- Click on the game’s preferences button on the right side of the Play button.
- Next, hover your mouse pointer over Manage Installation and select Verify/Repair in the expanded menu.
Perform a full malware scan
The problem could be appearing due to the operations of a malicious file or program. You can get rid of the malware file or application by running a deep scan.
A full scan is more thorough than your antivirus program’s regular scan as it will assess protected areas on your computer for viruses.
So, choose the Full Scan option in your antivirus scan and allow it to complete the process. Note that this may take up more time than the usual scheduled scan.
Update your system
The error could be popping up because your operating system is out of date. Executable files interact with device drivers, system files, and other system components. If one or more system components are out of date, issues will begin to occur. The Error 0x80000003 is one of the problems that erupt in such a case. Some underlying operating system bug, which may have been fixed in an update, could also be responsible for the problem.
So, if you haven’t updated your system in a while, do that and check for the problem. If you don’t know how to, follow these steps:
- Press the Windows logo key + S to open the search box.
- Type “Updates” into the text field and click on Check for Updates.
- Click “Check for updates” under Windows Update.
- Allow Windows Update to check for updates.
- Download and install available updates.
- Wait while Windows is installing updates.
- Click on “Restart now” to install the updates.
Update your device drivers
Device drivers control the communication between your hardware components and the operating system. Third-party applications also use drivers to interact with devices. If a driver is corrupt or obsolete, the operating system will display an error when there’s a communication breakdown, especially when a third-party program tries to make contact.
Find faulty and outdated drivers and update them. You can go to the Device Manager to find drivers with an exclamation mark and install their latest versions.
Unfortunately, the Device Manager does not show you outdated drivers or notify you when an update becomes available for driver software. And while Windows Update will help you install updates, that’s just for devices supported by Microsoft, so it won’t help you in many cases. You’ll have to go to the website of each device manufacturer to check if they’ve released updates. You should be really careful if you decide to tread that path. You may accidentally install the wrong driver software, which may cause multiple instability issues. So make sure you know exactly what drivers your system needs to operate smoothly.
And here is the good news – you don’t have to go through such stress. Auslogics Driver Updater can help you check for outdated and problematic drivers and then install their updates automatically. If you go for the program’s full version, you can update multiple drivers at once in just one click. The tool fetches driver software from trusted sources, and it keeps backups just in case.
Follow these steps to install the program:
- Open the tool’s download page.
- Click on Download Now.
- Allow your browser to download the installation package.
- Run the setup file after your browser downloads it.
- Click Yes after the User Account Control window requests permission to run the installer.
- When you see the installation wizard, select a language and choose your preferred installation folder. The default location is recommended.
- Next, enter other preferences, such as creating a desktop icon, allowing the app to launch at startup, and permitting the tool to send crash reports.
- Click the large “Click to install and check drivers” button at the bottom of the window after entering your installation choices.
- After installation, the program will scan your computer for problematic drivers.
- You’ll see a list of drivers that should be updated. You can now update them one after the other. However, you can update multiple drivers at once if you go for the tool’s full version.
- Allow the program to install the drivers, then restart your computer.
Prevent your antivirus program from blocking the file
Your antivirus program will prevent a file from executing if it suspects a security threat. You should check and confirm that the file is safe if you’re getting reports from your security application. In some cases, however, security programs tend to mistake legitimate files and applications for security threats. These cases are called false positives.
If you’re convinced that the file in question is safe, you can stop your antivirus from blocking it in the future. To do that, add it as an exception or an exclusion. You can also add it to the program’s whitelist, depending on the antivirus suite you use.
If you use Windows Security, these steps will show you how to prevent it from blocking the file you’re trying to open:
- Press the Windows and S keyboard buttons at the same time to open the search box beside Start.
- After the box appears, type “Virus and threat protection.”
- Click on Virus & Threat Protection in the search results.
- Once the Virus & Threat Protection window opens, go to the Virus & Threat Protection Settings section.
- Click on Manage Settings.
- Scroll down to Exclusions once you see the Virus & Threat Protection Settings screen and click on “Add or remove exclusions.”
- Click on Add an Exclusion immediately you see the Exclusions interface.
- Choose File from the drop-down menu.
- Once the Select File dialog opens, navigate to the file and double-click it.
Memory leaks are bad in any situation. They trigger different types of errors, and the “The exception Breakpoint” error is one of them. Memory leaks happen when your RAM fails to release unallocated memory. When this happens, new programs will likely not execute.
Memory leaks can be temporary or permanent. Rebooting your system should clear minor memory glitches. However, if the issue is connected to your RAM stick, you may need to change it. You have to run the Windows Memory Diagnostic tool to test your RAM.
These steps will show you how:
- Press the Windows logo key + R shortcut to open Run.
- Once Run shows up, type “mdsched.exe” and tap the Enter button.
- Choose “Restart now and check for problems (recommended)” once the Windows Memory Diagnostic mini-window opens.
Note: Once you click on this option, you’ll be giving up access to your computer until the tool completes its check.
If you choose the “Check for problems the next time I start my computer” option, you’ll also lose access to your system on your next reboot.
Once your system boots up, the Windows Memory Diagnostic tool’s screen will show up and conduct the test. You should see the results in this interface.
After the test is complete, the tool will automatically restart your computer and display the test results. However, some users reported they hadn’t seen the results after the restart.
If you cannot see the test results, head to the Event Viewer. Follow these steps:
- Press the Windows logo + X keyboard combination.
- Click on Event Viewer in the menu that shows up on the left side of your screen.
- You can also launch the Run dialog box, type “eventvwr.msc” (no quotes), then hit Enter.
- Once the Event Viewer window appears, navigate to the left pane.
- Expand Windows Logs, then click on System.
- In the Event Viewer’s middle pane, you’ll find different event entries.
- Go to the right pane of the window and click on Find.
- Type “MemoryDiagnostics-Results” (no quotes) and click on the Find Next button.
- The test results will be under General.
If the tool reports that your RAM is defective, you have to replace it. If there’s more than one RAM stick in your system, open your RAM slot, take out one stick, run the diagnostic tool, and check if the error appears. Try this for every other RAM stick and replace the bad one(s).
Create another administrator account
The problem might be related to your user account and creating another may get rid of the error for good.
Make sure you grant the new user account admin privileges.
Let’s show you how to create a new user account on Windows 10 and Windows 11:
- Launch the Settings application by right-clicking the Start menu and selecting Settings.
- When the Settings app opens, click on Accounts.
Note: On Windows 11, click on Accounts in the left pane of Settings.
- Next, click on Family & Other Users in the left pane and select “Add someone else to this PC.”
Note: If you’re running Windows 11, the Family & Other Users option is on the Accounts page.
- Click on “I don’t have this person’s sign-in information,” then choose “Add a user without a Microsoft account” on the next page.
- Now, enter the account’s username, and password. You can also choose to add a password hint or choose a few security questions that can be used to reset the password.
- Click on Next.
- After creating the account, head back to the Family & Other Users page and click on the account you just created.
- Select the Change Account Type option.
- Lick on Administrator under Account Type.
- Now, restart your computer and sign in with the new account to check for the issue.
Perform a clean boot
Another program or service could be preventing the executable file from running. Some of your applications launch at startup and continue to run in the background. In this case, you have to prevent every startup application from running and launch your system in a clean boot state to troubleshoot the problem.
If the file opens without issues while your system is in a clean boot state, it confirms that one of the startup items is responsible for triggering the Error 0x80000003. After you confirm that a startup app is responsible, you can isolate the culprit by starting your programs and services one after the other and opening the file.
Here’s how to perform a clean boot:
- Press the Windows and S keyboard buttons at the same time to open the search box beside Start.
- After the box appears, type “System configuration” and click on the first result.
- The System Configuration dialog window will open.
- Head to the Services tab.
- Mark the checkbox for “Hide all Microsoft services” so that you don’t disable operating system services.
- Now, click on the Disable All button to prevent the selected services from running the next time Windows starts.
- After that, go to the Startup tab.
- Click on Open Task Manager.
- You’ll now see the Startup tab of the Task Manager.
- Disable every program by clicking on each and selecting Disable in the bottom-right corner.
- Next, exit the Task Manager, go back to System Configuration and click on OK.
- Restart your device.
After your computer starts, open the file that triggers the error. If the file opens without issues, it’s clear that one of the startup programs has been clashing with it.
Head to the System Configuration window and enable one service. Restart your device and open the executable file. If the error shows up, then the startup service you just enabled is the culprit. Use the same method to check other startup items and programs.
Conclusion
That’s how to fix the “A breakpoint has been reached” issue in Windows 10 and Windows 11. If you want to ask questions or share how you resolved the problem, please head to the comments section below.
Download PC Repair Tool to quickly find & fix Windows errors automatically
Windows is a feature-rich operating system with several tiny components coming together. This raises a good probability of the different types of errors that a user may encounter. One such error is A breakpoint has been reached, 0x80000003 which a user can encounter upon their execution of any random file. But one thing is obvious that this file would be an executable file and the other thing is obvious this error is caused due to some Registry files conflicting with the execution or and drivers missing or not compatible with the hardware to run the program.
The exception Breakpoint, A breakpoint has been reached, (0x80000003) occured in the application.
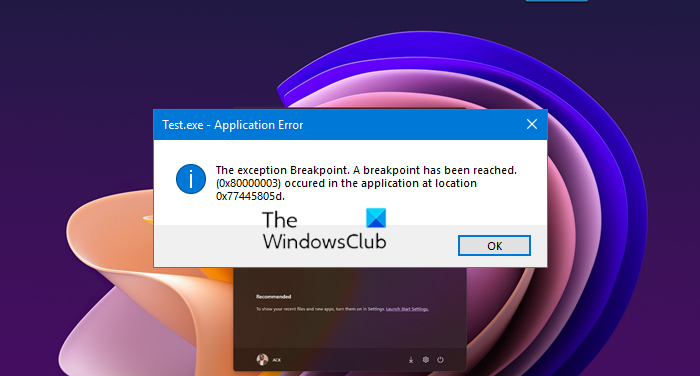
This Windows Executive STATUS message is a warning. If given an option, you need to choose one of the options from the message box. If you are running the application in an end-user environment, rather than in a development environment, you need to contact the supplier of the running application about this message, as this should not happen when a finished program is running.
There are a few things you could try and see if they help you fix the problem.
- Run chkdsk /r
- Run System File Checker at Boot time
- Run that file in Clean Boot State
- Such an error can also point to memory leaks.
- You may need to contact the developers of that particular software and ask them what this error means.
First of all, we would recommend you to create a System Restore point. Because we will be playing with registry files and modifying some really critical Windows settings. Having done this, we will continue on our quest of fixing error 0x80000003.
1] Run CHKDSK
Maybe you need to run CHKDSK so that it can fix and recover any damaged segments on the drive. In an elevated CMD run the chkdsk /r command.
2] Run SFC /SCANNOW
Run System File Checker offline. This will repair corrupted or damaged Windows files. You will need to run this command from elevated CMD, i.e., command prompt launched with admin privileges.
3] Boot Windows in a clean boot state
Boot in Clean Boot State and try to execute the same file. This will help if any processes are obstructing the removal.
4] Make a scan to check Memory Leaks
Using the Memory Diagnostic Tool is pretty straightforward. Save all your important work. Then, hit WINKEY + R to open the Run window. Now, type in the command mdsched.exe in the Run window. Reboot your computer.
After a reboot, perform a basic scan or go for the ‘Advanced’ options like ‘Test mix’ or ‘Pass count’. Hit F10 to start the test.
Hope the tests throw up something useful.
You can also try to find & fix Memory Leaks manually.
5] Contact the Developer
If nothing mentioned above works out for you, then you can try contacting the developer of the software throwing this error.
You can search the Internet for their official support channel and discuss this error there.
All the best!

Ayush has been a Windows enthusiast since the day he got his first PC with Windows 98SE. He is an active Windows Insider since Day 1 and has been a Windows Insider MVP.
Содержание
- Ways Of Handling The 0x80000003 Error Effortlessly
- What Is The 0x80000003 Error?
- Development Versus Client-Side Environments
- Pre-requisites
- Method 1 – Make Use Of The CHKDSK Utility Program
- To use the CHKDSK utility, you should follow these steps:
- Method 2 – The System File Checker Scan
- Running the SFC scan is quite simple. The steps to be followed are:
- The SFC scan report contains three crucial pieces of information:
- Method 3 – Clean Booting the Entire System
- Starting a computer in clean boot mode is easy if you follow these steps:
- Method 4 – Check for Memory Leaks
- Method 5 – Get In Touch With The Developers
- Method 6 – Advanced System Repair Operations
- Here are a few steps on how to use the Advanced System Repair option:
- Method 7 – Fix 0x80000003 Error with CCleaner
- Conclusion
- Как исправить ошибку 0x80000003 unknown software exception?
- Причины ошибки unknown software exception 0x80000003
- Методы решения ошибки приложения 0x80000003
- Метод No1 Отключение Антивируса
- Метод No2 Отключение Брандмауэра
- Метод No3 Проверка системы на наличие вирусов
- Метод No4 Переустановка приложения
- Метод No5 Чистый запуск
- Метод No6 Починка Реестра Windows
- Метод No7 Применение утилит SFC
- Метод No8 Запуск утилиты CHKDSK
- Метод No9 Проверка оперативной памяти
Ways Of Handling The 0x80000003 Error Effortlessly

You might be reading this post because you face the daunting 0x80000003 error. Many people wonder what has gone wrong with their machine when this error occurs.
This error can happen suddenly. And it can stop you from performing many important operations on your machine.
So, what is this error? Why does it occur? And how can you fix the issue? If these are questions in your mind, the following few lines will help you.
Here is a comprehensive guide on the 0x80000003 error.
What Is The 0x80000003 Error?
As mentioned previously, the 0x80000003 error happens suddenly. It will occur when you try to run a random file that conflicts with another file in the registry. The error is common when you try to execute .exe or executable files.
Also, it can occur when important drivers are missing from your machine. In some cases, the 0x80000003 error is caused due to incompatible hardware.
Hardware can also prevent you from executing certain files. This is why you should think of three ways to fix the 0x80000003 error.
In general, the 0x80000003 error comes with the following message:

The exception breakpoint, A breakpoint has been reached, (x0x80000003) occurred in the application.
The above message is always shown on the screen and can confuse the user. Once the error occurs, you will not be able to do any more operations with the executable file.
Besides, if you are bothered by the error 0x80070652 on Windows, click to fix it now.
Development Versus Client-Side Environments
In some cases, you will receive a warning message with multiple options. When an executive windows message appears on the screen, you should consider it a warning.
The warning message will have several options which you should select. For instance, if you are working on a client-side environment, and the application throws the 0x80000003 error, you can contact the vendor.
On the other hand, in case you are in an environment of development, and if the 0x80000003 error occurs, you should stop the current execution and try debugging.
The first scenario is always the easiest. That is because the application’s supplier will debug and help you figure out the error situation.
Pre-requisites
First, you must be in a system restore point before executing the steps mentioned in this post. This is an important step because you will make many critical changes to your system settings in this step.
Without having a proper system restore point, you may face unforeseen complications.
Method 1 – Make Use Of The CHKDSK Utility Program
By default, this utility program is designed to help you with the 0x80000003 error. In some cases, running this utility program will resolve the issue completely. However, the utility works well only in certain conditions.
For instance, is your machine throwing the 0x80000003 error due to a hard drive integrity issue? When a hard drive faces integrity issues, it will not allow you to update or make any changes to its files. It will fail when you try to run an update on the hard drive.
After all, the system is unhealthy and cannot accept any new changes. New changes will only make the hard drive worse.
Fortunately, the CHKDSK utility can help you handle this situation. This utility program is designed to rectify hard drives that have serious integrity issues.
And it works by repairing the hard drive and its errors. All errors that prevent the hard drive from functioning normally and getting updated will be fixed.
PS: Here are the best solutions for the 0x00000050 Blue Screen of Death Error and the Windows update error 0x80070652.
To use the CHKDSK utility, you should follow these steps:
- First of all, log in to your machine as an administrator. The next few steps will not work if you are with system admin privileges.
- Then, you should open the command prompt.
- Enter the following command: chkdsk /f /r, and hit the enter button.
- Now, your machine will run an internal program. Soon, the entire computer will restart.
Once the computer restarts, check if you can update the hard drive. If the CHKDSK utility program’s script was executed successfully, and the 0x80000003 error was resolved, you must be able to update the hard drive without any issues.
However, you must accept that this method will work only in certain scenarios. And it can be limited by many factors.
Method 2 – The System File Checker Scan
Next would be the system file checker scan. As suggested by its name, this program performs a system scan to look for files likely to cause the 0x80000003 error.
Doesn’t this sound simple? Nevertheless, the process is not as simple as it appears. There are chances that the System File Checker alias SFC Scan fails to spot all potential files.
If the SFC scan identifies files that can cause the 0x80000003 error, you must take the necessary actions to fix the corrupted files.
Running the SFC scan is quite simple. The steps to be followed are:
- You must launch “Run.” Just press “Windows” and “R” together to launch Run.
- Now, you should launch the command prompt. Typing “cmd” and hitting the enter button will launch the command prompt.
- In the command prompt, you must type the following commands: sfc /scannow. This command will initiate the system scan. This command will take a few minutes, just like most other scans. You must wait patiently for the scan to complete.
- On completion of the SFC scan, you will receive three different results. Scan through the results to identify corrupted files that were repaired and that were not fixed.
- You must restart the machine to ensure that the scan is complete and the results are saved.

The SFC scan report contains three crucial pieces of information:
- Whether windows resource protection was able to find integrity violations.
- Whether this protection was able to find corrupt files, if yes, whether the corrupt files were repaired successfully;
- The third thing, Whether this protection was able to find corrupt files; And if the corrupt files were not fixed as expected.
Method 3 – Clean Booting the Entire System
Moving on, there will be instances when you should clean and boot your machine. A clean boot becomes inevitable when you have installed several conflicting applications.
Conflicting applications are a major reason behind the 0x80000003 error. Finding these programs is not an easy task.
You may not be able to find all conflicting programs in one go. You should change your machine to clean boot mode to find all the conflicting programs.
Starting a computer in clean boot mode is easy if you follow these steps:
- You must have admin privileges. Login to your machine as a system administrator.
- You should open the System Configuration Utility option. Typing msconfig will open the System configuration utility program.
- You should select “Selective Startup” in the “General” tab in the System Configuration Utility window.
- Then select “Load Startup Items,” “Load System Services,” and “Use original boot configuration,” as well.

- Next, you will need to go to the “Services Tab.” In the services tab, you must select “Hide All Microsoft Services.” Then, select “Disable All.”

- You should select “Apply” and “OK” to apply all the chosen settings in the main window.
- Next, restart the machine. By executing this step, your machine will be shifted to clean boot mode.
- In Clean Boot Mode, you can identify all conflicting programs. Consequently, you can identify the main cause or reason for the 0x80000003 error.
To exit the Clean Boot State, you must undo the previous changes and restart windows.
Method 4 – Check for Memory Leaks
Another reason behind the 0x80000003 errors would be memory leaks. Finding programs that cause memory leaks is simple. The following steps will help you look for memory leaks:
- Launch “Run” and type mdsched.exe. This will open the Windows Memory Diagnostic Tool.
- The Windows Memory Diagnostic Tool offers two different options: You can check for issues or problems when the machine is restarted, or you can choose to restart immediately. The latter would be the most recommended choice.
- Next, you should execute a simple scan.
- You must navigate the “Advanced” options Pass Count or Test Mix. Press F10 to initiate the test process.
Method 5 – Get In Touch With The Developers
Finding the 0x80000003 error becomes easy when dealing with a single application. The best way to rectify the 0x80000003 error caused by a single application is by contacting its developers.
Search the software’s official website for a discussion forum or contact form. Now, escalate the 0x80000003 error to its developers.
Method 6 – Advanced System Repair Operations
Apart from the solutions mentioned above, you can choose to fix the 0x80000003 error along with many other windows system issues.
Advanced System Repair is a complex tool that can repair corrupted registries and even optimize the overall performance of your machine. It removes corrupted files and many other junk files from your machine.
Advanced System Repair is the best and simplest way to remove unwanted system files. With just a few clicks of a button, you can tackle the 0x80000003 error!
Here are a few steps on how to use the Advanced System Repair option:
- The system should be restarted in “ Safe Mode with Networking.”

- Now, you should press the “Windows and R” keys. You will see the run window if you have performed this step properly.

- Enter the URL for downloading advanced system repair.
- Once the program is downloaded, you must install it.
- Next, execute the Full System Scan.

- Once the scanning completes, you must select “Fix, Clean & Optimize Now.”

Completing the above steps will help you fix the 0x80000003 issue and all other problems in your Windows.
Method 7 – Fix 0x80000003 Error with CCleaner
Last but certainly not least, you can make use of CCleaner.
As suggested by its name, this program helps clean the windows operating system. It can be downloaded for free from the official website. Please install the application and launch it to run the cleaner.
Next, select “Registry” and select “Fix Selected Issues.” The application will prompt you to take a backup of the existing registry. You are highly advised to take a backup, so click “Yes.”
After successfully backing up the registry, you must select “Fix all selected issues.” Finally, restart your machine to witness the changes CCleaner made and verify if the 0x80000003 error is fixed.

Conclusion
So the 0x80000003 error is fixable. You don’t need to throw your machine or hard drive when this error occurs. Instead, choose one of the solutions mentioned in this post to fix the issue.
Источник
Как исправить ошибку 0x80000003 unknown software exception?
Ошибка 0x80000003 unknown software exception может появиться в момент запуска какой-либо утилиты или видеоигры. Естественно, данная ошибка препятствует дальнейшему запуску нужного вам контента. В сообщении ошибки может содержаться следующая информация:
Исключение unknown software exception (0x80000003) в приложении по адресу **********.
“ОК” — завершение приложения
Природа этой ошибки заключается в том, что запущенное приложение, по какой-то причине, не смогло получить доступ к памяти системы, что привело к уже указанному выше сообщению и к невозможности завершить свою операцию.
Сразу же стоит указать, что проблему испытывают абсолютно все пользователи на любой версии операционной системы, т.е. Windows 7/8/8.1/10. Разобравшись с природой проблемы, давайте рассмотрим причины ошибки приложения 0x80000003.
Причины ошибки unknown software exception 0x80000003
Данный список вам далеко не обрадует, так как в нем находится множество пунктов, как программного, так и аппаратного характера.
- Антивирус мог по какой-то причине заблокировать запускаемое вами приложение(или часть его файлов), что и вызвало появление проблемы с ошибкой.
- Системный Брандмауэр Windows или сторонний Firewall мог заблокировать определенный функционал вашего приложения.
- Ошибка 0x80000003 могла появиться на вашем компьютере вследствие повреждений определенных записей в Реестре Windows.
- Проникший на ваш компьютер вирус мог запросто наделать различных проблем и данная ошибка также возможно является следствием его воздействия.
- Могли возникнуть проблемы с различными драйверами при запуске утилиты или видеоигры. Например, если запустили игру, то проблема может заключаться в драйверах для аудио-/видеокарты.
- Возможно, произошли повреждения файловой системы Windows, что и привело к появлению ошибки при запуске утилиты, так как та пытается получить доступ к поврежденным элементам.
- Как вариант, само запускаемое вами приложение или видеоигра могла быть повреждены вследствие каких-то событий в системе. Так же не стоит исключать того, что утилита могла быть попросту повреждена во время своей установки.
- Множество пользователей указывали, что ошибка unknown software exception 0x80000003 заключалась в оперативной памяти, которая работала со сбоями и ошибками. Именно данная причина является наиболее распространенной.
- Самый худший сценарий — проблемы с вашим жестким диском. Если говорить более точно — поврежденные сектора или же бэд-блоки.
Множество причин, да, но большинство из них довольно просто и быстро проверить. Чем мы, собственно, сейчас и займемся — рассмотрим все потенциальные решения ошибки 0x80000003.
Методы решения ошибки приложения 0x80000003

Метод No1 Отключение Антивируса
Антивирус частенько становится причиной беспокойства для пользователя. Могло так статься, что именно он стал виновником в этой ситуации. Попробуйте отключить свой антивирус, дабы проверить эту теорию.
Описывать шаги по отключению антивируса абсолютно бесполезно, так как каждый разработчик имеет хоть и схожий, но все же уникальный интерфейс для своего продукта. В некоторых случаях, вам достаточно просто нажать на трей антивируса в Области уведомлений Пуска и выбрать «Отключить» или что-то в этом роде.
Если в параметрах трея антивируса нет пункта об его отключении, то вам нужно открыть антивирус, зайти в настройки и вручную отключить активную защиту(как правило, оно называется именно так).
Метод No2 Отключение Брандмауэра
Брандмауэр выступает в роли защитного экрана для сетевых подключений в ОС Windows. Однако, порой он заходит довольно далеко со своей защитой и начинает блокировать те сетевые подключения в системе, которые бы вам не хотелось видеть заблокированным.
Например, Брандмауэр Windows мог заблокировать какие-то сетевые функции запускаемого вами приложения. Как только приложение пытается получить доступ к этим функциям, но не может сделать этого, то появляется ошибка 0x80000003 unknown software exception.
Если вы подозреваете Брандмауэр Windows в создании проблемы, то это легко можно проверить — отключите его и все станет понятно. Для отключения Брандмауэра сделайте следующее:
- Нажмите ПКМ на Пуск и выберите «Панель управления».
- Выберите раздел «Брандмауэр Windows».
- Нажмите на ссылку в левой части экрана, которая отвечает за включение и отключение Брандмауэра Windows.
- Поставьте галочки возле опций, которые отключат Брандмауэр для локальных и общественных подключений.
Отключив защитный сетевой экран операционной системы, попробуйте запустить то приложение, запуск которого вызывал появление unknown software exception 0x80000003.
Метод No3 Проверка системы на наличие вирусов
Тут все довольно просто — вирусы могли попасть в вашу систему и наделать там немало бед. Возможно, вирусы смогли заблокировать или повредить какие-то файлы приложения или системы.
Попробуйте запустить свой антивирус и проверьте с помощью сканера свой компьютер на наличие вирусов. Если вы найдете в системе хотя бы малейшие намеки на вирусную угрозу, то немедленно ликвидируйте ее, удалив пораженные элементы с помощью антивируса.
Избавившись от незваных гостей, снова попробуйте запустить приложение, с которым возникла проблема.
Метод No4 Переустановка приложения
Почему бы не пойти на самый очевидный шаг в этой ситуации. Если у вас не запускается какое-то приложение, то попросту переустановите его. Возможно, что во время предыдущей установки приложение было установлено некорректно.
Метод No5 Чистый запуск
Существует вероятность, что какая-то служба в системе является причиной возникновения ошибки. Чтобы это проверить, вам необходимо выполнить так называемый Чистый запуск. Этот процесс довольно прост, но вот выявление проблемной службы займет у вас достаточно большое количество времени. Все дело в том, что вам придется пользоваться методом исключения, но об этом позже:
- Нажмите Windows+R.
- Впишите msconfig и нажмите Enter.
- Перед вами появится окошко «Конфигурация системы». Перейдите во вкладку «Службы».
- Активируйте опцию «Не отображать службы Майкрософт».
- Затем нажмите на кнопку «Отключить все».
- Перейдите в «Автозагрузка» и нажмите на «Открыть диспетчер задач».
- После перехода в Диспетчер задач, вам потребуется отключить все программы в Автозагрузке. Нажмите для этого на каждую из них ПКМ и выберите «Отключить».
- Перезагрузите свой компьютер.
Попробуйте снова запустить нужную вам программу и посмотрите, появится ли ошибка unknown software exception 0x80000003. Если нет, то вы смогли найти виновника — это одна из отключенных служб или программ в Автозагрузке. Итак, теперь самое сложное — вы должны поочередно включать каждую из служб и проверять наличие ошибки.
Метод No6 Починка Реестра Windows
Ошибка unknown software exception 0x80000003 могла возникнуть из-за того, что вследствие какого-то события в системе были повреждены записи Реестра Windows. Если это так, то вам нужно исправить их. Опытные пользователи могут сделать это самостоятельно, но, во-первых, это займет много времени и, во-вторых, легче попросту использовать специализированные утилиты для этой задачи. Например, CCleaner прекрасно подойдет для восстановления записей Реестра.
Метод No7 Применение утилит SFC
Еще одна возможность появления ошибки software exception 0x80000003 — повреждение системных файлов Windows. Однако, решается эта проблема довольно просто с помощью системной утилиты System File Checker или же SFC. Она выполнит сканирование системных файлов, укажет на повреждения и даже попытается исправить их, но только если такое будет возможно. Итак, для ее запуска вам потребуется сделать следующее:
- Нажмите ПКМ на Пуск и выберите «Командная строка(администратор)».
- Впишите sfc /scannow и нажмите Enter.
После нажатия на Enter, запуститься процесс сканирования системных файлов. По его окончанию, вам укажут на найденные повреждения и были ли они исправлены. Если что-то было найдено, то перезагрузите свой компьютер, а затем попытайтесь запустить программу и проверить наличие ошибки приложения 0x80000003.
Метод No8 Запуск утилиты CHKDSK
CHKDSK — это утилита, которая сможет выполнить целостность файловой системы на вашем жестком диске, а также проверит его на наличие бэд-блоков, которые и могли стать причиной возникшей ошибки. Для запуска утилиты CHKDSK сделайте следующее:
- Нажмите ПКМ на Пуск и выберите «Командная строка(администратор)».
- Впишите chkdsk C: /F /R и нажмите Enter.
- Далее просто следуйте инструкциям на экране. Если потребуется выполнить проверку при следующей перезагрузке компьютера, то соглашайтесь. После работы утилиты CHKDSK, вам выдадут результаты проверки, а также укажут на возможные восстановления.
Метод No9 Проверка оперативной памяти
И последний метод в нашем списке затронет вашу оперативную память. Если та работает с ошибками или со сбоями, то ошибка unknown software exception 0x80000003 могла стать закономерным исходом. Выполнять проверку RAM мы будем двумя способами: внешним осмотром и программным.
Начнем с осмотра оперативной памяти. Откройте ваш системный блок и выньте из него все планки RAM(естественно, предварительно выключив компьютер). Осмотрите планки и убедитесь, что на них нет каких-то физических повреждений. Если все выглядит нормально, то протрите контакты планок резинкой для карандаша или же ушной палочкой, смоченной в спирте(не перестарайтесь), и поставьте их обратно.
Попробуйте зайти в систему и проверьте наличие ошибки software exception 0x80000003. Если ее не стало, то дело заключалось определенно в плохом контакте. Если же ничего не изменилось, то давайте проверим оперативную память с помощью специального софта.
Мы рекомендуем вам использовать такую полезную утилиту, как MemTest86+. Использовать ее довольно просто: загрузить программу, создать с ней загрузочный диск, а затем запуститься через него. Как только вы сделаете это, то утилита автоматически проведет проверку вашей оперативной памяти.
Если результаты проверки будут окрашены в красные цвета, то ваша оперативная память действительно работает со сбоями и ошибками. К сожалению, тут вы мало что сможете сделать. Вам остается только либо отнести ее в сервисный центр для более детальной проверки и, возможно, возвратить ее к жизни, либо купить новую планку.
Источник
Our expert solutions fix the breakpoint error in Windows 10, 11
by Milan Stanojevic
Milan has been enthusiastic about technology ever since his childhood days, and this led him to take interest in all PC-related technologies. He’s a PC enthusiast and he… read more
Published on October 6, 2022
Reviewed by
Vlad Turiceanu

Passionate about technology, Windows, and everything that has a power button, he spent most of his time developing new skills and learning more about the tech world. Coming… read more
- The exception breakpoint has been reached message can appear and prevent you from running certain applications.
- A simple solution is to perform a deep scan of your computer to look for malware.
- A quick workaround is to terminate the application every time before you shut down the PC.
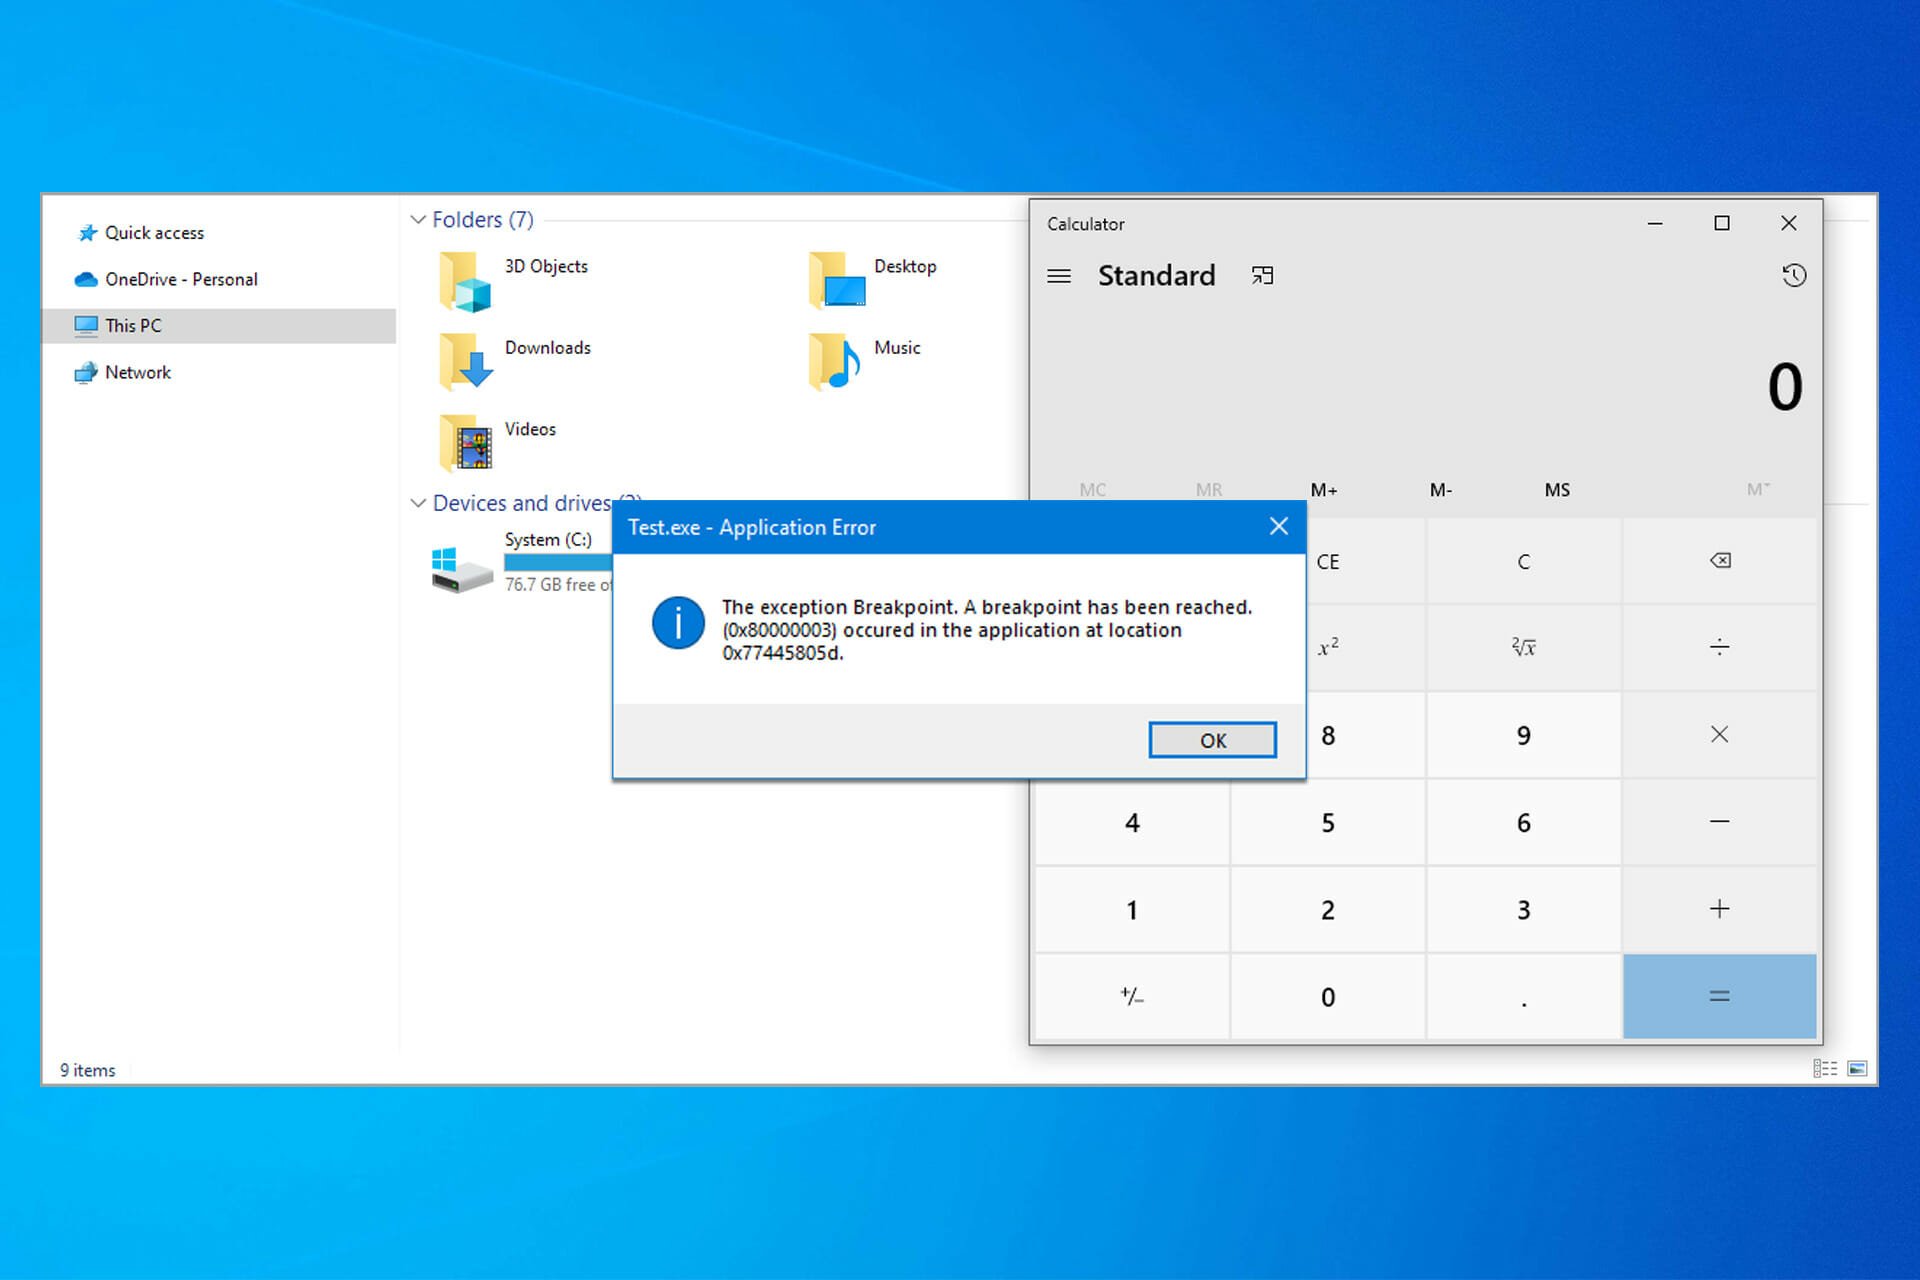
XINSTALL BY CLICKING THE DOWNLOAD FILE
This software will repair common computer errors, protect you from file loss, malware, hardware failure and optimize your PC for maximum performance. Fix PC issues and remove viruses now in 3 easy steps:
- Download Restoro PC Repair Tool that comes with Patented Technologies (patent available here).
- Click Start Scan to find Windows issues that could be causing PC problems.
- Click Repair All to fix issues affecting your computer’s security and performance
- Restoro has been downloaded by 0 readers this month.
The exception breakpoint has been reached message can sometimes appear on your PC while trying to run a certain application or while trying to shut down your computer.
The error can be encountered with a wide range of applications, including games, browsers, and even cloud storage programs. But, it’s easy to fix, given you follow the right approach, and we help you do that in the following sections.
What is an exception breakpoint on PC?
A breakpoint is an intended halting or pausing location in a program that is placed there for the sake of debugging. This is done in the context of developing software.
Here are some of the reasons you are encountering the error:
- Problems with the app itself – In some cases, users reported The exception breakpoint has been reached error with Skype on startup when not terminating the process before shutdown. Reverting to the previous version of the app fixed things here.
- Corrupted system files – Corrupted system files can lead to a range of issues and affect the overall Windows experience. Running the DISM tool and SFC scan would help here.
- Issues with memory allocation – Oftentimes, if sufficient memory is not allocated to the program or there are other similar issues with it, you may encounter the error.
Also, let’s find out the most common scenarios here:
- The exception breakpoint has been reached in Cyberpunk 2077, Origin, Sims 4, Warzone, – This problem can occur if the application you’re trying to run isn’t up to date or its installation is corrupted.
- A breakpoint has been reached when shutting down – Sometimes this issue can occur due to third-party applications. To fix it, you need to find and remove the problematic applications and the issue should be resolved.
- The exception breakpoint has been reached on Firefox, Chrome – A common error encountered by many, and can be fixed with our solutions.
- The exception breakpoint has been reached on Outlook, OneDrive, Google Drive– Chrome users have also reported encountering the error. Reinstalling the browser should do the trick.
- Breakpoint error in Windows 10, 11 – The solutions below are applicable for both OS iterations.
- Lghub.exe / msedge.exe the exception breakpoint – Run the DISM tool in order to fix the breakpoint.
- The exception breakpoint has been reached 0x80000003 – You can also create a new user profile then move all your data on it.
How do you fix the exception breakpoint has been reached?
- What is an exception breakpoint on PC?
- How do you fix the exception breakpoint has been reached?
- 1. Terminate the app before shutting down the computer
- 2. Run the DISM tool and SFC scan
- 3. Set the Page file to automatic
- 4. Scan your PC for malware
- 5. Create a new user profile
Before trying the comprehensive list of solutions, here are a few quick fixes to get things running:
- Update the app that’s throwing the error. Or if that doesn’t work, head to the official website and download the previous stable version, in case you started encountering the error after updating it.
- Install the latest available version of Windows 10.
- If you have overclocked the PC, revert to the default settings.
- In case you have third-party screensaver software running on the computer, uninstall the app.
If the error persists, try the solutions listed next:
1. Terminate the app before shutting down the computer
The users reported that simply terminating the application before shutting down fixed the problem for them. It is because the app was in some way affected when forcefully terminated by Windows while undergoing a shutdown.
1. Press Ctrl + Shift + Esc to open the Task Manager and locate the app that usually throws the error.
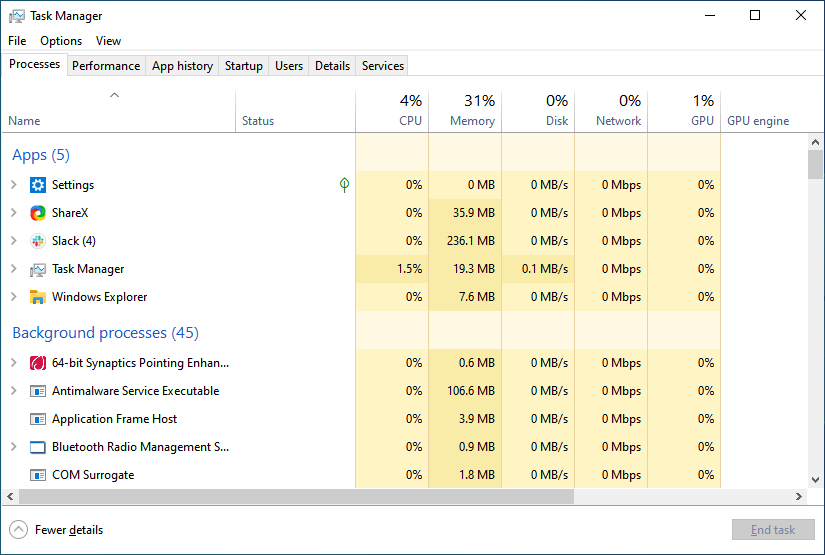
2. Select it, and then click on End task.
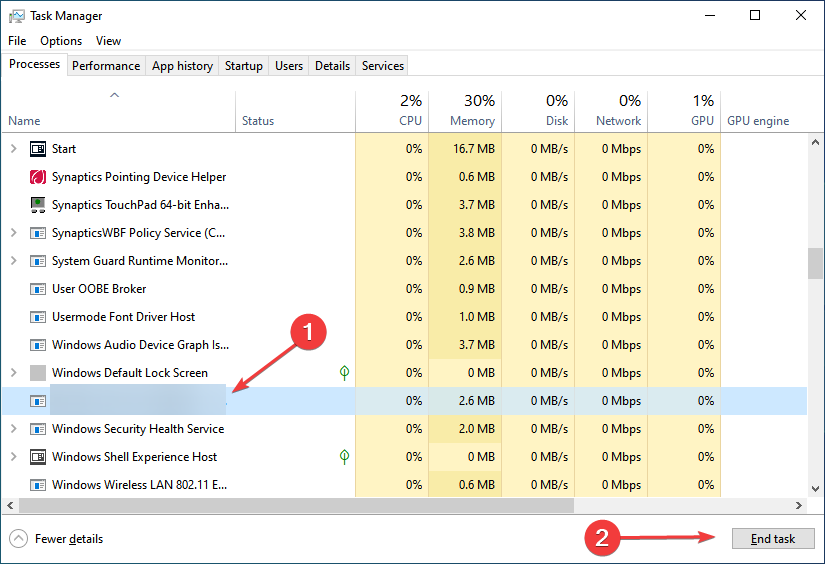
3. Once done, go ahead and shut down or restart the computer, and you shouldn’t see the error anymore.
This method is found to fix The exception breakpoint has been reached error for Skype, Origin, and Steam, amongst others.
2. Run the DISM tool and SFC scan
- Press Windows + R to open Run, type cmd in the text field, and hit Ctrl + Shift + Enter.

- Click Yes in the UAC prompt.
- Paste the following commands one at a time and hit Enter after each to run the DISM tool:
Dism /Online /Cleanup-Image /CheckHealthDism /Online /Cleanup-Image /ScanHealthDism /Online /Cleanup-Image /RestoreHealth - Now, run the SFC scan by executing the following command:
sfc /scannow
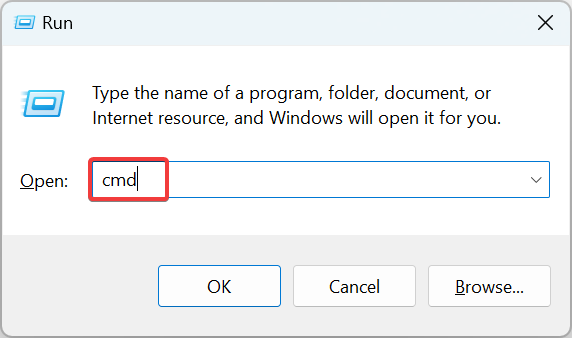

Some PC issues are hard to tackle, especially when it comes to corrupted repositories or missing Windows files. If you are having troubles fixing an error, your system may be partially broken.
We recommend installing Restoro, a tool that will scan your machine and identify what the fault is.
Click here to download and start repairing.
If you see Exception Breakpoint, Breakpoint has been reached (0x80000003) error, the DISM (Deployment Image Servicing and Mnaagement) tool and SFC (System File Checker) scan would come to your aid and help eliminate all corrupt system files.
And if that was the underlying cause, things should now be up and running.
3. Set the Page file to automatic
- Type Adjust the appearance and performance of Windows in the Search bar, and click on the relevant search result.

- Navigate to the Advanced tab, and click on Change under Virtual memory.

- Tick the checkbox for Automatically manage paging file size for all drives, and then click on OK to save the changes.

- Once done, restart the computer for the changes to come into effect.
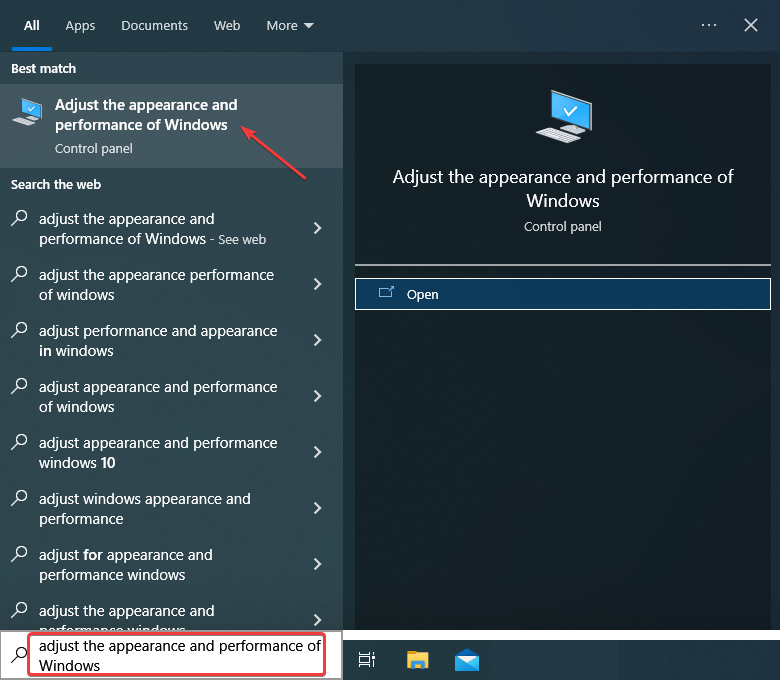
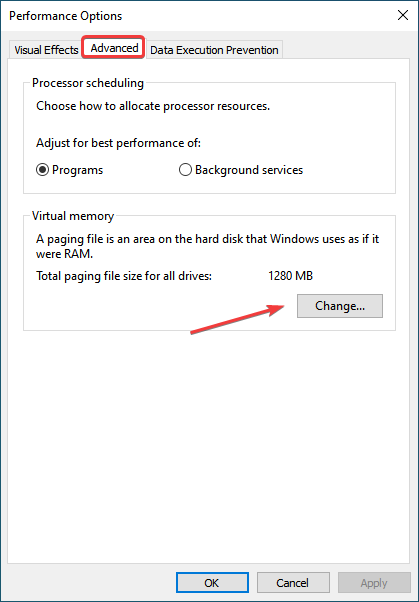
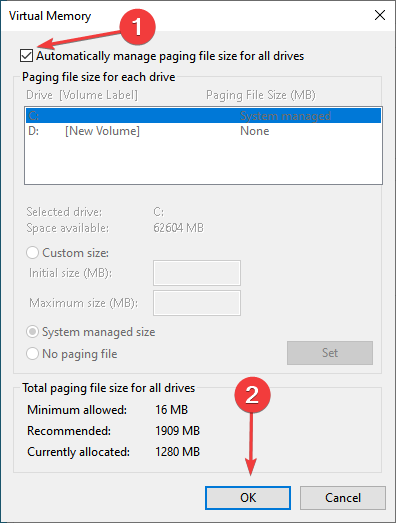
If you see The exception breakpoint has been reached error on MSFS, allow Windows to automatically manage the paging file size.
4. Scan your PC for malware
According to users, sometimes this issue can appear if your system is infected by malware. To fix the problem, it’s advised that you perform a full system scan and check if that solves your problem.
If you want to achieve maximum protection, we suggest that you try out professional antivirus software that also protects you against all types of malware.
The ESET NOD 32 toolkit has a small RAM footprint, therefore it is quite light on the PC. It has unbreakable security standards, identifies aggressive virus signatures, and provides great online protection.
The super-easy user interface allows you to quickly navigate to the task you want to perform. It’s one the most dependable AI ally you could have for your cyberlife.
Aside from the antivirus layer, the anti-malware method builds shields and checks for hidden bugs in your PC that are causing the breakpoint error to occur.
⇒ Get ESET NOD 32
5. Create a new user profile
- Press Windows + R to open Run, type netplwiz in the text field, and then click OK.
- Click Add.

- Now, provide a Microsoft-linked email address and then follow the on-screen instructions to complete the process.

- Alternative, you could create a Local Account. For that, click on Sign in without a Microsoft account (not recommended).
- Choose Local account.
- Enter the required information in the text fields, and then follow the on-screen instructions to complete the process.
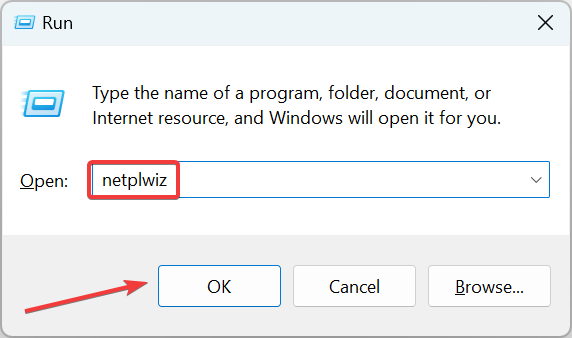
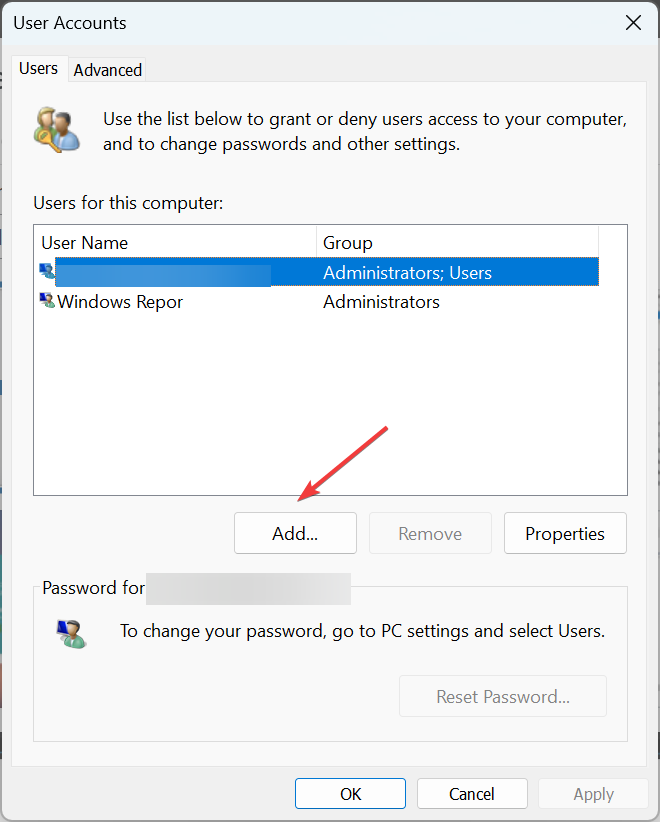
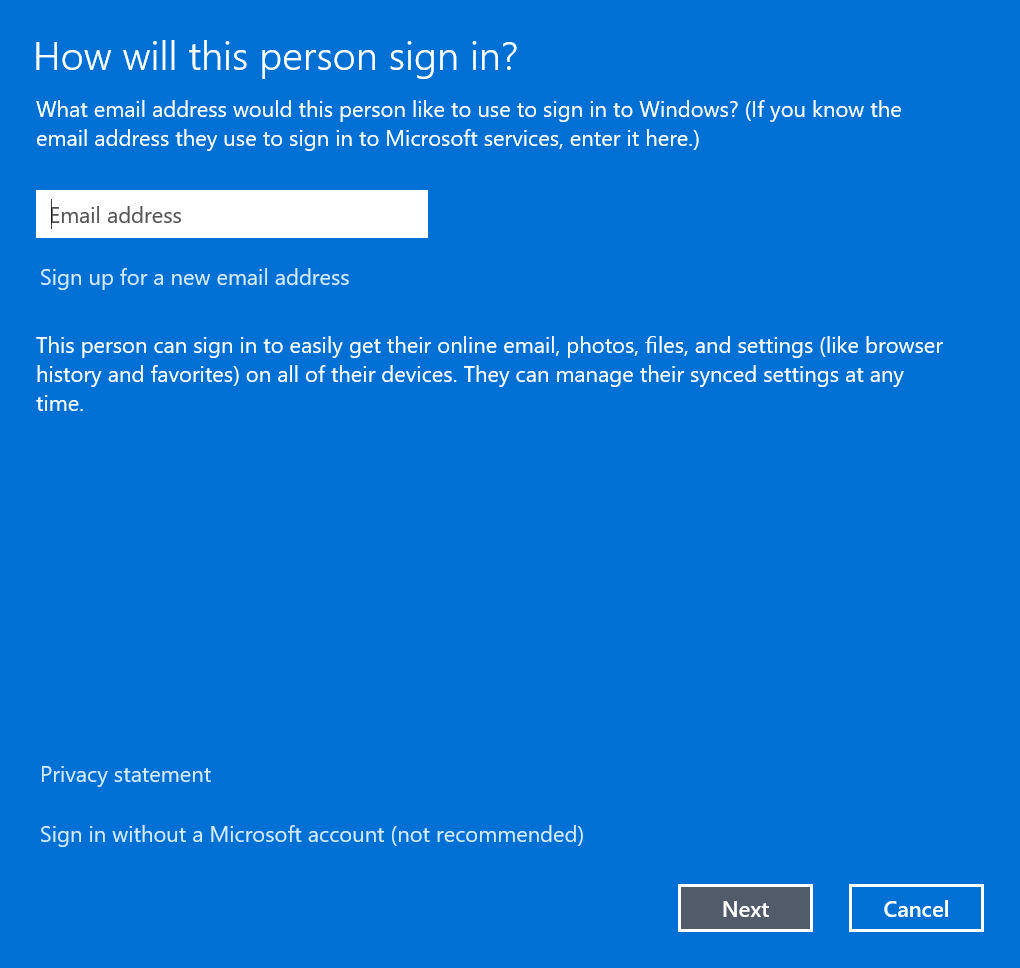
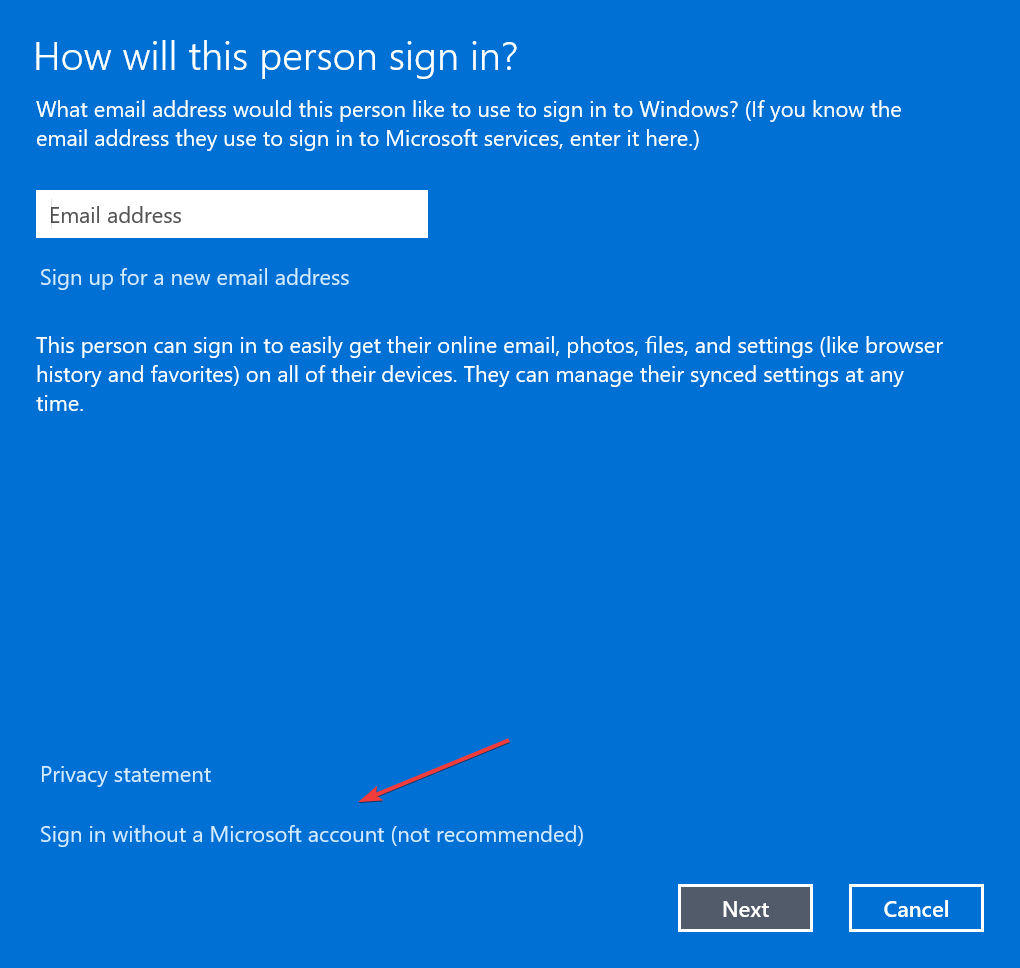
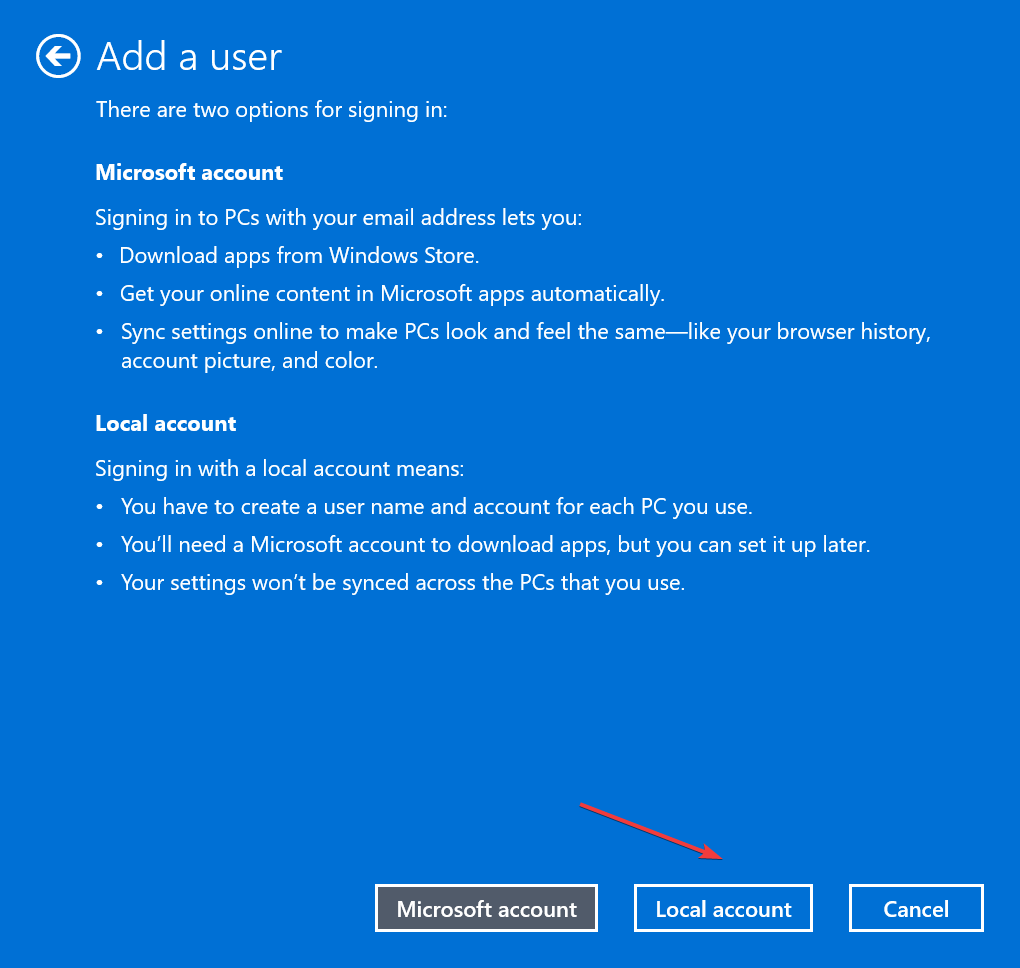
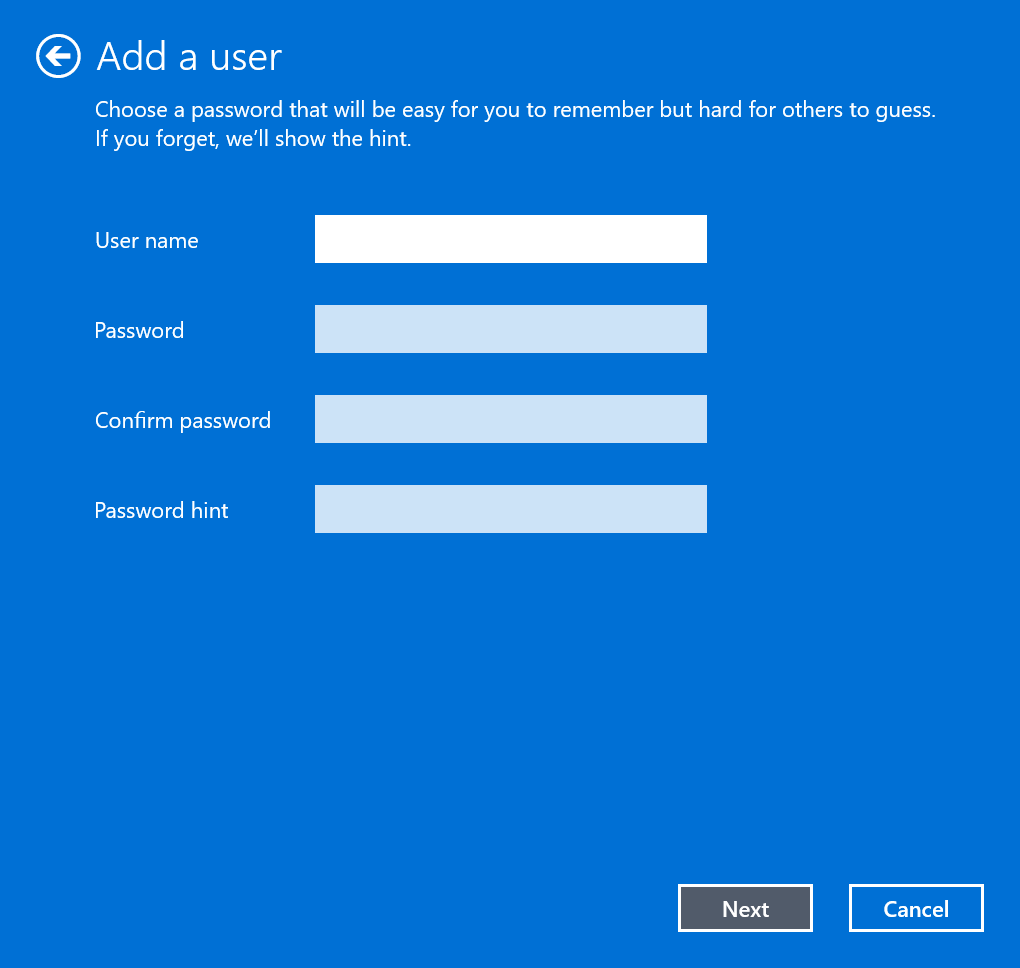
After the new account is created, sign in with it, install the problematic app here, and check if The exception breakpoint has been reached error is fixed.
In case the error doesn’t appear anymore, you can create a backup of the remaining data stored on the previous profile and move it to the new user account.
And once you have managed to eliminate the error for good, do check how to boost the performance of a Windows 10 PC.
If you fixed things with another solution, do not forget to share it with us in the comments section below.
Still having issues? Fix them with this tool:
SPONSORED
If the advices above haven’t solved your issue, your PC may experience deeper Windows problems. We recommend downloading this PC Repair tool (rated Great on TrustPilot.com) to easily address them. After installation, simply click the Start Scan button and then press on Repair All.
![]()
Newsletter
-
Partition Wizard
-
Partition Magic
- How to Fix a Breakpoint Has Been Reached Error [Full Guide]
By Ariel | Follow |
Last Updated January 19, 2022
When trying to run certain applications or shut down the computer, a breakpoint has been reached error message pops up. How to fix the exception breakpoint 0x80000003 error? Let’s explore the troubleshooting methods together with MiniTool.
What causes a breakpoint has been reached 0x80000003 error? According to a survey, this error can be caused by a malware infection, conflicting software, corrupted user profiles, and overclocking. To resolve this, we summarize the following several solutions. Let’s keep reading.
Fix 1. Scan for Malware
Malware infection is one of the most common reasons for a breakpoint has been reached error. To troubleshoot this error, we recommend you run a virus scan. Here’s how to do that:
Step 1. Type virus in the search box and click the Virus & threat protection app from the top result.
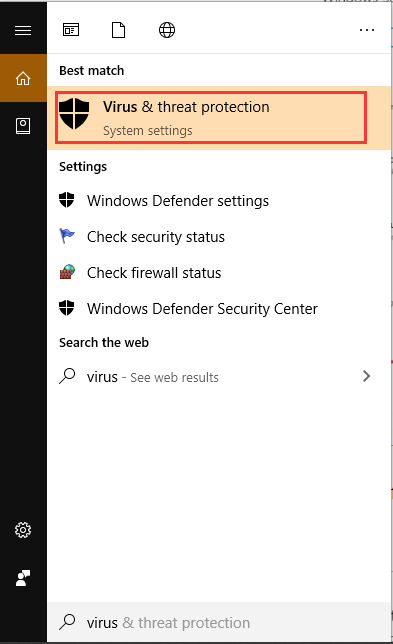
Step 2. Inside the Windows Defender Security Centre, click the Run a new advanced scan option on the right panel.
Step 3. Then you will see a list of advanced scans including Full scan, Custom scan, and Windows Defender Offline scan. Click Scan now after you selected an option and wait for the process to complete.
Once the scan completes, reboot your computer and see if the exception breakpoint 0x80000003 error goes away.
Fix 2. Uninstall the Third-Party Screensavers
Some users reported that a breakpoint has been reached Windows 10 appears after installing a third-party screensaver. The third-party screensaver may conflict with your system. Here you can try uninstalling it from your computer.
Step 1. Type control in the search box and select the Control Panel app from the context menu.
Step 2. Change the View by type to Category, and then click on Uninstall a program under the Programs section.
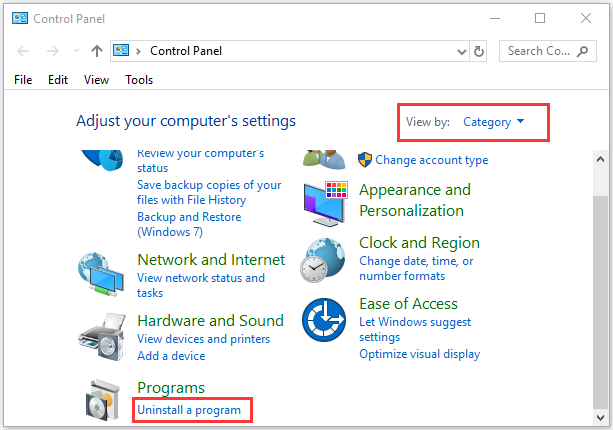
Step 3. Right-click the third-party screensaver from the list of installed programs and select Uninstall. Then follow the on-screen prompts to complete the uninstallation.
Fix 3. Perform a Clean Boot
If a breakpoint has been reached Windows 10 error still persists, you can try performing a clean boot to see if there are any conflicting programs. Once you find the problematic software, you can uninstall it through the above method. Now, you can read this post to learn how to perform a clean boot.
Fix 4. Create a New User Account
In some cases, the exception breakpoint 0x80000003 error can be caused by a corrupted user account. To fix the issue, you can try creating a new user account. Here are detailed steps.
Step 1. Press Win + I keys to open the Settings app and click on Accounts.
Step 2. Select the Other people option from the left pane and click on Add someone else to this PC from the right side pane.
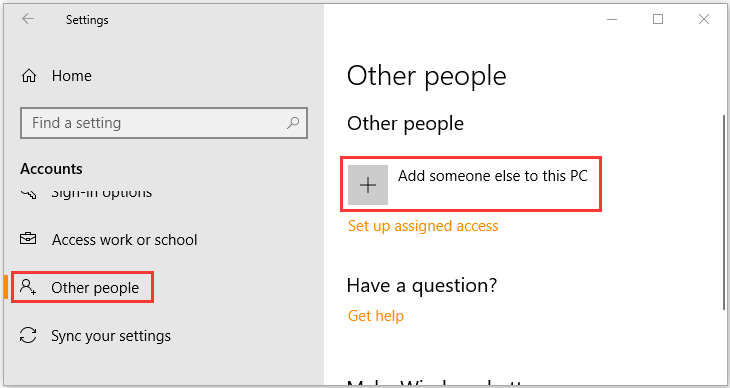
Step 3. Click on I don’t have this person’s sign-in information in the pop-up window.
Step 4. Click on Add a user without a Microsoft account. Then Windows will prompt you to create a new Microsoft account. Here you need to enter a user name and assign a password for the new account and click on Next.
After the new user account is created, you can check if a breakpoint has been reached Windows 10 error is fixed. If it is, then the issue can be caused by the user account. You should move your personal files to the new account and delete the old one.
Fix 5. Disable Overclocking
Overclocking is often used to speed up the CPU or GPU processor, which can help improve game performance. Sometimes, however, overclocking the hardware can trigger some issues like a breakpoint has been reached Windows 10.
Here you can follow the steps below to disable overclocking.
Step 1. Restart your computer and press the F2 or Delete key to enter BIOS when the manufacturer’s logo appears.
Step 2. Navigate to the Advanced tab, and then select Performance > Overclocking.
Step 3. Disable the Overclocking option, save the changes, and exit BIOS.
Now, you can restart your computer and see if the issue is fixed.
Fix 6. Perform a System Restore
If the exception breakpoint 0x80000003 error just appears after you install some Windows 10 updates, then you can perform a system restore to revert your system to an earlier date. To restore your Windows system, a system restore point is commonly used. You can read this post to learn more detailed steps.
About The Author

Position: Columnist
Ariel is an enthusiastic IT columnist focusing on partition management, data recovery, and Windows issues. She has helped users fix various problems like PS4 corrupted disk, unexpected store exception error, the green screen of death error, etc. If you are searching for methods to optimize your storage device and restore lost data from different storage devices, then Ariel can provide reliable solutions for these issues.
Hey there guys today I would like to look at another windows error that I encountered recently in the form of the exception breakpoint which is a really annoying error that would pop up in my case on My PC, I am using Windows 10 but it seems that this error can happen in any version of windows and would pop up each time I tried to shut down my PC, the error would pop up on-screen and can be quite annoying as there is very little clue as to what it actually means which I intend to change here today.
The Exception Breakpoint
The error reads: The exception Breakpoint A breakpoint has been reached. (0x80000003) in th application at location ….. click OK to terminate the program.
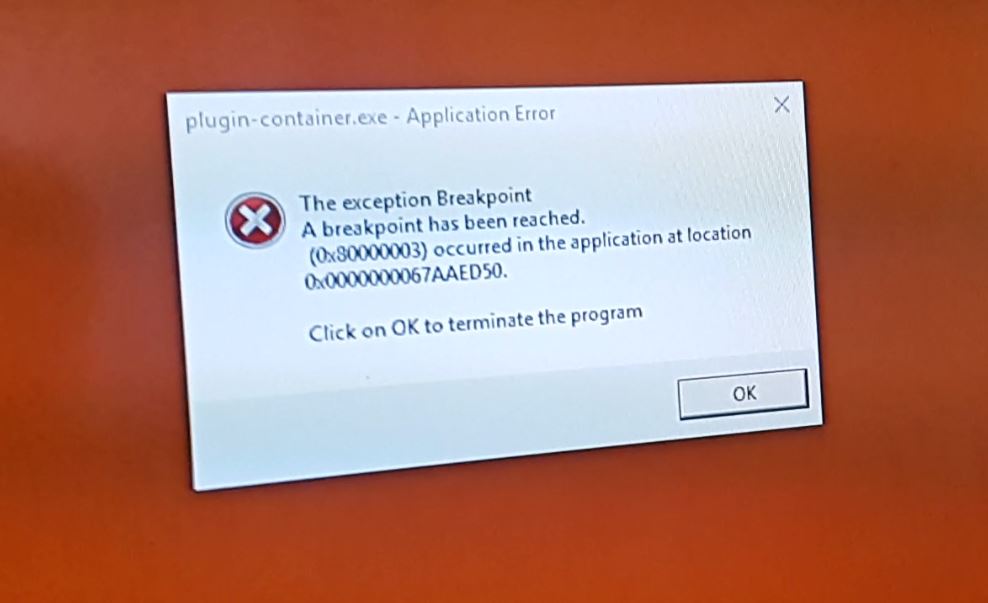
What operating Systems does this Affect?
This can affect any Windows operating system such as Windows 10 in my case or Windows XP, Windows Vista, Windows 7, Windows 8 or others.
What does this error actually mean?
The exception breakpoint 0x80000003 error is as a result of a corrupted operating system which in my case I think it may be as a result of updating to Windows 10 versus a clean install which can leave some old or corrupted registry entries which then can mess with the functioning of the operating system. Such as you may notice that your computer starts to lag and operate slower than normal and you may experience program crashes or strange behaviors due to the errors that are present in the registry.
How to fix the issue?
In my case I was able to fix the issue by:
1. Downloading a program called CCleaner.
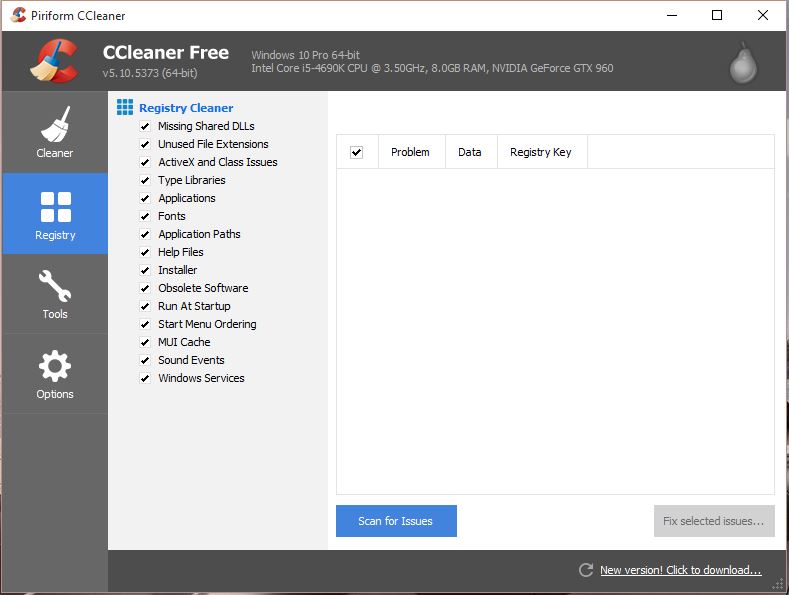
2. Once you install the program, launch it and go to the registry tab.
3. Next select: Scan for Issues and when finished select fix selected issues.
4. Repeat step 3 above until you have no more errors.
5. As an added step also select cleaner and give analyze and clean your PC a try as well.
The above should fix the errors in your corrupted registry in most cases and in a while the exception breakpoint error that was popping up should now be gone along with your computer running much smoother and error free. You can also keep the program above as it will keep your computer running smoothly and error free which is great for you.