Обновлено 22.06.2017
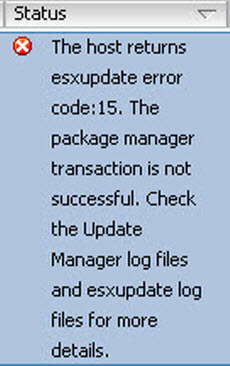
Всем привет, сегодня расскажу как решается ошибка «The host returns esxupdate error code:15» при попытке обновить VMware ESXI 5.5 хост через Update Manager. История простая при попытке апдейта ESXI хоста, до версии ESXI 5.5 3116895 поймал на одном из них вот такое вот чудо. Если попытаться перевести данное сообщение, то получается вот что, гипервизор, получил некую ошибку и не смог обработать пакет управления. Вам предлагается посмотреть файлы логов в Update Manager, для получения большего количества деталей. Делать нам с вами нечего, придется использовать консольное подключение и решать данную задачу, так как сама ошибка не исчезнет, перезагрузка вам не поможет, так что выполняем действия описанные ниже.
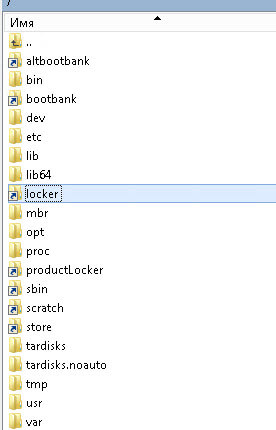
Для решения нашей задачи мы должны подключиться по ssh к вашему ESXI 5.5 хосту. Вы должны увидеть папку, а точнее ссылку locker.
Ошибка The host returns esxupdate error code15 при попытке обновить ESXI 5.5 хост через Update Manager-02
Проверить правильно ли она работает можно командой
В итоге вы должны увидеть, чтобы была ссылка locker -> /store

Ошибка The host returns esxupdate error code15 при попытке обновить ESXI 5.5 хост через Update Manager-01-1
Если ссылки нет то выполняем команду
Если все ок, то следует проверить есть ли банально место, делается это с помощью команды
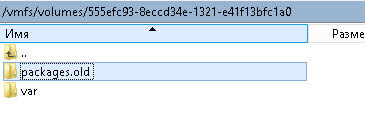
Далее переводим ваш хост в режим maintenance mode. Если место есть то нужно переименовать папку /locker/packages/ в version.old
Ошибка The host returns esxupdate error code15 при попытке обновить ESXI 5.5 хост через Update Manager-03
В итоге получите вот такую структуру папок

Ошибка The host returns esxupdate error code15 при попытке обновить ESXI 5.5 хост через Update Manager-04
Далее создадим в папке packeges папку в зависимости от версии
- ESXi 5.0 – /locker/packages/5.0.0/
- ESXi 5.1 – /locker/packages/5.1.0/
- ESXi 5.5 – /locker/packages/5.5.0/
- ESXi 6.0 – /locker/packages/6.0.0/

Ошибка The host returns esxupdate error code15 при попытке обновить ESXI 5.5 хост через Update Manager-05
После этих манипуляций можно обновлять ваш хост. Вот так вот просто решается ошибка The host returns esxupdate error code15 при попытке обновить VMware ESXI 5.5 хост через Update Manager.
Материал сайта pyatilistnik.org

This was an error message appeared on the VMware vCenter Server 6.5 Update Manager while one of my friends was patching an ESXi host. All the other ESXi hosts were updated without an issue and only single ESXi was throwing the error and it was stuck in the middle of the patch cycle. So, he sought some assistance to fix the issue.
Fixing this type of issue can be a time consuming work so I believe these steps will help my readers to fix similar issues and save some valuable time while in the middle of an update. While I was patching the host scanning was successfully completed and remediate step was completed only up to 92% and failed with the error message and redirect to check the esxupdate.log file. Actual displayed error message was this.
The host returns esxupdate error code:15. The package manager transaction is not successful. Check the Update Manager log files and esxupdate log files for more details.

While I was further checking the events I was able to find below errors as well:
“The ramdisk ‘root’ is full. As a result, the file /locker/packages/6.5.0/vmtools/windows.iso.sha could not be written“

This was also noticed:
“Could not stage image profile'(Updated) DellEMC-ESXi-6.5U1-7388607-A07″. (‘VMware_locker_tools-light_6.5.0-1.47.8285314’, ‘[Errno 32] Broken pipe’)“

As per the first error message I checked the esxupdate.log and it was similar to this.

How To Fix This Issue
After spending sometime with this I noticed that the files under “/locker/packages” directory have been corrupted, the content inside the directory was like this

I checked the same folder inside one of the upgraded host and there was a directory with the name of “6.5.0“

I deleted the “locker” folder in the update failure host and recreated with the same name

I copied the content of the “locker” directory from one of the updated host to the created “locker” directory using scp
I used below command to copy the content
scp -r /locker/packages/* root@<FQDN_OF_THE_TARGET_HOST>:/locker
Note: Host firewall should be opened before the scp
esxcli network firewall ruleset set --enabled true --ruleset-id=sshClient

Once those files were copied upgrade was successful with the Update Manager
Article Short Link: https://tcrum.net/esxupdate-error-code-15
If you found this post as useful please rate the post and share it!
Click to rate this post!
[Total: 9 Average: 5]

Aruna Lakmal
Associate Technical Specialist, Sri Lanka. Technology junky, enthusiast, a VMware vExpert and a blogger with more than 8 years of Experience in Virtualization and Cloud Native technologies.
Get Updates Directly To Your Inbox!
Whenever — You cannot remediate an ESXi 5.x or 6.0 host using vCenter Update Manager.
Remediating ESXi 5.x or 6.0 hosts fails.
A package is to be updated on the host, particularly when VMware_locker_tools-light* is corrupt.
error code:15. The package manager transaction is not successful. Check the Update Manager log files and esxupdate log files for more details.
To resolve this issue
Recreate the/locker/packages/version/ folder, where version is:
ESXi 5.0 – /locker/packages/5.0.0/
ESXi 5.1 – /locker/packages/5.1.0/
ESXi 5.5 – /locker/packages/5.5.0/
ESXi 6.0 – /locker/packages/6.0.0/
To verify the store folders contents and symbolic link:
Connect to the ESXi host using an SSH session.
Check for information in the /store folder by running this command:
ls /store
This folder must contain packages and var folder.
Run this command to verify that the symbolic link is valid:
ls -l /
The /store folder should be linked to /locker and appear as:
locker -> /store
If that link is not displayed, run this command to add the symbolic link:
ln -s /store /locker
To recreate the/locker/packages/version/ folder:
Put the host in the maintenance mode.
Navigate to the /locker/packages/version/ folder on the host.
Rename /locker/packages/version/ folder to /locker/packages/version.old.
Remediate the host using Update Manager.
The /locker/packages/version/ folder is recreated and the remediation should now be successful.
Note: Verify if you can change to the other folders in /locker/packages/version/. If not, rename all the three folders including floppies.
An alternative resolution for ESXi:
Put the host in the maintenance mode.
Navigate to the /locker/packages/version/ folder on the host.
Rename the folder to:
/locker/packages/ version.old
Run this command as the root user to recreate the folder:
mkdir / locker/packages/ version/
For ex:
In ESXi 5.0:
mkdir / locker/packages/5.0.0/
In ESXi 5.1:
mkdir / locker/packages/5.1.0/
In ESXi 5.5:
mkdir / locker/packages/5.5.0/
In ESXi 6.0:
mkdir / locker/packages/6.0.0/
Use WinSCP to copy the folders and files from the / locker/packages/ version/ directory on a working host to the affected host.
If the preceding methods do not resolve the issue:
Verify and ensure that there is sufficient free space on root folder by running this command:
vdf -h
Check the locker location by running this command:
ls -ltr /
If the locker is not pointing to a datastore:
Rename the old locker file by running this command:
mv /locker /locker.old
Recreate the symbolic link by running this command:
ln -s /store /locker
VMware Update Manager(VUM) “error code: 15” during ESXi 6.0 Remediate update in VUM operation
This is an error that can happen when you try to update your ESXi hosts. The configuration in this case is a Hewlett-Packard DL360 G9 with ESXi 6.0 build 3568940.
Using VMware Update Manager to scan it shows 17 updates to install, and the stage is 7 (the rest are older versions), but when we try to remediate the host we get this:
Remediate entity esxi721.localdomain. The host returns esxupdate error code: 15. The package manager transaction is not successful.
Check the Update Manager log files and esxupdate log files for more details.
Looking at the esxupdate.log there is some information about the locker folder:
2016-04-24T15:11:44Z esxupdate: downloader: DEBUG: Downloading from
http://esxi721.localdomain:9084/vum/repository/hostupdate/vmw/vib20/tools-light/VMware_locker_tools-light_6.0.0-2.34.3620759.vib…
2016-04-24T15:12:48Z esxupdate: LockerInstaller: WARNING: There was an error in cleaning up product locker: [Errno 2] No such file or directory: ‘/locker/packages/var/db/l
ocker’
2016-04-24T15:12:48Z esxupdate: esxupdate: ERROR: An esxupdate error exception was caught:
So we need to investigate in the ESXi host. In the VMware
KnowledgeBase about this ‘error 15’ it says to double check the folder/link:
Locker > Store . I checked to see if the link and folder exist and all is okay. I then checked the locker folder/link to see if the locker link is valid:
[root@esxi721:~] ls /locker/
                      packages    var         vsantraces


                      [root@esxi721:~] ls -l /
                      total 565
                      lrwxrwxrwx    1 root     root            49 Apr 23 21:23 altbootbank -> /vmfs/volumes/764b33e1-310325dd-1ebb-5399a3f70a03
                      drwxr-xr-x    1 root     root           512 Apr 23 21:22 bin
                      lrwxrwxrwx    1 root     root            49 Apr 23 21:23 bootbank -> /vmfs/volumes/2b0d84e8-332418f4-8e2c-e841fe1625cb
                      -r--r--r--    1 root     root        331579 Feb 19 02:24 bootpart.gz
                      drwxr-xr-x   15 root     root           512 Apr 24 20:08 dev
                      drwxr-xr-x    1 root     root           512 Apr 24 19:23 etc
                      drwxr-xr-x    1 root     root           512 Apr 23 21:22 lib
                      drwxr-xr-x    1 root     root           512 Apr 23 21:22 lib64
                      -r-x------    1 root     root         28377 Apr 23 21:19 local.tgz
                      lrwxrwxrwx    1 root     root             6 Apr 23 21:23 locker -> /store
                      drwxr-xr-x    1 root     root           512 Apr 23 21:22 mbr
                      drwxr-xr-x    1 root     root           512 Apr 23 21:22 opt
                      drwxr-xr-x    1 root     root        131072 Apr 24 20:08 proc
                      lrwxrwxrwx    1 root     root            22 Apr 23 21:23 productLocker -> /locker/packages/6.0.0
                      lrwxrwxrwx    1 root     root             4 Feb 19 01:54 sbin -> /bin
                      lrwxrwxrwx    1 root     root            12 Apr 23 21:23 scratch -> /tmp/scratch
                      lrwxrwxrwx    1 root     root            49 Apr 23 21:23 store -> /vmfs/volumes/56bb2e57-7933dd24-7e9c-00110a6930e4
                      drwxr-xr-x    1 root     root           512 Apr 23 21:22 tardisks
                      drwxr-xr-x    1 root     root           512 Apr 23 21:22 tardisks.noauto
                      drwxrwxrwt    1 root     root           512 Apr 24 20:08 tmp
                      drwxr-xr-x    1 root     root           512 Apr 23 21:22 usr
                      drwxr-xr-x    1 root     root           512 Apr 23 21:22 var
                      drwxr-xr-x    1 root     root           512 Apr 23 21:22 vmfs
                      drwxr-xr-x    1 root     root           512 Apr 23 21:22 vmimages
                      lrwxrwxrwx    1 root     root            17 Feb 19 01:54 vmupgrade -> /locker/vmupgrade
                      [root@esxi721:~]
Open in new window
I checked to see if the store location is correct:
[root@esxi721:~] ls -ltr /
                      total 565
                      lrwxrwxrwx    1 root     root            17 Feb 19 01:54 vmupgrade -> /locker/vmupgrade
                      lrwxrwxrwx    1 root     root             4 Feb 19 01:54 sbin -> /bin
                      -r--r--r--    1 root     root        331579 Feb 19 02:24 bootpart.gz
                      -r-x------    1 root     root         28377 Apr 23 21:19 local.tgz
                      drwxr-xr-x    1 root     root           512 Apr 23 21:22 vmimages
                      drwxr-xr-x    1 root     root           512 Apr 23 21:22 vmfs
                      drwxr-xr-x    1 root     root           512 Apr 23 21:22 var
                      drwxr-xr-x    1 root     root           512 Apr 23 21:22 usr
                      drwxr-xr-x    1 root     root           512 Apr 23 21:22 tardisks.noauto
                      drwxr-xr-x    1 root     root           512 Apr 23 21:22 tardisks
                      drwxr-xr-x    1 root     root           512 Apr 23 21:22 opt
                      drwxr-xr-x    1 root     root           512 Apr 23 21:22 mbr
                      drwxr-xr-x    1 root     root           512 Apr 23 21:22 lib64
                      drwxr-xr-x    1 root     root           512 Apr 23 21:22 lib
                      drwxr-xr-x    1 root     root           512 Apr 23 21:22 bin
                      lrwxrwxrwx    1 root     root            49 Apr 23 21:23 store -> /vmfs/volumes/56bb2e57-7933dd24-7e9c-00110a6930e4
                      lrwxrwxrwx    1 root     root            12 Apr 23 21:23 scratch -> /tmp/scratch
                      lrwxrwxrwx    1 root     root            22 Apr 23 21:23 productLocker -> /locker/packages/6.0.0
                      lrwxrwxrwx    1 root     root             6 Apr 23 21:23 locker -> /store
                      lrwxrwxrwx    1 root     root            49 Apr 23 21:23 bootbank -> /vmfs/volumes/2b0d84e8-332418f4-8e2c-e841fe1625cb
                      lrwxrwxrwx    1 root     root            49 Apr 23 21:23 altbootbank -> /vmfs/volumes/764b33e1-310325dd-1ebb-5399a3f70a03
                      drwxr-xr-x    1 root     root           512 Apr 24 19:23 etc
                      drwxrwxrwt    1 root     root           512 Apr 24 20:42 tmp
                      drwxr-xr-x    1 root     root        131072 Apr 24 20:42 proc
                      drwxr-xr-x   15 root     root           512 Apr 24 20:42 dev
                      [root@esxi721:~]
Open in new window
All is okay, so next we need to check the locker/packages folder to see if
Version (in this case folder 6.0.0) exists.
[root@esxi721:~] cd /locker/packages/
                      [root@esxi721:/vmfs/volumes/56bb2e57-7933dd24-7e9c-00110a6930e4/packages] ls
                      var
Open in new window
The folder doesn’t exist, and there are no
floppies or
vmtools folders that have all the files that ESXi and VUM need for the updates. The VMware
KnowledgeBase recommends to delete the old folder and links and recreate, but in this case we don’t need to delete anything, but we
do need to recreate and copy the necessary files(we will use another ESXi host with the same build).
Connecting to another host we will use SCP to copy all files to this ESXi host.
First if you don’t have your SSH Client enabled in the host firewall, you need to enable to do the next task using SCP command. To enable SSH Client in the source ESXi host:
[root@esxi720:~] esxcli network firewall ruleset set --enabled true --ruleset-id=sshClient
Open in new window
Note: Don’t forget to disable SSH Client after doing this task. After you run the SCP command you will be prompted for the root password of the remote host and once you have successfully authenticated the files will copy.
[root@esxi720:~]:/vmfs/volumes/566a92b0-97db4da2-c8be-00110a69322c] scp -r /locker/packages/ root@esxi721:/locker
                      The authenticity of host 'esxi721 (esxi721)' can't be established.
                      RSA key fingerprint is SHA256:bkmqdMHuJgAWEA5s96pWOTDJO3B7FxUzgJ0t0BnqFeM.
                      Are you sure you want to continue connecting (yes/no)? yes
                      Warning: Permanently added 'esxi721' (RSA) to the list of known hosts.
                      Password:
                      pvscsi-Windows2003.flp                                                                100%  118KB 117.5KB/s   00:00
                      pvscsi-Windows2008.flp                                                                100%  122KB 122.0KB/s   00:00
                      pvscsi-WindowsXP.flp                                                                  100%  114KB 114.0KB/s   00:00
                      vmscsi.flp                                                                            100%   42KB  41.5KB/s   00:00
                      solaris.iso                                                                           100%   13MB  12.8MB/s   00:01
                      solaris_avr_manifest.txt                                                              100%   49     0.1KB/s   00:00
                      darwin.iso.sig                                                                        100%  256     0.3KB/s   00:00
                      winPre2k.iso.sig                                                                      100%  256     0.3KB/s   00:00
                      windows.iso                                                                           100%   87MB  14.4MB/s   00:06
                      linux_avr_manifest.txt                                                                100% 1738     1.7KB/s   00:00
                      freebsd.iso                                                                           100%   15MB  15.1MB/s   00:00
                      netware.iso                                                                           100%  528KB 528.0KB/s   00:00
                      winPre2k.iso                                                                          100%   13MB  13.4MB/s   00:01
                      windows_avr_manifest.txt                                                              100% 1069     1.0KB/s   00:00
                      solaris.iso.sig                                                                       100%  256     0.3KB/s   00:00
                      darwin.iso                                                                            100% 3022KB   3.0MB/s   00:01
                      winPre2k_avr_manifest.txt                                                             100%   49     0.1KB/s   00:00
                      windows.iso.sig                                                                       100%  256     0.3KB/s   00:00
                      linux.iso                                                                             100%   71MB  11.8MB/s   00:06
                      scp: /locker/packages/packages/6.0.0/vmtools/linux.iso: truncate: No space left on device
                      scp: /locker/packages/packages/6.0.0/vmtools/linux.iso: No space left on device
                      scp: /locker/packages/packages/6.0.0/vmtools/netware.iso.sig: No space left on device
                      scp: /locker/packages/packages/6.0.0/vmtools/freebsd.iso.sig: No space left on device
                      scp: /locker/packages/packages/6.0.0/vmtools/tools-key.pub: No space left on device
                      scp: /locker/packages/packages/6.0.0/vmtools/linux.iso.sig: No space left on device
                      scp: /locker/packages/packages/var: No space left on device
                      scp: /locker/packages/packages/db: No space left on device
Open in new window
Only when trying to copy the files do we find the real issue; there is nothing in the logs related to this. There is a space issue in applying the updates, so we need to double check the
root space.
[root@esxi721:~] stat -f /
                        File: "/"
                          ID: 100000000 Namelen: 127     Type: visorfs
                      Block size: 4096
                      Blocks: Total: 655532     Free: 455845     Available: 455845
                      Inodes: Total: 524288     Free: 519299

                      [root@esxi721:~] vdf -h
                      Tardisk                  Space      Used
                      sb.v00                    139M      139M
                      s.v00                     330M      330M
                      net_tg3.v00               300K      298K
                      elxnet.v00                508K      505K
                      ima_be2i.v00                2M        2M
                      ....
                      -----
                      Ramdisk                   Size      Used Available Use% Mounted on
                      root                       32M      248K       31M   0% --
                      etc                        28M      240K       27M   0% --
                      opt                        32M      368K       31M   1% --
                      var                        48M      740K       47M   1% --
                      tmp                       256M        5M      250M   2% --
                      iofilters                  32M        0B       32M   0% --
                      hostdstats               1303M        2M     1300M   0% --
                      stagebootbank             250M      191M       58M  76% --
Open in new window
Here I don’t see any issues with the space, but see big files from the
Tardisk. Checking filesystems I see that the one is used for Locker is 100% full.
[root@esxi721:] df -h
                      Filesystem    Size   Used Available Use% Mounted on
                      NFS        1000.0G 692.5G    307.5G  69% /vmfs/volumes/vol01
                      NFS        1000.0G 459.2G    540.8G  46% /vmfs/volumes/vol02
                      NFS        1000.0G 577.9G    422.1G  58% /vmfs/volumes/vol03
                      NFS        1000.0G 822.5G    177.5G  82% /vmfs/volumes/vol04
                      NFS        1000.0G 570.4G    429.6G  57% /vmfs/volumes/vol05
                      NFS        1000.0G 398.5G    601.5G  40% /vmfs/volumes/vol06
                      NFS         666.5G 363.4G    303.1G  55% /vmfs/volumes/iso-vol
                      NFS        1000.0G 519.6G    480.4G  52% /vmfs/volumes/vol07
                      NFS        1000.0G 692.1G    307.9G  69% /vmfs/volumes/vol08
                      vfat        249.7M 185.4M     64.3M  74% /vmfs/volumes/2b0d84e8-332418f4-8e2c-e841fe1625cb
                      vfat        249.7M 185.1M     64.6M  74% /vmfs/volumes/764b33e1-310325dd-1ebb-5399a3f70a03
                      vfat        285.8M 285.4M    488.0K 100% /vmfs/volumes/56bb2e57-7933dd24-7e9c-00110a6930e4
Open in new window
So next step is to find the big files’ logs, and we also need to look inside /tmp to see if there are any dump files or other big files that are contributing to this issue.
[root@esxi721:~] find / -path "/vmfs" -prune -o -type f -size +50000k -exec ls -l '{}' ;
                      -r--r--r--    1 root     root     146513728 Apr 23 21:22 /tardisks/sb.v00
                      -r--r--r--    1 root     root     347061695 Apr 23 21:22 /tardisks/s.v00
                      -rw-r--r--    1 root     root      97493923 Apr 24 15:10 /tmp/stagebootbank/s.v00
                      -rw-------    1 root     root     15931539456 Apr 24 20:48 /dev/disks/mpx.vmhba32:C0:T0:L0
                      -rw-------    1 root     root     2684354560 Apr 24 20:48 /dev/disks/mpx.vmhba32:C0:T0:L0:9
                      -rw-------    1 root     root     299876352 Apr 24 20:48 /dev/disks/mpx.vmhba32:C0:T0:L0:8
                      -rw-------    1 root     root     115326976 Apr 24 20:48 /dev/disks/mpx.vmhba32:C0:T0:L0:7
                      -rw-------    1 root     root     262127616 Apr 24 20:48 /dev/disks/mpx.vmhba32:C0:T0:L0:6
                      -rw-------    1 root     root     262127616 Apr 24 20:48 /dev/disks/mpx.vmhba32:C0:T0:L0:5
Open in new window
As we can see there are some big temp files in the list, so the next step is to delete some.
Note: Double check which files you want to delete. Don’t delete any log files that you could need for any troubleshooting or audits. After deleting the files that we will not need (and also deleting the files that we copied from the previous ESXi host), and all of the folders inside
Locker/Store folder, we can check the space.
[root@esxi721:] df -h
                      Filesystem    Size   Used Available Use% Mounted on
                      vfat        285.8M 160.0K    285.7M   0% /vmfs/volumes/56bb2e57-7933dd24-7e9c-00110a6930e4
Open in new window
We now have space around 0% and lot of free space. Copy the files again from the other ESXi host and finish 100%. Now using VUM we will scan, stage and remidiate the ESXi host and the problem is fixed. After a final reboot (from remediate) the ESXi is fully updated.
Hope this article can you help fixing this error that you may encounter in your ESXi upgrade.
This is the part of my «TIP Articles». So, please vote «Helpful» on this Article. And I encourage your comments and feedback.