We have covered looking at new aspects of vSAN 6.7 as well as vSphere 6.7 and the process of installing vCenter Server as well as Installing and Upgrading ESXi server. Let’s now take a look at the process to upgrade an existing vCenter Server (6.5 in this case) up to vCenter Server 6.7 and the process involved to do that. VMware has made the upgrade process for vCenter Server dead simple with the ISO installer utility and the process really hasn’t changed from the one we saw with the 6.5 upgrade. In this post, we will cover Upgrading to VMware vCenter Server VCSA 6.7 and take a walk through the process from start to finish.
Upgrade Considerations and Upgrade Process
Before upgrading your VMware vCenter Server VCSA appliance to version 6.7, there is a very important “order of operations” that you need to follow when upgrading to this latest release of vCenter. We typically may think of the vCenter Server upgrade as the very first step, however, if you have other VMware products in your environment, VMware has published a workflow KB article addressing the order that upgrades need to take place in. Also, keep in mind at this point that certain products such as NSX are currently not supported with vCenter 6.7 at the time of this writing. The order of the upgrade operation as published by VMware is as followings. As you can see, vCenter Server is quite far down the list of upgrades.
- vRealize Automation (vRA)
- vRealize Orchestrator (vRB)
- vRealize Business for Cloud (vRBC)
- vRealize Operations (vROps)
- vRealize Operations Manager End-Point Operations Agent
- vRealize Log Insight (vRLI)
- vRealize Log Insight Agent
- VMware vSphere Storage APIs – Data Protection (vADP)-based Backup Solution
- NSX for vSphere (NSX-v)
- Platform Services Controller External (PSC)
- vCenter Server
- vSphere Update Manager (VUM)
- vSphere Replication (VR)
- Site Recovery Manager (SRM)
- ESXi
- vSAN
- Virtual Hardware
- VMware Tools
Also, the upgrade considerations KB article by VMware mentions several other notables before upgrading that you definitely want to consider:
- Update sequence for vSphere 6.7 and its compatible VMware products
- vCenter Server upgrade fails if it contains Host Profiles lower than version 6.0.0
- vCenter Server and Platform Services Controller Deployment Types
- Repoint vCenter Server to External Platform Services Controller in a Different Domain
- Best practices for upgrading to vCenter Server 6.7
- Deploying vCenter Server Appliance 6.7 fails with the message “The installation of vCenter Server failed due to an internal error.”
Once you have carefully went over the upgrade plan, and have decided to perform your upgrades in the proper order and have then made it to the vCenter Server VCSA 6.7 Upgrade step, let’s take a look at what upgrading a VCSA 6.5 appliance to 6.7 looks like.

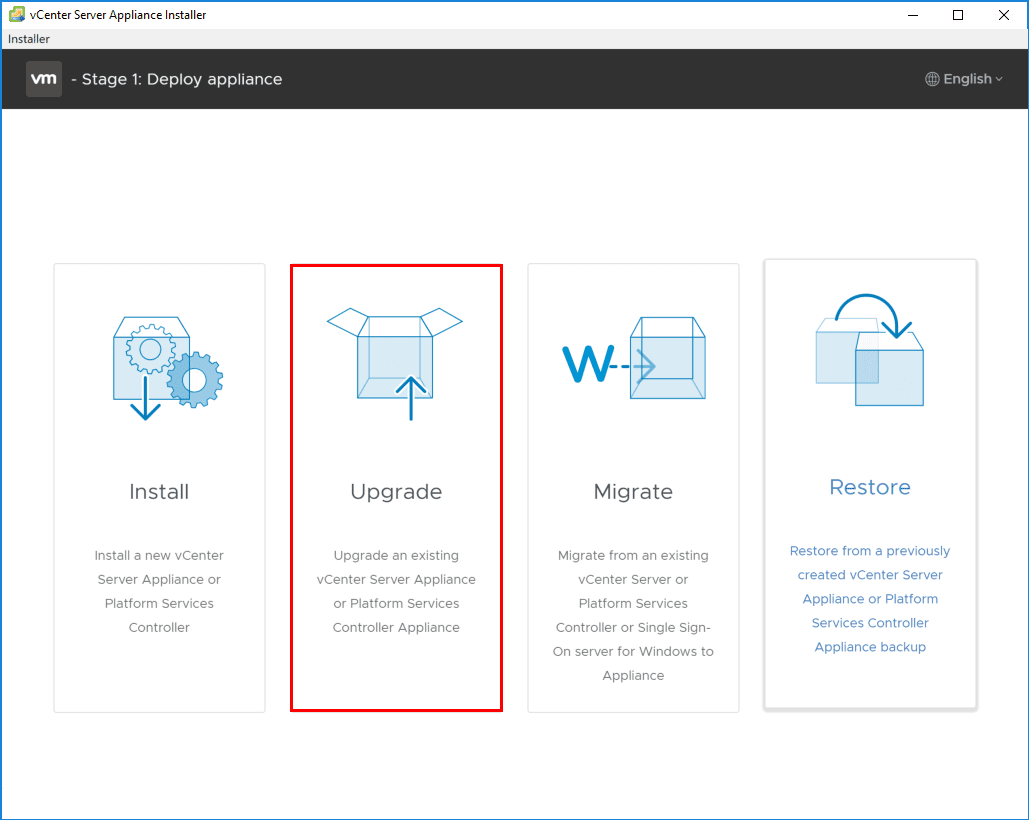
After launching the installer.exe from the new vCenter Server 6.7 ISO, choose the Upgrade option to upgrade an existing VCSA appliance to VCSA 6.7.
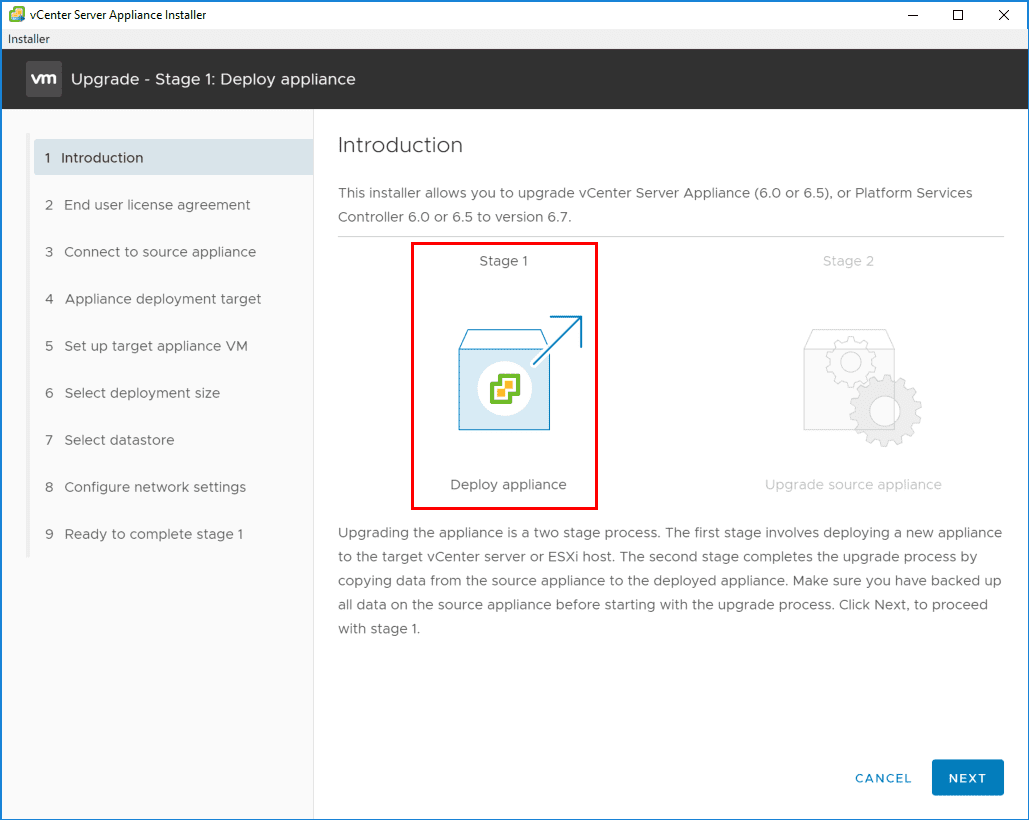
The process to upgrade to the VCSA 6.7 appliance involves a two stage process as described by VMware in the installer:
- Upgrading the appliance is a two stage process. The first stage involves deploying a new appliance to the target vCenter server or ESXi host. The second stage completes the upgrade process by copying data from the source appliance to the deployed appliance. Make sure you have backed up all data on the source appliance before starting with the upgrade process.
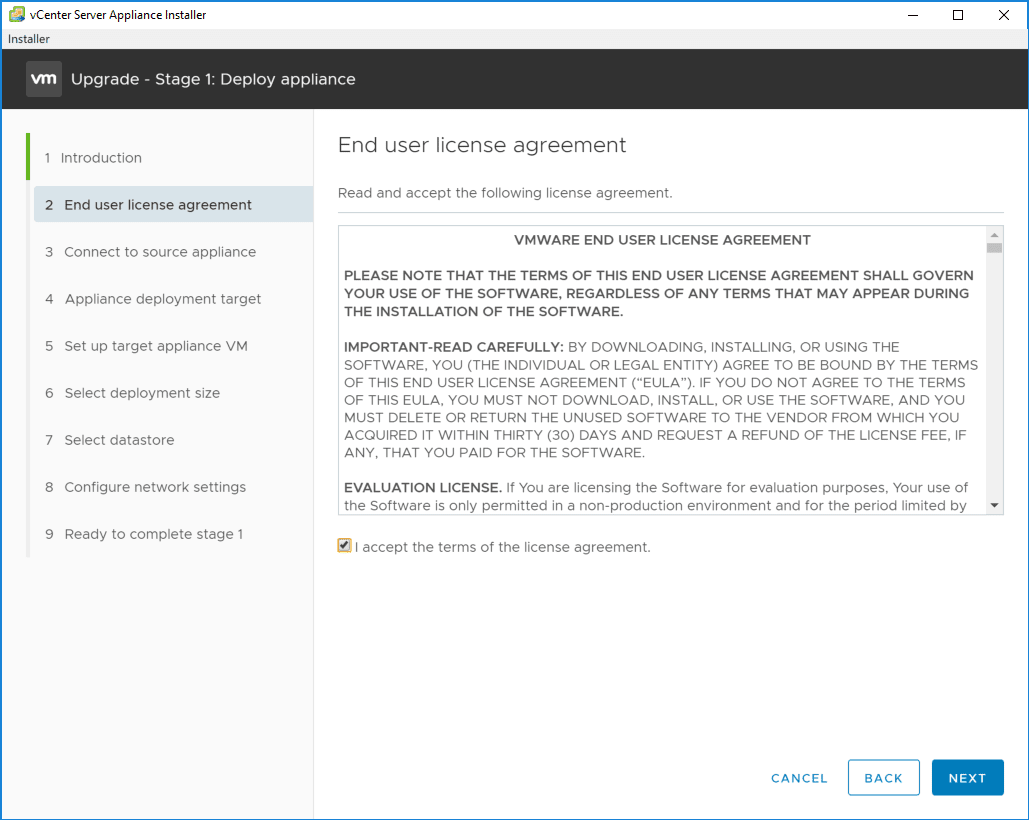
First things first, accept the EULA.
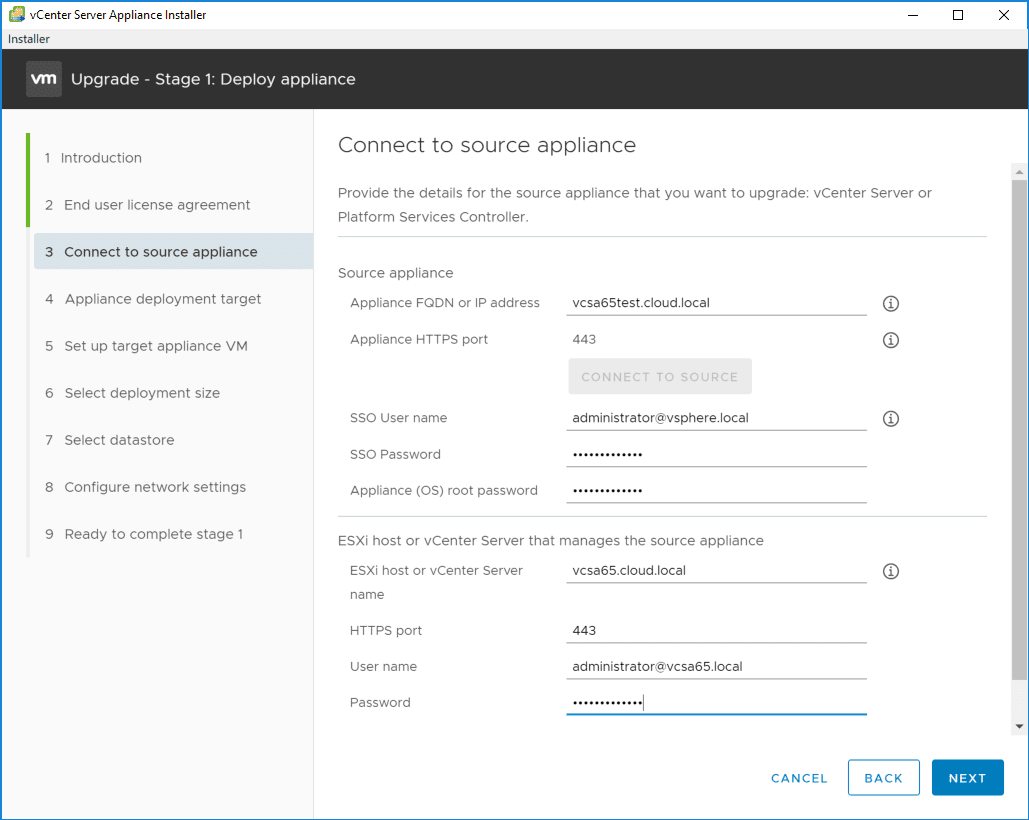
The first connectivity configuration that is made is connecting to the source VCSA appliance that you want to upgrade. In my case in the home lab test environment, I have a test VCSA 6.5 U1g appliance that I am going to upgrade to VCSA 6.7.

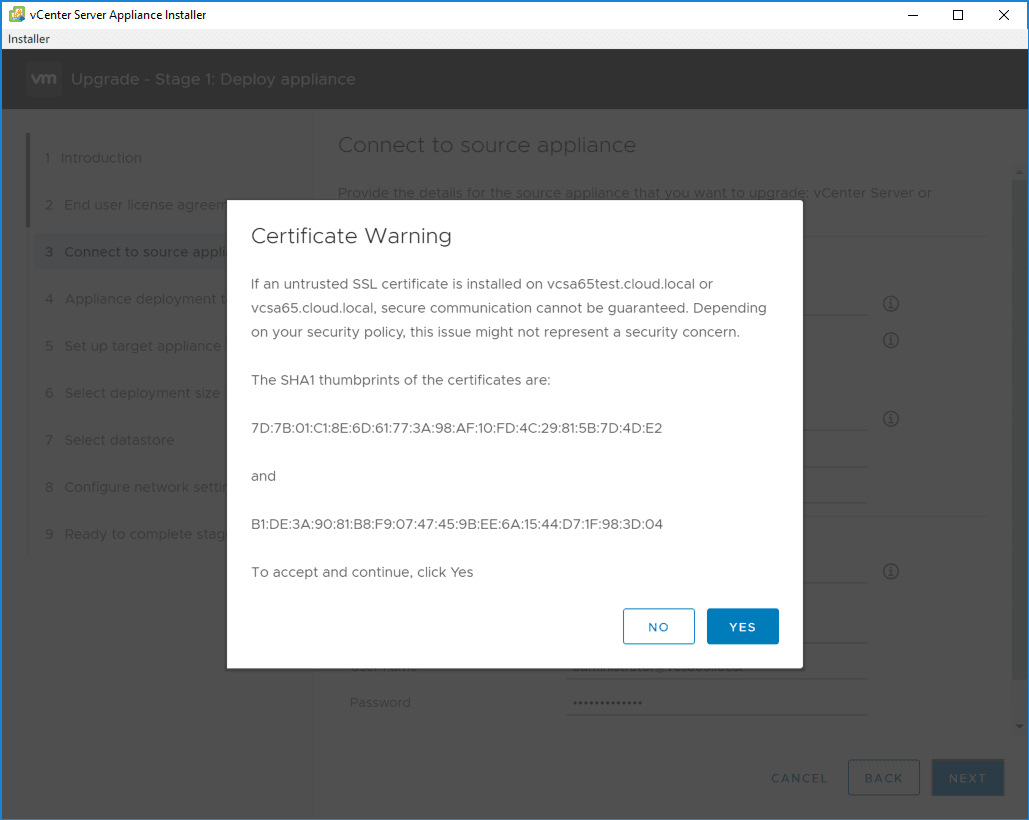
Once you click to Connect to Source, you will provide the login credentials for the source VCSA appliance as well as the login credentials for the ESXi host or vCenter Server that manages the source appliance.
Most likely if using self-signed certificates, you will see a certificate warning.
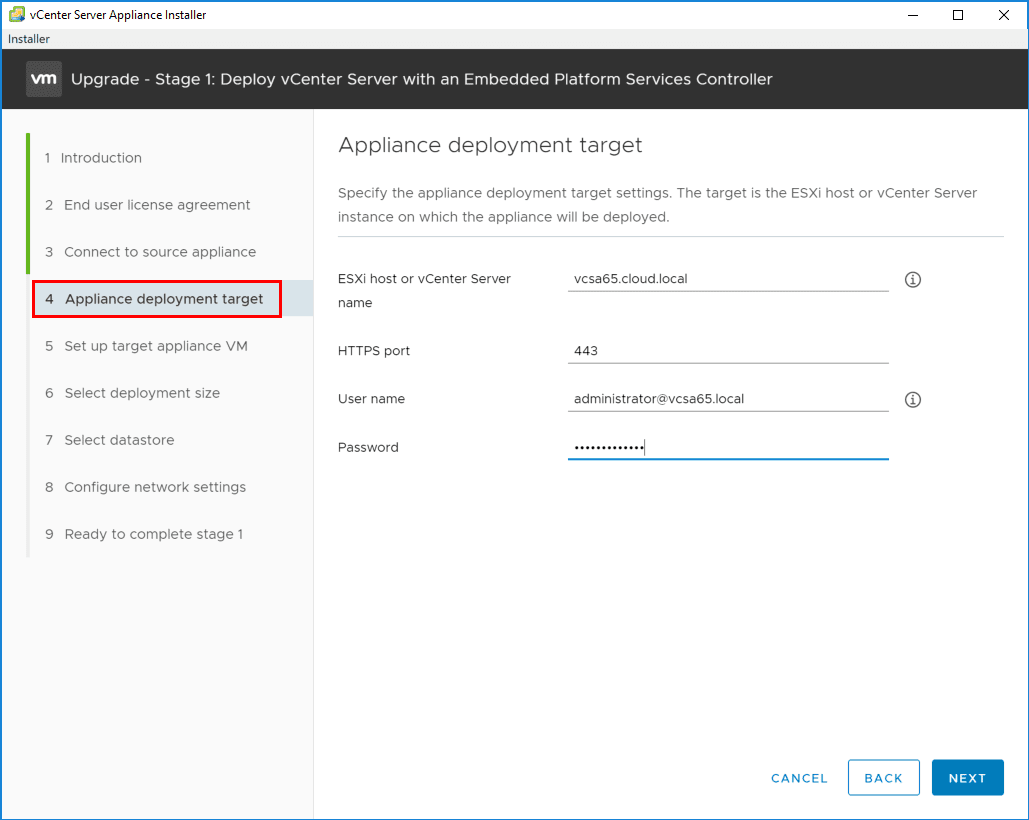
For the deployment target configuration screen, provide the connection information for the destination ESXi host or vCenter Server instance on which the new VCSA 6.7 appliance will be deployed.
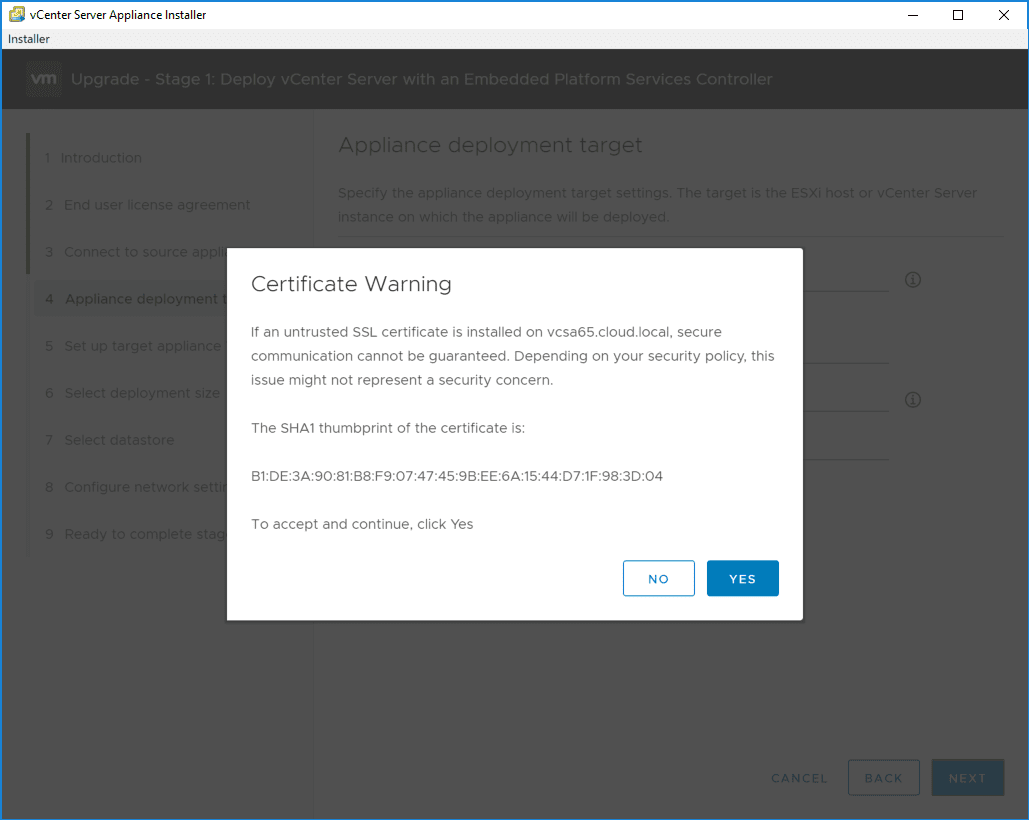
Again, here you will see a certificate warning with self-signed certificates on the destination vCenter Server.
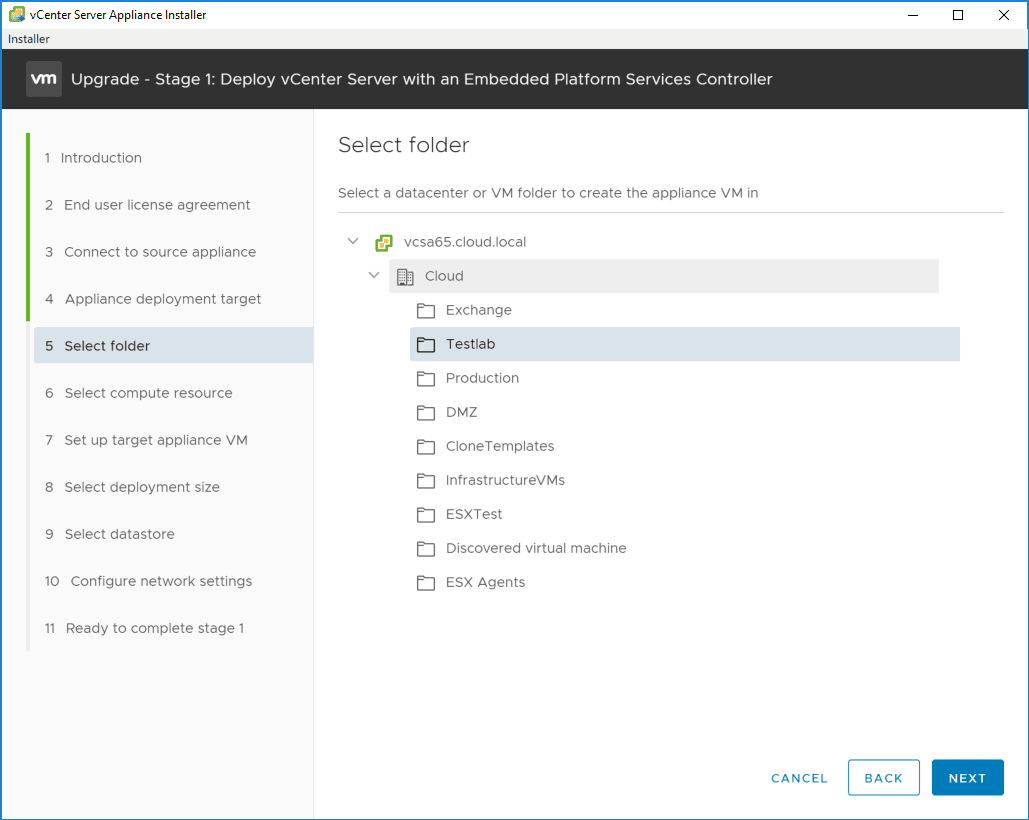
Choose the destination location, either a datacenter or VM folder.
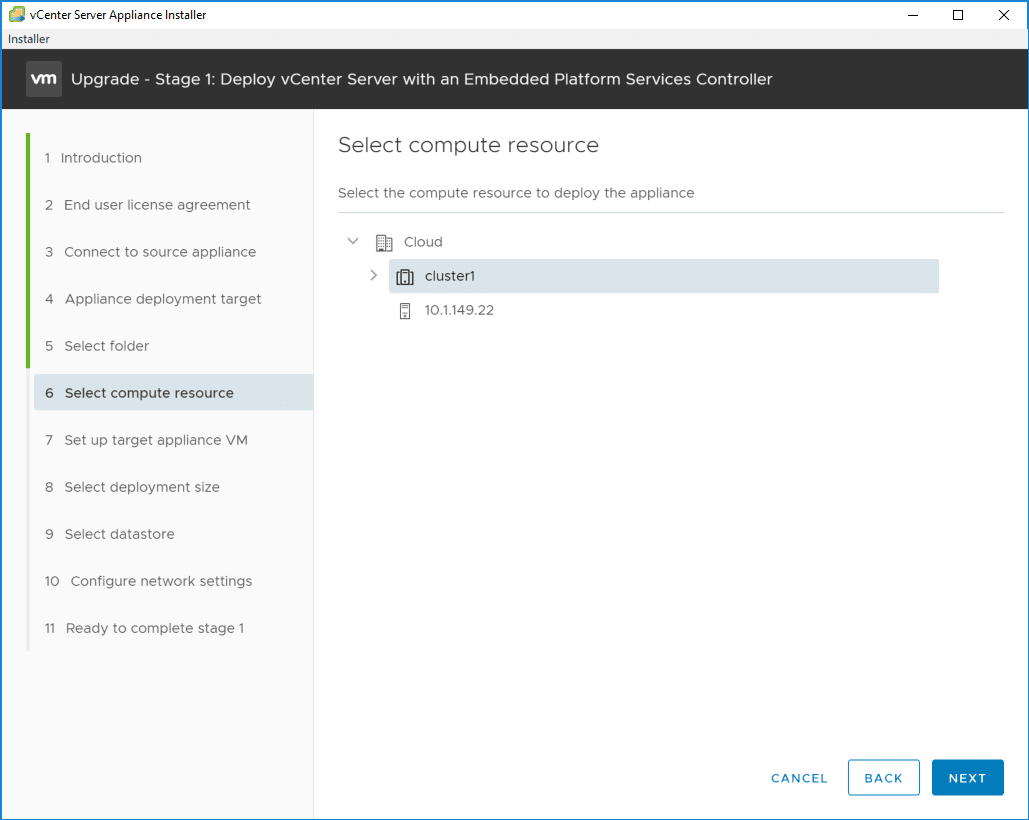
Select the compute resource on which to deploy the new VCSA 6.7 appliance.
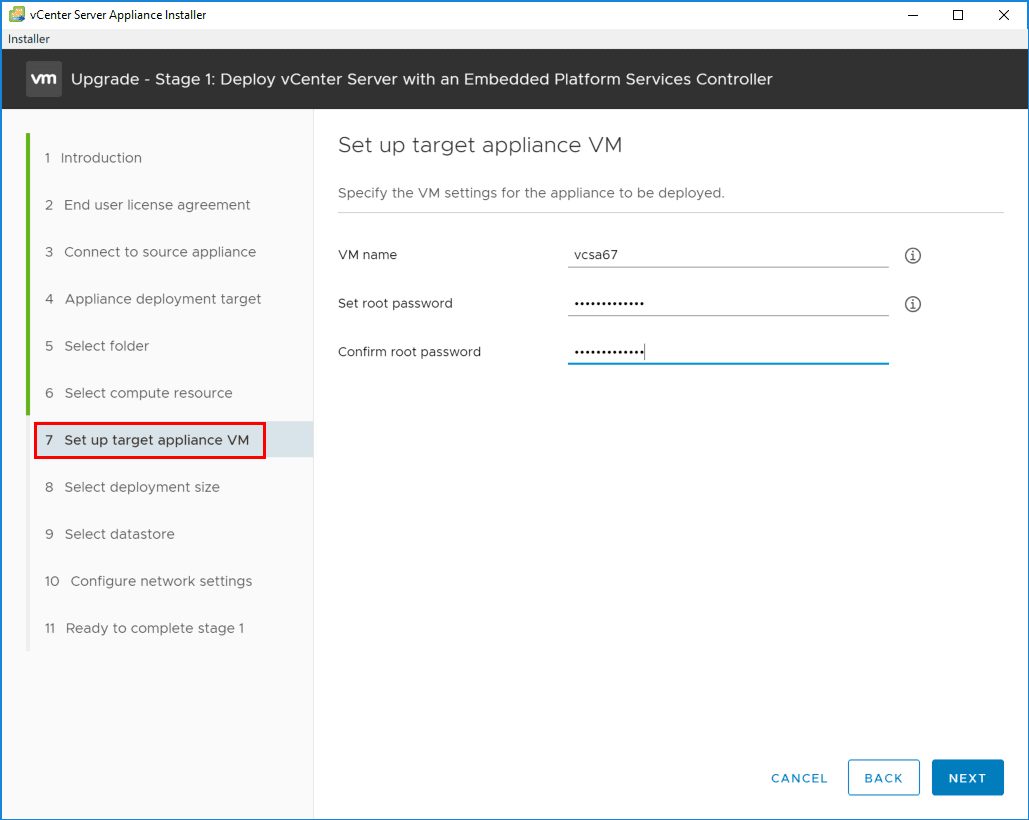
Now, we configure the target VCSA 6.7 appliance name for the vSphere inventory as well as set the root password.
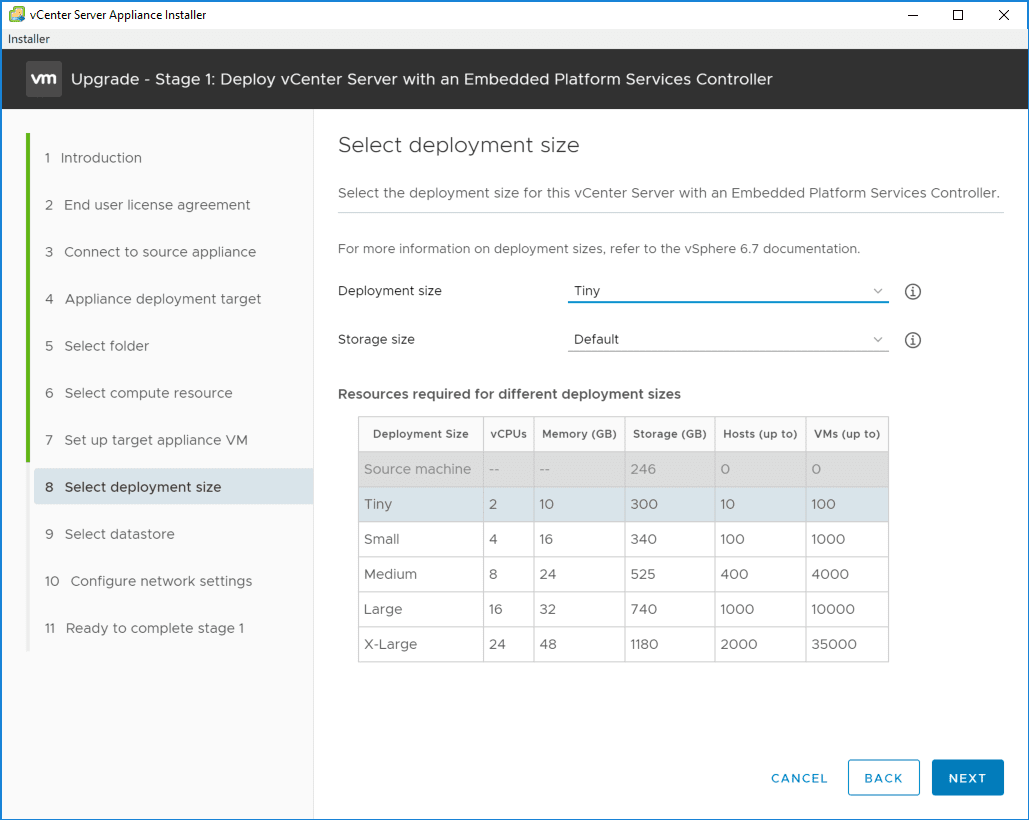
Similar to VCSA 6.5 deployment, you can plainly see the deployment size options. Here for home lab purposes, we are deploying the Tiny deployment.
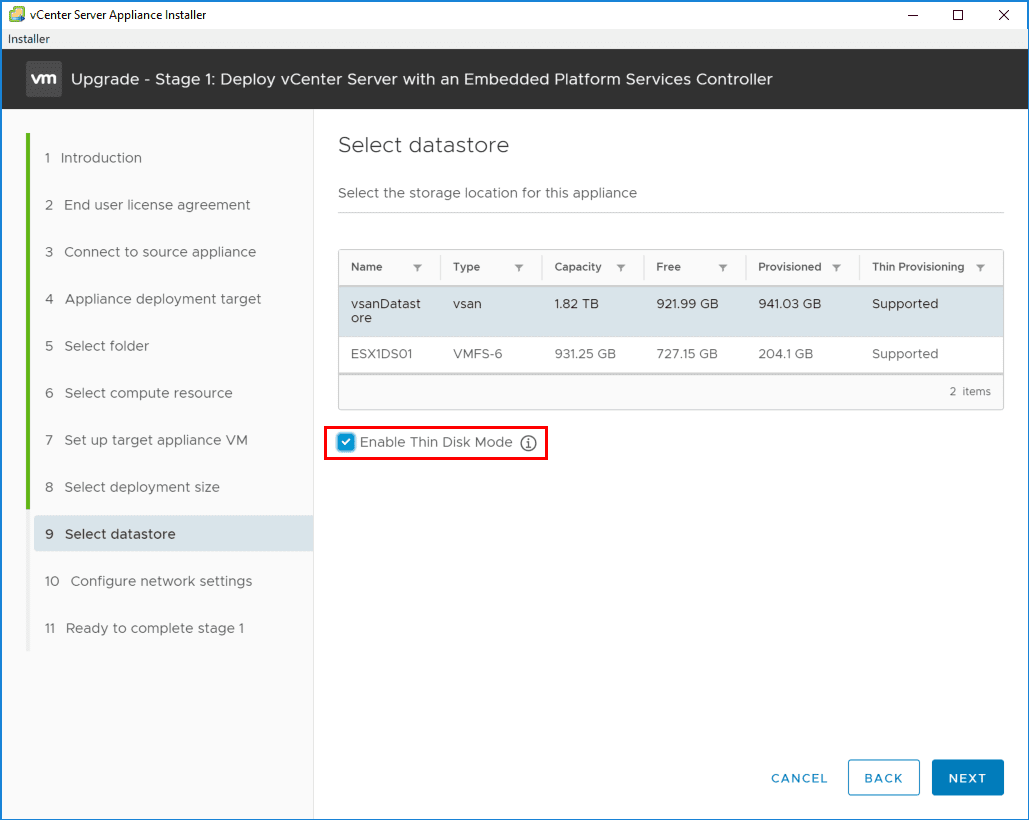
Next, we select the target storage for the destination VCSA 6.7 appliance. Also, you have the option on this screen to enable the Thin Disk Mode for thin provisioning the VCSA 6.7 appliance disks.
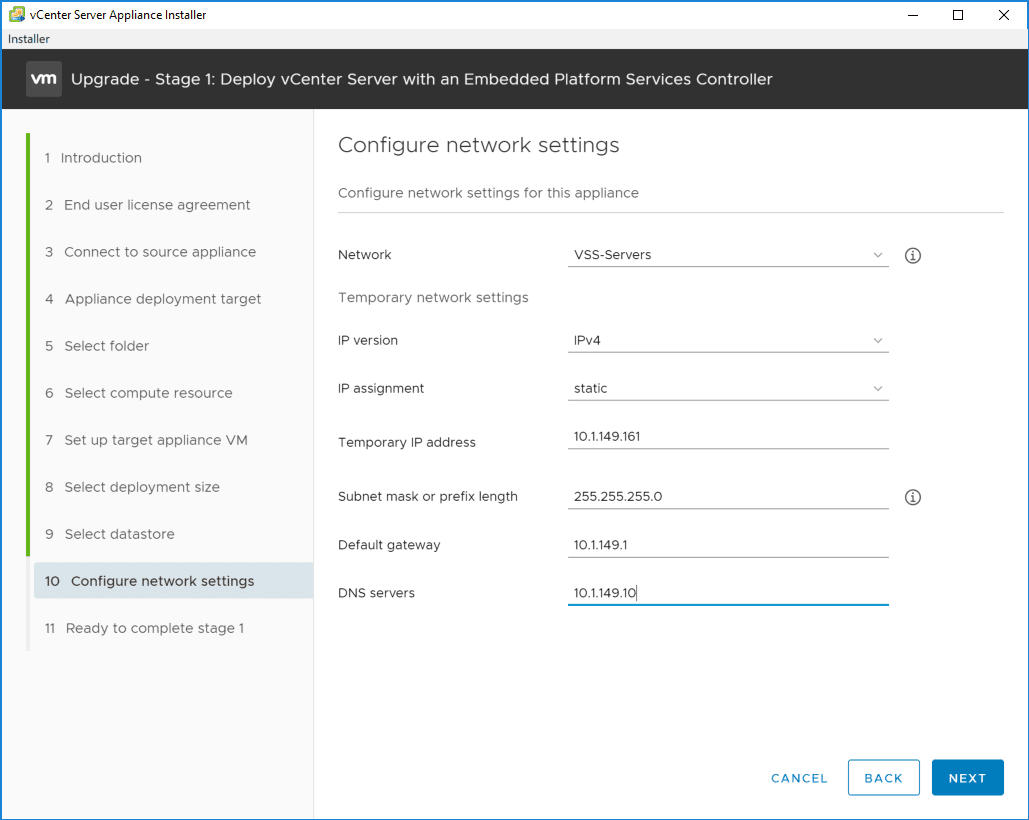
On the Configure Network Settings screen, select the network vSwitch you want to use as well as the IP address information for a temporary IP address. Remember with the upgrade, the resulting VCSA 6.7 appliance will assume the IP address of the source VCSA appliance once the upgrade process has made it to the point of powering off the source appliance and assuming identity. Here we simply need to provide a temporary IP address to allow network communication to copy over the data from the source VCSA appliance.
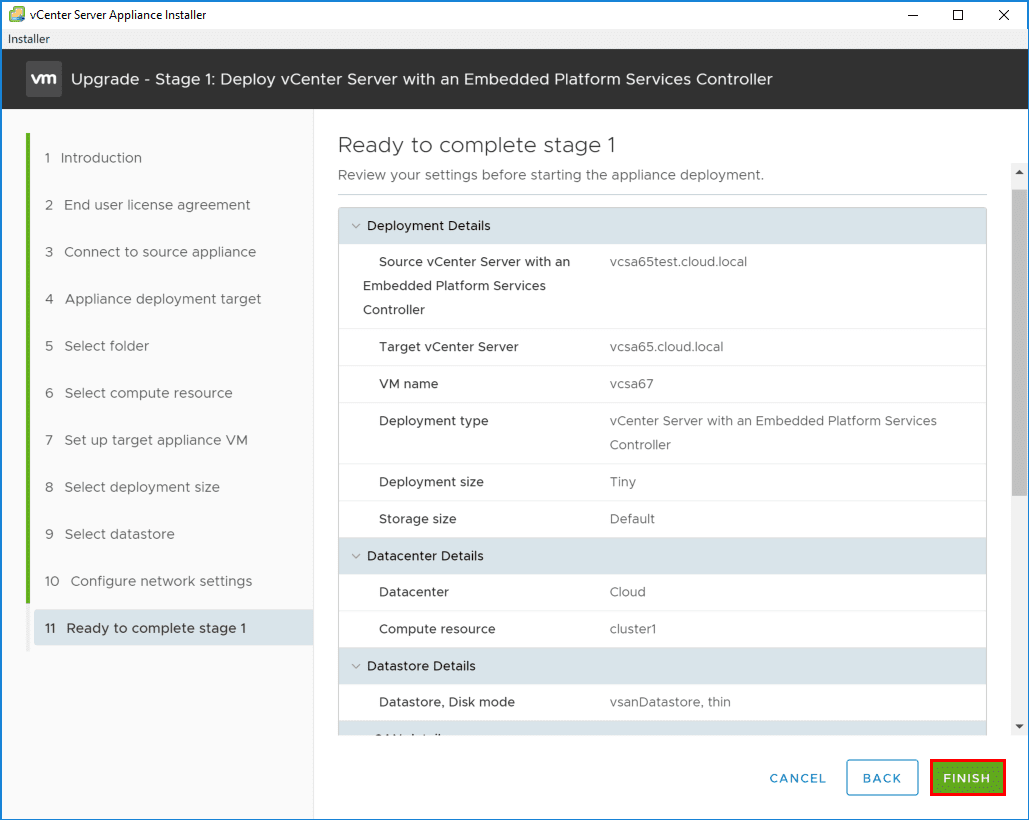
On the summary screen for Stage 1, be sure to review the configuration options and click Finish to begin the Stage 1 process of actually deploying the VCSA 6.7 appliance using the configuration options set in the preceding steps.
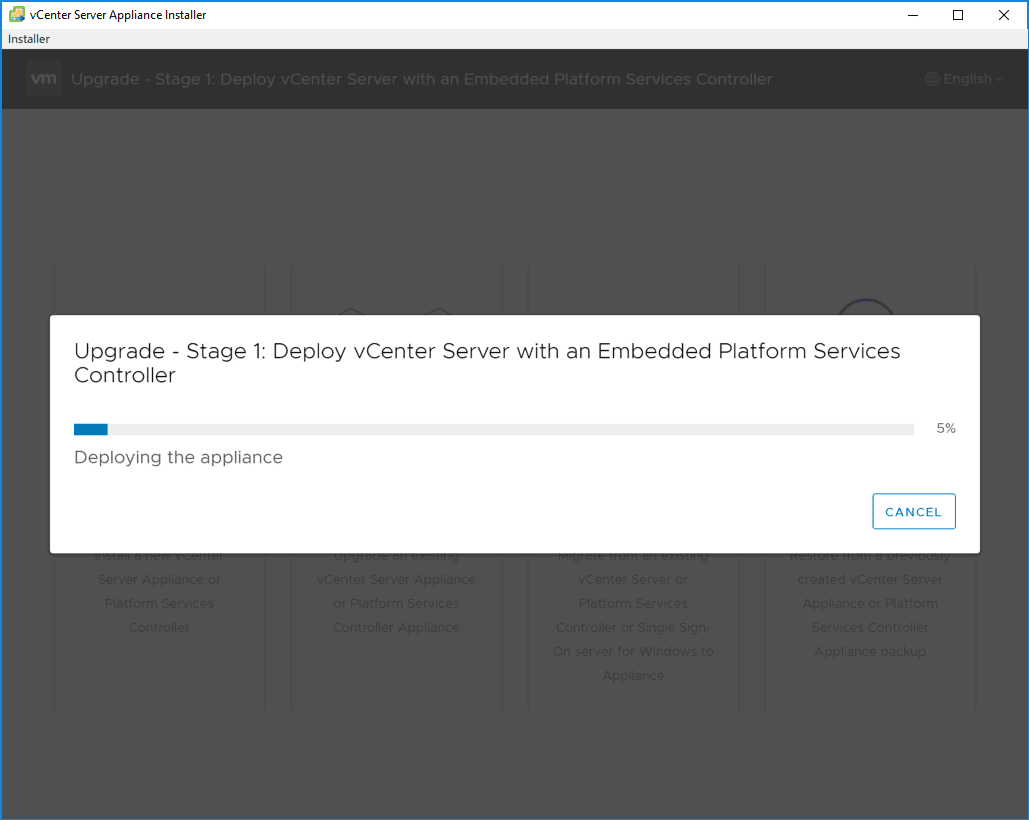
The process begins and proceeds forward.
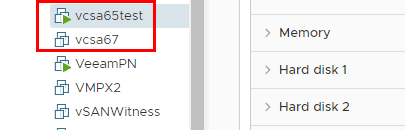
You will see the new appliance provisioned in the vSphere inventory along with your current VCSA appliance that will eventually be powered off.
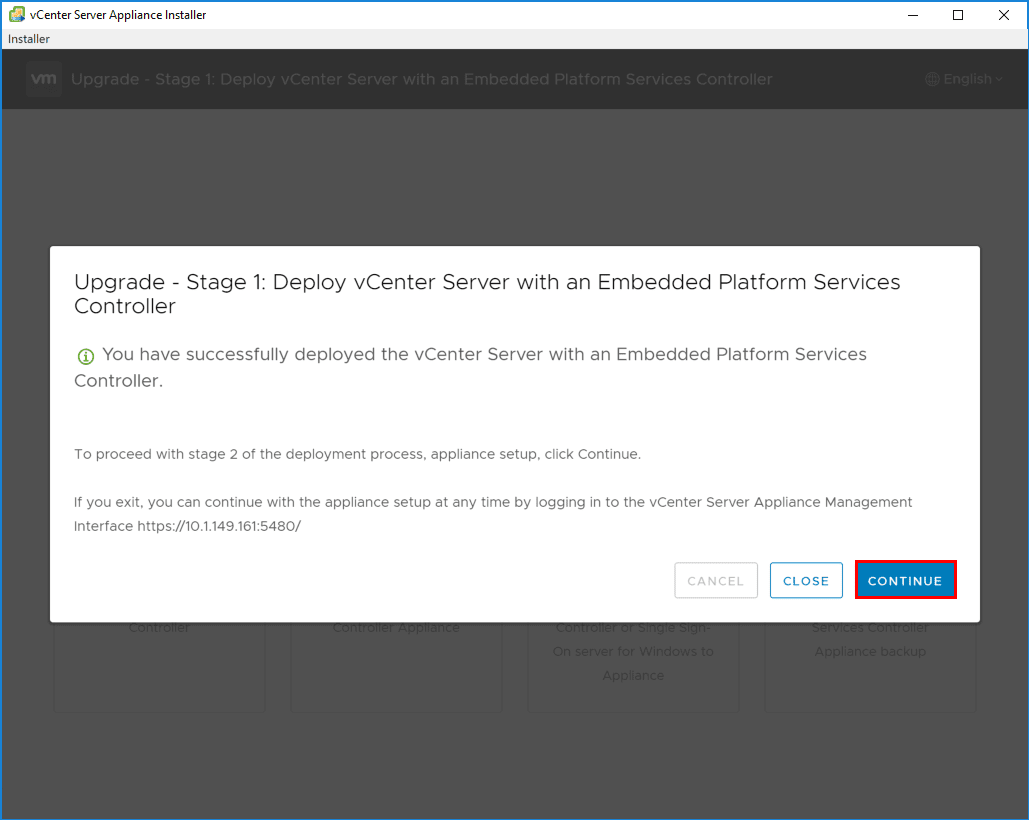
The Stage 1 process will eventually complete after the appliance is provisioned. Click Continue to proceed forward with Stage 2.
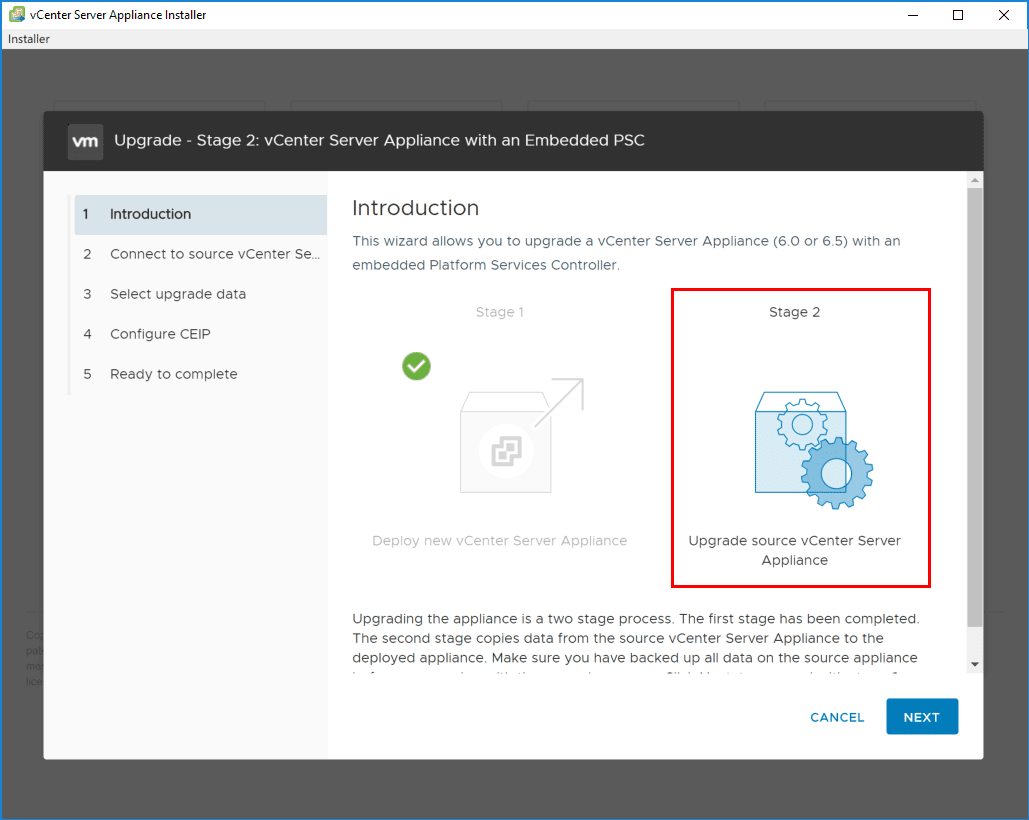
Stage 2 copies data from the source vCenter Server Appliance to the deployed appliance as explained by the installer introductory screen.
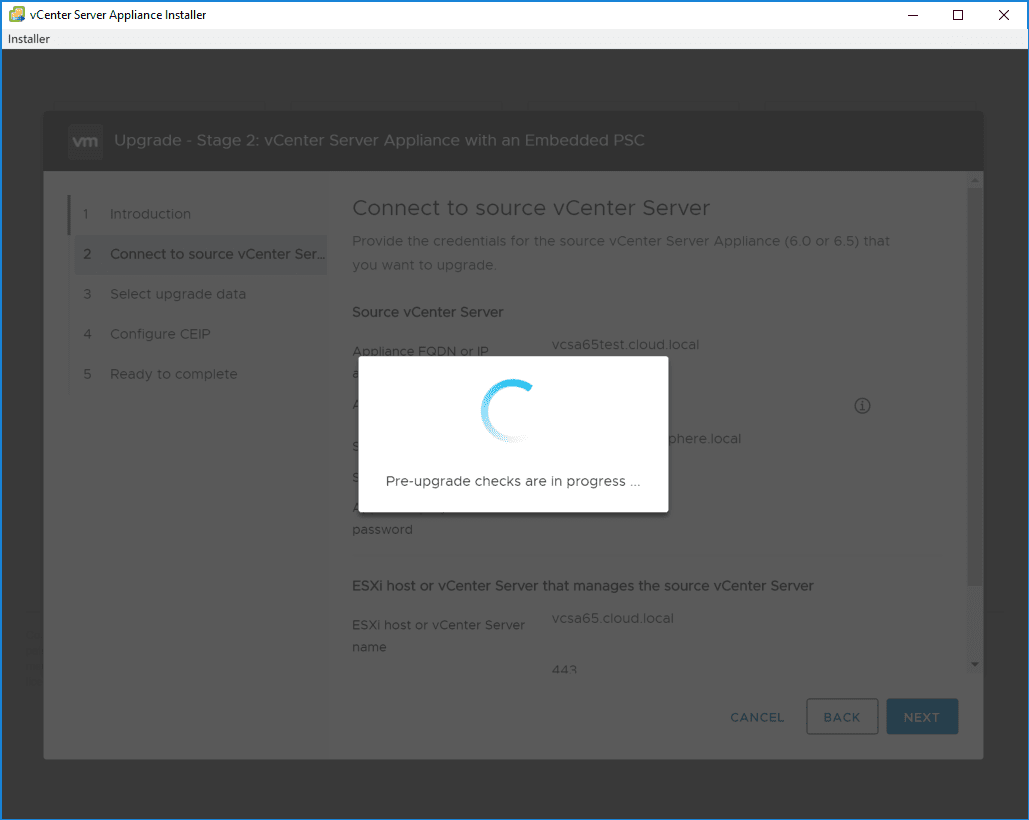
VMware has our backs here, pre-upgrade checks will check the environment to make sure everything is at least verified to work as expected.
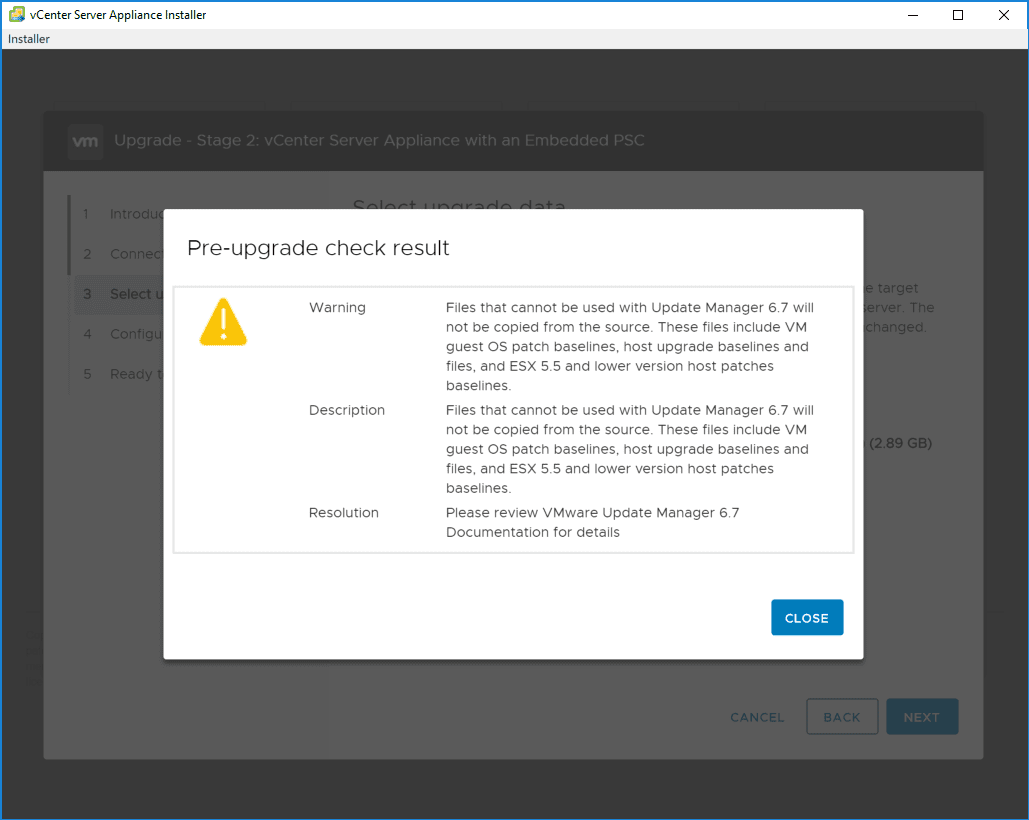
Any findings from the pre-upgrade checks will be displayed on the Pre-upgrade check result screen.
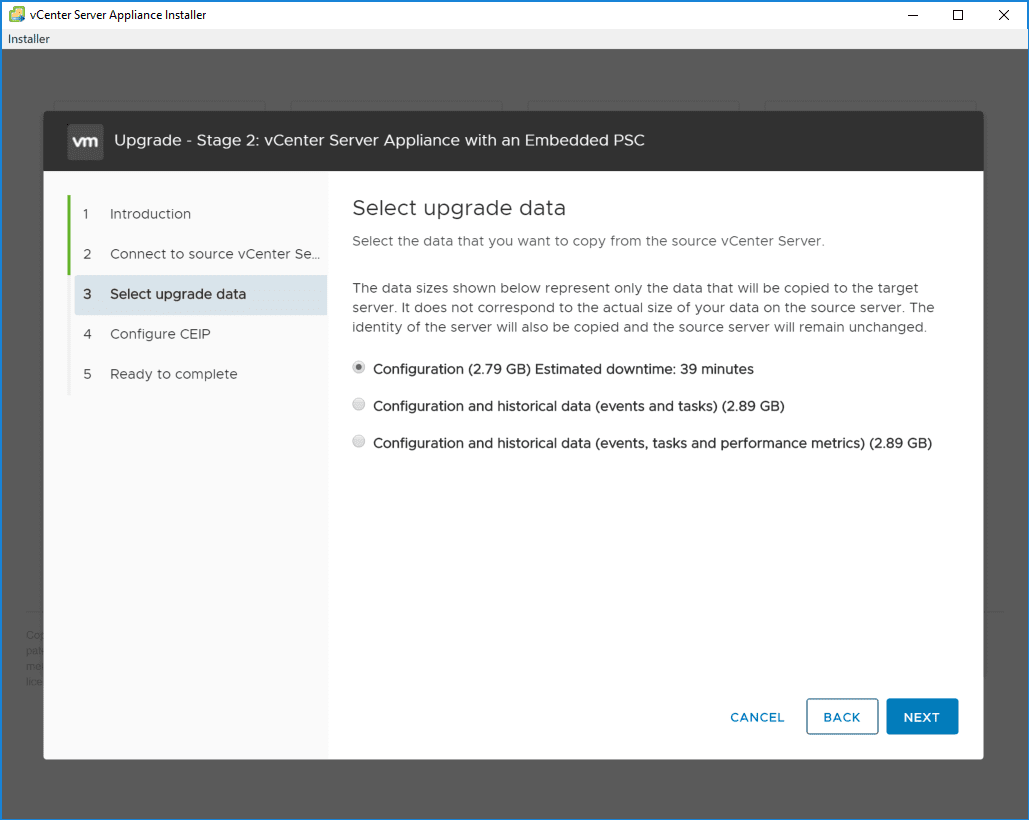
On the select upgrade data screen, you select the data you want to copy from the source VCSA appliance. The options are:
- Configuration data
- Configuration and historical data (events and tasks)
- Configuration and historical data (events, tasks, and performance metrics)
The installer will show the data sizes of each option. A nice feature as well is the estimated downtime that is displayed for the configuration option.
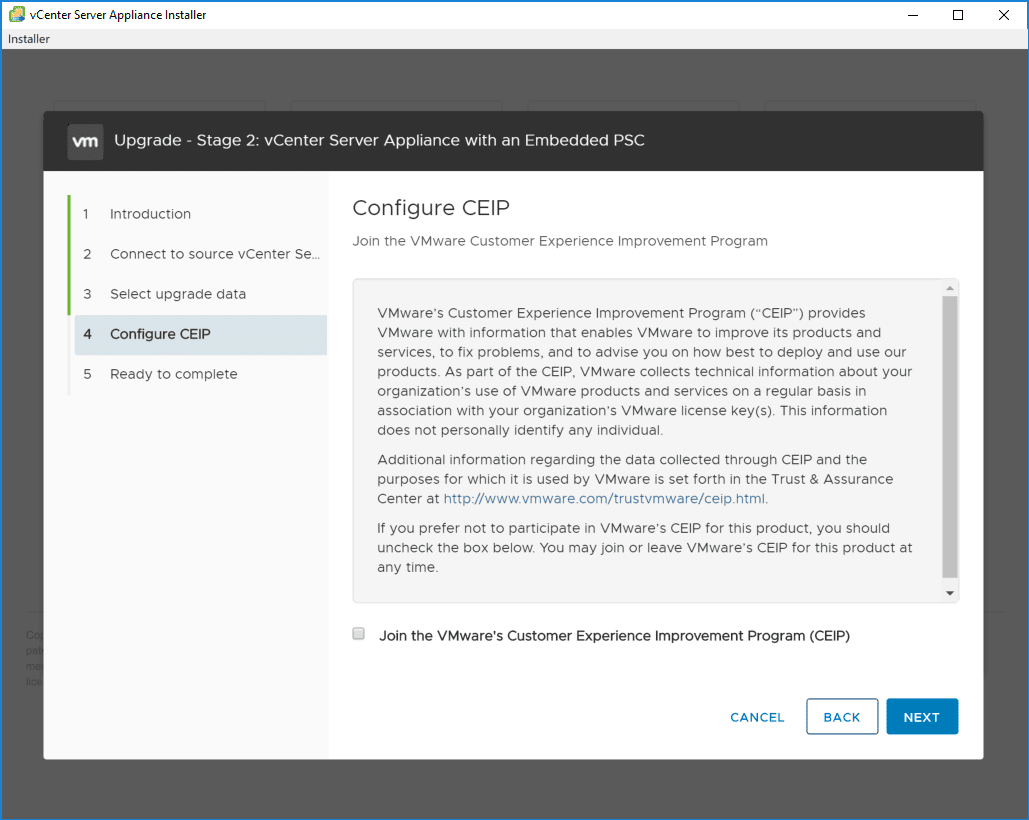
Choose whether or not to join the CEIP program.
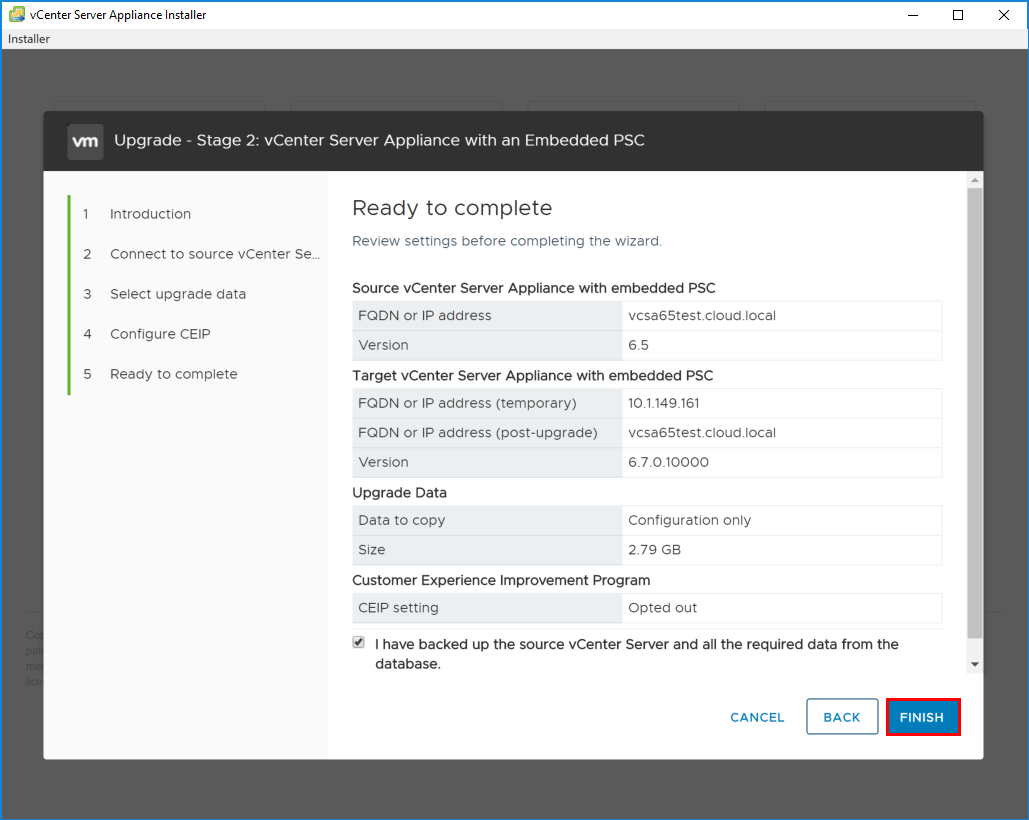
Stage 2 is ready to complete. Be sure to backup your source appliance data. Check the box and then click Finish.
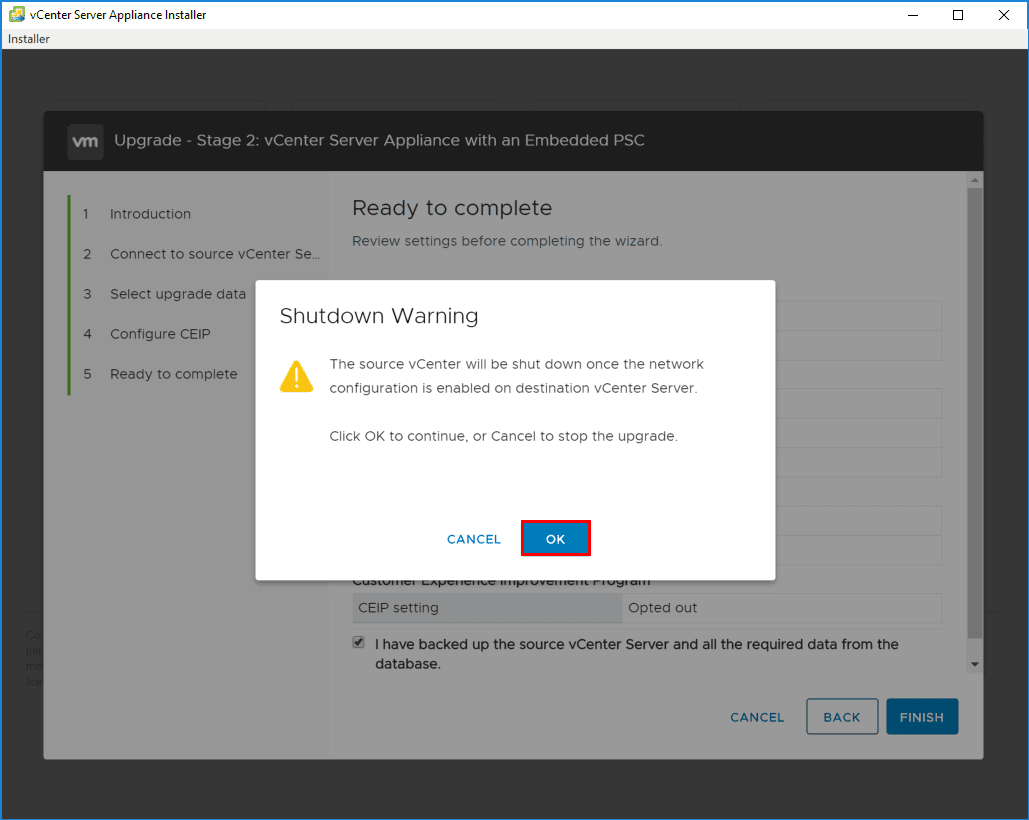
There will be a Shutdown Warning displayed to notify you that the source vCenter will be shut down once the network configuration is enabled on the destination VCSA 6.7 appliance.
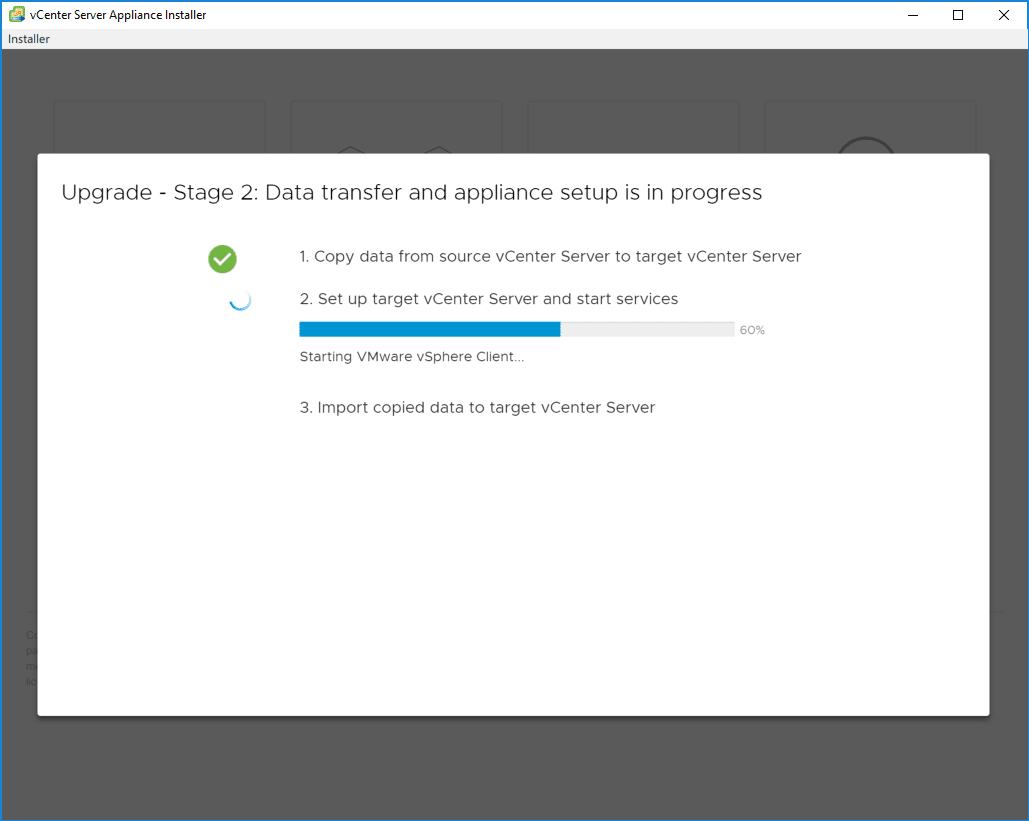
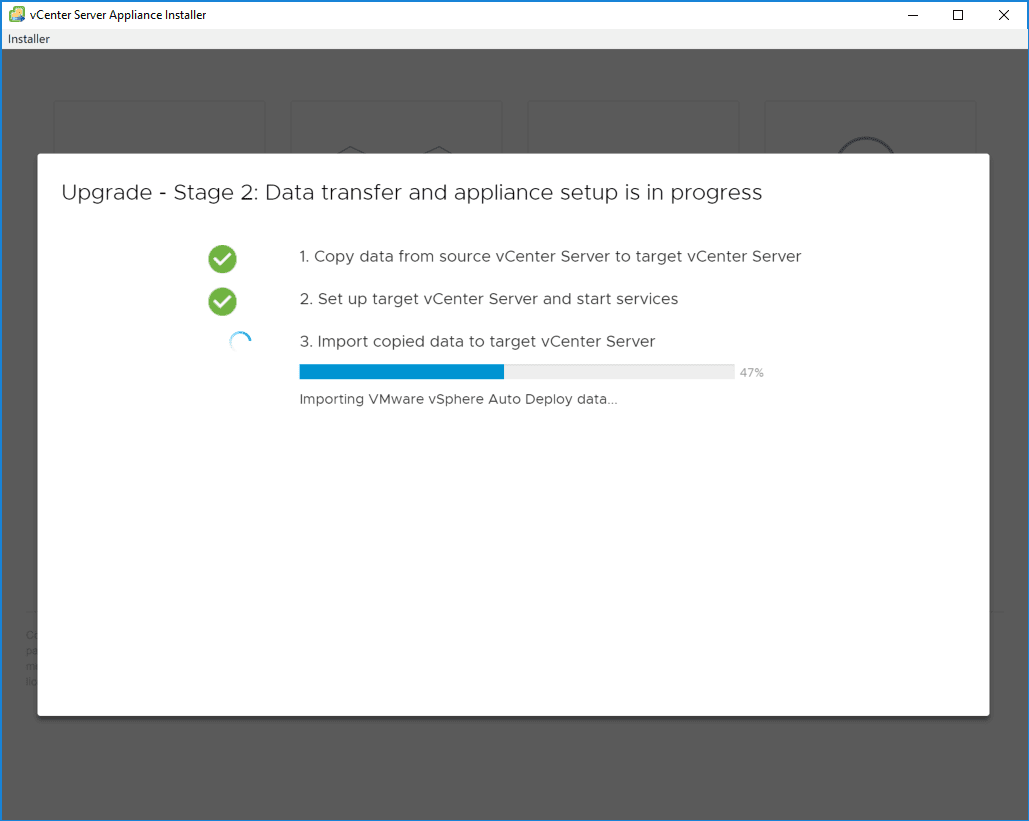
The three step Stage 2 process begins:
- Copying data from source VCSA to target VCSA 6.7
- Setting up target VCSA 6.7 appliance and starting services
- Importing copied data to the target VCSA 6.7 appliance.

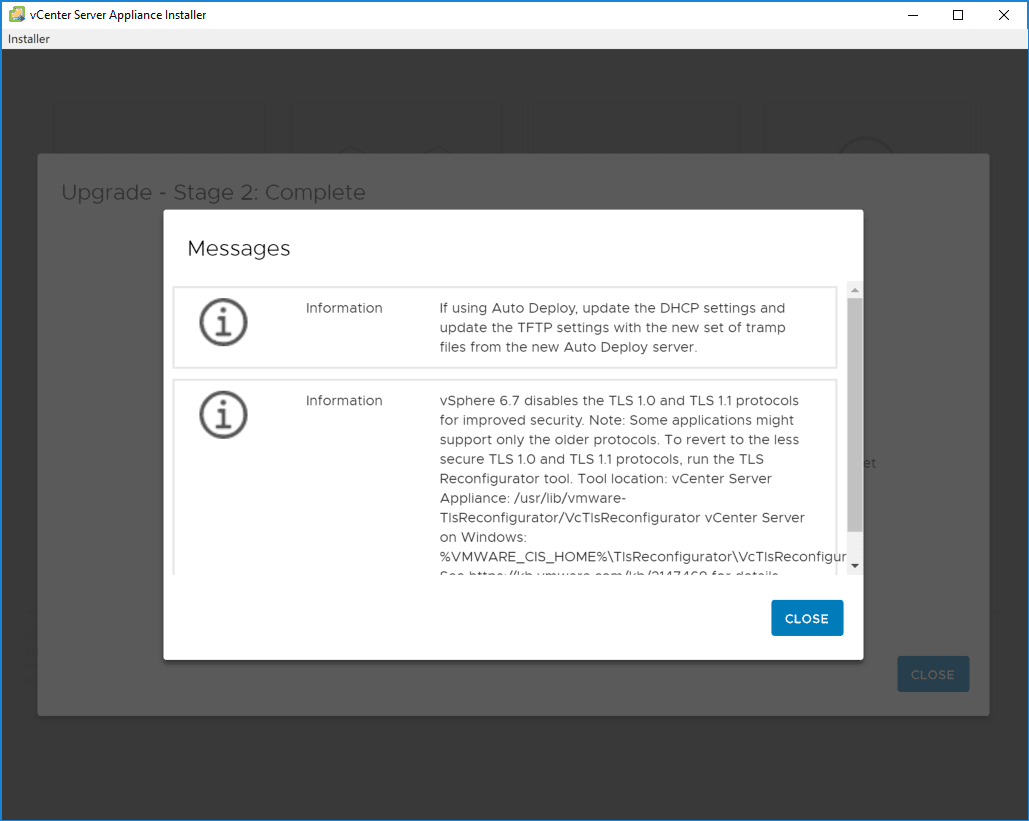
After the third step finishes, you will see a Messages box that shows some reminders after the upgrade finishes, including TFTP settings with Auto Deploy and new TLS standards with VCSA 6.7.
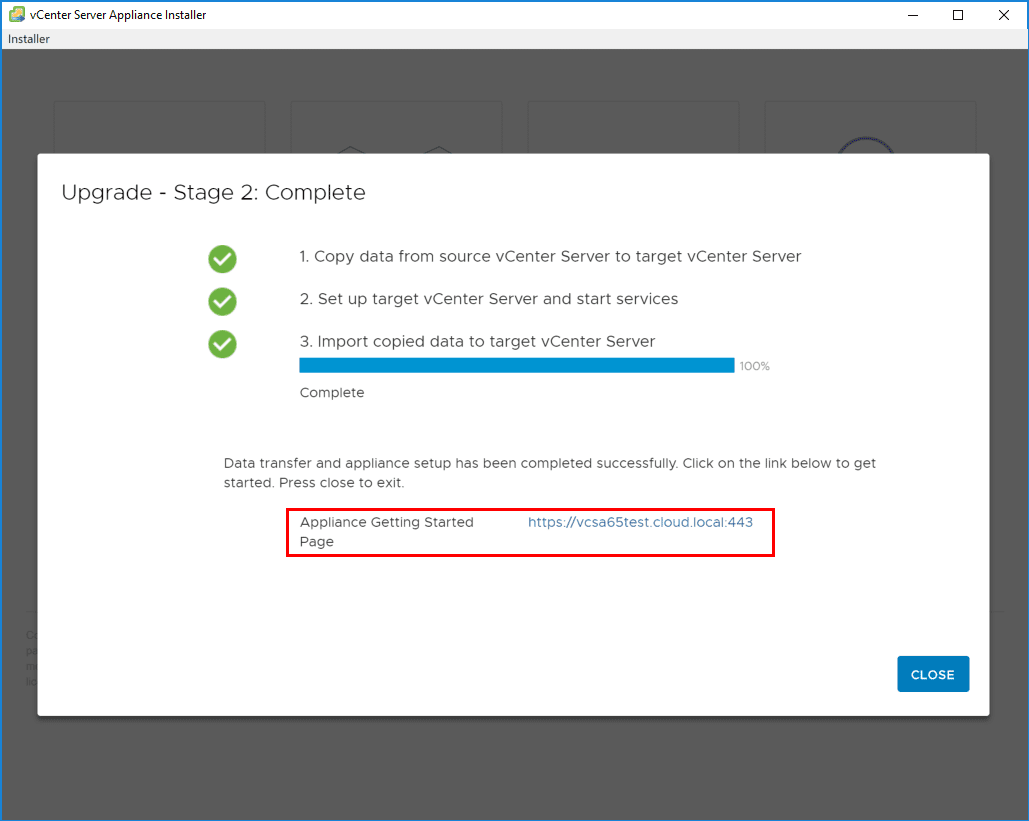
Conveniently, the link to the new VCSA 6.7 appliance web client is linked from the Stage 2 Complete screen at the bottom.
Takeaways
There you have it! The process of Upgrading to VMware vCenter Server VCSA 6.7 is as straightforward as you would expect from the now very mature VCSA platform for vCenter Server. The upgrade process went buttery smooth. There are no surprises here compared to the VCSA 6.5 upgrade. The new look and feel of the installer with the Clarity UI is extremely nice however and makes the process that much more pleasing to step through. Be sure to keep the order or upgrading in mind as many complex environments may be running many VMware products integrated with vCenter Server. Know at this point at least at the time of this post, NSX is not compatible currently with VCSA 6.7. So know your environment, read the documentation, and make sure to follow what is supported in production. Home labs are another story 😉

VMWARE VCSA 7 , 6.5, 6.7 VCENTER APPLIANCE INSTALLATION PROBLEM (FAILED TO START SERVICES. FIRSTBOOT ERROR.)
The installation successfully completes stage 1, but not complete 2nd stage.
If we retry we will get the same error
Firstboot error
 Failed to start Services. Firstboot error and vpxd service will not start
Or
Encountered an internal error. Traceback (most recent call last): File "/usr/lib/vmidentity/firstboot/vmidentity-firstboot.py", line 2017, in main vmidentityFB.boot() File "/usr/lib/vmidentity/firstboot/vmidentity-firstboot.py", line 349, in boot self.configureSTS(self.__stsRetryCount, self.__stsRetryInterval) File "/usr/lib/vmidentity/firstboot/vmidentity-firstboot.py", line 1478, in configureSTS self.startSTSService() File "/usr/lib/vmidentity/firstboot/vmidentity-firstboot.py", line 1140, in startSTSService returnCode = self.startService(self.__sts_service_name, self.__stsRetryCount * self.__stsRetryInterval) File "/usr/lib/vmidentity/firstboot/vmidentity-firstboot.py", line 88, in startService return service_start(svc_name, wait_time) File "/usr/lib/vmware/site-packages/cis/utils.py", line 784, in service_start raise ServiceStartException(svc_name) ServiceStartException: { "resolution": null, "detail": [ { "args": [ "vmware-stsd" ], "id": "install.ciscommon.service.failstart", "localized": "An error occurred while starting service 'vmware-stsd'", "translatable": "An error occurred while starting service '%(0)s'" } ], "componentKey": null, "problemId": null }Solution
We should have forward and reverse entries in domain controller.
This issue always comes if we are using static IP configuration or wrong domain entries.
Add this entry in vcsa’s hosts file and you are good to go. Once the configuration complete you can later add the vcsa in domain without any problems

Once stage 1 completes
Open a console to the appliance, enable SSH
On the appliance, echo ":: 1 localhost.localdom localhost" >> /etc/hosts
You can also wait till stage 2 is at 2%, and then add ” echo “::1 localhost.localdom localhost” >> /etc/hosts”.
Also, if you are facing the same issue update vcenter host entry in /etc/hosts file
I know many of you have been pinging me the last couple of days for an updated Nested ESXi 6.7 Virtual Appliance and I have just finished my strict quality control process 🙂 The only minor change with the 6.7 appliance is the VM is now configured with EFI Firmware, where as in the past it was set to BIOS. As of vSphere 6.5+ appliances, the customization scripts are automatically removed by default which means that customers can turn on Secure Boot feature post-deployment without having to perform any manual workarounds. In addition, you will find a few more updates related to the updated ESXi appliance below. I hope you enjoy these free resources to help learn and plan for your vSphere 6.7 upgrades, Happy Friday!
Note: These solutions are all developed during off hours and does take a considerable amount of time/effort to manage and update. Although they are provided to you as a free solution, the development itself is not 🙂
 o
o
Nested ESXi 6.7 Appliance:
ESXi 6.7 Virtual Appliance (Nested_ESXi6.7_Appliance_Template_v1.ova)
Nested ESXi Content Library
If you are using my Nested ESXi Content Library, I have updated it to include the latest 6.7 Appliance. Simply refresh your Content Library to automatically pull down the image or you can create a new Content Library by subscribing to the following URL: https://download3.vmware.com/software/vmw-tools/lib.json For more details, please take a look at this blog post here.
vGhetto vSphere Automated Lab Deployment:
For those that use my vGhetto lab deployment script to automate a fully functional vSphere environment, I have created a new version of the script to support vSphere 6.7 which you can find more details here. One neat feature that was suggested by Christian Mohn awhile back was the ability to get more insights to what is happening during the VCSA deployment since the verbosity can be quite distracting on the primary screen. There is now a new $enableVerboseLoggingToNewShell variable that is enabled by default to spawn a new PowerShell console that will watch the VCSA installer logs, so you have a better idea of what is going on.

VMware vcenter 7.0 A problem occurred during setup Services might not be working as expected 63%
April 5, 2020 08:05PM
As VMware vSphere 7 version is released recently, I thought of testing and have hands-on on the product, to get further on vCenter server 7.0, ISO file is downloaded from my.vmware.com. Here I am performing vCenter server deployment and installation steps on VMware workstation, OVA file is located under vcsa folder in the ISO file. Deployments of vCenter is as same as previous versions and installation/deployment is identical. You can find the steps in my earlier articles as below.
How to deploy vCenter server appliance on VMware Workstation
Deploy install VCSA (vCenter server appliance 6.5) on esxi and VMWare Workstation
While configuring vCenter 7.0, I saw below error and installation/configuration was stopping abruptly.
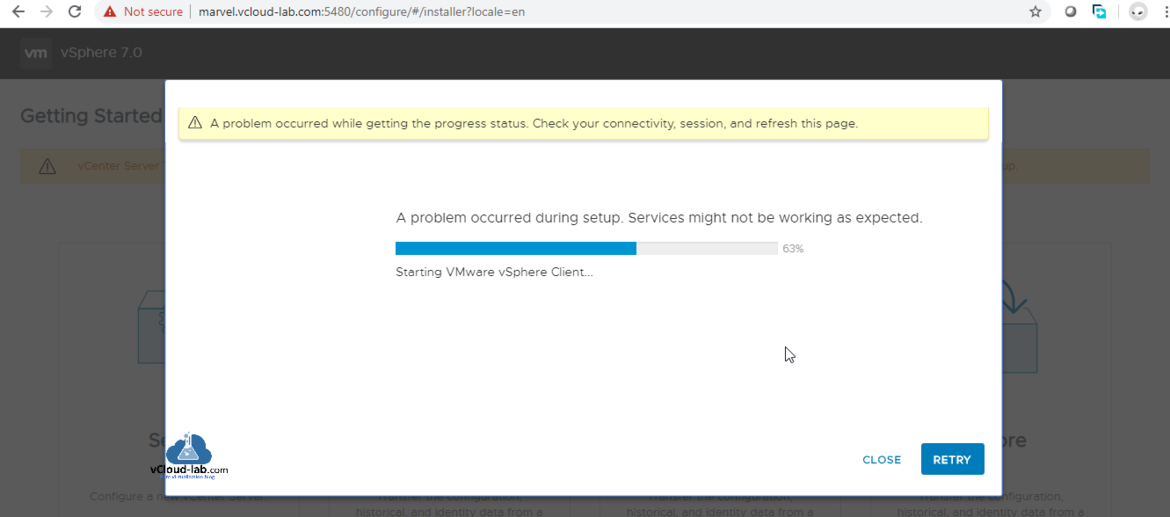
A problem occurred while getting the progress status. Check your connectivity, session, and refresh this page.
A problem occurred during setup. Services might not be working as expected at 63%, Retry
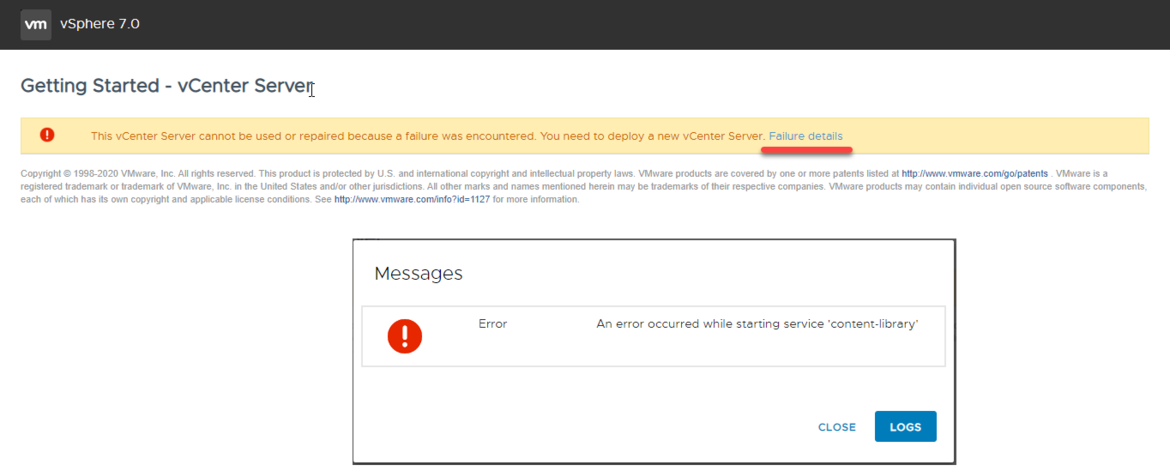
When I refreshed browser I was seeing another issue in the logs.
This vCenter Server cannot be used or repaired because a failure was encountered. You need to deploy a new vCenter Serve. Failure details
Error An error occurred while starting service ‘content-library’
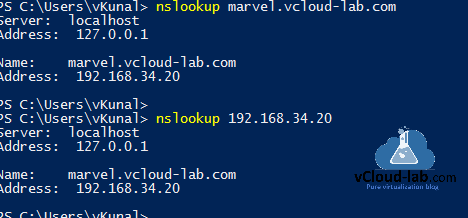
As a basic troubleshooting I tried nslookup to vcenter server FQDN and IP and both were failing.
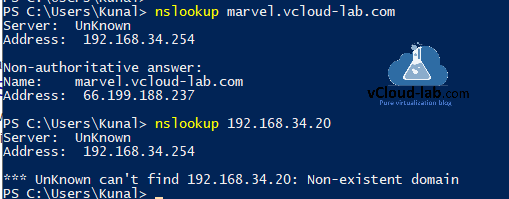
To resolved it I added DNS entry (under Forwared lookup zones and Reverse lookup zones) for vCenter server on the Active directory DNS server. Need to add Host (A) and Pointer (PTR) record, This was simple resolution to solve my problem
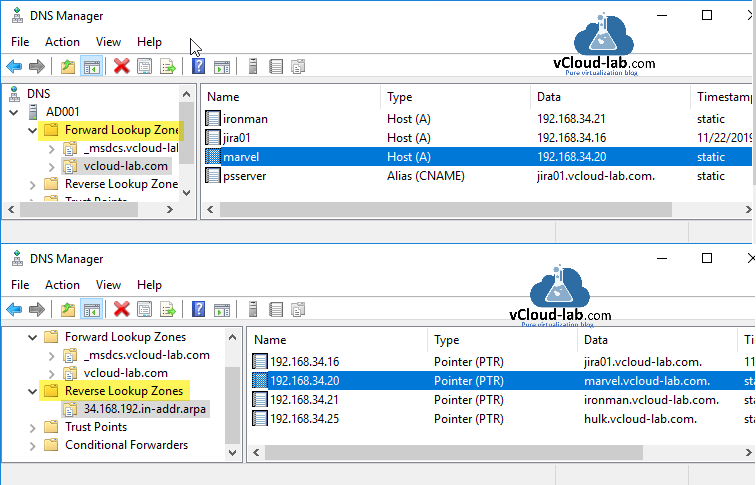
After DNS entry addition, I tested nslookup and it is successful, Alternatively (not recommended) you can user of hosts to add temporary entries file located on Windows under C:WindowsSystem32driversetc or for linux /etc.
Next make sure you configure NTP time server properly for time synchronization from proper NTP servers, if there is drift between Time, it will also cause the issue.


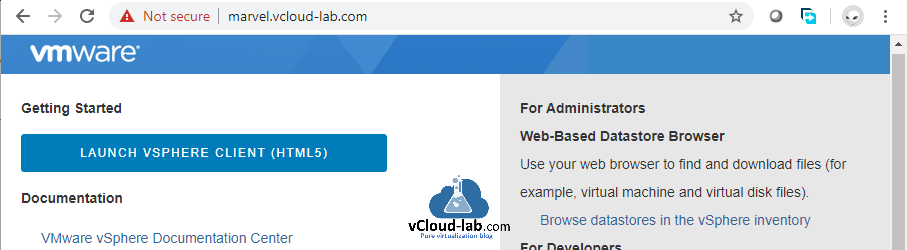
I redeployed vCenter 7.0 server again and it was good, as below if you see on the UI screen flash based option (FLEX) is missing and completely deprecated, This is one of the major change.
Earlier version screenshot here.
Useful Articles
PART 1 : BUILDING AND BUYING GUIDE IDEAS FOR VMWARE LAB
PART 2 : BUILDING AND HARDWARE BUYING GUIDE IDEAS FOR VMWARE LAB
PART 3 : MY VSPHERE LAB CONFIGURATION ON VMWARE WORKSTATION
PART 4 : CONFIGURING VMWARE WORKSTATION NETWORKING IN HOME LAB
PART 5 : CONFIGURING STORAGE IN VMWare WORKSTATION FOR OPTIMAL SPEED
PART 6 : CONFIGURE VMWARE WORKSTATION TO SAVE SSD SPACE AND TIME
PART 7 : CREATING NESTED VMWARE ESXI SERVER VM IN HOMELAB ON VMWARE WORKSTATION
PART 8 : CPU COOLING SOLUTION FOR MY HOME LAB ON VMWARE WORKSTATION
Go Back