Nothing is more terrifying than when your WordPress site goes down, especially when you get an alarming message like “There has been a critical error on this website.”
When you’re locked out and the frontend is entirely down, you need to know how to fix the critical error now. Every minute that passes is driving away visitors as they encounter a glaring error screen.
Luckily, fixing this critical error is usually just a matter of adding a small PHP function or deleting a problem plugin. Here we’ll go over a variety of ways to troubleshoot this issue and get your site up and running again fast.
Check out our video guide to fixing the ”There Has Been a Critical Error on Your Website” Error
What Causes the “There Has Been a Critical Error on Your Website” Error?
If you’ve been using WordPress for some time, you’ve likely heard of or possibly even encountered its most infamous error: the White Screen of Death. This startling glitch would cause your entire website, and sometimes even your backend, to load as a blank white page.
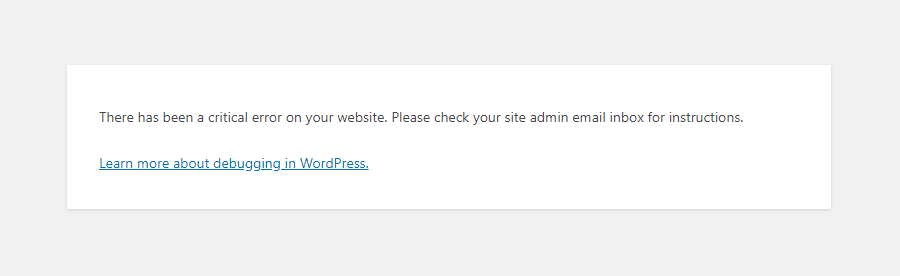
In recent versions of WordPress, this blank screen has been replaced with the critical error and the text “There has been a critical error on your website. Please check your site admin email inbox for instructions.”
While this is less panic-inducing than your site simply refusing to load at all, the error text isn’t much more helpful than before, and it’s likely to leave you wondering: What causes this critical error?
Much like the White Screen of Death, the issue can usually be traced back to an issue with PHP: either your memory limit being surpassed, or an error in your code, plugins, or theme. It may also be an issue of database corruption.
While the error text itself may not be very helpful, knowing this makes troubleshooting much easier.
You may also want to look into these other WordPress errors, as you could be experiencing multiple of them:
- ERR_CONNECTION_TIMED_OUT — Caused by a slow or overloaded web server.
- ERR_CACHE_MISS — If you see this, look into your website’s cache or PHP tools like plugins, as they’re very likely the cause.
- 500 Internal Server Error — A serious error that can usually be traced back to server file corruption.
- Error Establishing a Database Connection — Corruption in your database or a database server issue can be the root of this problem.
- HTTP 503 Service Unavailable — Indicates an issue with your server.
- HTTP 502 Bad Gateway — Yet another server issue, often caused by too many visitors overloading it.
And if you see any other strange errors, look through these HTTP status codes.
How to Fix the “There Has Been a Critical Error on Your Website” Error?
You’re here to get your site up and running again, and to that end, we’ve collected several different potential ways to fix the issue. Knowing that the cause is likely PHP-related, these may involve editing core WordPress files. Even with your site in a broken state, make sure to back it up before implementing any of these suggestions, as we don’t want to make it worse!
If you’re able to log in to your website’s backend, that will help immensely. But as your entire site is likely down, you’ll very likely need to access it through FTP (or SFTP).
Contact your web host or look through your hosting dashboard to find your FTP login credentials, and make sure to install an FTP client like FileZilla. This guide on connecting to WordPress over FTP can help too.
Enable Debug in WordPress
If you’re having trouble with WordPress, one of the first things you should do is enable debugging. With debug mode on, you’ll be able to see the various PHP errors occurring on your site, and you can use this to trace back to the root of the issue.
As you may be unable to access your dashboard, you’ll also need to enable the debug log. This will write all PHP errors to a file.
If you’re hosting with Kinsta, enabling debugging with MyKinsta is very easy. Just log in to the hosting dashboard, then go to Sites > Tools > WordPress debugging and click Enable. You can then look around your site to find the cause of the issue or check the log. Make sure to disable debugging when you’re done, as it’s visible to your visitors as well as you.
If you need to manually turn on debugging, or you need to access the debug log, follow these steps.
- Step 1: Connect to your site with FTP.
- Step 2: Find wp-config.php in the root folder and open it with a text editor or IDE.
- Step 3: Place the following code at the bottom of the document, just before the final message, then save and close the file:
define( 'WP_DEBUG', true );

define( 'WP_DEBUG_DISPLAY', false );

define( 'WP_DEBUG_LOG', true );
Here’s what it will look like when done:
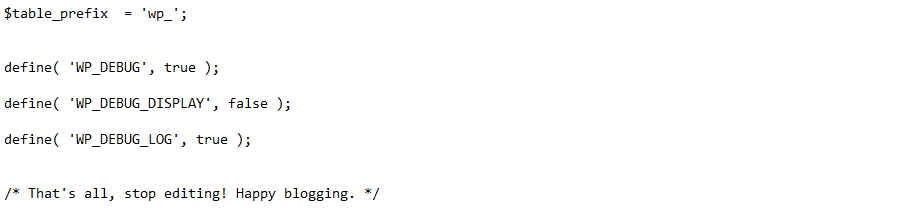
Debugging is now enabled on your site and errors will be written to the log. You can find the debug log in the wp-content folder, named debug.log.
Look for names of your theme or plugins which will point to them being the cause or references to a specific file. Even if you aren’t sure what to do with this information, save it someplace — it can help you if you need to reach out for support.
When you’re finished debugging, make sure to remove these lines of code.
Roll Back Your Site
When WordPress errors rear their head, restoring a backup can be a quick and easy way out. While it won’t always solve the issue, it’s definitely worth a shot. And if the problem happens again, you may be able to retrace your steps next time.
How you restore your website all depends on how you backed it up. If you use a plugin, follow the instructions in the documentation. If backups are included with your web host, you’ll likely be able to do it from your hosting dashboard.
For instance, Kinsta users can restore a backup by logging into MyKinsta, finding your site under Sites, going to the Backups tab, then clicking Restore to…
Before restoring to your live site, try it on a staging site to ensure that the site is indeed functioning and you’re not overwriting your hard work.
Revert to a Default Theme
Sometimes the critical error can be traced back to a conflict within your theme. The best way to test for this is to temporarily delete it and revert to a default theme, which should immediately clear up the issue.
Make sure you back up your site first, as you’ll need a way to get your theme files back once they’re gone. Simply reinstalling the theme may cause you to lose your custom styling.
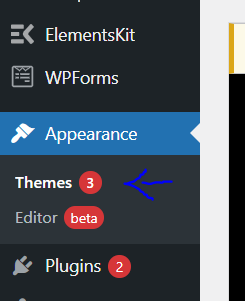
If you have access to your dashboard, this is easy. Just go to Appearance > Themes, click on the theme to select it, and then click Delete in the lower right corner of the pop-up window.
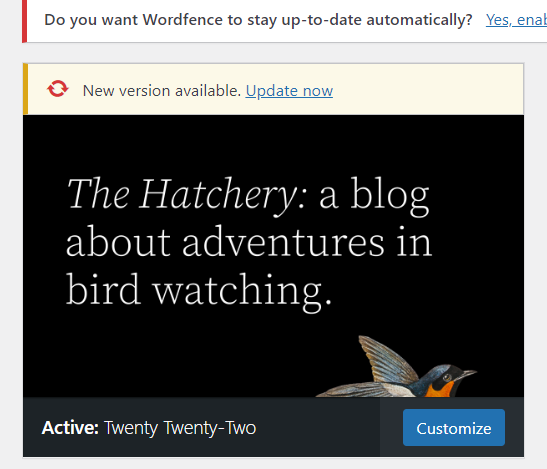
If you don’t see the option, then try downloading and switching to a different theme. The safest bet is to try a default theme like Twenty Twenty-One.

If you don’t have access to your backend, follow these instructions to revert to a default theme with FTP.
- Step 1: Connect to your site with FTP.
- Step 2: Navigate to wp-content/themes. You have two choices here: either rename your theme folder (will allow you to turn the theme back on later) or simply delete it.
- Step 3: If you don’t have a backup theme here already, manually download Twenty Twenty and place its files into the themes folder.
Your site should now revert to Twenty Twenty. If it loads properly now, you know it was a theme conflict.
To restore your theme files, simply reinstall the theme or change the folder back to its original name.
Disable All Plugins
When you’re having a critical error, a plugin is often to blame. If you have several or even dozens of plugins on your site, trying to locate the one that’s the issue may seem like a daunting task.
But there’s an easy way to find the problem plugin: simply turn them all off and see if that fixes the problem. If it does, enable them one by one until your site breaks again. And there’s the culprit!
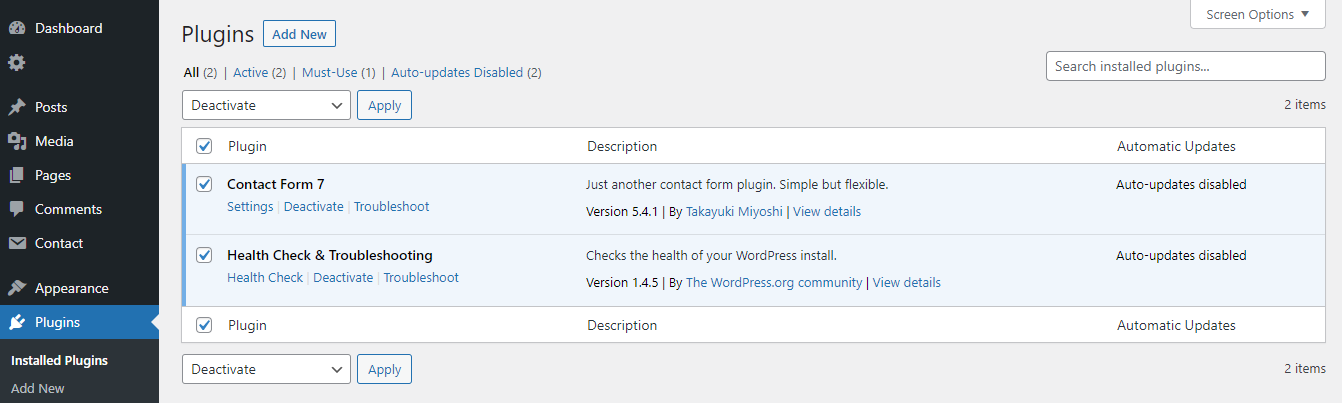
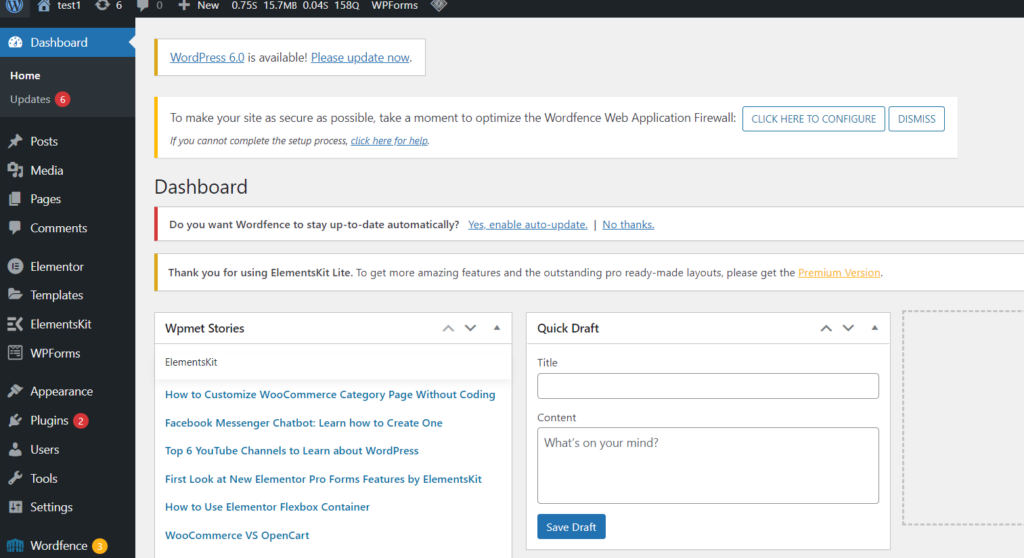
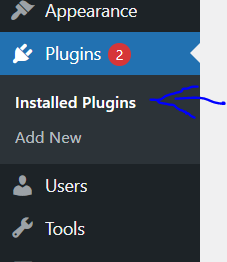
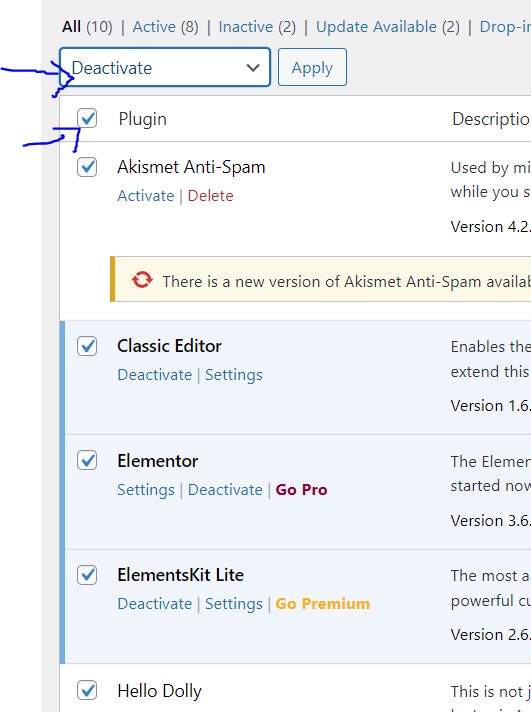
To disable your plugins from the dashboard, visit Plugins > Installed Plugins and tick the checkbox at the top of the list to select them all. Then click Bulk Actions > Deactivate, which should be enough to disable any conflicts and restore your site.
You can also click Delete instead to entirely remove their files, though you will need to reinstall them manually or restore a backup.
You can then turn them on one by one by returning to Installed Plugins and clicking Activate on each.
You can do essentially the same thing through FTP.
- Step 1: Log in to your site with FTP.
- Step 2: Open the wp-content folder to find your plugins.
- Step 3: Rename the plugins folder to plugins_old and verify that your site is working again.
- Step 4: Rename the folder back to “plugins”. The plugins should be disabled still, so you should be able to log in to your dashboard and activate them one by one. If the plugins reactivate automatically, rename individual plugin folders with _old until your site is restored.
Raise the PHP Memory Limit
Even if a plugin or theme is the cause of your broken website, the PHP memory limit is often the real one to blame.
What is the PHP memory limit? Your web server only has a certain amount of RAM, or memory, so WordPress sets a hard limit on how much memory a single PHP script can take up. When this limit is exceeded, you’ll encounter the white screen of death or the critical error.
While you don’t want to set the memory limit too high and allow misconfigured scripts to slow your site to a crawl, the default value may be far too low. Raising your PHP limit just a bit could instantly fix your broken website.
- Step 1: Access your site through FTP and open wp-config.php.
- Step 2: Insert the following code right before the final line and save.
define( 'WP_MEMORY_LIMIT', '128M' );
You can also try 256M if this doesn’t fix the issue, but anything higher is definitely unnecessary unless specifically called for in plugin documentation. If the issue is with the memory limit, the plugin you’re using is almost certainly broken and needs to be disabled.
A side note: Some hosts may enforce an extremely low memory limit and won’t allow you to raise it. If this is the problem, your only option is to switch to a better host or delete the plugin causing the problem.
While Kinsta does enforce a memory limit, it’s set to 256 MB. You should have no issues with legitimate working plugins on a Kinsta plan.
Raise the Max Upload File Size and Text Processing Functions
If you’re only seeing the critical error in certain situations and not constantly on every page, a small tweak to a few PHP functions might be able to fix it.
Uploading large files and finding yourself on an error screen is probably a result of the max upload file size being too small, while certain large pages breaking can be fixed by increasing recursion and backtrack limits.
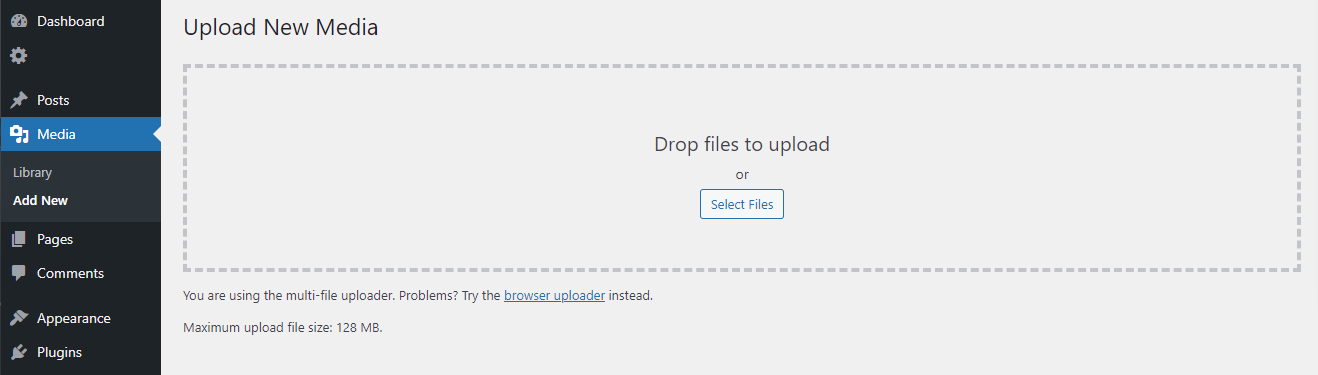
First, check what your maximum upload size is and compare it to the file you’re trying to upload. You can find this by visiting Media > Add New and checking beneath the file uploader.
To fix either of these issues, you’ll need to log into FTP and edit the wp-config.php file, placing the new code right above the final comment line.
To increase the max upload file size, add this code:
ini_set('upload_max_size' , '256M' );
ini_set('post_max_size','256M');
And to fix the breaking of large pages on your site, add this code:
ini_set('pcre.recursion_limit',20000000);

ini_set('pcre.backtrack_limit',10000000);
Clear Your Site Cache
Caching is a great way to speed up your website, and most of the time it’s strictly a good thing. But sometimes the cache can get corrupted, leaving your site throwing out errors.
When this happens, a simple solution is to clear the cache, which should be all you need to get rid of the problem and restore your site to working order.
No fear: The cached version of your pages will soon be restored, allowing your site to load quickly again. Clearing the cache will simply delete the stuck corrupted files.
MyKinsta users can clear their site’s cache through their hosting dashboard. Visit Sites > Tools and then click Clear Cache.
Using a different host, or maybe a caching plugin? Check out their documentation; they should be able to give you detailed instructions.
Upgrade Your PHP Version
Outdated PHP can cause your site to break, and other conflicts are sure to occur. You usually want your site on the latest version of PHP supported by WordPress, which is currently PHP 7.3 to 8.0.
Some WordPress users prefer to stay on PHP 7.4 as they’re concerned about theme and plugin compatibility. Usually, this won’t cause problems. But if you’re using PHP 5.x, it’s imperative you upgrade as it can cause serious conflicts.
A PHP upgrade is a big deal, so make sure you have a backup ready before trying it.
Kinsta users can upgrade PHP version with MyKinsta without needing to do anything complicated. Just log in and go to Sites > Tools, then click Modify under PHP engine. Select the version you want and, after a short wait, your site will be running on the latest PHP version.
If you’re not using Kinsta, upgrading PHP will rely on your host. Contact them for help.
Check for Malware
Sometimes a critical error can be caused by malware, especially if you’re noticing strange PHP scripts that can’t be traced back to your plugins or theme. Removing malware is a tough task, more so when you’re locked out of your website and can’t even run a scan.
It can be hard to tell the difference between legitimate files and suspicious ones added by malware, and deleting random core files isn’t likely to end well. Malware can also modify PHP files, hiding scripts in them you won’t notice as malicious unless you’re a developer.
If you suspect malware is the cause, then it may be best to turn to your web host for help.
Where to Get WordPress Support If All Else Fails?
If you’ve tried all these options and nothing is working, you definitely have a real problem on your hands. But you can always turn to your web host for help identifying and fixing the issue. A good web host will provide you with the support you need to get your site up and running again.
Along with every plan, Kinsta offers live WordPress support 24/7. With our support tools integrated into your MyKinsta dashboard, getting help at any time is only a click away. Response times are fast — often less than two minutes — so you won’t be waiting around with a down site for hours or days.
So how does the scope of support compare to this particular issue? Kinsta offers technical support when errors appear on your site, including the titular critical error. We can help you identify exactly which files or plugins are causing the problem.

While you’ll need to go in and fix the issue either yourself or with the help of a developer, Kinsta support is happy to offer instructions on how to do so (for instance, how to access the file through FTP).
Every plan includes access to the same great support; there’s no priority support plan, and no special treatment given to certain customers. So if you’re stuck on a critical error and need help resolving it, turn to Kinsta support for assistance.
Summary
The WordPress critical error can have a variety of causes, though the issue often has to do with PHP. Either the PHP memory limit has been exceeded, or your plugins or themes are having issues.
The quickest way to fix the problem is to roll back your website if you have a backup, but there are a variety of other methods you can try, from raising the PHP memory limit to identifying and disabling a problem plugin.
Troubleshooting may require trying a few different things, but don’t get discouraged if you can’t fix it yourself. You can always get WordPress support from a host like Kinsta. When in doubt, turn to the experts.
And if your site is often plagued by errors, check out our guide to the 65+ most common WordPress errors.
Get all your applications, databases and WordPress sites online and under one roof. Our feature-packed, high-performance cloud platform includes:
- Easy setup and management in the MyKinsta dashboard
- 24/7 expert support
- The best Google Cloud Platform hardware and network, powered by Kubernetes for maximum scalability
- An enterprise-level Cloudflare integration for speed and security
- Global audience reach with up to 35 data centers and 275 PoPs worldwide
Test it yourself with $20 off your first month of Application Hosting or Database Hosting. Explore our plans or talk to sales to find your best fit.
Are you seeing the critical error on your WordPress site?
WordPress may sometimes show you a message that ‘There has been a critical error on this website. Please check your site admin email inbox for instructions’. It will also include a link to debugging in the WordPress guide.
In this guide, we will show you how to easily fix the critical error in WordPress. We will also talk about what causes this error and how to avoid it.

What is Critical Error in WordPress?
The critical error in WordPress is an error that stops WordPress from loading all the scripts it needs to work properly.
Previously, this WordPress error resulted in a white screen of death or a fatal error message on screen. Most beginners didn’t find it very helpful and struggled to resolve the issue on their own.
Since WordPress 5.2, users will now see a generic error message ‘There has been a critical error on this website. Please check your site admin email inbox for instructions’ with a link to the WordPress debugging guide.

It will also send an email message to your WordPress site’s admin email address with more details about the error and a link to access your WordPress dashboard in the recovery mode.
What Causes the Critical Error in WordPress?
The critical error in WordPress is generally caused by a malfunctioning plugin, script, or code that prevents WordPress from functioning properly.
WordPress is unable to load the rest of the files it needs unless you resolve this issue.
If you have recently copied and pasted code snippets from some tutorial to your website, then it might trigger the critical error.
All top WordPress plugins are thoroughly tested, so they are less likely to cause a critical error on their own. However, a conflict with another WordPress plugin or some custom code may trigger the error.
That being said, let’s take a look at how to easily fix the critical error in WordPress and get your website back.
Fixing The Critical Error in WordPress (2 Methods)
The critical error message itself is not very useful in finding the cause of the issue and fix it. Luckily, WordPress also sends an email to the admin email address of your website.
Now, many WordPress sites have issues sending emails, so you might not get this crucial email notification. If you are among those users, don’t worry. We will show you how to fix the critical error even without the email.
On the other hand, if you did receive the WordPress technical issue email notification, then we’ll show you how to make sense of it and use it to bring your website back.
Simply click the links below to skip straight to the section you need:
- Method 1: Fixing Critical Error with WordPress Debugging Email
- Method 2: Fixing Critical Error in WordPress Manually (No Email)
Fixing Critical Error with WordPress Debugging Email
First, you need to go visit the inbox for the email address you use as the WordPress administration email on your website.
Not sure which email address you used as the admin email? It is the email address you provide when installing WordPress.
If you are on Bluehost or used a WordPress auto-installer, then your admin email address will likely be the same address that you have used for your WordPress hosting account.
In your inbox, you’ll see an email with the subject line ‘Your Site is Experiencing a Technical Issue’. Inside it, you will find a lot more helpful information about what caused the critical error on your WordPress website.
For instance, in the following screenshot, you can see that the critical error was caused by the WordPress theme on our test site.

The email also includes a special link that will allow you to login to your WordPress website in recovery mode to fix and investigate the issue.
At the bottom of the email, you will see even more detailed information about the error, including the specific file and code that triggered it.
In this example below, some code at line 614 in our theme’s functions.php file is responsible for triggering the error.

Here is another example which is showing error details caused by a malfunctioning WordPress plugin.

Now you just need to click on the link to WordPress recovery mode, which will take you to your WordPress admin area.
You’ll be asked to log in to continue.

Once you are logged in, you will see a notification informing you about the critical error, what caused the error, and a link to the place where you can go to fix it.
For instance, in the following screenshot, it is informing us about the critical error caused by the plugin with a link to the plugins page.

Now, if you click on the link, then it will show you the misbehaving plugin. It will also show you exactly which line of code caused the error.
You can go ahead and deactivate the plugin for now.

Then you can simply find an alternative WordPress plugin, or see if you can get support from the plugin developers.
Similarly, if the issue is with your theme, then you will see a link to the Themes page. At the bottom of the page, you can see the theme causing the issue.

You can simply change your WordPress theme, or delete the broken theme and reinstall a fresh copy of the same theme from the official source to see if that resolves the issue.
Once you have addressed the issue, you can simply go ahead and click on the Exit Recovery Mode button at the top.

In most cases, your WordPress website would now start working normally.
However, if you are still seeing the critical error in WordPress, then you can try the troubleshooting steps in the next step.
Fixing Critical Error in WordPress Manually
If you are didn’t receive the WordPress critical issue notification email, then here is how you can troubleshoot and fix the critical error in WordPress.
If the error was caused by a recent action you took, then you can simply undo that action to fix the issue.
For instance, if you installed a new plugin and activating it caused the critical error, then you need to deactivate that plugin (we’ll show you how to do that in the first step below).
On the other hand, if you are unsure, then you can simply follow these steps.
1. Deactivate All WordPress Plugins
The easiest way to disable a faulty WordPress plugin is by deactivating it. However, due to the critical error, you don’t have access to the admin area and you don’t know which plugin to deactivate.
To address this we will deactivate all WordPress plugins. Don’t worry, you can easily reactivate them once you get access to your WordPress admin area.
Simply connect to your WordPress website using an FTP client or the File Manager app in your WordPress hosting control panel.
Once connected, you need to navigate to the /wp-content/ folder.

Inside the wp-content folder, you will see a folder called ‘plugins’. You need to right-click on it and then select ‘Rename’ option.
Next, change the name of the plugins folder to anything that you like. In our example, we’ll call it ‘plugins.deactivate’.

Once you do this, all of your plugins will be deactivated.
Basically, WordPress looks for the plugins folder to load the activated plugins on your website. When it cannot find the plugins folder, it simply cannot activate the plugins and automatically sets them as deactivated.
You can now visit your website to see if the critical error message has disappeared.
Important: Whether the critical error issue is resolved or not, don’t forget to rename the plugins.deactivated folder back to ‘plugins’. WordPress will then recognize the folder, and you’ll be able to reactivate them one by one from the WordPress dashboard so you can identify which one caused the critical error.
2. Switch to Default Theme
The next step in troubleshooting the critical error is to switch your WordPress theme to a default theme. This would fix the critical error issue if it is caused by some code in your current WordPress theme.
Simply go to WordPress.org themes directory and download a fresh copy of the TwentyTwenty or Twenty Twenty-One WordPress theme.

Next, you need to unzip the theme file to your computer. This will create a folder with the theme name on your computer.

Now you need to connect to your WordPress site using an FTP client or the file manager app in your hosting control panel. Once connected, navigate to the /wp-content/themes folder and you will see a list of all themes installed on your website.

Go ahead and download all of them to your computer as a backup. After that, you need to delete all theme folders from your website.

Your WordPress site now has no theme installed. To fix this, go ahead and upload the default theme folder you downloaded earlier.

Once finished, you can try visiting your website.
If the critical error was caused by your WordPress theme, then it should disappear now and you’ll be able to access your website.
3. Reinstall WordPress
A corrupt WordPress core file or malware could also trigger the critical error in WordPress. The easiest way to fix this is by reinstalling WordPress.
Simply go to WordPress.org and download a fresh copy of WordPress to your computer. After downloading the file, you need to unzip it to your computer. This will create a folder called ‘wordpress’ which contains all the files you need for the reinstall.

Next, you need to connect to your WordPress site using an FTP client or the file manager app in your hosting control panel.
Once connected, you need to navigate to the root folder of your website. The root folder is the one that contains wp-admin, wp-content, wp-includes, and wp-admin folders inside it.

Now select the files inside the wordpress folder on your computer and upload them to your website. Your FTP client will ask if you want to overwrite these files or skip them. You need to select ‘Overwrite’ and check the box next to ‘Always use this action’ option.

Click on the OK button to continue. Your FTP client will now replace all your core WordPress files with fresh copies from your computer.
Once finished, you can try visiting your website to see if this resolved the error.
If the critical was caused by a corrupt WordPress core file or malware, then the error should disappear now.
We hope this article helped you troubleshoot and fix the critical error in WordPress. You may also want to see our guide on how to get a free SSL certificate for your WordPress site, or our expert comparison of the best business phone services for small business.
If you liked this article, then please subscribe to our YouTube Channel for WordPress video tutorials. You can also find us on Twitter and Facebook.
Disclosure: Our content is reader-supported. This means if you click on some of our links, then we may earn a commission. See how WPBeginner is funded, why it matters, and how you can support us.
Editorial Staff at WPBeginner is a team of WordPress experts led by Syed Balkhi. We have been creating WordPress tutorials since 2009, and WPBeginner has become the largest free WordPress resource site in the industry.
Is Your WordPress Site Down?

With the release of WordPress 5.3, there is a new WordPress Error “There has been a critical error on your website”.
There are a lot of errors that you can encounter with WordPress, like internal server errors, database connection errors, and even ones that say “There has been a critical error on your website.” A lot of times, the full error is:
“There has been a critical error on your website. Please check your site admin email inbox for instructions.
Learn more about debugging in WordPress.”
Things being what they are, you’re likely thinking about what it means, and how to fix it?
All things considered, ideally you’ll have the option to illuminate it, however in case you’re not happy with investigating WordPress issues, or apprehensive you’ll destroy something, WP Fix It can help with this issue at https://www.wpfixit.com/special-ticket-offer-service/
If your WordPress website is fully down, check this link out at WordPress Down.
What does this error mean?
On the off chance that you’ve at any point known about the Blue Screen of Death with Windows, well WordPress has a proportionate, which is known as the White Screen of Death.
That appears to be frightening. The blunder “There has been a critical error on your website” is really a comparable adaptation of the White Screen of Death.
After WordPress 5.3, this is generally observed rather than the previous White Screen of Death. Kindly note that despite the fact that it might be terrifying, your site isn’t lost.
It very well may be fixed.
A great deal of times, the straightforward issue is to rollback the site. To do that, you have to have a reinforcement of your site.
Shockingly, not every person backs up their site, so in case you’re understanding this, and one of those individuals who don’t have a reinforcement accessible, at that point this investigating instructional exercise is for you.
So as to fix the issue, you need to discover where the issue turned out badly. You do this by investigating whether it was a subject or module strife.
Theme Conflict Troubleshoot
To perform this, you just activate a default theme, like Twenty Nineteen. Unfortunately, because your site is showing an error, you will need to perform the troubleshoot with either your web host’s file manager (like cPanel’s Filemanager), or use FTP or sFTP (it’s like secure version of FTP.) It’s important to note that in switching themes, you won’t lose your chosen theme’s settings.
To do this, you rename your active theme’s folder by adding DISABLE or OFF to the end of the folder’s name. For example, if you’re using Twenty Eighteen and the folder is ‘twentyeighteen’, you would name it ‘twentyeighteenDISABLE’ or ‘twentyeighteenOLD’ . Go back to the front of your site and refresh.
The objective is to check whether the mistake leaves. In the event that it doesn’t, it is anything but a subject issue. Try to rename the organizer back to its unique name when you’re finished investigating.
Plugin Conflict Troubleshoot
If it’s not the theme, it might be a plugin issue. In a way, troubleshooting is similar. However, it’s much easier to rename the plugin folder to ‘pluginsOFF’. Visit the site, and log-in. This will turn off all of the plugins.
Please note that it won’t remove the original settings of those plugins, as they will be there when you reactivate them later on.
Once the plugins are off, go back and rename the folder back to ‘plugins’. Go to your WordPress admin area and reactivate each, one-by-one, until you get the screen that says “There has been a critical error on your website”. The plugin that you just reactivated, is the problem.
Once more, in case you’re not happy with doing any of these investigating steps, WP Fix It is here to help solve this issue. https://www.wpfixit.com/wordpress-support-service/
When you’ve discovered the issue, you probably need to rollback the subject or module that caused it. You can do this several different ways.
- Download the original plugin files directly from the WordPress plugin directory, and replace the plugin via Filemanager with your web host (or cPanel), or through FTP or sFTP.
- Use WP Rollback plugin https://wordpress.org/plugins/wp-rollback/ to roll the plugin back to the previous version.
If you use WP Rollback, it will give you several versions to choose from. It will tell you what version you have. Below, you can follow the images to get an idea of how to use WP Rollback.
Step 1:
Choose the plugin to rollback. Click ‘Rollback’ if it is available in the plugins listed in your WordPress admin.

Step 2:
Choose the version you want to rollback to.

Step 3:
Read the warnings. It might be better to test, before rollback. Only rollback if you’re sure.

You will want to hold off to update when the developer does another release of the plugin or theme.
Hopefully this article will help you through solving this issue with “There has been a critical error on your website”, but if you’re not computer savvy to troubleshoot, then no worries, we’re here to help at WP Fix It.
As a WordPress site owner, your site might occasionally suffer downtime caused by one or many critical errors in WordPress. When that happens, you’ll see the dreaded error message which says, “There has been a critical error on your website” when you try to log in or view the site.


With this message, WordPress is basically telling you that there is a fatal error on your website. During this period, the site will remain inaccessible to visitors, and you may be blocked from accessing the admin panel.
Fortunately, this error is easy to resolve, and in this article, we’ll go over some possible fixes for the WordPress critical error. First, let’s take a look at why this error might occur in the first place.
Causes of the «There Has Been a Critical Error in Your Website» Error
The critical website error in WordPress can be caused by one or several things, but unfortunately, the error text is too vague to provide any idea of what exactly went wrong with your site. Therefore, it’s up to you to figure out the reason behind it.
If you encounter this error while setting up WordPress for the first time, then it’s very likely that you either specified the wrong database information or added an inaccessible database. In this case, you’ll have to set your correct database details in the wp-config.php file of your WordPress installation.
Aside from setting the wrong database information, the critical WordPress error can also result from the following issues:
- corrupted database
- poor hosting provider
- lagging or overburdened web server
- corrupted website cache or PHP code (including plugins and themes)
- server file corruption
- other server-related issues
To help in fixing the issue, WordPress detects when a critical error happens and sends an email notification to the administrator’s email address. This email contains the error details and a link for logging in to the site dashboard in recovery mode.
Note that, sometimes, this email might get sent to the spam folder. Therefore, be sure to check there if you don’t find it in your main inbox. If you don’t get the email at all, then you’ll have to locate the issue yourself and fix it.
How to Fix the “There Has Been a Critical Error on Your Website” Error
Fixing the error requires you to know what caused it in the first place. In the notification email sent by WordPress, you’ll be shown the corrupted PHP file(s) and even the line of code to correct. However, if you didn’t get this message, don’t worry.
Below are eight methods of resolving critical errors in your WordPress site. Click on the link below to skip to a particular section:
1. Deactivate Your Site Plugins
Corrupt plugins are one of the most common causes of critical website errors in WordPress. If the WordPress critical error occurred just after you installed a plugin, then you’ll need to deactivate that particular plugin and see what happens after that.
You can deactivate a plugin from the Plugins area in your WordPress admin panel. But, in the event that you’re blocked from accessing the back-end, you’ll have to deactivate the plugins manually.
You can find all the plugins used in your site by navigating to wp-content > plugins from your WordPress site’s root directory.


There, all you need to do is rename the plugin. This ensures that WordPress loads without the problematic plugin when you next restart your WordPress site, which should get rid of the error.
If you’re not exactly sure which plugin is responsible, you can just rename them one by one until you find the culprit.
For hosted WordPress sites, you’ll need to log in using FTP. Consult your hosting provider for information on how to do that.
2. Check the Error Logs
Another method for checking the underlying cause of the critical error is by inspecting the error_log file, which stores PHP error information on your WordPress site. You can find this file within the wp-content folder of your WordPress installation.
The file lists all the errors in your WordPress site, as well as the time that each of them occurred. In addition, each error has detailed information about the responsible source file and even the line of code you’ll need to fix.
3. Return to a Default Theme
Themes are responsible for the look and feel of WordPress websites. Because they form the foundation of your site, you’re very likely to get a critical error if there are conflicts in the PHP code powering your site’s theme.
To check if a theme is responsible for your WordPress error, switch the current theme to a default one such as Twenty Twenty. If you can access the admin panel, go to Appearance > Themes and search for a default theme to use.


If you don’t have access to the admin panel, you’ll need to manually delete the theme folder in wp-content > themes. But before you do that, make sure that your site is backed up so you don’t end up permanently losing your theme files.
4. Restore Your Website From the Most Recent Backup Copy
The mere possibility of your WordPress site suffering a critical error is a good enough reason for you to regularly back up your site. Restoring a recent backup may be all you need to do to get your website working again in the shortest time possible.
The process of restoring a backup depends on how the backup was made. If you used a backup plugin like UpdraftPlus, navigate to the backup plugin’s panel and find the restore functionality. The interface will differ depending on the plugin you’re using, but generally, you’re just required to select a backup file to restore the site.
If you’re using a hosting platform which provides regular backups, you should be able to restore your website from the hosting dashboard or admin panel.
5. Enable Debug Mode for WordPress
In debug mode, WordPress is able to automatically detect PHP errors in either the main software or in the themes and plugins used on the site.
To enable debug mode in your WordPress site, open the wp-config.php file with a text editor or IDE and include the following code at the bottom of the file:
define( 'WP_DEBUG', true );

define( 'WP_DEBUG_DISPLAY', false );

define( 'WP_DEBUG_LOG', true );
The first setting above is what actually turns on debug mode on your site. The rest just defines how the logs will be shown.
Save the file and restart your website. Errors will be added to the log in a file called debug.log, which you can find in the wp-content folder. Inspect the logs and try to figure out the theme or plugin responsible for the error.
Make sure to remove these lines of code when you’re done with debugging.
6. Raise the Upper Limit for Upload File Size
If you get the critical error message when attempting to upload a file to WordPress, it’s probably because the maximum upload file size is too small. In that case, you can fix the issue by increasing the limit.
You should always first compare the current maximum upload size to the size of the file you want to upload. The maximum size is shown on the Media > Add page, just beneath the file upload section.


To increase the limit, open the wp-config.php file with a text editor and set the new maximum upload size in ini_set() as shown below:
ini_set('upload_max_size' , '256M' );
ini_set('post_max_size','256M');
On the line above, we also increase the maximum size for text processing.
7. Clear Your Site Cache
Caching helps your website to load faster by temporarily storing important and frequently used data. However, as data accumulates, it’s possible for the cache to get corrupted. When this happens, you’ll get a critical error on your site.
This problem can be resolved by clearing the cache. All the stale data will be deleted, and your site should start working again.
If you’re using a plugin like W3 Total Cache, go to the plugin’s panel in your WordPress dashboard and look for the functionality for clearing the cache. You may need to log in using the link in WordPress’s email in order to access your site’s admin panel.
8. Upgrade Your PHP Version
Using an old version of PHP is a common cause of critical errors in a WordPress site. For this reason, you should always use the latest stable version of PHP for your WordPress site. Currently, that’s between PHP 7.4 and 8.0.
Stable versions are not prone to errors like the older versions (PHP 5.x). You also don’t have to worry much about plugin and theme compatibilities. If you’re on an old PHP version, upgrade it to PHP 7.4 or higher. But before you do that, make sure you have backed up your website.
In most hosts, you can upgrade PHP from the hosting dashboard.
Summary
The WordPress critical error is one of the most common errors in WordPress, and fortunately, it’s very easy to resolve. In this article, we looked at several ways to troubleshoot this error and bring your website back to life.
To briefly recap, they are as follows:
- Deactivate your site plugins
- Check the error logs
- Return to a default theme
- Restore your website from the most recent backup copy
- Enable debug mode for WordPress
- Raise the upper limit for upload file size
- Clear your site cache
- Upgrade your PHP version
For WordPress site owners, the notice «there has been a critical error on this website» is unsettling. It prevents users from accessing the website, and in some situations, it prevents access to the admin panel altogether.
Fortunately, it is feasible to resolve this problem quickly. This article will explain what the notice «There has been a critical problem on your website» means and how to fix it.
What is «there has been a critical error on your website» error?
Some WordPress issues will prevent you from accessing the dashboard, displaying the notice “There has been a critical error on this website. Please check your site admin email inbox for instructions.”
This notification indicates that the site has a fatal PHP error. When a PHP script stops running and is therefore unable to fulfill its task, this error occurs.
WordPress includes a feature that recognizes when a plugin or theme creates a fatal error and notifies the admin email address in order to assist its users. Users will learn more about what is causing issues in the email.
A URL to view the site in recovery mode is also included in the email. To safely log into the WordPress dashboard and resolve the problem, follow the link.
Check your spam folder if you get this WordPress error but don’t receive an email message. However, it is possible that site owners will not receive the email and would be forced to investigate the problem on their own.
What causes this critical error?
If you’ve been using WordPress for a while, you’ve probably heard about, and possibly even experienced, the White Screen of Death. Your entire website, and occasionally even your backend, would load as a blank white page as a result of this surprising bug.
This blank screen has been changed with a critical error and the words «There has been a critical error on your website.» in newer versions of WordPress. Please look for instructions in your site administrator’s email inbox.»
Similar to the White Screen of Death, the problem is usually caused by a PHP problem: either your memory limit has been exceeded, or a mistake in your code, plugins, or theme. It could potentially be a problem with database corruption.
Whilst error wording may not be very useful in and of itself, knowing this makes debugging much easier.
You should also investigate the following additional WordPress problems, as you may be having numerous of them:
- HTTP 503 Service Unavailable — The server is down.
- HTTP 502 Bad Gateway — Anytime too many visitors overload the server, this error is caused.
- ERR_CONNECTION_TIMED_OUT — An overloaded or slow server may be responsible.
- ERR_CACHE_MISS — If this error occurs, it is likely to be caused by your website’s cache or by PHP tools like plugins.
- 500 Internal Server Error — This error usually results from file corruption on the server.
- Error Establishing a Database Connection — This issue may be caused by a corrupt database or a database server issue.
How to fix this critical error?
We will discuss 9 ways to resolve «there has been a critical error on this website»
Enable debugging in WordPress
Among the first actions you should do if you’re having problems with WordPress is activate debugging. With debug mode enabled, you’ll be able to see all of the PHP errors that are happening on your site, which you may use to track down the source of the problem.
Allowing debugging with CyberPanel is fairly simple if you’re hosting with CyberPanel.
- Login to CyberPanel dashboard
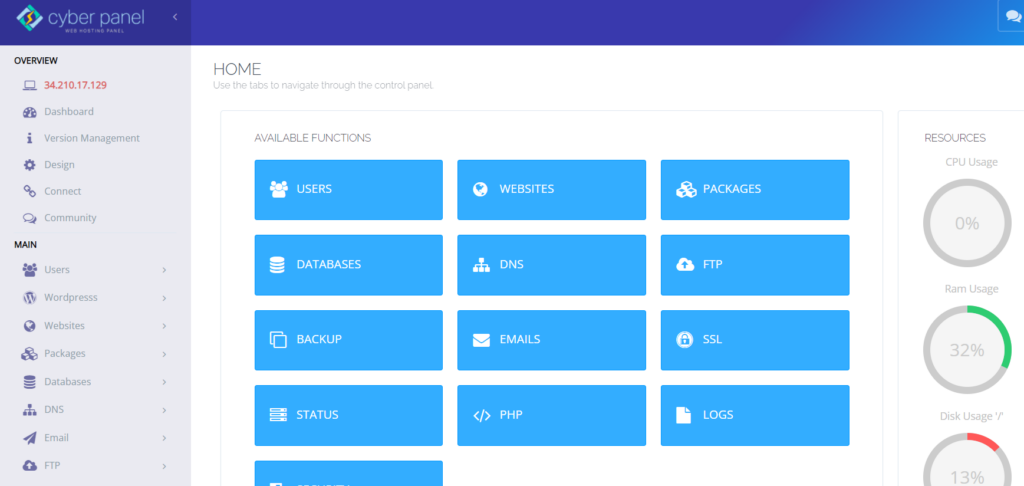
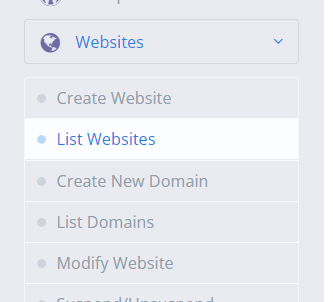
- Enter websites -> list website from the left hand side menu
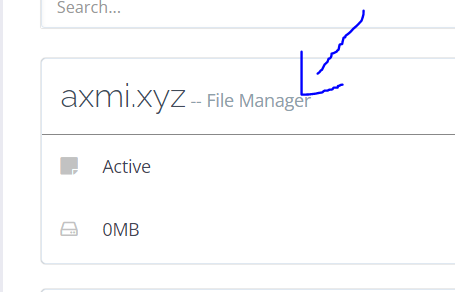
- Enter File Manager
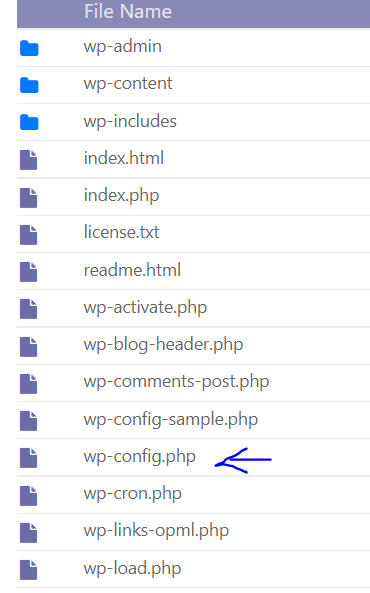
- Open wp-config.php in public_html folder
- Enter the following code at the end of the file.
define( 'WP_DEBUG', true );

define( 'WP_DEBUG_DISPLAY', false );

define( 'WP_DEBUG_LOG', true );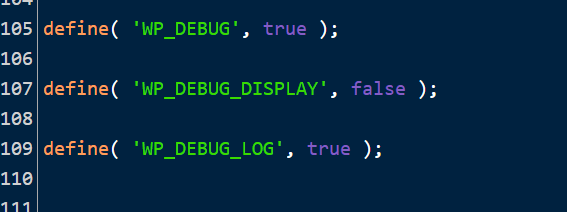
Your site’s debugging is now enabled, and failures will be recorded in the log. The debug log, named debug.log, can be found in the wp-content folder.
Look for names in your theme or plugins that indicate they are the source of the problem or links to a specific file. Even if you’re not sure what to do about this info, save it somewhere safe since it may come in handy if you need to seek help.
Remember to remove these lines of code once you’ve completed debugging.
Rollback your website
When WordPress issues occur, restoring a backup can be simple and quick. While it may not always solve the problem, it’s worth a try. You may also be allowed to redo your efforts if the problem occurs again.
Before restoring your live site, test it on a staging/testing site to make sure it’s working and that you’re not erasing your hard work.
Revert to a default theme
A dispute within your theme can sometimes be dated directly to a critical fault. The best approach to check for this is to delete it and revert to the default theme, which should fix the problem right away.
Make a backup of your site first, as you’ll need a mechanism to recover your theme files if they go missing. You may lose your personalized styling if you simply reinstall the theme.
- Enter your WordPress dashboard
- Click on Appearance -> Themes from the left hand side menu.
- Activate a default theme like Twenty Twenty-One.
Disable all plugins
A plugin is frequently to fault when you’re experiencing a critical problem. Finding the plugin that’s causing the problem can be difficult if your site has many or even hundreds of plugins.
But there’s a quick approach to figure out which plugin is causing the issue: turn them all off and see whether that solves the problem. If it does, turn them on one at a time until your site stops working. And there you have it: the perpetrator!
- Enter your WordPress dashboard

- Click on Plugins -> Add new from the left hand side menu
- To choose all of them, check the checkbox at the top of the list. Then go to Bulk Actions -> Deactivate, and that’s just to resolve any problems and get your site back up and running.
Raise the PHP memory limit.
Even when a plugin or theme is to blame for your website’s failure, the PHP memory limit is frequently to blame.
Because your web server only has so much RAM (memory), WordPress places a strict limit as to how much memory a given PHP script can use. If you go above this limit, you’ll get a white screen of death or a catastrophic error.
Although you don’t want to set the RAM limit too high and enable misconfigured scripts to bog down your site, the default setting is likely too low. Increasing your PHP limit just a little bit could solve your faulty website right away.
- You can raise the limit by entering the file manager of your site using the CyberPanel dashboard

- Enter the public_html -> wp-config.php

- Enter the following code right before the final line and save the code
define( 'WP_MEMORY_LIMIT', '128M' );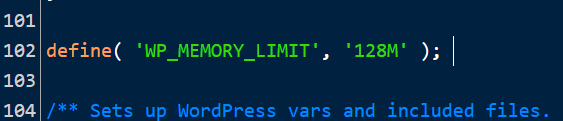
You can also raise the PHP memory limit using CyberPanel Dashboard
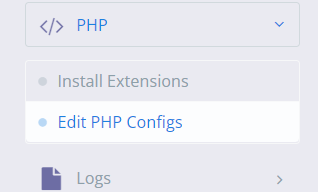
- Enter the CyberPanel dashboard

- Click on PHP -> Edit PHP config from the left hand side menu

- Select the PHP version

- Reset the memory limit

Raise the max upload file and text processing functions
A little adjustment to a few PHP functions could be able to cure the critical issue if you’re only seeing it in particular instances and not on every page.
When you upload large files and get an error message, it’s probably because the maximum upload file size is too little, however increasing the recursion and backtrack limitations can fix certain large sites breaking.
- You can raise the limit by entering the file manager of your site using the CyberPanel dashboard

- Enter the public_html -> wp-config.php

- Enter the following code
ini_set('upload_max_size' , '256M' );
ini_set('post_max_size','256M');
Fix the breaking of large pages on your site, add this code:
ini_set('pcre.recursion_limit',20000000);

ini_set('pcre.backtrack_limit',10000000);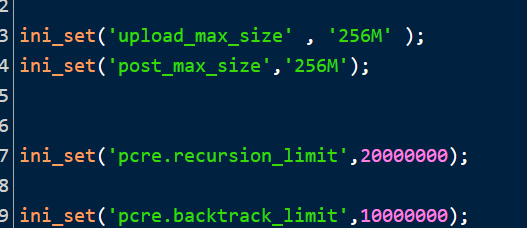
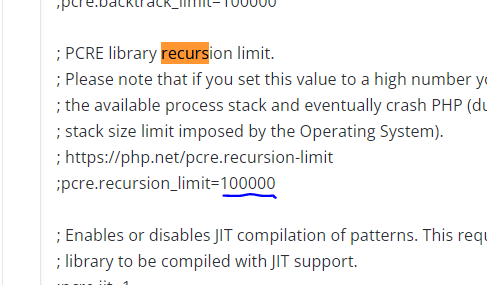
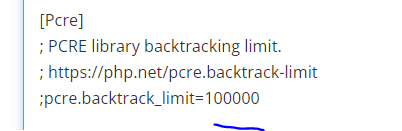
You can also achieve this directly from the CyberPanel dashboard
- Enter the CyberPanel dashboard

- Click on PHP -> Edit PHP config from the left hand side menu
- Select the PHP version

- Change the max upload file size and post max size
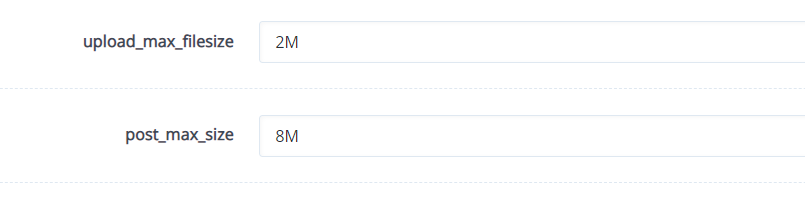
- Click on the Advanced option and find the recursion limit and backtrack limit and edit it.
Clear your site’s cache
Caching is a fantastic technique to accelerate your website, and it’s almost always a good thing. However, the cache can get corrupted, resulting in issues on your site.
When this happens, clearing the cache is a simple remedy that ought to be all you need to solve the problem and get your site back up and running.
With CyberPanel you get LiteSpeed Cache. and clearing that cache is super easy
- Enter the WordPress dashboard

- Click on LiteSpeed cache -> Toolbox from the left hand side menu
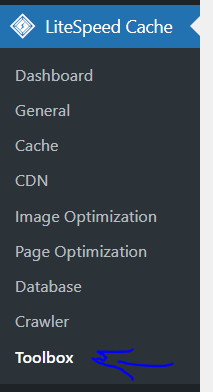
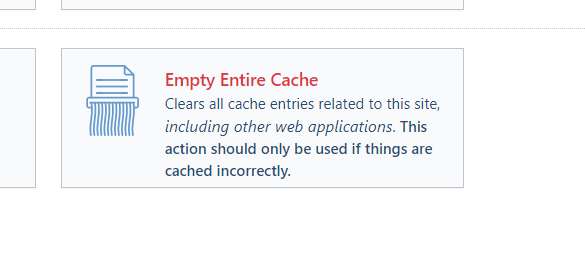
- Click on Empty Entire cache
Upgrade your PHP version
Your site may break due to outdated PHP, and additional issues are almost certain to arise. You should generally run your site on the most recent version of PHP that WordPress supports, which is presently PHP 7.3 through 8.0.
Several WordPress users prefer to stick on PHP 7.4 because of theme and plugin stability concerns. Normally, this isn’t a problem.
Before you attempt a PHP upgrade, ensure sure you have a backup prepared.
- Enter your CyberPanel Dashboard

- Click on Websites -> List website from the left hand side menu

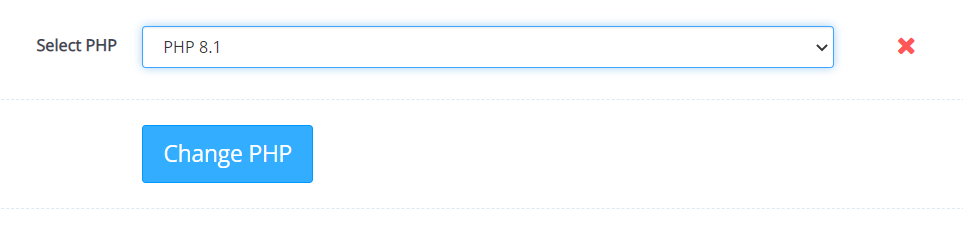
- Click manage for your site -> Configuration -> Change PHP


Check for Malware
Malware can sometimes generate a serious error, especially if you’re seeing weird PHP scripts that can’t be linked to your plugins or theme. It’s difficult to remove malware when you’re locked off of your website and can’t even perform a scan.
It’s difficult to distinguish between legal files and those added by malware, and deleting arbitrary core files isn’t going to help. Malware can also alter PHP files, hiding dangerous scripts that aren’t visible unless you’re a developer.
Check out our article on how to remove WordPress malware.
If you feel malware is to blame, you should seek assistance from your web host. Customer service at CyberPanel is excellent.
Conclusion
If you receive the warning «There has been a critical error on your website,» don’t panic.
Simply look for a message from WordPress in your inbox to identify the problem and promptly resolve it.
Even if you don’t get the email, there really are five options for resolving the issue:
- Look through the site’s error logs.
- Use the debug mode in WordPress.
- Identify and resolve any possible theme or plugin issues.
- Use backup files to restore the site.
- Upgrade the PHP version on the site.
Several reasons cause WordPress critical errors, but PHP is the most common cause. Either the PHP memory limit is reached, or plugins or themes are not functioning properly.
Rolling back your website is the easiest way to fix the problem if you have a backup, but you can also increase the PHP memory limit or find and uninstall a problematic plugin as an alternative.
When you need help with WordPress, a hosting service such as CyberPanel can provide assistance. If you aren’t sure how to proceed, consult the experts.
“There Has Been a Critical Error on Your Website” Error
Table of Contents [TOC]
- “There Has Been a Critical Error on Your Website” Error
- What does this WordPress critical error mean?
- What Causes “There has been a critical error on your website.” in WordPress?
- How to Debug & Fix Critical Error in WordPress?
- Enable debug mode in WordPress
- Check logs
- Upgrade PHP to 7.4 Or Greater
- Check your PHP version
- Troubleshoot Theme Conflict Issues
- Troubleshoot Plugin Conflict Issues
- Fix faulty custom codes
- Need help from WordPress Expert?
Specifically, the error that you will see on the screen is “There has been a critical error on your website.” The full error is:
“There has been a critical error on your website. Please check your site admin email inbox for instructions. Learn more about debugging in WordPress.”
There are various other versions of this error that comes up depending on what kind of changes you are doing:
- wordpress critical error after php update
- there has been a critical error on this website. wordpress install
- there has been a critical error on this website. wordpress fix
- there has been a critical error on your website. wordpress godaddy
- wordpress critical error can’t login
- wordpress critical error php 8
- wordpress ” there has been a critical error on this website
- wordpress recovery mode
- critical error when activating woocommerce
If you have come this far it is because you were manipulating your WordPress as administrator and suddenly a message has appeared on the screen indicating that the site has technical problems.
Since WordPress version 5, thanks to the debugging mode, a message appears on the screen indicating that the site has technical problems. Here we see how to fix it.
There are a lot of common wordpress errors that you can encounter, like 500 internal server error, 504 Gateway Timeout error, 404 Page Not Found , 405 Method Not Allowed Error , WordPress File And Folder Permissions Error, Error Establishing a Database Connection in WordPress, White Screen of Death (WSOD) Error and many more. We have covered all these in depth.
What does this WordPress critical error mean?
Between WordPress 5.2 and WordPress 5.3, we used to get the error message, “The site is experiencing technical difficulties.” But with the latest release of WordPress 5.4, WordPress developers have changed the message you receive. The developer has replaced the error message with There has been a critical error on your website.
What Causes “There has been a critical error on your website.” in WordPress?
WordPress 5.2 has a built-in feature that detects when a plugin or theme causes a fatal error on your site. it notifies you with this automated email. ”So it is clear that these types of problems generate PHP FATAL errors. FATAL errors occur when PHP stops working and requires you to troubleshoot issues before you can complete the process.
There are quite a few reasons you may experience critical error in WordPress, so try to remember what was your last action was.
- Did you install or delete a plugin?
- Did you activate or deactivate a plugin?
- Did you upload, activate or deactivate a new theme?
- Did you make any changes to your web hosting?
- Did you update anything through FTP?
- Did you update your PHP version?
When we have a website with WordPress and some of the plugins that we have active require the use of a lot of memory, or if the website has many concurrent visits, a high PHP memory consumption can occur. If the memory needs exceed the established limits, the error will occur on the web:
The “There Has Been a Critical Error on Your Website” error appears when there is an issue with your WordPress website and it cannot be fixed.
This error can occur if:
- Your web host has provided an incorrect username and password for your WordPress site.
- The system administrator has deleted the wp-config.php file from your server’s /wp-content/ folder.
- A hacker has hacked into your server, stealing valuable information or disabling important features like comments, pingbacks, RSS feeds or login security.
- Forgotten to update your WordPress installation before moving to a new server or domain name.
There are many other possible causes for the “There Has Been a Critical Error on Your Website” error.
The most common cause is due to a security issue or a virus on your website. Checking for malware can help you find out whether there is an infection on your site. In case a malware is found, we also have a post on how to remove malware from wordpress website here.
Step 1: Access your WordPress site by logging into it and clicking Maintenance > Web Hosting Manager.
Step 2: Run your website through a malware scanner. Scan your website using WP HACKED HELP Free WordPress malware scanner online. We have also listed many other WordPress security scanners here.
Step 3: Follow the instructions displayed in the pop-up window to check for malware on your site.
Step 4: If there are any viruses found, remove them immediately using an antivirus software application.
With a FATAL error, your request cannot be completed. Instead of showing broken pages with multiple errors, WordPress now displays a decent post. That’s it.
To debug the actual error that occurs and the reason, it will be necessary to activate the debug mode in WordPress. Next, we explain how to do it.
How to Debug & Fix Critical Error in WordPress?
Enable debug mode in WordPress
Check logs
Login to your site using FTP and check the error logs. If that doesn’t help, try enabling debug mode.
There are several options to activate debug mode in WordPress. One of the fastest and most efficient is to modify the wp-config.php file that will be at the root of our website. We will edit it and add the following lines (at the end, for example):
To do this login to your site using FTP and open the wp-config.php file from WordPress root folder in a text editor. Find the following lines.
PHP
define('WP_DEBUG', true);

define( 'WP_DEBUG_LOG', true );

define( 'WP_DEBUG_DISPLAY', false );

@ini_set( 'display_errors', 0 );

define('WP_DEBUG', true);

define( 'WP_DEBUG_LOG', true );

define( 'WP_DEBUG_DISPLAY', false );

@ini_set( 'display_errors', 0 );
define( 'WP_DEBUG', false );
define( 'WP_DEBUG_DISPLAY', false );
define( 'SCRIPT_DEBUG', false );
define( 'WP_DEBUG_LOG', false );
Change the false values to true and save. Now when you refresh your site, you may see other errors that may give you a better understanding of where the error is coming from. You can also check the debug logs via FTP. Make sure to turn these back to false once you’re done.
The file may already contain some of these lines, if so we will check that it is the same and we will leave one of them. We will save the changes in the wp-config.php file and, from now on, WordPress will write any warning, notice or error that occurs on our website in the file:
/www/wp-content/debug.log
With the previous lines we tell WordPress to save the possible errors that may occur in the debug.log file and NOT to show them on the screen.
This is highly recommended so as not to display sensitive information to the user who navigates to our website. Obviously, if we are developing the web and it has not yet been published, we can change the lines:
PHP
define( 'WP_DEBUG_DISPLAY', false );

@ini_set( 'display_errors', 0 );

1

2

define( 'WP_DEBUG_DISPLAY', false );

@ini_set( 'display_errors', 0 );
For:
PHP
define( 'WP_DEBUG_DISPLAY', true );

@ini_set( 'display_errors', 1 );

1

2

define( 'WP_DEBUG_DISPLAY', true );

@ini_set( 'display_errors', 1 );
This way it would show the errors on screen as well.
Consult the log file and analyze possible errors in WordPress
Once we have activated the debug mode, we can download or read the file directly:
/www/wp-content/debug.log
Which will have content similar to the following:
Depending on the log level, it will show us the Warnings, the Notices or the errors or all of them. In our case, it will show us all the log levels. We will mainly focus on the lines that start with “PHP Fatal error” or “Error”. And above all the “PHP Fatal error”, which are those that can cause the web to not be shown to the user.
There are other levels of error, but these are the most important. Now let’s learn how to solve it by upgrading your version of PHP.
Upgrade PHP to 7.4 Or Greater
WordPress is built with PHP and your hosting company sets its version.
Before you start updating your version of PHP, we strongly recommend that you make a backup of your site and the database. In case something goes wrong, you can restore your site from the backup.
Just like updating your WordPress plugins and theme, it’s also important to update your WordPress PHP to the latest version. There are mainly two reasons why you need to update your version of PHP:
Your WordPress site will be faster: The new version of PHP (currently 7.4) is more efficient. You can increase the performance of your site up to 3 or 4 times faster.
Your site will be more secure: WordPress is the most popular CMS and built with PHP. Hence, it becomes easy for hackers to hack a wordpress site. By updating your PHP, you will have the latest security features, which are missing from the previous version of PHP. Therefore, it is very important to update your PHP to the latest version.
Check your PHP version
To check your current PHP version you can create a new file let’s say serverinfo.php. Now edit this file and add the following code in the file. After that run file it will give you all information about the system your server is running.
Troubleshoot Theme Conflict Issues
To do this, simply activate a default theme, such as Twenty Twenty or greater.
Unfortunately, because your site displays an error, you will have to troubleshoot issues with your host’s file manager (like cPanel file manager) or use FTP or sFTP (it’s like the secure version of FTP).
It is important to note that by changing the theme, you will not lose the settings of the chosen theme.
To do this, rename your active theme folder by adding DISABLE or DISABLED at the end of the folder name. For example, if you are using Twenty Nineteen and the folder is “twentynineteen “, you would call it “twentynineteenDISABLE” or “twentynineteenOLD”. Come back to the top of your site and refresh.
The goal is to see if the error goes away. In case it doesn’t, it’s anything but a topic. Try to rename the organizer to their unique name when you have completed your survey.
Troubleshoot Plugin Conflict Issues
If that’s not the theme, it could be a problem with the plugin. In some ways, the troubleshooting is similar. However, it is much easier to rename the plug-in folder to “pluginsOFF”. Visit the site and log in. This will close all plugins. Note that this will not remove the original settings for these plugins, as they will be there when you re-enable them later.
Once the plug-ins are disabled, go back and rename the folder to “plug-in”. Go to your WordPress admin area and re-enable each one, one by one, until you see the screen saying “There has been a critical error on your website”.
When you’ve discovered the problem, you probably need to restore the object or module that caused it. You can do this in several ways.
Download the original plugin files directly from the WordPress plugin directory and replace the plugin via File manager by your host (or cPanel) or via FTP or sFTP.
Use the WP Rollback plugin to restore the plugin to the previous version.
If you are using WP Rollback, there are several versions to choose from. It will tell you which version you have. Below you can follow the images to get a feel for how to use WP Rollback.
If you are using WP Rollback, there are several versions to choose from. It will tell you which version you have. Below you can follow the images to get a feel for how to use WP Rollback.
Choose the plug-in to restore. Click on “Rollback” if it is available in the plugins listed in your WordPress administrator.
Fix faulty custom codes
If none of the above worked, we will assume that neither the plugins nor the themes are the culprits, and the next thing to do would be to check if any of your custom codes have any incompatibility with the current version of WordPress, theme, plugins or PHP.
To fix this, simply delete the custom codes from the theme’s functions.php file or where you add them and check if there are no more critical WordPress errors.
If the critical errors are fixed then you already know that the culprit is…
- Your custom code.
- …Or the version of PHP, due to compatibility problems between the two.
Seeing a critical WordPress bug may seem worrisome, but at least now it alerts you, and even offers you a link to learn how to debug WordPress errors like syntax error.
In addition, your WordPress site will send you an email with instructions, and sometimes it will even activate the WordPress recovery mode.
If you don’t receive the email from WP, you can look at the server logs and get the entry related to this issue?
It can also help you find the solution. You can access the error log via FTP or cPanel by going to the root directory of the WordPress installation.
You can also talk to your hosting provider to find out the location where the error logs are kept as different for each host.
Need help from WordPress Expert?
No technical knowledge? We can fix There has been a critical error on your website for you? Contact Us right now and get your wordpress issues fixed instantly.
This post was last modified on July 29, 2022