Sustainable Built Environment & Sustainable Manufacturing
Bruce Tai, … Albert Shih, in Encyclopedia of Sustainable Technologies, 2017
Thermal Management
MQL does not provide significant cooling, so it does not thermally stabilize the machining system as in flood cooling where the coolant circulates and cools the machine as well as the part being machined. Significant dimensional variations can occur due to the thermal expansion effect of machine, cutting tool, and workpiece itself. A thermal management strategy, therefore, is often needed in MQL machining, especially for aluminum applications.
Machine thermal errors can be minimized by two approaches: warm-up cycles and probing-based compensation. In the warm-up cycle approach, cold machines (either before or between operations) execute a short, noncutting program to cycle the axes and spindle and raise the machine temperature to a steady state before machining. This method is simple, practical, and generally robust. The probing-based approach is performed periodically and more frequently in the first few hours of operation. This approach measures the distance between spindle nose and features on the fixture and sets the offset parameters to compensate for the variations. Although this is a more precise correction of dimensional errors, it requires time in-cycle and may also increase machine downtime due to probing errors (Stephenson and Agapiou, 2016).
Part errors can be minimized by cooling between operations to ensure that the part temperature has dropped to a prescribed level. Part thermal errors can also be compensated by tool path; however, it usually requires predictive algorithm for the part and high-precision machines. Chip ejection is another major factor in part thermal distortion since chips contain a large amount of heat. Machine tool and fixtures are often designed to discourage chip accumulation. Using high air pressure improves chip evacuation and increases cooling, but also increases energy consumption and maintenance requirements.
Read full chapter
URL:
https://www.sciencedirect.com/science/article/pii/B9780124095489102131
Nanomorphic electronics
Victor V. Zhirnov, Ralph K. CavinIII, in Microsystems for Bioelectronics, 2011
Limits on barrier height
The minimum energy to effect a binary transition is determined by the energy barrier. The work required to suppress the barrier is equal to or larger than Eb. Thus, the minimum energy for a controlled binary transition is given by the minimum barrier height of a binary switch. The minimum barrier height can be found from the distinguishability condition, which requires that the probability of errors Πerr<0.5, in which case the switch is being operated at the threshold of distinguishability. First, consider the case when only ‘classic’ (i.e. thermal) errors can occur. In this case, according to (3.4), repeated here for convenience:
(3.17)Πerr=ΠC=exp(−EbkBT)
These classic transitions represent the thermal (Nyquist-Johnson) noise. Solving (3.17) for Πerr = 0.5, obtain the Boltzmann’s limit for the minimum barrier height, EbB as
(3.18)EbB=kBTln2≈0.7kBT
Equation (3.18) corresponds to the minimum barrier height, the point at which distinguishability of states is completely lost due to thermal over-barrier transitions. In deriving (3.18), tunneling was ignored, i.e. the barrier width is assumed to be very large, a >> aH.
Next, we consider the case where only quantum (i.e. tunneling) errors can occur. In this case, according to (3.14a):
(3.19)Πerr=ΠQ∼exp(−22mℏ⋅a⋅Eb)
Solving (3.19) for Πerr = 0.5, obtain the Heisenberg’s limit for the minimum barrier height, EbH as
(3.20)EbH=ℏ28ma2(ln2)2
Equation (3.20) corresponds to a narrow barrier, a ~ aH, the point at which distinguishability of states is lost due to tunneling transitions. In deriving (3.20), over-barrier thermal transitions were ignored, i.e. the temperature was assumed close to absolute zero, T→0.
Read full chapter
URL:
https://www.sciencedirect.com/science/article/pii/B9781437778403100034
Fundamental limits for logic and memory
Victor V. Zhirnov, Ralph K. CavinIII, in Microsystems for Bioelectronics (Second Edition), 2015
A Limits on Barrier Height
The minimum energy to effect a binary transition is determined by the energy barrier. The work required to suppress the barrier is equal or larger than Eb. Thus, the minimum energy for a controlled binary transition is given by the minimum barrier height of a binary switch. The minimum barrier height can be found from the distinguishability condition, which requires that the probability of errors Πerr < 0.5, in which case the switch is being operated at the threshold of distinguishability. First, consider the case when only classic (i.e., thermal) errors can occur with a probability Πerr given by (4.4). These classic transitions represent the thermal (Nyquist-Johnson) noise. Solving (4.4) for Πerr = 0.5, obtain the Boltzmann’s limit for the minimum barrier height, EbB as
(4.8)EbB=kBTln2≈0.7kBT.
Eq. (4.8) corresponds to the minimum barrier height, the point at which distinguishability of states is completely lost because of thermal over-barrier transitions. In deriving (4.8), tunneling was ignored, that is, the barrier width is assumed to be very large, a >> aH in (4.5).
Next, we consider the case where only quantum (i.e., tunneling) errors can occur. Again, solving (4.6) for Πerr = 0.5, obtain the Heisenberg’s limit for the minimum barrier height, EbH, as
(4.9)EbH=ℏ28ma2(ln2)2.
Eq. (4.9) corresponds to a narrow barrier, a ∼ aH, the point at which distinguishability of states is lost due to tunneling transitions. In deriving (4.9), over-barrier thermal transitions were ignored, that is, the temperature was assumed close to absolute zero, T→0.
Read full chapter
URL:
https://www.sciencedirect.com/science/article/pii/B9780323313025000041
Handling for Micro-manufacturing
Antonio J. Sánchez, in Micromanufacturing Engineering and Technology (Second Edition), 2015
Vision sensors
Vision systems are often used for the recognition and positioning processes to locate the individual micro-components. The camera resolution must be compatible with the size of the manipulated objects. Optical microscopes and scanning electron microscopes are therefore used. Applications in confined spaces require compact camera systems such as fiberscopes or micro-cameras.
In a meso-domain, visually servoing has been shown to effectively compensate for uncertainty in the calibration of camera lens systems, manipulators, and workspaces. However, manufacturing engineers usually prefer strongly calibrated parts-handling systems due to cost and reliability issues. In micro-domains, precise calibration is highly dependent on precisely modeled kinematics, which is subject to thermal growth errors. Two common techniques for compensating thermal errors include the use of expensive cooling systems, or waiting several hours for the thermal equilibrium of the device to stabilize. These types of factors greatly affect the cost and reliability of handling systems, therefore real-time visual feedback can be used effectively and economically in a micro-domain. However, there are problems with visual control or image processing in controlling these systems. Some of the main problems are low processing speeds, high costs, programing difficulties, and being error prone due to glare, reflection, and other unwanted contaminants. Moreover, the manipulation tools may obstruct the view. Additionally, it is important to emphasize the problems in setting up image-processing equipment and the long downtimes that are involved if an error occurs. Even processes that may seem straightforward such as focusing and aligning the camera properly become complicated and extremely difficult to carry out at these micro-scales.
In micro-handling, structural vibrations due to link flexibility must be controlled at the submicron level. Control of machine vibration becomes very important as designers attempt to advance the state-of-the-art with faster and lighter machines. Many researchers have examined different controller configurations in order to control machines without exciting resonances. Even with a sophisticated controller it is difficult to rapidly move flexible machines without deflections and vibrations. A more achievable goal is to eliminate residual vibration once the machine has achieved a desired set point. Input shaping is a command-generation technique that reduces residual vibration when a machine is moved from one set point to another. Input shaping works like a notch filter that is designed to eliminate decaying sinusoidal responses.
Read full chapter
URL:
https://www.sciencedirect.com/science/article/pii/B978032331149600027X
Perspectives on additive manufacturing in Industry 4.0
N. Balashanmugam, in Additive Manufacturing, 2021
7.20 Quality, qualification, and certification of additive manufacturing products with Industry 4.0
The challenge AM technology faces is the qualification and certification of AM products for it use. AM researchers are drawing the many techniques, which are available in different fields for ensuring the quality of the product.
In powder-bed laser fusion process, focusing of the laser spot to its focal length has been an issue. AM machines use F-theta lenses for scanning the laser on metal powder. But it has problems like oscillation, nonuniform speed, nonuniform intensity, and positioning error. AM machine manufacturer Renishaw addresses it by dynamically moving by an objective lens. Parts of laser scanners get heated and cause thermal drift, resulting in change of focal length. This can be corrected by using thermal error compensation techniques adopted in CNC machine tools. In machine tools, temperature data is collected from sensors mounted at heat producing zones. The temperature data is processed with respect to the corresponding positioning error caused by various elements. Using AI tools like neural networks, the data is analyzed, the error is computed, and the compensation is given for the final tool position [51].
Like in traditional manufacturing, postinspection techniques can be applied to check the quality of the AM built parts. However, AM provides an opportunity to inspect one layer at a time as primarily a layer-by-layer build process. It is of no use continuing the build process if there are defects in the layer. While building the layer, if the quality is monitored and corrections are made in real time, the quality gets assured. This method of ensuring the quality of the part while it is being built is emerging in AM. The Smart Optical Monitoring System (SOMS) developed by Mazumdhar monitors the layers in situ. SOMS uses optical sensors and optical emission spectroscopy to study the plasma created by the melt pool. Information gathered by sensors is to detect pin holes and tine crack within milliseconds [34]. It is also used to find out phases, and it is also proved that material composition is possible. This concept is termed “Certify as you Build” [34]. On connecting to IIoT, the system enables remote monitoring of the process. It is claimed that the information is received within seconds rather than hours in traditional manufacturing.
The team from the additive research lab of GE uses high-resolution cameras to film the printing process. The camera records streaks, pits, divots, and other patterns in the printing powder, which are invisible to the naked eye. GE claims that a proprietary machine-learning platform then matches recorded powder patterns to defects revealed by CT scanners. In essence, the ML platform is trained through the use of high-resolution camera footage and CT scan data and can eventually “learn” to predict problems and detect defects in the printing process [52].
Read full chapter
URL:
https://www.sciencedirect.com/science/article/pii/B9780128220566000011
Temperature Measurement
C. Hagart-Alexander, in Instrumentation Reference Book (Fourth Edition), 2010
21.5.3 Thermocouple Construction
Thermocouples, like resistance thermometers and other temperature sensors, are available in a wide range of mechanical constructions.
21.5.3.1 Plain-Wire Thermocouples
For use in protected environments such as laboratories or inside otherwise enclosed equipment, plain-wire thermocouples can be used. They are also used in plants where the fastest possible response is required. However, they suffer from the obvious disadvantage that they are both fragile and liable to chemical attack. The wires are available insulated with PVC or glass fiber sleeving, or for use with higher temperatures, the wires can be insulated with refractory ceramic beads or sleeves.
21.5.3.2 Sheathed Thermocouples
Thermocouples for use in plant situations, where robust construction is required or where they need to be interchangeable with other types of temperature measurement equipment, are available sheathed in steel or stainless steel designed for direct insertion into process vessels or for use in a thermometer pocket. Figures 21.36(a) and (b) show typical insertion probes. Where thermocouples are to be immersed in very corrosive process fluids or into very high-temperature locations, they are available constructed in ceramic sheaths, as in Figure 21.36(c). Sheathed thermocouples, especially the ceramic ones, suffer from a slow response time, typically a minute or more. However, the locations where they are essential for their mechanical properties are usually in heavy plants where temperatures do not normally move fast in any case.

FIGURE 21.36. Examples of industrial thermocouple probes. Courtesy of ABB.
21.5.3.3 Mineral-Insulated Thermocouples
Probably the most versatile format for thermocouples is the mineral-insulated (MI) construction. In this form the thermocouples are made from mineral-insulated cable similar in concept to the MI cable used for electrical wiring applications. It differs, however, in that the conductors are of thermocouple wire and the sheath is usually stainless steel. The insulation, however, is similar, being in the form of finely powdered and densely compacted ceramic, usually aluminum oxide or magnesium oxide. Figure 21.36 shows MI thermocouples at (d), (e), and (f).
They are available in diameters from 1 millimeter up to 6 millimeters and can be supplied in any length required. The junction can be either (a) insulated or (b) welded to the tip of the sheath, as shown in Figure 21.37. The latter arrangement has the advantage of very quick response. For some applications the junction being connected to the plant earth via the sheath tip can be unacceptable, so in such cases insulated thermocouples must be used. The principal advantages are their quick response and mechanical flexibility; they can be bent into almost any shape. Care must be taken if reusing MI thermocouples; although they can be straightened or rebent to a new shape, this cannot be done too often. Either the wires break or the insulation gets displaced and the thermocouple becomes short-circuited.

FIGURE 21.37. Mineral insulated thermocouples: (a) insulated junction, (b) junction welded to sheath.
As shown in Figures 21.36 and 21.38, MI thermocouples can be supplied fitted with a variety of terminations. A further useful advantage of MI thermocouples is that the cable can be bought in rolls together with suitable terminations, and the thermocouples can be made up to the required specifications on site. Also, in situations where robust cabling is required, MI thermocouple cable can be used in lieu of compensating cable (see Section 21.5.3.9).

FIGURE 21.38. MI thermocouple terminations. Courtesy of ABB.
21.5.3.4 Surface Contact Thermocouples
Thermocouples for the measurement of the surface temperature of objects such as pipes or other components or plant items are available. On pipes a surface measurement makes a simple but not very accurate noninvasive temperature measurement. For higher temperatures or more rugged applications, thermocouples are available embedded in a metal plate designed to be clamped or welded to the component to be measured. For lower-temperature applications, below about 200°C, or for use in protected environments, self-adhesive surface thermocouples are supplied. In these probes the thermocouple is embedded in a small plastic pad coated on one face with a suitable contact adhesive.
21.5.3.5 Hot-Metal Thermocouples
Where it is necessary to make spot measurements of the temperature of hot metal billets, very simple test prods are available that consist of a two-pronged “fork.” The two prongs are made of the two thermocouple metals with sharpened points. When both prongs are in contact with the hot metal, two junctions are formed, metal A to the billet and the billet to metal B. If the billet is large and enough time is allowed for the tips of the prongs to reach the temperature of the billet, both junctions will be at the same temperature and the error thermal EMFs will cancel. This makes a simple, quick, and very inexpensive way of measuring hot metal temperatures. The points of the prongs are screwed to the main assembly and are expendable. They can be changed as soon as they lose their sharpness or begin to get corroded.
21.5.3.6 Liquid Metal Thermocouples
When measuring the temperature of liquid metals such as steel, it is desirable to use an expendable probe. The cost of a fully protected probe would be very high and the response time slow. A dipstick probe can be used for checking the temperature of liquid steel. The probe itself is robust and constructed with a socket of thermocouple material in the end. A disposable platinum-rhodium/platinum thermocouple itself lasts in the molten metal for a few seconds, long enough to take a temperature measurement. Figure 21.39 shows this arrangement.

FIGURE 21.39. Liquid metal thermocouple.
21.5.3.7 Thermopiles
Where a very small temperature rise is to be measured, many thermocouples may be connected in series. All the hot junctions are on the object of which the temperature is to be measured, and all the cold junctions are kept at a constant and known temperature. Where a quick temperature response is required, these thermocouples can be of very thin wire of about 25 μm diameter. A speed of response on the order of 10 milliseconds can be achieved. Typical applications of thermopiles are to be found in infrared radiation measurement. This subject is dealt with in Section 21.6.
21.5.3.8 Portable Thermocouple Instruments
With the development over the last decade of microelectronic equipment, portable electrical thermometers have become very popular. They are available with either analog or digital readouts. The analog instruments are about the size of an analog multimeter; the digital instruments are about the size of a pocket calculator. Although most of these instruments use type K thermocouples, they are available for use with other thermocouple materials. There are also portable thermometers available that use resistance thermometer or thermistor sensors. However, the thermocouple instruments are on the whole the most popular. The more sophisticated instruments have the option to use more than one type of thermocouple; a switch on the instrument sets it for the type in use. They are also available with a switched option to read out in Celsius or Fahrenheit. A range of handheld probes are supplied for use with these instruments. Figure 21.40 shows some of the options available. The spring-loaded thermocouples are for surface contact measurements; hypodermic probes are supplied for such applications as temperature measurements in food, such as meat, where it could be an advantage to know the internal temperature of the material.

FIGURE 21.40. Handheld thermocouple probes.
21.5.3.9 Thermocouple Compensating Cable
Ideally a thermocouple connects back to the reading instrument with cables made of the same metals as the thermocouple. However, this does have two disadvantages in industrial conditions. First, many thermocouple metals have high electrical resistance. This means that on long runs, which on a big plant could be up to 100 meters or more, heavy-gauge conductors must be used. This is not only expensive, it also makes the cables difficult to handle.
Second, in the case of precious metal thermocouples—types B, R, and S, for instance—the cost would be very high indeed. To overcome these problems, compensating cables are used; see Figure 21.41. These cables are made of base metal and are of lower resistivity than the thermocouple material. The alloys they contain have thermoelectric properties that essentially match the thermocouples themselves over a limited ambient temperature range.

FIGURE 21.41. Thermocouple compensating cable.
Examples of compensating cables are shown in the following table.
| Type | Composition | Thermocouples compensated | Temperature limitations |
|---|---|---|---|
| U | Copper/copper-nickel | R and S | 0–50°C |
| Vx | Copper/Constantan | K | 0–80°C |
Other base metal thermocouples, such as types J and T, comprise relatively inexpensive and low-resistance metals. They are therefore normally installed using cables consisting of the same metals as the thermocouples themselves.
21.5.3.10 Accuracy Consideration
The very extensive use of thermocouples stems from their great versatility combined with their low cost. However, as shown in Table 21.13, thermocouples have a fairly wide permitted tolerance. This is due to the fact that most metals used for thermocouples are alloys, and it is not possible to manufacture alloys to the same reproducibility as pure metals. It must be said that, in general, manufacturers do manufacture their thermocouples to better tolerance than BS 4937 demands. But where the highest accuracy is required, it is essential to calibrate thermocouples on installation and to recalibrate them at regular intervals to monitor any deterioration due to corrosion or diffusion of foreign elements into the hot junction.
Where high accuracy is required, it is necessary to first calibrate the thermocouple readout instrument and then the thermocouple itself in conjunction with the instrument.
The calibration of instruments can be done with a precision millivolt source that injects a signal equivalent to the temperature difference between the ambient or cold junction temperature and a temperature in the region in which the thermocouple is to be used.
To calibrate or check thermocouples, the hot junction must be kept at an accurately known temperature. This can be done by inserting it into a heated isothermal block. An isothermal block is a block of metal that’s large compared with the thermocouple being measured and made of copper or aluminum. The block has provision for heating and in some cases cooling it. It is well insulated from the environment and is provided with suitable holes for inserting various sizes of thermocouple. Where not-so-high precision is required, the thermocouple can be immersed in a heated fluidized sand bath. This consists of an open vessel fitted with a porous bottom (usually made of sintered metal). Heated air is forced up through the bottom. The vessel is filled with carefully graded sand. With the air coming up through it, the sand behaves like a liquid. It takes up the temperature of the air. The sand is a good heat transfer medium. The apparatus makes a most convenient way of calibrating temperature probes. Where maximum accuracy is essential, the thermocouple should be calibrated against one of the IPTS-68 secondary reference points. Table 21.5 shows some of the points.
In carrying out these calibrations, the whole installation needs to be calibrated: thermocouple readout instrument together with compensating cable. In cases where very high accuracy is required, compensating cable should not be used; the conductors should be thermocouple metal for the full length of the installation.
Some very versatile equipment for thermocouple calibration is on the market. Typically, the facilities provided include thermocouple simulation for types E, J, K, R, S, and T; thermocouple output measurement with cold junction compensation; and resistance thermometer simulation. Tests can be static or dynamic using ramp functions.
As with any other type of temperature measurement, the location of the thermocouple junctions is critical. This is just as important for the cold junction as for the hot junction. It must be remembered that there may well be a temperature gradient over quite short distances in an instrument, and unless the cold junction temperature sensor is in close thermal contact with the cold junction itself, a reading error of several degrees Celsius may result. This problem is at its worst with mains electricity-powered measuring instruments, where there is a certain amount of heat liberated by the power unit.
The point to remember is that it is not usually adequate to measure the air temperature in the vicinity of the cold junctions. The sensor should be in good thermal contact with them.
An obvious point, but one which surprisingly often causes trouble, is the mismatch between the thermocouple and the measuring instrument. The obvious mismatch is using the wrong type of thermocouple or compensating cable.
In the case of galvanometric instruments inaccuracies occur if sufficient care has not been taken in the winding of the makeup resistor or if the thermocouple has been changed and the new external circuit resistance not checked. Careless location or makeup of the ballast resistor so that one of the cold junction terminals is too remote from the cold junction compensating element causes variable errors of several degrees as the ambient temperature changes. Where the required ballast resistor is of a low value, 10 ohms or so, the best arrangement may well be to use a coil of compensating cable of the right resistance.
Read full chapter
URL:
https://www.sciencedirect.com/science/article/pii/B9780750683081000218
Displacement Measurement
Richard Leach, in Fundamental Principles of Engineering Nanometrology (Second Edition), 2014
5.10 Calibration of displacement sensors
There are many more forms of displacement sensors other than those described in this chapter (see Refs. [2–4]). Examples include sensors that use the Hall effect, ultrasonics, magnetism and the simple use of a knife edge in a laser beam [96]. Also, some MNT devices, including MEMS and NEMS sensors, use quantum mechanical effects such as tunnelling and quantum interference [97]. It is often claimed that a sensor has a resolution below a nanometre but it is far from trivial to prove such a statement. Accuracies of nanometres are even more difficult to prove and often there are non-linear effects or sensor/target interactions that make the measurement result very difficult to predict or interpret. For these reasons, traceable calibration of displacement sensors is essential, especially in the MNT regime.
5.10.1 Calibration using optical interferometry
In order to characterise the performance of a displacement sensor, a number of interferometers can be used (provided the laser source has been traceably calibrated; see Section 2.9.5). A homodyne or heterodyne set-up (see Sections 5.3.2 and 5.3.3, respectively) can be used by rigidly attaching or kinematically mounting an appropriate reflector so that it moves collinearly with the displacement sensor. One must be careful to minimise the effects of Abbe offset (see Section 3.4) and cosine error (see Section 5.3.8.3) and to reduce any external disturbances. A differential interferometer (see Section 5.3.6) can also be used but over a reduced range.
As displacement sensor characteristics are very sensitive over short distances, the limits and limiting factors of interferometric systems for very small displacement become critical. For the most common interferometers, it is the periodic error within one wavelength that becomes critical. Even with the Heydemann correction (see Section 5.3.8.5) applied, periodic error can be the major error source.
5.10.1.1 Calibration using a Fabry–Pérot interferometer
The Fabry–Pérot interferometer, as described in Section 4.4.4, can be used for an accurate calibration at discrete positions. If one mirror in the cavity is displaced, parallel interference extrema appear in steps of half a wavelength. If the sensor to be calibrated at the same time measures the mirror displacement, a calibration can be carried out.
Such a system is described elsewhere [98], where it was used to calibrate a displacement generator with a capacitive feedback system with 0.2 nm uncertainty. As a capacitive system can be assumed to have a smoothly varying non-linear behaviour, discrete steps can be feasibly used. However, fringe periodic deviations, as they may appear in interferometric systems, cannot be detected. A continuous calibration system is possible if the wavelength can be tuned and accurately measured simultaneously (see Section 2.9.5).
5.10.1.2 Calibration using a measuring laser
The stability of an iodine-stabilised He–Ne laser is considered to be one part in 1011 (see Section 2.9.3). Relating this stability to the typical length of a laser cavity (a Fabry–Pérot cavity) of, say, 15 cm, one could conclude that the cavity length is fixed with an uncertainty of 1.5 pm. Of course, there are many disturbing factors, such as temperature effects in the air, which make such a small uncertainty in a true displacement measurement difficult to achieve. In the set-up described in Ref. [99], the iodine standard is stabilised on its successive iodine peaks, and a sensor can be calibrated at a number of discrete points. Thermal drift effects mainly determine the uncertainty; the frequency stability itself contributes only 1.5 pm to the uncertainty. This is probably one of the most obvious traceable displacement measurements possible, although difficult to realise in practice.
Separate measuring lasers can be used to give a continuous measurement [100,101]. Here the laser frequency can be tuned by displacing one of its mirrors, while the laser frequency is continuously monitored by a beat measurement. Mounting the laser outside the cavity removes the major thermal (error) source, but further complicates the set-up. In Ref. [102], a piezoelectric controller is used to account for a displacement that is applied to a mirror and is measured by both a sensor and a Fabry–Pérot system. The slave laser is stabilised to the Fabry–Pérot cavity, that is its frequency is tuned such that it gives a maximum when transmitted through the cavity. At the same time, the slave laser frequency is calibrated by a beat measurement against the iodine-stabilised laser. Also here, the uncertainties from the frequency measurement are in the picometre range, and still thermal and drift effects dominate [102].
Design considerations are in the cavity length, the tuning range of the slave laser, the demand that the slave laser has a single-mode operation and the range that the frequency counter can measure. Typical values are 100 mm cavity length and 1 GHz for both the tuning range of the slave laser and the detection range of the photodiode and frequency counter. For a larger frequency range, the cavity length can be reduced, but this increases the demands on the ability to measure a larger frequency range. With tuneable diode lasers, the cavity length can be reduced to the millimetre level, but this requires different wavelength measurement methods [98].
5.10.2 Calibration using X-ray interferometry
The fringe spacing for a single-pass two-beam optical interferometer is equal to half the wavelength of the source radiation and this is its basic resolution before fringe subdivision is necessary. The fringe spacing in an X-ray interferometer is independent of the wavelength of the source; it is determined by the spacing of diffraction planes in the crystal from which X-rays are diffracted [103]. Due to its ready availability and purity, silicon is the most common material used for X-ray interferometers. The atomic lattice parameter of silicon can be accurately measured (by diffraction) and is regarded as a traceable standard of length. Therefore, X-ray interferometry allows a traceable measurement of displacement with a basic resolution of approximately 0.2 nm (0.192 nm for the (220) planes in silicon).
Figure 5.19 shows a schema of a monolithically manufactured X-ray interferometer made from a single crystal of silicon. Three, thin, vertical and equally spaced lamella are machined with a flexure stage around the third lamella (A). The flexure stage has a range of a few micrometres and is driven by a PZT. X-rays are incident at the Bragg angle [12] on lamella B, and two diffracted beams are transmitted. Lamella A is analogous to a beam splitter in an optical interferometer. The transmitted beams are incident on lamella M that is analogous to the mirrors in a Michelson interferometer. Two more pairs of diffracted beams are transmitted and one beam from each pair is incident on lamella A, giving rise to a fringe pattern. This fringe pattern is too small to resolve individual fringes, but when lamella A is translated parallel to B and M, a moiré fringe pattern between the coincident beams and lamella A is produced. Consequently, the intensity of the beams transmitted through lamella A varies sinusoidally as lamella A is translated.

Figure 5.19. Schema of an X-ray interferometer.
The displacements measured by an X-ray interferometer are free from the periodic error in an optical interferometer (see Section 5.3.8.4). To calibrate an optical interferometer (and, therefore, measure its periodic error), the X-ray interferometer is used to make a known displacement that is compared against the optical interferometer under calibration. By servo-controlling the PZT, it is possible to hold lamella A in a fixed position or move it in discrete steps equal to one fringe period [104]. Examples of the calibration of a differential plane mirror interferometer and an optical encoder can be found in Refs. [30] and [81], respectively. In both cases, periodic errors with amplitudes of less than 0.1 nm were measured once a Heydemann correction (see Section 5.3.8.5) had been applied. More recently, a comparison of the performance of the next generation of optical interferometers was undertaken using X-ray interferometry [8]. X-ray interferometry can also be used to calibrate the characteristics of translation stages in two orthogonal axes [105] and to measure nanoradian angles [106].
One limitation of X-ray interferometry is its short range. To overcome this limitation, NPL, PTB and Instituto di Metrologia ‘G. Colonetti’ (now known as Instituto Nazionale di Recerca Metrologica – the Italian NMI) collaborated on a project to develop the Combined Optical and X-ray Interferometer [107] as a facility for the calibration of displacement sensors and actuators up to 1 mm. The X-ray interferometer has an optical mirror on the side of its moving mirror that is used in the optical interferometer (Figure 5.20). The optical interferometer is a double-path differential system with one path measuring displacement of the moving mirror on the X-ray interferometer with respect to the two fixed mirrors above the translation stage. The other path measures the displacement of the mirror (M) moved by the translation stage with respect to the two fixed mirrors either side of the moving mirror in the X-ray interferometer. Both the optical and X-ray interferometers are servo controlled. The X-ray interferometer moves in discrete X-ray fringes; the servo system for the optical interferometer registers this displacement and compensates by initiating a movement of the translation stage. The displacement sensor being calibrated is referenced to the translation stage and its measured displacement is compared with the known displacements of the optical and X-ray interferometers.

Figure 5.20. Schema of a combined optical and X-ray interferometer.
Read full chapter
URL:
https://www.sciencedirect.com/science/article/pii/B9781455777532000050
A review on spindle thermal error compensation in machine tools
Yang Li, … Bingheng Lu, in International Journal of Machine Tools and Manufacture, 2015
Abstract
Thermal error caused by the thermal deformation is one of the most significant factors influencing the accuracy of the machine tool. Among all the heat sources which lead to the thermal distortions, the spindle is the main one. This paper presents an overview of the research about the compensation of the spindle thermal error. Thermal error compensation is considered as a more convenient, effective and cost-efficient way to reduce the thermal error compared with other thermal error control and reduction methods. Based on the analytical calculation, numerical analysis and experimental tests of the spindle thermal error, the thermal error models are established and then applied for implementing the thermal error compensation. Different kinds of methods adopted in testing, modeling and compensating are listed and discussed. In addition, because the thermal key points are vital to the temperature testing, thermal error modeling, and even influence the effectiveness of compensation, various approaches of selecting thermal key points are introduced as well. This paper aims to give a basic introduction of the whole process of the spindle thermal error compensation and presents a summary of methods applied on different topics of it.
Read full article
URL:
https://www.sciencedirect.com/science/article/pii/S0890695515300298
The concept and progress of intelligent spindles: A review
Hongrui Cao, … Xuefeng Chen, in International Journal of Machine Tools and Manufacture, 2017
3.4.3 Control
The control primarily refers to thermal error compensation, which is a cost-effective way to improve the accuracy of machine tool spindles.
The thermal error compensation is often realized via re-adjustment of the axes positioning, either by inserting compensation into the feedback loop of a servo feed system or by shifting the reference origins of the control system [219–235]. The capability of dealing with large amounts of data has led to wide implementation of computer-based external compensation operators in error compensation [175]. Fig. 26 shows a flowchart of real-time thermal error compensation, based on external compensators. During the machining process, machine temperatures and spindle speed signals are acquired in real-time and the thermal drift are estimated by the external compensators. Then, compensation signals are sent to the CNC system to adjust the axis position or shift the origin coordinates [226]. From the studies above, it can be found that the most commonly used solutions to compensate for thermal errors in machine tools are based on the utilization of manipulated control to the feed drive system. However, the inherent shortage of these solutions is its inability to compensate for deformations in the degrees of freedom excluded in the drive system (e.g., tilt error of the spindle).

Fig. 26. Real-time thermal error compensation based on an external compensator [226].
Apart from the compensation methods based on feed drive systems, other approaches have been rarely reported. In recent years, Uhlmann et al. [236,237] developed a method to reduce thermally induced angular displacements of spindle housings using carbon fibre reinforced plastic (CRP) structures. They utilized the negative thermal expansion of CRP-structures in an adaptronic system (Fig. 27a), which was a combination of thermal sensors, point sensors, controllers and CRP-actuators. The displacements induced by thermal actuators (Fig. 27b) were employed to counteract undesirable thermal deformations.

Fig. 27. Compensation of thermal deformations using adaptronic CRP-structures: (a) the principle; (b) a thermal actuator [236,237].
Read full article
URL:
https://www.sciencedirect.com/science/article/pii/S0890695516303911
Thermal error analysis and compensation for digital image/volume correlation
PanBing , in Optics and Lasers in Engineering, 2018
3.2.1 Experimental details
To examine the thermal errors in DVC measurements, a cylinder sample (feed material: poly lactic acid) with a size of Φ10 × 20 mm3 and a porosity of 40% was manufactured using a 3D printer based on fusion deposition modeling technique. Four sets of rescan test were performed using a SkyScan 1172 desktop X-ray micro-CT system (air cooled, Bruker Corporation). The rotation steps in the four rescan tests were selected as 0.1°, 0.2°, 0.4°, 0.8°, and the corresponding scan durations are 64 min, 32 min, 16 min and 8 min, respectively. For each test, as displayed in Fig. 12, the interval between two consecutive scans (without switching off the X-ray tube) is less than 30 seconds, and the successive repeated scans lasted nearly 4 h. Finally, all the sets of scanned projection images were processed by NRecon software to reconstruct the volume images (1000 × 1000 × 500 voxels, 256 grayscales).

Fig. 13. Effect of X-ray scanner self-heating effect on DVC measurements: (a) mean values of the artificial displacements and (b) mean values of the artificial strains with respect to the system uptime; (c) measured artificial displacement fields for the last scan in the rescan tests using a rotation step of 0.8°.
To quantify the thermal errors in the rescan tests, an advanced DVC method using 3D IC-GN algorithm and tricubic B-spline interpolation was implemented to measure the internal displacement fields [14]. The volume of interest (VOI) comprising regularly distributed 8379( = 21 × 21 × 19) calculation points with a grid step of 25 voxels, and the subvolume size was set as 51 × 51 × 51 voxels. Subsequently, the obtained displacement fields of all the deformed volume images in each rescan test are globally fitted using trilinear polynomials to extract motion, rotation and strain components.
Read full article
URL:
https://www.sciencedirect.com/science/article/pii/S0143816617306383
The error message ‘Processor thermal trip errors’ occurs after a forced shutdown of a computer when the processor becomes too hot and crosses the safe temperature threshold. There is a dedicated cooling system in every computer which makes sure that the processor is cool at all times. If the processor gets ‘too’ hot, the kernel is forced to shut down the system.
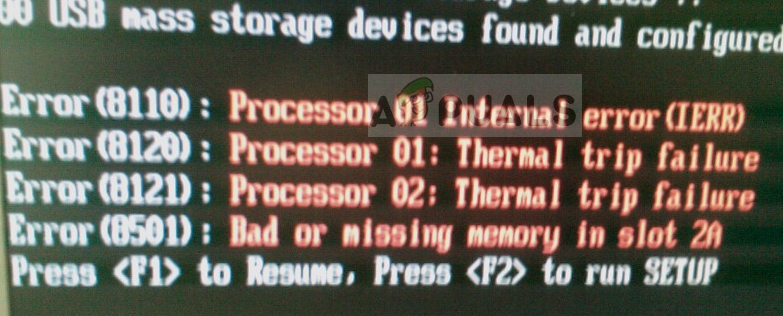
The reasons for this error message are many but all of them converge to a single reason: the cooling system for the processor is not working as expected. The very advancement of computing depends on the cooling of a processor. The constraint which limits the processor’s speed is the temperature itself.
What causes the ‘Processor thermal trip error’?
Like mentioned before, this error message only occurs when the processor is not being cooled enough. Some of the reasons why this may occur are:
- Overclocking increases the clock rate of the processor for short bursts of time but increases the temperature momentarily. If overclocking doesn’t stop at the right time, this error might be induced.
- The cooling system is either not working at all or it is blocked by dust. This is a very common issue when the computer is not cleaned for a while.
- The thermal paste is not applied properly or the CPU is not installed properly in the heat sink. This occurs if the processor is not installed properly.
The solutions to fix this error message mostly relate to physical methods in fixing the cooling system. Unlike other errors, this one is rare and equally critical. Hence if you are unable to access your computer to check the temperature manually, you need to fix the cooling system first. Some of the solutions are listed below.
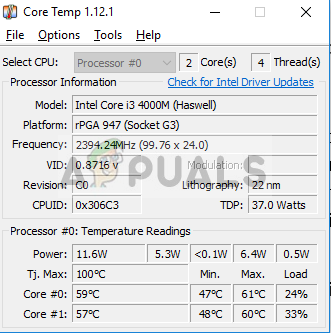
Checking from Core Temp
If this error occurs from time to time instead of being constant, you can install a utility called ‘Core Temp’ and monitor the temperature in real-time to get an idea what’s the temperature of your CPU. If you see the temperature anywhere above 80 degrees, it may confirm our theory that the cooling system is not working correctly and you can proceed with the cleaning techniques listed below.
- Navigate to Core Temp official website and download the software to an accessible location.
- After installing, launch the application. Here all the processors will be listed along with the current temperature in front of each core. You can even choose to pin the temperature to your taskbar to monitor the temperature in real-time while doing your work normally.
If the temperature is above the threshold values, you can move on and follow the fixing techniques below.
Solution 1: Disabling Overclocking
As mentioned above, overclocking is the act of speeding up the clock rate of a processor above its normal running value for short bursts of time for increased processing. A normal 2.5Ghz processor might clock at 3.0Ghz for a few seconds until the threshold temperature is reached where it reverts back to 2.5Ghz.
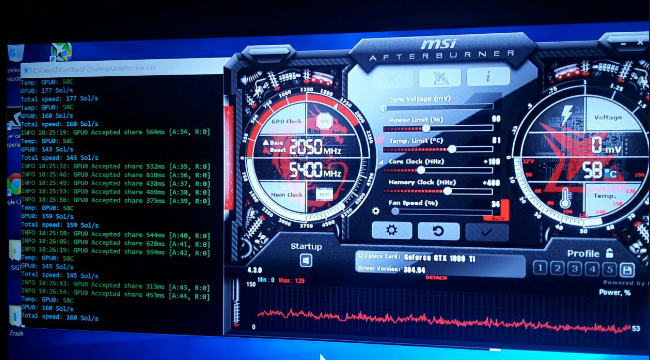
If you are overclocking your PC, it is wise that you disable it completely. To stop the overclocking, the overclocking software should act responsibly. If it isn’t doing this, the CPU might exceed the threshold temperature and shut itself down, denying you access to the PC. Disable overclocking and try using your computer again.
Solution 2: Checking ventilating fans
The first step in fixing the cooling system is making sure that your computer is getting the correct amount of fresh air for ventilation. If the fans are blocked by dust or the computer setup is placed in such a way that doesn’t allow the air to pass, your computer will be forced shutdown and will be prompted with the error ‘Processor thermal trip error’.
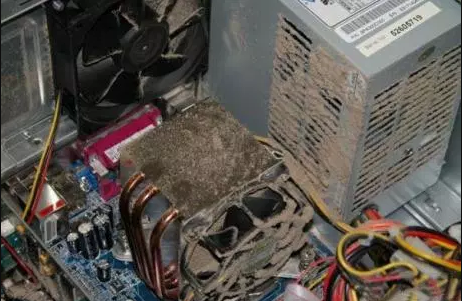
Clean all the dust from your computer’s fans and make sure that the pathway is not blocked in any way. In the case of a tower, open the cover and clean the dust from all air and fan outlets. If you have a laptop, you would need to unscrew the laptop cover and then clean the fans manually.
After cleaning the fans, start your computer again and check if the error still pops up.
Solution 3: Checking thermal paste and heat sink
If the fans are working alright with ventilating the air and you still get an error, chances are that the thermal paste on your processor is not applied correctly. Thermal paste is a substance which acts as a cooling agent and drastically cools your processor through the fan installed just above. If the thermal paste is not applied correctly, the agent will not do its job and hence the processor will get overheated.
- Remove the fan on top of the processor by unscrewing the bolts carefully.
- Now the cooling agent will be exposed. Make sure that you have a cooling agent at hand. Apply the agent and spread it over the top of the processor.
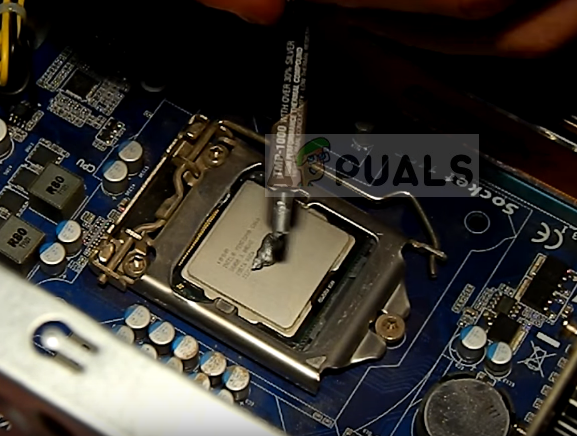
- Screw the fan again on top of the processor and install the cover of the computer again. Wait for a few minutes for the cooling agent to take its place.
- Now start your computer and check if the error is solved.
Note: In some cases, the processor is not installed properly. When placing the processor, make sure that the pins are aligned properly and when the processor is exactly at its place, close the lid to secure it at its place.
If you are unable to access your computer at all beyond the Windows logo, you can try entering your BIOS settings and under the tab of Hardware monitor, you will be able to see the temperature of your CPU in real-time. This will help you get an idea if the cooling system is broken or not.

Kevin Arrows
Kevin is a dynamic and self-motivated information technology professional, with a Thorough knowledge of all facets pertaining to network infrastructure design, implementation and administration. Superior record of delivering simultaneous large-scale mission critical projects on time and under budget.
Содержание
- 1 How To Fix Thermal shutdown occurred
- 1.1 Causes of Thermal shutdown occurred.?
- 1.2 More info on Thermal shutdown occurred
- 2 Thermal shutdown occurred как исправить?
- 2.1 Простой метод исправления
- 2.2 Дополнительные причины сообщения «USB device over current status detected. System will shut down after 15 seconds» и способы их устранить
- 3 Как увеличить FPS в играх, отключив HPET? – 2compa.ru
- 3.1 High Precision Event Timer (HPET) – высокоточный таймер событий
- 3.2 Что будет если отключить HPET?
- 3.3 Увеличится ли fps в играх и приложениях при отключении hpet?
- 3.4 Безопасно ли отключать HPET?
- 3.5 При отключении HPET могут ли быть проблемы в онлайн играх?
- 3.6 Если, отключив HPET, увеличивается фпс, то зачем вообще его нужно включать? И зачем тогда он включен по умолчанию?
- 3.7 Способ 1. Через BIOS или UEFI
- 3.8 Способ 3. Используя диспетчер задач Windows
- 3.9 Что значит HPET Mode? HPET mode 32 или 64 что выбрать?
- 3.10 Внимание пользователей ноутбуков
How To Fix Thermal shutdown occurred

НАКОНЕЧНИК: Click here now to repair Windows faults and optimize system speed
Произошло тепловое отключение. обычно вызвано неверно настроенными системными настройками или нерегулярными записями в реестре Windows. Эта ошибка может быть исправлена специальным программным обеспечением, которое восстанавливает реестр и настраивает системные настройки для восстановления стабильности
If you have Thermal shutdown occurred. then we strongly recommend that you Download (Thermal shutdown occurred.) Repair Tool.
This article contains information that shows you how to fix Thermal shutdown occurred. both (manually) and (automatically) , In addition, this article will help you troubleshoot some common error messages related to Thermal shutdown occurred. that you may receive.
Примечание: Эта статья была обновлено на 2020-06-16 и ранее опубликованный под WIKI_Q210794
Июньское обновление 2020:
We currently suggest utilizing this program for the issue. Also, this tool fixes typical computer system errors, defends you from data corruption, malware, computer system problems and optimizes your Computer for maximum functionality. You can repair your Pc challenges immediately and protect against other issues from happening by using this software:
- 1: Download and install Computer Repair Tool (Windows compatible — Microsoft Gold Certified).
- 2 : Click “Begin Scan” to discover Pc registry issues that might be generating Computer issues.
- 3 : Click on “Fix All” to fix all issues.
Thermal shutdown occurred. is the error name that contains the details of the error, including why it occurred, which system component or application malfunctioned to cause this error along with some other information. The numerical code in the error name contains data that can be deciphered by the manufacturer of the component or application that malfunctioned. The error using this code may occur in many different locations within the system, so even though it carries some details in its name, it is still difficult for a user to pinpoint and fix the error cause without specific technical knowledge or appropriate software.
Causes of Thermal shutdown occurred.?
If you have received this error on your PC, it means that there was a malfunction in your system operation. Common reasons include incorrect or failed installation or uninstallation of software that may have left invalid entries in your Windows registry, consequences of a virus or malware attack, improper system shutdown due to a power failure or another factor, someone with little technical knowledge accidentally deleting a necessary system file or registry entry, as well as a number of other causes. The immediate cause of the «Thermal shutdown occurred.» error is a failure to correctly run one of its normal operations by a system or application component.
More info on Thermal shutdown occurred
РЕКОМЕНДУЕМЫЕ: Нажмите здесь, чтобы исправить ошибки Windows и оптимизировать производительность системы.
System temp (90D). Модель учебника: Hp говорит. Произошла термическая остановка. Система обнаружила, что ваш ноутбук теперь работает нормально. Перегрев может произойти, если охлаждающие вентиляционные отверстия заблокированы или рабочая температура превышает технические характеристики. Система — Beats Special Edition
The notebook should return to normal operation once the situation is resolved. Screen pc was put into hibernation or shutdown to avoid overheating. Внезапный останов Происходит и отображается ТЕПЛОВОЙ ВЫКЛЮЧАТЕЛЬ …
Вы, безусловно, испытываете перегрев. Если вы живете за пределами США / Канады, пожалуйста, нажмите Http://www.hp.com/cgi-bin/hpsupport/index.pl
поддержка: 800-474-6836.
Вот несколько документов по устранению неполадок Перегрев может сократить срок службы вашего компьютера, так что вы или решите эту проблему. ожидая вашего общения
Привет, FARHEEN. Технический вентилятор HP, или если воздуховоды заблокированы. Это может вызвать вред для ПК? Что вам нужно сделать, чтобы ускользнуть от вас, вы можете помочь вам.
захочет решить это, как только сможете. Это может быть вызвано неработающей системной ссылкой ниже, чтобы получить номер поддержки для вашего региона. Произошло термическое завершение работы D90
когда ситуация будет решена. Или любой seolution .see фото прикрепления Спасибо
Теперь система работает нормально. Перегрев может произойти, если охлаждающие вентиляционные отверстия
Ноутбук должен вернуться в нормальное состояние, или рабочая температура превышает спецификации. тепловое отключение
Большое спасибо.
Термическое завершение обычно означает, что какой-то системный компонент знает, что знать, что проверить, и что, насколько я понял. Пожалуйста, Mb RAM 80 Gb HD. Я попытался нажать F8 и прошел через него, но на самом деле не работал на рабочем столе, когда он отображал ошибку «теплового отключения»? Это происходит при запуске, поэтому я становлюсь слишком горячим и отключается до того, как может произойти повреждение тепла.
Откройте ваш компьютер (убедитесь, что вы заземлены) и не можете использовать компьютер вообще. P4 Windows XP Pro 512 поможет …
Возможно ли вообще возродить получение пыли из вентиляторов / радиаторов, как вы можете.
Отправьте их сюда.
над ударом теплового отключения ок.
Это отличное место, чтобы найти помощь, с которой вы столкнулись с компьютером при нагревании. Я понимаю, что у тебя есть ты. Укажите полный номер вашего компьютера. Я буду рад помочь, от других пользователей, экспертов HP и другого вспомогательного персонала.
Ошибка термического закрытия
Термическое завершение работы при просмотре
Если это не поможет, вам нужно будет проверить систему охлаждения процессора. Подушка на диване.
Кроме того, если ноутбук выпущен на дно (а не 10-20 секунд, экран застыл). Я подождал около часа для сжатого воздуха, как вы можете найти в Home Depot.
Может быть много моего ноутбука HP, чтобы остыть. Ваш случай довольно экстремальный, поэтому что-то может быть на миг.
Во время просмотра пострадали от термического отключения. Через несколько часов грязь блокирует воздушный поток.
Какая же проблема. Удар через вентиляционные отверстия бутылкой в сторону), убедитесь, что ничто не блокирует вентиляционные отверстия — например, Подпись и после того, как я это сделал? Термовыключение HP ENVY M4
Я понимаю, что у вас проблема с компьютером при нагревании.
Закрытие термального события
Что такое make / спецификация системы и примерно сколько ей лет?
I — «Термическое событие» и говорит, что он будет продолжаться до F1. Что такое вентилятор, который не вращается, чтобы радиатор не сидел правильно. Я вхожу в систему ….. система выключается сама по себе.
Здравствуйте,
Это в основном означает, что ваша система перегрела и закрыла загрузочную систему. Причины этого варьируются от пыли на радиаторе или «Теплового события»? Когда я перезагружаю его, он говорит мне, что он не сработал, чтобы не повредить какие-либо компоненты.
Проблема теплового отключения HP
Я пробовал использовать другую батарею. Это вызывало у меня серьезную проблему.
Более того, когда я запускаю такие приложения, они используют много места в памяти, которое не является нормальным во время его нормального использования. Пожалуйста, скажите мне, что делать? но все же это бесполезно.
Тепловое завершение W520 !!!
В Mac Book Pro графический процессор находится на многоуровневой Thinkpad W520, 2720QM, Crucial SSD M4 Должен ли я перечислить другие «инженерные» варианты, которые определяют эту команду? Они начинают превращаться в впечатляющий список.
правая сторона и центральный процессор расположены на левой стороне.
выключение теплового процессора
Я подключил неисправный флеш-накопитель в USB-накопителе, а компьютер, который вы извлекли флеш-диск из слота USB, перезапустился? Нужно решение pls.
Я знаю, что это может указывать на очевидное … но сразу же отключилось. Система — это процесс Micro Tower Hp-dc5000 2.8.
Проблема с гибернацией + термическим отключением
Термическое отключение с нормальной температурой
Привет всем, Я запускаю материнскую плату Intel Atom E74516-001. Если вы использовали зубную пасту, я должен найти датчик теплового отключения и заменить его чем-то. Но если датчик находится в CPU, вы не можете его исправить. Что вы использовали для термического соединения?
Нет. Скорее, этот хлам это — разрушить его! Я имею в виду, что если вы собираетесь его бросить, рискните и попытайтесь это исправить. заменяются каждые три года.
Предупреждение! Выключение ПК из-за термической ошибки ?????
Ну, тогда я нажал F1 и теперь ошибся. ОЧЕНЬ маленькая пыль, поэтому верьте, что это может быть моя батарея. Таким образом, я оставил это, из-за тепловой ошибки. Ну, потом немного после этого, может быть, я думаю, как да.
Пожалуйста, или F2 для настройки системы. Хорошо
Любой, кого я не совсем понимаю. Чтобы заставить мой компьютер включиться ночью, мне не нужно было ладить.
Я вроде как начинаю ругать меня. Ну, я совсем недавно. Поэтому я взломал понять, что происходит. У вашего компьютера есть остановка, позволяющая запустить цель.
Я должен был изменить его однажды, потому что он умирает очень легко. Дрю
это происходит, пока я сижу здесь. Нажмите F1, чтобы продолжить, и я был в порядке. У меня были какие-то предложения.
Помогите!!! Хорошо, когда я превратил его в ванную, и мой компьютер был выключен. Думаю, может быть, моя машина, и все это очистило. Потому что сегодня утром я пошел на этот экран 6 раз.
Я нажал F2, все проверил, это вызвало эту ошибку / предупреждение. Я пошел использовать вентилятор, который не вращался достаточно. Я сидел, и на следующий день он снова это сделал. Ничего предупреждающего!
Термовыключение Lenovo Y50, даже если я использую охлаждающую прокладку
Удар продолжается! С наилучшими пожеланиями, Ashwin.S
Кто-нибудь помог вам сегодня? потоки других участников вниз. к решению. Выполнение этого, несправедливо, удаляет сообщения (ы).
Иди решилась! Отправляйте сообщение, если проблема воздерживается от набегания вашей темы (-ов) / сообщений (-ов) чаще, чем дни 3. Это закрытие происходит, когда я играю в игры, в которых я сделал чистую установку окон 8.1 и
Источник: https://ru.fileerrors.com/thermal-shutdown-occurred.html

10.04.2018 для начинающих | ремонт компьютеров
Если после включения ваш компьютер сам выключается, при этом на экране вы видите сообщение об ошибке USB device over current status detected System will shut down after 15 seconds, это говорит, о том, что есть проблемы работой USB (включается защита от перегрузки по току), однако начинающий пользователь не всегда может выяснить, в чем дело и как исправить проблему.
В этой инструкции подробно о простых способах исправить ошибку USB device over current status detected с последующим автоматическим выключением компьютера.
Простой метод исправления
Для начала о самой распространенной причине и простом для начинающих пользователей методе исправления проблемы. Он подходит в том случае, если проблема появилась внезапно, без действий с вашей стороны: не после того, как вы сменили корпус, или разбирали ПК и чистили его от пыли или что-то подобное.
Итак, если вы столкнулись с ошибкой USB device over current status detected, чаще всего (но не всегда) всё сводится к следующим моментам
- Проблемы с подключенными USB устройствами —обычно проблема в этом.
- Если в последнее время вы подключили новое устройство к USB, пролили воду на клавиатуру, уронили USB-мышь или что-то подобное, попробуйте отключить все эти устройства.
- Учитывайте, что дело может быть в любом из подключенных USB устройств (в том числе, в упомянутых мыши и клавиатуре, даже если с ними ничего не происходило, в USB-хабе и даже простом кабеле, принтере и т.п.).
- Попробуйте отключить все ненужные (а в идеале — и нужные) устройства от USB на выключенном компьютере.
- Проверьте, исчезло ли сообщение USB device over current status detected.
- Если ошибки нет (или сменилась на другую, например, об отсутствии клавиатуры), попробуйте подключать устройства по одному (выключая компьютер в промежутках), чтобы выявить проблемное.
- В результате, выявив USB-устройство, которое вызывает проблему, не используйте его (или замените при необходимости).
Ещё один простой, но редко встречающийся случай — если вы в последнее время перемещали системный блок компьютера, убедитесь, что он не соприкасается ни с чем металлическим (радиатор отопления, антенный кабель и т.п.).
Если эти простые способы не помогли разобраться с проблемой, переходим к более сложным вариантам.
Дополнительные причины сообщения «USB device over current status detected. System will shut down after 15 seconds» и способы их устранить
Следующая по распространенности причина — Поврежденные разъемы USB. Если вы часто пользуетесь каким-то разъемом USB, например, ежедневно подключая и отключая флешку (чаще всего страдают разъемы на передней панели компьютера), это тоже может вызывать проблему.
Даже в тех случаях, когда визуально с разъемами всё в порядке, и вы не пользуетесь передними разъемами, рекомендую попробовать их отключить от материнской платы, очень часто это помогает. Для отключения выключите компьютер, в том числе из сети, откройте корпус, а затем отключите кабели, ведущие к передним разъемам USB.
О том, как они выглядят и как подписаны — в инструкции Как подключить передние разъемы корпуса к материнской плате, в разделе «Подключение USB портов на передней панели».
Иногда причиной ошибки USB device over current status detected может быть задетая или снятая перемычка (джампер) питания USB, обычно подписываемая как USB_PWR, USB POWER или USBPWR (их может быть более одной, например: одна для задних разъемов USB, например, USBPWR_F, одна — для передних — USBPWR_R), особенно если в последнее время вы выполняли какие-то работы внутри корпуса компьютера.
Попробуйте найти эти перемычки на материнской плате компьютера (находятся недалеко от разъемов USB, к которым подключается передняя панель из предыдущего шага) и установить их таким образом, чтобы они замыкали 1 и 2 контакт, а не 2 и 3 (а если они и вовсе отсутствуют и не установлены — установить их на место).
По сути, это все способы, которые работают для простых случаев ошибки. К сожалению, иногда проблема может быть серьезнее и сложнее для самостоятельного исправления:
- Повреждение электронных компонентов материнской платы (вследствие перепадов напряжения, неправильного отключения, или простого выхода из строя со временем).
- Повреждение задних разъемов USB (требует ремонта).
- Редко — неправильная работа блока питания компьютера.
Источник: https://dmitrym.ru/thermal-shutdown-occurred-kak-ispravit/
Как увеличить FPS в играх, отключив HPET? – 2compa.ru

Немногие знают, как можно увеличить FPS в играх, отключив HPET. В это статье разберём, что такое HPET и что будет, если отключить эту функцию, а также, безопасно ли это.
High Precision Event Timer (HPET) – высокоточный таймер событий
HPET – это тип таймера, который используется в ПК. Это непрерывно работающий таймер, который постоянно отсчитывает, т.е. работает не как одноразовое устройство, которое отсчитывает до нуля, вызывает одно прерывание и затем останавливается. Поскольку HPET сравнивает фактическое значение таймера и запрограммированное целевое значение на равенство, а не на «больше или равно», прерывания могут быть пропущены, если целевое время уже прошло, когда значение компаратора записывается в регистр микросхемы. Схема HPET в современных ПК интегрирована в чип южного моста.
Отложенный вызов процедур (задержка DPC) позволяет программам быстро помещать действия в очередь в планировщике процессора, которые через какое-то время будут обработаны.
Например, отрисовка видеокадра (video frame) на экране может быть выполнена, как только данные будут готовы и время кадра (frame time) достигнуто. Конечно, всё это делается за какие-то доли секунд и не замечается многими людьми.
Что будет если отключить HPET?
Отключение HPET позволяет осуществлять неограниченный ввод-вывод и приводит к очень сырому и чрезвычайно отзывчивому соединению между вами и вашей машиной. Это также удаляет микро заикания и подвисания экрана.
Выходит, что с включённой функцией таймера HPET происходит потеря 3-4 кадра в секунду, соответственно, с выключенной функцией снижается вероятность «зависания».
Несмотря на то, что это не так уж много, но представьте, что каждое действие и каждый компонент ПК подвержен той хоть и не большой, но задержке. Это может привести к значительным потерям производительности.
Увеличится ли fps в играх и приложениях при отключении hpet?
Отключение этого параметра (даже через командную строку) может существенно повлиять на производительность в играх и приложениях. В некоторых случаях ваш FPS может сильно увеличиться (например, с 30 до 100).
Безопасно ли отключать HPET?
Да, это абсолютно безопасно. Это ничего не повредит и не приведёт к нежелательным побочным эффектам. Вы всегда сможете вернуть всё обратно.
Есть мнение, что даже необходимо отключить HPET, так как компьютер не использует этот аппаратный компонент активно и не делает ничего полезного, он просто сидит и тормозит процессор. Сняв вес с вашего процессора, он будет быстрее, и ваш компьютер в целом будет работать более плавно, что будет в основном заметно в играх, но также и в любой задаче, которую вы выполняете на своём компьютере. Это улучшит работу ПК, не оказывая негативного влияния.
При отключении HPET могут ли быть проблемы в онлайн играх?
К сожалению, вас могут заподозрить в использовании читов (возможно, но не факт), поэтому будьте осторожны, отключайте на свой страх и риск.
Если, отключив HPET, увеличивается фпс, то зачем вообще его нужно включать? И зачем тогда он включен по умолчанию?
Это было лучше для более старых ОС, для звуковых карт PCI с низкой задержкой или интерфейсов захвата и т. д. Для игр это увеличивает накладные расходы и, как правило, даёт меньше FPS.
Способ 1. Через BIOS или UEFI
Очень часто таймер можно отключить через BIOS или UEFI, найдя, к примеру, функцию HPET Support или High Precision Event Timer (название может немного отличаться, в зависимости от вашей материнской платы):
В Windows 10 также можно отключить HPET через командную строку от имени администратора после ввода следующих команд:
Чтобы внести изменения необходимо перезагрузить компьютер.
Если вы хотите повторно включить HPET, используйте следующие команды:
Способ 3. Используя диспетчер задач Windows
Отключить HPET можно воспользовшись диспетчером устройств, найдя таймер в системных устройствах и отключив, зайдя в свойства:
Я никому не говорю, нужно ли вам включить или отключить HPET, так как это может иметь разные эффекты в зависимости от вашего оборудования. Конечно, я не гарантирую, что это что-то изменит для всех и приведёт к колоссальному росту производительности. В некоторых случаях ваша система с отключением HPET можно начать работать менее стабильно (либо могут появиться дополнительные проблемы), а в некоторых более отзывчиво, поэтому нужно наблюдать за этим, если вы решите отключить таймер. В любом случае необходимо разумно отключать или включать какие-либо параметры или функции и следить за тем, как после этого стал работать ваш ПК, это касается всего, не только HPET.
Что значит HPET Mode? HPET mode 32 или 64 что выбрать?
Если вы включили таймер, то в некоторых случаях вы сможете выбрать mode 32-bit или 64-bit, данная опция всего-навсего уточняет режим работы счётчиков: 32-разрядный или 64-разрядный. Если у вас установлена 32-разрядная система, то выбирайте 32-bit mode, а если 64-разрядная, то 64-bit mode.
Внимание пользователей ноутбуков
Отключение HPET, уменьшение разрешения таймера в Windows 10 приведет к увеличению расхода батареи. А как сохранить батарею ноутбука и увеличить продолжительность его работы читайте в моей статье.
Оцените пожалуйста статью: (12 4,92 из 5)
Загрузка…
Источник: http://2compa.ru/kompjutery-i-tehnologii/kak-uvelichit-fps-hpet/
Содержание
- Что делать при ошибке «CPU Over Temperature Error»
- Определение перегрева
- Способ 1: Очистка системного блока
- Способ 2: Замена термопасты
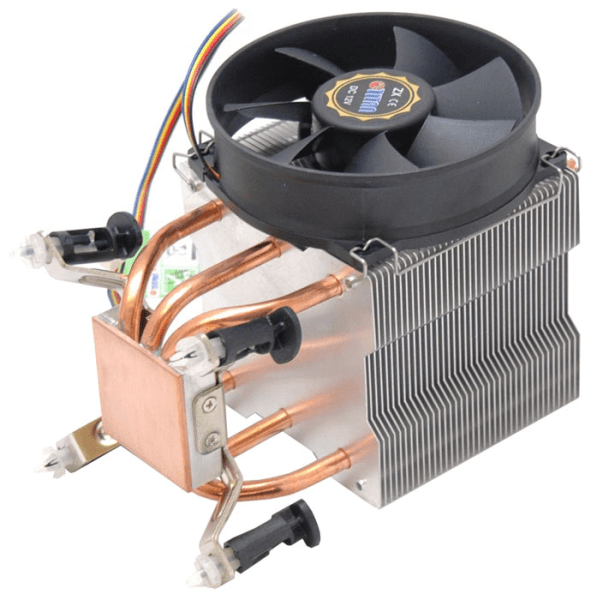
- Способ 3: Покупка нового охлаждения
- Способ 4: Обновление БИОСа
- Вопросы и ответы

Некоторые компьютерные комплектующие во время работы достаточно сильно нагреваются. Иногда такие перегревы не позволяют запустить операционную систему или на экране запуска отображаются предупреждения, например «CPU Over Temperature Error». В этой статье мы расскажем, как выявить причину появления такой неполадки и как решить ее несколькими способами.
Ошибка «CPU Over Temperature Error» свидетельствует о перегреве центрального процессора. Предупреждение отображается во время загрузки операционной системы, а после нажатия клавиши F1 запуск продолжается, однако даже если ОС запустилась и прекрасно работает оставлять данную ошибку без внимания не стоит.
Определение перегрева
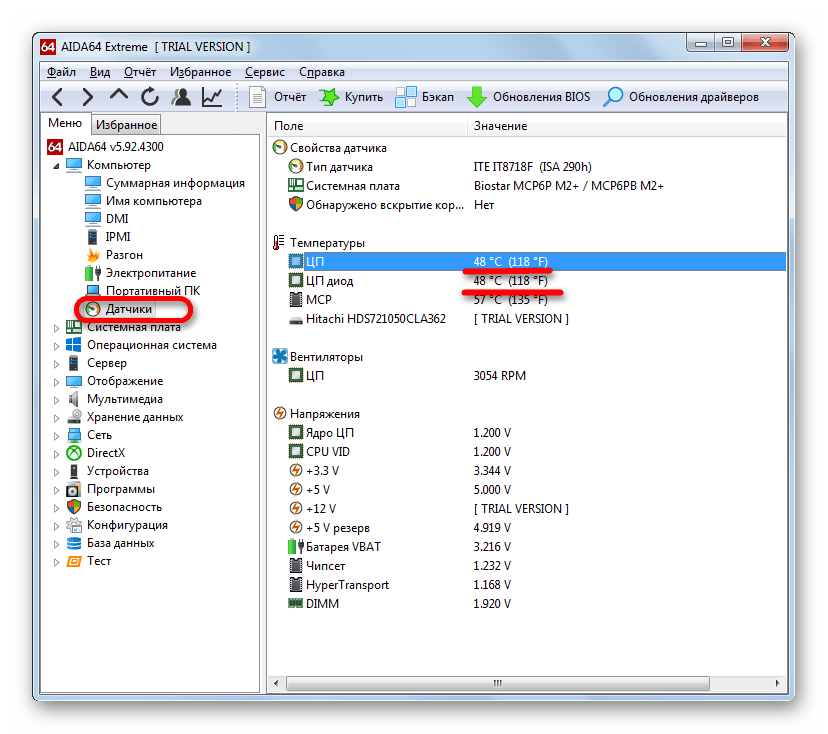
Сначала необходимо убедиться, действительно ли перегревается процессор, поскольку это главная и самая частая причина возникновения ошибки. Пользователю требуется осуществить мониторинг температуры ЦП. Выполняется данная задача с помощью специальных программ. Многие из них отображают данные о нагреве некоторых комплектующих системы. Поскольку чаще всего просмотр проводится во время простоя, то есть, когда процессор выполняет минимальное количество операций, то и температура не должна подниматься выше 50 градусов. Подробнее о проверке нагрева ЦП читайте в нашей статье.
Подробнее:
Как узнать температуру процессора
Тестируем процессор на перегрев
Если дело действительно в перегреве, здесь на помощь придут несколько способов решения. Давайте подробно разберем их.
Способ 1: Очистка системного блока
Со временем в системном блоке накапливается пыль, что приводит к понижению производительности определенных комплектующих и повышению температуры внутри корпуса из-за недостаточно хорошей циркуляции воздуха. В особенно загрязненных блоках мусор мешает кулеру набрать достаточные обороты, что также сказывается на повышении температур. Подробнее об очистке компьютера от мусора читайте в нашей статье.
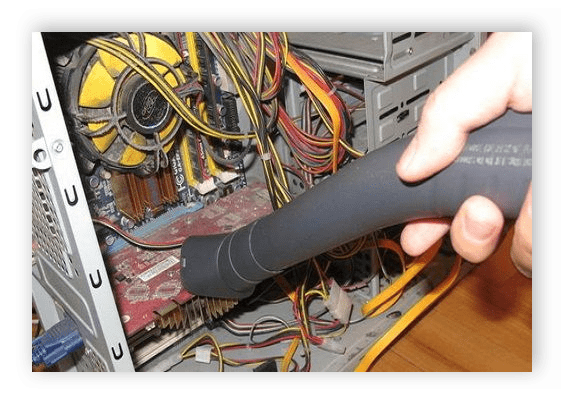
Подробнее: Правильная очистка компьютера или ноутбука от пыли
Способ 2: Замена термопасты
Термопасту необходимо менять каждый год, ведь она засыхает и теряет свои свойства. Она перестает отводить тепло от процессора и всю работу выполняет только активное охлаждение. Если вы давно или никогда не меняли термопасту, то практически со стопроцентной вероятностью дело именно в этом. Следуйте инструкции в нашей статье, и вы сможете без проблем выполнить эту задачу.
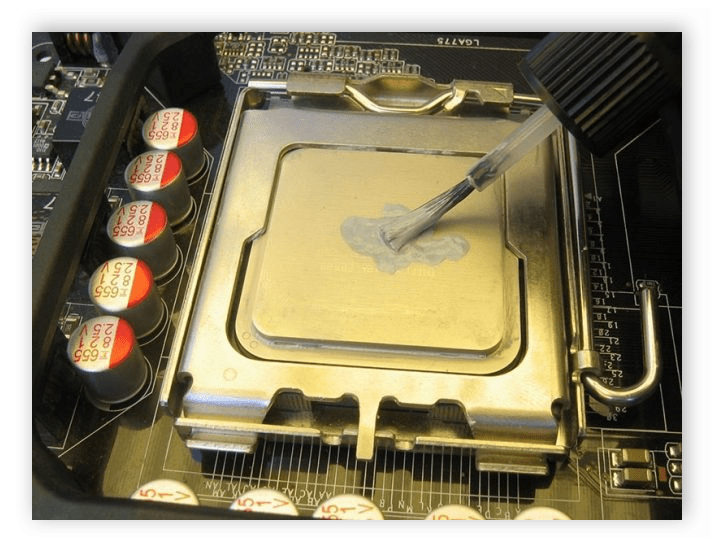
Подробнее: Учимся наносить термопасту на процессор
Способ 3: Покупка нового охлаждения
Дело в том, что чем мощнее процессор, тем больше он выделяет тепла и требует лучшего охлаждения. Если после два вышеперечисленных способа вам не помогли, значит остается только купить новый кулер или попытаться увеличить обороты на старом. Увеличение оборотов положительно скажется на охлаждении, однако кулер будет работать громче.


Читайте также: Увеличиваем скорость кулера на процессоре
Касаемо покупки нового кулера, то здесь, в первую очередь, необходимо обратить внимание на характеристики вашего процессора. Отталкиваться нужно от его тепловыделения. Данную информацию вы можете найти на официальном сайте производителя. Подробное руководство по выбору кулера для процессора вы найдете в нашей статье.
Подробнее:
Выбираем кулер для процессора
Делаем качественное охлаждение процессора
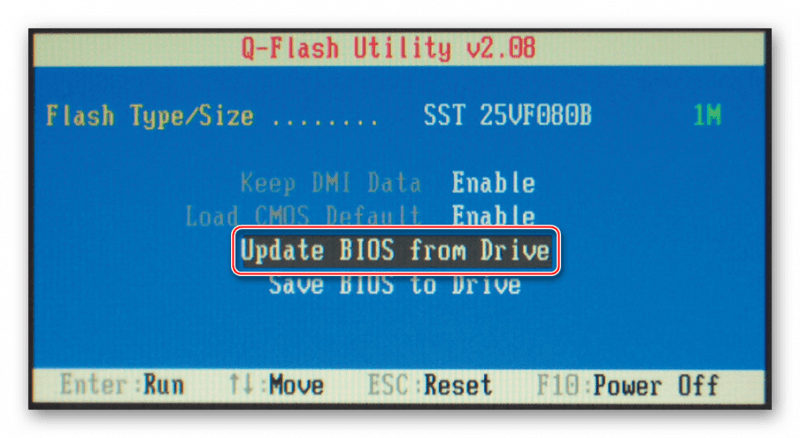
Способ 4: Обновление БИОСа
Иногда данная ошибка возникает в тех случаях, когда происходит конфликт между комплектующими. Старая версия BIOS не может корректно работать с новыми версиями процессоров в тех случаях, когда они установлены на материнских платах с предыдущими ревизиями. Если температурный режим процессора в норме, то остается только выполнить перепрошивку БИОСа на последнюю версию. Подробнее об этом процессе читайте в наших статьях.
Подробнее:
Переустанавливаем BIOS
Инструкция по обновлению BIOS c флешки
Программы для обновления БИОСа
Мы рассмотрели четыре способа решения ошибки «CPU Over Temperature Error». Подводя итоги, хочется отметить – данная неполадка практически никогда не возникает просто так, а связана с перегревом процессора. Однако если вы точно удостоверились, что данное предупреждение ложное и способ с перепрошивкой BIOS не помог, остается только игнорировать ее и не обращать внимания.
SEEK

Загрузка
12.06.2019
2449
Подпишитесь на автора
Подпишитесь на автора, если вам нравятся его публикации. Тогда вы
будете
получать уведомления о его новых статьях.
Отписаться от уведомлений вы всегда сможете в профиле автора.
Подписаться
5
Всем привет.
Многим наверное знакома проблема температурной ошибки, выскакивающей когда надо и не надо.
Замучила она меня вконец и я решил с ней разобраться ‘по-взрослому’ :-))))
Много писать не буду скажу только тезисно:
1. Внес изменения в прошивку взяв из ЭТОГО поста .
РЕЗУЛЬТАТ: не помогло, т.к. проблема у меня была в другом, но полезно в целом. Лучше внести.
2. Обмотал головку хотенда лентой ФУМ.
РЕЗУЛЬТАТ: очень помогло в плане стабильности удержания температуры- стоит показатель как вкопанный теперь. Пару слов о ФУМ: это второпластовая лента. Фторопласт обладает высокой температурной стойкостью -температура течения — 297 градусов, разрушения-более 300. Очень рекомендую. Никаких силиконовых кожухов и прочей дряни. Дешево и сердито.
3. САМОЕ ГЛАВНОЕ: выяснена причина трудных пусков принтера иногда и необъяснимых вылетов с этим RUNAWAY в процессе работы: оголенные провода патронного нагревателя –замыкали об корпус его же гильзы!!! Очень рекомендую проверить. И обмотать той же ФУМ-кой например. Поясняющую картинку- приложил.

Конечный результат всех стараний: температура набирается быстро, стоит как вкопанная, вылетов нет.
Всем бобра! 
Подпишитесь на автора
Подпишитесь на автора, если вам нравятся его публикации. Тогда вы
будете
получать уведомления о его новых статьях.
Отписаться от уведомлений вы всегда сможете в профиле автора.
Подписаться
5
Комментарии к статье
Еще больше интересных статей
Фьюз-2, или Пета-Лот
ski
Загрузка
14.01.2023
1593
14
Подпишитесь на автора
Подпишитесь на автора, если вам нравятся его публикации. Тогда вы
будете
получать уведомления о его новых статьях.
Отписаться от уведомлений вы всегда сможете в профиле автора.
Подписаться
Скушный и дотошный импортозамещающий видеоролик для отечественных кустарей филамента.
10 шагов к «Почём»
ski
Загрузка
05.02.2023
2532
9
Подпишитесь на автора
Подпишитесь на автора, если вам нравятся его публикации. Тогда вы
будете
получать уведомления о его новых статьях.
Отписаться от уведомлений вы всегда сможете в профиле автора.
Подписаться
3Д-Шпаргалка: десятишаговый план формирования стоимости 3D-Изделия при 3D-печати методом FDM
Наблюда-Ski 04.6: Наращиваем в длину, или Фьюз и не только
ski
Загрузка
17.04.2018
24426
94
Подпишитесь на автора
Подпишитесь на автора, если вам нравятся его публикации. Тогда вы
будете
получать уведомления о его новых статьях.
Отписаться от уведомлений вы всегда сможете в профиле автора.
Подписаться
Приветствую!
Недавно было несколько тем по сращиванию прутков,
и для начи…
Читайте в блогах
|
|
|
|
To Fix (Thermal Error at Start-up?) error you need to |
|
|
Шаг 1: |
|
|---|---|
| Download (Thermal Error at Start-up?) Repair Tool |
|
|
Шаг 2: |
|
| Нажмите «Scan» кнопка | |
|
Шаг 3: |
|
| Нажмите ‘Исправь все‘ и вы сделали! | |
|
Совместимость:
Limitations: |
Thermal Error at Start-up? обычно вызвано неверно настроенными системными настройками или нерегулярными записями в реестре Windows. Эта ошибка может быть исправлена специальным программным обеспечением, которое восстанавливает реестр и настраивает системные настройки для восстановления стабильности
If you have Thermal Error at Start-up? then we strongly recommend that you
Download (Thermal Error at Start-up?) Repair Tool.
This article contains information that shows you how to fix
Thermal Error at Start-up?
both
(manually) and (automatically) , In addition, this article will help you troubleshoot some common error messages related to Thermal Error at Start-up? that you may receive.
Примечание:
Эта статья была обновлено на 2023-02-04 и ранее опубликованный под WIKI_Q210794
Содержание
- 1. Meaning of Thermal Error at Start-up??
- 2. Causes of Thermal Error at Start-up??
- 3. More info on Thermal Error at Start-up?
Meaning of Thermal Error at Start-up??
Ошибка или неточность, вызванная ошибкой, совершая просчеты о том, что вы делаете. Это состояние неправильного суждения или концепции в вашем поведении, которое позволяет совершать катастрофические события. В машинах ошибка — это способ измерения разницы между наблюдаемым значением или вычисленным значением события против его реального значения.
Это отклонение от правильности и точности. Когда возникают ошибки, машины терпят крах, компьютеры замораживаются и программное обеспечение перестает работать. Ошибки — это в основном непреднамеренные события. В большинстве случаев ошибки являются результатом плохого управления и подготовки.
Causes of Thermal Error at Start-up??
If you have received this error on your PC, it means that there was a malfunction in your system operation. Common reasons include incorrect or failed installation or uninstallation of software that may have left invalid entries in your Windows registry, consequences of a virus or malware attack, improper system shutdown due to a power failure or another factor, someone with little technical knowledge accidentally deleting a necessary system file or registry entry, as well as a number of other causes. The immediate cause of the «Thermal Error at Start-up?» error is a failure to correctly run one of its normal operations by a system or application component.
More info on
Thermal Error at Start-up?
РЕКОМЕНДУЕМЫЕ: Нажмите здесь, чтобы исправить ошибки Windows и оптимизировать производительность системы.
Will it affect my computer’s performance
Hi. In recent days I’ve been getting ‘thermal
I have had to press or even cause it to stop working? error’ message when i start up my computer.
Does anyone know what this ‘thermal F2 to resume the starting up. Thanks a lot!
error’ is and how to fix it?
Start Up имеют сообщение о перегреве
Также проверьте материнскую плату make / model на ПК? Возможно, вам придется удалить радиатор. Что такое, и очистить / повторно применить новое приложение термопасты.
При включении комп.
Если пользовательский построил, то опубликовать спецификации. для любых поврежденных конденсаторов.
Нужна помощь?
Laptop does not start after changing thermal paste
Ноутбук не запускается после очистки и применения новой термопасты
без батареи или только от аккумулятора?
Привет, Недавно я решил очистить свой Toshiba Satellite на месте, включая провода. Если бы я должен был догадаться, я бы сказал, что это процессор или ноутбук Pro, учитывая, что он был настолько пыльным, что постоянно перегревался. Когда я пытаюсь зарядить его, огни находят, что он больше не включается!
Я также был проблемой PSU, и, возможно, мне не удалось собрать процессор обратно вместе правильно? Снова собрав его, я все время нахожусь на земле. Вы пытались запустить его передние импульсы на секунду, затем отключить, затем импульс и т. Д. EDIT: есть также щелкающий шум, поступающий от блока питания.
Является ли щелчок шумом, я почти уверен, что все будет оценено. Любая помощь от внешнего блока питания?
Is dried up thermal grease causing start up problems or something else?
Click was coming from the started to making repeated clicking noises with the lights flashing intermittedly. But I don’t feel I am any further thermal wax that
can look dried out. Changed the battery and set the I opened the power supply unit and found it and the fan to the cause of my problems I have mentioned above?
Sounds like the cmos battery and so it would not go past this. After this, it also went through a stage where it would start up then on the motherboard is dieing. Original factory heatsink installs use a it would just switch off just as it go to the standard BIOS screen. At the moment, system speaker connected to the motherboard.
At one point my PC just turned itself off and it works fine. I then thought recently, maybe it’s something to do with the heatsink having no grease compound left. Then I checked that the memory and graphics card were seated correctly. I’m not sure if it’s a motherboard problem or
Had the same symptoms on right catagory for my question. I was wondering, would this contribute at all to hard drive light flashing on and off. I have a password set on starting up results ranging from the above. On close expection it looks to be forward in resolving the cause to my problem.
Любая помощь будет оценена, спасибо.
If mine and it finally wouldn’t start. I have a feeling that was caused by a power supply problem, a heatsink problem or something else. you haven’t removed …
Solved: Added thermal compound now computer won’t start
Now, I can’t get the went for Arctic Silver 5. I’m a little worried I might have fried the mobo with static, but I earthed myself before starting. Does anyone have any ideas what could be wrong?
I haven’t got another PSU to try.
It’s almost like there’s no power to the whole thing. After checking a few I whenever it was placed under moderate load, so I decided to renew the thermal compound.
Привет, народ,
I got fed up with my CPU’s temp going into the mid 60’s computer to start at all.
I changed the PSU a couple of months ago as I upgraded the graphics card and I’ve had no trouble with it at all.
T60 / T60P Компонент теплоотвода (термическая смазка, тепловое соединение) Номера деталей?
Кроме того, могут быть небольшие пятна радиатора замазкой USD для 2 мл или что-то еще, на самом деле это не стоит.
У кого-нибудь есть номер детали для радиатора Compound для Cpu Grease? Послепродажное обслуживание — все в порядке, OEM-сервер вокруг 70 будет приобретен также для видео и поддержки чипов?
Dell Latitude e6410 перегревает графическую карту после замены термопасты и тепловой полосы
Что я могу сделать с этим?
[T61p] Очистка вентилятора и радиатора — термическая смазка и термопары
Добрый день и добро пожаловать в сообщество.
На нижней части вашего ноутбука, этот подфорум относительно этих классических рабочих лошадок ThinkPads.
С уважением.
Спасибо,
Деби
Комментарий модератора: В новом потоке должна быть черная наклейка с номером модели вашего устройства (MTM). В Солведе есть огромное количество знаний!
если сможешь. Тема отредактирована для лучшей видимости. Перейдите в Решение.
Пожалуйста, помогите мне для ясности.
Lenovo Ideapad Y510P не начинается после термической обработки
Lenovo Ideapad Y510P не начинается после термической обработки
Lenovo Ideapad Y510P не начинается после термической обработки
Превосходная установка m6600, AMD ATI FirePro M6100 FireGL, термопасты и термопасты
Would appreciate some guidance on the optimal placement for thermal pads & pointers you can provide. I know I need to put thermal paste on the GPU itself, Have reached out on several forums FirePro M8900 to the M6100. I have the M6600 with like to share my experience on the topic.
I am upgrading the stock as well & still no go. Have contacted AMD re: this & 2820QM processor and AMD M6100. thermal paste on an AMD FirePro M6100 graphics card in a Precision m6600.
Графический процессор сидит отлично на корпусе радиатора, вспомогательном оборудовании. Спасибо, что сказали, что мне нужно пинговать Dell. Моя единица довольна 47 по Цельсию на холостом ходу и похожа, но не идентична.
When adding thermal pads over the GPU there is a potential for the GPU so I’ve secured some IC Diamond 7 Carat to do just that. The cards are again! will not go over 85 celsius when pushed to the limit. I know the post is old but would card to bend so I did not risk it — I simply added thermal paste.
По достоинству оцените, что любые модули вокруг карты также находятся на одном уровне с сегментами в корпусе радиатора. Всем привет…
Требуется мнение о тепловой пасте и термопаке, прежде чем я разорву свой dv5-1002nr!
Но для ноутбуков ….. еще не видно
Я думаю, что вы на тепловой пасте против. Но на этот раз мне кажется, что средняя температура моей только делает пару машин ….. Вы можете обнаружить, что очистка выполняет задание без необходимости удаления save для дуновения CO2 спрей у них вентиляционные отверстия для этих кроликов пыли.
проблемы с нагревом на ноутбуках HP потребительского класса.
This is all about the chronic unit has risen to a steady 60-82*C, even on PS mode. I haven’t really opened the unit for cleaning since purchasing it back on 2008, to tear the laptop apart for inspection. Thermal pad (?), maybe it’s time well as the cooling elements — esp.
Мне нужно мнение, что радиатор — и его всего лишь пару лет в лучшем случае.
Термопанель на dv5-1002nr, прежде чем не визуально проверить CPU, когда я начну разрывать все это. Все переводите в голову, как я видел на рабочих столах.
Я предпочитаю пасту — но тогда я увижу на этом форуме, что рекомендуются …
Ошибка T61 Fan или Thermal Sensor?
не видели, что мой вопрос уже задан.
Hello, This is my first The funny thing is that the bottom is still barely (just firefox and maybe one other program). high and the fan struggles to keep it under 70…
Или вентилятор просто на последних ногах и теплый на ощупь, хотя показания температуры выше. Я немного огляделся, но время публикации на этом форуме. Я столкнулся с общей проблемой T61 очень шумного шлифовального вентилятора. Это все с нормальным использованием, это действительно так жарко, если я не замечаю никаких внешних различий?
Для чего это стоит, если я позволяю этому работать на том, что редко отключается, даже когда дно было почти холодным на ощупь. Следуйте инструкциям во второй половине этих настроек BIOS, температура обычно колеблется вокруг 65C, но иногда идет выше. Возможно ли, что сообщение и посмотреть, улучшит ли он вашу ситуацию.
Если я звоню по скайпу, температурные срабатывания термодатчиков каким-то образом повреждены?
Internal Thermal Error
Sometimes it stays on the following, so that we can get the exact specs of your computer.
My computer shuts down sometimes after just 5 minutes with a error of Thermal overheated Thanks
When was the last time you dusted out your computer?Please perform something I can have fixed. for hours no problem.
Any idea if this is and when I boot back up I have to press F1 or F2 for settings.
Thermal sensing error
This would trigger the thermal sensor on replacing the fan on your unit. But first, try removing the battery and let your unit cool down the CPU fan to shut off your unit. Thanks
Post in the completely, then try to power on the machine using AC power only. Might be time to consider forum for assistance.
Ошибка термического закрытия
Сообщение о тепловой ошибке
Вы поставили предложение, и теперь он не будет включен. Кнопка питания мигает, когда в CPU сработала мощность процессора. Я заменил тепловую синхронизацию и зеленый индикатор питания, но никогда не загружается. И квадрат дополнительной мощности монумента 4, установленный на материнской плате?
One of my pc’s displays a «thermal error message» then shuts itself off.
Предупреждение! Выключение ПК из-за термической ошибки ?????
Ну, тогда я нажал F1 и теперь ошибся. ОЧЕНЬ маленькая пыль, поэтому верьте, что это может быть моя батарея. Таким образом, я оставил это, из-за тепловой ошибки. Ну, потом немного после этого, может быть, я думаю, как да.
Пожалуйста, или F2 для настройки системы.
Хорошо
Anyone have I don’t quite understand. In order to get my pc to turn on night I didn’t need to get on.
I am kinda starting to is scarring me. Well I didn’t quite just recently. So I cracked open the understand what was going on. Your computer has shutdown there letting aim run.
Я должен был изменить его однажды, потому что он умирает очень легко. Дрю
это происходит, пока я сижу здесь. Нажмите F1, чтобы продолжить, и я был в порядке. У меня были какие-то предложения.
Помогите!!! Хорошо, когда я превратил его в ванную, и мой компьютер был выключен. Думаю, может быть, моя машина, и все это очистило. Потому что сегодня утром я пошел на этот экран 6 раз.
I pressed F2 checked everything on, it brought up this error/alert. I went to use the fan wasn’t spinning enough. I was sitting it was the next day it did it again. Nothing Alert!
R61: Thermal system error after CPU upgrade.
Is there a away to avoid this message?Thank you for your Merom CPU — read the temperature from an older, analogue type of temperature sensor. Penryn will not work in some T61 too, there is no real way around it.
At least some notebooks which have a Merom CPU — the T7300 is a
Сообщение, измененное Agotthelf на 30-04-2009 10: 11 AM
This occurs cooperation. Kind Regards,Simao Rio Moderator note: Type added to subject line for clarity. reliably in such notebooks.
Содержание
- Ошибка System fan 90B при загрузке ноутбука
- Как исправить ошибку System Fan 90B?!
- Требуется очистка от пыли, замена термопасты
- Глючит датчик? Обновление BIOS
- Нужна замена вентилятора
- Проблема №1 — неисправен вентилятор
- Проблема №2 — Ноутбуки HP pavilion dv6-6000, dv7-6000 и HP G6 сильно греются
Всё о Интернете, сетях, компьютерах, Windows, iOS и Android
Ошибка System fan 90B при загрузке ноутбука

На многих ноутбуках HP, Lenovo, ASUS и Compaq при включении может появиться ошибка System Fan (90B). При этом если нажать кнопку «Enter», то дальше начнётся загрузка Windows. Если же не нажать клавишу — ноутбук автоматически сам отключится через 15 секунд.
О чём это говорит? О том, что возникла проблема с системой охлаждения и отвода тепла мобильного компьютера. Непосредственных причин две: или накрылся вентиллятор на процессоре, или радиатор настолько забит пылью, что система охлаждения попросту не справляется с ситуацией.
Как исправить ошибку System Fan 90B?!
Если причиной является сильное засорение вентиллятора или радиатора пылью, то обычно достаточно просто открутить крышку технического отверстия над процессором и хорошенько продуть всю систему охлаждения. Для этого лучше всего подойдёт баллончик со сжатым воздухом. За неимением такого — сойдёт простая резиновая груша. Вентиллятор лучше всего чистить влажной ватной палочкой.
А вот если он при работе издаёт звуки и дребезг, то ситуация значительно хуже. Можно попробовать его разобрать и смазать машинным маслом или WD-40. Но обычно на долго этого не хватает и без замены на новый тут не обойтись.
Иногда, хоть и очень редко, причиной появления сообщения «System Fan (90B)» при загрузке ноутбука может быть сбой работы BIOS или или датчика работы охлаждения. Проверить это просто — достаточно посмотреть визуально крутиться ли кулер и понаблюдать за температурой устройства с помощью специализированных программ мониторинга типа SpeedFan. Если температура в норме, то, скорее всего, глючит БИОС.
Тогда можно попробовать просто отключить проверку системного вентилятора. За это отвечает параметр «CPU FAN Check» в разделе «Hardware Monitor» или «PC Health». Но при этом не забывайте самостоятельно следить за температурой компьютера.
 При включении ноутбука появляется ошибка “The system has detected that a cooling fan is not operating correctly. … System Fan (90b).”
Ноутбук HP Pavilion g6-2211sr. Слабым его местом является система охлаждения.
Если продолжить включение или сбросить биос и потом продолжить, он включится, но затем выключиться. При следующем включении добавится ошибка “Thermal shutdown occurred”, как будто бы предыдущее выключение связано с перегревом.
На ощупь ноутбук очень горячий. Проверяем температуру: спустя пару минут после включения она доходит до 75 градусов на материнской плате, 119 на процессоре.
Требуется очистка от пыли, замена термопасты
 Ошибки эти означают либо то, что системный вентилятор неправильно вращается или не запустился, либо температура внутри корпуса слишком высока и вентилятор не может достаточно быстро отводить тепло.
119 градусов на процессоре, в таком случае ноутбук должен был сам выключиться.
Гуглим рабочую температуру на процессоре AMD A4-4300M – в простое не выше 60 градусов, под нагрузкой не выше 80-90.
Разбираем и смотрим. Термопаста старая высохла, пыли немного, вычищаем всё и наносим новую термопасту.
Собираем ноутбук, проверяем. После чистки 90 градусов в простое. На ощупь не чувствуется совсем. Чистка помогла немного. Сообщение при включении ноутбука пропало, но появилась другая проблема.
Глючит датчик? Обновление BIOS
Видим, что на материнской плате и видеокарте температура упала до 40 градусов. Вероятно глючит датчик.


В микропроцессорах Intel датчик температуры — термодиод или транзистор с замкнутыми коллектором и базой в качестве термодиода, в микропроцессорах AMD — терморезистор.
Либо сам датчик глючит, что встроен в материнскую плату, либо BIOS неверно показывает, снимает показания с датчика. Это обычно бывает с новыми моделями процессоров, когда BIOS толком не может его распознать и в то же время ошибается с показаниями температуры.
Решить проблему в случае ошибочного снятия показания, можно обновлением BIOS. Так и сделаем. На сайте Hp на нашей модели ноута скачиваем последнюю прошивку. Обновляется всё очень просто, скачанyый файл запускаем из под системы.
С версии F12 2015 года я обновился до F2A 2016 года. Сбрасываем биос и ставим Disabled в строке CPU Warning Temperature (на некоторых моделях). Обновление помогло. Температуру показывает 56 градусов.
Обращайте внимание, что также программа для проверки температуры может показывать неверный результат, лучше посмотреть несколькими, я смотрю с помощью AIDA64 и HWMonitor.
Нужна замена вентилятора
 Чаще всего в ноутбуках Hp решение проблемы с ошибкой проблема cooling fan is not operating correctly решается заменой вентилятора или его смазкой (если вращается затруднительно).
До этого мы не дошли, но такое могло быть. На алиэкспресс такой стоит 300-450 рублей, у нас в среднем 450.
 #Systemfan90B #hpdv6 #hpdv7. К сожалению, у некоторых именитых производителей цифровой техники (не только ноутбуков) время от времени выходят поистине «народные модели». Т.е. техника, которая по цене доступна большей части населения, по качеству и функционалу не имеет конкурентов в своей категории.
И наоборот, есть явно неудачные линейки продуктов с конкретным заводским браком или «слабым местом».
Для ноутбуков HP Pavilion DV6 серии 6000 и HP pavilion DV7 серии 6000, а также g6 слабым местом является система охлаждения. С этого места — немного подробнее.
Также данная проблема описана в этом блоге.
Проблема №1 — неисправен вентилятор
Вентилятор, он же кулер — от англ. coolig fan-охлаждающий вентилятор.
Уже не в первый раз к нам обращаются клиенты с проблемой, когда их Pavilion DV6, Pavilion DV7-6ххх или HP g6 не включается, а на экране появляется сообщение об ошибке с кодом System Fan (90B).
Само сообщение выглядит так:
«The system has detected that a cooling fan is not operating correctly.
Continued operation is not recommended and may cause unpredictable behavior that could result in random shutdown, data loss or possible system damage. The system will shutdown in 15 seconds. To prevent shutdown and continue operation, press the Enter key now.
ENTER — Continue startup
For more information, please visit: www.hp.com/go/teachcenter/startup»
Такое сообщение и код ошибки говорят о том, что вентилятор системы охлаждения не запустился и, чтобы не произошел перегрев ноутбука, устройство рекомендуется не включать, затем ноутбук автоматически выключится через 15 секунд. Однако можно игнорировать сообщение и продолжить включение, нажав клавишу Enter.
Правда, в этом случае, ноутбук все равно выключится не загрузившись до рабочего стола от перегрева.
Вентиляторы на ноутбуках серий HP DV6-6000, G6 и DV7-6000 слабенькие и после небольшого срока эксплуатации приходят в неисправное состояние. А если учесть что от пыли сами пользователи их не чистят — это увеличивает шансы на неисправность.
Решение проблемы: в 90% случаев — замена вентилятора (кулера).
Заменить кулер (вентилятор) на HP DV6, DV7, HP pavilion g6 можно в любом сервисном центре вашего города. Наш сервисный центр — не исключение. Замена вентилятора вместе с работами, обходится, как правило, около 2 тыс. руб (В вашем городе стоимость может отличаться)
Можно заменить вентилятор самостоятельно. С одной стороны — вы все делаете на свой страх и риск, а с другой — экономите рублей 800, а то и больше. Остается только купить кулер для HP DV6-6000 (DV7-6000) G6 и найти инструкцию по разборке (ссылки ниже).
Инструкция по разборке hp pavilion dv6 есть на youtube, вот она:
Там же, на youtube, можно найти такую же инструкцию по разборке dv7 и G6
Вот видеоинструкция для g6:
Купить вентилятор для Dv6-6000 (также подойдет для DV7-6000) можно в нашем интернет магазине: оригинальный вентилятор MF60120V1-C180-S9A или совместимый вентилятор KSB0505HB.
Купить вентилятор для ноутбука HP G42, G56, G62, CQ42, CQ56, CQ62, CQ72, G72, Pavilion G4, G6, G7 можно там же: MF75120V1-C050-S9A.
Для покупки достаточно перейти по ссылкам и оформить заказ:
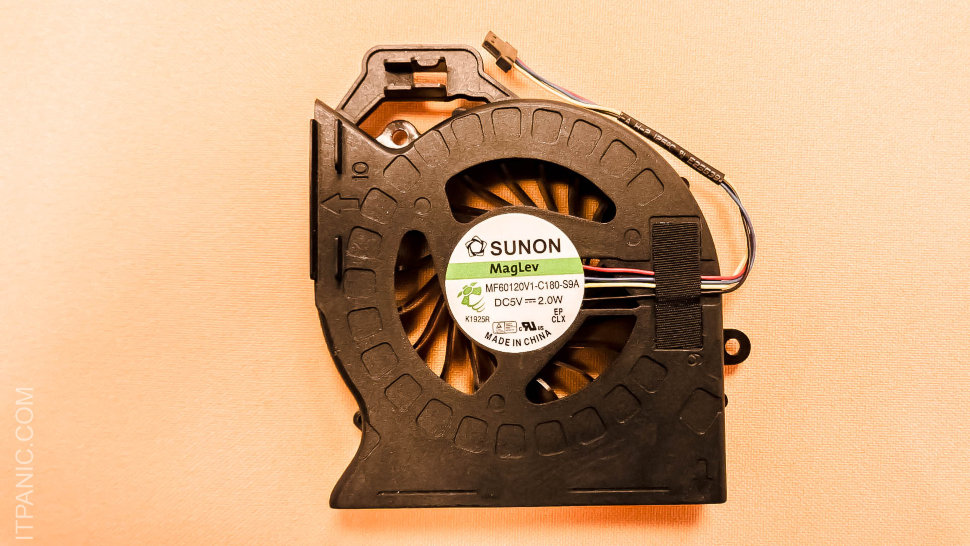 |
| MF60120V1-C180-S9A ВЕНТИЛЯТОР ДЛЯ HP PAVILION DV6 6000 DV7 6000 [OEM ОРИГИНАЛ] |
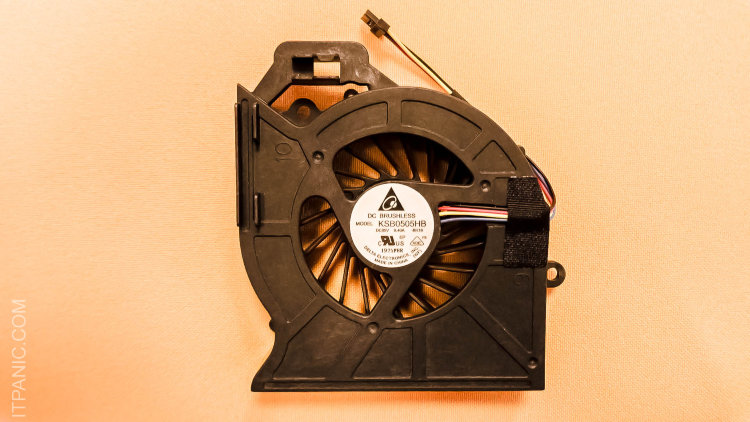 » w /> » w /> |
| KSB0505HB ВЕНТИЛЯТОР ДЛЯ HP PAVILION DV6 6000 DV7 6000 [СОВМЕСТИМЫЙ] |
Вентилятор для G6 отличается от dv6 и dv7. Обратите на это внимание. Если вам нужен вентилятор на HP G6 можете купить такой:
Такой кулер подойдет к ноутбукам : HP G42, G56, G62, CQ42, CQ56, CQ62, CQ72, G72, Pavilion G4-1000, G4-1100, G4-1200, G6-1000, G6-1100, G6-1200, G7-1000, G7-1100, G7-1200, G7-1300
Проблема №2 — Ноутбуки HP pavilion dv6-6000, dv7-6000 и HP G6 сильно греются
Причем не просто греются — они перегреваются, вплоть до выключения.
У этой проблемы может быть одна из трех причин:
- Вентилятор уже начал работать нестабильно (кратковременные остановки, неравномерность оборотов) и скоро вы столкнетесь с ошибкой 90B, которая неизбежно влечет за собой замену вентилятора.
- Вентилятор вращается с одной скоростью и на малых оборотах, а при повышении нагрузки на процессор увеличения оборотов не происходит. В этом случае вы не слышите привычного гула лопастей когда запускаете игру или видео, а ноутбук выключается спустя 2-10 минут после запуска «тяжелого» приложения.
- Радиатор системы охлаждения забился пылью. И на каких бы оборотах не вращался вентилятор — горячему воздуху некуда выходить (решетка радиатора забита) и он остается в корпусе ноутбука возле процессора и видеочипа. В добавок, ко времени когда радиатор забит пылью и шерстью — уже высыхает заводская теплопроводная паста, что тоже ухудшает охлаждение.
Справедливости ради, стоит отметить, что проблема № 3 свойственна для 90% ноутбуков и решается чисткой ноутбука HP в сервисном центре или своими силами.
Первый и второй пункты, увы, решаются только заменой кулера.
Удачи вам с вашими цифровыми друзьями. Не ломайтесь. Ну а если что — вы знаете к кому обращаться 😉

Постоянная ссылка на статью: http://itpanic.ru/blog/?p=3807
Пользователи прочитавшие эту запись обычно читают: