- After Effects User Guide
- Beta releases
- Beta Program Overview
- After Effects Beta Home
- Features in Beta
- Properties panel (Beta)
- 3D Model Import (Beta)
- Getting started
- Get started with After Effects
- What’s new in After Effects
- Release Notes | After Effects
- After Effects system requirements
- Keyboard shortcuts in After Effects
- Supported File formats | After Effects
- Hardware recommendations
- After Effects for Apple silicon
- Planning and setup
- Workspaces
- General user interface items
- Get to know After Effects interface
- Workflows
- Workspaces, panels, and viewers
- Projects and compositions
- Projects
- Composition basics
- Precomposing, nesting, and pre-rendering
- View detailed performance information with the Composition Profiler
- CINEMA 4D Composition Renderer
- Importing footage
- Preparing and importing still images
- Importing from After Effects and Adobe Premiere Pro
- Importing and interpreting video and audio
- Preparing and importing 3D image files
- Importing and interpreting footage items
- Working with footage items
- Detect edit points using Scene Edit Detection
- XMP metadata
- Text and Graphics
- Text
- Formatting characters and the Character panel
- Text effects
- Creating and editing text layers
- Formatting paragraphs and the Paragraph panel
- Extruding text and shape layers
- Animating text
- Examples and resources for text animation
- Live Text Templates
- Motion Graphics
- Work with Motion Graphics templates in After Effects
- Use expressions to create drop-down lists in Motion Graphics templates
- Work with Essential Properties to create Motion Graphics templates
- Replace images and videos in Motion Graphics templates and Essential Properties
- Text
- Drawing, Painting, and Paths
- Overview of shape layers, paths, and vector graphics
- Paint tools: Brush, Clone Stamp, and Eraser
- Taper shape strokes
- Shape attributes, paint operations, and path operations for shape layers
- Use Offset Paths shape effect to alter shapes
- Creating shapes
- Create masks
- Remove objects from your videos with the Content-Aware Fill panel
- Roto Brush and Refine Matte
- Layers, Markers, and Camera
- Selecting and arranging layers
- Blending modes and layer styles
- 3D layers
- Layer properties
- Creating layers
- Managing layers
- Layer markers and composition markers
- Cameras, lights, and points of interest
- Animation, Keyframes, Motion Tracking, and Keying
- Animation
- Animation basics
- Animating with Puppet tools
- Managing and animating shape paths and masks
- Animating Sketch and Capture shapes using After Effects
- Assorted animation tools
- Work with Data-driven animation
- Keyframe
- Keyframe interpolation
- Setting, selecting, and deleting keyframes
- Editing, moving, and copying keyframes
- Motion tracking
- Tracking and stabilizing motion
- Face Tracking
- Mask Tracking
- Mask Reference
- Speed
- Time-stretching and time-remapping
- Timecode and time display units
- Keying
- Keying
- Keying effects
- Animation
- Transparency and Compositing
- Compositing and transparency overview and resources
- Alpha channels and masks
- Track Mattes and Traveling Mattes
- Adjusting color
- Color basics
- Color management
- Color Correction effects
- OpenColorIO and ACES color management
- Effects and Animation Presets
- Effects and animation presets overview
- Effect list
- Simulation effects
- Stylize effects
- Audio effects
- Distort effects
- Perspective effects
- Channel effects
- Generate effects
- Transition effects
- The Rolling Shutter Repair effect
- Blur and Sharpen effects
- 3D Channel effects
- Utility effects
- Matte effects
- Noise and Grain effects
- Detail-preserving Upscale effect
- Obsolete effects
- Expressions and Automation
- Expression
- Expression basics
- Understanding the expression language
- Using expression controls
- Syntax differences between the JavaScript and Legacy ExtendScript expression engines
- Editing expressions
- Expression errors
- Using the Expressions editor
- Use expressions to edit and access text properties
- Expression language reference
- Expression examples
- Automation
- Automation
- Scripts
- Expression
- Immersive video, VR, and 3D
- Construct VR environments in After Effects
- Apply immersive video effects
- Compositing tools for VR/360 videos
- Tracking 3D camera movement
- Work in 3D Design Space
- 3D Transform Gizmos
- Do more with 3D animation
- Preview changes to 3D designs real time with the Mercury 3D engine
- Add responsive design to your graphics
- Views and Previews
- Previewing
- Video preview with Mercury Transmit
- Modifying and using views
- Rendering and Exporting
- Basics of rendering and exporting
- H.264 Encoding in After Effects
- Export an After Effects project as an Adobe Premiere Pro project
- Converting movies
- Multi-frame rendering
- Automated rendering and network rendering
- Rendering and exporting still images and still-image sequences
- Using the GoPro CineForm codec in After Effects
- Working with other applications
- Dynamic Link and After Effects
- Working with After Effects and other applications
- Sync Settings in After Effects
- Creative Cloud Libraries in After Effects
- Plug-ins
- Cinema 4D and Cineware
- Collaboration: Frame.io, and Team Projects
- Collaboration in Premiere Pro and After Effects
- Frame.io
- Install and activate Frame.io
- Use Frame.io with Premiere Pro and After Effects
- Frequently asked questions
- Team Projects
- Get Started with Team Projects
- Create a Team Project
- Collaborate with Team Projects
- Memory, storage, performance
- Memory and storage
- How After Effects handles low memory issues while previewing
- Improve performance
- Preferences
- GPU and GPU driver requirements for After Effects
- Knowledge Base
- Known issues
- Fixed issues
- After Effects and macOS Ventura
- How After Effects handles low memory issues while previewing

When an expression fails to evaluate, expression errors appear in a warning banner at the bottom of the Composition and Layer panels. After Effects does not disable the expression but continues to evaluate it. The warning banner is displayed as long as the expression fails to evaluate; that is, until the expression is either fixed or manually disabled.
The expression error UI
Here’s an example of what the expression error warning banner looks like:

A. Left or Right arrow buttons B. The Reveal Expression C. The Expand/Collapse Warning
- The Left or Right arrow buttons display the previous or next expression error when multiple expressions fail to evaluate.
- The Reveal Expression (magnifying glass) button exposes the property with the failing expression in the Timeline panel. If the expression is in a different composition, that composition opens.
- The Expand/Collapse Warning (up/down arrows) button shows or hides the error text.
The expression error text is one line only, and is clipped to the width of the Composition panel.
To see the full expression error text
Click ![]() next to the expression. The complete error appears in a dialog box.
next to the expression. The complete error appears in a dialog box.

Choose After Effects > Preferences > Scripting & Expressions (macOS) or Edit > Preferences > General (Windows) and disable Show Warning Banner When Project Contains Expressions Errors.
When this option is disabled, the warning banner remains hidden even when new expression errors occur.
Re-enable this option to view expression errors.
Reveal expression errors
If an expression cannot be processed, After Effects displays a message explaining the error and automatically disables the expression. A yellow warning icon ![]() appears next to the expression. Click the warning icon to view the error message again.
appears next to the expression. Click the warning icon to view the error message again.
To show expressions that have errors, select one or more layers. Right-click (Windows) or Control-click (macOS) a selected layer in the Timeline panel. Choose Reveal Expression Errors from the context menu.
Some expressions rely on the names of layers or properties in your project. If you change the name of a layer or property that is involved in an expression, After Effects attempts to update the expression to use the new name. However, in some complex cases, After Effects is unable to automatically update the expression. In this case, the expression may produce an error message and you must update the expression yourself.
The expression may not work if you are running After Effects in a different language, or if you changed the names of the items (such as layers, effects, or other property groups). To enable the expression, modify the expression to use the new names or the strings that match the language in which you are running After Effects.
The examples in this document were created for the default state of After Effects running in English. Some examples in this document will not work without such modification.
Errors caused by precomposing layers
Precomposing multiple layers can cause expressions that refer to a property of one of the layers to produce an error. You have to update these expressions to refer to the layer within the new composition. This is especially a concern with expressions that use thisComp instead of referring to a composition by its name. (See About precomposing and nesting.)
The arguments for some effects in After Effects have changed from the arguments in previous versions. If you have existing expressions that use argument index references instead of argument names, update the expressions to use argument names.
More Expression resources

Now that you have understood some of the concepts behind expressions, come to the community for some real-life examples, and to share your work.
You can also check out Dan Ebberts’ excellent collection of example expressions and tutorials on his MotionScript website.
The AE Enhancers forum also provides many examples and much information about expressions, as well as scripts and animation presets.
Давайте рассмотрим выражения в After Effects и ошибки, которые возникают из-за использования русской версии программы на примере простого проекта, присланного мне подписчиком. Я всем рекомендую устанавливать и использовать Adobe After Effects только английской версии, и вот вам еще одна причина зачем так делать.
https://www.youtube.com/watch?v=-wEPBXPlVMI
Еще больше видеоуроков по выражениям для After Effects вы найдете в плейлисте на канале
Сразу после открытия проекта я обнаружил, что проект в нерабочем состоянии и стандартное сообщение об ошибке: This project contains an expression error / Проект содержит ошибку выражения (This project contains expression errors / Этот проект содержит ошибки выражений).
В присланном мне проекте мы видим, что при попытке выражения найти нужный слайдер в композиции на слое в After Effects, происходит ошибка доступа. Программа не может найти свойство с именем «Ползунок«, потому что оригинальное выражение создавалось в русской версии After Effects. Что интереснее, подобные ошибки возникают и в обратную сторону — на русской версии After Effects не работают некоторые полезные скрипты и выражения.
Но для решения этой проблемы есть скрипт ExpressionUniversalizer, задача которого преобразовать все стандартные обращений к подобным элементам управления в универсальные идентификаторы ADBE. Например, список таких названий для стандартных эффектов вы можете найти у меня на сайте: Перевод названий эффектов для After Effects.
И вот легким движением руки скрипт ExpressionUniversalizer превращает «Ползунок» в «ADBE Slider Control-0001«, который будет уже без ошибок работать во всех версиях After Effects. А вот переименовывать слои и эффекты не обязательно, After Effects знает о возможности менять имена у этим элементов и находит их правильно.
Поступил интересный комментарий от зрителя Mr.Masterpiece:
Можно и самому универсальные выражения писать, в данном случае было бы достаточно («Ползунок») исправить на (1). Это так же работало бы на любом языке ;D
Есть специальное выражение, которое кидается на Source text. Оно показывает индекс любого параметра. Тут показывается как его применяют на 19 минуте: https://vimeo.com/19485387
Кстати, в бесплатном наборе скриптов redefinery.com: rd: scripts есть несколько под общим названием rd: Gimme Prop, что помогут определить путь или номер к нужному свойству эффекта для выражения в нескольких видах, в том числе и ADBE. Так что можно сразу писать выражения в правильной универсальной форме для любого языка.
Еще один комент от Виктора Иванова на ту же тему. Он прислал скрипт, который сразу показывает название и номер свойства слоя или эффекта, только скопировать не получится. Я немного упростил код, выбираете свойство, запускаете скрипт с кнопки или из файла и видите сообщение с нужной информацией.
Код: Выделить всё
var curComp = app.project.activeItem;
if(curComp != null && curComp instanceof CompItem){
   var selProps = curComp.selectedProperties;
   if(selProps.length == 1){
      alert("Name: " + selProps[0].name +
         "nIndex: " + selProps[0].propertyIndex +
         "nMatch Name: " + selProps[0].matchName);
   } else if(selProps.length > 1){
      alert("Name: " + selProps[1].name +
         "nIndex: " + selProps[1].propertyIndex +
         "nMatch Name: " + selProps[1].matchName);
   } else {
      alert("No Property are selected")
   }
} else {
   alert("No Composition are selected");
}

Полезные ссылки: Запись стрима по выражениям (expressions) в After Effects
 Русский против Английского интерфейса
 Как сменить язык у After Effects с русского на английский
Содержание
- Вопросы сообществу
- Добавить комментарий Отменить ответ
- Adobe After Effects. Урок 25
- Маркеры в Adobe After Effects.
Типы и виды маркеров. Свойства маркеров. - Задачи на этот урок:
- 1. Типы и виды маркеров в Adobe After Effects.
- 2. Создание маркеров.
- 3. Свойства маркеров.
- 4. Присвоение маркерам цветовых меток.

在中国购买的 Creative Cloud 产品不含 CC 桌面应用程序中的 Creative Cloud 移动应用程序和在线服务及相关功能。

Перед установкой After Effects CC 2015, прочитайте статью о том, как сохранить предыдущие версии установленными. Чтобы ознакомиться с обновлениями и изменениями, прочитайте данную статью.
Интерактивные улучшения производительности в After Effects включают существенные изменения в процессе вычисления выражений. Выражения теперь вычисляются в потоке рендеринга, а это значит, что интерфейс пользователя больше не будет замедляться при вычислении выражения. Выражение влияло на метки кэша, например, они обновлялись вместо ожидания завершения процесса с выражением. Некоторые композиции с большим количеством выражений преобразовываются быстрее за счет расширенного использования внутреннего кэша для выражений. Быстрый рендеринг происходит особенно тогда, когда одно выражение зависит от результатов других выражений.
Этот видно в работе, если выражение не удается вычислить:
- Сообщение об ошибке проверки выражения появляется не в диалоговом окне, а на предупредительном баннере в нижней части панелей «Композиция» и «Слой».
- Выражение автоматически не отключается и продолжает вычисляться.
Предупреждающий баннер отображается, покуда выражение не будет вычислено, то есть, до тех пор пока выражение будет определено или вручную отключено.
При наличии нескольких выражений, с которыми произошел сбой, вам больше не нужно щелкать по всем появляющимся сообщениям об ошибках.Кроме того, когда вы устраните причину сбоя выражения (включая просто отмену изменения), вам больше не нужно щелкать для его повторного включения.
Ранее, изменение отдельного свойства или удаление одного слоя могло привести к сбою сотни связанных выражений. Эти изменения дают некоторое облегчение пальцам пользователей, имеющих дело с большим количеством выражений.
В данном примере показано, как будет выглядеть предупреждающий баннер с сообщением об ошибке:
С правой стороны предупреждающего баннера об ошибке с выражением находятся кнопки управления:
- Кнопки со стрелками влево и вправо позволяют переходить к предыдущей или следующей ошибке с выражением, если не удалось проверить несколько выражений.
- Кнопка «Отобразить выражение» позволяет просмотреть фрагмент с непроверенным выражением на панели «Временная шкала». Если выражение находится в другой композиции, то она откроется.
- Кнопка развертывания/свертывания предупреждения (кнопки со стрелками вверх и вниз) показывает или скрывает текст ошибки.
Текст ошибки с выражением состоит только одну строку и прикреплен к широкой стороне панели «Композиция». Чтобы просмотреть весь текст ошибки с выражением в диалоговом окне старого образца, нажмите на желтый треугольник рядом с выражением на панели «Временная шкала».
Вы можете скрыть весь предупреждающий баннер, если он отвлекает вас.
Выберите Правка > Параметры > Общие (Windows) или After Effects > Параметры > Общие (Mac OS) и после этого снимите флажок рядом с пунктом «Показывать баннер с предупреждением, когда проект будет содержать ошибки с выражениями».
Когда этот параметр отключен, предупреждающий баннер остается скрытым даже при появлении новых ошибок с выражениями. Для просмотра ошибок выражений активируйте данный параметр повторно.
Сообщите нам ваше мнение об изменениях в вычислении выражений на форуме After Effects.
 На посты, размещаемые в Twitter™ и Facebook, условия Creative Commons не распространяются.

Вопросы сообществу
Получайте помощь от экспертов по интересующим вас вопросам.

Хотя бы одну, а как правило больше, из этих ошибок совершают все, кто использует After Effects. Данное видео сделает выполнение работы над ошибками гораздо проще!
У каждого редактора видео есть свой собственный подход к рабочему процессу, тот, который они выработали самостоятельно, и который подходит проектам, над которыми они обычно трудятся. Тем не менее, у каждого редактора, будь то начинающий новичок или ветеран с тридцатилетним стажем, есть немало немало возможностей для профессионального роста, развития и устранения некоторых вредных привычек, которые они неизбежно приобрели за время работы. В этом видео Josh Noel из PremiumBeat не только рассматривает более десяти ошибок, которые делают как начинающие, так и опытные редакторы, но и показывает, как заранее их избежать. Смотрите видео ниже:
Безусловно, правило «работает — не трогай» имеет право на жизнь, но советы, о которых Josh Noel говорит в видео, могут на самом деле сделать ваш рабочий процесс намного более эффективным, точным и профессиональным.
Вот список ошибок и способы их избежать, перечисленные в видео:
— Выравнивание текста вручную: Выравнивание текста можно выполнить с помощью инструментов в окне выравнивание.
— Использование меню transform для анимации текста: инструменты в меню Transform великолепны,но вы можете сделать гораздо больше с помощью вкладки Animate.
— Забывать использовать feather для масок
— Использование слоев в качестве shapes: фактически использование слоя shapes вместо solid слоя позволит вам получить доступ к большему количеству инструментов и элементов управления.
— Не использовать «easy ease»: обычные линейные ключевые кадры определенно имеют свое применение,но использование ключевых кадров «easy ease» — это легко и быстро, чтобы придать вашим анимациям естественное движение.
— Использование stroke effect: какой лучший путь создать эффект stroke? Использовать Stroke effect, не так ли? По мнению Josh Noel, лучше создать фигурный слой и выбрать «обрезать контуры». Таким образом, вы получите больше полезных элементов управления.
— Не использовать области при цветокоррекции: как правило, не рекомендуется полагаться на монитор, для точной оценки цвета в композиции. Изучайте и используйте scopes для этого.
— Использование плагинов в качестве костылей: плагины могут сделать ваш рабочий процесс немного быстрее и проще, но After Effects достаточно мощный, чтобы сделать все, что вам нужно. Не позволяйте плагинам быть костылями, без которых вы не можете обойтись.
— Неорганизованный timeline: нет ничего хуже, не так ли? Но как содержать свою временную шкалу организованной, когда у вас есть примерно 50 слоев для одной анимации? Использовать pre-comps.
— Не использовать размытие движения: Добавление легкого размытия движения к анимации-отличный способ сделать их более естественными и профессиональными.
Рубрики: Видео, Софт, Уроки |  Комментариев нет »
Добавить комментарий Отменить ответ
Для отправки комментария вам необходимо авторизоваться.

Adobe After Effects. Урок 25
Маркеры в Adobe After Effects.
Типы и виды маркеров. Свойства маркеров.

Задачи на этот урок:
1. Типы и виды маркеров в Adobe After Effects.

Маркеры предназначены для создания меток времени в композиции и на слое, а также для хранения комментариев и других метаданных XMP, кроме этого маркеры позволяют упростить совмещение слоев или курсора воспроизведения с определенными временными точками на Timeline.
В Adobe After Effectsесть два типа маркеров:
- Composition Markers (маркеры композиции) – находятся на линейке времени композиции, и используются для создания меток для всех слоев;
- Layer Markers (маркерs слоя) – находятся на каждом слое отдельно, и используются для создания меток для текущего слоя.
Оба типа маркеров могут содержать одну и ту же информацию. При установке маркера композиции в комментарий вводится номер маркера, при установке маркера слоя комментарий не содержит ничего.
Маркеры композиции After Effects аналогичны маркерам эпизода в Adobe Premiere. Маркеры слоя в After Effects аналогичны маркерам клипа в Adobe Premiere.
При рендеринге композиции, маркеры можно преобразовать в веб-ссылки, ссылки на разделы, монтажные метки, в зависимости от выходного формата и значения, заданного в диалоговом окне маркера. Маркеры можно экспортировать в формате метаданных XMP.

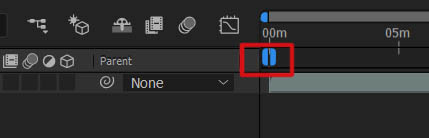
У интервальных маркеров есть точка входа (начало интервала) и точка выхода (конец интервала). Перетаскивание точки входа маркера изменяет позицию маркера на Timeline, а перетаскивание точки выхода маркера изменяет продолжительность маркера.
Для совмещения слоев или курсора воспроизведения с определенными временными точками на Timeline при перемещении ключевого кадра, курсора воспроизведения или ползунка длительности слоя нажмите и удерживайте клавишу SHIFT, это упростит привязку элементов к маркерам.
На значке маркера, содержащего ссылку или монтажную метку, есть небольшая точка.
2. Создание маркеров.
Маркеры можно добавлять, как в процессе редактирования, так и во время предпросмотра или предварительного воспроизведения аудио.
- Чтобы добавить маркер композиции, нужно снять выделение со всех слоев и выбрать меню «Layer/Add marker» (* на цифровой клавиатуре).
- Чтобы добавить маркер слоя, нужно выделить слой и выбрать меню «Layer/Add marker» (* на цифровой клавиатуре).
- Чтобы добавить маркер сразу для нескольких слоев, нужно выделить эти слои слой и выбрать меню «Layer/Add marker» (* на цифровой клавиатуре).
- Для удаления маркера перетащите маркер за пределы композиции или нажмите клавишу ctrl и щелкните его мышью.
- Чтобы удалить все маркеры, наведите указатель мыши на маркер и щелкните его правой кнопкой мыши, а затем выберите «Delete All Markers».
- Чтобы заменить все маркеры на слое маркерами, содержащими временные метаданные из исходных файлов, наведите указатель мыши на маркер слоя, щелкните его правой кнопкой мыши, а затем выберите «Update Markers From Source».
Быстрые клавиши управления маркерами:
- * на цифровой клавиатуре – установить маркер в позиции Курсора воспроизведения (действует во время предпросмотра и предварительного воспроизведения аудио).
- ALT+* – установить маркер в позиции Курсора воспроизведения и открыть диалоговое окно маркера.
- SHIFT+0-9 (на основной клавиатуре) – установить маркер композиции в позиции Курсора воспроизведения и присвоить номер маркеру (0 – 9) в текущем отрезке времени. Если указанный номер уже занят другим маркером композиции, After Effects не создает новый маркер. Вместо этого он переместит существующий маркер с таким номером на новую позицию.
- 0-9 (на основной клавиатуре) – перейти к маркеру композиции с номером 0-9.
- Щелчок по маркеру при нажатой клавише ALT – отобразить промежуток времени между маркерами двух слоев или ключевыми кадрами на панели «Info».
- Щелчок маркера при нажатой клавише CTRL – удалить маркер.
- Чтобы заблокировать все маркеры, щелкните маркер правой кнопкой мыши, а затем выберите «Lock Markers».
3. Свойства маркеров.

- В композиции может быть любое количество маркеров.
- За один раз можно создать только один маркер композиции.
- За один раз можно создать маркеры для всех выделенных слоев.
- При добавлении или перемещении маркера на место другого маркера композиции, он заменит существующий маркер.
- Чтобы просмотреть или изменить маркер, наведите указатель мыши на маркер и дважды щелкните его. Можно вызвать Всплывающее меню и выбрать команду «Setting…».
- Чтобы переместить маркер в точку, перетащите маркер в нужное место мышью или дважды щелкните маркер и панели свойств маркера введите время.
- Чтобы задать продолжительность интервальных маркеров композиции или слоя, перетащите точку выхода маркера на Timeline или дважды щелкните маркер и панели свойств маркера введите продолжительность.
- Если в панели свойств маркера ввести в свойство Duration (продолжительность) не нулевое значение, то точечный маркер станет интервальным.
- Для автоматического создания маркеров слоев, основанных на временных метаданных исходного файла, включите параметр «Create Layer Markers from Footage XMP Metadata» в настройках во вкладке «Media & Disk Cache». (Эти опция включена по умолчанию.)
- Для синхронизации маркеров слоя на слое предварительной композиции с соответствующими маркерами исходной композиции щелкните маркер слоя правой кнопкой мыши, а затем выберите «Обновить маркеры из источника». Внимание! Эта команда удалит все маркеры, добавленные на слой.
Примечание. Если слой использует файл, а не композицию в качестве источника, данная команда восстановит маркеры слоя так, чтобы они соответствовали временным метаданным XMP исходного файла.
- При добавлении одной композиции в другую первая композиция станет вложенным слоем второй. Все маркеры из вложенной композиции станут маркерами слоя на Timeline композиции-контейнера. Эти маркеры не будут связаны с исходными маркерами композиции. Изменение маркеров в исходной композиции не будет влиять на маркеры слоя вложенной композиции. Например, при удалении одного из исходных маркеров композиции соответствующий маркер слоя вложенной композиции останется на своем месте.
- Сценарии и выражения могут считывать данные, содержащиеся в маркерах. Поскольку метаданные XMP исходных элементов видеоряда могут быть преобразованы в маркеры слоя, то выражения и сценарии могут работать с метаданными XMP.
- При удалении нумерованного маркера композиции номера других маркеров остаются прежними. Если вместо номера, назначенного по умолчанию, ввести комментарий, то этот номер может быть использован для маркера композиции, созданного позже.

4. Присвоение маркерам цветовых меток.
Маркерам можно присваивать цветовые метки. По умолчанию маркеры не имеют никакого цвета. Чтобы изменить цветовую метку маркера:
Для настройки цветовых меток, выберите пункт меню Preferences/Label.
Содержание
- Expression errors
- The expression error UI
- To see the full expression error text
- To hide the warning banner
- Reveal expression errors
- Errors caused by precomposing layers
- AinTransitions for After Effects — Troubleshooting
- Project (templates) contains Expression errors in After Effects CC 2019 — CC 2022
- Using the Expressions editor
- Expression editor code interface
- Example 1: Display error in your code snippet
- Example 2: Auto-suggestions based on the commonly used components
- More Expression resources
- Editing expressions
- Add or remove an expression from a property
- Link a set of properties
- Disable expressions
- Edit expressions
- Edit an expression with the pick whip
- Format of expressions created by the pick whip
- Edit an expression manually
- Show expressions and the expression graph
- Showing expressions in the Timeline
- Expressions in the Graph Editor
- Read the graph editor
- Add comments to an expression
- Save and reuse expressions
- Save an expression as a preset
- Copy an expression from a layer property
Expression errors
When an expression fails to evaluate, expression errors appear in a warning banner at the bottom of the Composition and Layer panels. After Effects does not disable the expression but continues to evaluate it. The warning banner is displayed as long as the expression fails to evaluate; that is, until the expression is either fixed or manually disabled.
The expression error UI
Here’s an example of what the expression error warning banner looks like:
A. Left or Right arrow buttons B. The Reveal Expression C. The Expand/Collapse Warning
- The Left or Right arrow buttons display the previous or next expression error when multiple expressions fail to evaluate.
- The Reveal Expression (magnifying glass) button exposes the property with the failing expression in the Timeline panel. If the expression is in a different composition, that composition opens.
- The Expand/Collapse Warning (up/down arrows) button shows or hides the error text.
The expression error text is one line only, and is clipped to the width of the Composition panel.
To see the full expression error text
Click next to the expression. The complete error appears in a dialog box.

Choose After Effects > Preferences > Scripting & Expressions (macOS) or Edit > Preferences > General (Windows) and disable Show Warning Banner When Project Contains Expressions Errors .
When this option is disabled, the warning banner remains hidden even when new expression errors occur.
Re-enable this option to view expression errors.
Reveal expression errors
If an expression cannot be processed, After Effects displays a message explaining the error and automatically disables the expression. A yellow warning icon appears next to the expression. Click the warning icon to view the error message again.
To show expressions that have errors, select one or more layers. Right-click (Windows) or Control-click (macOS) a selected layer in the Timeline panel. Choose Reveal Expression Errors from the context menu.
Some expressions rely on the names of layers or properties in your project. If you change the name of a layer or property that is involved in an expression, After Effects attempts to update the expression to use the new name. However, in some complex cases, After Effects is unable to automatically update the expression. In this case, the expression may produce an error message and you must update the expression yourself.
The expression may not work if you are running After Effects in a different language, or if you changed the names of the items (such as layers, effects, or other property groups). To enable the expression, modify the expression to use the new names or the strings that match the language in which you are running After Effects.
The examples in this document were created for the default state of After Effects running in English. Some examples in this document will not work without such modification.
Errors caused by precomposing layers
Precomposing multiple layers can cause expressions that refer to a property of one of the layers to produce an error. You have to update these expressions to refer to the layer within the new composition. This is especially a concern with expressions that use thisComp instead of referring to a composition by its name. (See About precomposing and nesting.)
The arguments for some effects in After Effects have changed from the arguments in previous versions. If you have existing expressions that use argument index references instead of argument names, update the expressions to use argument names.
Источник
AinTransitions for After Effects — Troubleshooting
AinTransitions for After Effects — Troubleshooting
Popular Articles
Knowledge Base Categories
- AinTrailers – How To (1)
- AinTransitions – General (2)
- AinTransitions – Use Cases (33)
- AinTransitions for After Effects – Troubleshooting (13)
- AinTransitions for After Effects – Video Tutorials (20)
- AinTransitions for Premiere Pro – Troubleshooting (15)
- AinTransitions for Premiere Pro – Video Tutorials (14)
Project (templates) contains Expression errors in After Effects CC 2019 — CC 2022
A new type of expression engine (“Javascript”) has been added in After Effects CC 2019 – CC 2022 versions. This type of expression engine is enabled by default and has a more strict syntax, so some correct expressions from the “Legacy ExtendScript” engine may be partially incompatible with the new strict syntax, so you may encounter expression errors in templates.
All our transitions are compatible with the new “Javascript” engine; however, we cannot exclude the possibility that any template from more than 5500 transitions may have an expression that is partially incompatible. In this case, you can tell us the name of the composition that has error and we will fix it. But you can solve the problem in a couple of clicks yourself by the method described below:
- Go to menu “File” (or click to hamburger button as in the screenshot below) > “Project Settings” > “Expressions” tab
- In the field “Expressions Engine” select “Legacy ExtendScript” value and click OK
Источник
Using the Expressions editor
Use the different options in the expression editor to customize your expressions.

You can customize the code editor interface of the expression editor, including highlighting JavaScript syntax with custom colors, line numbers, code folding, and auto-complete. To customize these options, select Preferences > Scripting and Expressions.

Expression editor code interface
Customize syntax highlighting of JavaScript syntax and After Effects methods and properties:

- You can assign custom colors to different types of syntax, the background, and text selection, as well as adjust the alpha ( opacity ) of the text selection. Click the dropper icon to select a color from the color wheel.
- You can customize how the expression editor looks from the different themes available. Click the Theme drop-down list and select from the themes. You may also save custom themes.
Edit preferences:

Code Preview box:

All changes to the syntax colors and other editor preferences can be previewed live in this code preview box.
Tip: Use throw to debug expressions inline. You can use this when you want to see the code error within the expression editor field, to save time and efficient debugging.

Example 1: Display error in your code snippet
Open a comp in After Effects that has expression snippets.
In the Timeline panel, select a layer and do Alt+Click. It displays the expression in the expression editor field.

Click the editor field to enter the edit mode.

In this example, select MILE in the first line, and change it to mile in lowercase. This triggers an error in the code, and After Effects displays an error message within the code snippet.

After Effects also displays an error banner with details about the Line number where the error occurs.
Example 2: Auto-suggestions based on the commonly used components
In the same expression, change the layer name from mile to MILE.
As you type, After Effects displays a drop-down list with a set of suggestions that After Effects pulls from the layer names of the project.

Composition names, layer names, footage names, and effect names are all pulled into the autoComplete and shown in the correct context with their respective comp(), layer(), footage(), and effect() methods. This allows you to keep your expression active while referencing items in the project. You do not need to scroll the Timeline or open other panels to refer to properties or items using the pick whip.
More Expression resources
Now that you have understood some of the concepts behind expressions, come to the community for some real-life examples, and to share your work.
You can also check out Dan Ebberts’ excellent collection of example expressions and tutorials on his MotionScript website.
The AE Enhancers forum also provides many examples and much information about expressions, as well as scripts and animation presets.
Источник
Editing expressions
Learn how to add, edit, and work with expressions in After Effects.

Add or remove an expression from a property
Any property that you can keyframe can use an expression.
To add and reveal an expression, select the property in the Timeline panel and do one of the following:
- Select Animation > Add Expression . To remove, select Animation > Remove Expression .
- Press Alt+click (Windows) or Option+click (macOS) the stopwatch button next to the property name in the Timeline panel or the Effect Controls panel. To remove the expression, repeat this step.
When the expression is activated, four icons appear under the property, and the value turns red.
Link a set of properties
The pick whip is the drag-and-drop selection tool for linking in After Effects. Click and hold the spiral icon next to the expression to enter selection mode. A whip links to your cursor as you drag to another property. Releasing the click targets the property underneath, generating expression syntax automatically.

To fully understand how expressions work, you need to understand how code affects a property value.
To link a set of properties across layers and compositions, use property links:
Select any one property or set of properties and choose Edit > Copy With Property Links or Edit > Copy With Relative Property Links .
Then paste those properties on any layer in a composition. The pasted properties will now be connected to the layer from which the properties were copied. Any change made to the original property is reflected in the instances of the pasted property links.
You can also copy an entire layer with property links and paste it to create duplicates that follow the changes made to the original.
The result of copying a layer’s Position property with the Copy With Relative Property Links command is as follows:
The result of copying a layer’s Position property with the Copy With Property Links command is as follows:
Disable expressions
To temporarily disable an expression, click the Enable Expression switch. When an expression is disabled, a slash appears through the switch.

Edit expressions
Edit an expression with the pick whip
If you’re unsure about using JavaScript or After Effects expressions, go ahead and use the pick whip tool to get started. This tool is an easy way to link properties of expressions.

- Make sure your property has an expression applied to it. For example, Alt+Click (Win) or Opt+Click (Mac) the stopwatch icon to the left of the Scale property to apply an expression.
- Go to the Timeline panel and click inside the text field to activate the Expression Editor. Place the cursor where you want to edit the expression.
- The expression is entered in the expression field at the insertion point.
- If text is selected in the expression field, the new expression text replaces the selected text.
- If the insertion point is not in the expression field, the new expression text replaces all text in the field.
You can drag the pick whip to the name or value of a property. If you drag to the name of a property, the resulting expression displays all the values as one. For example, if you drag the pick whip to the name of the Position property, an expression like the following appears:
If you drag the pick whip to one of the component values of the Position property (such as the y value), an expression like the following appears. Both the x and y coordinates of the property are linked to the y value of the Position property:
If you use the pick whip to create an expression to refer to a layer, and that layer has the same name as another layer in the same composition, then the targeted layer’s name changes. The new layer name is the old layer name with a numeral at the end. This change is necessary to ensure that the expression unambiguously refers to a single layer in the composition.
Format of expressions created by the pick whip
The format of expressions created by the pick whip is determined by the Expression pick whip writes compact english preference.
- Edit > Preferences > General (Windows)
- Preferences > Scripting & Expressions (macOS)
The pick whip creates expressions, which use the names for properties as they appear in the Timeline panel. As these names are in-built, they can work when After Effects is running in another language. Editable property names are enclosed in double quotation marks and remain the same across languages. Deselect this option if the project is not being shared in other languages.
Here is an example in compact English:
Here is the same expression, not in compact English:
Because the default is to use compact English, this document uses compact English in most examples and illustrations.
Edit an expression manually

To edit an expression manually, do the following:
Enter text-editing mode by clicking in the expression field. When you enter text-editing mode, the entire expression is selected. To add to the expression, click within the expression to place the insertion point; otherwise, you will replace the entire expression.
Type and edit text in the expression field, optionally using the Expression Language menu. To see more of a multiline expression, drag the bottom or top of the expression field to resize it.
- Press Enter on the numeric keypad.
- Click outside the expression field.
Show expressions and the expression graph
Showing expressions in the Timeline
- Reveal expressions with errors:
You can choose to only show properties which contain expression errors, which helps you quickly view and correct the errors. Use the following steps to do it:
- Select the layer(s) you want to view the errors for and right click to open the flyout menu.
- Select Reveal > Reveal Expression Errors .


- Show only properties with expressions:
To show only properties with expressions, select one or more layers, and then press EE.

Use the search field in the Timeline panel to search expressions as well as other components of a property. If the search string appears in an expression, the property and its containing property groups and layer are shown in the set of search results.
To resize the expression field, drag its top edge up or down.
Expressions in the Graph Editor
In Graph Editor mode, the single expression field appears as a resizable box at the bottom of the Graph Editor. It shows only the expression for the selected property. To show multiple expression fields simultaneously, the Timeline panel must be in layer bar mode.

To toggle between layer bar mode and Graph Editor mode, press Shift+F3 . You can also use the Graph Editor button at the Top of the Timeline panel for this.

To show the expression field in the Graph Editor, choose Show Expression Editor from the Choose Graph Type And Options menu at the bottom of the Graph Editor. When you add an expression to a property, the expression editor is shown.

To see how an expression changes the value or velocity graph, click the Show Post-Expression Graph button while showing the value or velocity graph in the Graph Editor.
Read the graph editor
The dimly colored graph displays the value or velocity before the expression is applied. The brightly colored graph displays the value or velocity after the expression is applied. Turning on the graph overlay for the Position property changes the motion path display in the Composition panel so you can see the expression-affected path.

If you write a complex expression, you should add comments that explain what the expression does and how its pieces work.
Use one of the following syntaxes to comment your code:
- Type // at the beginning of the comment. Any text between // and the end of the line is ignored.
For example: //This is a comment. - Type /* at the beginning of the comment and */ at the end of the comment. Any text between /* and */ is ignored.
For example: /*This is a multiline comment.*/
Save and reuse expressions
Once you have written an expression, you can save it for future use by copying and pasting it into a text-editing application. You can also save it in an animation preset or template project. However, because expressions are written in relation to other layers in a project and may use specific layer names, you must sometimes modify an expression to transfer it between projects.
You can define your own functions within expressions using normal JavaScript function syntax. In this example, a function is defined that calculates the average of two values, and the last line uses this function:
You must define each function fully within each expression in which it is used. There is no global library of functions that you can add to.
If you want to save an expression for use in another project, consider adding comments to the expression. (See Add comments to an expression.) You should also use variables so that you can change a value in one place rather than having to change it in several places.
For example, this expression has a multiline comment at the beginning that explains what the expression does and a short comment after a variable is declared and initialized that tells what the variable is for:
You can save an animation preset that includes an expression and reuse it in other projects, as long as the expression does not refer to properties that don’t exist in the other projects. When you save a preset in which a property has an expression but no keyframes, only the expression is saved. If the property has one or more keyframes, the saved preset contains the expression along with all keyframe values.
Save an expression as a preset
You can save an expression as a preset and use it in other projects using the following steps:
In the TImeline , select the property on which the expression is applied, for example — the expression is applied to the Rotation property of a layer, so select it. Then, select Animation > Save Animation Preset .
Rename the preset — let’s say «Time40», and save. By default, it is saved in the User Presets folder as an Adobe After Effects Preset file.
To apply your preset, twirl open Animation Presets under the Effects & Controls menu. You have two folders there — Presets and User Presets , twirl open User Presets . It has all the presets that you create within After Effects. Drag the «Time40» preset onto the layer you are working on and the expression is applied!
Copy an expression from a layer property
You can copy an expression from a layer property, with or without the keyframes for the property.
- To copy an expression and keyframes from one property to other properties, select the source layer property in the Timeline panel, copy the layer property, select the target layer properties, and paste.
- To copy an expression from one property to other properties without copying keyframes, select the source property, choose Edit > Copy Expression Only, select the target properties, and paste.
TIP: Copying an expression without keyframes is useful when you want to simultaneously copy multiple expressions and paste them onto one or more new layers, or when you want to copy one expression and paste it onto more than one layer.
As with pasting keyframes and other items, you can often paste the item into the target layer and rely on After Effects to determine which property should be the target of the paste operation. For example, this works for copying Position properties from one layer to another. But you must select the target property if you are pasting an expression from a Position property into a Scale property.
Источник
Работа над ошибками
20. При загрузке Adobe After Effects CC 2020 появляется окно System Compatibility Report (Отчёт о совместимости системы). Где сообщается что, драйвера видеокарт старые и не поддерживаются, и предлагается их обновить.
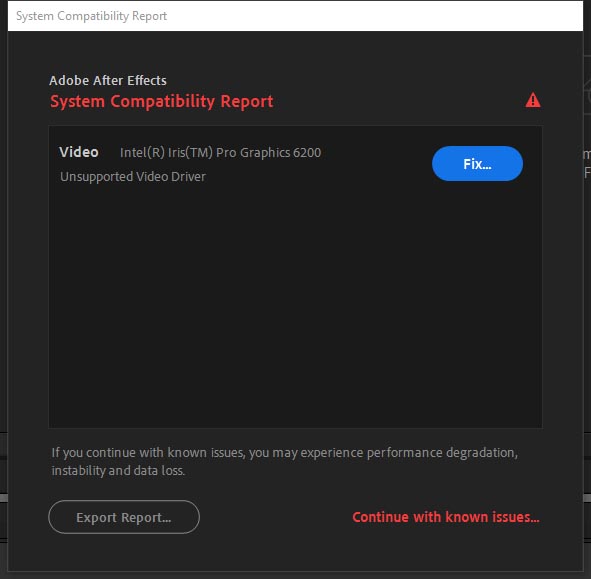
Если у вас старая видеокарта, для которой драйвера не обновляются, до рекомендуемой версии, то можно отключить это окно.
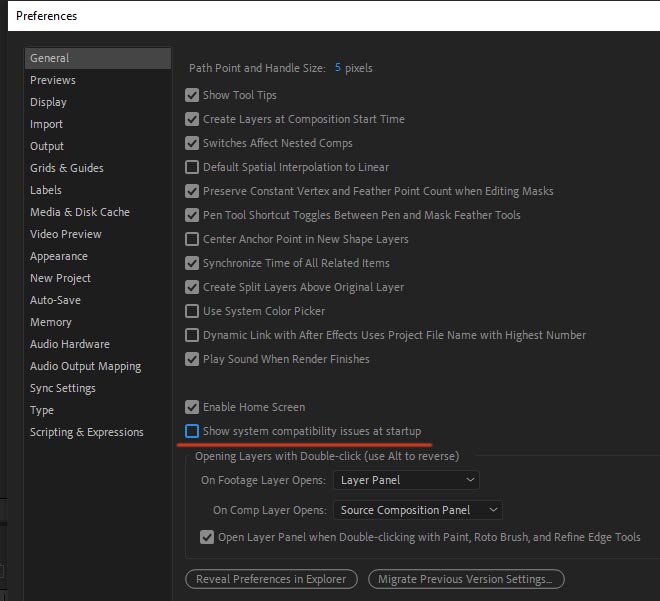
В обновлении программы Adobe After Effects CC 2020 (17.0.1), была добавлена новая команда Показать проблемы с совместимостью с системой при запуске (Show system compatibility issues at startup) в закладке Общие (General).
Идём в Edit > Preferences > General и снимаем галку перед пунктом: Show system compatibility issues at startup.
Если у вас базовая версия Adobe After Effects CC 2020, то окно System Compatibility Report отключается через Console.
21. Ошибка при рендере в версии программы Adobe After Effects 2022: After Effects error: After Effects has encountered a failure (code: 19969) related to GPU-enabled effects on this frame. This is likely because your GPU is out of memory.
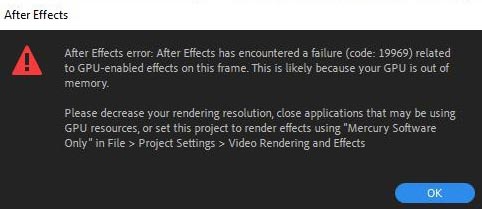
Якобы у графического процессора просто недостаточно памяти для GPU ускорения
Источник
Работа над ошибками
11. При открытии mov файла в программе After Effects СС получаем ошибку. Это происходит на платформе Mac OS X когда компонент DVCPROHDVideoOutput QuickTime конфликтует с программой After Effects CC (12.0). Ошибка также может возникнуть при просмотре, визуализации и экспорте видео. Встречаются следующие варианты ошибок:
— «After Effects error: file ‘file name.mov’ cannot be imported — this ‘Mov file is damaged or unsupported.’»
— «After Effects: One of the output modules could not be imported. It has been reset to use the default setting for the selected file format.»
— “Error reading frame from file ‘[file path and name].mov’. (86 :: 2)”
— “[file path and name].mov”. An output module failed. The file may be damaged or corrupted. (-1610153464)”
Решение проблемы: это происходит потому что, для воспроизведения и экспорта Adobe After Effects СС использует QT32 Server. И с этим процессом происходит сбой из-за плохого взаимодействия с QuickTime video out, при установленном компоненте DVCPROHDVideoOutput QuickTime component. Поэтому идем в [OS Drive]/Library/QuickTime делаем резервную копию DVCPROHDVideoOutput.component перетащив его на рабочий стол. Теперь удаляем DVCPROHDVideoOutput.component из папки Library/QuickTime перетащив его в корзину. И соответственно не забываем очистить корзину. Также как вариант, можно попробовать установить последнююю сборку кодеков Apple ProApps QuickTime Codecs 1.0.x update.
*При открытии проекта в версии программы Adobe After Effects CC 2020 появляются следующие сообщения об ошибках:
«After Effects error: The source compression type is not supported. (86 :: 1)»
Нажимаем на кнопку ОК и появится ещё одно сообщение:
«After Effects error: file ‘file name.mov’ cannot be imported — this ‘.mov’ file is damaged or unsupported.»
Проблема в том, что версия программы Adobe After Effects CC 2020 не поддерживает связанное с проектом видео в контейнере MOV. Т.е. не поддерживается кодек которым пожато видео в контейнере MOV.
12. После запуска программы на плфтформе Mac OS X Maverics появляется сообщение: You can’t use this version of the application “Adobe After Effects CC” with this version of OS X. You have “Adobe After Effects CC” 12.0. Или: Данная версия программы “Adobe After Effects CC” не может быть использована с этой версией OS X. Вы используете “Adobe After Effects CC” 12.0.
Необходимо установить обновление Adobe After Effects CC (12.1) Update и выше, при установке обновления 12.2 и выше необходимо использовать следующую методику.
Если при попытке поставить или скачать обновление, получаем ошибку: The most likely causes for this failure are an inability to connect to the internet or being logged in as a non-administrative user. То вот следующие методы решения проблемы: удалить или переименовать, файл в следующих директориях:
Mac OS X / Library / Application Support/Adobe/AAMUpdaterInventory/1.0/AdobeUpdaterAdminPrefs.dat. Или / Library / Application Support/Adobe/AAMUpdater/1.0/ AdobeUpdaterAdminPrefs.dat.
Windows C:Program files(x86)common filesadobeAAMUpdaterInventory1.0AdobeUpdaterAdminPrefs.dat.
Или искать файл в этой папке: C:Program DataAdobeAAMUpdater1.0AdobeUpdaterAdminPrefs.dat.
И далее вручную ставим скачанное обновление.
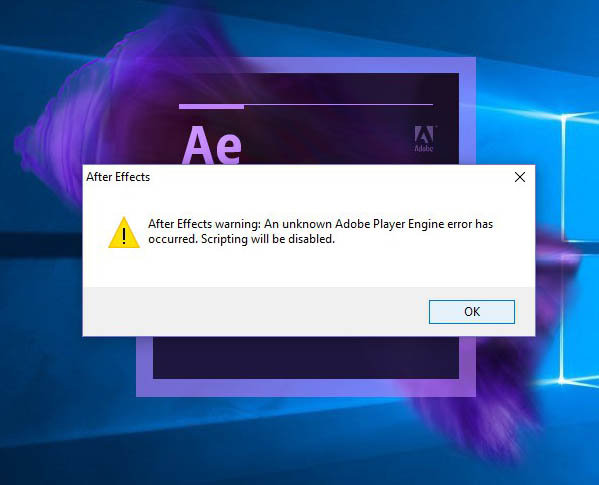
13. Ошибка при загрузке программы: «After Effects warning: An unknown Adobe Player Engine error has occurred. Scripting will be disabled.«. Вариант решения проблемы: попробовать поставить последнее обновление, переустановить или если есть ошибки в работе Adobe Media Encoder, переустановить и его.
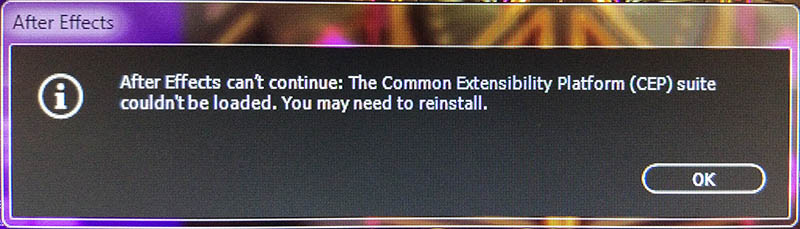
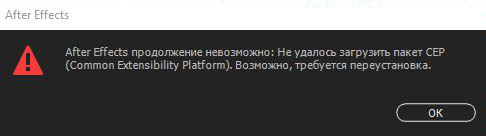
14. Ошибка при загрузке программы: «After Effects can’t continue: The Common Extensibility Platform (CEP) suite couldn’t be loaded. You may need to reinstall.«. / After Effects продолжение невозможно: Не удалось загрузить пакет CEP (Common Extensibility Platform). Возможно, требуется переустановка.
Как исправить? Попробовать запустить приложение от имени администратора. Нажимаем на AfterFX.exe правую кнопку мыши и выбираем: Запуск от имени администратора.
15. Ошибка при проигрывании таймлайна композиции: After Effects error: Cached Preview needs 2 or more frames to playback / After-Effects Fehler: Wiedergabe einer Cache-Vorschau benotigt mindestens 2 Frames. Данная ошибка связана с недостатком памяти.
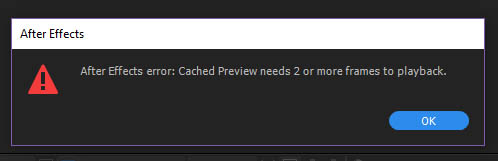
Несколько вариантов решения проблемы:
— Чистим память командой: Edit > Purge > All Memory & Cache.
— Перезагружаем программу Adobe After Effects CC 2017.
— Включаем Enable Disk Cache, если данная опция включена, то чистим ее содердимое нажав на кнопки: Empty Disk Cache и Clean Database & Cache, в настройках программы: Edit > Preferences > Media & Disk Cache.
— Снижаем качество предварительного просмотра в окне композиции с Full на Quarter.
— Проверяем наличие свободной памяти в Диспетчере задач. Т.е. память может быть занята какими-то процессами, или наоборот, для превью используется только часть свободной памяти, выделенной для Adobe After Effects CC 2017.
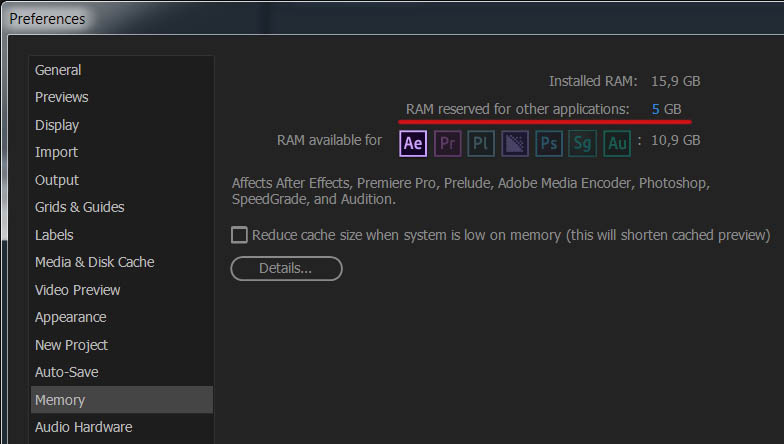
— Снимаем галку перед пунктом Reduce Cache Size when system is low on memory (this will shorten cached preview) в настройках Edit > Preferences > Memory.
— Также стоит обратить внимание на размер файла подкачки и чтобы достаточно памяти было выделено для операционной системы: RAM reserved for other applications.
— Проверяем, чтобы рабочая область (Work Area) не находилась в следующем положении:
16. Ошибка: After Effects warning: Unspecified drawing error. Решение: сбрасываем рабочее пространство до дефолтного (делаем его по-умолчанию).
Источник
Expression errors
When an expression fails to evaluate, expression errors appear in a warning banner at the bottom of the Composition and Layer panels. After Effects does not disable the expression but continues to evaluate it. The warning banner is displayed as long as the expression fails to evaluate; that is, until the expression is either fixed or manually disabled.
The expression error UI
Here’s an example of what the expression error warning banner looks like:
A. Left or Right arrow buttons B. The Reveal Expression C. The Expand/Collapse Warning
- The Left or Right arrow buttons display the previous or next expression error when multiple expressions fail to evaluate.
- The Reveal Expression (magnifying glass) button exposes the property with the failing expression in the Timeline panel. If the expression is in a different composition, that composition opens.
- The Expand/Collapse Warning (up/down arrows) button shows or hides the error text.
The expression error text is one line only, and is clipped to the width of the Composition panel.
To see the full expression error text
Click next to the expression. The complete error appears in a dialog box.
To hide the warning banner
Choose After Effects > Preferences > Scripting & Expressions (macOS) or Edit > Preferences > General (Windows) and disable Show Warning Banner When Project Contains Expressions Errors .
When this option is disabled, the warning banner remains hidden even when new expression errors occur.
Re-enable this option to view expression errors.
Reveal expression errors
If an expression cannot be processed, After Effects displays a message explaining the error and automatically disables the expression. A yellow warning icon appears next to the expression. Click the warning icon to view the error message again.
To show expressions that have errors, select one or more layers. Right-click (Windows) or Control-click (macOS) a selected layer in the Timeline panel. Choose Reveal Expression Errors from the context menu.
Some expressions rely on the names of layers or properties in your project. If you change the name of a layer or property that is involved in an expression, After Effects attempts to update the expression to use the new name. However, in some complex cases, After Effects is unable to automatically update the expression. In this case, the expression may produce an error message and you must update the expression yourself.
The expression may not work if you are running After Effects in a different language, or if you changed the names of the items (such as layers, effects, or other property groups). To enable the expression, modify the expression to use the new names or the strings that match the language in which you are running After Effects.
The examples in this document were created for the default state of After Effects running in English. Some examples in this document will not work without such modification.
Errors caused by precomposing layers
Precomposing multiple layers can cause expressions that refer to a property of one of the layers to produce an error. You have to update these expressions to refer to the layer within the new composition. This is especially a concern with expressions that use thisComp instead of referring to a composition by its name. (See About precomposing and nesting.)
The arguments for some effects in After Effects have changed from the arguments in previous versions. If you have existing expressions that use argument index references instead of argument names, update the expressions to use argument names.
Источник
Known issues in After Effects
This document provides information on the list of known issues in After Effects.
To view the list of issues fixed from this document, see Fixed issues in After Effects.
To view known issues with After Effects in macOS Ventura, see After Effects and macOS Ventura.
December 2022 Release (Version 23.1)
Export issue for H.264 with After Effects 23.1
Issue: An issue affecting H.264 exports on Windows with After Effects 23.1.
The issue impacts H.264 exports to folders with names that use double-byte characters, such as Chinese, Japanese, Korean, or extended ASCII characters, like accents and umlauts.
Affected users will see this message: «After Effects warning: Failed to write XMP metadata.»
Workaround: We’ll let you know when a fix is available. But if you’re experiencing this issue, use one of these options:
- Choose an export destination folder that uses only single-byte ASCII English characters (no accents, umlauts, etc.)
- Export to a different format, such as Apple ProRes.
- For H.264 exports only: Disable hardware accelerated encoding by going to the Render Queue > Output Module Settings > Main Options tab > Format Options > Video tab > Performance > Software Encoding .
ISSUE WITH IME-GENERATED CHARACTERS ON WINDOWS DEVICES
Issue : After Effects 23.0 and 23.1 unexpectedly quit on Windows devices when you use the backspace keys to delete typed Chinese or other languages utilizing IME in a Text layer and try entering new characters.
Workaround : Complete text editing that includes Chinese or other IME-generated characters before bringing them into After Effects, or you can use After Effects 22.x.
October 2022 Release (Version 23.0)
Unable to use Cinema 4D when installed as an Add-on from the Creative Cloud desktop app.
You may get one of the following errors:
- «Cinema 4D must be installed in order to use the Cinema 4D renderer» while creating a new Cinema 4D file.
- «This version of AE requires an installation of Cinema 4D R25 (25.015 or later)» while adding a Cineware effect.
- «After Effects error: Cinema 4D: Render Failed» while previewing compositions with Cineware effect.
Workaround: If you get any of these errors, do the following:
Uninstall After Effects and existing Cinema 4D components.
Reboot the system and reinstall After Effects 23.0.
Check Cinema 4D in the installed apps. If you do not find it, Cinema 4D may still be getting installed.
To check Cinema 4D installation status, go to Creative Cloud desktop app > All apps > After Effects > Add-Ons .
Open Cinema 4D separately after the installation once.
Now, you can launch Cinema 4D from After Effects as usual and perform all related actions.
Unable to select Video Rendering and Effects options on Windows devices with Intel GPU and NVIDIA Graphic cards
Issue: You are unable to select from the Use options from the Video Rendering and Effects dropdown because it is greyed out. Or, if you open any project that uses OpenCL or CUDA, you get an error message — «Mercury Playback Engine is not available.»
Workaround: When OpenCL™ and OpenGL® Compatibility Pack is installed, it adds another implementation of OpenCL to the machine, along with one by Microsoft, and NVIDIA is by default chosen as an OpenCL device.
If OpenCL™ and OpenGL® Compatibility Pack is installed, we recommend you remove the compatibility pack. Go to Settings > Apps > Apps & features > OpenCL™ and OpenGL® Compatibility Pack > Uninstall .
The compatibility pack is a backup implementation designed for ARM devices, thus, should not impact other installed applications.
May 2022 (Version 22.4) release
Issue: BorisFX Mocha cannot apply tracking data to layers with Separated Dimensions.
Workaround: Disable Separated Dimensions on the Position property of the target layer before applying tracking data from BorisFX Mocha.
- Issue: Application Menus may not be enabled when starting After Effects on macOS 12.
Workaround: In this state, select the After Effects icon in the Dock to restore the After Effects menus. - Issue: After Effects 22.3 and 22.4 crash on startup when running on macOS versions 10.15.0 through 10.15.3.
Workaround: Upgrade macOS to 10.15.4 or above, or use After Effects 22.5 Beta, build 29 or above. For After Effects 22.5×29 and above, Transmit of DV video content over Firewire is unsupported on macOS 10.15.0 through 10.15.3. - Issue: After Effects 22.3 and above may crash when run natively on Apple silicon hardware with Mercury Transmit enabled and Blackmagic Desktop Video version 12.1 (or earlier) installed.
Workaround: Install Blackmagic Desktop Video version 12.3 or above. Version 12.1 and earlier are unsupported with Apple silicon hardware. - Issue: After Effects throws an error message stating that the project is corrupt as the project has multiple cameras. It occurs when you open an .aep project created in version 22.2.1 in After
Effects versions 22.3 or 22.4.
Workaround: Open the project in After Effects version 22.2.1.
April 2022 (Version 22.3) release
- Issue: When you quit After Effects, changes you make to a workspace are automatically saved into the workspace instead of being remembered as a temporary state.
Workaround: Use Reset . to Saved Layout before each quit to ensure the saved state retains.
- Issue: In After Effects on M1 Pro, M1 Max, and M1 Ultra systems, the following error can occur when rendering to ProRes 4444 and ProRes 4444XQ codec variants with Alpha channel.

Workaround: In the Output preferences dialog (Preferences > Output):
- Uncheck the option Enable ProRes hardware accelerated encoding, if available . It is checked by default.
- Retry render.
February 2022 (Version 22.2) release
- Issue: The Exposure control at the bottom of the Composition , Layer , and Footage viewer panels do not automatically enable or disable when the value changes from or to zero.
Workaround: No known workaround yet.
December 2021 (Version 22.1.1) release
- Issue: After Effects throws three different errors when you render PNG sequence with the sRGB IEC61966-2.1 color profile.
Workaround: Try any of the following to make the render work:
- Change the Color Management in the Output Module settings from Embed Profile to Preserve RGB.
- Create an empty project and import the project with the error and render the same PNG.


- Issue : On macOS Monterey, After Effects menu bar and mouse right-click don’t work. When you click again, it displays for a moment but disappears when you move the mouse to click a drop-down.
Workaround : Click the After Effects icon in the Dock for the menus to work.
- Issue: Encounter stability problems while using After Effects 2022.1.1 MOGRTs with Cinema 4D R25,
Workaround: Use the following steps to resolve the issue:
- Close any instance of After Effects, Cinema 4D R25, Premiere Pro or Adobe Media Encoder.
-
- Locate the Cinema 4D R25 config.cineware_dll.txt file which can be found in the following locations. Make a backup copy of the file in case you need to restore the previous configuration.
- win: C:Program FilesMaxon Cinema 4D R25resource
- mac: /Applications/Maxon Cinema 4D R25resource
- Under an administrator account, replace the existing config.cineware_dll.txt with the following one:
4. Restart After Effects and Cinema 4D to work.
October 2021 (Version 22.0) release
- Issue: After Effects and Adobe Media Encoder dynamic link issue — Multi-Frame rendering, aerendercore is not terminated if it is invoked via dynamic link.
Workaround: Set Enable Multi-Frame Rendering to off.
- Issue: After Effects 22.0 crashed during launch due to third party AE Juice plugin on macOS 12.x.
Workaround: Try any of the following workarounds:
a. Remove the AE Juice plug-in Install the newer version of the AE Juice plugin. Some of the plug-ins (not all) are stored in HD/Library/Application Support/Adobe/Common/Plugins/7.0/MediaCore . Move all the files and folders to the desktop (except dummy.txt).
b. Install the newer version of the plug-in to work with After Effects 22.0 using the following links:
- Issue: On Windows, Adobe Media Encoder 2022 and Adobe Premiere Pro 2022 may hang when rendering a Cinema 4D-based After Effects 2022 composition, or a composition containing the Cineware effect using Dynamic Link.
Workaround: Export the composition from the After Effects Render Queue using the new High Quality or High Quality with Alpha output module presets and import the resulting footage file into Media Encoder or Premiere Pro.
- Issue: Cineware Live Link fails to respond with Cinema 4D.
Workaround: Live Link is not currently enabled with After Effects 2022. We hope to restore this functionality in a future update.
- Issue: Precomps that contain 3D layers and have both their Collapse Transform switch and their 3D Layer switch set to ON may have inaccurate Render Time values displayed for their layer.
Workaround: Open the precomp’s timeline and note the Frame Render Time to get a more accurate measurement.
July 2021 (Version 18.4) release
- Issue: When you paste text from another application into After Effects text layer, The Paste command in the Edit menu is unavailable, and n othing is pasted.
Workaround: No known workaround yet.
May 2021 (Version 18.2) release
- Issue: Preview glitches or crashes can occur when using After Effects 18.2 or Premiere Pro 15.2 on systems with Nvidia drivers if you have enabled Image Sharpening or Antialiasing — FXAA in Nvidia Control Panels.
Resolution: For more information and a resolution to this issue, see Preview glitch or crash after resizing Preview panels .
- Issue: On Mac, aerender automation is failing everytime aerender is launched for the first time and it displays the Access Control dialog. Allowing control is providing access to documents and data in the app folder, and to perform actions within that app. Upon ignoring the alert or clicking Don’t Allow , aerender test fails and aerendercore remains in process (activity monitor).
Workaround: No known workaround yet.
- Issue: JPEG images in projects from previous versions cannot be read.
Workaround: In the Project panel, select the JPG file, select File > Replace Footage > File and replace the JPG with itself. This changes the Type of the file in the Project panel from «JPEG» to «ImporterJPEG», which points to a possible failure to update from the legacy JPEG importer.
March 2021 (Version 18.0) release
- Issue: H.264 (MP4) files import as green frames. Use the following workaround:
- Go to Preferences > Import
- Deselect “Enable hardware accelerated decoding” under Video Footage.
- Then go to Preferences > Media & Disk Cache.
- Click “Empty Disk Cache” and “Clean Database & Cache”.
- Relaunch After Effects and import the files again.
- Issue: Can’t disable multiple 3D views in Composition panel if 3D is disabled for all layers. No control exists that allows to change the view back to 1-up.
Workaround: Re-enable 3D for the layer, change the view, then disable 3D.
- Issue: When Draft 3D is enabled, the camera does not render correctly in orthographic view such as Front view.
Workaround: No known workaround yet.
February 2021 (Version 17.7) release
- Issue: Enabling “Use Legacy UI” in a ScriptUI panel will cause a crash. Opening a ScriptUI panel with this preference previously enabled or switching to a workspace containing a ScriptUI panel with this preference enabled will also cause a crash.
Workaround: Use the following steps to troubleshoot the issue:
- Inside After Effects, reveal the preferences folder with Preferences > General > Reveal Preferences in Finder/Explorer.
- Close After Effects.
- Open «Adobe After Effects 17.7 Prefs-indep-general.txt» in a text editor.
- Search for “Pref_SUI_PANEL_USES_LEGACY_SKIN” in the text file.
- Change each entry under the “Pref_SUI_PANEL_USES_LEGACY_SKIN” section to 00 instead of 01.
- Save the text file.
Upon re-opening After Effects, all scripts will open with legacy mode disabled and avoid the crash.
- Issue: Custom UI in the Effect Controls panel is not displayed, which affects some third-party plug-ins.
Workaround: Downgrade to After Effects version 17.5.
November 2020 (Version 17.5.1) release
Issue: Use Display Color Management is not enabled by default when setting Project Working Space.
Workaround: When you set up your Color Managed project, select Use Display Color Management to enable it. This sets the state for this project, which remains persistent. But you need to do this for every Color Managed project you create.
October 2020 (Version 17.5) release
- Issue: Holding the Option (Mac) or Alt (Windows) key while you click or click and drag with the Selection, Pen, Zoom, or other tools doesn’t perform the expected action of that tool, but instead activates the Universal Camera Tool. This only occurs if there is a 3D layer in the composition. Examples of when holding the Opt/Alt key does not work as expected:
- The Selection tool does not duplicate a shape or shape path when dragging that path.
- The Pen tool does not activate the Convert Vertex tool when the mouse cursor is over a mask point or handle.
- The Zoom tool does not change to zoom out.
Also, holding the Option/Alt key while dragging the current-time indicator in the Timeline panel does not prevent the Composition panel from updating while you drag, regardless of whether a 3D layer is in the composition.
Workaround: Disable the Activate option — Left/Middle/Right Mouse Click For Camera Navigation option in Preferences > 3D .
- Issue: After Effects crashes on launch or throws a «File is not found» error message when opening images with Camera Raw 13.0. This is due to OS incompatibility of Adobe Camera Raw 13.0 with macOS 10.13.
UPDATE: Camera RAW version 13.0.1 has been released which takes care of this issue. Please ensure that your Camera RAW is updated to 13.0.1 to solve this issue.
Workaround : If you are facing this issue, rollback to Camera Raw version 12.x, see Camera Raw 12.x installer . To learn more on Camera Raw OS compatibility, see System Requirements. For more information, see this community post.
- Issue: (Win) aerender only works if you disable render license checks using «ae_render_only_node.txt» — usage of that file is documented here: Automated rendering and network rendering.
(Mac) aerender renders files without the «ae_render_only_node.txt» in place but ends up leaving an aerendercore process running.
Workaround: It works properly when «ae_render_only_node.txt» is used.
September 2020 (Version 17.1.4) release
Issue: After Effects v17.1.4 crashes at random.
Workaround: Roll back to the previous version 17.1.3 of After Effects using the steps in this article. We are actively working to resolve this issue.
August 2020 (Version 17.1.3) release
Issue: Removing an audio device while it is in use prevents preview playback.
June 2020 (Version 17.1.2) release
- Issue: After Effects displaying preview artifacts on Program monitor when using Lumetri on systems using NVIDIA GPUs with newer Studio/Game Ready drivers. The issue has been reported on multiple GPUs and GTX 1080 Ti running on latest Game Ready driver 451.48.
Workaround: Upgrade to the NVIDIA studio driver v451.77.
- Issue: After Effects displays green horizontal lines in the Composition panel with Intel drivers 8280 and 8336.
Workaround: Roll back to the older Intel drivers.

June 2020 (Version 17.1.1) release
- Issue: Markers cannot be referenced by name in the JavaScript expressions engine.
Workaround: Switch to the Legacy ExtendScript expression engine to view the correct value.
- Issue: There is unpredictable behavior with Adobe Stock media contained in shared Creative Cloud Libraries. Stock media that has been licensed and shared by a collaborator may not appear as licensed to fellow collaborators, it may appear as media offline, or it may not appear at all in the shared library or sequence when other collaborators open the project and the shared library.
Workaround: Try closing and opening the project, or closing and relaunching After Effects.
May 2020 (Version 17.1) release
- Issue: The script method findMenuCommandId() no longer works in After Effects 17.0 or above running in Japanese.
Workaround : No known workaround yet.
- Issue: When manually transforming layers, such as, position, scale, and rotation, color fringing may be seen on the edge of layer elements while the transform is in progress. Once the transform is complete, the fringing is no longer seen. This fringing does not occur during composition preview or export. This may occur when a project has both Linearize Working Space and Hardware Accelerate Composition, Layer, and Footage Panels enabled.
Workaround: Disabling either Linearize Working Space or Hardware Accelerate Composition, Layer, and Footage Panels stops the color fringing from appearing.
April 2020 (Version 17.0.6) release
- Issue: Closing Lumetri Scopes panel while playing back a preview may cause After Effects to crash.
Workaround: Close the Scopes panel after stopping the preview.
- Issue: On macOS, changing the comp window using the tilde (
) may cause an aliased image to appear until you move your mouse over the comp.
Workaround: Upgrade to the latest version of macOS Catalina (version 10.15).
- Issue: After Effects may crash on startup if Red Giant Supercomp plugin is installed.
Workaround: Uninstall Supercomp if it is not required for the project being opened. If it is required for the project, continue to use After Effects 17.0.5.
Red Giant will be releasing an update to Supercomp in late April 2020 that will resolve this issue.
March 2020 (Version 17.0.5) release
Issue: MP4 (H.264) files fail to import in After Effects version 17.0.5.
Workaround:
- Reinstall a previous version of After Effects.
- Transcode files to a different file format.
For more infromation, see this community post.
February 2020 (Version 17.0.4) release
- Issue: On Win, Double-clicking an .aep project file which in-turn causes After Effects to launch creates three subfolders (CIDFont, CMap, and Font) in the same folder as the .aep project.
Workaround: Open the .aep project using File > Open Project after starting After Effects, or double-click the .aep project file once After Effects is open. It is safe to delete these three subfolders once After Effects is closed.
- Issue: Closing Lumetri Scopes panel while playing back a preview may cause After Effects to crash.
Workaround: Close the Scopes panel after stopping the preview.
- Issue: On macOS, changing the comp window using the tilde (
) may cause an aliased image to appear until you move your mouse over the comp.
Workaround: Continue to enter the name to restore the filename being entered.
January 2020 (Version 17.0.2) and December 2019 (Version 17.0.1) releases
- Issue: In After Effects 17.0.2, when you create a composition from a .mov, the graphics get corrupt even during preview. This issue occurs on 16″ MacBook Pro, if you are using AMD Radeon Pro 5300M 4GB.
Workaround: No workaround yet.
- Issue : Motion graphic templates do not render correctly in Premiere Pro 14.0 when After Effects 17.0.2 is installed.
Workaround: Upgrade Premiere Pro to 14.0.1. Premiere Pro 14.0.1 requires After Effects 17.0.2 (and vice versa) for motion graphic template rendering.
- Issue: Closing Lumetri Scopes panel while playing back a preview may cause After Effects to crash.
Workaround : Close the Scopes panel after stopping the preview.
- Issue: On macOS, changing the comp window using the tilde (
) may cause an aliased image to appear until you move your mouse over the comp.
Workaround: Please reinstall After Effects if this occurs.
- Issue: The filename displayed when using the Save/Open dialog may become illegible on Mac Touch bar laptops if the Escape key is pressed.
Workaround: Continue to enter the name to restore the filename being entered.
November 2019 (Version 17.0) release
- Issue: The Dropdown Menu Control is a new feature in this release of After Effects. As this control is based on a pre-existing menu type, it appears in projects opened in previous versions of After Effects. Functionality is limited in these older releases, however, so creating menus with the intent to use in earlier releases is not recommended. Also, scripting for the Dropdown Menu Control is currently not supported.
- Issue: Colorama color picker may crash when using macOS 10.15.
- Issue: Closing Lumetri Scopes while playing back a preview may cause After Effects to crash.
Workaround: Close the scopes panel after stopping the preview.
- Issue: On MacOS 10.13 or 10.14, changing the comp window using the tilde (
) may cause an aliased image to appear until you move your mouse over the comp. This does not occur on macOS 10.15.
- If the 17.0 project uses the new Dropdown Menu expression effect, the Dropdown Menu settings cannot be edited.
- Projects using master properties may not load all keyframe data for those properties.
April 2019 (version 16.1) release
Issue: The Edit Original command does not launch the external application such as Photoshop, and Illustrator on macOS if the file path contains non-ASCII characters such as Japanese, Chinese, and Korean characters. Also, the Create Reference Frame button in the Content-Aware Fill panel does not automatically launch Photoshop.
Workaround: Use any of the following workarounds:
- Do not use non-ASCII characters in the file path or file names.
- Manually launch Photoshop or other external application and open the file manually.
Known issues with Content-Aware fill
Issue: On both Mac and Win, while generating a fill layer, CPU usage can exceed 100 percent.
Workaround: There is no known workaround for this issue.
Issue: When you have a team project open and you click the Generate Fill layer or Create Reference frame buttons, After Effects gives no results.
Workaround: Convert the team project to a local project, select Edit > Team Project > Convert Team Project to Project .
Known issues with Expression Editor
Issue: On Windows, the kerning and letter spacing visibly changes when the expression field is activated. When you open the Preferences > Scripting & Expressions, and set expression editor width to 2, and confirm Settings with OK ,the text kerning from the inactive state to the active state is very different and causes extra jump in the text placement. Also, the tab spacing in the inactive state appears to be between 6 and 8 spaces regardless of the Tab Width settings in the preferences.
Workaround: Set tab width between 6 and 8 to minimize jumping.
Known issue with Rotobrush on M1-based Apple computers with macOS 11
Issue: After Effects crashes when you use Rotobrush on an M1-based Apple computer running on macOS 11.
Workaround: Upgrade to macOS 12 to fix this issue.
If you run into any other issues, or you want to post, discuss, and be part of our knowledgeable community, visit the After Effects forums. To report suspected bugs or suggest modifications to existing features in an Adobe product, use the Feature request/bug report form.
Источник