Version
![]()
![]()
Error Handling
- Introduction
- Configuration
-
The Exception Handler
- Reporting Exceptions
- Exception Log Levels
- Ignoring Exceptions By Type
- Rendering Exceptions
- Reportable & Renderable Exceptions
-
HTTP Exceptions
- Custom HTTP Error Pages
Introduction
When you start a new Laravel project, error and exception handling is already configured for you. The AppExceptionsHandler class is where all exceptions thrown by your application are logged and then rendered to the user. We’ll dive deeper into this class throughout this documentation.
Configuration
The debug option in your config/app.php configuration file determines how much information about an error is actually displayed to the user. By default, this option is set to respect the value of the APP_DEBUG environment variable, which is stored in your .env file.
During local development, you should set the APP_DEBUG environment variable to true. In your production environment, this value should always be false. If the value is set to true in production, you risk exposing sensitive configuration values to your application’s end users.
The Exception Handler
Reporting Exceptions
All exceptions are handled by the AppExceptionsHandler class. This class contains a register method where you may register custom exception reporting and rendering callbacks. We’ll examine each of these concepts in detail. Exception reporting is used to log exceptions or send them to an external service like Flare, Bugsnag or Sentry. By default, exceptions will be logged based on your logging configuration. However, you are free to log exceptions however you wish.
For example, if you need to report different types of exceptions in different ways, you may use the reportable method to register a closure that should be executed when an exception of a given type needs to be reported. Laravel will deduce what type of exception the closure reports by examining the type-hint of the closure:
use AppExceptionsInvalidOrderException;
/**
* Register the exception handling callbacks for the application.
*
* @return void
*/
public function register()
{
$this->reportable(function (InvalidOrderException $e) {
//
});
}
When you register a custom exception reporting callback using the reportable method, Laravel will still log the exception using the default logging configuration for the application. If you wish to stop the propagation of the exception to the default logging stack, you may use the stop method when defining your reporting callback or return false from the callback:
$this->reportable(function (InvalidOrderException $e) {
//
})->stop();
$this->reportable(function (InvalidOrderException $e) {
return false;
});
Note
To customize the exception reporting for a given exception, you may also utilize reportable exceptions.
Global Log Context
If available, Laravel automatically adds the current user’s ID to every exception’s log message as contextual data. You may define your own global contextual data by overriding the context method of your application’s AppExceptionsHandler class. This information will be included in every exception’s log message written by your application:
/**
* Get the default context variables for logging.
*
* @return array
*/
protected function context()
{
return array_merge(parent::context(), [
'foo' => 'bar',
]);
}
Exception Log Context
While adding context to every log message can be useful, sometimes a particular exception may have unique context that you would like to include in your logs. By defining a context method on one of your application’s custom exceptions, you may specify any data relevant to that exception that should be added to the exception’s log entry:
<?php
namespace AppExceptions;
use Exception;
class InvalidOrderException extends Exception
{
// ...
/**
* Get the exception's context information.
*
* @return array
*/
public function context()
{
return ['order_id' => $this->orderId];
}
}
The report Helper
Sometimes you may need to report an exception but continue handling the current request. The report helper function allows you to quickly report an exception via the exception handler without rendering an error page to the user:
public function isValid($value)
{
try {
// Validate the value...
} catch (Throwable $e) {
report($e);
return false;
}
}
Exception Log Levels
When messages are written to your application’s logs, the messages are written at a specified log level, which indicates the severity or importance of the message being logged.
As noted above, even when you register a custom exception reporting callback using the reportable method, Laravel will still log the exception using the default logging configuration for the application; however, since the log level can sometimes influence the channels on which a message is logged, you may wish to configure the log level that certain exceptions are logged at.
To accomplish this, you may define an array of exception types and their associated log levels within the $levels property of your application’s exception handler:
use PDOException;
use PsrLogLogLevel;
/**
* A list of exception types with their corresponding custom log levels.
*
* @var array<class-string<Throwable>, PsrLogLogLevel::*>
*/
protected $levels = [
PDOException::class => LogLevel::CRITICAL,
];
Ignoring Exceptions By Type
When building your application, there will be some types of exceptions you simply want to ignore and never report. Your application’s exception handler contains a $dontReport property which is initialized to an empty array. Any classes that you add to this property will never be reported; however, they may still have custom rendering logic:
use AppExceptionsInvalidOrderException;
/**
* A list of the exception types that are not reported.
*
* @var array<int, class-string<Throwable>>
*/
protected $dontReport = [
InvalidOrderException::class,
];
Note
Behind the scenes, Laravel already ignores some types of errors for you, such as exceptions resulting from 404 HTTP «not found» errors or 419 HTTP responses generated by invalid CSRF tokens.
Rendering Exceptions
By default, the Laravel exception handler will convert exceptions into an HTTP response for you. However, you are free to register a custom rendering closure for exceptions of a given type. You may accomplish this via the renderable method of your exception handler.
The closure passed to the renderable method should return an instance of IlluminateHttpResponse, which may be generated via the response helper. Laravel will deduce what type of exception the closure renders by examining the type-hint of the closure:
use AppExceptionsInvalidOrderException;
/**
* Register the exception handling callbacks for the application.
*
* @return void
*/
public function register()
{
$this->renderable(function (InvalidOrderException $e, $request) {
return response()->view('errors.invalid-order', [], 500);
});
}
You may also use the renderable method to override the rendering behavior for built-in Laravel or Symfony exceptions such as NotFoundHttpException. If the closure given to the renderable method does not return a value, Laravel’s default exception rendering will be utilized:
use SymfonyComponentHttpKernelExceptionNotFoundHttpException;
/**
* Register the exception handling callbacks for the application.
*
* @return void
*/
public function register()
{
$this->renderable(function (NotFoundHttpException $e, $request) {
if ($request->is('api/*')) {
return response()->json([
'message' => 'Record not found.'
], 404);
}
});
}
Reportable & Renderable Exceptions
Instead of type-checking exceptions in the exception handler’s register method, you may define report and render methods directly on your custom exceptions. When these methods exist, they will be automatically called by the framework:
<?php
namespace AppExceptions;
use Exception;
class InvalidOrderException extends Exception
{
/**
* Report the exception.
*
* @return bool|null
*/
public function report()
{
//
}
/**
* Render the exception into an HTTP response.
*
* @param IlluminateHttpRequest $request
* @return IlluminateHttpResponse
*/
public function render($request)
{
return response(/* ... */);
}
}
If your exception extends an exception that is already renderable, such as a built-in Laravel or Symfony exception, you may return false from the exception’s render method to render the exception’s default HTTP response:
/**
* Render the exception into an HTTP response.
*
* @param IlluminateHttpRequest $request
* @return IlluminateHttpResponse
*/
public function render($request)
{
// Determine if the exception needs custom rendering...
return false;
}
If your exception contains custom reporting logic that is only necessary when certain conditions are met, you may need to instruct Laravel to sometimes report the exception using the default exception handling configuration. To accomplish this, you may return false from the exception’s report method:
/**
* Report the exception.
*
* @return bool|null
*/
public function report()
{
// Determine if the exception needs custom reporting...
return false;
}
Note
You may type-hint any required dependencies of thereportmethod and they will automatically be injected into the method by Laravel’s service container.
HTTP Exceptions
Some exceptions describe HTTP error codes from the server. For example, this may be a «page not found» error (404), an «unauthorized error» (401) or even a developer generated 500 error. In order to generate such a response from anywhere in your application, you may use the abort helper:
abort(404);
Custom HTTP Error Pages
Laravel makes it easy to display custom error pages for various HTTP status codes. For example, if you wish to customize the error page for 404 HTTP status codes, create a resources/views/errors/404.blade.php view template. This view will be rendered on all 404 errors generated by your application. The views within this directory should be named to match the HTTP status code they correspond to. The SymfonyComponentHttpKernelExceptionHttpException instance raised by the abort function will be passed to the view as an $exception variable:
<h2>{{ $exception->getMessage() }}</h2>
You may publish Laravel’s default error page templates using the vendor:publish Artisan command. Once the templates have been published, you may customize them to your liking:
php artisan vendor:publish --tag=laravel-errors
Fallback HTTP Error Pages
You may also define a «fallback» error page for a given series of HTTP status codes. This page will be rendered if there is not a corresponding page for the specific HTTP status code that occurred. To accomplish this, define a 4xx.blade.php template and a 5xx.blade.php template in your application’s resources/views/errors directory.
Версия
![]()
![]()
Error Handling
- Introduction
- Configuration
-
The Exception Handler
- Reporting Exceptions
- Ignoring Exceptions By Type
- Rendering Exceptions
- Reportable & Renderable Exceptions
-
HTTP Exceptions
- Custom HTTP Error Pages
Introduction
When you start a new Laravel project, error and exception handling is already configured for you. The AppExceptionsHandler class is where all exceptions thrown by your application are logged and then rendered to the user. We’ll dive deeper into this class throughout this documentation.
Configuration
The debug option in your config/app.php configuration file determines how much information about an error is actually displayed to the user. By default, this option is set to respect the value of the APP_DEBUG environment variable, which is stored in your .env file.
During local development, you should set the APP_DEBUG environment variable to true. In your production environment, this value should always be false. If the value is set to true in production, you risk exposing sensitive configuration values to your application’s end users.
The Exception Handler
Reporting Exceptions
All exceptions are handled by the AppExceptionsHandler class. This class contains a register method where you may register custom exception reporting and rendering callbacks. We’ll examine each of these concepts in detail. Exception reporting is used to log exceptions or send them to an external service like Flare, Bugsnag or Sentry. By default, exceptions will be logged based on your logging configuration. However, you are free to log exceptions however you wish.
For example, if you need to report different types of exceptions in different ways, you may use the reportable method to register a closure that should be executed when an exception of a given type needs to be reported. Laravel will deduce what type of exception the closure reports by examining the type-hint of the closure:
use AppExceptionsInvalidOrderException;
/**
* Register the exception handling callbacks for the application.
*
* @return void
*/
public function register()
{
$this->reportable(function (InvalidOrderException $e) {
//
});
}
When you register a custom exception reporting callback using the reportable method, Laravel will still log the exception using the default logging configuration for the application. If you wish to stop the propagation of the exception to the default logging stack, you may use the stop method when defining your reporting callback or return false from the callback:
$this->reportable(function (InvalidOrderException $e) {
//
})->stop();
$this->reportable(function (InvalidOrderException $e) {
return false;
});
{tip} To customize the exception reporting for a given exception, you may also utilize reportable exceptions.
Global Log Context
If available, Laravel automatically adds the current user’s ID to every exception’s log message as contextual data. You may define your own global contextual data by overriding the context method of your application’s AppExceptionsHandler class. This information will be included in every exception’s log message written by your application:
/**
* Get the default context variables for logging.
*
* @return array
*/
protected function context()
{
return array_merge(parent::context(), [
'foo' => 'bar',
]);
}
Exception Log Context
While adding context to every log message can be useful, sometimes a particular exception may have unique context that you would like to include in your logs. By defining a context method on one of your application’s custom exceptions, you may specify any data relevant to that exception that should be added to the exception’s log entry:
<?php
namespace AppExceptions;
use Exception;
class InvalidOrderException extends Exception
{
// ...
/**
* Get the exception's context information.
*
* @return array
*/
public function context()
{
return ['order_id' => $this->orderId];
}
}
The report Helper
Sometimes you may need to report an exception but continue handling the current request. The report helper function allows you to quickly report an exception via the exception handler without rendering an error page to the user:
public function isValid($value)
{
try {
// Validate the value...
} catch (Throwable $e) {
report($e);
return false;
}
}
Ignoring Exceptions By Type
When building your application, there will be some types of exceptions you simply want to ignore and never report. Your application’s exception handler contains a $dontReport property which is initialized to an empty array. Any classes that you add to this property will never be reported; however, they may still have custom rendering logic:
use AppExceptionsInvalidOrderException;
/**
* A list of the exception types that should not be reported.
*
* @var array
*/
protected $dontReport = [
InvalidOrderException::class,
];
{tip} Behind the scenes, Laravel already ignores some types of errors for you, such as exceptions resulting from 404 HTTP «not found» errors or 419 HTTP responses generated by invalid CSRF tokens.
Rendering Exceptions
By default, the Laravel exception handler will convert exceptions into an HTTP response for you. However, you are free to register a custom rendering closure for exceptions of a given type. You may accomplish this via the renderable method of your exception handler.
The closure passed to the renderable method should return an instance of IlluminateHttpResponse, which may be generated via the response helper. Laravel will deduce what type of exception the closure renders by examining the type-hint of the closure:
use AppExceptionsInvalidOrderException;
/**
* Register the exception handling callbacks for the application.
*
* @return void
*/
public function register()
{
$this->renderable(function (InvalidOrderException $e, $request) {
return response()->view('errors.invalid-order', [], 500);
});
}
You may also use the renderable method to override the rendering behavior for built-in Laravel or Symfony exceptions such as NotFoundHttpException. If the closure given to the renderable method does not return a value, Laravel’s default exception rendering will be utilized:
use SymfonyComponentHttpKernelExceptionNotFoundHttpException;
/**
* Register the exception handling callbacks for the application.
*
* @return void
*/
public function register()
{
$this->renderable(function (NotFoundHttpException $e, $request) {
if ($request->is('api/*')) {
return response()->json([
'message' => 'Record not found.'
], 404);
}
});
}
Reportable & Renderable Exceptions
Instead of type-checking exceptions in the exception handler’s register method, you may define report and render methods directly on your custom exceptions. When these methods exist, they will be automatically called by the framework:
<?php
namespace AppExceptions;
use Exception;
class InvalidOrderException extends Exception
{
/**
* Report the exception.
*
* @return bool|null
*/
public function report()
{
//
}
/**
* Render the exception into an HTTP response.
*
* @param IlluminateHttpRequest $request
* @return IlluminateHttpResponse
*/
public function render($request)
{
return response(...);
}
}
If your exception extends an exception that is already renderable, such as a built-in Laravel or Symfony exception, you may return false from the exception’s render method to render the exception’s default HTTP response:
/**
* Render the exception into an HTTP response.
*
* @param IlluminateHttpRequest $request
* @return IlluminateHttpResponse
*/
public function render($request)
{
// Determine if the exception needs custom rendering...
return false;
}
If your exception contains custom reporting logic that is only necessary when certain conditions are met, you may need to instruct Laravel to sometimes report the exception using the default exception handling configuration. To accomplish this, you may return false from the exception’s report method:
/**
* Report the exception.
*
* @return bool|null
*/
public function report()
{
// Determine if the exception needs custom reporting...
return false;
}
{tip} You may type-hint any required dependencies of the
reportmethod and they will automatically be injected into the method by Laravel’s service container.
HTTP Exceptions
Some exceptions describe HTTP error codes from the server. For example, this may be a «page not found» error (404), an «unauthorized error» (401) or even a developer generated 500 error. In order to generate such a response from anywhere in your application, you may use the abort helper:
abort(404);
Custom HTTP Error Pages
Laravel makes it easy to display custom error pages for various HTTP status codes. For example, if you wish to customize the error page for 404 HTTP status codes, create a resources/views/errors/404.blade.php view template. This view will be rendered on all 404 errors generated by your application. The views within this directory should be named to match the HTTP status code they correspond to. The SymfonyComponentHttpKernelExceptionHttpException instance raised by the abort function will be passed to the view as an $exception variable:
<h2>{{ $exception->getMessage() }}</h2>
You may publish Laravel’s default error page templates using the vendor:publish Artisan command. Once the templates have been published, you may customize them to your liking:
php artisan vendor:publish --tag=laravel-errors
Fallback HTTP Error Pages
You may also define a «fallback» error page for a given series of HTTP status codes. This page will be rendered if there is not a corresponding page for the specific HTTP status code that occurred. To accomplish this, define a 4xx.blade.php template and a 5xx.blade.php template in your application’s resources/views/errors directory.
- Введение
- Конфигурирование
-
Обработчик исключений
- Отчет об исключениях
- Игнорирование исключений по типу
- Отображение исключений
- Отчетные и отображаемые исключения
-
HTTP-исключения
- Пользовательские страницы ошибок HTTP
Введение
Когда вы запускаете новый проект Laravel, обработка ошибок и исключений уже настроена для вас. Класс AppExceptionsHandler – это то место, где все исключения, созданные вашим приложением, регистрируются и затем отображаются пользователю. В этой документации мы углубимся в этот класс.
Конфигурирование
Параметр debug в конфигурационном файле config/app.php определяет, сколько информации об ошибке фактически отобразится пользователю. По умолчанию этот параметр установлен, чтобы учесть значение переменной окружения APP_DEBUG, которая содержится в вашем файле .env.
Во время локальной разработки вы должны установить для переменной окружения APP_DEBUG значение true. Во время эксплуатации приложения это значение всегда должно быть false. Если в рабочем окружении будет установлено значение true, вы рискуете раскрыть конфиденциальные значения конфигурации конечным пользователям вашего приложения.
Обработчик исключений
Отчет об исключениях
Все исключения обрабатываются классом AppExceptionsHandler. Этот класс содержит метод register, в котором вы можете зарегистрировать свои отчеты об исключениях и замыкания рендеринга. Мы подробно рассмотрим каждую из этих концепций. Отчеты об исключениях используются для регистрации исключений или отправки их во внешнюю службу, например Flare, Bugsnag или Sentry. По умолчанию исключения будут регистрироваться в соответствии с вашей конфигурацией логирования. Однако вы можете регистрировать исключения как хотите.
Например, если вам нужно сообщать о различных типах исключений по-разному, вы можете использовать метод reportable для регистрации замыкания, которое должно быть выполнено, когда необходимо сообщить об исключении конкретного типа. Laravel определит о каком типе исключения сообщает замыкание с помощью типизации аргументов:
use AppExceptionsInvalidOrderException;

/**
 * Зарегистрировать замыкания, обрабатывающие исключения приложения.
 *
 * @return void
 */
public function register()
{
    $this->reportable(function (InvalidOrderException $e) {
        //
    });
}
Когда вы регистрируете собственные замыкания для создания отчетов об исключениях, используя метод reportable, Laravel по-прежнему регистрирует исключение, используя конфигурацию логирования по умолчанию для приложения. Если вы хотите остановить распространение исключения в стек журналов по умолчанию, вы можете использовать метод stop при определении замыкания отчета или вернуть false из замыкания:
$this->reportable(function (InvalidOrderException $e) {
    //
})->stop();

$this->reportable(function (InvalidOrderException $e) {
    return false;
});
Чтобы настроить отчет об исключениях для переданного исключения, вы можете рассмотреть возможность использования отчетных исключений.
Глобальное содержимое журнала
Если доступно, Laravel автоматически добавляет идентификатор текущего пользователя в каждое сообщение журнала исключения в качестве контекстных данных. Вы можете определить свои собственные глобальные контекстные данные, переопределив метод context класса AppExceptionsHandler вашего приложения. Эта информация будет включена в каждое сообщение журнала исключения, написанное вашим приложением:
/**
 * Получить переменные контекста по умолчанию для ведения журнала.
 *
 * @return array
 */
protected function context()
{
    return array_merge(parent::context(), [
        'foo' => 'bar',
    ]);
}
Контекст журнала исключений
Хотя добавление контекста в каждое сообщение журнала может быть полезно, иногда конкретное исключение может иметь уникальный контекст, который вы хотели бы включить в свои журналы. Определив метод context для конкретного исключения вашего приложения, вы можете указать любые данные, относящиеся к этому исключению, которые должны быть добавлены в запись журнала исключения:
<?php

namespace AppExceptions;

use Exception;

class InvalidOrderException extends Exception
{
    // ...

    /**
     * Получить контекстную информацию исключения.
     *
     * @return array
     */
    public function context()
    {
        return ['order_id' => $this->orderId];
    }
}
Помощник report
По желанию может потребоваться сообщить об исключении, но продолжить обработку текущего запроса. Помощник report позволяет вам быстро сообщить об исключении через обработчик исключений, не отображая страницу с ошибкой для пользователя:
public function isValid($value)
{
    try {
        // Проверка `$value` ...
    } catch (Throwable $e) {
        report($e);

        return false;
    }
}
Игнорирование исключений по типу
При создании приложения будут некоторые типы исключений, которые вы просто хотите игнорировать и никогда не сообщать о них. Обработчик исключений вашего приложения содержит свойство $dontReport, которое инициализируется пустым массивом. Ни о каких классах, добавленных в это свойство, никогда не будет сообщено; однако у них все еще может быть собственная логика отображения:
use AppExceptionsInvalidOrderException;

/**
 * Список типов исключений, о которых не следует сообщать.
 *
 * @var array
 */
protected $dontReport = [
    InvalidOrderException::class,
];
За кулисами Laravel уже игнорирует для вас некоторые типы ошибок, такие как исключения, возникающие из-за ошибок 404 HTTP «не найдено» или 419 HTTP-ответ, сгенерированный при недопустимом CSRF-токене.
Отображение исключений
По умолчанию обработчик исключений Laravel будет преобразовывать исключения в HTTP-ответ за вас. Однако вы можете зарегистрировать свое замыкание для отображения исключений конкретного типа. Вы можете сделать это с помощью метода renderable обработчика исключений.
Замыкание, переданное методу renderable, должно вернуть экземпляр IlluminateHttpResponse, который может быть сгенерирован с помощью функции response. Laravel определит, какой тип исключения отображает замыкание с помощью типизации аргументов:
use AppExceptionsInvalidOrderException;

/**
 * Зарегистрировать замыкания, обрабатывающие исключения приложения.
 *
 * @return void
 */
public function register()
{
    $this->renderable(function (InvalidOrderException $e, $request) {
        return response()->view('errors.invalid-order', [], 500);
    });
}
Вы также можете использовать метод renderable чтобы переопределить отображение для встроенных исключений Laravel или Symfony, таких, как NotFoundHttpException. Если замыкание, переданное методу renderable не возвращает значения, будет использоваться отрисовка исключений Laravel по умолчанию:
use SymfonyComponentHttpKernelExceptionNotFoundHttpException;

/**
 * Зарегистрировать замыкания, обрабатывающие исключения приложения.
 *
 * @return void
 */
public function register()
{
    $this->renderable(function (NotFoundHttpException $e, $request) {
        if ($request->is('api/*')) {
            return response()->json([
                'message' => 'Record not found.'
            ], 404);
        }
    });
}
Отчетные и отображаемые исключения
Вместо проверки типов исключений в методе register обработчика исключений вы можете определить методы report и render непосредственно для ваших исключений. Если эти методы существуют, то они будут автоматически вызываться фреймворком:
<?php

namespace AppExceptions;

use Exception;

class InvalidOrderException extends Exception
{
    /**
     * Отчитаться об исключении.
     *
     * @return bool|null
     */
    public function report()
    {
        //
    }

    /**
     * Преобразовать исключение в HTTP-ответ.
     *
     * @param  IlluminateHttpRequest  $request
     * @return IlluminateHttpResponse
     */
    public function render($request)
    {
        return response(...);
    }
}
Если ваше исключение расширяет исключение, которое уже доступно для визуализации, например встроенное исключение Laravel или Symfony, вы можете вернуть false из метода render исключения, чтобы отобразить HTTP-ответ исключения по умолчанию:
/**
 * Преобразовать исключение в HTTP-ответ.
 *
 * @param  IlluminateHttpRequest  $request
 * @return IlluminateHttpResponse
 */
public function render($request)
{
    // Определить, требуется ли для исключения пользовательское отображение...

    return false;
}
Если ваше исключение содержит пользовательскую логику отчетности, которая необходима только при выполнении определенных условий, то вам может потребоваться указать Laravel когда сообщать об исключении, используя конфигурацию обработки исключений по умолчанию. Для этого вы можете вернуть false из метода report исключения:
/**
 * Сообщить об исключении.
 *
 * @return bool|null
 */
public function report()
{
    // Определить, требуется ли для исключения пользовательская отчетность ...

    return false;
}
Вы можете указать любые требуемые зависимости метода
report, и они будут автоматически внедрены в метод контейнером служб Laravel.
HTTP-исключения
Некоторые исключения описывают коды HTTP-ошибок с сервера. Например, это может быть ошибка «страница не найдена» (404), «неавторизованный доступ» (401) или даже ошибка 500, сгенерированная разработчиком. Чтобы создать такой ответ из любой точки вашего приложения, вы можете использовать глобальный помощник abort:
abort(404);
Пользовательские страницы ошибок HTTP
Laravel позволяет легко отображать пользовательские страницы ошибок для различных кодов состояния HTTP. Например, если вы хотите настроить страницу ошибок для кодов HTTP-состояния 404, создайте файл resources/views/errors/404.blade.php. Это представление будет отображено для всех ошибок 404, сгенерированных вашим приложением. Шаблоны в этом каталоге должны быть названы в соответствии с кодом состояния HTTP, которому они соответствуют. Экземпляр SymfonyComponentHttpKernelExceptionHttpException, вызванный функцией abort, будет передан в шаблон как переменная $exception:
<h2>{{ $exception->getMessage() }}</h2>
Вы можете опубликовать стандартные шаблоны страниц ошибок Laravel с помощью команды vendor:publish Artisan. После публикации шаблонов вы можете настроить их по своему вкусу:
php artisan vendor:publish --tag=laravel-errors
Russian (Pусский) translation by Anna k.Ivanova (you can also view the original English article)
В этой статье мы рассмотрим одну из наиболее важных и наименее обсуждаемых функций Laravel web framework — обработку исключений. Laravel поставляется со встроенным обработчиком исключений, который позволяет легко и дружелюбно сообщать об исключениях.
В первой половине статьи мы рассмотрим настройки по умолчанию, предоставляемые обработчиком исключений. Фактически, мы рассмотрим класс Handler, чтобы понять, как Laravel обрабатывает исключения.
Во второй половине статьи мы поговорим о том, как создать пользовательский обработчик исключений, позволяющий обнаруживать пользовательские исключения.
Предварительная настройка
Прежде чем двигаться дальше и сразу погрузиться в класс Handler, давайте посмотрим на пару важных параметров конфигурации, связанных с исключениями.
Откройте файл config/app.php. Давайте внимательно рассмотрим следующий фрагмент.
1 |
...
|
2 |
...
|
3 |
/*
|
4 |
|--------------------------------------------------------------------------
|
5 |
| Application Debug Mode
|
6 |
|--------------------------------------------------------------------------
|
7 |
|
|
8 |
| When your application is in debug mode, detailed error messages with
|
9 |
| stack traces will be shown on every error that occurs within your
|
10 |
| application. If disabled, a simple generic error page is shown.
|
11 |
|
|
12 |
*/
|
13 |
|
14 |
'debug' => env('APP_DEBUG', false), |
15 |
...
|
16 |
...
|
Как следует из названия, если оно установлено в TRUE, это поможет вам отлаживать ошибки, которые генерируются приложением. Значению по умолчанию этой переменной присваивается значение переменной среды APP_DEBUG в файле .env.
В среде разработки вы должны установить значение TRUE, чтобы вы могли легко отслеживать ошибки и исправлять их. С другой стороны, вы хотите отключить это в рабочей среде, и в этом случае будет отображаться общая страница ошибок.
В дополнение к отображению ошибок, Laravel позволяет регистрировать ошибки в файле журнала. Давайте быстро рассмотрим варианты, доступные для ведения журнала. Опять же, перейдем к файлу config/app.php и внимательно рассмотрим следующий фрагмент.
1 |
...
|
2 |
...
|
3 |
'log' => env('APP_LOG', 'single'), |
4 |
|
5 |
'log_level' => env('APP_LOG_LEVEL', 'debug'), |
6 |
...
|
7 |
...
|
Поскольку Laravel использует библиотеку Monolog PHP для ведения журнала, вы должны установить вышеуказанные параметры в контексте этой библиотеки.
Файл журнала по умолчанию находится в файле storage/logs/laravel.log, и в большинстве случаев этого достаточно. С другой стороны, APP_LOG_LEVEL устанавливается в значение, которое указывает на серьезность ошибок, которые будут регистрироваться.
Таким образом, это было базовое введение в параметры конфигурации, доступные для исключений и ведения логов.
Затем давайте взглянем на класс Handler, который поставляется с приложением Laravel по умолчанию. Откройте файл app/Exceptions/Handler.php.
1 |
<?php
|
2 |
|
3 |
namespace AppExceptions; |
4 |
|
5 |
use Exception; |
6 |
use IlluminateAuthAuthenticationException; |
7 |
use IlluminateFoundationExceptionsHandler as ExceptionHandler; |
8 |
|
9 |
class Handler extends ExceptionHandler |
10 |
{
|
11 |
/**
|
12 |
* A list of the exception types that should not be reported.
|
13 |
*
|
14 |
* @var array
|
15 |
*/
|
16 |
protected $dontReport = [ |
17 |
IlluminateAuthAuthenticationException::class, |
18 |
IlluminateAuthAccessAuthorizationException::class, |
19 |
SymfonyComponentHttpKernelExceptionHttpException::class, |
20 |
IlluminateDatabaseEloquentModelNotFoundException::class, |
21 |
IlluminateSessionTokenMismatchException::class, |
22 |
IlluminateValidationValidationException::class, |
23 |
];
|
24 |
|
25 |
/**
|
26 |
* Report or log an exception.
|
27 |
*
|
28 |
* This is a great spot to send exceptions to Sentry, Bugsnag, etc.
|
29 |
*
|
30 |
* @param Exception $exception
|
31 |
* @return void
|
32 |
*/
|
33 |
public function report(Exception $exception) |
34 |
{
|
35 |
parent::report($exception); |
36 |
}
|
37 |
|
38 |
/**
|
39 |
* Render an exception into an HTTP response.
|
40 |
*
|
41 |
* @param IlluminateHttpRequest $request
|
42 |
* @param Exception $exception
|
43 |
* @return IlluminateHttpResponse
|
44 |
*/
|
45 |
public function render($request, Exception $exception) |
46 |
{
|
47 |
return parent::render($request, $exception); |
48 |
}
|
49 |
|
50 |
/**
|
51 |
* Convert an authentication exception into an unauthenticated response.
|
52 |
*
|
53 |
* @param IlluminateHttpRequest $request
|
54 |
* @param IlluminateAuthAuthenticationException $exception
|
55 |
* @return IlluminateHttpResponse
|
56 |
*/
|
57 |
protected function unauthenticated($request, AuthenticationException $exception) |
58 |
{
|
59 |
if ($request->expectsJson()) { |
60 |
return response()->json(['error' => 'Unauthenticated.'], 401); |
61 |
}
|
62 |
|
63 |
return redirect()->guest(route('login')); |
64 |
}
|
65 |
}
|
Существуют две важные функции, за которые отвечает класс Handler: сообщение и визуализация всех ошибок.
Давайте внимательно рассмотрим метод report.
1 |
/**
|
2 |
* Report or log an exception.
|
3 |
*
|
4 |
* This is a great spot to send exceptions to Sentry, Bugsnag, etc.
|
5 |
*
|
6 |
* @param Exception $exception
|
7 |
* @return void
|
8 |
*/
|
9 |
public function report(Exception $exception) |
10 |
{
|
11 |
parent::report($exception); |
12 |
}
|
Метод report используется для регистрации ошибок в файле логов. В то же время важно также отметить свойство dontReport, в котором перечислены все типы исключений, которые не должны регистрироваться.
Затем давайте изучим метод render.
1 |
/**
|
2 |
* Render an exception into an HTTP response.
|
3 |
*
|
4 |
* @param IlluminateHttpRequest $request
|
5 |
* @param Exception $exception
|
6 |
* @return IlluminateHttpResponse
|
7 |
*/
|
8 |
public function render($request, Exception $exception) |
9 |
{
|
10 |
return parent::render($request, $exception); |
11 |
}
|
Если метод report используется для регистрации или сообщения об ошибках, метод render используется для визуализации ошибок на экране. Фактически, этот метод обрабатывает то, что будет отображаться пользователям при возникновении исключения.
Метод render также позволяет настраивать ответ для разных типов исключений, как мы увидим в следующем разделе.
Наконец, метод unauthenticated обрабатывает исключение AuthenticationException, которое позволяет вам определять, что будет отображаться для пользователей, если они не прошли проверку подлинности для доступа к странице, которую они ищут.
Пользовательский класс исключения
В этом разделе мы создадим собственный класс исключений, который обрабатывает исключения типа CustomException. Идея создания пользовательских классов исключений заключается в том, чтобы легко управлять пользовательскими исключениями и одновременно создавать настраиваемые ответы.
Двигаемся дальше и создаем файл app/Exceptions/CustomException.php со следующим содержимым.
1 |
<?php
|
2 |
|
3 |
namespace AppExceptions; |
4 |
|
5 |
use Exception; |
6 |
|
7 |
class CustomException extends Exception |
8 |
{
|
9 |
/**
|
10 |
* Report the exception.
|
11 |
*
|
12 |
* @return void
|
13 |
*/
|
14 |
public function report() |
15 |
{
|
16 |
}
|
17 |
|
18 |
/**
|
19 |
* Render the exception into an HTTP response.
|
20 |
*
|
21 |
* @param IlluminateHttpRequest
|
22 |
* @return IlluminateHttpResponse
|
23 |
*/
|
24 |
public function render($request) |
25 |
{
|
26 |
return response()->view( |
27 |
'errors.custom', |
28 |
array( |
29 |
'exception' => $this |
30 |
)
|
31 |
);
|
32 |
}
|
33 |
}
|
Важно отметить, что класс CustomException должен расширять основной класс Exception. Для демонстрационных целей мы обсудим только метод render, но, конечно, вы также можете настроить метод report.
Как вы можете видеть, в нашем случае мы перенаправляем пользователей на страницу ошибок error.custom. Таким образом, вы можете создавать собственные страницы ошибок для определенных типов исключений.
Конечно, нам нужно создать соответствующий файл представления в resources/views/errors/custom.blade.php.
1 |
Exception details: <b>{{ $exception->getMessage() }}</b> |
Это довольно простой файл, который отображает сообщение об ошибке, но, конечно же, вы могли бы спроектировать его так, как вы этого хотите.
Нам также необходимо внести изменения в метод render файла app/Exceptions/Handler.php, чтобы наш пользовательский класс исключений мог быть вызван. Давайте заменим метод render следующим содержимым в файле app/Exceptions/Handler.php.
1 |
...
|
2 |
...
|
3 |
/**
|
4 |
* Render an exception into an HTTP response.
|
5 |
*
|
6 |
* @param IlluminateHttpRequest $request
|
7 |
* @param Exception $exception
|
8 |
* @return IlluminateHttpResponse
|
9 |
*/
|
10 |
public function render($request, Exception $exception) |
11 |
{
|
12 |
if ($exception instanceof AppExceptionsCustomException) { |
13 |
return $exception->render($request); |
14 |
}
|
15 |
|
16 |
return parent::render($request, $exception); |
17 |
}
|
18 |
...
|
19 |
...
|
Как вы можете видеть, сперва мы проверяем тип исключения в методе render. Если тип исключения — AppExceptionsCustomException, мы вызываем метод render этого класса.
Итак, все уже готово. Далее, давайте продолжим и создадим файл контроллера в app/Http/Controllers/ExceptionController.php, чтобы мы могли протестировать наш собственный класс исключений.
1 |
<?php
|
2 |
namespace AppHttpControllers; |
3 |
|
4 |
use AppHttpControllersController; |
5 |
|
6 |
class ExceptionController extends Controller |
7 |
{
|
8 |
public function index() |
9 |
{
|
10 |
// something went wrong and you want to throw CustomException
|
11 |
throw new AppExceptionsCustomException('Something Went Wrong.'); |
12 |
}
|
13 |
}
|
Конечно, вам нужно добавить соответствующий маршрут в routes/web.php, как показано в следующем фрагменте.
1 |
// Exception routes
|
2 |
Route::get('exception/index', 'ExceptionController@index'); |
И теперь вы можете открыть http://your-laravel-site.com/exception/index , чтобы узнать, работает ли он так, как ожидалось. Он должен отображать представление errors.custom в соответствии с нашей конфигурацией.
Таким образом, вы должны обрабатывать пользовательские исключения в Laravel. На этом мы подходим к концу этой статьи — надеюсь, вам понравилось!
Вывод
Сегодня мы изучили функцию обработки исключений в Laravel. В начале статьи мы рассмотрели базовую конфигурацию, предоставленную Laravel, чтобы отображать и сообщать об исключениях. Кроме того, мы кратко рассмотрели класс обработчика исключений по умолчанию.
Во второй половине статьи мы подготовили специальный класс обработчика исключений, который продемонстрировал, как вы можете обрабатывать пользовательские исключения в своем приложении.
Для тех из вас, кто только начинает работать с Laravel или хочет расширить свои знания, сайт или приложение с расширениями, у нас есть множество вещей, которые вы можете изучать на Envato Market.
Оставляйте свои идеи и вопросы ниже в комментариях!
Обычно веб-разработчики не следят за ошибками. Если что-то идет не так, то мы частенько видим дефолтный текст ошибки Laravel: «Whoops, something went wrong» или, что еще хуже, код исключения, который посетителю совсем ни к чему. Поэтому я решил написать пошаговую статью о том, как элегантно обрабатывать ошибки и показывать посетителю правильную информацию о произошедшем.
Примечание: в этой статье также будет показан пример создания собственной службы с внедрением зависимости и обработка исключений, создаваемых службой.
Подготовка: Задача поиска пользователя
Итак, у нас есть очень простой пример — форма для поиска пользователя по его идентификатору.

У нас есть два маршрута:
Route::get('/users', 'UserController@index')->name('users.index');
Route::post('/users/search', 'UserController@search')->name('users.search');
И контроллер с двумя методами:
class UserController extends Controller
{

    public function index()
    {
        return view('users.index');
    }

    public function search(Request $request)
    {
        $user = User::find($request->input('user_id'));
        return view('users.search', compact('user'));
    }

}
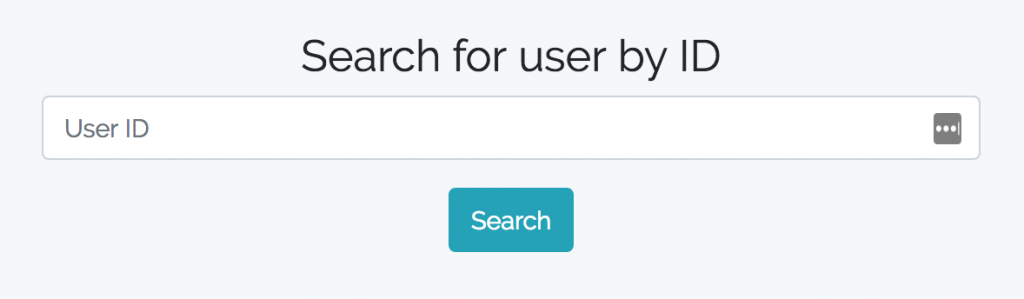
В файле resources/views/users/index.blade.php находится сама форма:
<form action="{{ route('users.search') }}" method="POST">
@csrf
<div class="form-group">
<input id="user_id" class="form-control" name="user_id" type="text" value="{{ old('user_id') }}" placeholder="User ID">
</div>
<input class="btn btn-info" type="submit" value="Search">
</form>
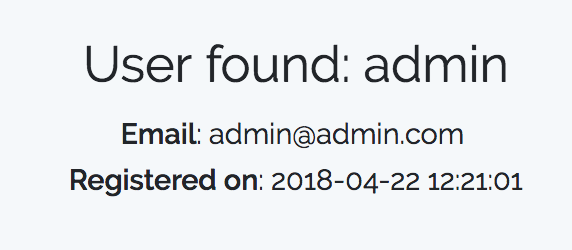
Если мы ищем существующего пользователя и он найден, мы видим такой результат:

Всё это находится в resources/views/users/search.blade.php:
<h3 class="page-title text-center">User found: {{ $user->name }}</h3>
<b>Email</b>: {{ $user->email }}
<br>
<b>Registered on</b>: {{ $user->created_at }}
Но это в идеальном случае, а что, если пользователь не найден?
Обработка исключений
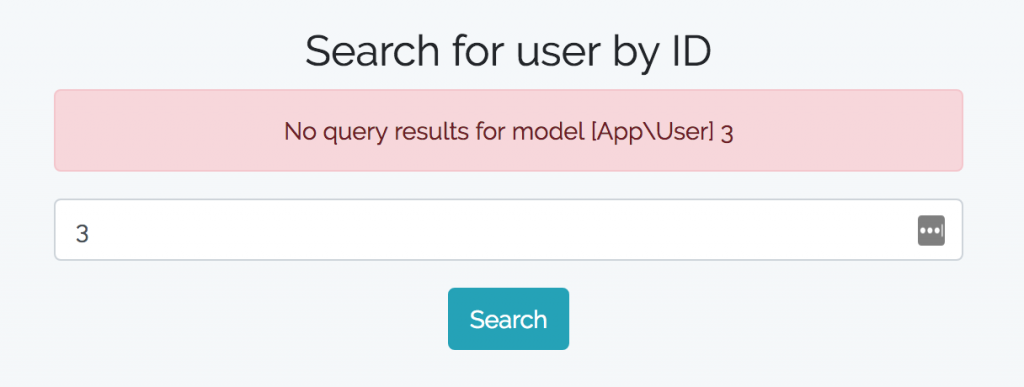
Давайте вернемся в реальный мир. Мы не проверяем существование пользователя, в контроллере мы только делаем:
$user = User::find($request->input('user_id'));
И, если пользователь не найден, то получим это:

Или, понятное дело, мы можем задать APP_DEBUG=false в файле .env, и тогда браузер просто покажет пустую страницу с «Whoops, looks like something went wrong». Но для нашего посетителя все это совершенно бесполезно.
Еще одно быстрое исправление, которое мы можем сделать, это использовать User::findOrFail() вместо просто find() — тогда, если пользователь не найден, Laravel покажет страницу 404 с текстом «Sorry, the page you are looking for could not be found». Но это дефолтная страница ошибки для всего сайта. Для посетителя она, опять таки, бесполезна.
Поэтому нам нужно отлавливать ошибки, обрабатывать их и перенаправлять обратно в форму с действительно понятным сообщением об ошибке.
Нам нужно знать тип исключения и имя класса, которое оно будет возвращать. В случае с findOrFail() будет выдано Eloquent исключение ModelNotFoundException, поэтому нам нужно сделать так:
public function search(Request $request)
{
    try {
        $user = User::findOrFail($request->input('user_id'));
    } catch (ModelNotFoundException $exception) {
        return back()->withError($exception->getMessage())->withInput();
    }
    return view('users.search', compact('user'));
}
Теперь давайте покажем ошибку в Blade:
<h3 class="page-title text-center">Search for user by ID</h3>

@if (session('error'))
<div class="alert alert-danger">{{ session('error') }}</div>
@endif

<form action="{{ route('users.search') }}" method="POST">...</form>
Результат:

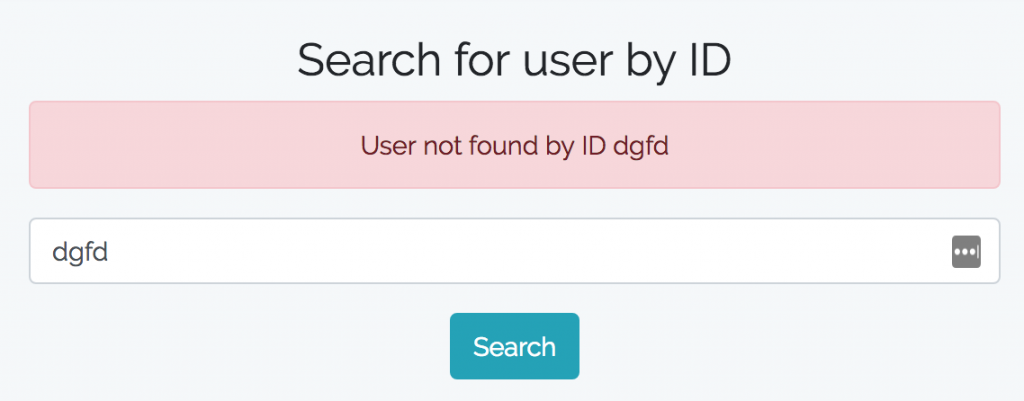
Отлично, мы отобразили ошибку! Но это еще не идеал, верно? Вместо $exception->getMessage() нам нужно показать наше собственное сообщение:
return back()->withError('User not found by ID ' . $request->input('user_id'))->withInput();
Финальный вариант!
Перемещаем обработку ошибок в Сервис
На данный момент мы взяли очень простой пример одного действия в контроллере — поиск пользователя. В реальном приложении все гораздо сложнее — обычно контроллер вызывает какой-нибудь внешний сервис или метод пакета, которые могут завершиться с какими-угодно ошибками.
Давайте создадим свой собственный сервис, который, по сути, делает то же самое, но будет генерировать исключение, поэтому контроллеру даже не потребуется знать текст сообщения.
Давайте переместим нашу логику в app/Services/UserService.php:
namespace AppServices;

use AppUser;
use IlluminateDatabaseEloquentModelNotFoundException;

class UserService
{

    public function search($user_id)
    {
        $user = User::find($user_id);
        if (!$user) {
            throw new ModelNotFoundException('User not found by ID ' . $user_id);
        }
        return $user;
    }

}
А в контроллере нам нужно вызвать этот сервис. Для начала мы внедрим его в метод __construct():
use AppServicesUserService;

class UserController extends Controller
{

    private $userService;

    public function __construct(UserService $userService)
    {
        $this->userService = $userService;
    }

// ...
Если вы не знакомы с внедрением зависимостей и как работает контейнер Laravel IOC, то вот официальная документация.
А вот так теперь выглядит наш метод search():
public function search(Request $request)
{
    try {
        $user = $this->userService->search($request->input('user_id'));
    } catch (ModelNotFoundException $exception) {
        return back()->withError($exception->getMessage())->withInput();
    }
    return view('users.search', compact('user'));
}
Обратите внимание, мы снова можем использовать $exception->getMessage(), вся проверка ошибок и логика сообщений происходит внутри службы. Мы удалили это из контроллера, он не должен заниматься этим.
Следующий Шаг: Создание собственного класса исключений
Последняя глава этой статьи посвящена улучшению архитектуры. Это когда ваш сервис генерирует свое собственное исключение, связанное с этой конкретной ошибкой, и, в зависимости от ошибки, может быть несколько классов исключений. Хорошим примером такой архитектуры является библиотека Stripe, ее использование выглядит так:
try {
  // Use Stripe's library to make requests...
} catch(StripeErrorCard $e) {
  // Since it's a decline, StripeErrorCard will be caught
  $body = $e->getJsonBody();
  $err  = $body['error'];

  print('Status is:' . $e->getHttpStatus() . "n");
  print('Type is:' . $err['type'] . "n");
  print('Code is:' . $err['code'] . "n");
  // param is '' in this case
  print('Param is:' . $err['param'] . "n");
  print('Message is:' . $err['message'] . "n");
} catch (StripeErrorRateLimit $e) {
  // Too many requests made to the API too quickly
} catch (StripeErrorInvalidRequest $e) {
  // Invalid parameters were supplied to Stripe's API
} catch (StripeErrorAuthentication $e) {
  // Authentication with Stripe's API failed
  // (maybe you changed API keys recently)
} catch (StripeErrorApiConnection $e) {
  // Network communication with Stripe failed
} catch (StripeErrorBase $e) {
  // Display a very generic error to the user, and maybe send
  // yourself an email
} catch (Exception $e) {
  // Something else happened, completely unrelated to Stripe
}
Итак, как мы можем создать наш собственный класс исключений? Очень просто — с помощью команды Artisan:
php artisan make:exception UserNotFoundException
Сгенерируется app/Exceptions/UserNotFoundException.php:
namespace AppExceptions;

use Exception;

class UserNotFoundException extends Exception
{
    //
}
Здесь же ничего нет, верно? Давайте заполним наше исключение логикой.
В этом классе может быть два метода:
- report() — используется, если вы хотите сделать дополнительную запись в журнал — отправить сообщение об ошибке в BugSnag, на почту, в Slack и т. д.
- render() — используется, если вы хотите сделать редирект с ошибкой или вернуть HTTP-ответ (например, свой собственный файл Blade ) непосредственно из класса Exception
Итак, для этого примера мы cделаем метод report():
namespace AppExceptions;

use Exception;

class UserNotFoundException extends Exception
{
    /**
     * Report or log an exception.
     *
     * @return void
     */
    public function report()
    {
        Log::debug('User not found');
    }
}
А вот так мы вызываем это исключение из контроллера:
public function search(Request $request)
{
    try {
        $user = $this->userService->search($request->input('user_id'));
    } catch (UserNotFoundException $exception) {
        report($exception);
        return back()->withError($exception->getMessage())->withInput();
    }
    return view('users.search', compact('user'));
}
Итак, это всё, что я хотел рассказать вам об обработке исключений и использовании Сервисов.
Я понимаю, что мой пример очень упрощен, и другие люди могут использовать исключения иными способами, но я надеюсь, что в этой статье дан основой обзор исключений и причин, по которым вы должны их использовать.
Подробнее об исключениях и обработке ошибок: официальная документация Laravel.
Автор: Povilas Korop
Перевод: Алексей Широков
Задать вопросы по урокам можно на нашем форуме.
Tutorial last revisioned on August 10, 2022 with Laravel 9
Quite often web-developers don’t care enough about errors. If something goes wrong, you often see default Laravel texts like «Whoops, something went wrong» or, even worse, the exception code, which is not helpful at all to the visitor. So I decided to write a step-by-step article of how to handle errors in elegant way and present proper error information to the visitor.
As a side-note: this article will also show an example of creating your own Service with Dependency Injection, and handling exceptions thrown by the service.
Preparation: User Search Task
So we have a really simple example — a form to find a user by their ID.
We have two routes:
Route::get('/users', [UserController::class, 'index'])->name('users.index');
Route::post('/users/search', [UserController::class, 'search'])->name('users.search');
And a controller with two methods:
class UserController extends Controller
{

    public function index()
    {
        return view('users.index');
    }

    public function search(Request $request)
    {
        $user = User::find($request->input('user_id'));
        return view('users.search', compact('user'));
    }

}
Finally, resources/views/users/index.blade.php will present a form:
<form action="{{ route('users.search') }}" method="POST">
@csrf
<div class="form-group">
<input id="user_id" class="form-control" name="user_id" type="text" value="{{ old('user_id') }}" placeholder="User ID">
</div>
<input class="btn btn-info" type="submit" value="Search">
</form>
If we search for existing user and it’s found, we see this result:
It’s all in resources/views/users/search.blade.php:
<h3 class="text-center page-title">User found: {{ $user->name }}</h3>
<b>Email</b>: {{ $user->email }}
<br>
<b>Registered on</b>: {{ $user->created_at }}
Ok, so this is our ideal scenario. But what if the user is not found?
Exception handling
Let’s get out of ideal world. We’re not checking for user existence, we’re only doing this in Controller:
$user = User::find($request->input('user_id'));
And if user is not found, we will see this:

Or, of course, we can set .env file with APP_DEBUG=false and then the browser will just show blank Whoops, looks like something went wrong. But that still doesn’t give any valuable information to our visitor.
Another quick fix we can make is using User::findOrFail() instead of just find() — then if user is not found, Laravel would show 404 page with text «Sorry, the page you are looking for could not be found.». But this is a default 404 page for the whole project, so not massively helpful to user, is it?
So we need to catch the errors, process them and redirect back to the form with actual understandable error message.
We need to know the exception type and class name that it would return. In case of findOrFail() it would throw an Eloquent exception ModelNotFoundException, so we need to do this:
public function search(Request $request)
{
    try {
        $user = User::findOrFail($request->input('user_id'));
    } catch (ModelNotFoundException $exception) {
        return back()->withError($exception->getMessage())->withInput();
    }
    return view('users.search', compact('user'));
}
Now, let’s actually show an error in Blade:
<h3 class="text-center page-title">Search for user by ID</h3>

@if (session('error'))
<div class="alert alert-danger">{{ session('error') }}</div>
@endif

<form action="{{ route('users.search') }}" method="POST">...</form>
Result:
Great, we show the error message! But it’s still not ideal, right? Instead of $exception->getMessage() we need to show our own message:
return back()->withError('User not found by ID ' . $request->input('user_id'))->withInput();
Finally!

Moving Error Message Handling into Service
For now, we’ve taken a really simple example of one action in controller — just finding the user. In real application it gets more complicated — usually controller is calling some kind of external service or package method which may fail with different kind of errors.
Let’s create our own service which would essentially do the same thing, but would throw exception, so controller wouldn’t even have to know the message text.
Let’s move our logic into app/Services/UserService.php:
namespace AppServices;

use AppUser;
use IlluminateDatabaseEloquentModelNotFoundException;

class UserService
{

    public function search($user_id)
    {
        $user = User::find($user_id);
        if (!$user) {
            throw new ModelNotFoundException('User not found by ID ' . $user_id);
        }
        return $user;
    }

}
And in Controller, we need to call this service. First, we inject it into __construct() method:
use AppServicesUserService;

class UserController extends Controller
{

    private $userService;

    public function __construct(UserService $userService)
    {
        $this->userService = $userService;
    }

// ...
If you are not familiar with dependency injection and how Laravel IOC container works, here’s official documentation or a good article about it.
Now, here’s how our search() method looks:
public function search(Request $request)
{
    try {
        $user = $this->userService->search($request->input('user_id'));
    } catch (ModelNotFoundException $exception) {
        return back()->withError($exception->getMessage())->withInput();
    }
    return view('users.search', compact('user'));
}
Notice that we can use $exception->getMessage() again, and all the error validation or message logic is happening within the service — that’s one of the purpose, to separate these actions, controller shouldn’t perform it.
Step Even Further: Creating Our Own Exception Class
Final chapter in this article — even better architecture when your service throws its own exception related to that particular error, and there could be multiple exception classes depending on error. A good example of such architecture is Stripe library, its usage looks like this:
try {
  // Use Stripe's library to make requests...
} catch(StripeErrorCard $e) {
  // Since it's a decline, StripeErrorCard will be caught
  $body = $e->getJsonBody();
  $err  = $body['error'];

  print('Status is:' . $e->getHttpStatus() . "n");
  print('Type is:' . $err['type'] . "n");
  print('Code is:' . $err['code'] . "n");
  // param is '' in this case
  print('Param is:' . $err['param'] . "n");
  print('Message is:' . $err['message'] . "n");
} catch (StripeErrorRateLimit $e) {
  // Too many requests made to the API too quickly
} catch (StripeErrorInvalidRequest $e) {
  // Invalid parameters were supplied to Stripe's API
} catch (StripeErrorAuthentication $e) {
  // Authentication with Stripe's API failed
  // (maybe you changed API keys recently)
} catch (StripeErrorApiConnection $e) {
  // Network communication with Stripe failed
} catch (StripeErrorBase $e) {
  // Display a very generic error to the user, and maybe send
  // yourself an email
} catch (Exception $e) {
  // Something else happened, completely unrelated to Stripe
}
So how can we create our own exception class? Simple, with Artisan command:
php artisan make:exception UserNotFoundException
Here’s what it would generate in app/Exceptions/UserNotFoundException.php:
namespace AppExceptions;

use Exception;

class UserNotFoundException extends Exception
{
    //
}
Nothing here, right? Let’s fill our exception with some logic.
There could be two methods in this class:
- report() is used if you want to do some additional logging — send error to BugSnag, email, Slack etc.
- render() is used if you want to redirect back with error or return HTTP response (like your own Blade file) directly from Exception class
So, for this example we fill our render() method:
namespace AppExceptions;

use Exception;

class UserNotFoundException extends Exception
{
    /**
     * Report or log an exception.
     *
     * @return void
     */
    public function report()
    {
        Log::debug('User not found');
    }
}
Finally, this is how we call this exception then, from Controller:
public function search(Request $request)
{
    try {
        $user = $this->userService->search($request->input('user_id'));
    } catch (UserNotFoundException $exception) {
        report($exception);
        return back()->withError($exception->getMessage())->withInput();
    }
    return view('users.search', compact('user'));
}
So, that’s all I wanted to show you about Exception handling and also using Services, as a side-note.
I understand that my example is really simplified, and other people could use Exceptions in a different way, but I hope this article will give an overview of exceptions in general, and reasons WHY you should use them, to show errors to the visitors in elegant way.
More about exceptions and error handling: official Laravel documentation
Video example
I’ve shot a video for new online-course, which demonstrates some things related to exceptions:
An exception is an event that occurs during the execution of a program that disrupts the normal flow of instructions. PHP uses exceptions to handle errors and other exceptional events.
As in many other languages, an exception can be thrown, and caught. You can throw an exception using the throw keyword that in PHP 8 became an expression that may be used in any expression context, while in previous versions it was a statement that had to be in its own line.
To facilitate the catching of exceptions, the code should be surrounded by a try block that must have at least one matching catch or finally blocks. In case an exception gets thrown, and its current scope doesn’t have a catchable block, the exception will «bubble up» or be sent to a «higher scope».
If the handling of an exception implements both the catch and finally blocks, be advised that all finally blocks encountered in the way of the exception event will be executed, even when the event has already passed through the catch block.
Finally, if an exception went all the way to the global scope without finding a matching catchable block, your code will terminate with a fatal error unless the app has a global exception handler set, like the one that Laravel has.
Content
- Throwing exceptions
- The try and catch blocks
- The finally block
Throwing exceptions
Now that we understood the structure around exception events, let’s see a couple of examples of how we can throw and catch exceptions.
Let’s say we want to parse a PHP object to JSON, we would probably use the json_encode() function for that. This function not always will be able to transform the given object to JSON for various reasons, and when this happens, the function will return false to let us know that the transformation failed.
In some ways, we can say that if the transformation of the object fails our code got disrupted from the normal flow of instructions, since we instructed the code to get us a JSON, and we got a boolean instead.
With that being said, let’s see in the example down below, how we can use an exception to trigger an event informing that something out of the normal flow has happened.
<?php

class Person
{
    private $props = [];

    public function __construct(
        private string $name = '',
        private string $lastName = ''
    ) {
        $this->props = [
            'name' => $this->name,
            'last_name' => $this->lastName,
        ];
    }

    public function toJson($options = 0.0)
    {
        $jsonEncoded = json_encode($this->props, $options);

        if ($jsonEncoded === false) {
            throw new JsonEncodeException();
        }

        return $jsonEncoded;
    }
}
Enter fullscreen mode
Exit fullscreen mode
The toJson() function is responsible for transforming his class into a JSON, as mentioned before, we were going to use the json_encode() which is being called at the first line of the function and has its returned value stored at the $jsonEncoded object.
Next, we have a conditional that checks if the $jsonEncoded is false, in case it is an exception will be thrown because the normal flow of our code got disrupted.
Then, if the flow of our code didn’t get disrupted, we would just return the $jsonEncoded object that at this point is a JSON with the correspondent values of the $props from our Person class.
The try and catch blocks
To catch the exception potentially thrown by the Person class, we have to use a try with a matching catch block, as the example down below shows.
try {
    $person = new Person('Jack', 'Miras');
    $personAsJson = $person->toJson();
} catch(JsonEncodeException $e) {
    echo "Exception has been caught";
}
Enter fullscreen mode
Exit fullscreen mode
At the first line of the try block, we are creating a person object, passing a name and a last name as parameters in its constructor.
Next, we are calling the toJson() function out of the $person object. If the object got correctly transformed into a JSON, the $personAsJson object would receive a JSON string as a result. Otherwise, an exception would be thrown, and the catch block would be triggered.
Thereafter, if an exception gets thrown and the catch block gets triggered, it would first check if the exception being intercepted is an instance of the JsonEncodeException class. If that’s the case, the catch block would take this exception event, passing him to its handling block where is printing a message telling that the exception has been caught.
The finally block
Another way of handling the exception potentially thrown by the Person class would be to use a finally block to match the try block defined, as the example down below show.
try {
    $person = new Person('Jack', 'Miras');
    $personAsJson = $person->toJson();
} finnaly {
    echo "Converting person to JSON failed";
}
Enter fullscreen mode
Exit fullscreen mode
As in the previous example, at the try block, we are creating a person object and calling the toJson() function out of it. If the object gets correctly transformed, the $personAsJson would receive a JSON string. Otherwise, an exception would be thrown.
Thereafter, if an exception gets thrown, the finally block will be triggered even though the exception event has been already handled by a catch block.
If that’s the case, the finally block would take in this exception event and printing a message telling that the conversion of the person object into JSON failed.
Now that you have a better understanding of what are exceptions and what they are used for, it’s time for us to move to the next post of this series.
Happy coding!
Posted
Mahedi Hasan
Category
Laravel 7.x
Published
August 24, 2020
Hello Artisan
In this Laravel error handling tutorial i will show you how we can handle error using laravel try catch and laravel exception class. We will use ModelNotFoundException to show our example.
Simply i will use User model to search user by requested id, if there is no user then i will show the error from our custom exception class. If you don’t know how to use csutom exception class then this tutorial is for you. So in this tutorial i decided to write a step-by-step article of how to handle errors in elegant way and present proper error information to the visitor.
So let’s start our error handling with exception class tutorial.
Step 1 : Create Routes
We need to routes one is for view form and another is for searching user.
routes/web.php
Route::get('/', 'TestController@index')->name('users.index');
Route::post('/', 'TestController@search')->name('users.search');
Step 2 : Create Controller
We have to create TestController to add our two method. So create TestController and update it like below.
app/Http/Controllers/TestController.php
namespace AppHttpControllers;

use AppUser;
use IlluminateHttpRequest;
use IlluminateDatabaseEloquentModelNotFoundException;

class TestController extends Controller
{
    public function index()
    {
        return view('welcome');
    }

    public function search(Request $request)
    {
        $user = User::find($request->input('user_id'));

        return view('search', compact('user'));
    }
}
Step 3 : Create Blade File
In this step we need to create two blade file. One is for showing form and anther is for displaying searched data. So create those both file.
resources/views/welcome.blade.php
resources/views/search.blade.php
Now have a look on the controller search method. We’re not checking for user existence, so if there is no user from requested id, then laravel will show error like below image.

We’re not checking for user existence. Sometimes you may wish to throw an exception if a model is not found. This is particularly useful in routes or controllers. The findOrFail and firstOrFail methods will retrieve the first result of the query; however, if no result is found, a IlluminateDatabaseEloquentModelNotFoundException will be thrown:
We have to know the exception type and class name that it would return. In case of findOrFail() it will throw an Eloquent exception ModelNotFoundException, so we have to do this. Now update your controller like below.
app/Http/Controllers/TestController.php
namespace AppHttpControllers;

use AppUser;
use IlluminateHttpRequest;
use IlluminateDatabaseEloquentModelNotFoundException;

class TestController extends Controller
{
    public function index()
    {
        return view('welcome');
    }

    public function search(Request $request)
    {

        try {

          $user = User::findOrFail($request->input('user_id'));

	    } catch (ModelNotFoundException $exception) {

	       return back()->withError($exception->getMessage())->withInput();
	    }

        return view('search', compact('user'));
    }
}
Now you will see the error like below instead of before error messages.

You can also use throw exception to show error. To do it update you test controller search method like below.
namespace AppHttpControllers;

use AppUser;
use IlluminateHttpRequest;
use IlluminateDatabaseEloquentModelNotFoundException;

class TestController extends Controller
{
    public function index()
    {
        return view('welcome');
    }

    public function search(Request $request)
    {

        $user = User::find($request->input('user_id'));

        if (!$user) {
           throw new Exception("User not found by ID {$request->input('user_id')}");
        }

        return view('search', compact('user'));
    }
}
Now if there is no user from requested id, then i will throw an exception error. Hope you will understand.
Recommended: Laravel 7.x Daily Monthly Weekly Automatic Database Backup Tutorial
Hope it can help you.