I am trying to outsource my models for the dbInit function from my dbController because I have several models which makes the dbController to big.
So I am calling initDb from my db_controller.js which looks like this (I use that docu http://docs.sequelizejs.com/manual/getting-started.html )
const userModel = require('../model/user')
const subjectModel = require('../model/subject')
const Sequelize = require('sequelize')
const seq = new Sequelize({
  dialect: 'sqlite',
  storage: './user.db'
})

async function initDb () {
  await userModel.user.initUser()
  await subjectModel.subject.initSubject()
  userModel.user.userClass.hasMany(subjectModel.subject.subjectClass)
}
The user in the user.js looks like this:
const Sequelize = require('sequelize')
const seq = new Sequelize({
  dialect: 'sqlite',
  storage: './user.db'
})

class User extends Sequelize.Model {
}

exports.user = {
  initUser: initUser,
  userClass: User
}

async function initUser () {
  return new Promise(resolve => {
    User.init(
      // attributes
      {
        firstName: {
          type: Sequelize.STRING,
          allowNull: false
        },
        lastName: {
          type: Sequelize.STRING,
          allowNull: false
        },
        email: {
          type: Sequelize.STRING,
          allowNull: false
        }
      },
      // options
      {
        seq,
        modelName: 'user'
      }
    )
    resolve()
  })
}
and pretty much the same for the subject.js
const Sequelize = require('sequelize')
const sequelize = new Sequelize({
  dialect: 'sqlite',
  storage: './user.db'
})

class Subject extends Sequelize.Model {
}

exports.subject = {
  initSubject: initSubject,
  subjectClass: Subject
}

async function initSubject () {
  return new Promise(resolve => {
    Subject.init(
      // attributes
      {
        name: {
          type: Sequelize.STRING,
          allowNull: false
        }
      },
      // options
      {
        seq: sequelize,
        modelName: 'subject'
      }
    )
    resolve()
  })
}
So when I try to execute this via node db_controller.js
I receive this error (shortened)
(node:12444) UnhandledPromiseRejectionWarning: Error: No Sequelize instance passed
    at Function.init (D:Gitppbnode_modulessequelizelibmodel.js:915:13)
    at resolve (D:Gitppbsrcmodeluser.js:26:10)
    at new Promise (<anonymous>)
    at Object.initUser (D:Gitppbsrcmodeluser.js:25:10)
    at initDb (D:Gitppbsrccontrollerdb_controller.js:18:24)
    at Object.<anonymous> (D:Gitppbsrccontrollerdb_controller.js:45:1)
    at Module._compile (module.js:652:30)
    at Object.Module._extensions..js (module.js:663:10)
Thank you very much for any advice in advance!
New issue
Have a question about this project? Sign up for a free GitHub account to open an issue and contact its maintainers and the community.
By clicking “Sign up for GitHub”, you agree to our terms of service and
privacy statement. We’ll occasionally send you account related emails.
Already on GitHub?
Sign in
to your account
Closed
peterb0yd opened this issue
Jun 25, 2017
· 4 comments
Comments
![]()
As per this part of the new updates to v4:
- Instances (database rows) are now instances of the model, instead of being an instance of a separate class. This means you can replace
User.build()withnew User()andsequelize.define(attributes, options)with
class User extends Sequelize.Model {}
User.init(attributes, options)
Now, how do I pass the sequelize instance to the class?
I’ve tried requiring it above the class instantiation var sequelize = require(path/to/db-file).sequelize and passing it by doing:
User.init({ attributes: { ... }}, { sequelize, hooks: { ... });
in the «options» object in the User.init function, but that still gives me this error.
I’ve tried referencing the class from my DB file multiple ways to no avail:
db.User = sequelize.import(__dirname + '/user.js');
- I figured this method would pass along the sequelize instance on it’s own, no?
db.User = require('./user.js');
Very confused, really appreciate any help. Thanks.
![]()
I’ve given up on the method above and now trying the old way of doing things and am getting some success, but I’m still failing in the instance methods
user.js
module.exports = (sequelize, DataTypes) => {
  var User = sequelize.define('user', {
    attributes ....
  }, {
    hooks: {
      afterCreate(user, options) {
        user.testFunction();
      }
    }
  });

  // Instance methods
  User.prototype.testFunction = () => {
    this.firstName = "John";
  }

  // Class methods
  User.anotherTestFunction = () => {
    User.findOne().then(() => doSomething());
  }

  return User;
}
index.js
var sequelize;
sequelize = new Sequelize(config.DATABASE_URL);

db.User = sequelize.import(__dirname + '/user.js');

db.sequelize = sequelize;
db.Sequelize = Sequelize;

module.exports = db;
usersController.js
var db = require('../path/to/db');

function create_post_function = (req, res) => {
  var body = getBody();
  db.User.create(body).then(user => respondSuccess());
}
Now, everything in this example works perfectly EXCEPT the instance method!!!
I’m continually getting TypeError: Cannot set property 'firstName' of undefined
For some reason, it’s not applying the instance method to the sequelize Model. Very strange, but I’m probably doing something noticeably wrong and not seeing it.
Really appreciate any help!
![]()
peterb0yd
changed the title
Error: No Sequelize Instance Passed
v4 updates | Error: No Sequelize Instance Passed
Jun 26, 2017
![]()
Figured it out thanks to this majestic person.
You can’t use arrow functions for the instance methods. BTW — the method in my second comment is working, not the one in the first comment.
![]()
I had the same problem when I first tried to use the new way of writing models by subclassing Sequelize.Model: «Error: No Sequelize Instance Passed». This is how I solved it (Node 8). The trick is to pass in the sequelize instance just like before. The rest of the code, e.g., index.js (see above), stays the same.
File User.js
const Sequelize = require('sequelize');

class User extends Sequelize.Model {
  constructor(...args) {
    super(...args);
  }
  getName() { // instance method
  }
}

const attributes = { /* ... */ };

const options = { /* ... */ };

module.exports = sequelize => User.init(attributes, { ...options, sequelize });
![]()
In my case it was a sorta dependency loop case. I was syncing the models (which required the instance to be created) in the same file where I created the instance.
Issue
I’m having this problem when I try to start my application or run some route. I can’t understand why. Can anyone help?
The full error:
Error: No Sequelize instance passed
    at Function.init (D:repolbrnode_modulessequelizedistlibmodel.js:1:13622)
    at initUser (D:repolbrdbmodelsUSERSuser.js:20:7)
    at Object.<anonymous> (D:repolbrdblbDB.js:33:8)
    at Module._compile (node:internal/modules/cjs/loader:1101:14)
    at Object.Module._extensions..js (node:internal/modules/cjs/loader:1153:10)
    at Module.load (node:internal/modules/cjs/loader:981:32)
    at Function.Module._load (node:internal/modules/cjs/loader:822:12)
    at Module.require (node:internal/modules/cjs/loader:1005:19)
    at require (node:internal/modules/cjs/helpers:102:18)
    at Object.<anonymous> (D:repolbrcontrollersUserController.js:1:16)
My app.js in the root of the directory, where the routes are configured:
const express = require("express");
const cors = require("cors");
const cookieParser = require("cookie-parser");

const app = express();

const users = require("./routes/users");

app.use(express.json());
app.use(express.urlencoded({ extended: false }));
app.use(cookieParser());
app.use(cors({ origin: "*", optionsSuccessStatus: 200 }));

app.use("/users", users);

module.exports = app;
/routes/users.js
const express = require("express");

const { listUsers, addUsers, deleteUsers, updateUsers } = require("../controllers/UserController");

const router = express.Router();

router.get("/users", listUsers);
router.post("/users", addUsers);
router.put("/users/:id", updateUsers);
router.delete("/users/:id", deleteUsers);

module.exports = router;
user controller:
const models = require("../db/lbDB");

/**
 * @param {import("express").Request} req
 * @param {import("express").Response} res
 */
async function listUsers (req, res) {
    try {
        res.status(200).send("Users.");
    } catch (err) {
        console.log(err);
        res.status(500).json({ message: err.message, err });
    }
}

    module.exports = { listUsers, ... };
lbDb, where is the configuration for database:
const Sequelize = require("sequelize");
const configs = require("./config/config");

const { initUser } = require("./models/USERS/user");
const { initSector } = require("./models/USERS/sector");
const { initArchives } = require("./models/ARCHIVES/archives");


if (Sequelize.Promise) {
    Sequelize.Promise.config({
        // Enables all warnings except forgotten return statements.
        warnings: {
            wForgottenReturn: false
        }
    });
}

const env = process.env.NODE_ENV || "development";
const config = configs[env];

if (config.logging)
    config.logging = console.log;

/**
 * @type {Sequelize} conexão com o banco de dados.
 */
let sequelize;

const db = {
    db:sequelize,

    // Carrega arquivos de modelos das tabelas.
    User: initUser(sequelize),
    Sector: initSector(sequelize),

    Archives: initArchives(sequelize)
};

Object.keys(db).forEach(modelName => {
    if ("associate" in db[modelName])
        db[modelName].associate(db);
});

module.exports = db;
user model:
const { Model, DataTypes } = require("sequelize");

class User extends Model {
    /**
     * Cria associações entre as tabelas do banco de dados.
     * @param {import("../../lbDB")} models
     */
    static associate (models) {
        User.belongsTo(models.Sector, { as: "sector", foreignKey: "id_sector" });
        User.hasMany(models.Archives, { as: "archives", foreignKey: "id_archives" });
    }
}

/**
 * Cria o modelo da tabela
 * @param {import("sequelize").Sequelize} sequelize conexão com o banco de dados.
 * @returns
 */
function initUser (sequelize) {
    User.init({
        id: {
            type: DataTypes.INTEGER,
            primaryKey: true,
            autoIncrement: true
        },

        id_sector: {
            type: DataTypes.INTEGER,
            references: { model: "sector", key: "id" },
            allowNull: false
        },

        user: DataTypes.STRING(40),
        name: DataTypes.STRING(100),
        email: DataTypes.STRING(100),
        password: DataTypes.STRING(100)
    }, {
        sequelize,
        timestamps: false,
        modelName: "User",
        tableName: "user",
        underscored: true
    });

    return User;
}

module.exports = { initUser };
These are the parts of my code where I believe I might be causing an error. I can’t understand why. Sequelize seems to be configured correctly, but I can’t access my route or start my application without error.
Solution
You are not initializing sequelize. Example:
const sequelize = new Sequelize({
  dialect: 'sqlite',
  storage: './user.db'
})
In your code sequelize is undefined:
let sequelize;

const db = {
    db:sequelize,

    // Carrega arquivos de modelos das tabelas.
    User: initUser(sequelize),
    Sector: initSector(sequelize),

    Archives: initArchives(sequelize)
};
Answered By – Diogo Simões
This Answer collected from stackoverflow, is licensed under cc by-sa 2.5 , cc by-sa 3.0 and cc by-sa 4.0
Содержание
- Support inheritance for models #6502
- Comments
- Model Querying — Basics
- Simple INSERT queries
- Simple SELECT queries
- Specifying attributes for SELECT queries
- Applying WHERE clauses
- The basics
- Operators
- Shorthand syntax for Op.in
- Logical combinations with operators
- Examples with Op.and and Op.or
- Examples with Op.not
- Advanced queries with functions (not just columns)
- Postgres-only Range Operators
- Deprecated: Operator Aliases
- Simple UPDATE queries
- Simple DELETE queries
- Creating in bulk
- Ordering and Grouping
- Ordering
- Grouping
- Limits and Pagination
- Utility methods
- count
- max , min and sum
- increment , decrement
Support inheritance for models #6502
This needs to be supported and tested:
Derived inherits all attributes and options from Base.
Model.init() should do something like
The text was updated successfully, but these errors were encountered:
This looks a bit cumbersome.
Also I’m not sure if you actually want all the options to be inherited.
Think about this case —
If you inherit options from Base you are actually still referring the table base_table where with other models tableName would be derived from the Model.name.
Another way to approach this is to add another static method that init will call to get options and attributes. since each Model implementation can extend this method it can have ful control on what will be inherited and what will be stayed in default. you are also not required to call init method on parents and so not locking them to specific connection and you can have more abstract models
The base model will need some minor changes to the init mehtod to support this
Imo the examples you gave are more cumbersome, way more complex.
tableName is not a problem because the tableName is either set explicitly or inferred from the model name. So it will always override the parent value.
I don’t understand how a method gives more control than a property. Properties are inherited just like methods, the attributes and options are already stored as properties. The options and attributes objects just need to be set to inherit from the parent’s objects. It also looks weird to me to have a method getOptions that is passed options as a parameter.
Imo the examples you gave are more cumbersome, way more complex.
Library code is shorter and has better seperation and user code doesn’t require accessing internal properties like proto or guessing internal logic. How is it more cumbersome ?
tableName is not a problem because the tableName is either set explicitly or inferred from the model name. So it will always override the parent value.
Set explicitly by the options if you inherit the options which were passed to init you should inherit it as well. It is of course doesn’t make since to inherit it and you can hack around it but I would try to design a consistent API with less hacks
I don’t understand how a method gives more control than a property. Properties are inherited just like methods, the attributes and options are already stored as properties. The options and attributes objects just need to be set to inherit from the parent’s objects. It also looks weird to me to have a method getOptions that is passed options as a parameter.
Properties are not inherited they are overwritten, you can not call super on an object. It might have been possible to run on the inheritance chain and merge the property but since original design decided options and attributes will be set during the init process and not when the Model class is defined it is not really an option without breaking the api.
I agree that the init method is not really intuitive and should be deprecated but this is a major change that should have been done before v4 was released.
I think the point about abstraction is the most important thing. if we assume users will want to set a base model with a few basic attributes like status and id and than have other models inherit from this base class like posts and users that both have status and id. it doesn’t make any sense to init the base class since it is not a real model.
I’d say this is the most common use cases and I doubt if many users will actually have base classes that should be initiated by themselves. Best case scenario you might just have useless models in your connection instance, worst case you’ll have junk tables being created in your database if syncing.
I would argue that whatever solution for inheritance you choose it must not require initializing the parent model
Library code is shorter and has better seperation and user code doesn’t require accessing internal properties like proto or guessing internal logic. How is it more cumbersome ?
I think you misunderstood my example. The __proto__ is only to explain the effect of the internal implemetnation. It uses === , it doesn’t change anything, it is just for explanation. Inheritance happens in the library code with the last line through Object.create() .
Set explicitly by the options if you inherit the options which were passed to init you should inherit it as well. It is of course doesn’t make since to inherit it and you can hack around it but I would try to design a consistent API with less hacks
It is inherited and then overridden. The object will have the correct value, the prototype will have the value of the parent as expected. Don’t see how that’s inconsistent/hacky?
Properties are not inherited they are overwritten, you can not call super on an object. It might have been possible to run on the inheritance chain and merge the property but since original design decided options and attributes will be set during the init process and not when the Model class is defined it is not really an option without breaking the api.
I don’t understand this point, could you explain more?
The child attributes will prototypically inherit from the parent’s attributes . There is no need for super , __proto__ and Object.getPrototypeOf() will point to the parent’s attributes if you need to access them (you shouldn’t need to). Any later change to the parent (e.g. late setup of associations) will be reflected in the child. This is not the case if you use Utils.merge() to copy them, it would depend on the order of execution. You would be mixing inheritance semantics with mixin semantics.
I agree that the init method is not really intuitive and should be deprecated but this is a major change that should have been done before v4 was released.
I never said that, init is a static constructor that is crucial to implement abstractions like define() or decorators.
I think the point about abstraction is the most important thing. if we assume users will want to set a base model with a few basic attributes like status and id and than have other models inherit from this base class like posts and users that both have status and id. it doesn’t make any sense to init the base class since it is not a real model.
I’d say this is the most common use cases and I doubt if many users will actually have base classes that should be initiated by themselves. Best case scenario you might just have useless models in your connection instance, worst case you’ll have junk tables being created in your database if syncing.
I would argue that whatever solution for inheritance you choose it must not require initializing the parent model
One of the biggest use cases is history tables. In most serious projects you need to version and review customer data for legal reasons. There are multiple approaches to this. You could store it all in one table, but that table will not scale well with large amounts of users. Another approach is having a second table that holds history and/or change request data. Example: You have a table Users and a table UserChangeRequests . UserChangeRequests has all attributes of Users plus an attribute status that can be pending , rejected or approved . This can be modelled by having a class User and a class UserChangeRequest extends User . Both would be models in the database that share many columns. In some databases, the UserChangeRequest table can even be set to inherit columns with INHERITS FROM .
Base classes that don’t map to a table in the DB would be best modelled as an abstract class in OOP. We could add an abstract: true option to define this.
You could also simply use a mixin, which would not pollute the inheritance chain — you could mixin these properties to any model even if they inherit from another non-abstract Model.
Источник
Model Querying — Basics
Sequelize provides various methods to assist querying your database for data.
Important notice: to perform production-ready queries with Sequelize, make sure you have read the Transactions guide as well. Transactions are important to ensure data integrity and to provide other benefits.
This guide will show how to make the standard CRUD queries.
Simple INSERT queries
First, a simple example:
The Model.create() method is a shorthand for building an unsaved instance with Model.build() and saving the instance with instance.save() .
It is also possible to define which attributes can be set in the create method. This can be especially useful if you create database entries based on a form which can be filled by a user. Using that would, for example, allow you to restrict the User model to set only an username but not an admin flag (i.e., isAdmin ):
Simple SELECT queries
You can read the whole table from the database with the findAll method:
Specifying attributes for SELECT queries
To select only some attributes, you can use the attributes option:
Attributes can be renamed using a nested array:
You can use sequelize.fn to do aggregations:
When using aggregation function, you must give it an alias to be able to access it from the model. In the example above you can get the number of hats with instance.n_hats .
Sometimes it may be tiresome to list all the attributes of the model if you only want to add an aggregation:
Similarly, it’s also possible to remove a selected few attributes:
Applying WHERE clauses
The where option is used to filter the query. There are lots of operators to use for the where clause, available as Symbols from Op .
The basics
Observe that no operator (from Op ) was explicitly passed, so Sequelize assumed an equality comparison by default. The above code is equivalent to:
Multiple checks can be passed:
Just like Sequelize inferred the Op.eq operator in the first example, here Sequelize inferred that the caller wanted an AND for the two checks. The code above is equivalent to:
An OR can be easily performed in a similar way:
Since the above was an OR involving the same field, Sequelize allows you to use a slightly different structure which is more readable and generates the same behavior:
Operators
Sequelize provides several operators.
Shorthand syntax for Op.in
Passing an array directly to the where option will implicitly use the IN operator:
Logical combinations with operators
The operators Op.and , Op.or and Op.not can be used to create arbitrarily complex nested logical comparisons.
Examples with Op.and and Op.or
Examples with Op.not
The above will generate:
Advanced queries with functions (not just columns)
What if you wanted to obtain something like WHERE char_length(«content») = 7 ?
Note the usage of the sequelize.fn and sequelize.col methods, which should be used to specify an SQL function call and a table column, respectively. These methods should be used instead of passing a plain string (such as char_length(content) ) because Sequelize needs to treat this situation differently (for example, using other symbol escaping approaches).
What if you need something even more complex?
The above generates the following SQL:
Postgres-only Range Operators
Range types can be queried with all supported operators.
Keep in mind, the provided range value can define the bound inclusion/exclusion as well.
Deprecated: Operator Aliases
In Sequelize v4, it was possible to specify strings to refer to operators, instead of using Symbols. This is now deprecated and heavily discouraged, and will probably be removed in the next major version. If you really need it, you can pass the operatorAliases option in the Sequelize constructor.
Simple UPDATE queries
Update queries also accept the where option, just like the read queries shown above.
Simple DELETE queries
Delete queries also accept the where option, just like the read queries shown above.
To destroy everything the TRUNCATE SQL can be used:
Creating in bulk
Sequelize provides the Model.bulkCreate method to allow creating multiple records at once, with only one query.
The usage of Model.bulkCreate is very similar to Model.create , by receiving an array of objects instead of a single object.
However, by default, bulkCreate does not run validations on each object that is going to be created (which create does). To make bulkCreate run these validations as well, you must pass the validate: true option. This will decrease performance. Usage example:
If you are accepting values directly from the user, it might be beneficial to limit the columns that you want to actually insert. To support this, bulkCreate() accepts a fields option, an array defining which fields must be considered (the rest will be ignored).
Ordering and Grouping
Sequelize provides the order and group options to work with ORDER BY and GROUP BY .
Ordering
The order option takes an array of items to order the query by or a sequelize method. These items are themselves arrays in the form [column, direction] . The column will be escaped correctly and the direction will be checked in a whitelist of valid directions (such as ASC , DESC , NULLS FIRST , etc).
To recap, the elements of the order array can be the following:
- A string (which will be automatically quoted)
- An array, whose first element will be quoted, second will be appended verbatim
- An object with a raw field:
- The content of raw will be added verbatim without quoting
- Everything else is ignored, and if raw is not set, the query will fail
- A call to Sequelize.fn (which will generate a function call in SQL)
- A call to Sequelize.col (which will quoute the column name)
Grouping
The syntax for grouping and ordering are equal, except that grouping does not accept a direction as last argument of the array (there is no ASC , DESC , NULLS FIRST , etc).
You can also pass a string directly to group , which will be included directly (verbatim) into the generated SQL. Use with caution and don’t use with user generated content.
Limits and Pagination
The limit and offset options allow you to work with limiting / pagination:
Usually these are used alongside the order option.
Utility methods
Sequelize also provides a few utility methods.
count
The count method simply counts the occurrences of elements in the database.
max , min and sum
Sequelize also provides the max , min and sum convenience methods.
Let’s assume we have three users, whose ages are 10, 5, and 40.
increment , decrement
Sequelize also provides the increment convenience method.
Let’s assume we have a user, whose age is 10.
Источник
Представляю вашему вниманию руководство по Sequelize.
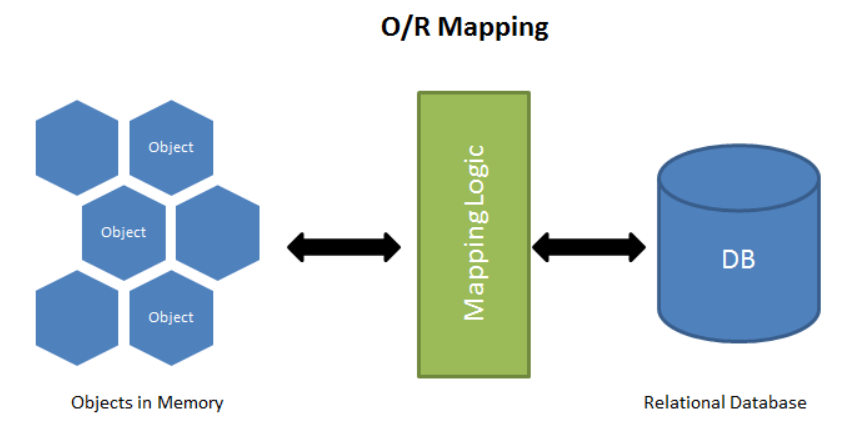
Sequelize — это ORM (Object-Relational Mapping — объектно-реляционное отображение или преобразование) для работы с такими СУБД (системами управления (реляционными) базами данных, Relational Database Management System, RDBMS), как Postgres, MySQL, MariaDB, SQLite и MSSQL. Это далеко не единственная ORM для работы с названными базами данных (далее — БД), но, на мой взгляд, одна из самых продвинутых и, что называется, «battle tested» (проверенных временем).
ORM хороши тем, что позволяют взаимодействовать с БД на языке приложения (JavaScript), т.е. без использования специально предназначенных для этого языков (SQL). Тем не менее, существуют ситуации, когда запрос к БД легче выполнить с помощью SQL (или можно выполнить только c помощью него). Поэтому перед изучением настоящего руководства рекомендую бросить хотя бы беглый взгляд на SQL. Вот соответствующая шпаргалка.
Это первая из 3 частей руководства, в которой мы поговорим о начале работы с Sequelize, основах создания и использования моделей и экземпляров для взаимодействия с БД, выполнении поисковых и других запросов, геттерах, сеттерах и виртуальных (virtual) атрибутах, валидации, ограничениях и необработанных (raw, SQL) запросах.
Вторая часть.
Третья часть.
Я постараюсь быть максимально лаконичным (надеюсь, без ущерба для полноты изложения материала). Я также постараюсь излагать материал максимально простым языком. Большинство примеров, приводимых в руководстве, заимствованы из официальной документации.
Содержание
- Начало работы
- Модели
- Экземпляры
- Основы выполнения запросов
- Поисковые запросы
- Геттеры, сеттеры и виртуальные атрибуты
- Валидация и ограничения
- Необработанные запросы
Начало работы
Установка
yarn add sequelize
# или
npm i sequelize
Подключение к БД
const { Sequelize } = require('sequelize')

// Вариант 1: передача `URI` для подключения
const sequelize = new Sequelize('sqlite::memory:') // для `sqlite`
const sequelize = new Sequelize('postgres://user:pass@example.com:5432/dbname') // для `postgres`

// Вариант 2: передача параметров по отдельности
const sequelize = new Sequelize({
  dialect: 'sqlite',
  storage: 'path/to/database.sqlite'
})

// Вариант 2: передача параметров по отдельности (для других диалектов)
const sequelize = new Sequelize('database', 'username', 'password', {
  host: 'localhost',
  dialect: /* 'mysql' | 'mariadb' | 'postgres' | 'mssql' */
})
Проверка подключения
try {
  await sequelize.authenticate()
  console.log('Соединение с БД было успешно установлено')
} catch (e) {
  console.log('Невозможно выполнить подключение к БД: ', e)
}
По умолчанию после того, как установки соединения, оно остается открытым. Для его закрытия следует вызвать метод sequelize.close().
↥ Наверх
Модели
Модель — это абстракция, представляющая таблицу в БД.
Модель сообщает Sequelize несколько вещей о сущности (entity), которую она представляет: название таблицы, то, какие колонки она содержит (и их типы данных) и др.
У каждой модели есть название. Это название не обязательно должно совпадать с названием соответствующей таблицы. Обычно, модели именуются в единственном числе (например, User), а таблицы — во множественном (например, Users). Sequelize выполняет плюрализацию (перевод значения из единственного числа во множественное) автоматически.
Модели могут определяться двумя способами:
- путем вызова
sequelize.define(modelName, attributes, options) - путем расширения класса
Modelи вызоваinit(attributes, options)
После определения, модель доступна через sequelize.model + название модели.
В качестве примера создадим модель User с полями firstName и lastName.
sequelize.define
const { Sequelize, DataTypes } = require('sequelize')
const sequelize = new Sequelize('sqlite::memory:')

const User = sequelize.define(
  'User',
  {
    // Здесь определяются атрибуты модели
    firstName: {
      type: DataTypes.STRING,
      allowNull: false,
    },
    lastName: {
      type: DataTypes.STRING,
      // allowNull по умолчанию имеет значение true
    },
  },
  {
    // Здесь определяются другие настройки модели
  }
)

// `sequelize.define` возвращает модель
console.log(User === sequelize.models.User) // true
Расширение Model
const { Sequelize, DataTypes, Model } = require('sequelize')
const sequelize = new Sequelize('sqlite::memory:')

class User extends Model {}

User.init(
  {
    // Здесь определяются атрибуты модели
    firstName: {
      type: DataTypes.STRING,
      allowNull: false,
    },
    lastName: {
      type: DataTypes.STRING,
    },
  },
  {
    // Здесь определяются другие настройки модели
    sequelize, // Экземпляр подключения (обязательно)
    modelName: 'User', // Название модели (обязательно)
  }
)

console.log(User === sequelize.models.User) // true
sequelize.define под капотом использует Model.init.
В дальнейшем я буду использовать только первый вариант.
Автоматическую плюрализацию названия таблицы можно отключить с помощью настройки freezeTableName:
sequelize.define(
  'User',
  {
    // ...
  },
  {
    freezeTableName: true,
  }
)
или глобально:
const sequelize = new Sequelize('sqlite::memory:', {
  define: {
    freeTableName: true,
  },
})
В этом случае таблица будет называться User.
Название таблицы может определяться в явном виде:
sequelize.define(
  'User',
  {
    // ...
  },
  {
    tableName: 'Employees',
  }
)
В этом случае таблица будет называться Employees.
Синхронизация модели с таблицей:
User.sync()— создает таблицу при отсутствии (существующая таблица остается неизменной)User.sync({ force: true })— удаляет существующую таблицу и создает новуюUser.sync({ alter: true })— приводит таблицу в соответствие с моделью
Пример:
// Возвращается промис
await User.sync({ force: true })
console.log('Таблица для модели `User` только что была создана заново!')
Синхронизация всех моделей:
await sequelize.sync({ force: true })
console.log('Все модели были успешно синхронизированы.')
Удаление таблицы:
await User.drop()
console.log('Таблица `User` была удалена.')
Удаление всех таблиц:
await sequelize.drop()
console.log('Все таблицы были удалены.')
Sequelize принимает настройку match с регулярным выражением, позволяющую определять группу синхронизируемых таблиц:
// Выполняем синхронизацию только тех моделей, названия которых заканчиваются на `_test`
await sequelize.sync({ force: true, match: /_test$/ })
Обратите внимание: вместо синхронизации в продакшне следует использовать миграции.
По умолчанию Sequelize автоматически добавляет в создаваемую модель поля createAt и updatedAt с типом DataTypes.DATE. Это можно изменить:
sequelize.define(
  'User',
  {
    // ...
  },
  {
    timestamps: false,
  }
)
Названные поля можно отключать по отдельности и переименовывать:
sequelize.define(
  'User',
  {
    // ...
  },
  {
    timestamps: true,
    // Отключаем `createdAt`
    createdAt: false,
    // Изменяем название `updatedAt`
    updatedAt: 'updateTimestamp',
  }
)
Если для колонки определяется только тип данных, синтаксис определения атрибута может быть сокращен следующим образом:
// до
sequelize.define('User', {
  name: {
    type: DataTypes.STRING,
  },
})

// после
sequelize.define('User', {
  name: DataTypes.STRING,
})
По умолчанию значением колонки является NULL. Это можно изменить с помощью настройки defaultValue (определив «дефолтное» значение):
sequelize.define('User', {
  name: {
    type: DataTypes.STRING,
    defaultValue: 'John Smith',
  },
})
В качестве дефолтных могут использоваться специальные значения:
sequelize.define('Foo', {
  bar: {
    type: DataTypes.DATE,
    // Текущие дата и время, определяемые в момент создания
    defaultValue: Sequelize.NOW,
  },
})
Типы данных
Каждая колонка должна иметь определенный тип данных.
// Импорт встроенных типов данных
const { DataTypes } = require('sequelize')

// Строки
DataTypes.STRING // VARCHAR(255)
DataTypes.STRING(1234) // VARCHAR(1234)
DataTypes.STRING.BINARY // VARCHAR BINARY
DataTypes.TEXT // TEXT
DataTypes.TEXT('tiny') // TINYTEXT
DataTypes.CITEXT // CITEXT - только для `PostgreSQL` и `SQLite`

// Логические значения
DataTypes.BOOLEAN // BOOLEAN

// Числа
DataTypes.INTEGER // INTEGER
DataTypes.BIGINT // BIGINT
DataTypes.BIGINT(11) // BIGINT(11)

DataTypes.FLOAT // FLOAT
DataTypes.FLOAT(11) // FLOAT(11)
DataTypes.FLOAT(11, 10) // FLOAT(11, 10)

DataTypes.REAL // REAL - только для `PostgreSQL`
DataTypes.REAL(11) // REAL(11) - только для `PostgreSQL`
DataTypes.REAL(11, 12) // REAL(11,12) - только для `PostgreSQL`

DataTypes.DOUBLE // DOUBLE
DataTypes.DOUBLE(11) // DOUBLE(11)
DataTypes.DOUBLE(11, 10) // DOUBLE(11, 10)

DataTypes.DECIMAL // DECIMAL
DataTypes.DECIMAL(10, 2) // DECIMAL(10, 2)

// только для `MySQL`/`MariaDB`
DataTypes.INTEGER.UNSIGNED
DataTypes.INTEGER.ZEROFILL
DataTypes.INTEGER.UNSIGNED.ZEROFILL

// Даты
DataTypes.DATE // DATETIME для `mysql`/`sqlite`, TIMESTAMP с временной зоной для `postgres`
DataTypes.DATE(6) // DATETIME(6) для `mysql` 5.6.4+
DataTypes.DATEONLY // DATE без времени

// UUID
DataTypes.UUID
UUID может генерироваться автоматически:
{
  type: DataTypes.UUID,
  defaultValue: Sequelize.UUIDV4
}
Другие типы данных:
// Диапазоны (только для `postgres`)
DataTypes.RANGE(DataTypes.INTEGER) // int4range
DataTypes.RANGE(DataTypes.BIGINT) // int8range
DataTypes.RANGE(DataTypes.DATE) // tstzrange
DataTypes.RANGE(DataTypes.DATEONLY) // daterange
DataTypes.RANGE(DataTypes.DECIMAL) // numrange

// Буферы
DataTypes.BLOB // BLOB
DataTypes.BLOB('tiny') // TINYBLOB
DataTypes.BLOB('medium') // MEDIUMBLOB
DataTypes.BLOB('long') // LONGBLOB

// Перечисления - могут определяться по-другому (см. ниже)
DataTypes.ENUM('foo', 'bar')

// JSON (только для `sqlite`/`mysql`/`mariadb`/`postres`)
DataTypes.JSON

// JSONB (только для `postgres`)
DataTypes.JSONB

// другие
DataTypes.ARRAY(/* DataTypes.SOMETHING */) // массив DataTypes.SOMETHING. Только для `PostgreSQL`

DataTypes.CIDR // CIDR - только для `PostgreSQL`
DataTypes.INET // INET - только для `PostgreSQL`
DataTypes.MACADDR // MACADDR - только для `PostgreSQL`

DataTypes.GEOMETRY // Пространственная колонка. Только для `PostgreSQL` (с `PostGIS`) или `MySQL`
DataTypes.GEOMETRY('POINT') // Пространственная колонка с геометрическим типом. Только для `PostgreSQL` (с `PostGIS`) или `MySQL`
DataTypes.GEOMETRY('POINT', 4326) // Пространственная колонка с геометрическим типом и `SRID`. Только для `PostgreSQL` (с `PostGIS`) или `MySQL`
Настройки колонки
const { DataTypes, Defferable } = require('sequelize')

sequelize.define('Foo', {
  // Поле `flag` логического типа по умолчанию будет иметь значение `true`
  flag: { type: DataTypes.BOOLEAN, allowNull: false, defaultValue: true },

  // Дефолтным значением поля `myDate` будет текущие дата и время
  myDate: { type: DataTypes.DATE, defaultValue: DataTypes.NOW },

  // Настройка `allowNull` со значением `false` запрещает запись в колонку нулевых значений (NULL)
  title: { type: DataTypes.STRING, allowNull: false },

  // Создание двух объектов с одинаковым набором значений, обычно, приводит к возникновению ошибки.
  // Значением настройки `unique` может быть строка или булевое значение. В данном случае формируется составной уникальный ключ
  uniqueOne: { type: DataTypes.STRING, unique: 'compositeIndex' },
  uniqueTwo: { type: DataTypes.INTEGER, unique: 'compositeIndex' },

  // `unique` используется для обозначения полей, которые должны содержать только уникальные значения
  someUnique: { type: DataTypes.STRING, unique: true },

  // Первичные или основные ключи будут подробно рассмотрены далее
  identifier: { type: DataTypes.STRING, primaryKey: true },

  // Настройка `autoIncrement` может использоваться для создания колонки с автоматически увеличивающимися целыми числами
  incrementMe: { type: DataTypes.INTEGER, autoIncrement: true },

  // Настройка `field` позволяет кастомизировать название колонки
  fieldWithUnderscores: { type: DataTypes.STRING, field: 'field_with_underscores' },

  // Внешние ключи также будут подробно рассмотрены далее
  bar_id: {
    type: DataTypes.INTEGER,

    references: {
      // ссылка на другую модель
      model: Bar,

      // название колонки модели-ссылки с первичным ключом
      key: 'id',

      // в случае с `postres`, можно определять задержку получения внешних ключей
      deferrable: Deferrable.INITIALLY_IMMEDIATE
      /*
        `Deferrable.INITIALLY_IMMEDIATE` - проверка внешних ключей выполняется незамедлительно
        `Deferrable.INITIALLY_DEFERRED` - проверка внешних ключей откладывается до конца транзакции
        `Deferrable.NOT` - без задержки: это не позволит динамически изменять правила в транзакции
      */

      // Комментарии можно добавлять только в `mysql`/`mariadb`/`postres` и `mssql`
      commentMe: {
        type: DataTypes.STRING,
        comment: 'Комментарий'
      }
    }
  }
}, {
  // Аналог атрибута `someUnique`
  indexes: [{
    unique: true,
    fields: ['someUnique']
  }]
})
↥ Наверх
Экземпляры
Наш начальный код будет выглядеть следующим образом:
const { Sequelize, DataTypes } = require('sequelize')
const sequelize = new Sequelize('sqlite::memory:')

// Создаем модель для пользователя со следующими атрибутами
const User = sequelize.define('User', {
  // имя
  name: DataTypes.STRING,
  // любимый цвет - по умолчанию зеленый
  favouriteColor: {
    type: DataTypes.STRING,
    defaultValue: 'green',
  },
  // возраст
  age: DataTypes.INTEGER,
  // деньги
  cash: DataTypes.INTEGER,
})

;(async () => {
  // Пересоздаем таблицу в БД
  await sequelize.sync({ force: true })
  // дальнейший код
})()
Создание экземпляра:
// Создаем объект
const jane = User.build({ name: 'Jane' })
// и сохраняем его в БД
await jane.save()

// Сокращенный вариант
const jane = await User.create({ name: 'Jane' })
console.log(jane.toJSON())
console.log(JSON.stringify(jane, null, 2))
Обновление экземпляра:
const john = await User.create({ name: 'John' })
// Вносим изменение
john.name = 'Bob'
// и обновляем соответствующую запись в БД
await john.save()
Удаление экземпляра:
await john.destroy()«Перезагрузка» экземпляра:
const john = await User.create({ name: 'John' })
john.name = 'Bob'

// Перезагрузка экземпляра приводит к сбросу всех полей к дефолтным значениям
await john.reload()
console.log(john.name) // John
Сохранение отдельных полей:
const john = await User.create({ name: 'John' })
john.name = 'Bob'
john.favouriteColor = 'blue'
// Сохраняем только изменение имени
await john.save({ fields: ['name'] })

await john.reload()
console.log(john.name) // Bob
// Изменение цвета не было зафиксировано
console.log(john.favouriteColor) // green
Автоматическое увеличение значения поля:
const john = await User.create({ name: 'John', age: 98 })

const incrementResult = await john.increment('age', { by: 2 })
// При увеличении значение на 1, настройку `by` можно опустить - increment('age')

// Обновленный пользователь будет возвращен только в `postres`, в других БД он будет иметь значение `undefined`
Автоматическое увеличения значений нескольких полей:
const john = await User.create({ name: 'John', age: 98, cash: 1000 })

await john.increment({
  age: 2,
  cash: 500,
})
Также имеется возможность автоматического уменьшения значений полей (decrement()).
↥ Наверх
Основы выполнения запросов
Создание экземпляра:
const john = await User.create({
  firstName: 'John',
  lastName: 'Smith',
})
Создание экземпляра с определенными полями:
const user = await User.create(
  {
    username: 'John',
    isAdmin: true,
  },
  {
    fields: ['username'],
  }
)

console.log(user.username) // John
console.log(user.isAdmin) // false
Получение экземпляра:
// Получение одного (первого) пользователя
const firstUser = await User.find()

// Получение всех пользователей
const allUsers = await User.findAll() // SELECT * FROM ...;
Выборка полей:
// Получение полей `foo` и `bar`
Model.findAll({
  attributes: ['foo', 'bar'],
}) // SELECT foo, bar FROM ...;

// Изменение имени поля `bar` на `baz`
Model.findAll({
  attributes: ['foo', ['bar', 'baz'], 'qux'],
}) // SELECT foo, bar AS baz, qux FROM ...;

// Выполнение агрегации
// Синоним `n_hats` является обязательным
Model.findAll({
  attributes: [
    'foo',
    [sequelize.fn('COUNT', sequelize.col('hats')), 'n_hats'],
    'bar',
  ],
}) // SELECT foo, COUNT(hats) AS n_hats, bar FROM ...;
// instance.n_hats

// Сокращение - чтобы не перечислять все атрибуты при агрегации
Model.findAll({
  attributes: {
    include: [[sequelize.fn('COUNT', sequelize.col('hats')), 'n_hast']],
  },
})

// Исключение поля из выборки
Model.findAll({
  attributes: {
    exclude: ['baz'],
  },
})
Настройка where позволяет выполнять фильтрацию возвращаемых данных. Существует большое количество операторов, которые могут использоваться совместно с where через Op (см. ниже).
// Выполняем поиск поста по идентификатору его автора
// предполагается `Op.eq`
Post.findAll({
  where: {
    authorId: 2,
  },
}) // SELECT * FROM post WHERE authorId = 2;

// Полный вариант
const { Op } = require('sequelize')
Post.findAll({
  where: {
    authorId: {
      [Op.eq]: 2,
    },
  },
})

// Фильтрация по нескольким полям
// предполагается `Op.and`
Post.findAll({
  where: {
    authorId: 2,
    status: 'active',
  },
}) // SELECT * FROM post WHERE authorId = 2 AND status = 'active';

// Полный вариант
Post.findAll({
  where: {
    [Op.and]: [{ authorId: 2 }, { status: 'active' }],
  },
})

// ИЛИ
Post.findAll({
  where: {
    [Op.or]: [{ authorId: 2 }, { authorId: 3 }],
  },
}) // SELECT * FROM post WHERE authorId = 12 OR authorId = 13;

// Одинаковые названия полей можно опускать
Post.destroy({
  where: {
    authorId: {
      [Op.or]: [2, 3],
    },
  },
}) // DELETE FROM post WHERE authorId = 2 OR authorId = 3;
Операторы
const { Op } = require('sequelize')

Post.findAll({
  where: {
    [Op.and]: [{ a: 1, b: 2 }],   // (a = 1) AND (b = 2)
    [Op.or]: [{ a: 1, b: 2 }],    // (a = 1) OR (b = 2)
    someAttr: {
      // Основные
      [Op.eq]: 3,       // = 3
      [Op.ne]: 4,       // != 4
      [Op.is]: null,    // IS NULL
      [Op.not]: true,   // IS NOT TRUE
      [Op.or]: [5, 6],  // (someAttr = 5) OR (someAttr = 6)

      // Использование диалекта определенной БД (`postgres`, в данном случае)
      [Op.col]: 'user.org_id',    // = 'user'.'org_id'

      // Сравнение чисел
      [Op.gt]: 6,               // > 6
      [Op.gte]: 6,              // >= 6
      [Op.lt]: 7,               // < 7
      [Op.lte]: 7,              // <= 7
      [Op.between]: [8, 10],    // BETWEEN 8 AND 10
      [Op.notBetween]: [8, 10], // NOT BETWEEN 8 AND 10

      // Другие
      [Op.all]: sequelize.literal('SELECT 1'), // > ALL (SELECT 1)

      [Op.in]: [10, 12],    // IN [1, 2]
      [Op.notIn]: [10, 12]  // NOT IN [1, 2]

      [Op.like]: '%foo',      // LIKE '%foo'
      [Op.notLike]: '%foo',   // NOT LIKE '%foo'
      [Op.startsWith]: 'foo', // LIKE 'foo%'
      [Op.endsWith]: 'foo',   // LIKE '%foo'
      [Op.substring]: 'foo',  // LIKE '%foo%'
      [Op.iLike]: '%foo',     // ILIKE '%foo' (учет регистра, только для `postgres`)
      [Op.notILike]: '%foo',        // NOT ILIKE '%foo'
      [Op.regexp]: '^[b|a|r]',      // REGEXP/~ '^[b|a|r]' (только для `mysql`/`postgres`)
      [Op.notRegexp]: '^[b|a|r]',   // NOT REGEXP/!~ '^[b|a|r]' (только для `mysql`/`postgres`),
      [Op.iRegexp]: '^[b|a|r]',     // ~* '^[b|a|r]' (только для `postgres`)
      [Op.notIRegexp]: '^[b|a|r]',  // !~* '^[b|a|r]' (только для `postgres`)

      [Op.any]: [2, 3], // ANY ARRAY[2, 3]::INTEGER (только для `postgres`)

      [Op.like]: { [Op.any]: ['foo', 'bar'] } // LIKE ANY ARRAY['foo', 'bar'] (только для `postgres`)

      // и т.д.
    }
  }
})
Передача массива в where приводит к неявному применению оператора IN:
Post.findAll({
  where: {
    id: [1, 2, 3], // id: { [Op.in]: [1, 2, 3] }
  },
}) // ... WHERE 'post'.'id' IN (1, 2, 3)
Операторы Op.and, Op.or и Op.not могут использоваться для создания сложных операций, связанных с логическими сравнениями:
const { Op } = require('sequelize')

Foo.findAll({
  where: {
    rank: {
      [Op.or]: {
        [Op.lt]: 1000,
        [Op.eq]: null
      }
    }, // rank < 1000 OR rank IS NULL
    {
      createdAt: {
        [Op.lt]: new Date(),
        [Op.gt]: new Date(new Date() - 24 * 60 * 60 * 1000)
      }
    }, // createdAt < [timestamp] AND createdAt > [timestamp]
    {
      [Op.or]: [
        {
          title: {
            [Op.like]: 'Foo%'
          }
        },
        {
          description: {
            [Op.like]: '%foo%'
          }
        }
      ]
    } // title LIKE 'Foo%' OR description LIKE '%foo%'
  }
})

// НЕ
Project.findAll({
  where: {
    name: 'Some Project',
    [Op.not]: [
      { id: [1, 2, 3] },
      {
        description: {
          [Op.like]: 'Awe%'
        }
      }
    ]
  }
})
/*
  SELECT *
  FROM 'Projects'
  WHERE (
    'Projects'.'name' = 'Some Project'
    AND NOT (
      'Projects'.'id' IN (1, 2, 3)
      OR
      'Projects'.'description' LIKE 'Awe%'
    )
  )
*/
«Продвинутые» запросы:
Post.findAll({
  where: sequelize.where(
    sequelize.fn('char_length', sequelize.col('content')),
    7
  ),
}) // WHERE char_length('content') = 7

Post.findAll({
  where: {
    [Op.or]: [
      sequelize.where(sequelize.fn('char_length', sequelize.col('content')), 7),
      {
        content: {
          [Op.like]: 'Hello%',
        },
      },
      {
        [Op.and]: [
          { status: 'draft' },
          sequelize.where(
            sequelize.fn('char_length', sequelize.col('content')),
            {
              [Op.gt]: 8,
            }
          ),
        ],
      },
    ],
  },
})

/*
  ...
  WHERE (
    char_length("content") = 7
    OR
    "post"."content" LIKE 'Hello%'
    OR (
      "post"."status" = 'draft'
      AND
      char_length("content") > 8
    )
  )
*/
Длинное получилось лирическое отступление. Двигаемся дальше.
Обновление экземпляра:
// Изменяем имя пользователя с `userId = 2`
await User.update(
  {
    firstName: 'John',
  },
  {
    where: {
      userId: 2,
    },
  }
)
Удаление экземпляра:
// Удаление пользователя с `id = 2`
await User.destroy({
  where: {
    userId: 2,
  },
})

// Удаление всех пользователей
await User.destroy({
  truncate: true,
})
Создание нескольких экземпляров одновременно:
const users = await User.bulkCreate([{ name: 'John' }, { name: 'Jane' }])

// Настройка `validate` со значением `true` заставляет `Sequelize` выполнять валидацию каждого объекта, создаваемого с помощью `bulkCreate()`
// По умолчанию валидация таких объектов не проводится
const User = sequelize.define('User', {
  name: {
    type: DataTypes.STRING,
    validate: {
      len: [2, 10],
    },
  },
})

await User.bulkCreate([{ name: 'John' }, { name: 'J' }], { validate: true }) // Ошибка!

// Настройка `fields` позволяет определять поля для сохранения
await User.bulkCreate([{ name: 'John' }, { name: 'Jane', age: 30 }], {
  fields: ['name'],
}) // Сохраняем только имена пользователей
Сортировка и группировка
Настройка order определяет порядок сортировки возвращаемых объектов:
Submodel.findAll({
  order: [
    // Сортировка по заголовку (по убыванию)
    ['title', 'DESC'],

    // Сортировка по максимальному возврасту
    sequelize.fn('max', sequelize.col('age')),

    // Тоже самое, но по убыванию
    [sequelize.fn('max', sequelize.col('age')), 'DESC'],

    // Сортировка по `createdAt` из связанной модели
    [Model, 'createdAt', 'DESC'],

    // Сортировка по `createdAt` из двух связанных моделей
    [Model, AnotherModel, 'createdAt', 'DESC'],

    // и т.д.
  ],

  // Сортировка по максимальному возврасту (по убыванию)
  order: sequelize.literal('max(age) DESC'),

  // Сортировка по максимальному возрасту (по возрастанию - направление сортировки по умолчанию)
  order: sequelize.fn('max', sequelize.col('age')),

  // Сортировка по возрасту (по возрастанию)
  order: sequelize.col('age'),

  // Случайная сортировка
  order: sequelize.random(),
})

Model.findOne({
  order: [
    // возвращает `name`
    ['name'],
    // возвращает `'name' DESC`
    ['name', 'DESC'],
    // возвращает `max('age')`
    sequelize.fn('max', sequelize.col('age')),
    // возвращает `max('age') DESC`
    [sequelize.fn('max', sequelize.col('age')), 'DESC'],

    // и т.д.
  ],
})
Синтаксис группировки идентичен синтаксису сортировки, за исключением того, что при группировке не указывается направление. Кроме того, синтаксис группировки может быть сокращен до строки:
Project.findAll({ group: 'name' }) // GROUP BY nameНастройки limit и offset позволяют ограничивать и/или пропускать определенное количество возвращаемых объектов:
// Получаем 10 проектов
Project.findAll({ limit: 10 })

// Пропускаем 5 первых объектов
Project.findAll({ offset: 5 })

// Пропускаем 5 первых объектов и возвращаем 10
Project.findAll({ offset: 5, limit: 10 })
Sequelize предоставляет несколько полезных утилит:
// Определяем число вхождений
console.log(
  `В настоящий момент в БД находится ${await Project.count()} проектов.`
)

const amount = await Project.count({
  where: {
    projectId: {
      [Op.gt]: 25,
    },
  },
})
console.log(
  `В настоящий момент в БД находится ${amount} проектов с идентификатором больше 25.`
)

// max, min, sum
// Предположим, что у нас имеется 3 пользователя 20, 30 и 40 лет
await User.max('age') // 40
await User.max('age', { where: { age: { [Op.lt]: 31 } } }) // 30
await User.min('age') // 20
await User.min('age', { where: { age: { [Op.gt]: 21 } } }) // 30
await User.sum('age') // 90
await User.sum('age', { where: { age: { [op.gt]: 21 } } }) // 70
↥ Наверх
Поисковые запросы
Настройка raw со значением true отключает «оборачивание» ответа, возвращаемого SELECT, в экземпляр модели.
findAll()— возвращает все экземпляры моделиfindByPk()— возвращает один экземпляр по первичному ключу
const project = await Project.findByPk(123)findOne()— возвращает первый или один экземпляр модели (это зависит от того, указано ли условие для поиска)
const project = await Project.findOne({ where: { projectId: 123 } })findOrCreate()— возвращает или создает и возвращает экземпляр, а также логическое значение — индикатор создания экземпляра. Настройкаdefaultsиспользуется для определения значений по умолчанию. При ее отсутствии, для заполнения полей используется значение, указанное в условии
// Предположим, что у нас имеется пустая БД с моделью `User`, у которой имеются поля `username` и `job`
const [user, created] = await User.findOrCreate({
  where: { username: 'John' },
  defaults: {
    job: 'JavaScript Developer',
  },
})findAndCountAll()— комбинацияfindAll()иcount. Может быть полезным при использовании настроекlimitиoffset, когда мы хотим знать точное число записей, совпадающих с запросом. Возвращает объект с двумя свойствами:count— количество записей, совпадающих с запросом (целое число)rows— массив объектов
const { count, rows } = await Project.findAndCountAll({
  where: {
    title: {
      [Op.like]: 'foo%',
    },
  },
  offset: 10,
  limit: 5,
})
↥ Наверх
Геттеры, сеттеры и виртуальные атрибуты
Sequelize позволяет определять геттеры и сеттеры для атрибутов моделей, а также виртуальные атрибуты — атрибуты, которых не существует в таблице и которые заполняются или наполняются (имеется ввиду популяция) Serquelize автоматически. Последние могут использоваться, например, для упрощения кода.
Геттер — это функция get(), определенная для колонки:
const User = sequelize.define('User', {
  username: {
    type: DataTypes.STRING,
    get() {
      const rawValue = this.getDataValue(username)
      return rawValue ? rawValue.toUpperCase() : null
    },
  },
})
Геттер вызывается автоматически при чтении поля.
Обратите внимание: для получения значения поля в геттере мы использовали метод getDataValue(). Если вместо этого указать this.username, то мы попадем в бесконечный цикл.
Сеттер — это функция set(), определенная для колонки. Она принимает значение для установки:
const User = sequelize.define('user', {
  username: DataTypes.STRING,
  password: {
    type: DataTypes.STRING,
    set(value) {
      // Перед записью в БД пароли следует "хэшировать" с помощью криптографической функции
      this.setDataValue('password', hash(value))
    },
  },
})
Сеттер вызывается автоматически при создании экземпляра.
В сеттере можно использовать значения других полей:
const User = sequelize.define('User', {
  username: DatTypes.STRING,
  password: {
    type: DataTypes.STRING,
    set(value) {
      // Используем значение поля `username`
      this.setDataValue('password', hash(this.username + value))
    },
  },
})
Геттеры и сеттеры можно использовать совместно. Допустим, что у нас имеется модель Post с полем content неограниченной длины, и в целях экономии памяти мы решили хранить в БД содержимое поста в сжатом виде. Обратите внимание: многие современные БД выполняют сжатие (компрессию) данных автоматически.
const { gzipSync, gunzipSync } = require('zlib')

const Post = sequelize.define('post', {
  content: {
    type: DataTypes.TEXT,
    get() {
      const storedValue = this.getDataValue('content')
      const gzippedBuffer = Buffer.from(storedValue, 'base64')
      const unzippedBuffer = gunzipSync(gzippedBuffer)
      return unzippedBuffer.toString()
    },
    set(value) {
      const gzippedBuffer = gzipSync(value)
      this.setDataValue('content', gzippedBuffer.toString('base64'))
    },
  },
})
Представим, что у нас имеется модель User с полями firstName и lastName, и мы хотим получать полное имя пользователя. Для этого мы можем создать виртуальный атрибут со специальным типом DataTypes.VIRTUAL:
const User = sequelize.define('user', {
  firstName: DataTypes.STRING,
  lastName: DataTypes.STRING,
  fullName: {
    type: DataTypes.VIRTUAL,
    get() {
      return `${this.firstName} ${this.lastName}`
    },
    set(value) {
      throw new Error('Нельзя этого делать!')
    },
  },
})
В таблице не будет колонки fullName, однако мы сможем получать значение этого поля, как если бы оно существовало на самом деле.
↥ Наверх
Валидация и ограничения
Наша моделька будет выглядеть так:
const { Sequelize, Op, DataTypes } = require('sequelize')
const sequelize = new Sequelize('sqlite::memory:')

const User = sequelize.define('user', {
  username: {
    type: DataTypes.STRING,
    allowNull: false,
    unique: true,
  },
  hashedPassword: {
    type: DataTypes.STRING(64),
    is: /^[0-9a-f]{64}$/i,
  },
})
Отличие между выполнением валидации и применением или наложением органичение на значение поля состоит в следующем:
- валидация выполняется на уровне
Sequelize; для ее выполнения можно использовать любую функцию, как встроенную, так и кастомную; при провале валидации, SQL-запрос в БД не отправляется; - ограничение определяется на уровне
SQL; примером ограничения является настройкаunique; при провале ограничения, запрос в БД все равно отправляется
В приведенном примере мы ограничили уникальность имени пользователя с помощью настройки unique. При попытке записать имя пользователя, которое уже существует в БД, возникнет ошибка SequelizeUniqueConstraintError.
По умолчанию колонки таблицы могут быть пустыми (нулевыми). Настройка allowNull со значением false позволяет это запретить. Обратите внимание: без установки данной настройки хотя бы для одного поля, можно будет выполнить такой запрос: User.create({}).
Валидаторы позволяют проводить проверку в отношении каждого атрибута модели. Валидация автоматически выполняется при запуске методов create(), update() и save(). Ее также можно запустить вручную с помощью validate().
Как было отмечено ранее, мы можем определять собственные валидаторы или использовать встроенные (предоставляемые библиотекой validator.js).
sequelize.define('foo', {
  bar: {
    type: DataTypes.STRING,
    validate: {
      is: /^[a-z]+$/i, // определение совпадения с регулярным выражением
      not: /^[a-z]+$/i, // определение отсутствия совпадения с регуляркой
      isEmail: true,
      isUrl: true,
      isIP: true,
      isIPv4: true,
      isIPv6: true,
      isAlpha: true,
      isAlphanumeric: true,
      isNumeric: true,
      isInt: true,
      isFloat: true,
      isDecimal: true,
      isLowercase: true,
      isUppercase: true,
      notNull: true,
      isNull: true,
      notEmpty: true,
      equals: 'определенное значение',
      contains: 'foo', // определение наличия подстроки
      notContains: 'bar', // определение отсутствия подстроки
      notIn: [['foo', 'bar']], // определение того, что значение НЕ является одним из указанных
      isIn: [['foo', 'bar']], // определение того, что значение является одним из указанных
      len: [2, 10], // длина строки должна составлять от 2 до 10 символов
      isUUID: true,
      isDate: true,
      isAfter: '2021-06-12',
      isBefore: '2021-06-15',
      max: 65,
      min: 18,
      isCreditCard: true,

      // Примеры кастомных валидаторов
      isEven(value) {
        if (parseInt(value) % 2 !== 0) {
          throw new Error('Разрешены только четные числа!')
        }
      },
      isGreaterThanOtherField(value) {
        if (parseInt(value) < parseInt(this.otherField)) {
          throw new Error(
            `Значение данного поля должно быть больше значения ${otherField}!`
          )
        }
      },
    },
  },
})
Для кастомизации сообщения об ошибке можно использовать объект со свойством msg:
isInt: {
  msg: 'Значение должно быть целым числом!'
}
В этом случае для указания аргументов используется свойство args:
isIn: {
  args: [['ru', 'en']],
  msg: 'Язык должен быть русским или английским!'
}
Для поля, которое может иметь значение null, встроенные валидаторы пропускаются. Это означает, что мы, например, можем определить поле, которое либо должно содержать строку длиной 5-10 символов, либо должно быть пустым:
const User = sequelize.define('user', {
  username: {
    type: DataTypes.STRING,
    allowNull: true,
    validate: {
      len: [5, 10],
    },
  },
})
Обратите внимание, что для нулевых полей кастомные валидаторы выполняются:
const User = sequelize.define('user', {
  age: DataTypes.INTEGER,
  name: {
    type: DataTypes.STRING,
    allowNull: true,
    validate: {
      customValidator(value) {
        if (value === null && this.age < 18) {
          throw new Error('Нулевые значения разрешены только совершеннолетним!')
        }
      },
    },
  },
})
Мы можем выполнять валидацию не только отдельных полей, но и модели в целом. В следующем примере мы проверяем наличие или отсутствии как поля latitude, так и поля longitude (либо должны быть указаны оба поля, либо не должно быть указано ни одного):
const Place = sequelize.define(
  'place',
  {
    name: DataTypes.STRING,
    address: DataTypes.STRING,
    latitude: {
      type: DataTypes.INTEGER,
      validate: {
        min: -90,
        max: 90,
      },
    },
    longitude: {
      type: DataTypes.INTEGER,
      validate: {
        min: -180,
        max: 180,
      },
    },
  },
  {
    validate: {
      bothCoordsOrNone() {
        if (!this.latitude !== !this.longitude) {
          throw new Error(
            'Либо укажите и долготу, и широту, либо ничего не указывайте!'
          )
        }
      },
    },
  }
)
↥ Наверх
Необработанные запросы
sequelize.query() позволяет выполнять необработанные SQL-запросы (raw queries). По умолчанию данная функция возвращает массив с результатами и объект с метаданными, при этом, содержание последнего зависит от используемого диалекта.
const [results, metadata] = await sequelize.query(
  "UPDATE users SET username = 'John' WHERE userId = 123"
)
Если нам не нужны метаданные, для правильного форматирования результата можно воспользоваться специальными типами запроса (query types):
const { QueryTypes } = require('sequelize')

const users = await sequelize.query('SELECT * FROM users', {
  // тип запроса - выборка
  type: QueryTypes.SELECT,
})
Для привязки результатов необработанного запроса к модели используются настройки model и, опционально, mapToModel:
const projects = await sequelize.query('SELECT * FROM projects', {
  model: Project,
  mapToModel: true,
})
Пример использования других настроек:
sequelize.query('SELECT 1', {
  // "логгирование" - функция или `false`
  logging: console.log,

  // если `true`, возвращается только первый результат
  plain: false,

  // если `true`, для выполнения запроса не нужна модель
  raw: false,

  // тип выполняемого запроса
  type: QueryTypes.SELECT,
})
Если название атрибута в таблице содержит точки, то результирующий объект может быть преобразован во вложенные объекты с помощью настройки nest.
Без nest: true:
const records = await sequelize.query('SELECT 1 AS `foo.bar.baz`', {
  type: QueryTypes.SELECT,
})
console.log(JSON.stringify(records[0], null, 2))
// { 'foo.bar.baz': 1 }
С nest: true:
const records = await sequelize.query('SELECT 1 AS `foo.bar.baz`', {
  type: QueryTypes.SELECT,
  nest: true,
})
console.log(JSON.stringify(records[0], null, 2))
/*
{
  'foo': {
    'bar': {
      'baz': 1
    }
  }
}
*/
Замены при выполнении запроса могут производиться двумя способами:
- с помощью именованных параметров (начинающихся с
:) - с помощью неименованных параметров (представленных
?)
Заменители (placeholders) передаются в настройку replacements в виде массива (для неименованных параметров) или в виде объекта (для именованных параметров):
- если передан массив,
?заменяется элементами массива в порядке их следования - если передан объект,
:keyзаменяются ключами объекта. При отсутствии в объекте ключей для заменяемых значений, а также в случае, когда ключей в объекте больше, чем заменяемых значений, выбрасывается исключение
sequelize.query('SELECT * FROM projects WHERE status = ?', {
  replacements: ['active'],
  type: QueryTypes.SELECT,
})

sequelize.query('SELECT * FROM projects WHERE status = :status', {
  replacements: { status: 'active' },
  type: QueryTypes.SELECT,
})
Продвинутые примеры замены:
// Замена производится при совпадении с любым значением из массива
sequelize.query('SELECT * FROM projects WHERE status IN(:status)', {
  replacements: { status: ['active', 'inactive'] },
  type: QueryTypes.SELECT,
})

// Замена выполняется для всех пользователей, имена которых начинаются с `J`
sequelize.query('SELECT * FROM users WHERE name LIKE :search_name', {
  replacements: { search_name: 'J%' },
  type: QueryTypes.SELECT,
})
Кроме замены, можно выполнять привязку (bind) параметров. Привязка похожа на замену, но заменители обезвреживаются (escaped) и вставляются в запрос, отправляемый в БД, а связанные параметры отправляются в БД по отдельности. Связанные параметры обозначаются с помощью $число или $строка:
- если передан массив,
$1будет указывать на его первый элемент (bind[0]) - если передан объект,
$keyбудет указывать наobject['key']. Каждый ключ объекта должен начинаться с буквы.$1является невалидным ключом, даже если существуетobject['1'] - в обоих случаях для сохранения знака
$может использоваться$$
Связанные параметры не могут быть ключевыми словами SQL, названиями таблиц или колонок. Они игнорируются внутри текста, заключенного в кавычки. Кроме того, в postgres может потребоваться указывать тип связываемого параметра в случае, когда он не может быть выведен на основании контекста — $1::varchar.
sequelize.query(
  'SELECT *, "текст с литеральным $$1 и литеральным $$status" AS t FROM projects WHERE status = $1',
  {
    bind: ['active'],
    type: QueryTypes.SELECT,
  }
)

sequelize.query(
  'SELECT *, "текст с литеральным $$1 и литеральным $$status" AS t FROM projects WHERE status = $status',
  {
    bind: { status: 'active' },
    type: QueryTypes.SELECT,
  }
)
↥ Наверх
На этом первая часть руководства завершена. В следующей части мы поговорим о простых и продвинутых ассоциациях (отношениях между моделями), «параноике», нетерпеливой и ленивой загрузке, а также о многом другом.
Аренда VPS/VDS с быстрыми NVMе-дисками и посуточной оплатой у хостинга Маклауд.

No sequelize instance passed: This error is a common one. You have to create an Instance Mock Object through the Model class methods. The defaults parameter is sufficient, but you can also use the obj overrides parameter to define the properties of the instance. The dataValues property of the Instance contains values. The dataValues property is used by Sequelize. It is better to use the other methods of the Instance rather than passing the dataValues property.
The id field of the Instance is the cause for the error. If you have a default value for this field, you can try setting the value using a ‘defaultValue’ attribute. Otherwise, the default value is ‘none’. Alternatively, you can use the ‘raw’ property to get the raw data. Ensure you use ‘raw’ when calling a property with this name.
To add a new instance, just add a new instance of Sequelize. Instances are a separate result from the Sequelize call. They have most of the attributes of an Instance but also have some additional functionality. Default values for these attributes are provided by the Model Mock. Instances can also have the values that you supply during queries. The id, createdAt and updatedAt attributes are available in all instances.
Similarly, a Sequelize model is a Sequelize model with the same attributes as the real thing. But the instance of a model is different. If there is no serialized model, it will be returned with a referenced instance instead of a raw object. Instances can have different values, or they can have the same values. This method returns an Instance that is not part of the original instance.
The exception in this error is a duplicate of a Sequelize instance. If you have a single instance, it will be empty. You can also pass multiple instances. You can have the same number of models with multiple models. This will make it possible for you to use your UI and APIs without any problems. This way, you can easily switch between different versions of a model and its corresponding data.
Creating a Sequelize instance is a simple matter of passing the right arguments. It is important to keep in mind that the instance is an individual result of the Sequelize call. The instances are named accordingly, and each has the same attributes as their real counterparts. The id, createdAt, and updatedAt properties of a Sequelize model will be present on all instances. If you want to create a new instance, just make sure that the parameters in the _id fields are set to match the ones that you supplied in the Model Mock.
Usually, you will get this error when calling Sequelize. A sequelize object contains the same data as the original model. Upon creating a new one, use the same parameters as in the original. Inputs are optional and should be provided with the same values as the real counterpart. Instances are also returned by the ‘instance’ property. The’model’ argument of a sequelize object should be set to a string.
If the Sequelize instance is not passed in the correct order, you can still access the data by passing an instance with the id field. The raw property will return an instance that matches the id field. A sequelize object is always a sequence of elements. However, it is possible to pass more than one. It is important to note that the name of the class should be unique. If it is not, it is a simple dictionary containing all of the key/value pairs that are stored in the database.
If there is no sequelize instance passed, you will need to create an Instance. A valid Sequelize instance will be one with the id field as its first parameter. Then, you will need to pass the name of the object. During the validation process, the id field will be validated. If the Instance is invalid, it will be rejected. If there are no sequences, the data will not be deleted.