Окна
В этом уроке рассмотрим основные настройки окон, в которых располагаются виджеты. Обычные окна в Tkinter порождаются не только от класса Tk, но и Toplevel. От Tk принято создавать главное окно. Если создается многооконное приложение, то остальные окна создаются от Toplevel. Методы обоих классов схожи.
Размер и положение окна
По умолчанию окно приложения появляется в верхнем левом углу экрана. Его размер (ширина и высота) определяется совокупностью размеров расположенных в нем виджетов. В случае если окно пустое, то tkinter устанавливает его размер в 200 на 200 пикселей.
С помощью метода geometry можно изменить как размер окна, так и его положение. Метод принимает строку определенного формата.
from tkinter import *

root = Tk()

root.geometry('600x400+200+100')

root.mainloop()
Первые два числа в строке-аргументе geometry задают ширину и высоту окна. Вторая пара чисел обозначает смещение на экране по осям x и y. В примере окно размерностью 600 на 400 будет смещено от верхней левой точки экрана на 200 пикселей вправо и на 100 пикселей вниз.
Если перед обоими смещениями вместо плюса указывается минус, то расчет происходит от нижних правых углов экрана и окна. Так выражение root.geometry('600x400-0-0') заставит окно появиться в нижнем правом углу.
В аргументе метода geometry можно не указывать либо размер, либо смещение. Например, чтобы сместить окно, но не менять его размер, следует написать root.geometry('+200+100').
Бывает удобно, чтобы окно появлялось в центре экрана. Методы winfo_screenwidth и winfo_screenheight возвращают количество пикселей экрана, на котором появляется окно. Рассмотрим, как поместить окно в центр, если размер окна известен:
…
w = root.winfo_screenwidth()
h = root.winfo_screenheight()
w = w//2 # середина экрана
h = h//2
w = w - 200 # смещение от середины
h = h - 200
root.geometry('400x400+{}+{}'.format(w, h))
…
Здесь мы вычитаем половину ширины и высоты окна (по 200 пикселей). Иначе в центре экрана окажется верхний левый угол окна, а не его середина.
Если размер окна неизвестен, то его можно получить с помощью того же метода geometry, но без аргументов. В этом случае метод возвращает строку, содержащую сведения о размерах и смещении, из которой можно извлечь ширину и высоту окна.
from tkinter import *
root = Tk()

Button(text="Button", width=20).pack()
Label(text="Label", width=20, height=3).pack()
Button(text="Button", width=20).pack()

root.update_idletasks()
s = root.geometry()
s = s.split('+')
s = s[0].split('x')
width_root = int(s[0])
height_root = int(s[1])

w = root.winfo_screenwidth()
h = root.winfo_screenheight()
w = w // 2
h = h // 2
w = w - width_root // 2
h = h - height_root // 2
root.geometry('+{}+{}'.format(w, h))

root.mainloop()
Метод update_idletasks позволяет перезагрузить данные об окне после размещения на нем виджетов. Иначе geometry вернет строку, где ширина и высота равняются по одному пикселю. Видимо таковы параметры на момент запуска приложения.
По умолчанию пользователь может разворачивать окно на весь экран, а также изменять его размер, раздвигая границы. Эти возможности можно отключить с помощью метода resizable. Так root.resizable(False, False) запретит изменение размеров главного окна как по горизонтали, так и вертикали. Развернуть на весь экран его также будет невозможно, при этом соответствующая кнопка разворота исчезает.
Заголовок окна
По умолчанию с стоке заголовка окна находится надпись «tk». Для установки собственного названия используется метод title.
…
root.title("Главное окно")
…
Если необходимо, заголовок окна можно вообще убрать. В программе ниже второе окно (Toplevel) открывается при клике на кнопку, оно не имеет заголовка, так как к нему был применен метод overrideredirect с аргументом True. Через пять секунд данное окно закрывается методом destroy.
from tkinter import *


def about():
    a = Toplevel()
    a.geometry('200x150')
    a['bg'] = 'grey'
    a.overrideredirect(True)
    Label(a, text="About this")
        .pack(expand=1)
    a.after(5000, lambda: a.destroy())


root = Tk()
root.title("Главное окно")
Button(text="Button", width=20).pack()
Label(text="Label", width=20, height=3)
    .pack()
Button(text="About", width=20, command=about)
    .pack()

root.mainloop()
Практическая работа
Напишите программу, в которой на главном окне находятся холст и кнопка «Добавить фигуру». Кнопка открывает второе окно, включающее четыре поля для ввода координат и две радиокнопки для выбора, рисовать ли на холсте прямоугольник или овал. Здесь же находится кнопка «Нарисовать», при клике на которую соответствующая фигура добавляется на холст, а второе окно закрывается. Проверку корректности ввода в поля можно опустить.
Курс с примерами решений практических работ:
pdf-версия,
android-приложение.
Окно приложения
Последнее обновление: 10.09.2022
Основным компонентом графических программ является окно. Затем в окно добавляются все остальные компоненты графического интерфейса. В Tkinter окно представлено классом Tk.
Например, создание окна:
root = Tk()
Для отображения окна и взаимодействия с пользователем у окна вызывается метод mainloop()
from tkinter import *

root = Tk()
root.mainloop()
Класс Tk обладает рядом методов и атрибутов, которые позволяют установить различные аспекты окна. Некоторые из них.
Размеры и начальная позиция окна
По умолчанию окно имеет некоторые стандартные размеры. Для установки размеров используется метод geometry(). Например, определение окна с шириной в 300 единиц и высотой 250 единиц:
from tkinter import *

root = Tk()
root.geometry("300x250")

root.mainloop()
По умолчанию окно позиционируется в верхний левый угол экрана с небольшим смещением. Но мы можем изменить его положение, передав нужные значения в метод geometry():
from tkinter import *

root = Tk()
root.geometry("300x250+400+200")

root.mainloop()
Теперь строка в методе geometry имеет следующий формат: «Ширина x Высота + координатаX + координатаY». То есть при запуске окно шириной в 300 единиц и высотой 250 единиц будет находиться на 400 пикселей вправо и на 200 пикселей вниз от верхнего левого угла экрана.
Для получения данных о размере и позиции также можно использовать метод geometry(), который возвращает данные значения в виде строки в формате «widthxheight+x+y»:
from tkinter import *

root = Tk()
root.geometry("300x250+400+200")

root.update_idletasks()
print(root.geometry())    # "300x250+400+200"

root.mainloop()
Чтобы приложение еще до метода mainloop() принименило для окна переданные ему значения по ширине, высоте и позиции, вызывается метод root.update_idletasks().
В итоге вызов root.geometry() возвратить строку «300×250+400+200»
По умолчанию мы можем изменять размеры окна. Тем не менее иногда может потребоваться сделать размер окна фиксированным. В этом случае мы можем
использовать метод resizable(). Его первый параметр указывает, может ли пользователь растягивать окно по ширине, а второй параметр — можно ли растягивать по высоте.
Чтобы запретить растягивание по какой-либо стороне, необходимо для соответствующего параметра передать значение False.
Например, запретим какое-либо изменение размеров:
from tkinter import *

root = Tk()
root.geometry("300x250")

root.resizable(False, False)

root.mainloop()
Также можно установить минимальные и максимальные размеры окна:
root.minsize(200,150)   # минимальные размеры: ширина - 200, высота - 150
root.maxsize(400,300)   # максимальные размеры: ширина - 400, высота - 300
Установка заголовка
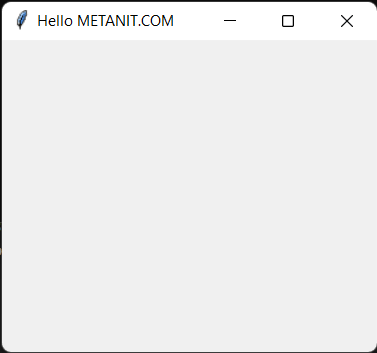
По умолчанию заголовок окна — «tk». Для установки заголовка применяется метод title(), в который передается текст заголовка:
from tkinter import *

root = Tk()
root.title("Hello METANIT.COM")
root.geometry("300x250")
root.mainloop()
Установка иконки
Перед заголовком отображается иконка. По умолчанию это иконка пера. С помощью метода iconbitmap() можно задать любую другую иконку.
Например, определим в одной папке с файлом приложения какой-нибудь файл с иконкой, допустип, он называется «favicon.ico» и используем его для установки иконки:
from tkinter import *

root = Tk()
root.title("Hello METANIT.COM")
root.iconbitmap(default="favicon.ico")
root.geometry("300x250")
root.mainloop()
через параметр default в метод iconbitmap передается путь к иконки. В данном случае файл иконки располагается с файлом приложения в одной папке, поэтому в качестве пути
указывается просто имя файла.
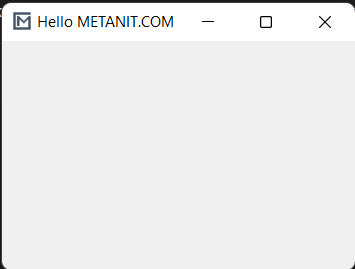
В качестве альтернативы для установки иконки также можно было бы использовать метод iconphoto()
from tkinter import *

root = Tk()
root.geometry("250x200")

root.title("Hello METANIT.COM")
icon = PhotoImage(file = "icon2.png")
root.iconphoto(False, icon)

root.mainloop()
Первый параметр метода iconphoto() указывает, надо ли использовать иконку по умолчанию для всех окон приложения. Второй параметр — объект PhotoImage, который собственно
и устанавливает файл изображения (здесь файл «icon2.png)
Однако что, если мы хотим, чтобы окно вообще не имело иконки? В этом случае можно определить прозрачную иконку и также ее подключать. Можно это сделать также динамически без наличия реального файла:
from tkinter import *
import tempfile, base64, zlib

ICON = zlib.decompress(base64.b64decode("eJxjYGAEQgEBBiDJwZDBysAgxsDAoAHEQCEGBQaIOAg4sDIgACMUj4JRMApGwQgF/ykEAFXxQRc="))

_, ICON_PATH = tempfile.mkstemp()
with open(ICON_PATH, "wb") as icon_file:
    icon_file.write(ICON)

root = Tk()
root.title("Hello METANIT.COM")
root.geometry("300x250")

root.iconbitmap(default=ICON_PATH)

root.mainloop()
В данном случае создается временный файл иконки в памяти.
Перехват закрытия окна
from tkinter import *

def finish():
    root.destroy()  # ручное закрытие окна и всего приложения
    print("Закрытие приложения")

root = Tk()
root.geometry("250x200")

root.title("Hello METANIT.COM")
root.protocol("WM_DELETE_WINDOW", finish)

root.mainloop()
Первый параметр метода protocol() представляет имя события, в данном случае это «WM_DELETE_WINDO». Второй параметр представляет функцию, которая вызывается при
возникновении события. Здесь эта функция finish(), в котором с помощью метода destroy() вручную вызываем закрытие окна (а с ним и всего приложения),
а затем выводим на консоль некоторое сообщение.
Атрибуты окна
С помощью специального метода attributes() можно установать отдельные атрибуты окна, для которых нет специальных методов. В качестве первого параметра
метод принимает название атрибута, которое предваряется дефисом. А второй параметр — значение для этого атрибута. Например, растяжение окна на весь экран:
root.attributes("-fullscreen", True)
Здесь атрибуту fullscreen передается значение True, благодаря чему устанавливается полноэкранный режим.
Другой пример — установка прозрачности с помощью атрибута alpha:
root.attributes("-alpha", 0.5)
Значение 0.5 указывает на полупрозрачность.
Третий пример — отключение верхней панели окна (за исключением заголовка и крестика для закрытия):
root.attributes("-toolwindow", True)
The size of Tkinter windows can be controlled via the following methods:
.minsize()
.maxsize()
.resizable()
Are there equivalent ways to control the size of Tkinter or ttk Frames?
@Bryan: I changed your frame1.pack code to the following:
frame1.pack(fill='both', expand=True)
frame1.bind( '<Configure>', maxsize )
And I added this event handler:
# attempt to prevent frame from growing past a certain size
def maxsize( event=None ):
    print frame1.winfo_width()
    if frame1.winfo_width() > 200:
        print 'frame1 wider than 200 pixels'
        frame1.pack_propagate(0)
        frame1.config( width=200 )
        return 'break'
The above event handler detects that a frame’s width is too big, but is unable to prevent the increase in size from happening. Is this a limitation of Tkinter or have I misunderstood your explanation?
![]()
nbro
14.8k29 gold badges108 silver badges193 bronze badges
asked Dec 9, 2010 at 14:18
![]()
1
There is no single magic function to force a frame to a minimum or fixed size. However, you can certainly force the size of a frame by giving the frame a width and height. You then have to do potentially two more things: when you put this window in a container you need to make sure the geometry manager doesn’t shrink or expand the window. Two, if the frame is a container for other widget, turn grid or pack propagation off so that the frame doesn’t shrink or expand to fit its own contents.
Note, however, that this won’t prevent you from resizing a window to be smaller than an internal frame. In that case the frame will just be clipped.
import Tkinter as tk

root = tk.Tk()
frame1 = tk.Frame(root, width=100, height=100, background="bisque")
frame2 = tk.Frame(root, width=50, height = 50, background="#b22222")

frame1.pack(fill=None, expand=False)
frame2.place(relx=.5, rely=.5, anchor="c")

root.mainloop()
answered Dec 9, 2010 at 14:55
![]()
Bryan OakleyBryan Oakley
360k50 gold badges531 silver badges670 bronze badges
0
A workaround — at least for the minimum size: You can use grid to manage the frames contained in root and make them follow the grid size by setting sticky=’nsew’. Then you can use root.grid_rowconfigure and root.grid_columnconfigure to set values for minsize like so:
from tkinter import Frame, Tk

class MyApp():
    def __init__(self):
        self.root = Tk()

        self.my_frame_red = Frame(self.root, bg='red')
        self.my_frame_red.grid(row=0, column=0, sticky='nsew')

        self.my_frame_blue = Frame(self.root, bg='blue')
        self.my_frame_blue.grid(row=0, column=1, sticky='nsew')

        self.root.grid_rowconfigure(0, minsize=200, weight=1)
        self.root.grid_columnconfigure(0, minsize=200, weight=1)
        self.root.grid_columnconfigure(1, weight=1)

        self.root.mainloop()

if __name__ == '__main__':
    app = MyApp()
But as Brian wrote (in 2010 :D) you can still resize the window to be smaller than the frame if you don’t limit its minsize.
answered Jan 9, 2020 at 11:53
![]()
RichardRichard
6591 gold badge6 silver badges15 bronze badges
1
При создании графического интерфейса с помощью Tkinter размер окна обычно определяется размером и расположением компонентов в окне. Однако вы можете регулировать размер окна, задав ему определенную ширину и высоту. Функция геометрии () в окне со строками ширины и высоты, предоставленными в качестве аргументов, может использоваться для изменения размера окна Tkinter. В этом руководстве мы предоставили вам рекомендации о том, как указать размер окна для приложения с графическим интерфейсом Tkinter в Python.
Синтаксис метода Geometry()
При использовании Python Tkinter используйте функцию геометрии() в переменной класса Tk(), чтобы установить размер окна. Метод геометрии() имеет следующий синтаксис:
родитель.геометрия(«стоимость»)

Этот метод геометрии называется родительским объектом, который в данном случае является объектом Tkinter. Теперь мы знаем, что можем изменить размер нашего окна в Tkinter, используя методы геометрии и minsize().
Однако мы должны сначала импортировать модуль Tkinter в наше приложение, чтобы использовать оба этих метода, поскольку мы можем использовать только объект Tkinter для их вызова. Высота и ширина используются в качестве параметров в обеих этих процедурах, прямо или косвенно.
Пример 1:
В приведенном здесь примере мы определяем размер нашего окна, используя оба упомянутых подхода. Во-первых, мы должны импортировать модуль Tkinter в наше приложение, так как мы знаем, что это модуль, используемый для создания графического интерфейса в Python.
Мы используем ключевое слово import для импорта модуля в нашу программу, за которым следует имя библиотеки. После этого мы создадим объект Tkinter, который в данном случае будет называться родительским объектом. Для этого родительского объекта могут быть вызваны оба метода геометрии() и minsize().
Родительский объект Tkinter можно использовать для вызова метода геометрии(). Требуется только один параметр, представляющий собой строковое значение, разделенное оператором «x». Другими словами, он преобразует высоту и ширину в новый формат.
В этом сценарии окно имеет размер 250×250 пикселей. Размер нашего окна также изменяется с помощью функции minsize(). Параметры ширины и высоты являются обязательными. Поскольку к нему может получить доступ только его объект, он называется объектом Tkinter. Первый — это размер ширины, который мы сейчас назначаем, а второй — размер высоты.
Наконец, вызывается метод mainloop(). Эта процедура используется для запуска окна в Tkinter. Объект Tkinter также вызывается с использованием этого метода. Очень важно позвонить; иначе мы не увидим в окно:
от ткинтер импорт *
parent_obj = Тк()
родитель_объект.минимальный размер(ширина=250, высота=250)
родитель_объект.геометрия(«250×250»)
родитель_объект.основной цикл()

Здесь вы можете увидеть результат:
Пример 2:
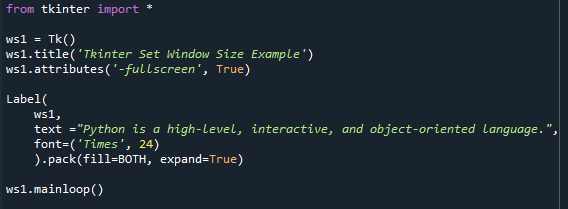
В этом примере мы узнаем, как сделать окно Python Tkinter полноэкранным. Есть несколько вариантов сделать приложение полноэкранным по умолчанию. Первый подход требует разрешения экрана. Вы можете напрямую указать высоту и ширину, если знаете разрешение экрана.
Другой вариант — изменить свойство родительского окна на True для полноэкранного режима. Таким образом, независимо от размера дисплея, экран устанавливается в полноэкранный режим. Другими словами, программа занимает весь экран. Недостаток этого решения состоит в том, что требуется вручную закрывать и другие кнопки. Здесь мы установили для полноэкранного режима значение True в следующем коде:
от ткинтер импорт *
ws1 = Тк()
ws1.заглавие(«Пример установки размера окна Tkinter»)
ws1.атрибуты(‘-полноэкранный’,Истинный)
Этикетка(
ws1,
текст =«Python — это интерактивный и объектно-ориентированный язык высокого уровня».,
шрифт=(«Таймс»,24)
).пакет(наполнять=ОБЕ, расширять=Истинный)
ws1.основной цикл()
В этом выводе Python Tkinter работает в полноэкранном режиме. Стандартные панели инструментов для закрытия, уменьшения и увеличения экрана заметно отсутствуют:
Пример 3:
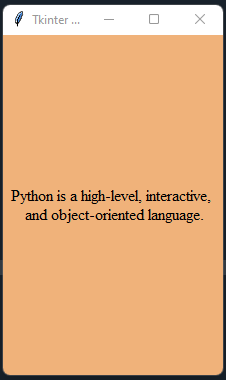
При работе с некоторыми конкретными приложениями нам иногда требуется изменить размер окна, чтобы виджеты отображались в том же положении, в котором вы их установили. В результате в этой части мы узнаем, как использовать Python Tkinter для установки фиксированного размера окна. Мы добьемся этого, передав (0,0) методу resizable.
Для ширины и высоты 0,0 означает False. Метод resizable указывает, может ли это окно изменить свой размер в оконном менеджере. Он принимает только логические значения. Вот как можно изменить размер окна с помощью кода:
от ткинтер импорт *
ws1 = Тк()
ws1.заглавие(«Tkinter Установить размер окна»)
ws1.геометрия(«430×310+650+180»)
ws1.изменяемый размер(0,0)
Этикетка(
ws1,
текст=«Python — это высокоуровневая интерактивная n и объектно-ориентированный язык».,
шрифт=(«Таймс»,16)
).пакет(наполнять=ОБЕ, расширять=Истинный)
ws1.основной цикл()
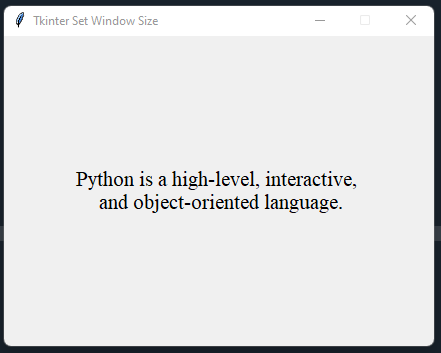
Коробка, как вы можете видеть ниже, имеет запертое окно. Размер окна фиксирован, и пользователь не сможет его изменить:
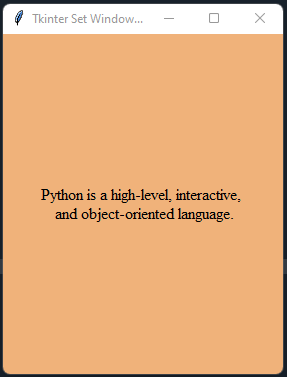
Пример 4:
В этом разделе мы узнаем, как установить минимальный размер окна в Python Tkinter. Количество окон, которое можно уменьшить, определяется минимальным размером окна. Без этого окно можно уменьшить до любого размера. Метод minsize() используется для установки максимального размера окна, после которого оно не будет уменьшаться. В этом коде мы разрешили пользователям уменьшать окно только на 60 и 50 пикселей.
Как видите, геометрия 280×340, с минимальной шириной 220 пикселей и максимальной высотой 290 пикселей. Разница составляет 60 баллов и 50 баллов соответственно. В результате окно можно уменьшить на 60 процентов слева направо и на 50 процентов снизу вверх:
от ткинтер импорт *
ws1 = Тк()
ws1.заглавие(«Пример установки размера окна Tkinter»)
ws1.геометрия(«280×340»)
ws1.минимальный размер(220,290)
Этикетка(
ws1,
текст=«Python — это высокоуровневая интерактивная n и объектно-ориентированный язык».,
шрифт=(«Таймс»,12),
бг =‘# F0B27A’,
).пакет(наполнять=ОБЕ, расширять=Истинный)
ws1.основной цикл()

В этом выводе отображаются три изображения. Верхний показывает окно в исходном состоянии, когда код выполняется. Второе изображение слева показывает, что когда пользователь хочет сжать или уменьшить окно с правой стороны на левую, он может сделать это только на 60 пикселей и 50 пикселей по высоте. Итак, в Python Tkinter именно так мы ограничиваем размер окна.

Заключение:
С помощью подробных примеров мы узнали, как установить размер окна для приложения с графическим интерфейсом, созданного с помощью Tkinter в этом посте. Кроме того, мы добавили четыре примера, чтобы наши читатели могли получить подробное представление о функции размера окна Tkinter. Мы надеемся, что вы нашли эту статью полезной. Дополнительные советы и идеи можно найти в других статьях Linux Hint.
Summary: in this tutorial, you’ll learn how to manipulate various attributes of a Tkinter window.
Let’s start with a simple program that consists of a window:
Code language: Python (python)
import tkinter as tk root = tk.Tk() root.mainloop()
Output:
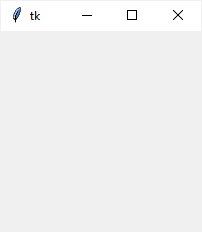
The root window has a title that defaults to tk. It also has three system buttons including Minimize, Maximize, and Close.
Let’s learn how to change the attributes of the root window.
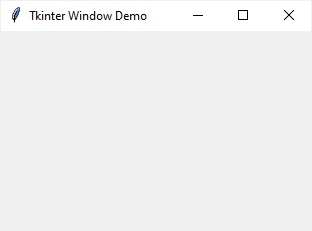
Changing the window title
To change the window’s title, you use the title() method like this:
Code language: Python (python)
window.title(new_title)
For example, the following changes the title of the root window to 'Tkinter Window Demo':
Code language: Python (python)
import tkinter as tk root = tk.Tk() root.title('Tkinter Window Demo') root.mainloop()
Output:
To get the current title of a window, you use the title() method with no argument:
Code language: Python (python)
title = window.title()
Changing window size and location
In Tkinter, the position and size of a window on the screen is determined by geometry.
The following shows the geometry specification:
Code language: Python (python)
widthxheight±x±y

In this specification:
- The
widthis the window’s width in pixels. - The
heightis the window’s height in pixels. - The
xis the window’s horizontal position. For example,+50means the left edge of the window should be 50 pixels from the left edge of the screen. And-50means the right edge of the window should be 50 pixels from the right edge of the screen. - The
yis the window’s vertical position. For example,+50means the top edge of the window should be 50 pixels below the top of the screen. And-50means the bottom edge of the window should be 50 pixels above the bottom of the screen.
To change the size and position of a window, you use the geometry() method:
Code language: Python (python)
window.geometry(new_geometry)
The following example changes the size of the window to 600x400 and the position of the window to 50 pixels from the top and left of the screen:
Code language: Python (python)
import tkinter as tk root = tk.Tk() root.title('Tkinter Window Demo') root.geometry('600x400+50+50') root.mainloop()
Sometimes, you may want to center the window on the screen. The following program illustrates how to do it:
Code language: PHP (php)
import tkinter as tk root = tk.Tk() root.title('Tkinter Window - Center') window_width = 300 window_height = 200 # get the screen dimension screen_width = root.winfo_screenwidth() screen_height = root.winfo_screenheight() # find the center point center_x = int(screen_width/2 - window_width / 2) center_y = int(screen_height/2 - window_height / 2) # set the position of the window to the center of the screen root.geometry(f'{window_width}x{window_height}+{center_x}+{center_y}') root.mainloop()
How it works.
- First, get the screen width and height using the
winfo_screenwidth()andwinfo_screenheight()methods. - Second, calculate the center coordinate based on the screen and window width and height.
- Finally, set the geometry for the root window using the
geometry()method.
If you want to get the current geometry of a window, you can use the geometry() method without providing any argument:
Code language: Python (python)
window.geometry()
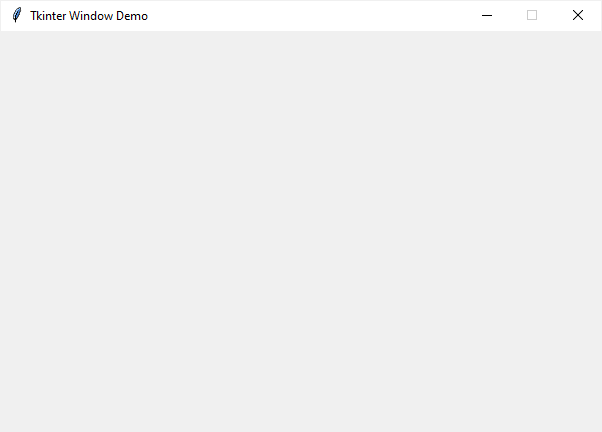
Resizing behavior
By default, you can resize the width and height of a window. To prevent the window from resizing, you can use the resizable() method:
Code language: Python (python)
window.resizable(width,height)
The resizable() method has two parameters that specify whether the width and height of the window can be resizable.
The following shows how to make the window with a fixed size:
Code language: Python (python)
import tkinter as tk root = tk.Tk() root.title('Tkinter Window Demo') root.geometry('600x400+50+50') root.resizable(False, False) root.mainloop()
Output:
When a window is resizable, you can specify the minimum and maximum sizes using the minsize() and maxsize() methods:
Code language: Python (python)
window.minsize(min_width, min_height) window.maxsize(min_height, max_height)
Transparency
Tkinter allows you to specify the transparency of a window by setting its alpha channel ranging from 0.0 (fully transparent) to 1.0 (fully opaque):
window.attributes('-alpha',0.5)Code language: Python (python)
The following example illustrates a window with 50% transparent:
Code language: Python (python)
import tkinter as tk root = tk.Tk() root.title('Tkinter Window Demo') root.geometry('600x400+50+50') root.resizable(False, False) root.attributes('-alpha', 0.5) root.mainloop()
Output:
![]()
Window stacking order
The window stack order refers to the order of windows placed on the screen from bottom to top. The closer window is on the top of the stack and it overlaps the one lower.
To ensure that a window is always at the top of the stacking order, you can use the -topmost attribute like this:
Code language: Python (python)
window.attributes('-topmost', 1)
To move a window up or down of the stack, you can use the lift() and lower() methods:
Code language: Python (python)
window.lift() window.lift(another_window) window.lower() window.lower(another_window)
The following example places the root window on top of all other windows. In other words, the root window is always on top:
Code language: Python (python)
import tkinter as tk root = tk.Tk() root.title('Tkinter Window Demo') root.geometry('300x200+50+50') root.resizable(0, 0) root.attributes('-topmost', 1) root.mainloop()
Changing the default icon
Tkinter window displays a default icon. To change this default icon, you follow these steps:
- Prepare an image in the
.icoformat. If you have the image in other formats likepngorjpg, you can convert it to the.icoformat. There are many online tools that allow you to do it quite easily. - Place the icon in a folder that can be accessible from the program.
- Call the
iconbitmap()method of the window object.
The following program illustrates how to change the default icon to a new one:
Code language: PHP (php)
import tkinter as tk root = tk.Tk() root.title('Tkinter Window Demo') root.geometry('300x200+50+50') root.resizable(False, False) root.iconbitmap('./assets/pythontutorial.ico') root.mainloop()
Output:
![]()
If you want to use the above icon, you can download it to your computer:
Summary
- Use the
title()method to change the title of the window. - Use the
geometry()method to change the size and location of the window. - Use the
resizable()method to specify whether a window can be resizable horizontally or vertically. - Use the
window.attributes('-alpha',0.5)to set the transparency for the window. - Use the
window.attributes('-topmost', 1)to make the window always on top. - Use
lift()andlower()methods to move the window up and down of the window stacking order. - Use the
iconbitmap()method to change the default icon of the window.
Did you find this tutorial helpful ?
Improve Article
Save Article
Improve Article
Save Article
Prerequisite: Tkinter
There are two ways to create a full screen window in tkinter using standard python library for creating GUI applications.
Method 1: Using attributes() function
Syntax:
window_name.attributes('-fullscreen',True)
We will set the parameter ‘-fullscreen’ of attributes() to True for setting size of our window to fullscreen and to False otherwise.
Approach:
- Importing tkinter package
- Creating a tkinter window with name window
- Setting the window attribute fullscreen as True
- Giving title to the window, here ‘Geeks For Geeks’
- Creating a label with text ‘Hello Tkinter’ (just for display to the user here)
- Placing the label widget using pack()
- Closing the endless loop of windows by calling mainloop()
Disadvantage:
We get an output tkinter WINDOW with no toolbar. This disadvantage is covered by the next method.
Program
Python3
import tkinter as tk
window = tk.Tk()
window.attributes('-fullscreen', True)
window.title("Geeks For Geeks")
label = tk.Label(window, text="Hello Tkinter!")
label.pack()
window.mainloop()
Output:

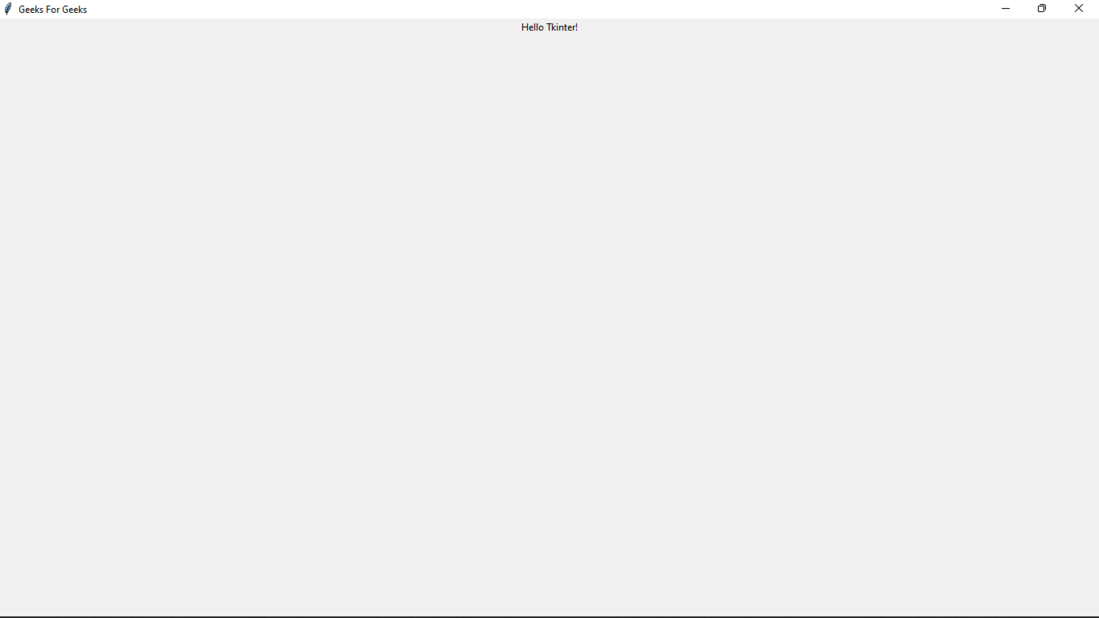
Method 2: Using geometry() function
We get an output tkinter window with the toolbar above along with the title of window.
Syntax:
     width= window_name.winfo_screenwidth()
     height= window_name.winfo_screenheight()
     window_name.geometry("%dx%d" % (width, height))
We can set the parameter of geometry() same as the width*height of the screen of our original window to get our full screen tkinter window without making the toolbar invisible. We can get the width and height of our desktop screen by using winfo_screenwidth() and winfo_screenheight() functions respectively.
Approach:
- Importing tkinter package
- Creating a tkinter window with name window
- Getting width and height of the desktop screen using winfo_screenwidth() in variable width and winfo_screenheight() in variable height respectively.
- Setting size of tkinter window using geometry () by setting dimensions equivalent to widthxheight.
- Giving title to the window, here ‘Geeks For Geeks’
- Creating a label with text ‘Hello Tkinter’ (just for display to the user here)
- Placing the label widget using pack()
- Closing the endless loop of windows by calling mainloop()
Program:
Python3
import tkinter as tk
window=tk.Tk()
width= window.winfo_screenwidth()
height= window.winfo_screenheight()
window.geometry("%dx%d" % (width, height))
window.title("Geeeks For Geeks")
label = tk.Label(window, text="Hello Tkinter!")
label.pack()
window.mainloop()
Output:

Method 3: Using state() function
Syntax:
window_name.state('zoomed')
We will set the parameter of state() to ‘zoomed’ for setting the size of our window to fullscreen by maximizing the window.
Approach:
- Importing tkinter package
- Creating a tkinter window with name window
- Setting the window attribute state as ‘zoomed’
- Giving a title to the window, here ‘Geeks For Geeks’
- Creating a label with text ‘Hello Tkinter’ (just for display to the user here)
- Placing the label widget using pack()
- Closing the endless loop of windows by calling mainloop()
Result:
We get an output tkinter WINDOW which is already maximized.
Program
Python3
import tkinter as tk
window = tk.Tk()
window.state('zoomed')
window.title("Geeks For Geeks")
label = tk.Label(window, text="Hello Tkinter!")
label.pack()
window.mainloop()
Output:
Output using window_name.state(‘zoomed’)
Improve Article
Save Article
Improve Article
Save Article
Prerequisite: Tkinter
There are two ways to create a full screen window in tkinter using standard python library for creating GUI applications.
Method 1: Using attributes() function
Syntax:
window_name.attributes('-fullscreen',True)
We will set the parameter ‘-fullscreen’ of attributes() to True for setting size of our window to fullscreen and to False otherwise.
Approach:
- Importing tkinter package
- Creating a tkinter window with name window
- Setting the window attribute fullscreen as True
- Giving title to the window, here ‘Geeks For Geeks’
- Creating a label with text ‘Hello Tkinter’ (just for display to the user here)
- Placing the label widget using pack()
- Closing the endless loop of windows by calling mainloop()
Disadvantage:
We get an output tkinter WINDOW with no toolbar. This disadvantage is covered by the next method.
Program
Python3
import tkinter as tk
window = tk.Tk()
window.attributes('-fullscreen', True)
window.title("Geeks For Geeks")
label = tk.Label(window, text="Hello Tkinter!")
label.pack()
window.mainloop()
Output:
Method 2: Using geometry() function
We get an output tkinter window with the toolbar above along with the title of window.
Syntax:
     width= window_name.winfo_screenwidth()
     height= window_name.winfo_screenheight()
     window_name.geometry("%dx%d" % (width, height))
We can set the parameter of geometry() same as the width*height of the screen of our original window to get our full screen tkinter window without making the toolbar invisible. We can get the width and height of our desktop screen by using winfo_screenwidth() and winfo_screenheight() functions respectively.
Approach:
- Importing tkinter package
- Creating a tkinter window with name window
- Getting width and height of the desktop screen using winfo_screenwidth() in variable width and winfo_screenheight() in variable height respectively.
- Setting size of tkinter window using geometry () by setting dimensions equivalent to widthxheight.
- Giving title to the window, here ‘Geeks For Geeks’
- Creating a label with text ‘Hello Tkinter’ (just for display to the user here)
- Placing the label widget using pack()
- Closing the endless loop of windows by calling mainloop()
Program:
Python3
import tkinter as tk
window=tk.Tk()
width= window.winfo_screenwidth()
height= window.winfo_screenheight()
window.geometry("%dx%d" % (width, height))
window.title("Geeeks For Geeks")
label = tk.Label(window, text="Hello Tkinter!")
label.pack()
window.mainloop()
Output:
Method 3: Using state() function
Syntax:
window_name.state('zoomed')
We will set the parameter of state() to ‘zoomed’ for setting the size of our window to fullscreen by maximizing the window.
Approach:
- Importing tkinter package
- Creating a tkinter window with name window
- Setting the window attribute state as ‘zoomed’
- Giving a title to the window, here ‘Geeks For Geeks’
- Creating a label with text ‘Hello Tkinter’ (just for display to the user here)
- Placing the label widget using pack()
- Closing the endless loop of windows by calling mainloop()
Result:
We get an output tkinter WINDOW which is already maximized.
Program
Python3
import tkinter as tk
window = tk.Tk()
window.state('zoomed')
window.title("Geeks For Geeks")
label = tk.Label(window, text="Hello Tkinter!")
label.pack()
window.mainloop()
Output:
Output using window_name.state(‘zoomed’)