Содержание
- Announcement
- My desperate situation with M8S (m8 v8_1 20150418) SOLVED. 🙂
- My desperate situation with M8S (m8 v8_1 20150418) SOLVED. 🙂
- Comment
- Comment
- Comment
- Comment
- Comment
- Comment
- Uboot partition boot download buffer data transfer error
Announcement
My desperate situation with M8S (m8 v8_1 20150418) SOLVED. 🙂
![]()
My desperate situation with M8S (m8 v8_1 20150418) SOLVED. 🙂
- Join Date: Jun 2012
- Posts: 9458
Welcome to Freaktab.com.
1.: What Version of Windows you are running?
2.: Did you install the Drivers with USB Burning Tool?
3.: You are sure you are using the Right USB Port?

![]()
Yes. On Windows 10 World cup drivers installed trough USB burning tool 2.0.4.3 setup and i used the usb port next the corner of the box not the port next the hdmi output. i used a toothpick to push recovery button and in same time plug the USB male-male cable to the PC and the power cable too but nothing appear. only blue led on front.
please find a video of my box inside:
https://goo.gl/photos/XMCUM2h4zGnwC19s7
I read somewhere we have to short some pins on nand or create a jumper on the board between USB port and HDMI. But with tons of m8s clones I don’t which.
- Join Date: Jun 2012
- Posts: 9458
The problem here is Windows 10, It’s working also on Windows 10 / 8.1 64 bit, but you’ll have to disable driver signature enforcement to install the Drivers.
Take a look here —> https://www.youtube.com/watch?v=gmw8. yer_detailpage
![]()
Even if there is no drivers installed it should react when I plug the USB cable in! No? I m going to try and tell you. Thx
Envoyé de mon Nexus 5 en utilisant Tapatalk
![]()
OK. Still no detection using F7 to install unsigned drivers. Only blue LED on front and still no video output and no recovery access. I shorted pins 29-30 and with power no led at all.
Envoyé de mon Nexus 5 en utilisant Tapatalk
![]()
Finally my box is back to life. Not far to go into the bin. 
i followed this procedure: i had to shorten 29-30pins of the nand then unshort when box detected by USB Burning tool in order to use this firmware m8s_ap6330_8g2g_150818_USB
My problem is SOLVED
»
NOTE: Shortening the pins is needed only if you have problems with device recognition (in Windows) and troubles with NAND flashing procedure. This trick will enable a special state to interact with NAND directly. Please, refer to your NAND datasheet to find the correct pin numbers for I/O0 and I/O1 pins. In my case it’s 29-30 pins (H27UCG8T2ETR). Please, be carefull! It’s on your own risk!
Flashing procedure:
1) Install the drivers and USB Burning tool first (refer to instruction in this thread).
2) Check the connection: hold the recovery button, then connect device to PC using USB-OTG slot.
If the device is visible in Windows — GOOD! If not — you should try a trick with a pins (see below).
To test the connection — run Amlogic USB Burning Tool as administrator, if everything is fine — you should see the device connected in this tool.
Disconnect the device.
3) Prepare the firmware in IMG file. Make sure it’s ok
4) Hold the recovery button on your device (I’ve used a wooden stick), then proceed to the next step:
5) (powering up)
a) Without shortening pins: Put USB cable into USB-OTG slot to power-up the device. You should see the new device dialog in Windows and connection in Amlogic USB Burning Tool. Goto step 6.
b) With shortening pins: Shorten the 29 and 30 pins (refer to your NAND datasheet) with a needle (or some thin metal) and hold it, then put USB cable into USB-OTG slot to power-up the device. When LED powers-up — stop shortening! A new device dialog will display, and you will see the device connected in Windows and Amlogic USB Burning Tool.
6) Now you can un-press the recovery button.
Check device connection in Amlogic USB Burning Tool.
Flash IMG file (refer to instruction in this thread).
After you will successfully flash the IMG file, press Stop button, then remove USB cable from USB-OTG port
Thats it! Your device now should boot fine!
In case of errors I suggest you to use Force Erase All option, and check the connection.
Using a good USB connection is very important!
There was a problem with my USB connection at the first time, so I had to change the cable to good and short one, and after that its worked fine.
So, you should try to change the cable first in case of this errors:
UBOOT/Partition boot/Download buffer/Data tranfer error
Romcode/Lead UBOOT/Download UBOOT/Data tranfer error
USB error occur when transfer buffer at Uboot Partition
NOTE: After you have flashed the image, you will be able to flash your regular firmware from zip (from recovery).
In case of fail, you can use Amlogic USB Burning Tool to start all over again
»
Source: http://mbox.co.za/forum/viewtopic.ph. t=182&start=20
![]()
Finally my box is back to life. Not far to go into the bin.
i followed this procedure: i had to shorten 29-30pins of the nand then unshort when box detected by USB Burning tool in order to use this firmware m8s_ap6330_8g2g_150818_USB
My problem is SOLVED
»
NOTE: Shortening the pins is needed only if you have problems with device recognition (in Windows) and troubles with NAND flashing procedure. This trick will enable a special state to interact with NAND directly. Please, refer to your NAND datasheet to find the correct pin numbers for I/O0 and I/O1 pins. In my case it’s 29-30 pins (H27UCG8T2ETR). Please, be carefull! It’s on your own risk!
Flashing procedure:
1) Install the drivers and USB Burning tool first (refer to instruction in this thread).
2) Check the connection: hold the recovery button, then connect device to PC using USB-OTG slot.
If the device is visible in Windows — GOOD! If not — you should try a trick with a pins (see below).
To test the connection — run Amlogic USB Burning Tool as administrator, if everything is fine — you should see the device connected in this tool.
Disconnect the device.
3) Prepare the firmware in IMG file. Make sure it’s ok
4) Hold the recovery button on your device (I’ve used a wooden stick), then proceed to the next step:
5) (powering up)
a) Without shortening pins: Put USB cable into USB-OTG slot to power-up the device. You should see the new device dialog in Windows and connection in Amlogic USB Burning Tool. Goto step 6.
b) With shortening pins: Shorten the 29 and 30 pins (refer to your NAND datasheet) with a needle (or some thin metal) and hold it, then put USB cable into USB-OTG slot to power-up the device. When LED powers-up — stop shortening! A new device dialog will display, and you will see the device connected in Windows and Amlogic USB Burning Tool.
6) Now you can un-press the recovery button.
Check device connection in Amlogic USB Burning Tool.
Flash IMG file (refer to instruction in this thread).
After you will successfully flash the IMG file, press Stop button, then remove USB cable from USB-OTG port
Thats it! Your device now should boot fine!
In case of errors I suggest you to use Force Erase All option, and check the connection.
Using a good USB connection is very important!
There was a problem with my USB connection at the first time, so I had to change the cable to good and short one, and after that its worked fine.
So, you should try to change the cable first in case of this errors:
UBOOT/Partition boot/Download buffer/Data tranfer error
Romcode/Lead UBOOT/Download UBOOT/Data tranfer error
USB error occur when transfer buffer at Uboot Partition
NOTE: After you have flashed the image, you will be able to flash your regular firmware from zip (from recovery).
In case of fail, you can use Amlogic USB Burning Tool to start all over again
»
Source: http://mbox.co.za/forum/viewtopic.ph. t=182&start=20
please, I needed that firmware, you’d be so kind to give me a link that works.
Thank you.
a greeting.
Источник
Uboot partition boot download buffer data transfer error
Вскрываете приставку и смотрите маркировку на плате рядом с процессором.
Пример
Старая ревизия с 2 Гб ОЗУ
Q5X2 V1.0 18482
Q5X2 V1.5 19023
Q5X2 V2.0 18375
Q5X2 V4.0 18472
Q5X2 V4.5 18525
Старая ревизия с 4 Гб ОЗУ
Q5X2 V3.0 18393
Q5X2 V3.0 18395
Q5X2 V5.0 18436 — Проблемная. Многие прошивки не работают.
Q5X2 V5.0 18483
Q5X2 V5.5 19015
Q5X2 V7.0 19133 — Проблемная. Многие прошивки не работают.
Новая ревизия с 4 Гб ОЗУ
Q5X2 LP3 19215
- Amlogic USB Burning Tool (Поддерживаемые версии от 2.1.6.8 до 2.2.4 ) — Прошивальщик для устройств на базе Amlogic
- ADB и все, что с помощью него можно сделать — Консольное приложение для работы с Android устройством
- Burn Card Maker — Программа для создания «прошивочной» флешки
- AFRD (актуально для стоковых и на их основе прошивок) — автофреймрейт для устройств на SOC Amlogic
- Google Chrome версия 57 с copy/paste (Не будет обновляться)
- SmartTubeNext — альтернативный youtube клиент без рекламы
- YouTube Bridge (STN) — дополнение для SmartTubeNext, позволяет запустить видео найденные с помощью голосового поиска
- Включение/Отключение USB
- Google Cast
- Пульт на смартфон для Android TV BOX (CetusPlay)
- Кастомное ядро от anpaza
- AFR на прошивках UGOOS
- Патч для отключения защиты на прошивках UGOOS
Необходимую запись добавить в файл /vendor/bin/preinstall.sh после последней строки через любой файловый менеджер или терминал
Отключение деинтерлейса (помогает с проблемами в приложении Wink):
Рабочая регулировка работы шумодава в Droid settings — Picture — DNR ( только для Android 9)
В файле по пути /vendor/etc/tvconfig/pq/pq_default.ini исправляем строку:
В теме нет куратора. По вопросам наполнения шапки обращайтесь к модераторам раздела через кнопку  под сообщениями, на которые необходимо добавить ссылки.
Сообщение отредактировал Cuphead — 13.01.23, 05:55


YouTube максимальная резолюция 1080p может потому что мой ТВ не поддерживает 4К. Тут тоже придётся покопаться в индефикация бокса и разрешение резолюцией файле build.prop.
Далее была установлена Aida 64. Которая показала система Android 8.1.0 Linux ядро 4.9. 76.
Устройство с Root доступом (Да) что очень сомнительно.
ЦП — 4 ядра 100-1908Мгц.
Память Ram 4 Гб для пользования доступно 3836MB.
Память ROM 24.01Гб ( вот тут странность было заказано 32Гб ).
Поддержка как и обещано Open GL ES 3.2 графическая карта Mali g31.
USB 2.0 — поддерживаемая скорость 480 Мбит/с.
USB 3.0 HCI Host Controller — поддерживаемая скорость 5000 Мбит/с.


Была установлена программа мониторинг ресурсов. Выведи на верхнюю часть экрана показания работы CPU, температурный режим а также оставшаяся Ram память.
Состояние простоя температурный режим 40-45 градусов. (Поначалу даже удивила меня столь хорошим охлаждением бокса). При установке программ и серфинге интернет температура не подымалась более 50 градусов.
Далее было установлено Ace Stream Media. Lol TV. Для контроля потоковое онлайн ТВ. IPTV Player с встроенными плейлистми. Программы и ресурсы отзывались с хорошей скоростью по WiFi 5.8Ггц соединения. Но тут началось нагревания бокса до 65 градусов в течение получаса просмотра 1 HD канал. 720dpi. Переключение на спортивный канал увеличила температурный режим до 70 градусов. И как мы видим по скриншотам таинственно стали исчезать мегабайты с Ram памяти. CPU — 4 процессоры молотили 98-100%.
Video HD Box установлен запустился но не было проверено. OGYouTube так же был установлен но не хватило времени проверить. Может быть во второй серии продолжим тестирование сей удивительного бокса .
P. S Удивило очень быстрая отзывчивость быстрая работа системы. По сравнению с процессором Amlogic s912 ощущение 20-30% прибавление скорости. Копирование штук 20 скриншотов прошло моментально на флешку USB 3.0.
Установка программ, ощущение ускоренного процесса. Подключение к аккаунту и скачивание с Play Market Aida64 довольно-таки большая программа, прошла быстро.
Пульт — программируется четыре (4) дополнительные кнопки под ТВ. Очень удобно лежит в руке отзывчивый.
Не понравилось неудобная управление мышь. Так как система более заточена под управления пульт.
Но это уже издержки системы Android 8.1.
CPU Throttling тест не прошёл по причине некорректной работы самой программы, при запуске программы запускалась то в ландшафтном режиме, то переворачивалась портретный режим невозможно было отследить и сделать скриншоты.
Нав-бар не присутствует не Нижний не верхний статус бар.
Скриншоты сейчас добавлю по мере возможности буду добавлять некоторые нюансы по тестированию.
Источник
-
#1
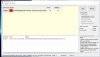
Hello all I was wondering if you could help with my H96 MAX X2 box, it started with it not fully booting up, was stuck on screen logo, reported it to the people I bought the box off (eBay) they told me to reset to factory settings using set setup menu, but it still would not start up, still stuck on the logo screen, they then sent me files and a video to reflash the box, the very first time I tried to flash it, it got to 29% (see picture 1) then got the error UBOOT/Partition system/Download buffer/Data transfer error,… I followed the video perfectly, the box was recognized when I plugged in the USB, then when it started to reflash it again it got to 3% and I heard the sound of the USB being disconnected, then it carried on to 9% (see picture 2) also a box pops up in the bottom right hand corner saying unrecognizable device, then I get and error saying “[HUB5-14][Err]—[0x30403003]UBOOT/Partition boot/Download buffer/Data tranfer error” and that happens every time now
I am using a Windows 7 32bit pc to try this on
Thanks in advance
Bazza08
P.S. nothing at all shows up when i plug the box into my tv, there is an orange light on the front of the box
-
#2
here are the pictures and Log
-

Picture 1.JPG
152.2 KB · Views: 408
-

Picture 2.JPG
117.1 KB · Views: 463
-
2019.06.27-12.txt
330.7 KB · Views: 223
![]()
-
#4
Hi Dave, thanks for your time, yes mate that is what they told me to do and the pictures i attached were the result of tring to flash the firmware, this is the video they sent me
-
#5
Try another usb port on your pc as the amlogic burning tool can be very temperamental at the best of times. If you have the correct drivers installed it will happen for you.
-
#6
Hi Sean thanks for your time, i will give it a try
Bazza08
-
#7
Try another usb port on your pc as the amlogic burning tool can be very temperamental at the best of times. If you have the correct drivers installed it will happen for you.
Hello Sean i have tried every USB port three or four times in each, still no joy just keeps stopping at the same 9% ….with the same error as in picture 2 in my earlier post. Is there any other way to flash the firmware say with a Linux pc or using scrt_sfx852-x64??
barry
![]()
-
#8
If it is stopping at the same place then it could be an error on the device itself such as faulty storage. I do not know off hand if there is flashing software for Linux etc, we only have and use a Windows version. Have you tried it on a different PC?
-
#9
If it is stopping at the same place then it could be an error on the device itself such as faulty storage. I do not know off hand if there is flashing software for Linux etc, we only have and use a Windows version. Have you tried it on a different PC?
Morning Dave C, Yes mate three computers and one laptop, is there any other firmware I could try on this box??
![]()
-
#10
The only firmware we have is the one on the forum guide. If it is failing on other PC’s then the issue is most likely that the hardware is faulty. You will need to contact the seller for a return for repair.
-
#11
Merhaba
Bende de aynı problem var H96 max x2 lpddr3 4 ram 32 rom
çözdün mü
![]()
![]()
-
#14
It is the firmware we use in our devices. I can not guarantee it will work for you if you did not buy from us. But if your device is bricked then it is worth trying.
Finally my box is back to life!!!! Not far to go into the bin…
i followed this procedure: i had to shorten 29-30pins of the nand then unshort when box detected by USB Burning tool in order to use this firmware m8s_ap6330_8g2g_150818_USB
My problem is SOLVED
«
NOTE: Shortening the pins is needed only if you have problems with device recognition (in Windows) and troubles with NAND flashing procedure. This trick will enable a special state to interact with NAND directly. Please, refer to your NAND datasheet to find the correct pin numbers for I/O0 and I/O1 pins. In my case it’s 29-30 pins (H27UCG8T2ETR). Please, be carefull! It’s on your own risk!
Flashing procedure:
1) Install the drivers and USB Burning tool first (refer to instruction in this thread).
2) Check the connection: hold the recovery button, then connect device to PC using USB-OTG slot.
If the device is visible in Windows — GOOD! If not — you should try a trick with a pins (see below).
To test the connection — run Amlogic USB Burning Tool as administrator, if everything is fine — you should see the device connected in this tool.
Disconnect the device.
3) Prepare the firmware in IMG file. Make sure it’s ok
4) Hold the recovery button on your device (I’ve used a wooden stick), then proceed to the next step:
5) (powering up)
a) Without shortening pins: Put USB cable into USB-OTG slot to power-up the device. You should see the new device dialog in Windows and connection in Amlogic USB Burning Tool. Goto step 6.
b) With shortening pins: Shorten the 29 and 30 pins (refer to your NAND datasheet) with a needle (or some thin metal) and hold it, then put USB cable into USB-OTG slot to power-up the device. When LED powers-up — stop shortening! A new device dialog will display, and you will see the device connected in Windows and Amlogic USB Burning Tool.
6) Now you can un-press the recovery button.
Check device connection in Amlogic USB Burning Tool.
Flash IMG file (refer to instruction in this thread).
After you will successfully flash the IMG file, press Stop button, then remove USB cable from USB-OTG port
Thats it! Your device now should boot fine!
In case of errors I suggest you to use Force Erase All option, and check the connection.
Using a good USB connection is very important!
There was a problem with my USB connection at the first time, so I had to change the cable to good and short one, and after that its worked fine.
So, you should try to change the cable first in case of this errors:
UBOOT/Partition boot/Download buffer/Data tranfer error
Romcode/Lead UBOOT/Download UBOOT/Data tranfer error
USB error occur when transfer buffer at Uboot Partition
NOTE: After you have flashed the image, you will be able to flash your regular firmware from zip (from recovery).
In case of fail, you can use Amlogic USB Burning Tool to start all over again
«
Source: http://mbox.co.za/forum/viewtopic.ph…t=182&start=20
Have had a U9-h for 2 years now. No problems till this summer. While streaming video (using apps, not Kodi) my screen would go black, but audio would carry on. Sometimes video would return back to normal; other times the screen would go blue. Had to turn it off and reboot to get going again.
Now the problem is getting worse. I get a black screen sometimes without doing anything (i.e. at the Launcher screen). Have tried a factory reset to no avail. Any suggestions to rectify the situation?
To make matters worse, I have an old MXQ Pro which functions fine (except that it is much slower than the U9-h.
Any suggestions you might have would be greatly appreciated.

Firmware is up to date. No updates per the OTA firmware check.

Any suggestions you might have would be greatly appreciated.
Try with another hdmi cable
Firmware is up to date. No updates per the OTA firmware check.
You have to flash the firmware via manual update with usb burning tool and not via OTA (automatic).
Tried the manual update. Got through to 38% complete and received the following error message:
[0x30403003] UBoot/Partition System/Download Buffer/Data Transfer Error
Now my PC will not even recognize the U9-h as an external device. Any suggestions?
Tried the manual update. Got through to 38% complete and received the following error message:
[0x30403003] UBoot/Partition System/Download Buffer/Data Transfer Error
Now my PC will not even recognize the U9-h as an external device. Any suggestions?
Did you try a Factory Reset before this?
Gave it one last try. Got much further this time, but stopped on the 1-yard line (i.e. 98%) and received this message:
[0x30401002]UBoot/Partition Bootloader/Identify/USB Control Setup Error. Suggestions?

Gave it one last try. Got much further this time, but stopped on the 1-yard line (i.e. 98%) and received this message:
[0x30401002]UBoot/Partition Bootloader/Identify/USB Control Setup Error. Suggestions?
Try it a third time .
Have tried numerous times with both the Android 6 and Android 7 versions. Both get me to the 98% mark with the error message as noted above. Also tried hooking the unit back up with my TV. No start up. As well, nothing happens when I hold the Power Button down for 6+ seconds to try to get to the Factory Reset screen. Is this the end?
Did you try a Factory Reset before this?
If you performed a Factory Reset, why did you then progress to burning the image?
nothing happens when I hold the Power Button down for 6+ seconds to try to get to the Factory Reset screen.
As your device has been partly flashed then Factory Reset will no longer be an option as it needs a fully flashed firmware to do this.
Have had a U9-h for 2 years now. No problems till this summer. While streaming video (using apps, not Kodi) my screen would go black, but audio would carry on. Sometimes video would return back to normal; other times the screen would go blue. Had to turn it off and reboot to get going again.
Now the problem is getting worse. I get a black screen sometimes without doing anything (i.e. at the Launcher screen). Have tried a factory reset to no avail. Any suggestions to rectify the situation?
To make matters worse, I have an old MXQ Pro which functions fine (except that it is much slower than the U9-h.
Any suggestions you might have would be greatly appreciated.
I have kind off the same problem but my minix reboot after +/_ 1 hour of streaming… I just wondering do you use a VPN app?
-
Mohannad84
- Verified Member
- Posts: 12
- Joined: Sun Jun 07, 2020 6:30 pm
Wed Jun 10, 2020 2:11 pm
yes.. I did unzip the file, and took the image file and put it in separate folder and then I open USB burning tool and i click on import image and choose the image file . is there something wrong ?!
-
Mohannad84
- Verified Member
- Posts: 12
- Joined: Sun Jun 07, 2020 6:30 pm
#12
Wed Jun 10, 2020 2:15 pm
yes I unzipped the file and took the image file and put it in a separate folder.. then I opened USB burning tool and clicked in import image and choose that image file..and then it gave me error (( Parse burning image fail )) …
is there something wrong ?!
-
Mohannad84
- Verified Member
- Posts: 12
- Joined: Sun Jun 07, 2020 6:30 pm
#13
Thu Jun 11, 2020 12:23 pm
bumerc wrote: ↑Wed Jun 10, 2020 5:39 am
Mohannad84 wrote: ↑Tue Jun 09, 2020 8:53 pm
When I’m inside the burning tool, I clicked on import image and choose the images file you added in the link, but the burning tool is giving me the following message (( Parse burning image fail )).did you unzip the image earlier?
yes I did .. see my reply up … waiting for your reply ..
-
bumerc
- Administrator & Developer
- Posts: 1656
- Joined: Tue Oct 02, 2018 6:19 pm
- Has thanked: 256 times
- Been thanked: 350 times
#14
Thu Jun 11, 2020 1:03 pm
Mohannad84 wrote: ↑Wed Jun 10, 2020 2:15 pm
yes I unzipped the file and took the image file and put it in a separate folder.. then I opened USB burning tool and clicked in import image and choose that image file..and then it gave me error (( Parse burning image fail )) …
is there something wrong ?!
try sdcard method. Also try 2ff version and post logs if it doesn’t work
-
Mohannad84
- Verified Member
- Posts: 12
- Joined: Sun Jun 07, 2020 6:30 pm
#15
Thu Jun 11, 2020 8:24 pm
bumerc wrote: ↑Thu Jun 11, 2020 1:03 pm
Mohannad84 wrote: ↑Wed Jun 10, 2020 2:15 pm
yes I unzipped the file and took the image file and put it in a separate folder.. then I opened USB burning tool and clicked in import image and choose that image file..and then it gave me error (( Parse burning image fail )) …
is there something wrong ?!try sdcard method. Also try 2ff version and post logs if it doesn’t work
I tried with SD card through program called ( Burn card maker ) and after I put the SD card in the box and turn it on, there is no picture on TV.. only black picture and nothing happening even if I wait for more than several minutes !!
by the way what do you mean by (( Also try 2ff version )) what does 2ff means ?!!
-
bumerc
- Administrator & Developer
- Posts: 1656
- Joined: Tue Oct 02, 2018 6:19 pm
- Has thanked: 256 times
- Been thanked: 350 times
-
Mohannad84
- Verified Member
- Posts: 12
- Joined: Sun Jun 07, 2020 6:30 pm
#17
Wed Jun 17, 2020 8:09 pm
Hello my friend,
I tried the first version v2FF and it gave me the same error at 2%. log file attached.
then I closed the program USB burning tool and opened it again and load the second image file ( LPDDR v2FF ) this one maybe better because this is the first time it moved more than 2% but it stopped at 4% and no error but kept going between 3% and 4% saying Downlod UBOOT :
[0X10202003] ROMCODE/Lead UBOOT/Download UBOOT/Date transfer error
but I waited more than 4 or 5 minutes and nothing happened and sometimes where it says ((Device Connected)) it disappeared and the windows gave me error notification saying that there is unknown USB device !!! anyway I also attached the log file when I restart the USB burning tool and used the PLDDR version only.
please have a look and waiting for your help.
You do not have the required permissions to view the files attached to this post.
-
Mohannad84
- Verified Member
- Posts: 12
- Joined: Sun Jun 07, 2020 6:30 pm
#19
Fri Jun 19, 2020 12:44 pm
bumerc wrote: ↑Wed Jun 17, 2020 10:53 pm
[mention]Mohannad84[/mention]
Your device is in a boot loop, please post uart log while running sdcard update
viewtopic.php?f=16&t=453
is there any other way to fix or bypass this Boot loop !! because I don’t have the tools and cables mentioned in that post, and if I will order them online they will take at least 25 to 35 days to arrive.
Форум РадиоКот • Просмотр темы — Восстановление прошивки тв бокса
Сообщения без ответов | Активные темы
| ПРЯМО СЕЙЧАС: |
| Автор | Сообщение |
|---|---|
|
|
Заголовок сообщения: Восстановление прошивки тв бокса
|
|
Первый раз сказал Мяу!
Зарегистрирован: Сб мар 10, 2012 13:10:53 Рейтинг сообщения: 0
|
Уважаемые коты прошу помощи!После не удачной прошивки через USB_Burning_Tool-бокс перестал видиться компом,поначалу он выдавал ошибку при прошивке,потом я снял галку с erase Bootloader прошивка прошла до конца и все бокс висит на бутлупе не в рикавери никуда не заходит.Можно ли его как то ввести Mask ROM Mode или прошить через UART ?Чтобы здесь не засорять фотками тему дам ссылку на фотки бокса на freaktabе. |
| Вернуться наверх |
Профиль
|

| Реклама | |
|
|
|
|
an.ig.nik |
Заголовок сообщения: Re: Восстановление прошивки тв бокса
|
|
Карма: 4 Рейтинг сообщения: 0
|
|
| Вернуться наверх | |
| Реклама | |
|
|
|

|
Spider1973 |
Заголовок сообщения: Re: Восстановление прошивки тв бокса
|
|
Зарегистрирован: Сб мар 10, 2012 13:10:53 Рейтинг сообщения: 0
|
уже бы давно попробовал если бы в этом боксе был слот по карту |
| Вернуться наверх | |
|
musor |
Заголовок сообщения: Re: Восстановление прошивки тв бокса
|
||
Карма: 112 Рейтинг сообщения: 0
|
а Добавлено after 2 minutes 14 seconds: |
||
| Вернуться наверх | |||

| Реклама | |
|
|
Выгодные LED-драйверы для решения любых задач КОМПЭЛ представляет со склада и под заказ широкий выбор LED-драйверов производства MEAN WELL, MOSO, Snappy, Inventronics, EagleRise. Линейки LED-драйверов этих компаний, выполненные по технологии Tunable White и имеющие возможность непосредственного встраивания в систему умного дома (димминг по шине KNX), перекрывают практически полный спектр применений: от простых световых указателей и декоративной подсветки до диммируемых по различным протоколам светильников внутреннего и наружного освещения. Подобрать LED-драйвер>> |
|
Spider1973 |
Заголовок сообщения: Re: Восстановление прошивки тв бокса
|
|
Зарегистрирован: Сб мар 10, 2012 13:10:53 Рейтинг сообщения: 0
|
осталось только понять где взять файлы как в статье по раскирпичиванию,в стоковой прошиве имеем только :aml_sdc_burn.ini ,aml_upgrade_package.img и u-boot.bin.sd.bin |
| Вернуться наверх | |
| Реклама | |
|
|
|
| Реклама | |
|
|
LIMF – источники питания High-End от MORNSUN со стандартным функционалом на DIN-рейку На склад Компэл поступили ИП MORNSUN (крепление на DIN-рейку) с выходной мощностью 240 и 480 Вт. Данные источники питания обладают 150% перегрузочной способностью, активной схемой коррекции коэффициента мощности (ККМ; PFC), наличием сухого контакта реле для контроля работоспособности (DC OK) и возможностью подстройки выходного напряжения. Источники питания выполнены в металлическом корпусе, ПП с компонентами покрыта лаком с двух сторон, что делает ее устойчивой к соляному туману и пыли. Изделия соответствуют требованиям ANSI/ISA 71.04-2013 G3 на устойчивость к коррозии, а также нормам ATEX для взрывоопасных зон. Подробнее>> |
|
an.ig.nik |
Заголовок сообщения: Re: Восстановление прошивки тв бокса
|
|
Карма: 4 Рейтинг сообщения: 0
|
|
| Вернуться наверх | |
|
Spider1973 |
Заголовок сообщения: Re: Восстановление прошивки тв бокса
|
|
Зарегистрирован: Сб мар 10, 2012 13:10:53 Рейтинг сообщения: 0
|
сомнительное видео,у автора 3 способ именно по раскирпичиванию это прошивка с помощью компа,интересно ,как бы он это делал если ,как у меня бокс перестал бы видеть комп. |
| Вернуться наверх | |
|
musor |
Заголовок сообщения: Re: Восстановление прошивки тв бокса
|
||
Карма: 112 Рейтинг сообщения: 0
|
савсем? неужелит при втычке не появлется дажне на короткое ремя «найдено неизвмное устройств МТКхххх» лодер в этих чипахи апаратный в кистале и должен работать по идее |
||
| Вернуться наверх | |||
|
Spider1973 |
Заголовок сообщения: Re: Восстановление прошивки тв бокса
|
|
Зарегистрирован: Сб мар 10, 2012 13:10:53 Рейтинг сообщения: 0
|
в том то и дело пока галку на стирании бутлодера не убирал всё появлялось а теперь,полный труп,ничего не булькает и ничего не появляется |
| Вернуться наверх | |
|
musor |
Заголовок сообщения: Re: Восстановление прошивки тв бокса
|
||
Карма: 112 Рейтинг сообщения: 0
|
вы путаеть бутлодер заливаемый в нанд(тот можно затереть) и бутлодер чипа в ряде чипоф тел и планцетоф (думаю и смарт боксах) он апаратныйи не стираемый но вот активировать его иногда можно ток замыкая при старте нужные EP PCB или того худе1 ноги чипа ищи подробности в сети я с этим девайсом не работал даже не вкурсе какой nmfv процик стоит а то б даташиту можно полискать и референц схекмки на том кристале.. |
||
| Вернуться наверх | |||
|
Spider1973 |
Заголовок сообщения: Re: Восстановление прошивки тв бокса
|
|
Зарегистрирован: Сб мар 10, 2012 13:10:53 Рейтинг сообщения: 0
|
в интернете по этому чипу нет ничего,да и как тут с бга чипами найти ноги для включения режима Mask ROM ,вот я и спрашиваю может можно как то через UART что то сделать |
| Вернуться наверх | |
|
musor |
Заголовок сообщения: Re: Восстановление прошивки тв бокса
|
||
Карма: 112 Рейтинг сообщения: 0
|
метод должен быть завот паяет туда непрошитые чипы и прошивает на месте |
||
| Вернуться наверх | |||
|
Spider1973 |
Заголовок сообщения: Re: Восстановление прошивки тв бокса
|
|
Зарегистрирован: Сб мар 10, 2012 13:10:53 Рейтинг сообщения: 0
|
а если с рабочей коробки попробовать считать флеш и сюда влить программатором или бесполезно,биты защиты не дадут?Просто есть вторая такая же но с горелым портом HDMI но по VGA работает |
| Вернуться наверх | |
|
musor |
Заголовок сообщения: Re: Восстановление прошивки тв бокса
|
||
Карма: 112 Рейтинг сообщения: 0
|
если обе одинаковые пересадите нанду с живой на труп если оборудование и опыт есть если нет -забейте просите спеца -а то вместо 1х 200 +1х 300 будет 2х 200… |
||
| Вернуться наверх | |||
Кто сейчас на форуме |
|
Сейчас этот форум просматривают: нет зарегистрированных пользователей и гости: 12 |
| Вы не можете начинать темы Вы не можете отвечать на сообщения Вы не можете редактировать свои сообщения Вы не можете удалять свои сообщения Вы не можете добавлять вложения |

![]()
I changed partition sizes in aml_upgrade_package.img, but after flashing it, bootloader still sees old partition table — system and cache sizes are wrong:
[mmc_startup] mmc refix success
init_part() 297: PART_TYPE_AML
[mmc_init] mmc init success
      Amlogic multi-dtb tool
      Single dtb detected
start dts,buffer=0000000073e8a240,dt_addr=0000000073e8a240
get_partition_from_dts() 71: ret 0
      Amlogic multi-dtb tool
      Single dtb detected
parts: 17
00:      logo   0000000000800000 1
01:  recovery   0000000001800000 1
02:      misc   0000000000800000 1
03:      dtbo   0000000000800000 1
04:  cri_data   0000000000800000 2
05:     param   0000000001000000 2
06:      boot   0000000001000000 1
set has_boot_slot = 0
07:       rsv   0000000001000000 1
08:  metadata   0000000001000000 1
09:    vbmeta   0000000000200000 1
10:       tee   0000000002000000 1
11:    vendor   0000000010000000 1
12:       odm   0000000008000000 1
**13:    system   0000000050000000 1**
14:   product   0000000008000000 1
**15:     cache   0000000046000000 2**
16:      data   ffffffffffffffff 4
init_part() 297: PART_TYPE_AML
eMMC/TSD partition table have been checked OK!
crc32_s:0x1577dad == storage crc_pattern:0x1577dad!!!
crc32_s:0xee152b83 == storage crc_pattern:0xee152b83!!!
crc32_s:0x7fd3b243 == storage crc_pattern:0x7fd3b243!!!
mmc env offset: 0x4d400000
In:    serial
Out:   serial
Err:   serial
reboot_mode=watchdog_reboot
[store]To run cmd[emmc dtb_read 0x1000000 0x40000]
_verify_dtb_checksum()-2755: calc b62fcfb7, store b62fcfb7
_verify_dtb_checksum()-2755: calc b62fcfb7, store b62fcfb7
dtb_read()-2972: total valid 2
update_old_dtb()-2953: do nothing
      Amlogic multi-dtb tool
      Single dtb detected
In the result box can’t boot and resets to USB Burning mode:
...
active slot = 0
CONFIG_AVB2:
active_slot: normal avb2: 0
Err imgread(L328):Fmt unsupported!genFmt 0x0 != 0x3
InUsbBurn
[MSG]sof
Set Addr 25
Get DT cfg
Get DT cfg
set CFG
Flashing the same image with official USB Burning Tool has no problem.
![]()
You have to change partition size inside device tree(s), not just size of actual partition. Search github for dtbSplit or dtbTool scripts, someone reverse-engineered aml-s version of dtbTool to split and combine DTBs from/into dtb.img
![]()
@Stane1983 If I understand you right I’ve already done all the needed:
--- a/arch/arm/boot/dts/amlogic/partition_mbox_normal_P_32.dtsi
+++ b/arch/arm/boot/dts/amlogic/partition_mbox_normal_P_32.dtsi
@@ -102,7 +102,7 @@
                system:system
                {
                        pname = "system";
-                       size = <0x0 0x50000000>;
+                       size = <0x0 0x46000000>;
                        mask = <1>;
                };
                product:product{
@@ -113,7 +113,7 @@
                cache:cache
                {
                        pname = "cache";
-                       size = <0x0 0x46000000>;
+                       size = <0x0 0x25000000>;
                        mask = <2>;
                };
                data:data

--- a/SWG2001A/BoardConfig.mk
+++ b/SWG2001A/BoardConfig.mk
@@ -83,7 +83,7 @@ BOARD_HAVE_FLASHLIGHT := false
 BOARD_HAVE_HW_JPEGENC := true

 TARGET_USERIMAGES_USE_EXT4 := true
-BOARD_USERDATAIMAGE_PARTITION_SIZE := 576716800
+BOARD_USERDATAIMAGE_PARTITION_SIZE := 4294967296
 BOARD_FLASH_BLOCK_SIZE := 4096

 BOARD_VENDORIMAGE_FILE_SYSTEM_TYPE := ext4
@@ -112,7 +112,7 @@ BOARD_VENDORIMAGE_PARTITION_SIZE := 268435456
 BOARD_ODMIMAGE_PARTITION_SIZE := 134217728
 BOARD_PRODUCTIMAGE_PARTITION_SIZE := 134217728
 else
-BOARD_SYSTEMIMAGE_PARTITION_SIZE := 1342177280
+BOARD_SYSTEMIMAGE_PARTITION_SIZE := 1174405120
 BOARD_VENDORIMAGE_PARTITION_SIZE := 268435456
 BOARD_ODMIMAGE_PARTITION_SIZE := 134217728
 BOARD_PRODUCTIMAGE_PARTITION_SIZE := 134217728
Nevertheless, the tool didn’t flash the DTB changes.
Again, the same aml_upgrade_package.img flashed fine with USB Burning Tool, so I assume there is problem with this tool.
Sorry if I misunderstand something.
![]()
![]()
DTB seem just doesn’t flashed for some reason. If I flash it afterwards (with fastboot) — all is OK
![]()
Can it be due to this condition: "$parts" != "dtb"?
| if [[ ${partitions_name[$i]} == «bootloader« ]] || [[ ${partitions_name[$i]} == «_aml_dtb« && «$parts« != «dtb« ]]; then |
![]()
![]()
Ok, I’ll try to fix it.
Seems this part from http://openlinux.amlogic.com:8000/download/A113/DOC/Amlogic_update_usb_tool_user_guide.pdf is skipped in the script due aforementioned "$parts" != "dtb" condition:
3.3.1 Commonly way to upgrading dtb
Step 1. Download dtb.img to memory
update mwrite z:xxxp200dtb.img mem 0x1080000 normalStep 2. Using flash command to updating the dtb.img
update bulkcmd "store dtb write 0x1080000"3.3.2 Newly way to upgrading dtb
If your uboot code is the latest version, try this combined command to upgrading dtb:
update partition _aml_dtb z:/xxx/dtb.img
![]()
bam80
changed the title
DTS is not flashed properly, boot failed
DTB is not flashed, boot failed if partition layout changes
Sep 26, 2019
0
1
Добрый день. Может быть у кого-то есть опыт работы с u-boot?
У меня возникла проблема на одноплатнике (кастомном): uboot не может определить таблицу разделов на emmc (в то же время загруженный дистрибутив без проблем работает с этой же emmc).
* U-Boot > mmc dev 2
...
CMD_TRACE:
...
CMD_SEND:8
                ARG                      0x000001AA
                RET: -19 , 0xffffffed
                MMC_RSP_R1,5,6,7         0x2FF67610
CMD_SEND:55
                ARG                      0x00000000
                RET: -19 , 0xffffffed
                MMC_RSP_R1,5,6,7         0x2FF67610
...
CMD_SEND:8
                ARG                      0x00000000
                RET: -19 , 0xffffffed
                MMC_RSP_R1,5,6,7         0x00000900
...
===> mmc_bread: buff start=0, cur=1, value=0x2ef575e0
===> mmc_bread: blkcnt=1
===> test_block_type error 1: (buffer[DOS_PART_MAGIC_OFFSET + 0] != 0x55) || (buffer[DOS_PART_MAGIC_OFFSET + 1] != 0xaa)
bad MBR sector signature: 0x9966
===> test_part_dos error: test_block_type(buffer) != DOS_MBR
switch to partitions #0, OK
mmc2(part 0) is current device
Паспорт устройства читается без каких-либо проблем:
* U-Boot > mmc info
Device: FSL_SDHC
Manufacturer ID: 90
OEM: 14a
Name: H8G1e
Tran Speed: 52000000
Rd Block Len: 512
MMC version 5.0
High Capacity: Yes
Capacity: 7.3 GiB
Bus Width: 1-bit
Erase Group Size: 512 KiB
HC WP Group Size: 8 MiB
User Capacity: 7.3 GiB WRREL
Boot Capacity: 4 MiB ENH
RPMB Capacity: 512 KiB ENH
Загруженный дистрибутив нормально определяет память и работает с ней:
# fdisk -l /dev/mmcblk3
Disk /dev/mmcblk3: 7.3 GiB, 7818182656 bytes, 15269888 sectors
Units: sectors of 1 * 512 = 512 bytes
Sector size (logical/physical): 512 bytes / 512 bytes
I/O size (minimum/optimal): 512 bytes / 512 bytes
Disklabel type: dos
Disk identifier: 0x3f1bef1e
Device         Boot Start    End Sectors Size Id Type
/dev/mmcblk3p1       2048 133119  131072  64M 83 Linux
Может быть у кого-нибдуь есть идеи, почему такое с uboot может быть?
Что за ошибка -19 (не могу нигде найти описание кода ошибки)?
Благодарю.